DIY Home Renovation Before and After: Full House Remodel Tour


Updated October 12, 2025
This DIY home renovation has been a true labor of love. Over three years, countless hours, and plenty of blood, sweat, and tears turned our dated split-level into a gorgeous, modern home. In this post, I’m sharing a full DIY home renovation before and after tour with dramatic photo transformations. From outdated stone and carpet to fresh finishes and custom DIY projects in nearly every room. The transformation is so complete you’ll hardly believe it’s the same house.
Related: DIY Kitchen Remodel • Our Exterior House Remodel • How to Upgrade Interior Doors • DIY Girls’ Bunk Beds • DIY Stone Range Hood
Table of Contents
- Before Our DIY Home Renovation (Fixer-Upper Tour)
- Main Floor Remodel: Major Changes (Before & After)
- Basement DIY Home Renovation (Before & After)
- Upstairs DIY Home Renovation: Bedrooms & Baths
- Front Exterior Remodel: Curb Appeal Before and After
- Backyard Remodel: Patio & Landscaping Before and After
- DIY Home Renovation Before and After: What’s Next?
- 📌 Save This Project for Later
- FAQ About Our DIY Home Renovation
Before Our DIY Home Renovation (Fixer-Upper Tour)
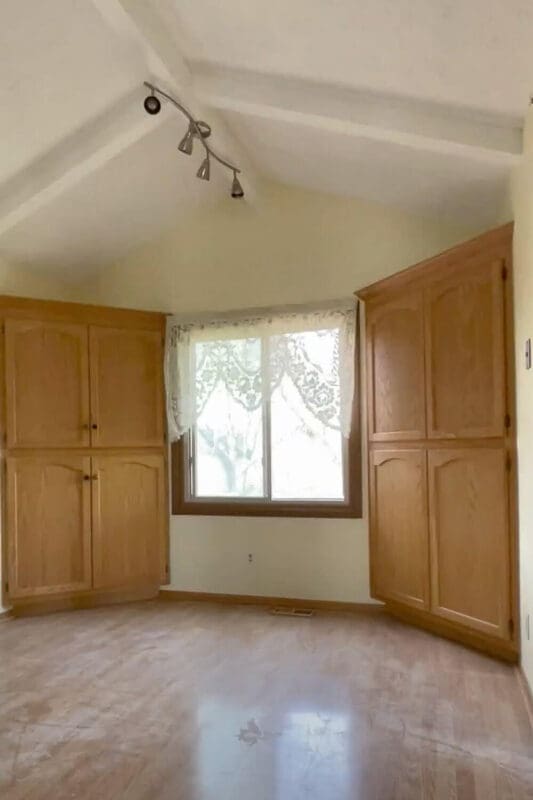
Back in April of 2022, we bought this dated split-level. If you remember the chaos of the housing market, then you’ll get why we were just relieved to land a house at all. It wasn’t a dream home. The inside and out both needed major love, but we knew what we were getting into and rolled up our sleeves to turn it from drab to something we’d be proud of.

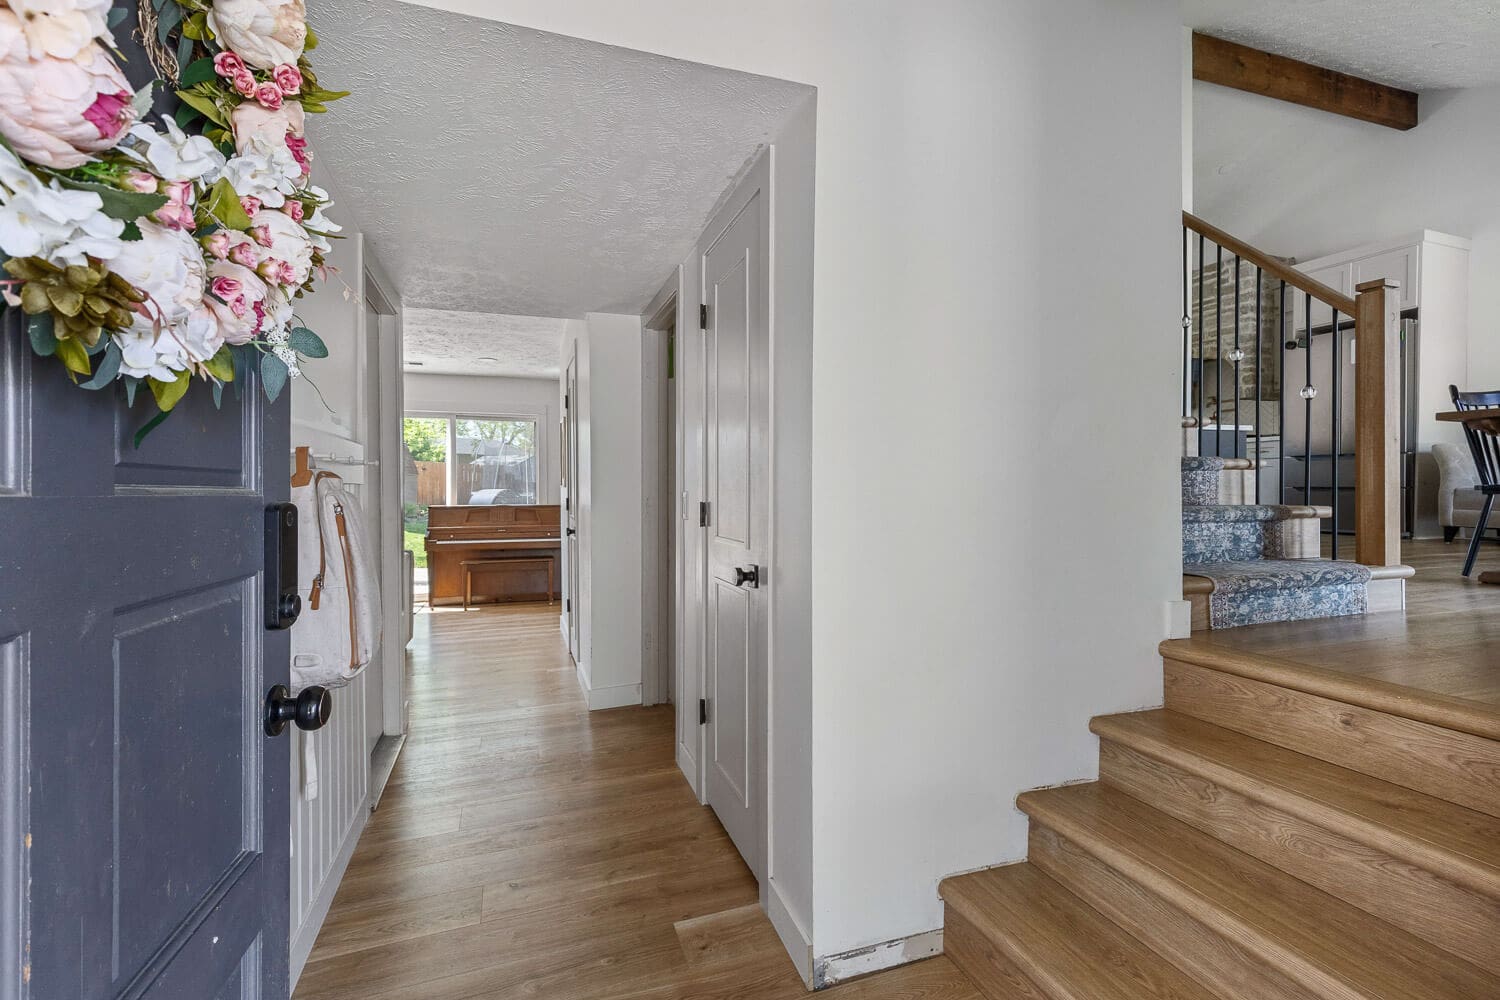
Main Floor Remodel: Major Changes (Before & After)
Come on in! To your left is the shiplap coat rack I built for guests to drop off their coats and bags. From the entryway, you can either head straight into the living room or take a right up to the dining area. For today’s tour, we’re heading to the dining room first.
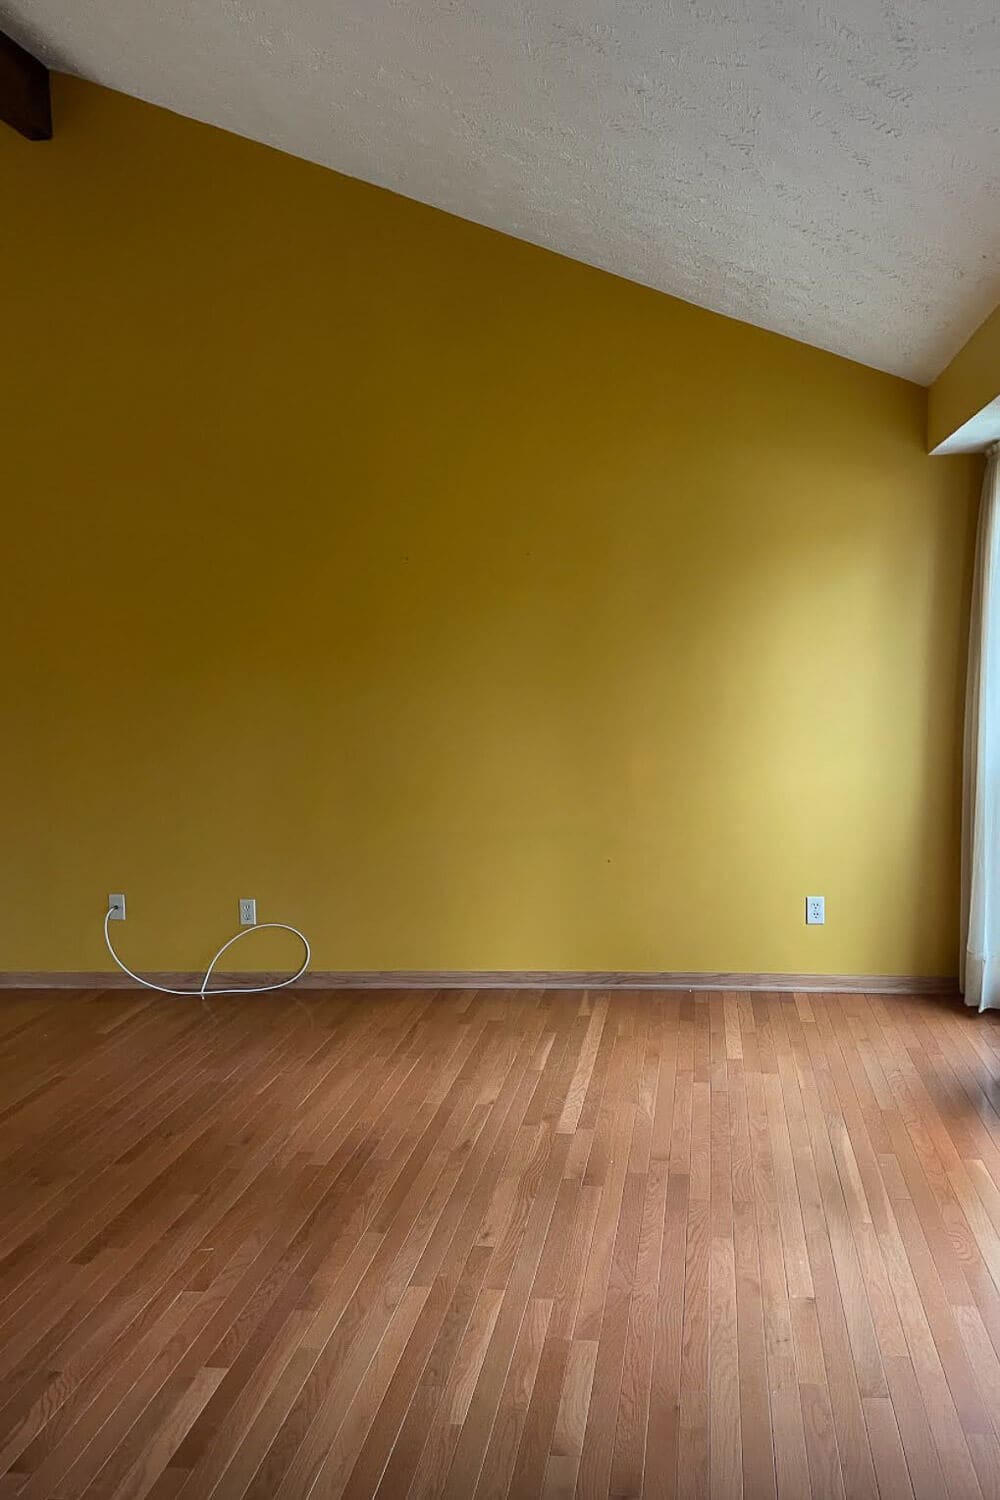
Dining Room Makeover: Before & After
This is the first space guests see when they walk in. It was originally meant to be a formal seating area, but it was the perfect spot for a big table. I love all the natural light in this space. After painting the walls in Sherwin-Williams Alabaster, I then built a floor-to-ceiling fireplace that makes the space feel instantly cozy.
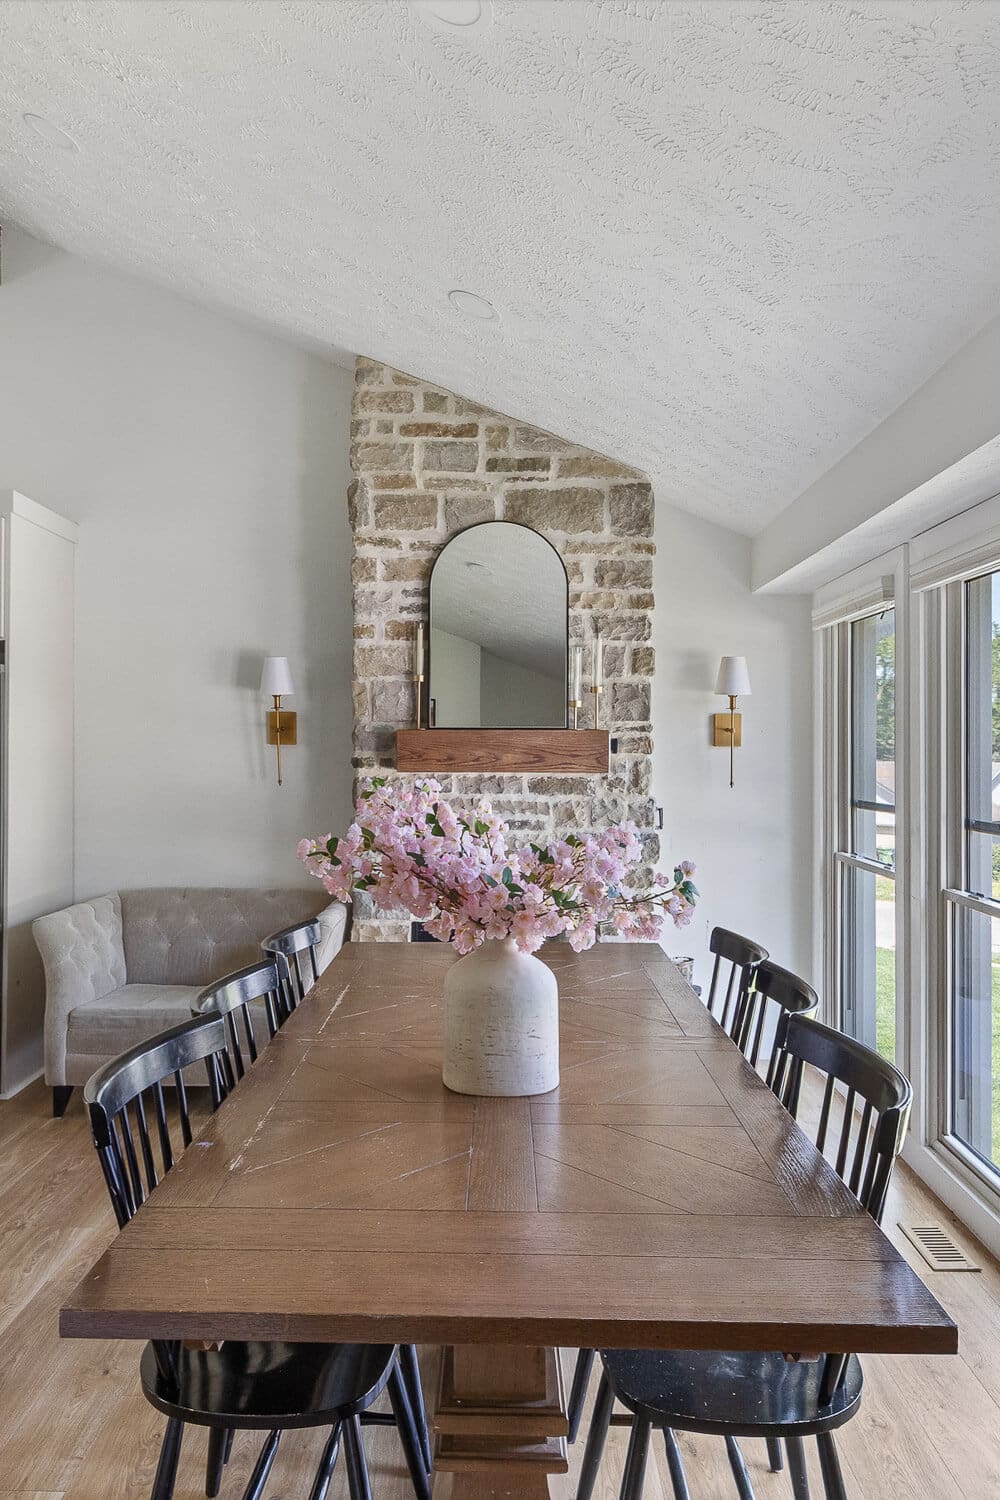
Dining Room DIY Projects
- Fireplace > Building a Fireplace That Looks Custom But Was Totally DIY
- Mantel > How to Build a DIY Fireplace Mantel With a Hidden Outlet!
Kitchen Remodel Before and After
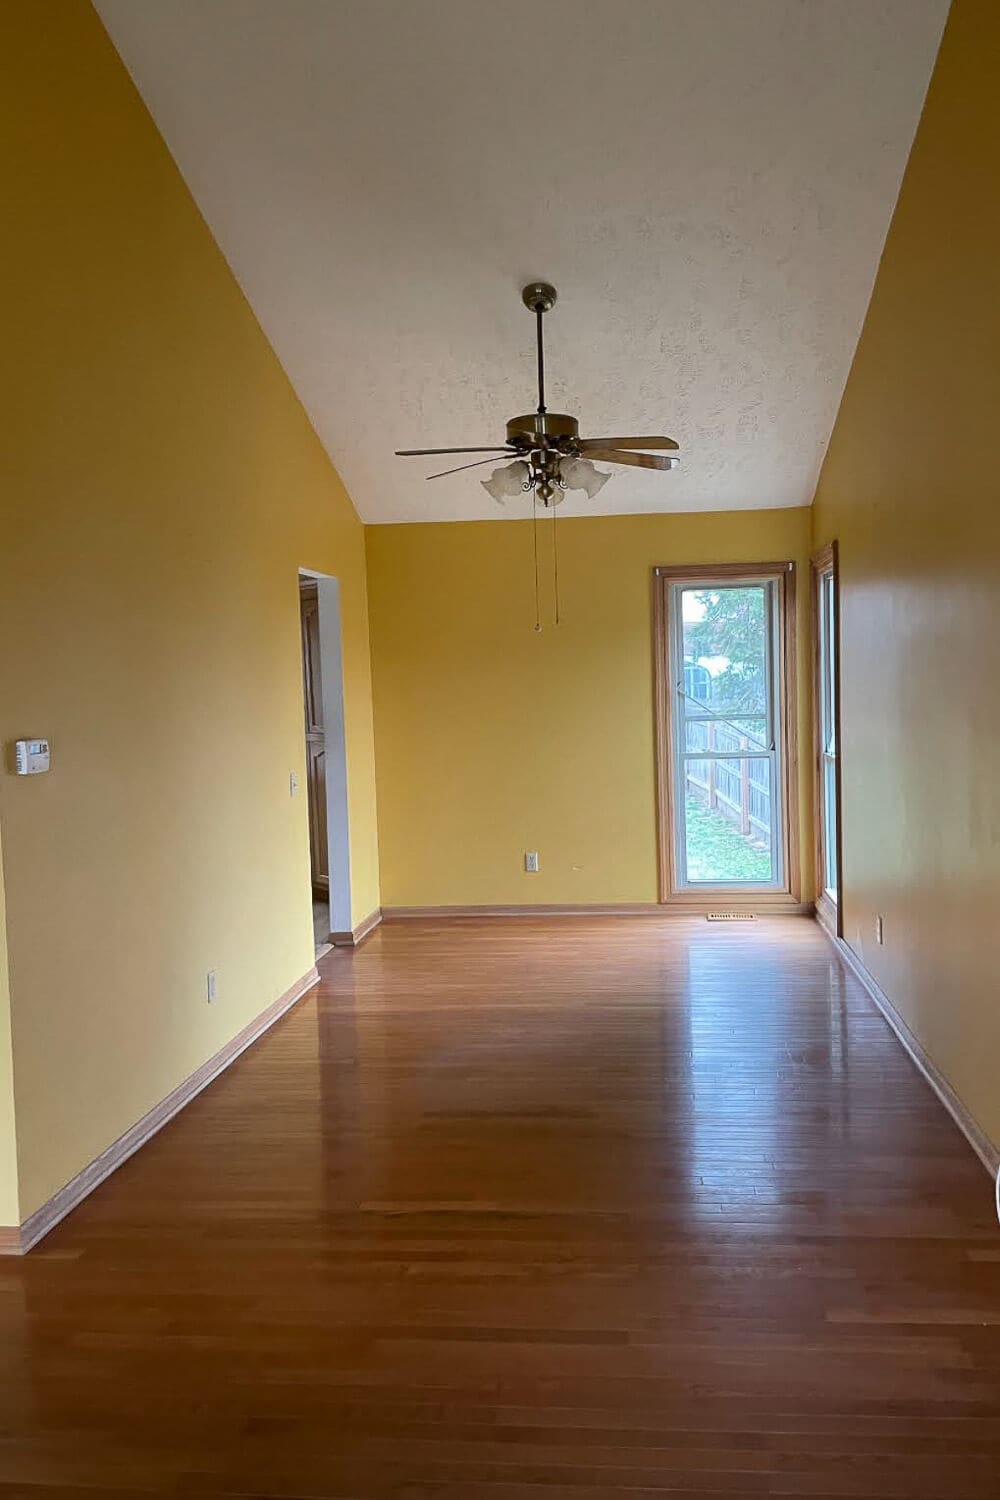
As you turn to your left, you’ll head on into the kitchen. When we bought this house, the kitchen was tucked through a doorway and surrounded by more of those awful yellow walls. It felt dark, dated, and way too cramped for our big family.
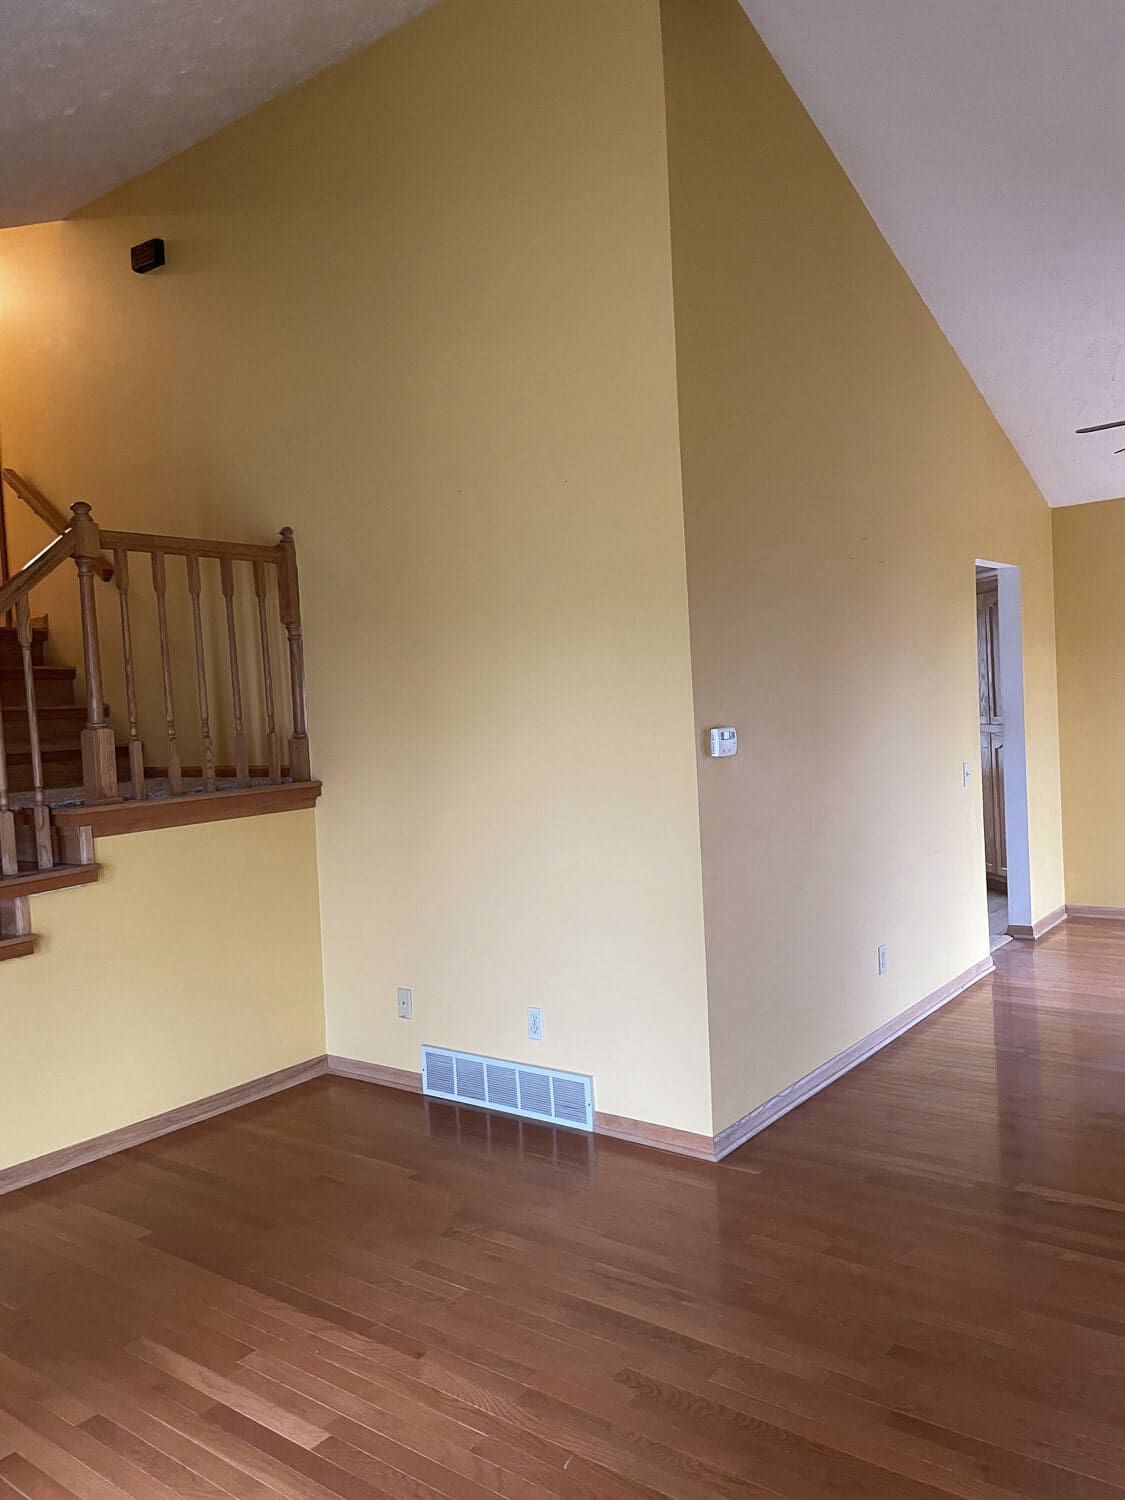
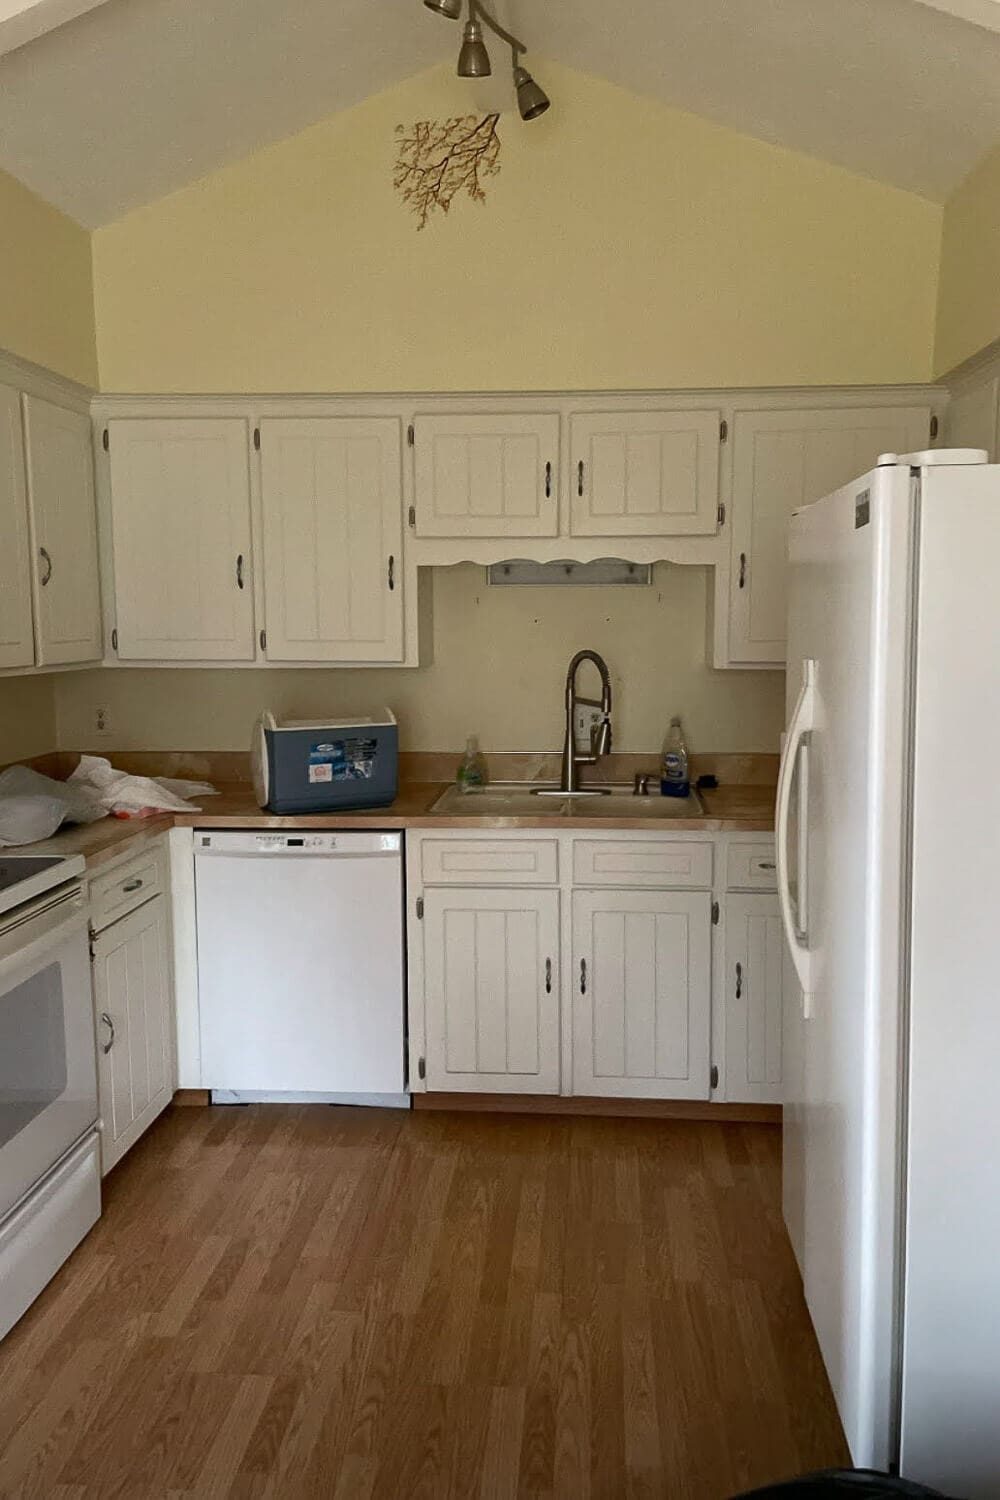
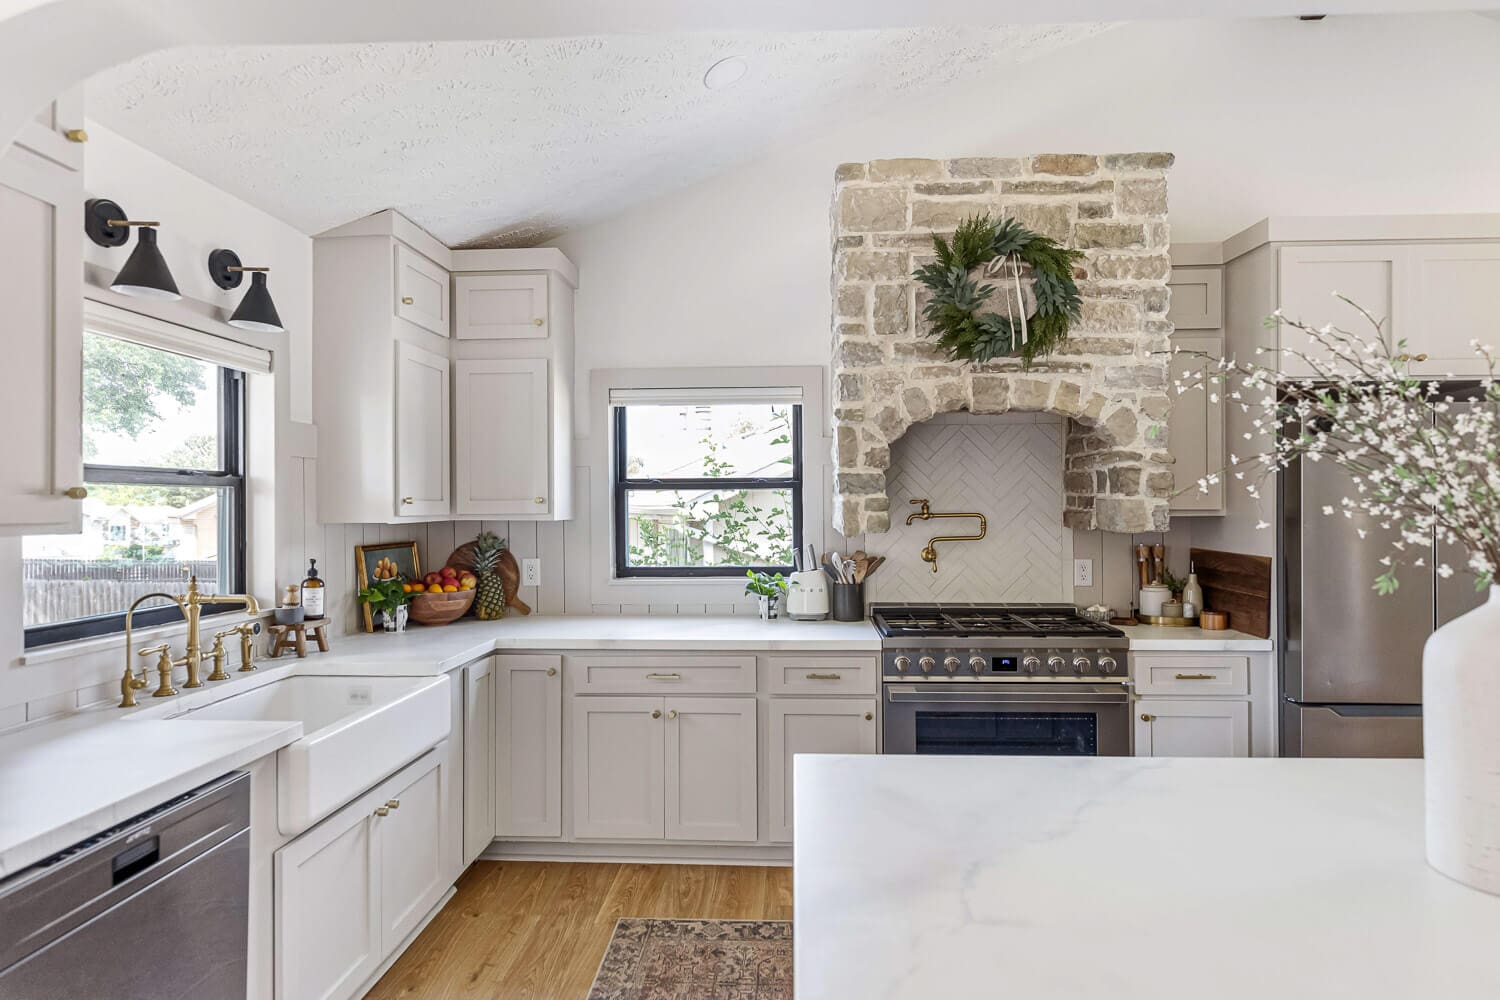
What’s a DIY home renovation without a little demo? We made the bold choice to tear out those walls and shift the entire kitchen into what was originally the dining area. It meant moving plumbing, electrical, and even windows, but it was 100% worth it. Just look at the before and after… so much brighter, open, and way more functional!
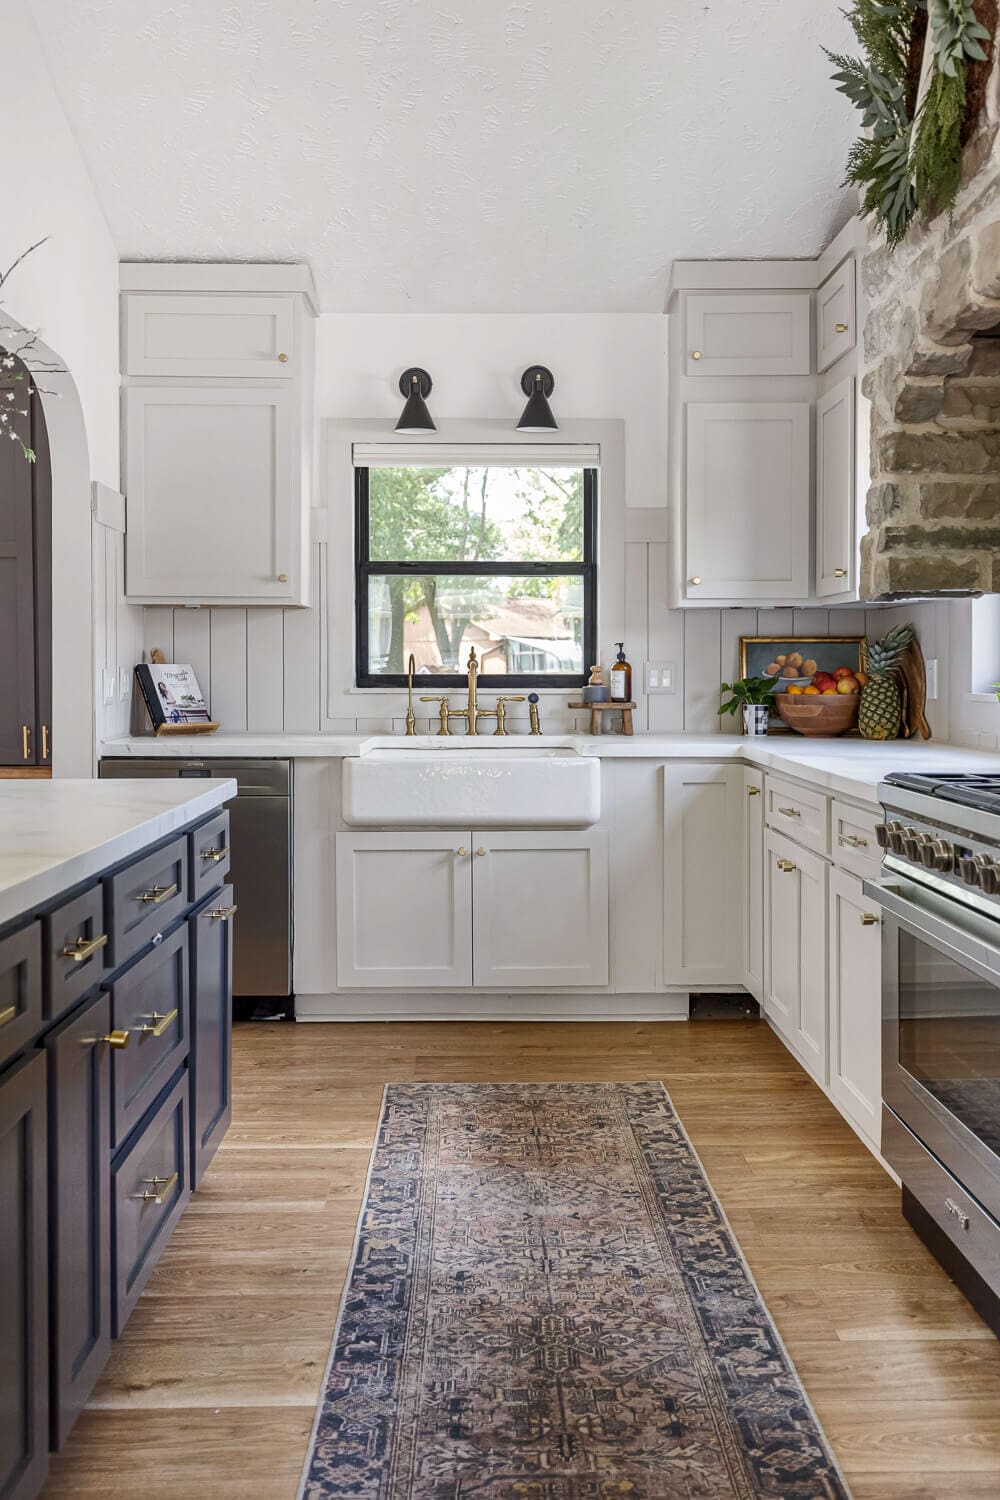
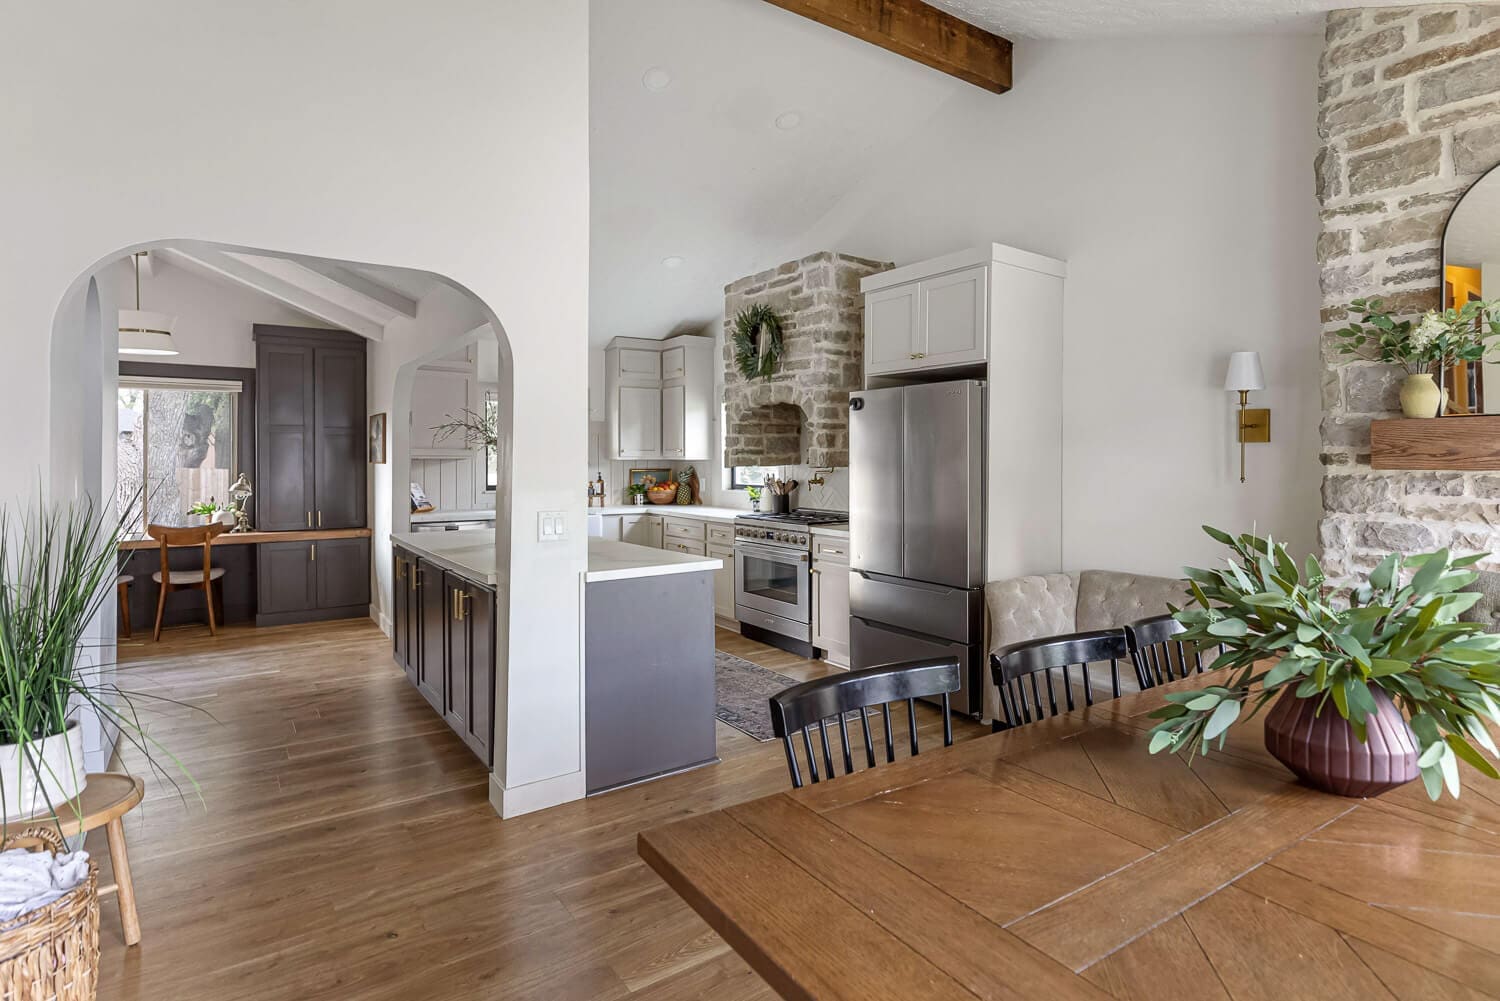
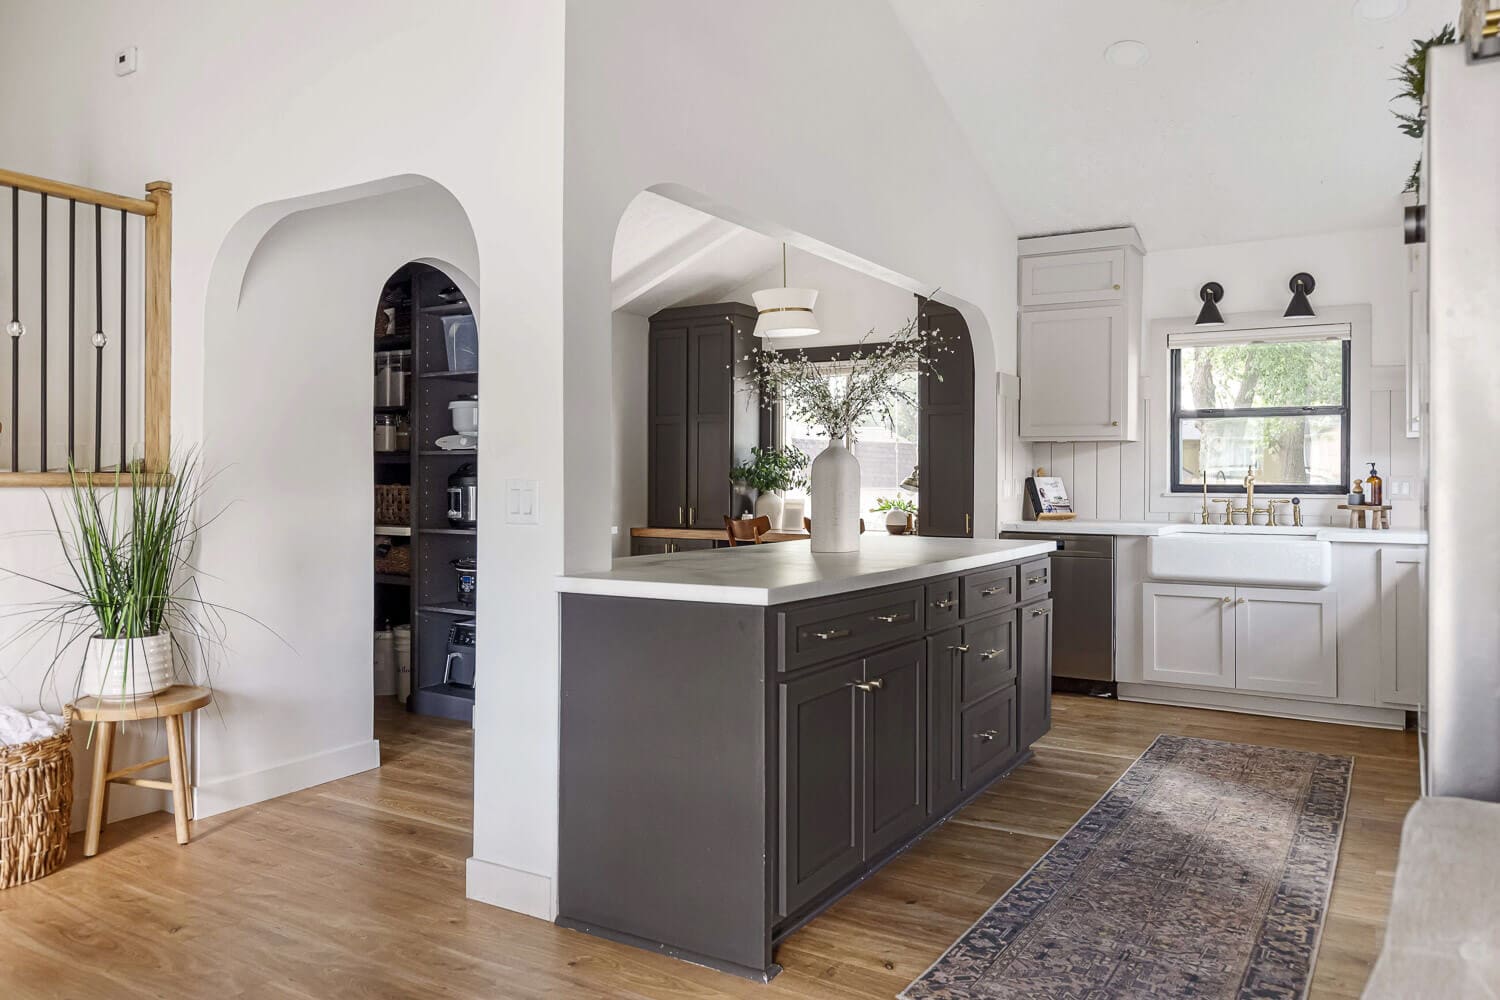
I built the range hood using the same stone as the dining room fireplace to tie the spaces together. And those arches you’ll see throughout the house? They’re a small detail that really makes everything feel cohesive.
And what went into the old kitchen space? It’s now a roomy walkway behind the island and, best of all, a dream pantry with an arched opening. Tons of beautiful storage that makes all the difference!
I’ve got a full post that walks through the entire DIY renovation of our home’s kitchen, from demo to finishing touches, with tons of photos. You can check it out here > DIY Kitchen Remodel – all the details. I will also link some individual projects below.
Kitchen DIY Projects
- Using Stock Cabinets > Making Unfinished Kitchen Cabinets Look Custom
- Painting Cabinets > The ULTIMATE Guide to Painting Cabinets & Furniture
- Stone Range Hood > DIY Stone Range Hood for Your Kitchen
- Pantry > How to Build Beautiful DIY Pantry Shelves
- Painting Window Frames > Painting Window Frames Black for a Modern Look
- Shiplap Backsplash > Beautiful DIY Shiplap Backsplash
- Epoxy Countertops > The Best Way to DIY Epoxy Countertops
Homeschool Room Built-Ins (DIY Renovation)
Just beyond the island is what used to be the breakfast nook. Since we didn’t need two dining areas, we turned it into a built-in office that doubles as our homeschool room. The storage is perfect for school supplies, and painted the same custom dark gray as the island, it ties in seamlessly with the kitchen.

As we turn the corner, there was just a little sliver of space before the steps down to the living room. Rather than let it go to waste, I built a family command center there. I’m always up for adding more storage during DIY home renovations!
- Homeschool Room > Beautiful DIY Home Office Built Ins
- Command Center > How to DIY a Family Command Center

Living Room Remodel Before and After
And with that, let’s head on down into the living room. This is what it looked like the day we moved in, before starting our DIY home renovation. Two words… UGLY and dated.
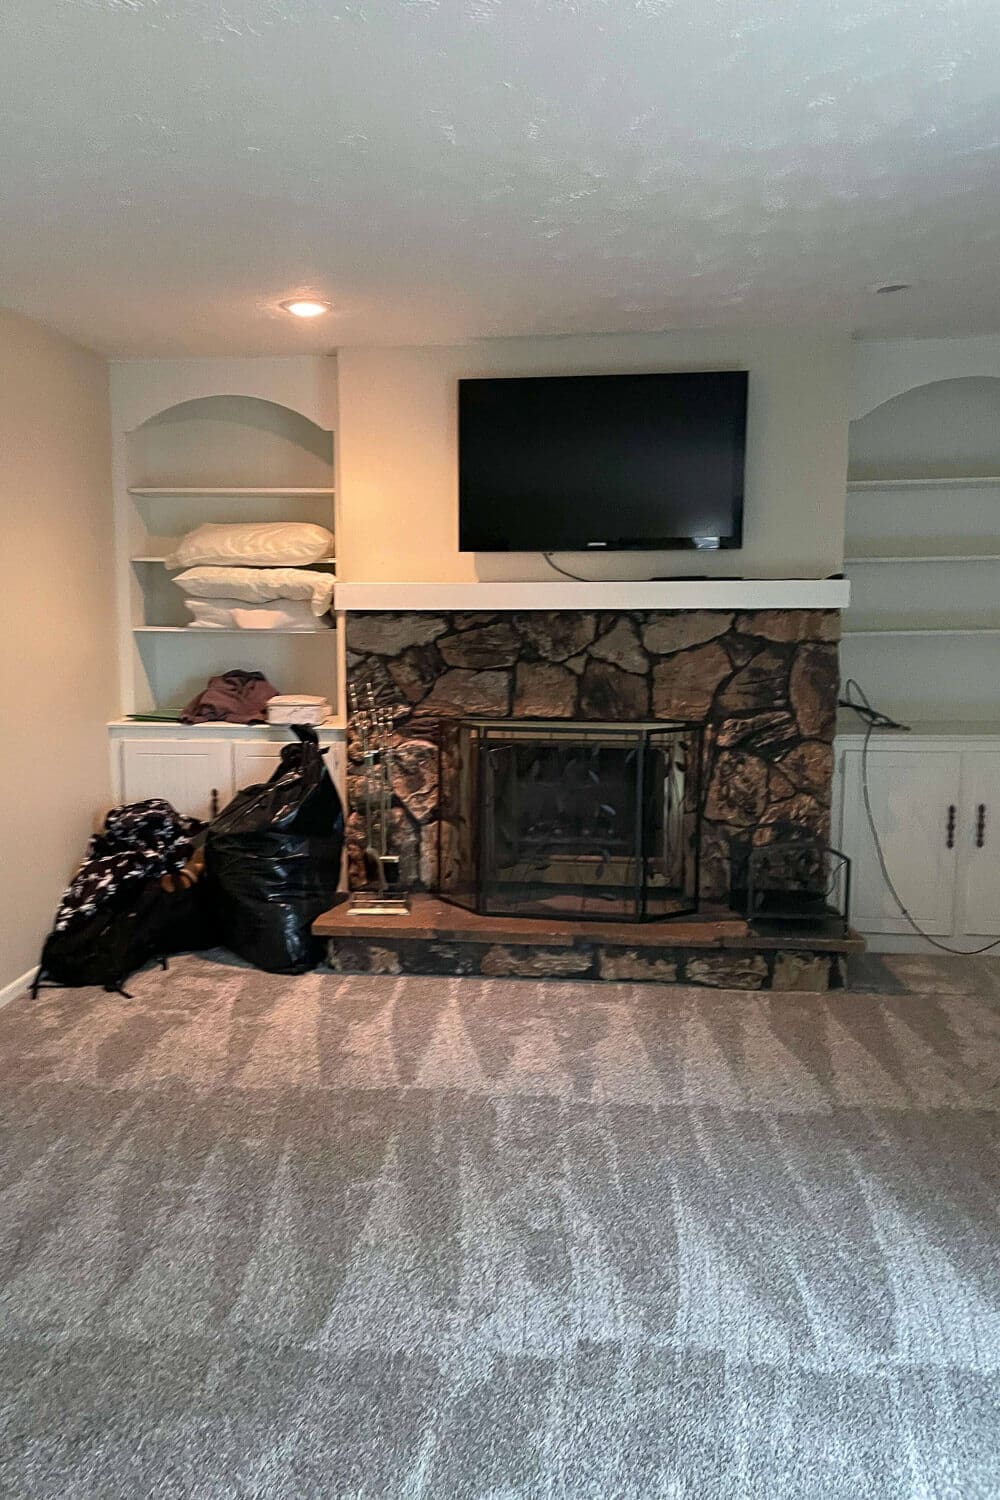
We demoed the fireplace surround, swapped the stone for something more modern, and I built a new mantel. The built-ins got reshaped arches and fresh paint. And the carpet had to go. We replaced it with the same flooring we used throughout the entire first floor.
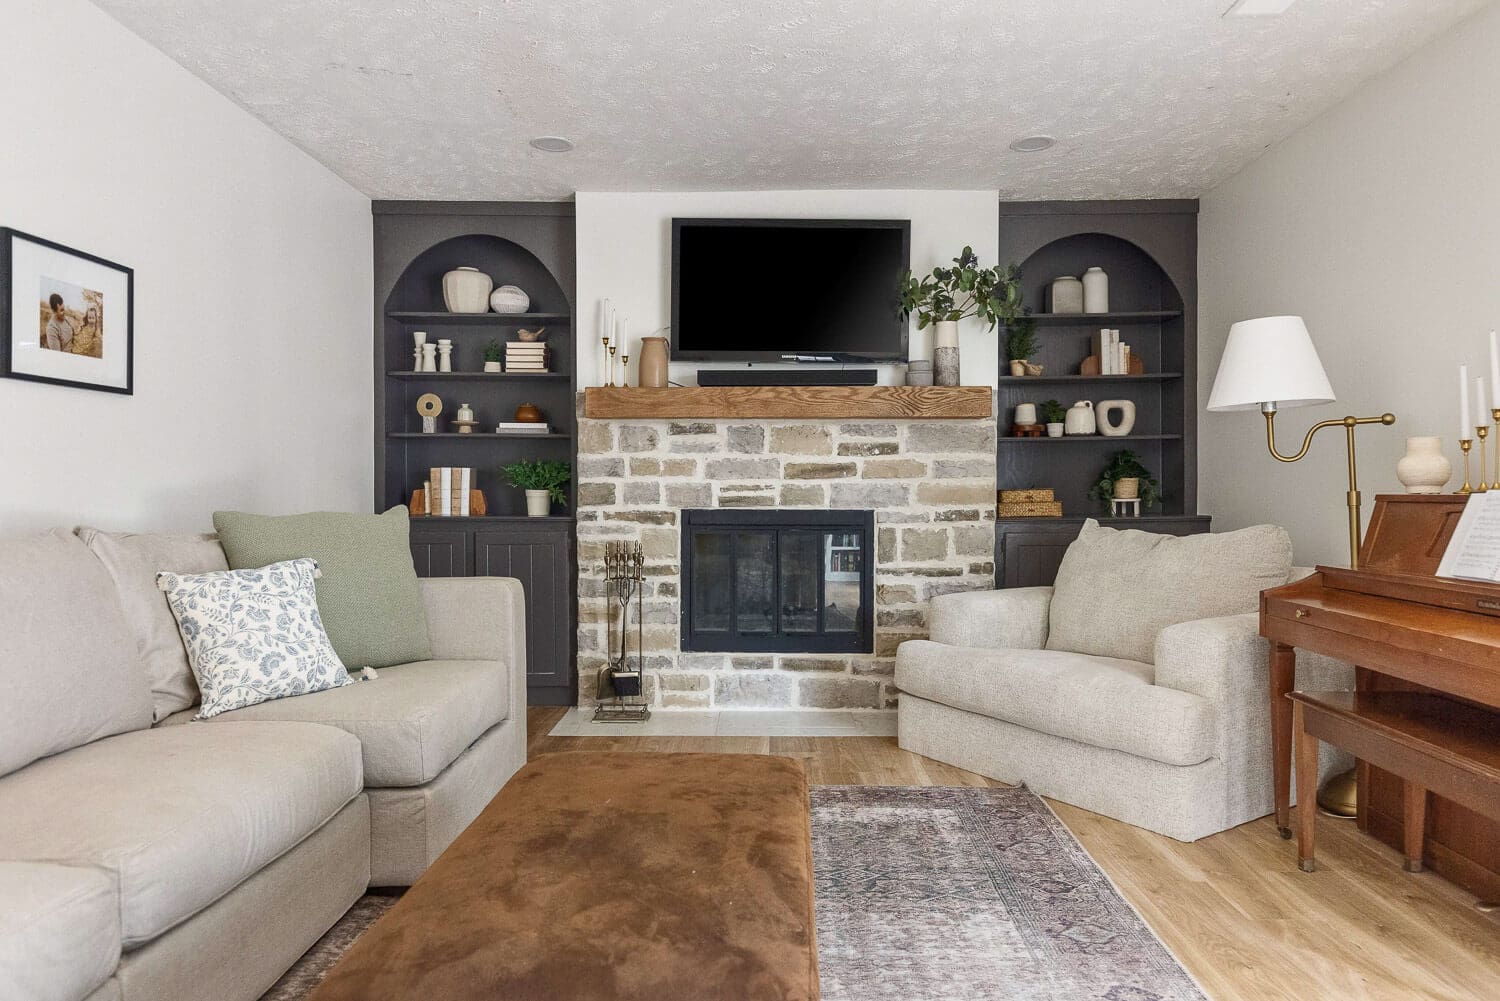
Living Room DIY Projects
- Fireplace > Updating An Ugly Rock Fireplace
- Shelves > DIY Arched Living Room Shelves
- Flooring > Simple DIY Duravana Plank Flooring Installation
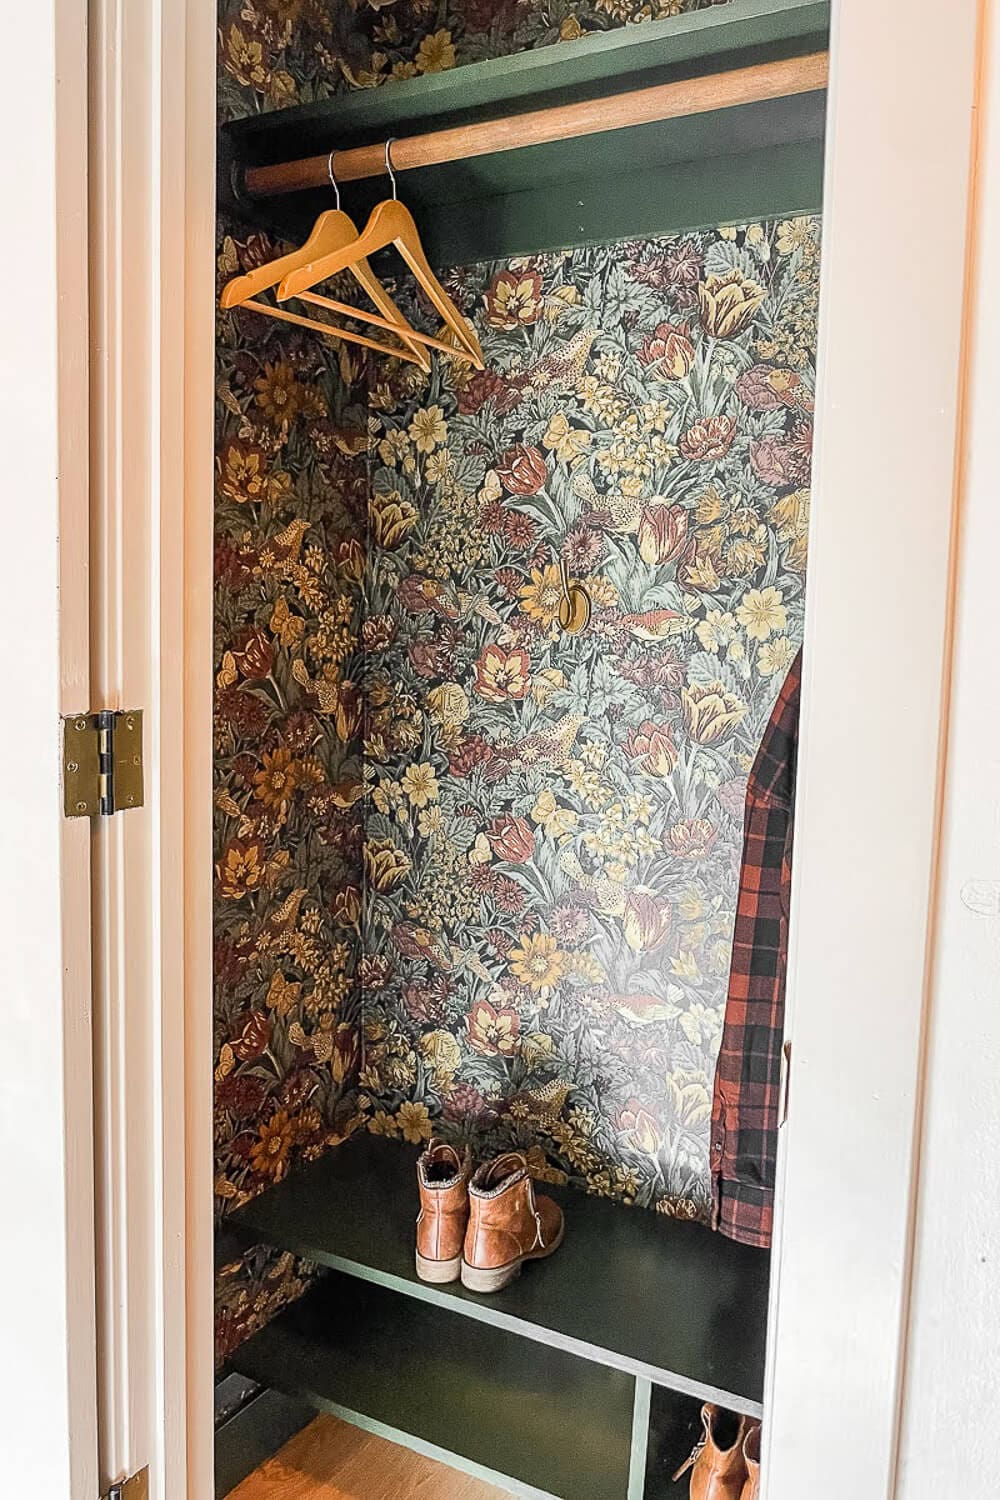
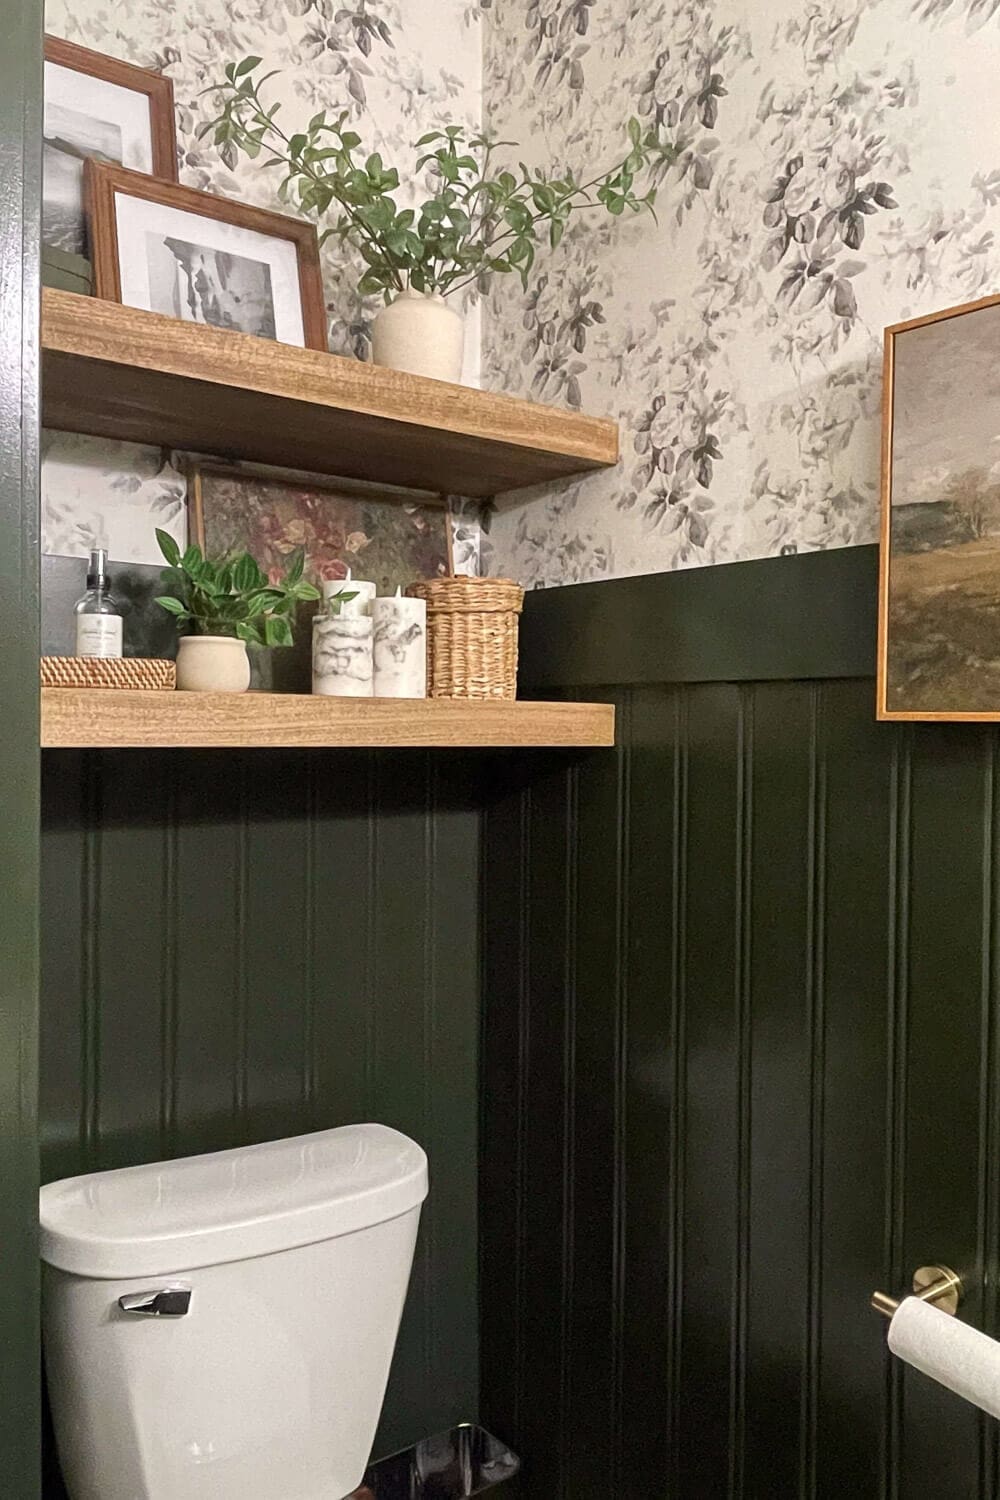
Hall Closet & Powder Room Makeovers
As we head out of the living room and back toward the front door, there are two small spaces I re-did off the hall: a coat closet and a powder room. For all the details on those makeovers, including the before photos, you can check out the full posts.
- Closet > Beautiful Coat Closet Makeover!
- Powder Room > DIY Bathroom Walls With Beadboard Upgrade
Basement DIY Home Renovation (Before & After)
Now that you’ve seen the first floor, let’s head down to the partially finished basement. My goal for this portion of our DIY home renovation was to create a multi-purpose space that could handle everything from overnight guests to family movie nights.

I’d call this mission accomplished! We swapped the carpet for the same plank flooring as the main floor, replaced the drop ceiling, added built-in storage, and even tucked in a Murphy bed for overnight guests.
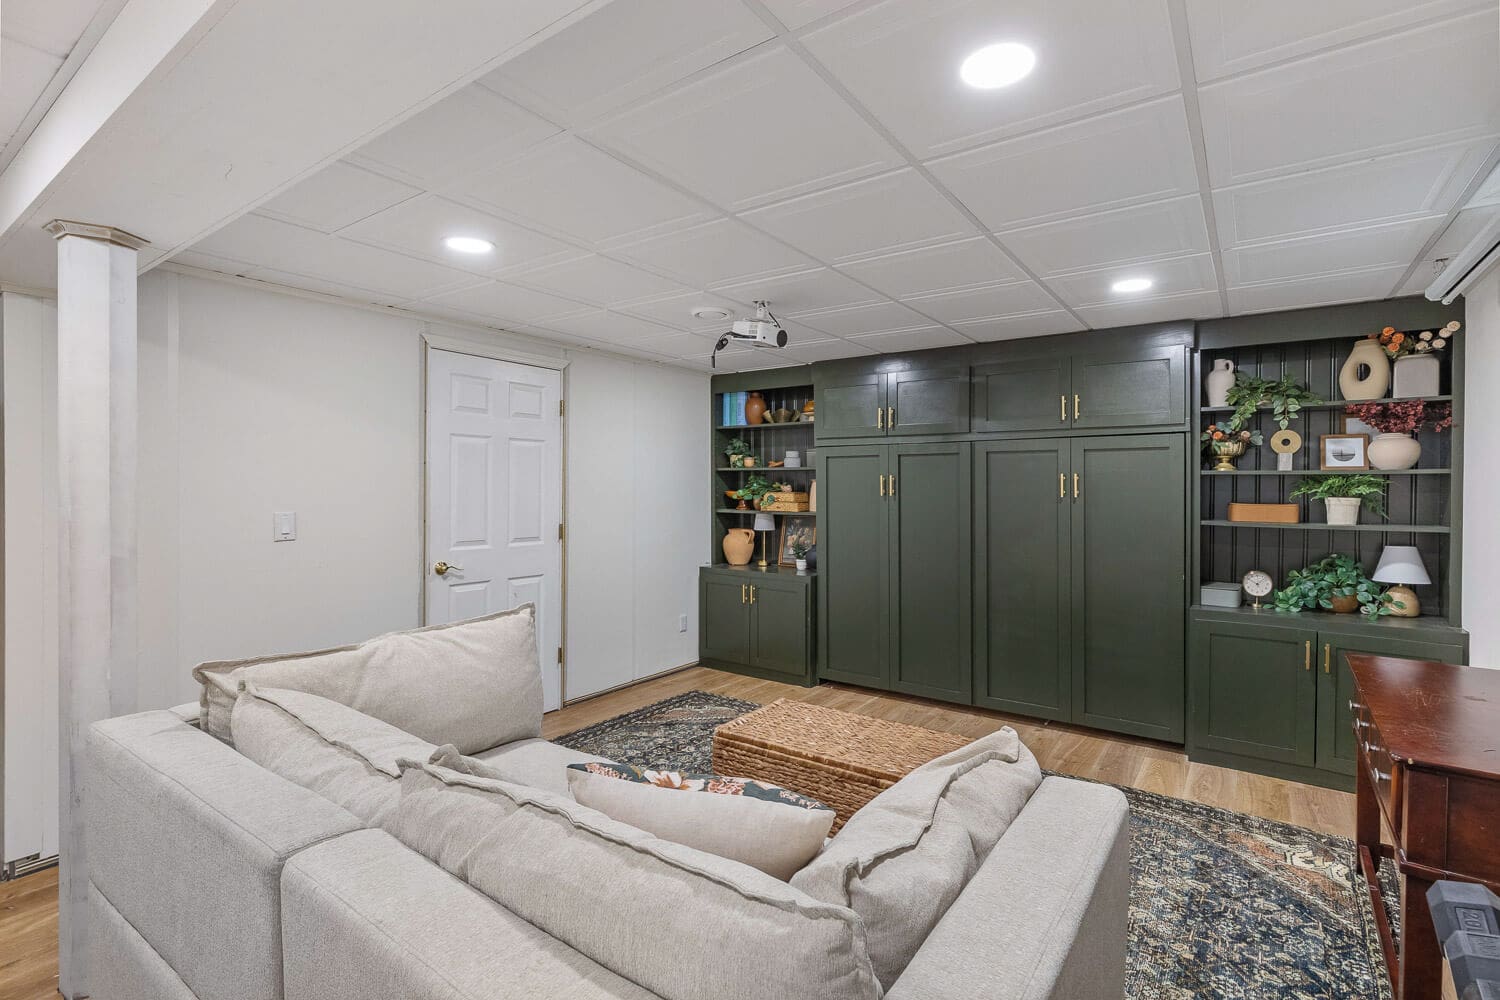
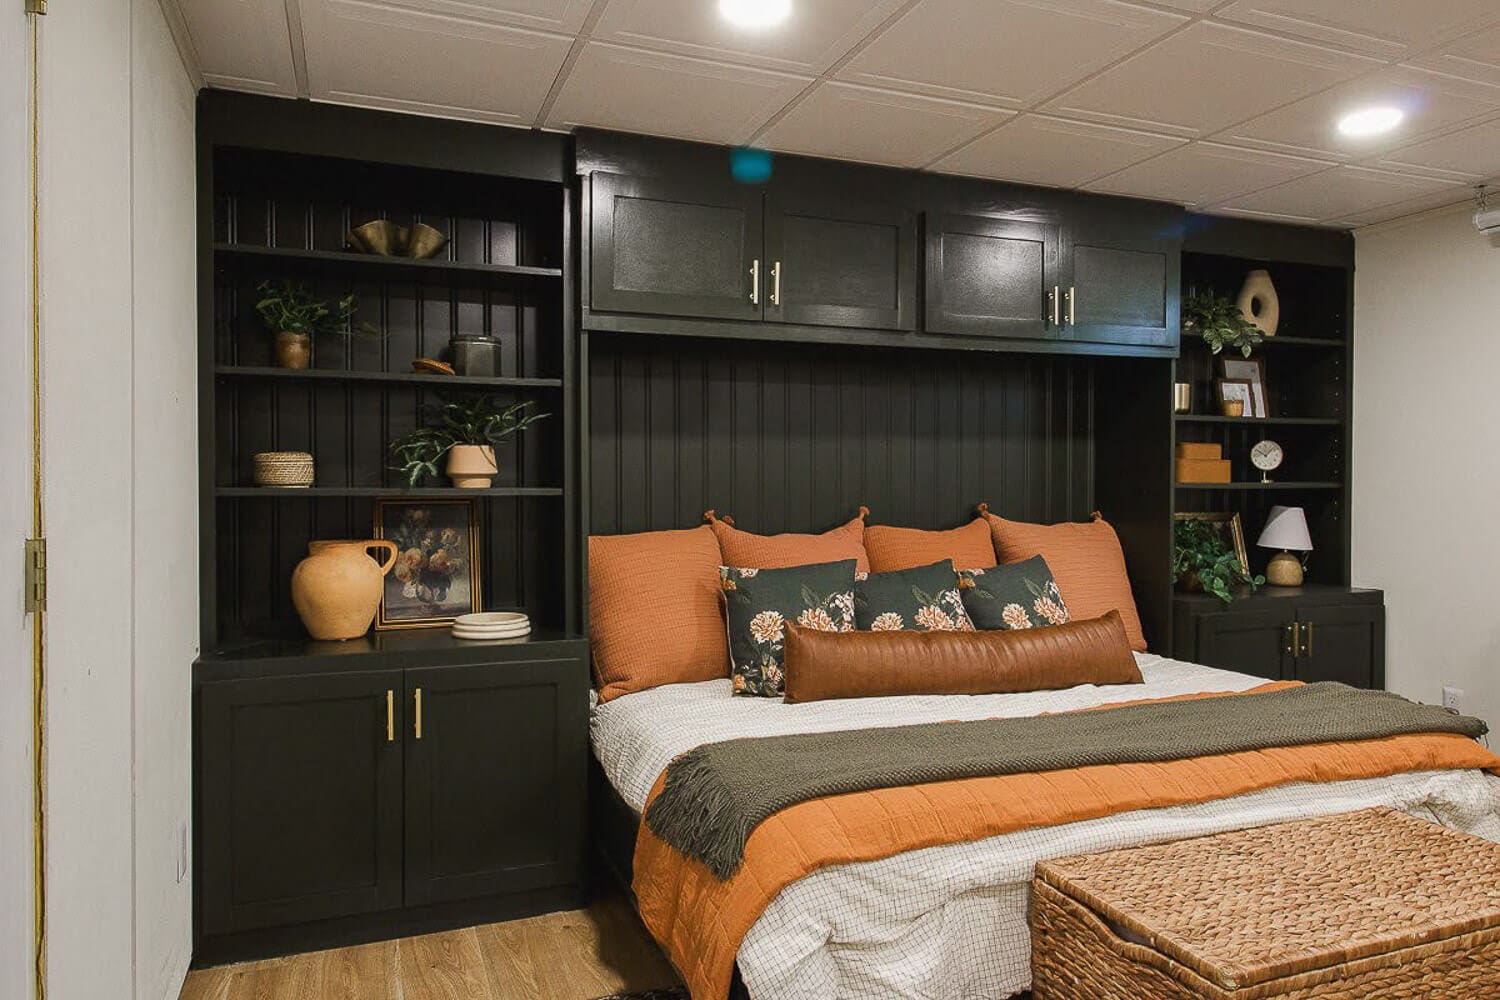
Basement DIY Projects
- Murphy Bed > How We Built a Horizontal Murphy Bed in Our Basement
- Built-In Shelves > DIY Built-in Murphy Bed With Bookshelves (And How I Styled Them!)
- Drop Ceiling > Gorgeous Modern DIY Drop Ceiling Tile Makeover
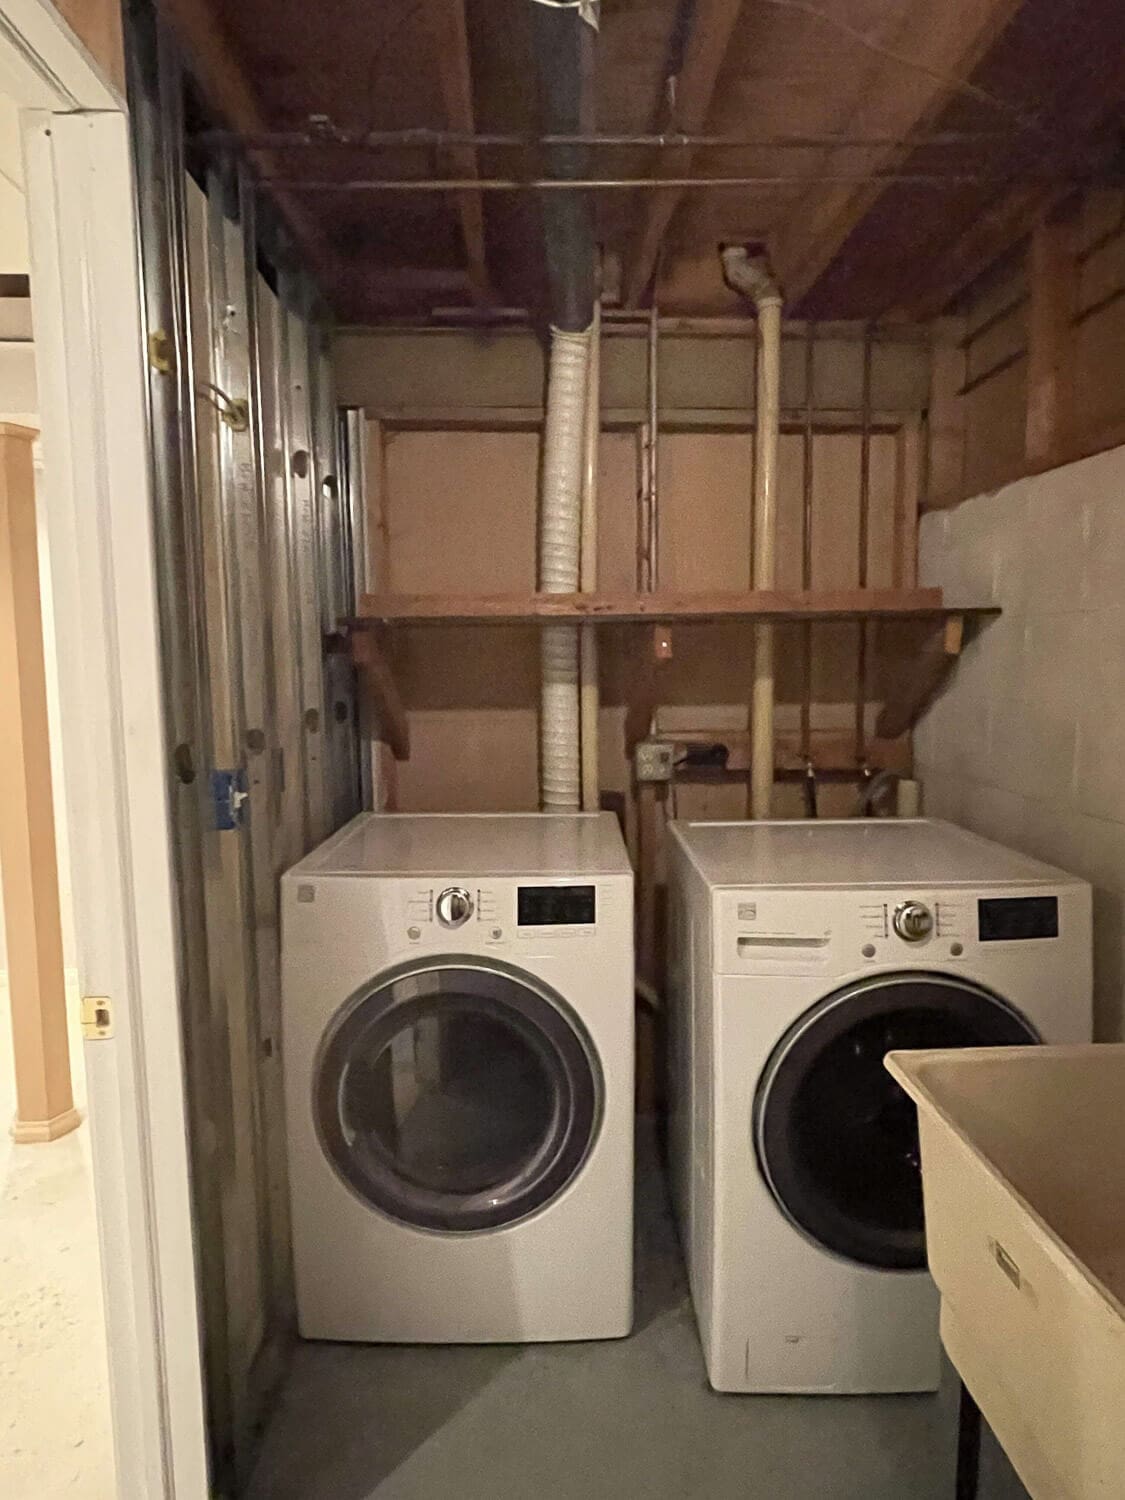
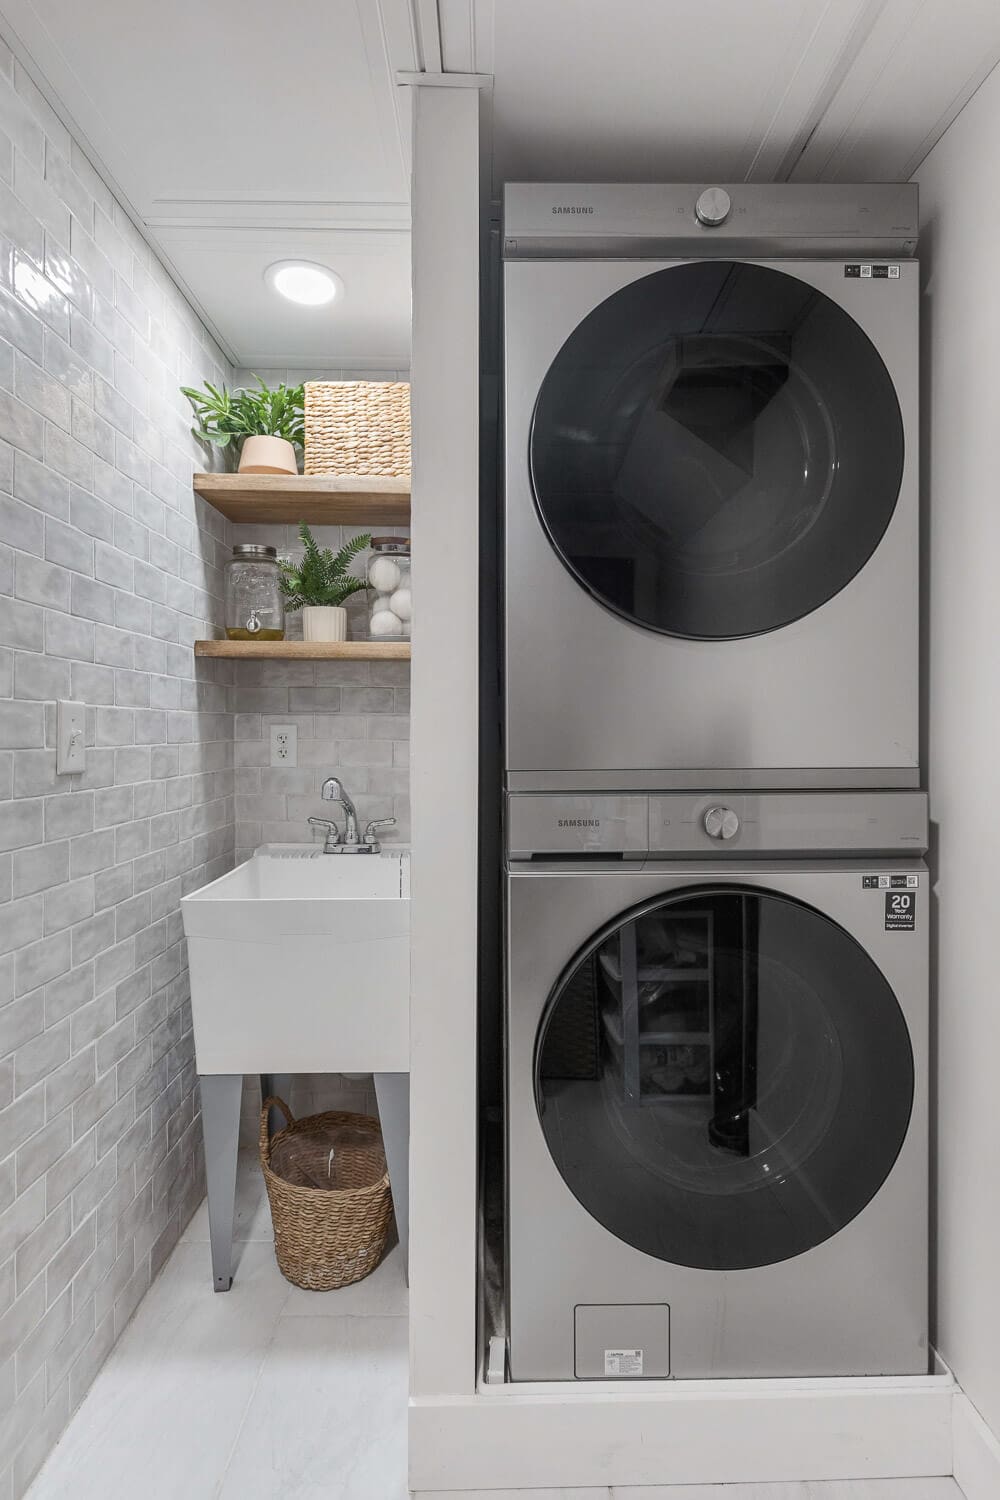
Basement Laundry Room Makeover (DIY)
Also down in the basement, we had a laundry room, but I envisioned something brighter and more inviting (no small task for a DIY home renovation in a basement). This turned out even better than I expected. Absolutely gorgeous! All the details are here. > DIY Basement Laundry Room Makeover
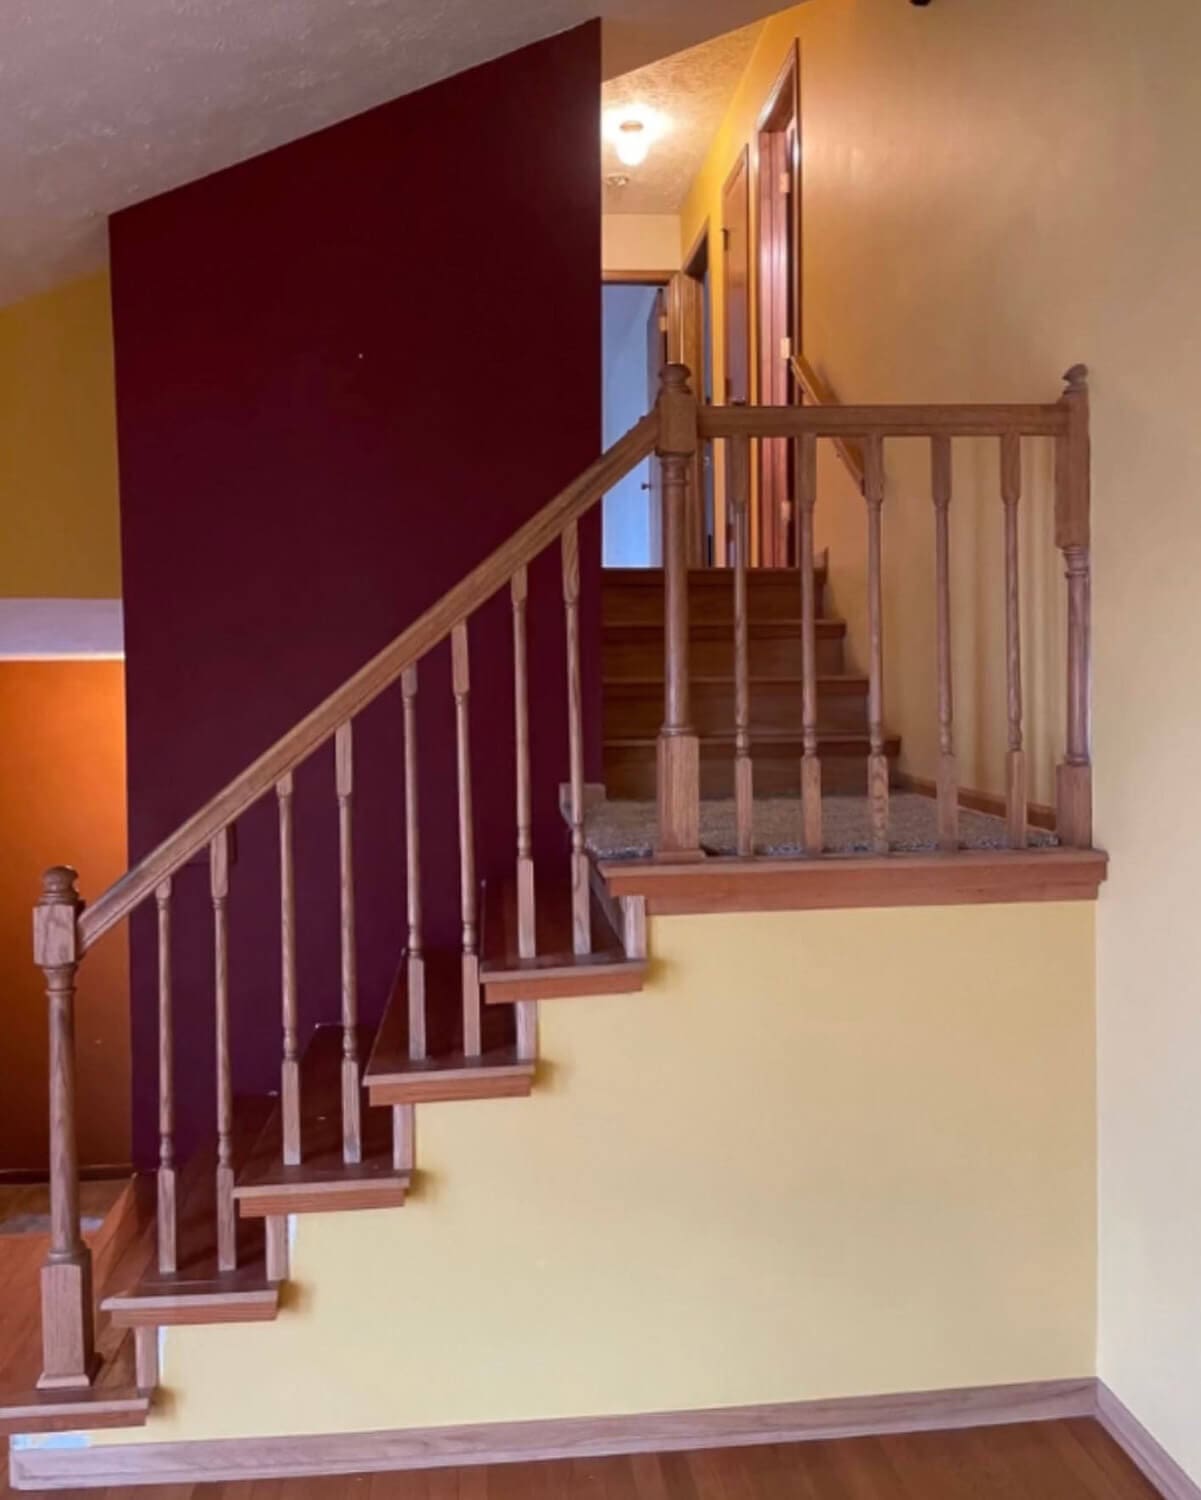
Upstairs DIY Home Renovation: Bedrooms & Baths
Now that we’re finished in the basement, let’s check out all my DIY home renovation projects upstairs, and be sure to admire the staircase on the way. We redid the treads and risers with plank flooring, swapped in a modern railing, and added the stair runner.

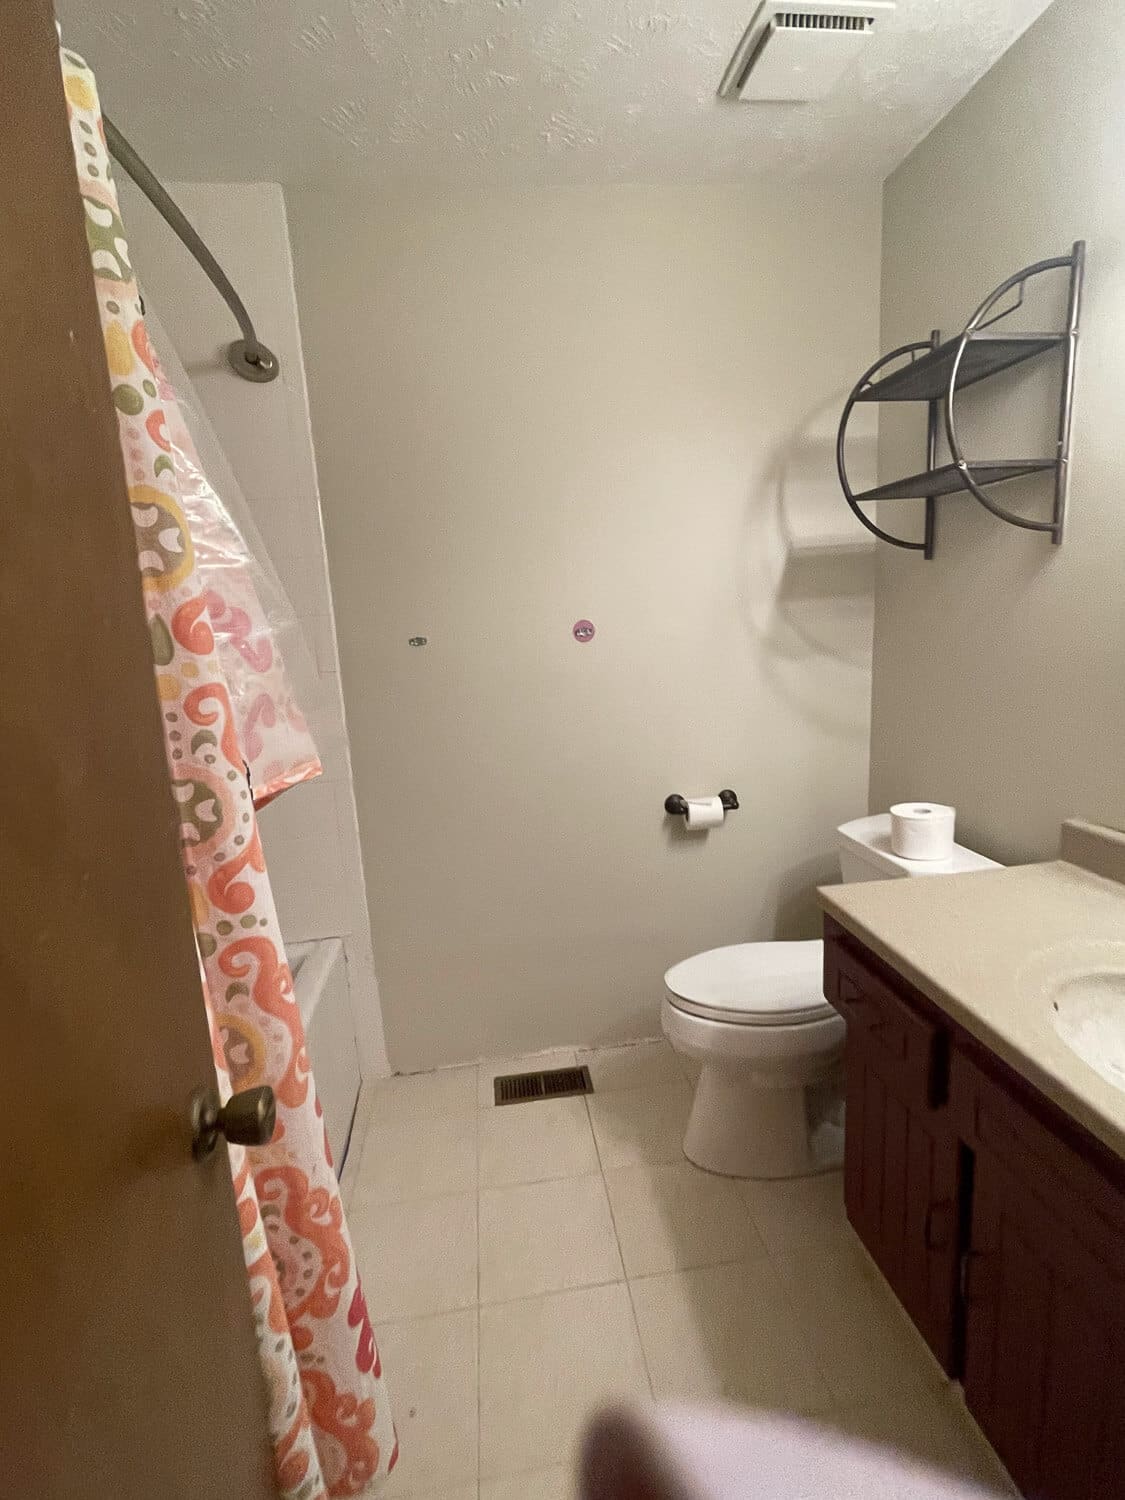
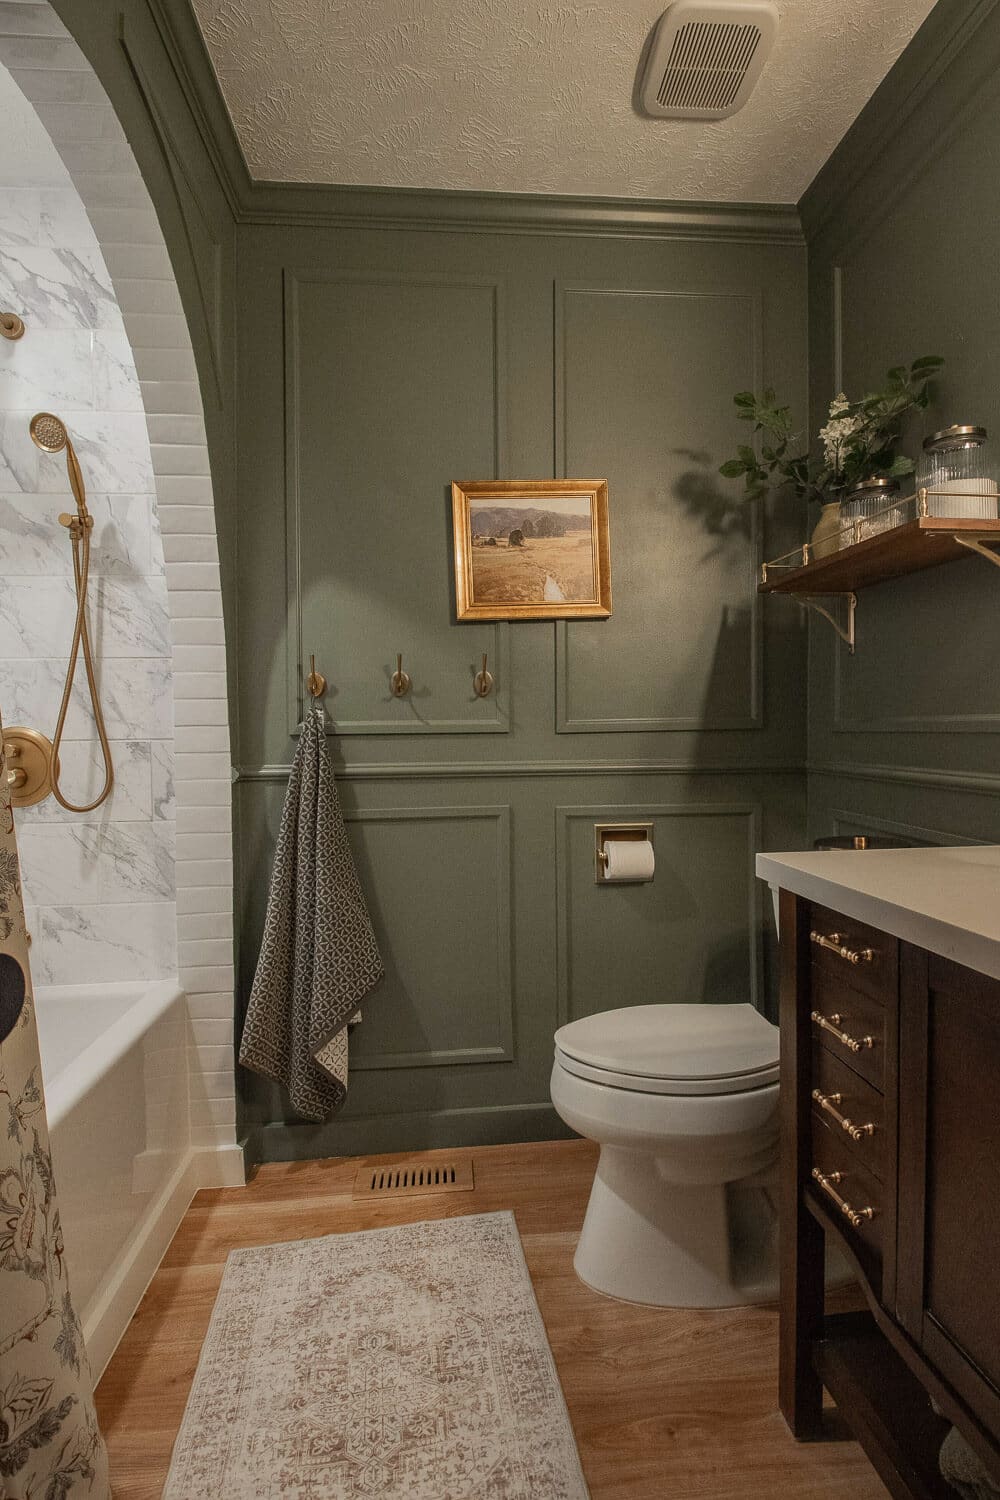
Guest Bathroom Remodel Before and After
The guest bathroom started out as the most basic builder-grade space. Now, the after looks like it belongs in a luxury hotel. From the molding to the arched shower alcove, this room got a serious glow-up. For all the details on every project in this space, check out the full post here. > DIY Dark Green Bathroom Remodel: Complete Guide
Girls’ Bedroom Built-Ins (DIY Remodel)
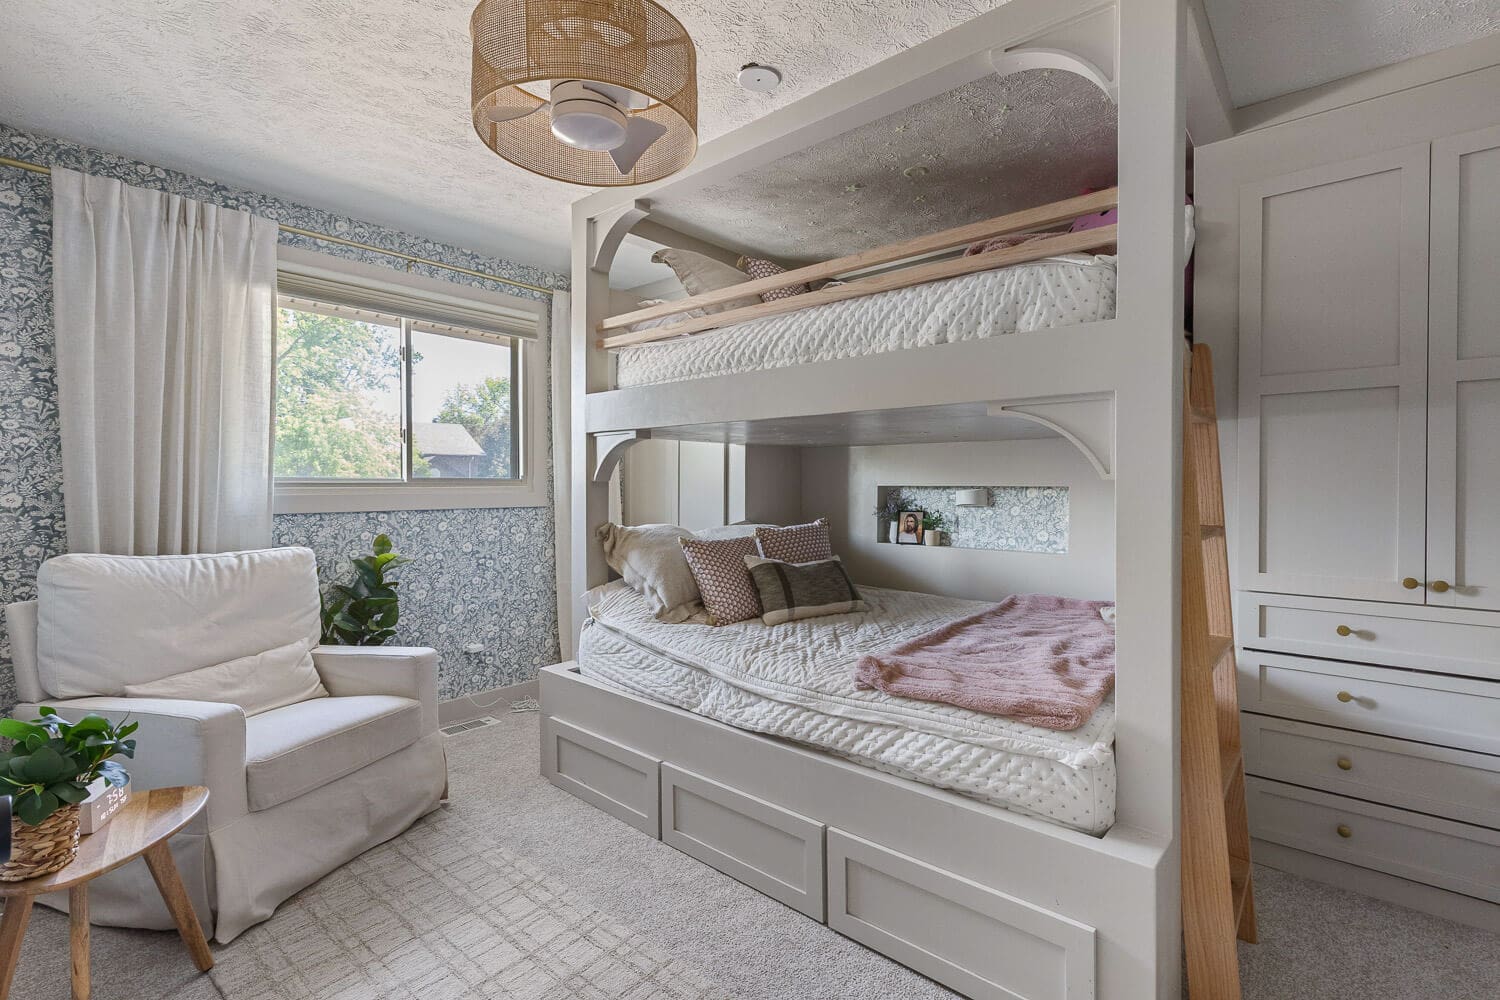
My three girls all shared a room, which meant for this part of the DIY home renovation, I needed to maximize storage space, build custom queen-size bunk beds, and give them a beautiful room that would make them feel like princesses!
I’m so happy with how this room turned out. I used two pieces from IKEA to give me a head start on those built-in cabinets on the side, then created an entire bed from scratch, including the ladder. This space turned out absolutely beautiful! Find more details here. > DIY Girls’ Bunk Beds and Decor
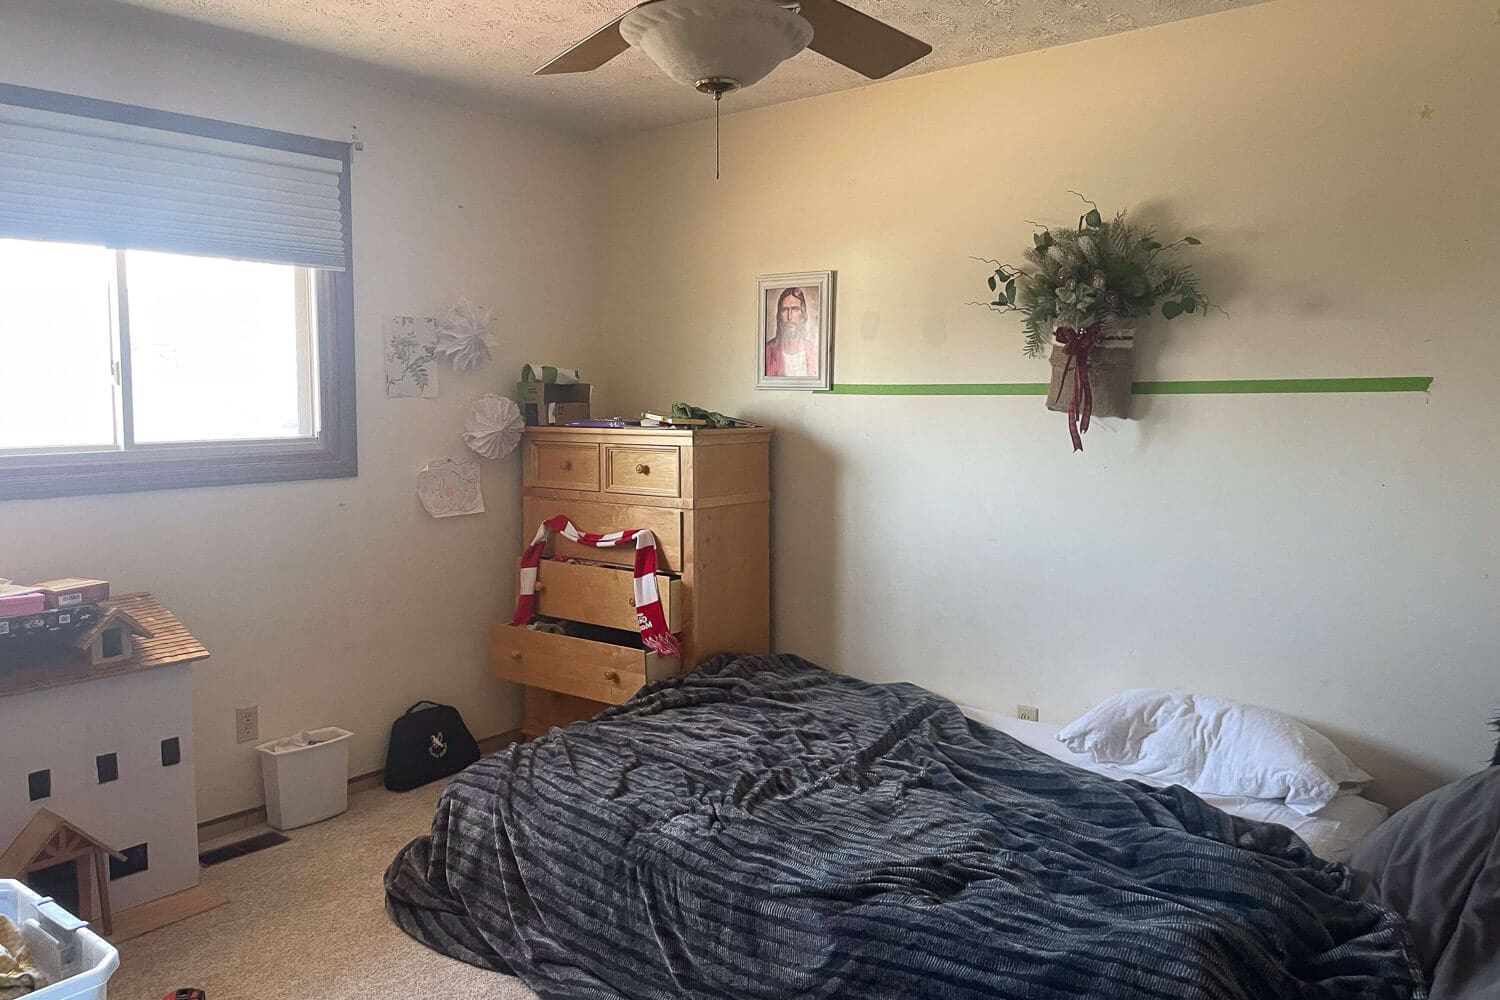
Malcom’s Room Built-Ins (DIY Remodel)
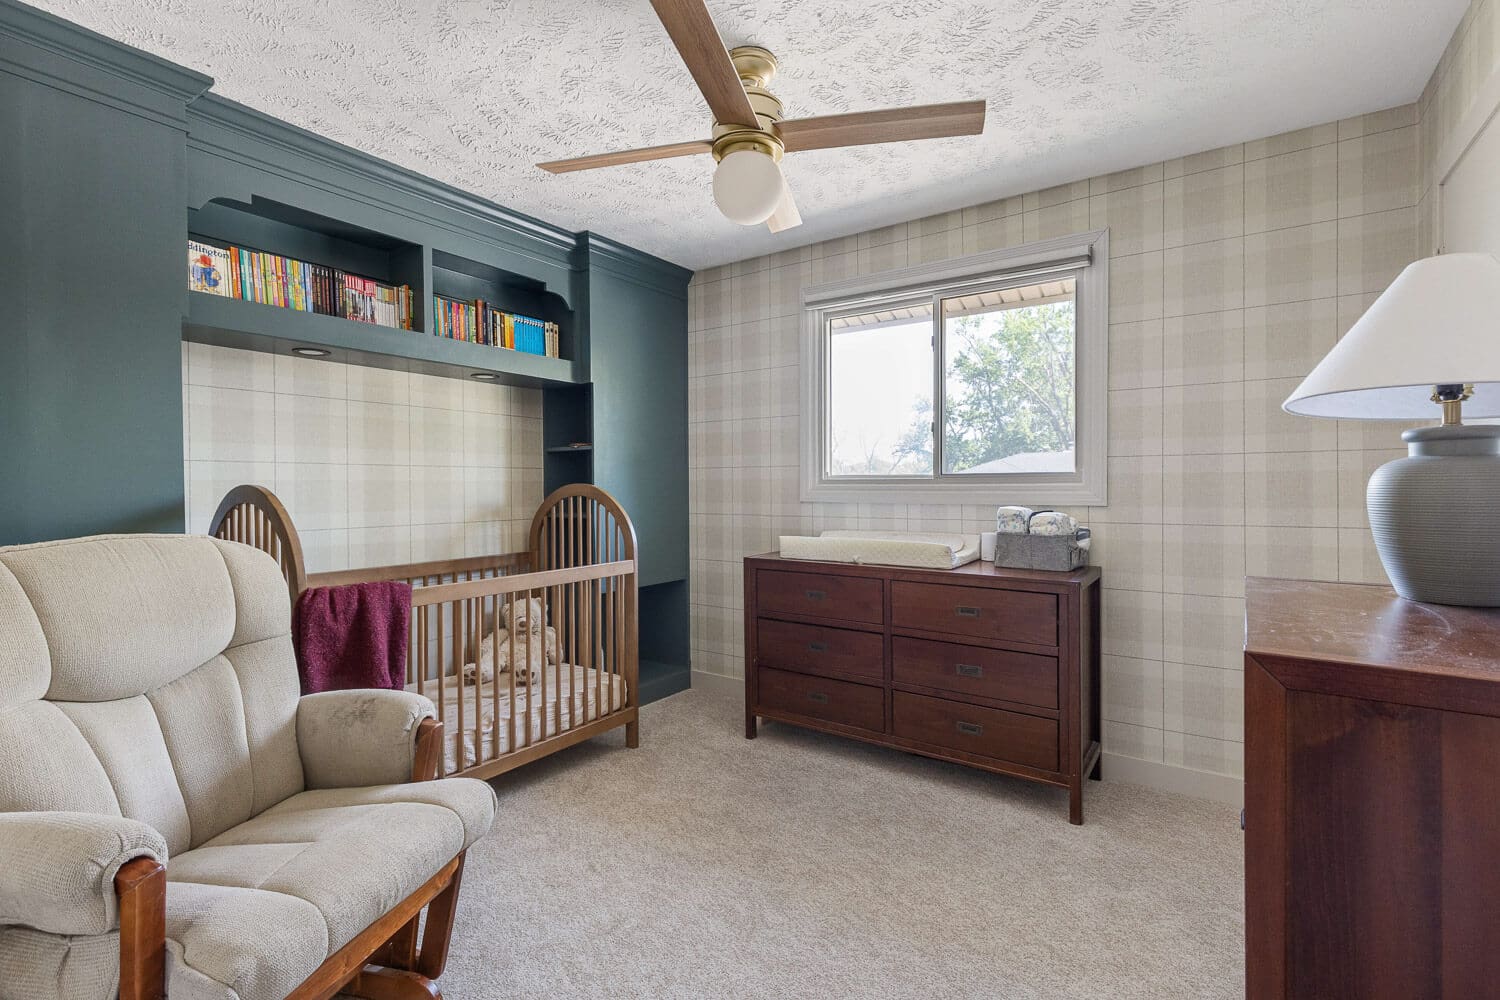
This was actually the last DIY home renovation project I tackled before we moved, so I wanted it to work well for us but also be practical for the new owners. I even found a way to hide that awkward air duct bump-out in the corner.

Along with adding neutral wallpaper, I built custom built-ins that work as both a headboard and nightstand. The center opening was perfect for a crib, but it’s big enough to fit a queen bed or even a desk, giving the new owners plenty of options for how to use the space. Check out the step-by-step process here. >DIY Headboard with Storage (That Looks Built-In!)
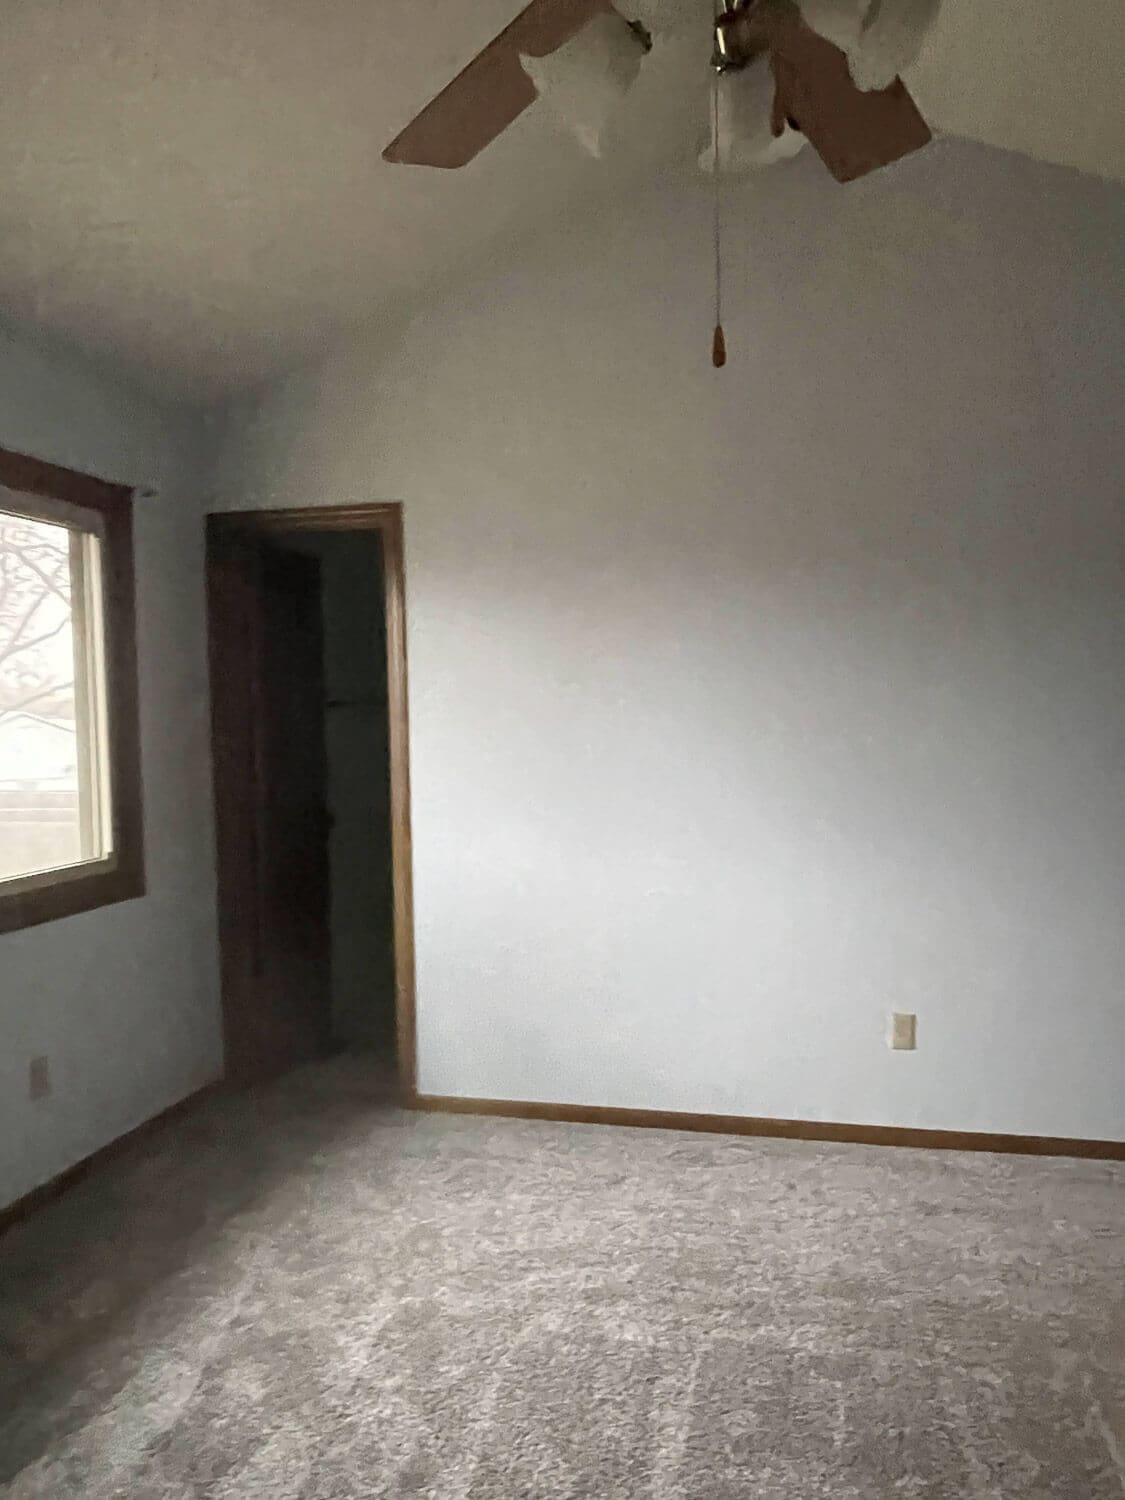
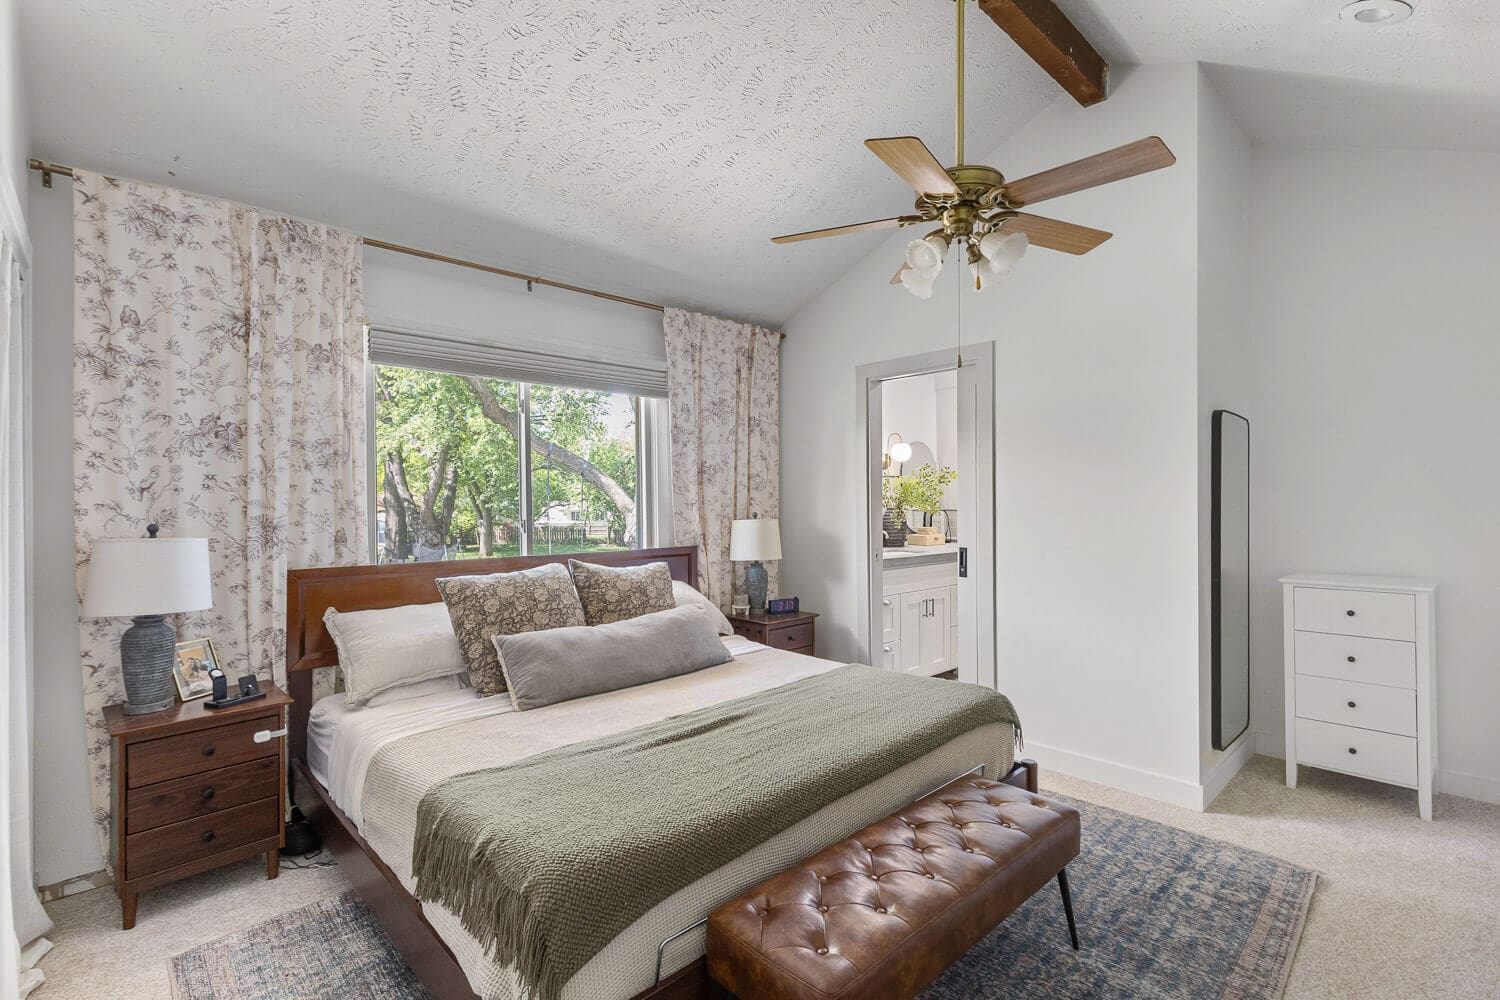
Primary Suite Remodel: Bedroom + Bath Before and After
Our primary suite was nothing to get excited about, and the bathroom was tiny and awkward. We made the somewhat controversial choice to steal a few feet from the bedroom to expand it. By shifting the window down and bumping the bathroom wall out about three feet, we gained just enough space.
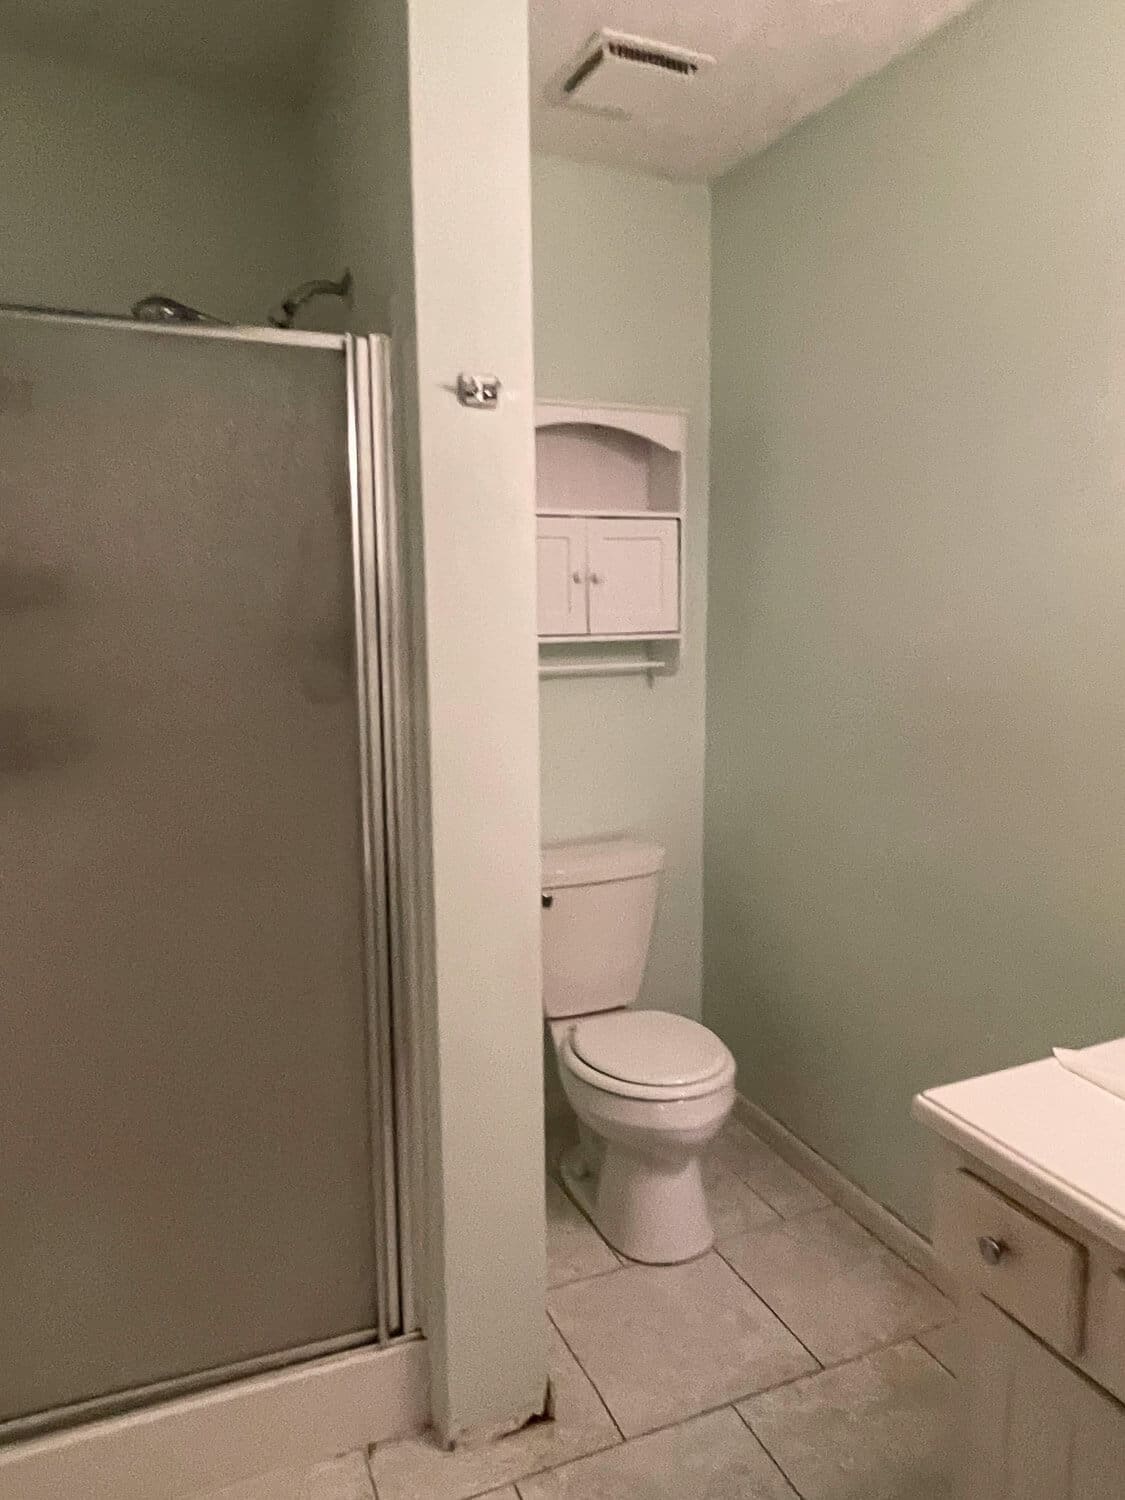
We completely gutted the bathroom and rearranged everything. Now it has a huge walk-in shower, custom concrete counters, heated floors, and more. This is what a primary suite bathroom should be! Full post here. > DIY Primary Bath Remodel on a Budget
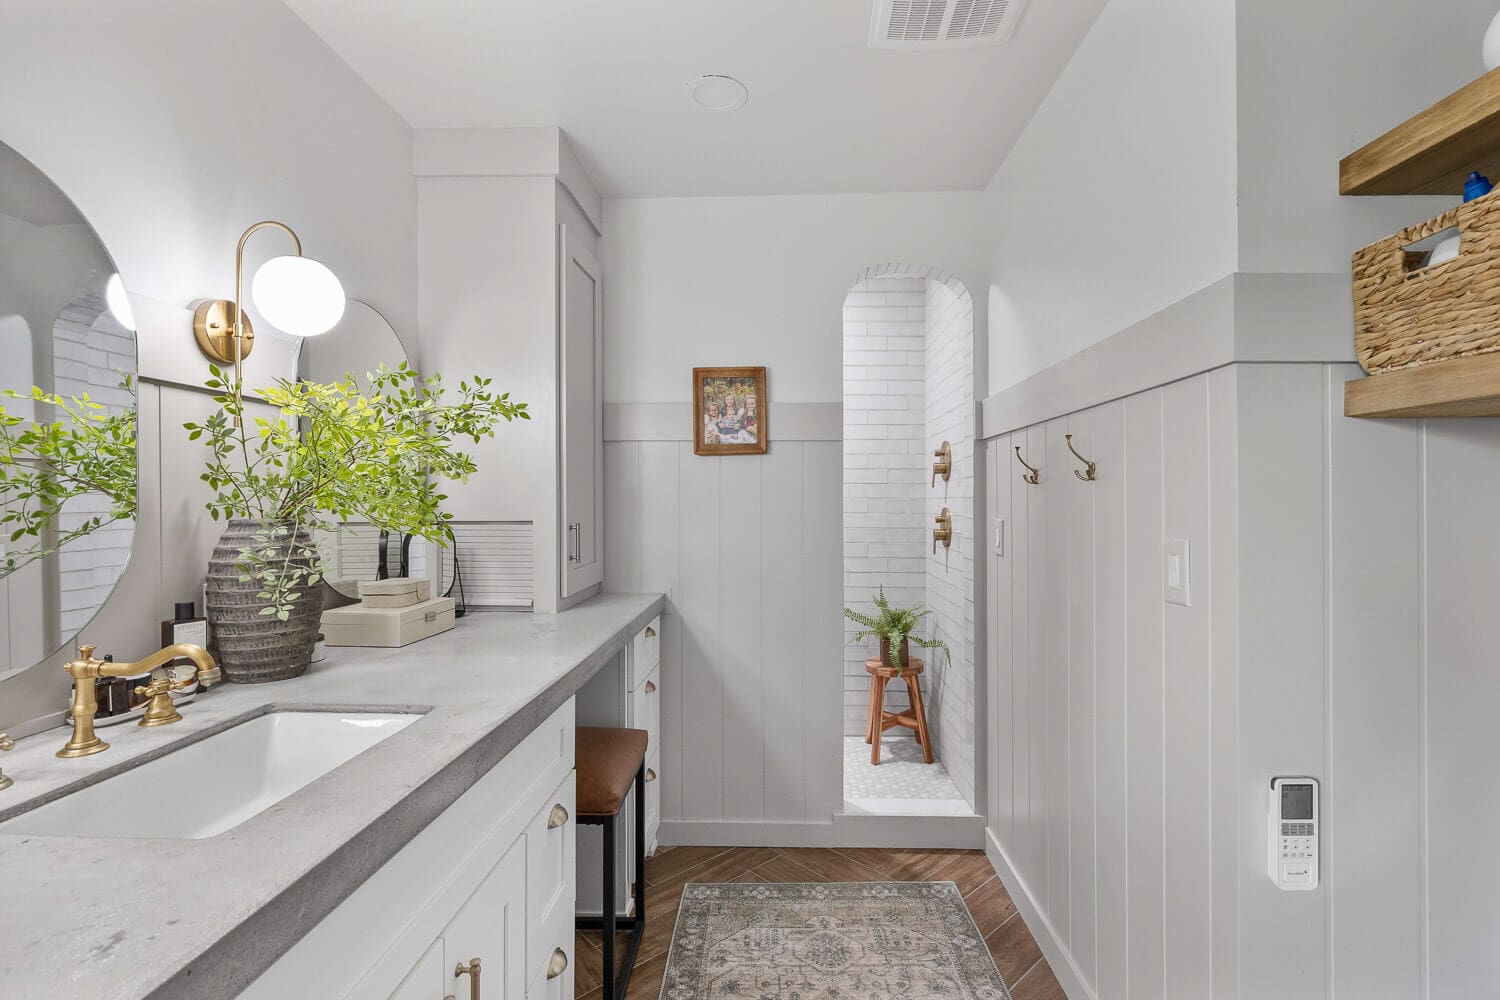
Even with bumping the bathroom wall out, we still had plenty of space in the bedroom. Together with the expanded bath, the primary suite finally felt like the relaxing retreat it was meant to be.
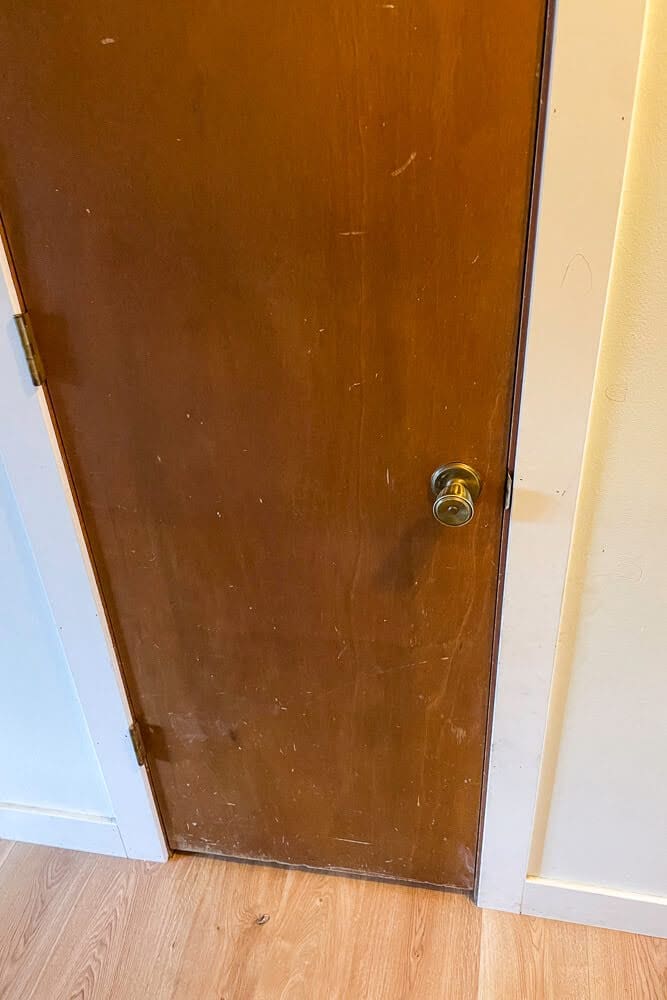
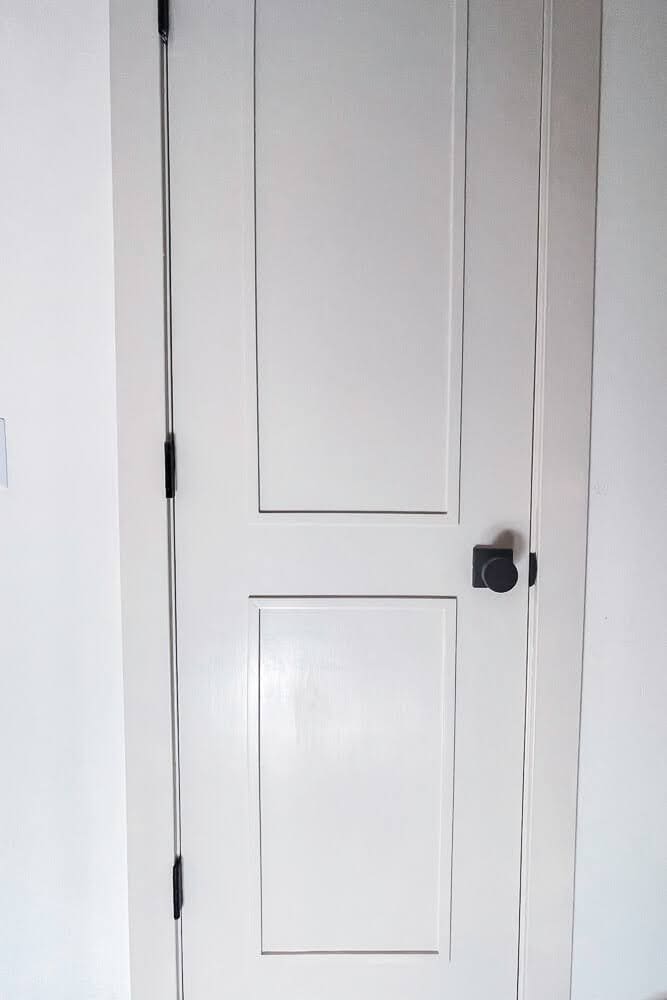
Interior Door Upgrades (DIY Home Renovation)
The easiest DIY home renovation with the biggest impact… upgrading doors! All through the house I upgraded the basic hollow-core doors with some paint, trim, and new hardware. It was so much cheaper than replacing them, and the difference is huge! Easy instructions are posted here. > How to Upgrade Interior Doors – Affordable!
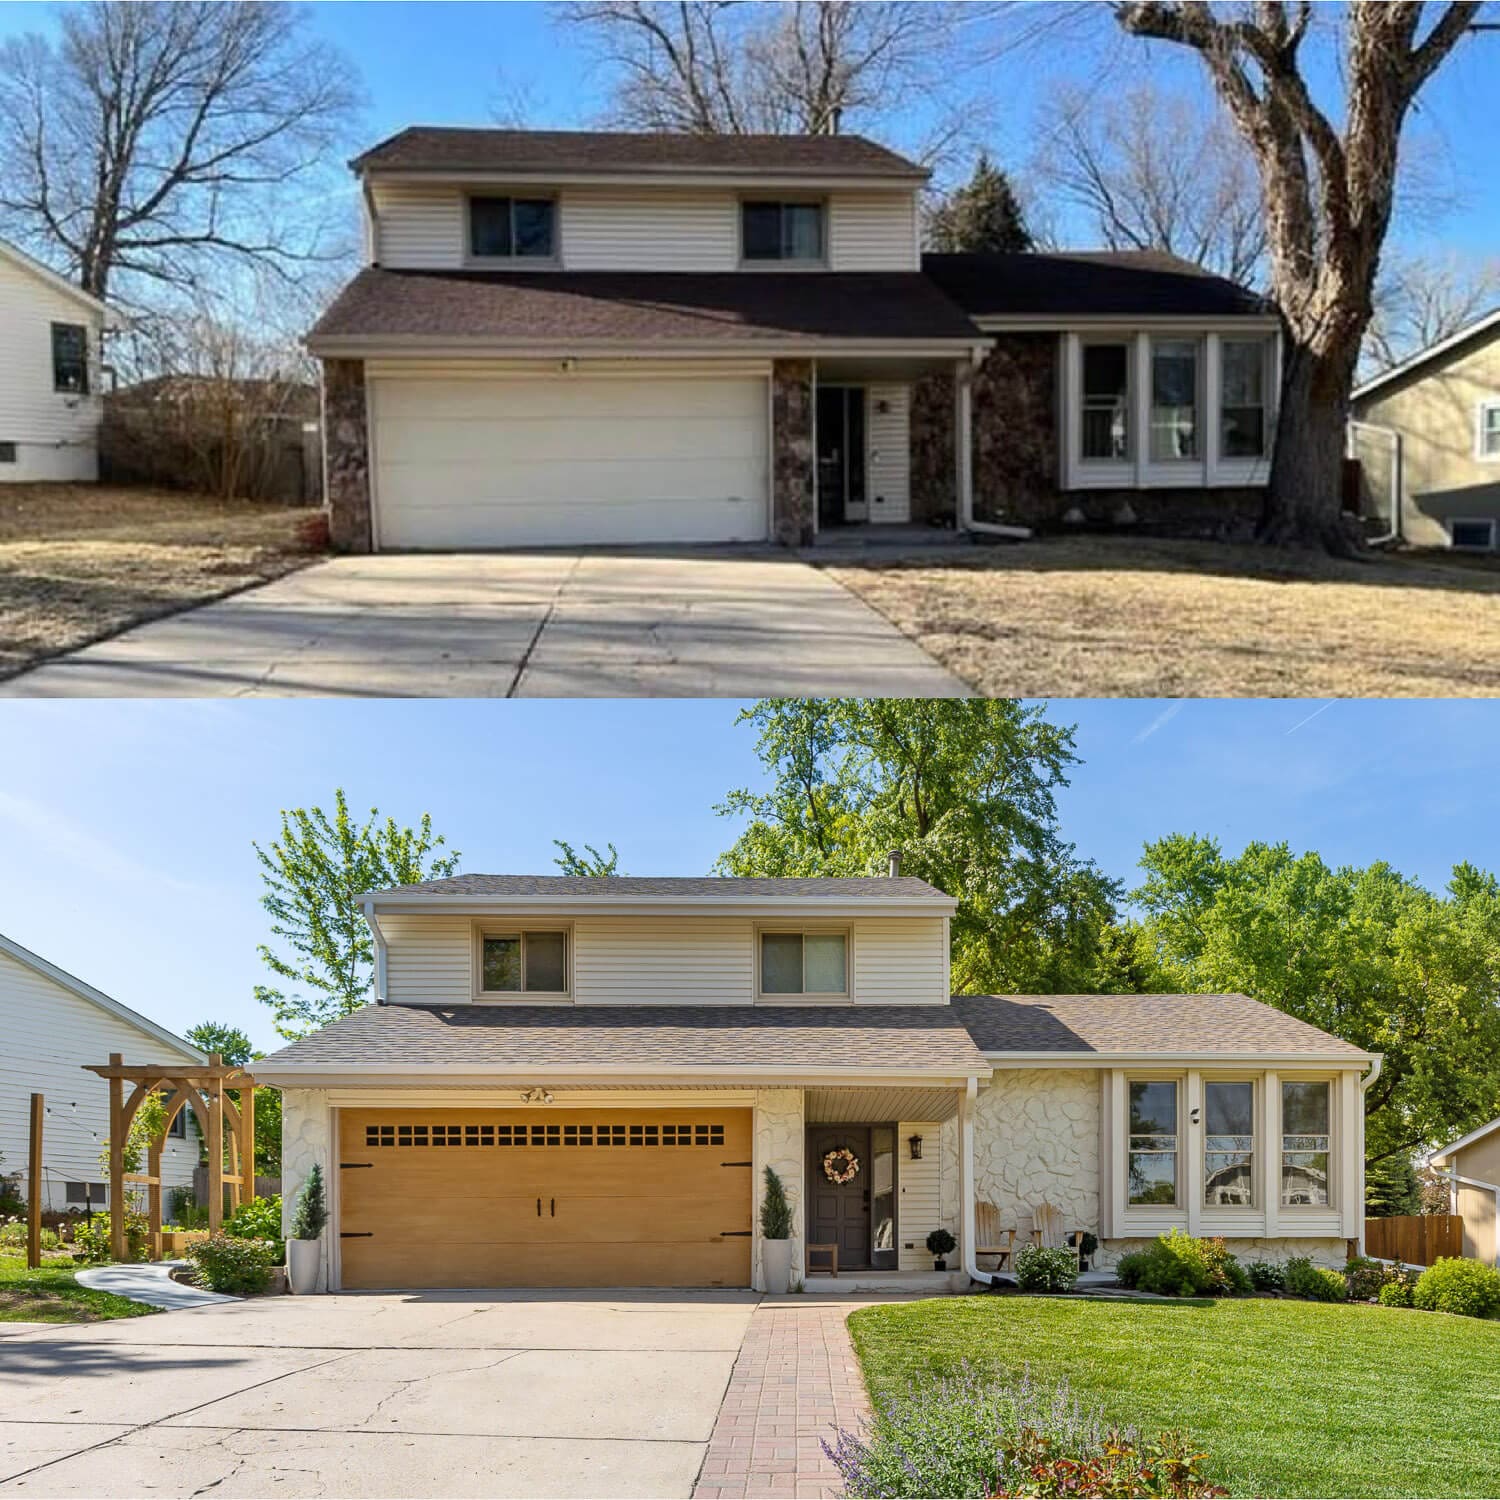
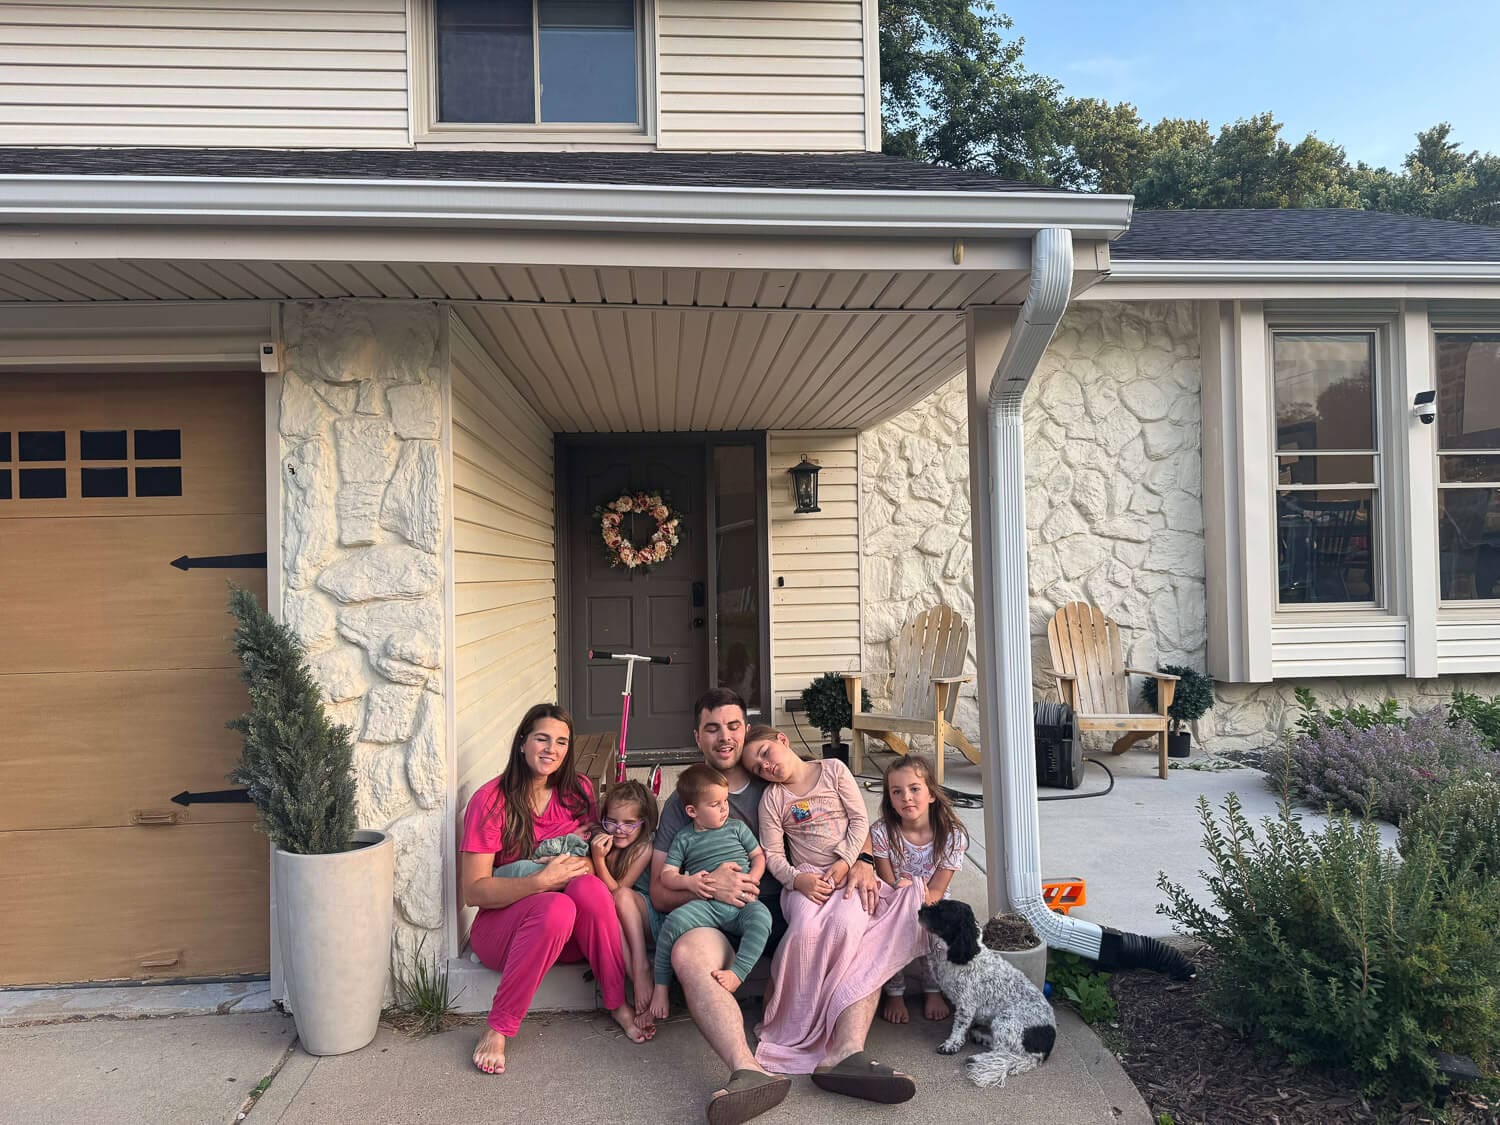
Front Exterior Remodel: Curb Appeal Before and After
The before and the after photos here hardly look like the same house. It was so brown and drab. I couldn’t wait to do something about it.
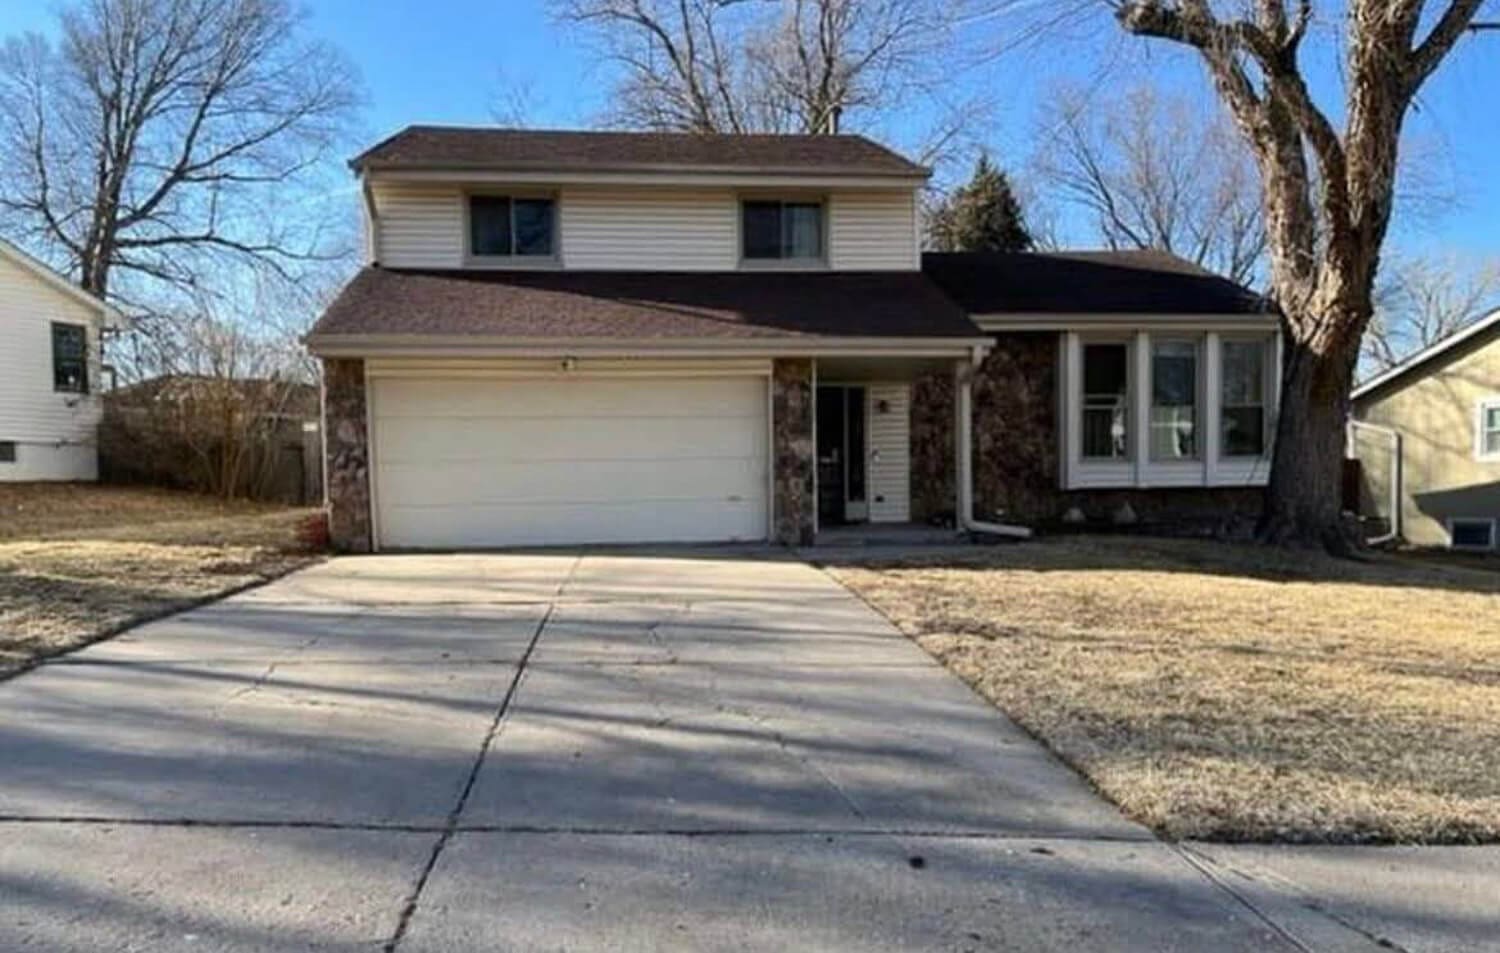
Over those three years, we tackled so many projects on the front of our home. Everything from laying sod and pouring concrete curbing to building a garden arbor, and so much more! I pulled them all together in one full post for you here. > This DIY Exterior Remodel Took 3 Years—Here’s Everything We Did
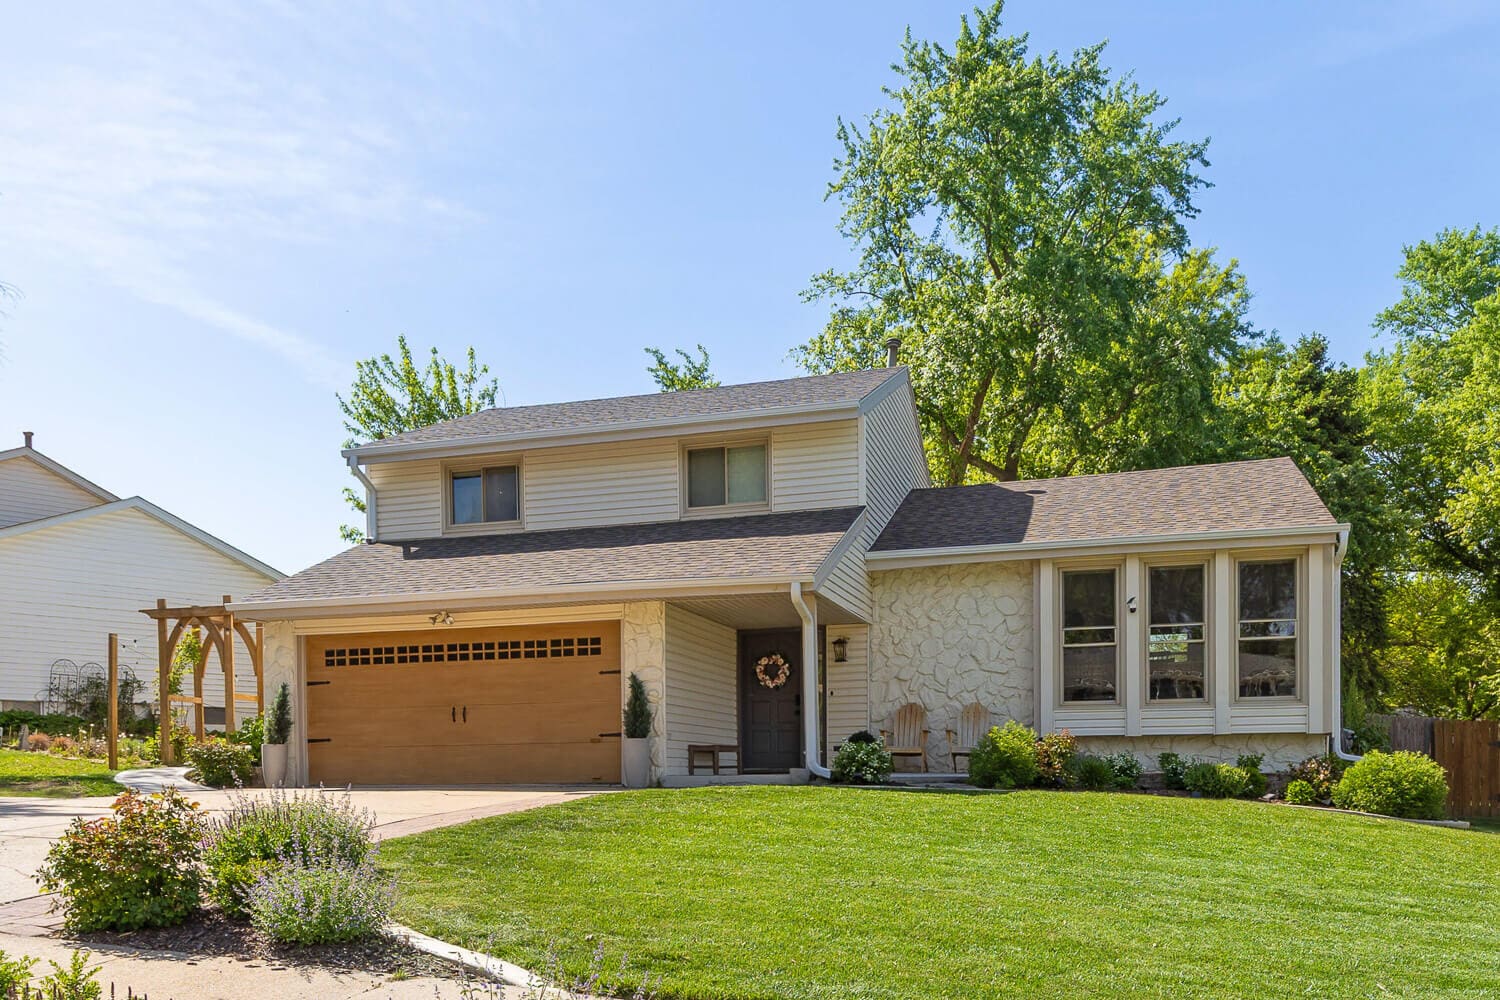
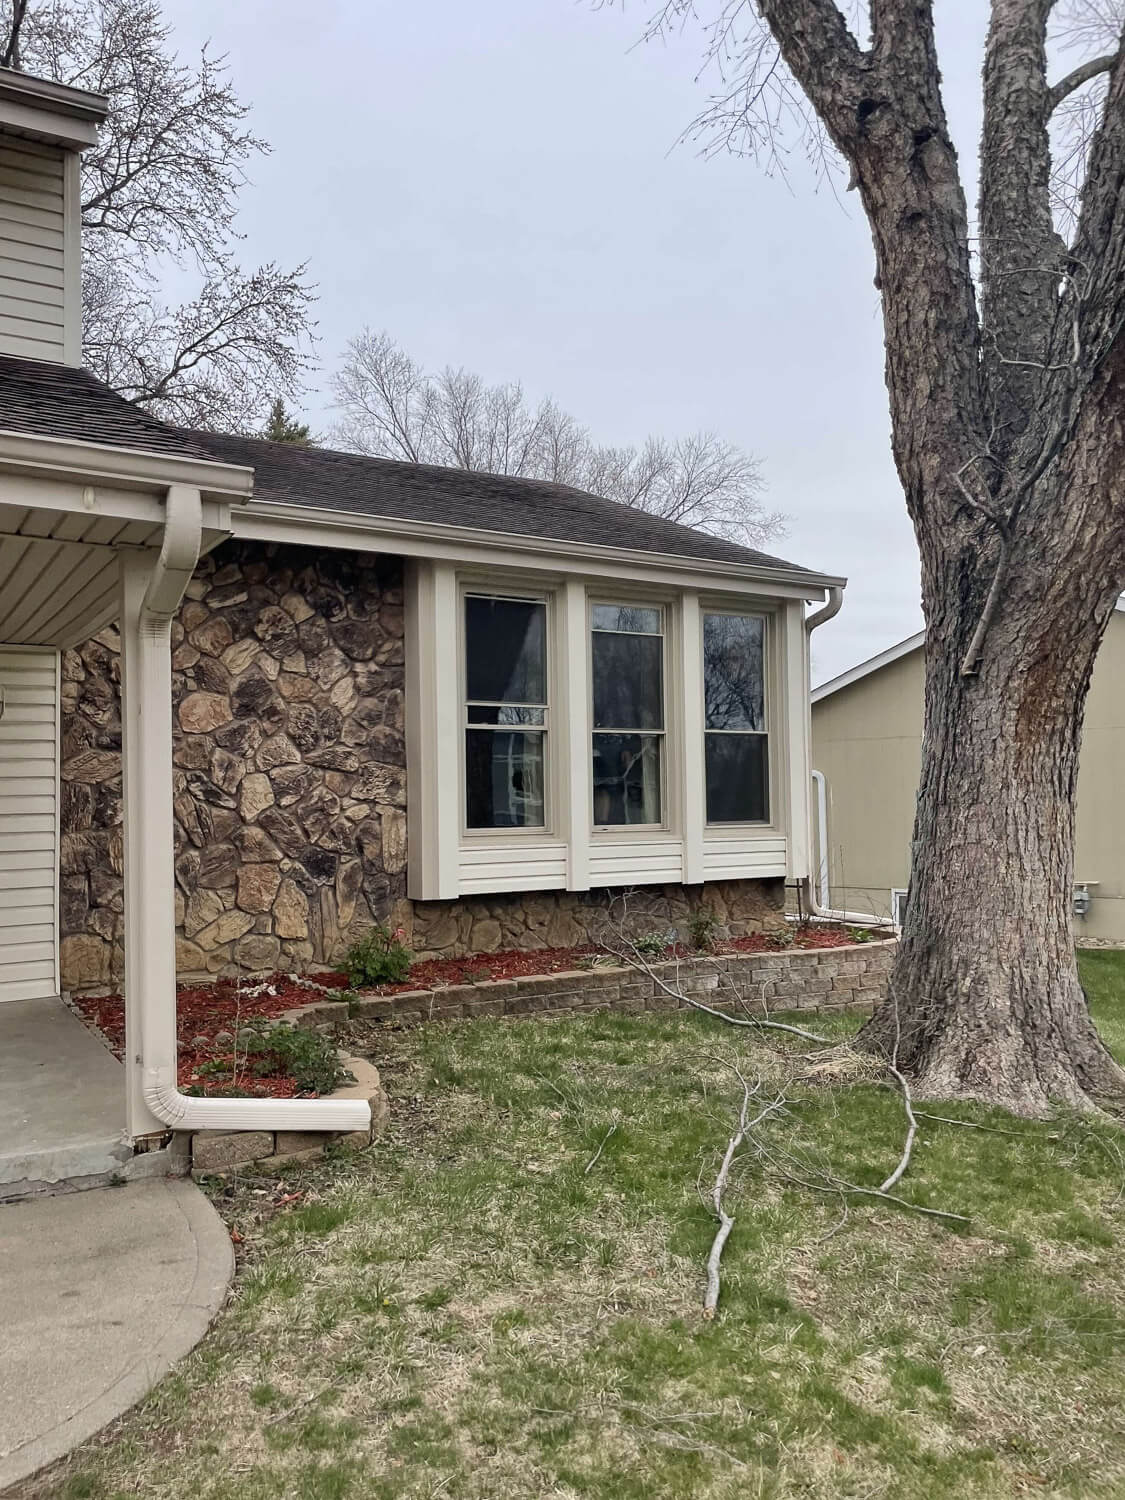
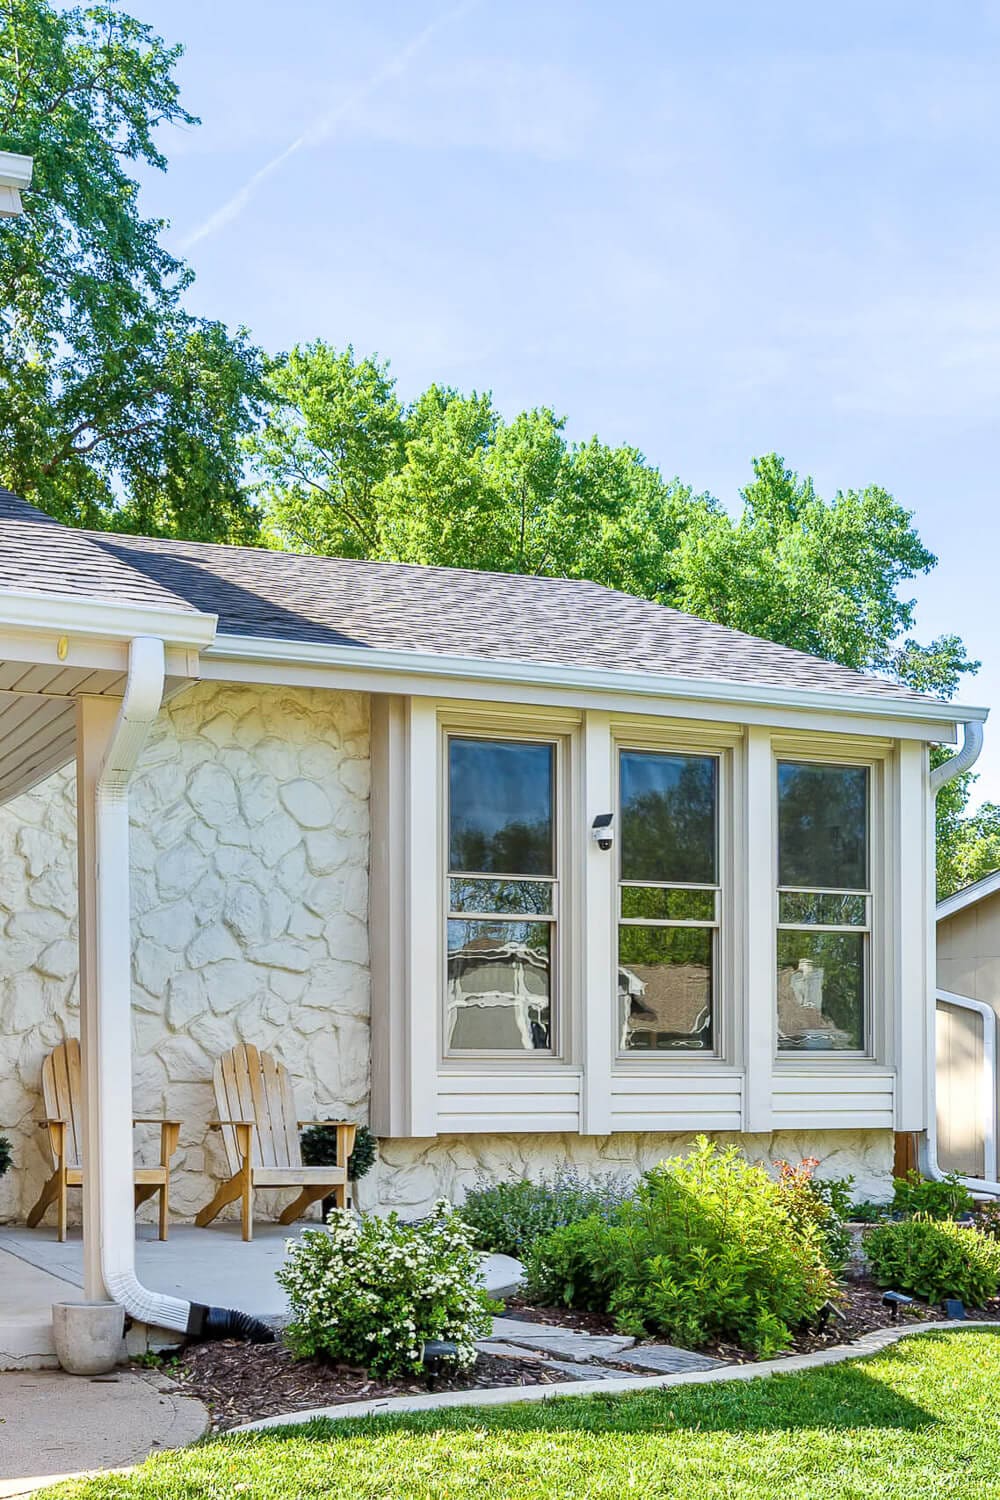
The DIY home renovation project that got the most backlash? Covering up that ugly 1970s stone. But just look at the difference it made! The whole house finally feels like it belongs in the 21st century.
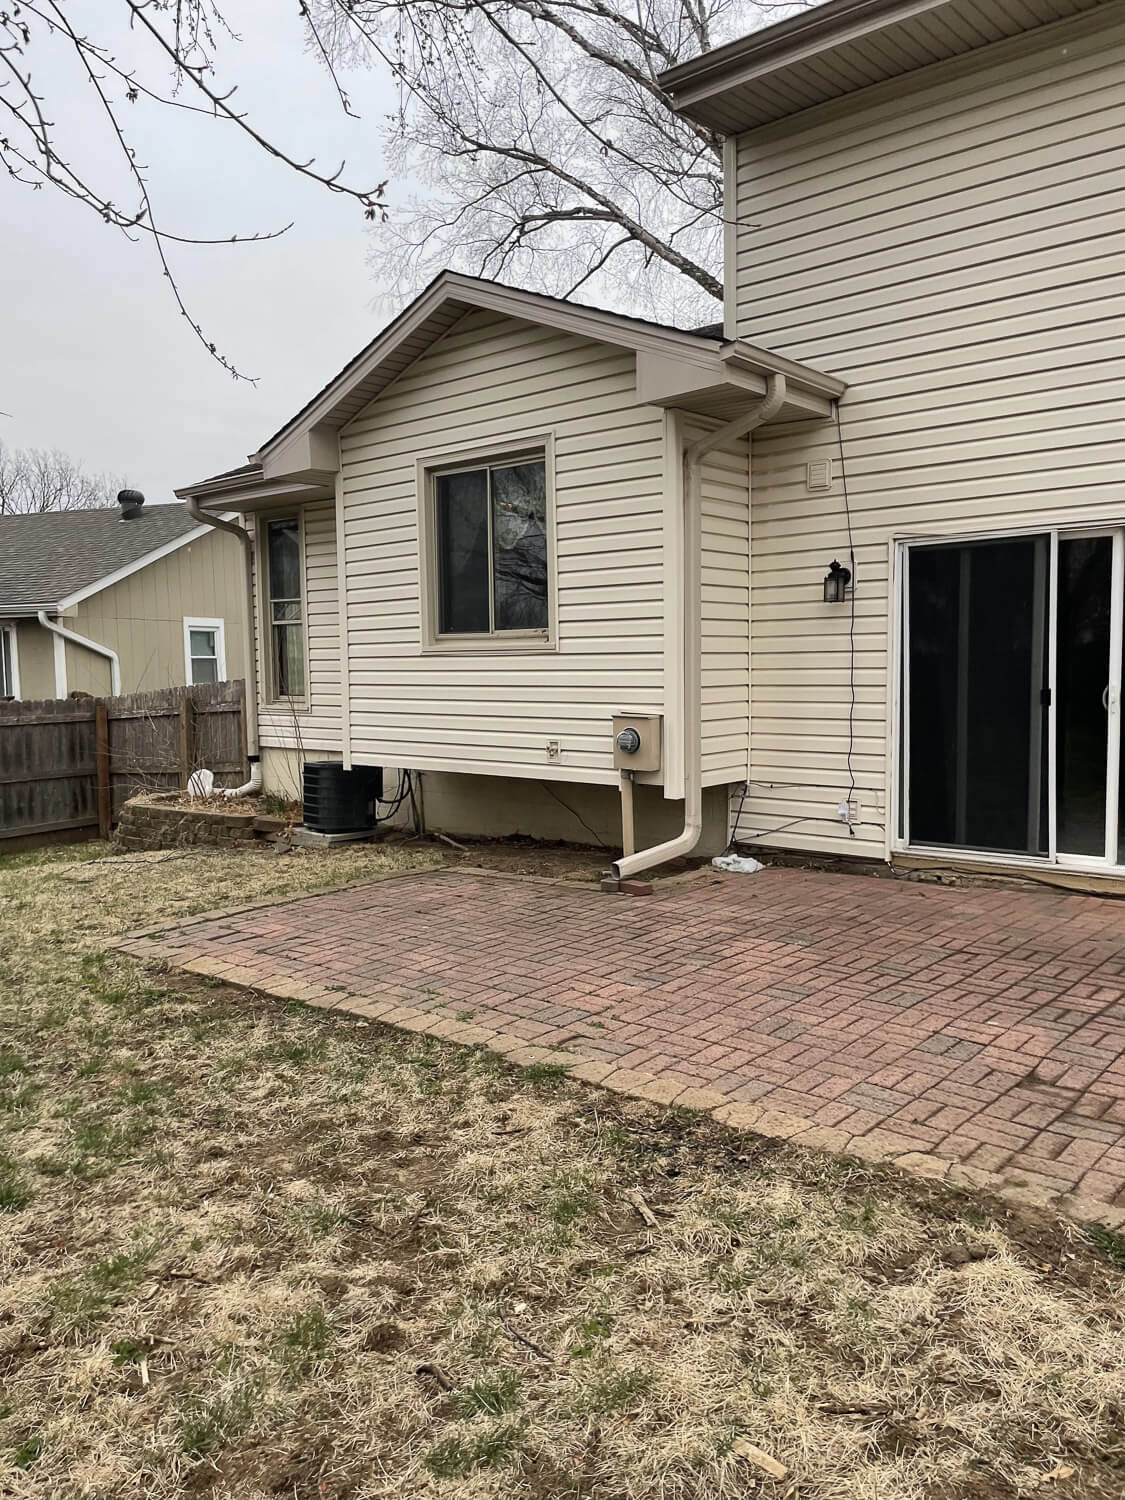
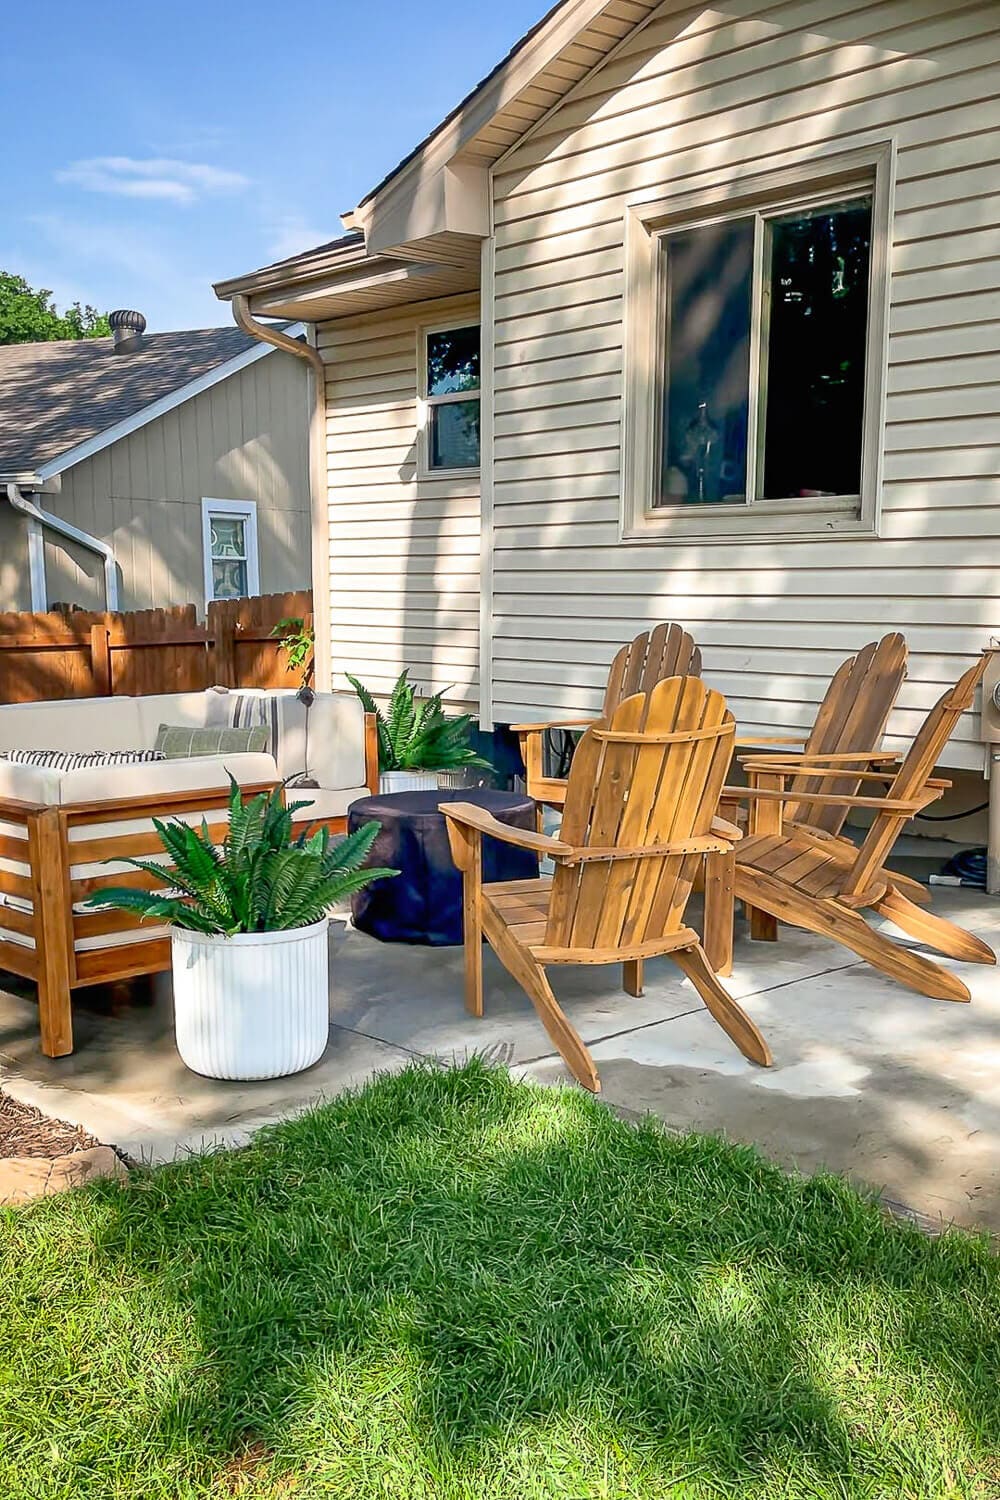
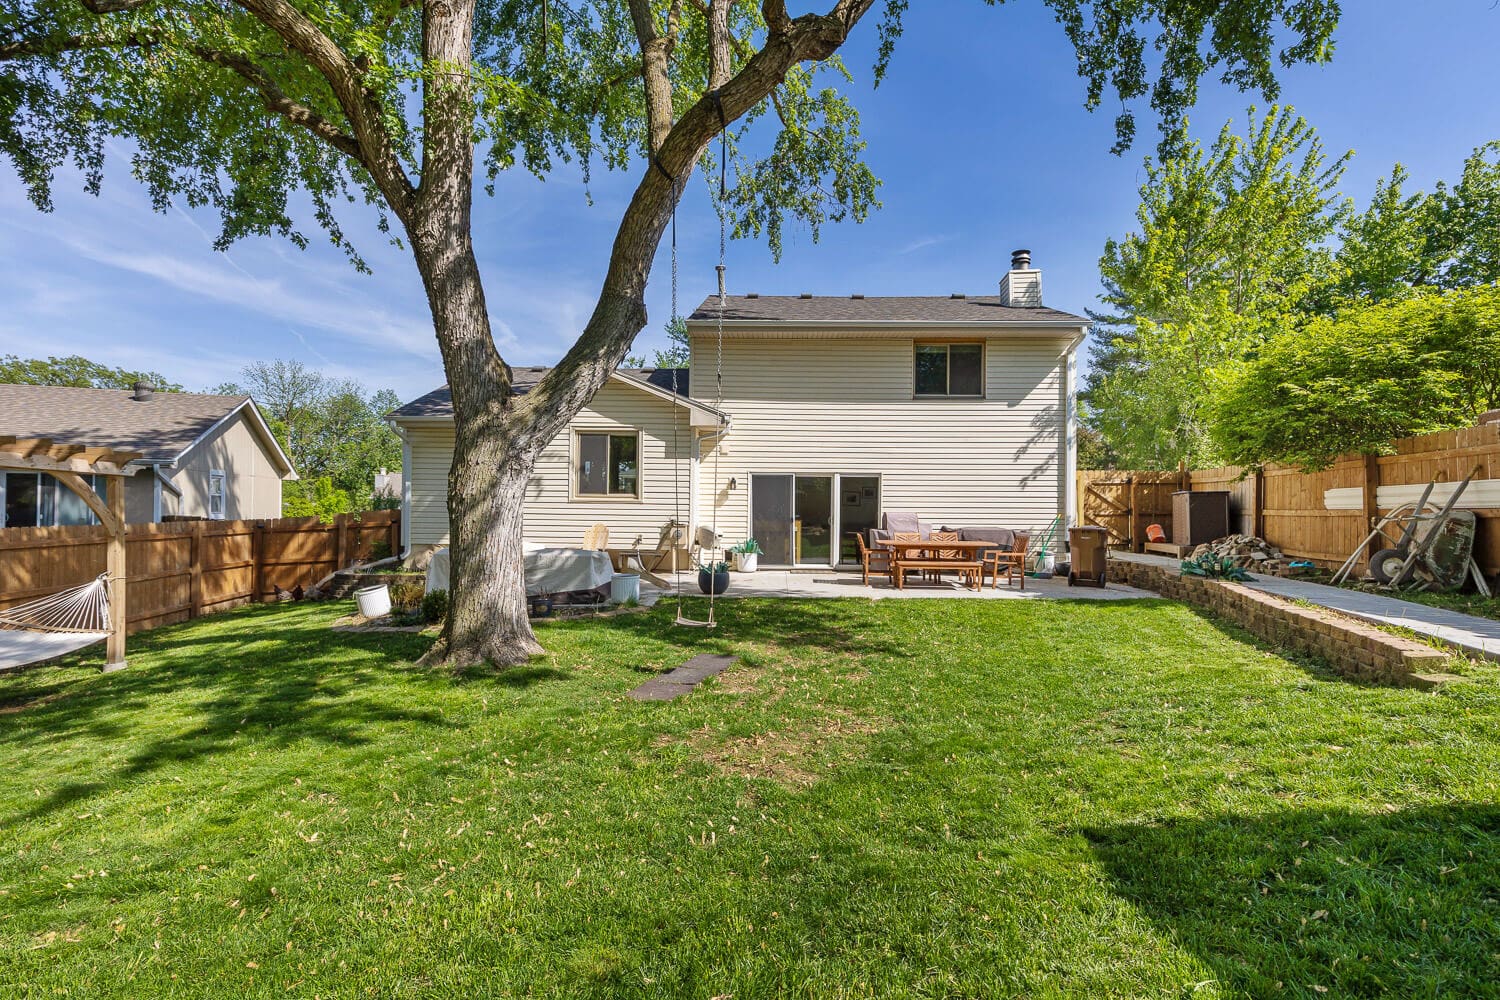
Backyard Remodel: Patio & Landscaping Before and After
One of our first backyard projects was tearing out the failing paver patio and replacing it with a bigger, better concrete one. From there, the backyard projects just kept rolling.
Backyard DIY Projects
- Hammock Stand > DIY Backyard Hammock Stand
- Tree Swing > How to Install a Tree Swing in Your Backyard
- Chicken Coop > How to Build a Low Cost DIY Chicken Coop
DIY Home Renovation Before and After: What’s Next?
We loved giving this house new life, and one of our biggest philosophies has always been to leave a place better than we found it. In just three years, we poured so much into this home and transformed it top to bottom. Now the Army has moved us on to a new city, which of course means a brand-new fixer-upper just waiting for its own DIY home renovation.
📌 Save This Project for Later
Pin now and come back anytime you need DIY home renovation inspiration or want to scroll through these home remodel before and after photos again.
FAQ About Our DIY Home Renovation
Our remodel took just over three years from start to finish. We tackled just about everything ourselves. From demo and painting to building custom projects. All while also juggling work, kids, homeschool, etc.
Covering the dated 1970s stone on the front of the house made a huge curb appeal impact.
Absolutely. Doing nearly all of the work ourselves saved us thousands. It took more time and energy, but DIY was the only way we could pull off such a full renovation on a budget.
The Army has already moved us to a new city, which means we’re starting over with another fixer-upper, and another round of before-and-after transformations!
Costs vary by region and scope, but we saved thousands by DIY’ing most projects and using budget-friendly materials (stock cabinets, paint, and smart re-use). We break down what we tackled ourselves vs. hired out in each project post.
Tackle it in layers: safety/structure → electrical/plumbing/HVAC → floors, walls, doors → kitchens/baths → exterior/landscaping → decor. Doing it in this order avoids rework and protects finished spaces.
Start with safety and structure, then mechanicals (electrical, plumbing, HVAC), then walls/floors/doors, then kitchens and baths, then exterior and landscaping, and finish with decor. This order prevents rework and protects finished spaces.
