


Beautiful DIY Home Office Built Ins


Updated July 13, 2026
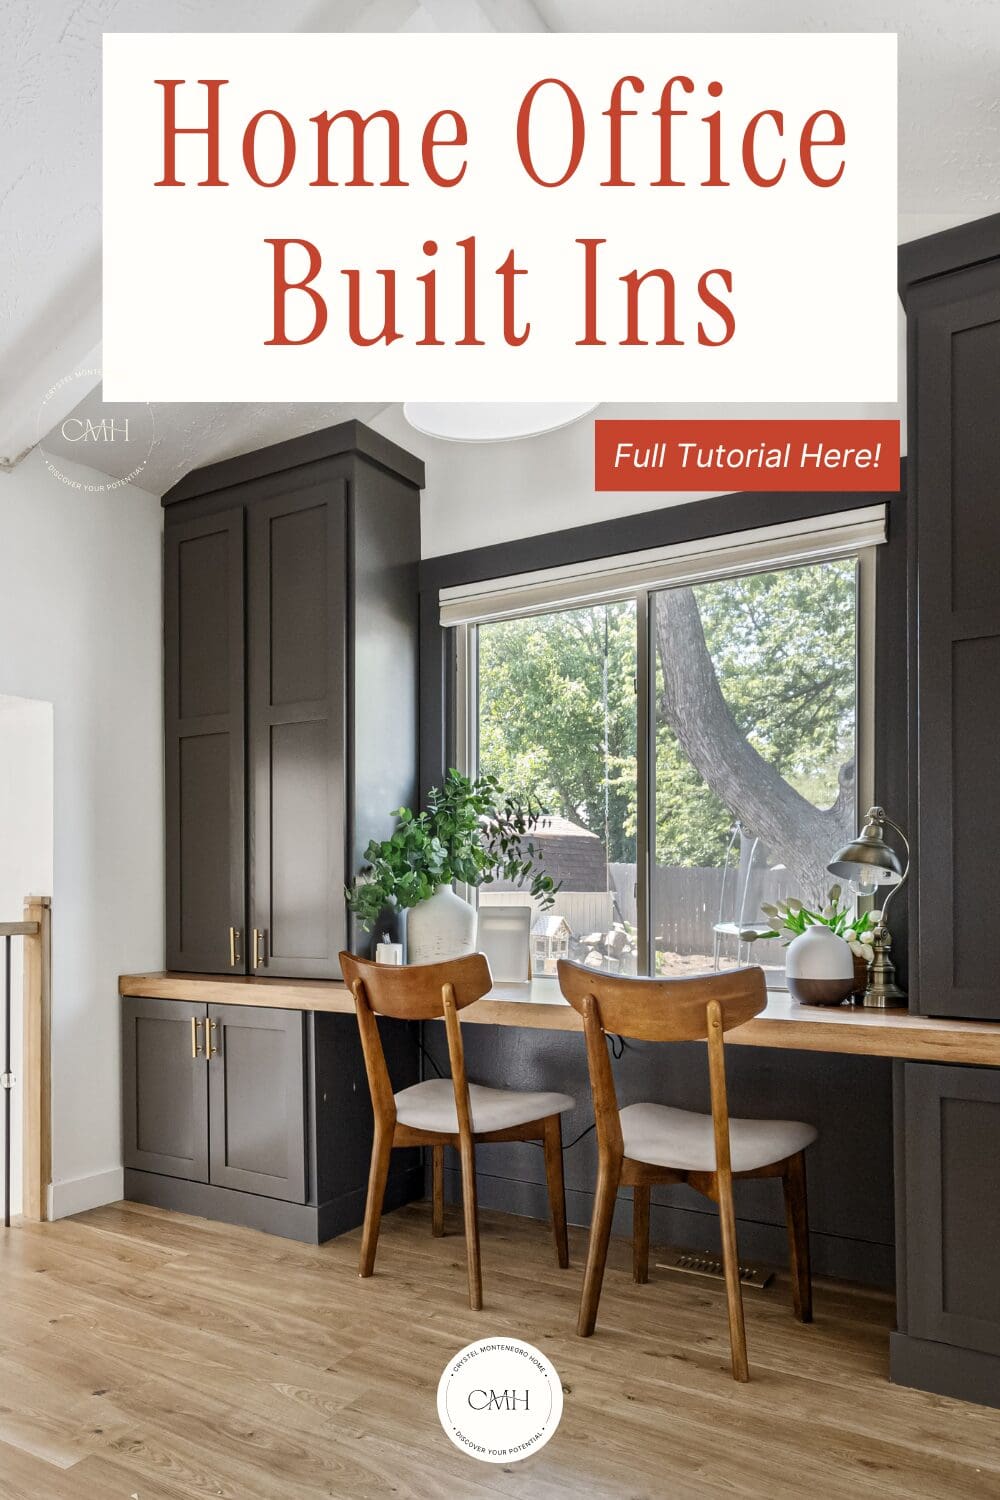
Are you thinking about installing home office built ins? You’ve come to the right place! Read on for my tutorial on installing custom built-in cabinets with tons of storage!
Decor Sources –
Modern Chandelier
Hearth and Hand Natural Ceramic Vase
Hearth and Hand Silver Dollar Eucalyptus Stems
Woodgrain Oil Diffuser
Vintage Desk Lamp
White and Gold Pencil Cup
Rattan Tissue Box Cover
White Silk Tulips
This area in my home used to be a small, awkward little corner the previous owners had used as a breakfast nook since it was right across from the kitchen. When we moved in, we needed to figure out how we would make our kitchen bigger, so we did some rearranging and ended up moving the kitchen entirely.
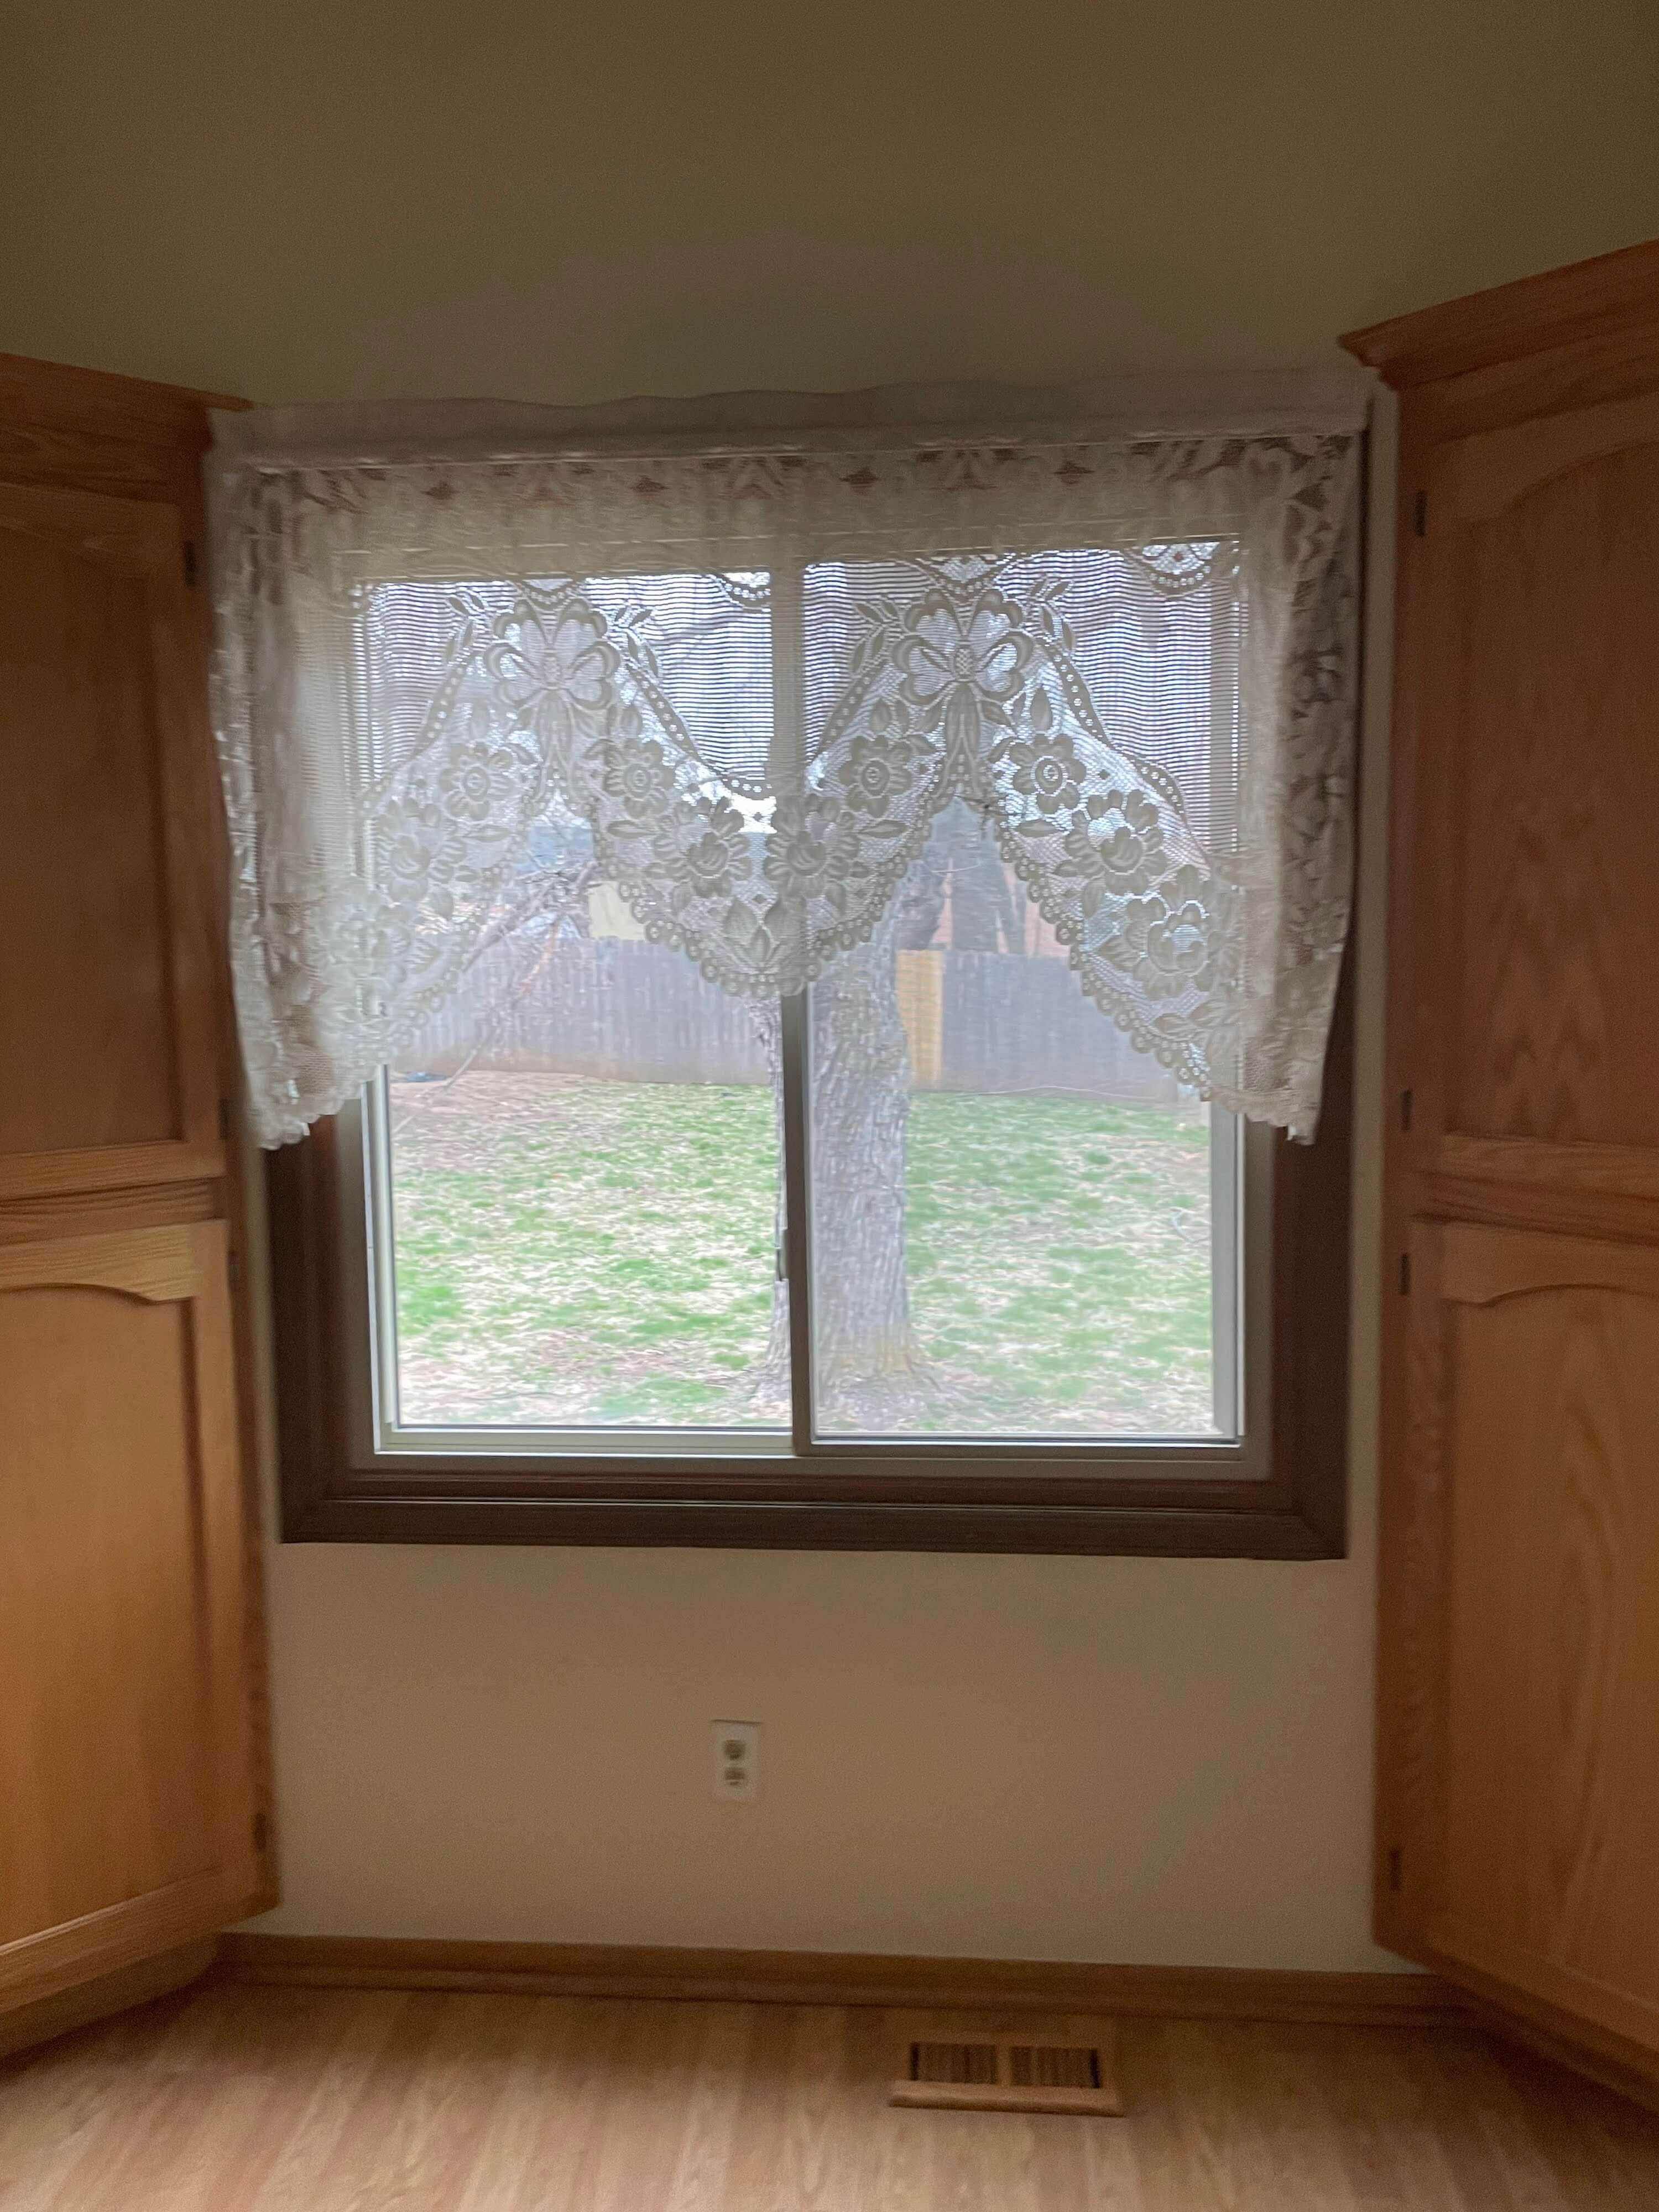
Since we changed the entire layout of the kitchen by knocking out some walls, we originally thought we could use the area as a dining room. Check out the custom kitchen details here.
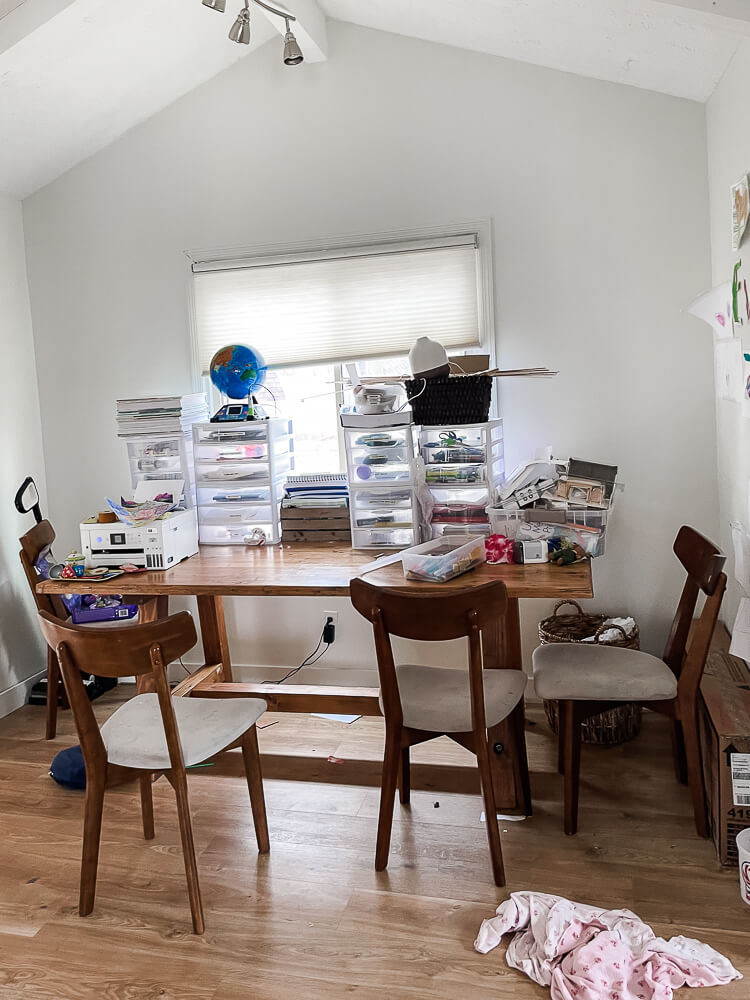
But, it was still just a little too small to pull chairs in and out comfortably. Eventually, we moved our dining table elsewhere and realized the space would be perfect as a little office. Because we homeschool our kids, it would also double as a homeschooling station.
I don’t know what got into me, but I began this project the week before having a baby… and I got it done, finally, the day before our little bundle of joy was born. It turned out to be a good move since we were in the thick of the school year, and I was tired of putting away school before we could have dinner while trying to hush a crying baby. Sheesh.
LUMBER SHOPPING LIST
- 3/4-in x 4-ft x 8-ft Maple Sanded Plywood
- 1-in x 3-in x 6-ft Pine
- 1-in x 2-in x 6-ft Poplar
- 1-in x 3-in x 8-ft Poplar
- 1-in x 6-in x 8-ft Poplar
- 1-in x 8-in x 10-ft Poplar
- Shiplap Panel
- 1-in x 3-in MDF
TOOLS
- DeWalt Table Saw
- Dewalt Drill
- Dewalt Circular Saw
- Wall Level
- Huepar Laser Level
- Straight Edge Guide
- One-Handed Clamps
- Kreg Pocket Hole Jig
- Long Clamp
- Trim Puller
- Kreg Adjustable Shelf Jig
- Caulk Gun
- Sander
SUPPLY SHOPPING LIST
- Mini High Density Foam Roller
- Angled Paint Brush
Primer - DAP Wood Filler
- Titebond Wood Glue
- DAP Spackling Paste
- Wood Shims
- Adjustable Shelf Pins
- Wood Screws
- 3-in Power Pro Screws
- 1 ¼-in Pocket Hole Screws
- 1-in Brad Nails
- Tack Cloth
- Foam Insulation
- Wood Conditioner
- Nail Punch
- Painters Tape & Plastic Combo
- Caulk
- Painters Tape
- Early American Wood Stain
- Minwax Polycrylic
- Edge Banding
- Painting Tri Pods
Cut List ForHome Office Built Ins
The dimensions of these home office built ins are customized to my space and will likely differ from yours, but these should give you a general idea.
4 – Plywood @ 28-in x 24-in
4 – Plywood @ 60-in x 16-in
2 – Plywood @ 24-in x 36-in
2 – Plywood @ 36-in x 16-in
2 – Plywood @ 24-in x 34 ½-in
2 – Plywood @ 34 ½-in x 16-in
2 – Plywood @ 34 ½-in x 4-in
4 – Pine 1 x 3 @ 36-in
2 – Poplar 1 x 6 @ 36-in
2 – Poplar 1 x 3 @ 17 ½-in
2 – Poplar 1 x 3 @ 36 ¾-in
1 – Poplar 1 x 3 @ 24-in
4 – Poplar 1 x 2 @ 21 ½-in
2 – Poplar 1 x 2 @ 33-in
4 – Poplar 1 x2 @ 60 ¼-in
2 – Shiplap Panel to size
Prepping The Office For The Built In Cabinets
The first thing I did was clean out the room and remove the baseboards. I used a trim-puller which minimizes any damage to the wood. If your baseboards are caulked, you should run a razor blade along the top to help separate the boards from the wall. Since I’m installing new molding around the window, I also removed that.
Constructing the Built In Cabinets
Before I cut the plywood for the home office built ins, I primed both sides of each sheet. I’m typically not a prime-before-I-build kind of gal, but I switched things up this time, and as it turns out, I liked the result! I was so glad I did it when I got to the step where I would normally be priming.
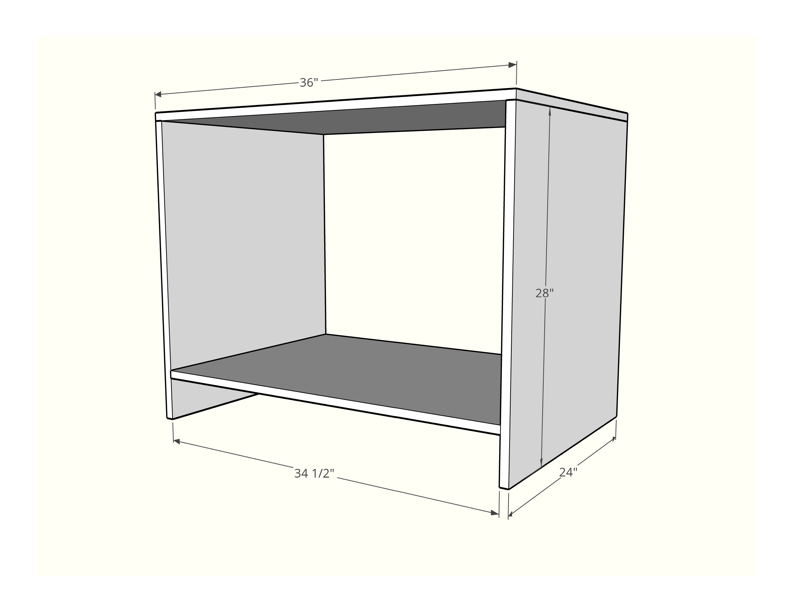
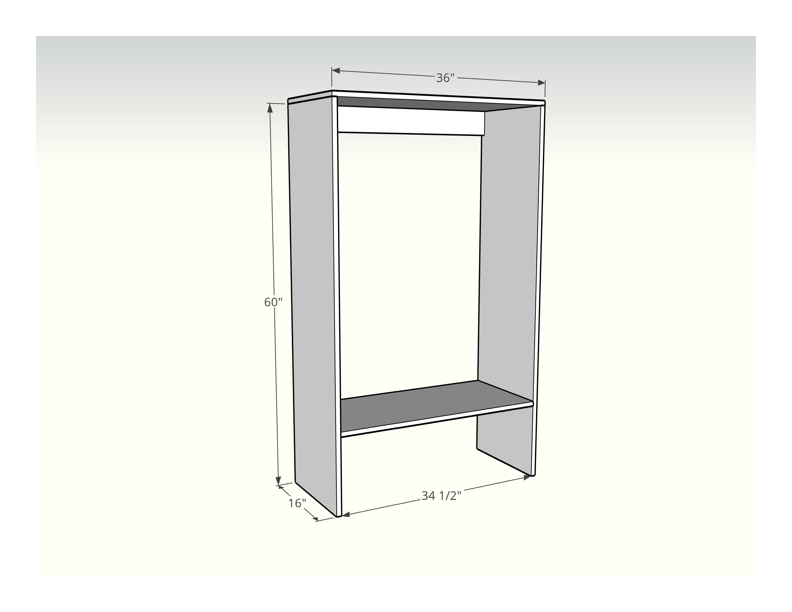
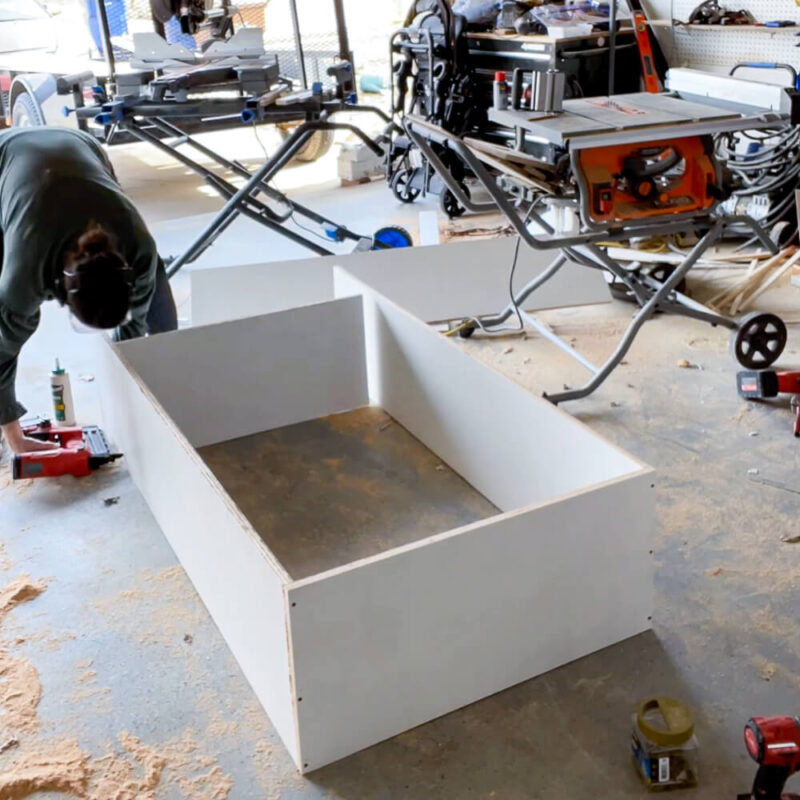
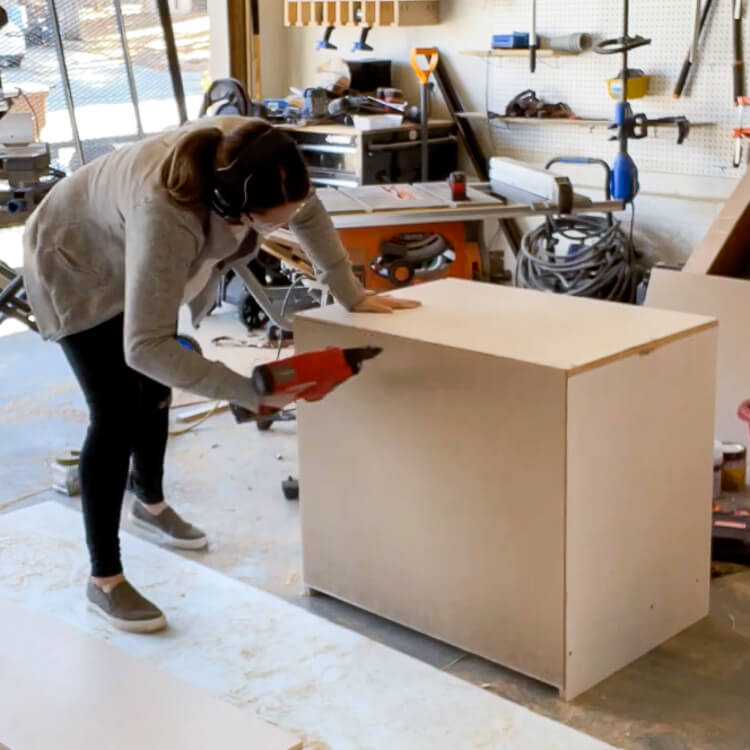
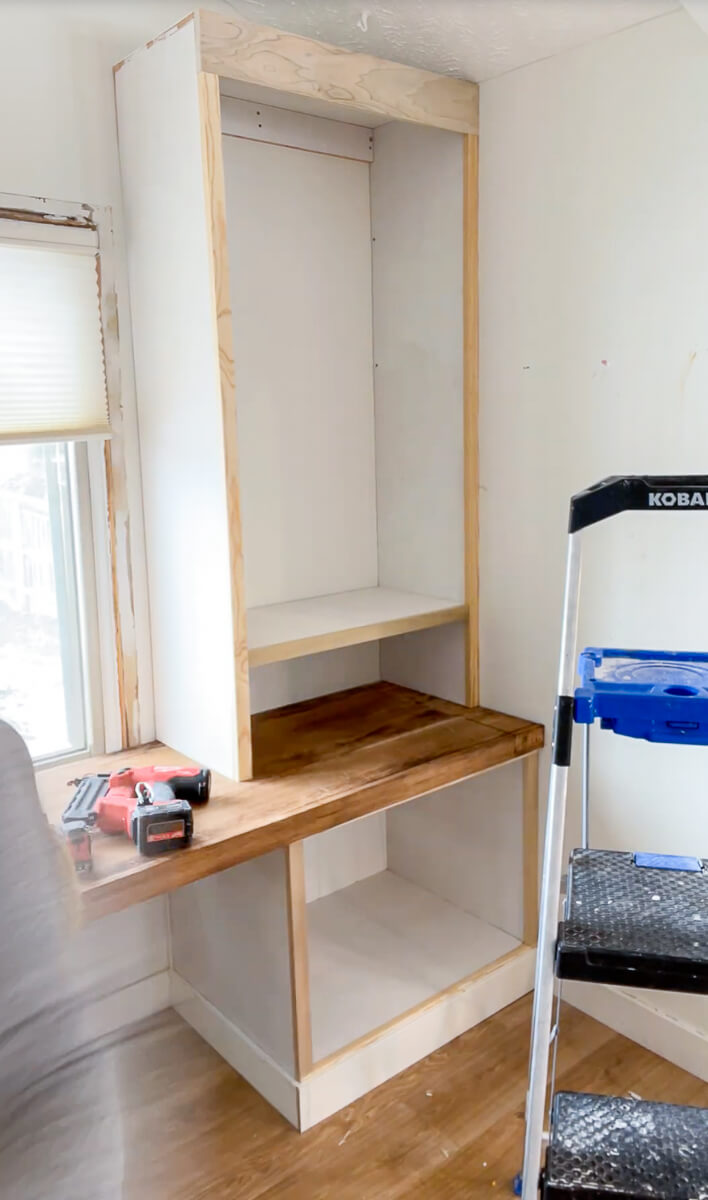
First, I assembled the builtin cabinets using plywood. The lower and upper cabinets are the same width, but because the lower cabinets support the desk, they’re deeper.
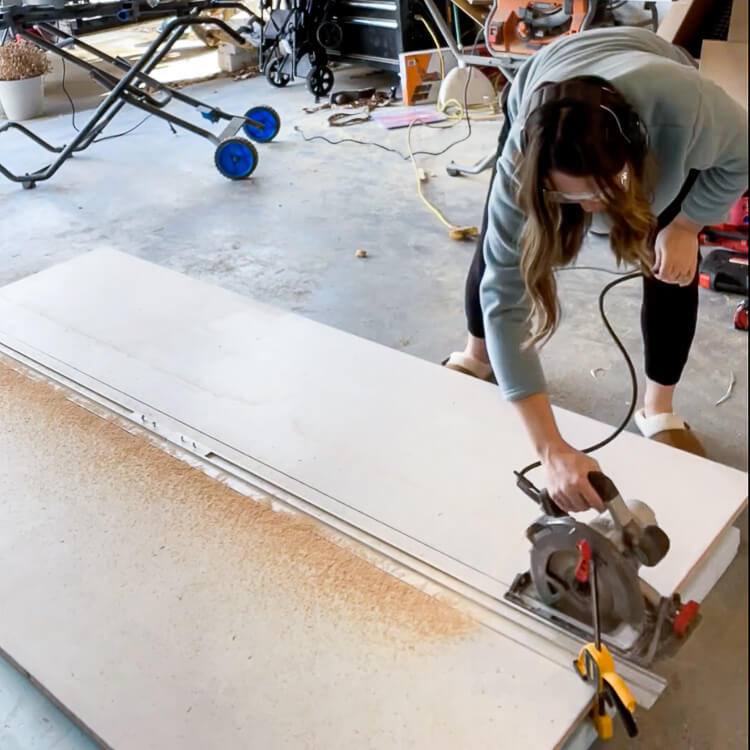
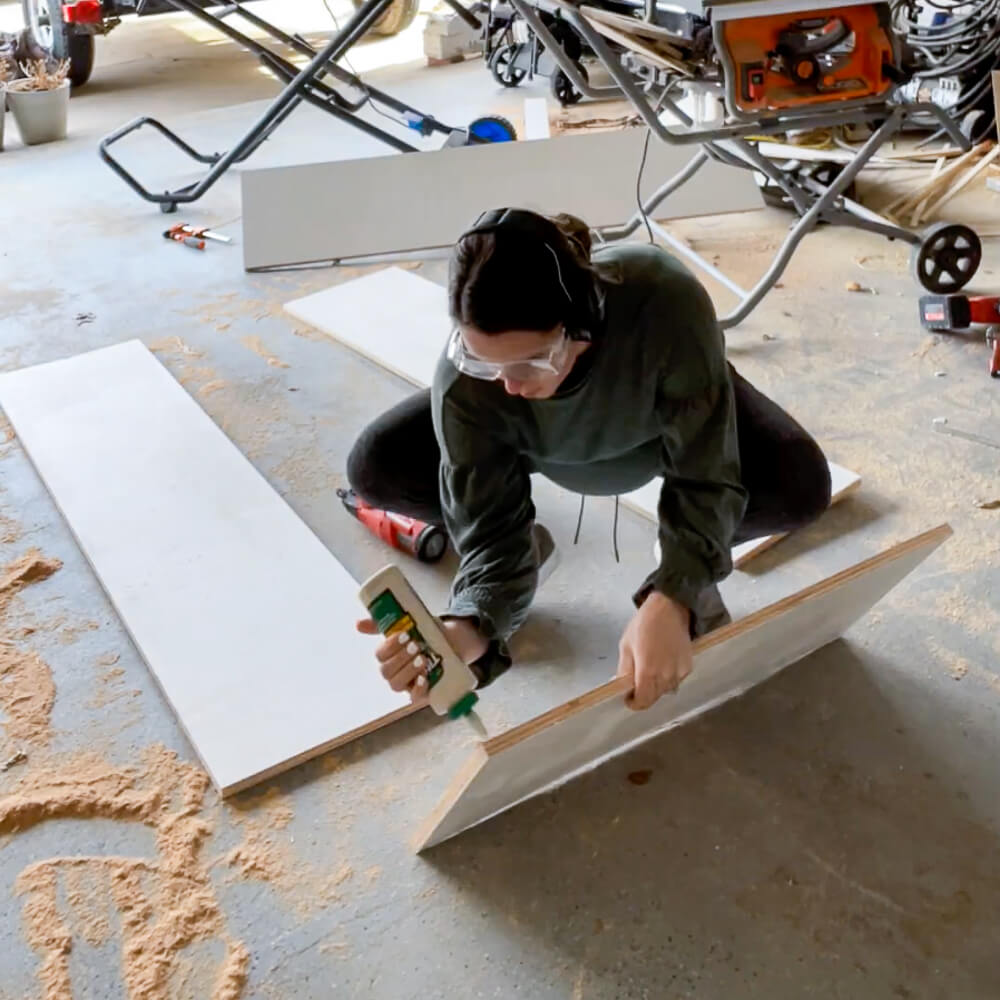
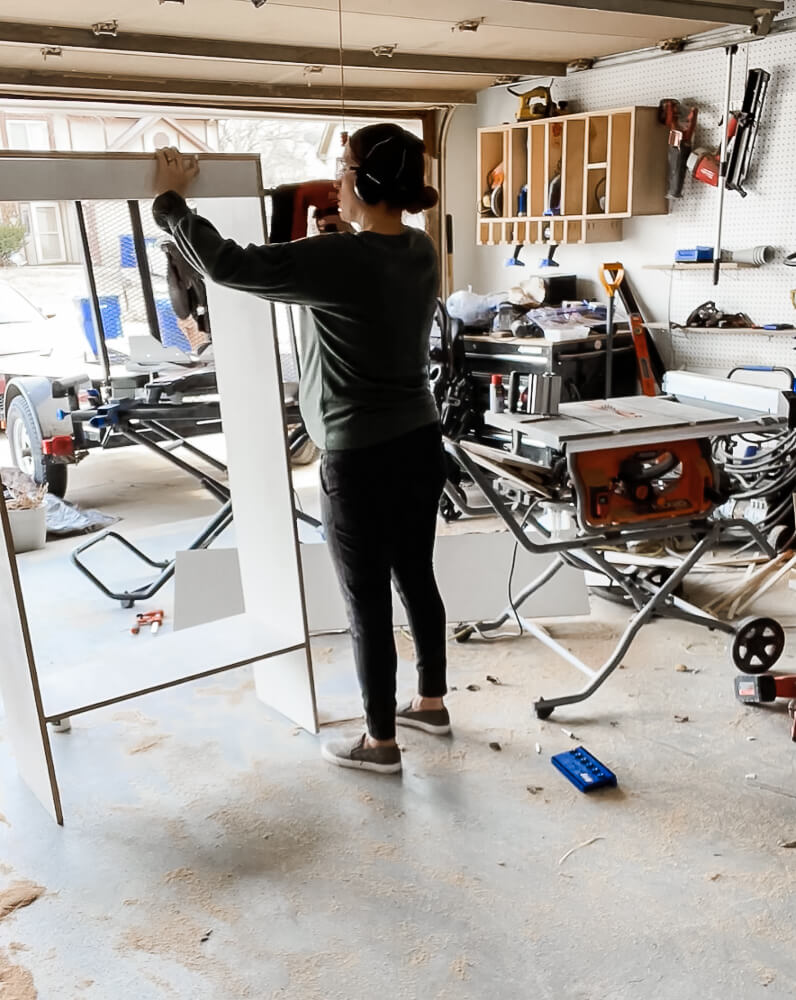
Plywood is difficult to handle when you’re a solo DIYer, so I like to make my long cuts on the ground on top of a piece of foam insulation. This straight edge is very handy for guiding my circular saw to make a perfectly straight cut as I run it down the length of the plywood.
Everything was secured using wood glue, brad nails, and screws. I covered all the edges in wood glue first, and then I always like using a brad nailer to keep the boards in place while I drive in my screws and while the glue dries. Then I added screws through the tops and sides to strengthen all the horizontal and vertical pieces, just for good measure.
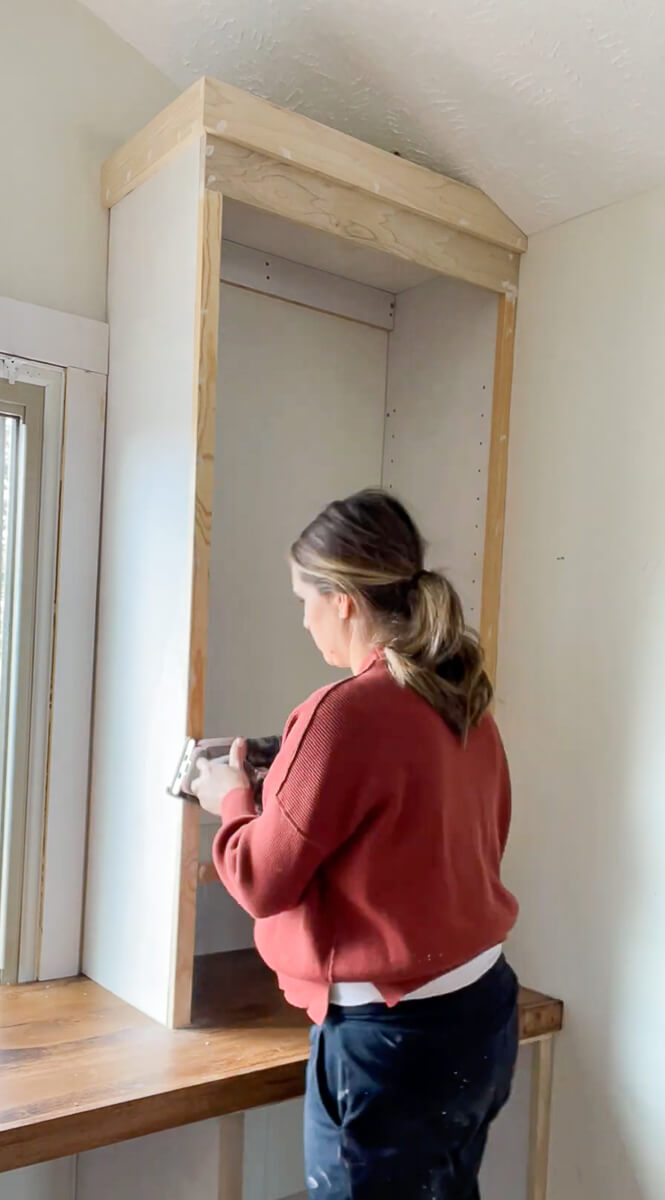
On the upper cabinets, I screwed a brace to the back because I needed something to secure the cabinet to the studs. This image is the back of the upper cabinet.
And to finish everything off, I cut a piece of the shiplap paneling for the back of the lower cabinets and secured it using my nail gun. I prefer adding a piece of backing directly to the cabinet as opposed to using the wall simply because some walls are wonky, and this eliminates the need to cover any potential big gaps on the inside of the cabinet.
Building The Desk For the Home Office Built Ins
When I built the desk for the home office built ins, I had to get creative.
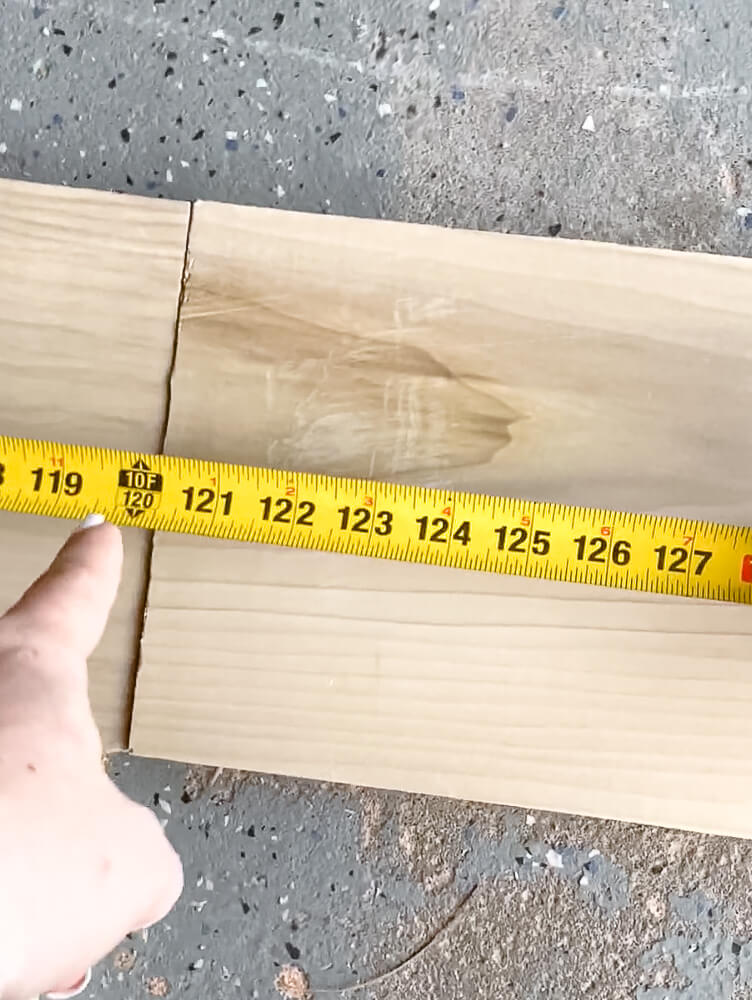
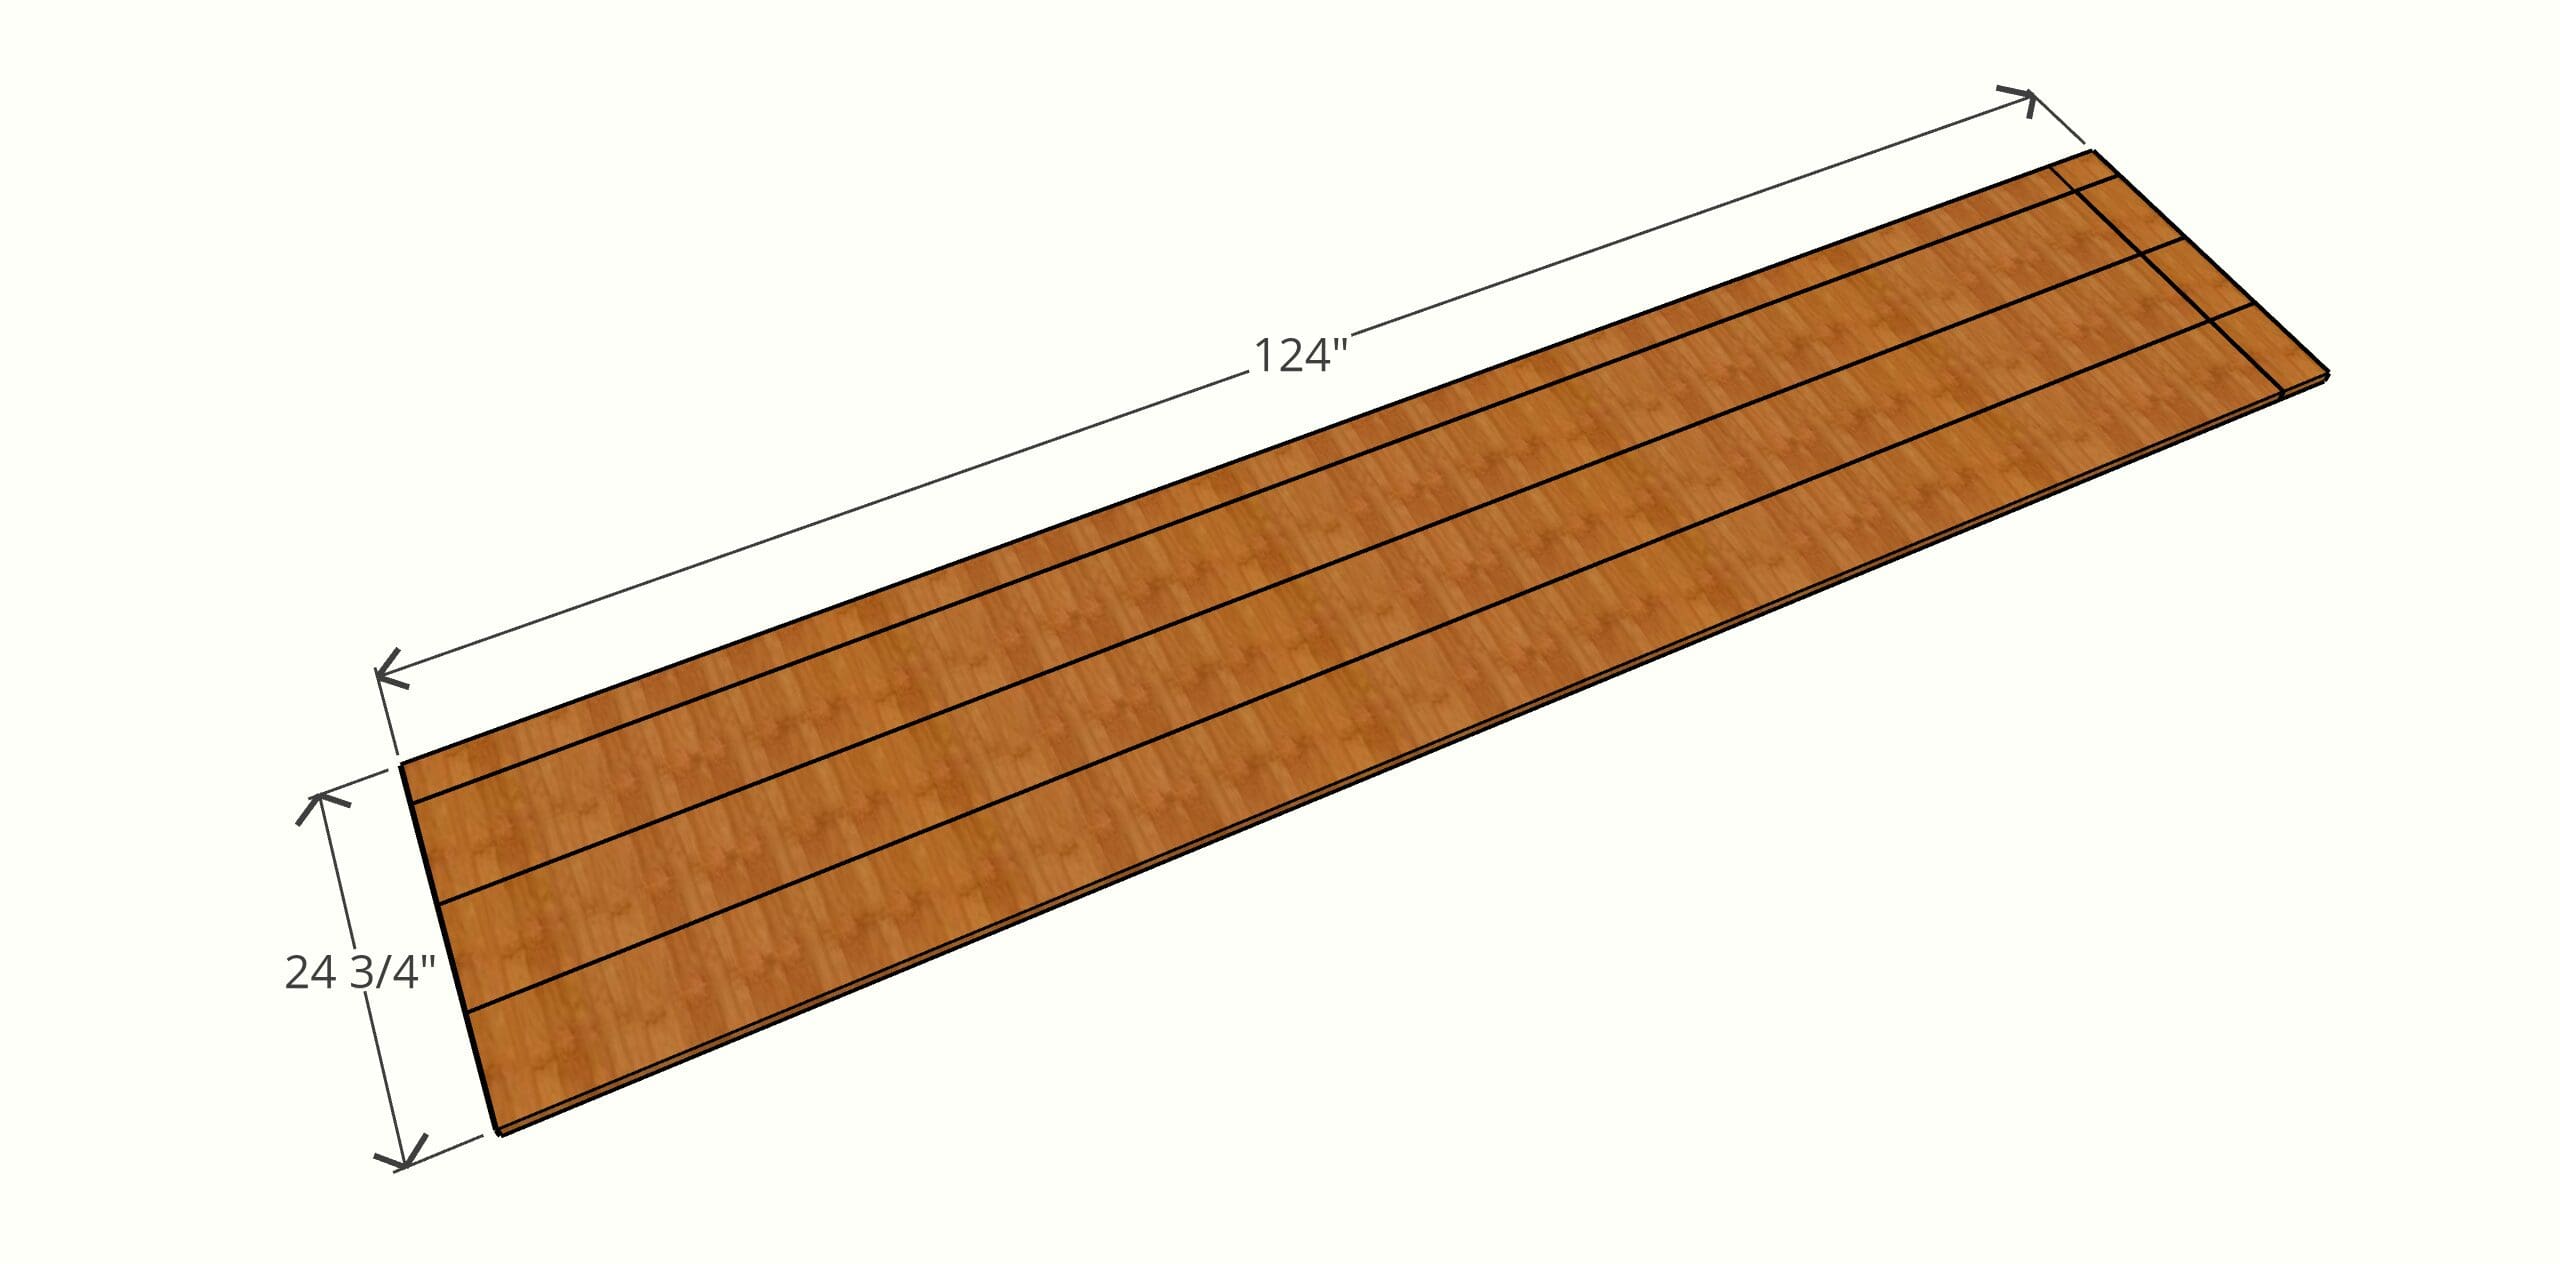
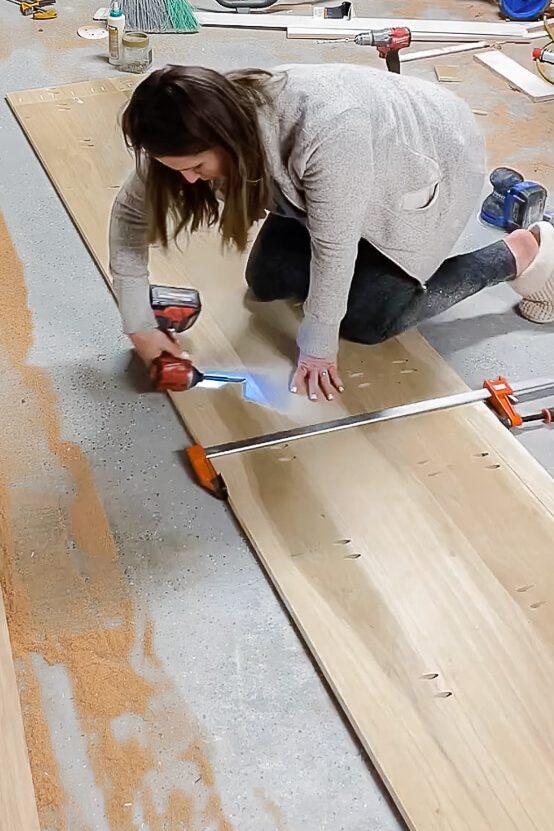
To take up the length of the wall, the desk needed to be 124 inches. The store near me only had boards as long as 120 in, so I had to do some splicing. I cut 4 inch poplar pieces to join them at the ends of the longer boards. Ideally, you’d get boards the proper length you need, but for me, it wasn’t happening, unfortunately.
Hopefully, nobody will notice the joints.
I used wood glue and clamps to keep the pieces together while I screwed through some pocket holes I had made earlier.
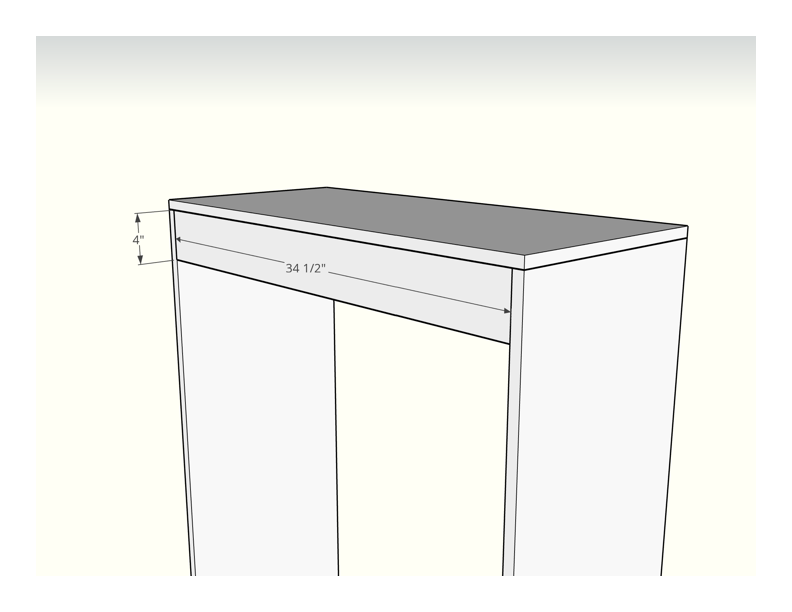
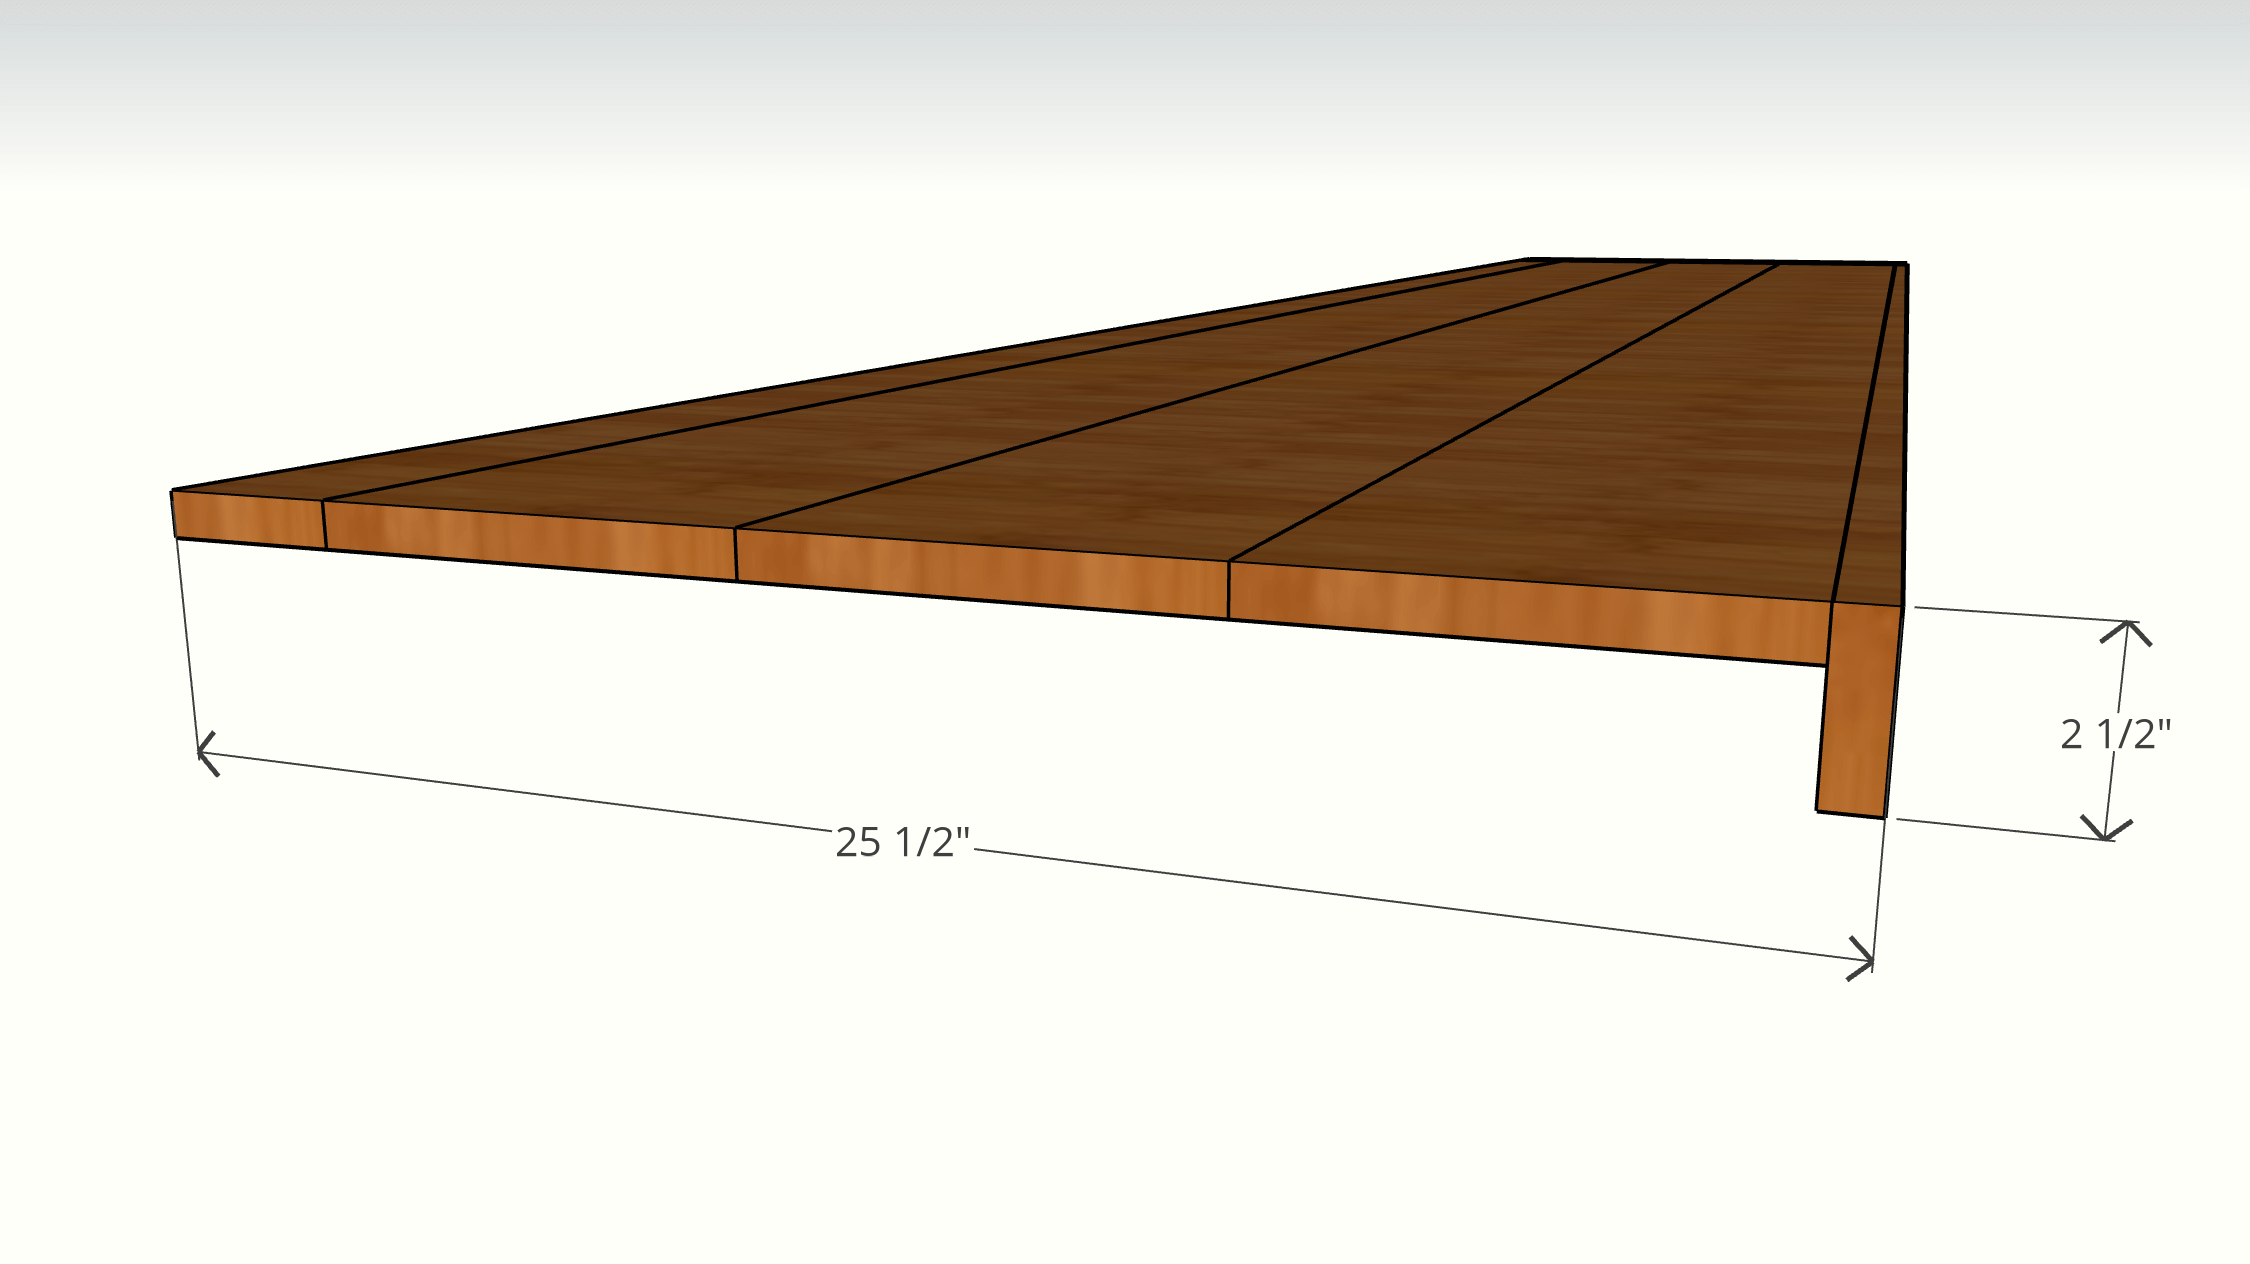
The depth needed to be 24 3/4 inch to completely cover the lower cabinet.
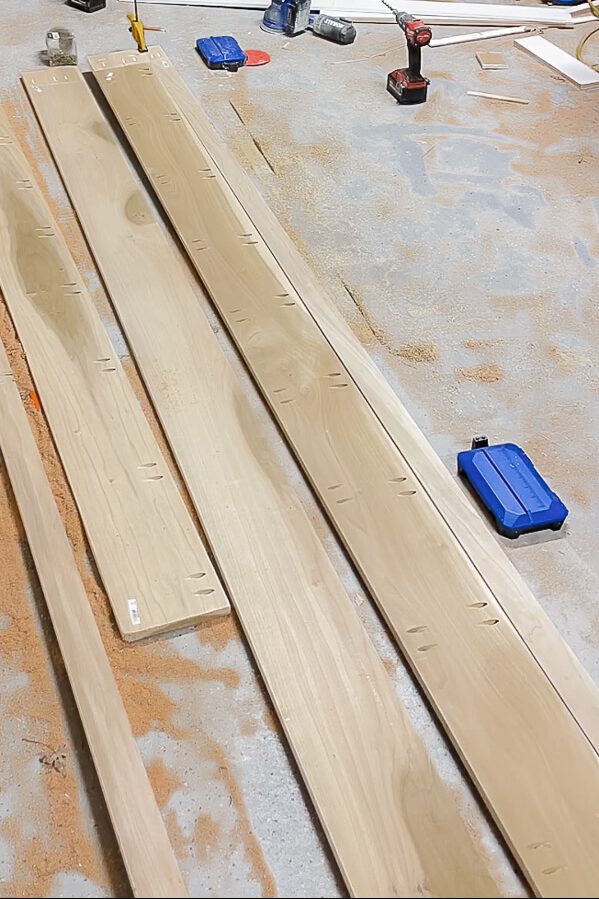
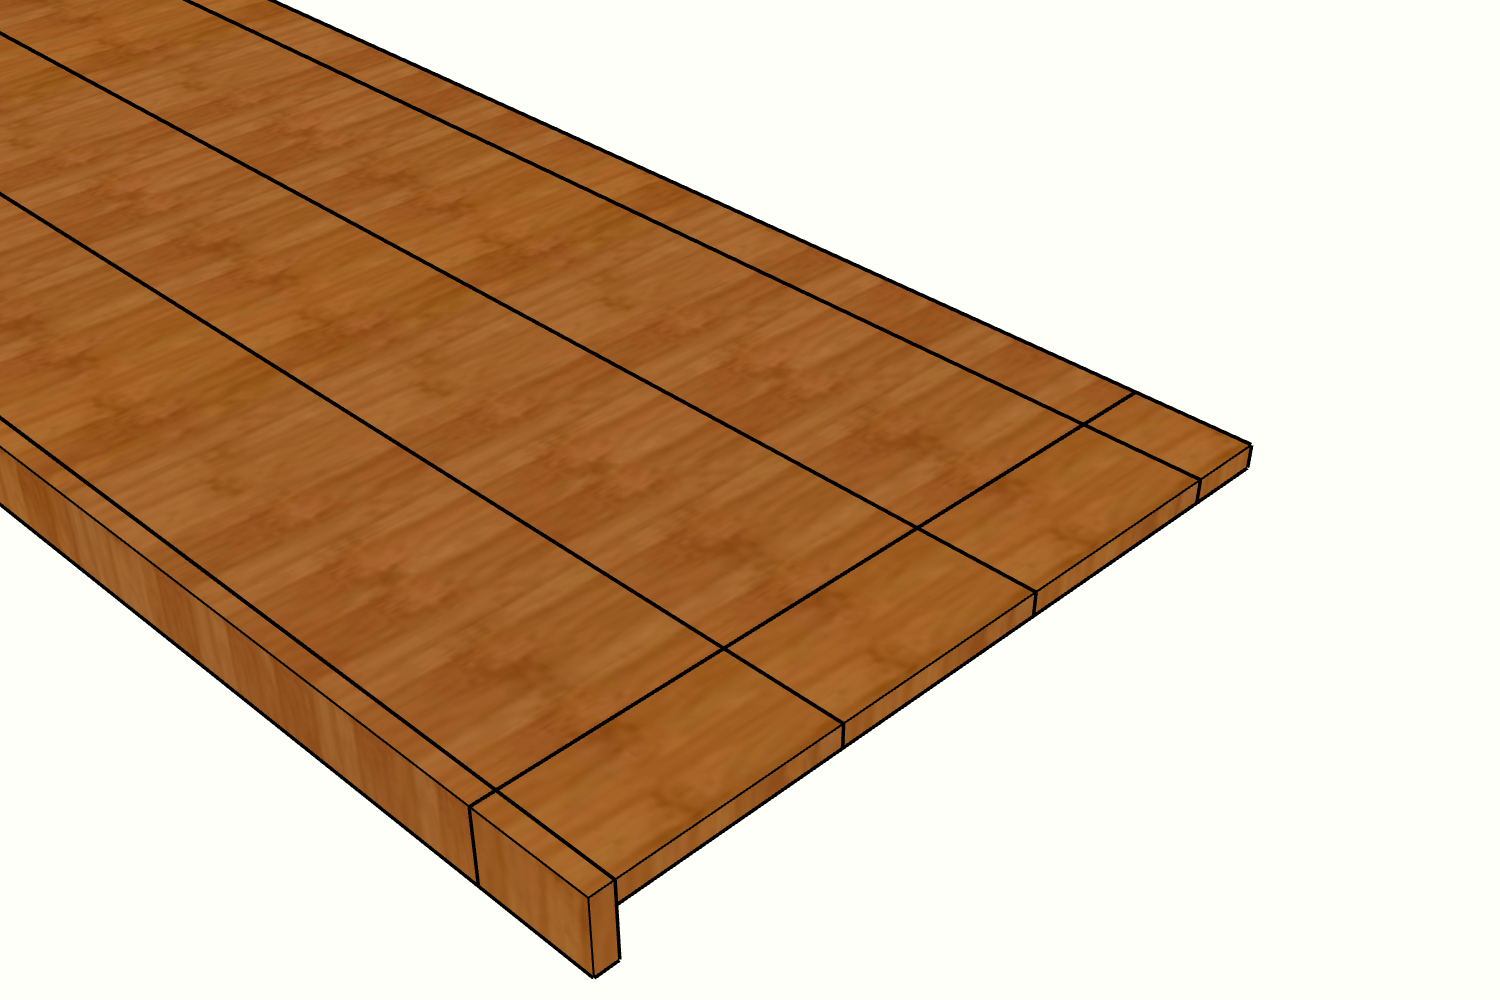
Since my poplar boards were 8 inch wide (technically 7 ¼ inch), I used 3 boards and then had to run a board through my table saw to make a 3 inch board.
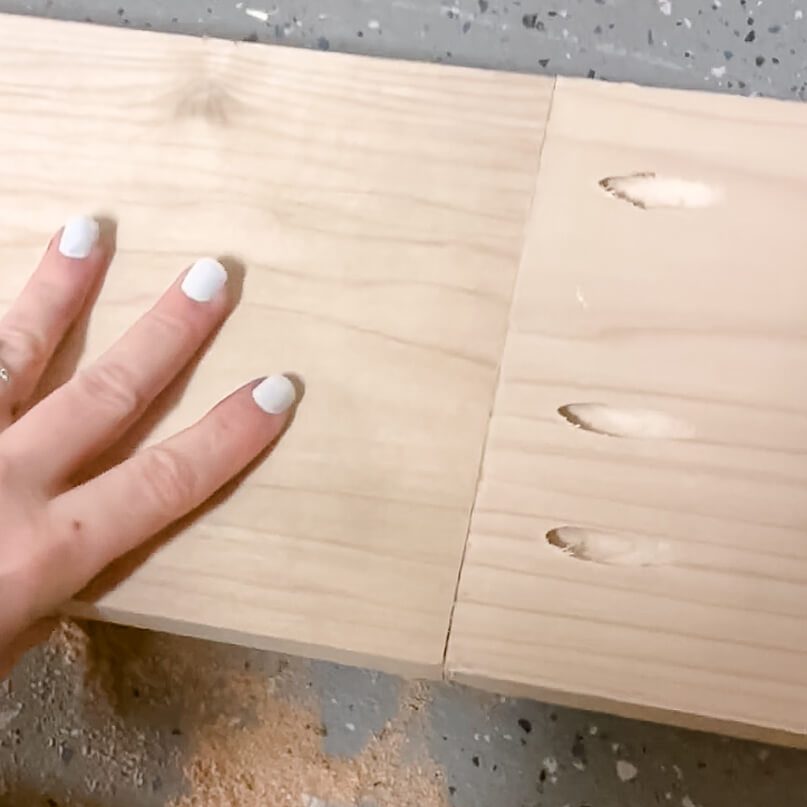
Next, I used my Kreg Jig to drill pocket holes on the sides of some boards to be screwed together, making them sturdy and look like one piece of wood.
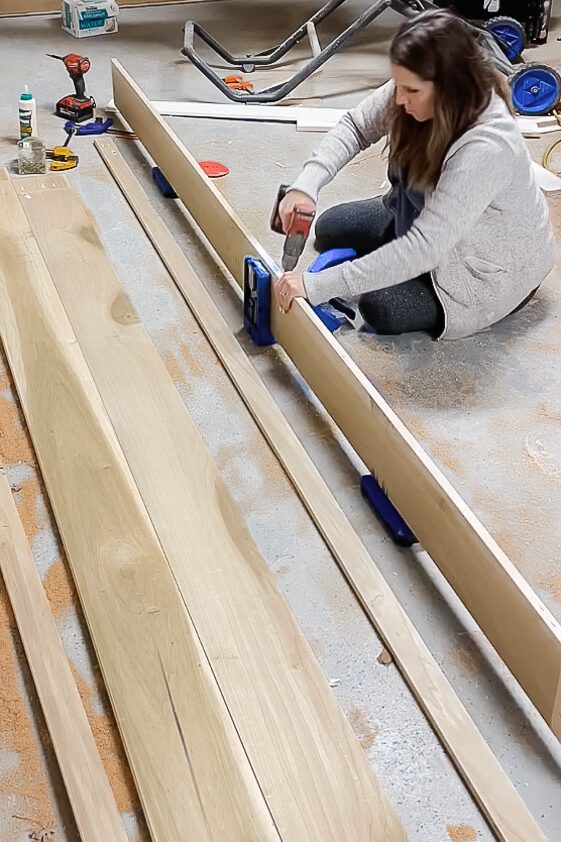
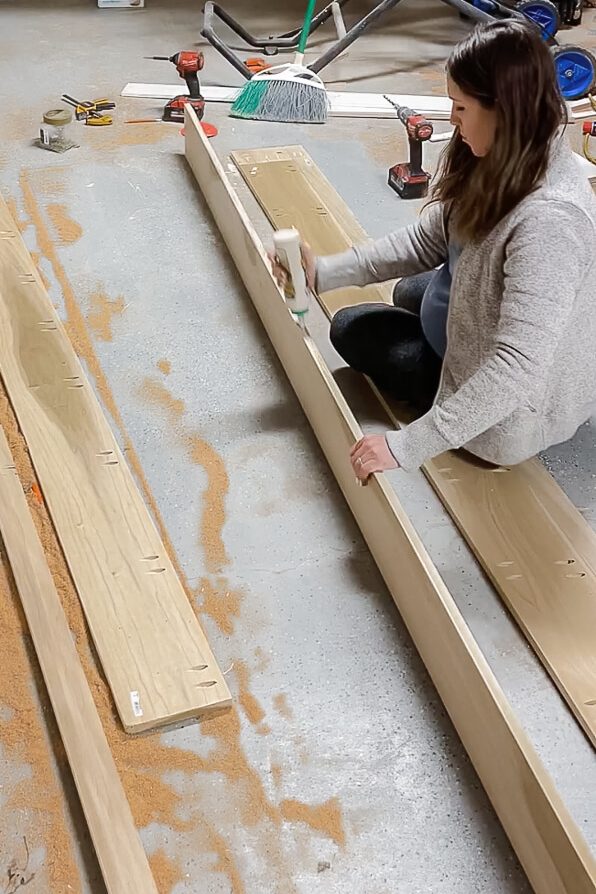
Then, I applied wood glue to each side of the boards before I screwed them together through the pocket holes. A clamp helps keep everything tight until it dries.
Here’s a tip when building home office built ins: while the wood glue is wet, sand the desktop. That way, the wood glue and sanding sawdust will mix and fill the joints. If some of your joints are still visible, then use wood filler. The entire desk needed a good sanding using high grit sandpaper, like 150.
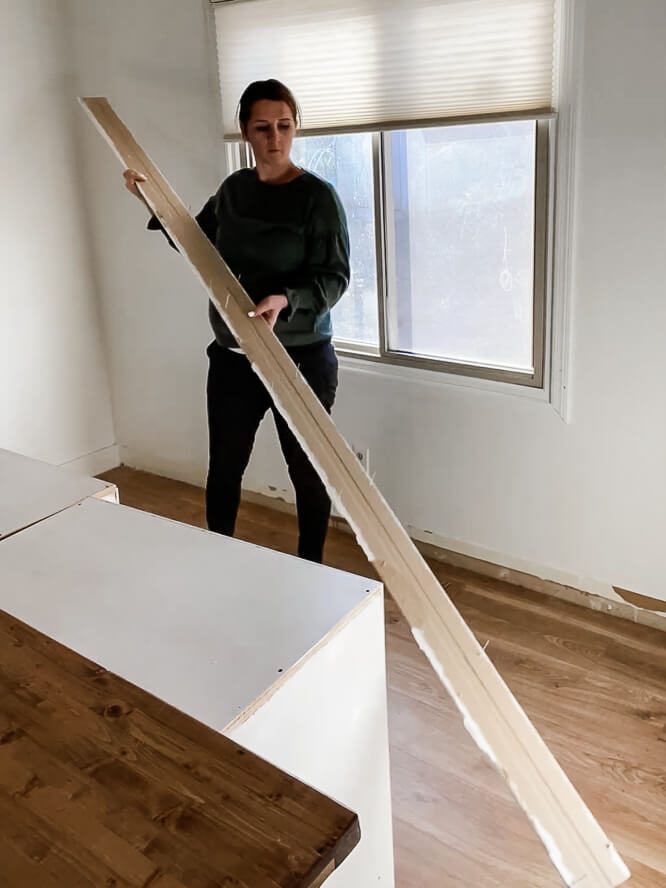
I also elongated, sanded down, and stained a 1×4 piece of lumber the same length as the desktop to beef it up from the front.
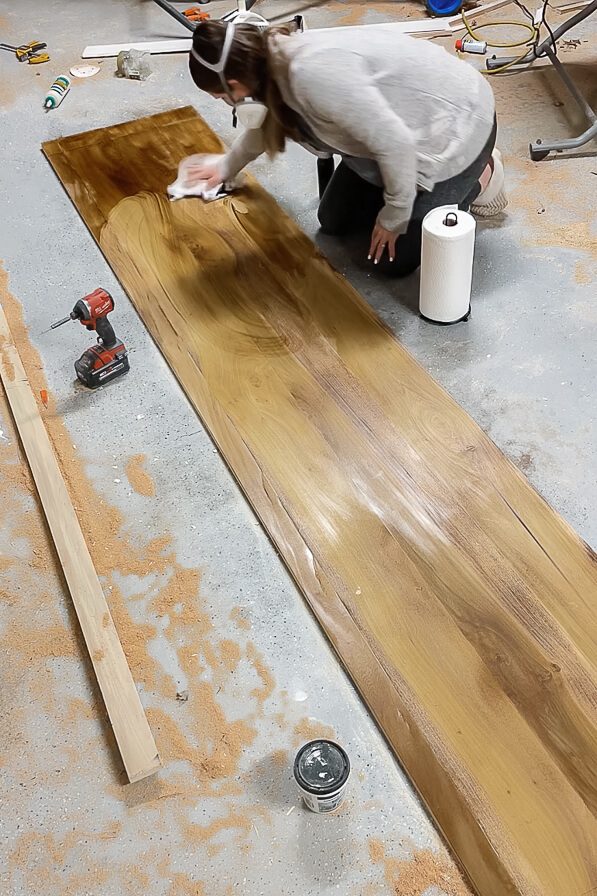
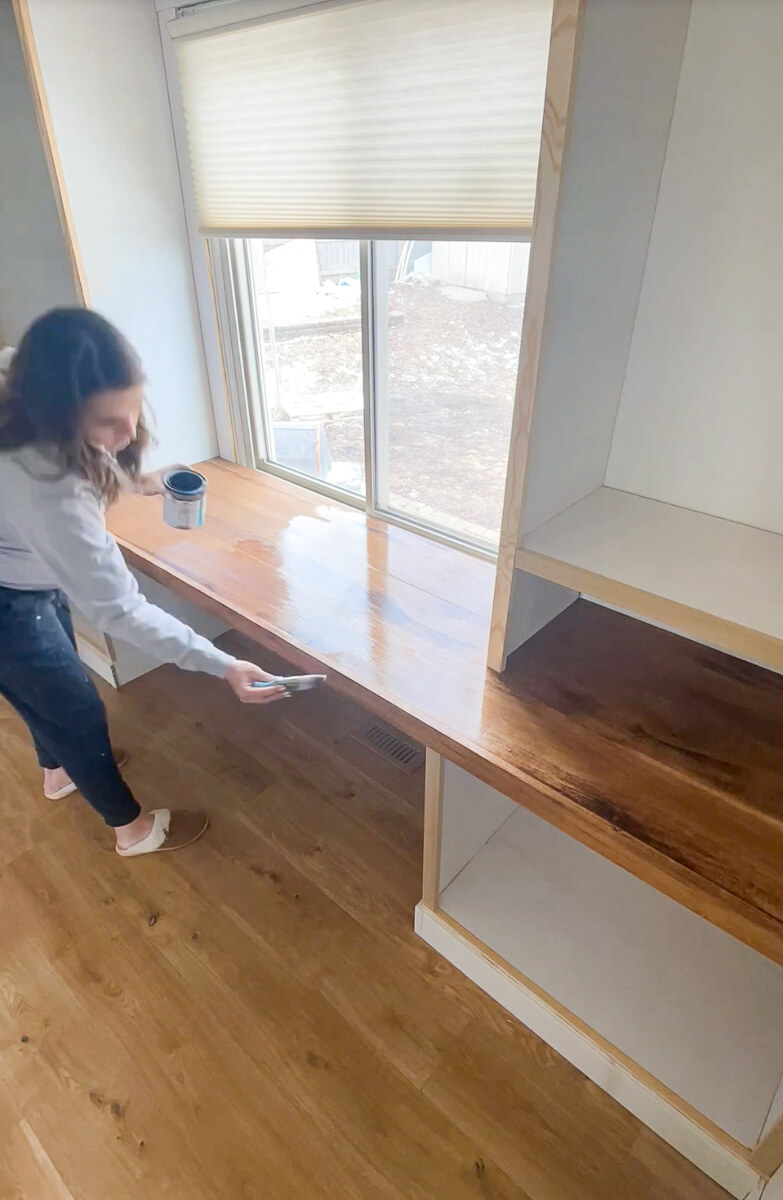
Staining The Built In Desk
To finish off the desk of the home office built ins, I wiped it clean (tack cloths work great!) and sprayed the desktop with water. I had run out of wood conditioner and water works in a pinch, but wood conditioner is preferable. Then I applied two coats of Early American stain, wiping it off between coats.
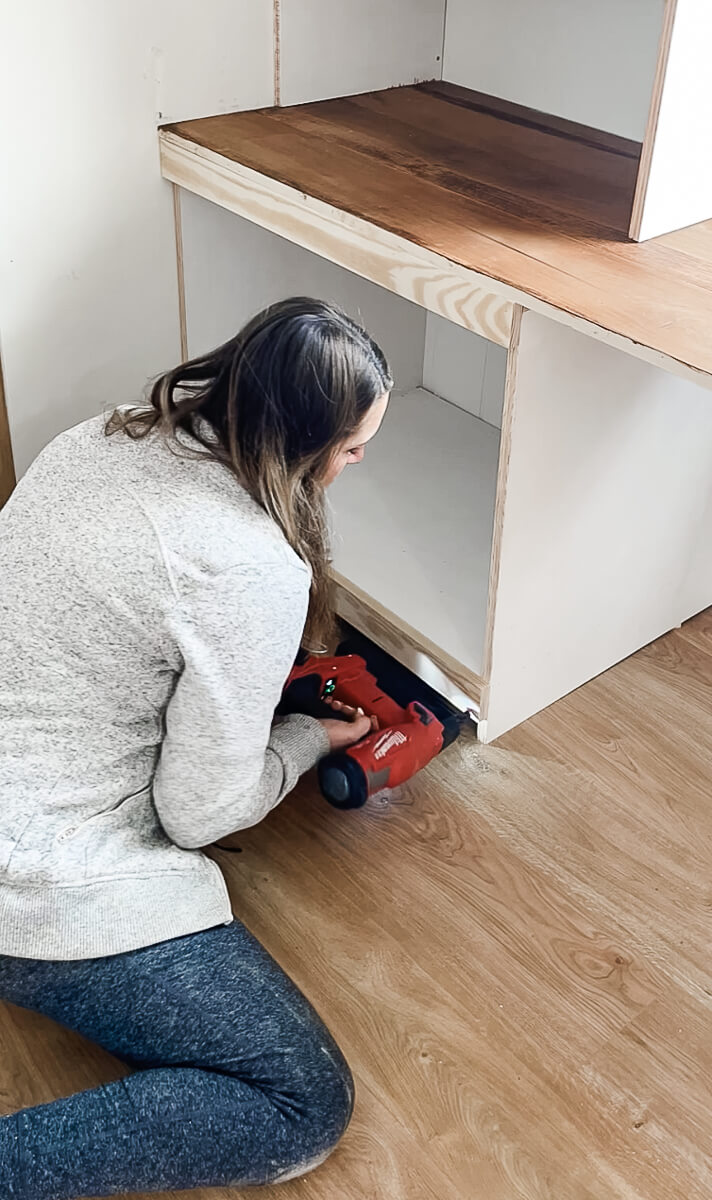
Securing the Lower Built In Cabinets
The next phase of the home office built ins is to secure the home office cabinets to the wall. First, I used a stud finder to mark the wall where the center of each stud was located. Then I placed the lower cabinets in the corners and set up my laser level so the horizontal line would touch the top of the cabinet.
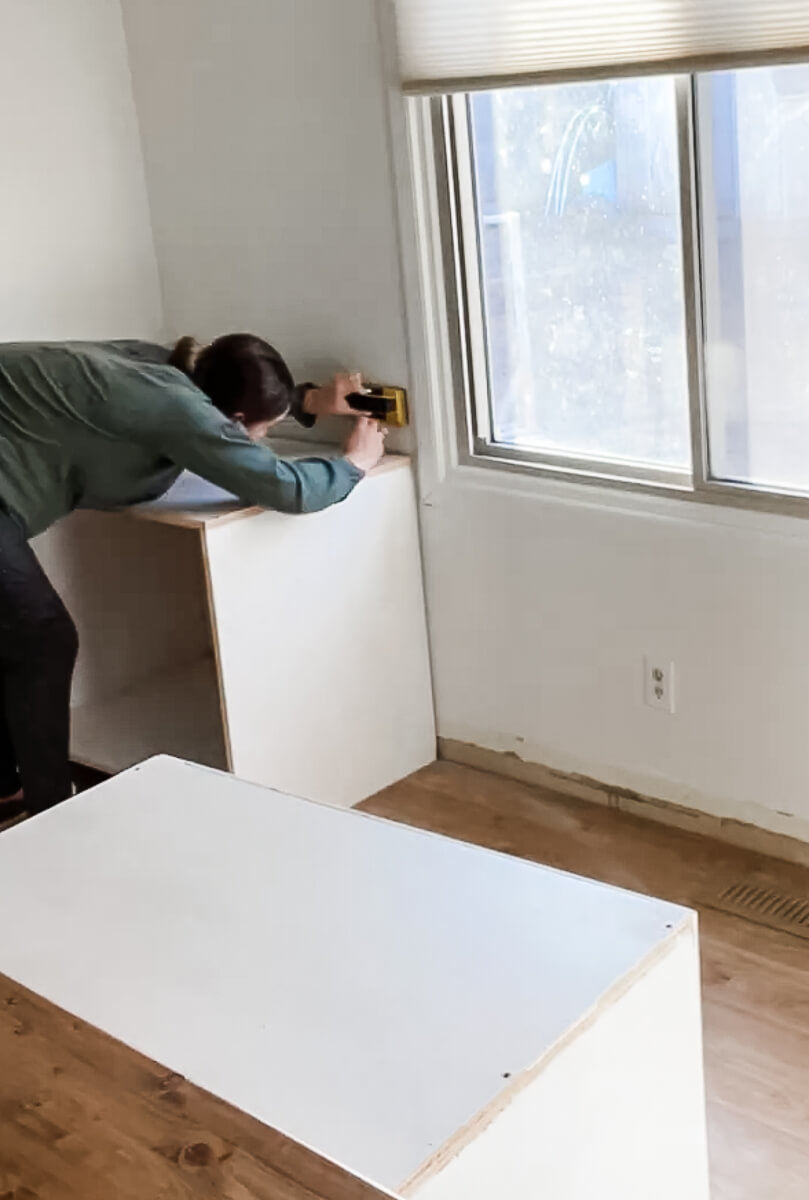
This is when you notice how uneven floors can be. I elevated the cabinets by placing shims underneath in certain places. Because I’m placing a desk on top of the cabinets, both cabinet bottoms must be level.
When the cabinet tops were level with the laser line, I secured the cabinets into the studs with 3 inch Power Pro Screws. I tried to be strategic with where I placed the screws so they wouldn’t be seen. The cabinets were screwed into the wall on the sides and back.
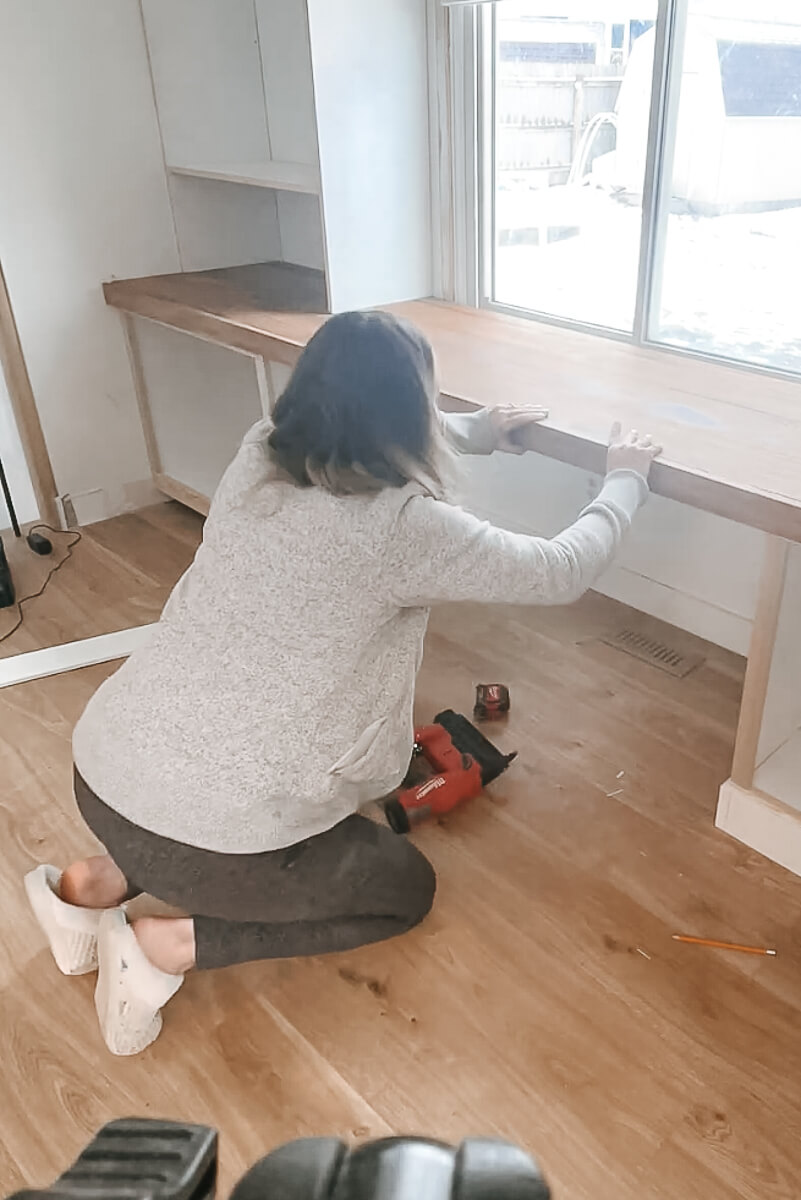
Installing the Desk On Top Of the Built In Cabinets
With my cabinet bases level and secure, it’s time to set up the desk. It was a tight fit, which was alright with me. I used a hammer and a shim to gently “encourage” the desktop into place. Using a shim in between the hammer and the desk helped protect the desktop from being damaged by the strike of the hammer.
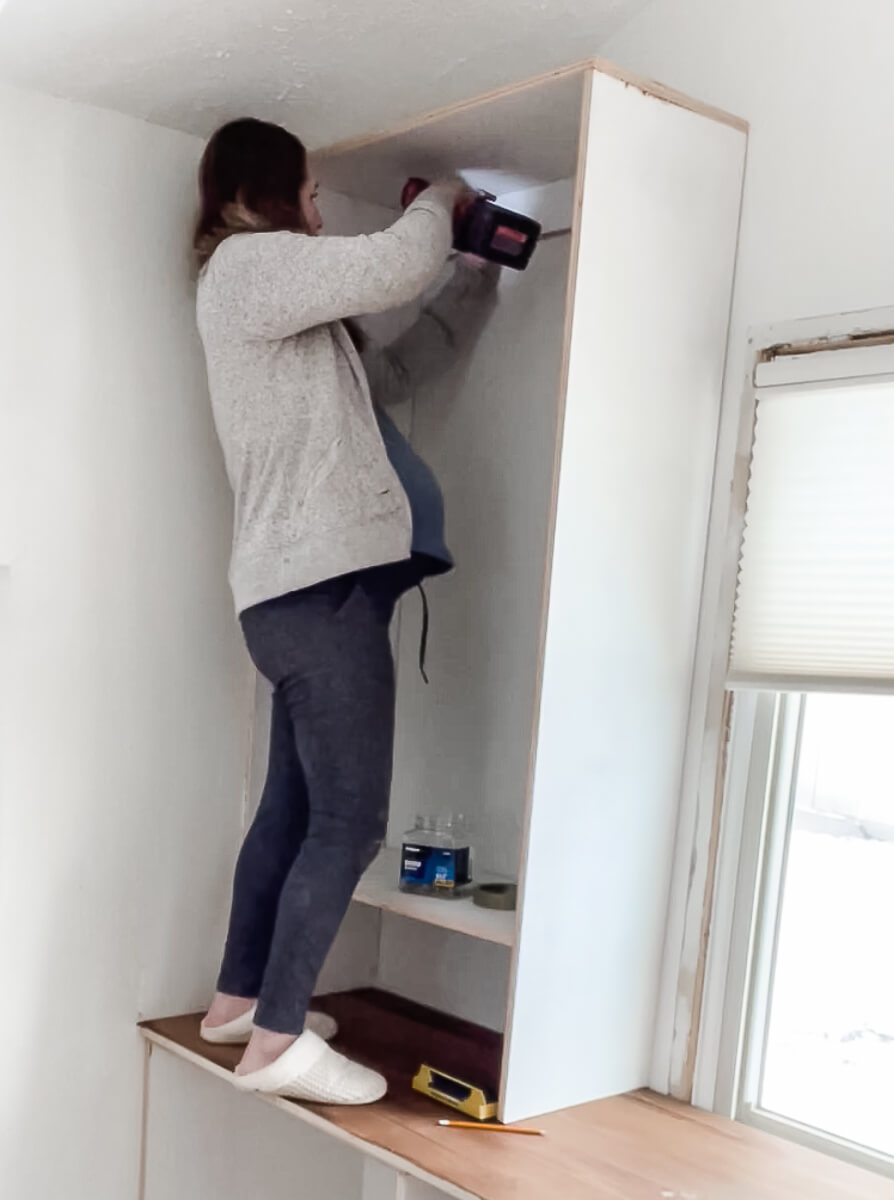
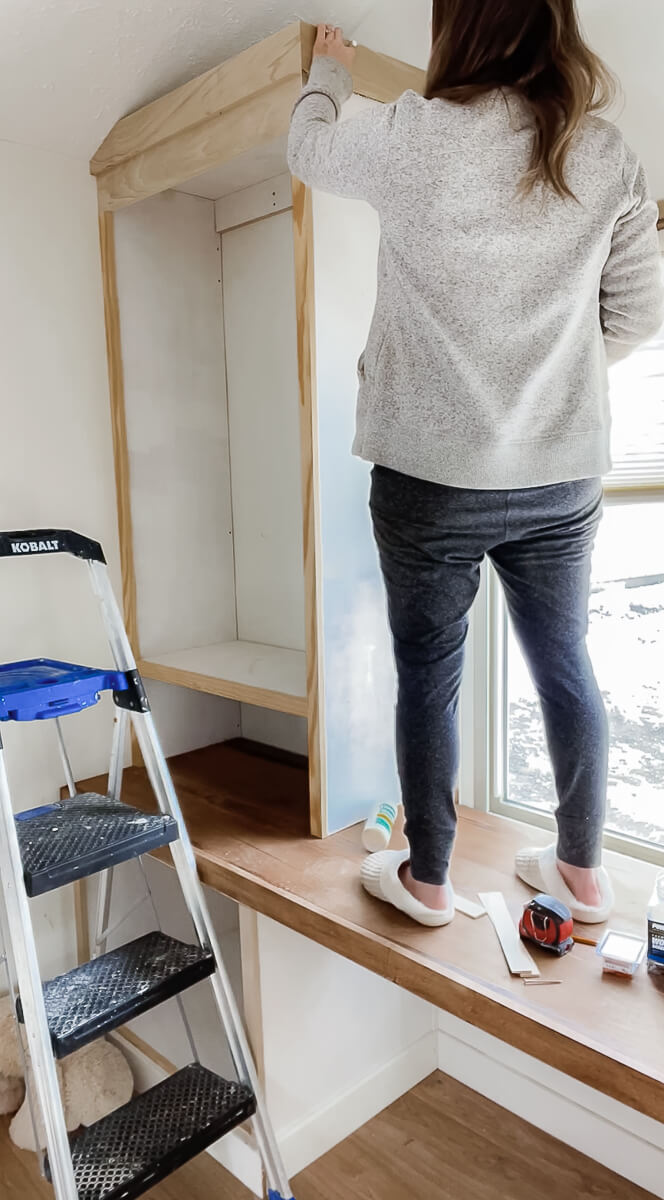
Securing the Upper Built In Cabinets
It was time to place the upper cabinets on top of the desk. They’re lightweight but awkward to maneuver, so I tried not to scratch the desktop. As with the lower cabinets, I secured the upper cabinets into the studs on the side and back using 3 inch power pro screws. This is when that back brace comes in handy.
Adding the Face Frame to the Cabinetry
Adding a face frame to these home office built ins will make a difference in their overall look. Starting on the bottom cabinets, I used 1 inch brad nails and 1 x 3 inch pine to cover the top and bottom. Then I used 1 x 2 inch poplar on the sides. I used a mix of materials because that’s what I had to work with, and I didn’t want to go back to the store. They were being painted and were sturdy; that’s all that matters.
The baseboards covered that gap at the bottom. Speaking of the baseboard, I used brad nails to secure it back to the wall after trimming it to fit. Then I cut the baseboard to cover the front and sides of the bottom cabinet. It looks better if you miter the baseboard corners, but I used butt joints.
Face Frame on the Built in Desktop
To finish off the desk, I attached my 1 x 4 inch poplar board to hang off the front. This is another detail on home office built ins that makes the desk look finished and thicker. I added a bead of wood glue and used brad nails to secure it to the desk.
Finishing Touches on the Built In Cabinets
I’m almost done with the building! I added a 1 x 6 inch poplar board to the top of the upper cabinets. Then I trimmed and secured a 1 x 2 inch polar board that runs vertically down both sides and another that runs horizontally in front of the shelf.
That shelf frame makes the shelf appear larger than it actually is. The last thing I did was add a 1 x 3 inch poplar board to the top and side of the cabinet to act as my crown molding, which hangs over the board beneath by about an inch. Due to my ceiling, I had to cut mine at a diagonal.
By this point, all of the ugly unfinished plywood sides have been covered. However, my window still needed to be addressed, so I used 1 inch MDF to trim the window on the top and sides.
Finishing the Built In Desktop
Okay, NOW the building is done. Mostly. I was eager to start using the desk, so I used Minwax Polycrylic to seal it and protect it from spills and homeschool art projects.
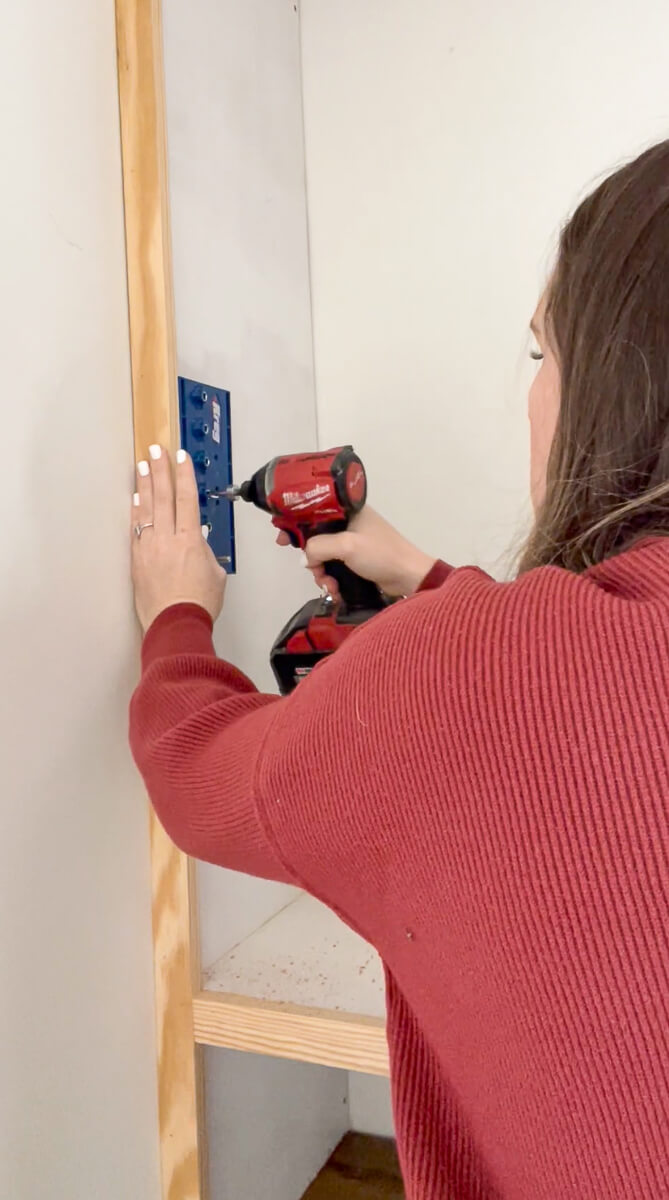
Adding Adjustable Shelving Using a Jig
Sometimes when I’m using my nail gun, the nail doesn’t set in all the way, so I run my hand over all the nails, and if one is sticking out a bit, I use a nail punch and hammer to finish setting the nail into the wood.
These home office built ins need to be functional, and I need shelves for all our supplies. It’s time to use one of my favorite tools by Kreg. It’s an Adjustable Shelf Pin Drilling Jig, and I used it to drill a set of holes down the inside of each cabinet. The laser level made a horizontal beam across my cabinet, where I lined up the jig and drilled two holes on one side and two holes on the other. Then, building off of those, I used the jig to drill perfectly spaced holes up along the cabinet.
Prepping the Cabinetry for Paint
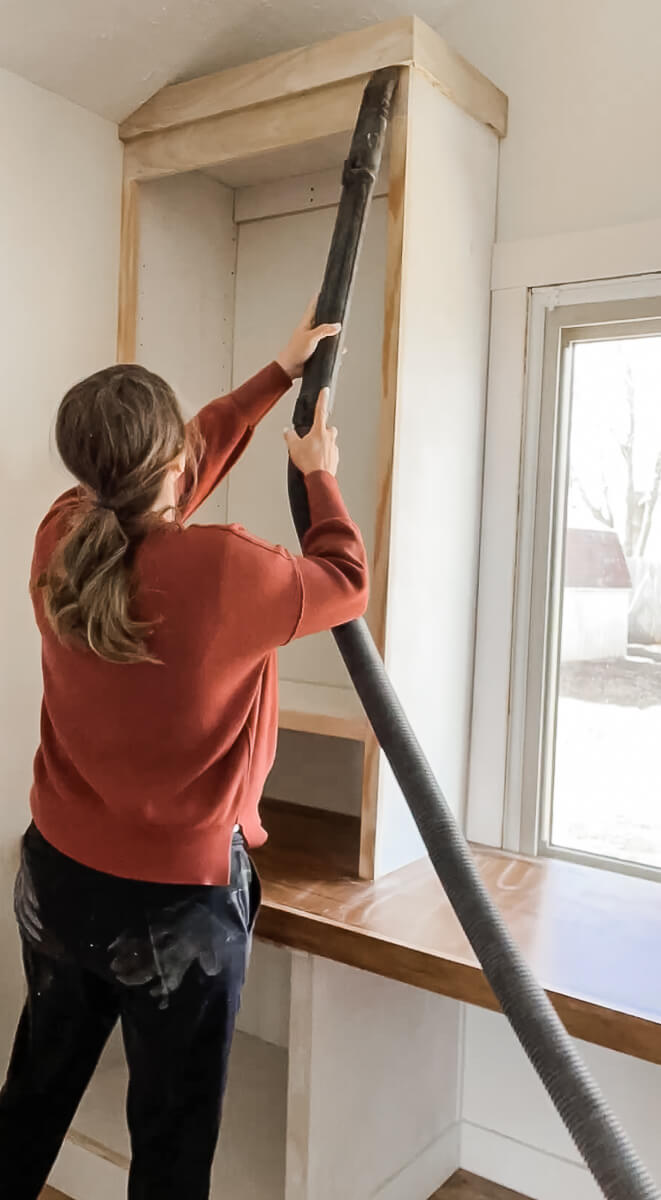
Caution: Tedious but necessary work ahead. All the nail holes in the cabinetry (not the desk) needed to be covered with wood filler. I try not to glob it on since it’s more work to sand it off. After that was dried, I used a battery-operated sander to sand all the wood filler until everything was smooth. A sanding block can be used, but it’s just so much quicker to use a palm sander. However, using a palm sander does create more mess.

I needed everything to be squeaky clean, so I used my shop vac to get the majority of the dust and then a tack cloth to get the rest. You could use a wet rag as well, but the dust just clings like magic to a tack cloth, and I think they work better.
Painting the Home Office Built In
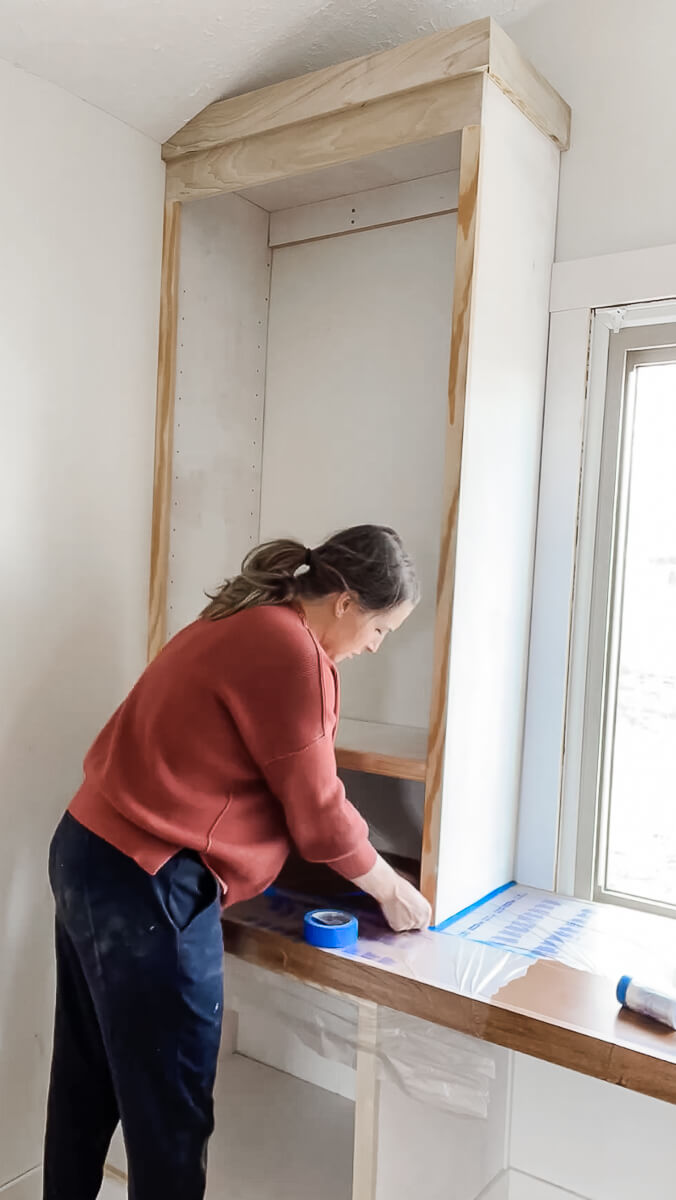
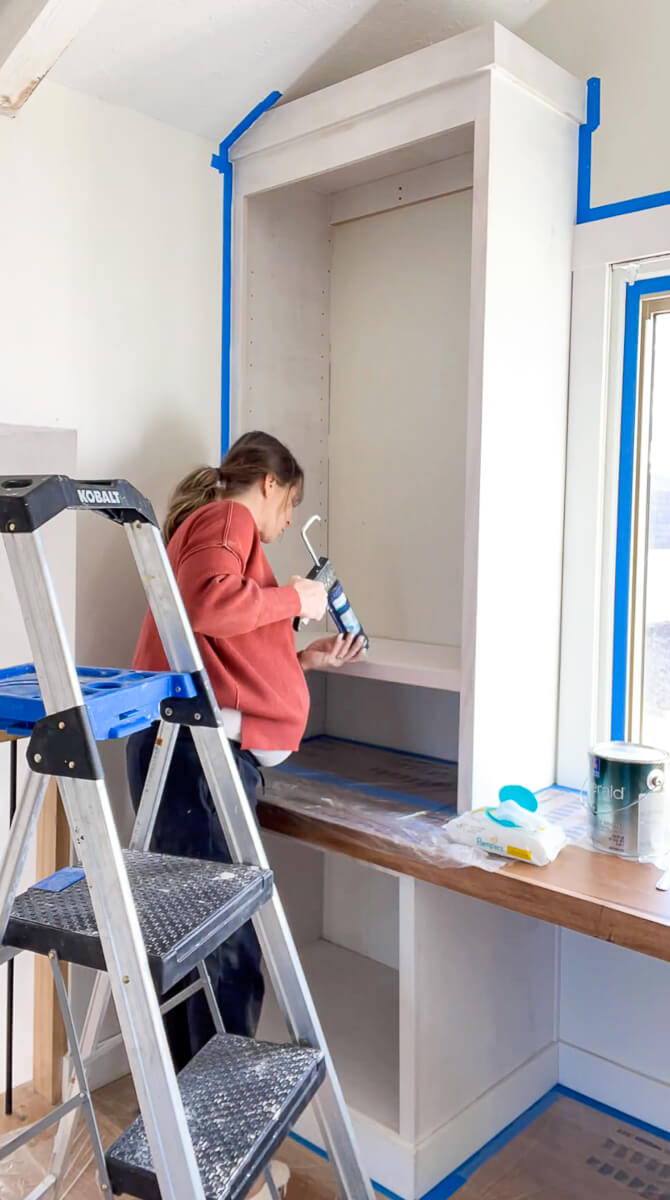
Continuing with our tedious but necessary work, it’s time to paint. That meant lots of taping and protecting, so I used a 2 in 1 tape and plastic combo. It’s AWESOME! I was mostly concerned with the desk, so I covered that well.
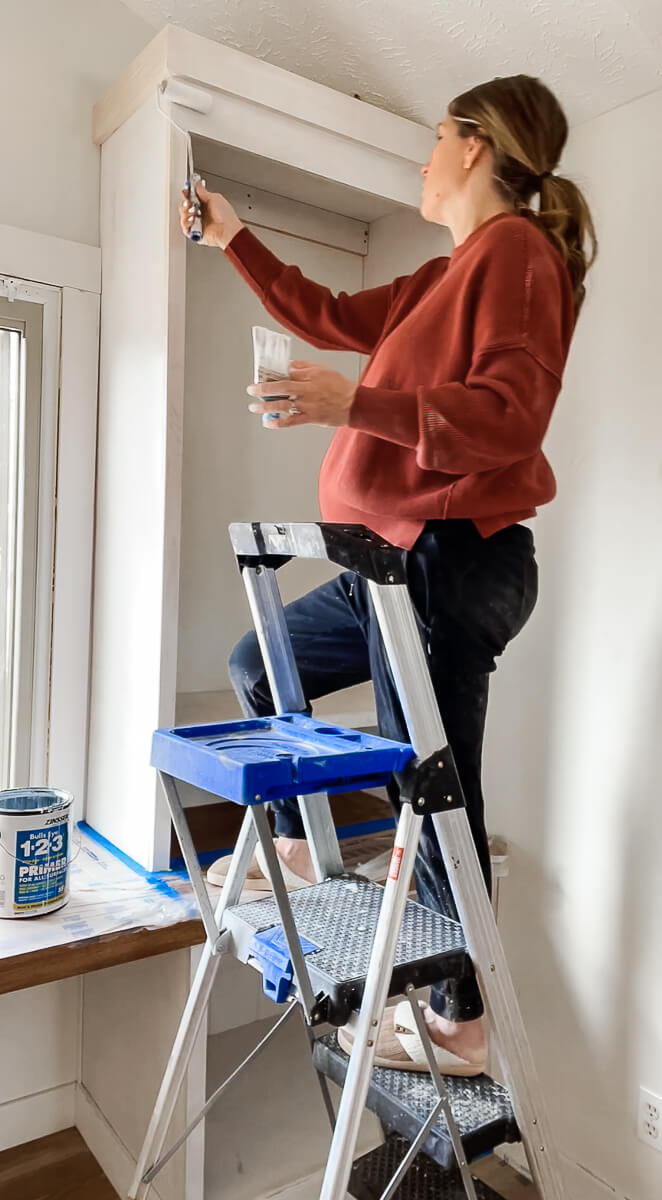
Next, it was prime baby, prime! Everything got a coat of primer. Foam rollers work best when applying primer or paint to wood on home office built ins.
After fully drying, I taped everything off, like the walls and the floor. Then I caulked and caulked and caulked. Every corner was caulked except what touched the floor. Baby wipes are my secret weapon when wiping off the excess caulk on these home office built ins.
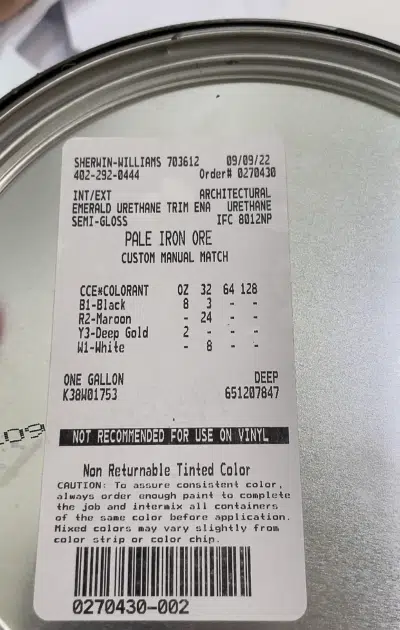
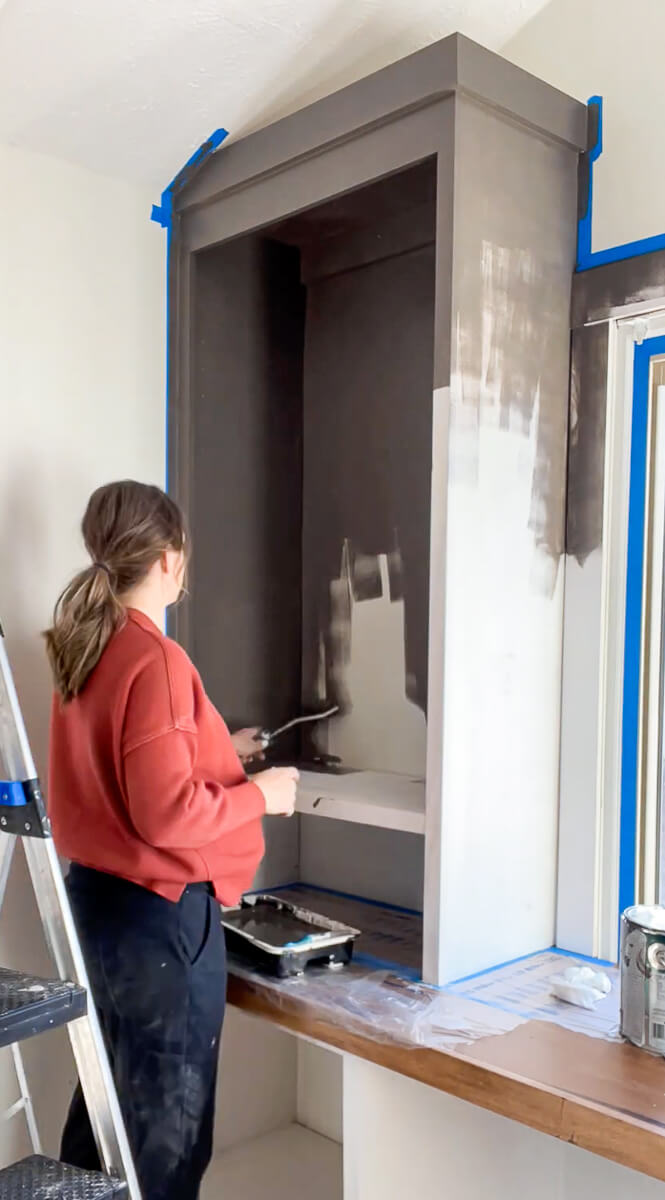
And then, finally, I painted two coats on all the wood. The color I chose is a custom color I had made at my local Sherwin-Williams. Screenshot the image below, take it anywhere they sell Sherwin Williams paint, and they’ll be able to match the color exactly for you!
I painted the baseboards, the molding around the window, and the wall underneath my desk the same color to make it look like one big unit.
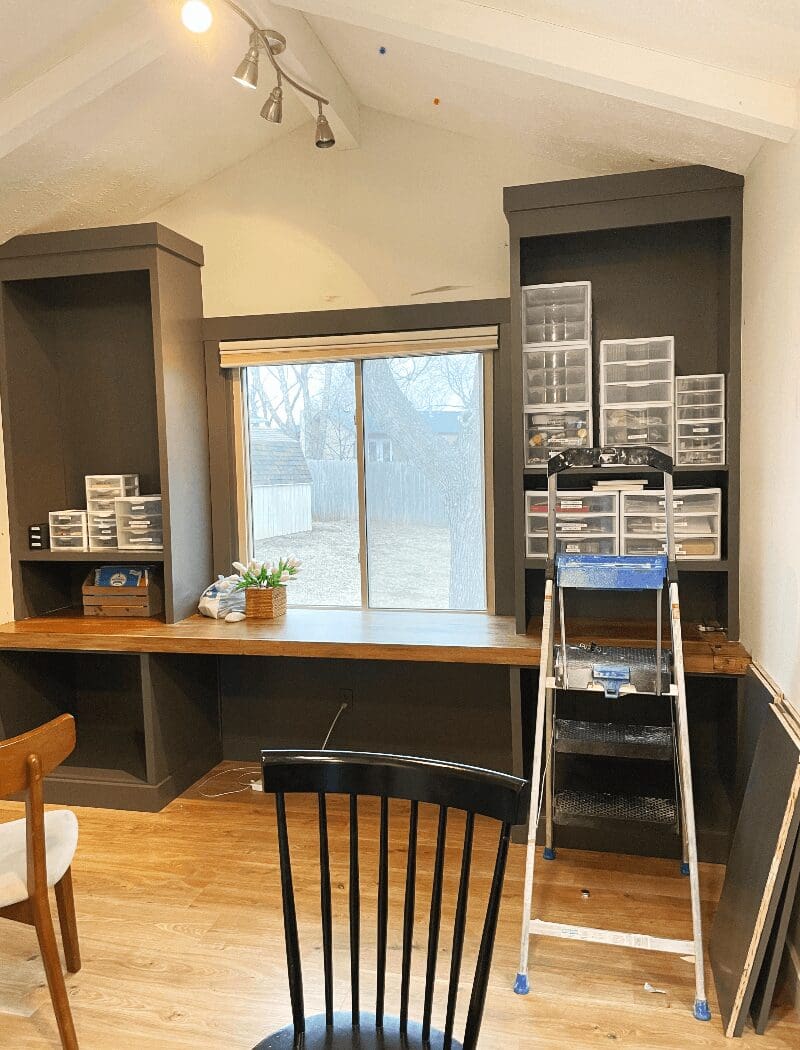
Final Touches on Our Homeschool Cabinets
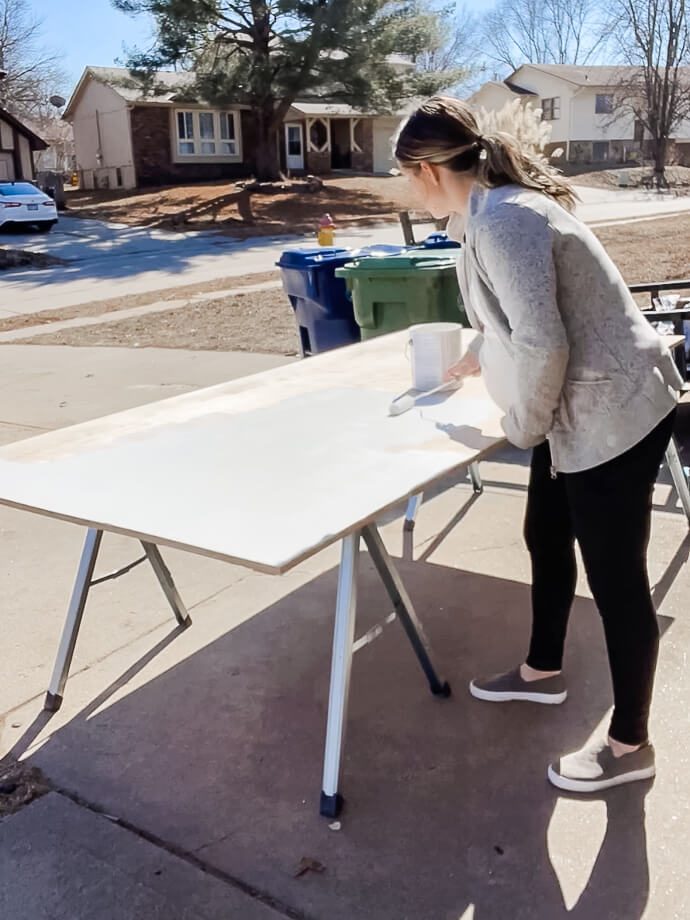
The last task completed before I could actually use the home office built ins was to make shelves and paint them. These shelves were made out of plywood, so I applied edge banding on all the unattractive edges that would be facing outwards.
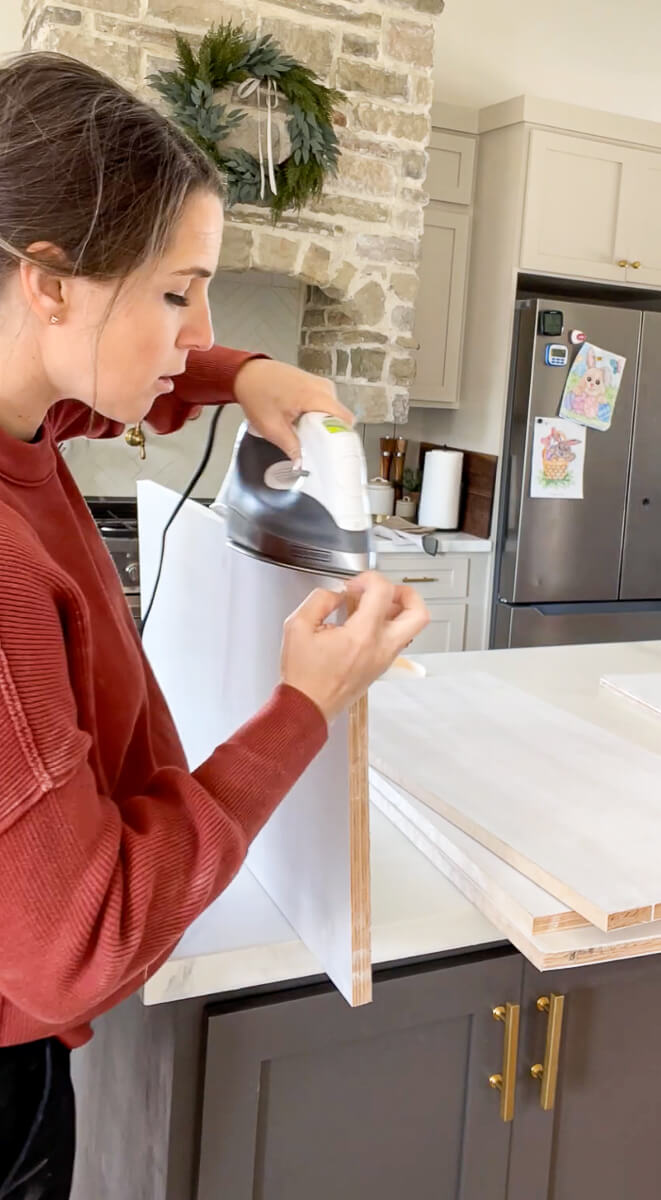
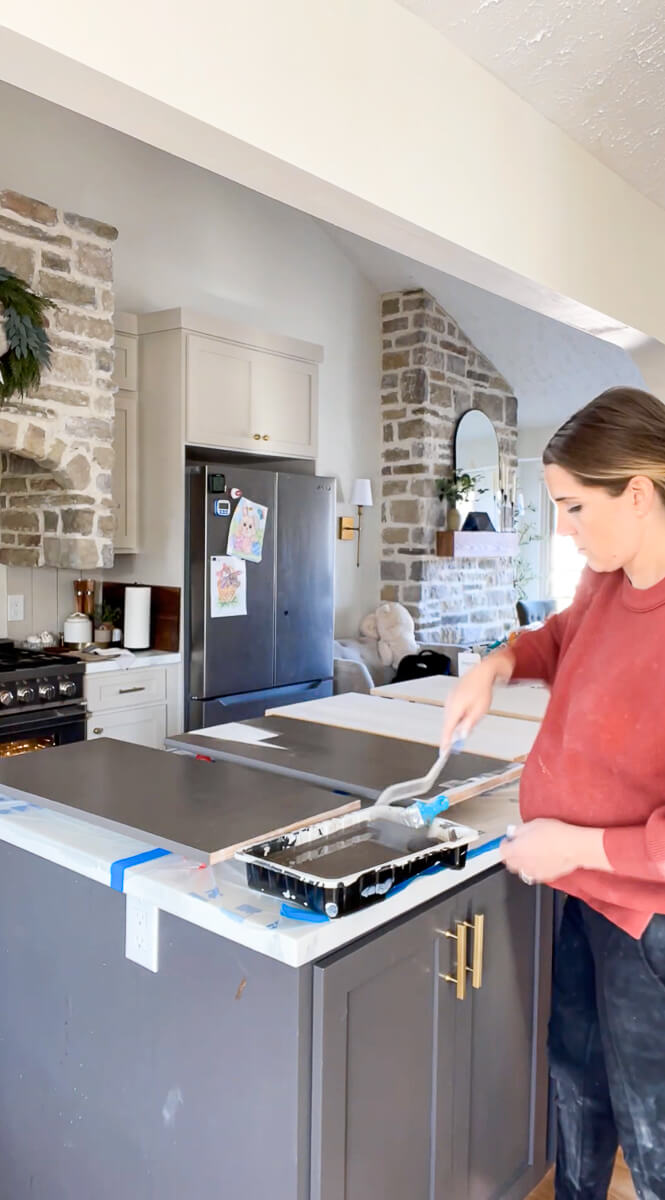
Then I set up an area on my kitchen island to prime and paint. Painting Tri Pods are useful when you need to paint the sides of things.
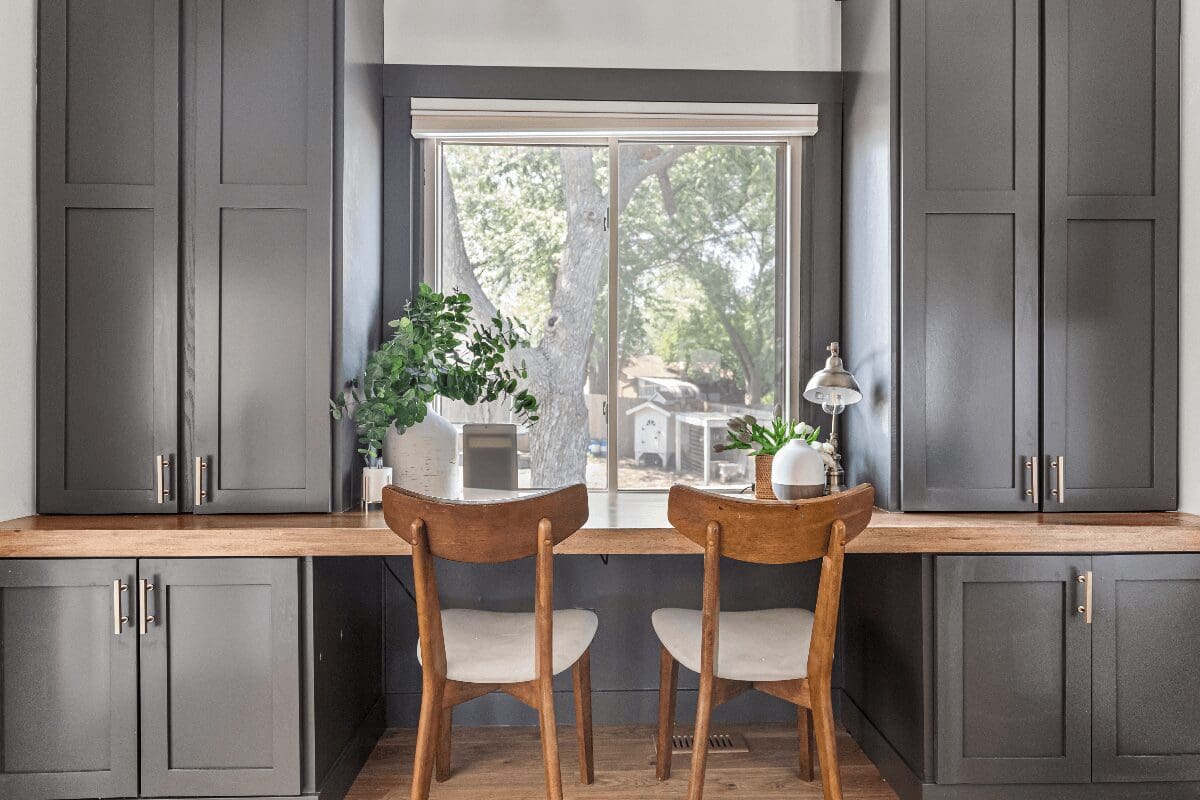
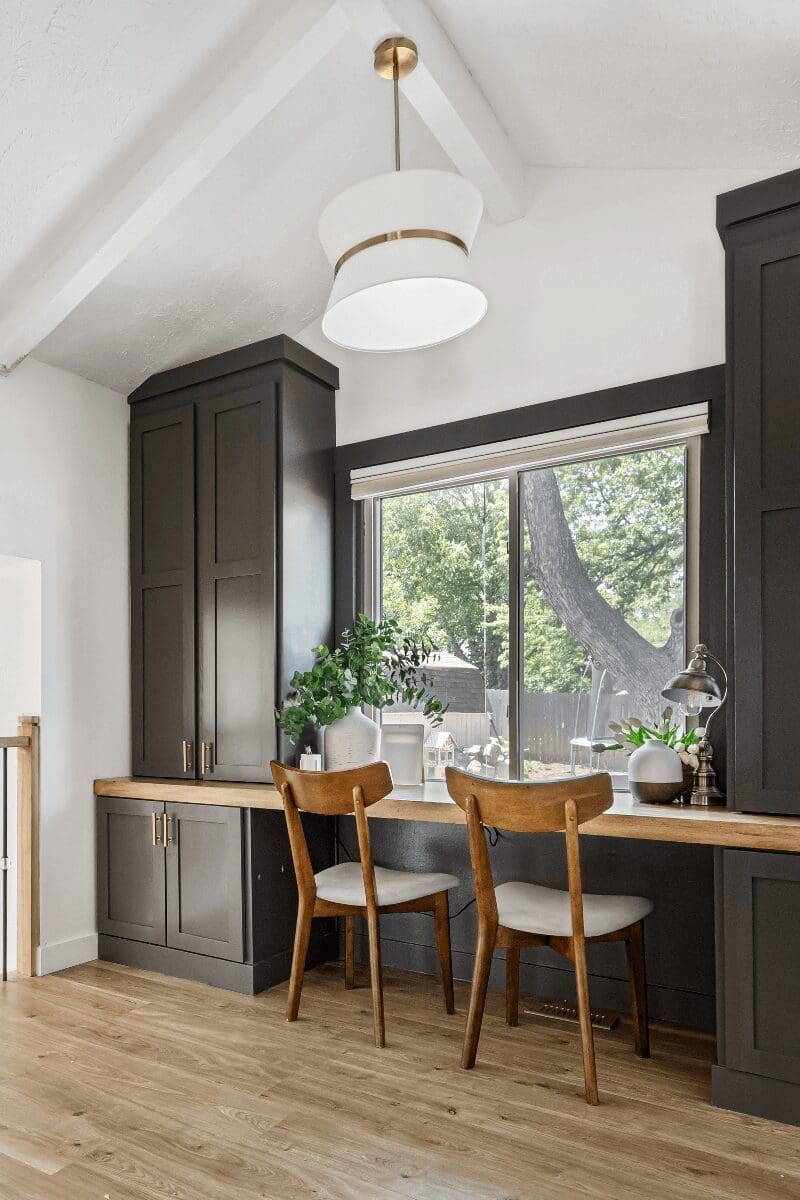
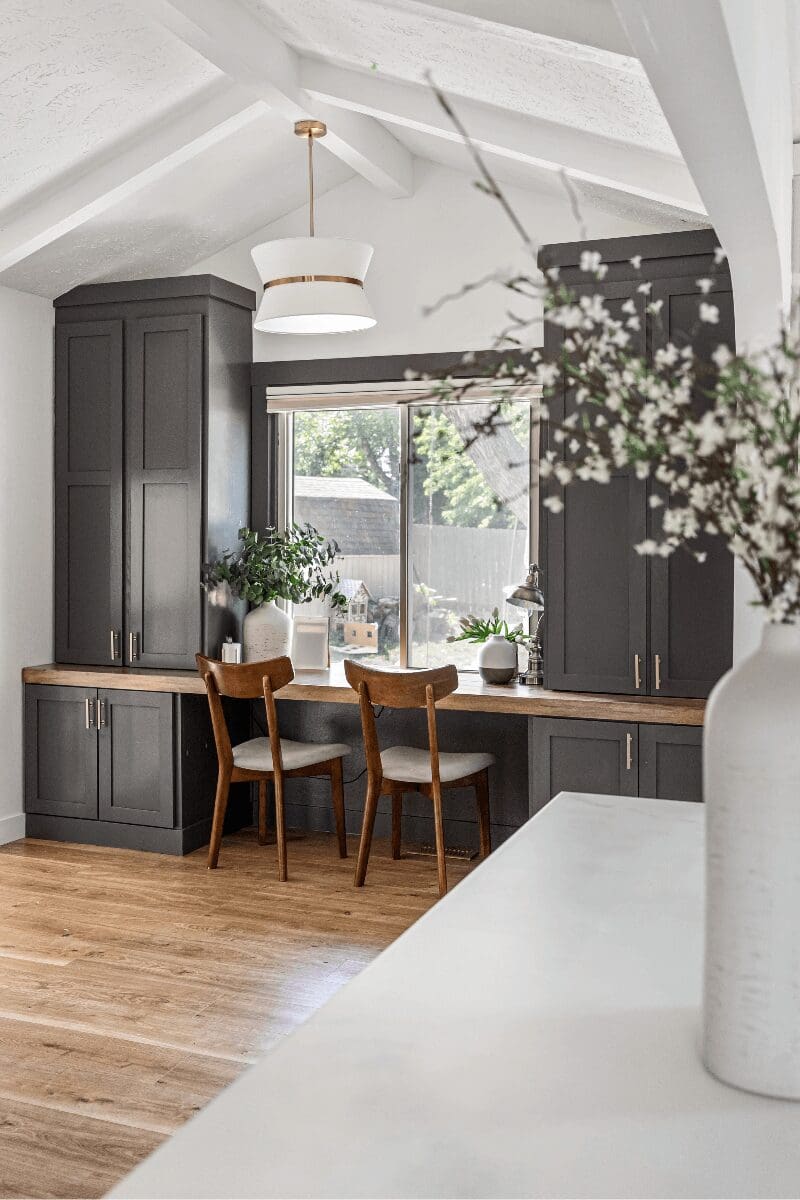
The Big Reveal!
Decor Sources –
Modern Chandelier
Hearth and Hand Natural Ceramic Vase
Hearth and Hand Silver Dollar Eucalyptus Stems
Woodgrain Oil Diffuser
Vintage Desk Lamp
White and Gold Pencil Cup
Rattan Tissue Box Cover
White Silk Tulips
I wish I had learned how to read sitting at this desk! What I really love is that all of my homeschooling chaos is hidden behind doors.
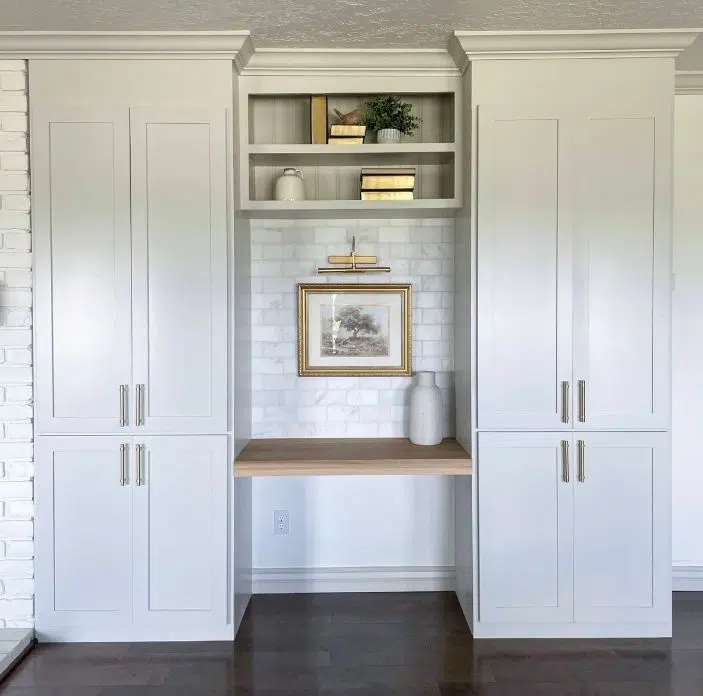
Speaking of doors, I built those Shaker Style Doors and wrote the instructions in a blog post. That blog post will be coming very soon. Cabinets that hide the mess are the best. Here’s another office built in project I did in my last house. There’s a lot of crazy behind those doors, but you’d never know!
If you have any questions about these home office built ins, please leave a comment!
XOXO
Crystel
These turned out so well! I’ll be looking forward to the cabinet door tutorial since I need to build some of those soon. I should build something like this in my dining room/homeschool room! Would you say this project cost less building it yourself (obviously with custom sizes) vs. buying stock cabinets from a big box store? I’m in Canada and often buying mdf and lumber will cost me way more than just hacking ikea cabinets or the like lol
Yes if you’re making the cabinet boxes yourself out of plywood then it would cost less. It’s the time factor that’s the problem. I’ll be getting that shaker door post out very soon!