


DIY Black Roman Clay Fireplace (Builder Grade Fireplace Makeover)


Updated May 9, 2026
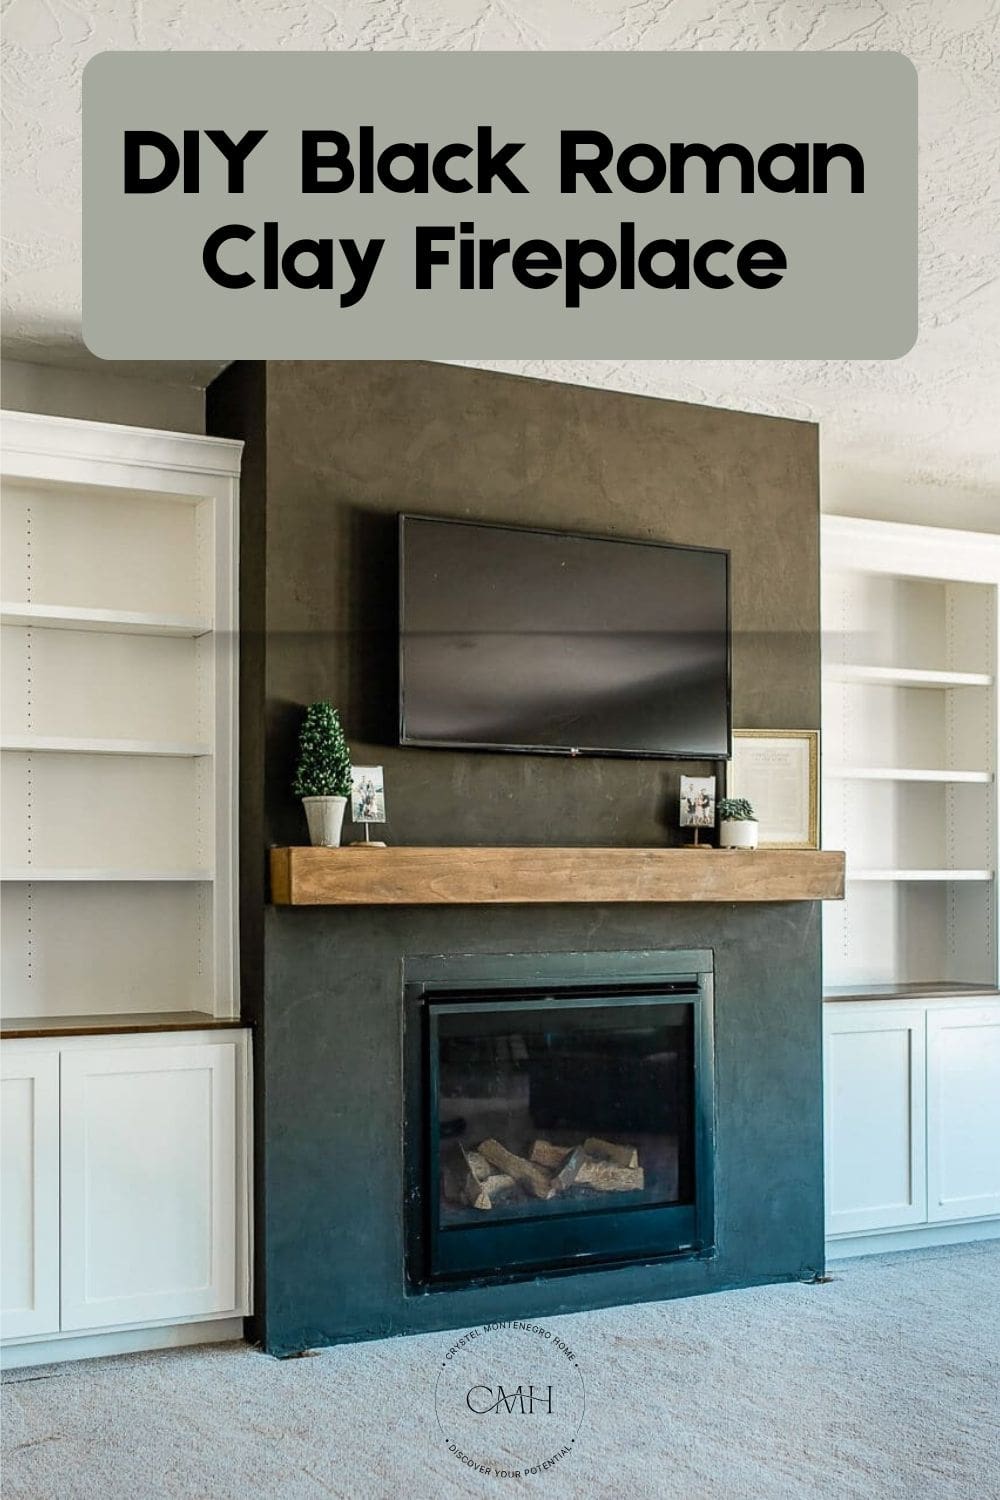
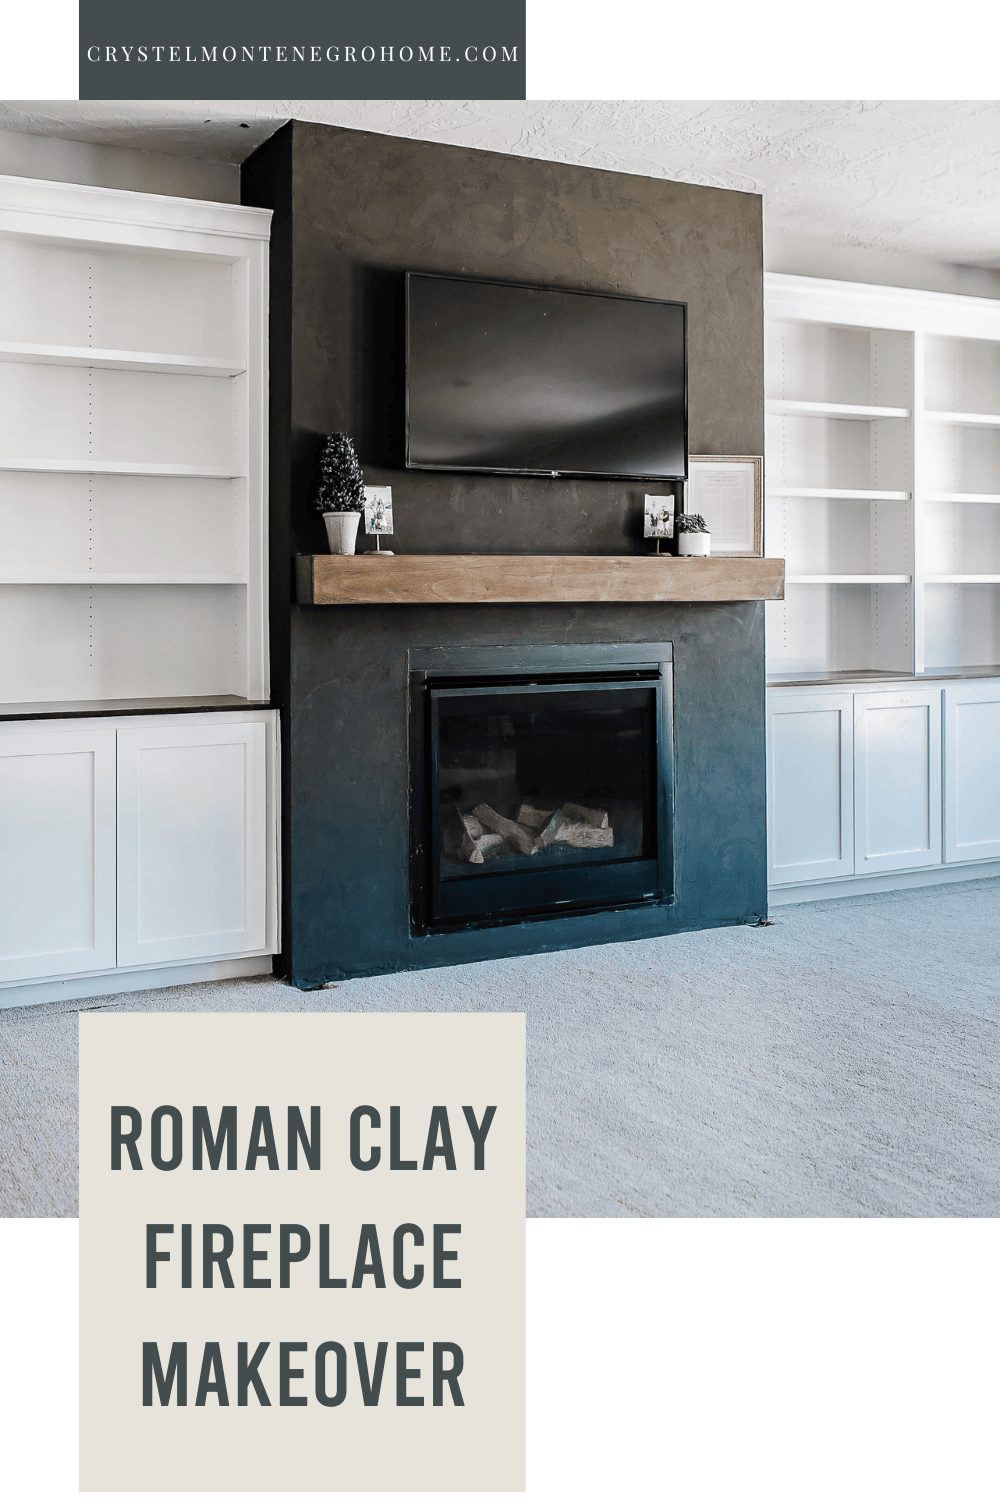
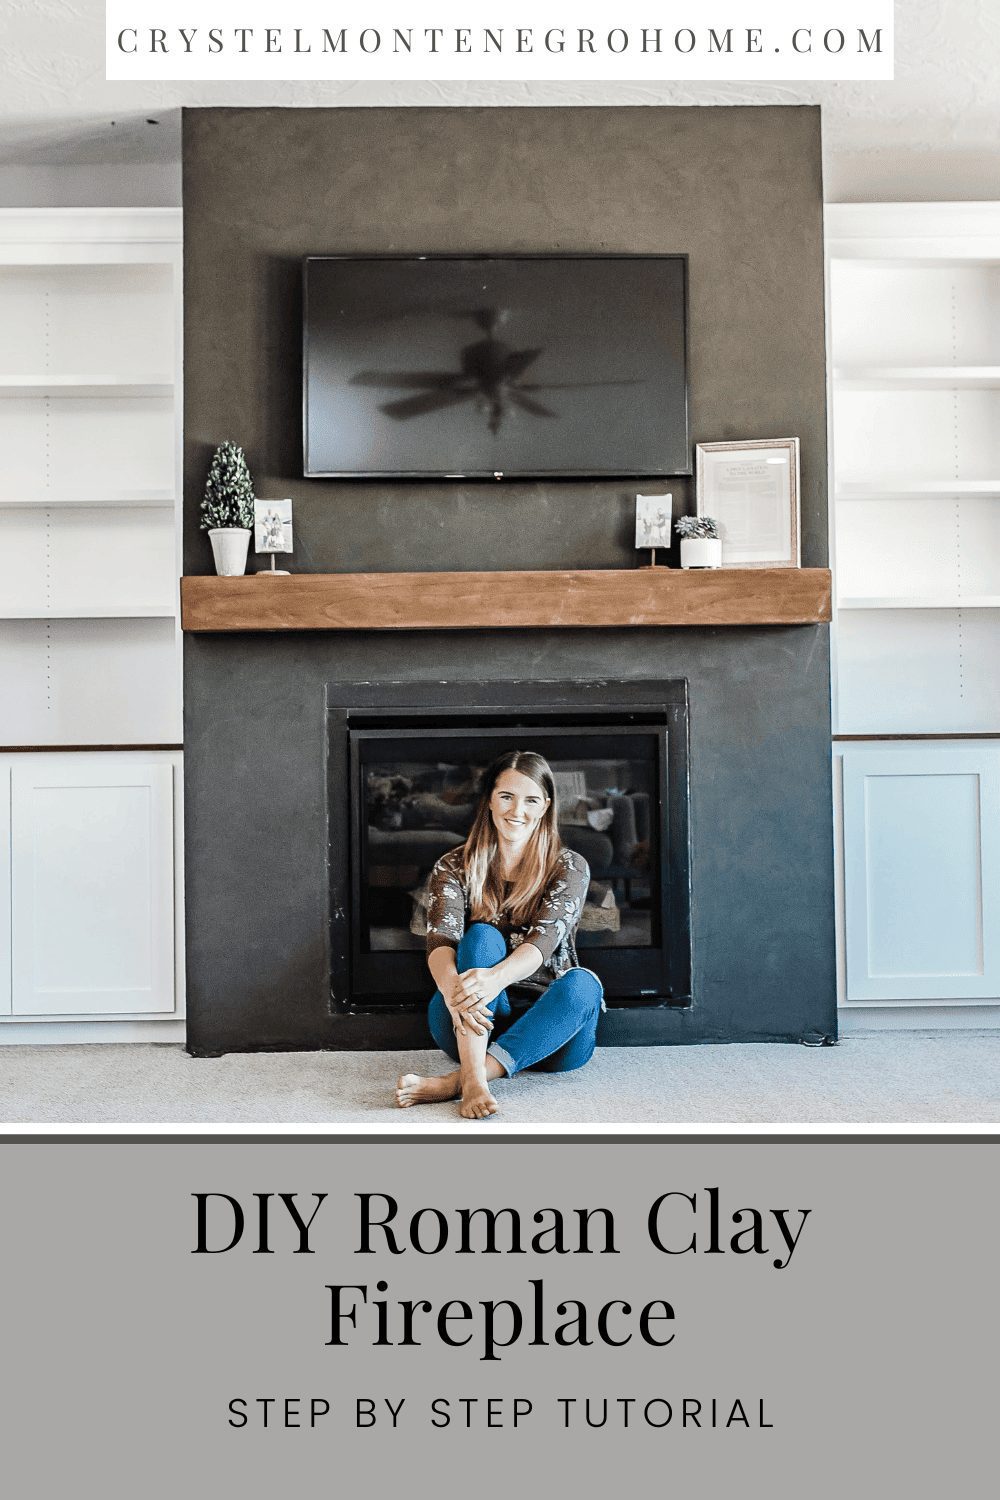
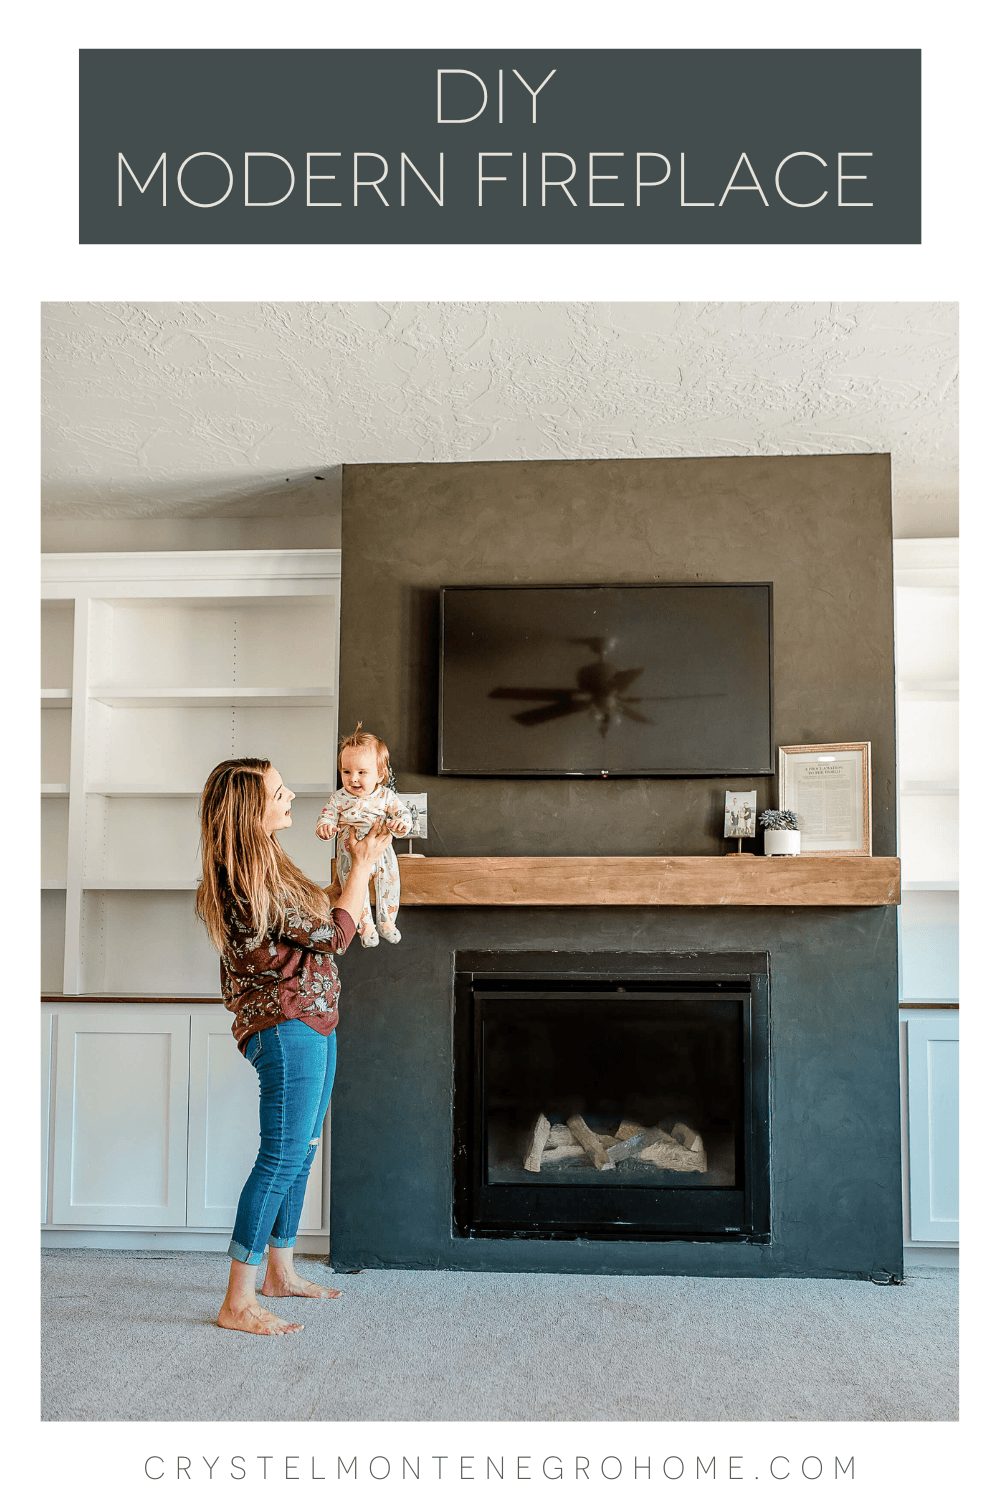
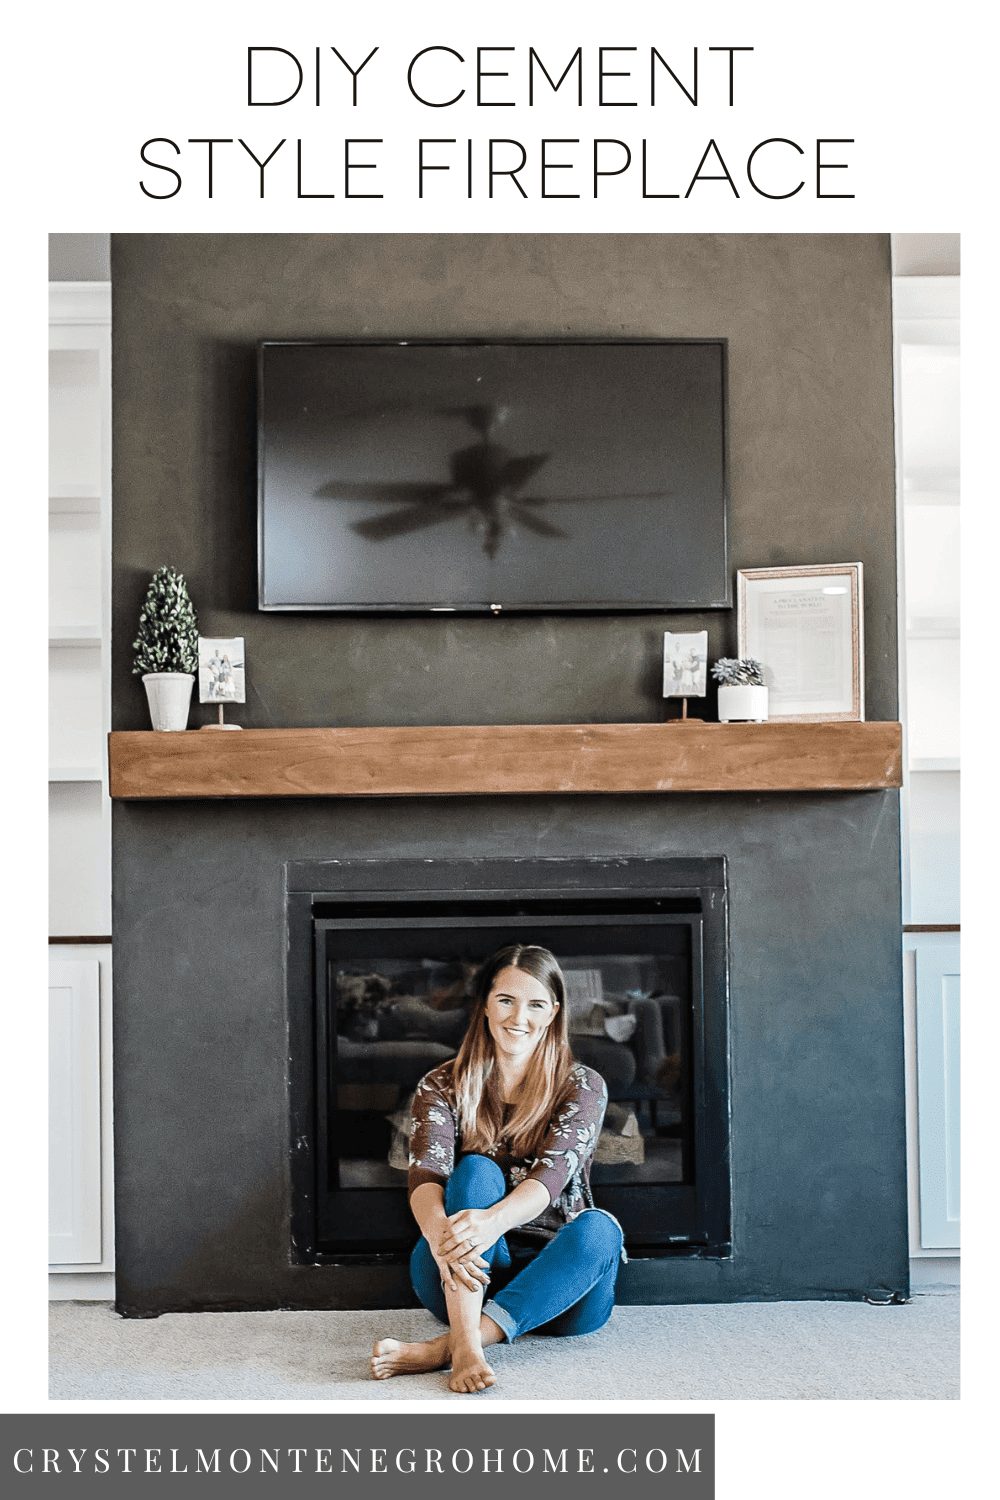
When my brother’s builder-grade fireplace was begging for a makeover, we decided to go dramatic – a floor-to-ceiling black Roman Clay fireplace using Portola Paints Roman Clay. The transformation was amazing and the best part? Roman Clay is incredibly forgiving to work with, even for beginners. If you’re renovating a room with a fireplace, always start with the fireplace – it sets the tone for everything else. Once this was done, I built and installed a DIY floating beam mantel using French cleats to complete the look.
Here’s exactly how I did it.
Table of Contents
- Tools & Supplies for Your DIY Black Roman Clay Fireplace
- Watch the Full Roman Clay Fireplace Makeover
- Step 1: Demo the Builder Grade Fireplace Surround
- Step 2: Build the Framing for Your Fireplace Wall
- Step 3: Cut and Install Sheetrock on Your Fireplace
- Step 4: Apply Joint Compound to the Fireplace Drywall
- Step 5: Sand and Prime the Fireplace for Roman Clay
- Step 6: Apply Black Roman Clay to Your Fireplace
- Finished DIY Black Roman Clay Fireplace
- 📌 Save This Project for Later
- Black Roman Clay Fireplace FAQs
- More Fireplace Projects
Tools & Supplies for Your DIY Black Roman Clay Fireplace
Framing & Drywall Materials
- 2x4x8 Studs (for furring out the upper fireplace wall)
- Sheetrock (for covering the new framing – buy more than you think you need)
- Drywall Screws (for attaching sheetrock to framing)
- Wood Screws (for securing new framing to existing framing)
- Mesh Drywall Tape (for covering flat seams)
- Paper Drywall Tape (for covering corners)
- Corner Bead (for clean outside corners)
Tools
- Pry Bar (for removing old trim and drywall)
- Reciprocating Saw (for trimming protruding framing – also called a Sawzall)
- Drill (for driving screws)
- Drywall Square (for marking straight cut lines on sheetrock)
- Utility Knife (for scoring and cutting sheetrock)
- Taping Knives (for applying and smoothing joint compound)
- Plastic Putty Knife (for applying Roman Clay)
Finishing Supplies
- Roman Clay from Portola Paints (the star of the show – we used black)
- Fast-Set Joint compound(for patching large gaps – dries in 20 minutes)
- All-Purpose Joint compound (for the final smoothing coat – easier to sand)
- Primer (to prep drywall before Roman Clay)
- Painters Tape
- Plastic Sheeting (to protect floors – trust me, Roman Clay is messy)
- Black High-Heat Paint (for the fireplace surround)
Watch the Full Roman Clay Fireplace Makeover
Step 1: Demo the Builder Grade Fireplace Surround
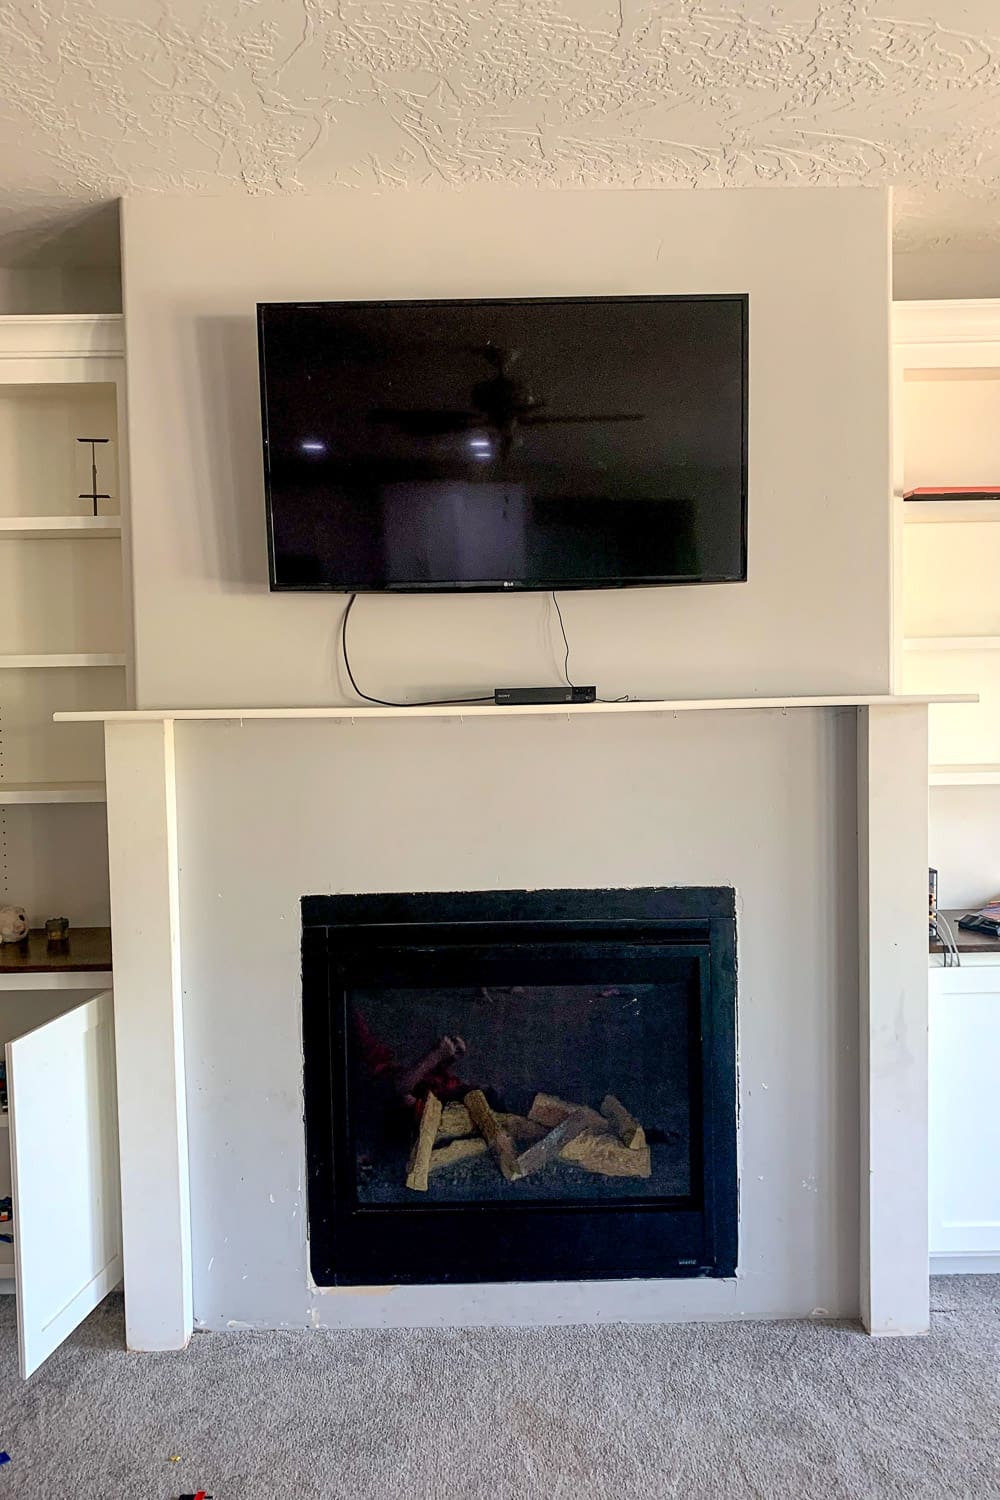
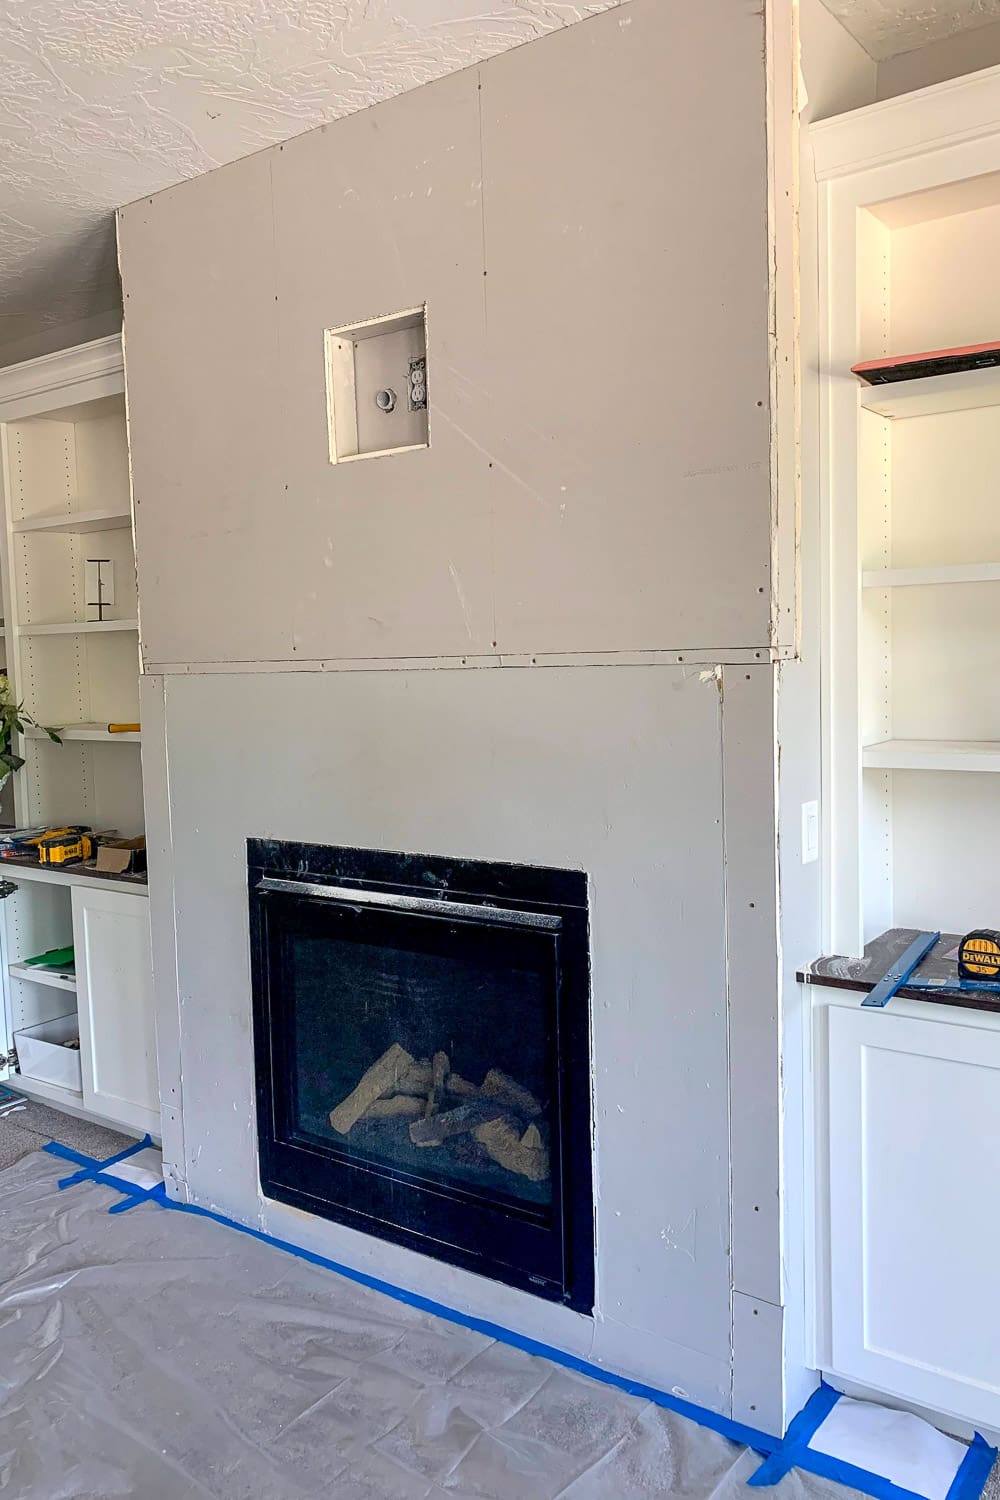
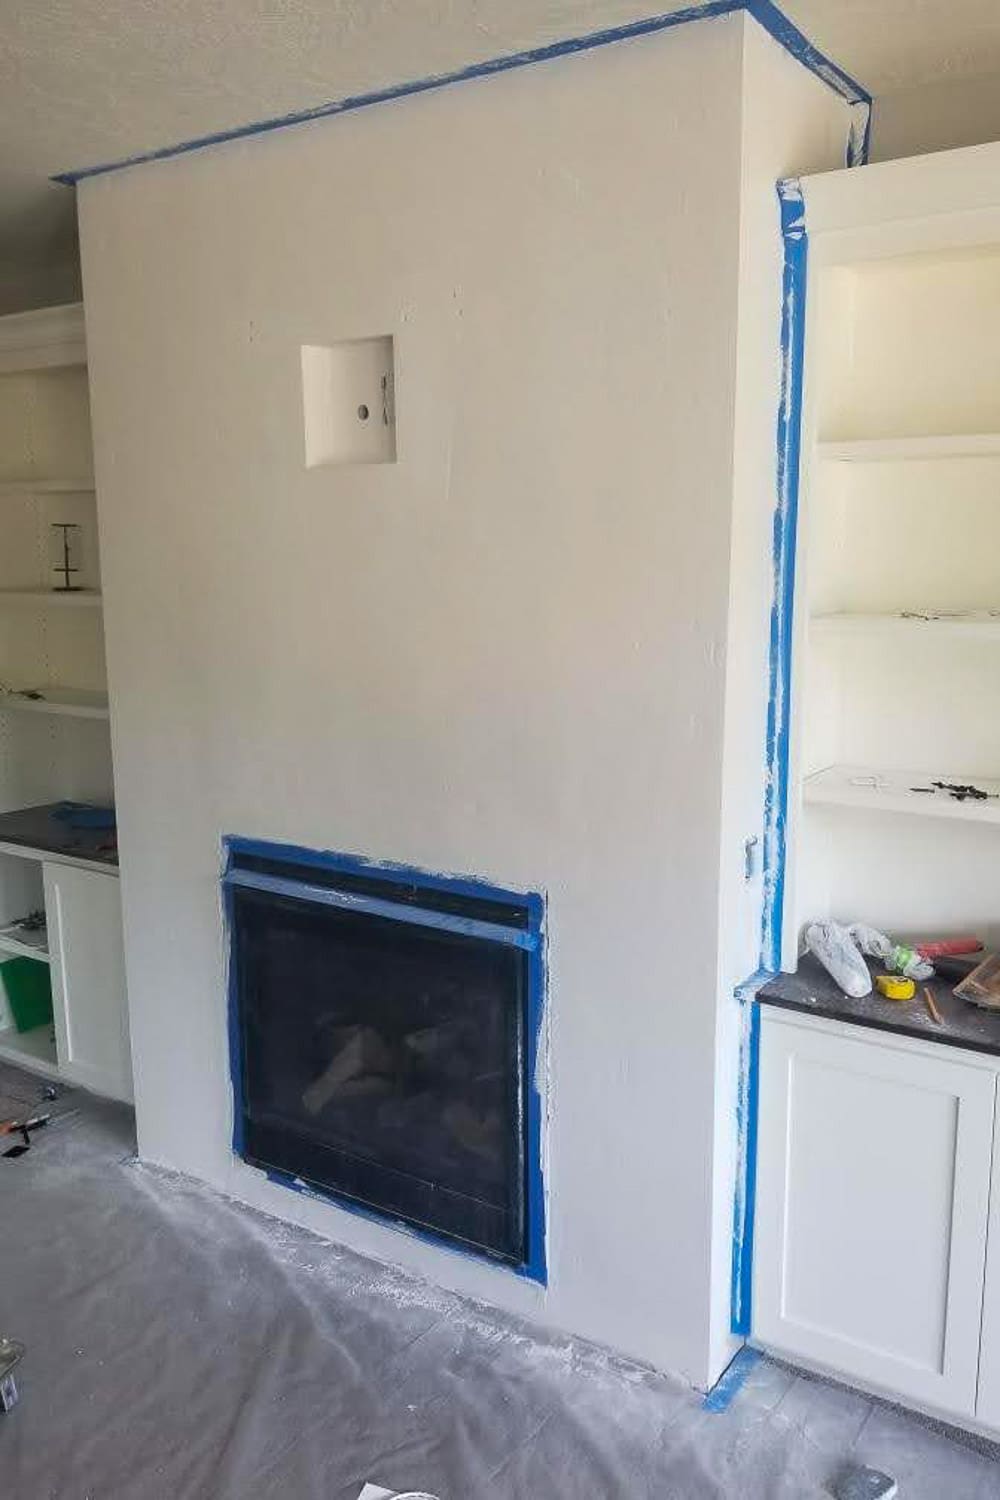
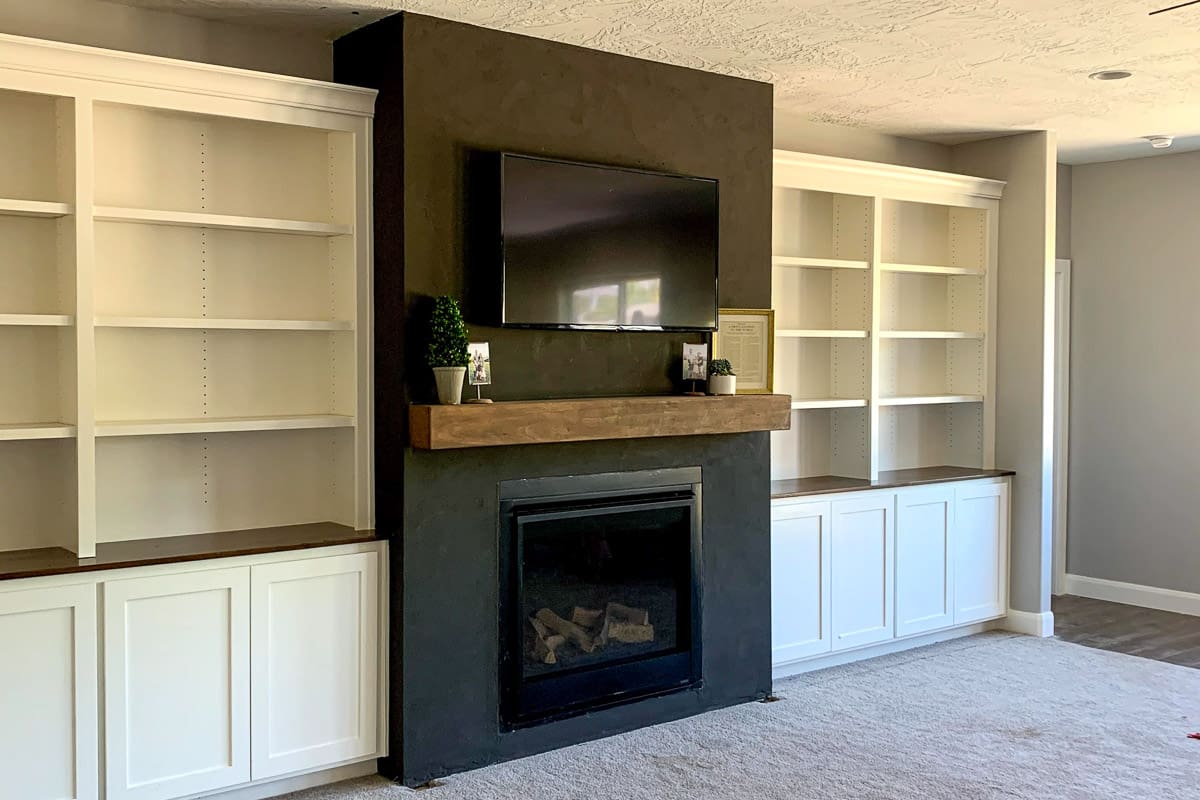
My brother’s fireplace had that classic “builder-grade-blocky” look – a stepped-out drywall surround with trim pieces that made the whole thing feel dated. We wanted the entire face of the fireplace to look like one seamless piece, so it all had to go.
A wooden 2×4 was sticking out and creating an unwanted lip, so I trimmed it flush with the reciprocating saw (Sawzall).
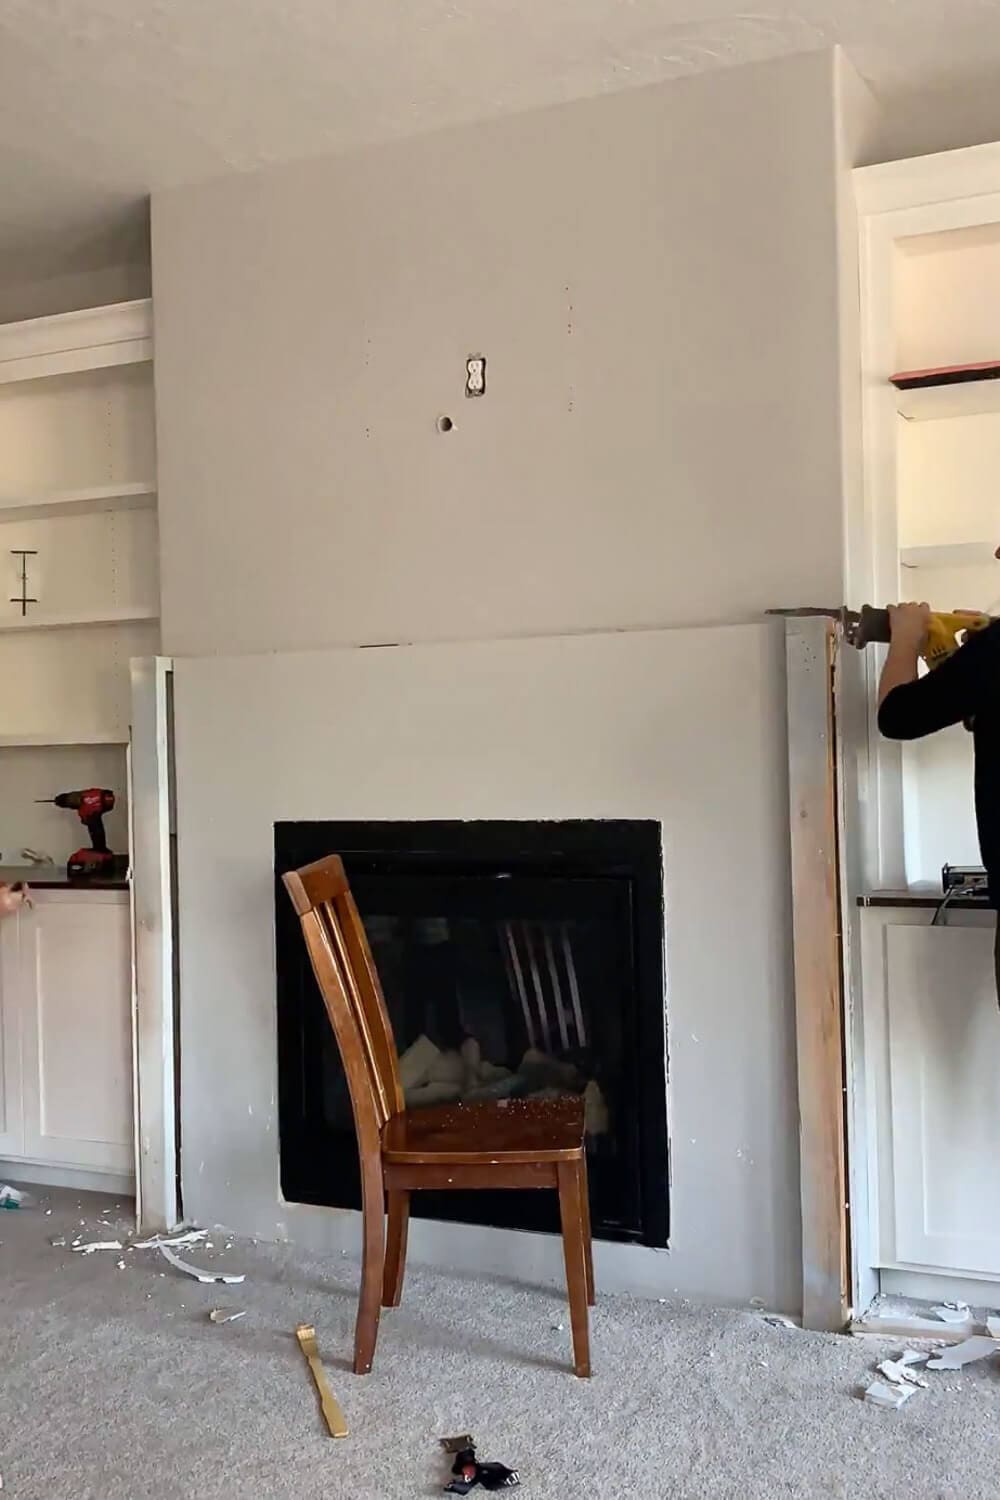
After all that surgical dissecting, I started having some fun with the hammer and did some real demolition – removing the large drywall piece above the fireplace.
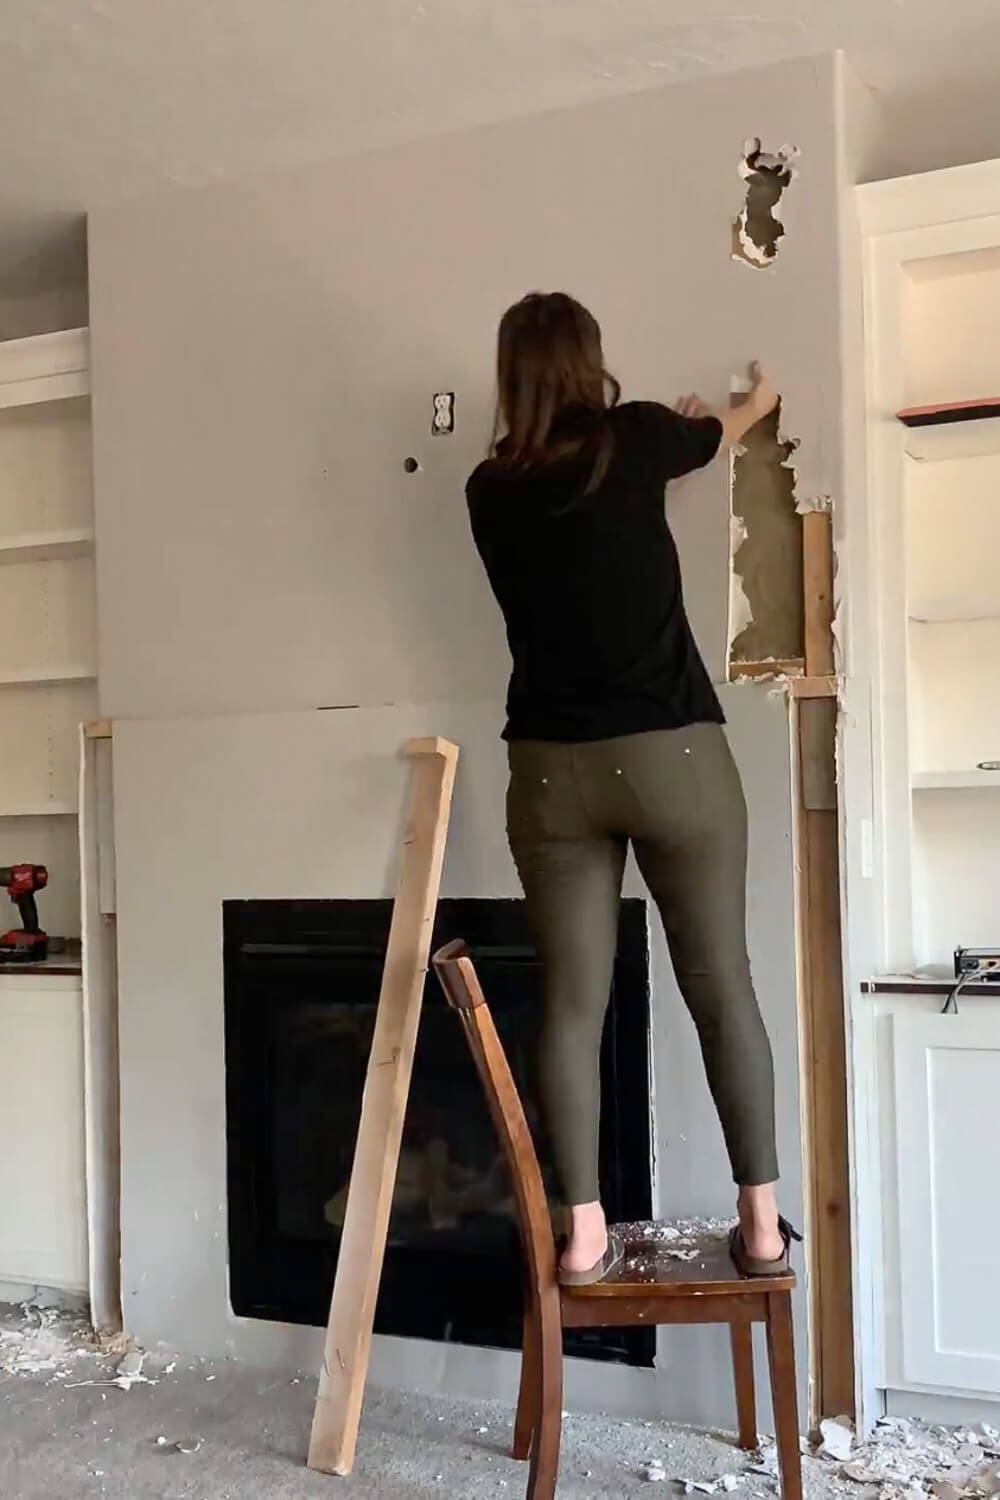
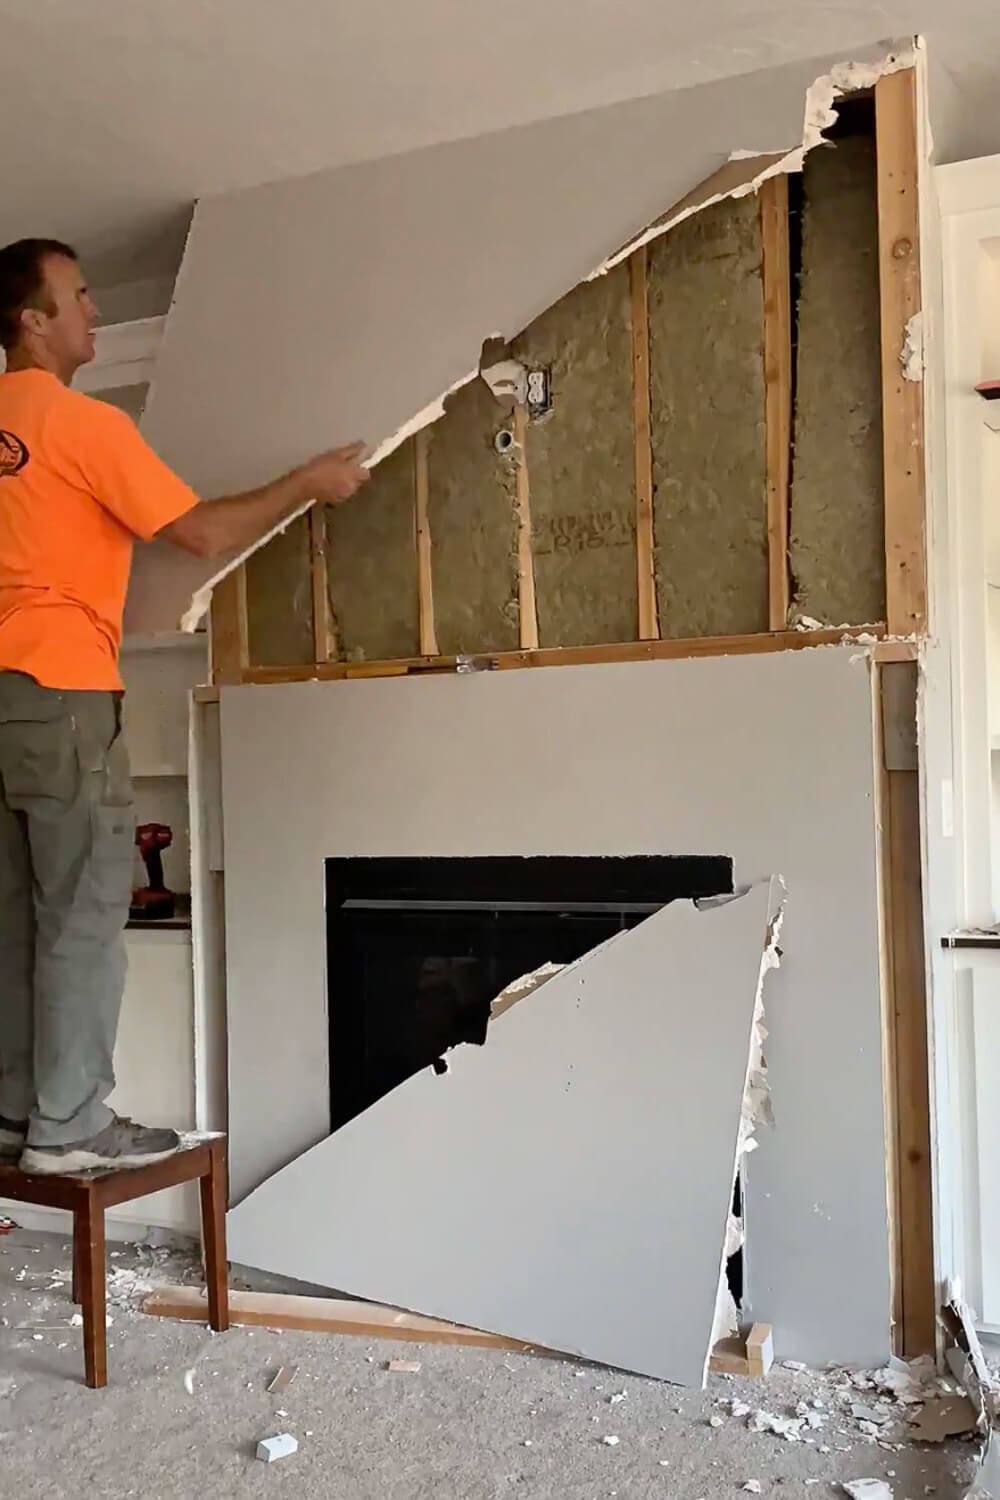
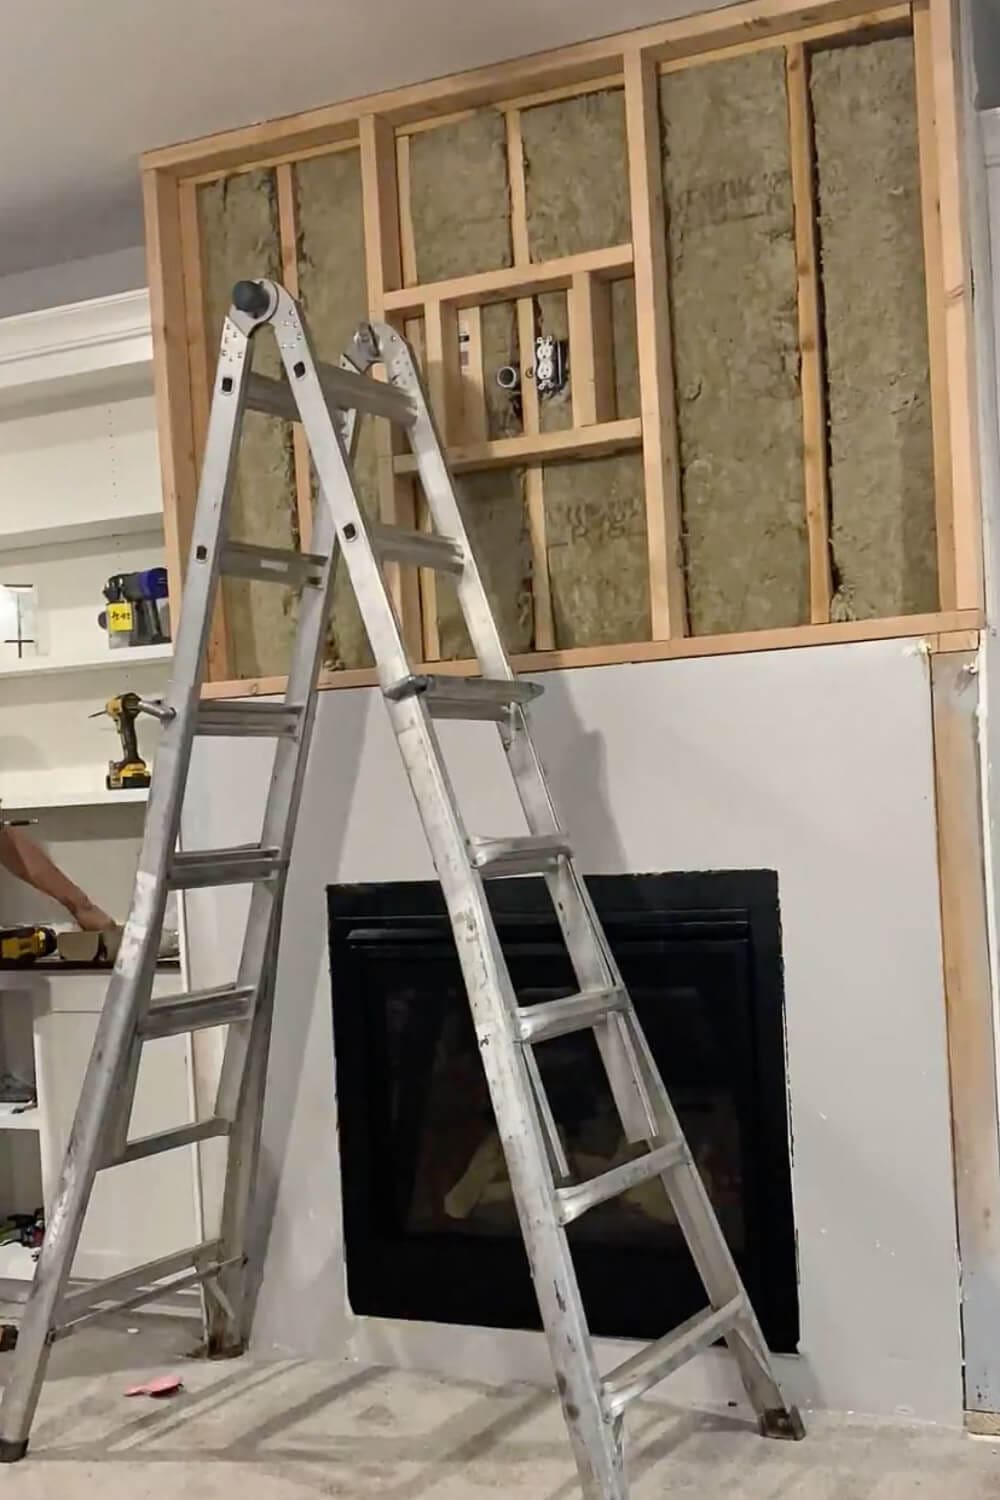
We removed the top half drywall because the upper portion was recessed compared to the bottom – and we needed everything flush. That meant building it out, which brings us to framing.
Step 2: Build the Framing for Your Fireplace Wall
Since the top half of the fireplace was recessed, we needed to furr out a wall. What is furring out a wall, you ask? It’s a weird way to say we had to build a new stud wall that would sit on top of the existing bottom wall to bring everything to the same plane.
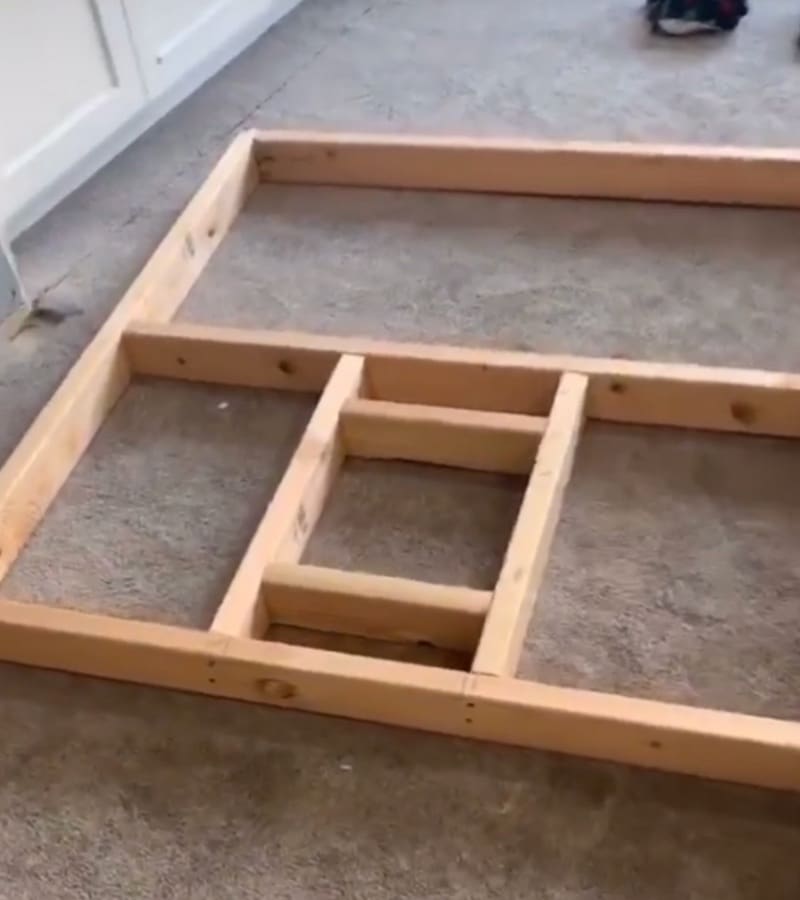
My brother added a square area frame in the top middle that would become a recessed multimedia box – hidden behind the TV, allowing the outlet and cords to stay tucked away. If you’re planning to mount a TV above your fireplace, I highly recommend building one of these in.
After we set the new wall up, we noticed it was 0.5 inches too wide – it hung out over the existing bottom wall.
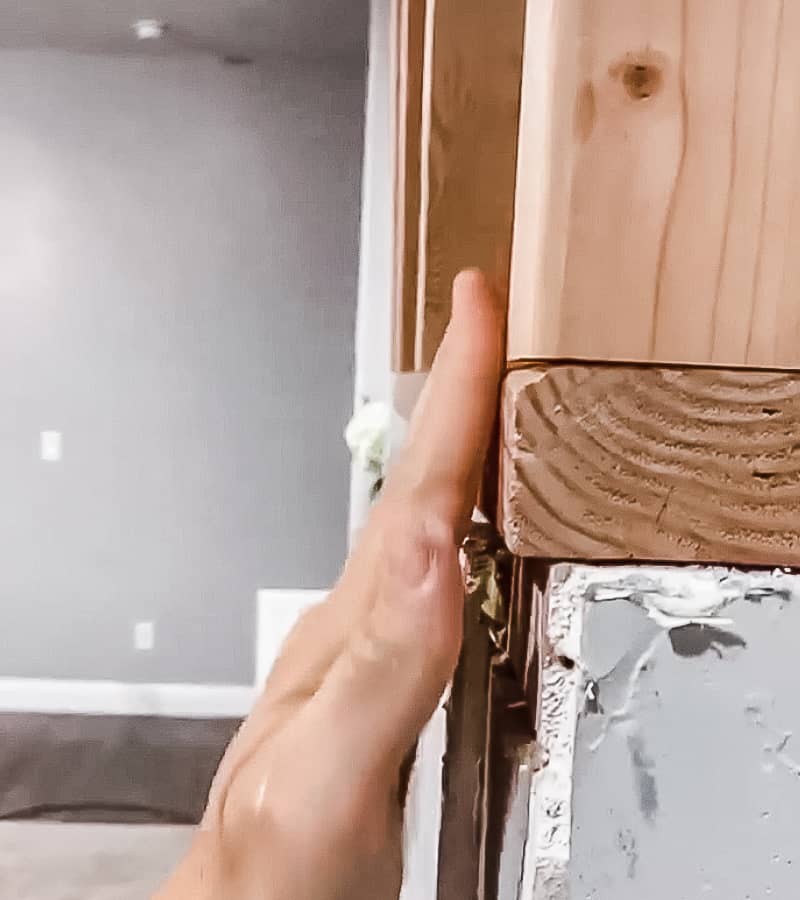
We needed it flush, and there was a 0.5 inch gap between the new frame and the existing frame. My brother’s solution? He grabbed his hammer and started whacking the framing to push everything back. It worked! After everything was straight, level, and flush, we used wood screws to secure the new frame to the existing one.
Step 3: Cut and Install Sheetrock on Your Fireplace
First, we used some of the salvageable drywall pieces from the demo and cut them down to fit inside the open holes. This gave the new sheetrock something to attach to in areas without studs.
Next, it was puzzle time. I only bought one sheet of sheetrock, so I had to minimize waste. (The goal was to do this fireplace makeover for cheap. Spoiler: do yourself a favor and just buy extra sheetrock. Don’t be like me.)
Cutting sheetrock is straightforward:
- Lay the sheetrock on top of some plywood and measure out the piece you need
- Use a drywall square to draw a straight line
- Score along the line with a utility knife – don’t cut all the way through
- Snap the two pieces apart along the score line
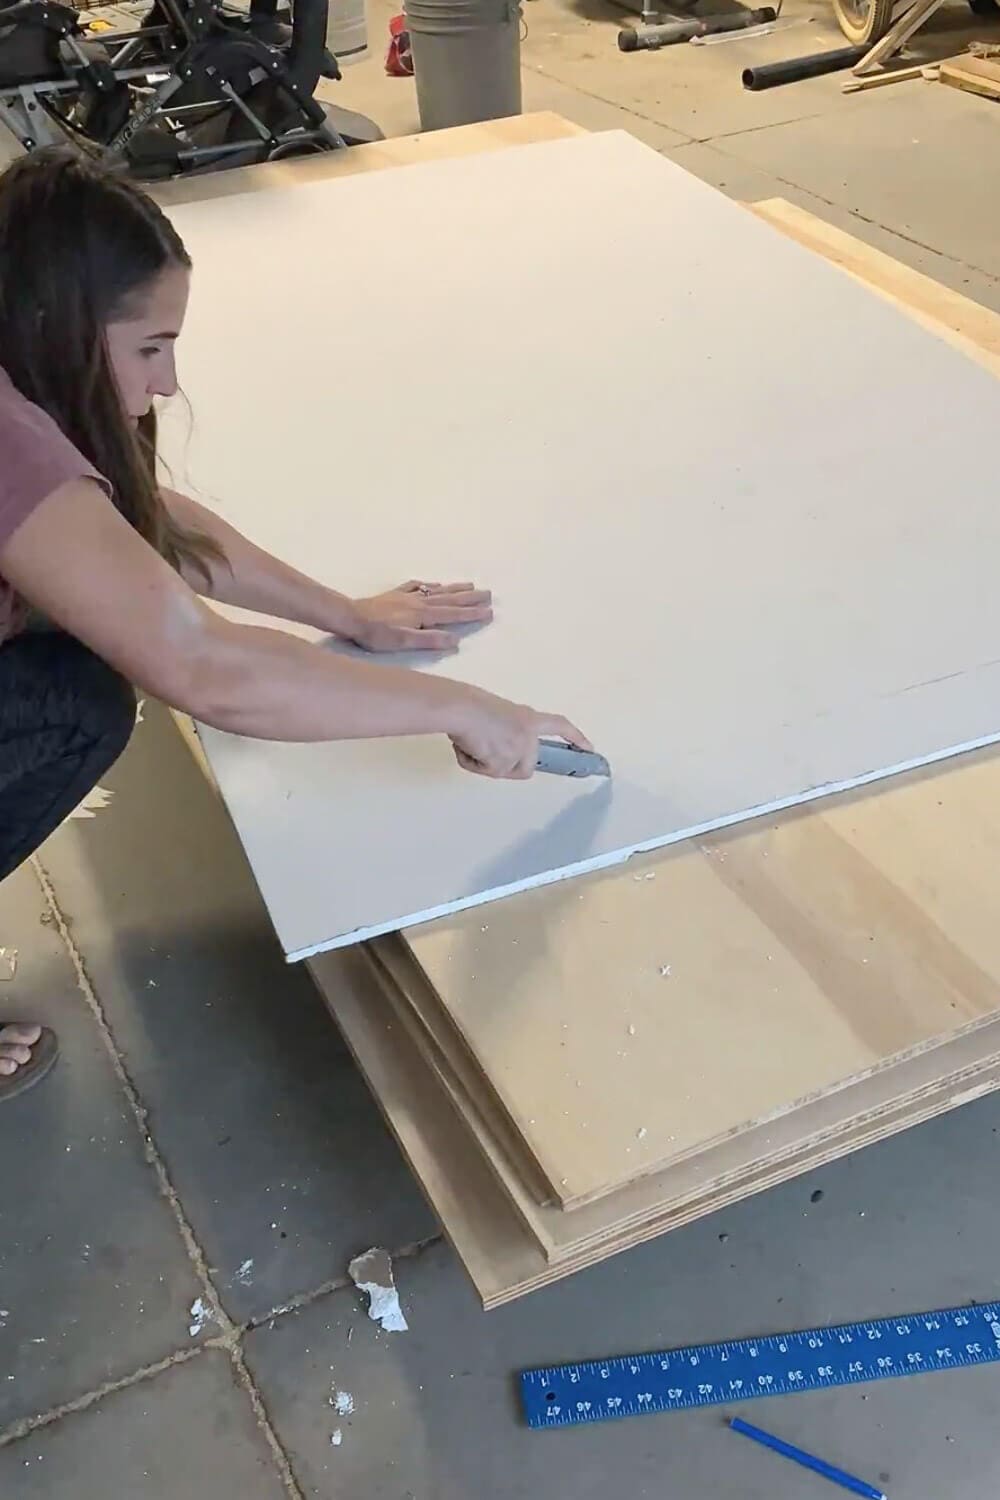
Sheetrock comes in 4 ft wide pieces, and the main area we had to cover was 4 ft plus 2 inches. Ugh.
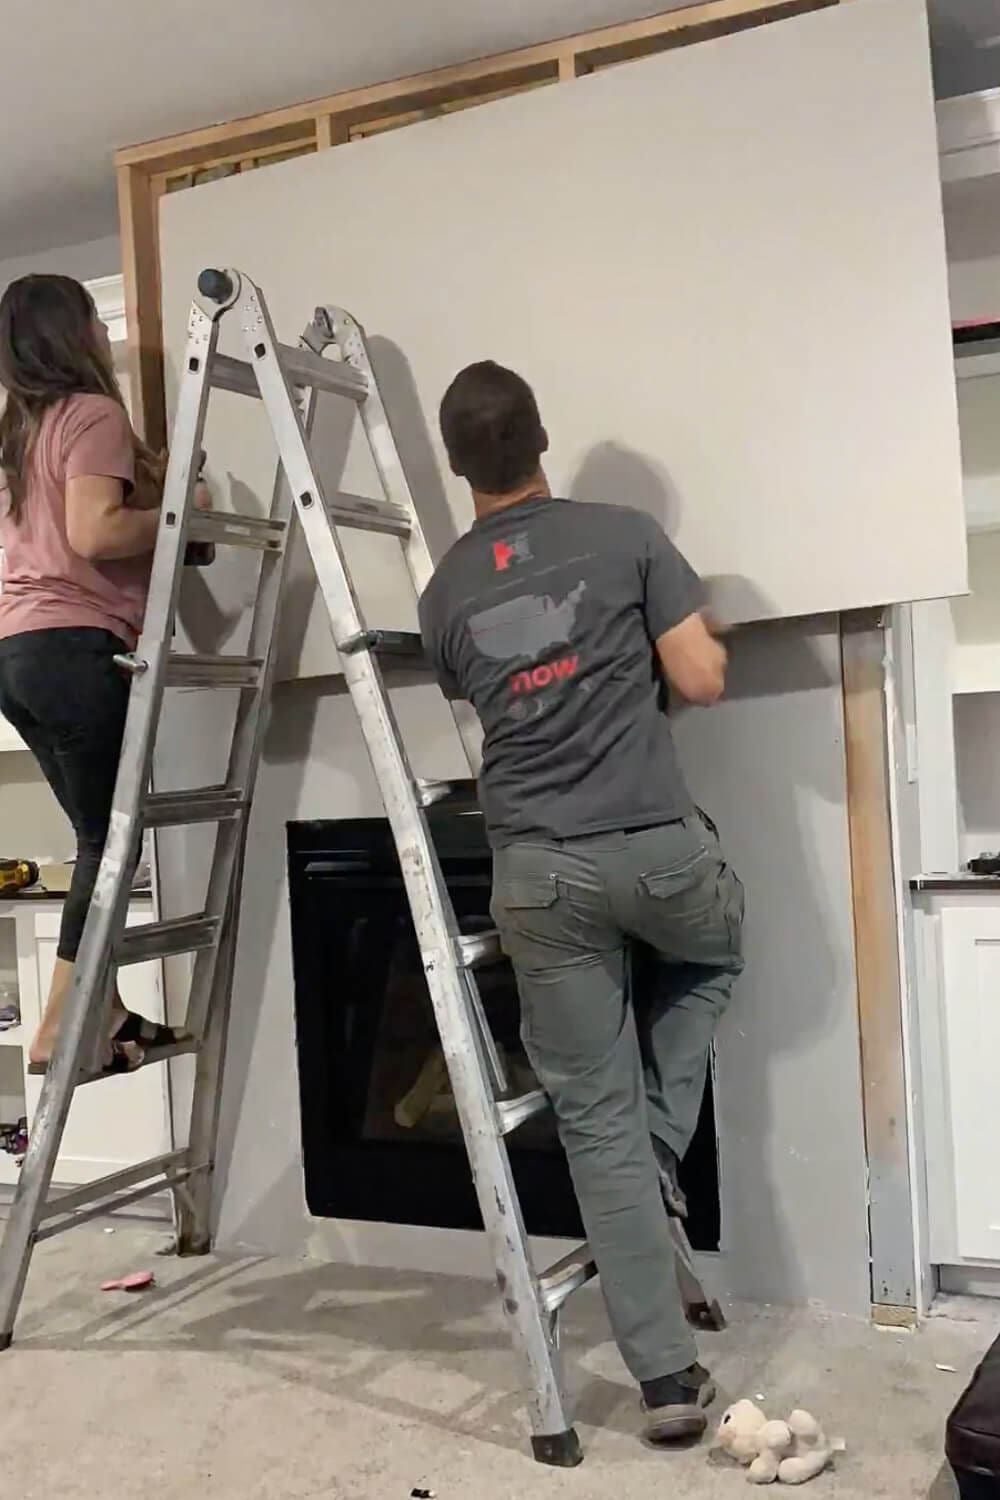
I used drywall screws to secure the larger pieces first, then creatively cut smaller pieces to cover the rest. It kind of resembled an ugly quilt at this point, but that’s what joint compound is for.
Since the large sheet covered the recessed media box, my brother used a drill bit to cut out the square piece of sheetrock covering it. Then he pushed the cut piece to the back of the box and secured it to the frame with screws. Work smarter, not harder!
Step 4: Apply Joint Compound to the Fireplace Drywall
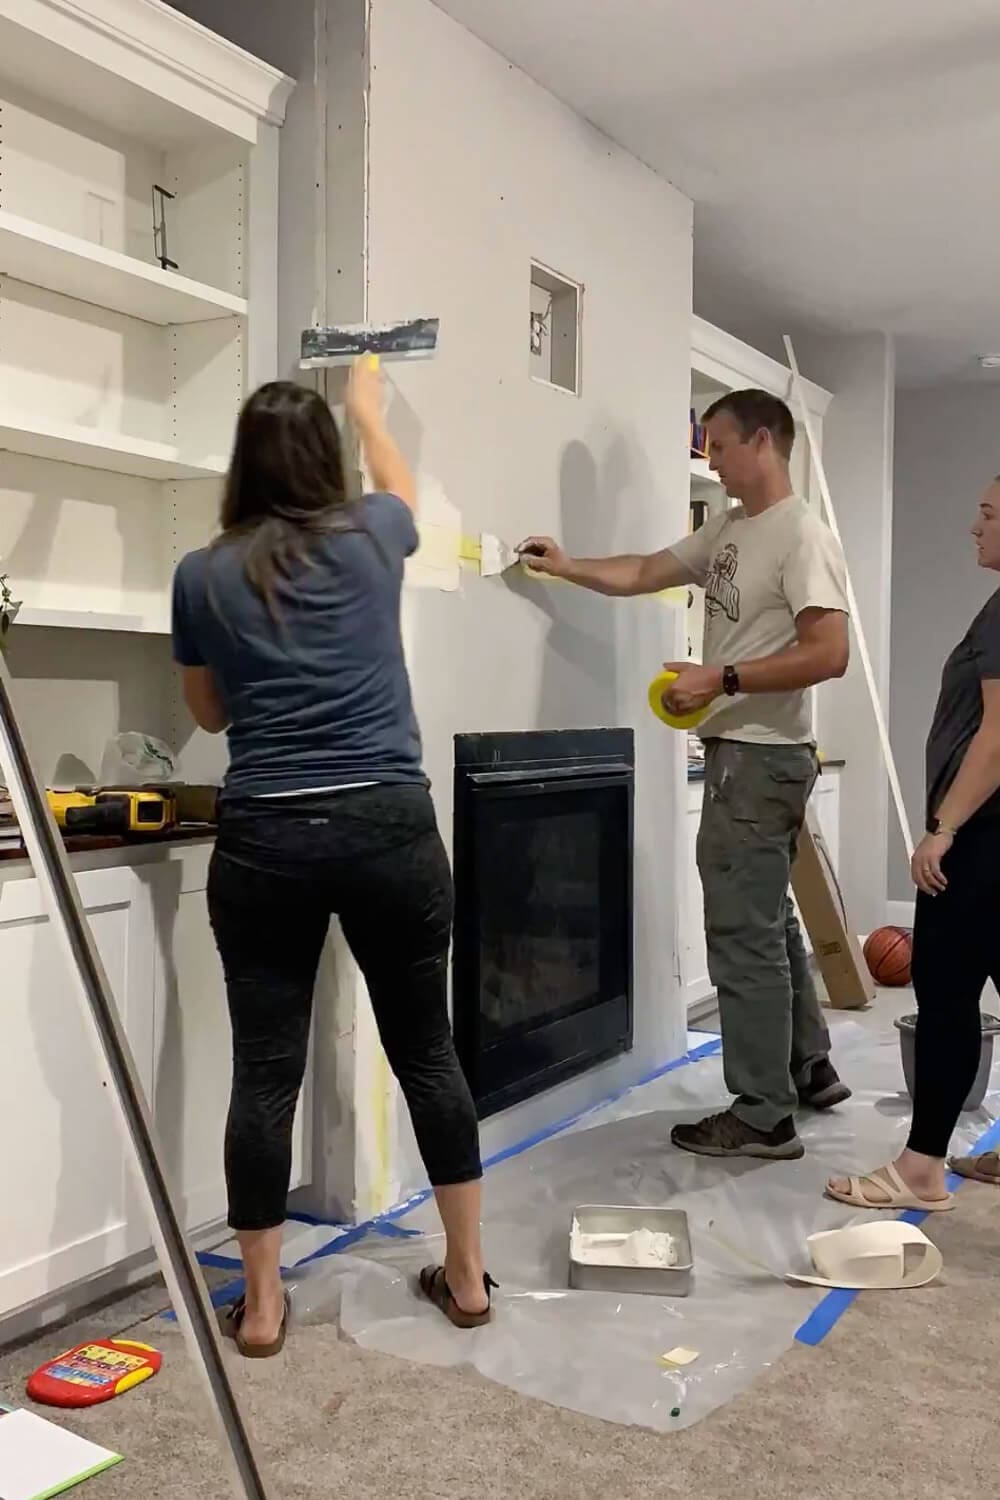
We used two different types of mud to cover the seams and corners, and the order matters.
First up: fast-set joint compound. This stuff dries in about 20 minutes, which gives you roughly a 3–8 minute window to get it applied and smoothed before it starts setting up. It was all hands on deck. If you’re working solo, use a longer-setting formula – you’ll thank yourself.
The fast-set compound has a concrete element to it, so it dries much harder than regular mud – great for patching large gaps. Here’s the process:
- Slather on the mud with taping knives
- While it’s still wet, apply mesh drywall tape on all flat seams
- Apply paper drywall tape on all corners
- Lay corner bead on top of wet compound on outside corners, then cover with more mud
- Smooth everything as best you can — this compound doesn’t sand easily
Important: Taping is necessary. If you just smear mud on the seams without tape, it will crack as it dries. Don’t skip this step.
If you’re working alone, mix small batches. It’s more annoying, but less waste than a bucket of compound that hardens before you can use it.
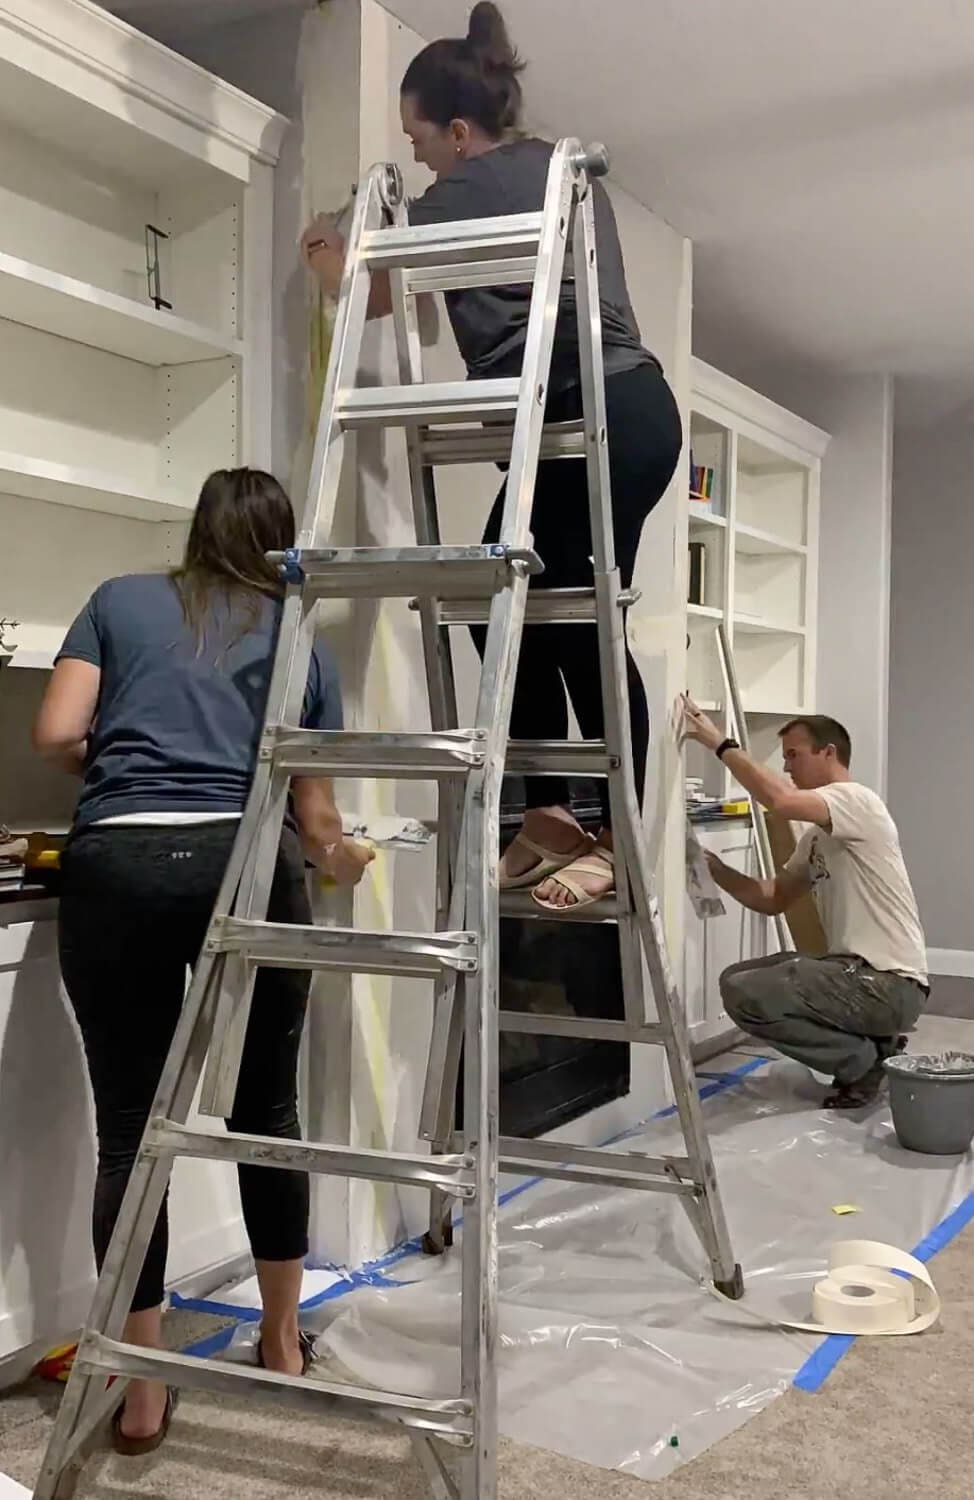
Step 5: Sand and Prime the Fireplace for Roman Clay
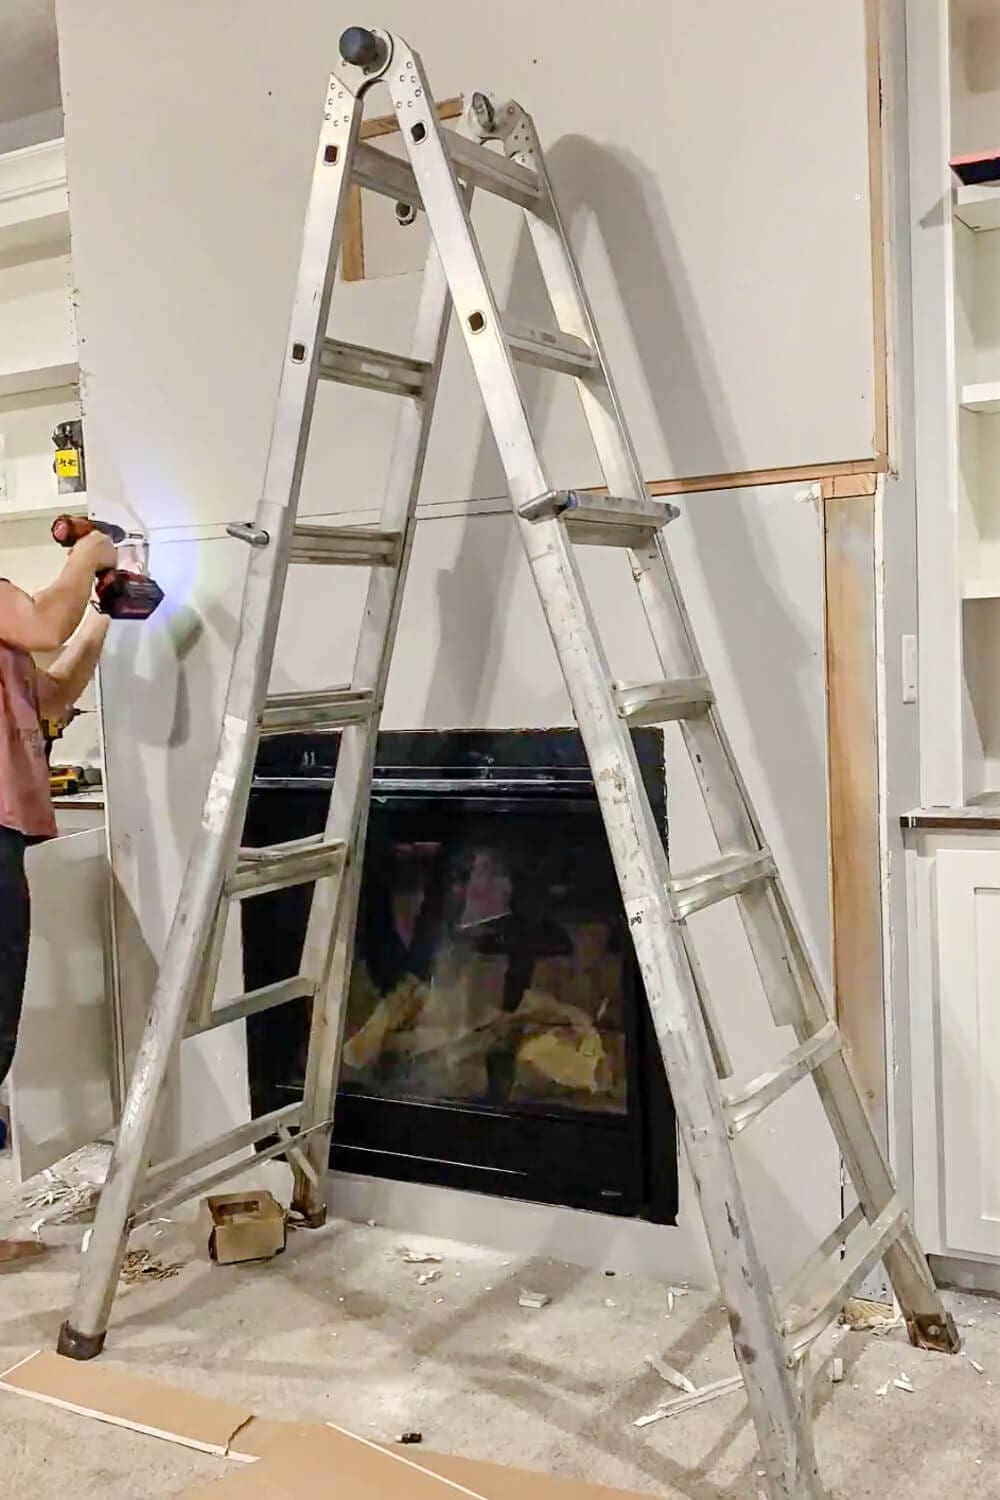
Once the fast-set compound was dry, we sanded down the roughness and lumps, then went over everything with all-purpose joint compound. This second layer has a longer working time and sands much easier – it’s what gives you that smooth final surface.
After the all-purpose compound dried, we sanded one last time and applied primer.
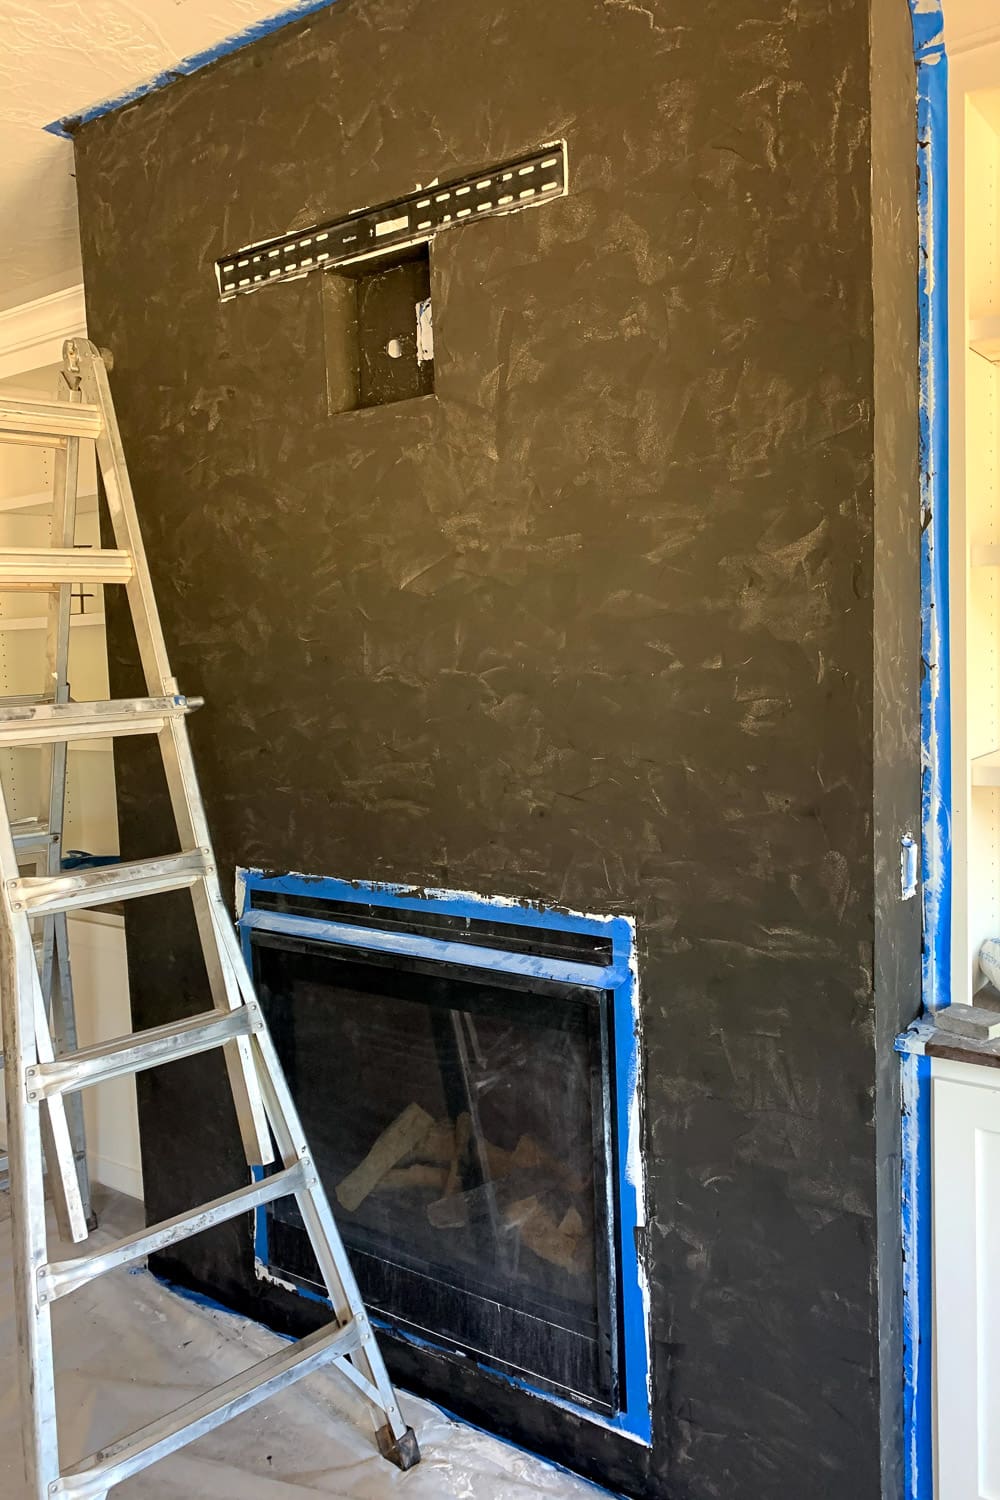
Step 6: Apply Black Roman Clay to Your Fireplace
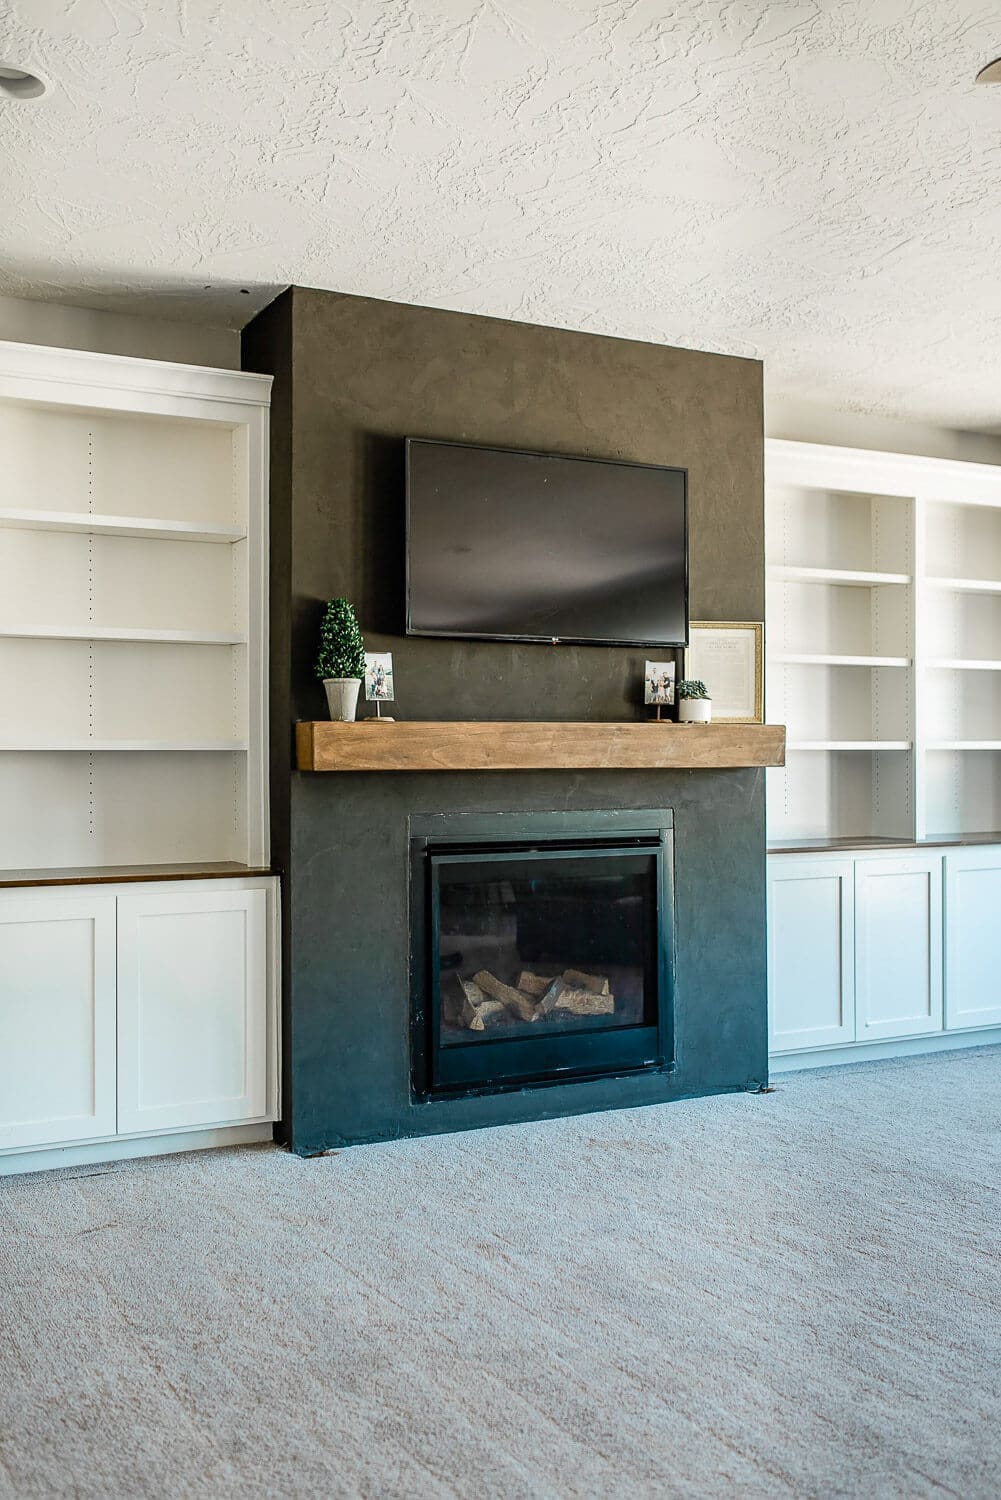
The best thing about a Portola Paints Roman Clay fireplace? It hides all the drywall imperfections. We chose black because it’s actually a beautiful dark charcoal – dramatic without being harsh.
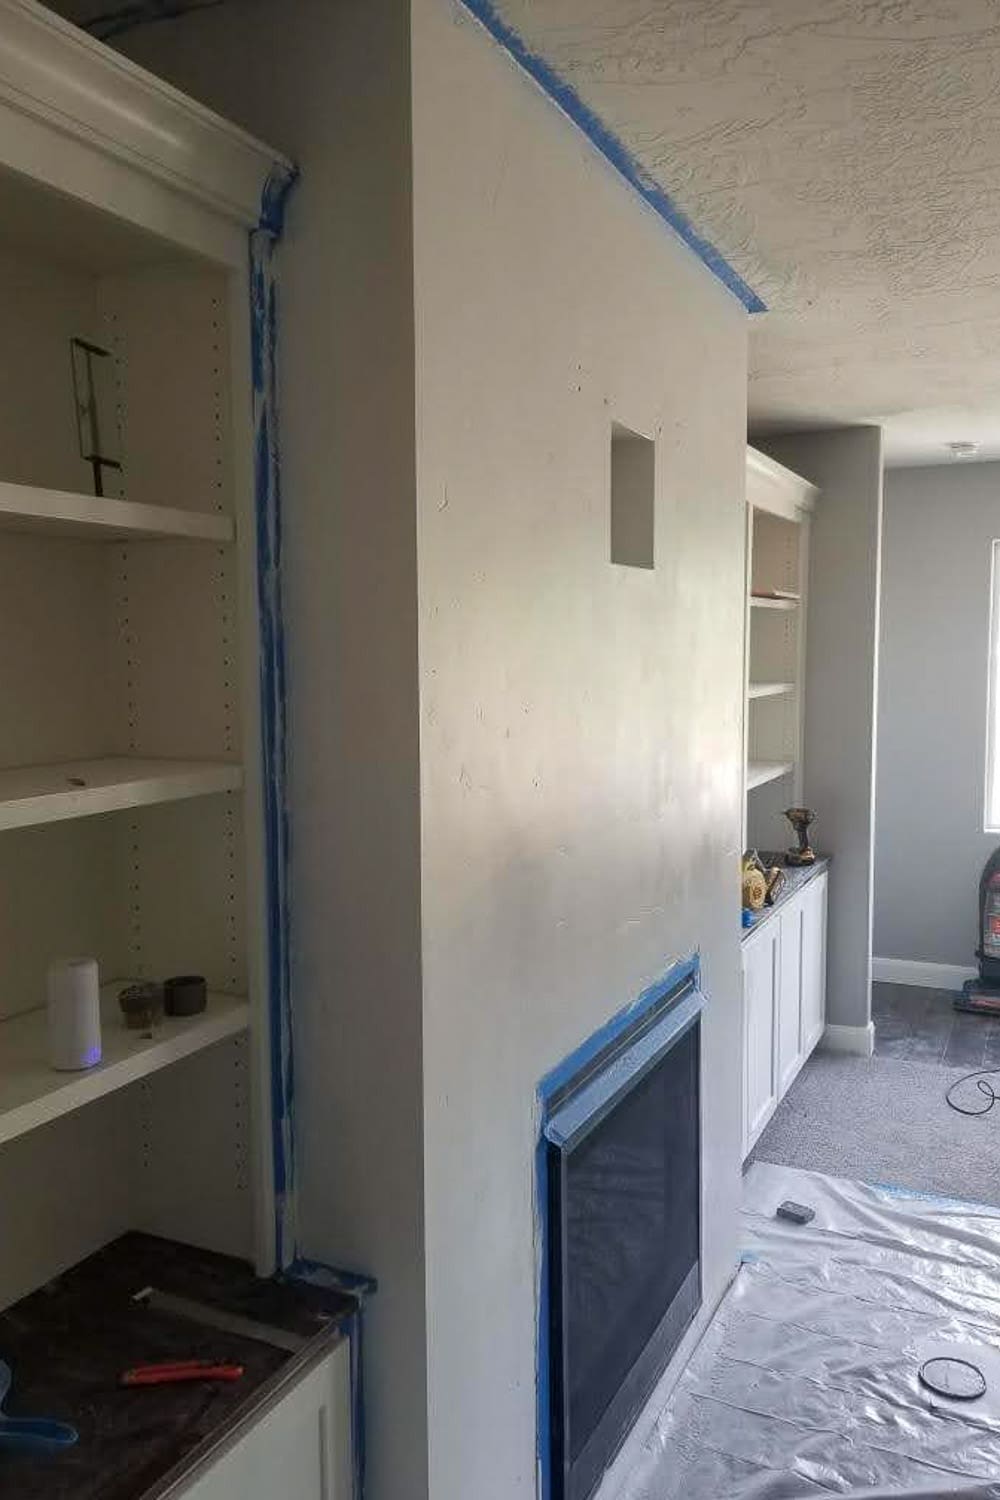
I don’t like prep work. Taping things off, laying down plastic, none of it. But Roman Clay is messy, and even I couldn’t be lazy on this one, so I laid plastic sheeting on the carpet.
Portola Roman Clay has a thin consistency, which makes it easy to work with.
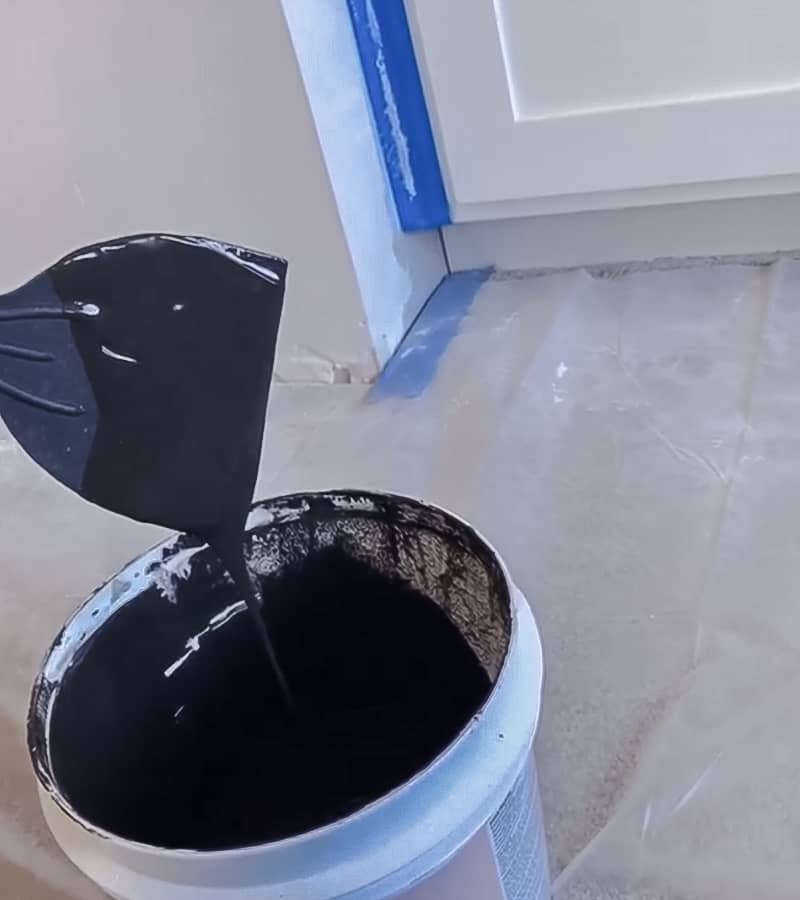
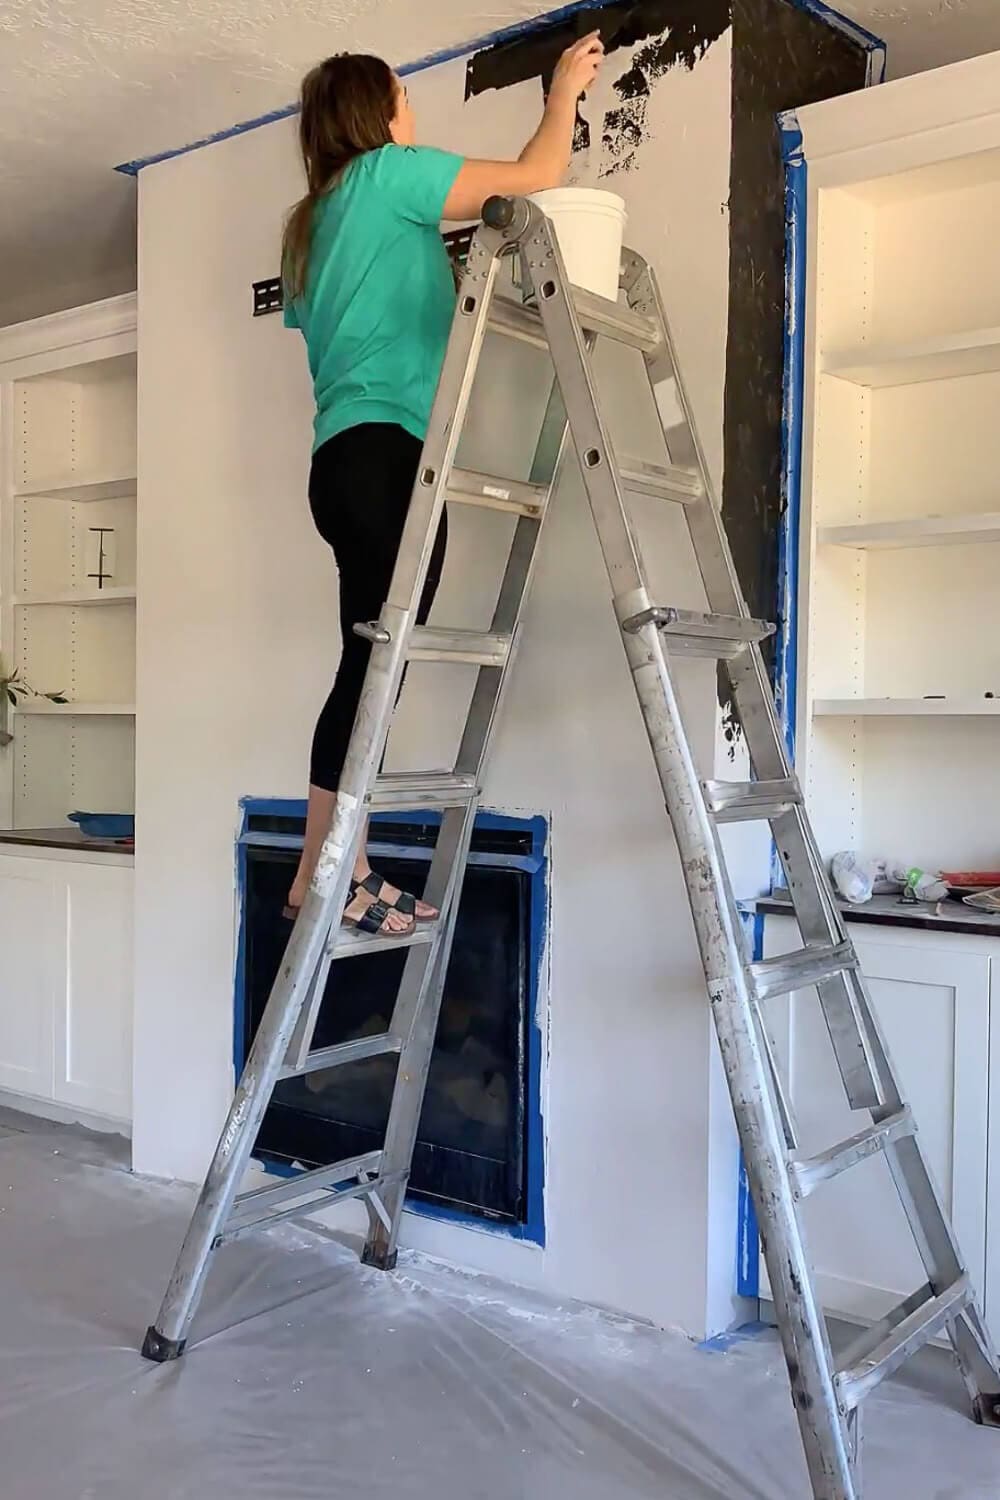
I dipped my plastic putty knife into the clay, scraped off the excess on the sides of the bucket, and applied it to the wall in a random crisscross pattern. I purposely left some ridges because it adds character – the whole point of Roman Clay is that it doesn’t look perfect.
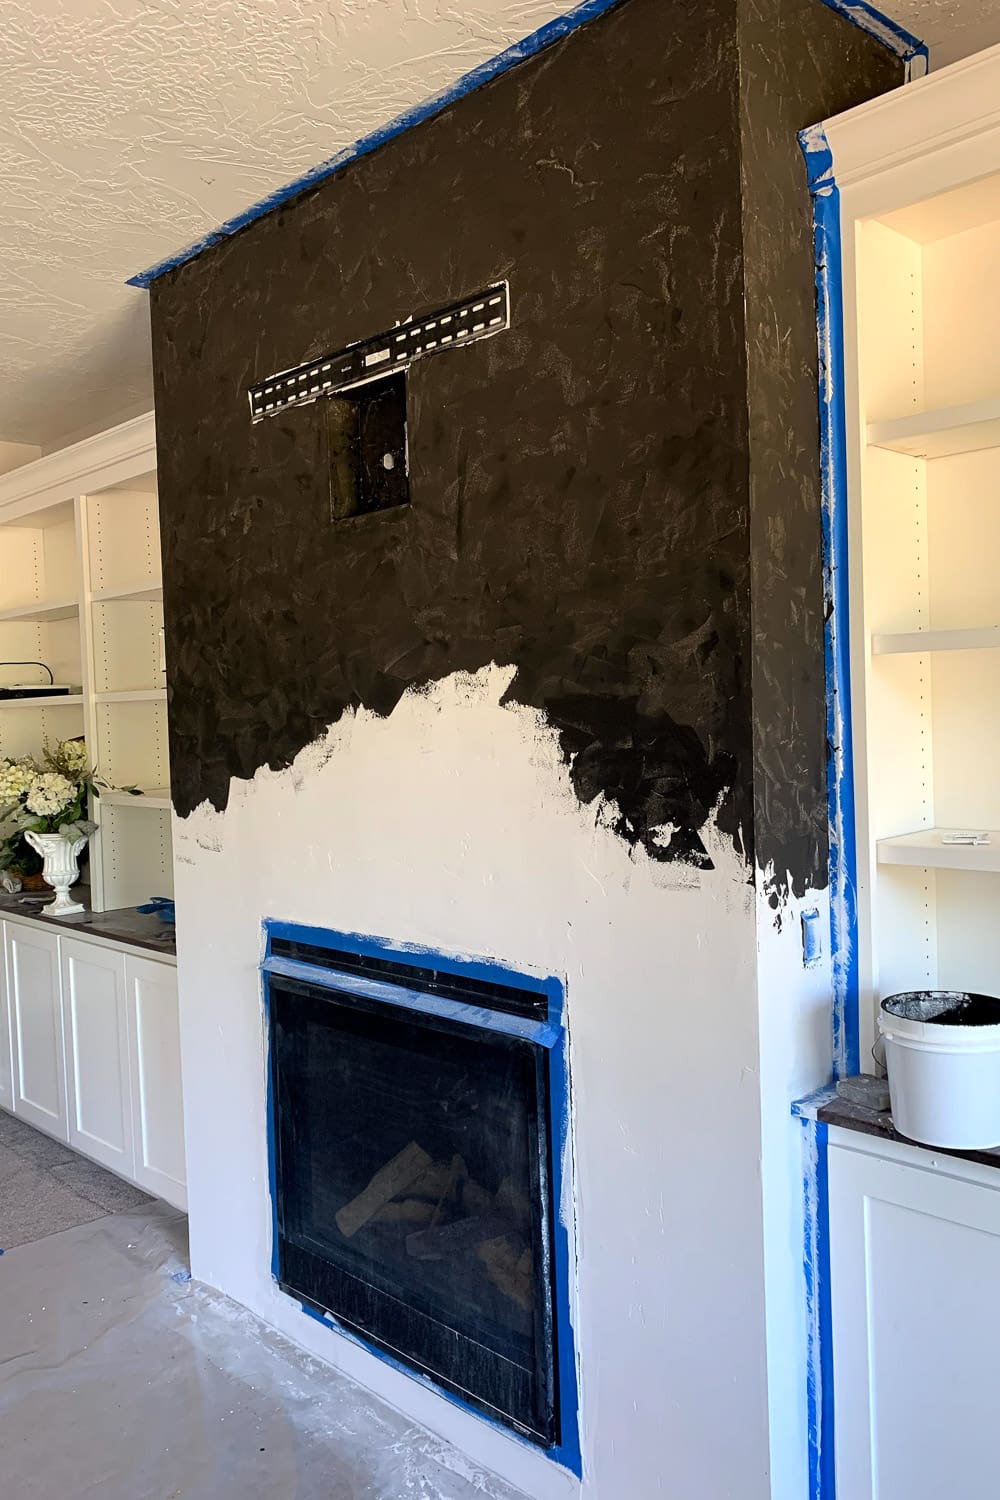
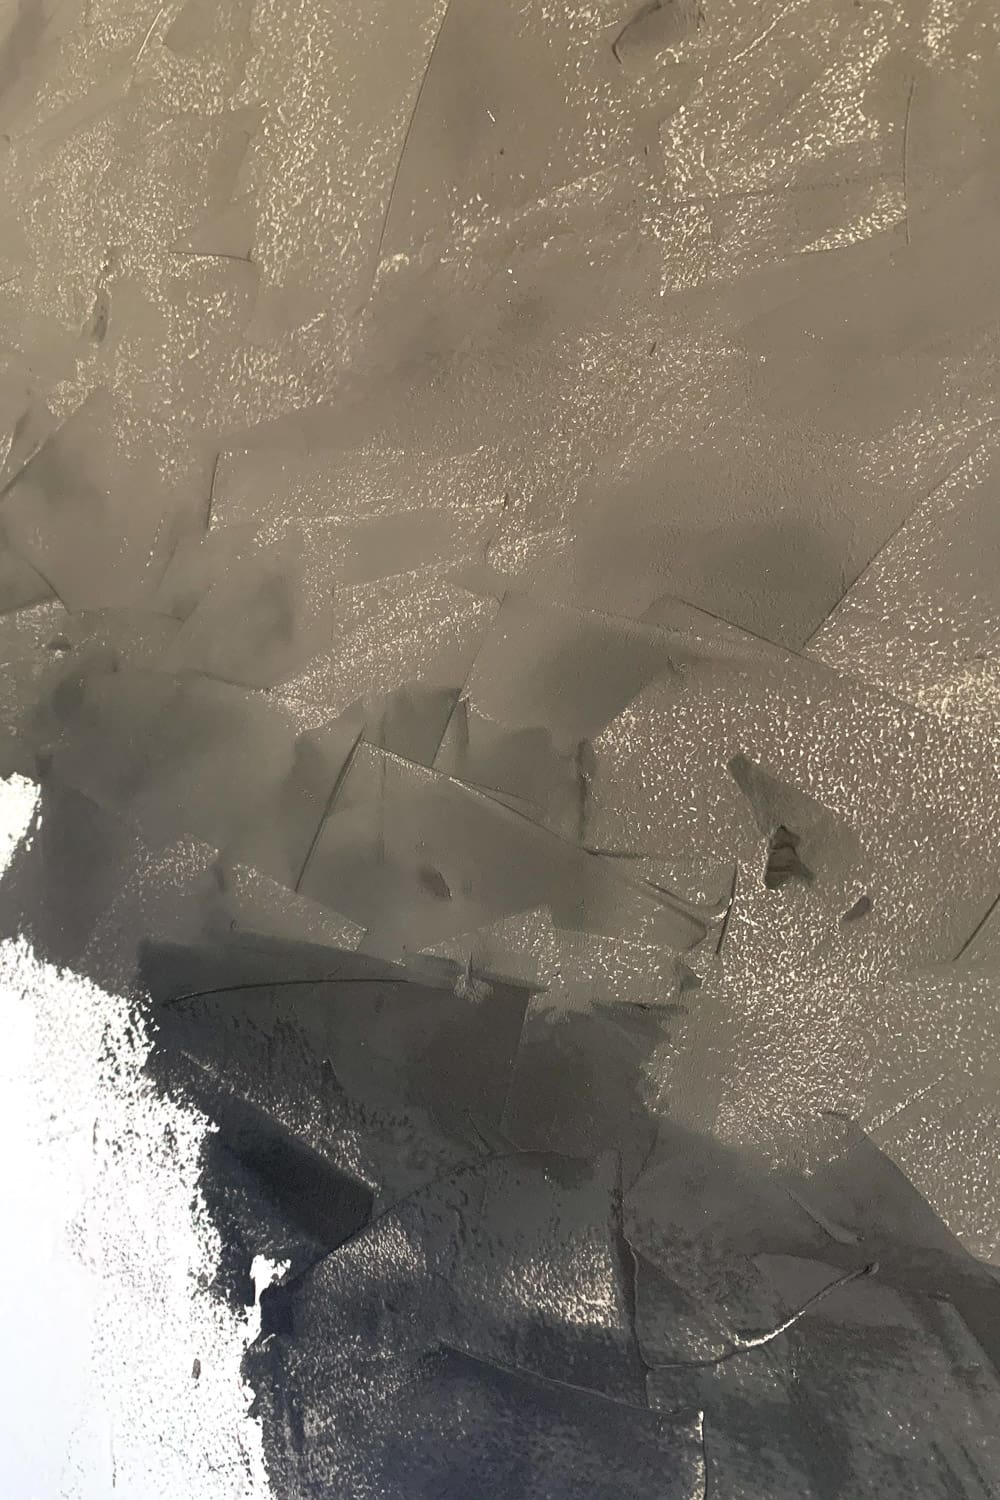
There’s really no way to mess this up. The front and sides were covered and left to dry overnight.
The next day, I applied a second coat using the same crisscross pattern. Each coat took about 45 minutes.

I used a paint brush in the hard-to-reach places and along the carpet line.
Last thing: cleaning up around the fireplace surround. I scraped off a few bits of clay with a razor, then brushed on black high-heat paint on the surround to make all the edges look crisper. I could have used the spray version, but that would have meant MORE taping. No thanks.

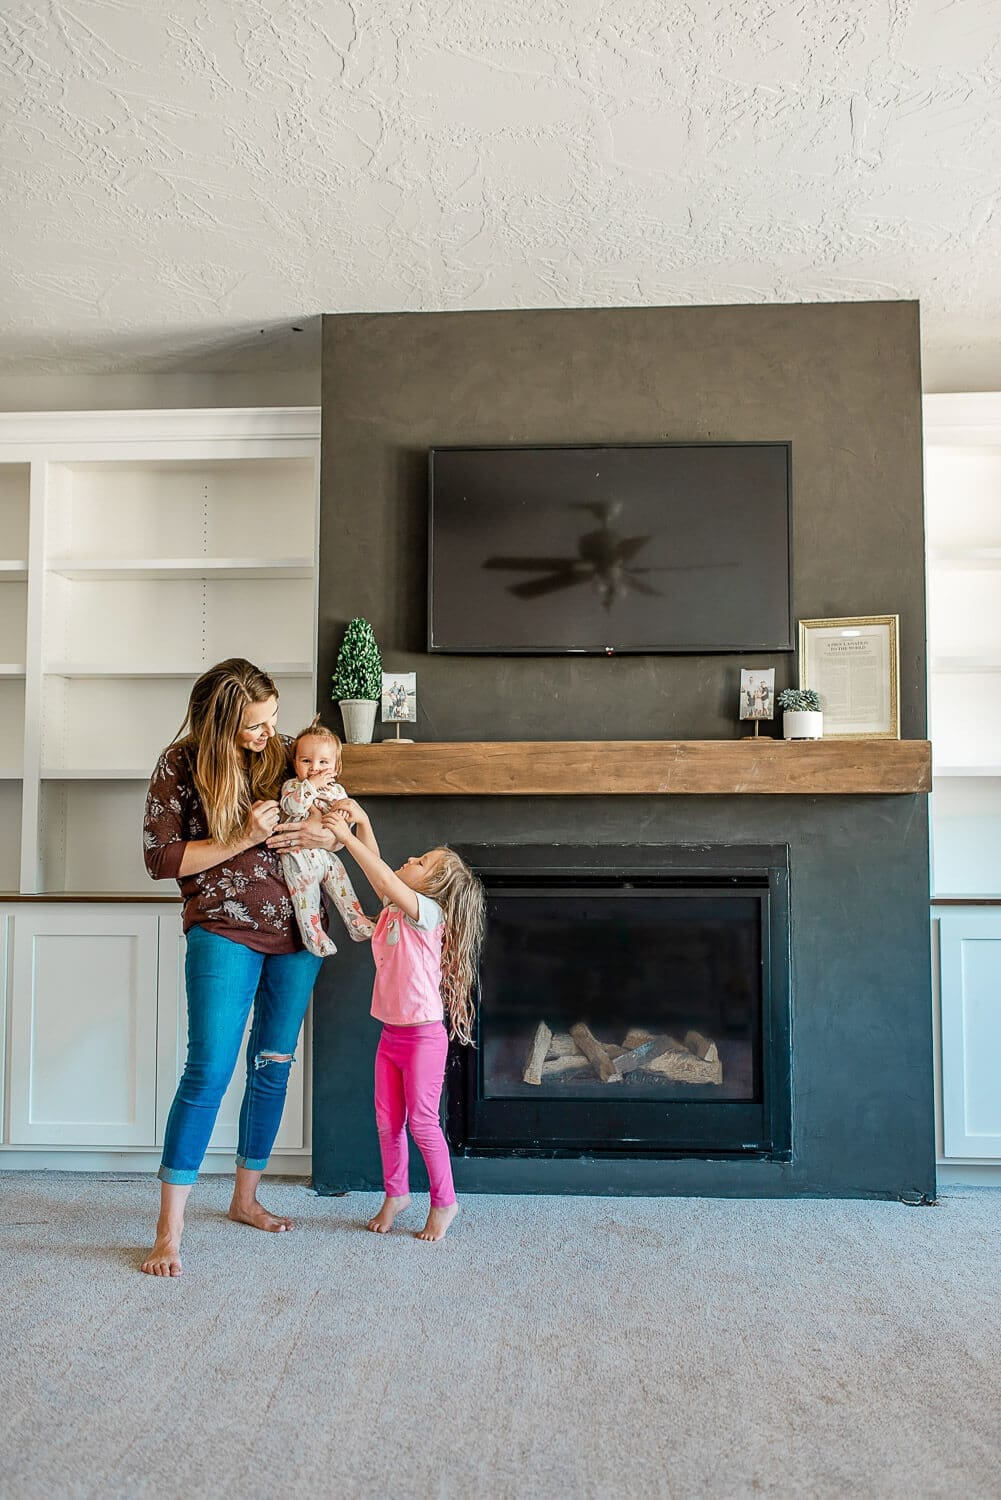
Finished DIY Black Roman Clay Fireplace
And here she is!
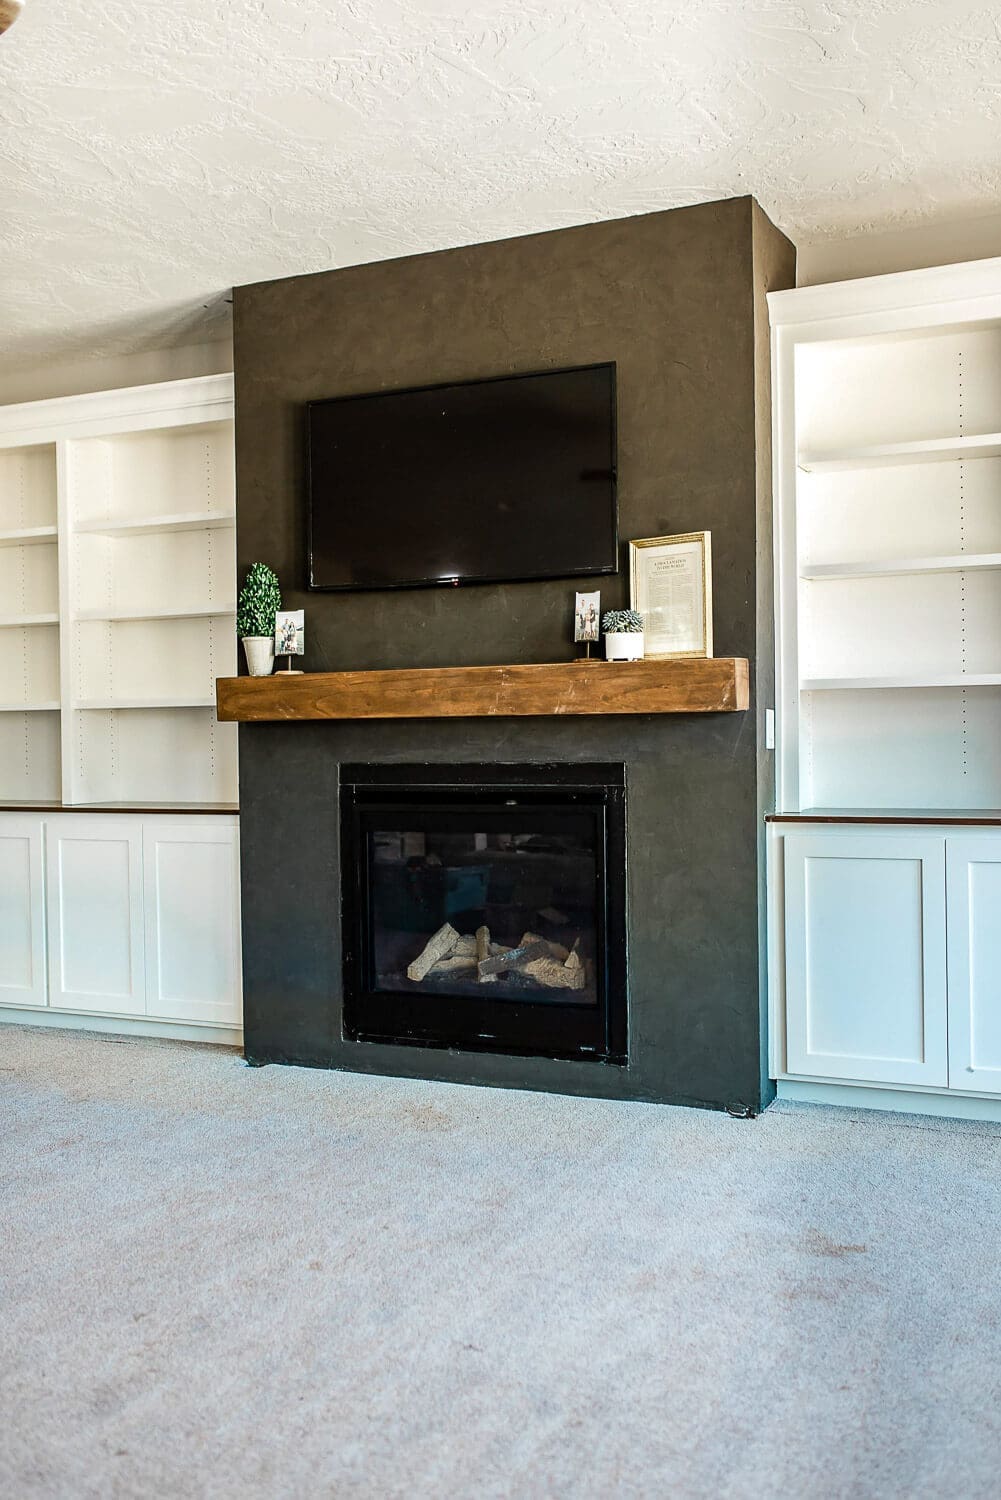
After this was done, I built a DIY floating beam mantel to go above it – the dark stain against the black clay is chef’s kiss. I’ve also used this same fireplace makeover approach on my ugly rock fireplace update. Want to see some built-in shelves you can add on both sides? Check out my DIY custom built-ins tutorial.
I also built a butler’s pantry for this same brother’s house. I’m the best sister ever.
Thanks for reading! Drop a comment below if you have any questions – I’m happy to help.
📌 Save This Project for Later
Love this black Roman Clay fireplace? Pin it now and come back when you’re ready to tackle your own!
Black Roman Clay Fireplace FAQs
Roman Clay is a plaster-like finish applied with a putty knife instead of a roller. It creates a textured, dimensional look with natural ridges and variation that flat paint can’t replicate. It’s also incredibly forgiving — imperfections actually add to the character.
The Roman Clay itself runs about $60–$80 per quart from Portola Paints. With drywall materials, joint compound, primer, and tools, expect to spend $150–$300 total depending on how much demo and reframing your fireplace needs.
Two coats. Each coat takes about 45 minutes to apply and needs to dry overnight before the next coat. The second coat fills in any thin spots and deepens the color.
Yes, but you need to prime the drywall first. Roman Clay adheres best to a smooth, primed surface. Make sure all your drywall seams are taped, mudded, and sanded smooth before priming.
Roman Clay works on the drywall areas around the fireplace, but not on the metal fireplace surround itself – that needs high-heat paint rated for the temperatures a fireplace produces. We used black high-heat appliance paint on the surround.
More Fireplace Projects
If you loved this DIY black Roman Clay fireplace tutorial, here are more fireplace makeovers I’ve done:
- DIY Floating Beam Mantel – The companion project to this fireplace, built for under $75
- DIY Fireplace Mantel With Hidden Outlet – Same technique, but with oak and a built-in outlet
- Updating An Ugly Rock Fireplace – From 1970s eyesore to modern focal point
- Painted Brick Fireplace Makeover – Quick refresh for dated brick
- Building a DIY Stone Fireplace – Floor-to-ceiling stone from scratch
What did you do for where the bottom of the wall meets the floor?
I taped off the carpet and brought the roman clay all the way down to the floor.
What was the overall cost for the material and how long did this project take?
It probably took about 3 days and I honestly don’t remember the cost. It’s been so long!
how did you get it so close to the actual fireplace. Did you just tape the surround and use the clay right up to the edge? Or do you have some sort of transition strip?
Nope, I just went right up to the edge and tried to be as careful as possible.
I love the way both the black roman clay AND the hollow beam mantel turned out. The pictures make the clay looks like a balayage color treatment – is that just the photo or did you blend colors top to bottom?
Thank you!
That’s totally just the photo, but yeah I see what you mean!
Is this a gas fireplace ?
Yes this was a gas fireplace
Is this safe to do around a fireplace without a granite or brick fireproof surround ?
The Roman Clay isn’t flammable, but I would suggest you contact the manufacturer before you take my advice 🙂
has the clay cracked at all? we wanted a minimal look and our builder left drywall around our fireplace insert so we could add something around it later. the drywall is already showing hairline cracking around the corners after just a few uses this winter. wondering how the clay on top will hold up.
I made sure to purchase higher quality clay so that cracks didn’t happen. It’s held up really well. If you do see little cracks eventually, just keep the clay air tight so you can use it to fill in the cracks as needed in the future.
How much Roman clay did you need?
So sorry but I can’t remember. There are recommended amounts on the product description.
What is the name of the color you used from Portola Paints?
Hi Kirsten – The name of the color is “jacket” and thankfully Portola still carries that color. Good luck with your project!