


Building Office Cabinets: Functional & Smart DIY Part 1


Updated July 13, 2026
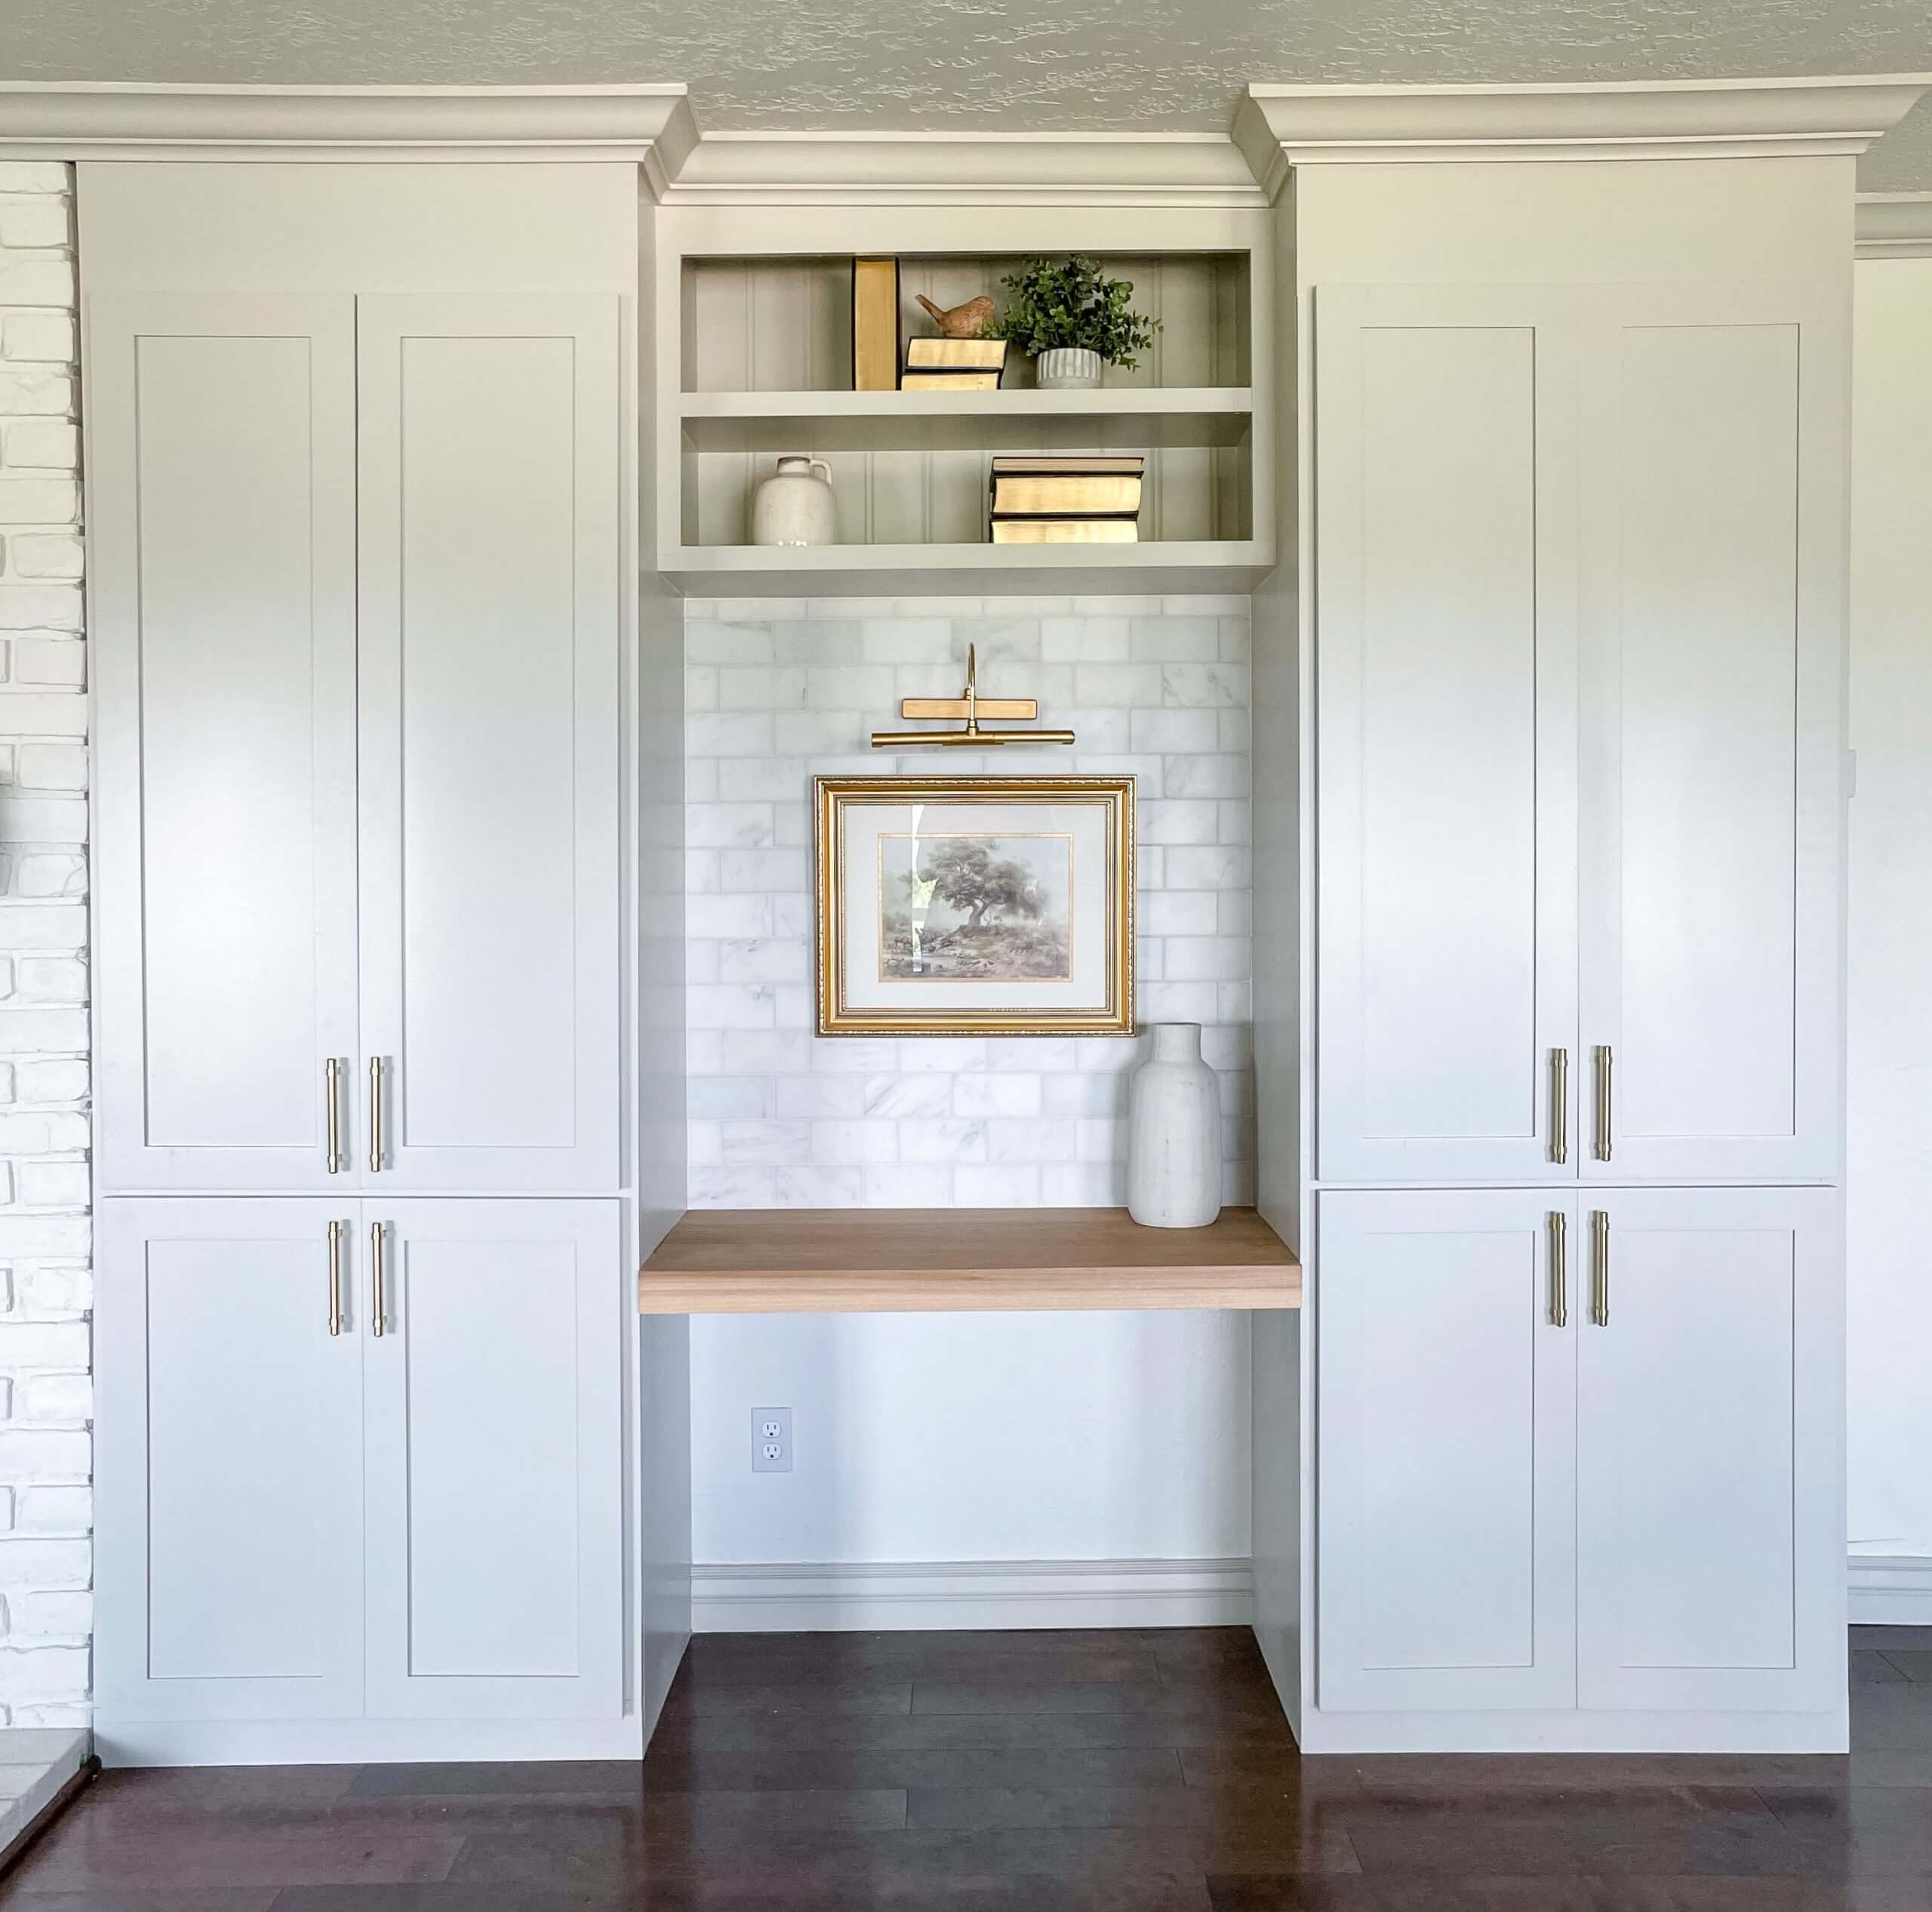
Building office cabinets was the perfect solution for this work-from-home mom of three because dedicating an entire room to a home office just wasn’t practical. I needed a stylish, functional workspace that wouldn’t take over an entire room but would still keep office supplies (and my collection of half-used Scotch Tape dispensers) neatly tucked away.
This is Part 1 of How I Built Office Cabinets. Head over to Part 2 to see how I built the connecting shelf, installed additional shelving, and painted the cabinets.
Then check out Part 3 where I tackled the floating desk, backsplash, and cabinet doors—plus some fun cabinet lighting tricks you won’t want to miss!
Table of Contents
- Why Custom Office Cabinets?
- Supplies for Building Home Office Cabinets
- Essential Tools for Building Custom Office Cabinets
- Planning & Prepping Your Built-In Office Cabinet Wall
- How to Build Office Cabinets Step-by-Step
- Assembling the DIY Cabinet Boxes
- Installing Adjustable Shelves in Cabinets
- Adding a Divider Shelf for Upper and Lower Storage
- Framing the Cabinets for a Built-In Look
- Finishing Touches – Edge Banding for a Professional Finish
- 📌 Save this Project for Later
- FAQs About Building Custom Office Cabinets
Why Custom Office Cabinets?
The answer? A built-in office cabinet system with hidden storage, plenty of workspace, and even a little nook for my kids to “work” alongside me (translation: color, snack, and occasionally pretend to do homework). If you’re dreaming of a more organized, efficient office setup, keep reading to learn how to build office cabinets and create a space that works for your home!
Supplies for Building Home Office Cabinets
To build your own office cabinets, you’ll need durable materials that can handle daily use. Here’s what I used:
- Plywood: (4) 3/4-in x 4-ft x 8-ft sheets
- Beadboard: (3) 4-ft x 8-ft sheets
- Select Pine Boards: (5) 1-in x 2-in x 8-ft boards
- Kreg Pocket Hole Screws: 1 1/4 inch
- Wood Screws: 2 1/2 inch
- Brad Nails: 1 1/4 inch
- Wood Glue
- Birch Edge Banding
Essential Tools for Building Custom Office Cabinets
If you’re serious about building office cabinets, having the right tools makes all the difference:
- Circular Saw & Table Saw – For cutting plywood sheets
- Miter Saw – To make precise cuts
- Drill & Kreg Pocket Hole Jig – Essential for assembling strong, hidden joints
- Nail Gun – To secure trim and beadboard
- Clamps & Straight Edge – To keep everything square
- Laser Level
- Kreg Shelf Pin Jig
- Kreg Single Pocket Hole Jig
Want to see the entire cabinet-building process in action? Watch my YouTube tutorial!
Planning & Prepping Your Built-In Office Cabinet Wall
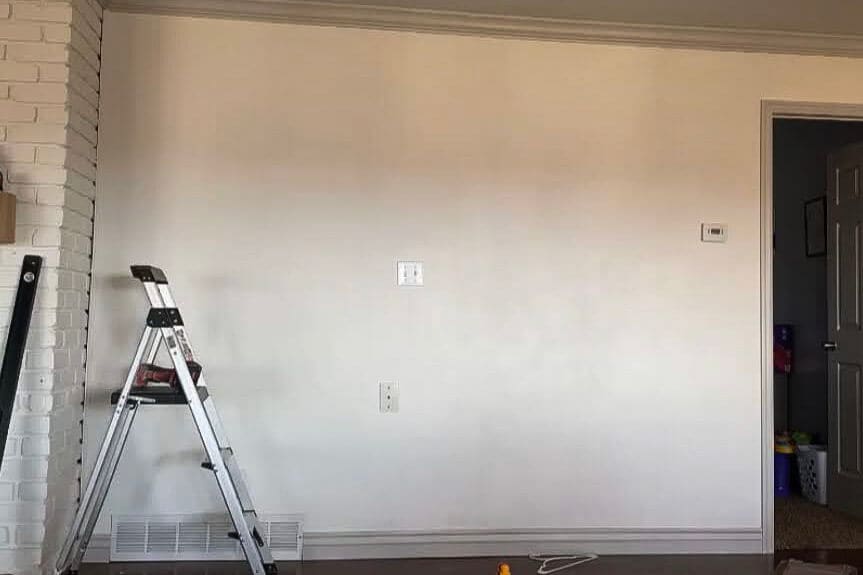
Choosing the Right Wall for Your Cabinets
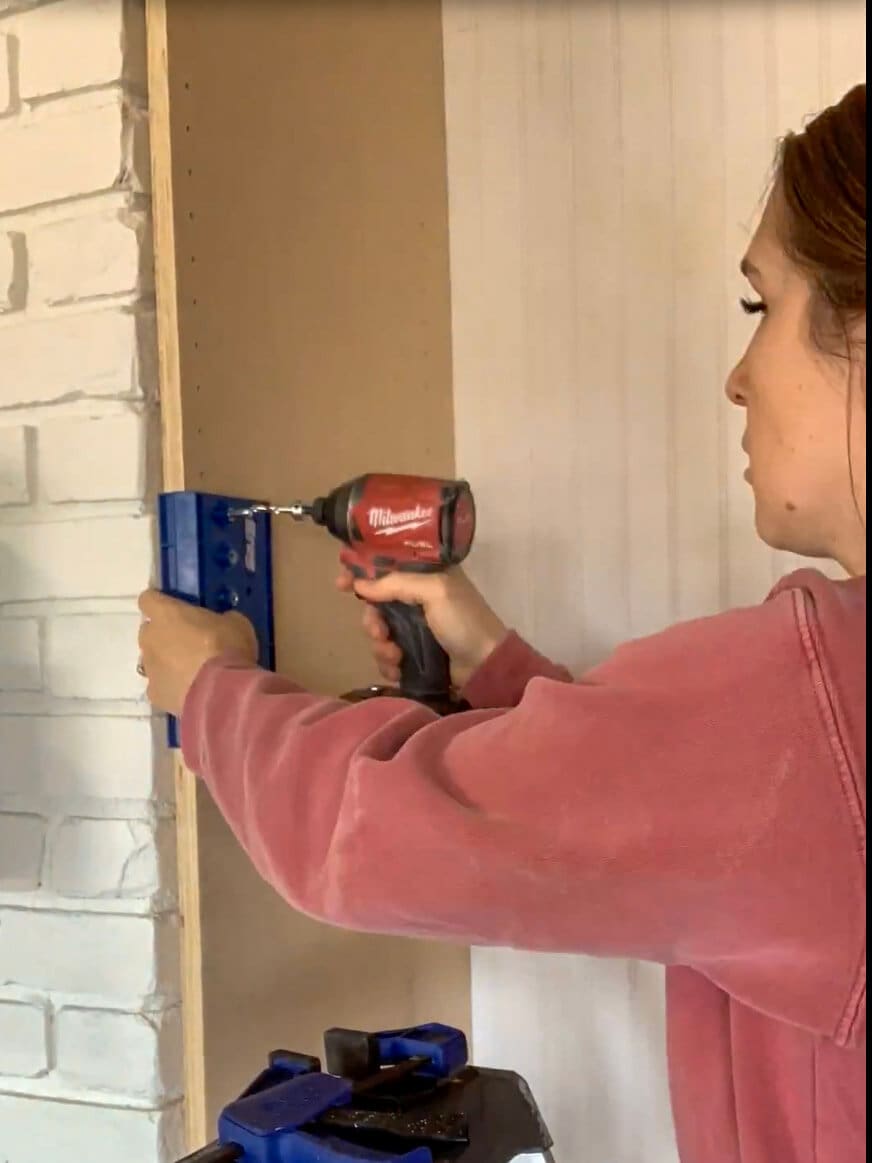
The first step in building office cabinets is choosing a wall that works with minimal modifications to outlets, vents, and switches. If adjustments are needed, consult an expert or reference online tutorials for guidance. Remove baseboards, crown molding, or plate covers before beginning construction.
Moving my vent grate was pretty straightforward, and with some guidance from a contractor (and YouTube), I was able to move the electric box on my own.
How to Build Office Cabinets Step-by-Step
Cutting the Cabinet Pieces to Size
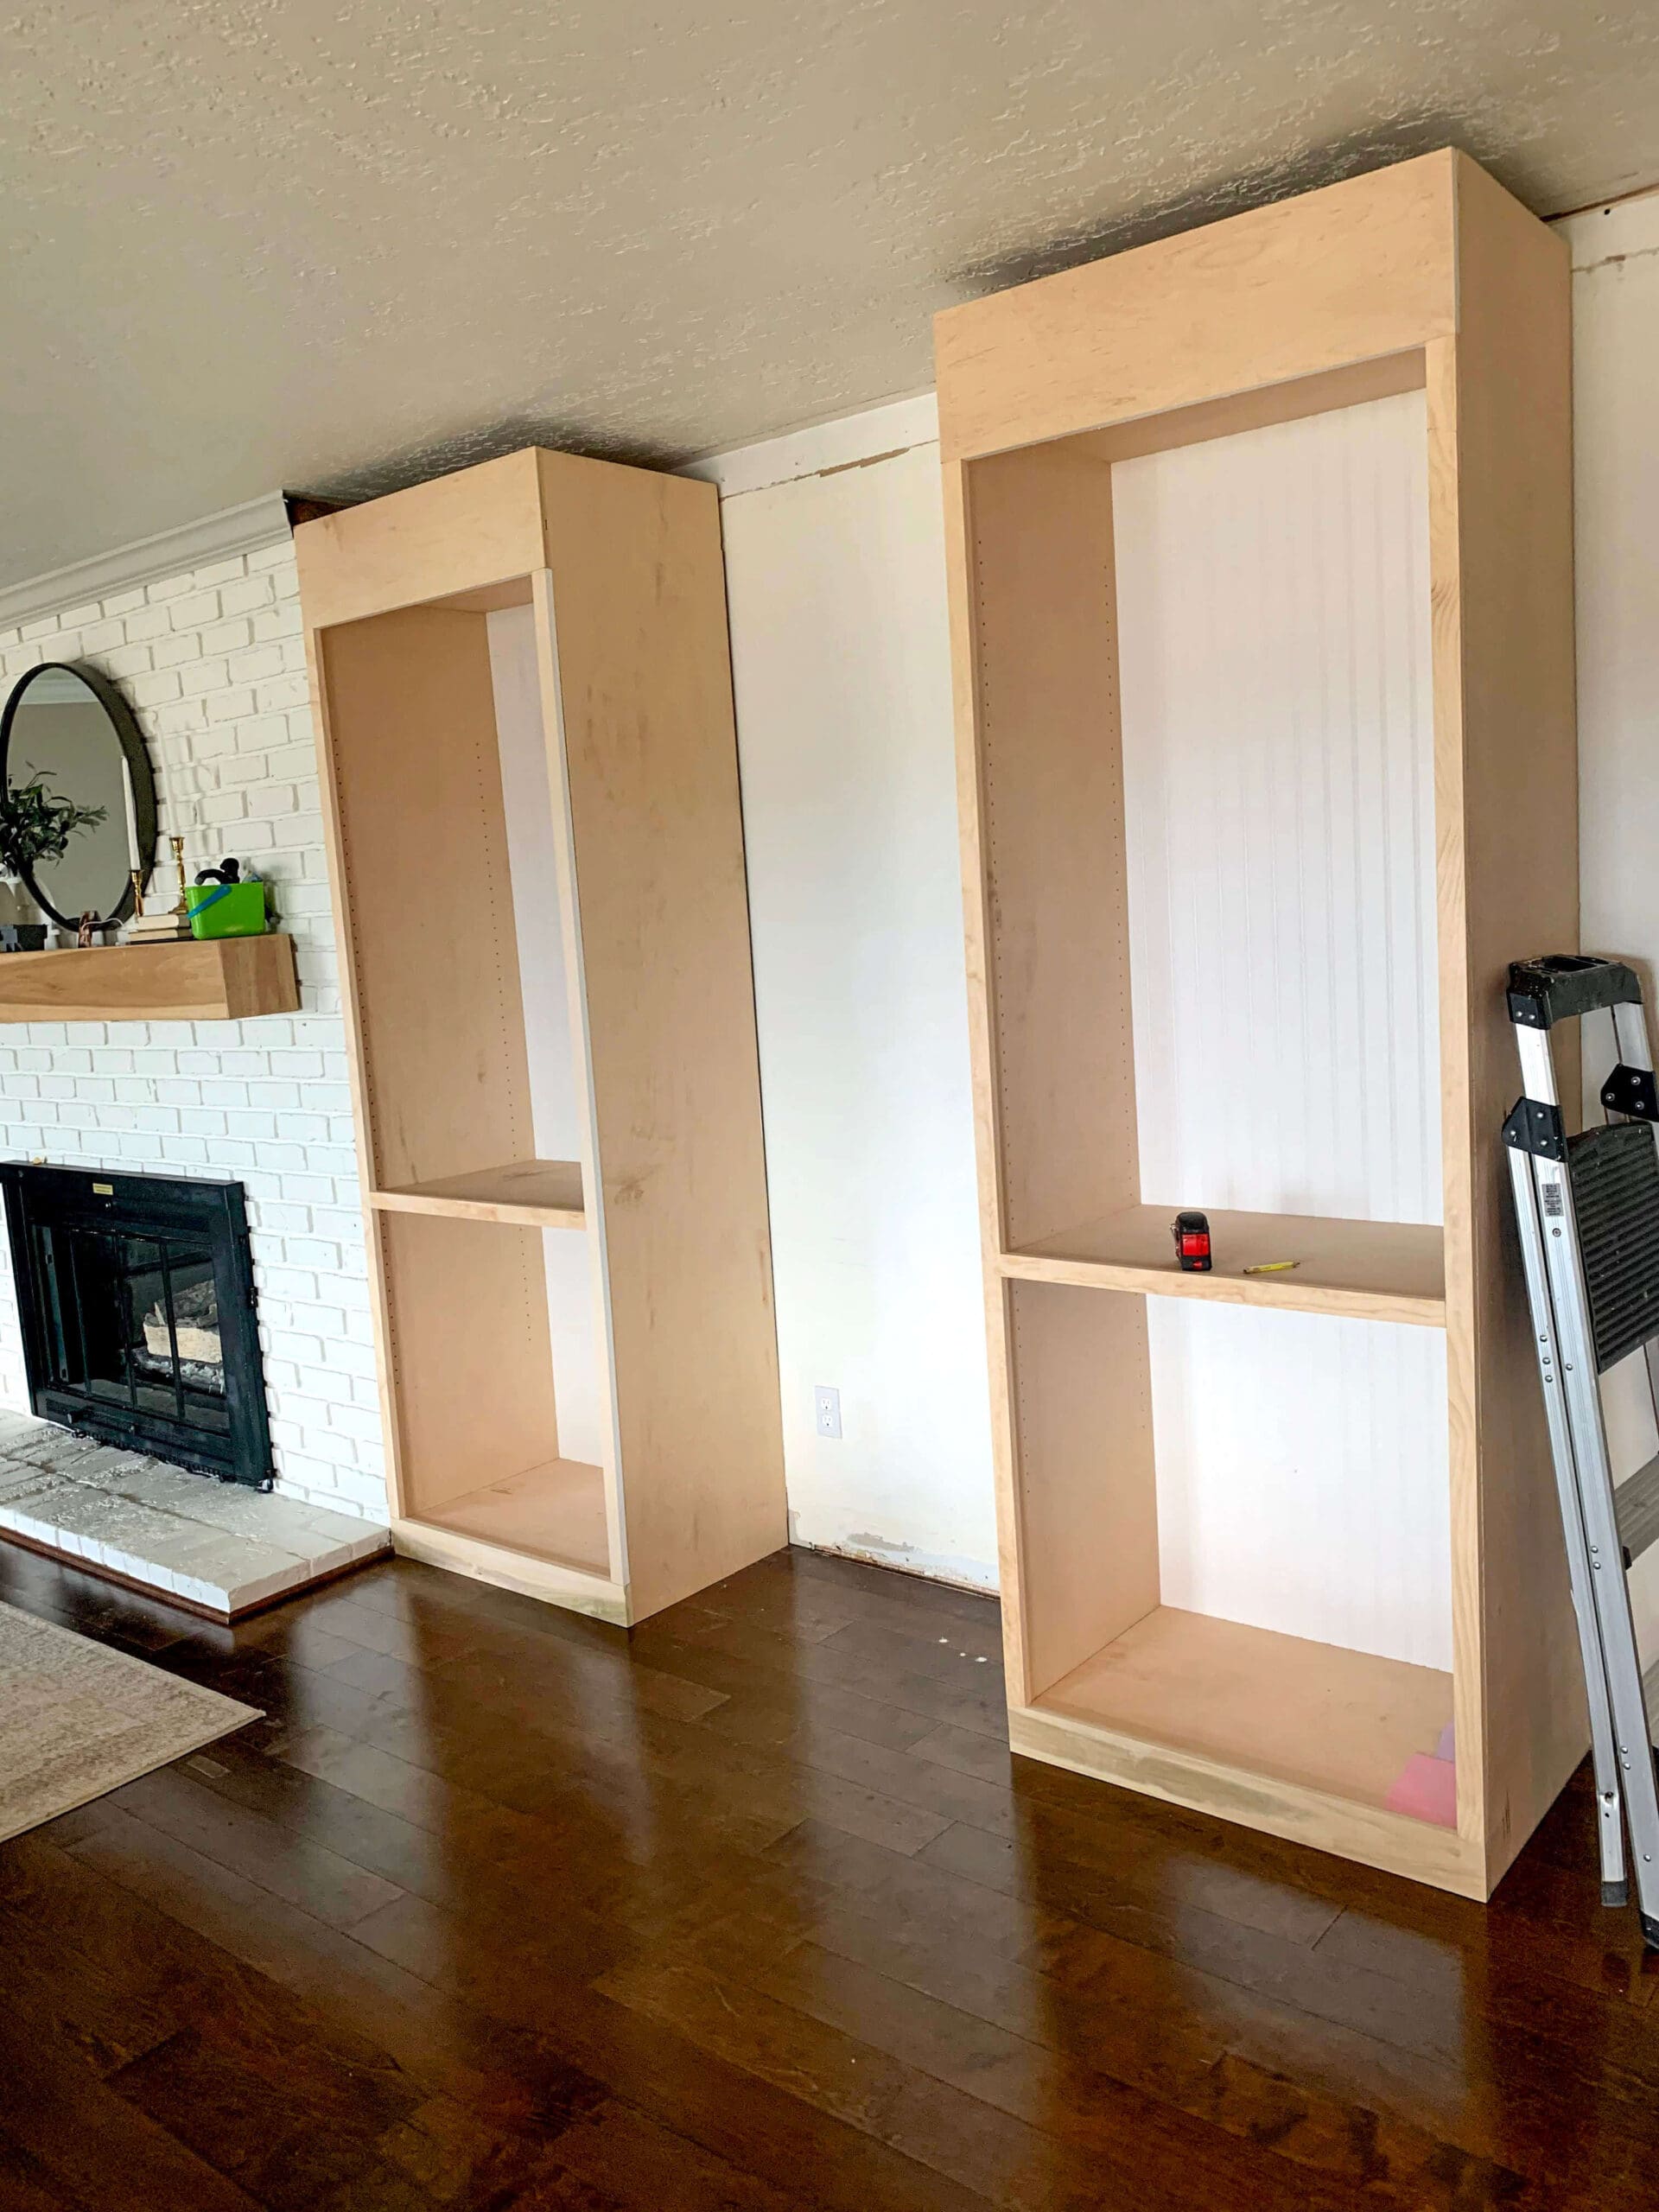
Building home office cabinets begins with accurate cuts. Since my walls are 8 feet tall, I sized the cabinets at 94 inches – just enough clearance to stand them upright without scraping the ceiling.
Using a circular saw and a straight edge, I cut the plywood sheets lengthwise to yield 8 boards:
- (4) 20-in x 94-in boards – Cabinet walls
- (4) 20-in x 30-in boards – Top & bottom panels
Did you know that foam insulation is helpful when you’re cutting large sheets of plywood? The insulation lifts the wood off the ground, as well as protects the saw blade from grinding into the pavement.
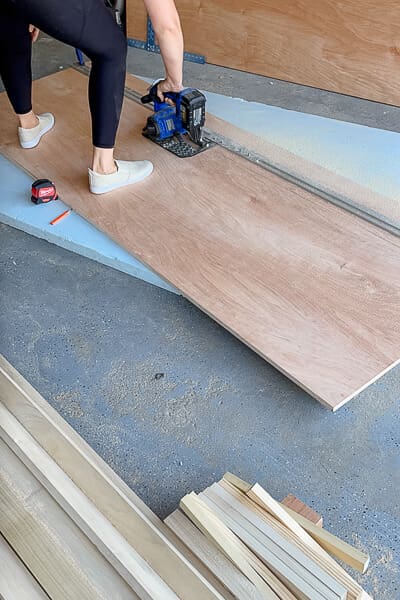
DIY Pro Tip: To prevent plywood from splintering when cutting across the grain, place painter’s tape over your cut line. Mark the cut on the tape and then saw through it – this helps minimize chipping.
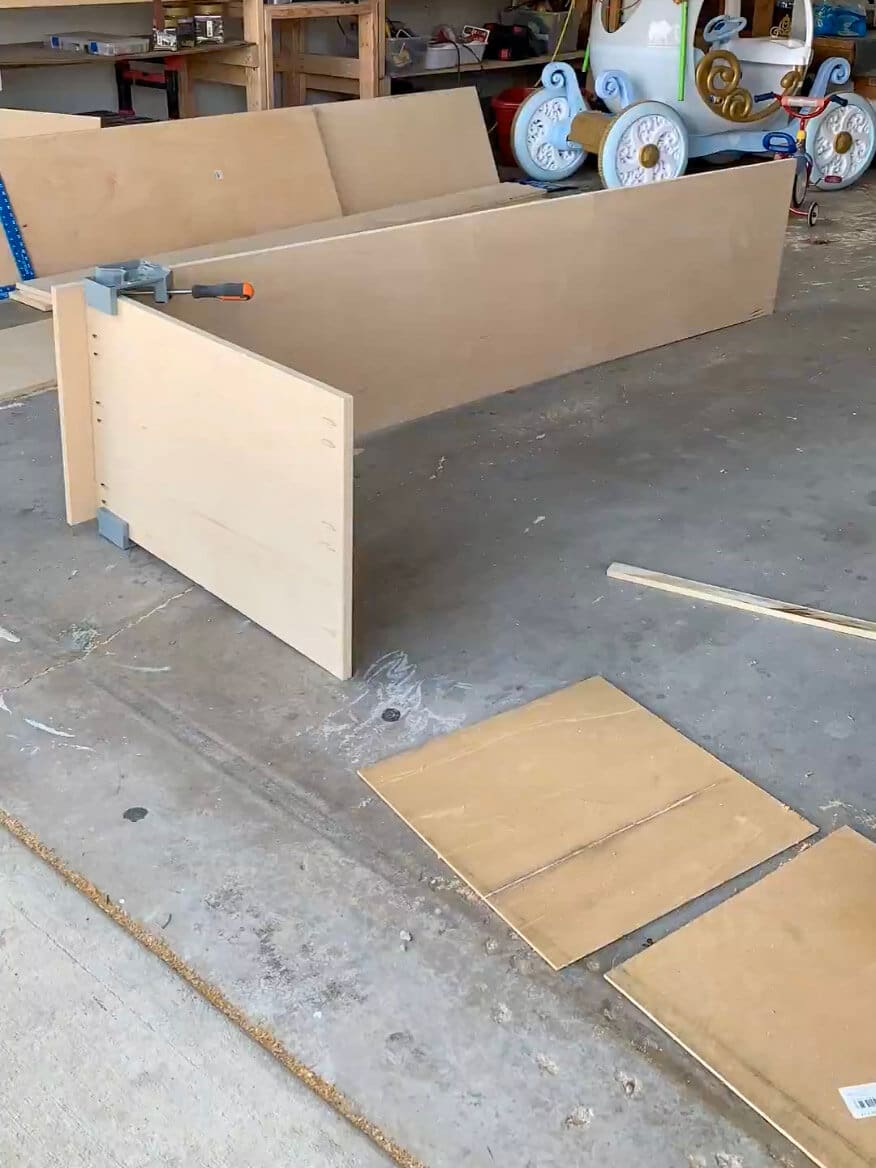
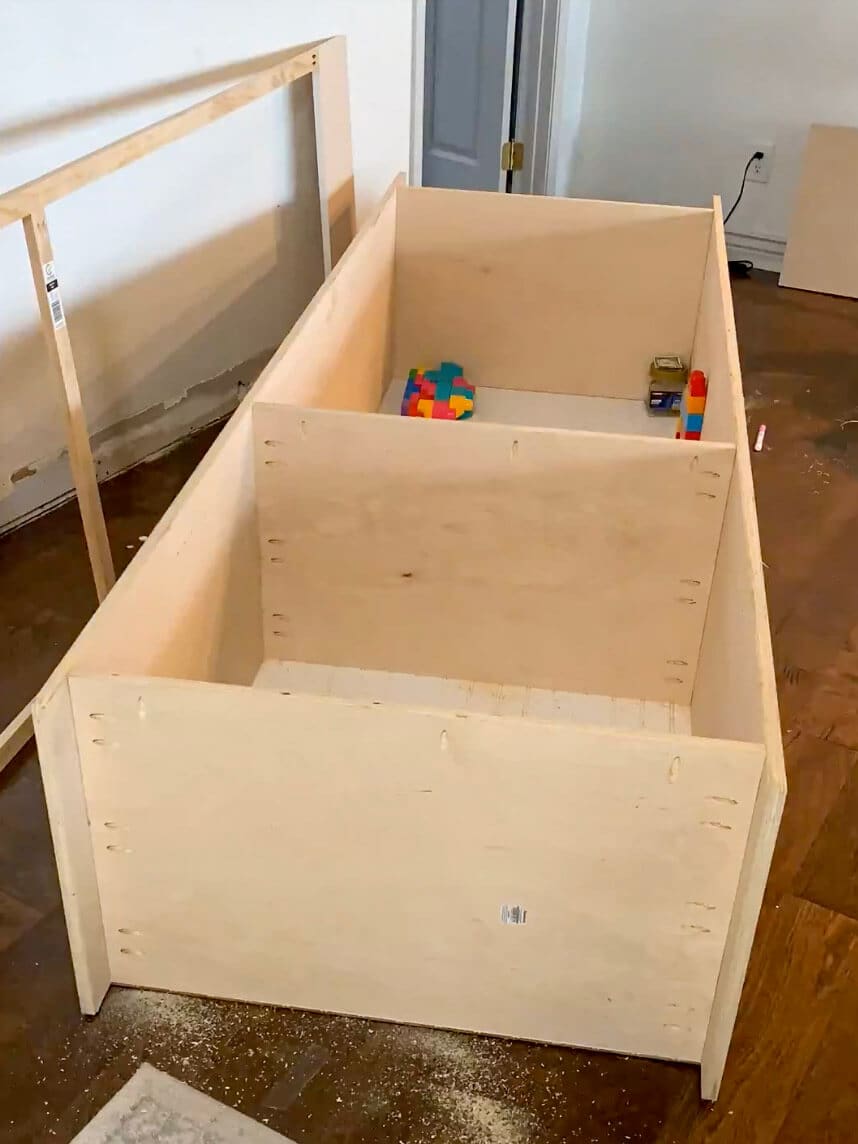
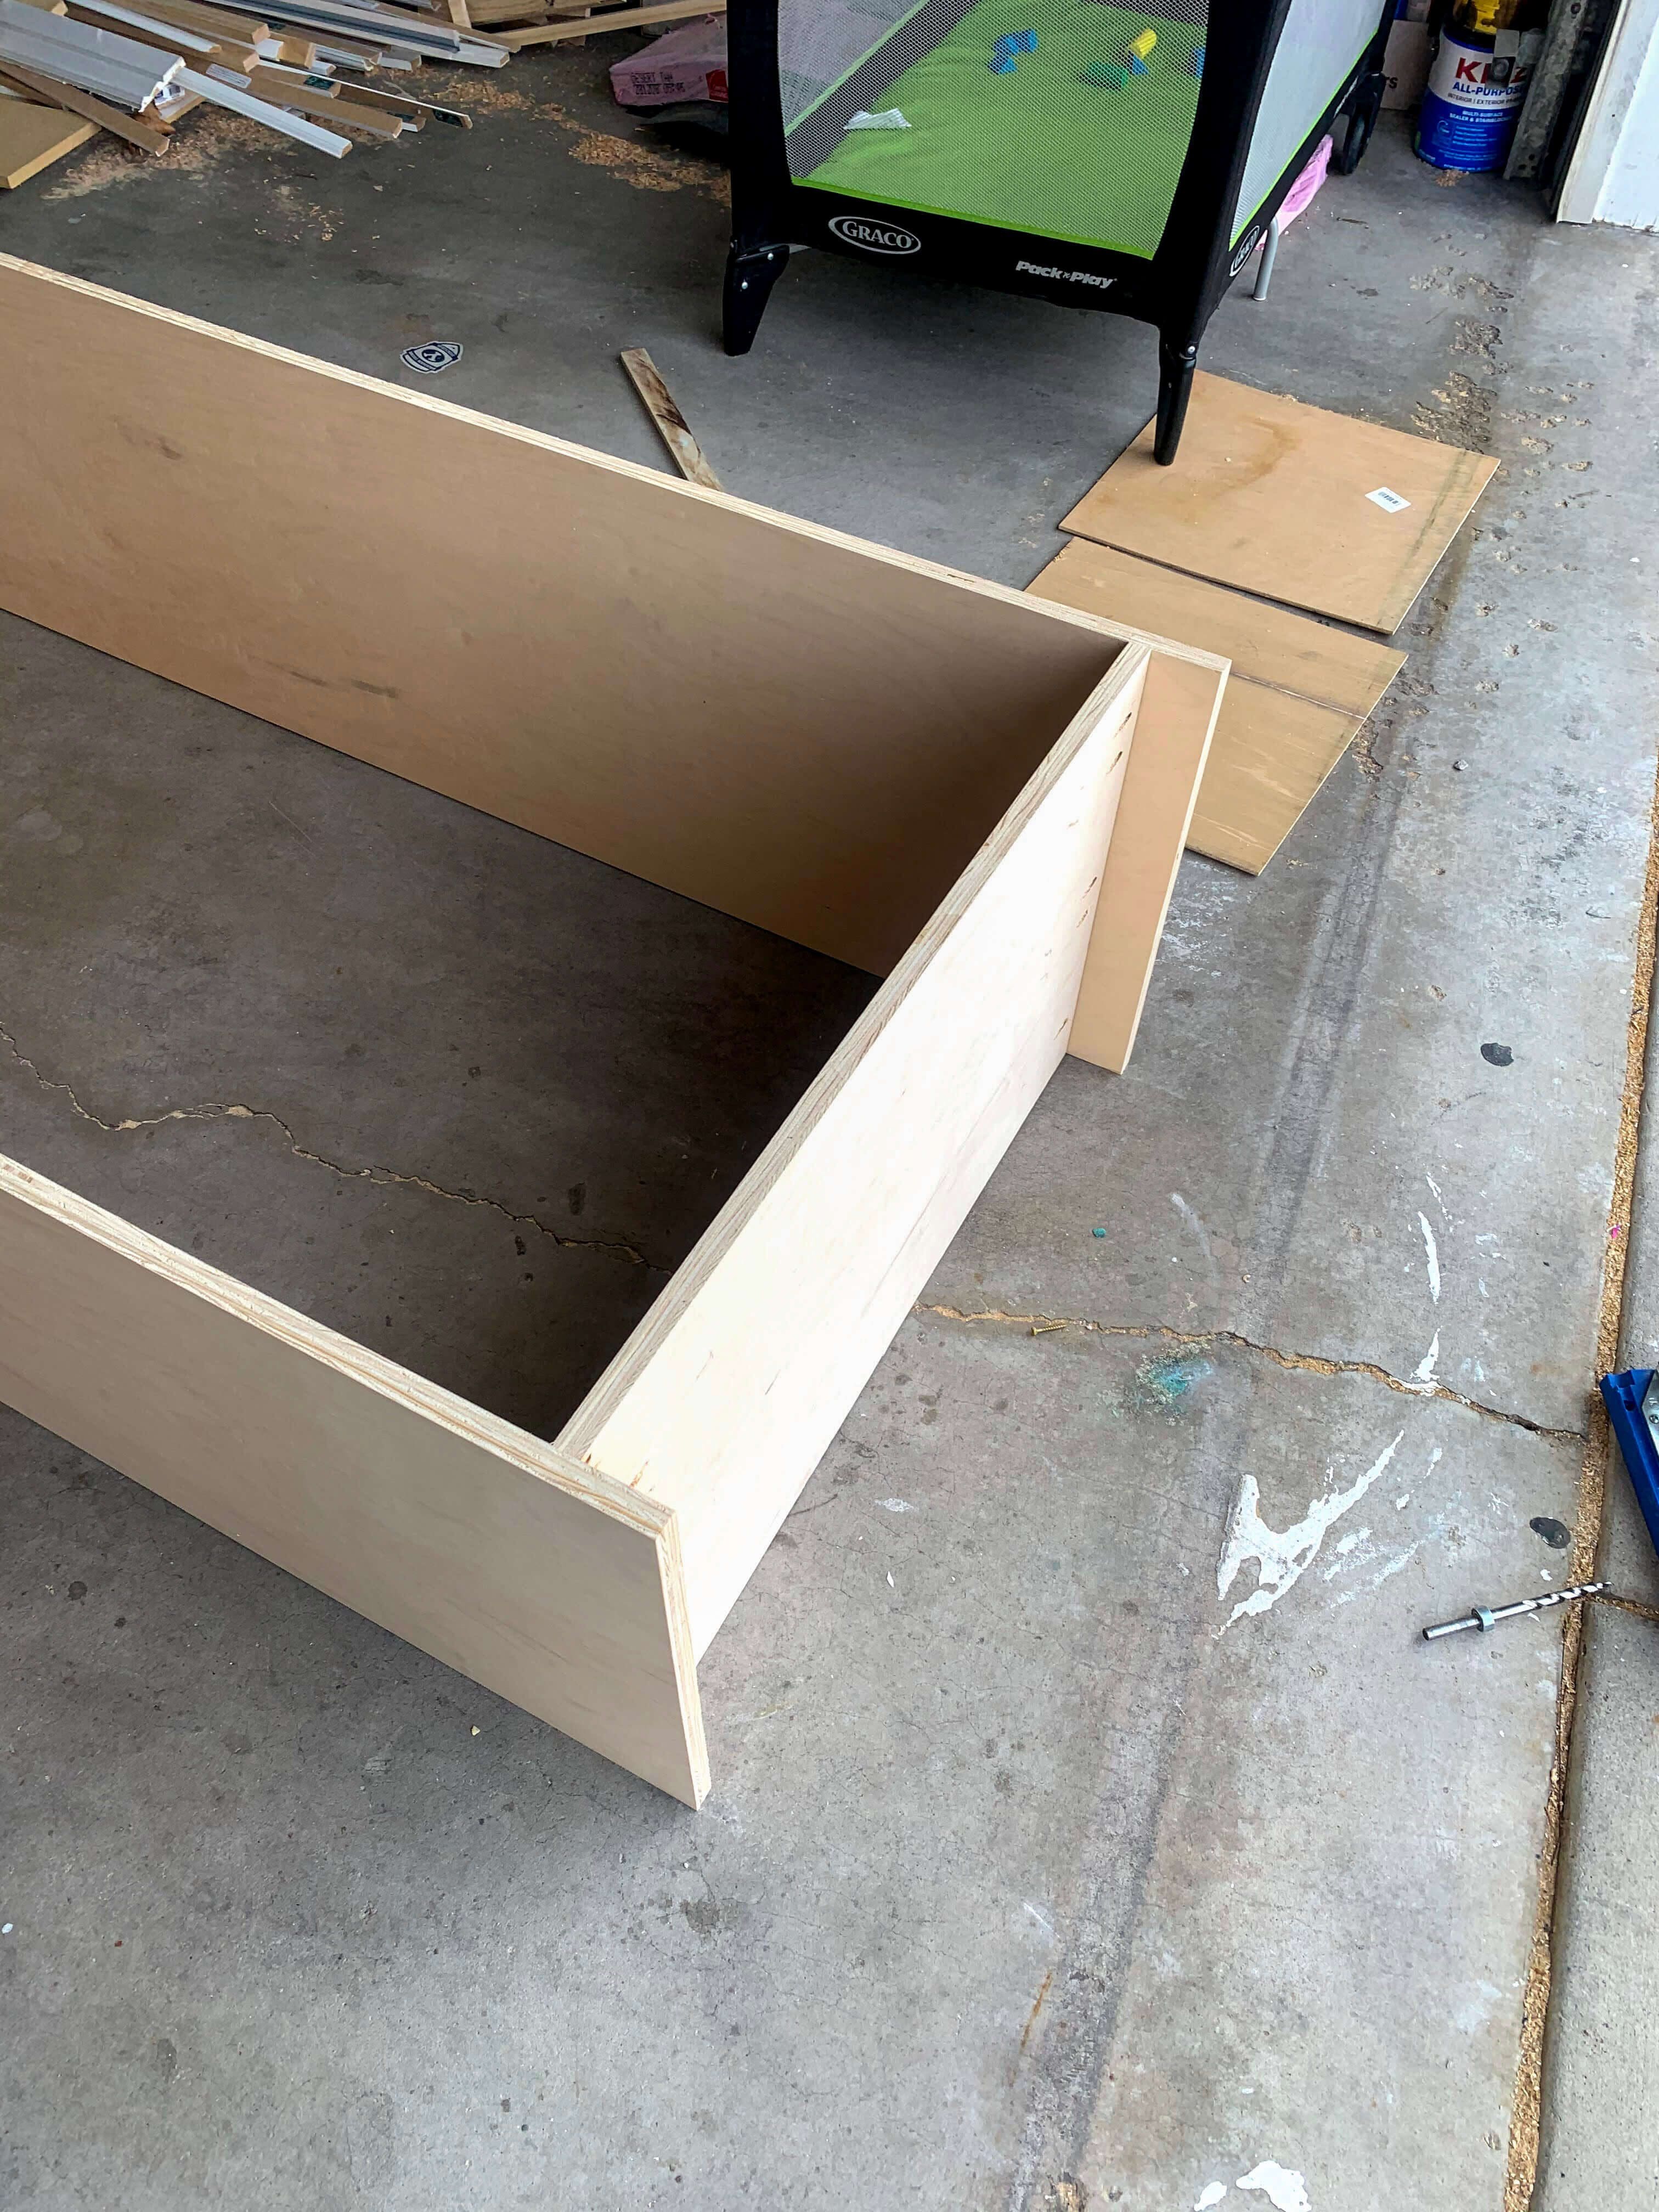
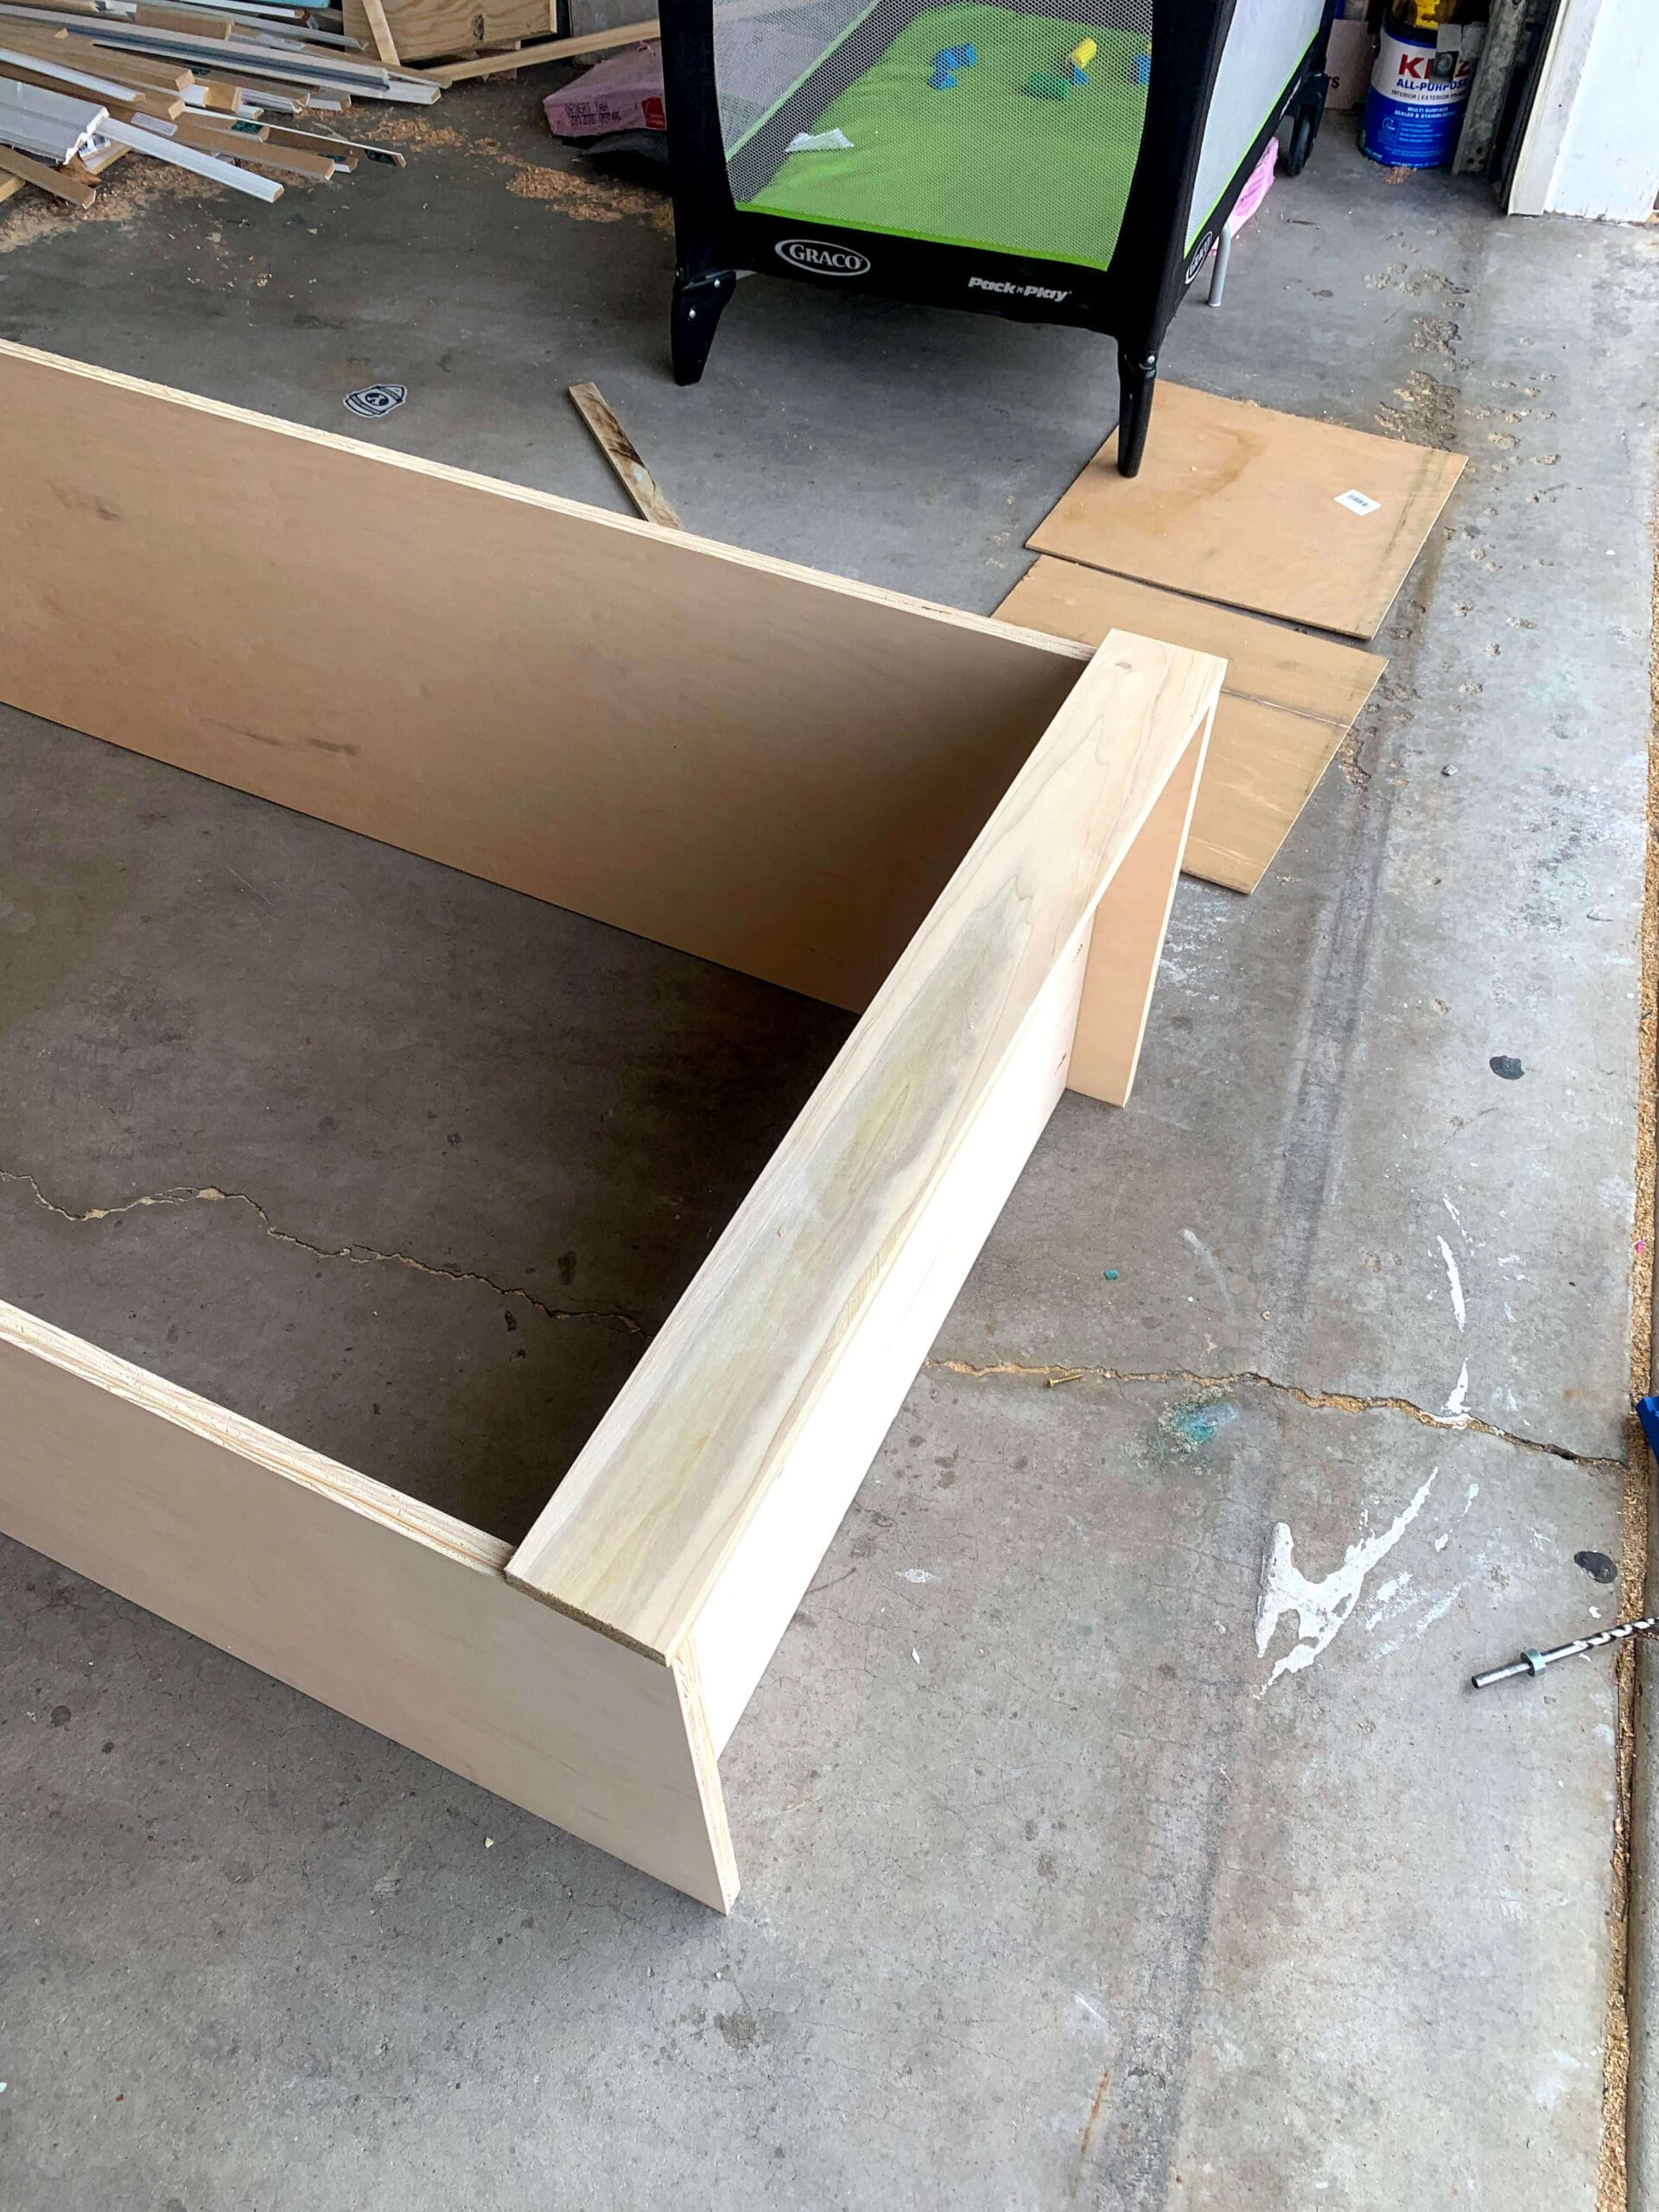
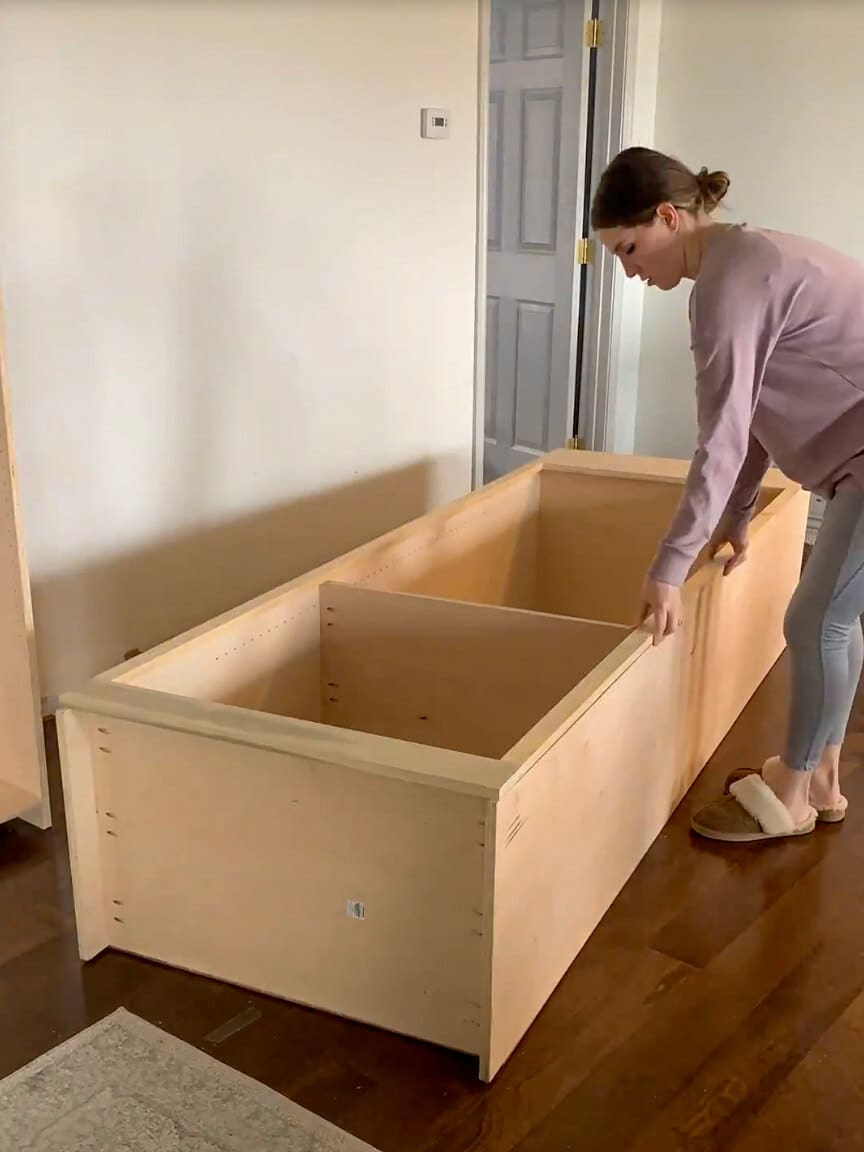
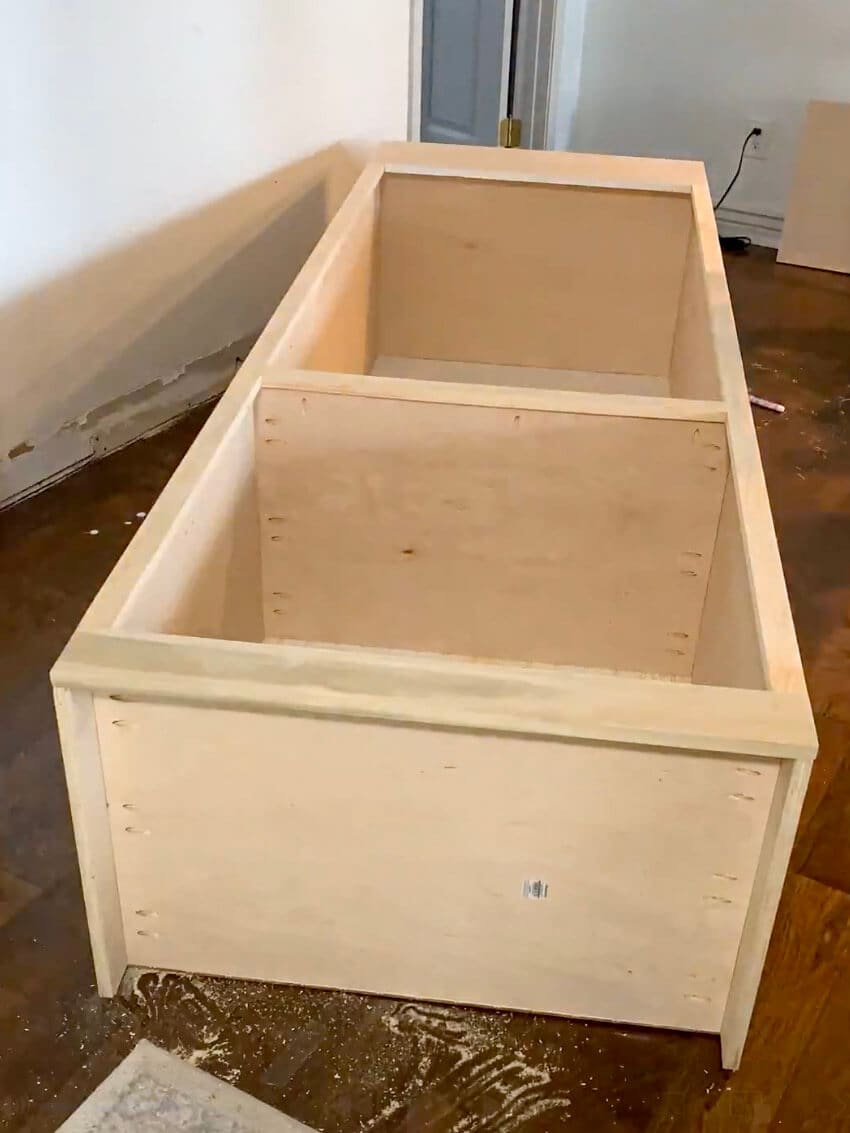
Assembling the DIY Cabinet Boxes
I used a Kreg Pocket Hole Jig to create strong, hidden joints for a clean, professional build.
- Drill pocket holes in the top and bottom panels.
- Attach the floor panel 3 inches from the bottom using wood glue and pocket screws.
- Attach the top panel 5 inches from the top using the same method.
- Secure the back panel by cutting beadboard to fit and securing it with wood screws.
At this point, the basic structure is done. Step back and admire your DIY built-in office cabinets coming to life!


Installing Adjustable Shelves in Cabinets
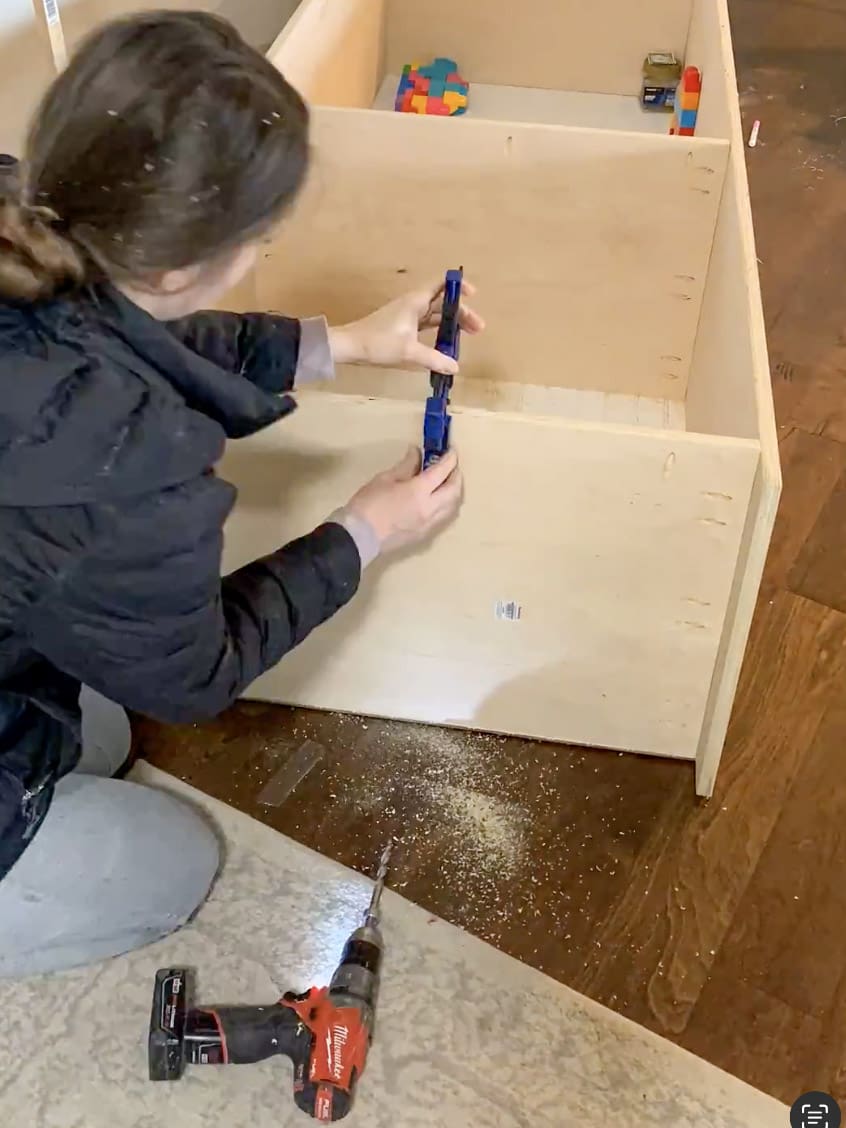
Adjustable shelves make custom office cabinets way more functional. Using a Kreg Shelf Pin Jig, I drilled evenly spaced holes inside the cabinet walls so I could move the shelves around as needed.
Because let’s be real – your storage needs will change. One day, it’s notebooks and office supplies; the next, it’s a printer the size of a small car.
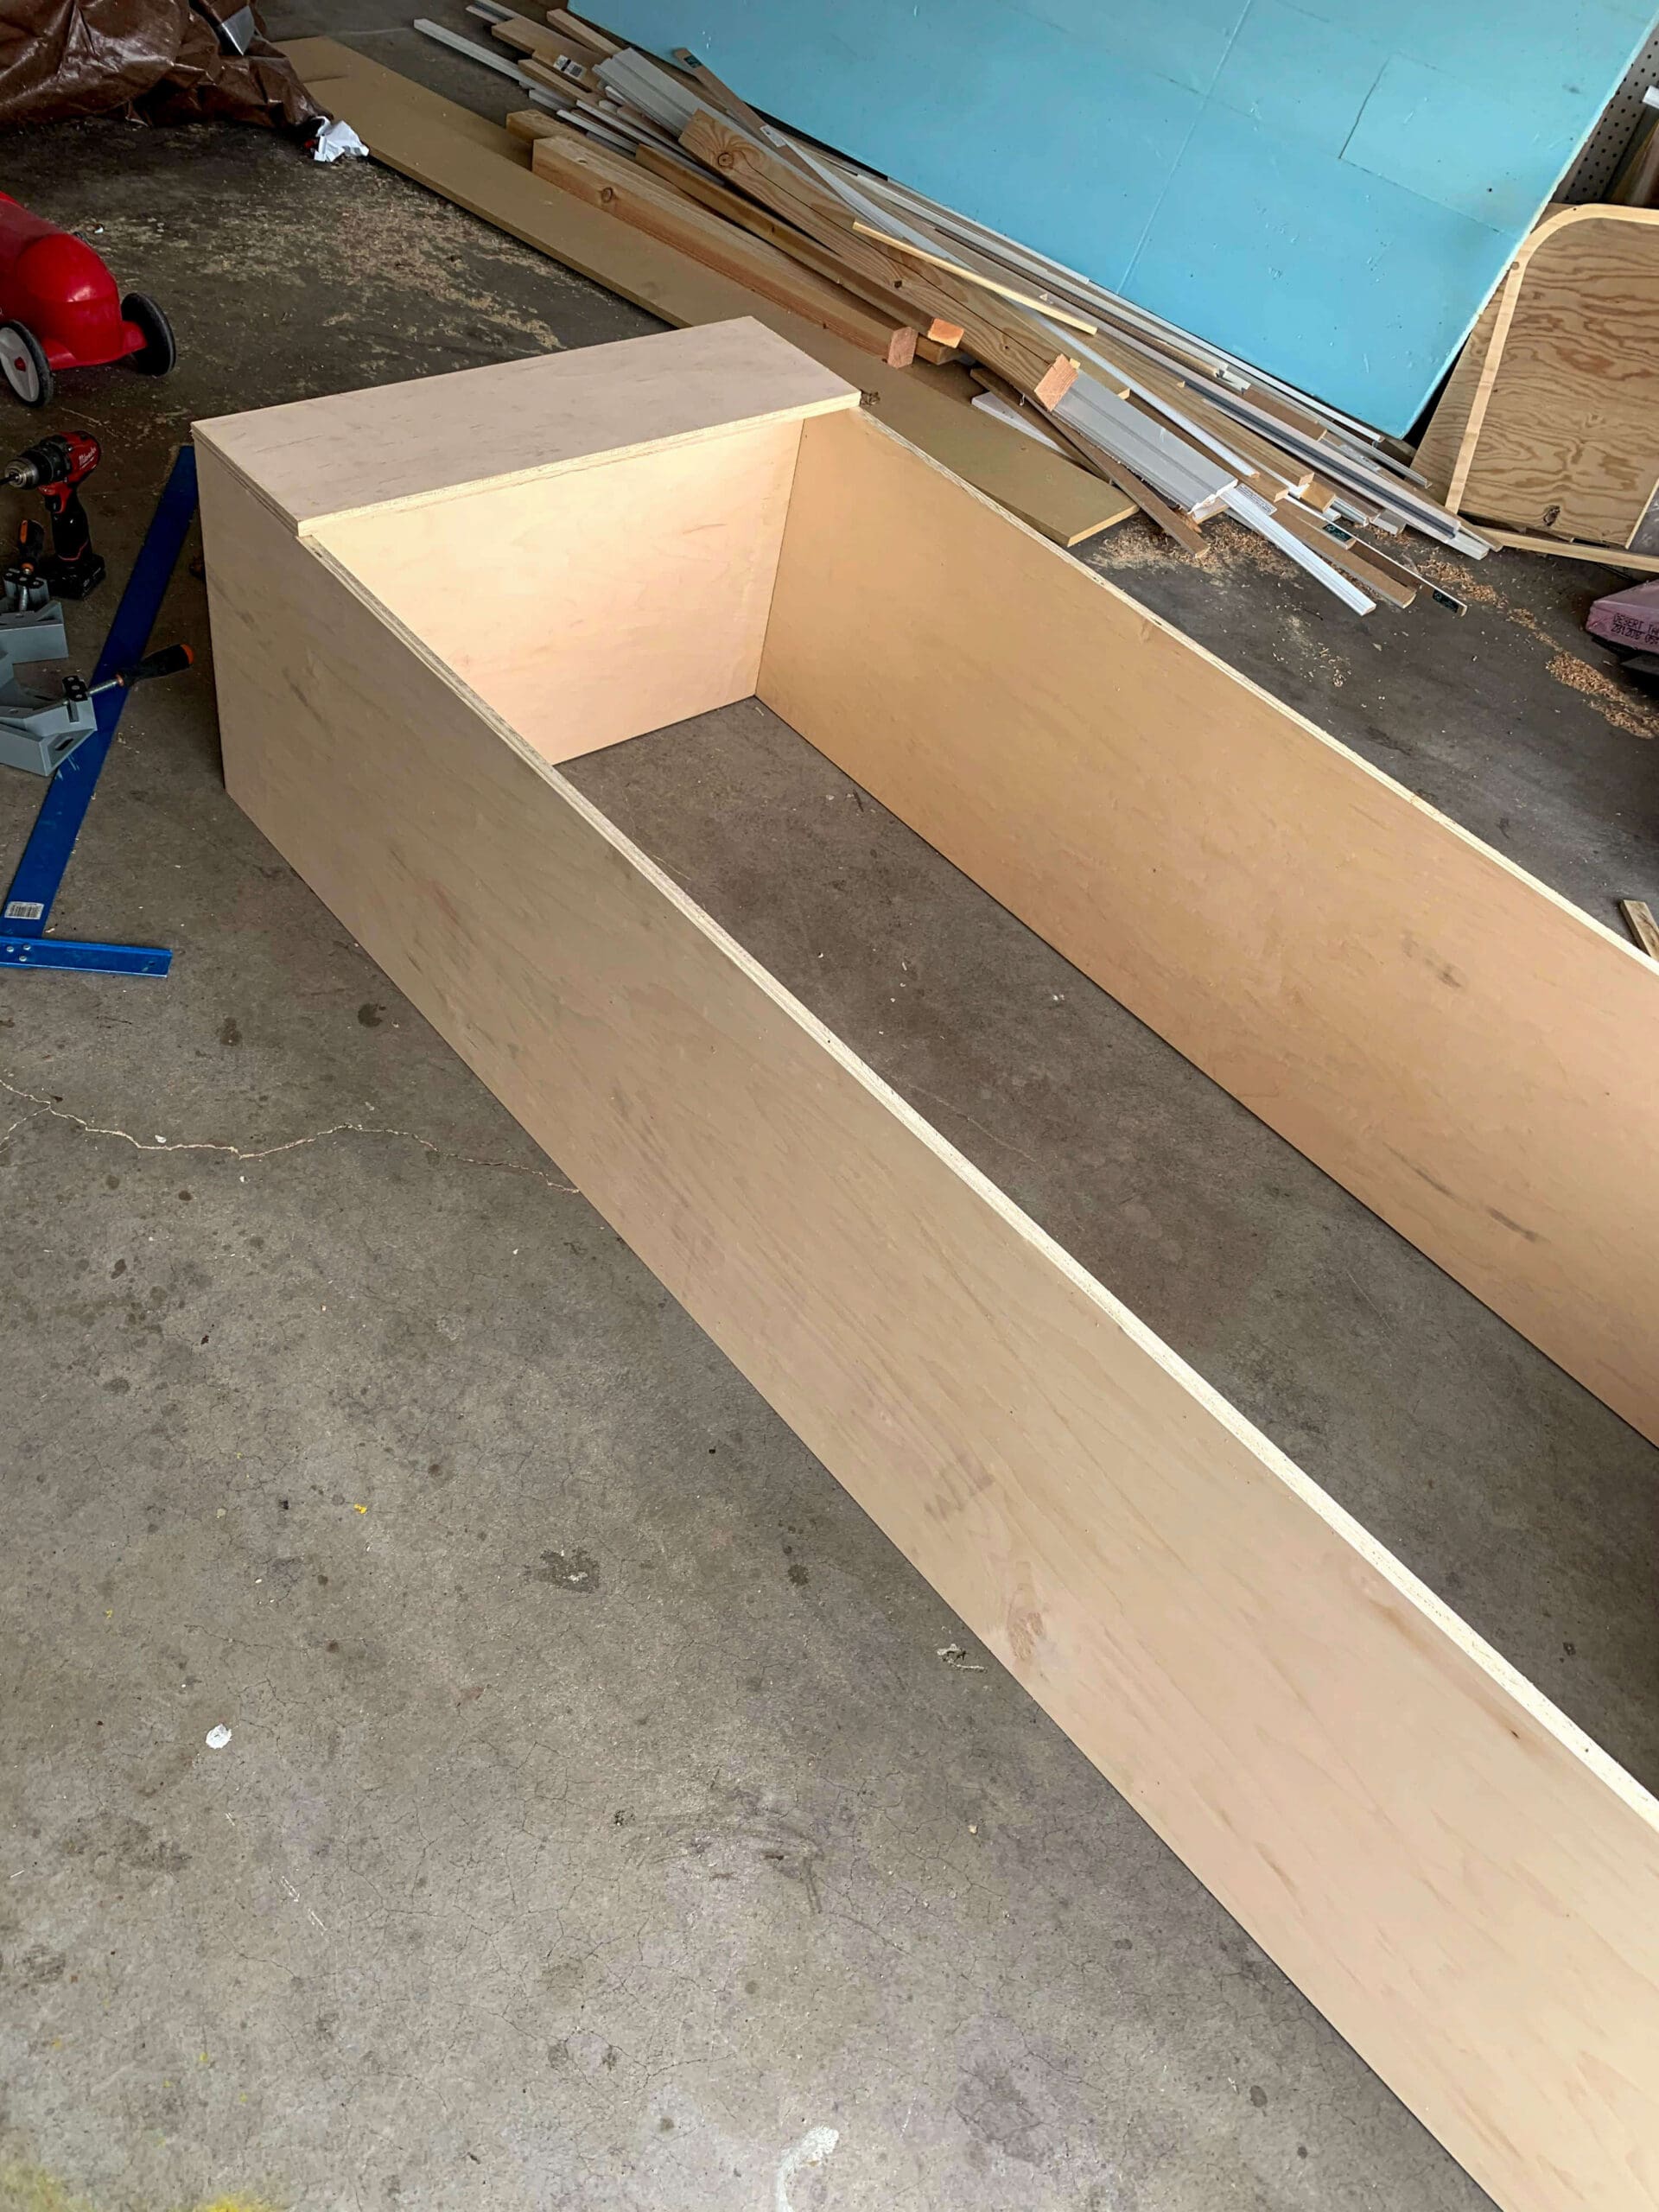
Adding a Divider Shelf for Upper and Lower Storage
I planned for each cabinet to have a larger upper door and a smaller lower door, so to create a distinct separation, I installed a shelf one-third of the way up (or two-thirds down, depending on how you look at it).
I cut a plywood shelf to fit inside the cabinet, then drilled three sets of pocket holes on each side. Once positioned, I secured it to the cabinet walls with pocket screws, ensuring a sturdy and seamless fit.
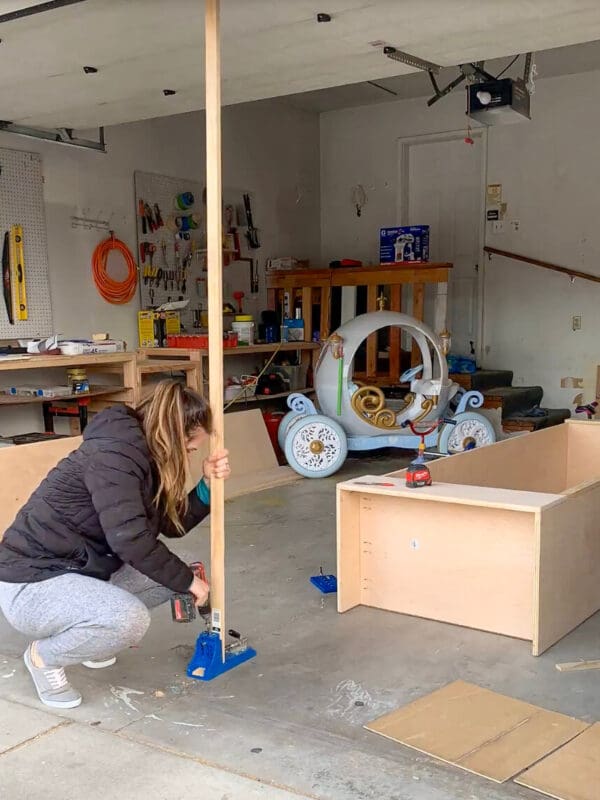
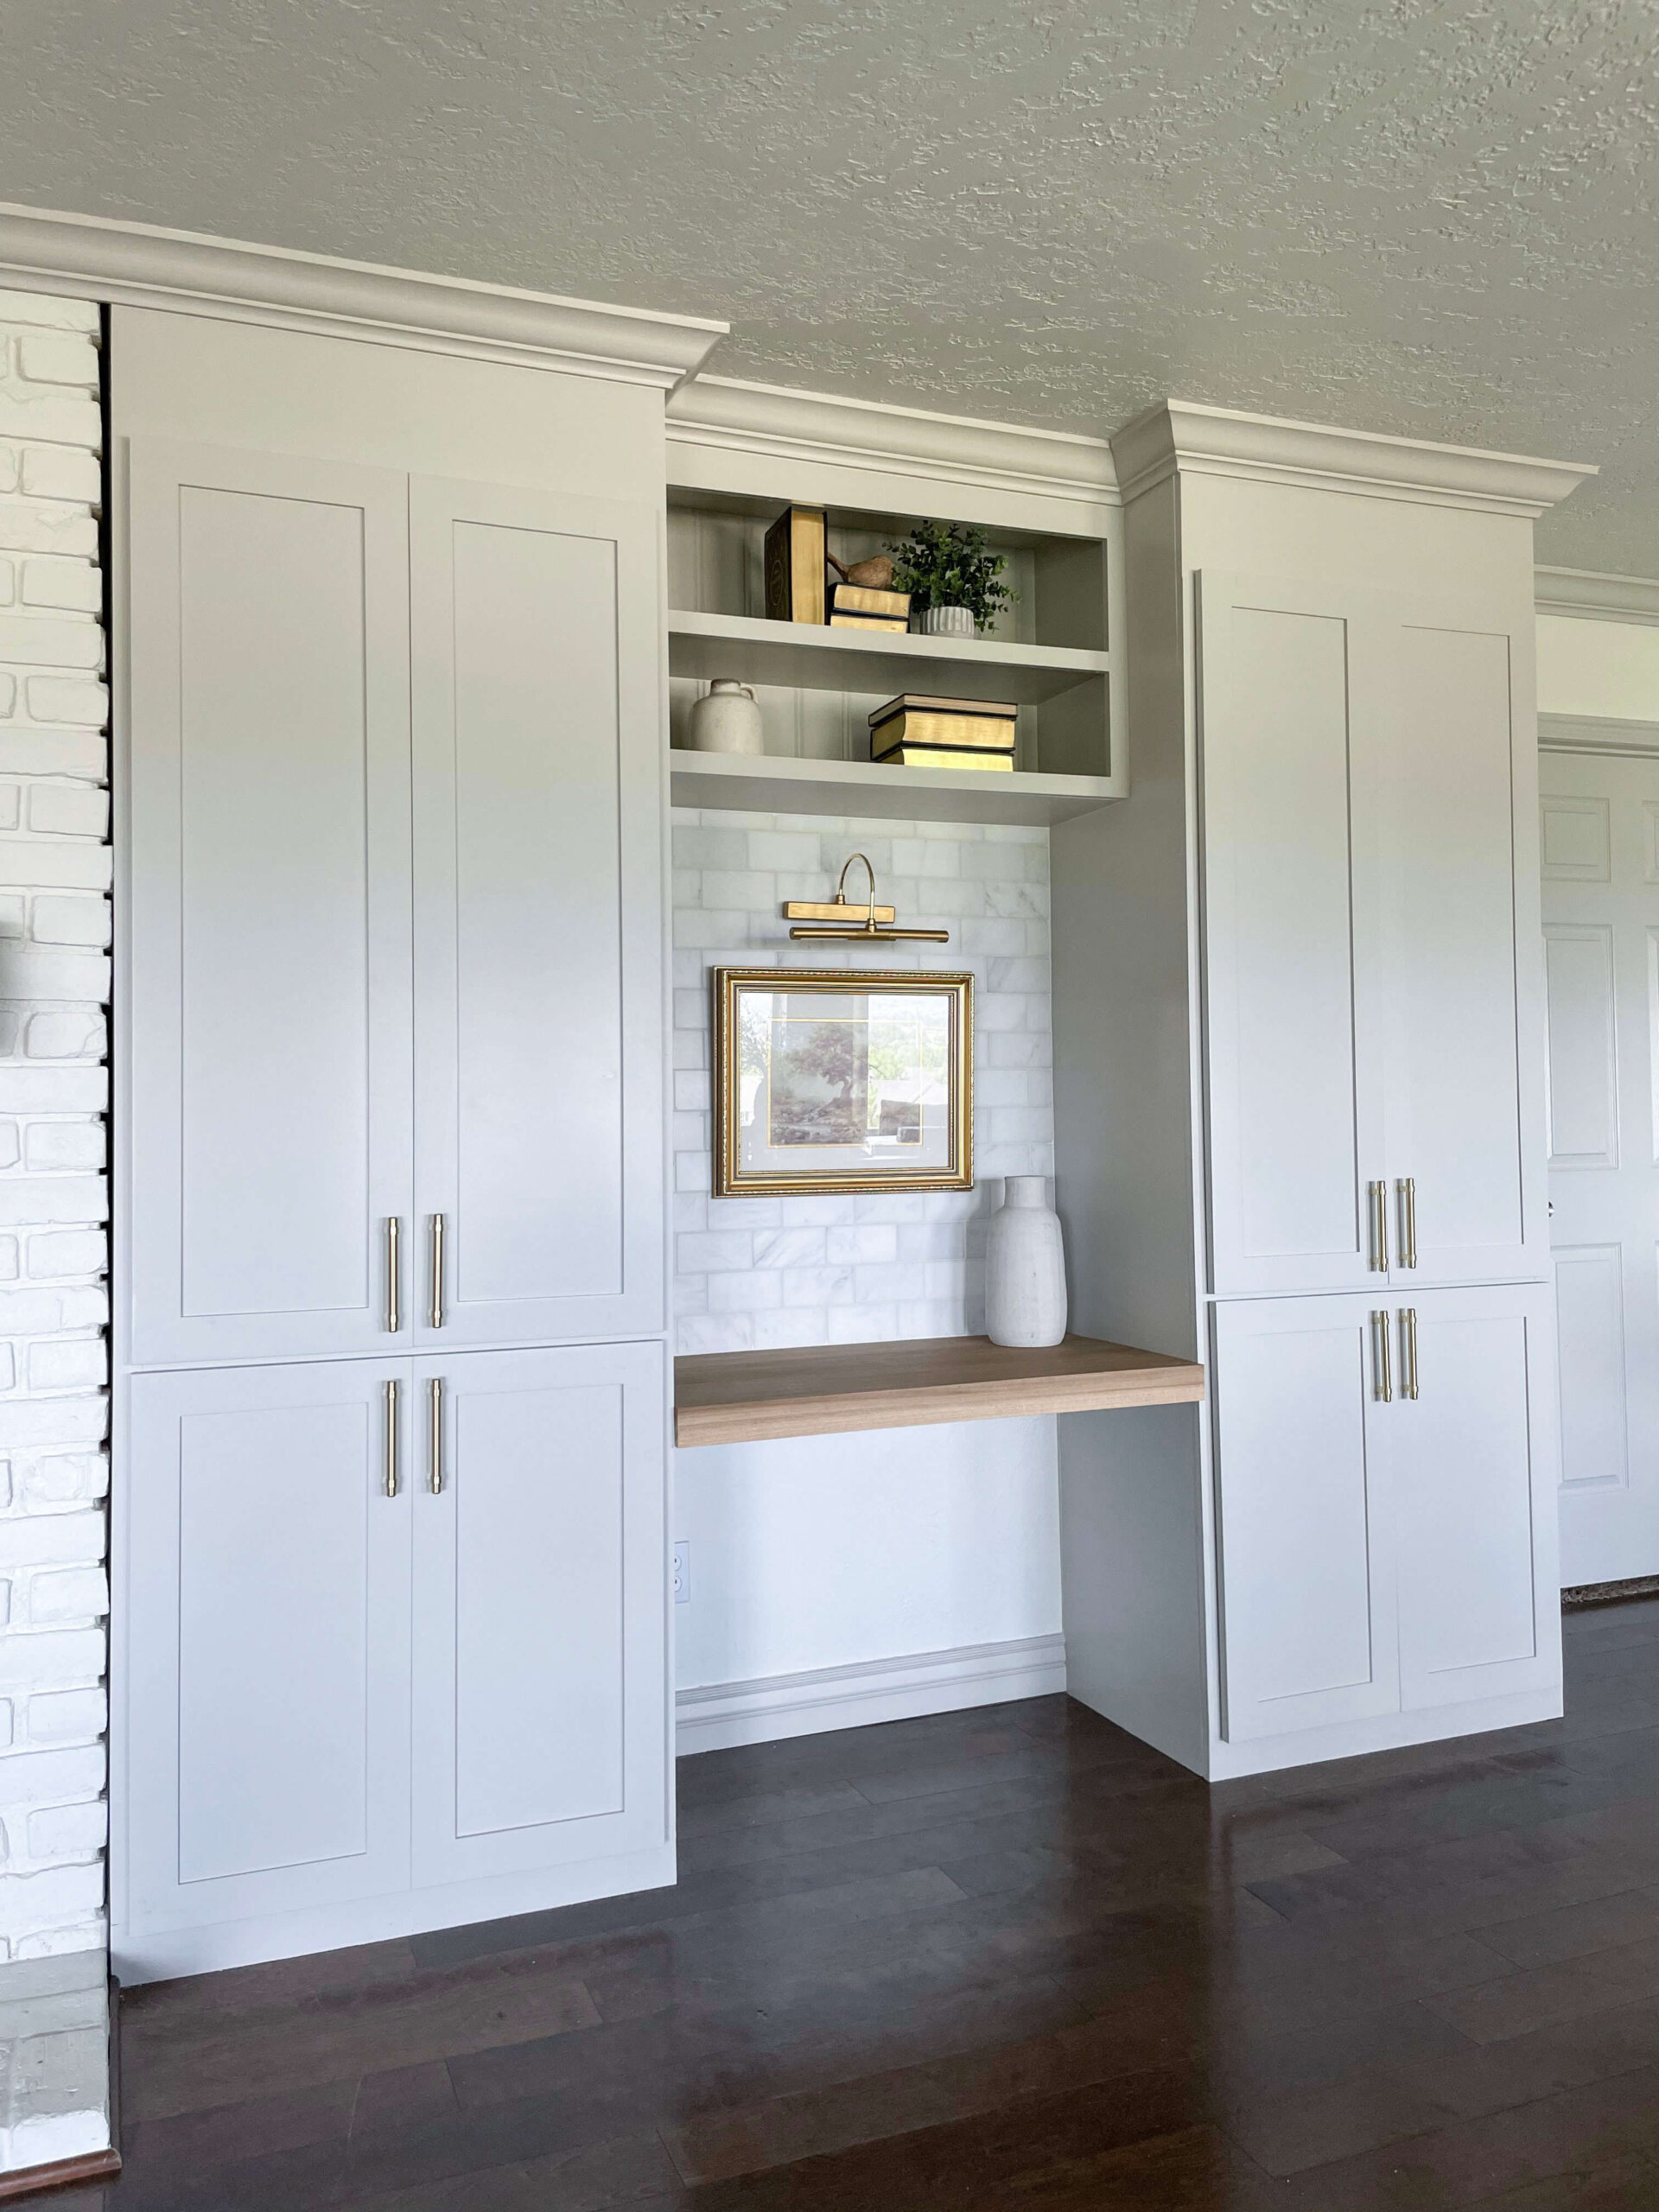
Framing the Cabinets for a Built-In Look
To achieve a true built-in office cabinet look, I constructed the face frame as a single unit to ensure all seams were perfectly flush.
Step 1: Cutting the Face Frame Boards
I started by cutting two horizontal plywood pieces:
- Top piece: 9 inches high, cut to match the cabinet’s width
- Bottom piece: 4 inches high, also cut to match the cabinet’s width
For the top board, I intentionally cut it to 9 inches to create a subtle overhang, adding depth and giving it a more custom-built look.
The bottom board was positioned flush on all sides, completely closing the open space without creating a ledge.
For the vertical frame pieces, I used select pine boards. To determine their exact length, I measured the distance between the top and bottom horizontal boards along the exposed cabinet sides.
I also added a lip along the cabinet walls, giving it more structure and a clean, polished look.
To conceal the exposed front edge of the new shelf, I added another select pine board, positioning it flush with the top while allowing for a clean, intentional overhang.
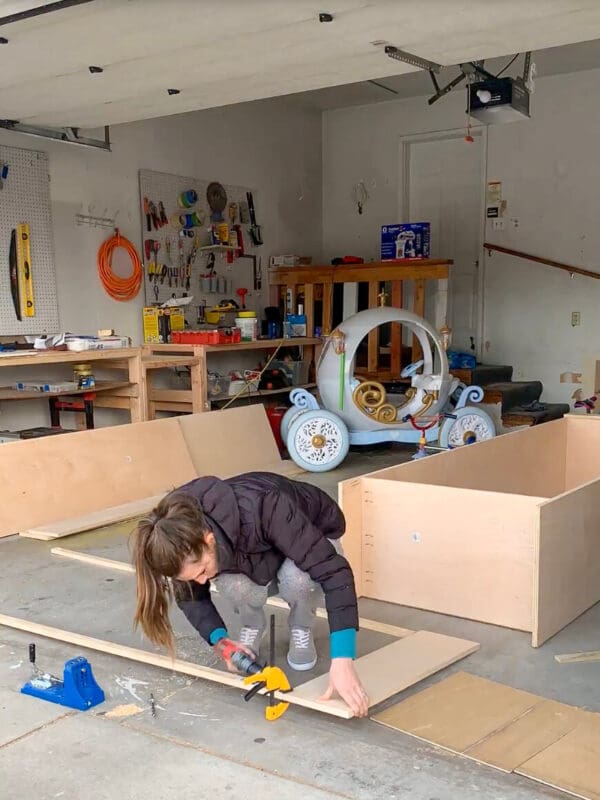
Once all the pieces were cut, I laid them out for a final dry fit, making small adjustments before assembling them.
Step 2: Assembling the Face Frame
With everything cut and measured, I drilled pocket holes on the backside of the select pine boards, ensuring the screws would be hidden once attached.
I clamped the frame securely and used pocket screws to join the pieces, creating a sturdy, seamless face frame.
Since I was using pocket holes, it was essential to do a dry fit before screwing anything together – this helped me catch any small adjustments before making them permanent.
Step 3: Attaching the Face Frame to the Cabinet Boxes
To ensure a secure fit, I drilled additional pocket holes along the inside edges of the cabinet using my Kreg Pocket Hole Jig.
Then, I fastened the face frame to the cabinet structure using pocket screws, keeping the attachment hidden while providing a strong, seamless connection.

For extra reinforcement, I used a nail gun with 1 1/4-inch brad nails along the sides of the frame, eliminating gaps and ensuring the frame was flush against the cabinet.
Step 4: Sanding & Prepping for Paint
After securing the face frame, I went over the entire frame with an orbital sander and 150-grit sandpaper to smooth out any rough edges.
Then, I did it all over again – because two cabinet boxes mean two face frames!
Finishing Touches – Edge Banding for a Professional Finish
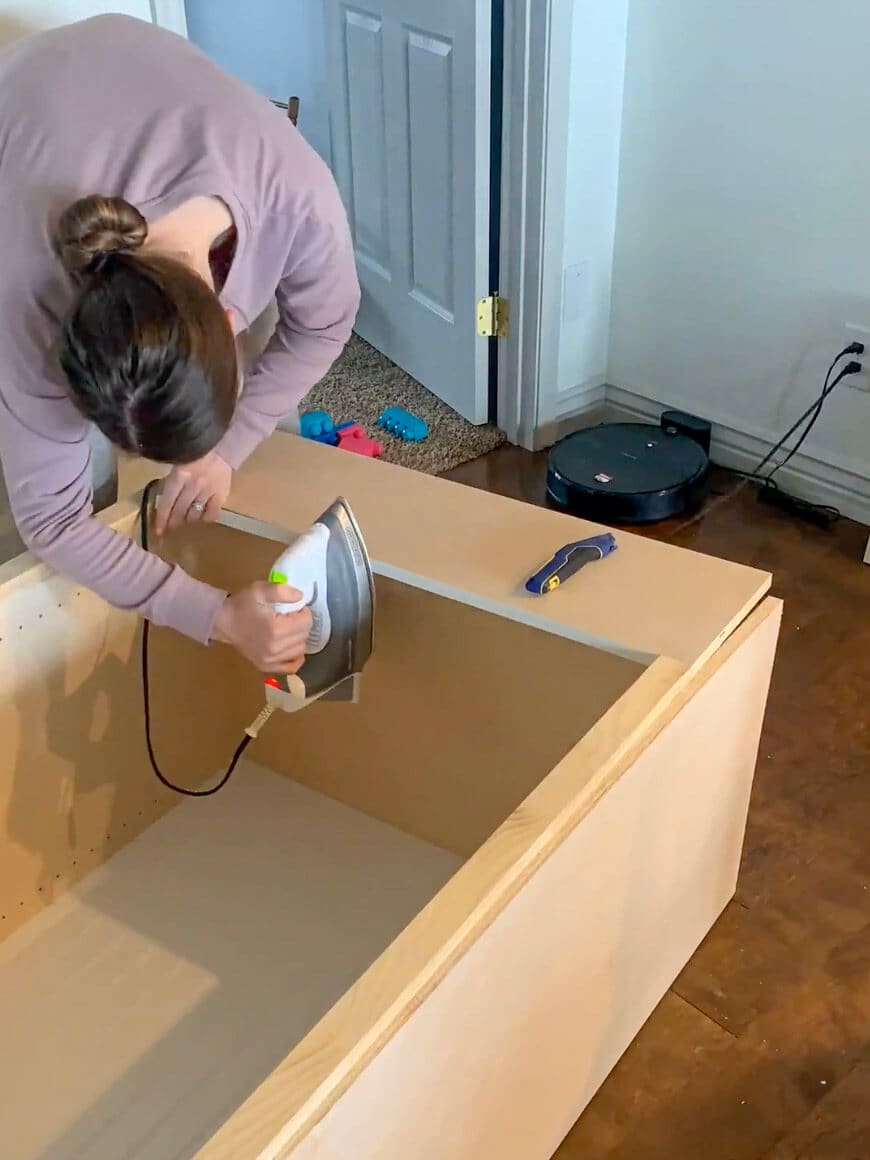
Since plywood edges can look rough, I applied iron-on birch edge banding to the exposed edges of the face frame. Using an iron, I adhered the banding to the plywood and trimmed off any excess with a razor blade. This small detail gave the cabinets a smooth, polished appearance.
Next Steps: Now that we’ve built the cabinet boxes and attached the framing, it’s time for the fun part – adding shelves, painting, and bringing these built-ins to life! 🎉
Head over to Part 2 to see how I built the connecting shelf, installed additional shelving, and painted the cabinets.
Then check out Part 3 where I tackled the floating desk, backsplash, and cabinet doors – plus some fun cabinet lighting tricks you won’t want to miss!

📌 Save this Project for Later
FAQs About Building Custom Office Cabinets
Plywood is the most common and affordable option for DIY office cabinets because it’s durable and easy to work with. If you want a more premium look, consider birch plywood for its smooth finish or MDF for a painted finish. For face frames and trim, select pine or poplar work great.
Building your own office cabinets can be 50-70% cheaper than buying pre-made or custom cabinets. While store-bought cabinets range from $2,000-$6,000, a DIY cabinet build using plywood and pocket hole joinery can cost as little as $300-$1,500 depending on materials and tools.
For a sturdy cabinet frame, use:
¾-inch plywood – For cabinet sides, tops, and shelves
½-inch plywood – For the back panel (or beadboard for a decorative touch)
¼-inch plywood – For drawer bottoms
To get a high-end built-in cabinet look:
Add face frames using select pine or poplar
Use crown molding at the top
Paint with a sprayer for a smooth finish
Choose sleek hardware (gold, black, or matte nickel for a modern touch)
