ALL the Details of Our DIY Kitchen Remodel


Updated July 13, 2026
This DIY kitchen remodel was a labor of love, one that started long before we ever bought our home. We were moving to a new state, and since we had to buy the house sight unseen because of how quickly the homes were selling at the time, we studied the listing images and had our realtor take measurements of each of the walls so that we could start planning. I’m excited to share all the tips, tricks, sources, and a whole lot of DIY fun!
Before Our DIY Kitchen Remodel
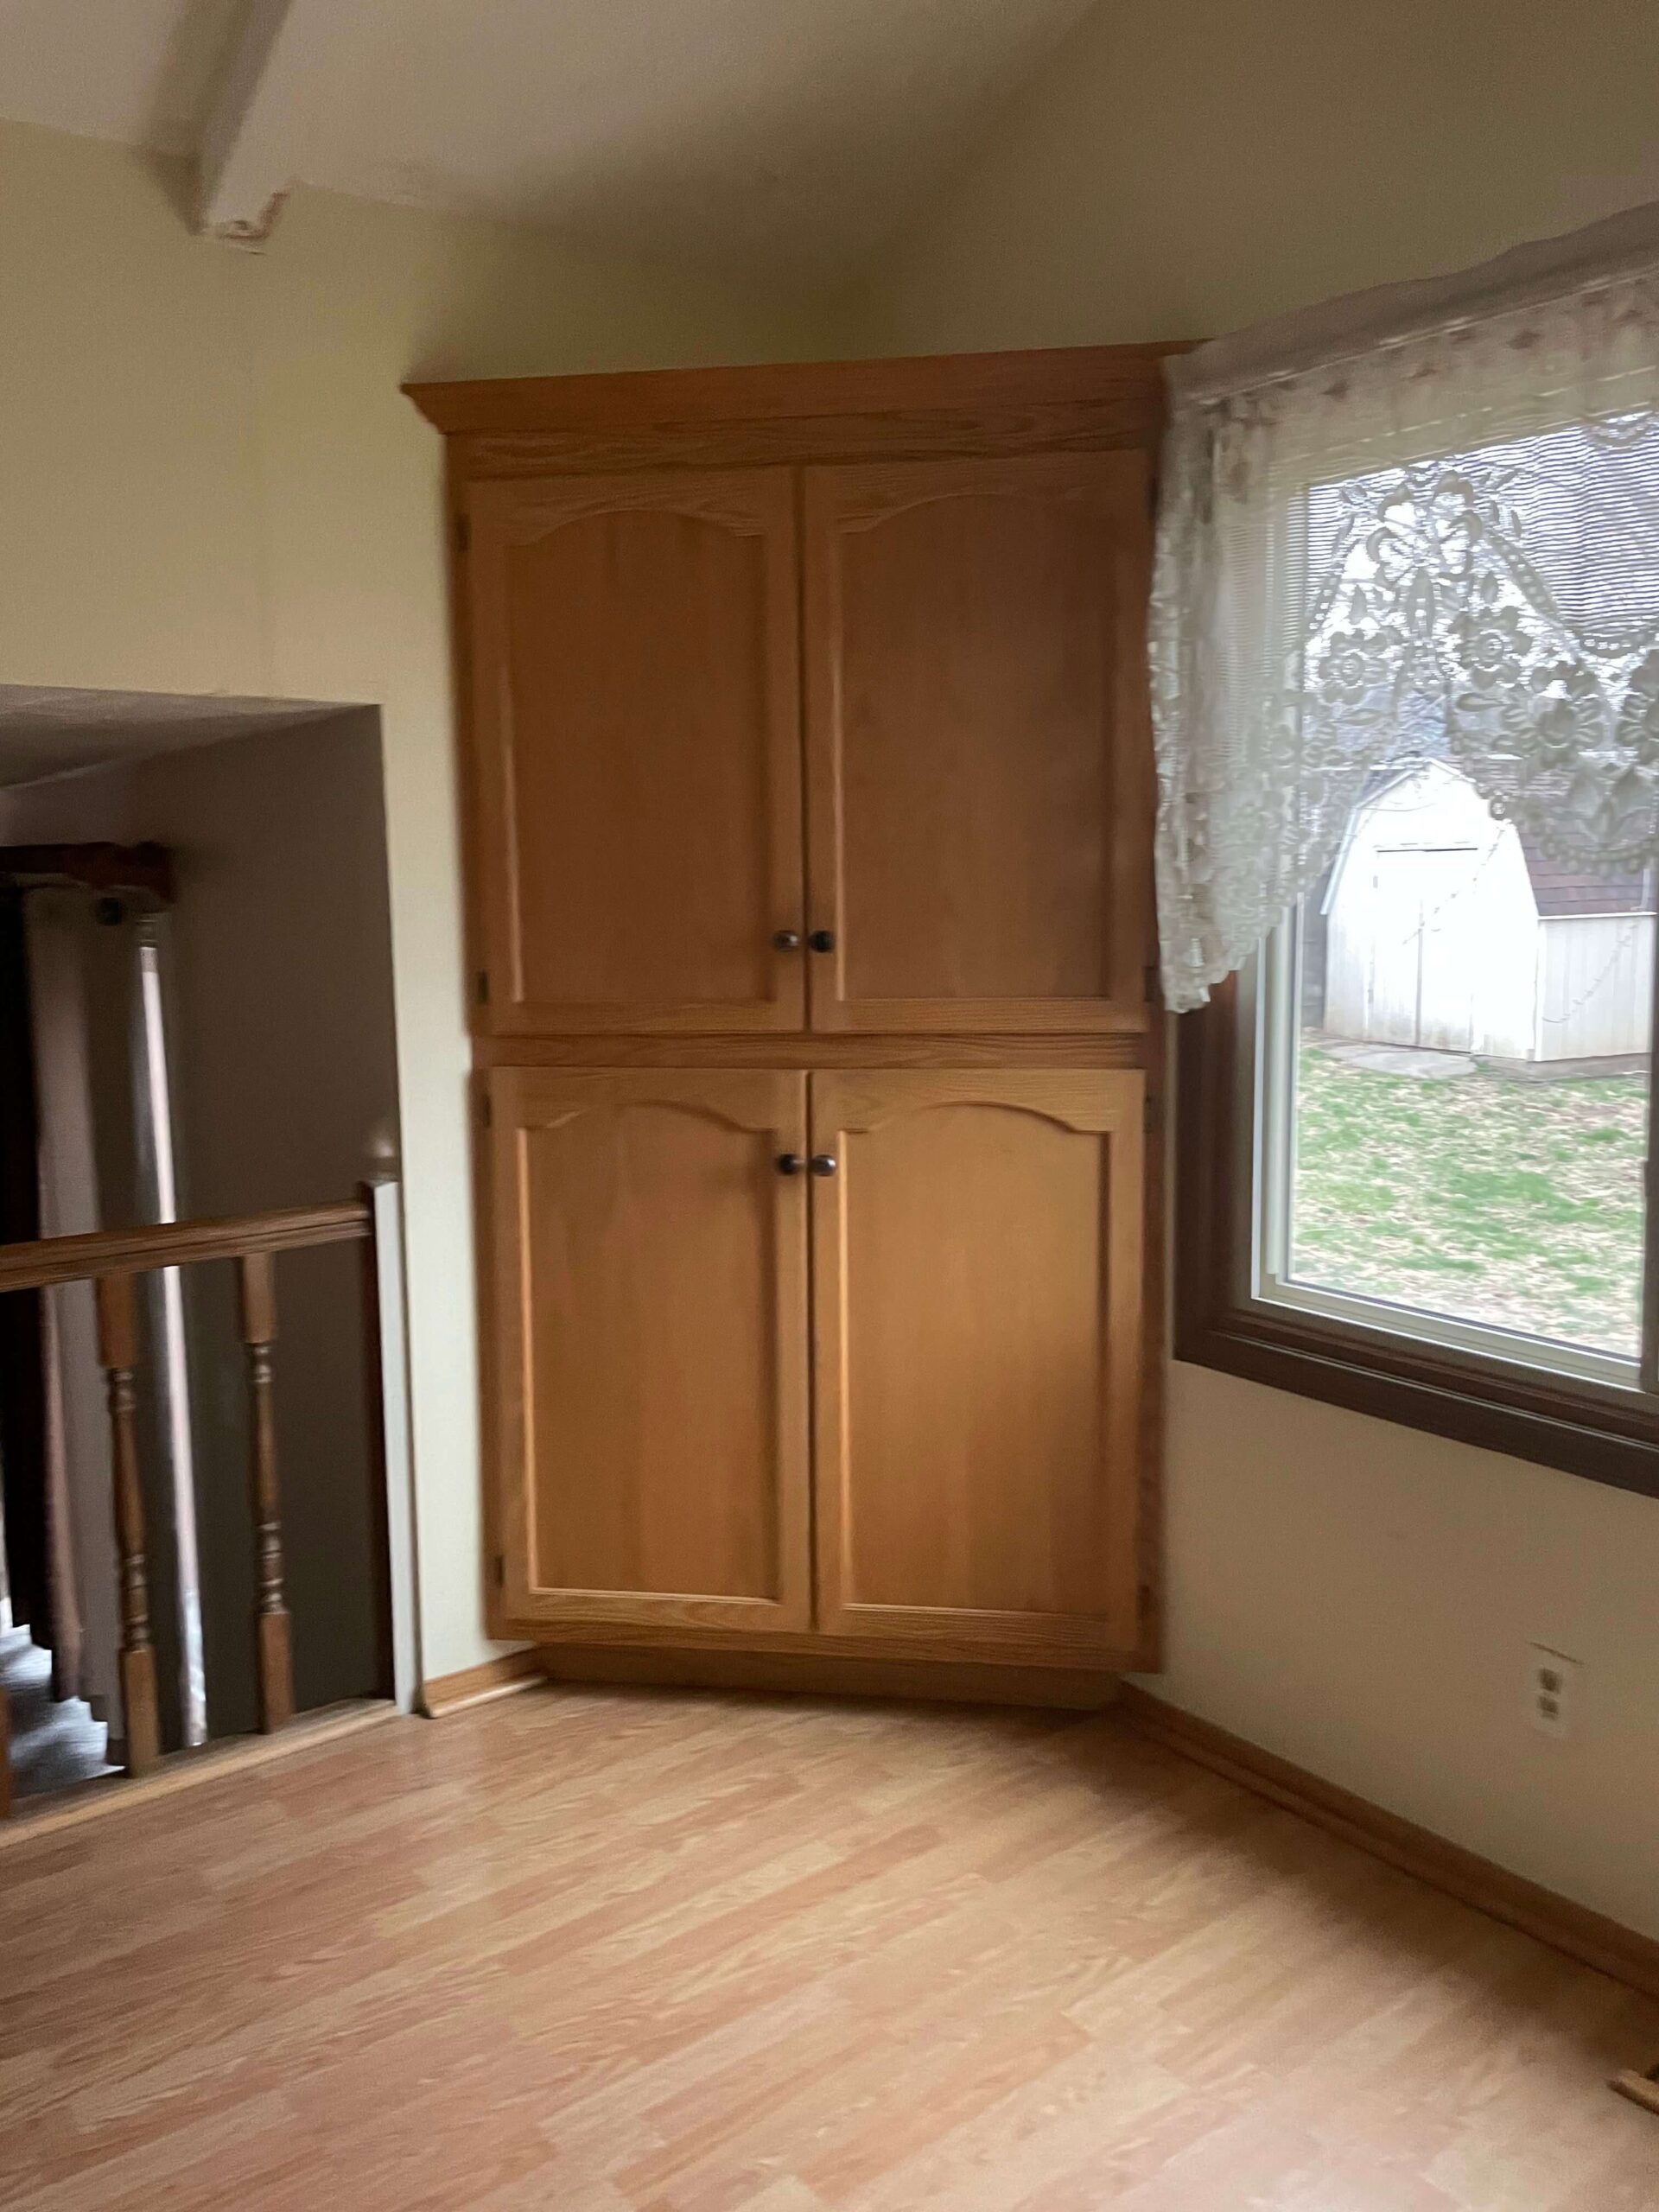
When our family moved from Utah to Nebraska, we bought this house knowing that it had a lot of potential, but also needed a lot of love and updating. Since buying our house in April of 2022 we have put literal blood, sweat, and tears into totally gutting our master bathroom, completely upgrading our basement/tornado shelter, adding a garden, and so much more. The to do list for our house is years long, and honestly, may not all get done, but the very first project we dove into was our DIY kitchen remodel.

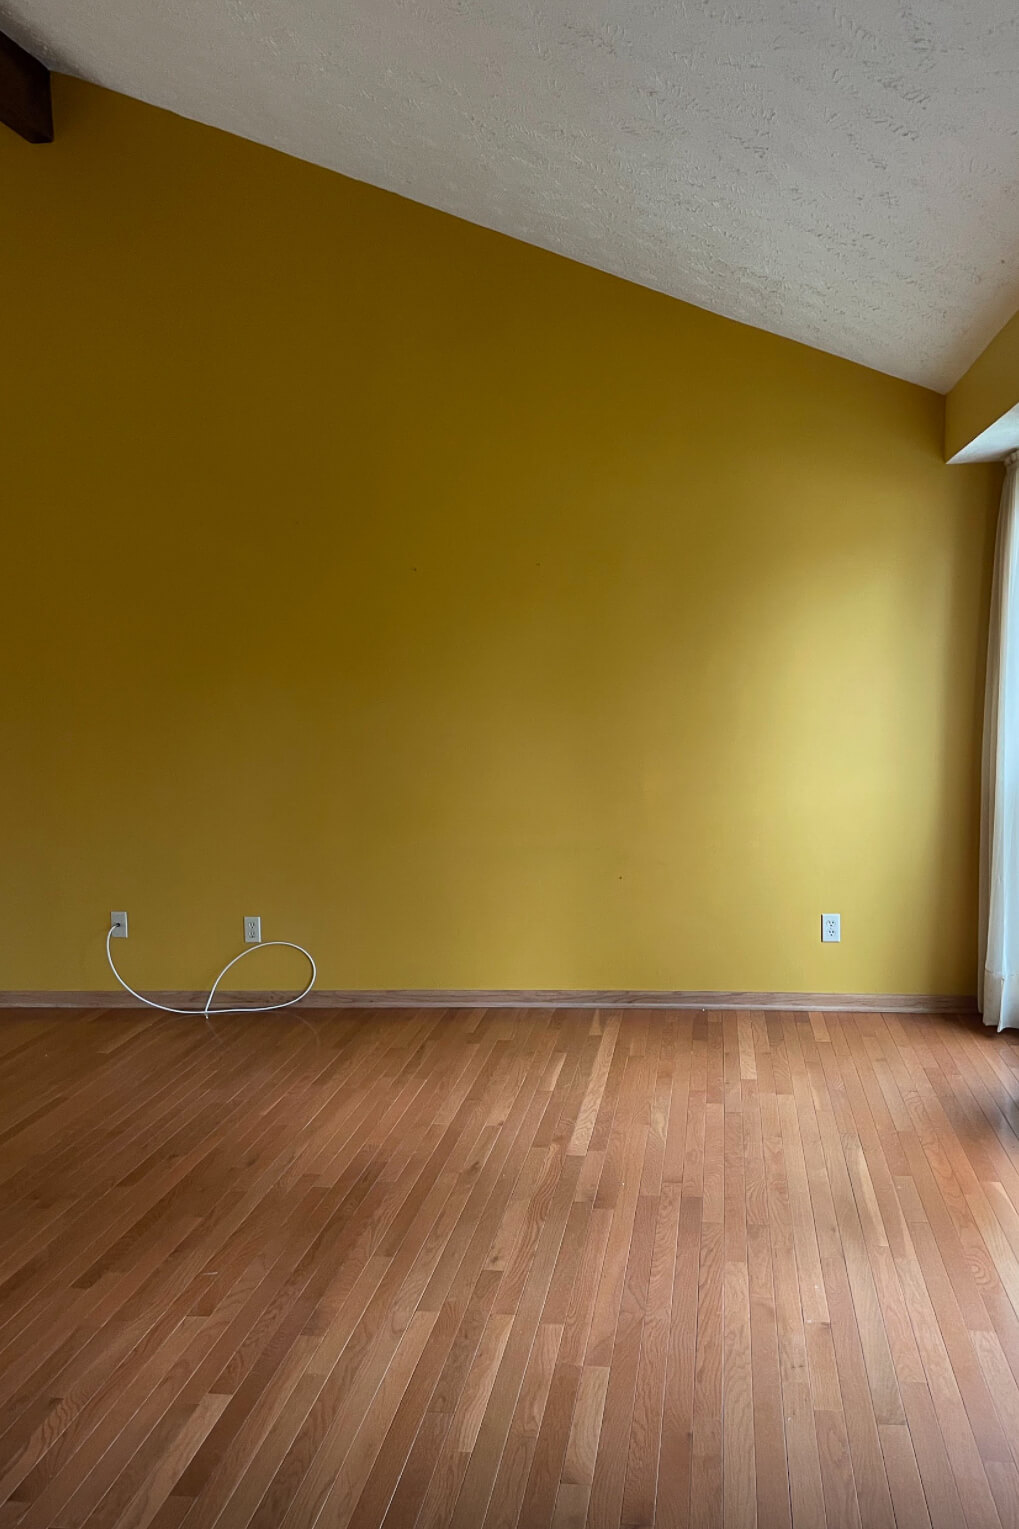
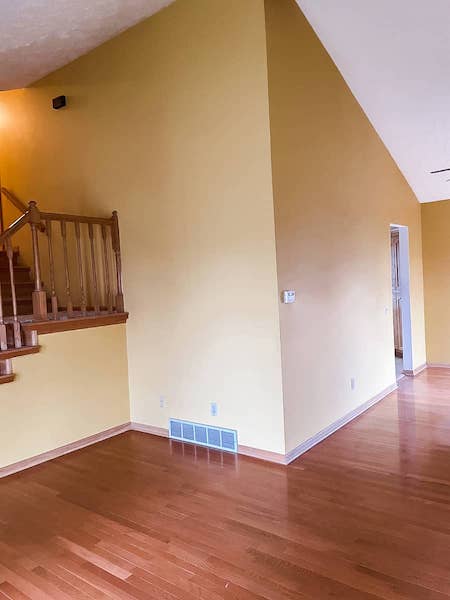
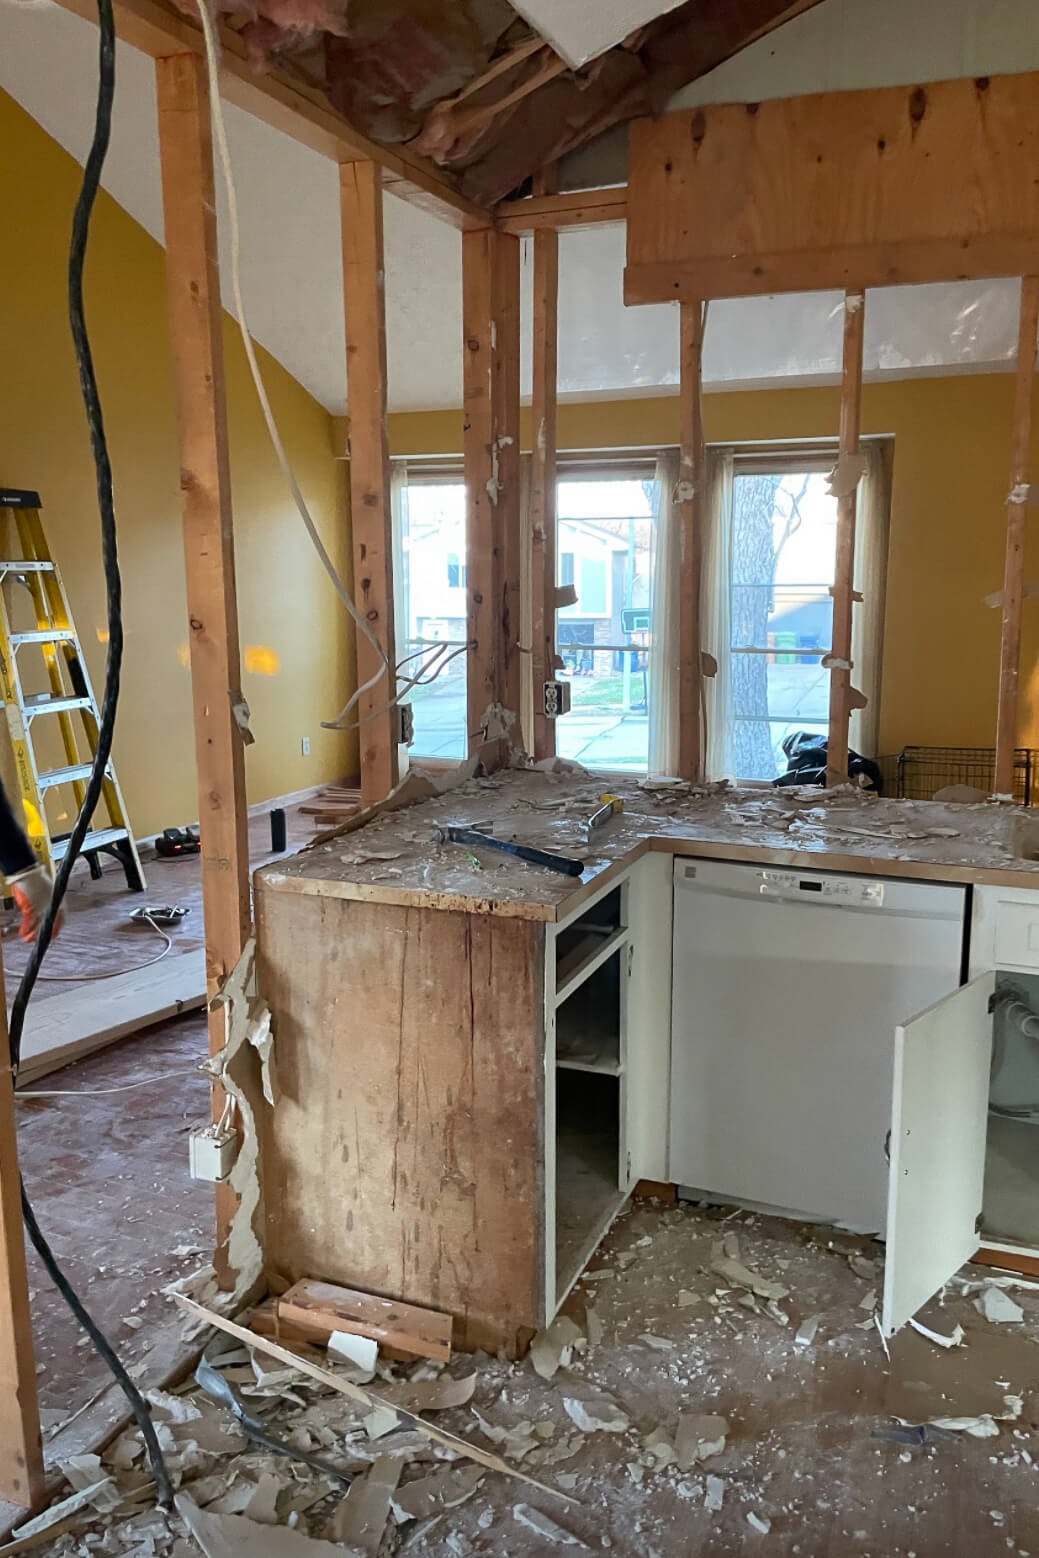
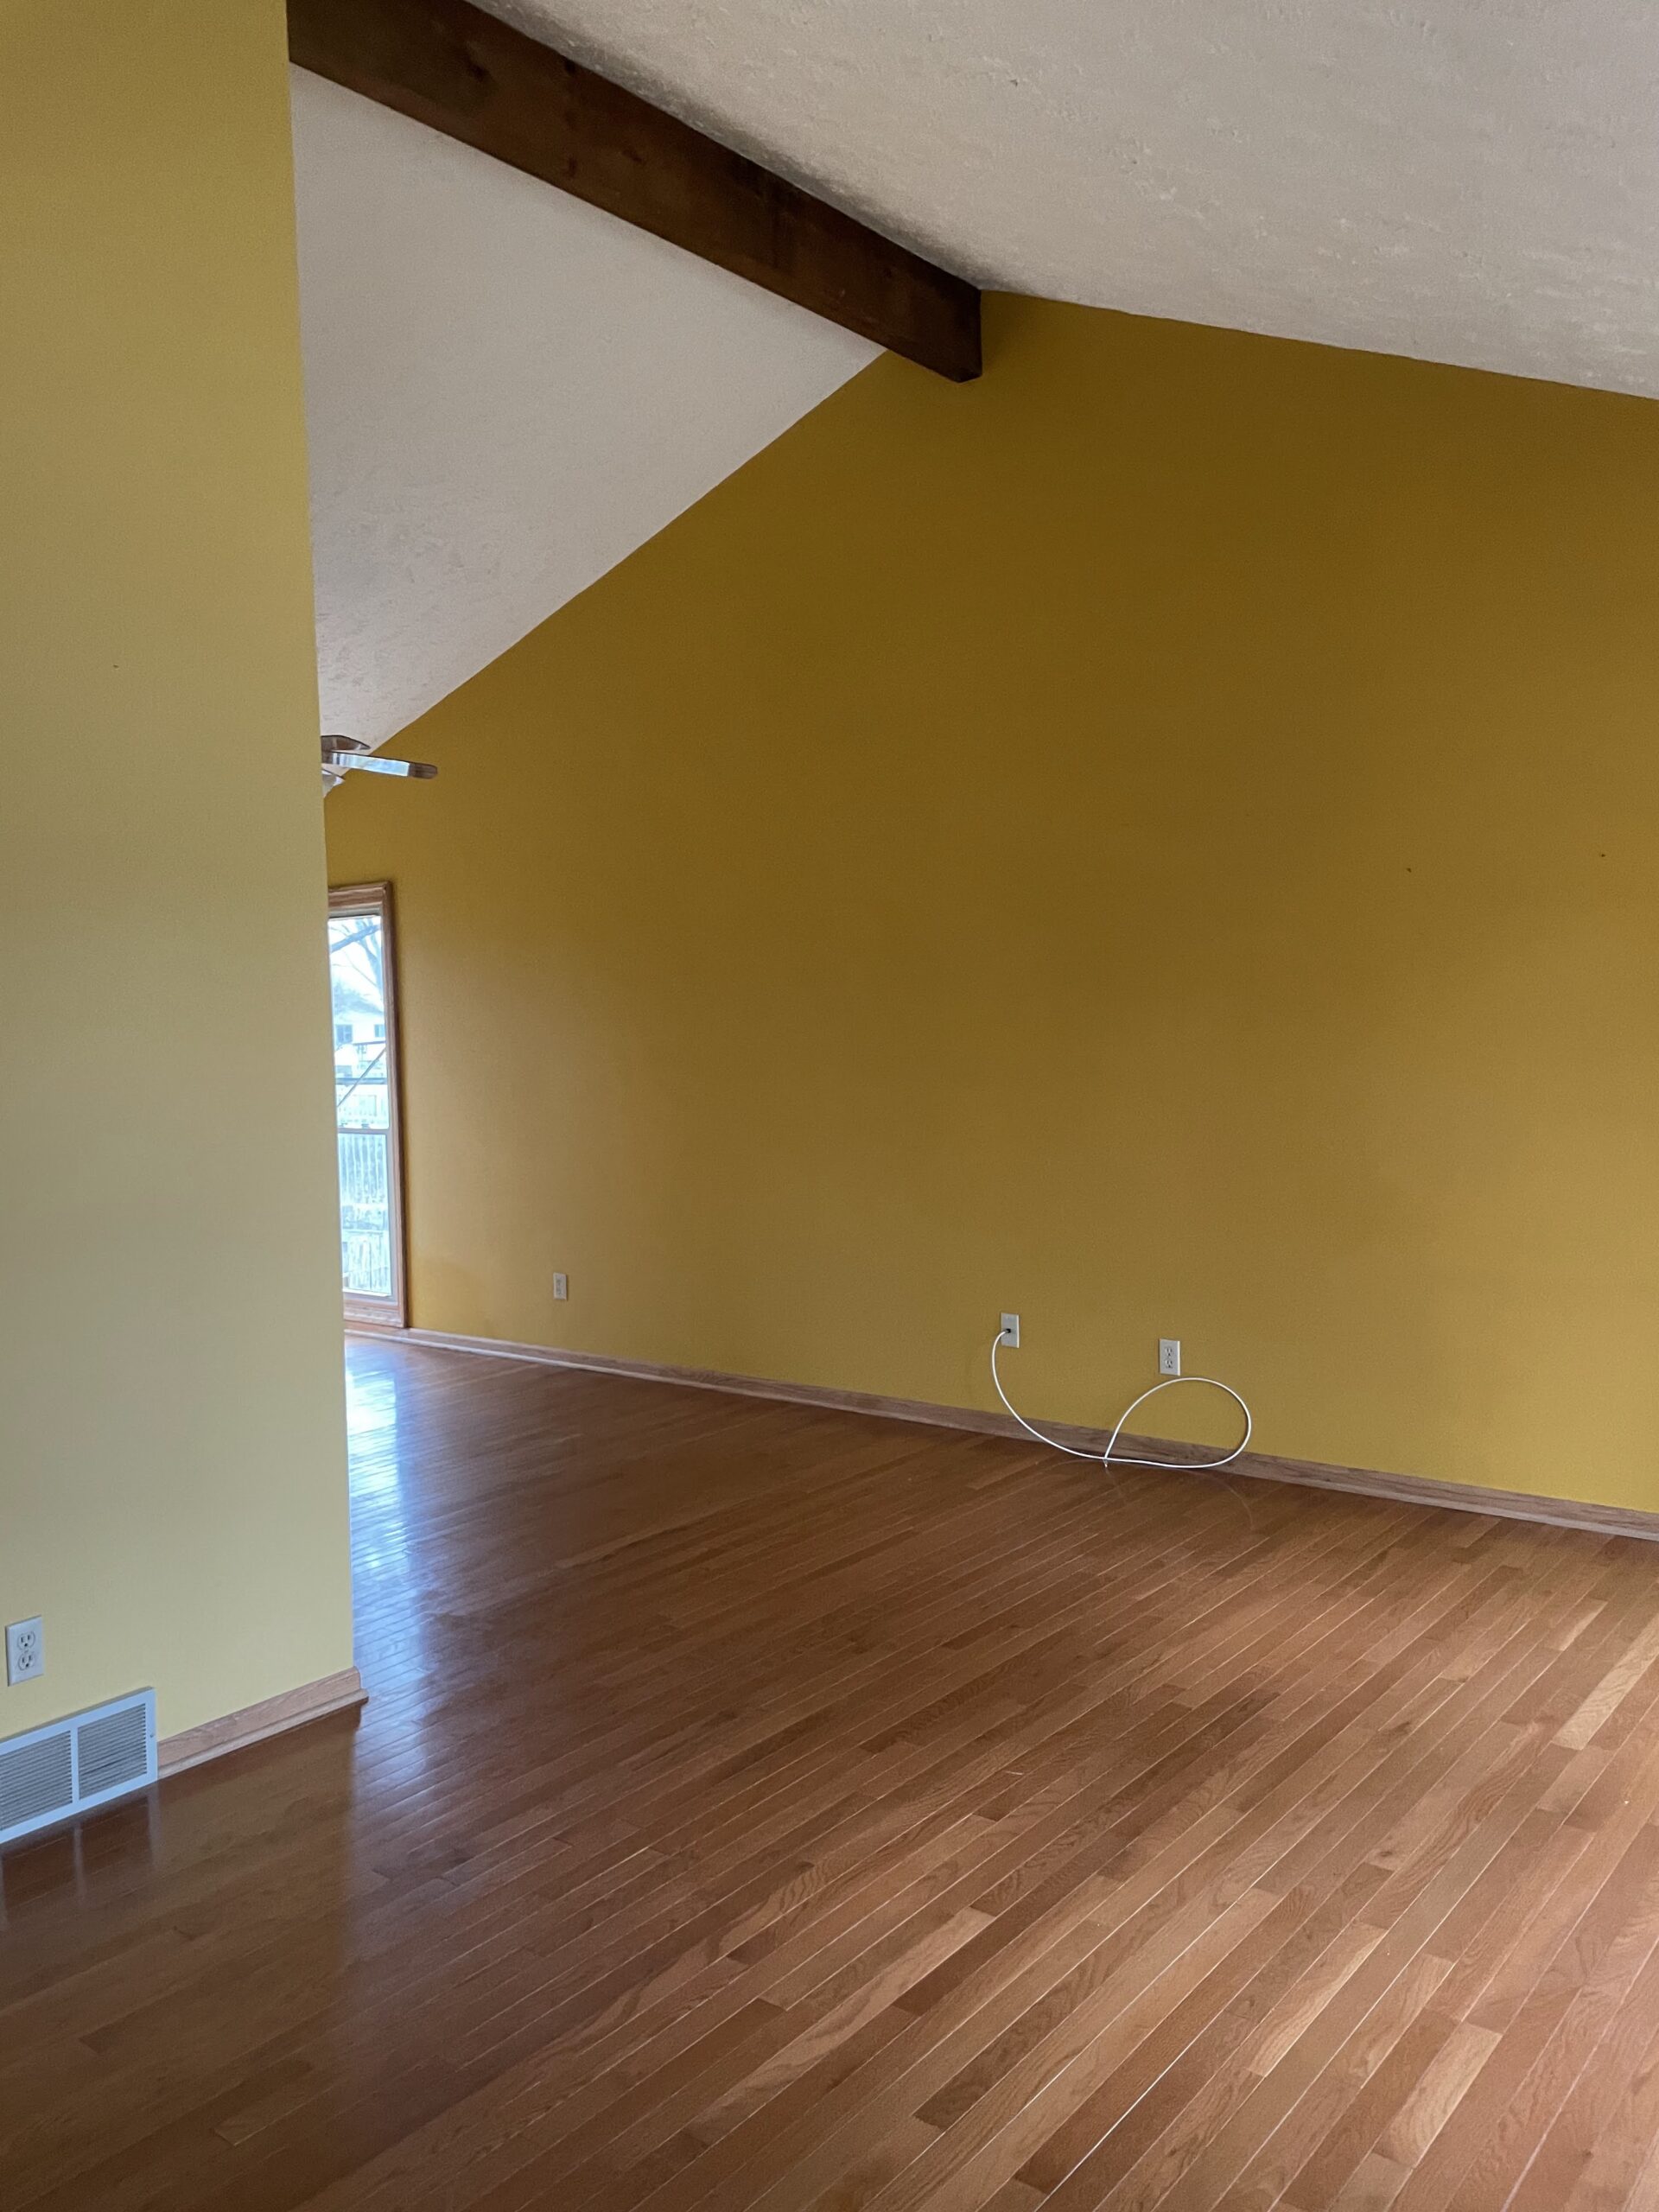
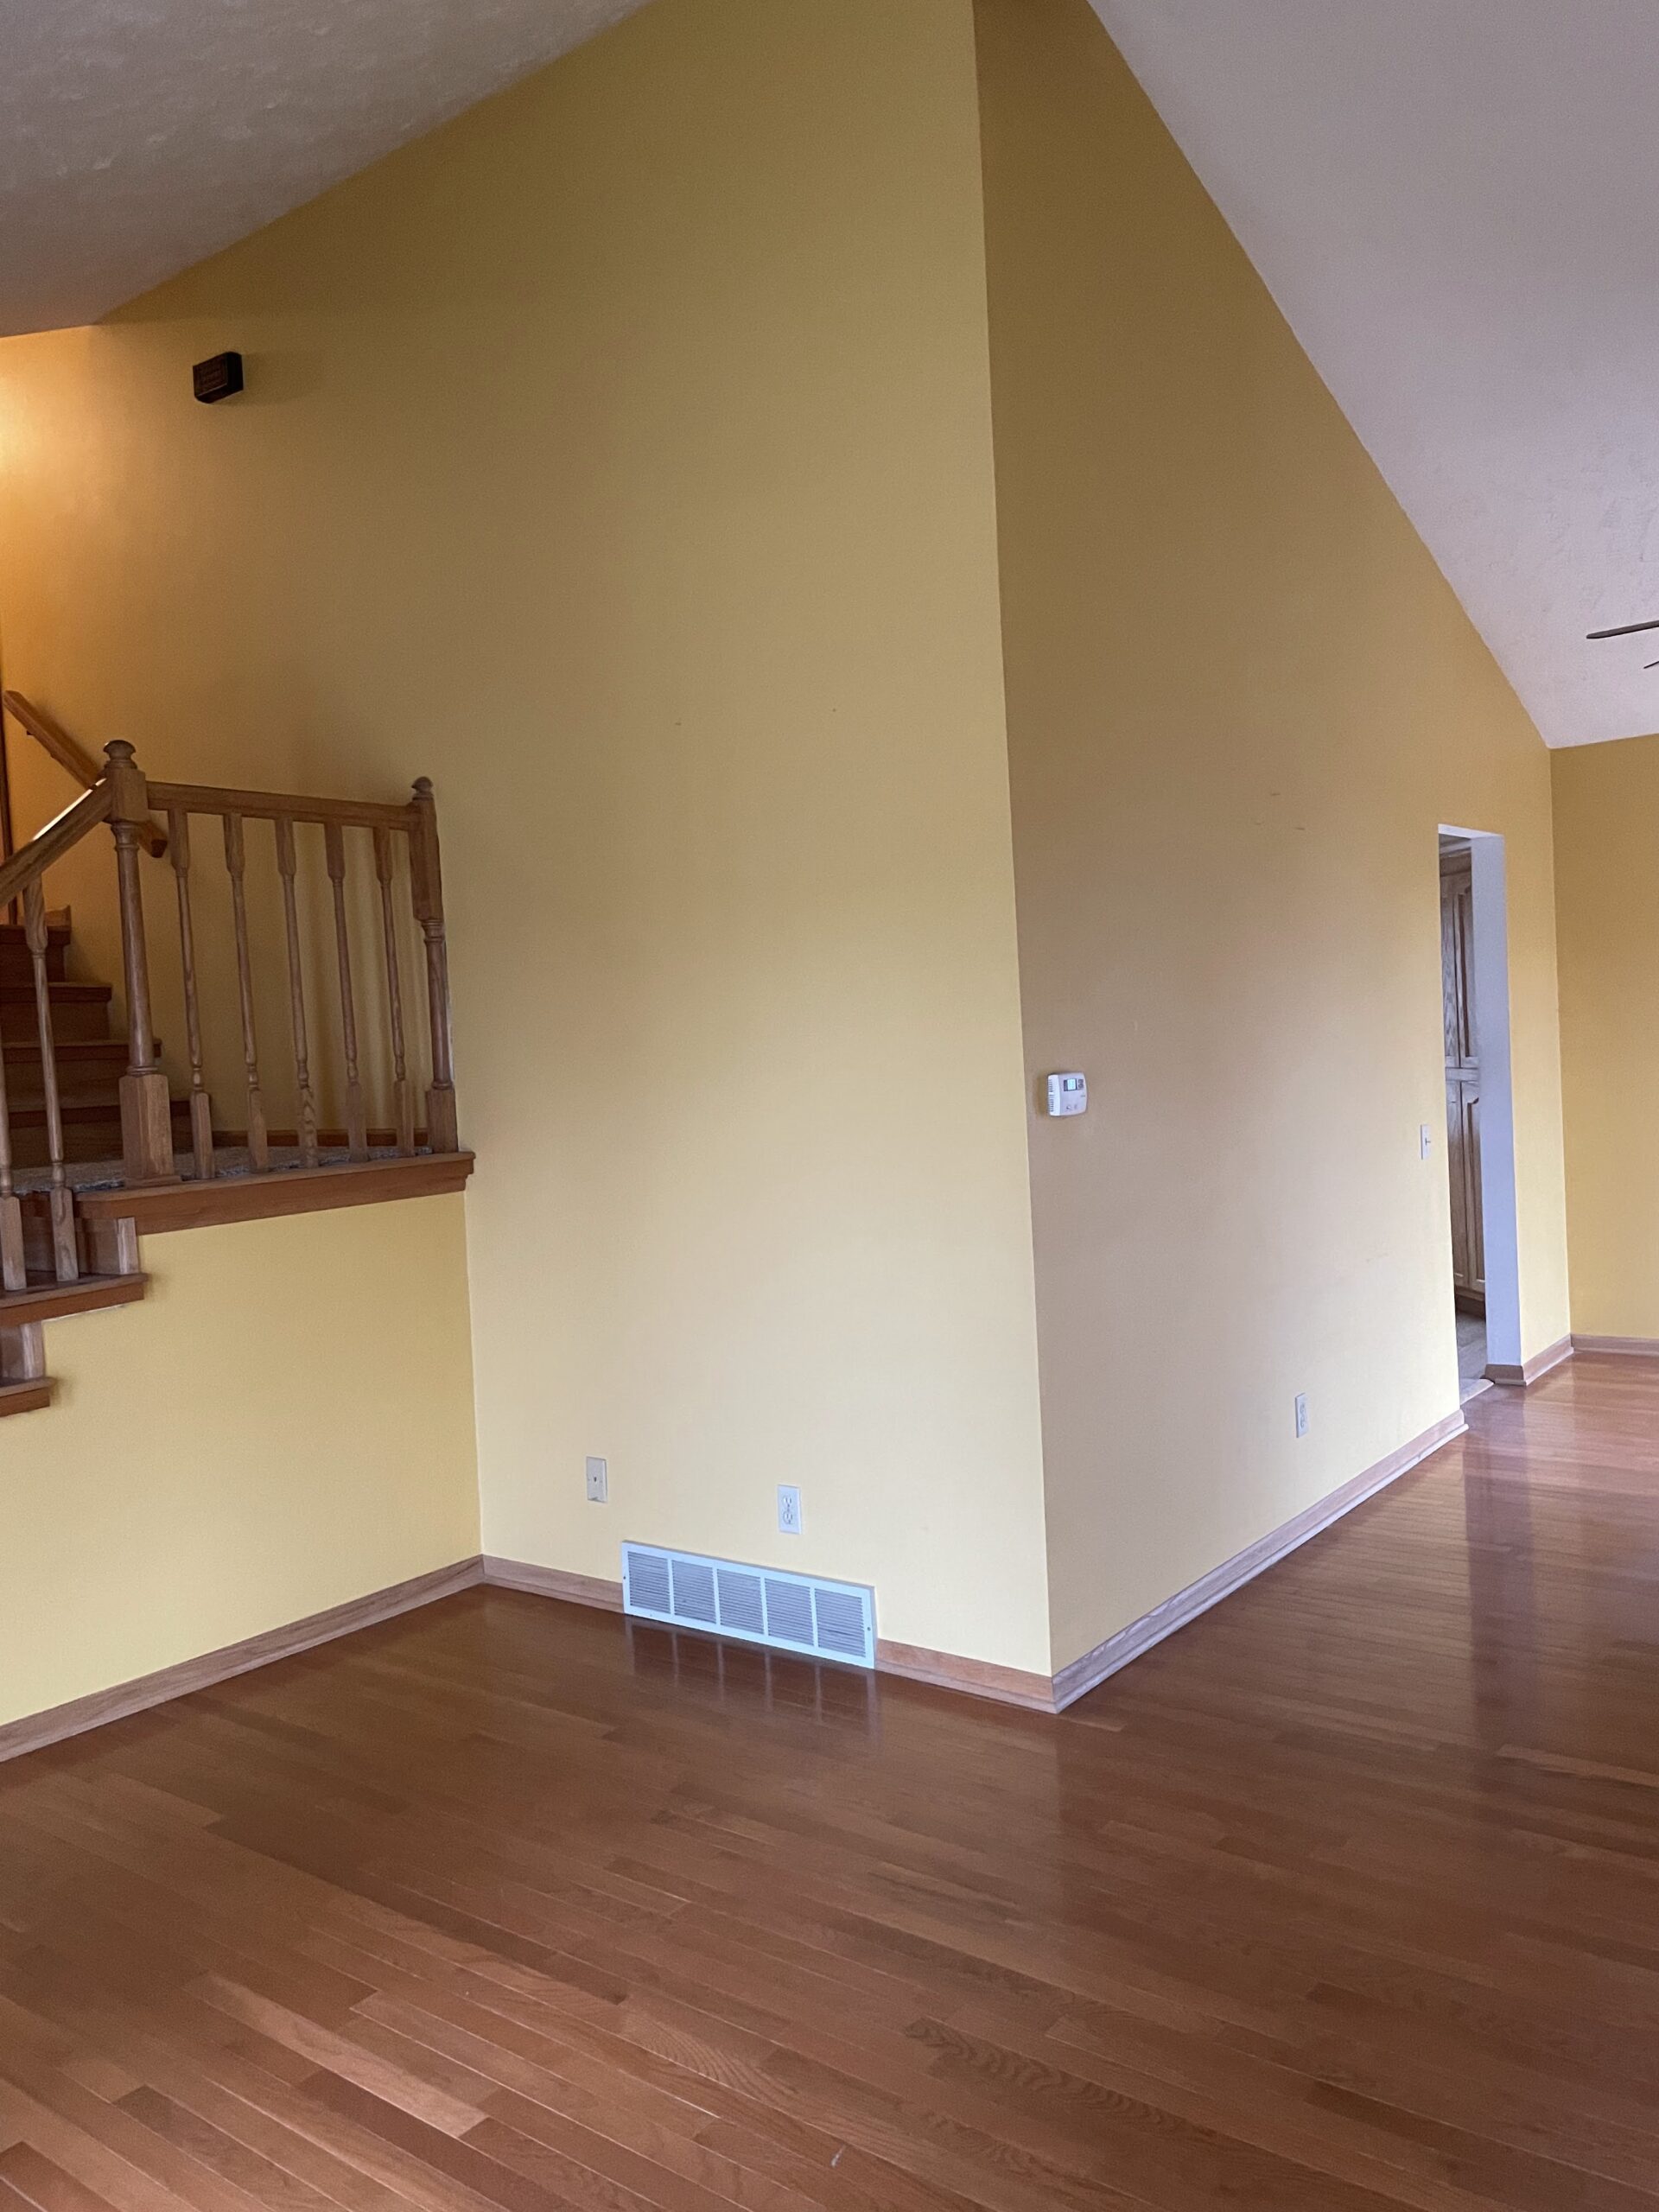
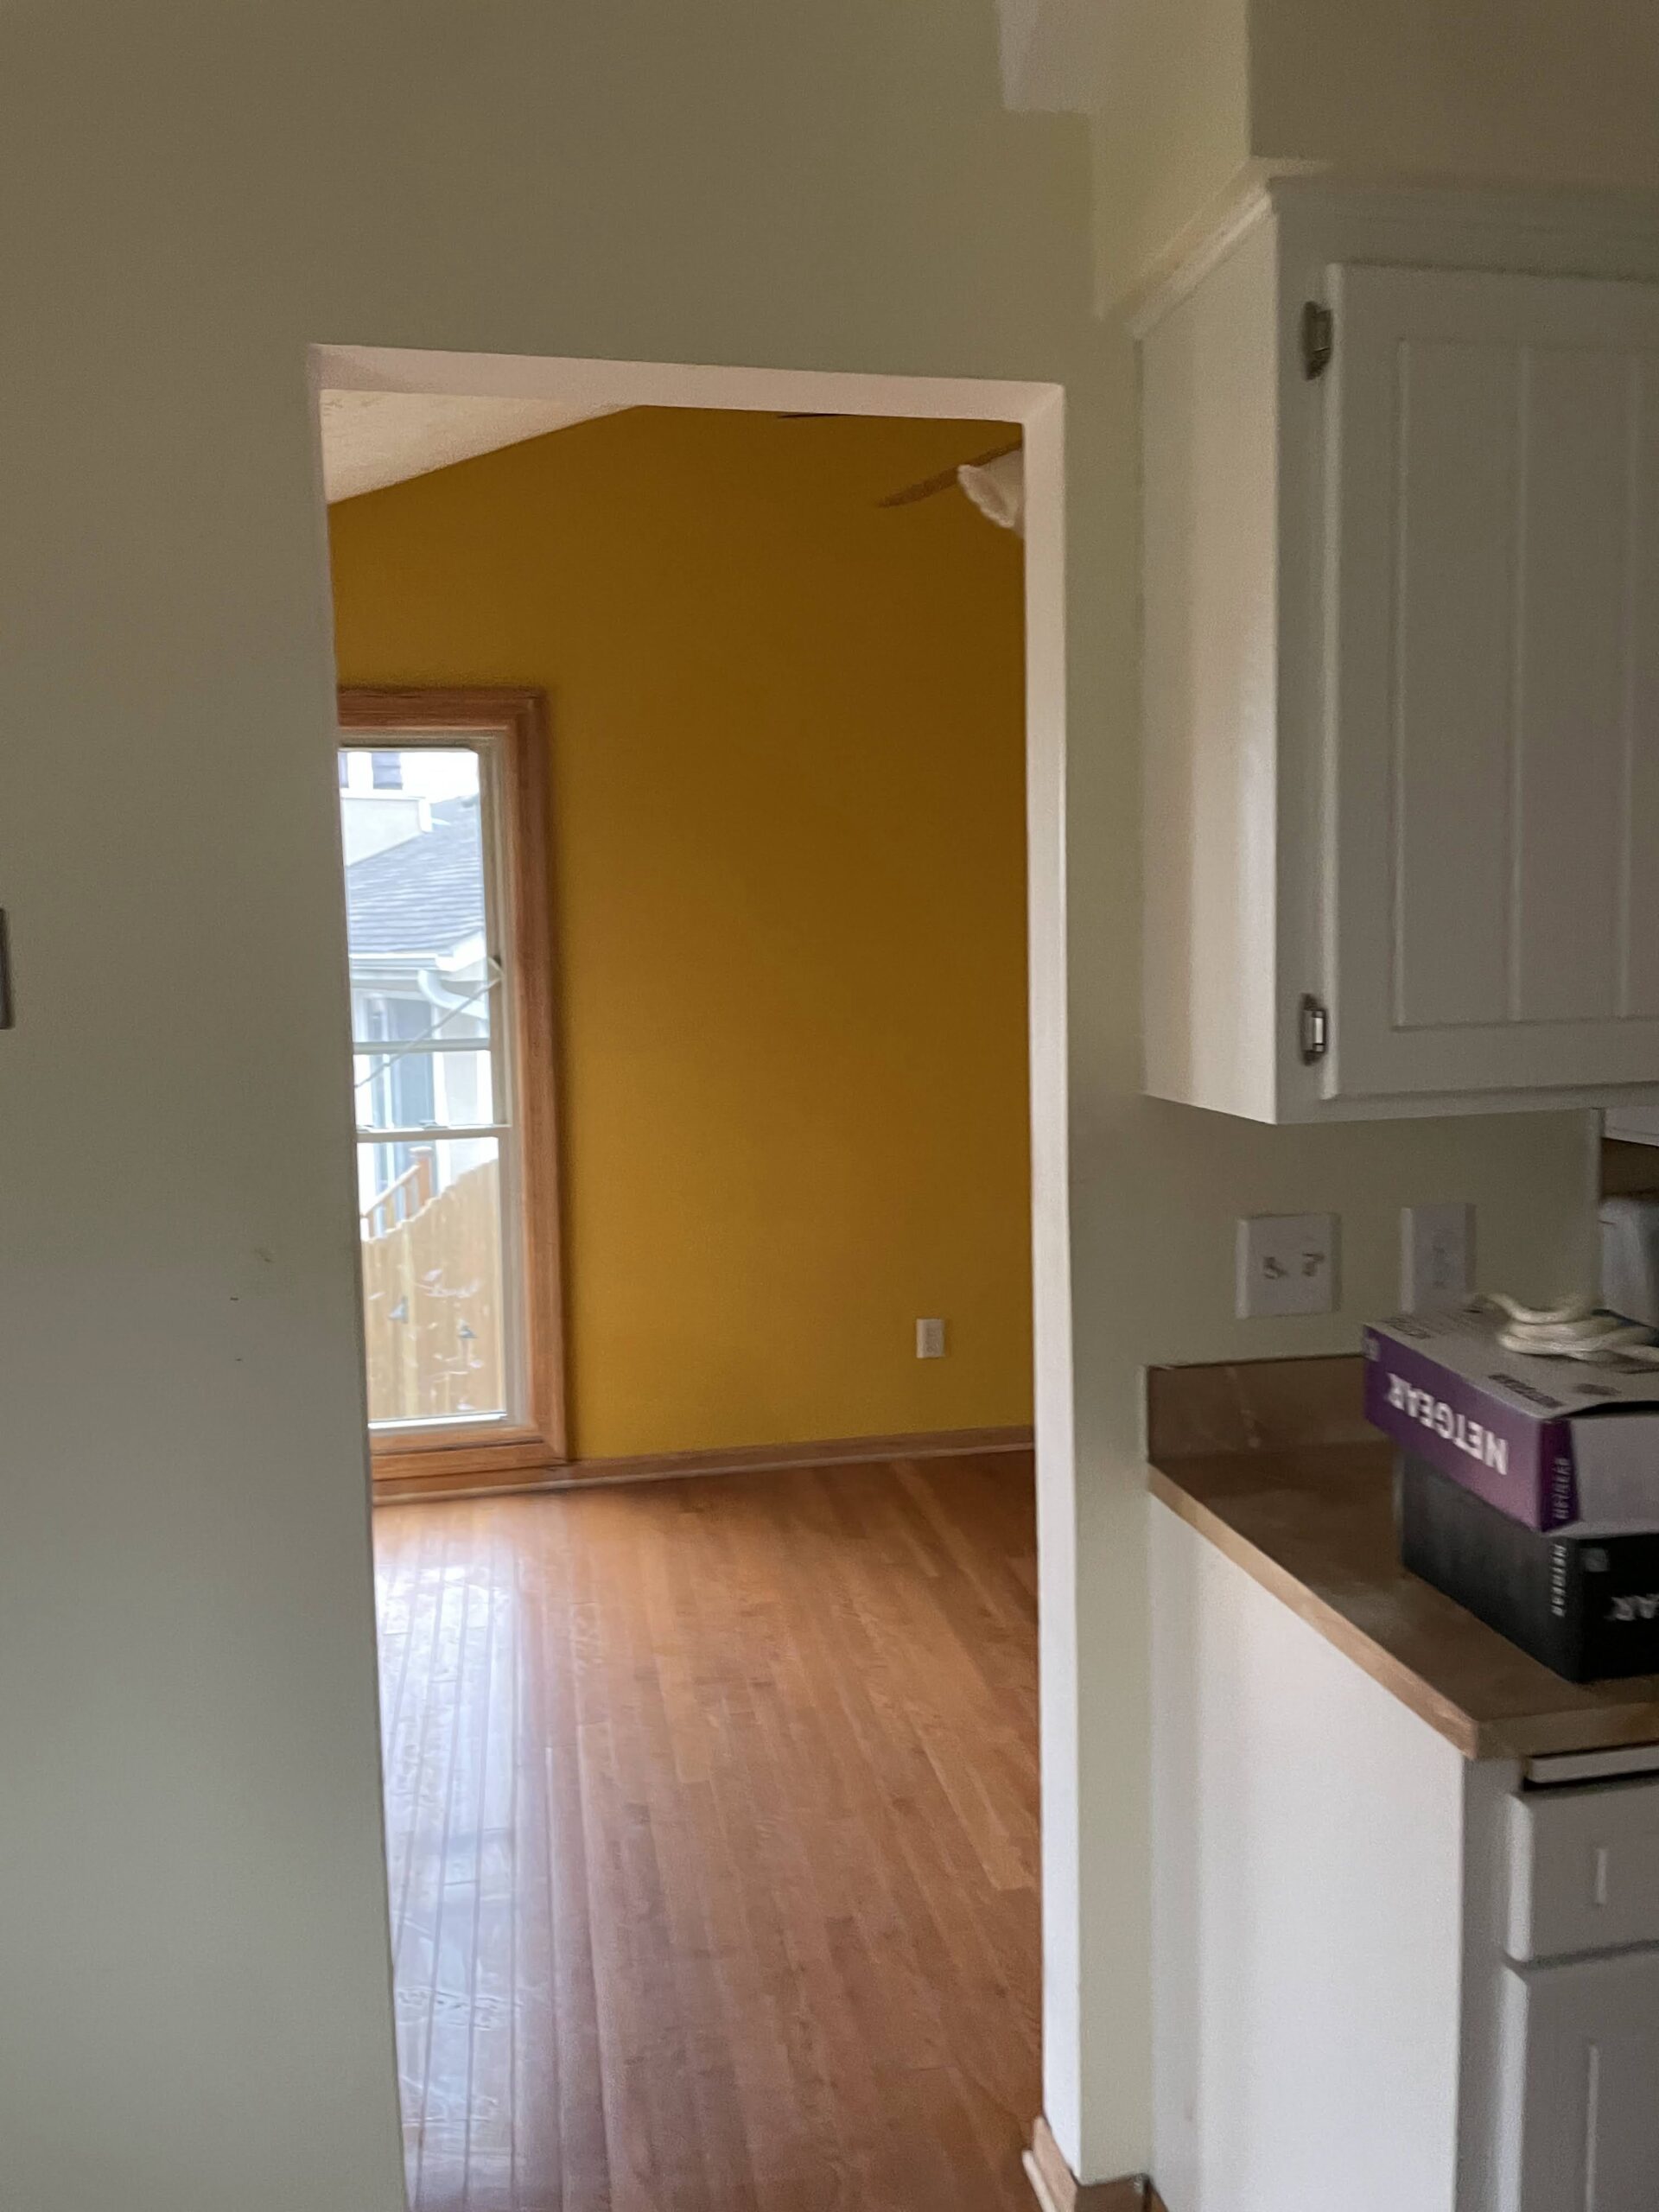
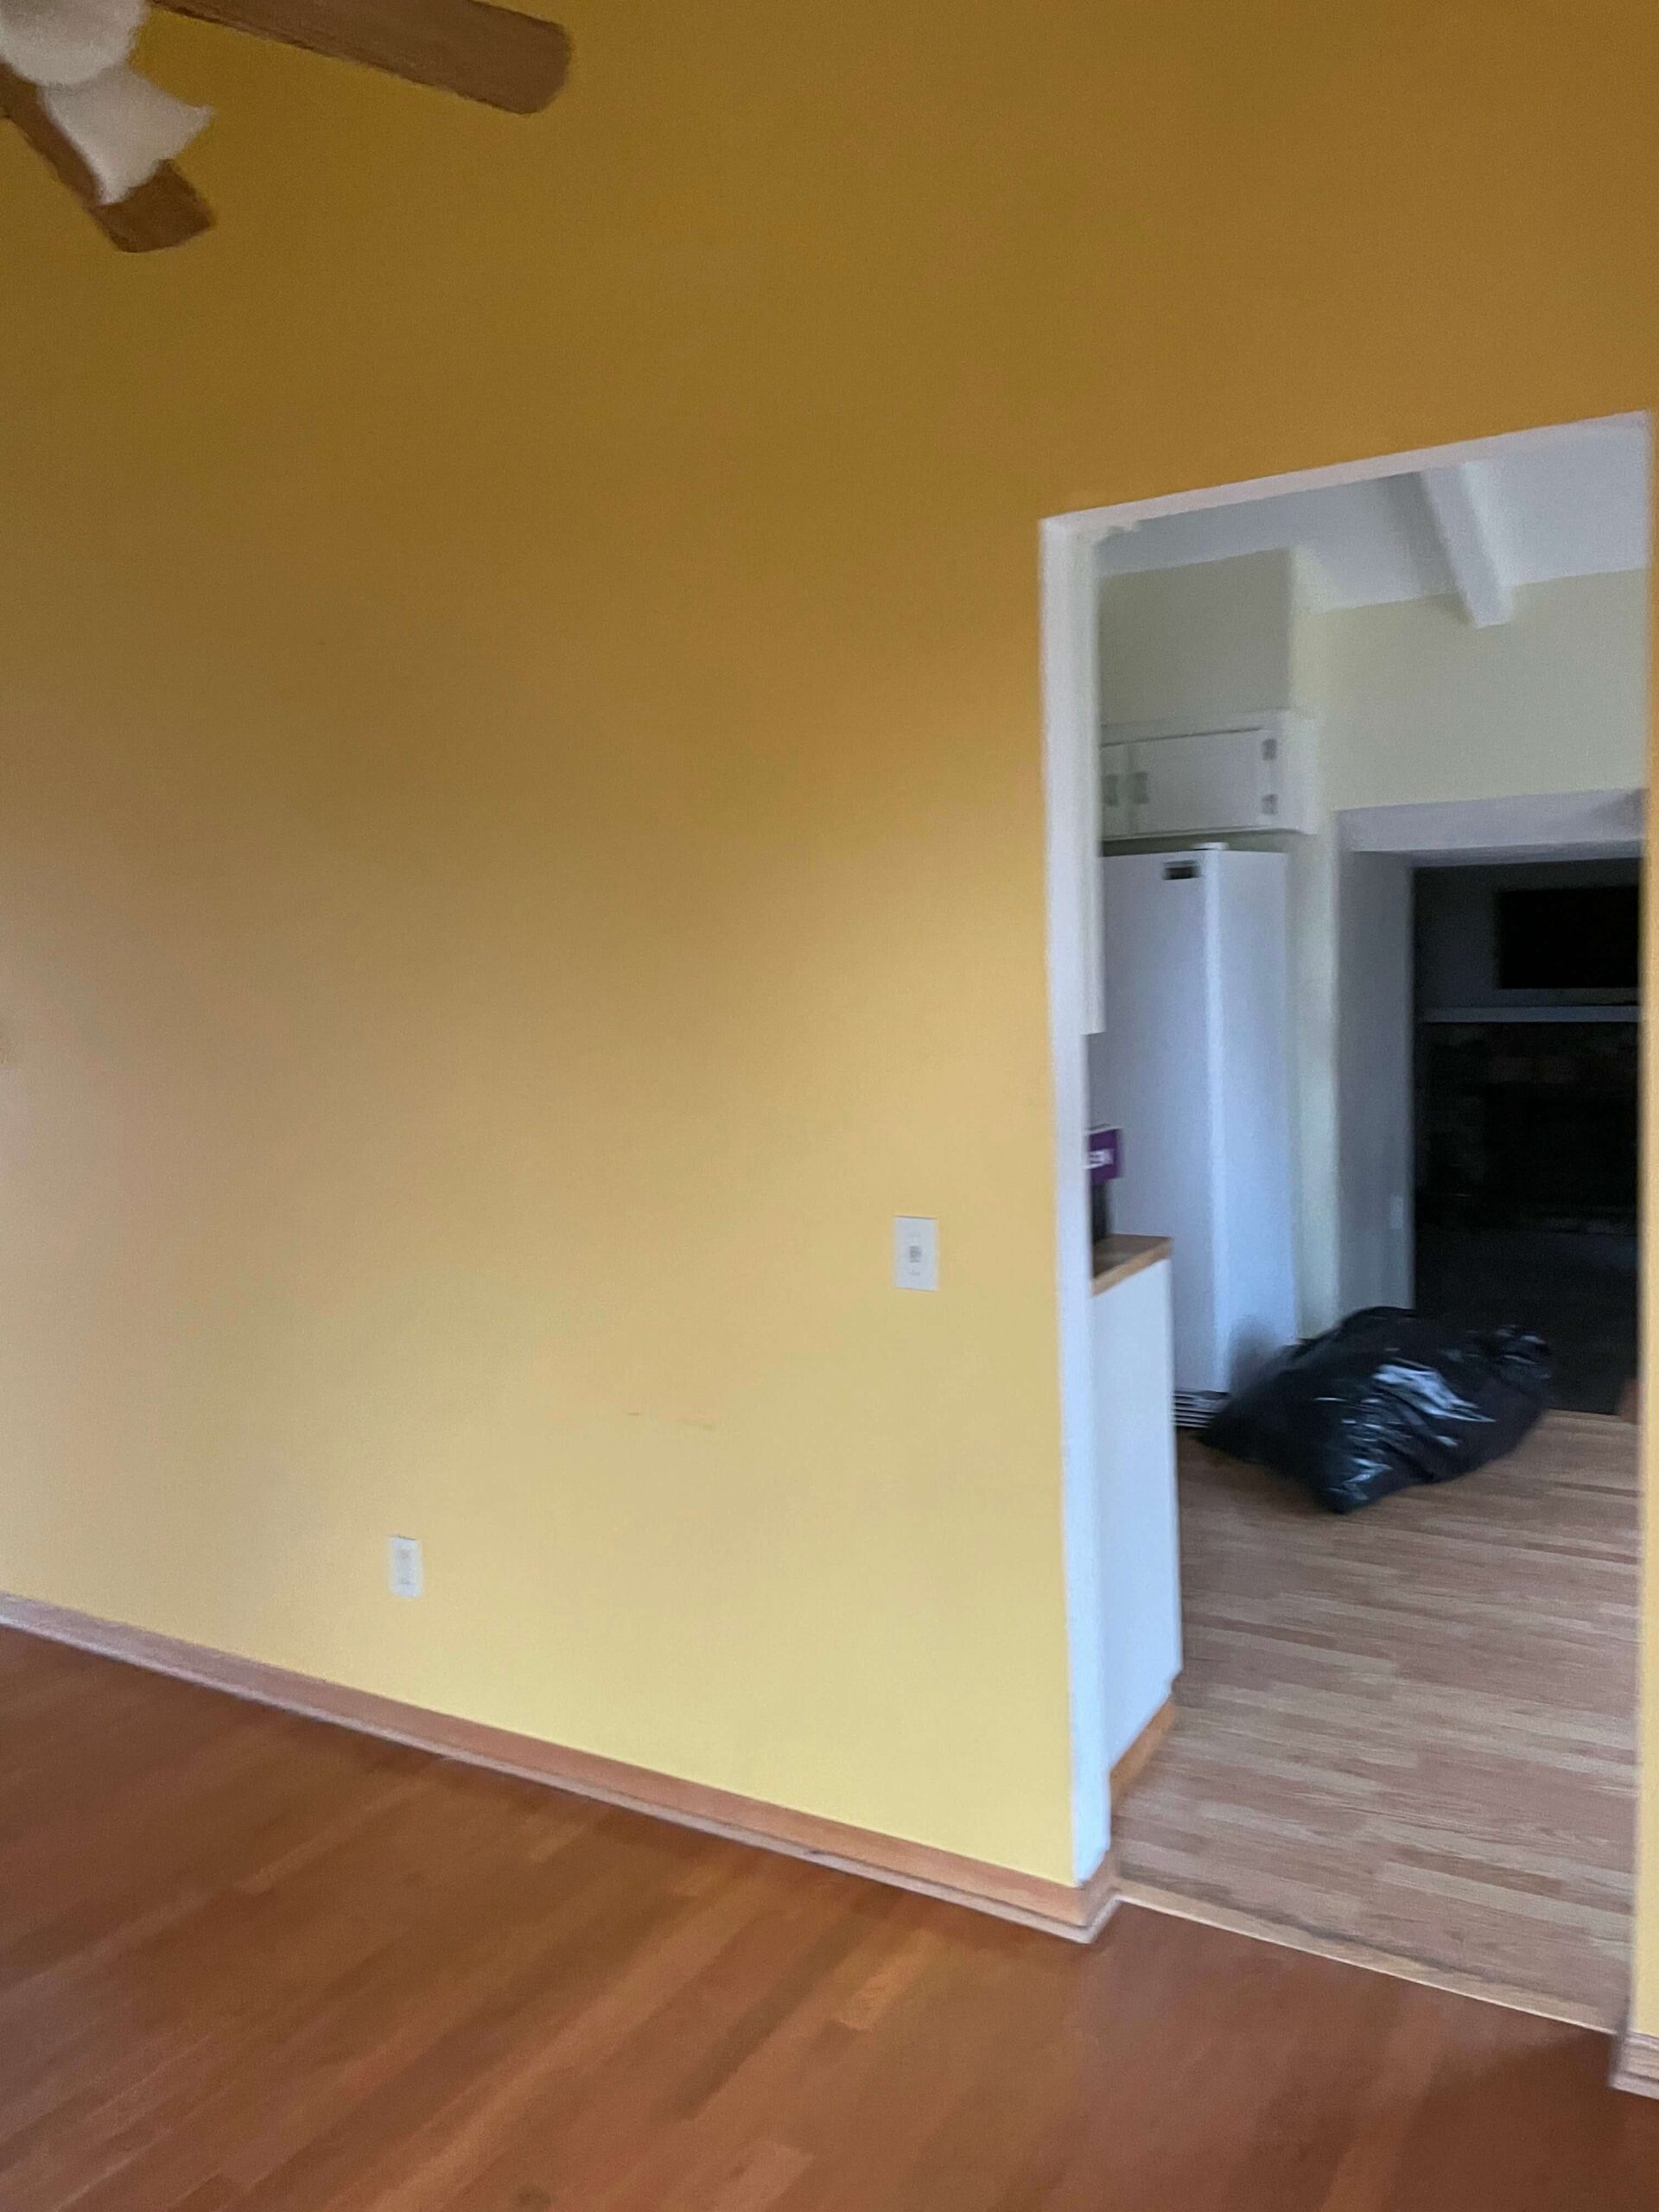
When you first walked into the house, it opened up into a giant, open, overwhelmingly yellow space that was probably originally designed as a formal living area near the windows at the front of the house, and then a formal dining area as you walked back closer to the kitchen.
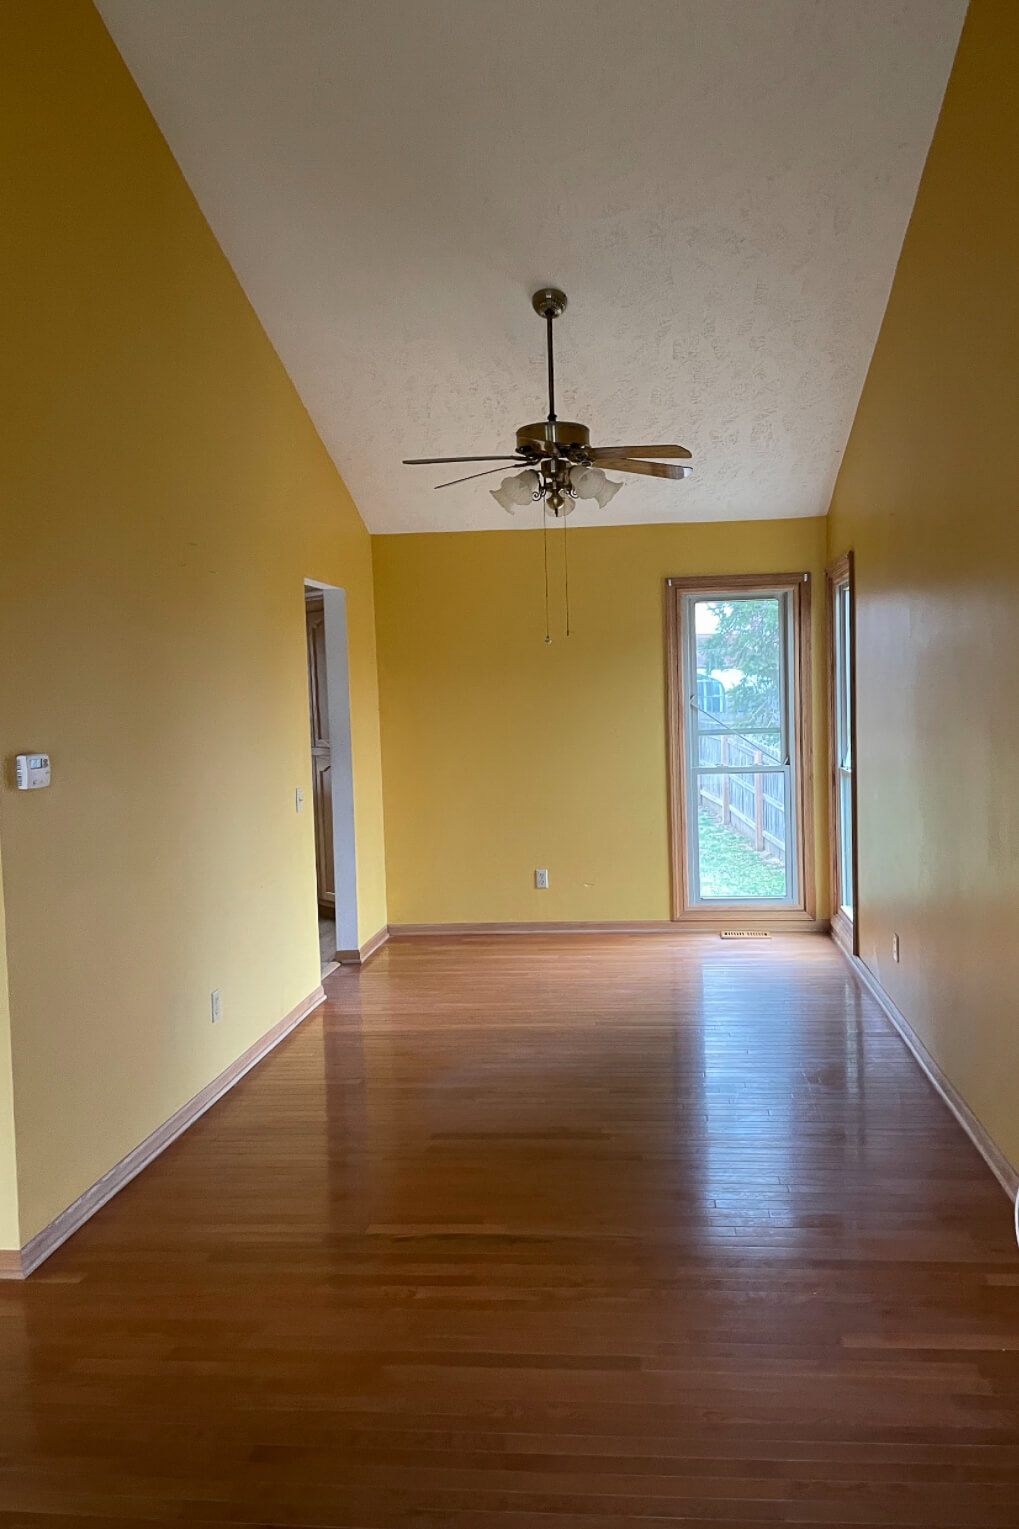

Unfortunately, the existing “dining room” also needed to be a hallway of sorts to access the kitchen, and was not wide enough for a kitchen table, space to pull the chairs out on both sides, and more space to walk behind the chairs.

The existing layout was not only not very functional, but was also sad, dark, and dated. Also, I’m part of that generation that doesn’t like too many walls. I like to be able to communicate with my family in the dining area while working in the kitchen, so we were really looking for more of an open concept kitchen for our family to spend time in. Thus, our DIY kitchen remodel journey began.
My DIY Kitchen Remodel Planning and Mood Board
Once we had the measurements of the existing layout from our realtor, we went out to our driveway in our former house and drew the area out with chalk to determine what we were working with. I knew that I wanted extra space between cabinets so that one person could be working at the island, one person could be working at the stove, and there would still be room for a third person to walk in between. The standard is 48 inches, and we bumped it out as far as we could which ended up being 58 inches. Those 10 inches make a HUGE difference.

In order to achieve the open concept plan I was going for, I also planned on all walls being load bearing, which meant we would need to add a beam instead of removing the entire wall, so I was able to work that into my design.
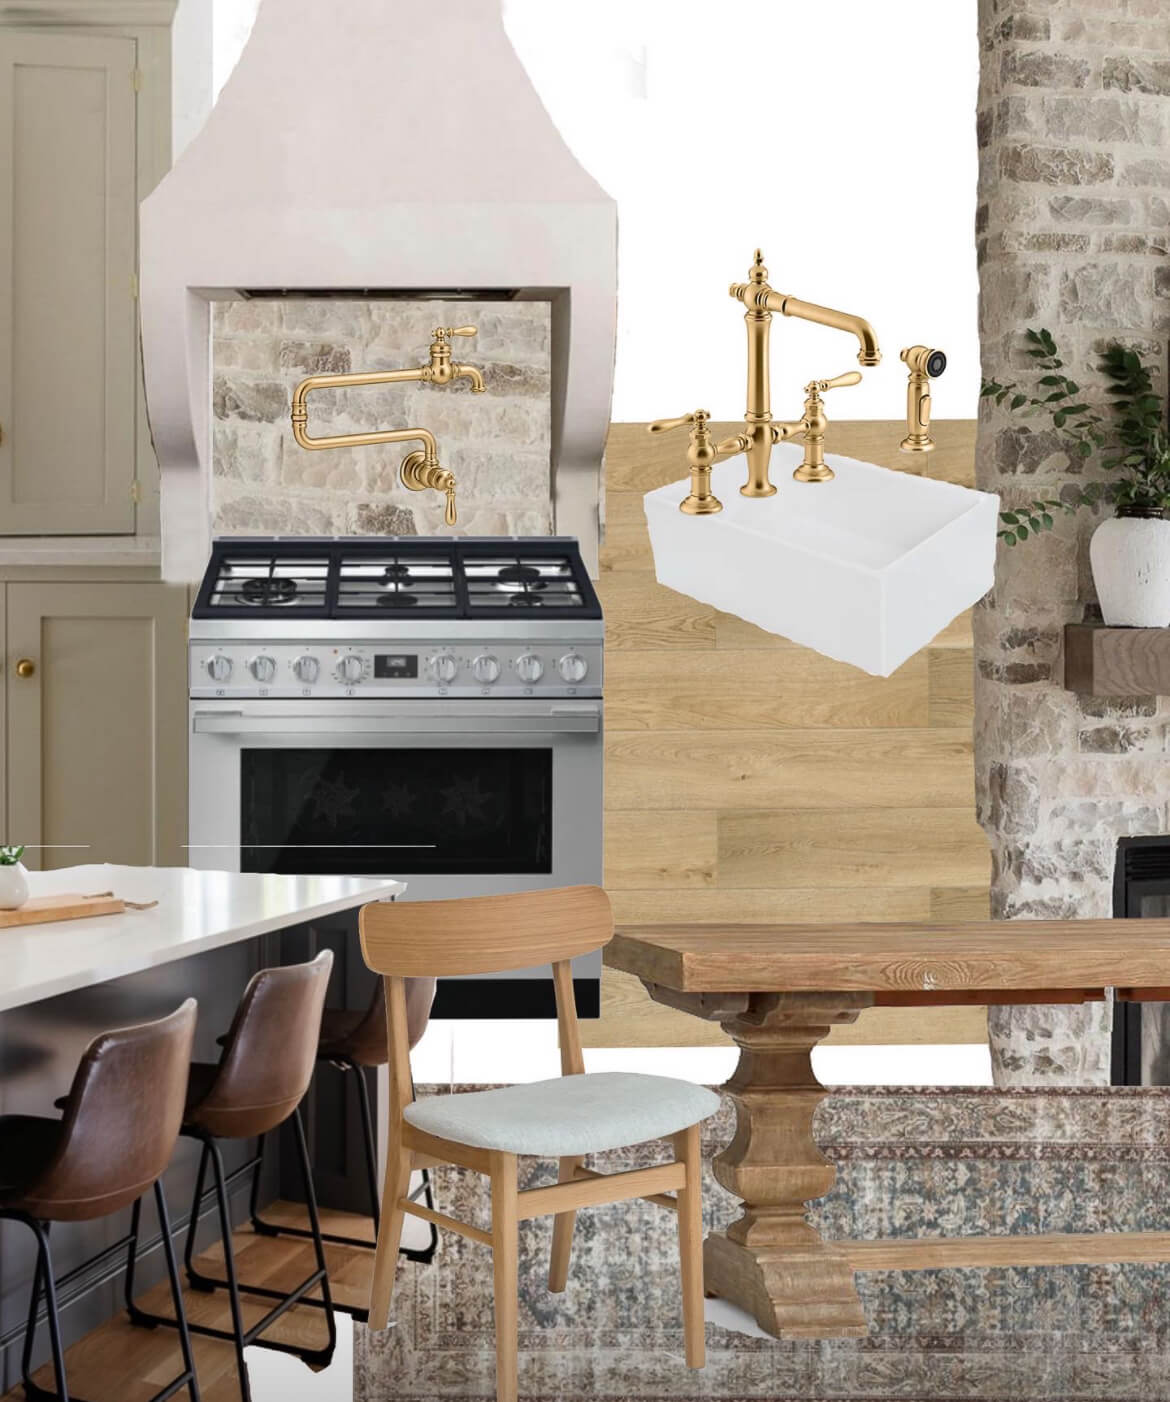
I put together a design plan on a mood board for inspiration on this project. You can create these easily in Canva, which is totally free to use. I find it helpful for referring back to when making design decisions.
As we got deeper into our DIY kitchen remodel there were a few things that I changed stylistically from my original plan, but the bulk of it remained. Features like the brass faucets, shaker doors, a dark painted island, and natural stone are all elements that you will see in my completed kitchen.
Tools
Some of the tools that we used again and again during our DIY kitchen remodel.
- Tape measure
- Brad nailer
- Framing nailer
- Sawzall
- Drywall cut out tool
- Laser level
- Chalk box
- Circular saw
- Multitool
- Drill and driver
- Jig saw
- Foldable work platform
- 18 inch roller, plus sleeves, and tray
- Paint sprayer
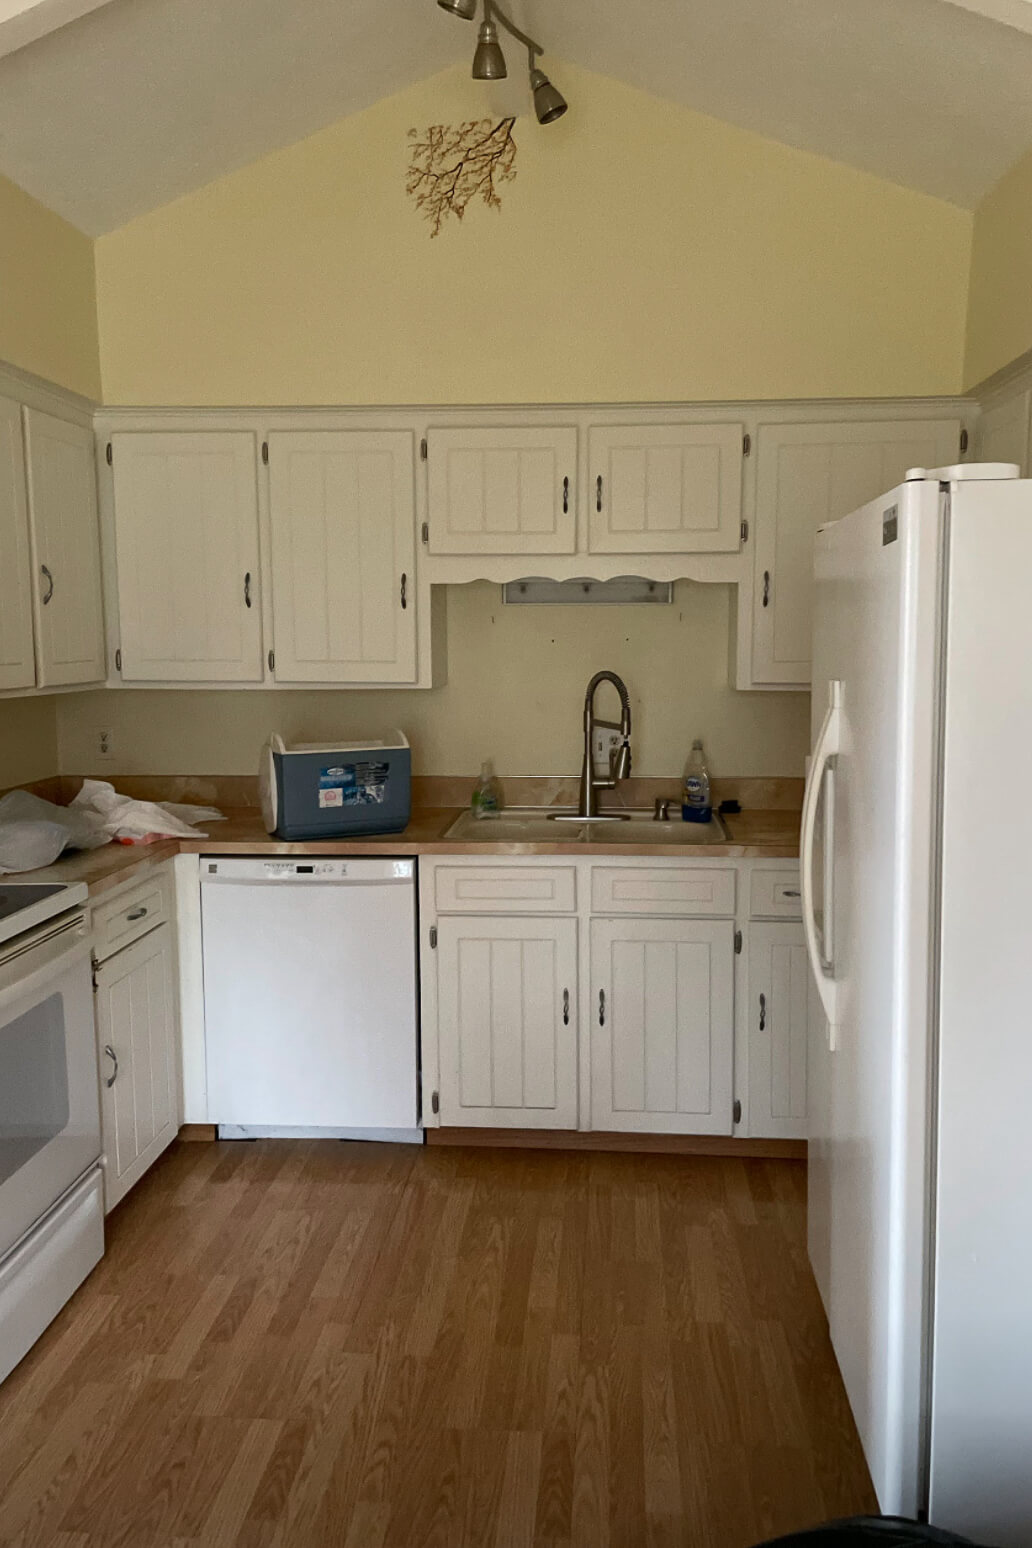
Removing the Old Kitchen Cabinets and Tearing Down a Wall
Once it was officially the long-awaited move-in time, we immediately got to work! In order to achieve our bright and airy, open kitchen, we needed to tear out this wall, and the old kitchen cabinets had to come out. I carefully removed all of the doors and shelves as our original plan for our DIY kitchen remodel was to reuse these cabinets in the new space.


Once the doors and shelves were out of the way, removing cabinets came down to finding how they were attached to the wall. It could be nails, screws, or a mix of the two. I removed everything that I could, but we ended up having to cut some of the nails with a sawzall. Then after a lot of prying and tugging the cabinets finally came free. To our dismay, they weren’t individual cabinets but large pieces built custom to the home. This meant that we wouldn’t be able to use them for the new kitchen.


Removing a wall is messy and a lot of work. You will be tearing out drywall, removing framing, and often having to move electrical as well.
Whenever you are removing drywall, you never want to take out more than you need to, so it’s always a good idea to plan, measure, and mark your cut lines. When making a cut line, a tool to have on hand is a chalk box. As Stuart and I used here for the horizontal line, it’s a quick and low tech way of marking a straight line. A laser level can also be really helpful, but I recommend tracing that line with a straight edge and pencil to make it easier to follow while cutting.
This foldable work platform made it a breeze. They give you a boost to the perfect height and are so much better and faster than having to work from a ladder.


One of the tools that we used over and over again for cutting drywall during our DIY kitchen remodel is this cool, handheld drywall cut out tool. The guide is adjustable for different cutting depths, and it’s great for making a clean cut whether I was removing part of a wall, or cutting out an archway. It worked so well! I also used this tool when cutting a vent to the outside for my stone range hood. It’s just all around a great tool to have on hand if you are going to do any drywall work.


As demo day continued on it was getting messier and messier, but it was also so exciting to see how open and bright everything was starting to look. Love being able to see those big front windows!

Replacing a Load Bearing Wall With a Beam
The wall we needed to tear out for the DIY kitchen remodel of our dreams happened to be a load-bearing wall. Unfortunately, the beam in the corner had to stay, and the load-bearing wall needed to be replaced with a hefty beam capable of carrying all the weight that the wall we removed was holding up.
If you are wanting to take out a wall during your DIY kitchen remodel, and you are unsure if it is load bearing, or what you might be getting yourself into, I highly recommend hiring an engineer or a professional contractor. You can DIY a lot of things, but you also have to be safe and know your personal limits.


Framing in the Pantry
One of the perks of a DIY kitchen remodel is having the opportunity to change up the floor plan. Our kitchen will be moving over to where the original builders imagined a dining room, and the area where the old kitchen was is where I built my pantry.


Once we removed all the cabinets and tore out the drywall soffit that had been hanging above them, I needed to cut out the flooring. You can see that the flooring had only come up to the cabinets, and in order to frame my pantry walls, I needed to get the rest of it out of the way. Using my circular saw I cut out where I wanted the walls to go, and got it out of there.
After that flooring was out of the way, I could start framing in my new walls. A laser level is perfect for helping me to keep the walls nice and plumb. And I love this framing nailer. It’s like the beefy, big brother to my brad nailer that I use all the time.


After framing in these new walls, I also took the opportunity to think ahead to where I would want shelves to be in my new pantry. By planning ahead I was able to add extra blocking into the walls before adding drywall, so that my shelves will have something to attach to besides just the studs.

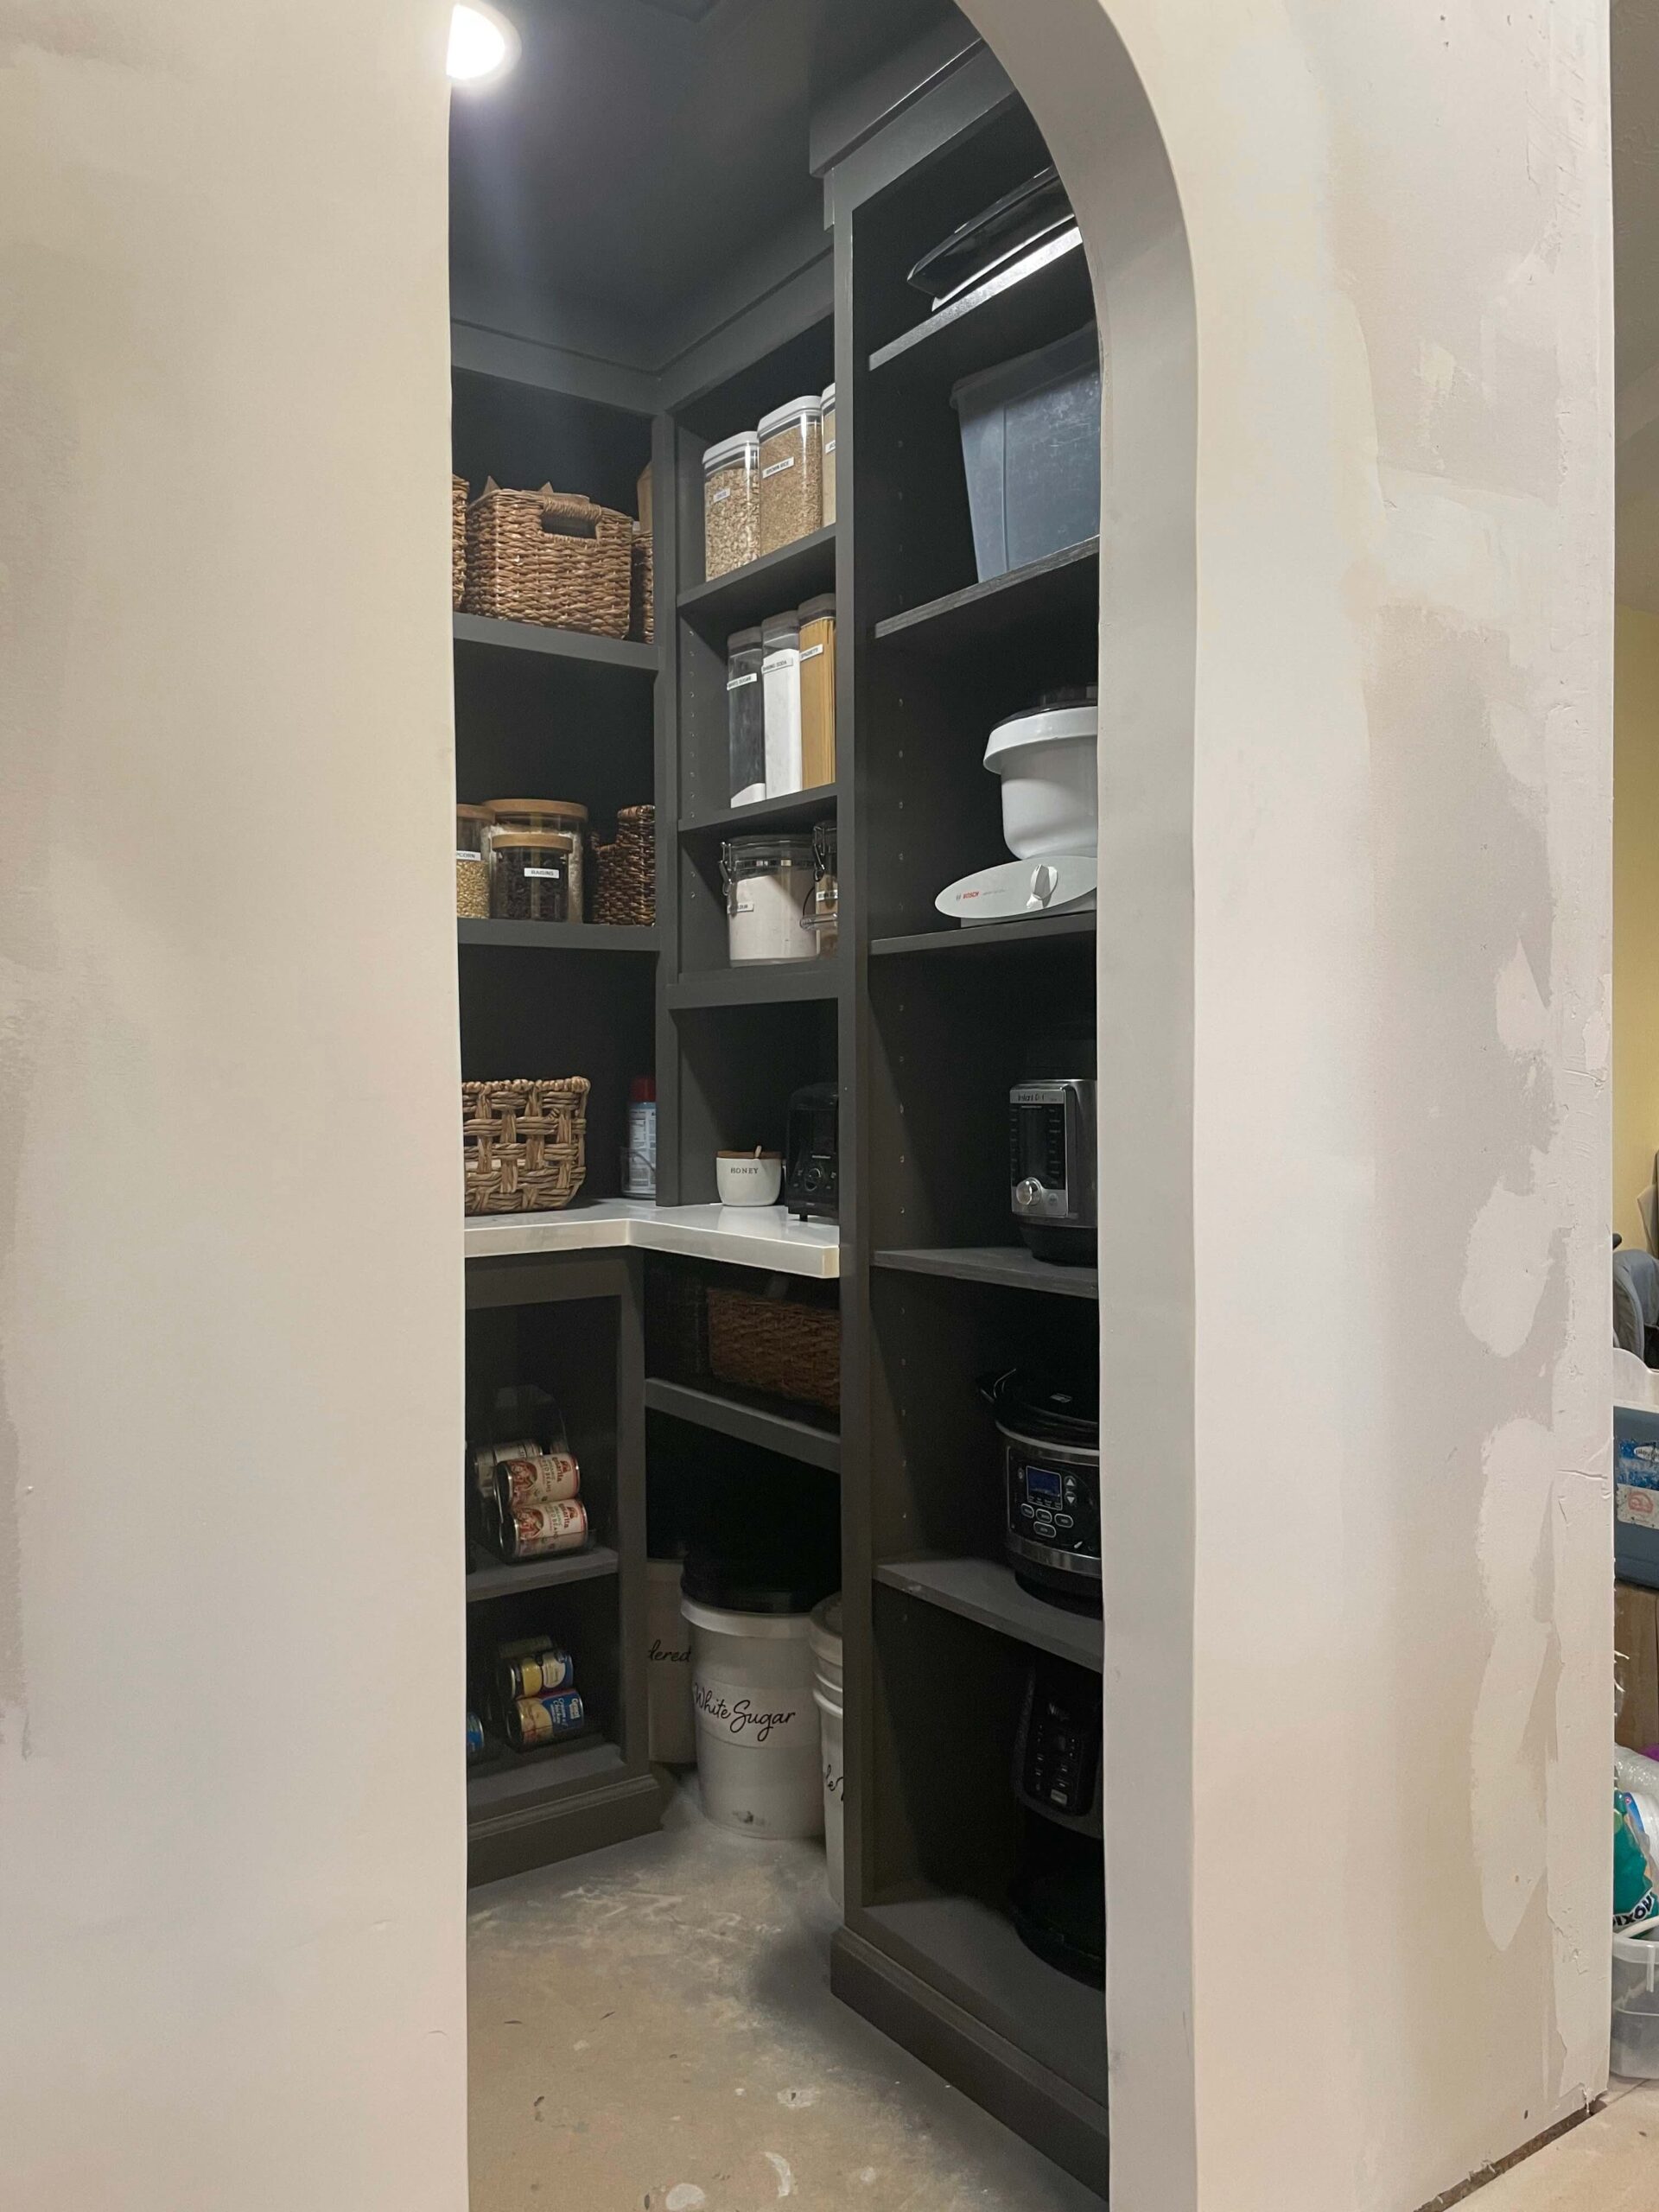
For a full tutorial on how I built my pantry check out this blog post. You can also watch this reel on Instagram to get more details for this project.
Moving Windows
Since a big part of our DIY kitchen remodel was completely relocating the kitchen, we were also going to have to relocate some windows. As much as I loved these tall, almost floor to ceiling windows, they just weren’t going to work with kitchen cabinets.
Moving the windows was kind of a two part project. Not only did we have to remove the old ones, add framing, and seal up those openings, we were also cutting out new holes and framing in different locations for our new, smaller windows.


Whenever you move windows, whether it’s for a DIY kitchen remodel or for another room in your home, you also have to consider what effect that will have on the outside of your house. We had to replace siding and trim, add insulation, and match paint. It’s so much more than just drywall and framing.

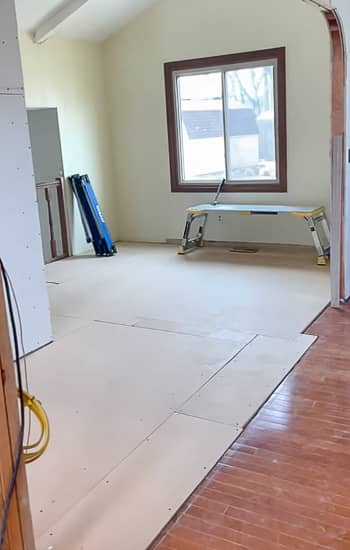
I can’t believe how far we had come at this point, and how good it was already starting to look. New windows were in, drywall was getting done, and the pantry was framed in. It was time to start laying out some cabinets.


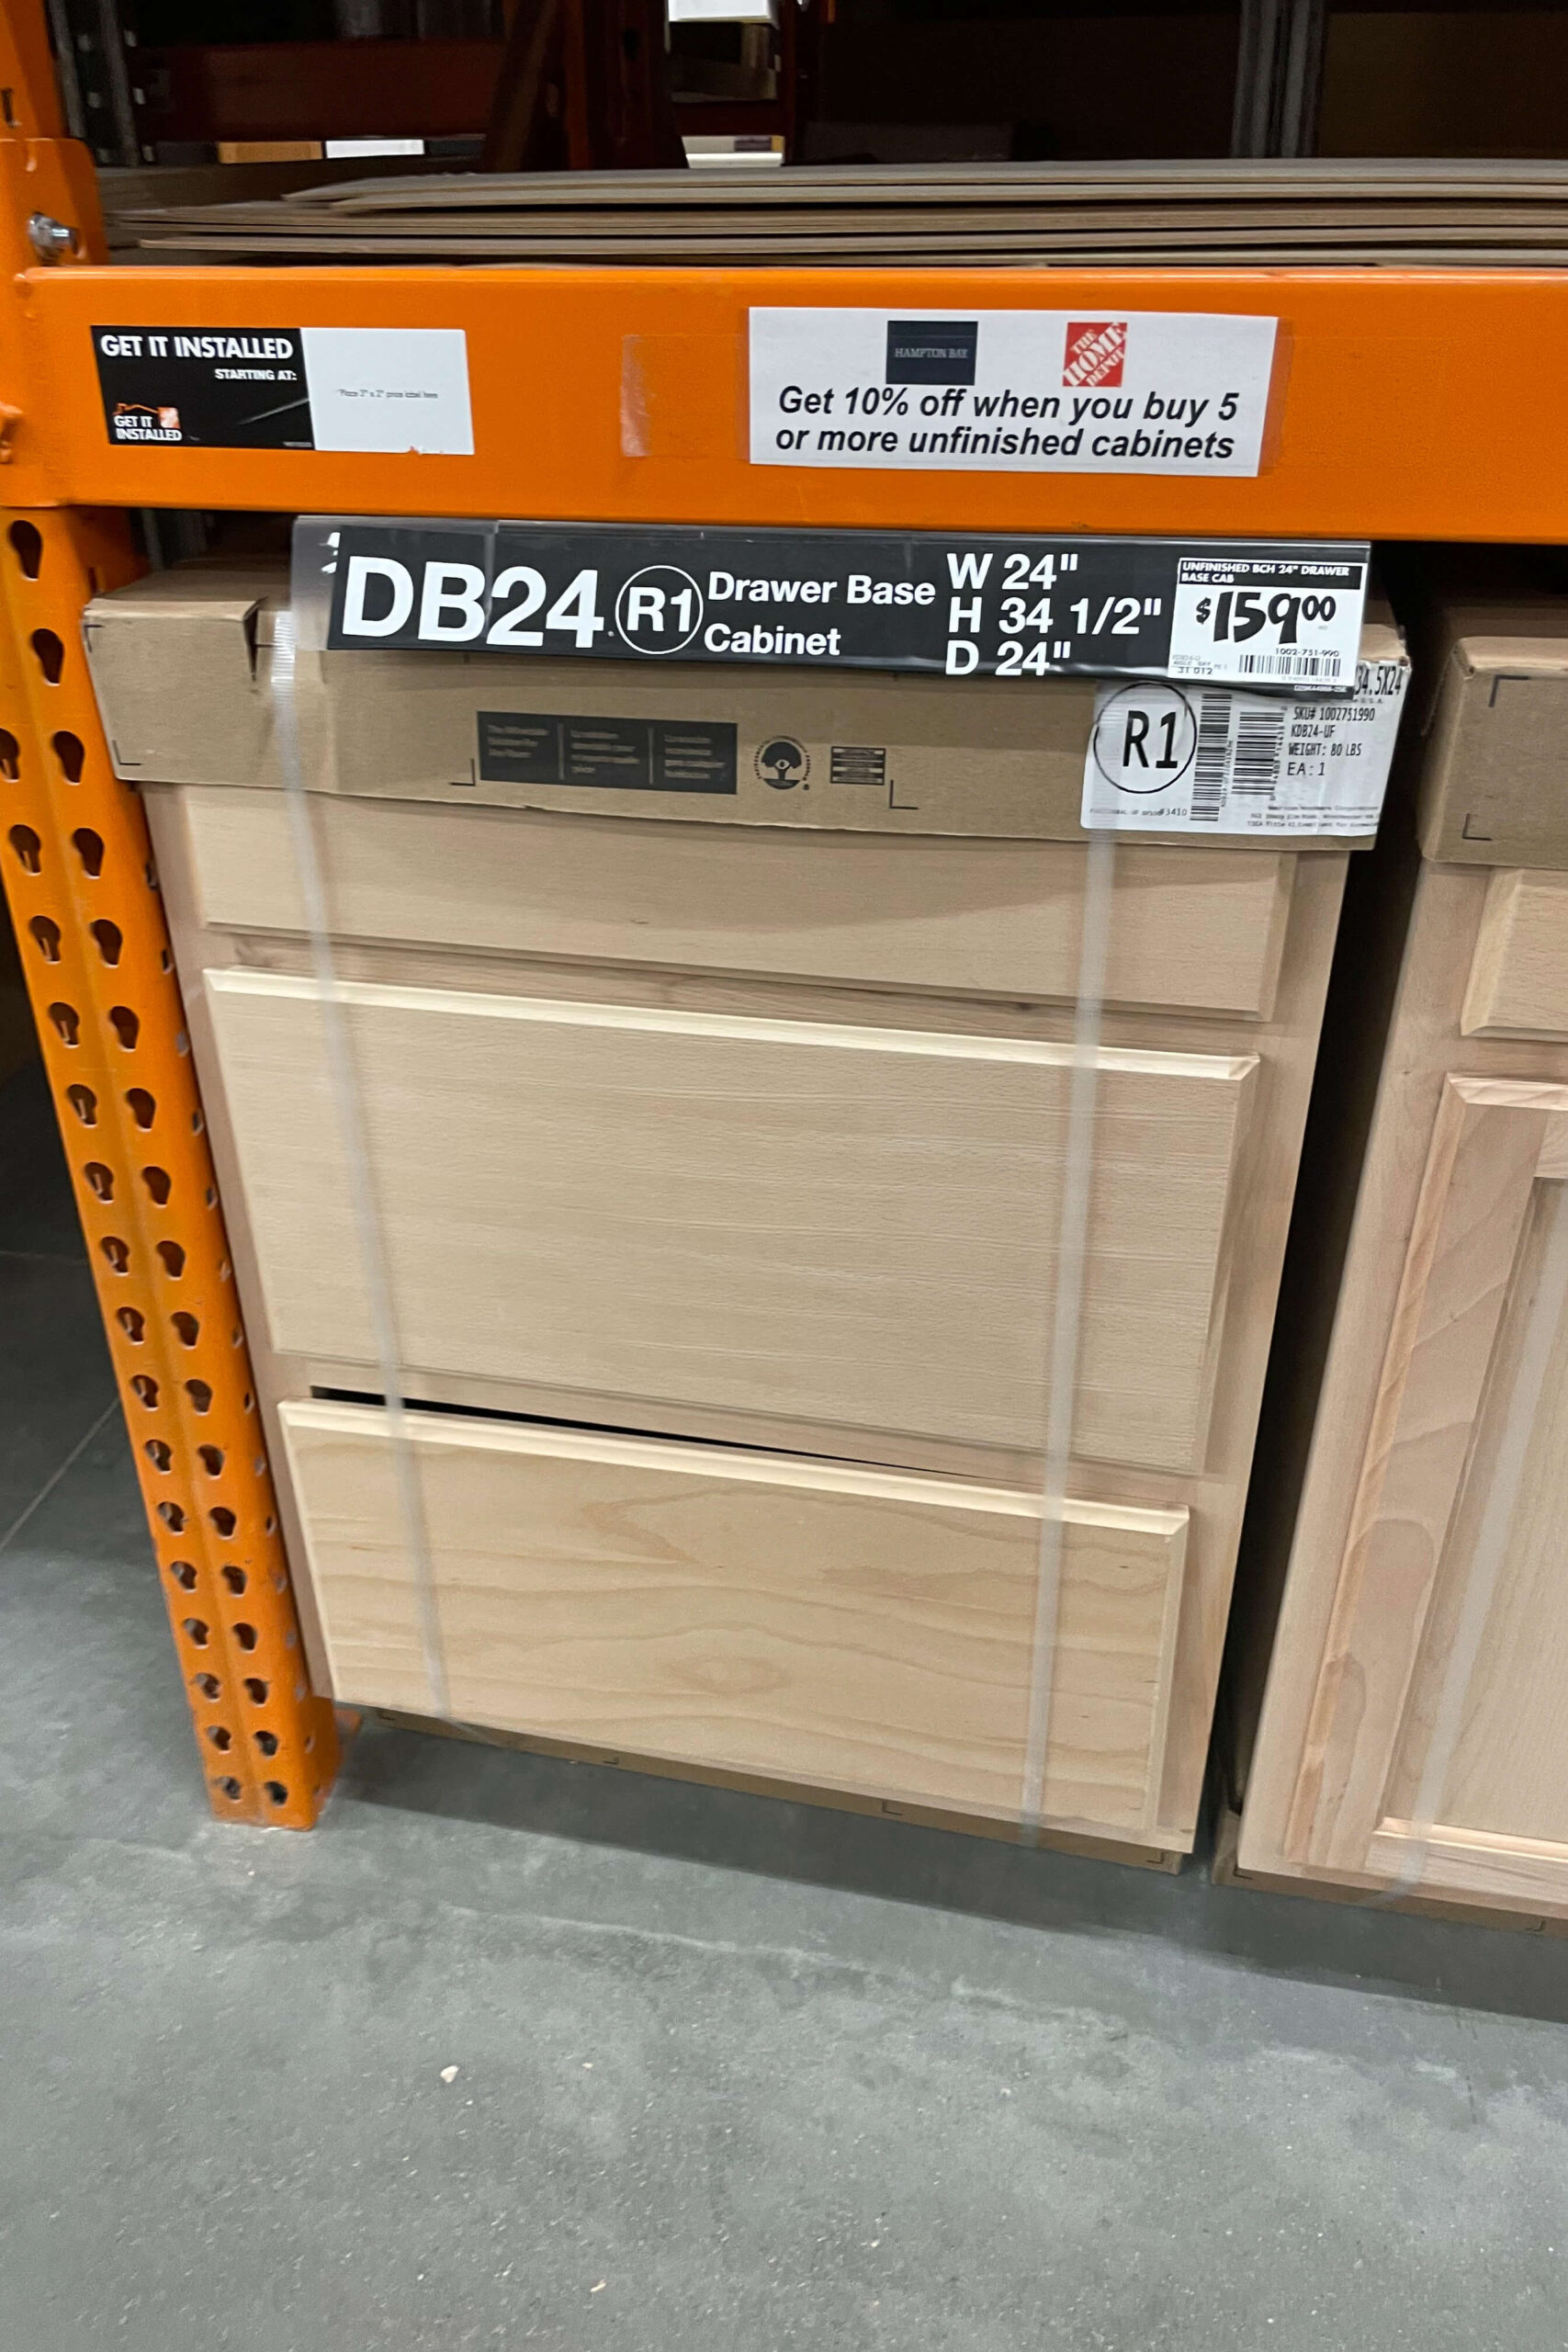
Using Stock Cabinets for Our DIY Kitchen Remodel
We had originally planned to reuse the kitchen cabinets that we had just taken out of the old kitchen, but we quickly realized that wasn’t going to work. So, instead we opted for stock cabinets.
Stock cabinets are a great option for a budget, DIY kitchen remodel. They are much more affordable than custom cabinets. There is no ordering or wait time, as the name implies… they are in stock. You simply head on down to your local Home Depot and load up a bunch of orange, flat carts with the cabinets of your choice. They come unfinished, but they are ready to install with no assembly required.
We got them at a time when they were offering 10% off for buying a certain number of them, but we were also able to stack our military discount on top of that. In all, we only paid $1000 for all of our cabinets! Talk about a steal.

After you bring your cabinets home from the store it is as simple as putting them all in place, then using screws to attach them to the studs in the wall, as well as attach them to each other.


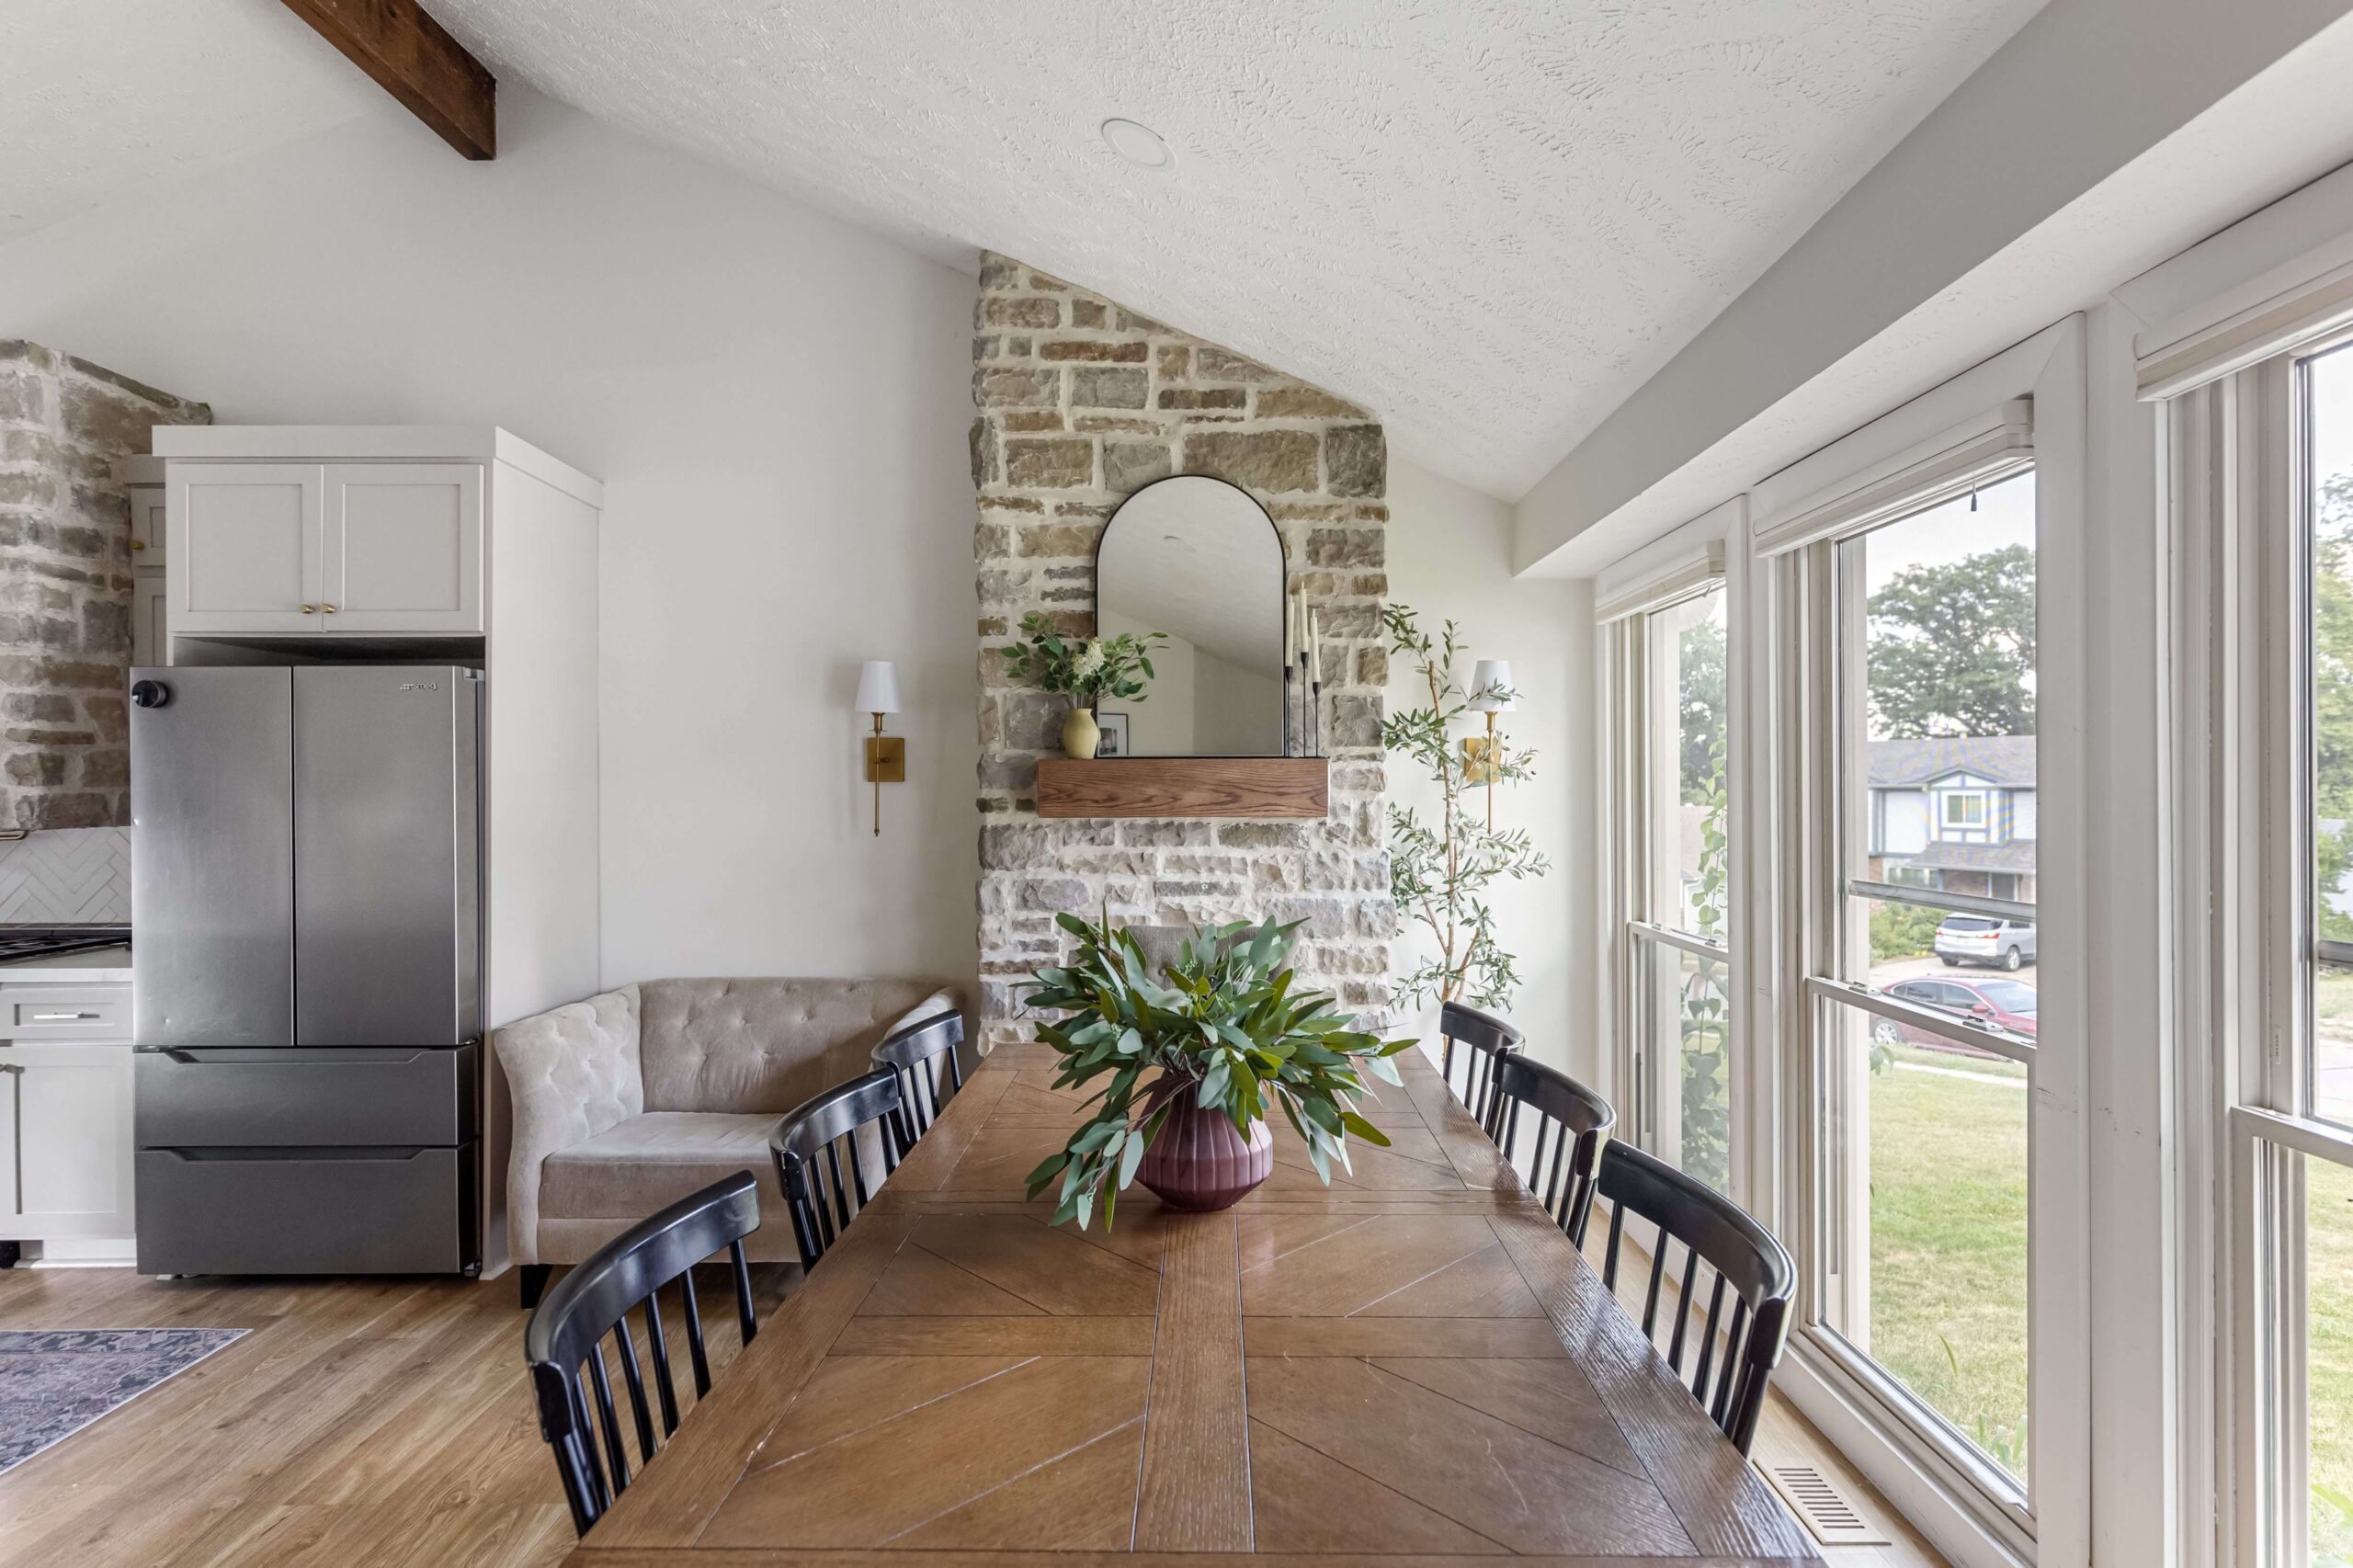
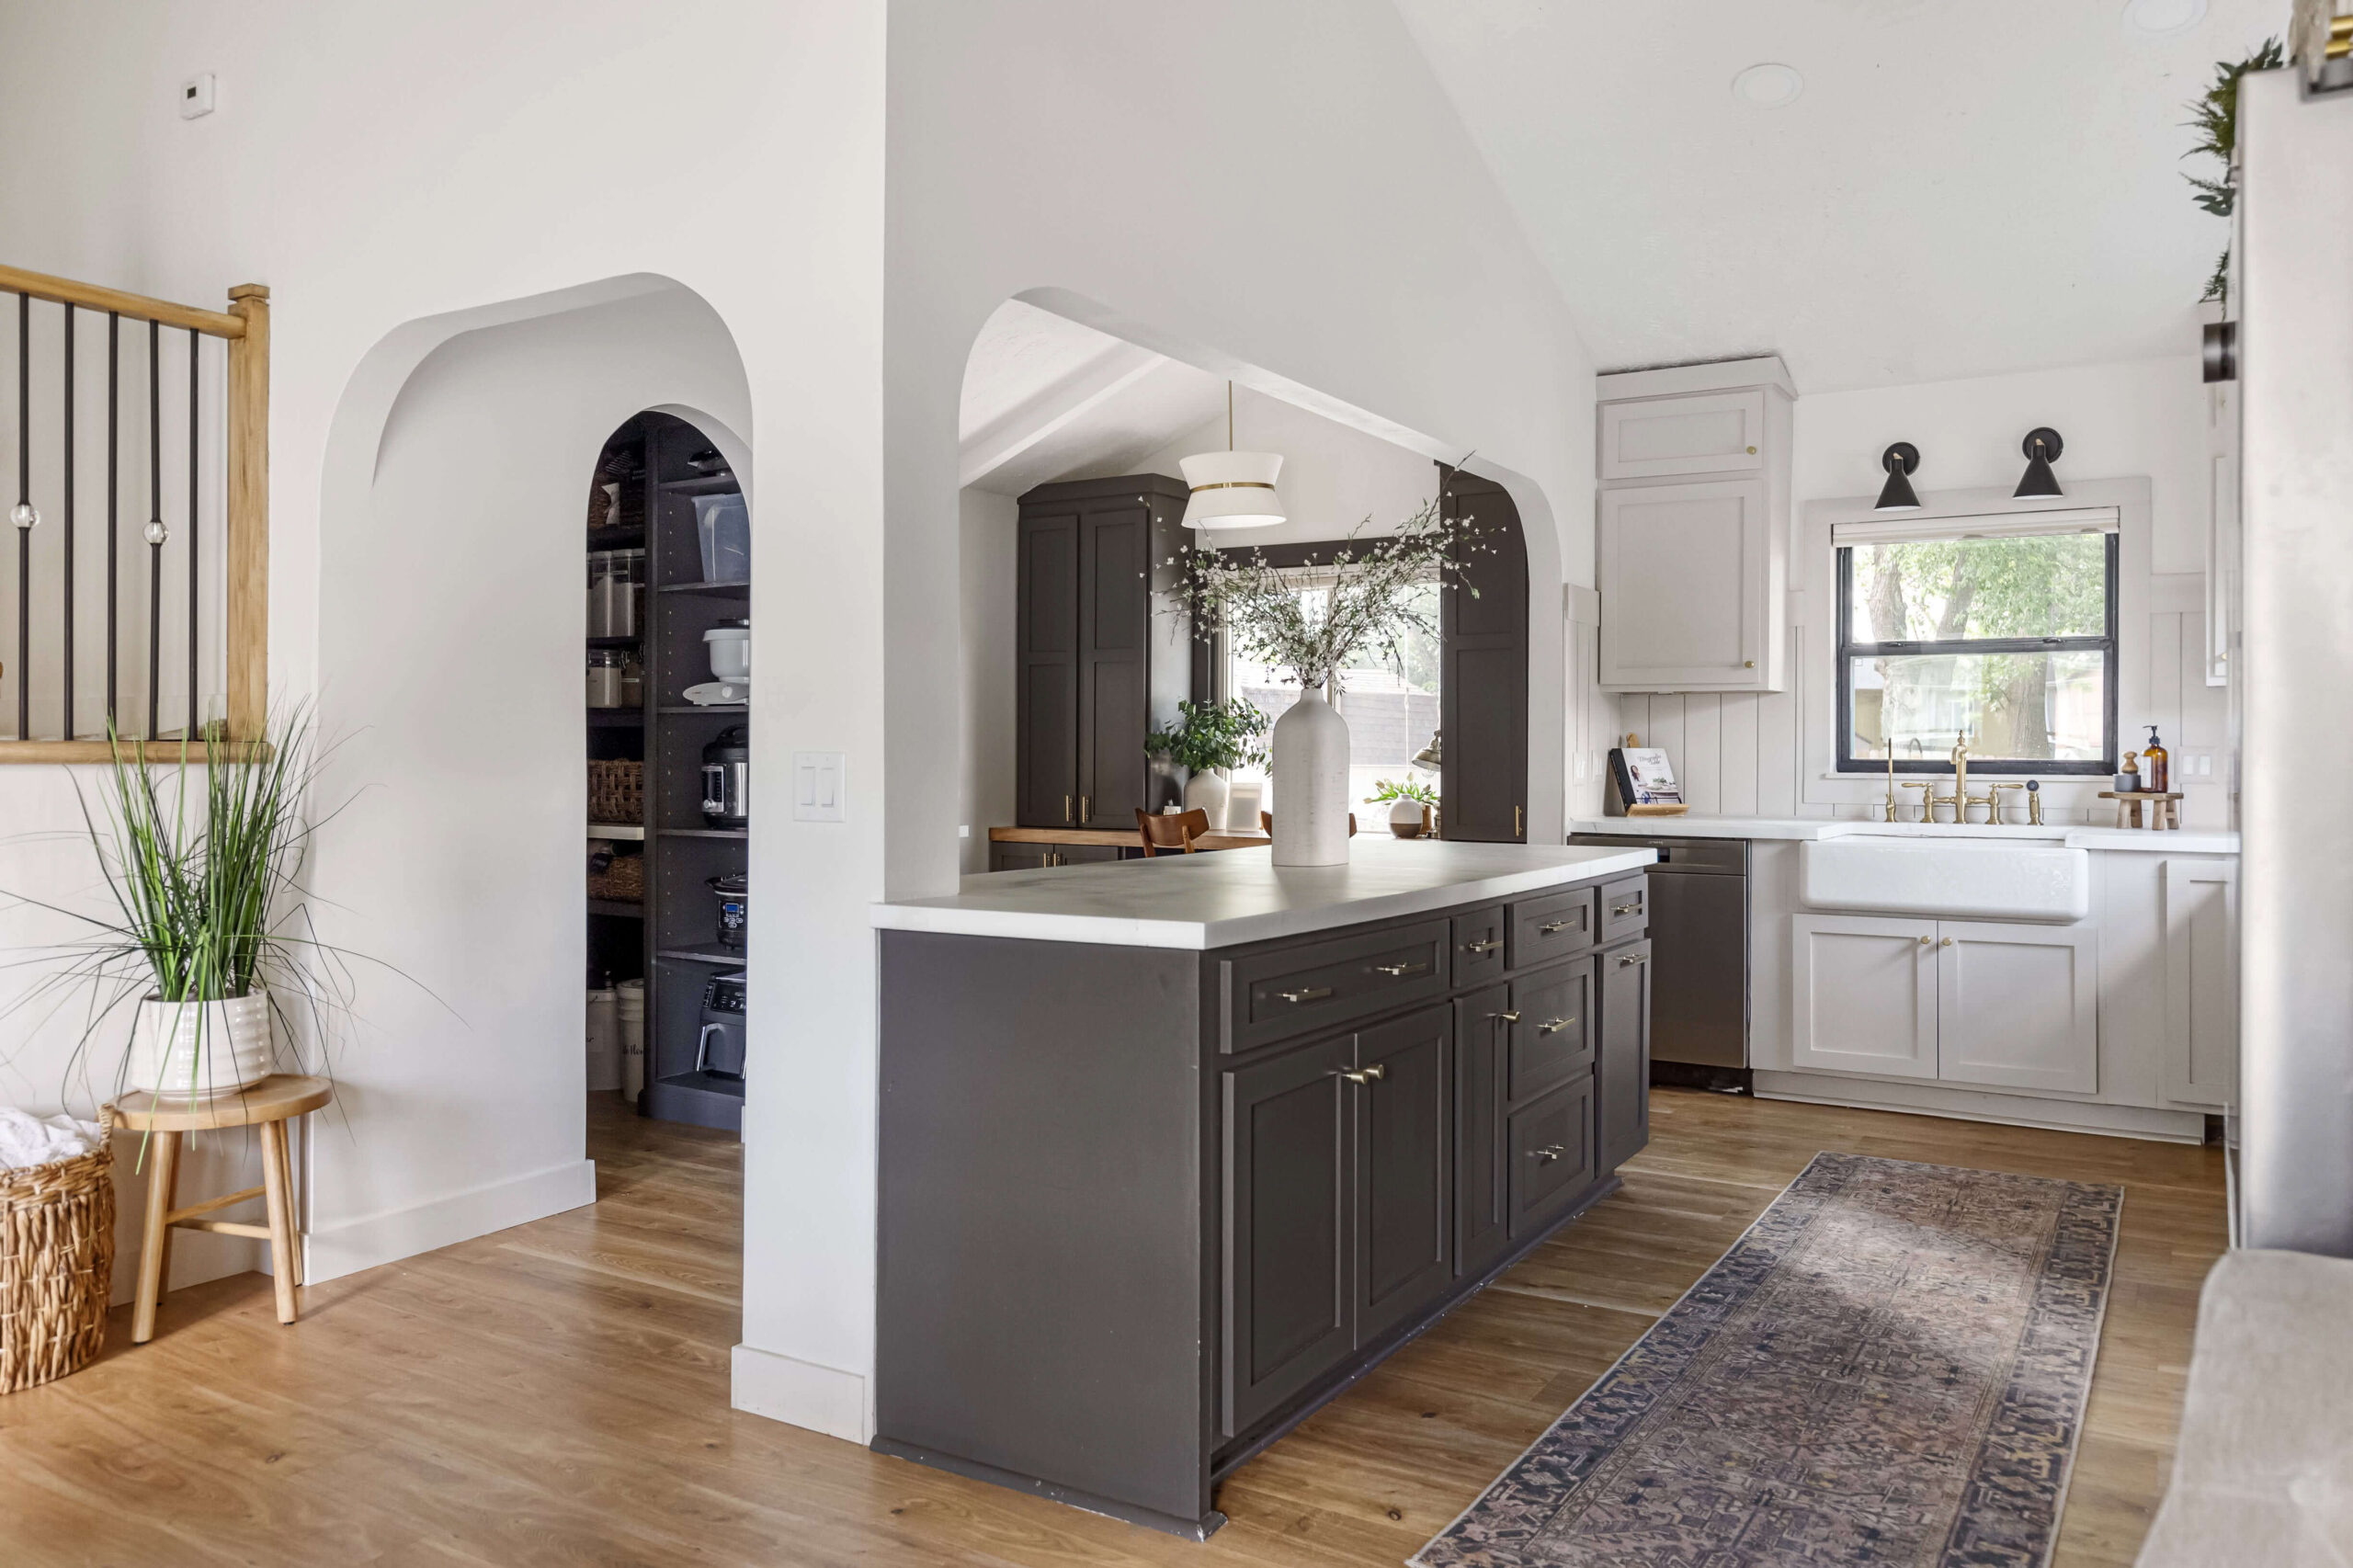
For our island, I didn’t want or need a bar counter with stools. The open concept of this space meant that the dining table would be close by. I needed more than extra eating space; I needed extra storage space, so we did cabinets on both sides of our large island.
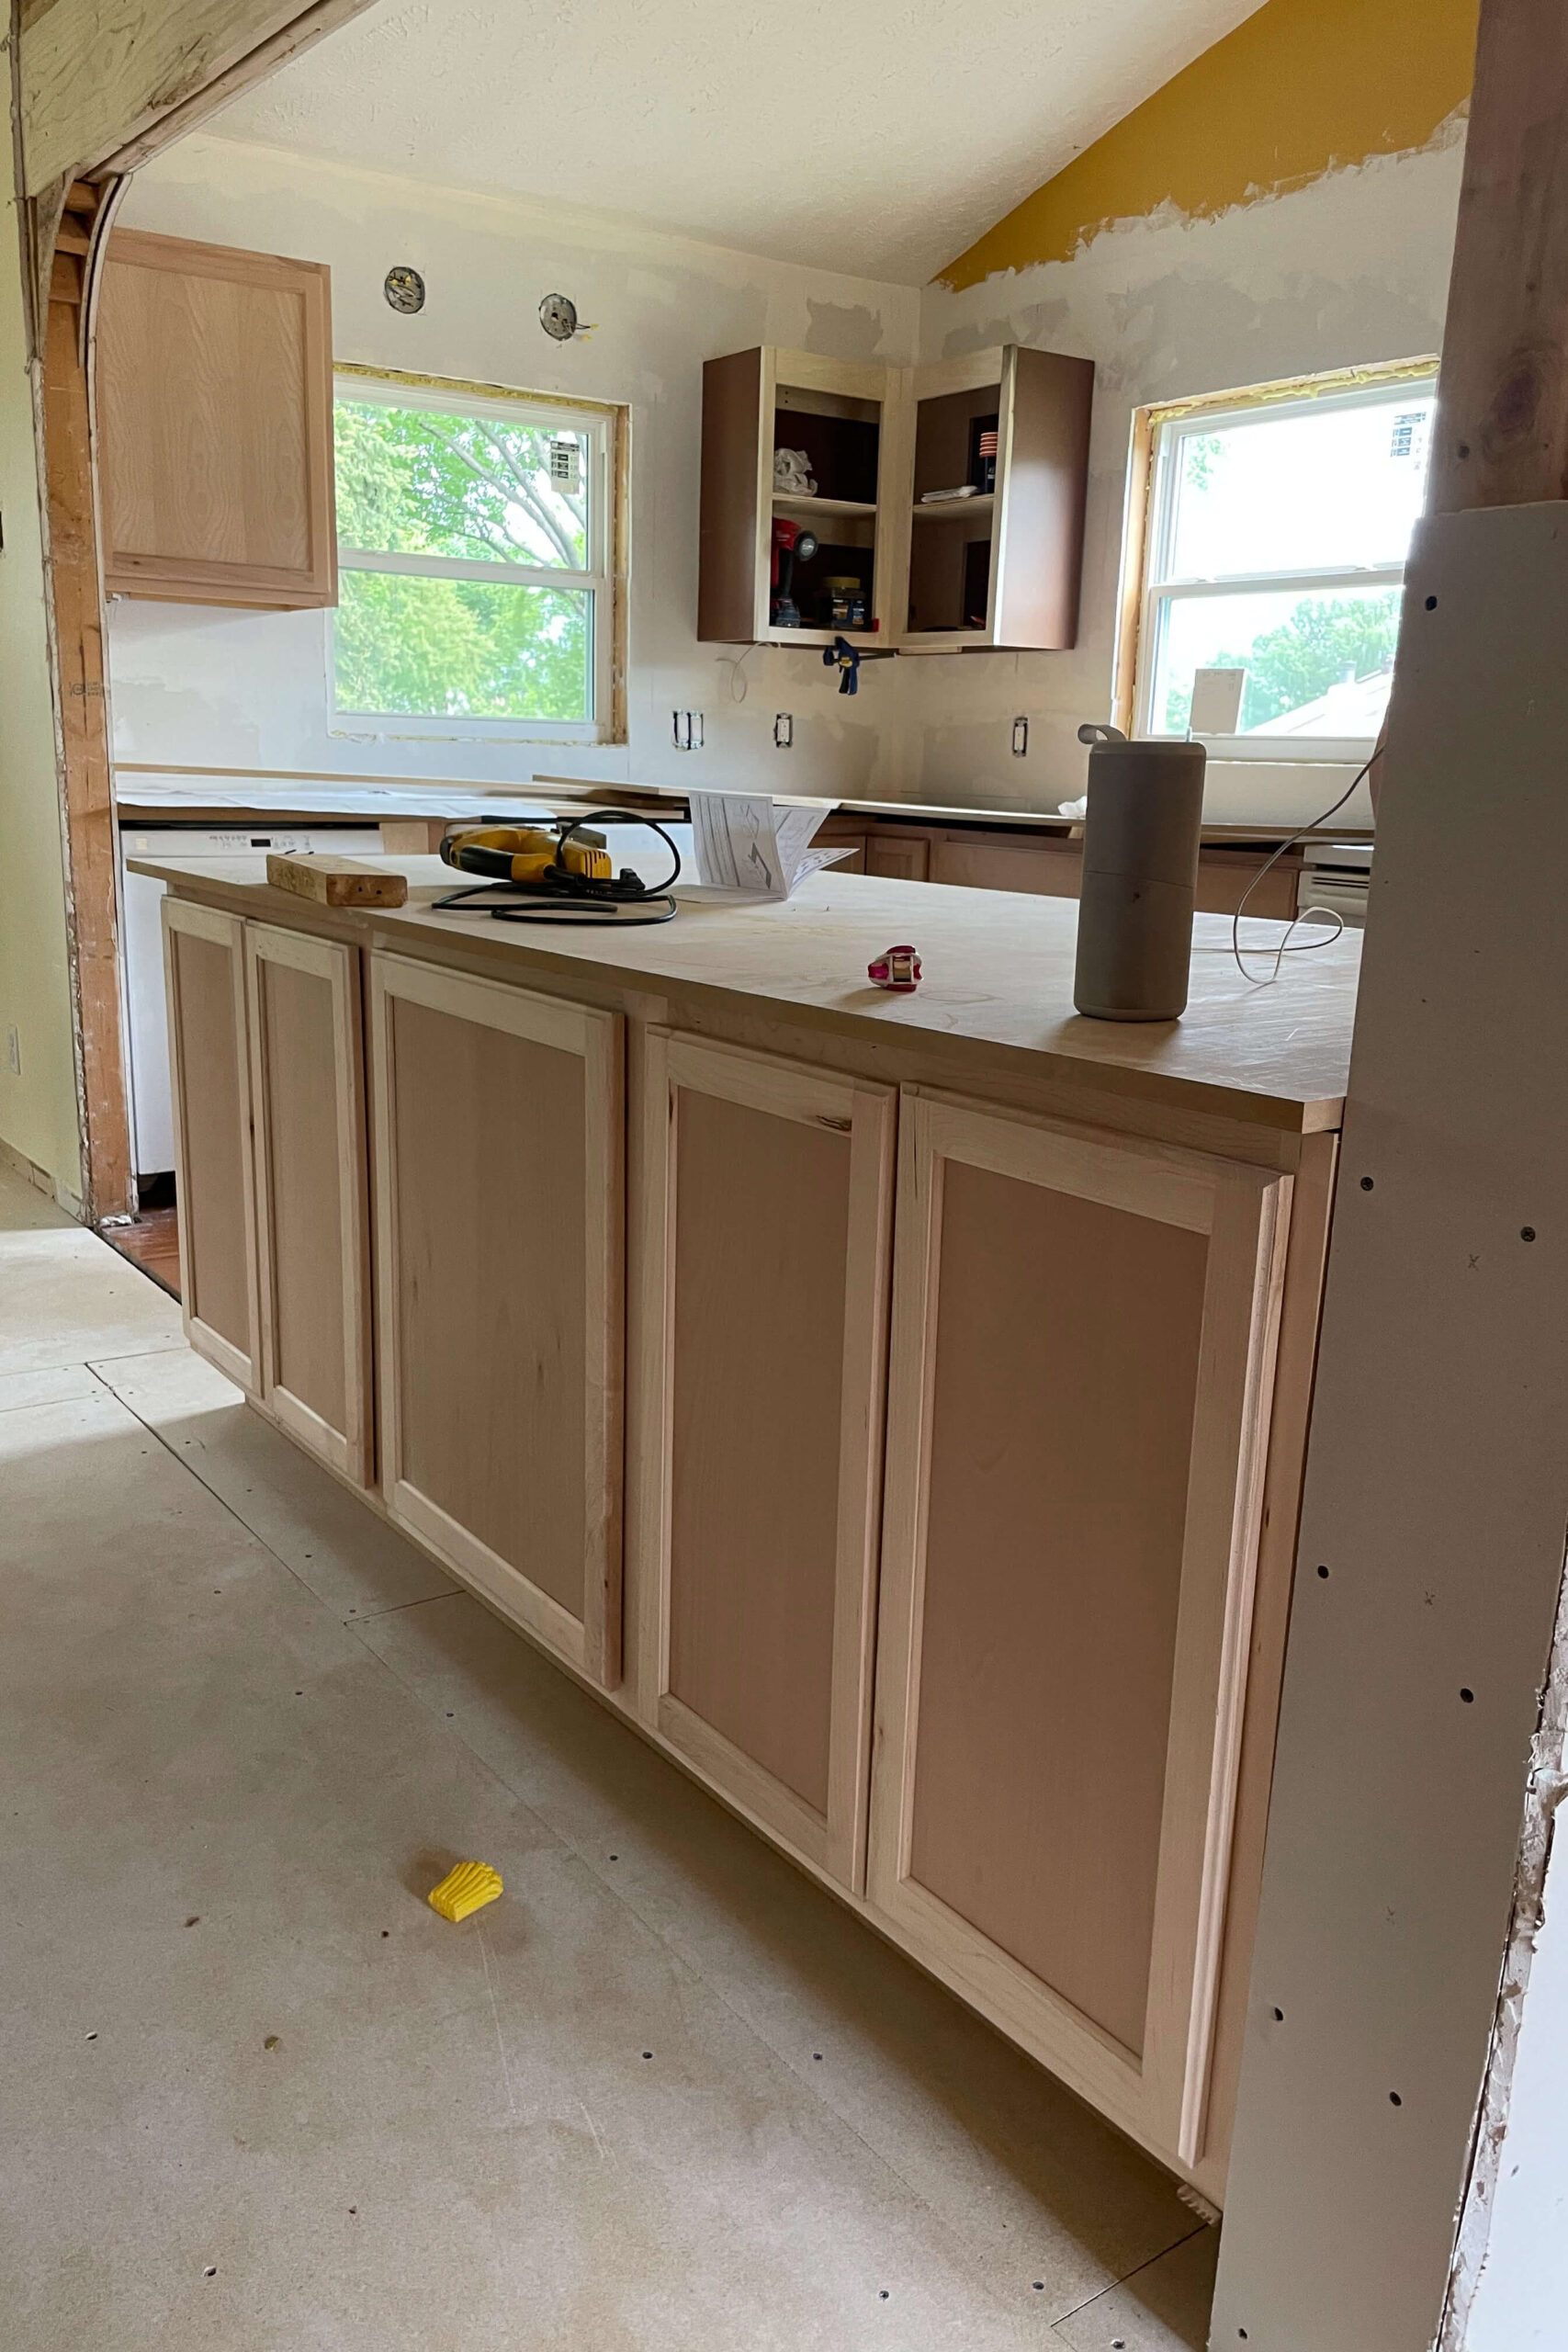
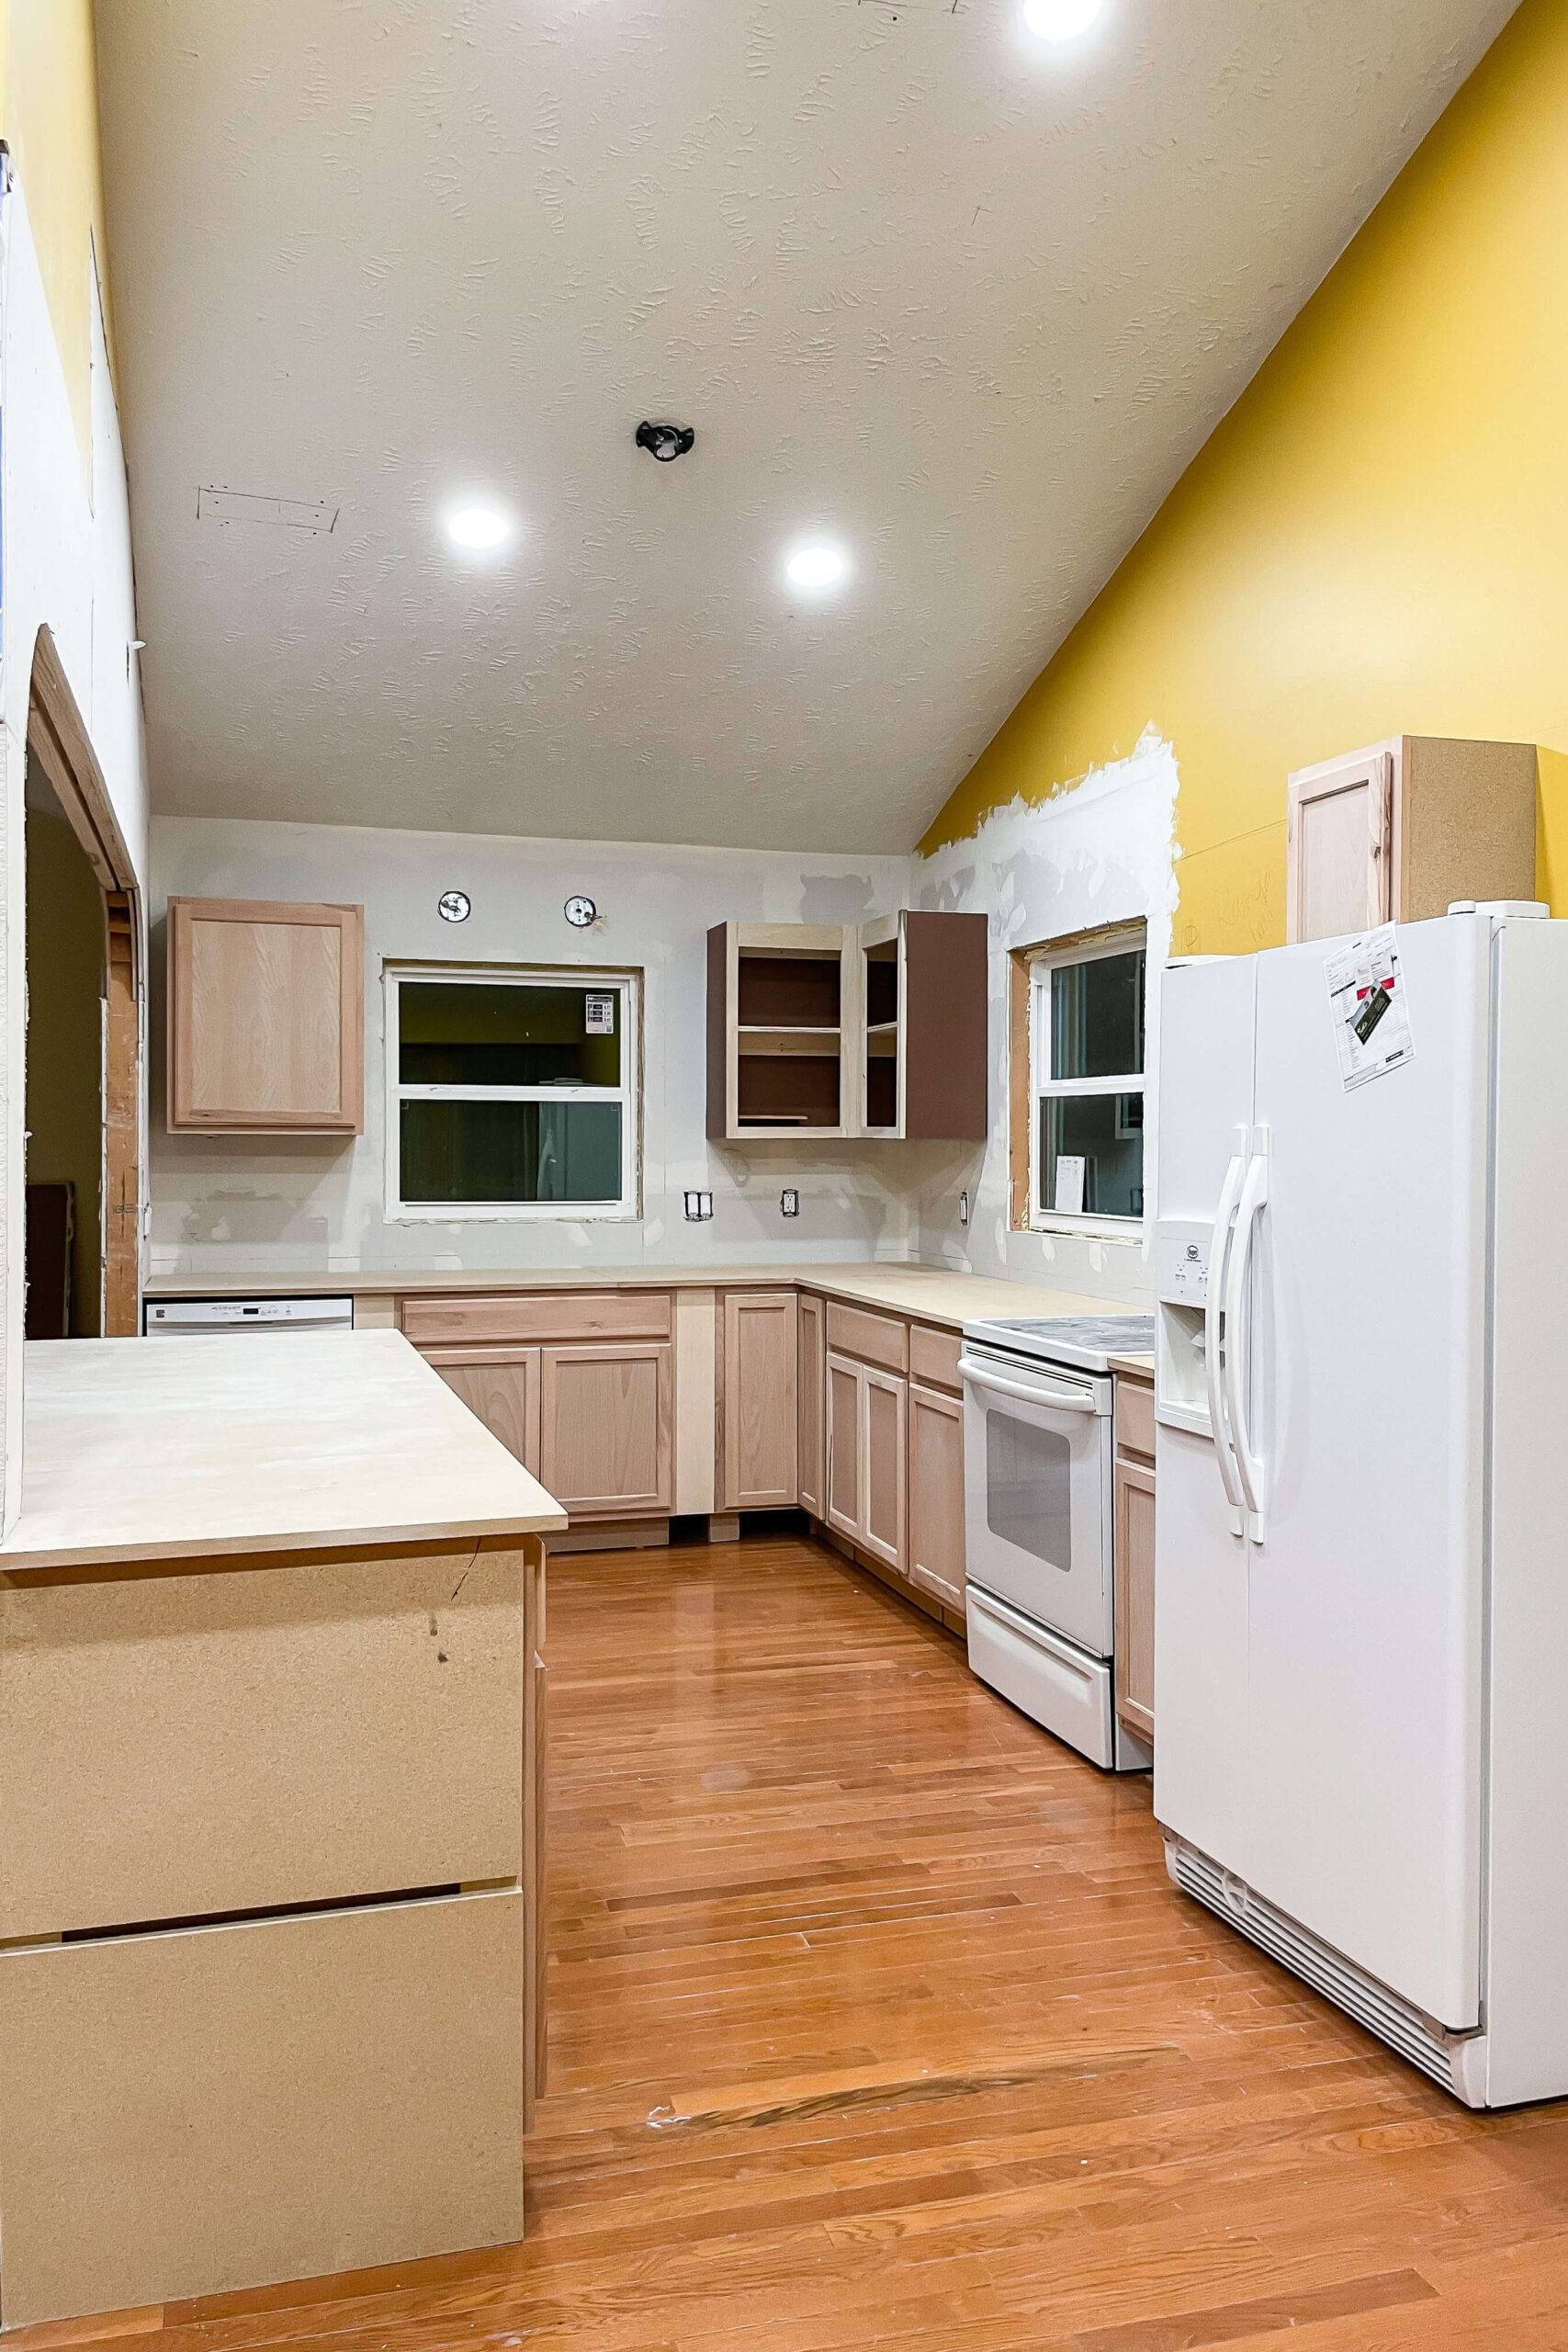
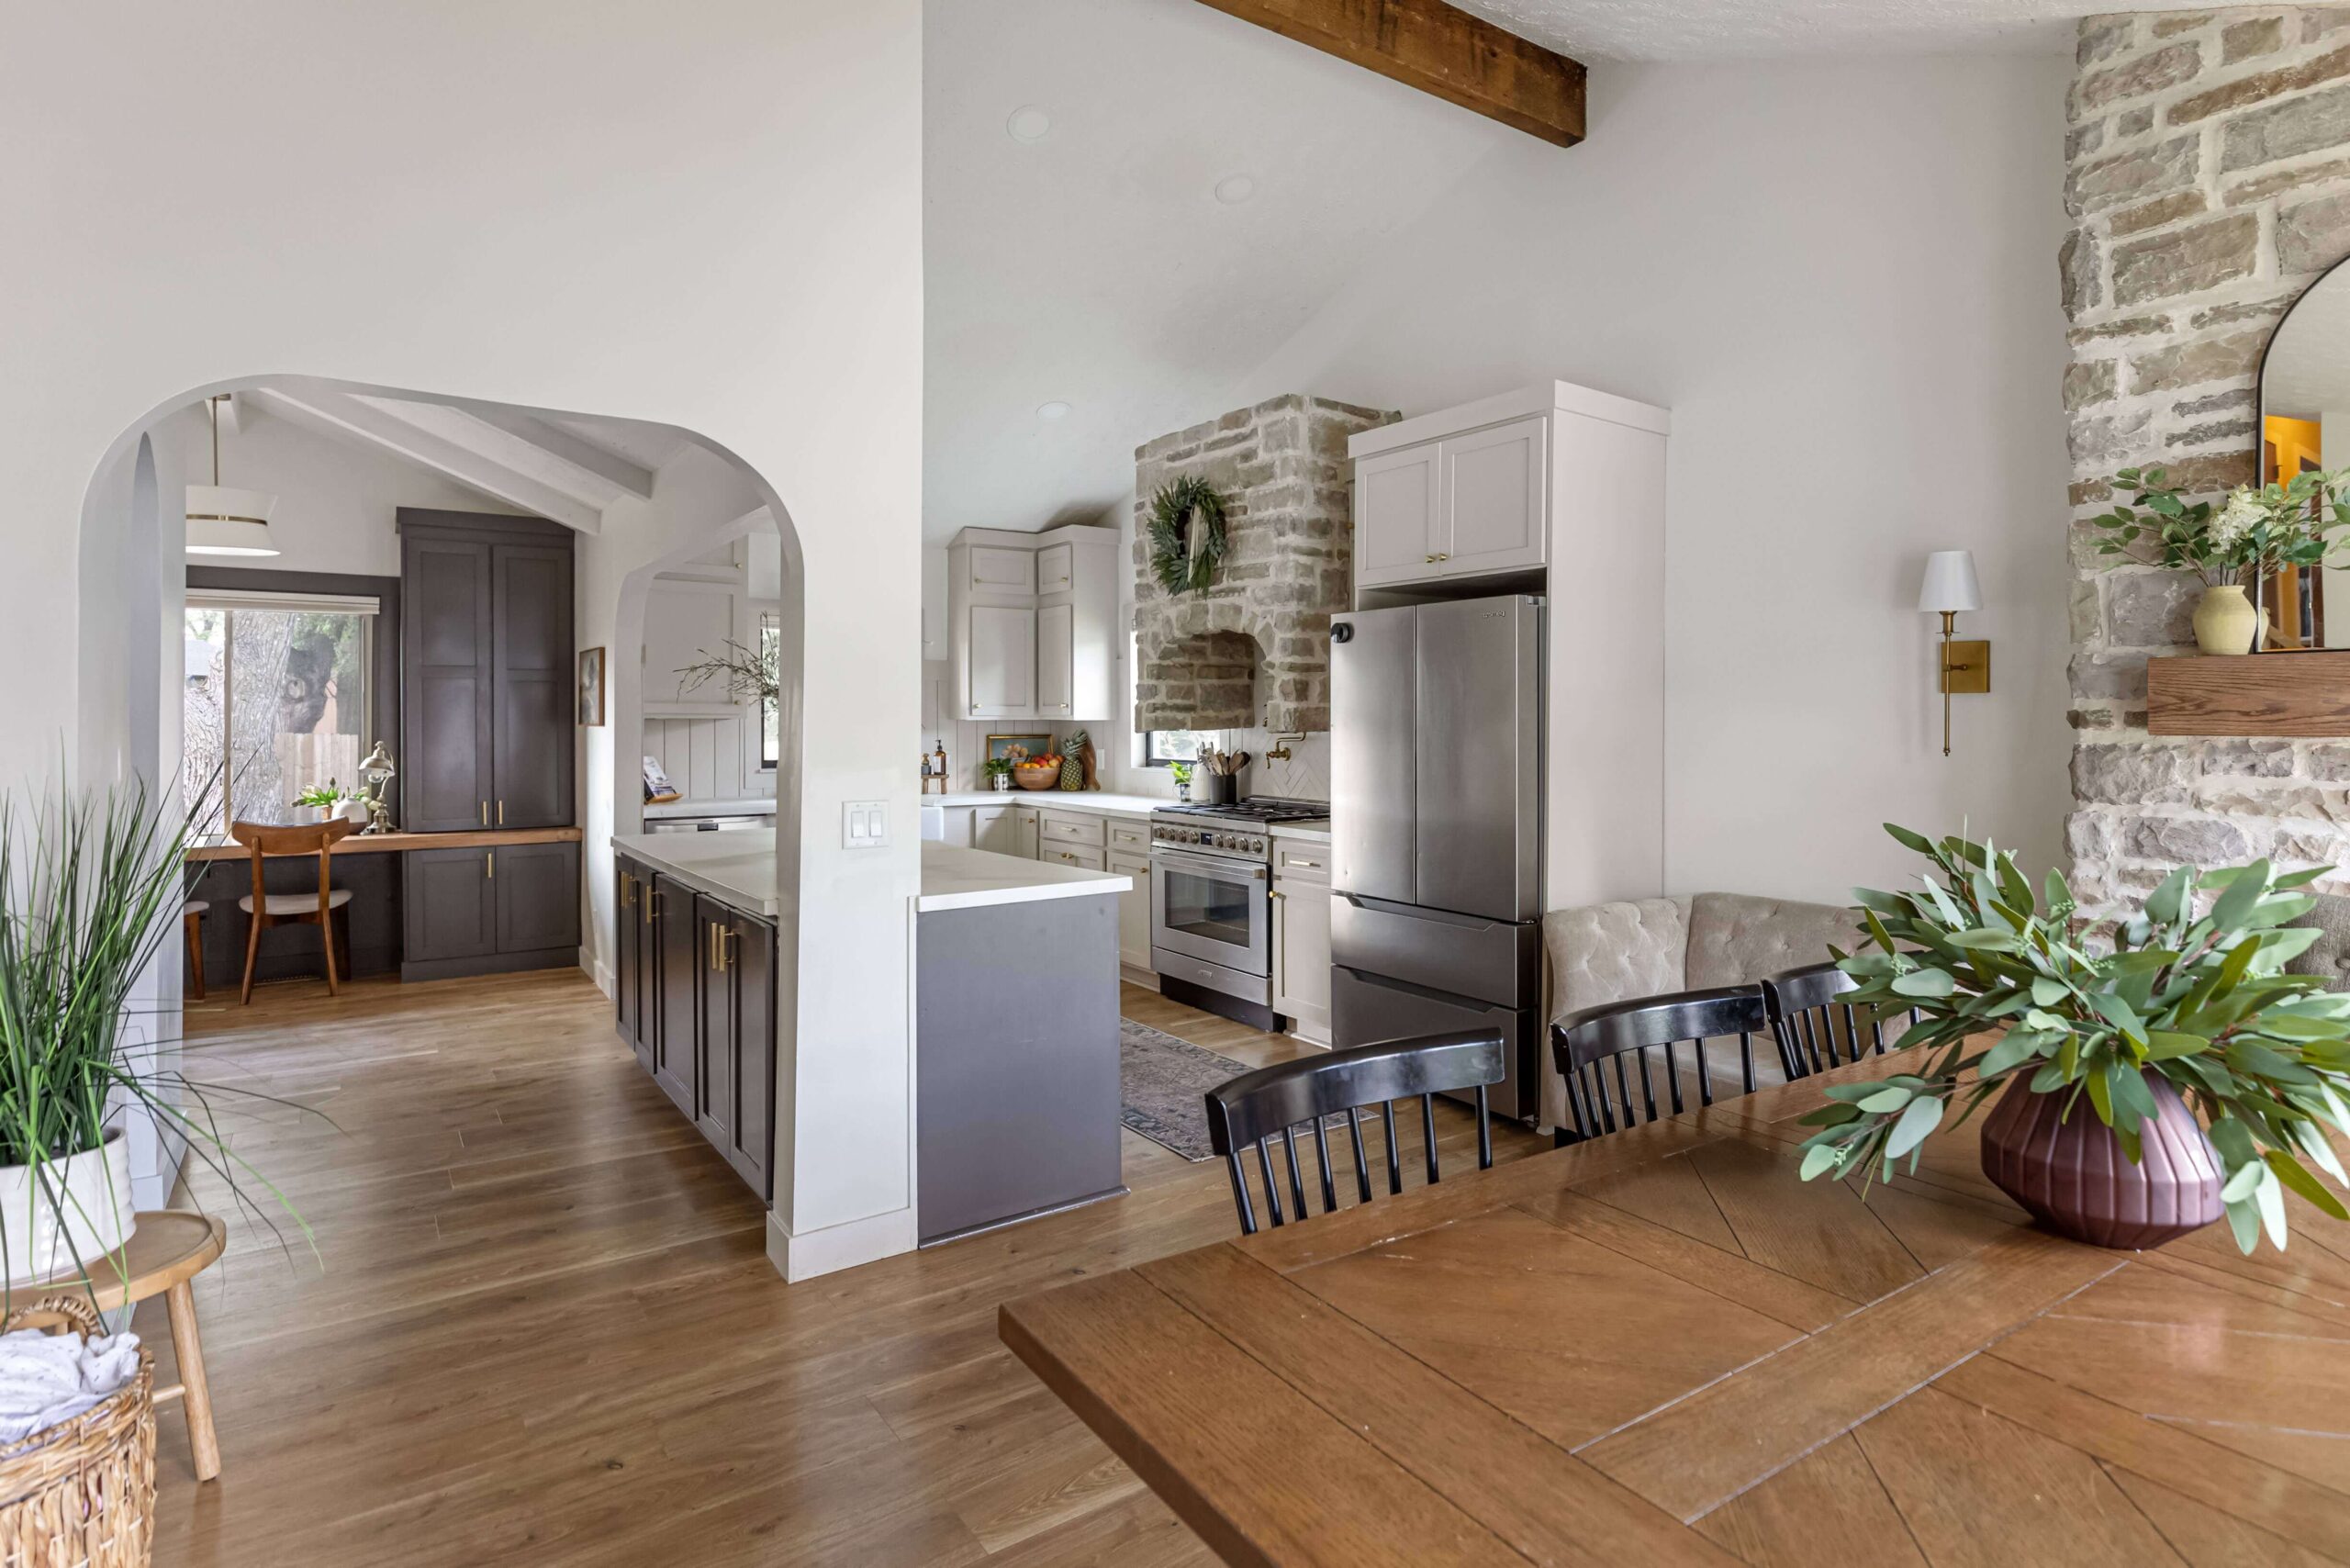
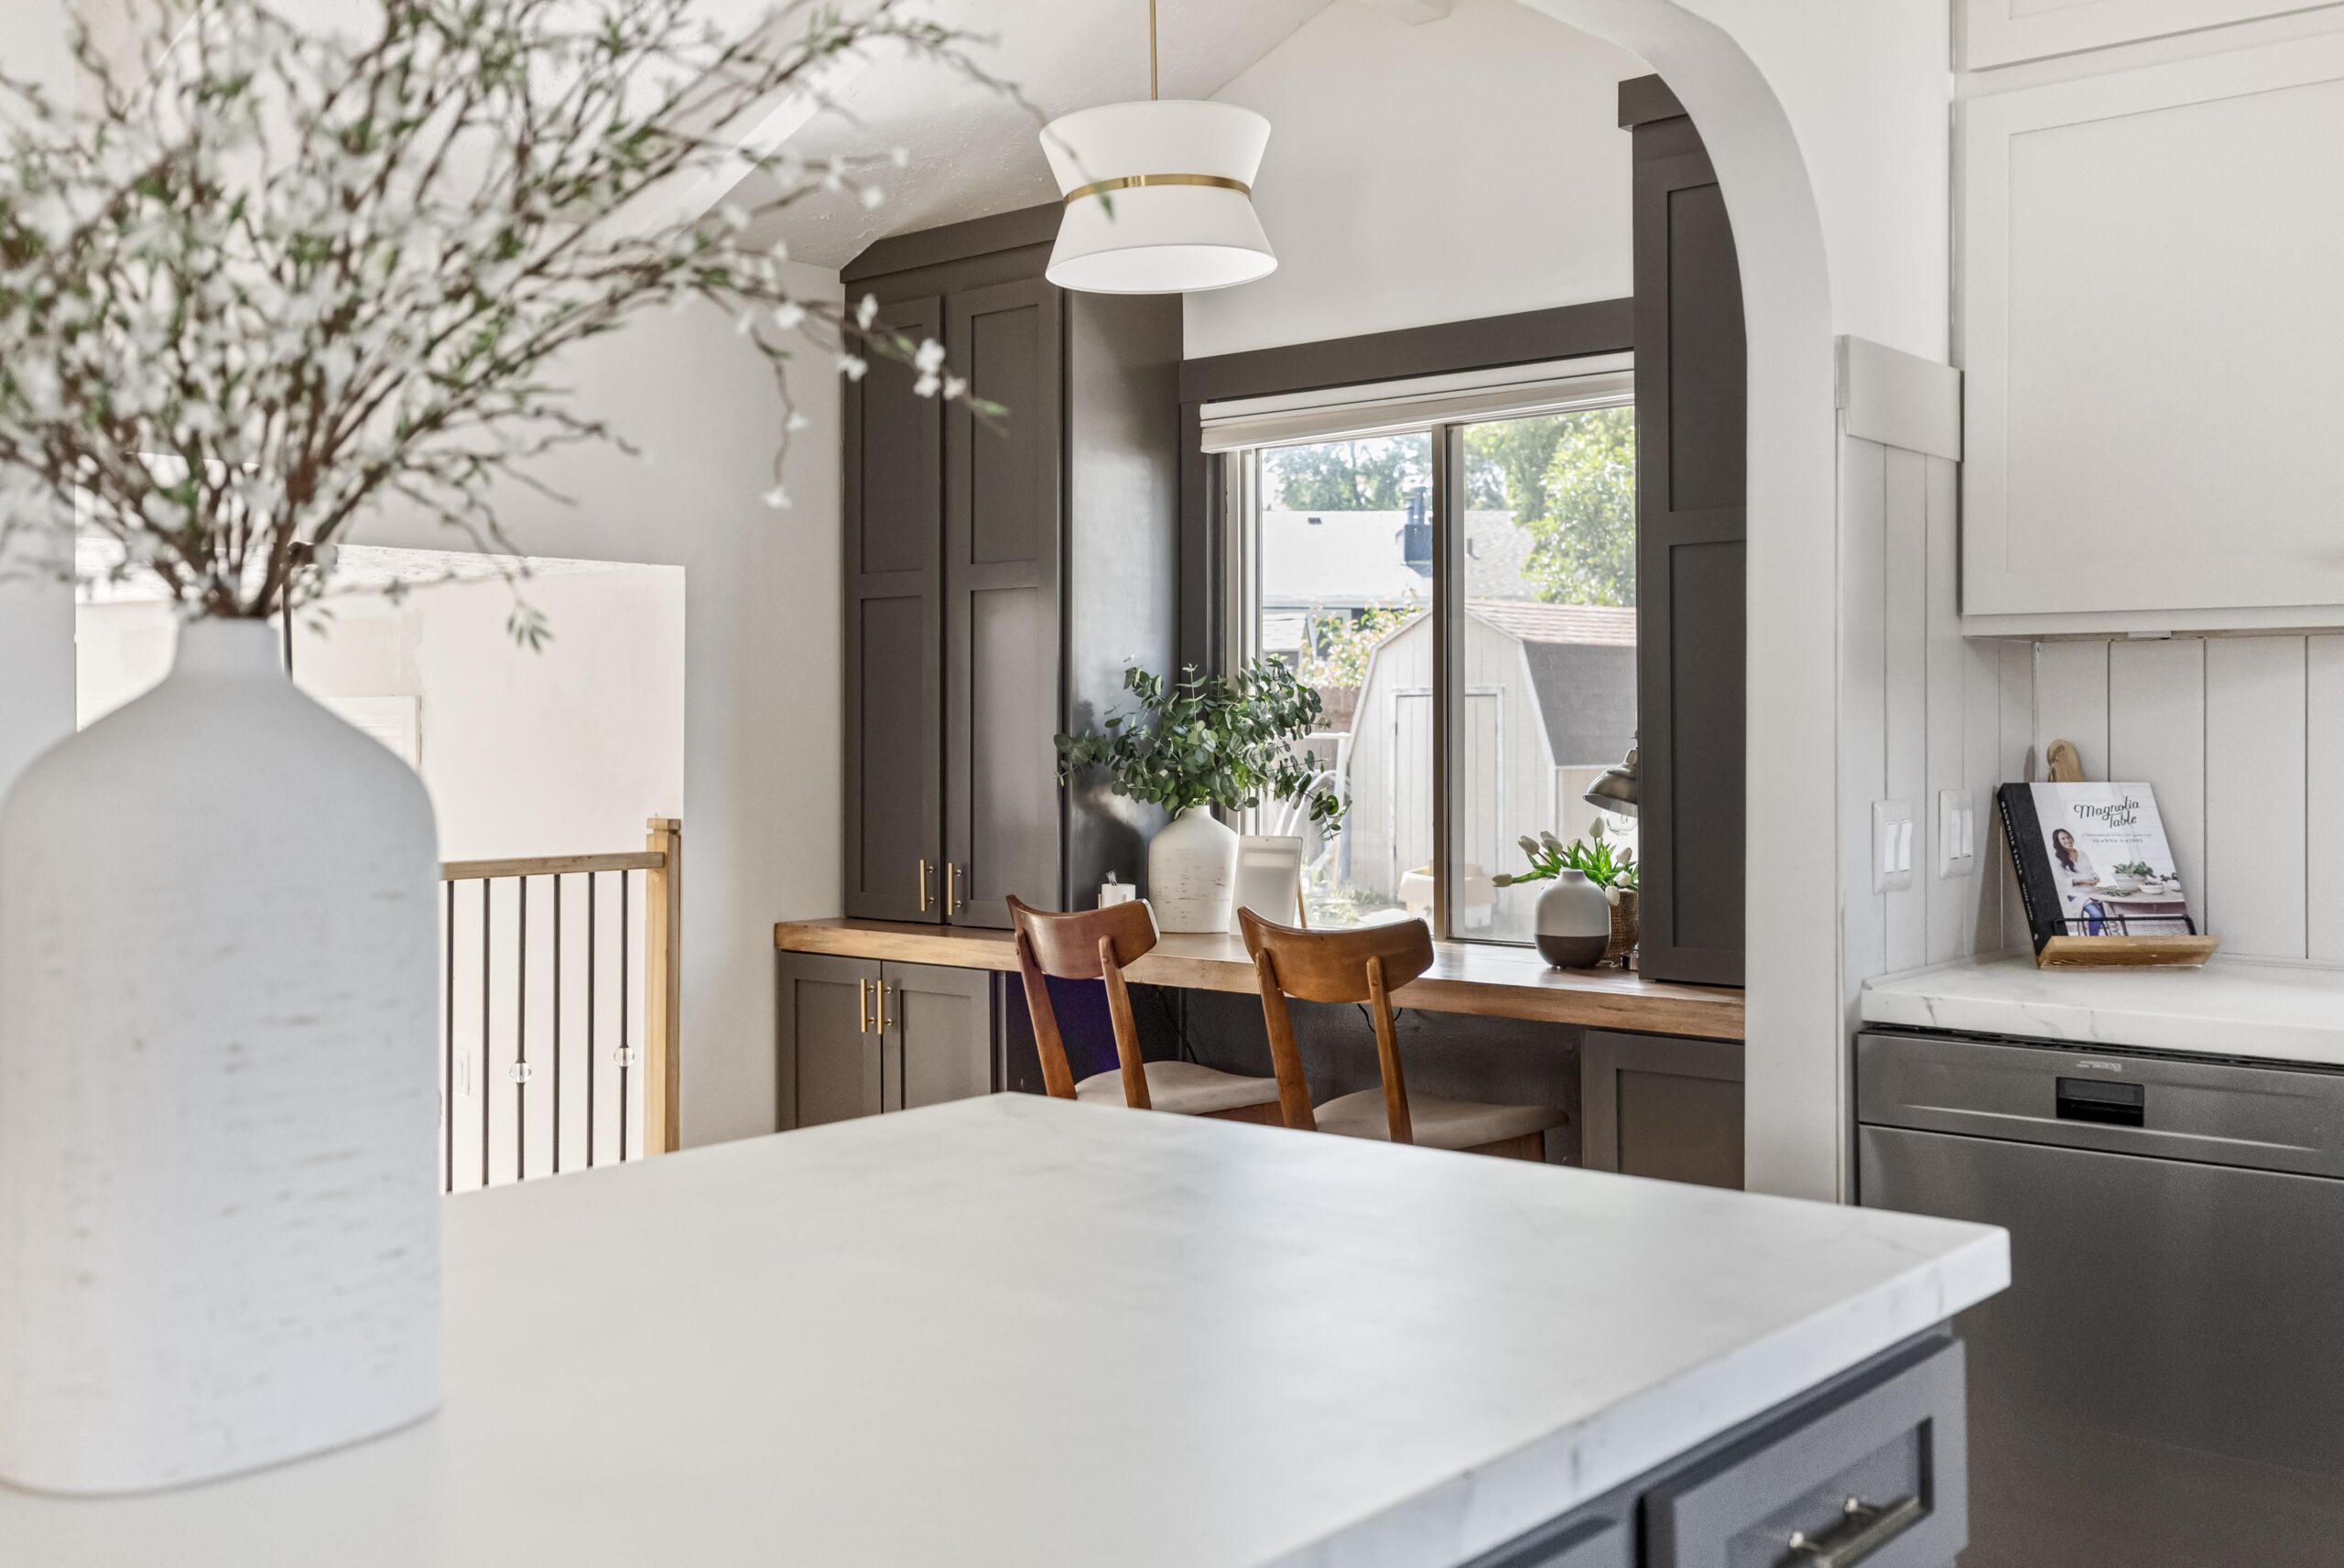
Having all the cabinets in was amazing! At this point in our DIY kitchen remodel, you can really see the space coming to life and my vision unfolding. I still had a few cabinet projects to do to take this kitchen to a whole different level of style and functionality. The image below is looking into what was once the former dining room that was way too narrow. Now look at it!
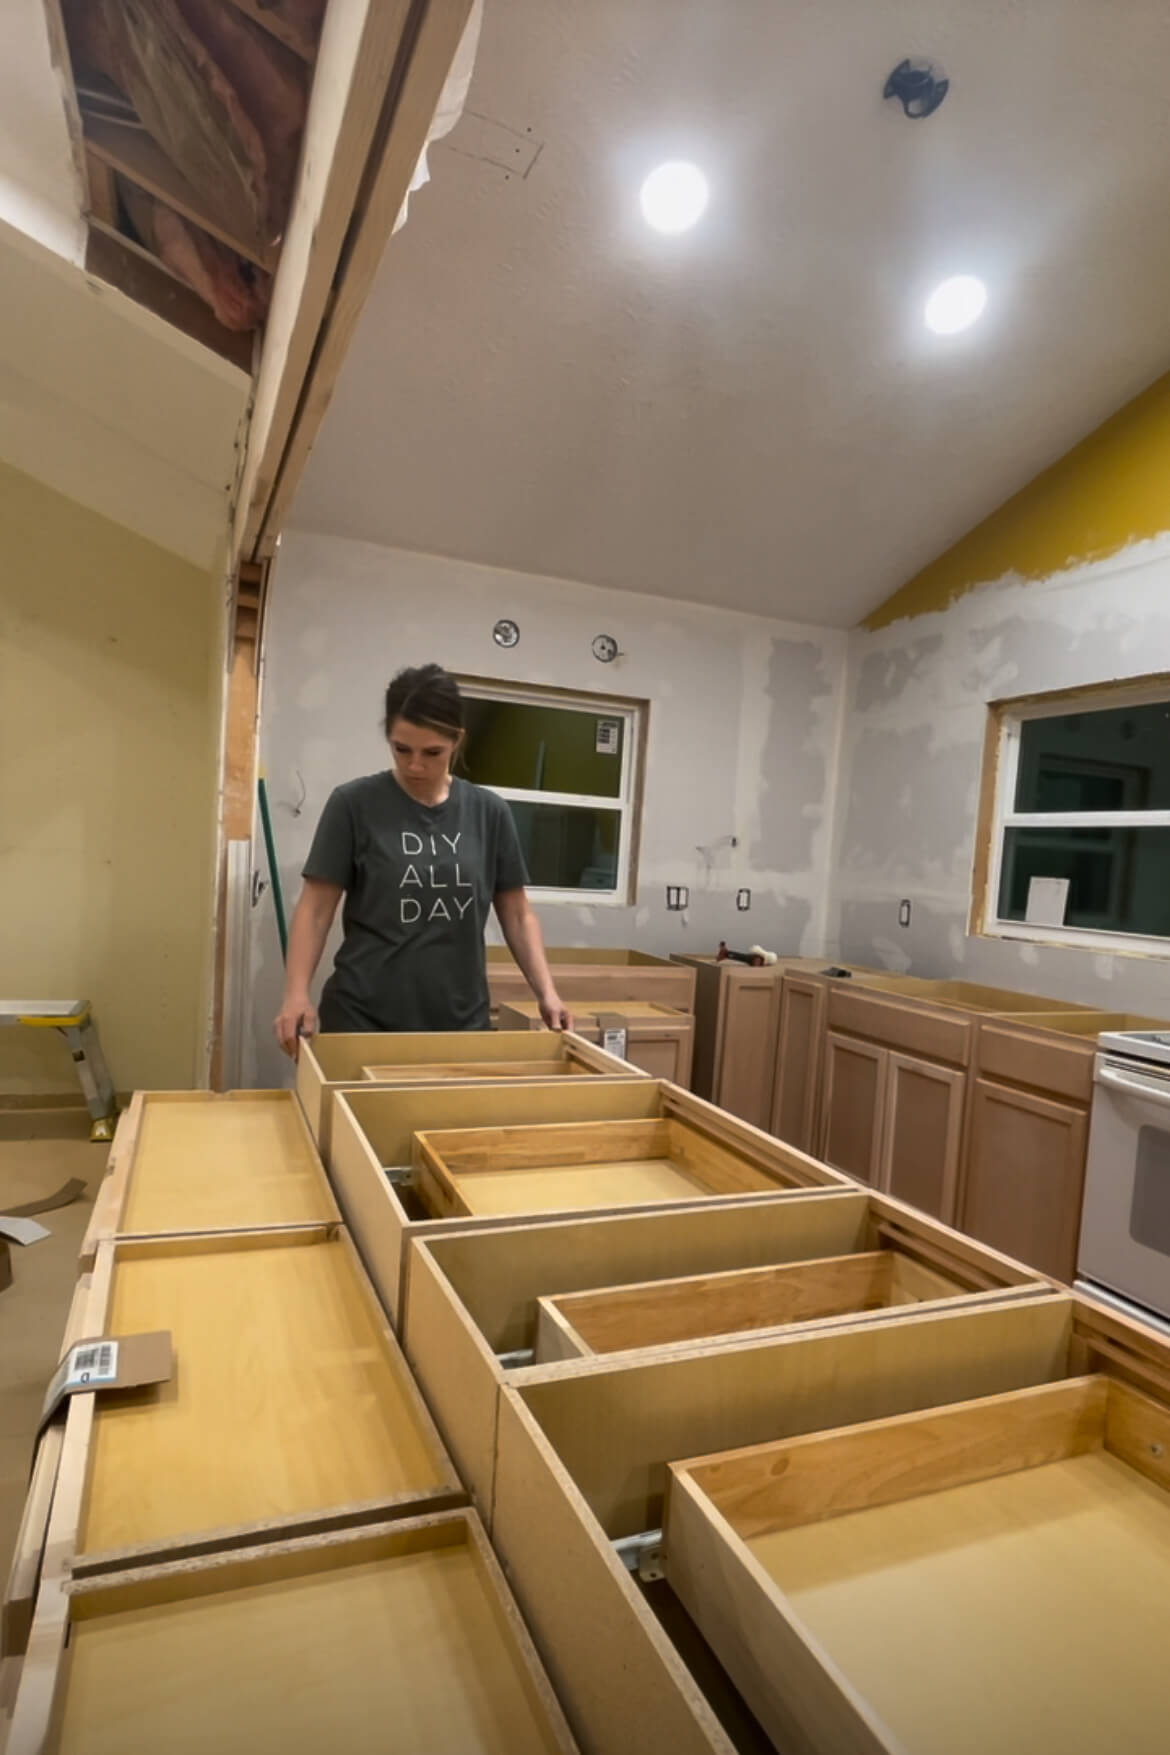
Upgrading our Stock Cabinets
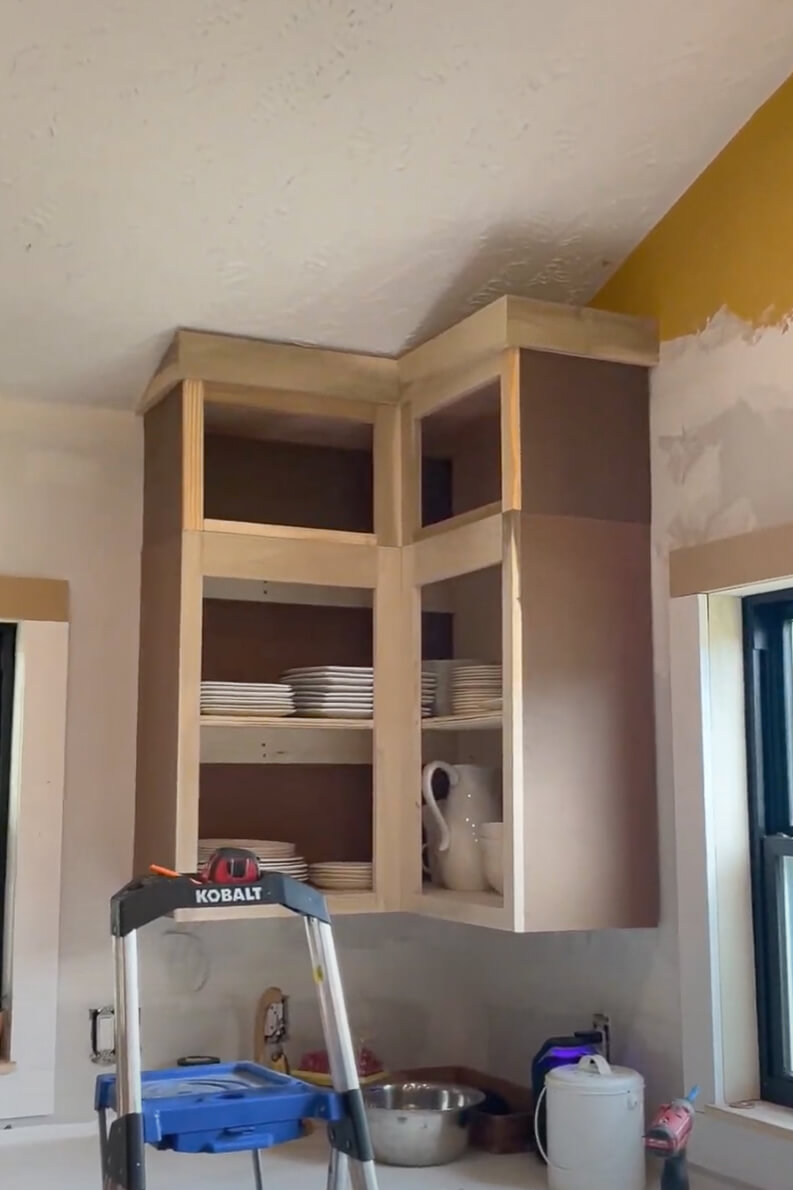
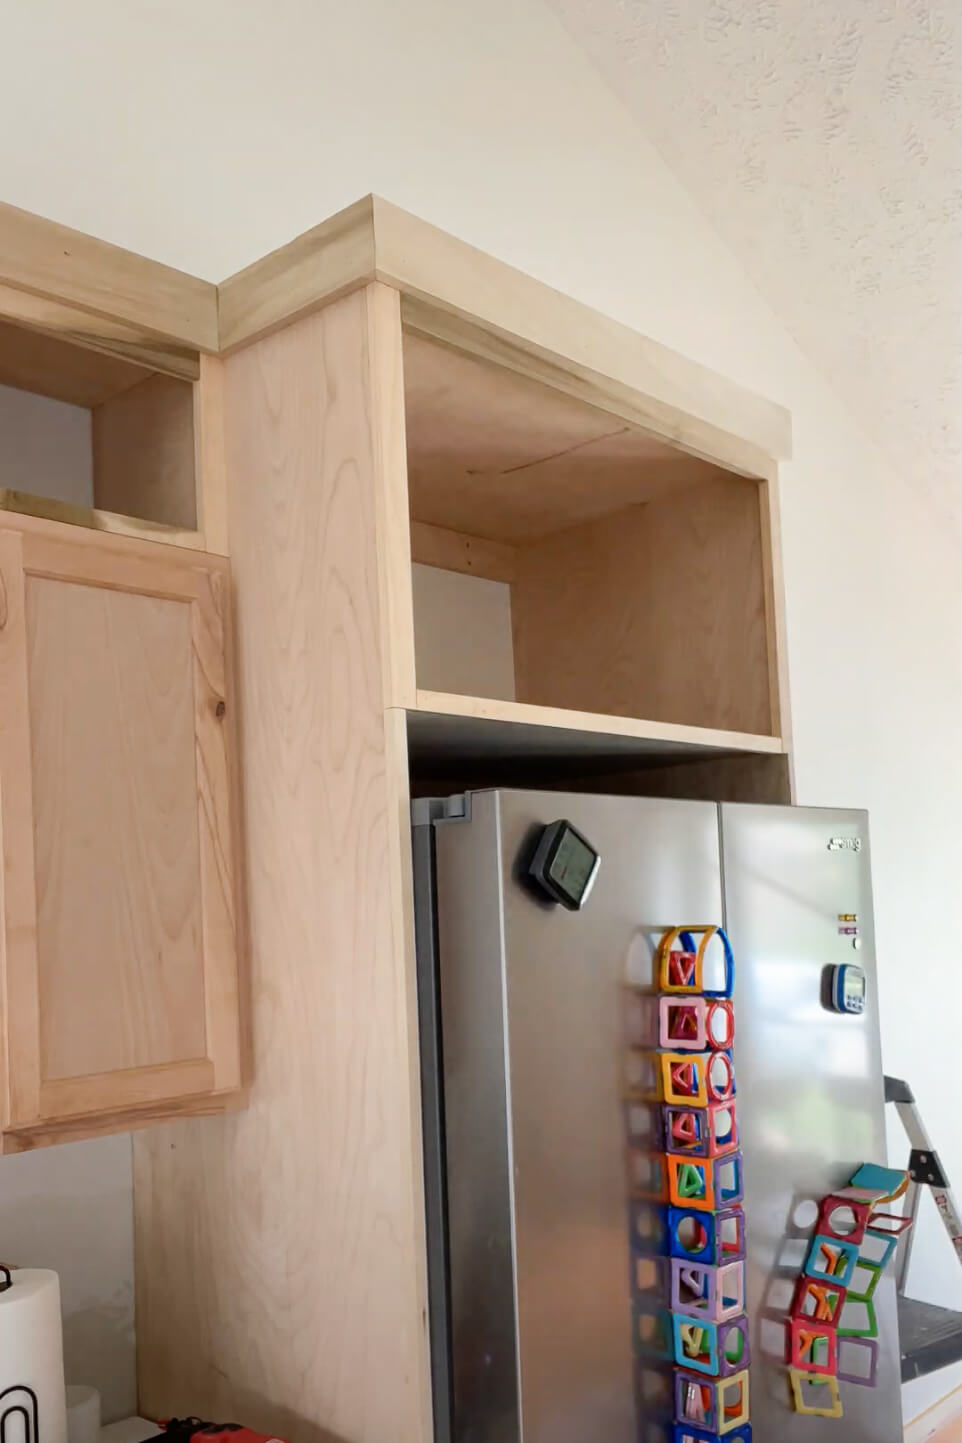
During our DIY kitchen remodel I did a few upgrades to our stock cabinets that really brought the style and function of our kitchen to a whole new level. We couldn’t buy an upper corner cabinet to fit our space, so I built that cabinet box. I also made extension cabinets to raise the height of the stock ones, and built a custom refrigerator cabinet as well.
The interior of our stock cabinets really needed some upgrading as well. I removed a Lazy Susan, made pull-out shelves, and built a pull-out cabinet for the trash bins. All small projects with big impacts for our DIY kitchen remodel.
For full instructions on any of those projects you can click on the links below.
- Removing a Lazy Susan
- Building Pull-Out Shelves
- Building a Pull-Out Trash Drawer
- Extending Cabinets to the Ceiling
- Building a Refrigerator Cabinet
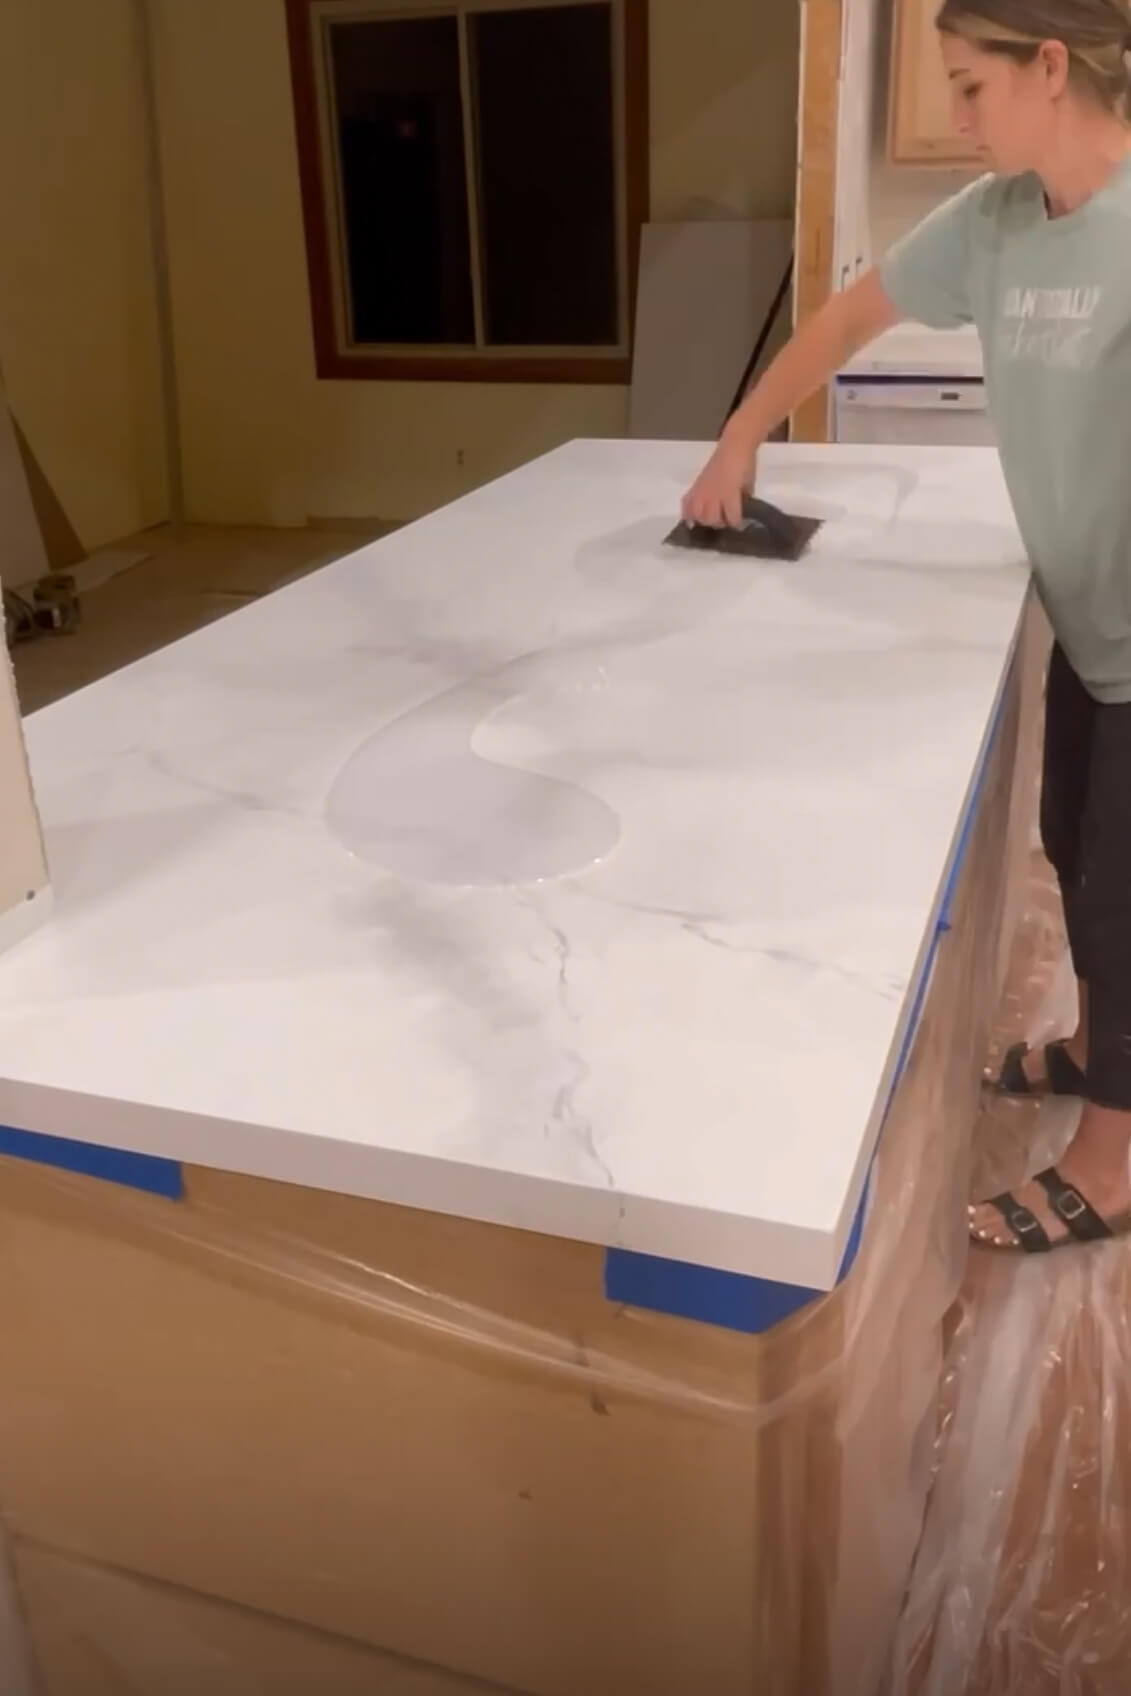
DIY Faux Marble Epoxy Countertops
I have done several kitchen remodels in my day, and I love doing epoxy countertops. They are affordable, extremely durable, and totally doable for even a beginner level DIYer.
For most of the kitchen, the countertop will sit right on top of my cabinets, but for areas like around the dishwasher, you have to add a little extra support. Using my laser level as a guide, I attached these boards to the wall at the same height as my cabinets.


Next, I measured out my kitchen, transferred that measurement to MDF, and then cut the MDF using my circular saw.
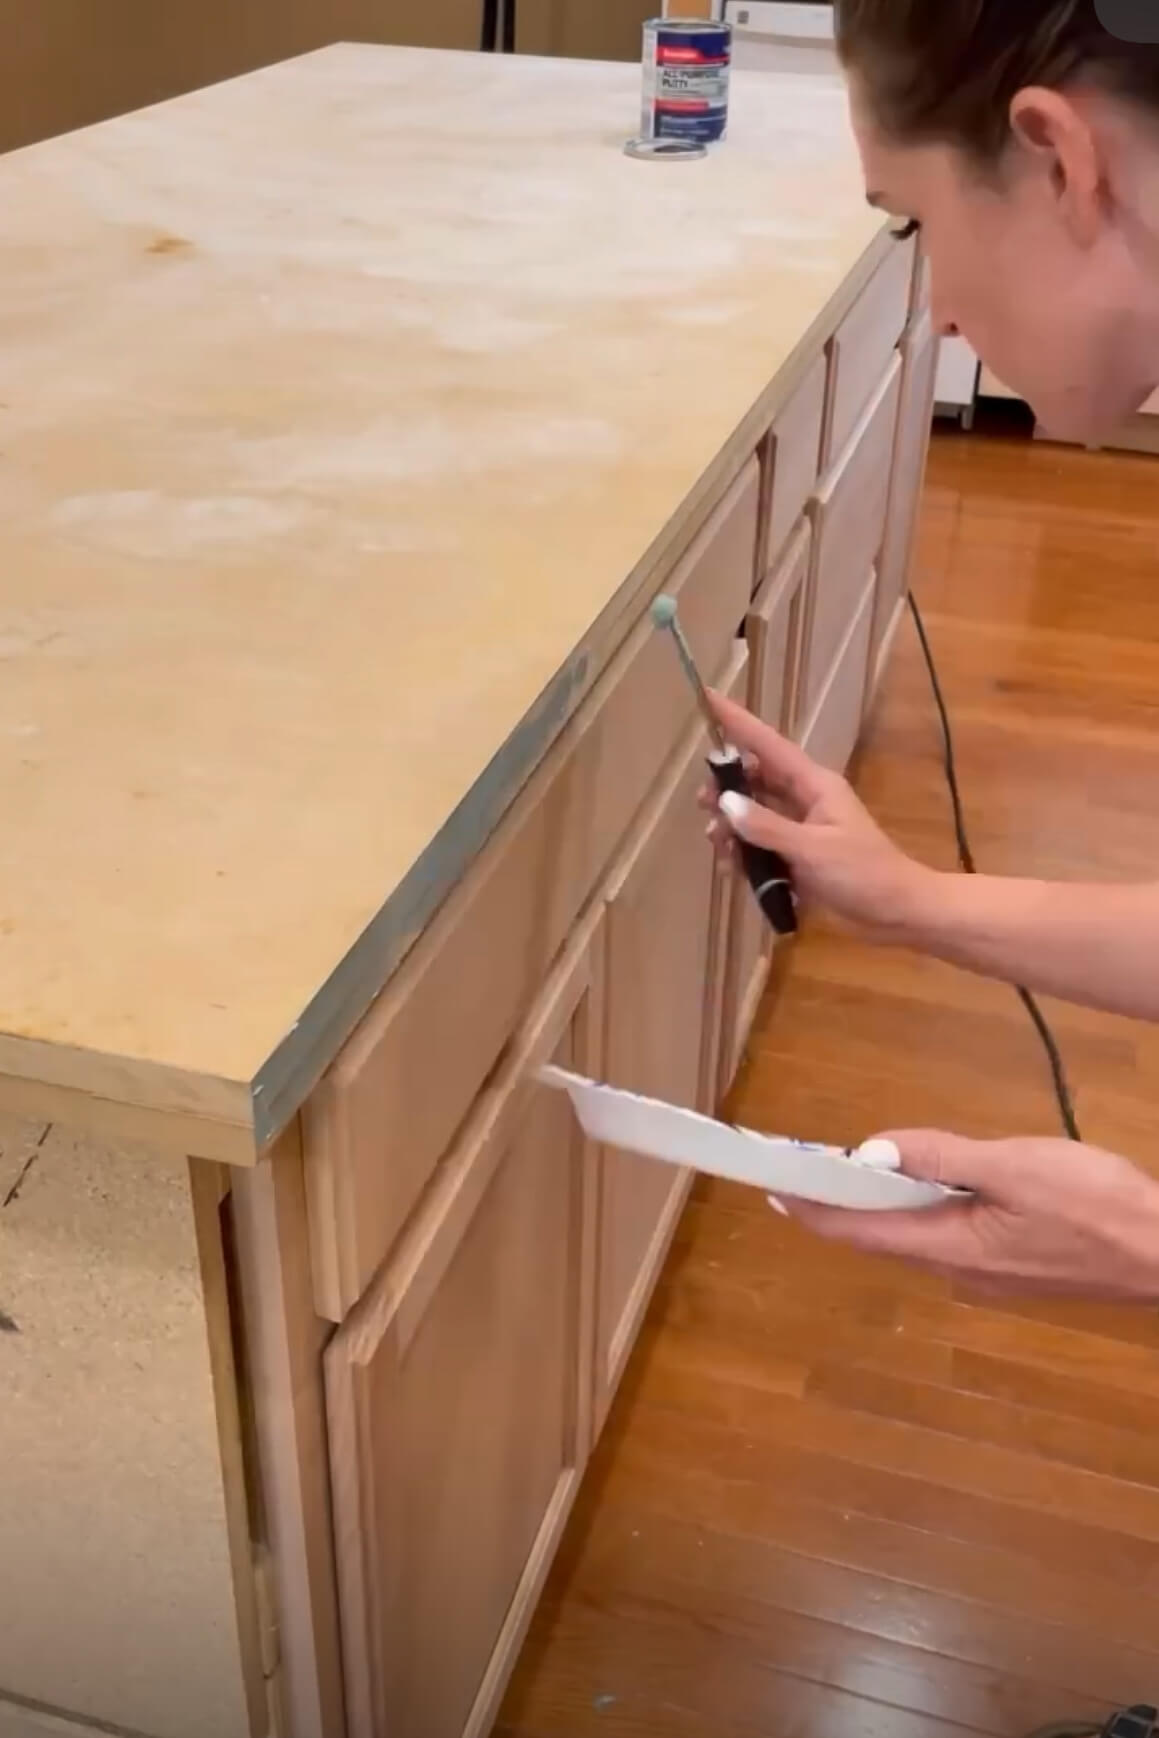
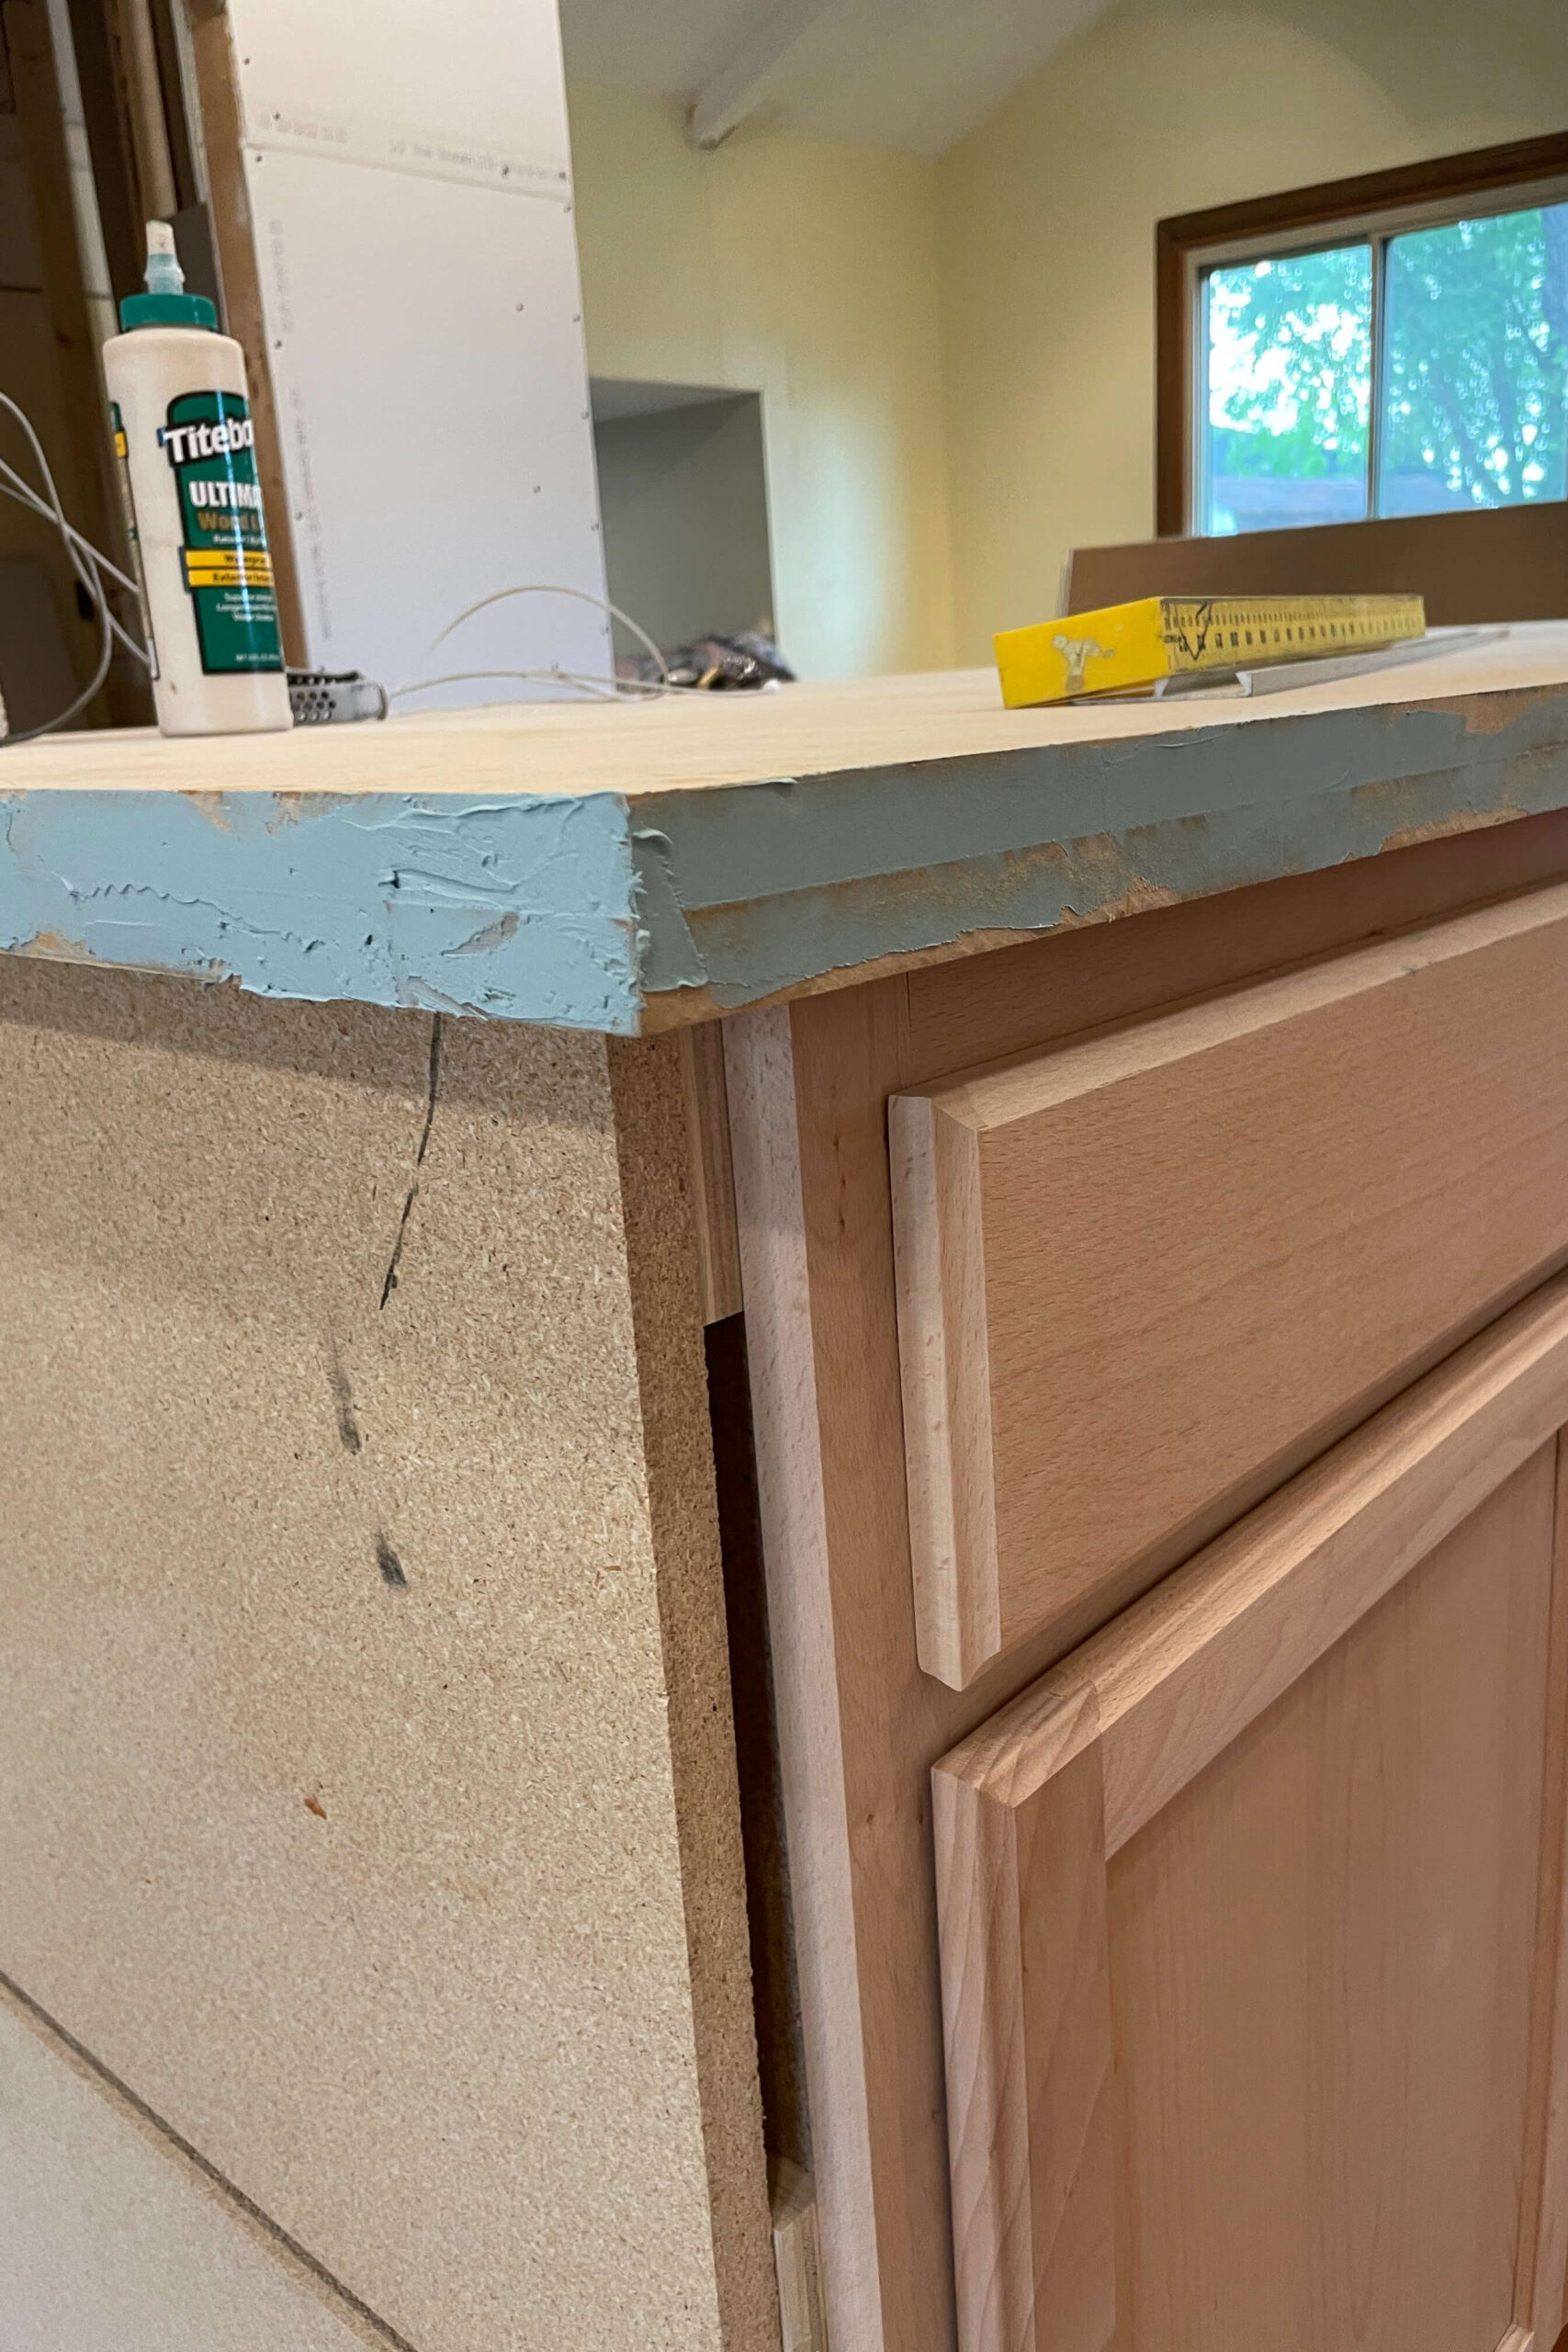
After you have all of your MDF in place it is time for Bondo. This is one of my go-to products during not only this DIY kitchen remodel, but even just for filling nail holes on trim. It is far superior to wood filler for a smooth finish. A little goes a long way, and it sets up quickly, so you have to work fast.
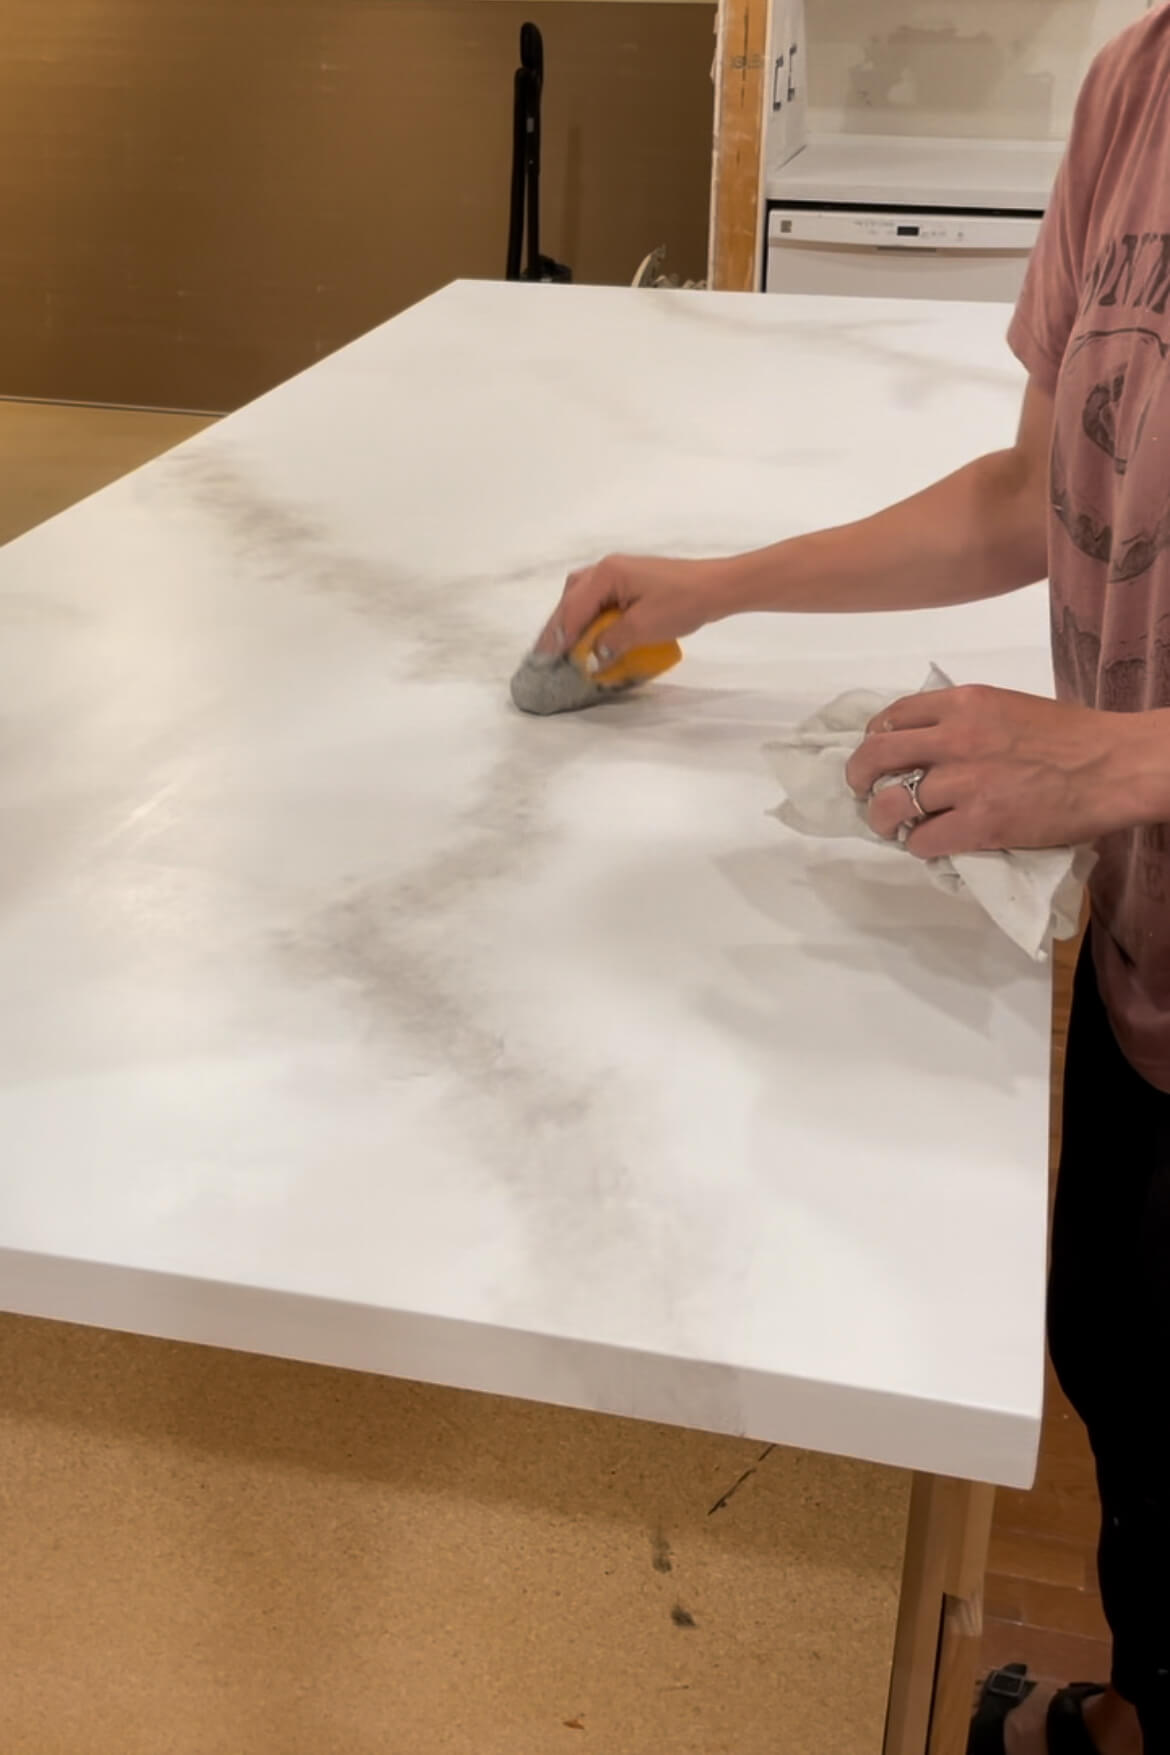
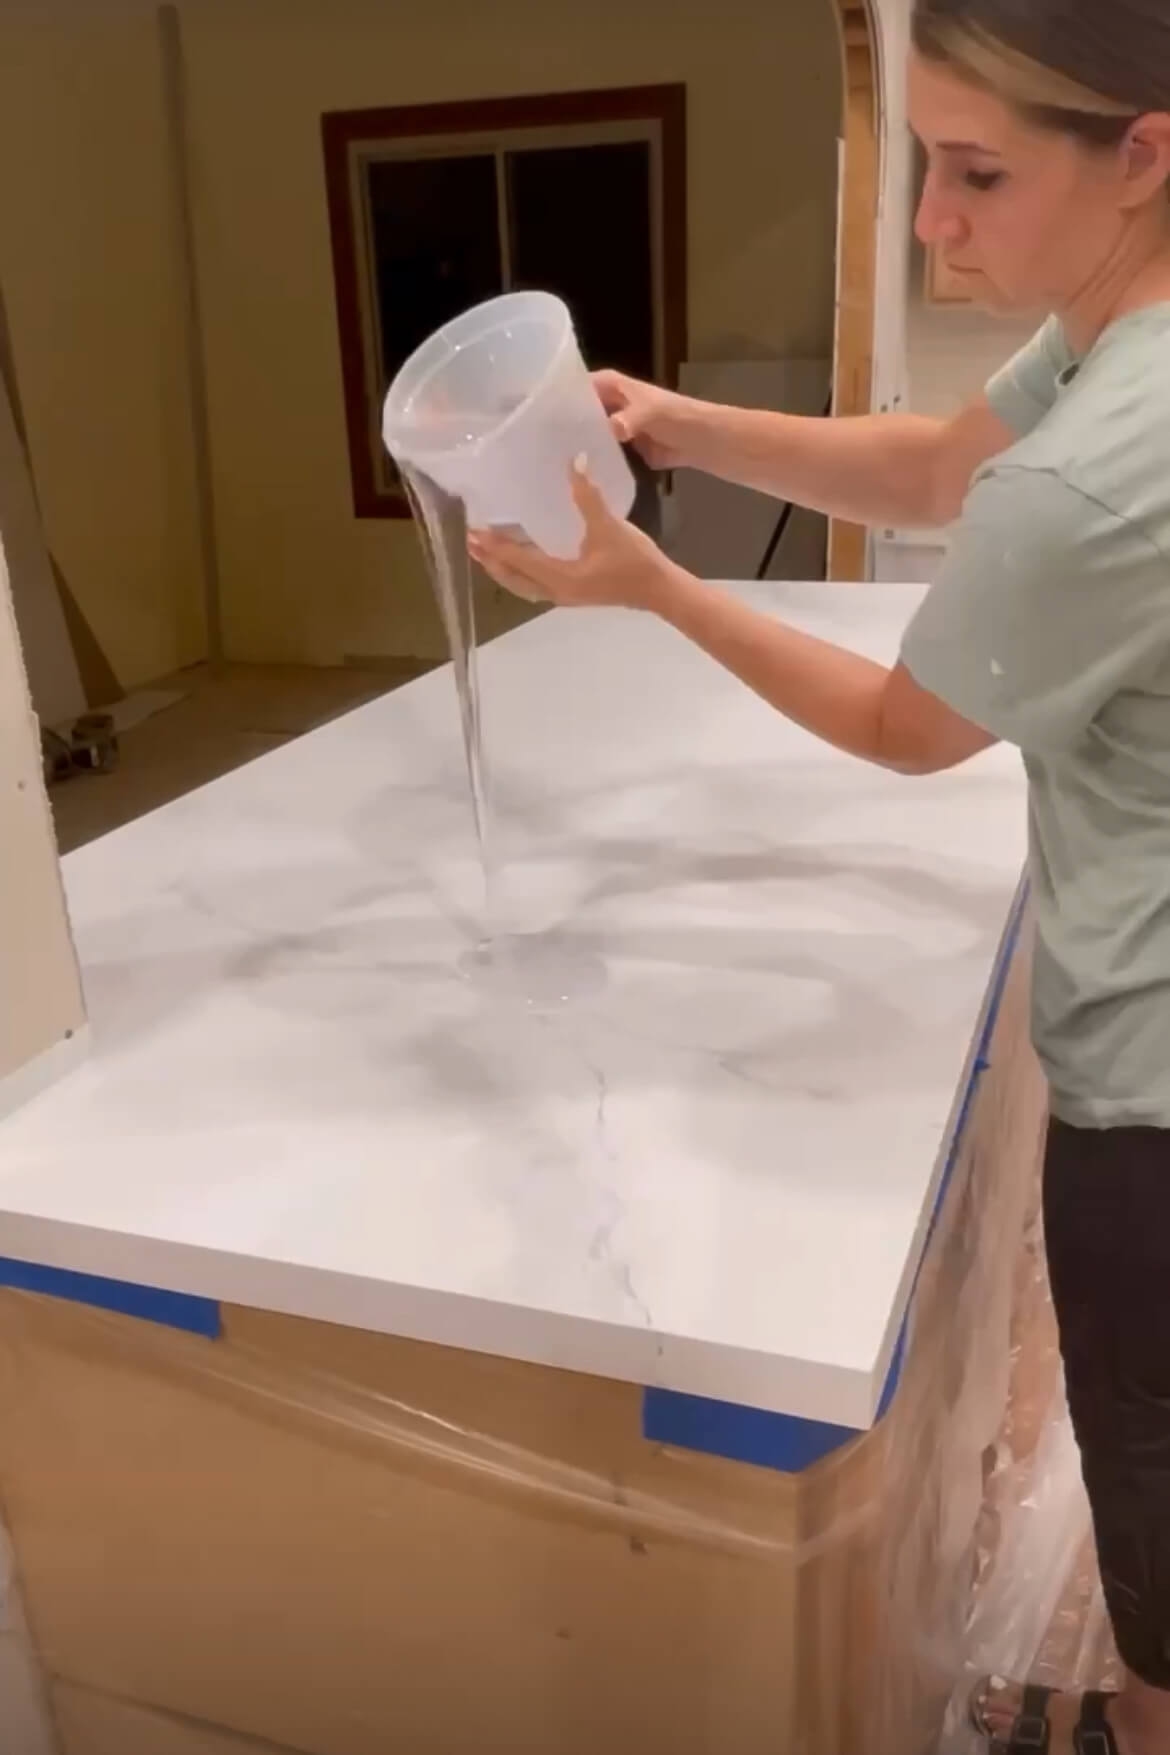
Once the Bondo has done its job, all of the seams disappear and it is time to paint. I start with a white base layer, then add the gray veining. After the paint is dry it is time for epoxy.
I love the look of marble countertops, but not the price tag or the upkeep. My epoxy countertops are incredibly durable, and if they do happen to get stained it is an easy, inexpensive repair compared to real marble.
I have spent years perfecting my technique of creating epoxy countertops and have written an e-book with all of my tips, tricks, and thoroughly detailed instructions. I have used this technique in countless kitchens, bathrooms, and even a coffee table top. You can find the link to download the e-book here.
Installing New Flooring
Since we had changed up the floor plan so much during our DIY kitchen remodel, we had to do all new flooring. We used this beautiful Duravana plank flooring, and I just love how it turned out.
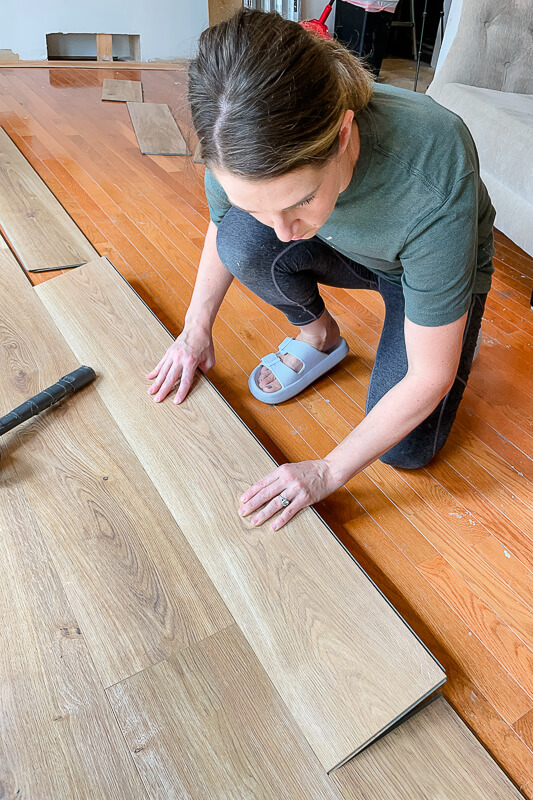
For all the details on how we prepped our uneven subfloor and installed this right over the hardwood that was left in parts of our new kitchen, you can see the full post with all the instructions here.
Painting My Kitchen
When adding these new windows to my kitchen, I really wanted black, but that is nothing that a little spray paint can’t fix. When spray painting the windows, I was careful to mask off the sink and the countertops, but I wasn’t worried at all about getting paint on the walls since I still needed to paint those, or getting paint on the window glass itself.


When painting near glass I never bother to mask with painter’s tape, as it is so easy to just scrape away the paint with a basic razor blade. I painted while the windows were closed, then after they dried I opened them just a hair and painted the bottom part that was hidden while it was closed.


For these windows I went with a simple trim. I did a sill at the bottom, a little bit of plywood to finish off the inside casing, and some basic PVC trim around the frame.

I am going to paint this window trim in the same color as my cabinets. So, now that the trim is up, it is finally time to paint!
The key to having a professional looking paint job during your DIY kitchen remodel, is to have quality paint and the right tools.
This 18 inch roller from Purdy is the best. It makes painting so much faster. Make sure you also have an 18 inch roller pan as well as the 18 inch roller sleeves.
A paint edger tool is perfect for areas where you are going along ceilings, next to cabinets, or even trim.
And you of course need a good quality brush. There are going to be spots that are too small to get with the roller, or the edger. A quality brush will save you a lot of frustration over a cheap one, and last a lot longer too.


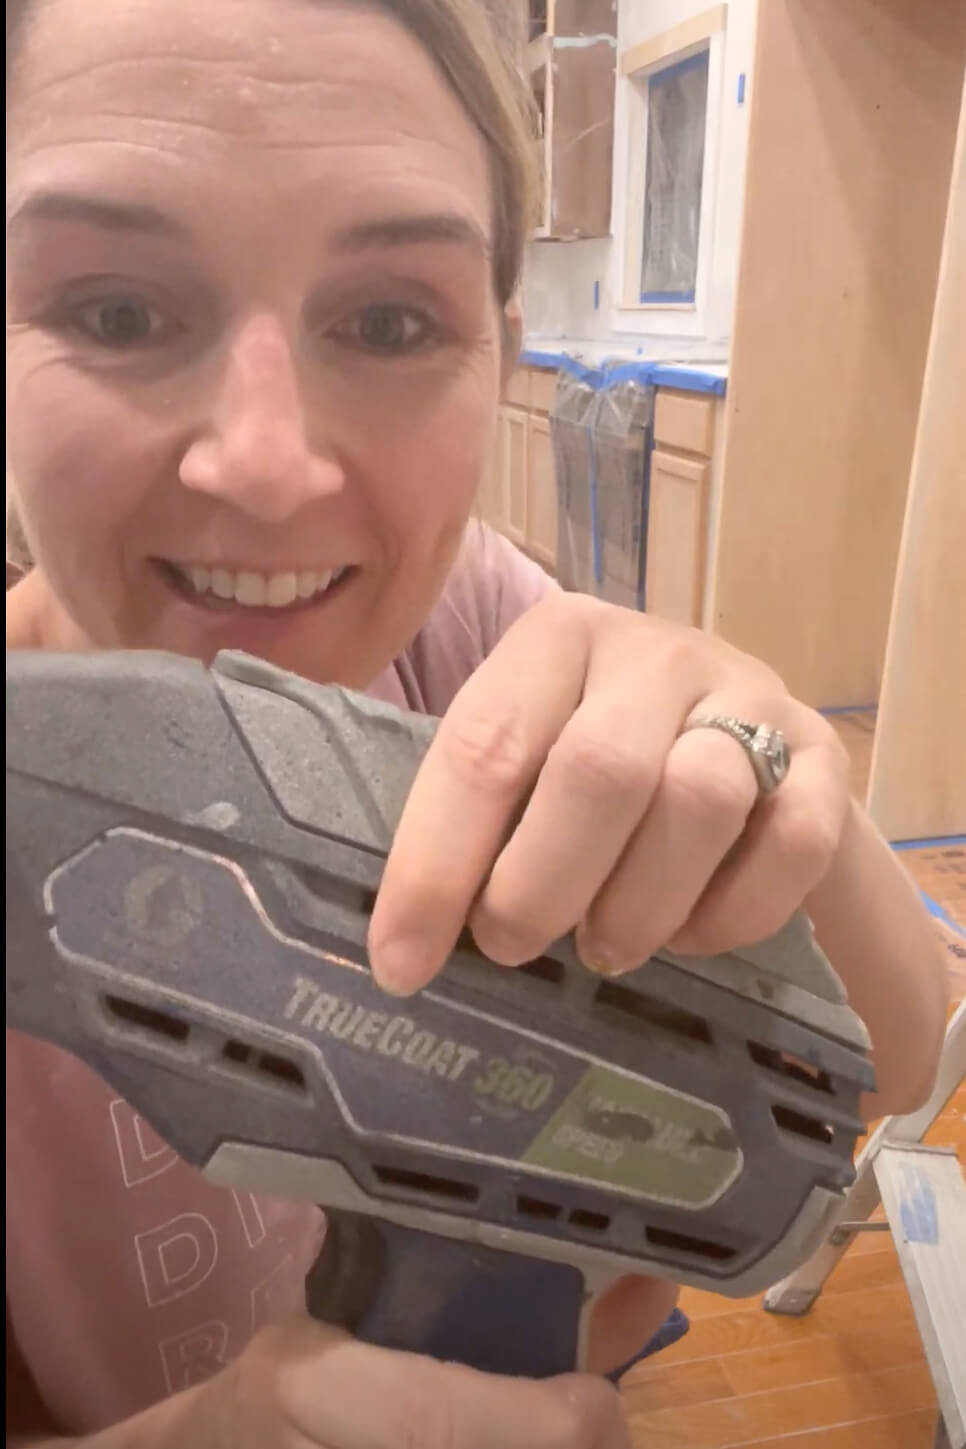
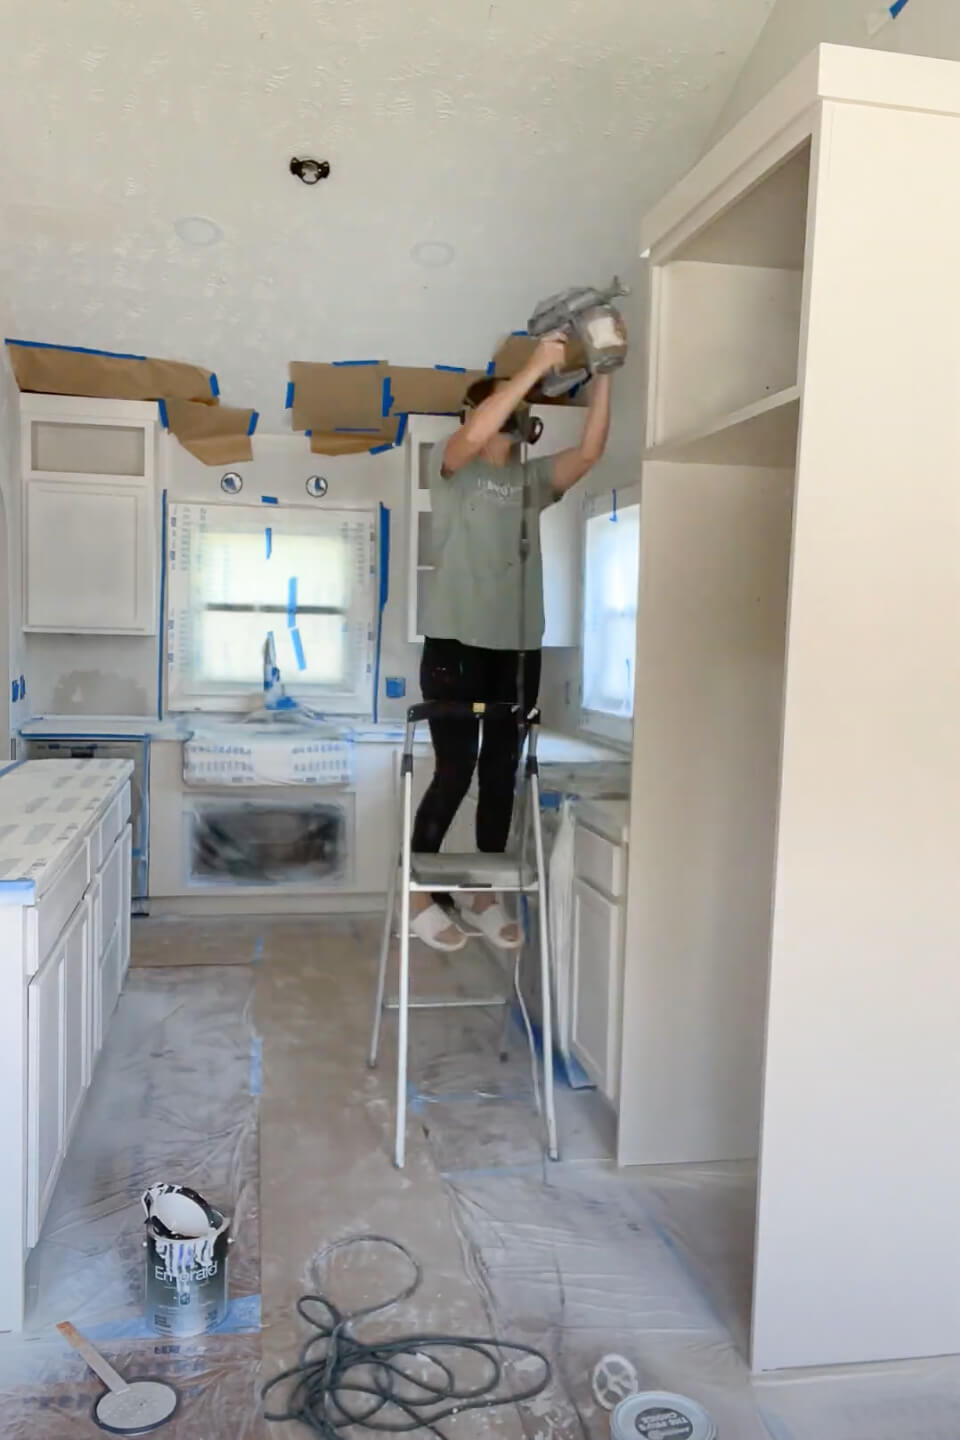
My favorite paint sprayer is the Graco TrueCoat 360. This sprayer is airless, so I can paint in any direction, and the paint does not have to be thinned. This sprayer was perfect for getting a smooth finish on my cabinets during this DIY kitchen remodel, but I have used it on so many other projects too like this Murphy Bed that I built in my basement.
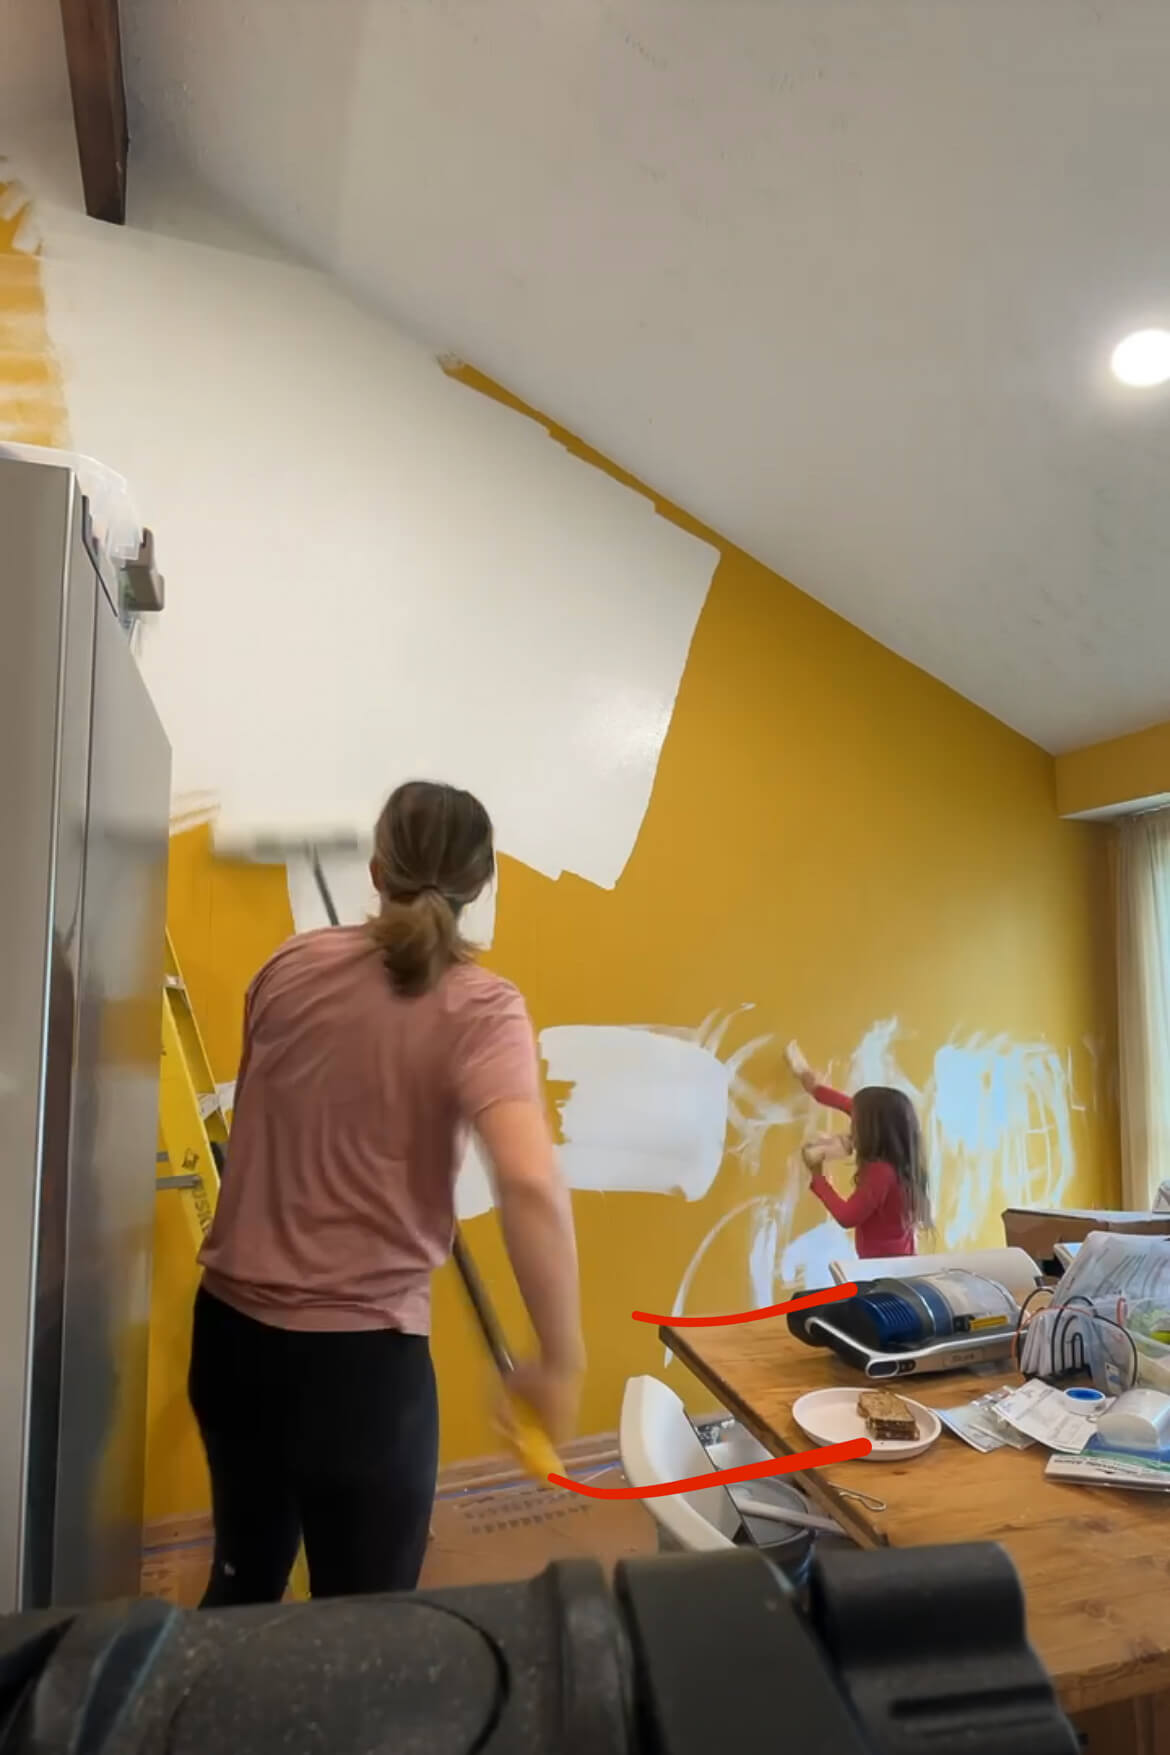
I was so happy to see this yellow finally go away. The 18 inch roller made short work of these walls, and the lighter color felt so fresh. For painting the walls I used Sherwin Williams Showcase paint. High quality paint is absolutely worth the extra investment.
I did one good coat over this dark, ugly yellow wall. Then, without even waiting for it to dry all the way, I started back at the beginning and worked my way down the wall with a second, light coat on top. The coverage of this paint is amazing.

When painting my cabinets I started with a good primer, and you cannot skip this step if you want long lasting results. I used B-I-N Shellac Based Primer. This primer will give you really good adherence on the unfinished cabinets. Spray it right on with your paint sprayer for the smoothest finish.

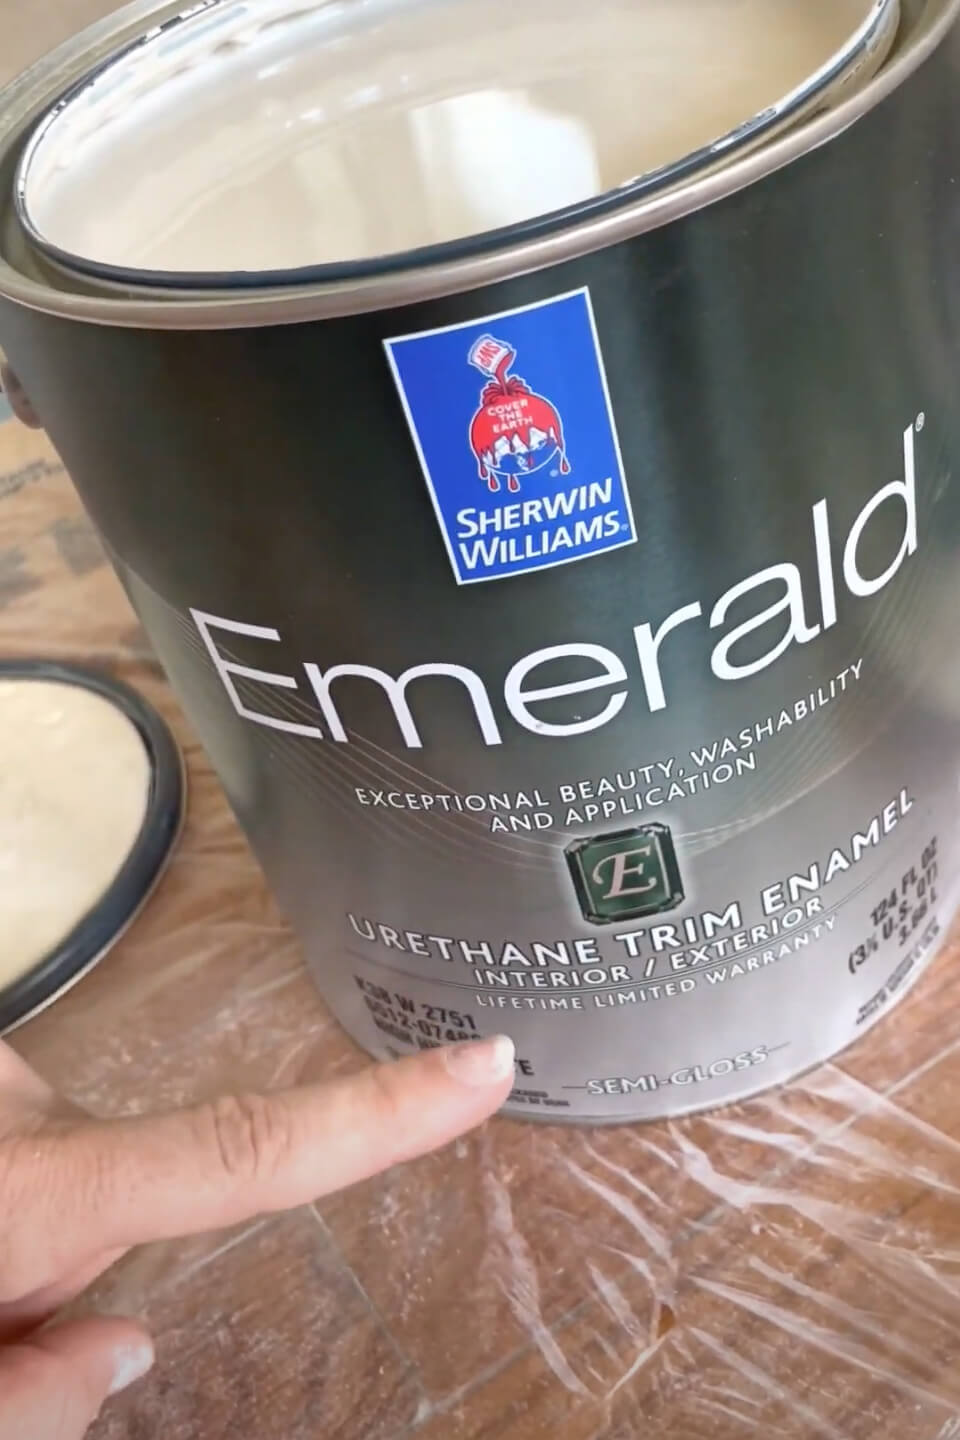
Once the primer has dried, you can move on to paint. For the cabinets, I used a step up from the Sherwin Williams Showcase that I used on the walls and went with the Sherwin Williams Emerald Urethane Trim Enamel. This paint has been so durable and held up great even in a high-traffic area like the kitchen.
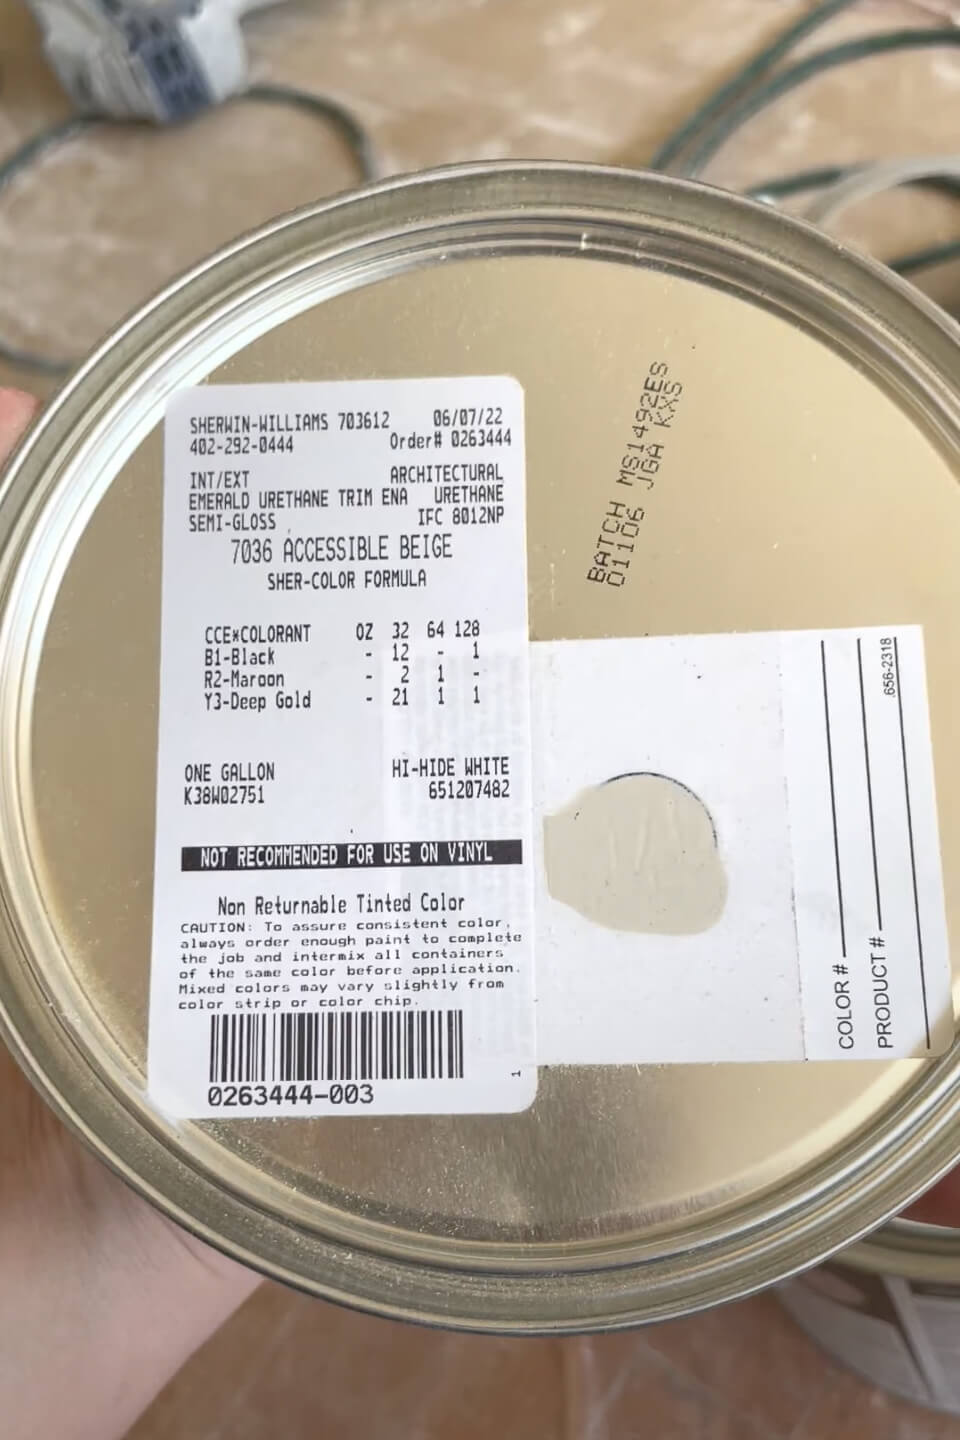
The cabinets along the wall are all done in Accessible Beige, a color I have all over my house including my laundry room.
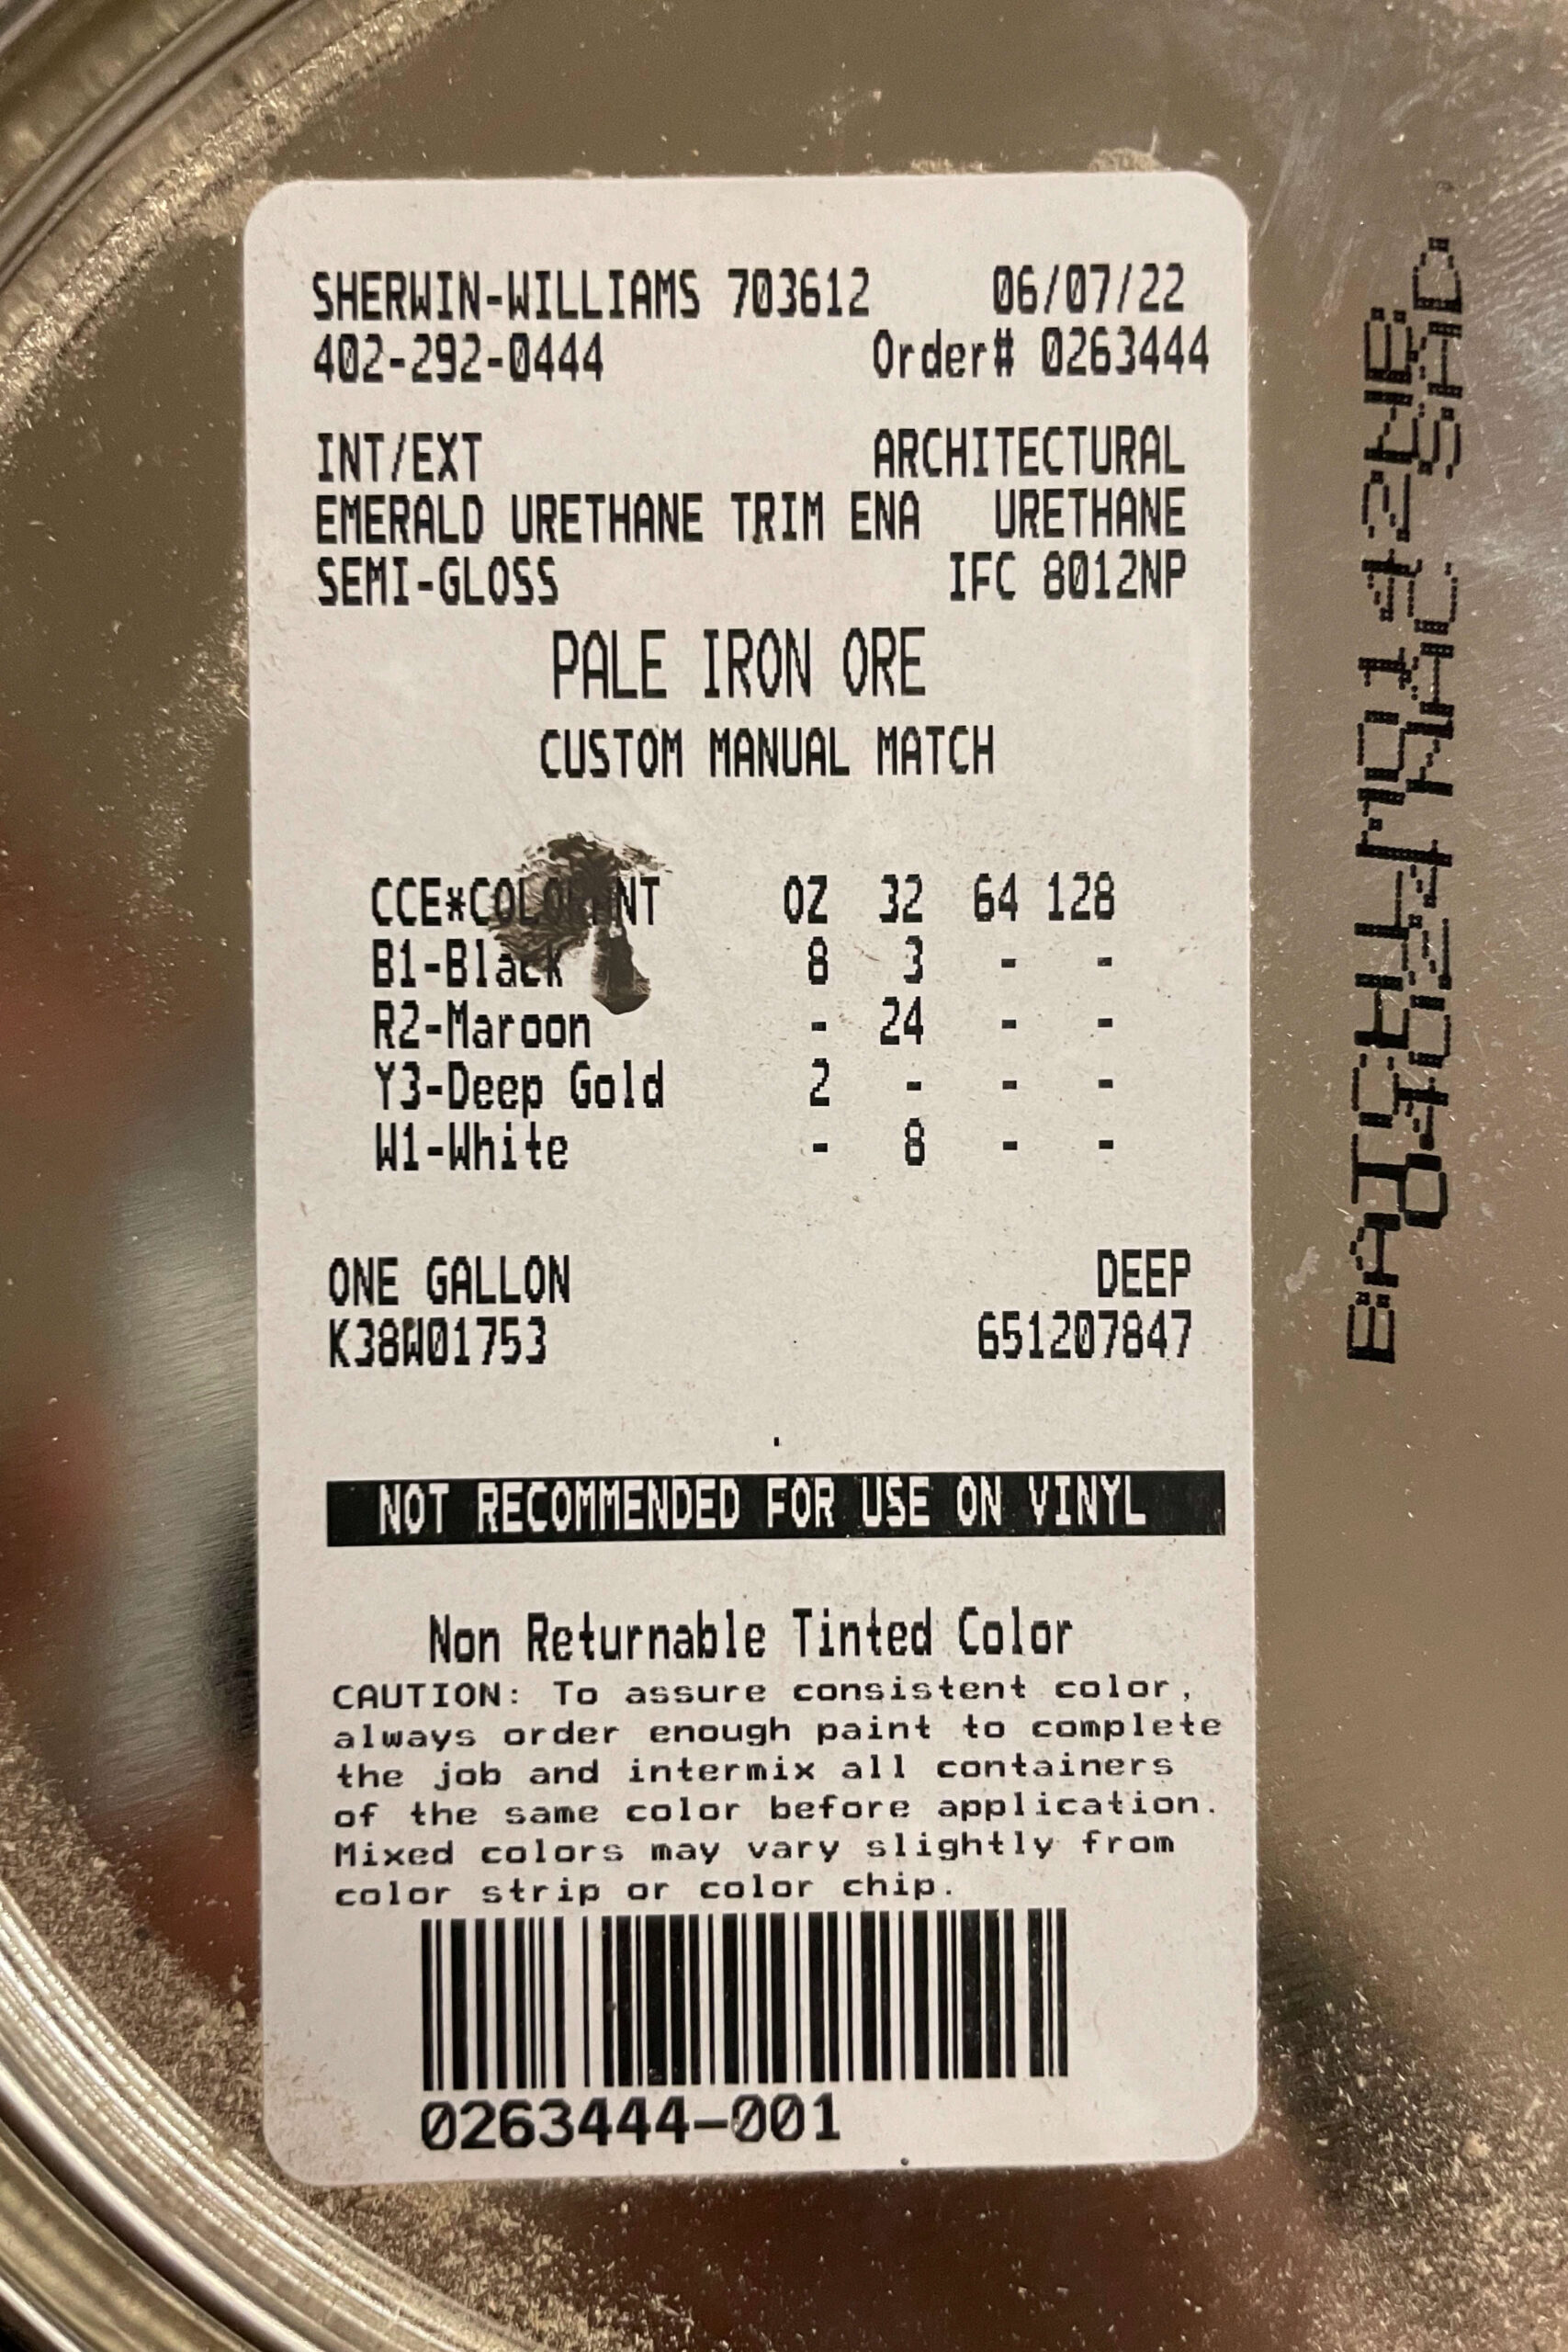
I love the look of two-tone kitchens, so for the island I decided to go with a contrasting color and did a custom color match we are calling Pale Iron Ore. It’s a moody, dark grey, and I love how it pops against the Accessible Beige.
The only downside to painting with a sprayer during a DIY kitchen remodel is the prep work. You have to mask everything that you do not want to get paint on. Countertops, walls, ceilings, windows, and anywhere that you do not want the paint to go have to be masked and covered. I love using this pre-taped plastic. It makes masking big jobs like this go so much faster.
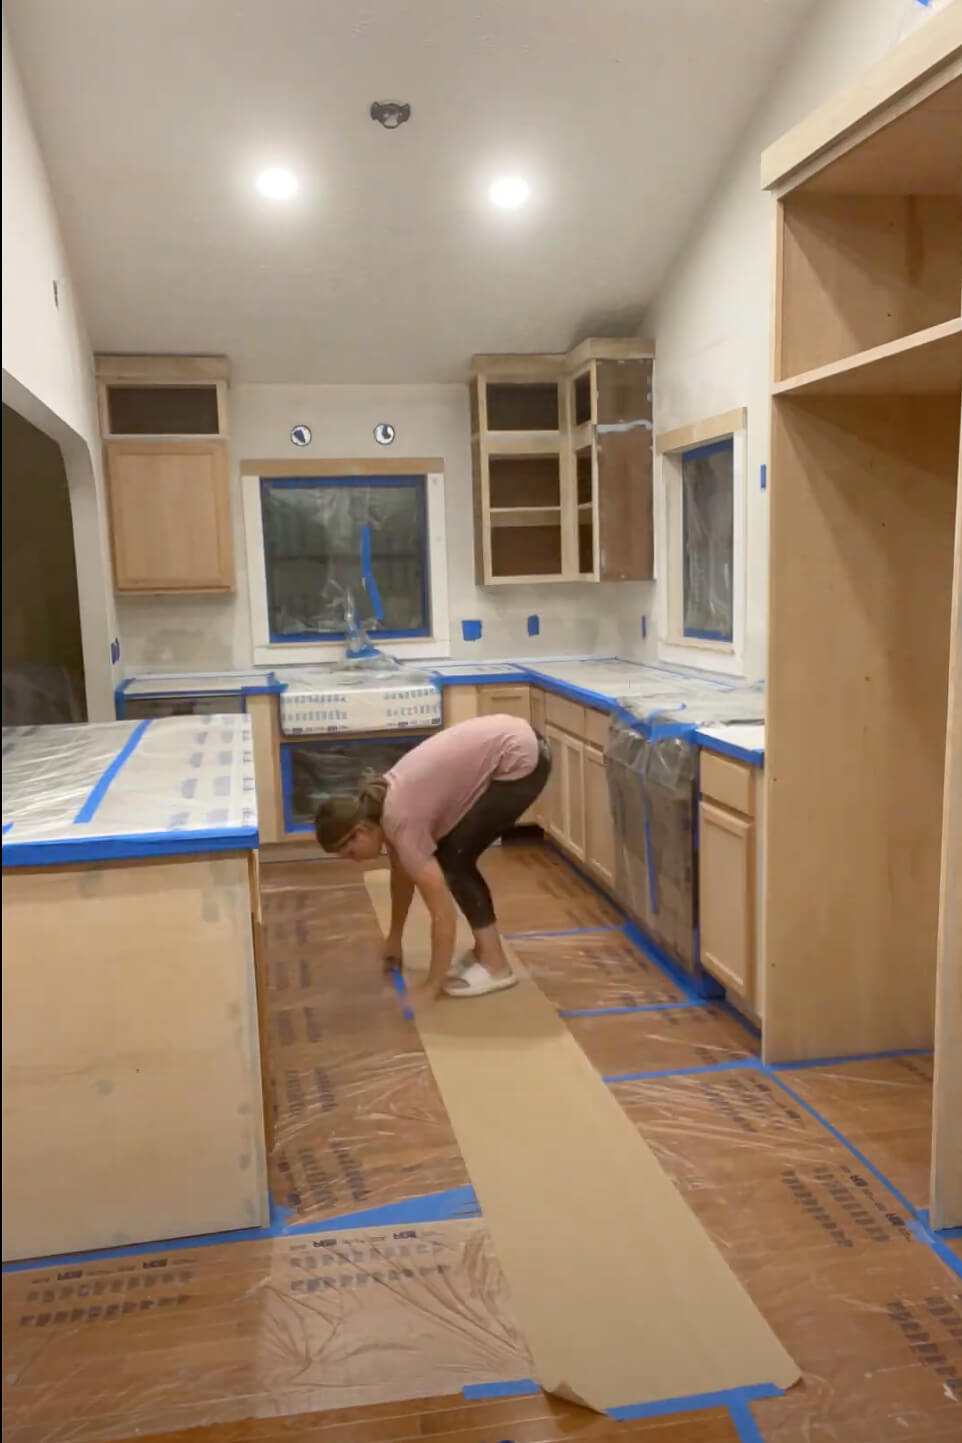
We’re not there yet, but oh boy is this kitchen coming together. It’s amazing what paint will do!
Using Custom Doors in My DIY Kitchen Remodel
As you can see, I’m missing a few doors for the cabinets I’ve built and modified during this DIY kitchen remodel, but I actually want to change out all of the doors and drawer fronts to a custom shaker door. Adding custom doors is a great way to update old cabinets and is perfect for adding a high-end touch to stock cabinets while still being an affordable option.
We ordered our cabinet doors and drawer fronts from Fast Cabinet Doors, and could not be happier with the results. They came unfinished, but ready to paint, and had soft close hinges.
Even though the doors and drawer fronts that came on the stock cabinets were just fine, I am really happy with the elevated style of these custom shaker doors. It’s really such a big difference for a low price tag. I have a full tutorial on how to measure, paint, and install these doors here.


Although I opted not to build my own doors for this DIY kitchen remodel, I did build custom shaker doors for the cabinets in my home office. You can check out those instructions here to build your own kitchen cabinet doors.
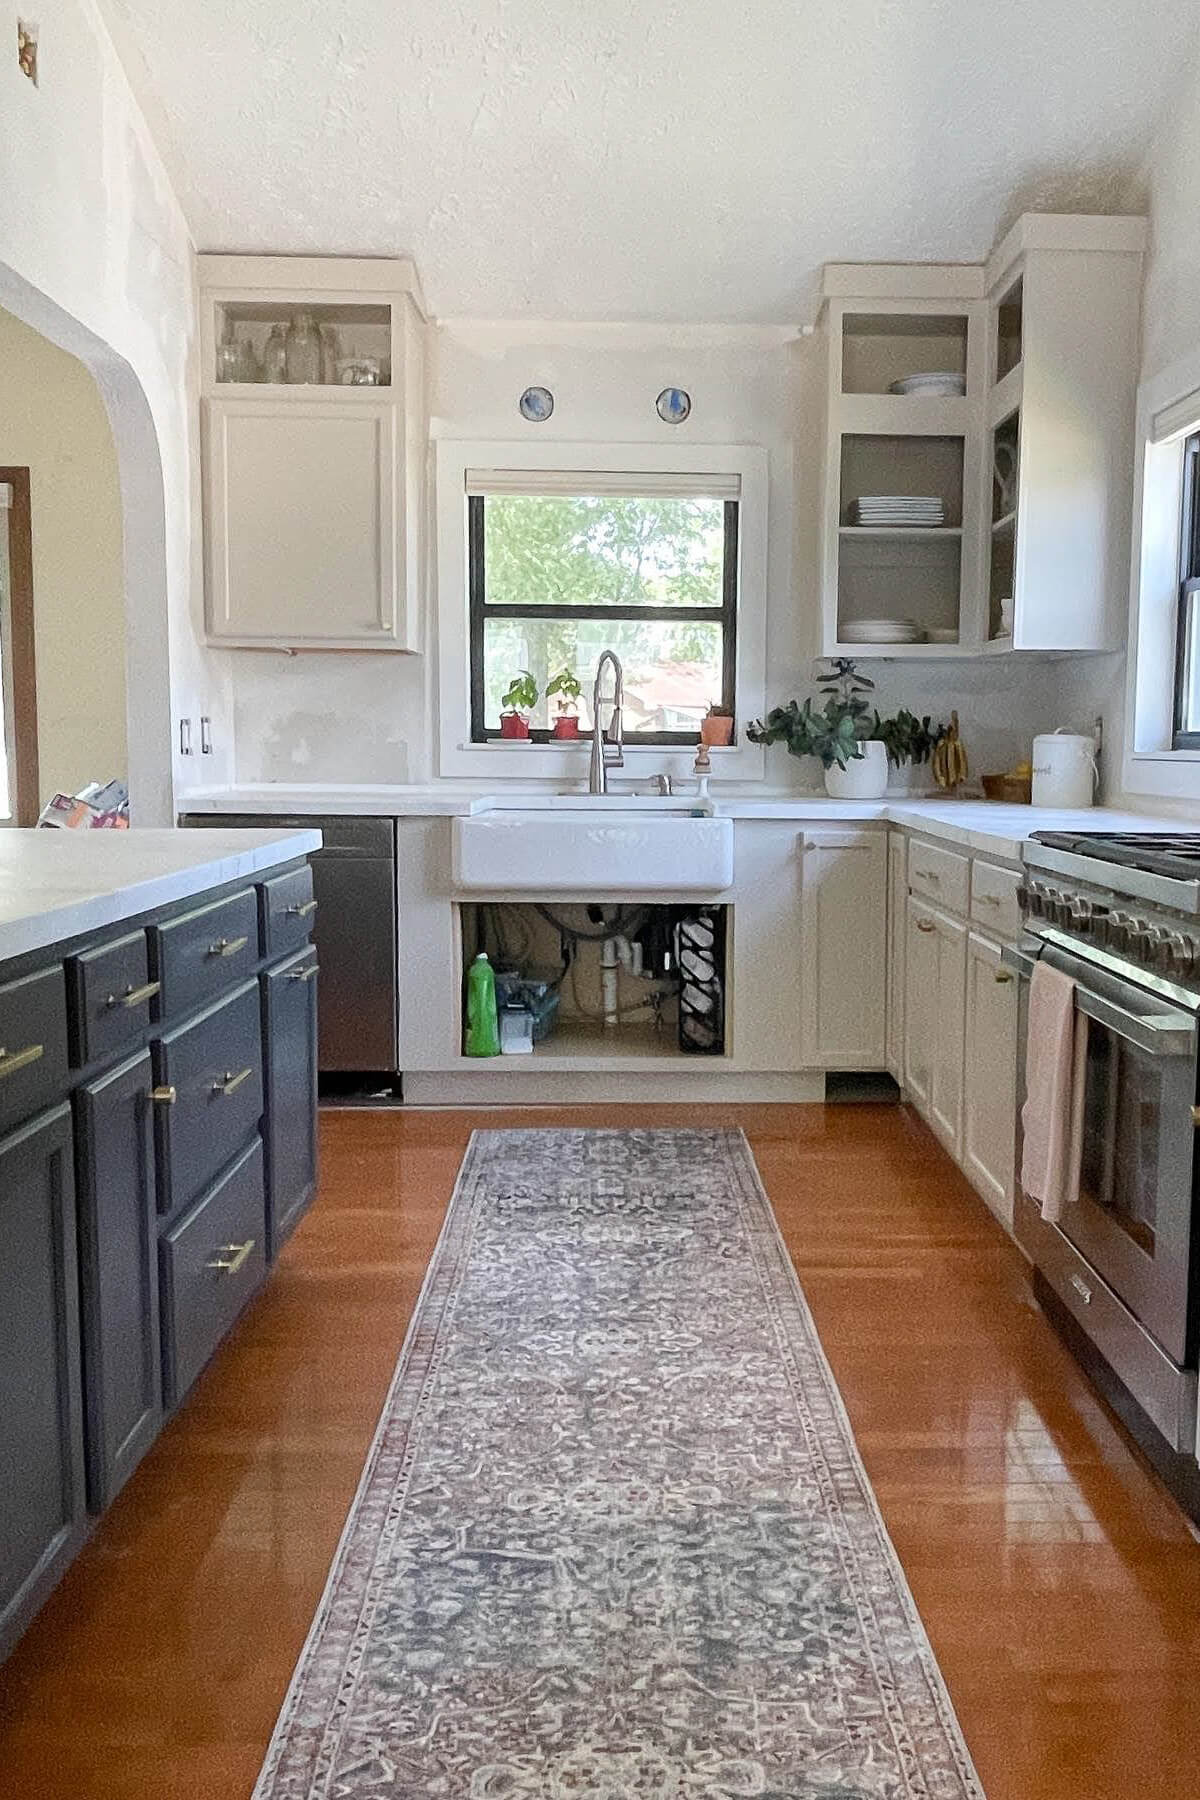
DIY Shiplap Backsplash
Every kitchen needs a backsplash. It protects your drywall from splashes and spills, making an easy-to-maintain wipeable surface. Tile is often a go-to. I have even made a faux marble backsplash using the same technique that I teach in my e-book for epoxy countertops.
For this DIY kitchen remodel, though, I wanted to do something totally different, so I decided on a shiplap backsplash.
I used regular, pre-primed shiplap planks, painted them the same shade of Accessible Beige I used for the cabinets and window trim, and mounted them right to my wall above all of my countertops using my brad nailer.


The icing on the cake is these paintable wall plates. They help the electrical outlets just blend right in with the backsplash.

To read a full tutorial on how to achieve your own shiplap backsplash, check out my blog post here.
Stone Range Hood
The last, and one of the biggest projects in our DIY kitchen remodel, was building this stone range hood. I had natural stone in my original mood board, and was so excited to use it here. It adds such a warmth and old world grandeur to the room.
We had to build a frame for the stone range, installed a hood, then vented it to the outside of the house, and of course… added all the beautiful, natural stone.


You can check out the full tutorial here for all the details on this project, like how to install the hood, what we used to secure the stone to the frame, and what tile I used for that portion of the backsplash.
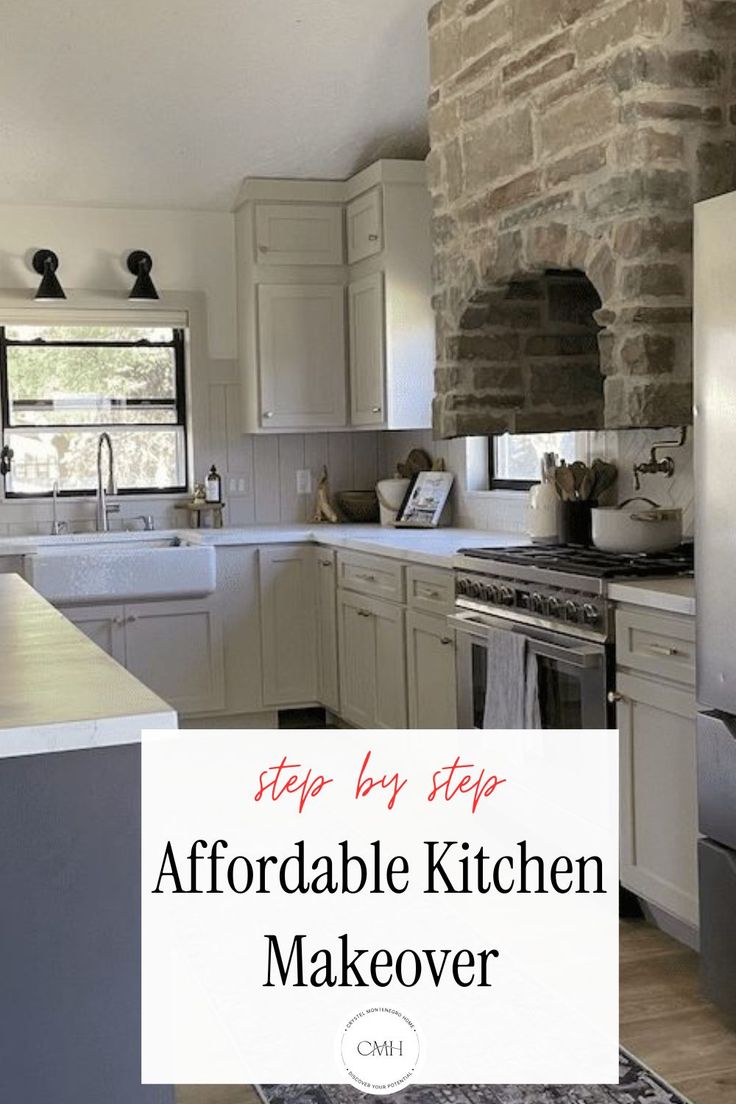
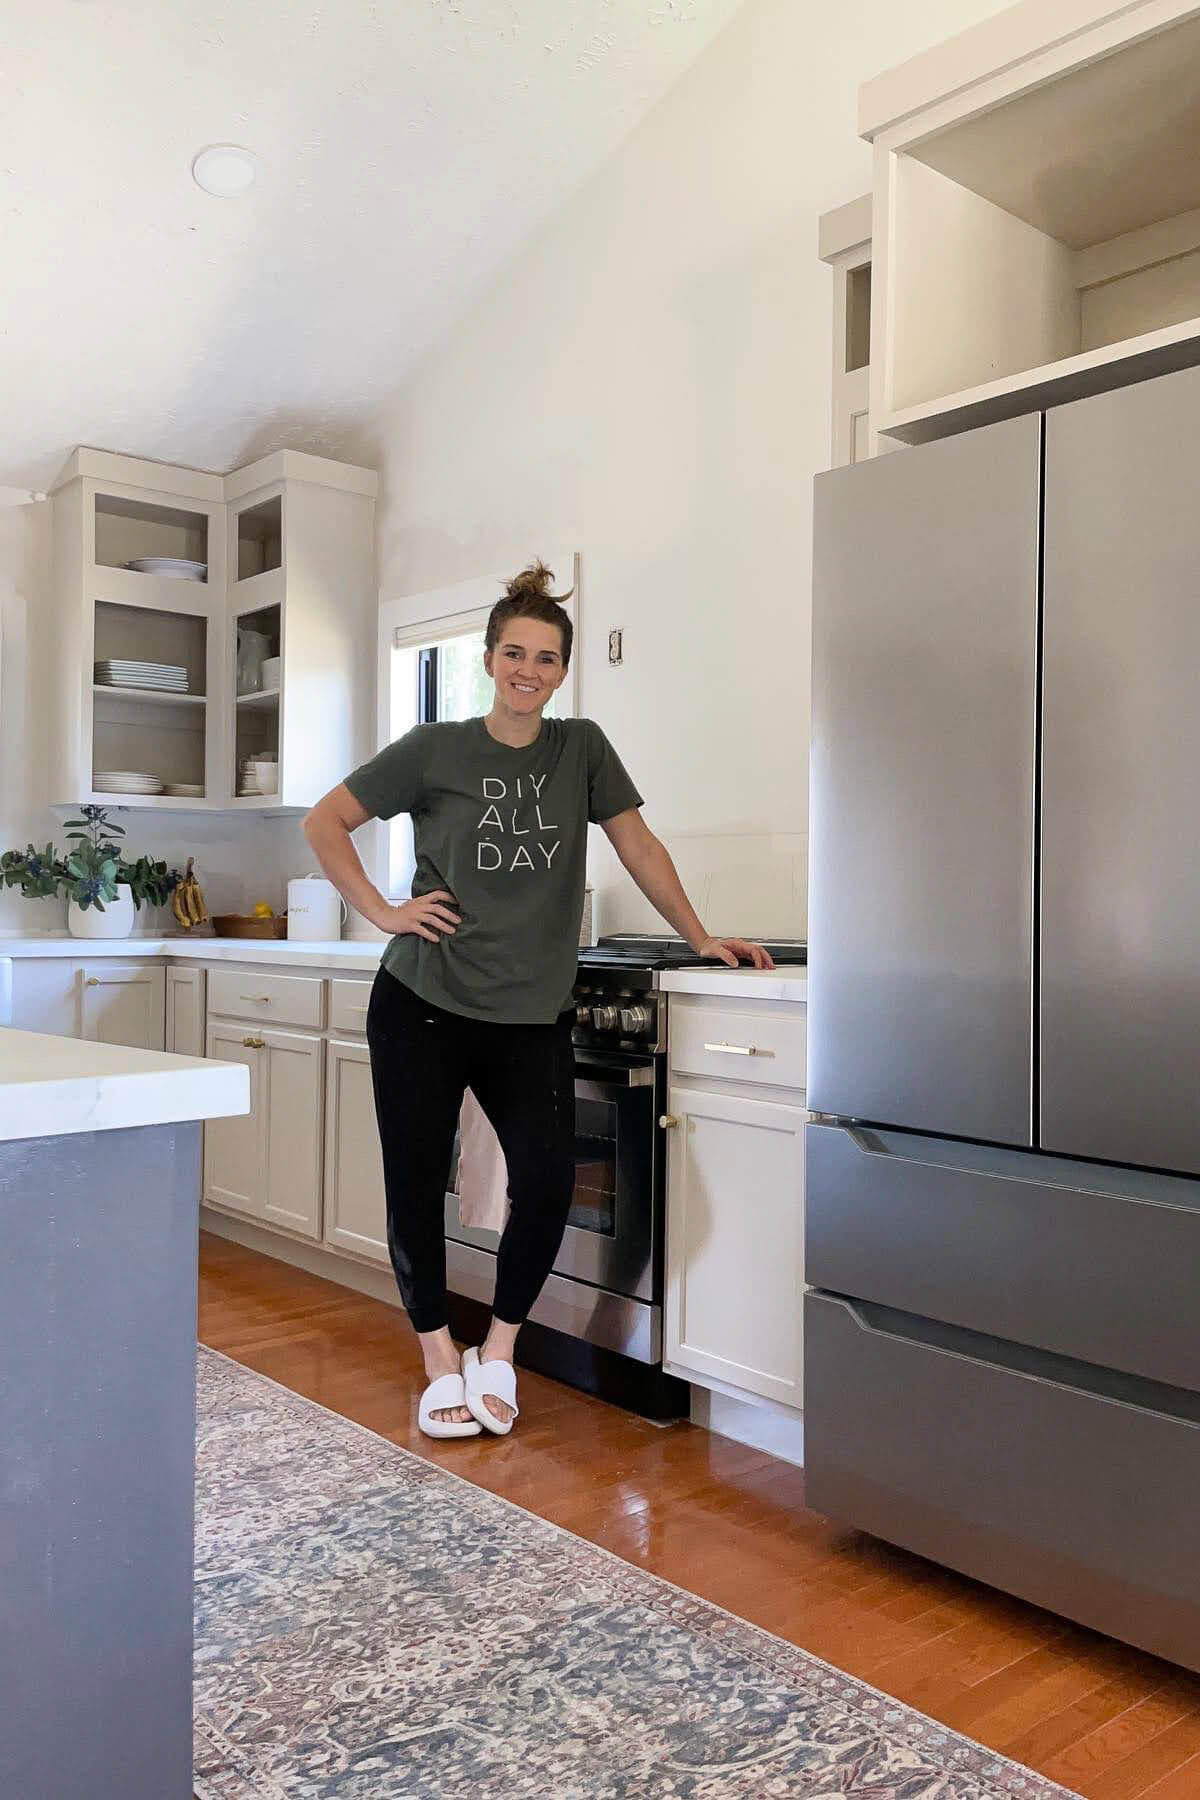
Done! The Before and After
After weeks of work and so many projects our DIY kitchen remodel was finally done.

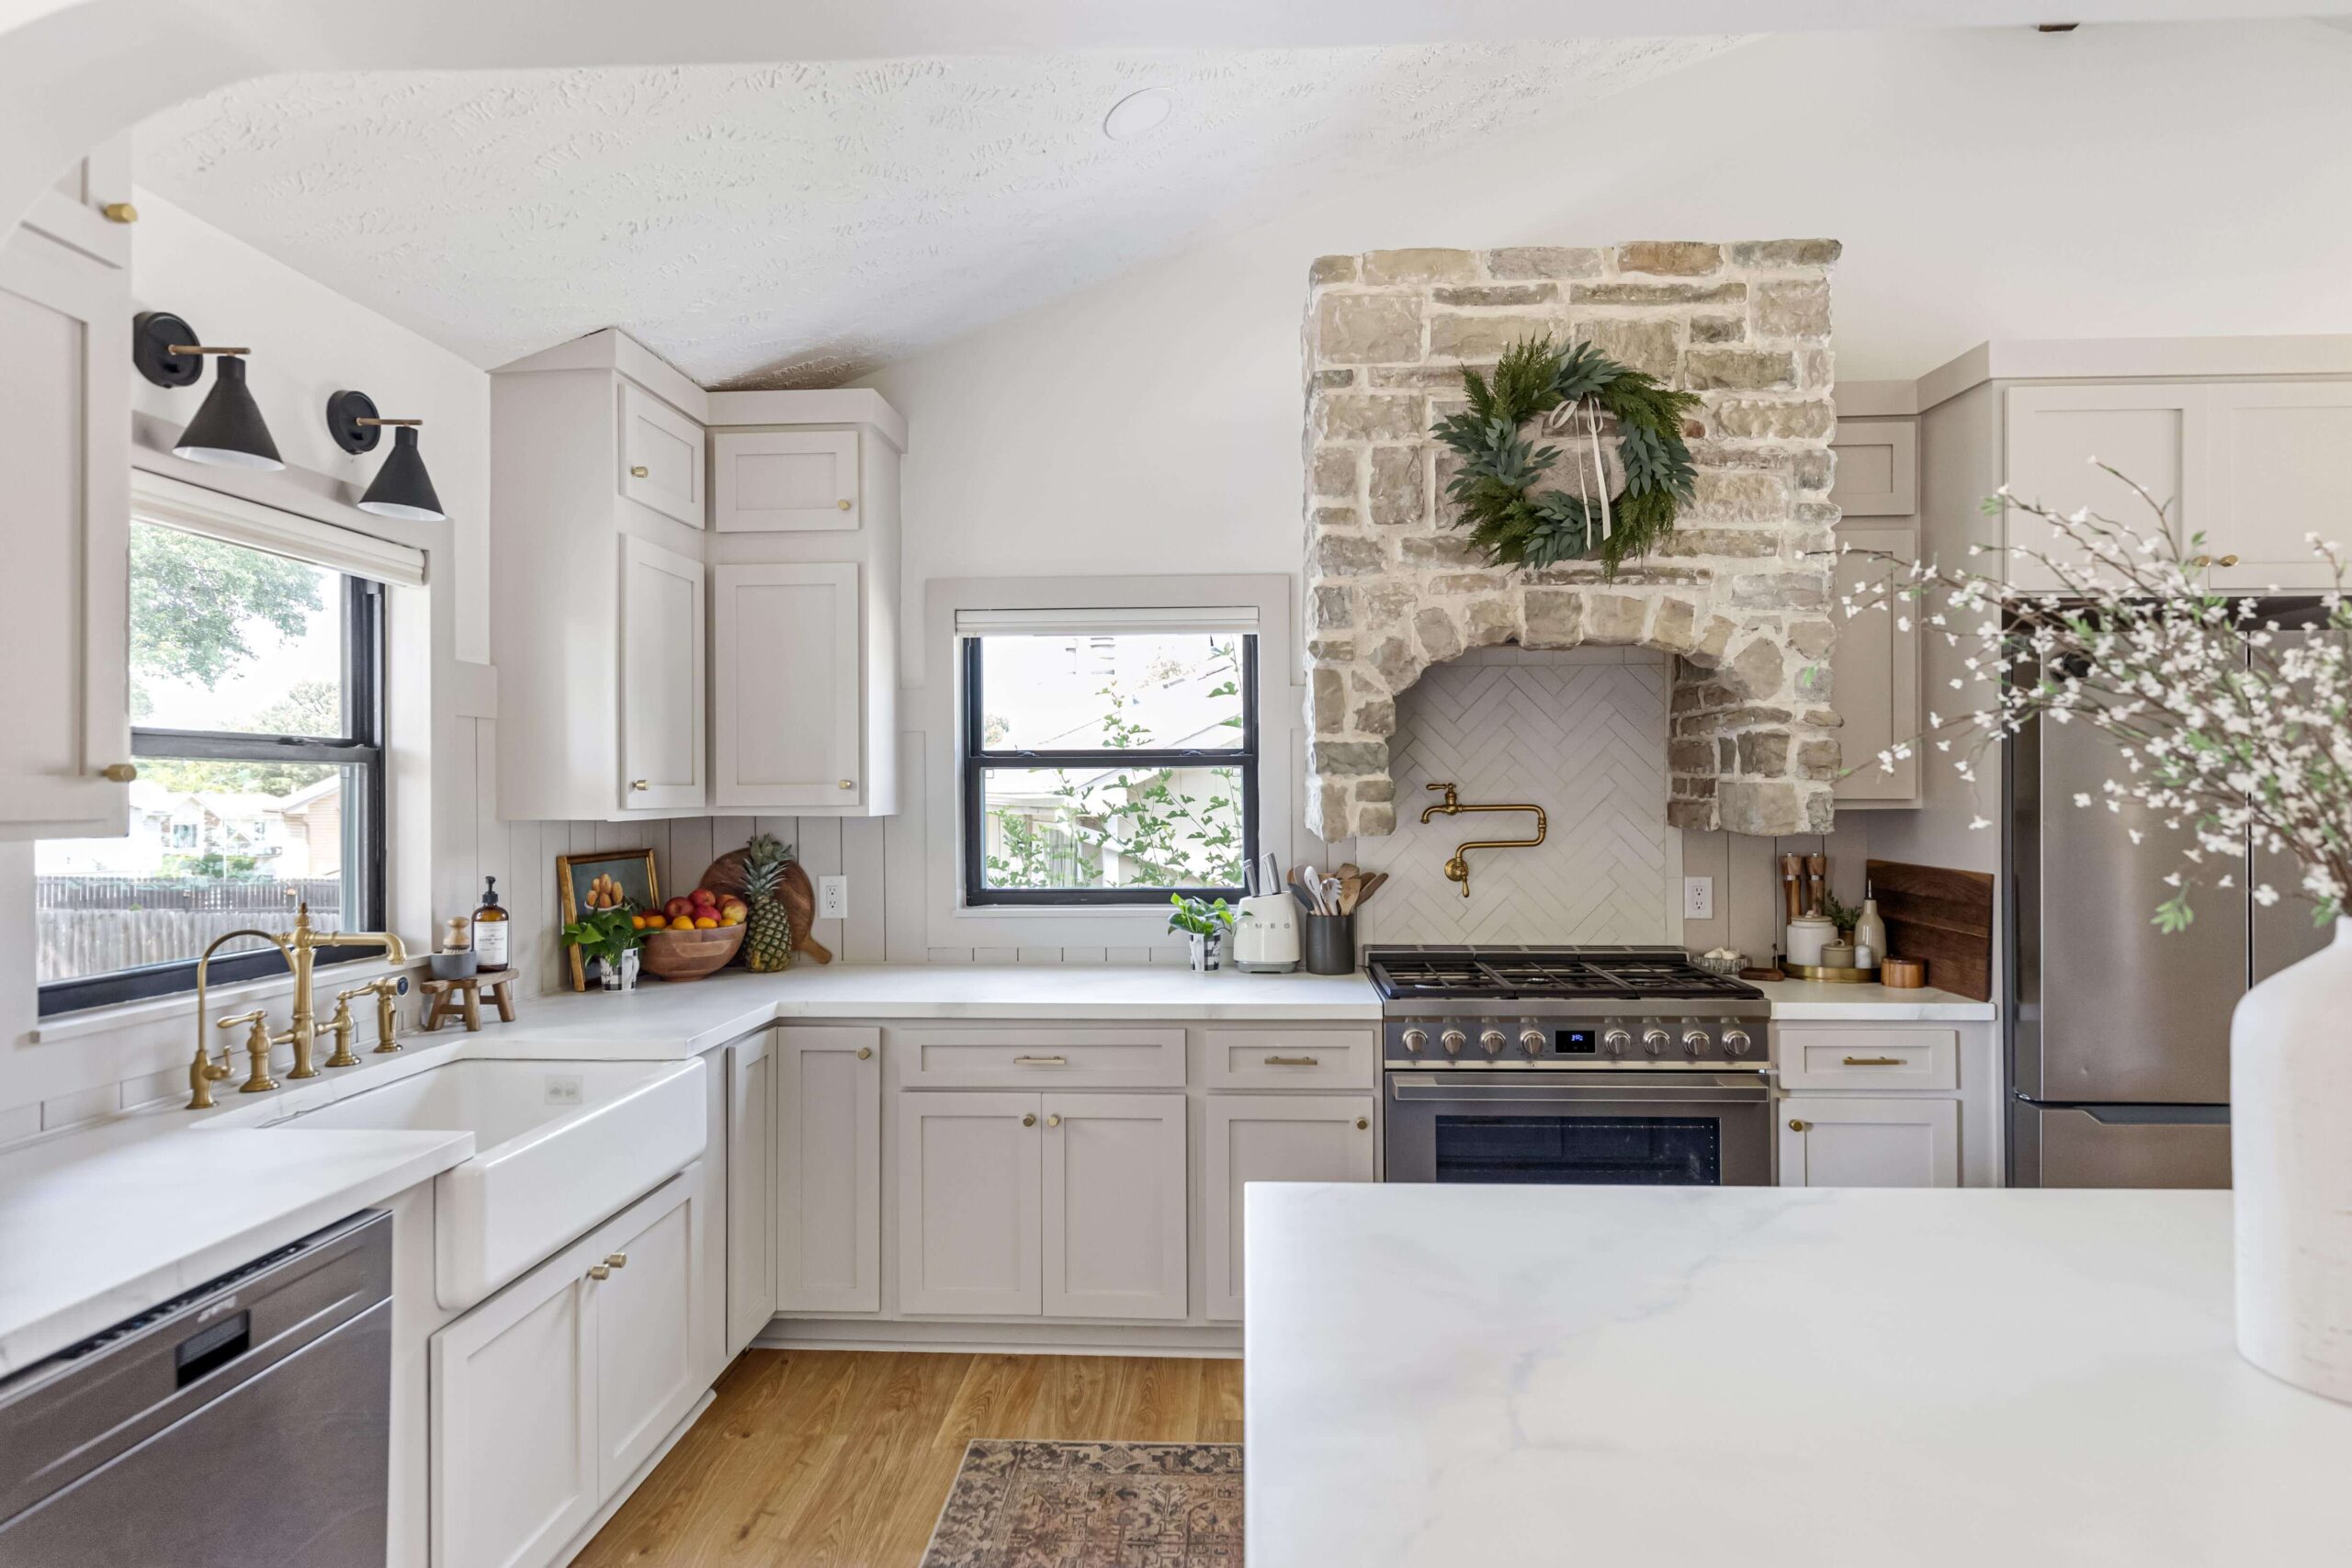
Look at some of these side by side before-and-after shots. I can barely believe this is the same dark, yellow room that we first walked into.


What was your favorite project during our DIY kitchen remodel? Have you attempted a major remodel of your own? I would love to hear about it in the comments!
Sources
- Cabinet hardware
- Stock cabinets
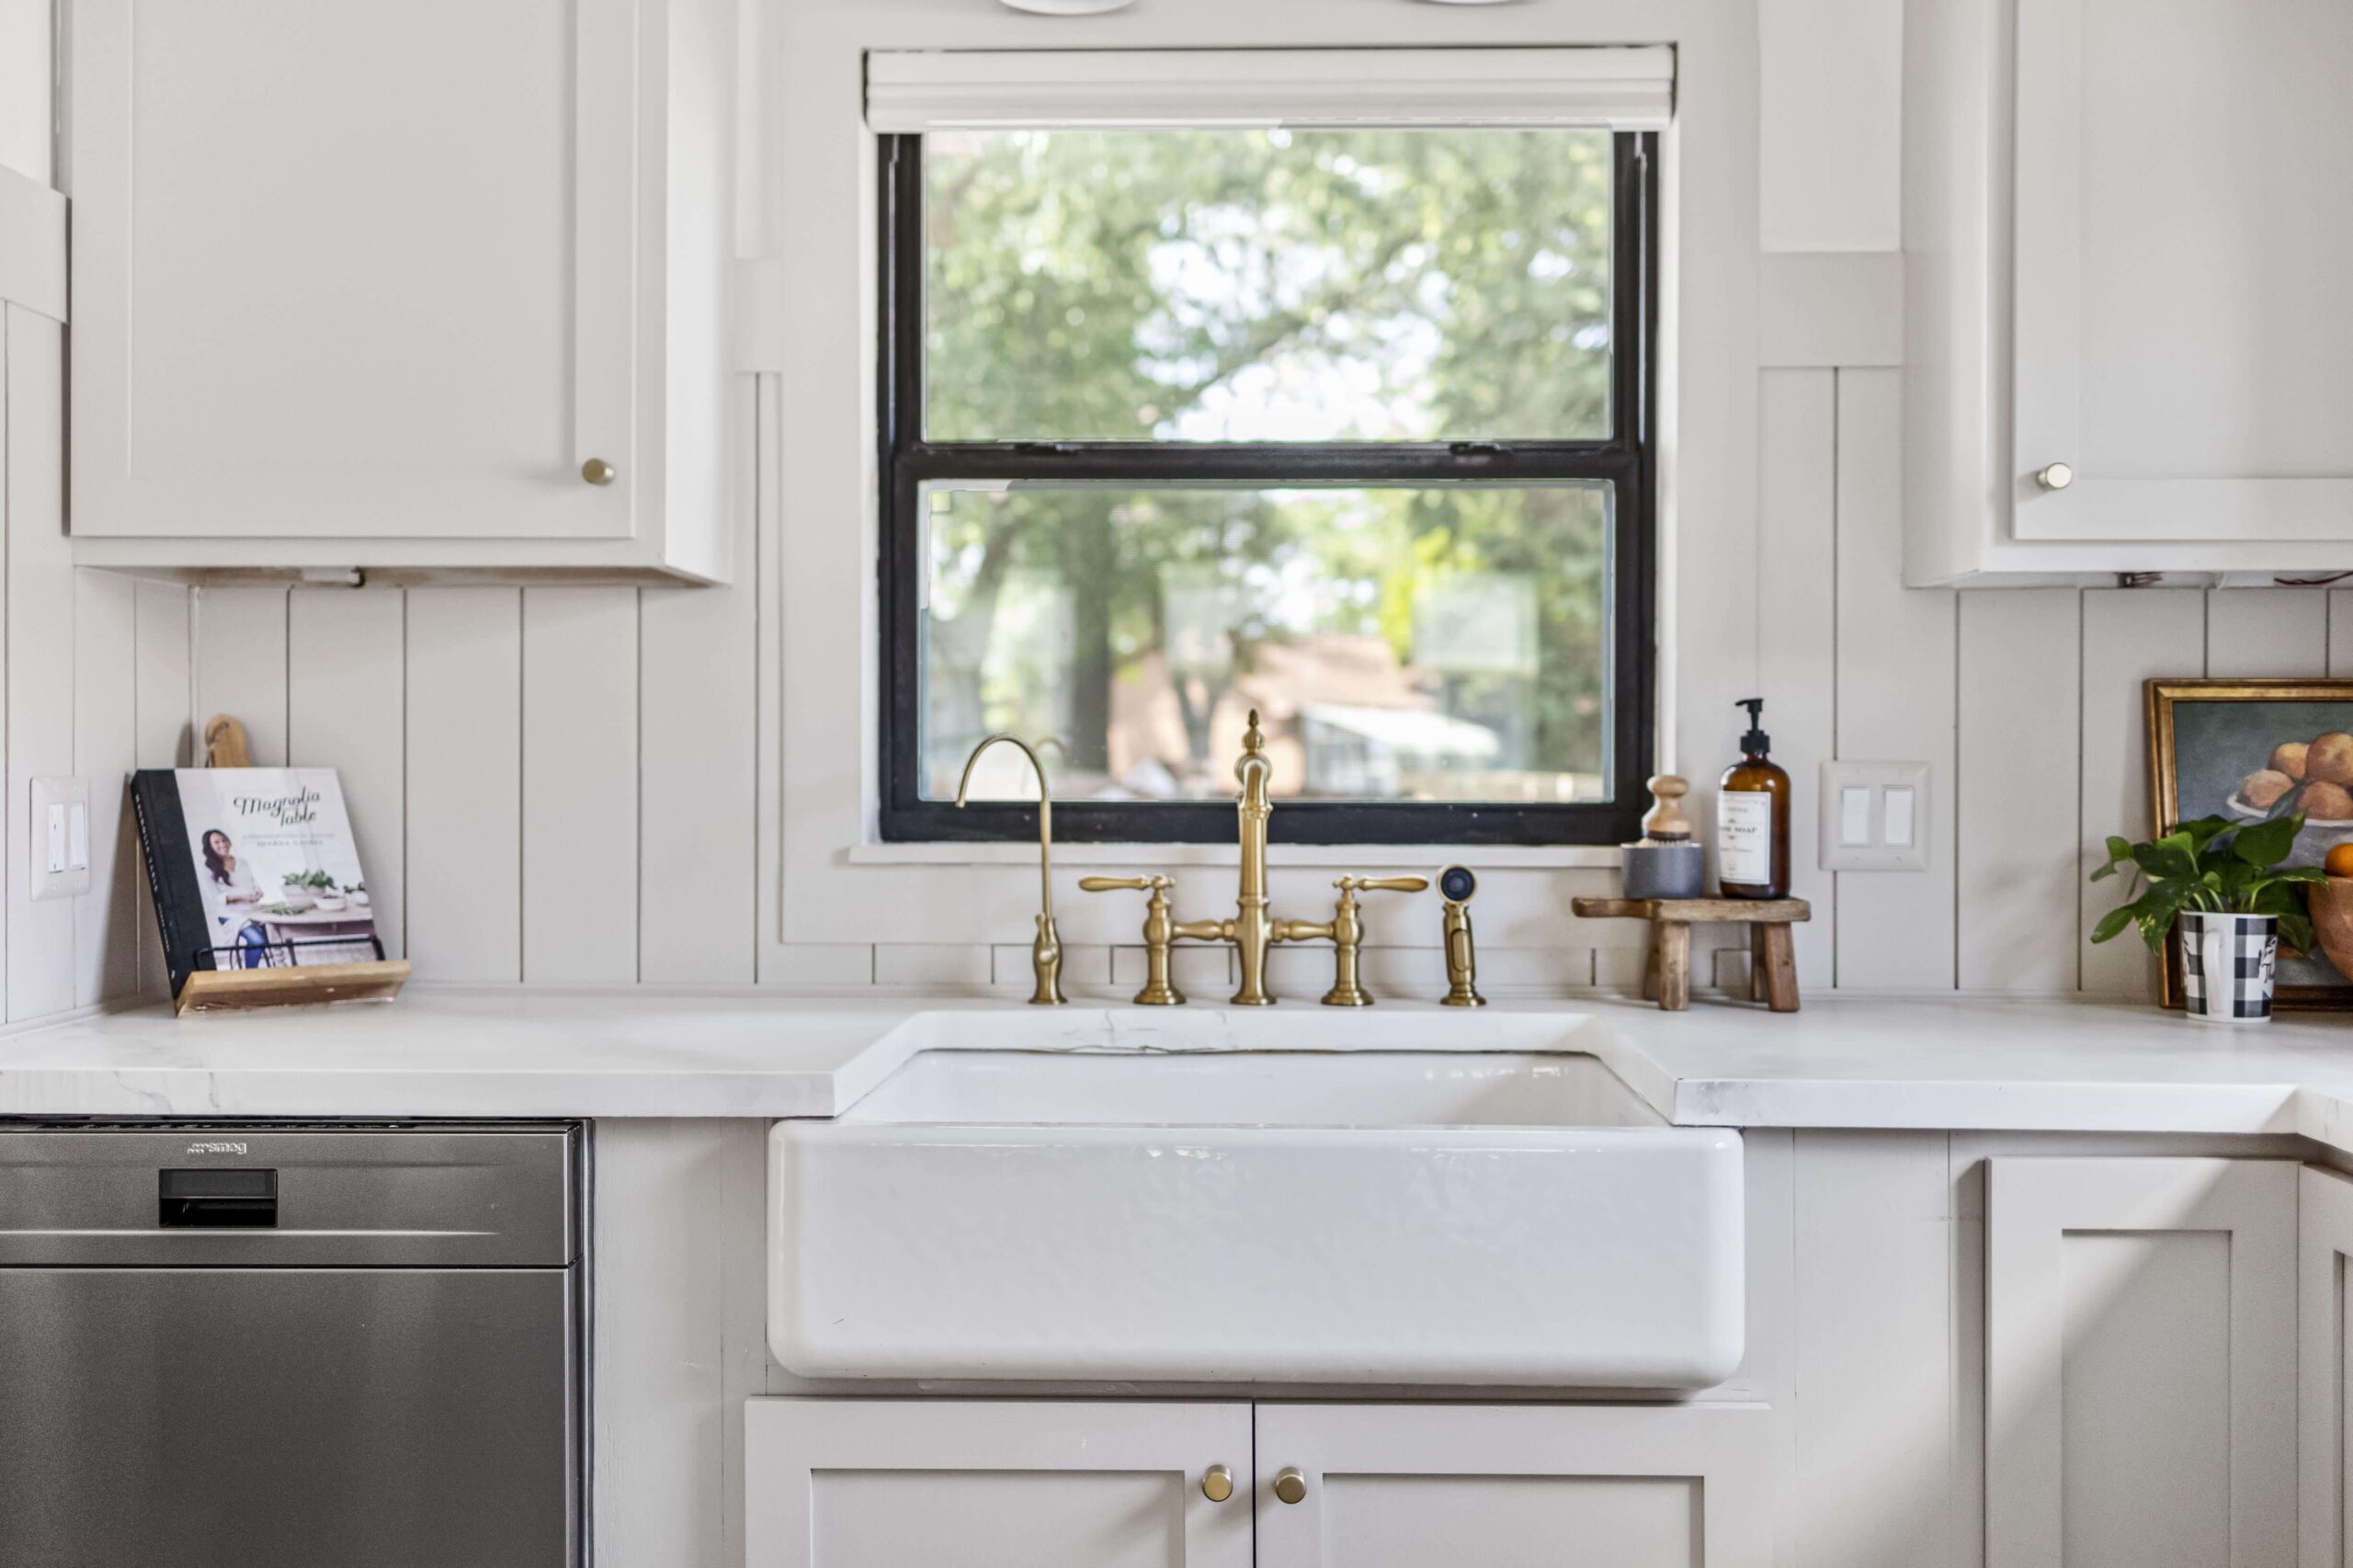
- Brass faucet
- Farmhouse sink
- Brass pot filler
- Table
- Chairs
- Sconces
- Range hood
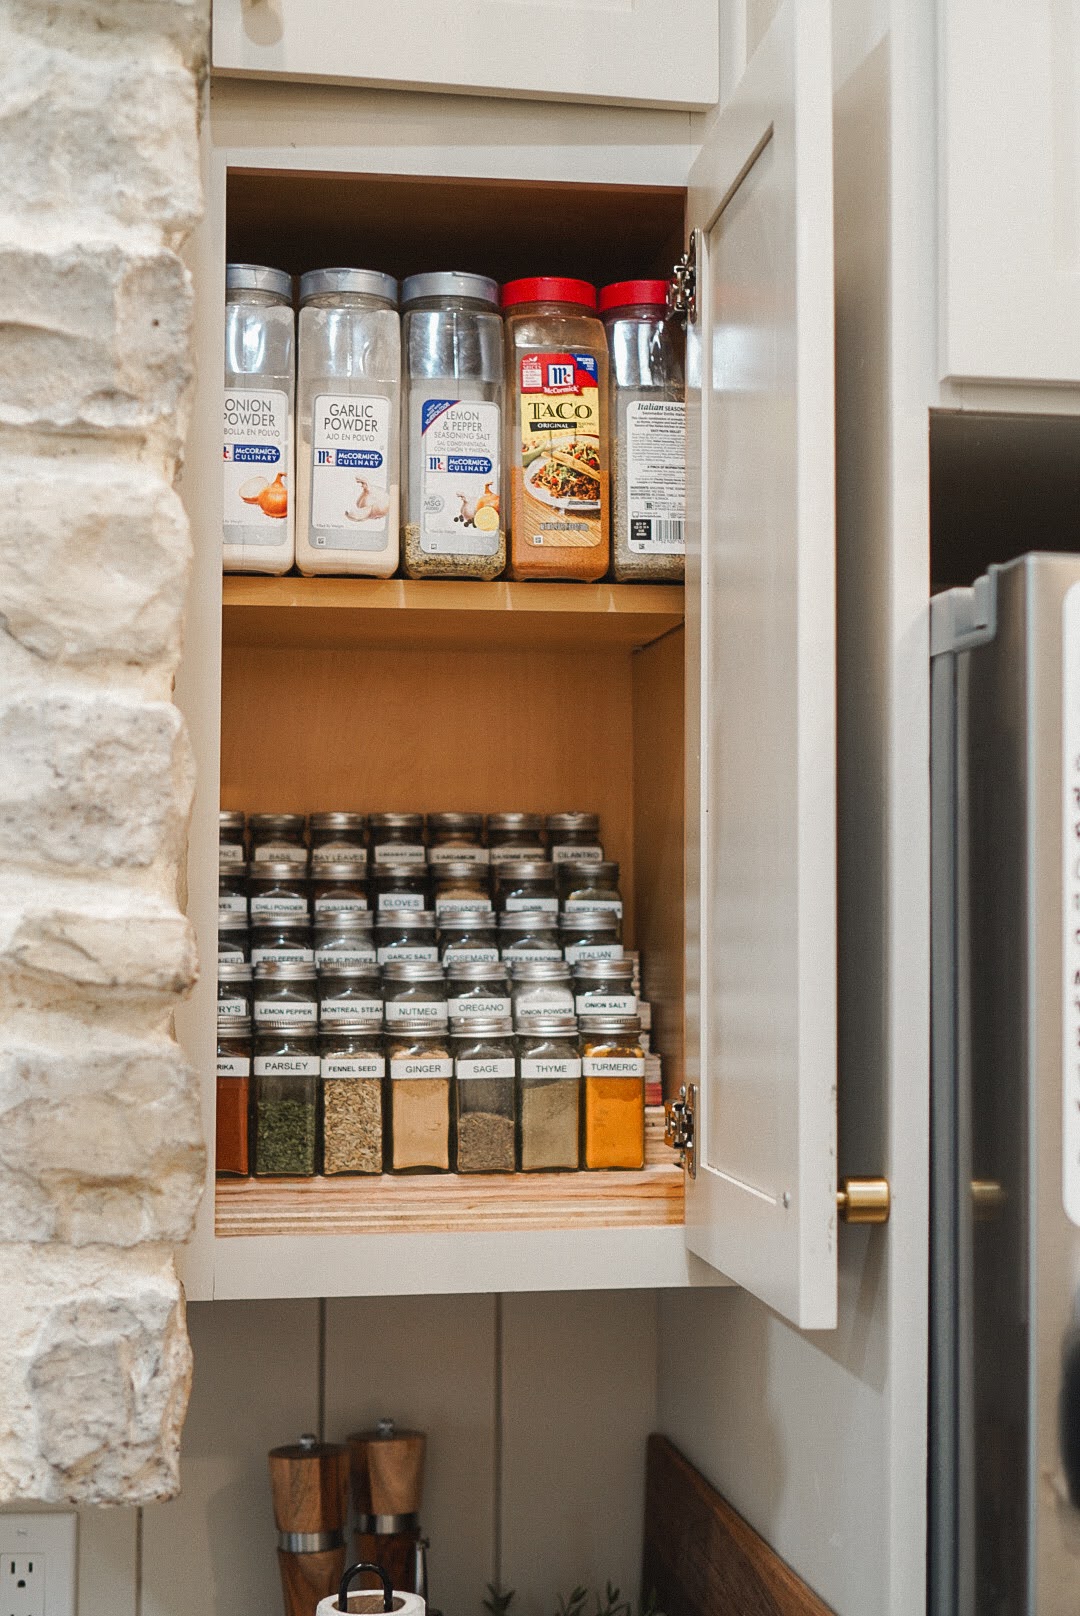
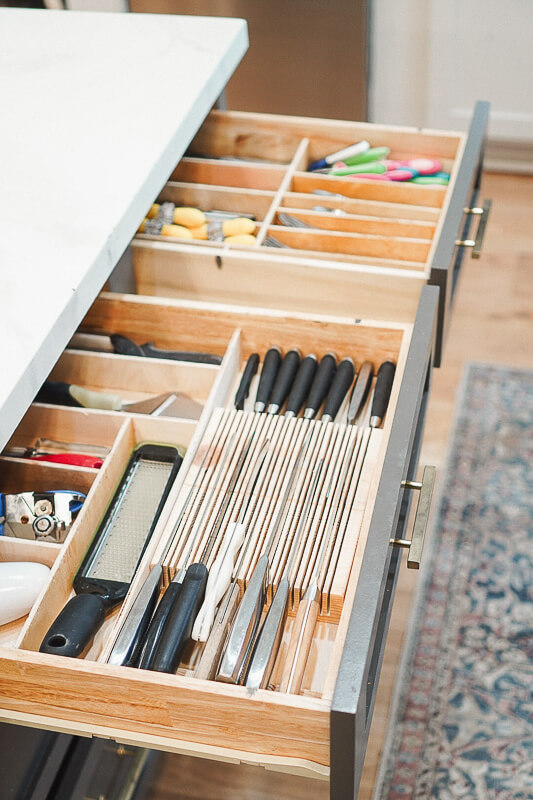
Looking for smaller projects to update your kitchen organization?
You should check out my posts for a simple, tiered spice cabinet and an easy to build drawer organizer.