Simple DIY Duravana Plank Flooring Installation


Updated May 9, 2026
We’ve done a lot of DIY home projects over the years, but this one made a huge impact – fast. Installing Duravana plank flooring from Lumber Liquidators instantly transformed the look of our main living space. I couldn’t wait to share it. This is one of the easiest flooring installs I’ve ever done, and I’m walking you through everything – from subfloor prep to snapping the final plank into place. Plus, I’ve added a video update showing how it’s held up (spoiler: still obsessed).
Watch How Our Duravana Plank Flooring Has Held Up
Here’s a quick update showing how well our Duravana plank flooring has held up over time with kids, pets, and a whole lot of life.
LL Flooring launched their new Duravana plank flooring line, and it’s awesome. It’s the latest and greatest in flooring technology. They combined all the best features of vinyl, laminate, and wood, to create an ultra-hybrid plank flooring that’s superior to anything on the market. I love that it’s family-friendly, eco-friendly, waterproof, and dent/scratch-resistant.
Duravana plank flooring is also easy to cut, and with a simple snap and tap, there are minimum tools needed for installation. You could easily finish an install in one afternoon for a moderate sized room. Duravana is seriously the future of hard surface flooring.
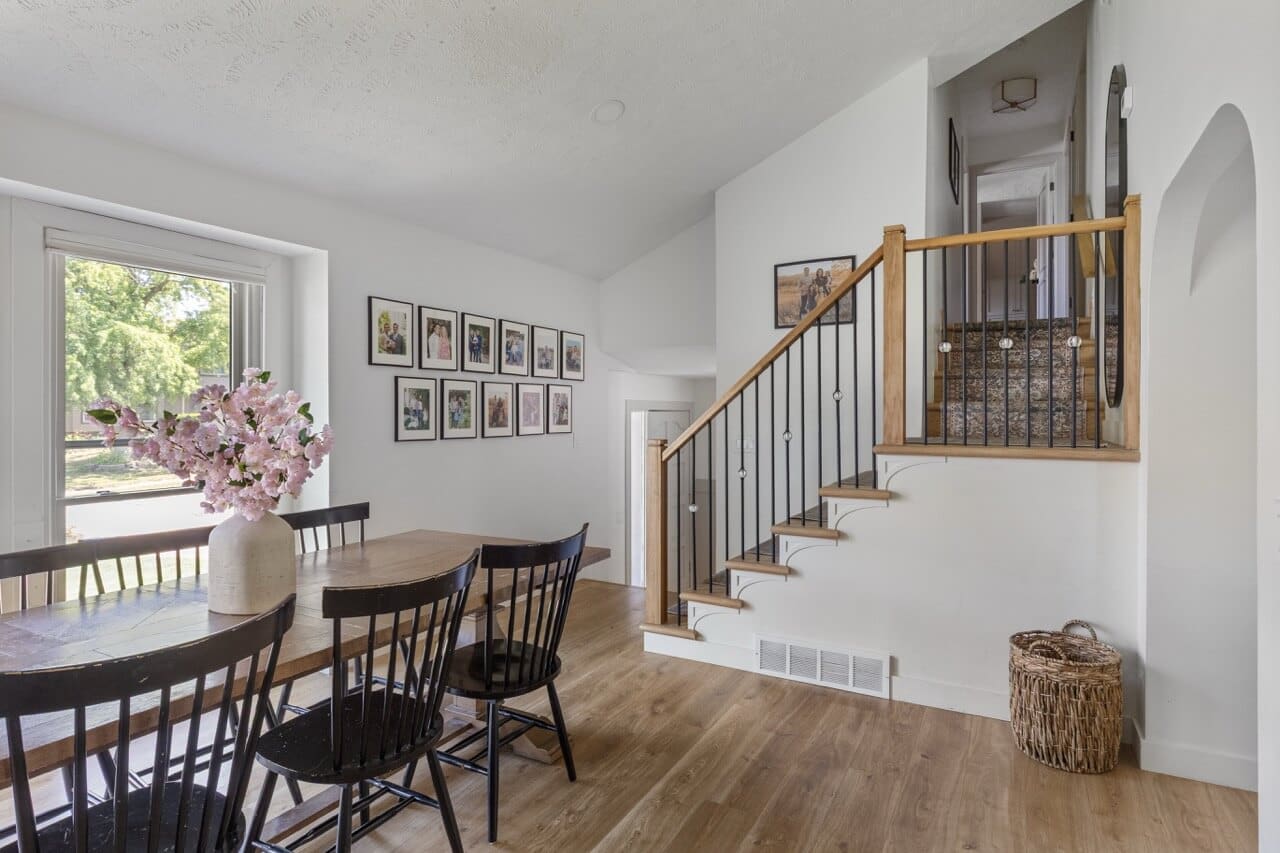
And since then? We’ve even used their bullnose stair planks to give our stairs a full makeover too—check out that tutorial here.
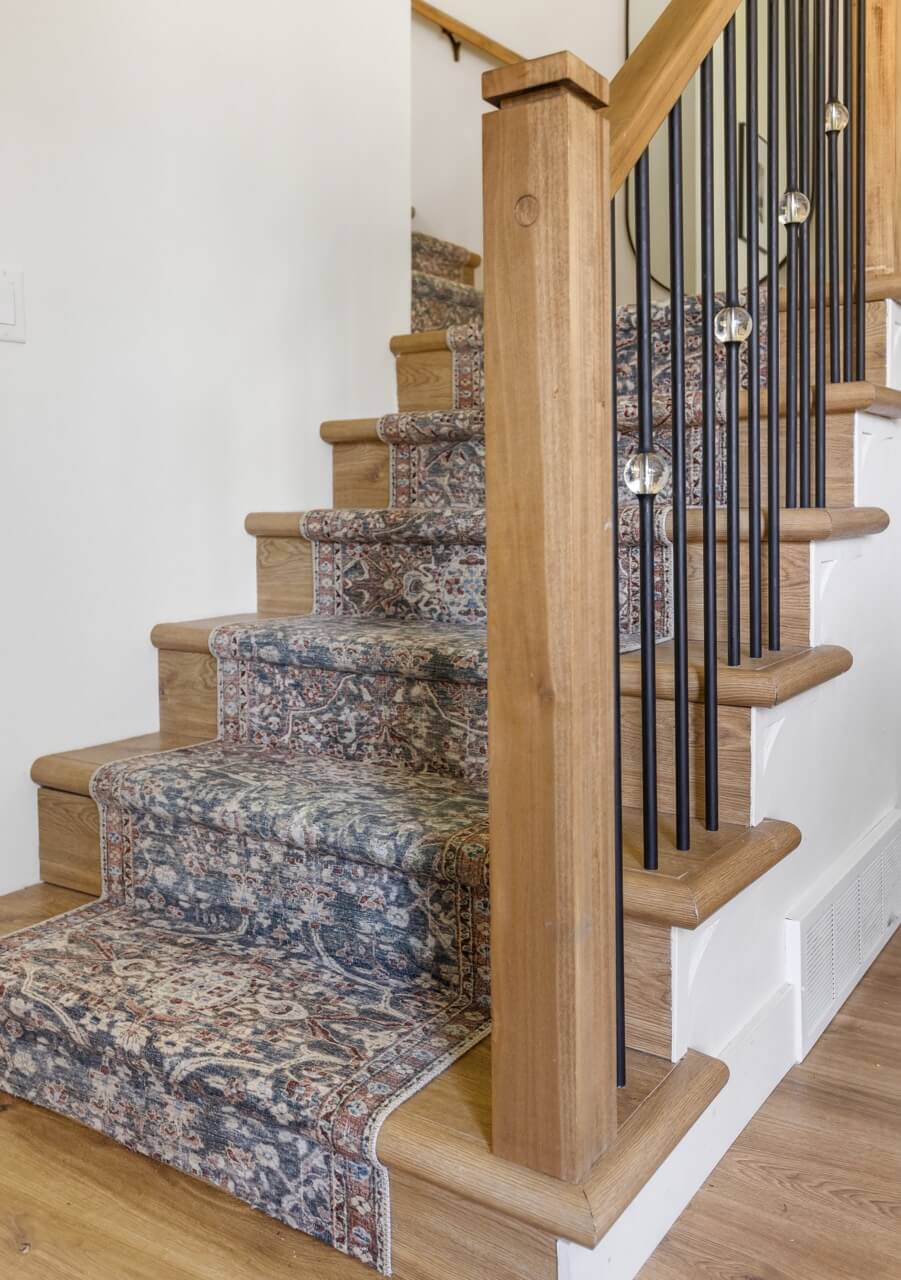
Table of Contents
- Watch How Our Duravana Plank Flooring Has Held Up
- Tools and Materials for Installing Duravana Plank Flooring
- How to Prep a Subfloor Before Installing Plank Flooring
- How to Raise Low Spots and Match Hardwood Subfloor Height
- Why You Should Remove Baseboards Before Installing Plank Flooring
- How to Lay Flooring in a Straight Line
- Which Direction Should You Lay Plank Flooring?
- How to Stagger the Plank Seams in Floating Wood Flooring
- Step-by-Step Guide to Installing Duravana Hybrid Resilient Flooring
- How to Cut Plank Flooring Around Vents and Walls
- How to Cut the Last Plank in a Row (No Expansion Gap Needed)
- Final Thoughts on Installing Duravana Plank Flooring
- 📌 Save this Project for Later
- Frequently Asked Questions About Duravana Plank Flooring
Tools and Materials for Installing Duravana Plank Flooring
Here’s everything we used to install our new wood floors
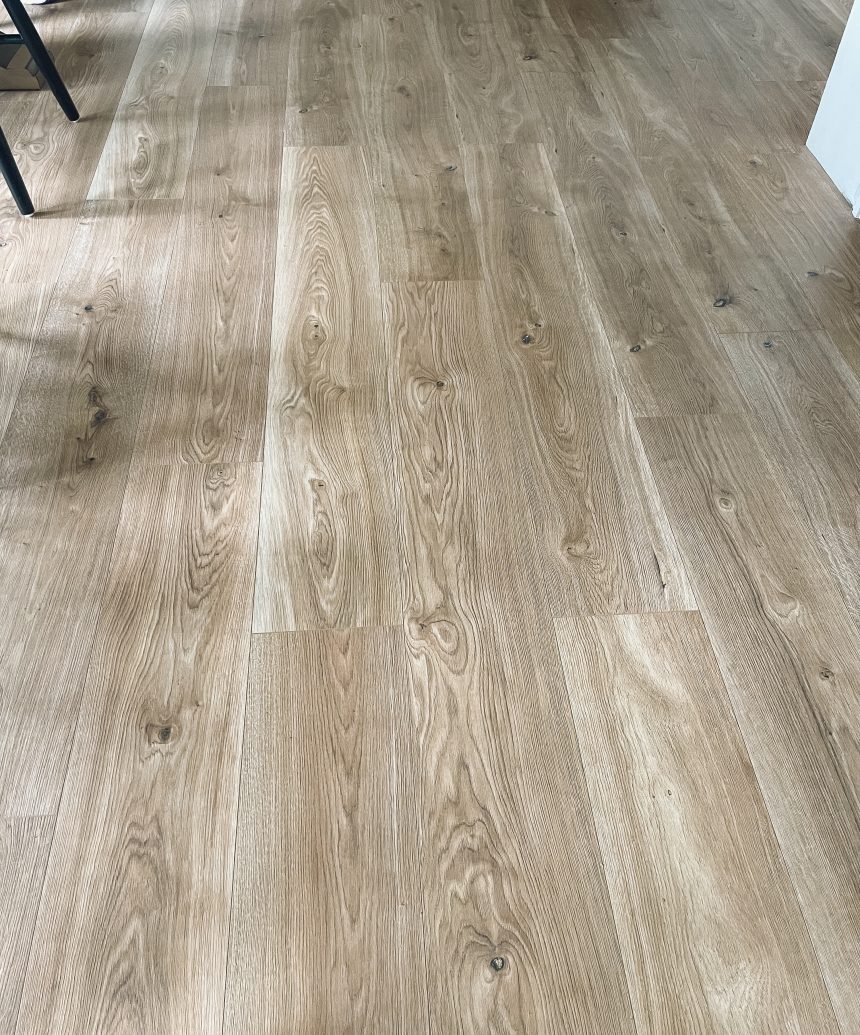
Duravana Hybrid Resilient Flooring– the style I chose is Bay Bridge Oak
Carpenter’s Square
Floor Installation Kit
Quikrete Setting Cement
Putty Knife
Tape Measure
Table Saw
Knee Pads
Miter Saw
Flooring Mallet
Long Pro Pull Bar
Vapor Barrier
¾” Particle Board
Drill
Screws
How to Prep a Subfloor Before Installing Plank Flooring
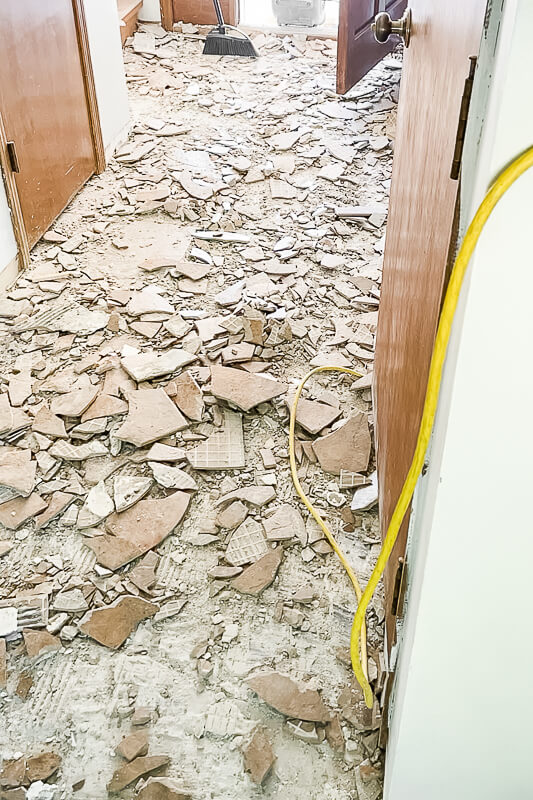
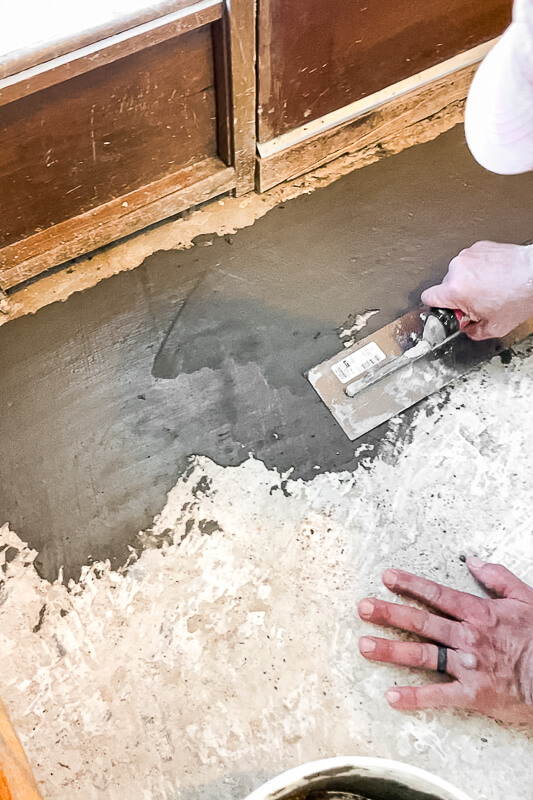
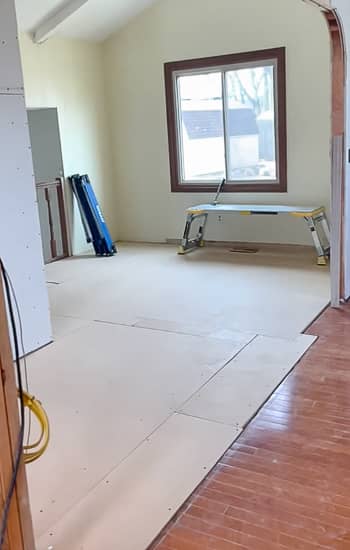
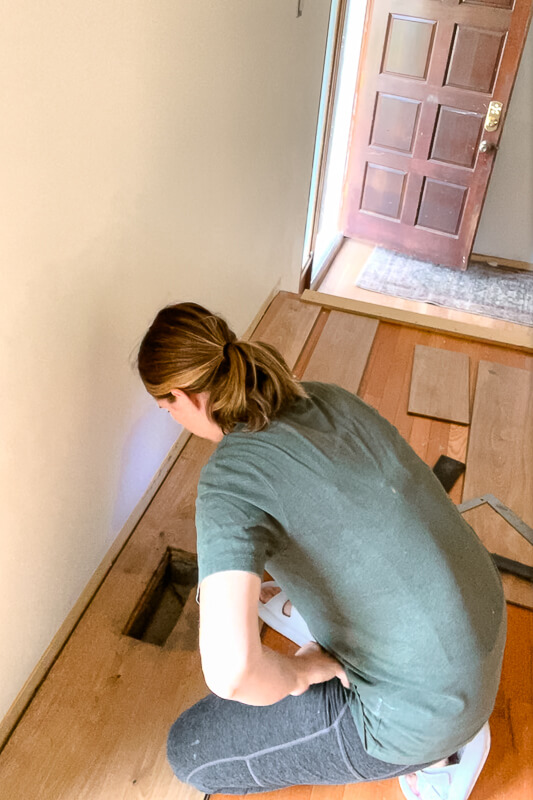
Before laying any flooring, you’ve gotta get that subfloor right. Ours had tile (yay!) and uneven concrete (not yay). We jackhammered up the tile and patched low spots with fast-setting cement.
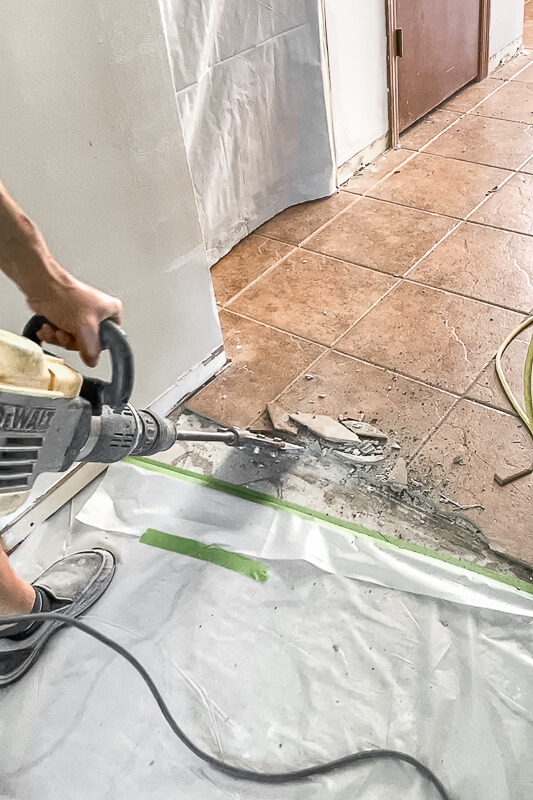
We also had to level out a section near our front door by feathering out cement to gradually smooth the elevation difference.
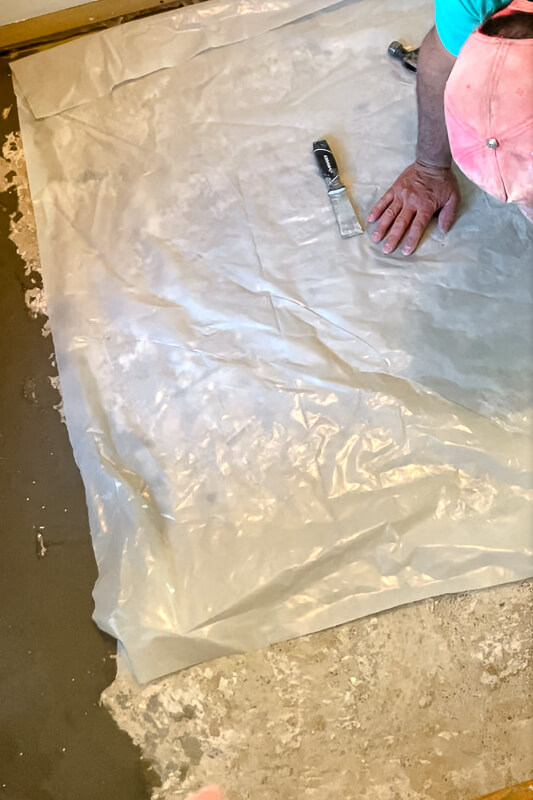
Tip: Duravana has a built-in pad underneath, which saved us a whole step. All we added was a plastic vapor barrier over the concrete.
How to Raise Low Spots and Match Hardwood Subfloor Height
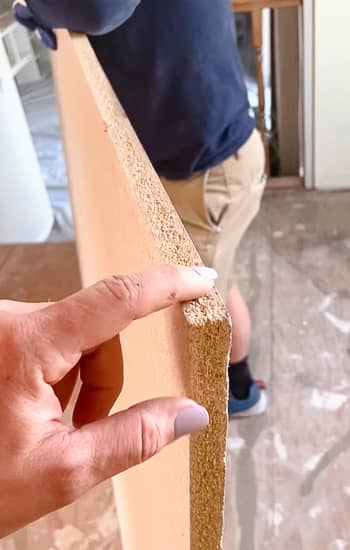
We had a weird situation where the old kitchen had a different floor height. So we cut ¾” particle board to bring it level with our hardwood and screwed it down tight. Once it was all evened out, we had a continuous surface to float the planks over.
Why You Should Remove Baseboards Before Installing Plank Flooring
We took off all the baseboards – partly because they needed an upgrade anyway, but also because it’s usually best to install baseboards after flooring. That way, they neatly cover any small gaps between the planks and the wall. If removing your baseboards isn’t in the cards, no worries—you can always add ½-inch quarter-round molding at the base to get a clean, finished look.
How to Lay Flooring in a Straight Line
Our house isn’t exactly square, and the walls are… let’s say “creative.” To avoid a wavy layout, Grandpa installed a perfectly straight guide board to keep our first rows aligned. Once the flooring got going, everything clicked into place from there (literally).
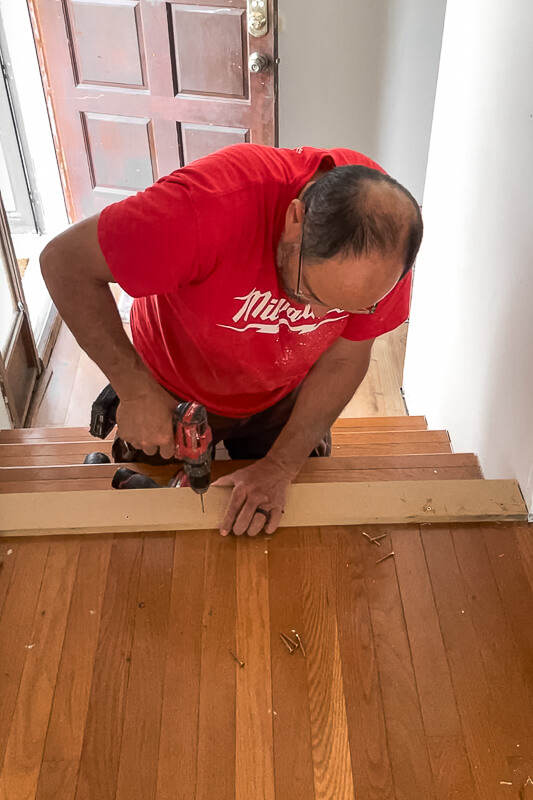
We plan to add bullnose stair treads later (also from the Duravana line at Lumber Liquidators), but since those get glued down, we weren’t ready just yet. To keep things straight, Grandpa – my husband’s dad, who everyone just calls Grandpa – screwed down a temporary board as a guide. He started with one long row of Duravana plank flooring and used that straight edge to lay the next few rows perfectly in line.
Which Direction Should You Lay Plank Flooring?
This comes up a lot – should you lay flooring with the length of the room? Across it? Diagonal? We flipped a coin. With our layout, it was going to meet other floors either way, so we just picked what looked best with the natural light and ran with it.
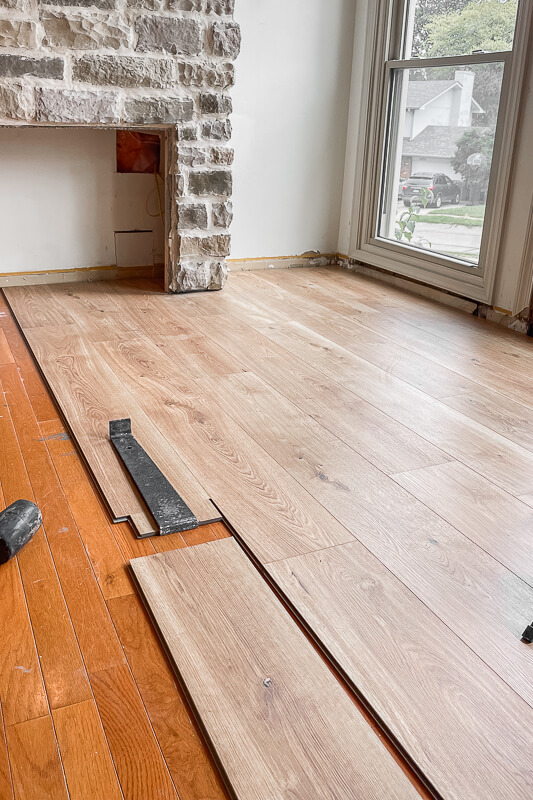
How to Stagger the Plank Seams in Floating Wood Flooring
This part is crucial. You don’t want seams that line up across rows – it looks odd and weakens the structure. We staggered the seams in thirds to create a random, natural look. It’s an easy rhythm once you start: full plank, two-thirds, one-third, repeat.
When we’d get to the end of the row, we’d cut off the excess and save it for when we needed one that size.
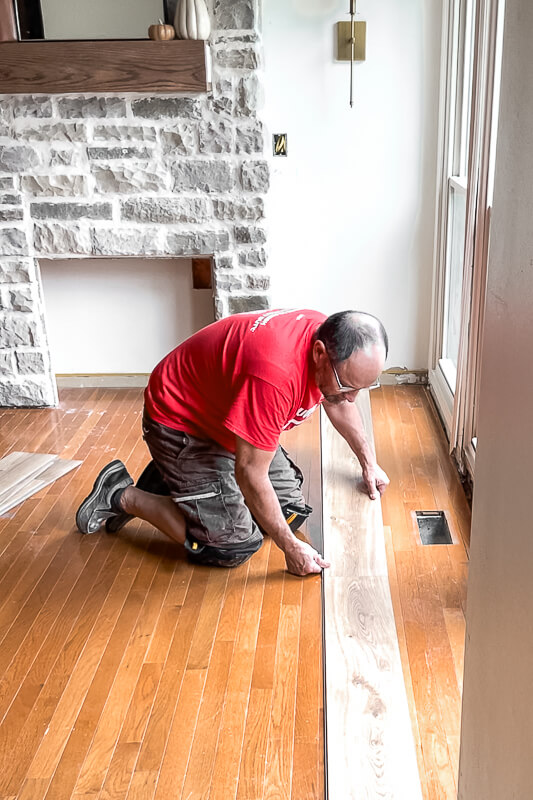
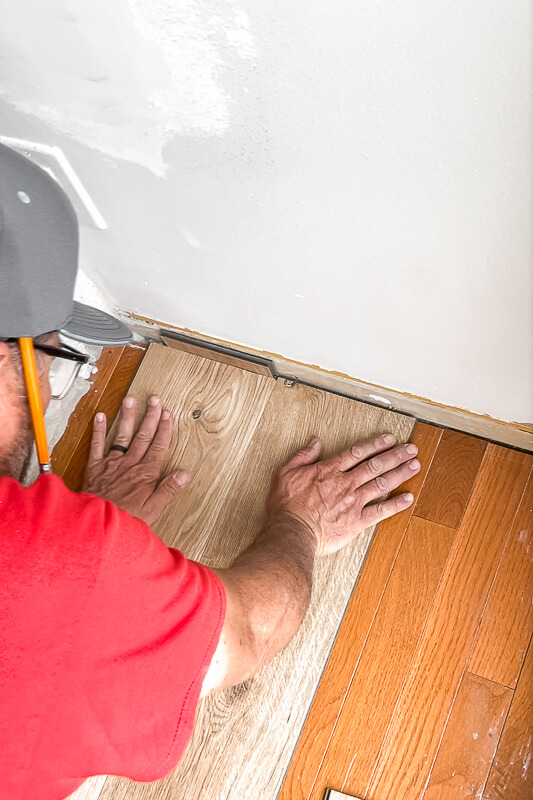
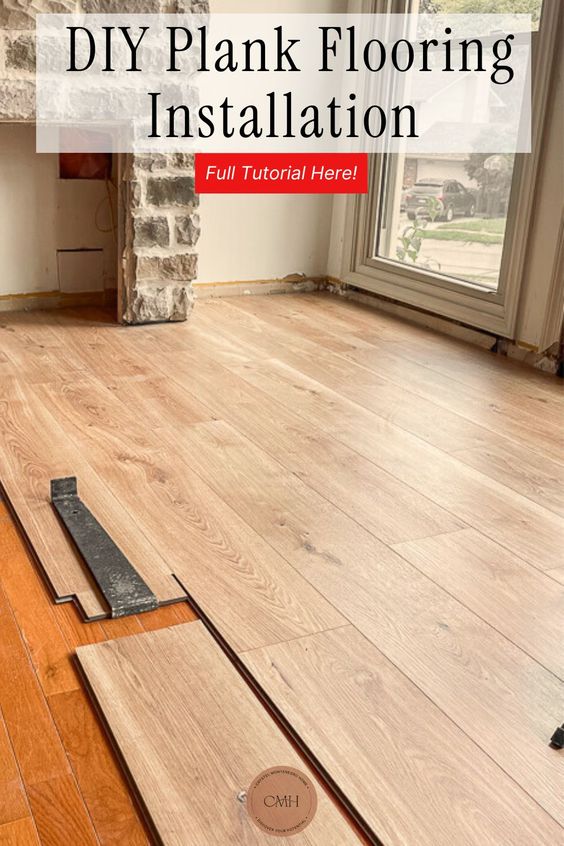
Step-by-Step Guide to Installing Duravana Hybrid Resilient Flooring
This is the part where you really see it come to life. Here’s how we did it:
- Click and lock the long side of the plank.
- Use a mallet and tapping block to snug it in place.
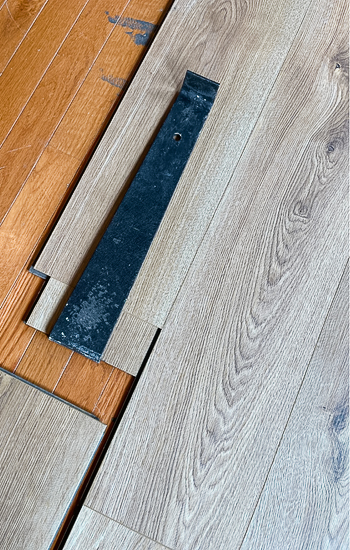
- Lock the short end using a pull bar and a little tap tap tap.
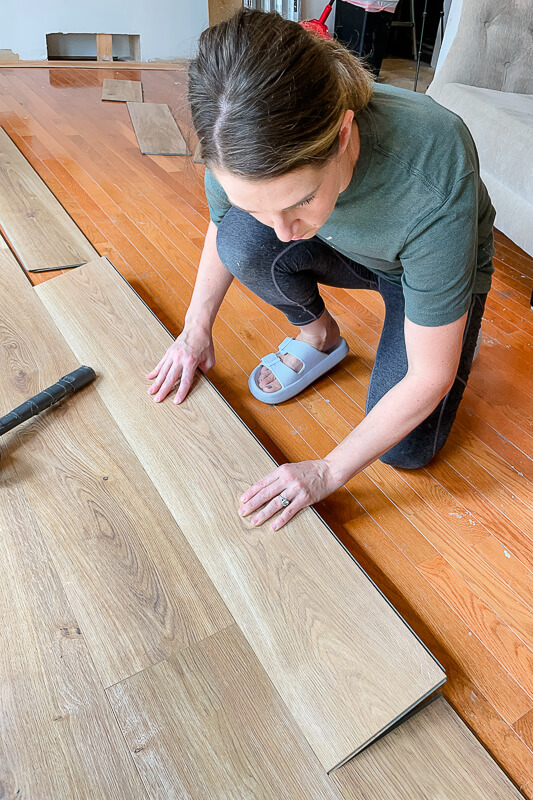
The grooves on Duravana planks are super intuitive, and everything felt solid once locked in.
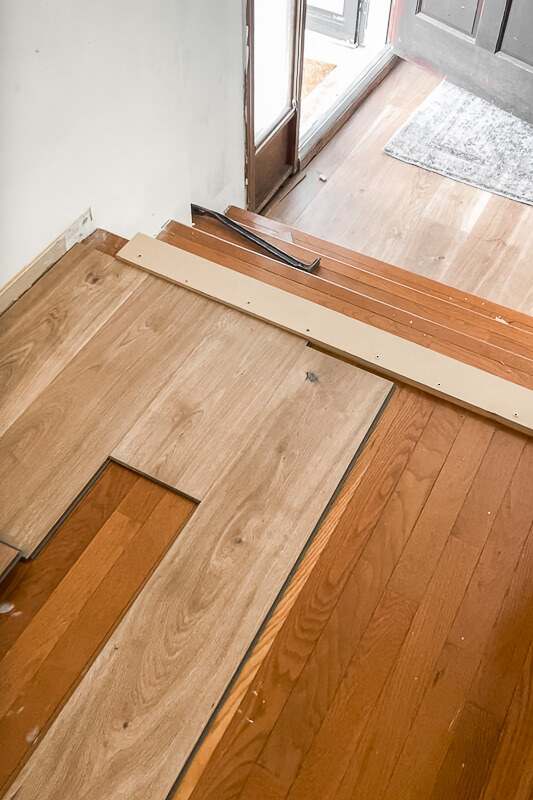
You’ll know if you did a good enough job locking the plank flooring into place by checking your seams. Here is Grandpa’s seam before and after. He’s pretty good at this.


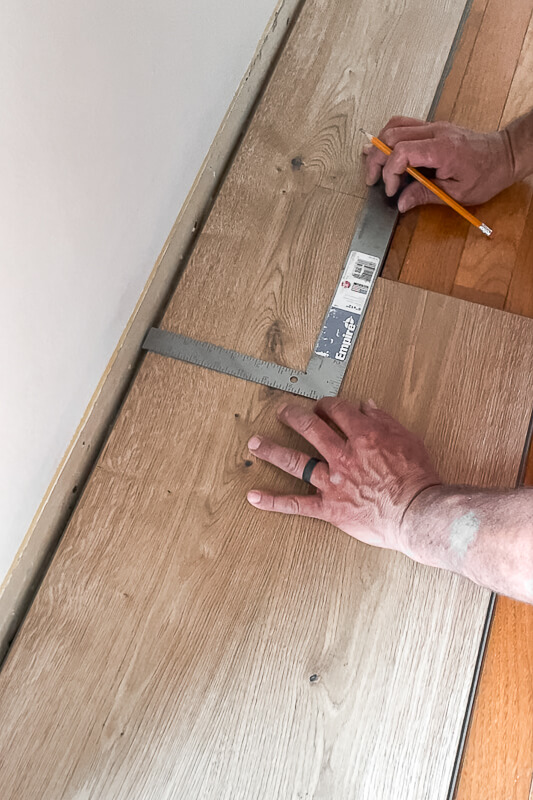
How to Cut Plank Flooring Around Vents and Walls
Most cuts were straight across, and I used a miter saw for speed. Or buy a floor cutter. if you’re looking for something quieter and less intimidating.
At the end of each row, we measured, cut, and reused any scraps on future rows. When trimming for vents or narrow rows along walls, my table saw and jigsaw made quick work of it.
How to Cut the Last Plank in a Row (No Expansion Gap Needed)
When it came time to cut the end piece of each row, we didn’t have to stress about leaving an expansion gap – Duravana plank flooring doesn’t swell or shrink thanks to its waterproof core. Huge win! To measure our final cut, we placed the tapping block up against the wall. That left just enough room to hook the floor puller underneath and tap the last piece into place without a hitch.

Final Thoughts on Installing Duravana Plank Flooring
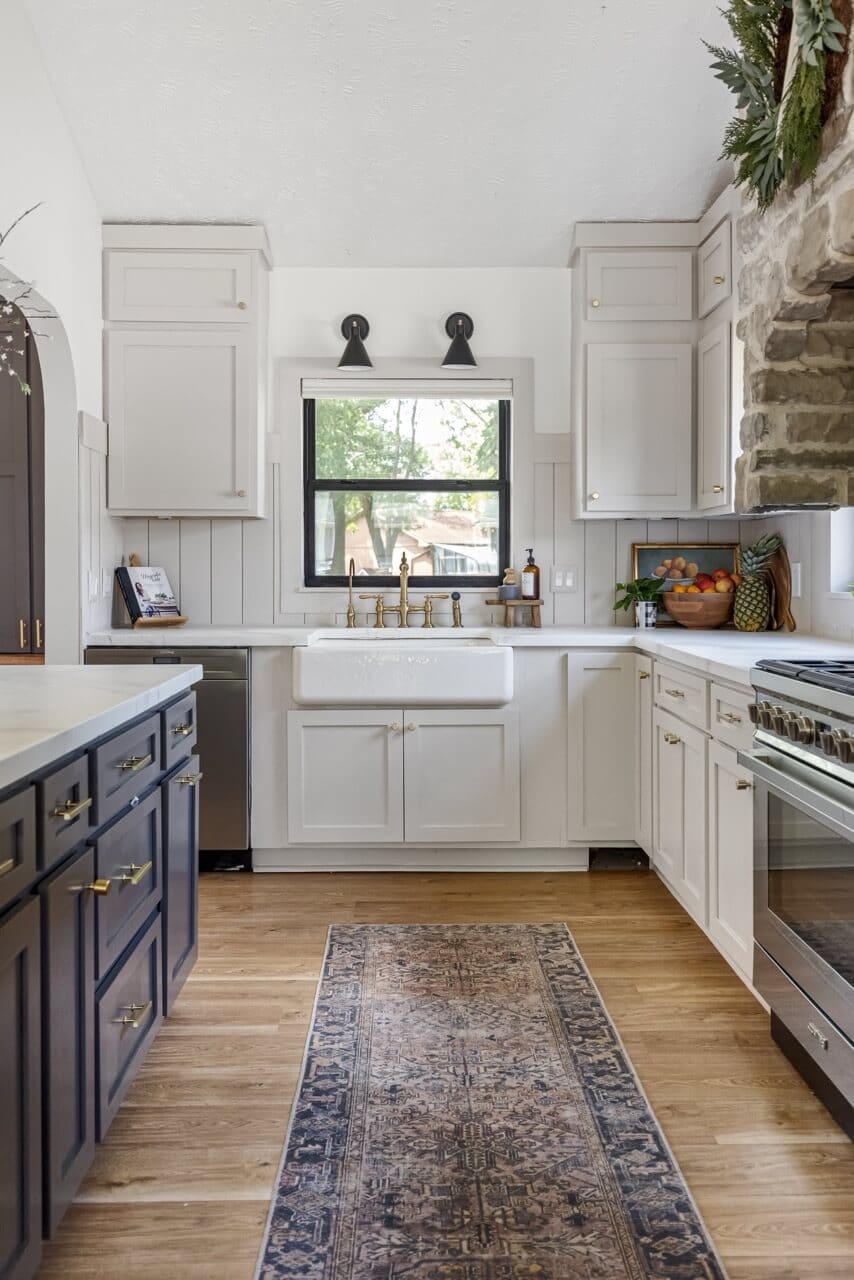
Even before we installed new baseboards, these floors were gorgeous. The Bay Bridge Oak color instantly brightened our home and gave it a high-end wood look – without the upkeep.
Between the waterproof surface, the durability, and the way it hides dirt (seriously, so good), Duravana plank flooring was the perfect choice for our busy family.
If you have plans to do an affordable kitchen remodel, click here to read how I installed shaker doors and painted my kitchen cabinets.
📌 Save this Project for Later
Pin now and come back when you’re ready to upgrade your floors!

Frequently Asked Questions About Duravana Plank Flooring
Yes! Duravana plank flooring is 100% waterproof, making it a smart choice for kitchens, bathrooms, entryways, and anywhere spills happen. It’s designed with a waterproof core and tight-sealing joints, so you don’t have to stress about moisture damage.
Duravana combines the best of both worlds. It has the waterproof qualities of vinyl, the scratch resistance of laminate, and the look of real wood. It’s thicker and more durable than most budget-friendly options and designed to last in high-traffic homes with kids and pets.
Yes! You can install Duravana directly over a concrete subfloor—just make sure to use a vapor barrier underneath. We used one before floating the planks, and it made the install smoother and added moisture protection.
Removing baseboards is highly recommended for a cleaner, more professional look. It allows the planks to float freely and gives your room a seamless finish once the baseboards are reinstalled. If you’d rather not remove them, you can add quarter-round trim to cover the expansion gap.

This post made the process of laying new plank flooring feel so accessible! I appreciate the step-by-step guidance and tips. I’m excited to try this in my own home—thanks for sharing!
Great post! I found the step-by-step instructions on laying new plank flooring incredibly helpful. The tips on measuring and cutting were particularly useful. Can’t wait to try this out in my own home!
Thanks!
This is such a helpful guide! I love how you broke down the process step-by-step. I can’t wait to try laying plank flooring in my living room. Thanks for the tips!
Great tips! I love how you broke down the process step by step. I’m excited to try laying plank flooring in my living room now. Thanks for the clear instructions!
What saw blade did you use for your miter saw and table saw? We want to make sure we don’t chip the flooring when cutting. Also, did you have the flooring side facing up when performing your cuts?
I used a fine tooth blade. Maybe 80 tooth? And the flooring side was facing up. Have you ever used the painters tape trick? Put tape where your cut line is and it’ll help prevent shredding,
Loved the step-by-step guide! It was so helpful to have the measurements and diagrams included. I was able to install my Duravana plank flooring with minimal assistance. The planks look amazing and it was a huge cost savings compared to hiring a professional.
Just finished installing my Duravana plank flooring using your instructions and it looks amazing! The details about the underlayment and subfloor prep really made a big difference. Thanks for sharing your experience and expertise
That is awesome! Thank you for letting me know! I LOVE their flooring
What is the longest run without a transition bar with this type of flooring do you have in your home? I’m wanting to try and run my entire living area( roughly 1000 Sq ft or so) with no transition pieces
Hi – You can install 1000 sqft without a transition piece, so I’m not quite sure what you’re asking. Could you clarify?
Curious if you’ve had to repair or replace any boards I just installed and received over 1/3 of the flooring damaged in the boxes and just received a call back due to the edges chipping off.
None of my boards were damaged when I received them. LL Flooring is a great company so I’m sure they’ll help get them replaced.
I’m thinking about putting these exact floors in my house. How are they holding up? Any tips looking back now?
They are holding up so well! It’s amazing how durable they are. Totally recommend them.