


Updated May 9, 2026
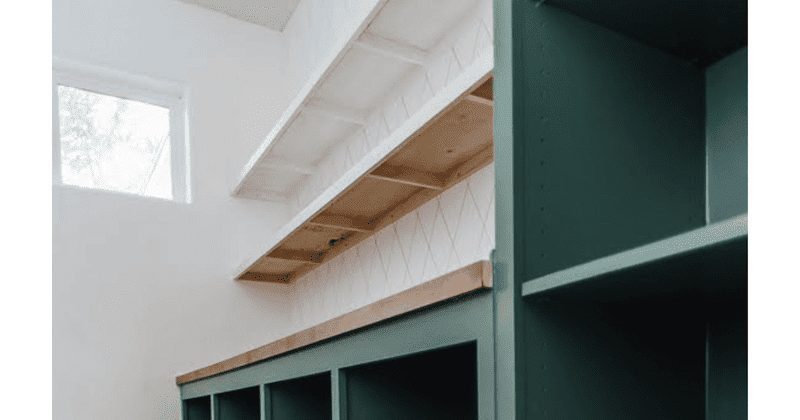
Floating shelf tutorials are all over the internet, and with good reason. They make a considerable impact, take up very little space, and are super cheap to build. They’ve got a classy, minimalistic vibe that can easily be added into any décor aesthetic. I built my brother a Butler’s Pantry, and decided a to build a floating shelf since it would be a great way to finish off the look. It’s sturdy enough for heavy appliances, and classy enough to offset any utilitarian pantry vibe. This relatively simple and inexpensive project can be assembled in one afternoon.
This post includes affiliate links. If you purchase from these links, I may get a small commission from the seller. But the great thing is, this doesn’t cost you any extra money! ????
SUPPLIES
- (1) 1/4 x 48 x 96 inch Sande Plywood
- (3) 1 x 2 x 96 inch Select Pine
- (2) 3/4 x 36 inch Square Dowel
- 1 1/4 inch Brad Nails
- 1 1/4 inch Pocket Hole Screws
- Pocket Hole Plugs
- 2 1/2 inch Wood Screws
- Latex Caulk
- Sandpaper
- Primer
- Paint color of your choice
- Paint brush
- Wood glue
TOOLS
How to Cut Wood for the Floating Shelf
There are several ways to build a floating shelf. A very popular style you may have seen is to build a frame, a box, and then slide the box over the frame. The method I’m laying out doesn’t require the box and frame to be built separately. Less steps!
The area I was working with was 66 inches in length, and would be used in conjunction with the Butler’s Pantry, so I knew the shelf needed to be sturdy enough for larger appliances, dishes, or whatever items that usually live in the overflow area outside of a kitchen.
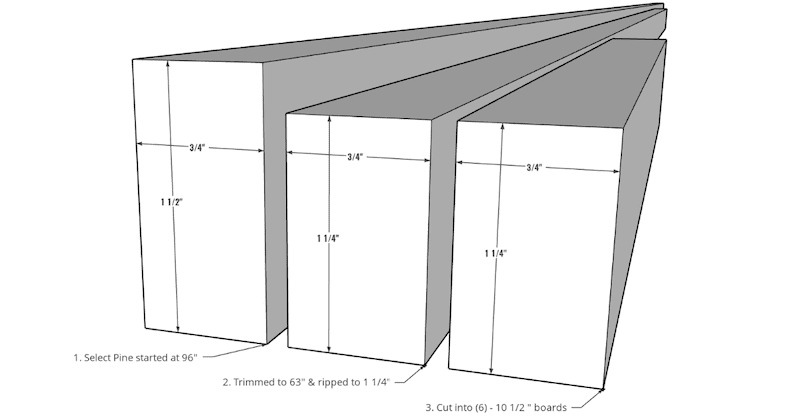
To make the brace, I used my miter saw and first trimmed a 96 inch select pine board to 63 inches. Then, I used my table saw to to rip down 1/4 inch from the top of the piece, and lastly cut it into 6 – 10 1/2 inch pieces.
Confused? Here’s a handy pictorial for reference:
I used my miter saw and trimmed the remaining 2 piece of select pine to 66 inches each. One piece would be the be the face of the shelf, and the other would be a cleat.
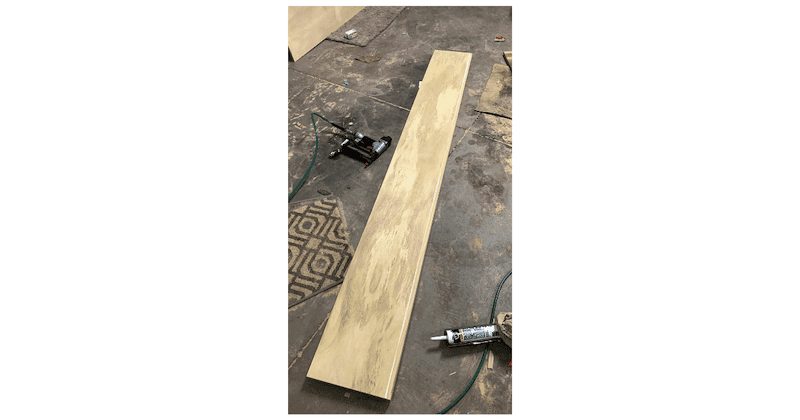
My last cut was for the shelf itself. I used my table saw to cut a piece of plywood into a 1/4 x 10 1/2 x 66 inch board.
How to Prepare the Floating Shelf for Assembly
Okay, now that you’ve got a bunch of random pieces of wood all over your floor, it’s time to prep for assembly.
My plan doesn’t include a piece of wood to cover the bottom, so the actual frame is seen underneath, which didn’t bother me because it would be painted and still look great.
But, I never compromise a seamless look, so my plan was to use pocket holes to hide the screws.
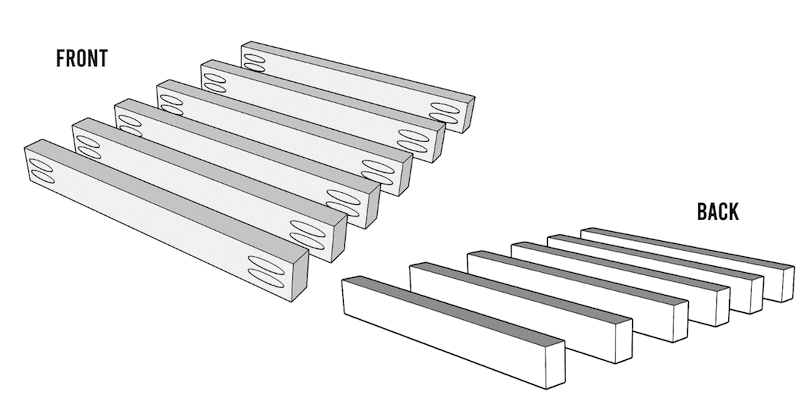
On each of the 10 ½ inch pieces, I drilled a set of pockets holes on each end, on only one side. Confused again? Here you go:
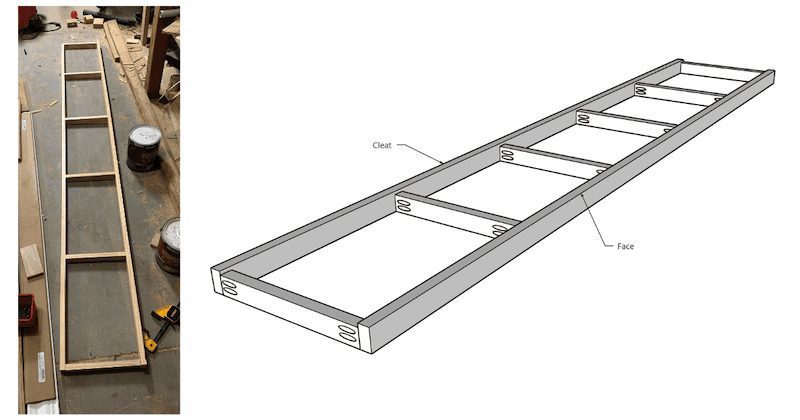
How to Assemble the Floating Shelf
The first thing to build is the frame. Through the pocket holes in the supports, I screwed pocket hole screws into the end of the cleat, forming an open rectangle. I made sure the pocket holes were facing the outside of the open rectangle.
Then, through the pocket holes, I screwed the rest of the 4 supports to the cleat.
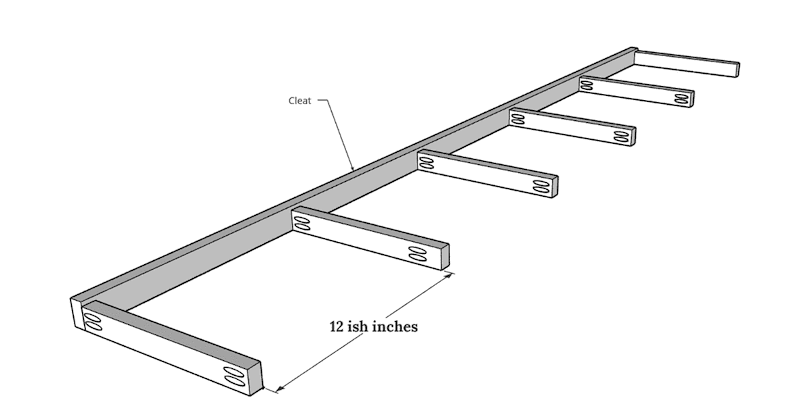
I wasn’t too concerned about the supports being evenly spaced, but the best estimate for mine were about 12ish inches between each board. I did have to keep in mind where the studs in the walls were located because I didn’t want a support to be in the way when I went to hang the shelf.
Since the shelves would be on the right wall of the pantry, I made sure all my pocket holes were facing towards the left so you wouldn’t see them upon entry.
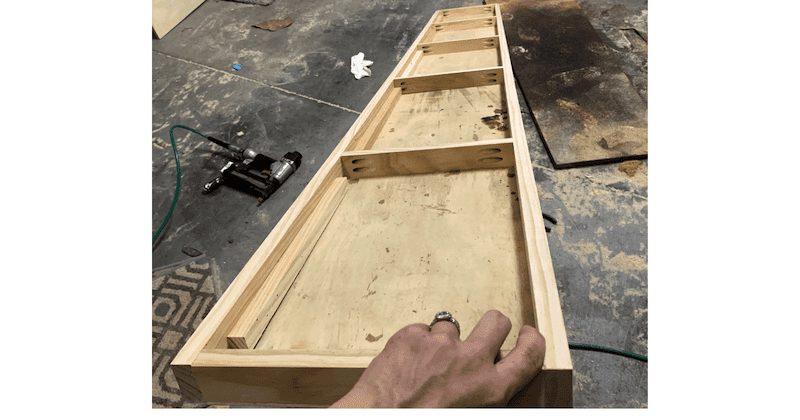
The last piece to complete my frame was the face of the shelf. I attached the 6 supports to the face board through the pocket holes.
Now that that’s together, it should resemble something like this:
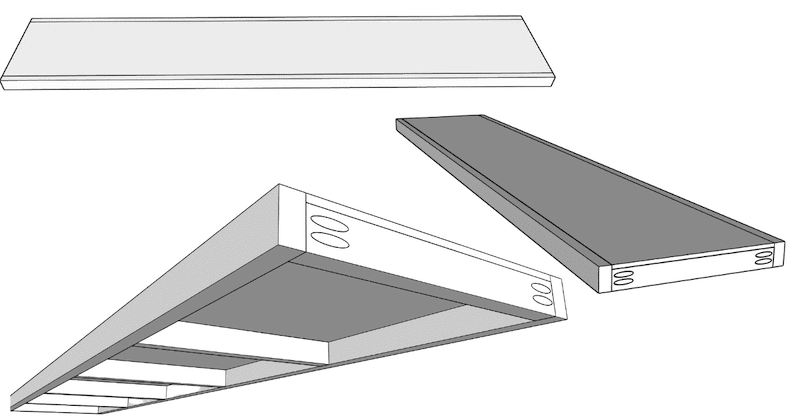
I used wood glue and pocket hole plugs to hide the pocket holes.
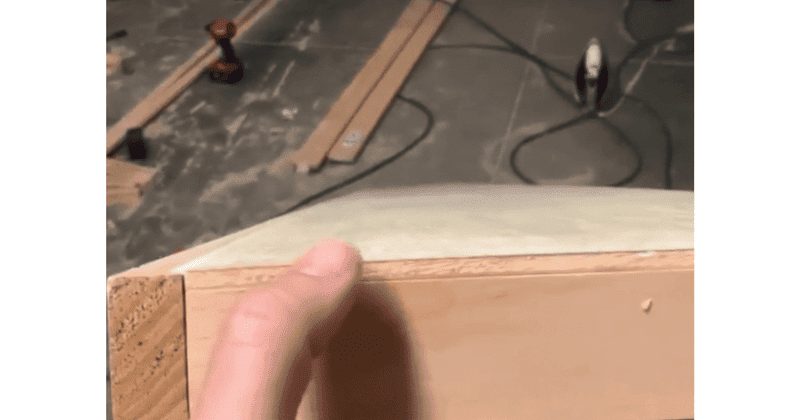
The last part of assembly is to secure the plywood to your frame. If all your cuts were pretty close to perfect, it should sit perfectly flush with the cleat and face of the frame. I secured the plywood to the frame with wood glue and 1 1/4 inch brad nails through the top of the plywood into the supports, down the length of the board.
Since the shelf would be holding heavy items, I added square wooden dowels in between each support to act as a brace. I cut the dowels using my miter saw and were about 10-11 inches each. I secured them from the underside, into to the face frame using 1 1/4 inch brand nails.
The seam between the plywood and the face and cleat were caulked, then it was given a good sanding with my orbital sander and 220 grit sandpaper, and finally it was time to install!
I had planned to paint the shelf, so I installed it unfinished. However, you could stain the shelf instead, and at this point, before installation, it would be a good time to get that done. Give it a good sanding, use some wood conditioner, and get to staining. Also, use a stainable wood filler in the seams rather than caulk.
I had made two shelves since I had the space. I installed the lower shelf first., and used a stud finder to mark the location of the studs. Then I cut 2 pieces of scrap wood to act as a spacer, and secured the shelf through the sheetrock directly into the studs using 2 1/2 inch screws. A level comes in handy to ensure the shelf isn’t tilted. My shelf fit verrrryyy snugly between the cabinet and the wall, which is exactly what I wanted. Spacers came in handy to install the top shelf. The spacers were moved along the wall between both shelves, ensuring they spacing was even and the top shelf was level. The shelves were screwed into the walls on either side of the shelf.

The shelves were given a coat of primer and painted white.
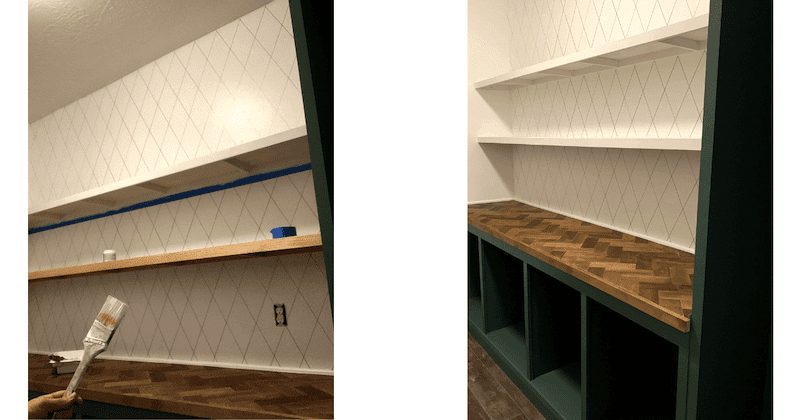
I didn’t paint the underside of the lower shelf because unless you’re laying on the dirty pantry floor, or taking pictures for your website, you’d never notice.

Have I peaked your interest in how I built the butlers pantry? I have all the tutorials on my website!
Do you like the wallpaper design you see in the pictures? I did that with a sharpie!
This is the How to build a Butler’s Pantry Part 1 where I explain how to build the cabinets, and in the Butler’s Pantry Build Part 2, I explain how to do all the frame and finish work.
Check this post out if you like the Herringbone Counter.
And do you see the drawers? Learn how to build super easy sliding drawers here.
And lastly, if you’re a visual learner, all of my stories for my projects can be found in my highlights on my instagram account @crystelmontenegrohome.
I would love to hear from you! Leave a comment and let me know if you’ve ever built a floating shelf and how it worked out for you. If you have any questions, I’ll be sure to respond.