

Updated May 9, 2026
Ready to bid farewell to that annoying Lazy Susan cabinet? I personally hated mine and felt like it was such a waste of space, which, as it turns out is apparently controversial among my Instagram followers. Removing the swivel tray from your Lazy Susan cabinet is an easy DIY project to maximize your precious kitchen storage space. Follow along to see how I did this, and how much better this corner cabinet functions for me now.
Why I Didn’t Like My Lazy Susan Cabinet
When we remodeled my kitchen we used stock cabinets from Home Depot. This meant they were affordable, but we were limited on what options they had. I took matters into my own hands and did some modifications like extending the cabinets to the ceiling and building a refrigerator cabinet.
For the corner cabinet, we went with this stock Lazy Susan cabinet that came with a basic, swiveling two tier system. If I was using it for food or maybe for smaller items that I had to reach in the back for, a lazy susan might not be the worst option out there with its swivel feature. But I’m just generally not a fan of deep shelves of any kind that aren’t meant to hold huge items like totes. With this corner cabinet, there’s still so much space that the lazy susan isn’t capitalizing on and thus becomes wasted. For a small kitchen like mine, ya gotta use all the space you can!

This is a really simple, low-cost project that requires very little in the way of materials. If you’re like me, you may even have everything you need left over from other projects.
Tools
- Tape measure
- Drill or impact driver
- Phillips drill bit
- Circular saw
- Table saw
- Jig saw
- Brad nailer
- Laser level
Materials
- 3/4″ Plywood
- Brad nails
Removing the Lazy Susan From the Cabinet
After emptying everything out of the Lazy Susan cabinet, it was time to get the swiveling tier system out of there. The two swiveling shelves are both attached to a single pole. In my Lazy Susan cabinet, this pole was attached to the cabinet box at both the top and the bottom with just a few screws. Using my drill and Philips bit I removed the screws, then pulled the whole Lazy Susan system out.


Look how much space there is! Seeing my Lazy Susan cabinet empty really helped me to visualize the storage potential.

Installing Shelves into the Corner Cabinet
Now that I have a blank slate to work with, I can add it to my shelf. To know how big of a shelf I needed to make to replace the swiveling system in this former Lazy Susan cabinet, I measured the inside of the cabinet. Depth, width, everything.


Once I had all of my dimensions, I headed out to the garage. For this project, I needed to cut out two pieces. One for the shelf and a second piece of plywood to set down at the bottom of the cabinet. The cabinet box came with just basic particle board in the bottom, but a piece of plywood will be much sturdier and smoother too.
Cutting Wood for the Shelves
First I transferred all of my dimensions to my sheet of plywood, and then I drew out the shape I needed to cut. If you do not currently have a T Square it would be great to invest in one. It is perfect for a project like this where you want to make sure that you are actually drawing a straight line at a square angle.


After I had drawn out my shelf, it was time to cut. I started by using the circular saw just to cut off some of the extra length of my sheet of plywood because it’s difficult to maneuver an entire sheet of plywood through a table saw by yourself.
After I had a more manageable sized piece, I used a table saw for all of the longer cuts and then finished the very inside point of the corner with my jig saw. The big, round blade of the table saw is not ideal for cutting a nice inside corner. The smaller, straight blade of a jig saw is much better for getting a straight cut in a tight corner like I had on this shelf.


Lastly, I used my circular saw to lop off just a bit off of the back corner. This was for two reasons. First, getting this shelf into the cabinet opening will make it easier. Secondly, the back corner of my cabinet had a vertical beam sitting kitty corner that I needed to leave room for.
You can see the finished shelf here. Now it was time to take it inside and see how it fits.

And… it didn’t fit.
I tried every which way to get that shelf into the cabinet, and no matter which angle I tried, it just wasn’t happening.


I put the shelf into my former Lazy Susan cabinet as far as I could possibly get it to go, and then I marked how much of the shelf was still sticking out. I then took the shelf back to the table saw and cut off just about 3/4 inch (the amount that was sticking out) from just one edge. I then brought the shelf back inside, which fit perfectly this time.


A lot of DIY is trial and error. You may have a bigger cabinet opening where this is not an issue, or you may have to go back and cut a little more off like I did. If I had known I was going to do this while we were designing the kitchen, I would have made sure to do this part before the countertops were installed so I could just lower the shelf in from the top.
Adding Cleats for the Shelf
I really wanted to store large items in this cabinet, so I decided to add one single shelf right in the middle of it. I measured the height of my cabinet opening, which was 27 inches. I divided that measurement in half, leaving me with 13.5 inches. Now, I knew how high to install my cleats.

What are cleats? A cleat is a piece of wood or metal used to support a shelf. For my cabinet, I’m going to use wood cleats that will run around the interior and sit underneath the shelf, giving it both strength and stability.
I’m using strips of plywood for my cleats, but have one little problem.
You can see here that because I had to trim my shelf down to make it fit into the cabinet opening, the gap on the side would now be bigger than the width of my cleat. Fortunately, this was only going to be a problem on the one side that I had trimmed down. My solution was simple. I decided to double up the cleats on that side giving the shelf an extra thick area to sit on.


To install the cleats I used my laser level to set the height all the way around the cabinet. I measured and cut the cleats to be the right length, then attached them directly to the inside of the cabinet using my brad nailer.


Installing a Shelf in the Former Lazy Susan Cabinet
Once the cleats were added all the way around, it was time to put the shelf in place. I used my brad nailer and went around the border of the cabinet, just attaching the shelf to the cleats in a few places. This will keep the shelf from sliding around on me.

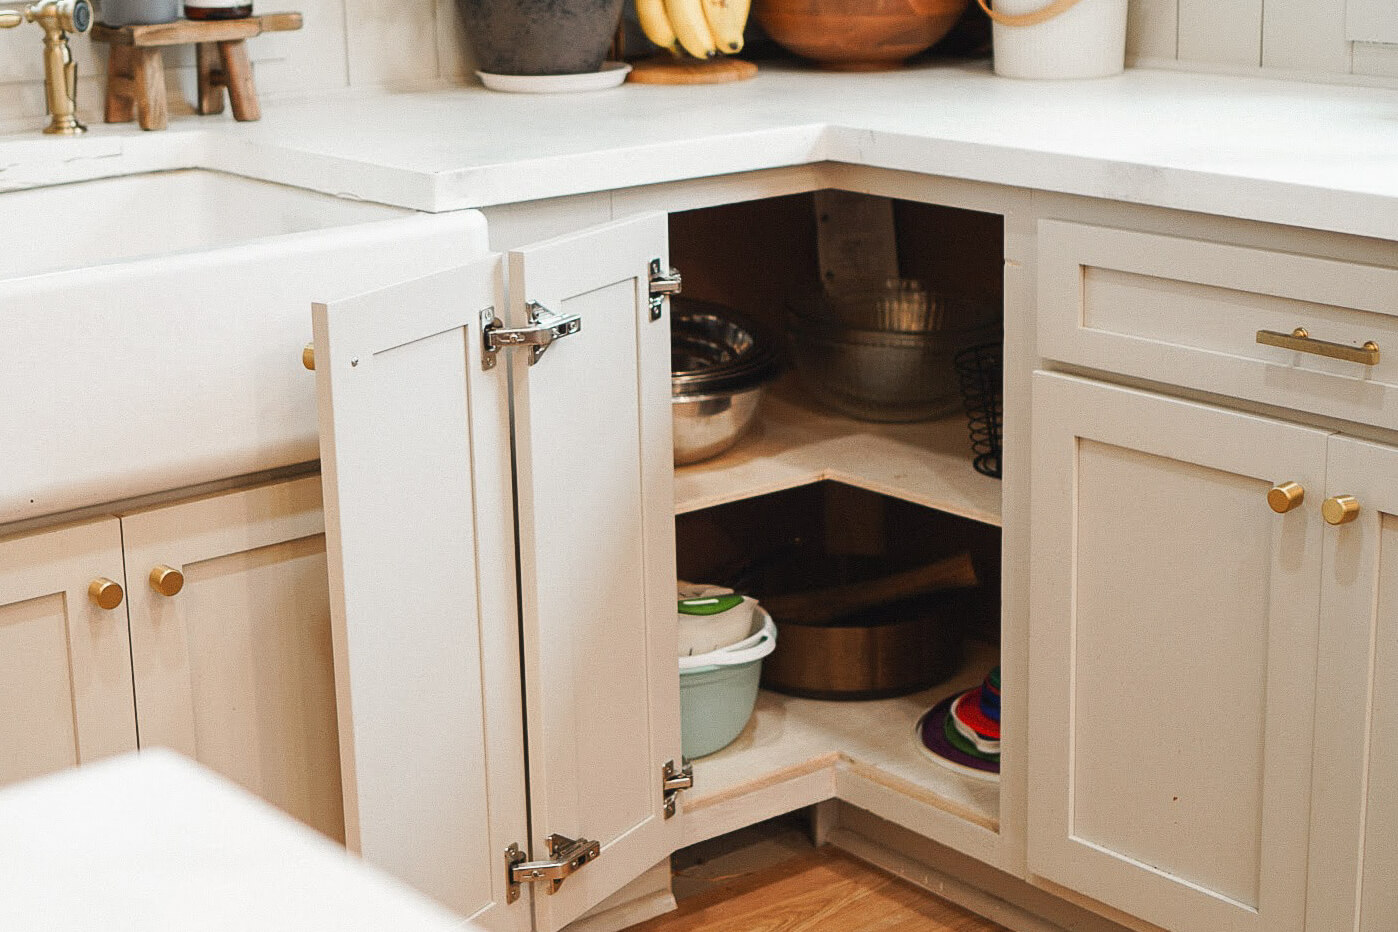
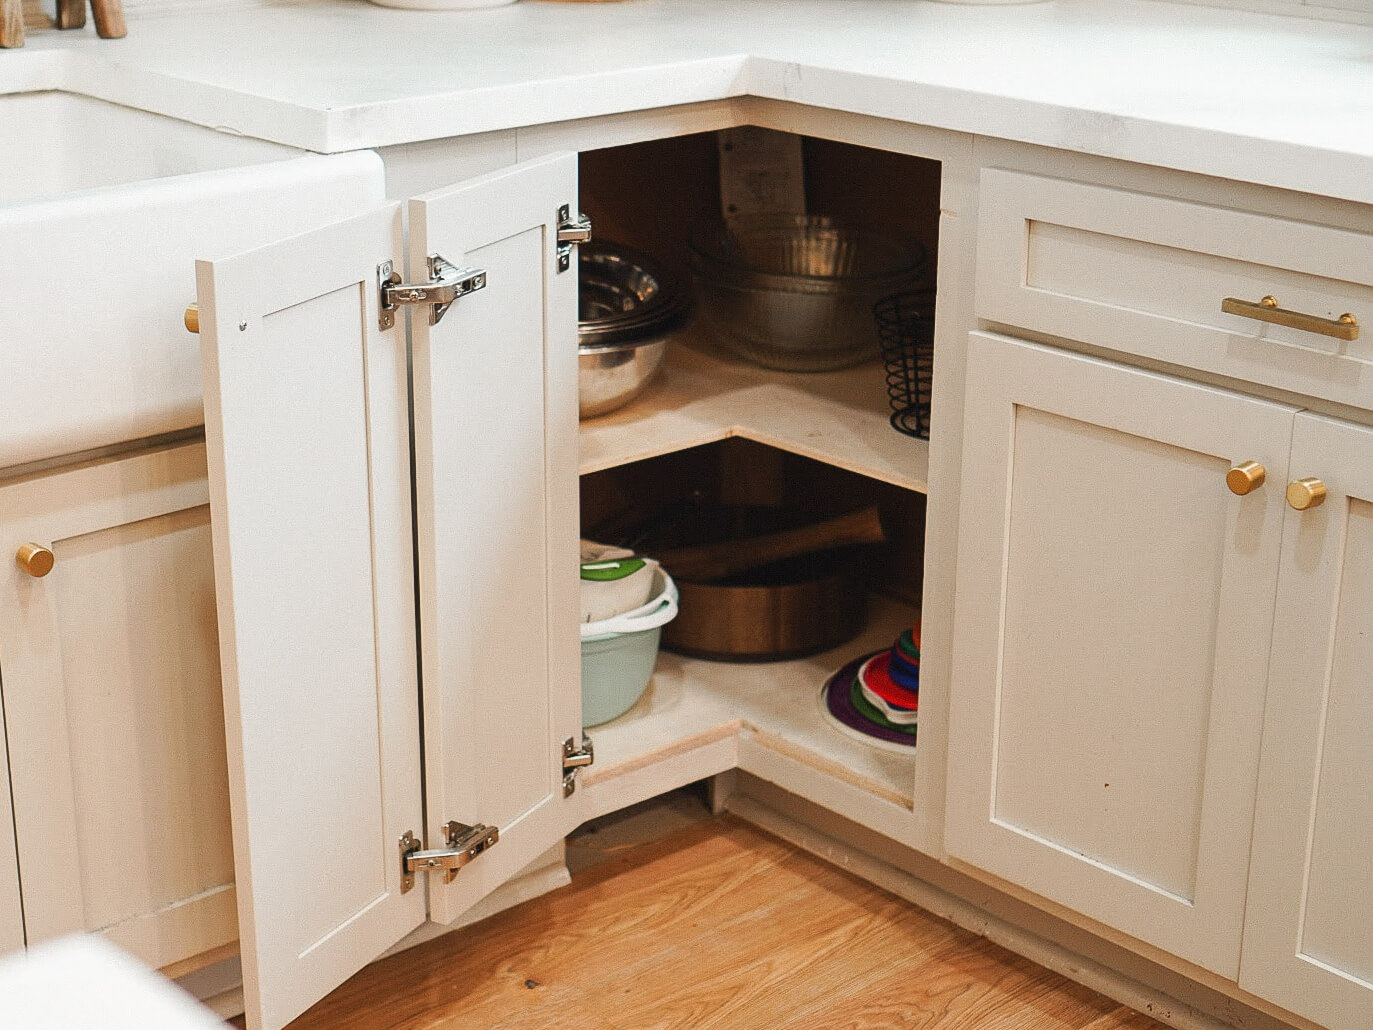
Look how much more space I have! This cabinet isn’t even full yet, but it’s already holding way more than it ever did as a Lazy Susan cabinet.

I know that some people really love their Lazy Susan cabinets, and that is fine. For me, this just works so much better. I only store large items in here, so I really don’t have to worry about things getting lost in the back, and the hinged, corner door gives me plenty of access to reach everything with ease.
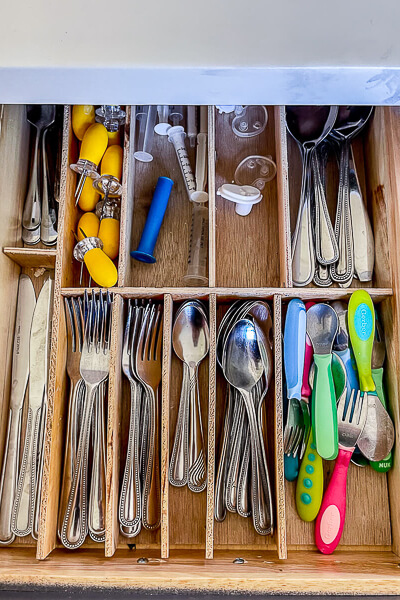
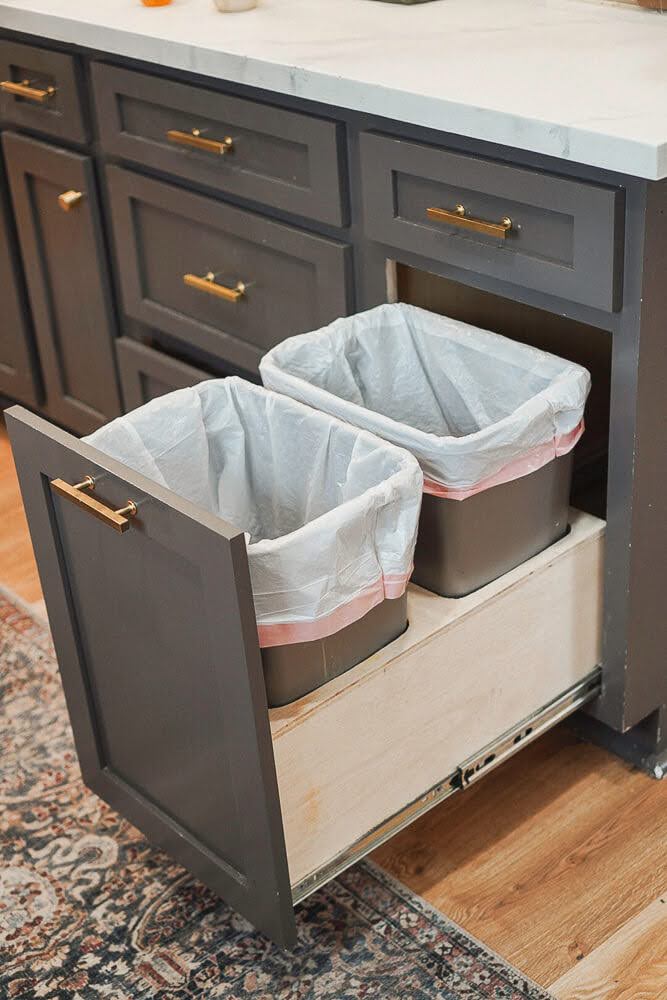
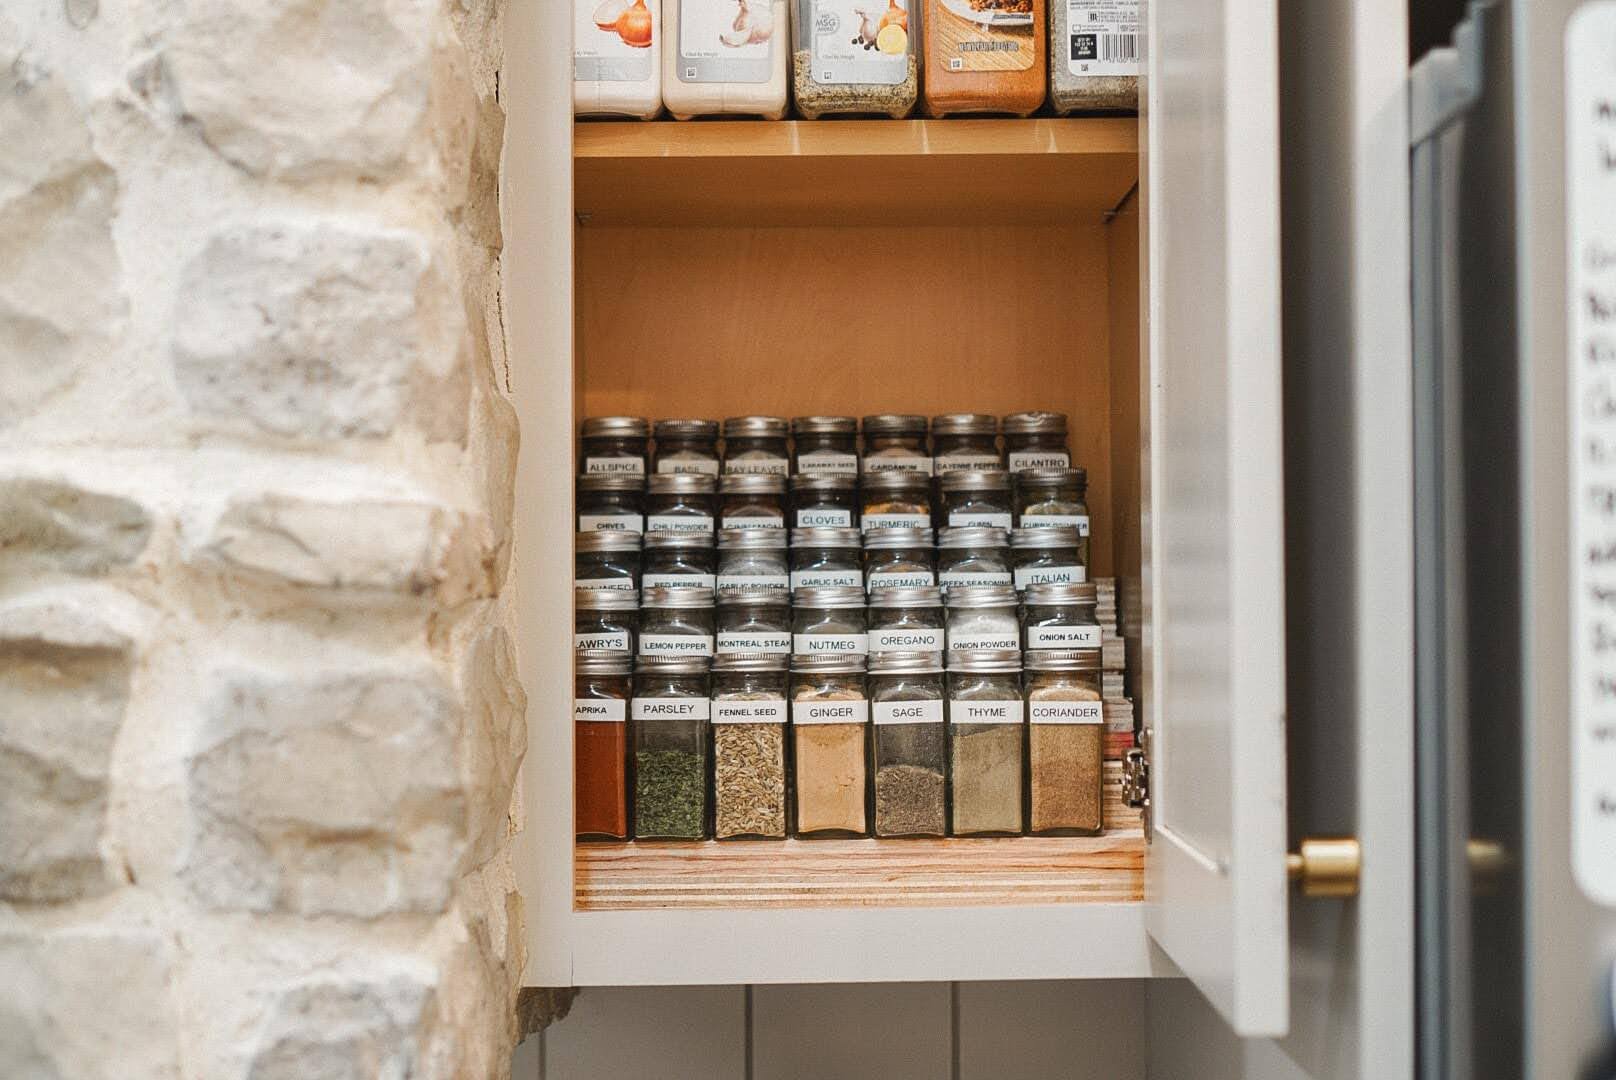
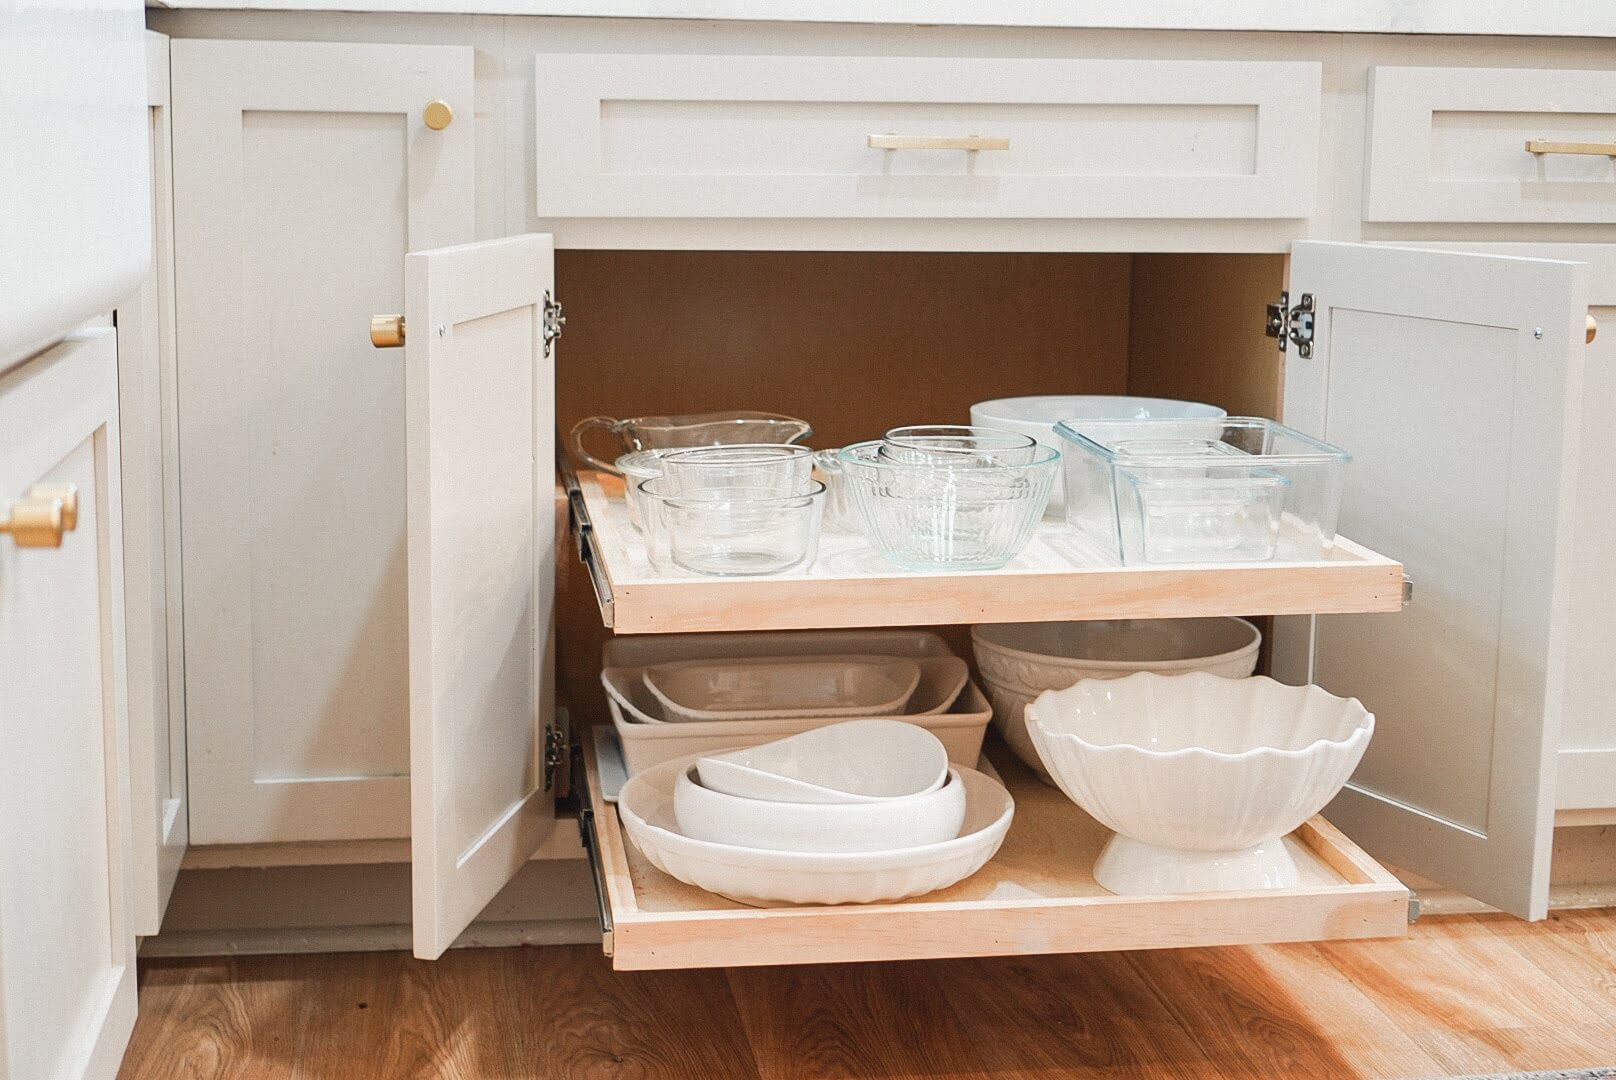
When redoing my kitchen, I had some major projects, like fabricating a stone range hood, but several smaller projects, like this one, had a big impact on its organization and functionality. I added wooden drawer organizers, built a pull-out trash cabinet, made a tiered spice rack, and built pull-out shelves for my cabinets.
If you decide to remove your Lazy Susan cabinet and change things up to shelves, I would love to hear about it in the comments! Us Lazy Susan haters have to stick together.


This is great! We are trying to figure out the same cabinet in white for our daughter’s first home. How did you get the door to hinge?
Hi Debbie – The door already had hinges on it. I reused the ones they had. But you can buy a corner cabinet hinge online.