


DIY Guide for Extending Kitchen Cabinets to the Ceiling


Updated July 13, 2026
Take your kitchen cabinets to new heights by extending kitchen cabinets to the ceiling for a stylish and practical upgrade. I’ve got the lowdown on maximizing space, adding high end style, and turning your kitchen into the envy of the neighborhood. Let’s get creative with cabinet extensions!
Why Am I Extending Kitchen Cabinets to the Ceiling?
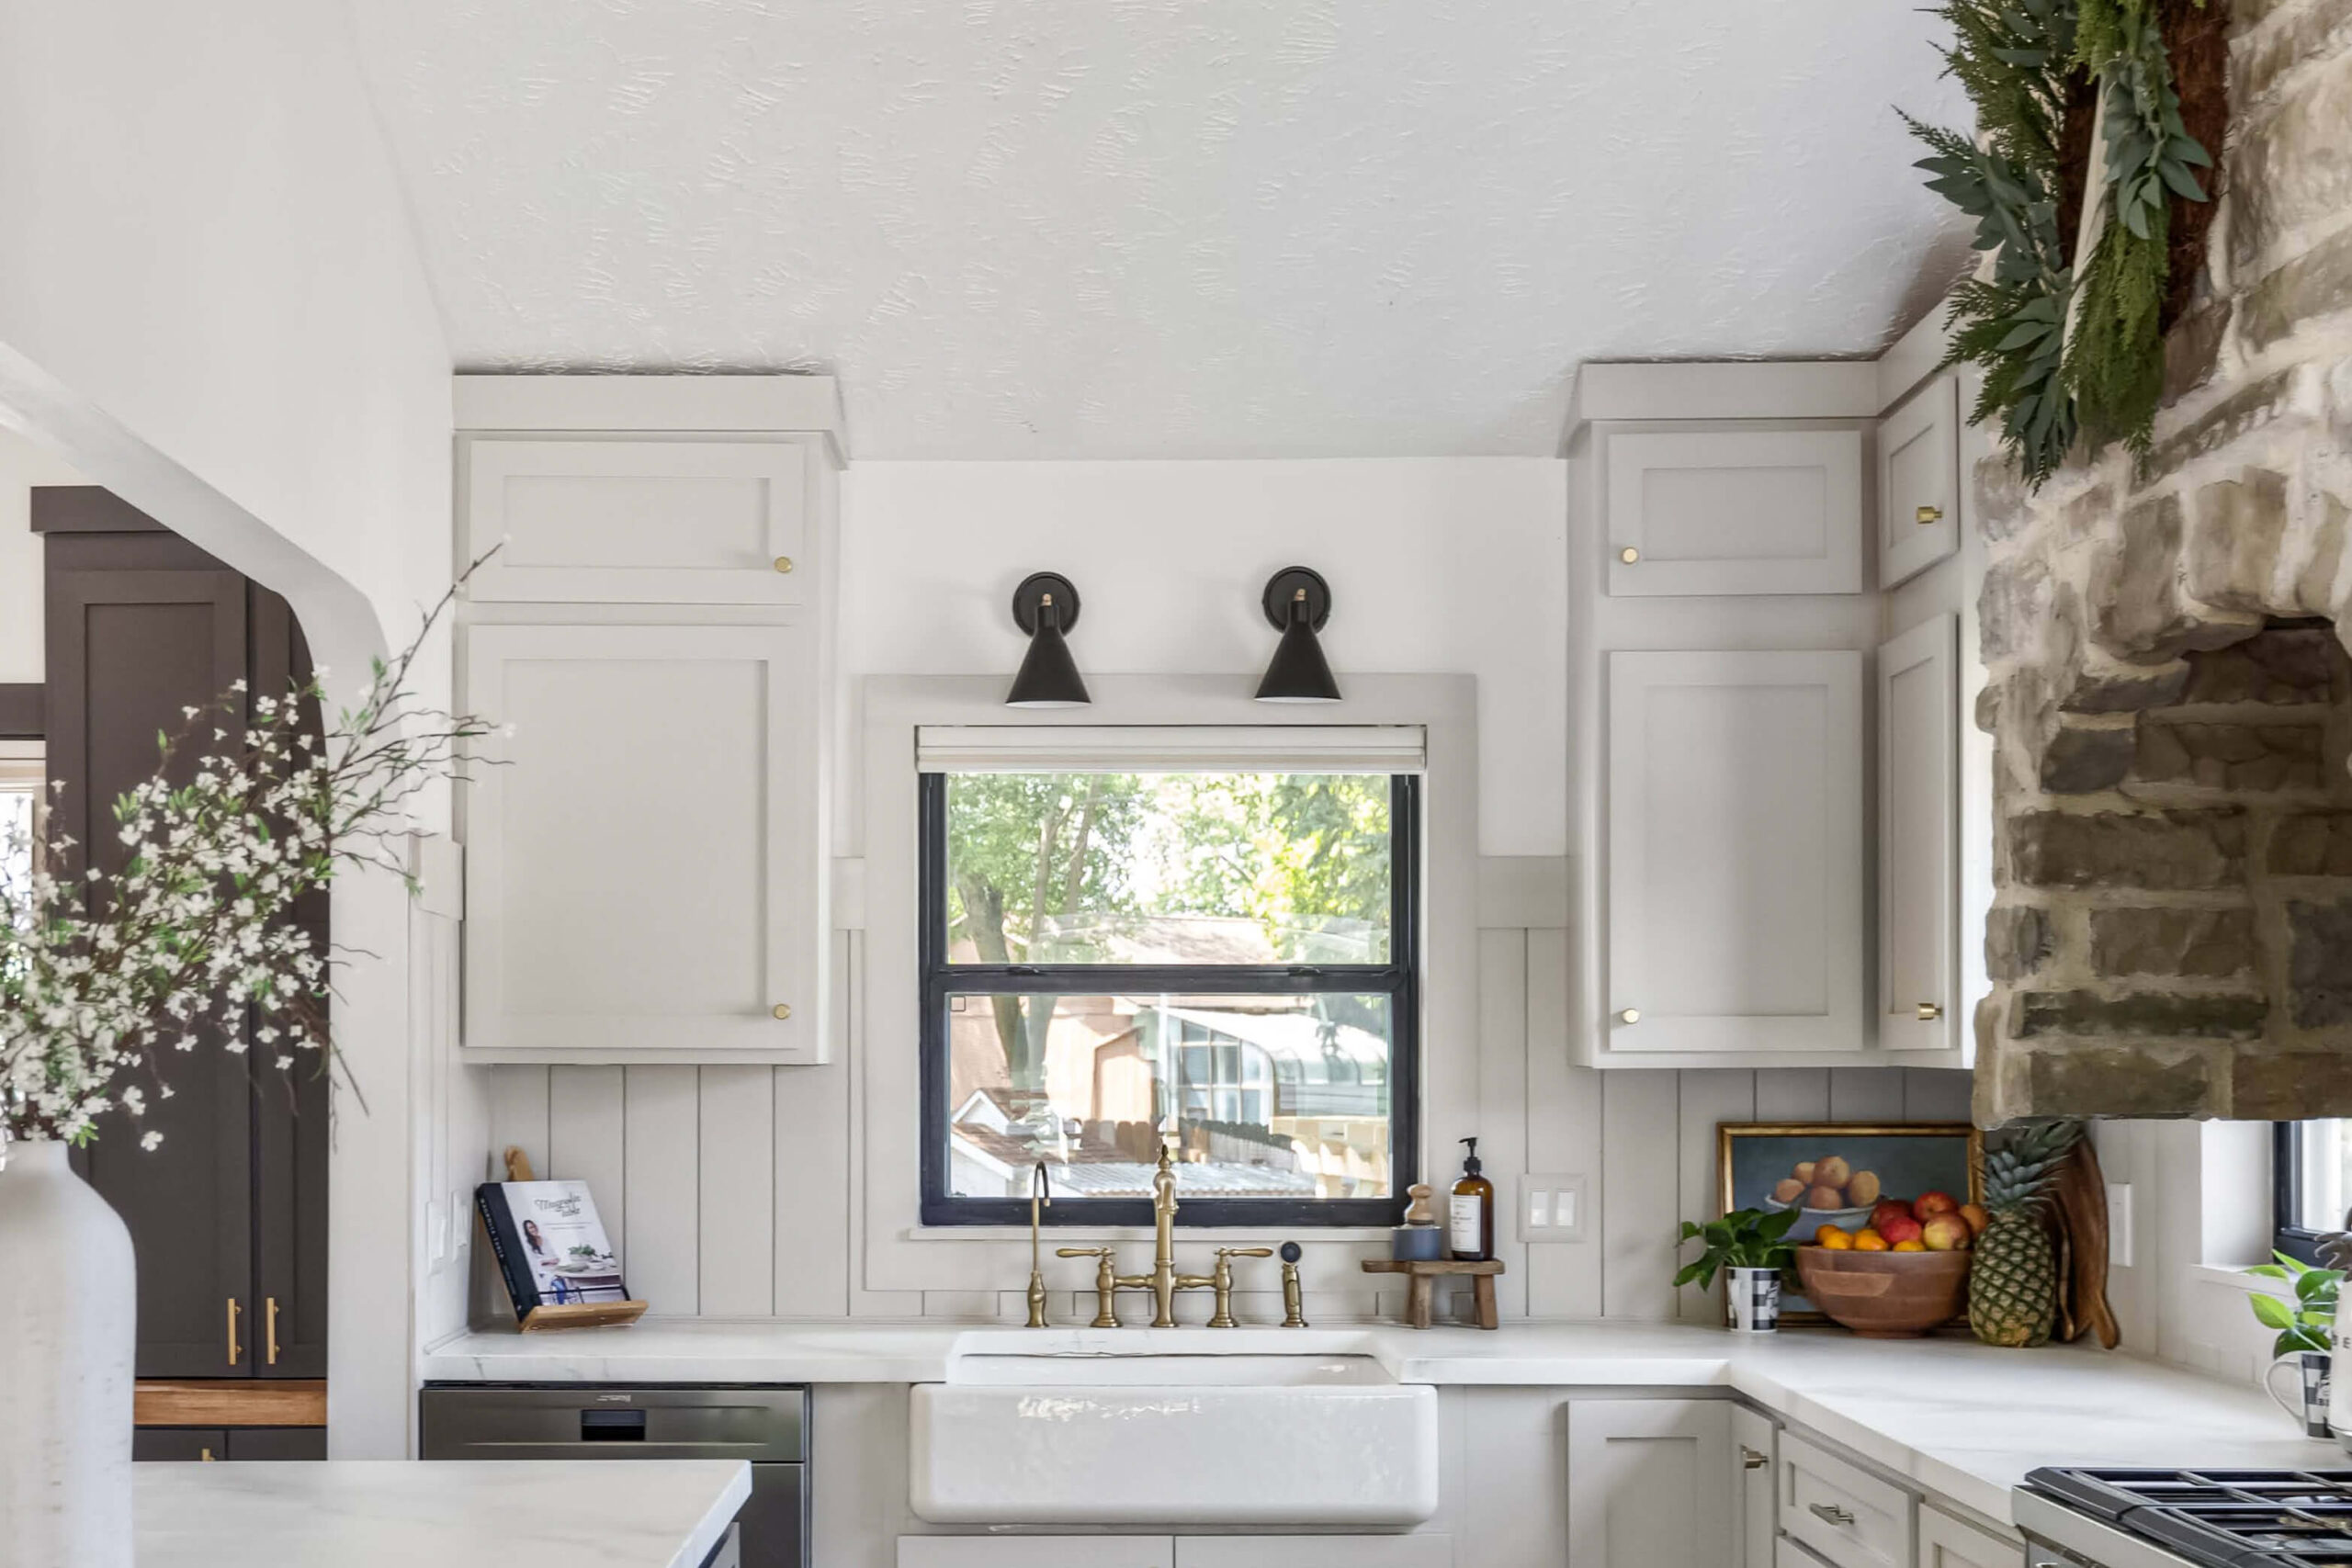
I started with stock kitchen cabinets that we purchased from Home Depot for my kitchen remodel. Here is a photo taken shortly after I finished installing them. See all that empty space I have above those stock, upper cabinets?
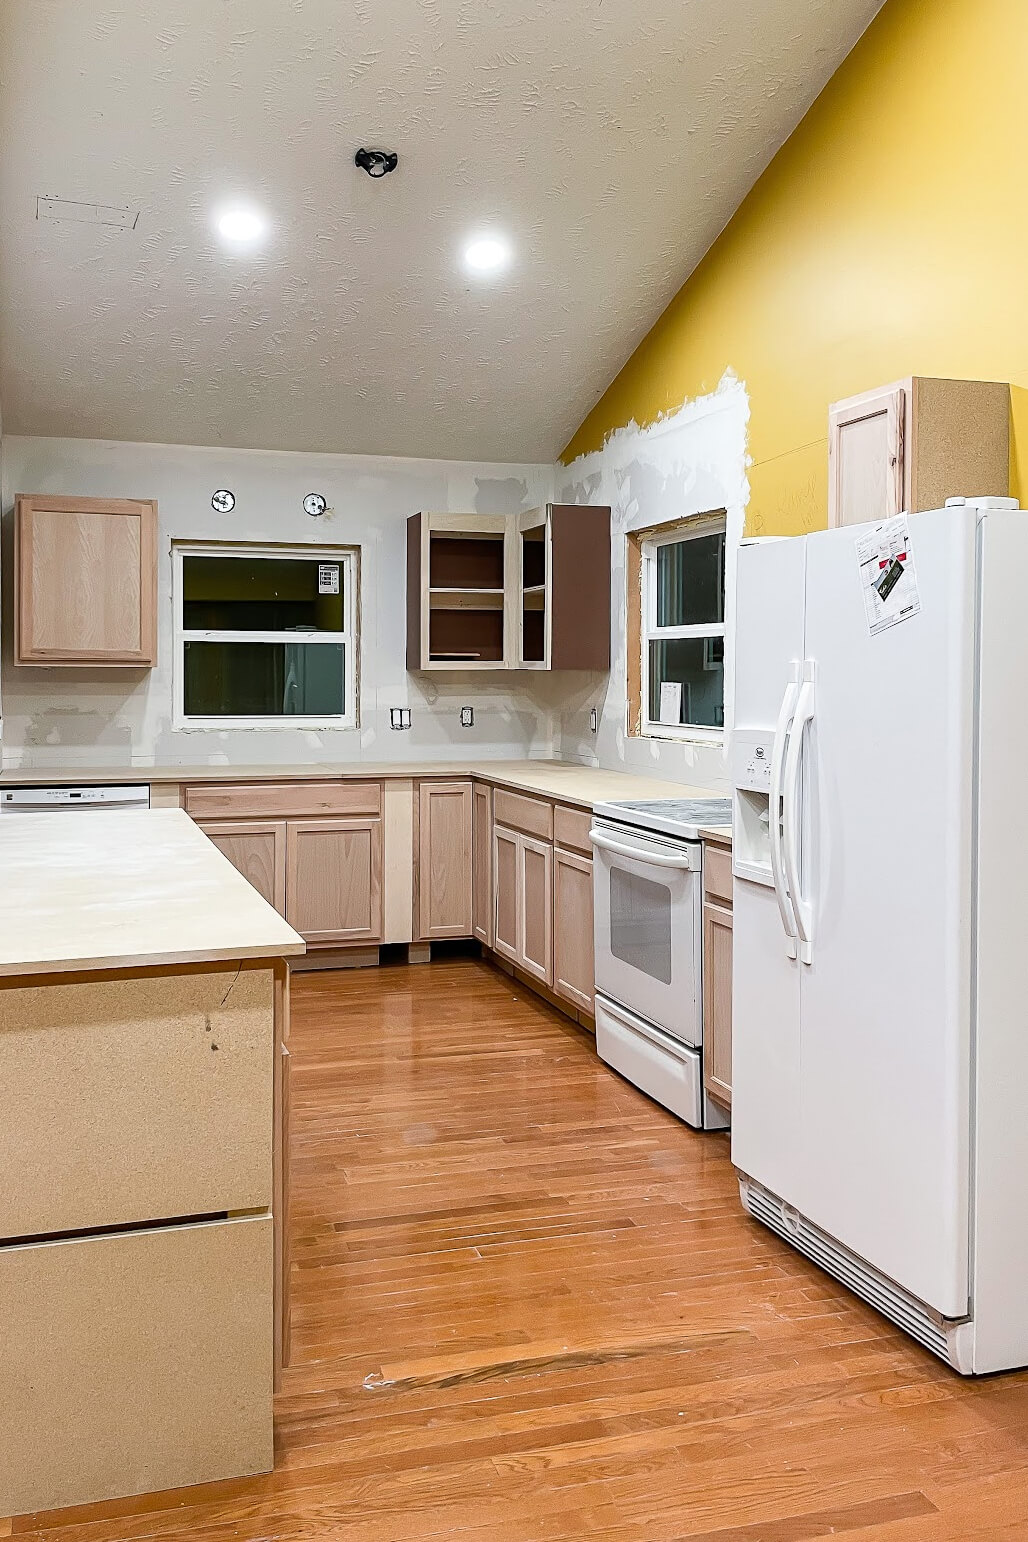
By extending kitchen cabinets to the ceiling, I’m adding a design feature to draw your eye up, making the room feel bigger and more luxurious. And I am also adding practical storage space for items I use less often.
What You Need for Extending Kitchen Cabinets to the Ceiling
Tools
- Tape measure
- Table saw
- Kreg pocket hole jig
- Brad nailer
- Miter saw
- Jig saw
- Small level
- Handheld sander
Materials
- 4 x 8 sheet of plywood
- 4×8 hardboard panel
- Wood glue
- Wood screws
- Brad nails
- Trim
Extending Kitchen Cabinets to the Ceiling – Basic Cabinet
In my kitchen, I had three sets of upper cabinets that I wanted to extend. One single cabinet against a wall, a corner unit, and a small cabinet by my refrigerator. I decided to start in the back corner of my kitchen and work my way around.
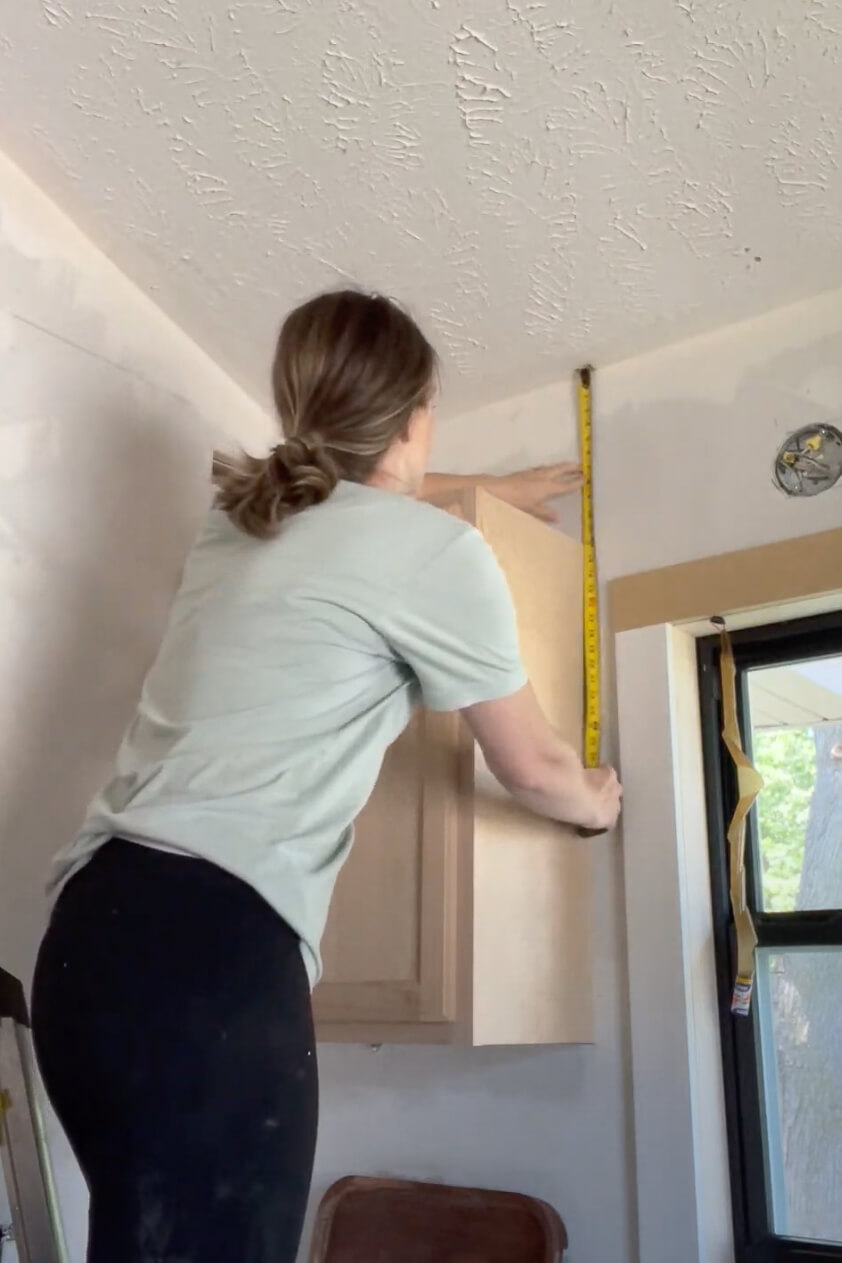
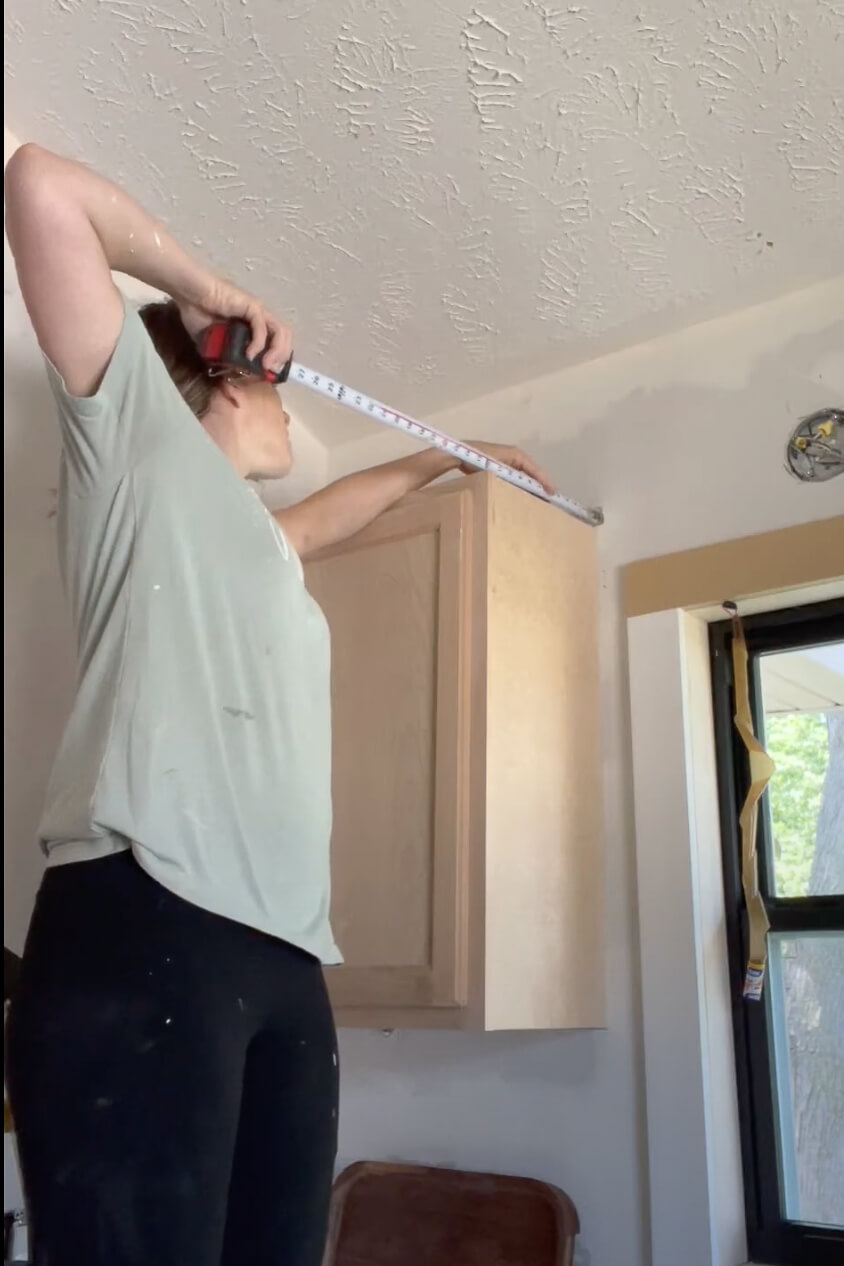
Step One: Measure
The first step in extending kitchen cabinets to the ceiling is measuring the space between the top of the existing upper cabinet and my ceiling. This way, I know how tall my extension cabinet needs to be. Next, I measure the width of the existing cabinet as well as the depth. When measuring the depth, you need to be careful not to include the face frame or the backing since those pieces will be added on separately.
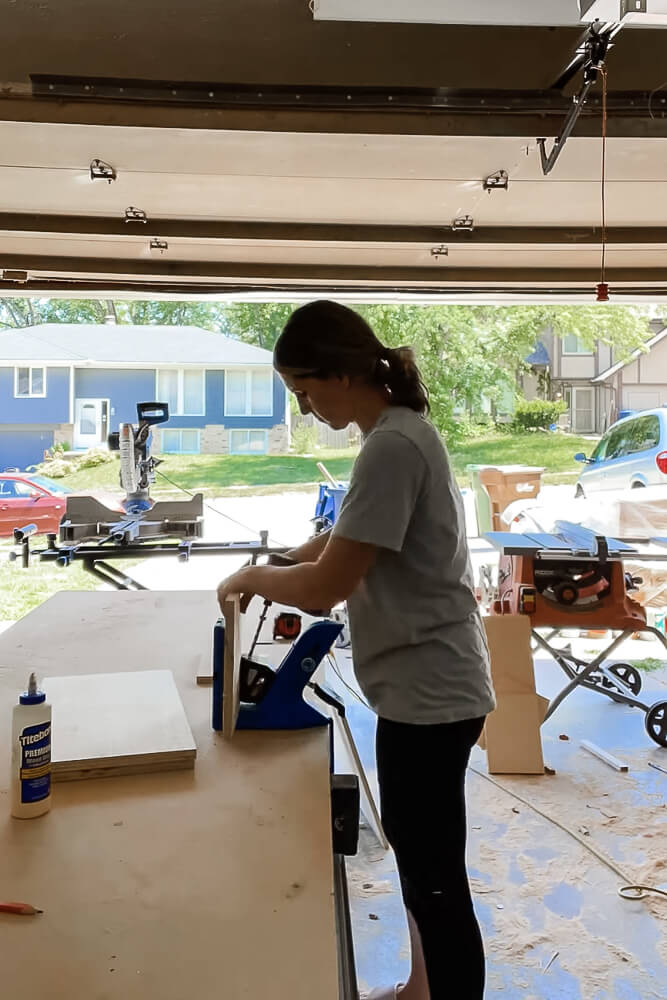
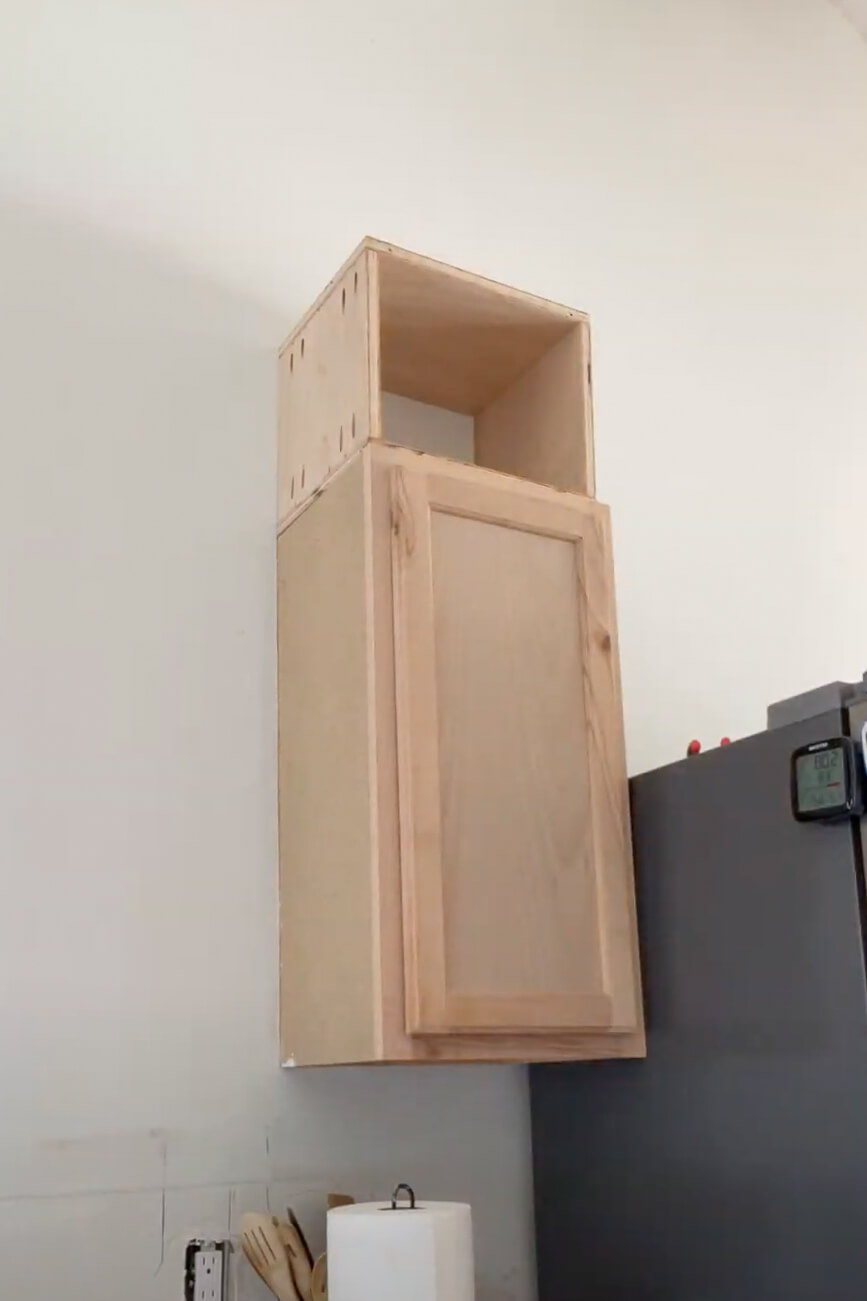
Step Two: Build a Cabinet Box
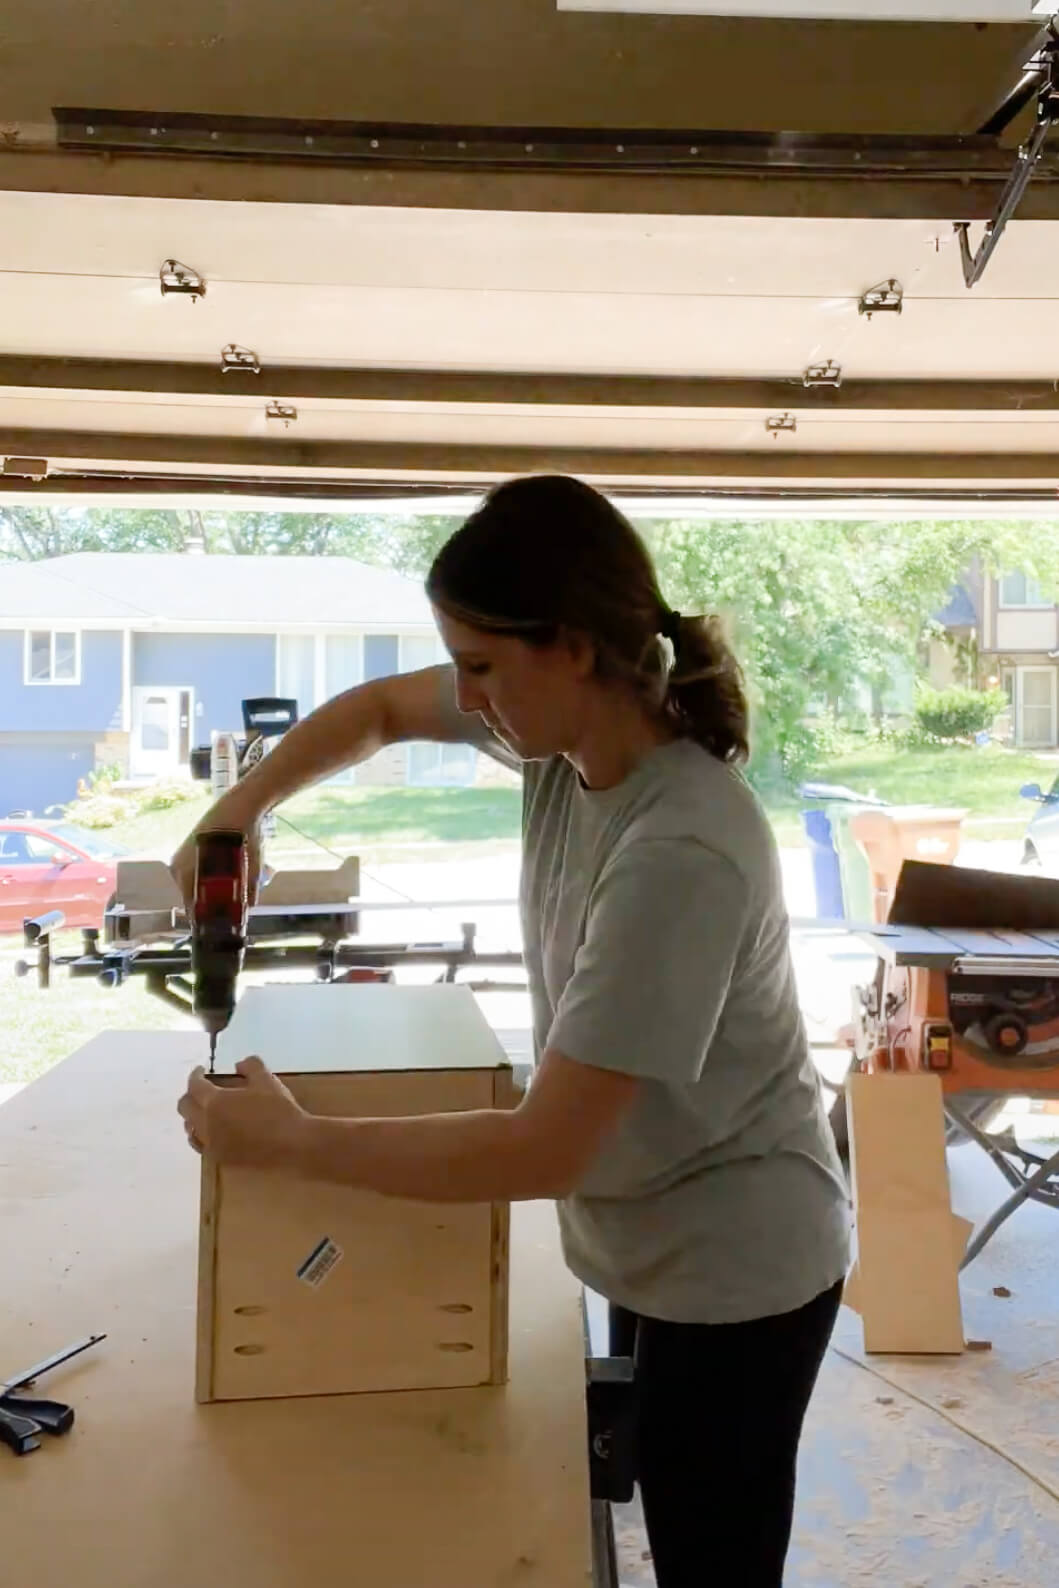
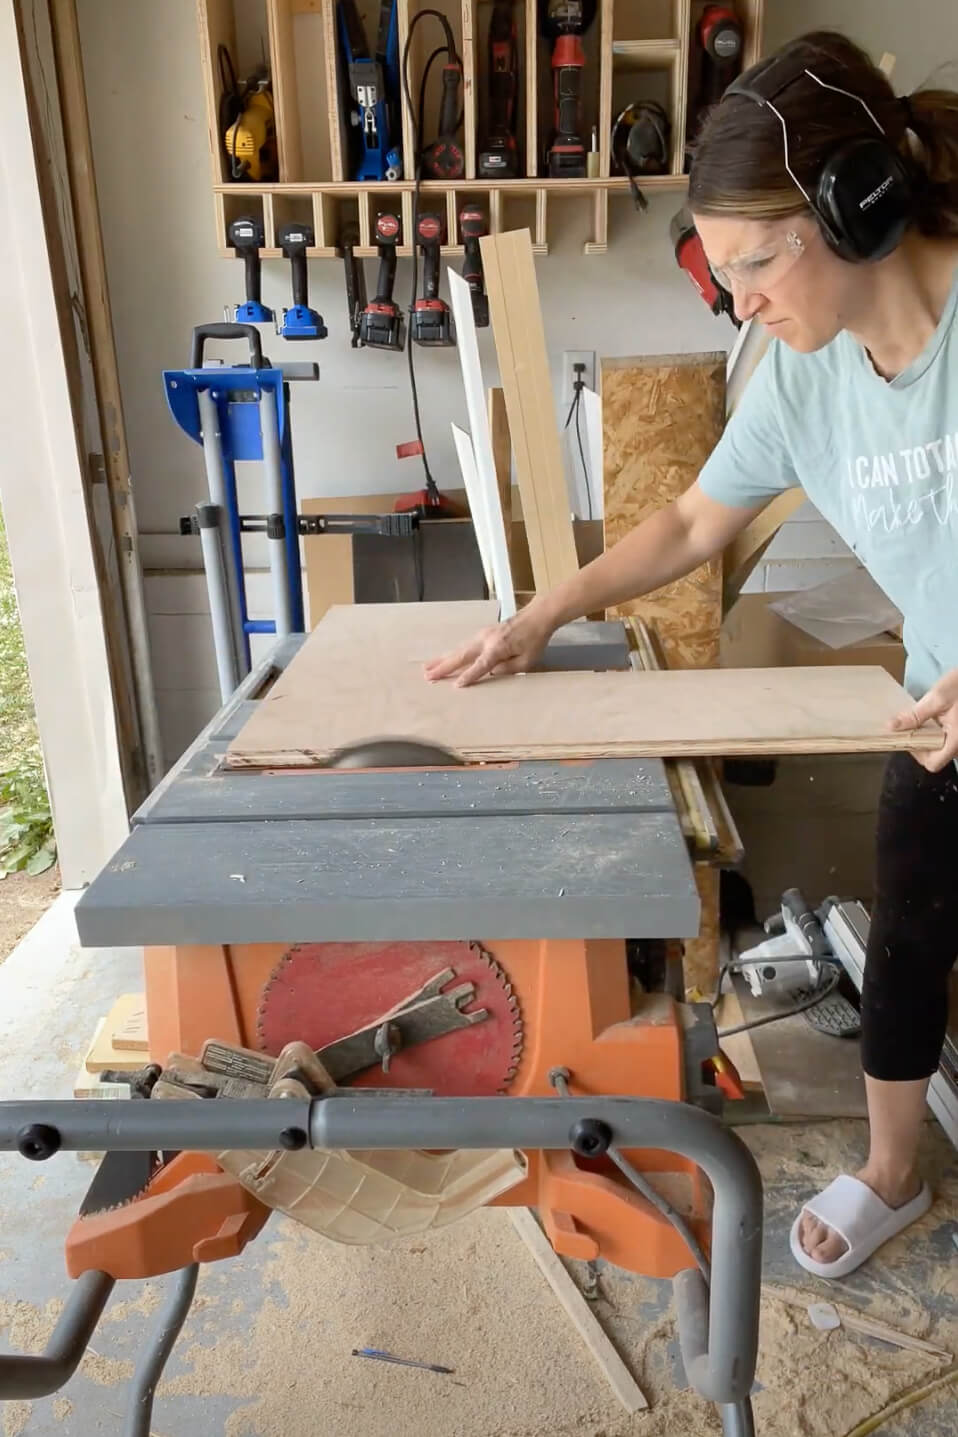
When extending kitchen cabinets to the ceiling, it doesn’t matter what shape or style your current cabinets are because you’ll begin with building a basic cabinet box. You’ll need a bottom, two sides, and a top. I used my table saw to cut these four pieces, then used my Kreg pocket hole jig to add pocket holes to the side pieces.
Pro Tip: When you add the pocket holes to the side pieces of your cabinet box, make sure they are on the side that will be on the outside. This way, they will either be covered by the wall or by a side panel piece.
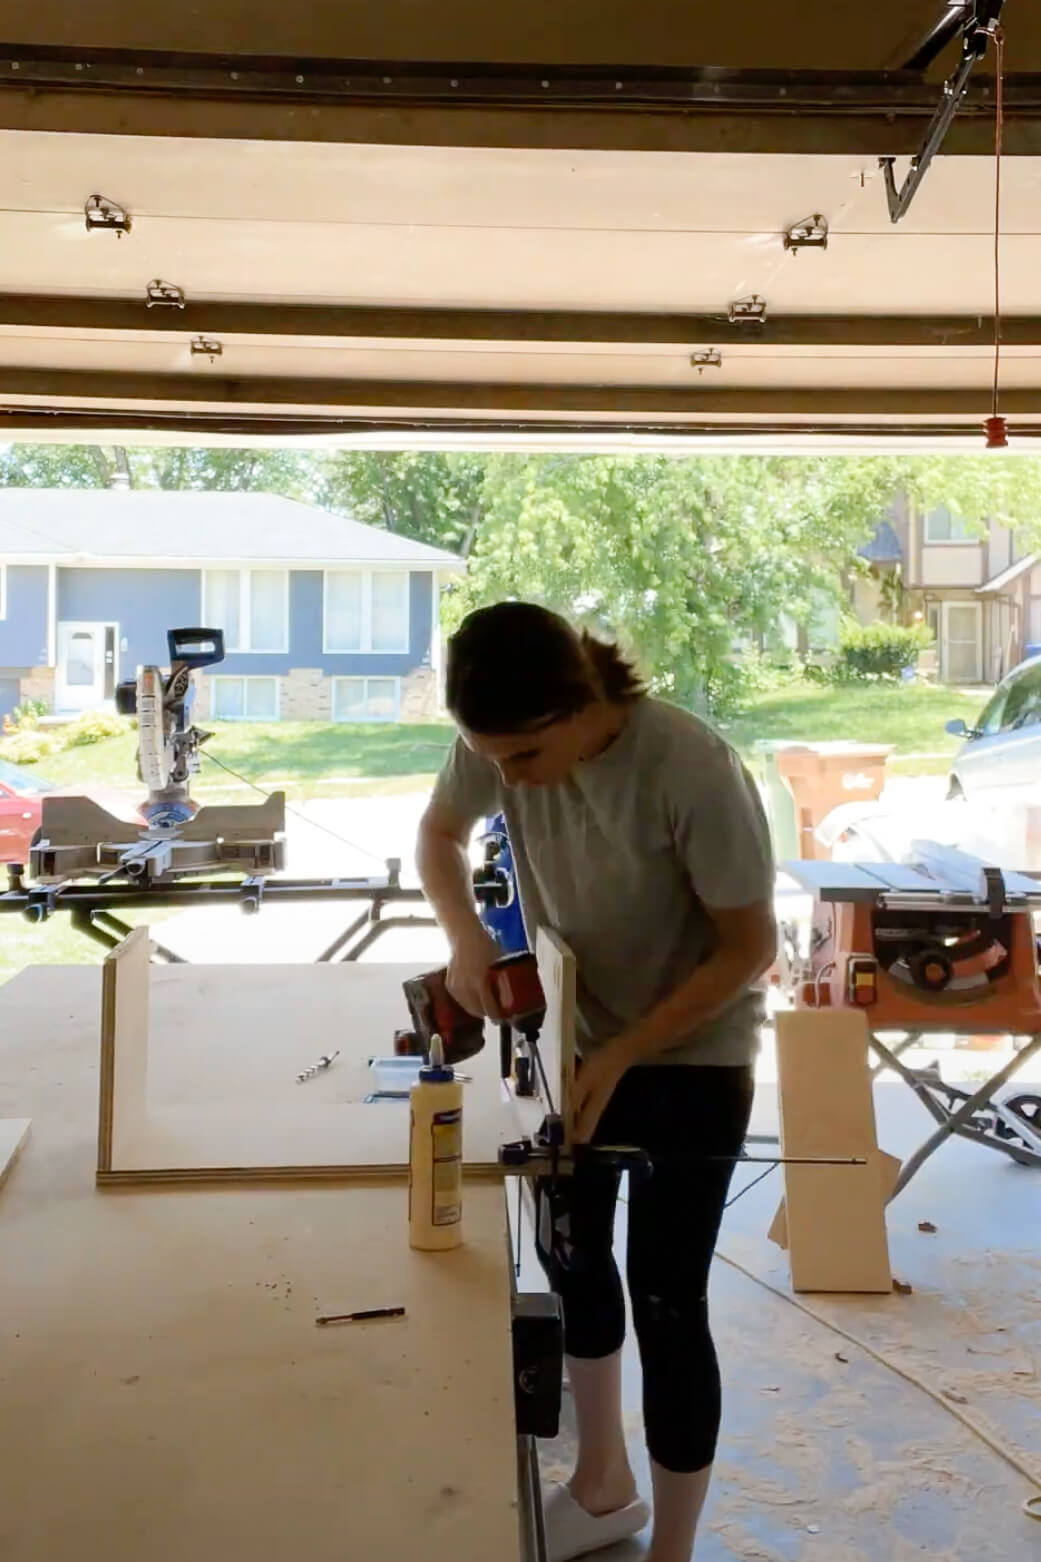
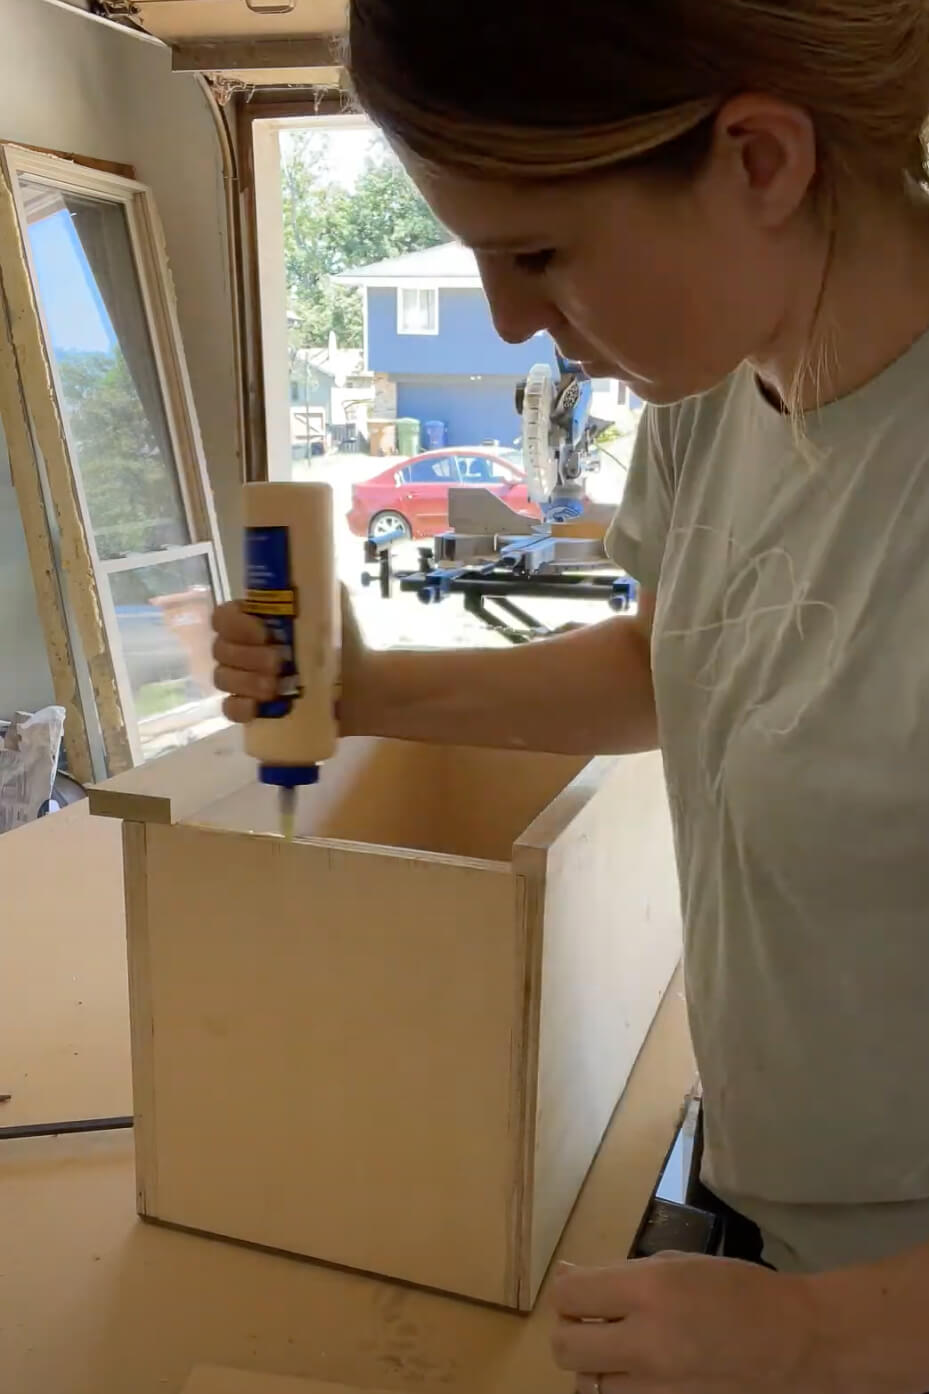
Now that I had all of my pieces cut out, and had put in the pocket holes, it was time to assemble my cabinet box. I added wood glue to all of the edges that would be touching and then screwed it together through the pocket holes that I had made.
If you’ve followed me for any amount of time, you’ll know that this is my go-to method when building big projects, or even small projects like these floating shelves. I use pocket holes, wood glue, and screws. It’s a great way to get a strong, durable hold, with a professional look.
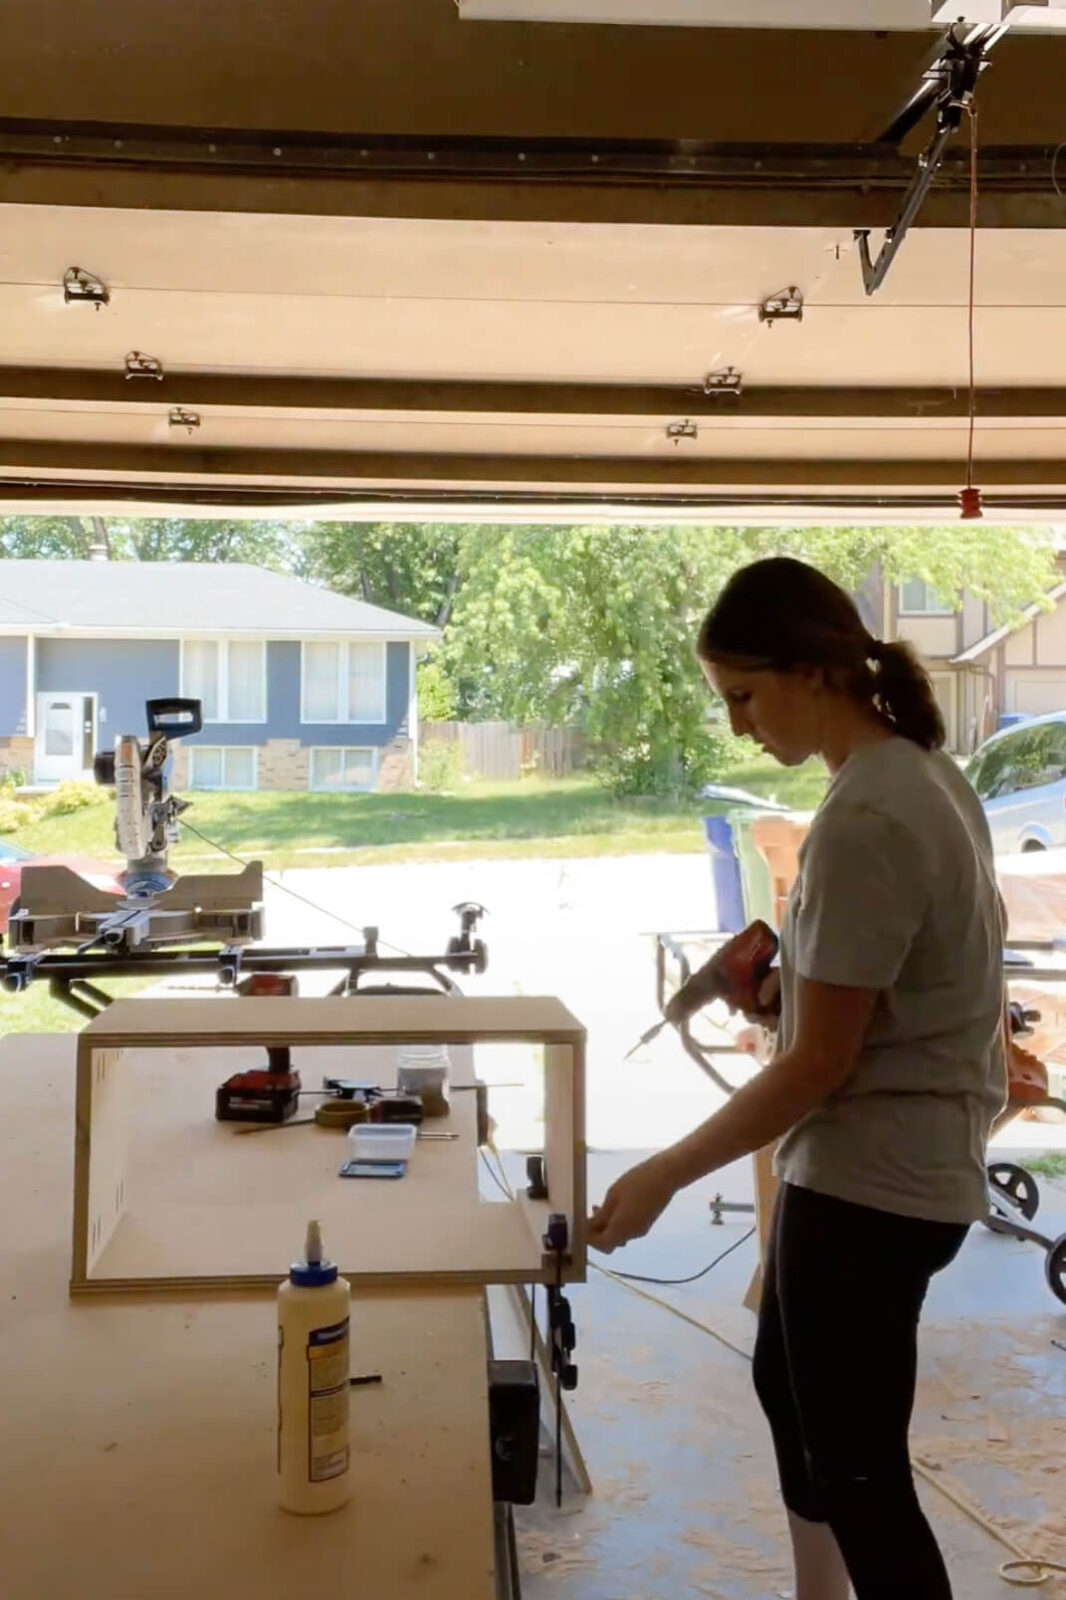
I’m using a 1/8″ thick hardboard for the cabinet’s backing. It’s inexpensive compared to plywood, and because of its thinness, it won’t take away from my valuable cabinet space. To add the backing, simply measure the back of your cabinet box, cut out a piece of hardboard to fit, then attach it with screws.
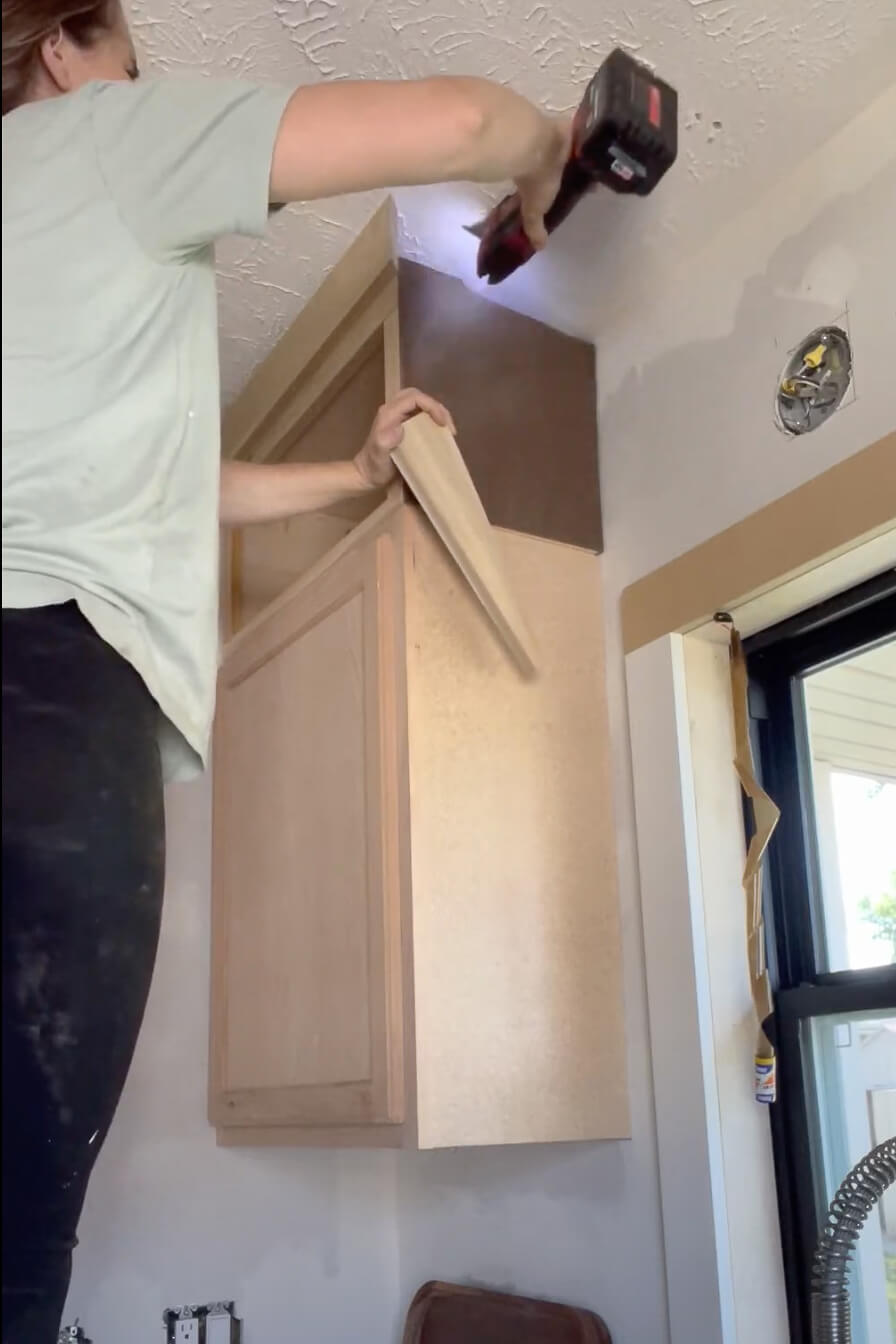
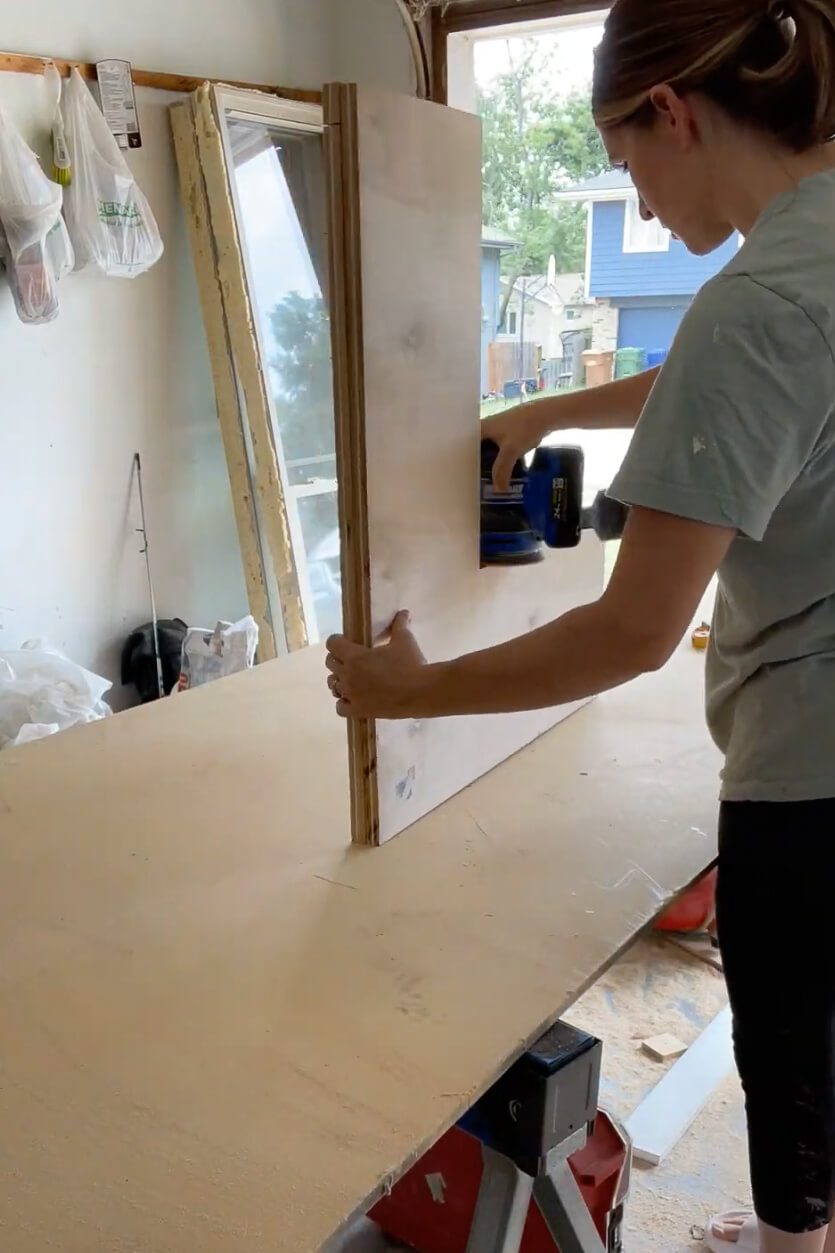
I wanted my cabinet to have a nice smooth finish, so I’m also adding the 1/8-inch hardboard to the side that will be facing out. Cut out a piece of hardboard that fits the side, then use brad nails to hold it in place.
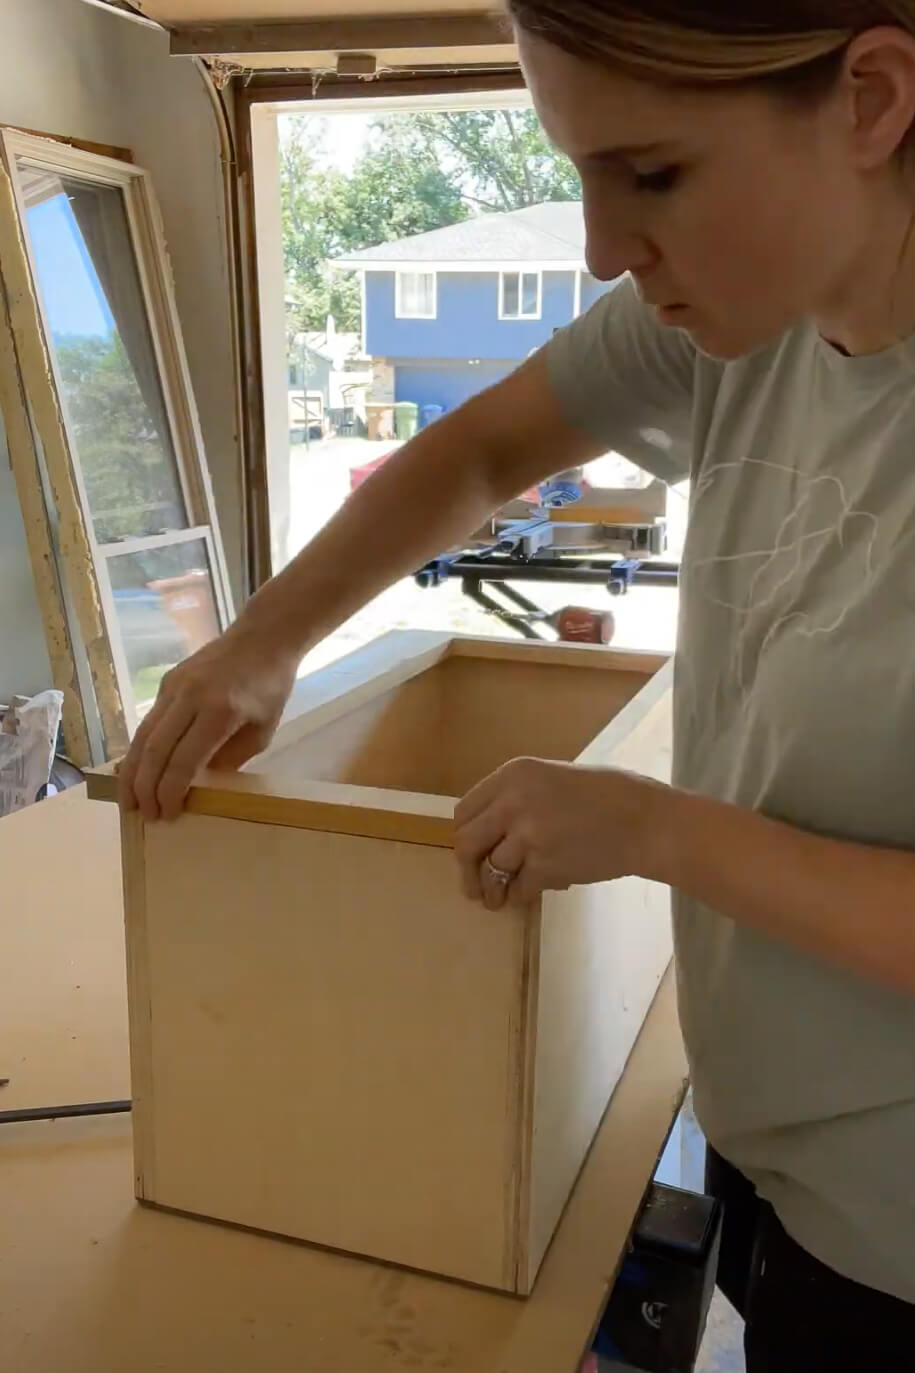
Step Three: Add Face Frame to Your Cabinet
Now that the basic box that will fill that space for extending kitchen cabinets to the ceiling is complete, you need to add a face frame to finish it off. When choosing what size of face frame to go with, I would look at what you have in the cabinet below, and continue with those sizes for a cohesive look.
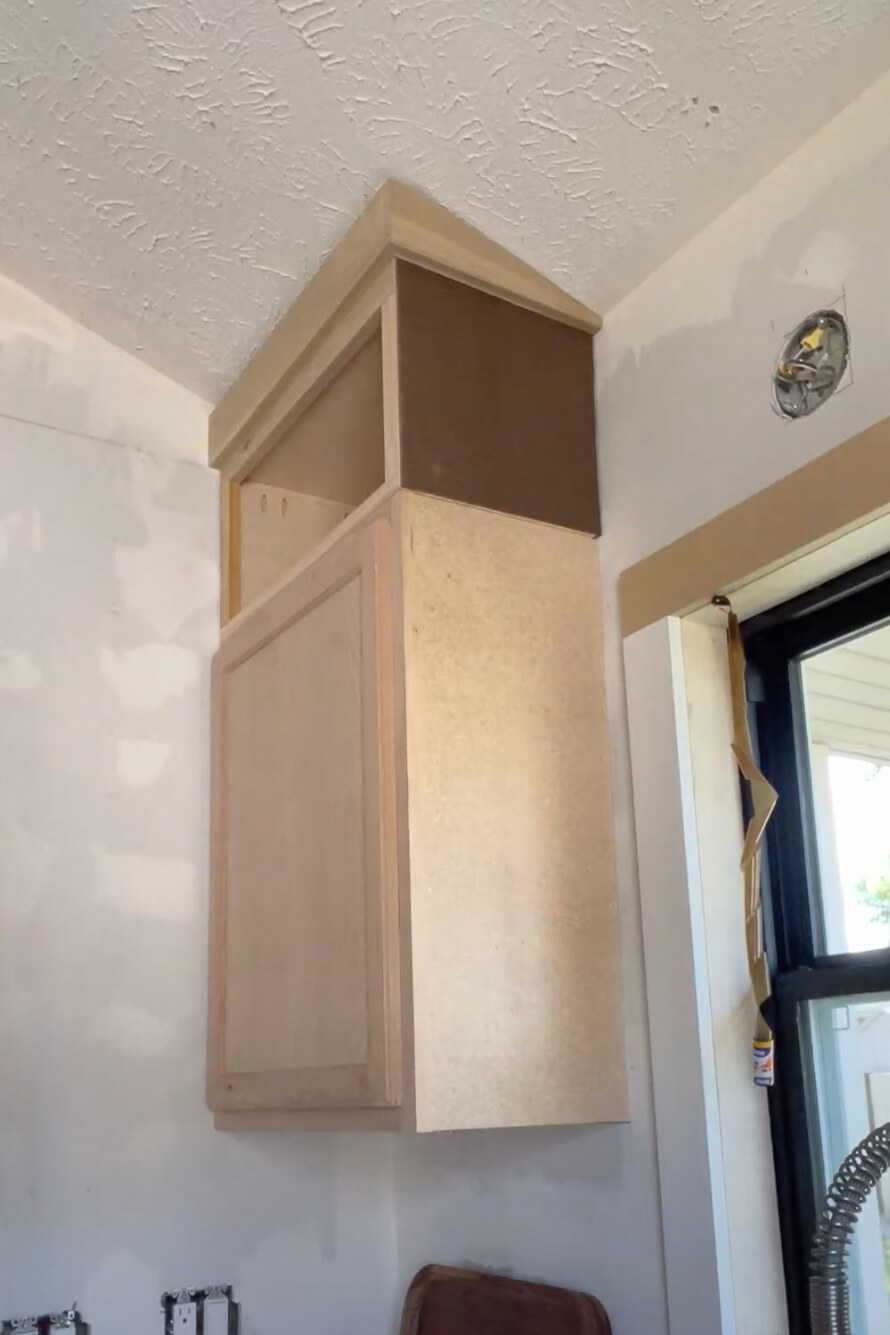
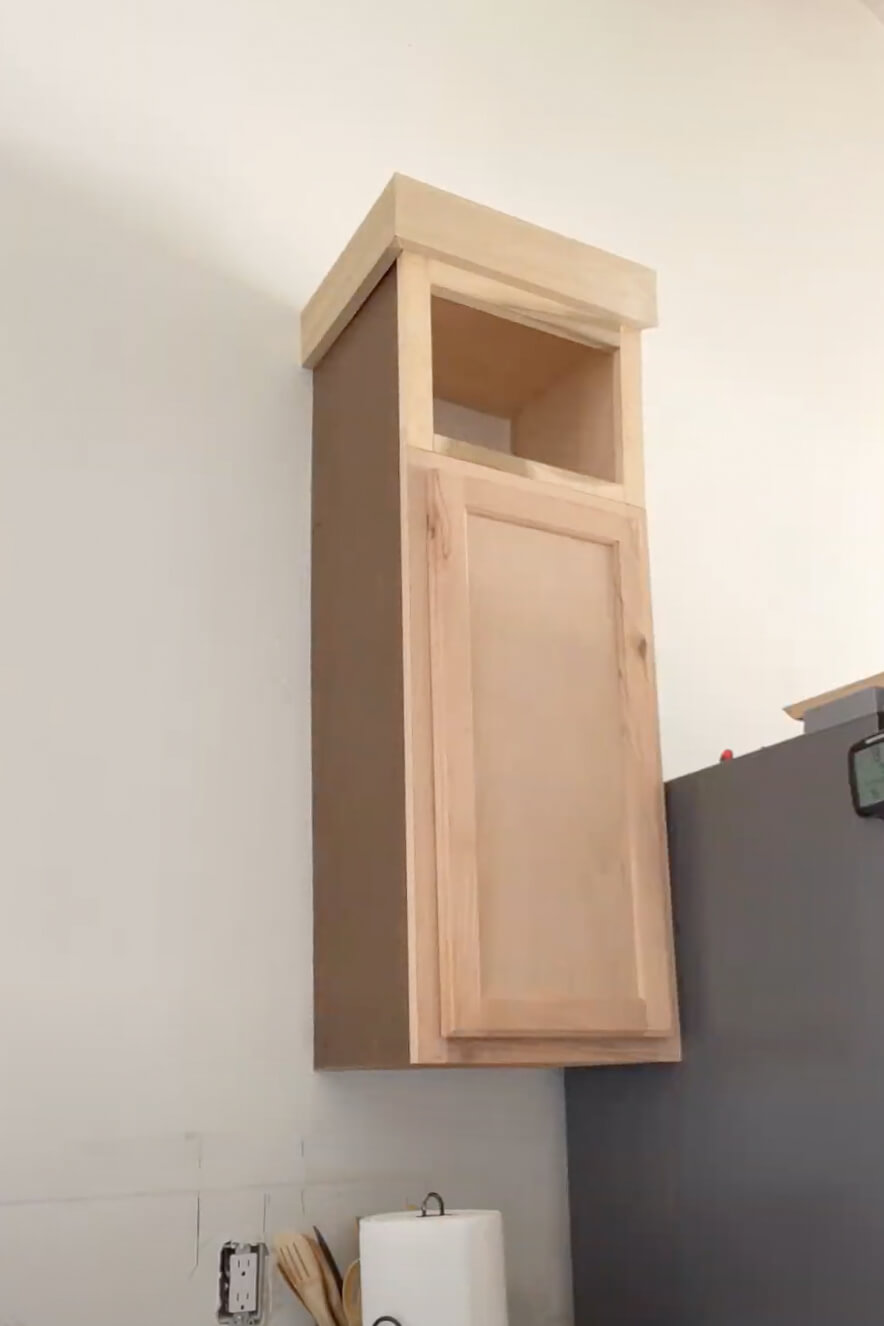
For the top, I did a 2 1/2-inch piece to give me the height that I needed to attach crown molding to later but still hang over the edge of the opening of my cabinet box. The bottom is a simple 1 inch piece that covers the edge of the plywood and sits nice and flush with the bottom of my cabinet. The sides are a 2-inch piece that overlaps the opening a bit but lines up with the outside edge of my box.
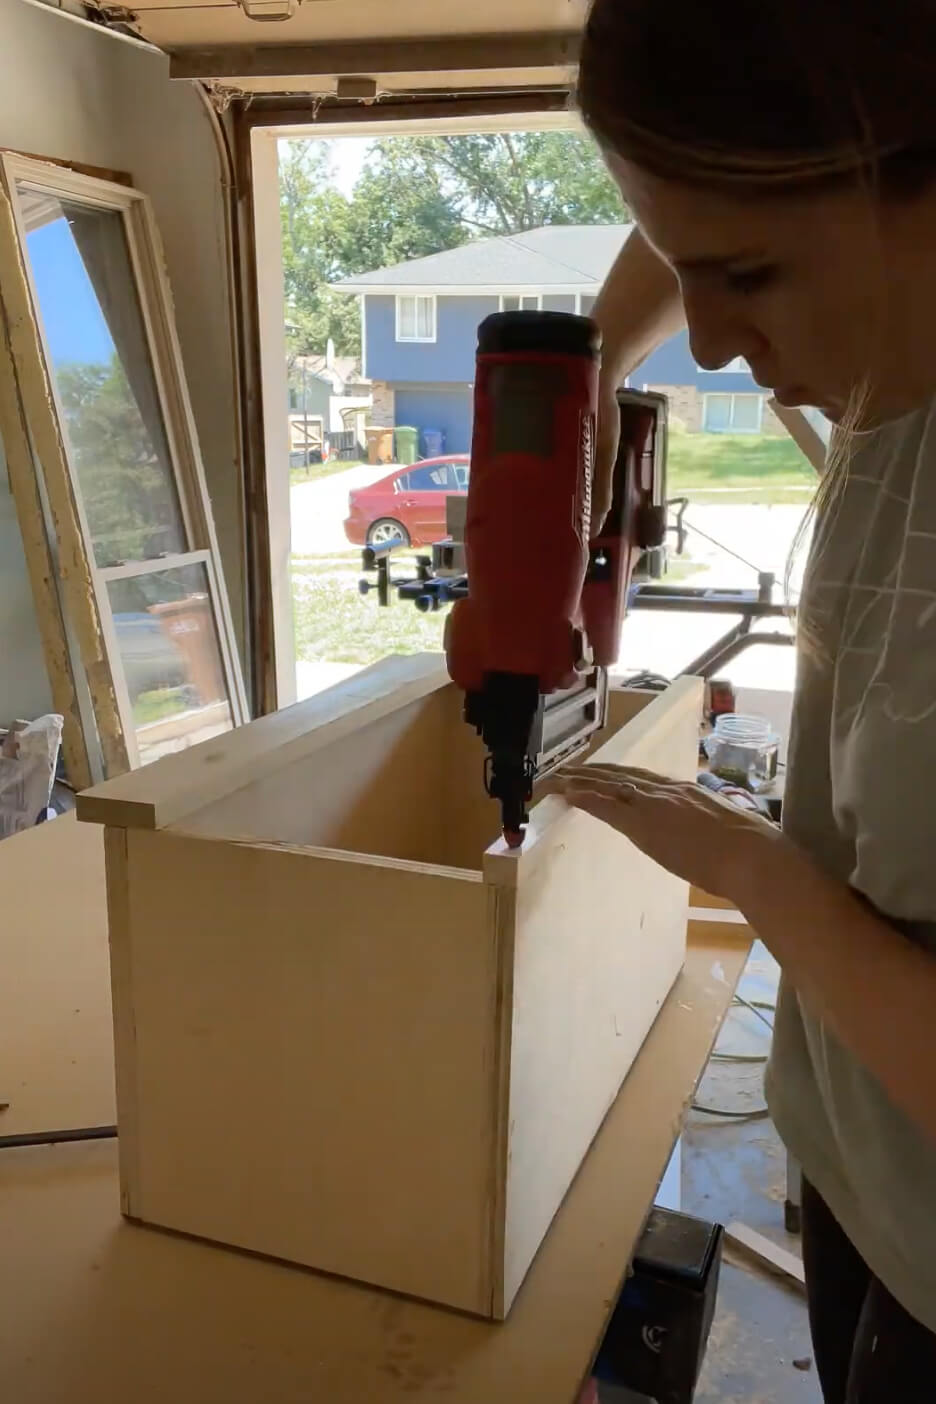
No matter which size of trim you use for your face frame, you will want to attach it using wood glue and a brad nailer.
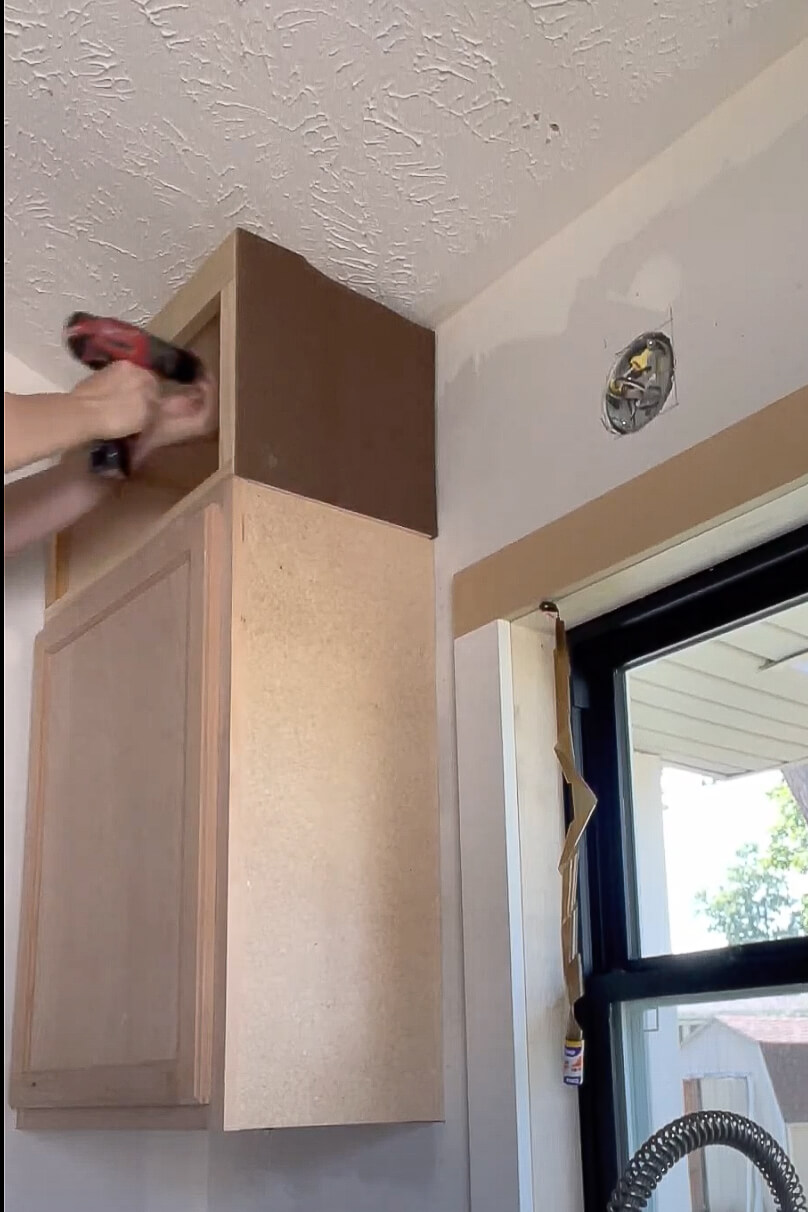
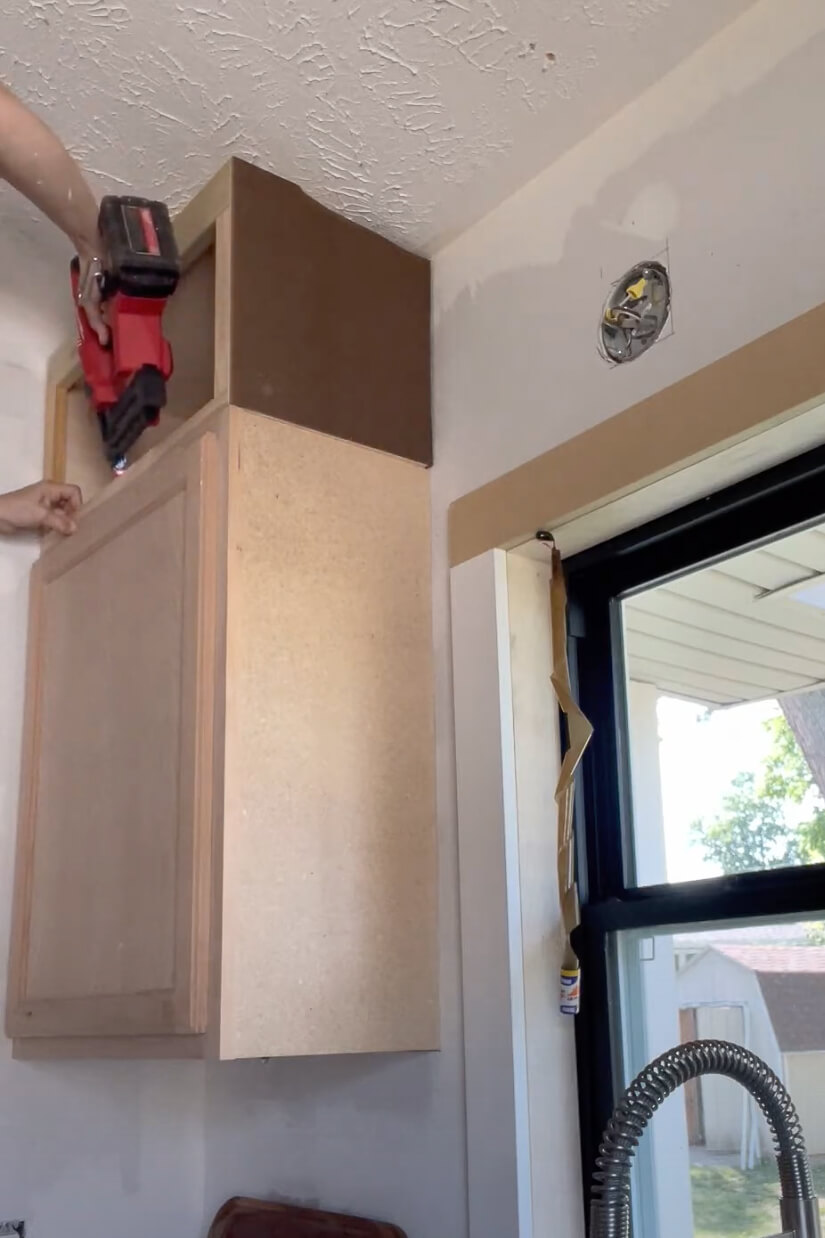
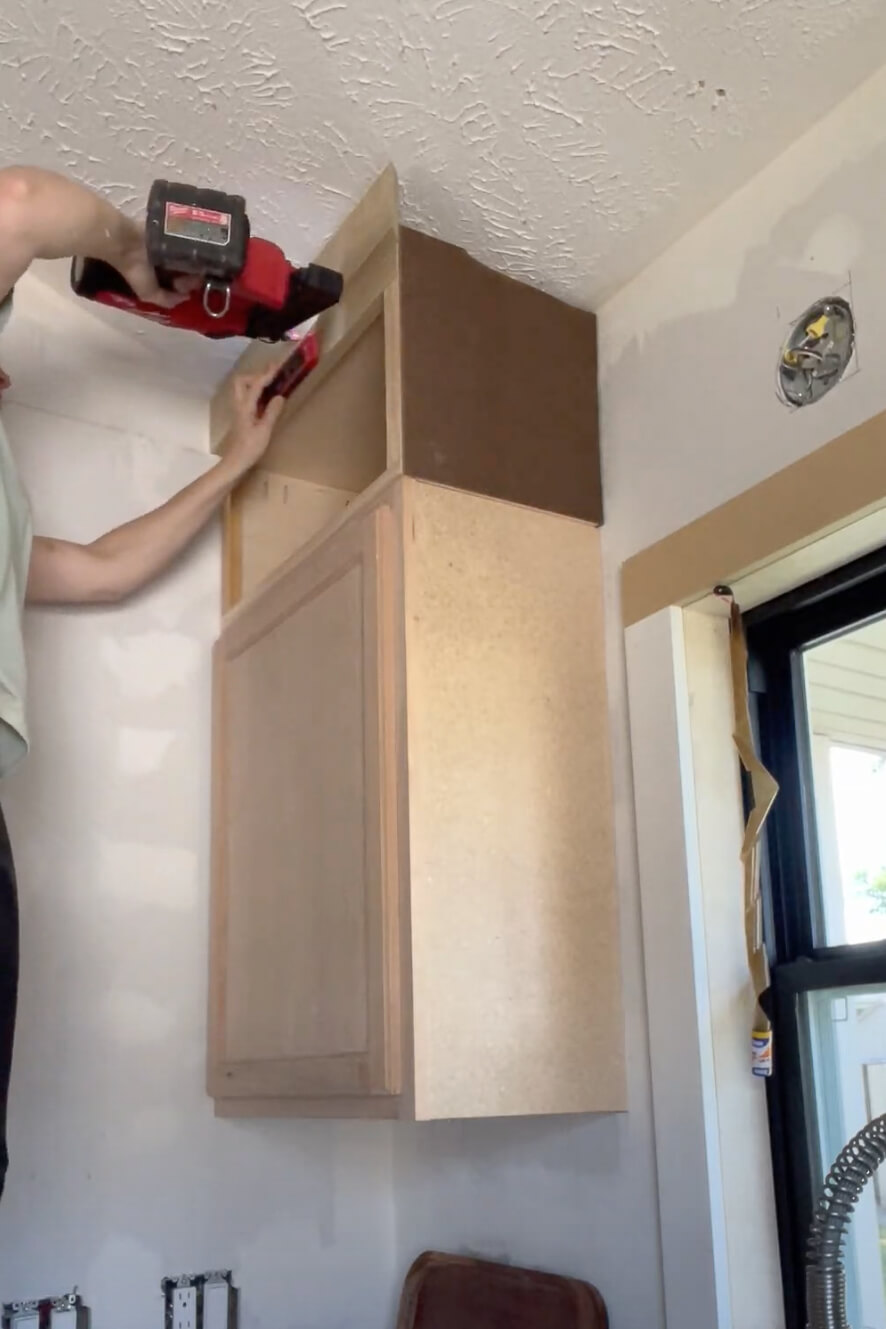
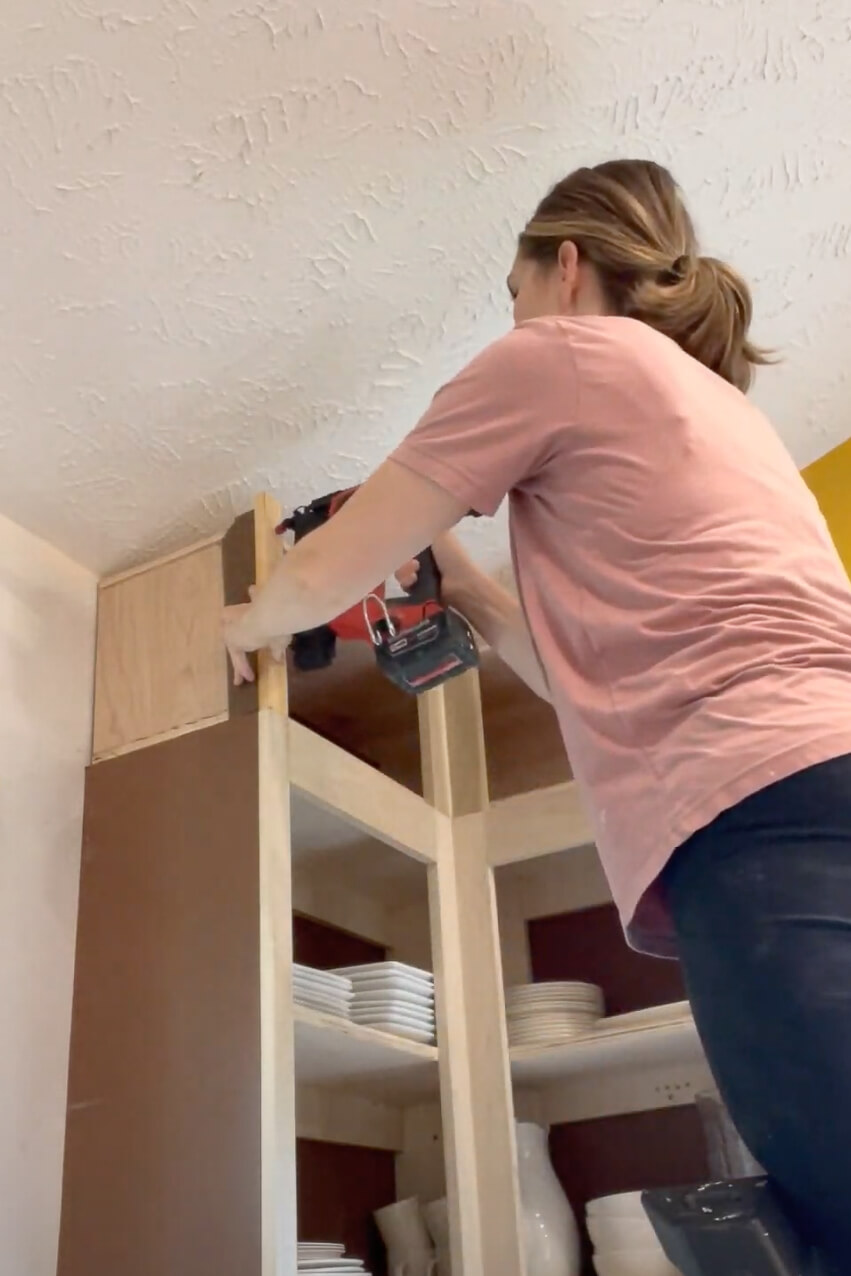
Step Four: Installing Your Cabinet
To install my freshly built cabinet box I set it right on top of the existing upper cabinet, then attached it to the wall studs by screwing through the back of the cabinet. I also used my brad nailer to add some nails down through the new cabinet into the existing one.
Step Five: Add Crown Molding to Your Cabinet
To add the crown, I started with the front of the cabinet, measuring the length of the piece that I needed. I cut the edge that touched the wall straight, but for the edge where my two pieces of crown will meet at the corner, I cut a mitered edge at a 45° angle.
Using this small level, I made sure that the crown was straight. Then I attached it with my brad nailer.
For the side piece, it was a little bit trickier to cut. Since my kitchen has vaulted ceilings, I had to cut off the crown at an angle on the top edge. I measured how long my piece should be, cut the mitered edge where it would meet my other piece of the crown at the front corner, and then, using my table saw, cut the top edge of the crown off at the angle I needed.
My kitchen ceiling has a really heavy texture that is popular in homes in the Midwest. I didn’t have this issue when putting crown on the front, but when it came to the side, the texture was really messing with me getting the crown nice and flush to the ceiling. So, I pulled out my multitool and removed a bit of the texture, just enough to get the crown molding to fit nicely. Once I was happy with the fit I attached it with a brad nailer.

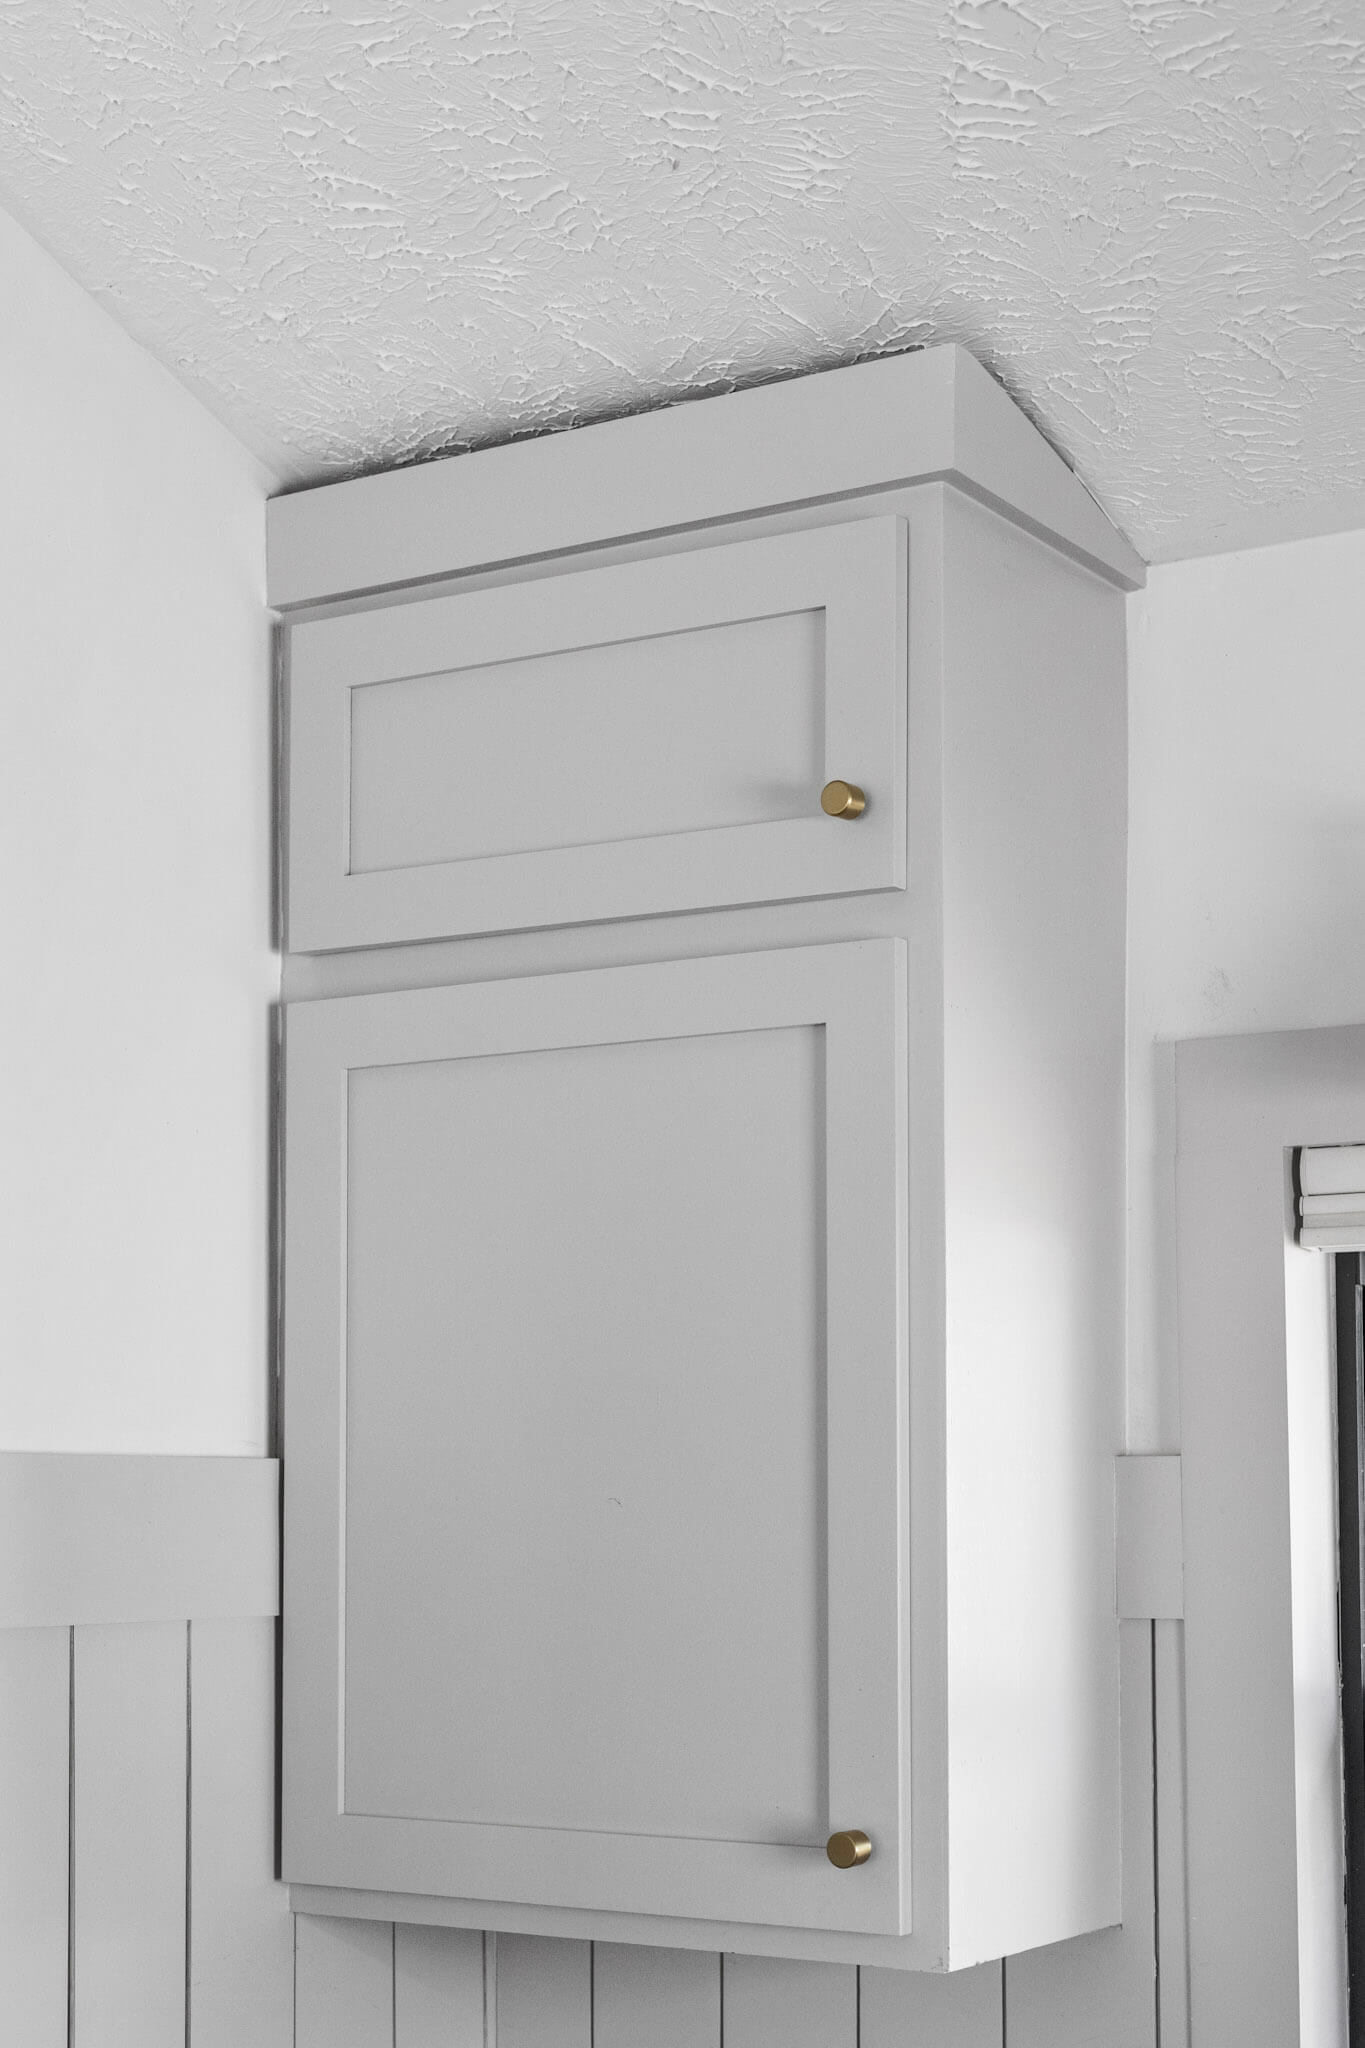
Step Six: Stand Back and Admire
It’s not quite done, but it already looks so much better. I’m so glad I decided to take on this project of extending kitchen cabinets to the ceiling.
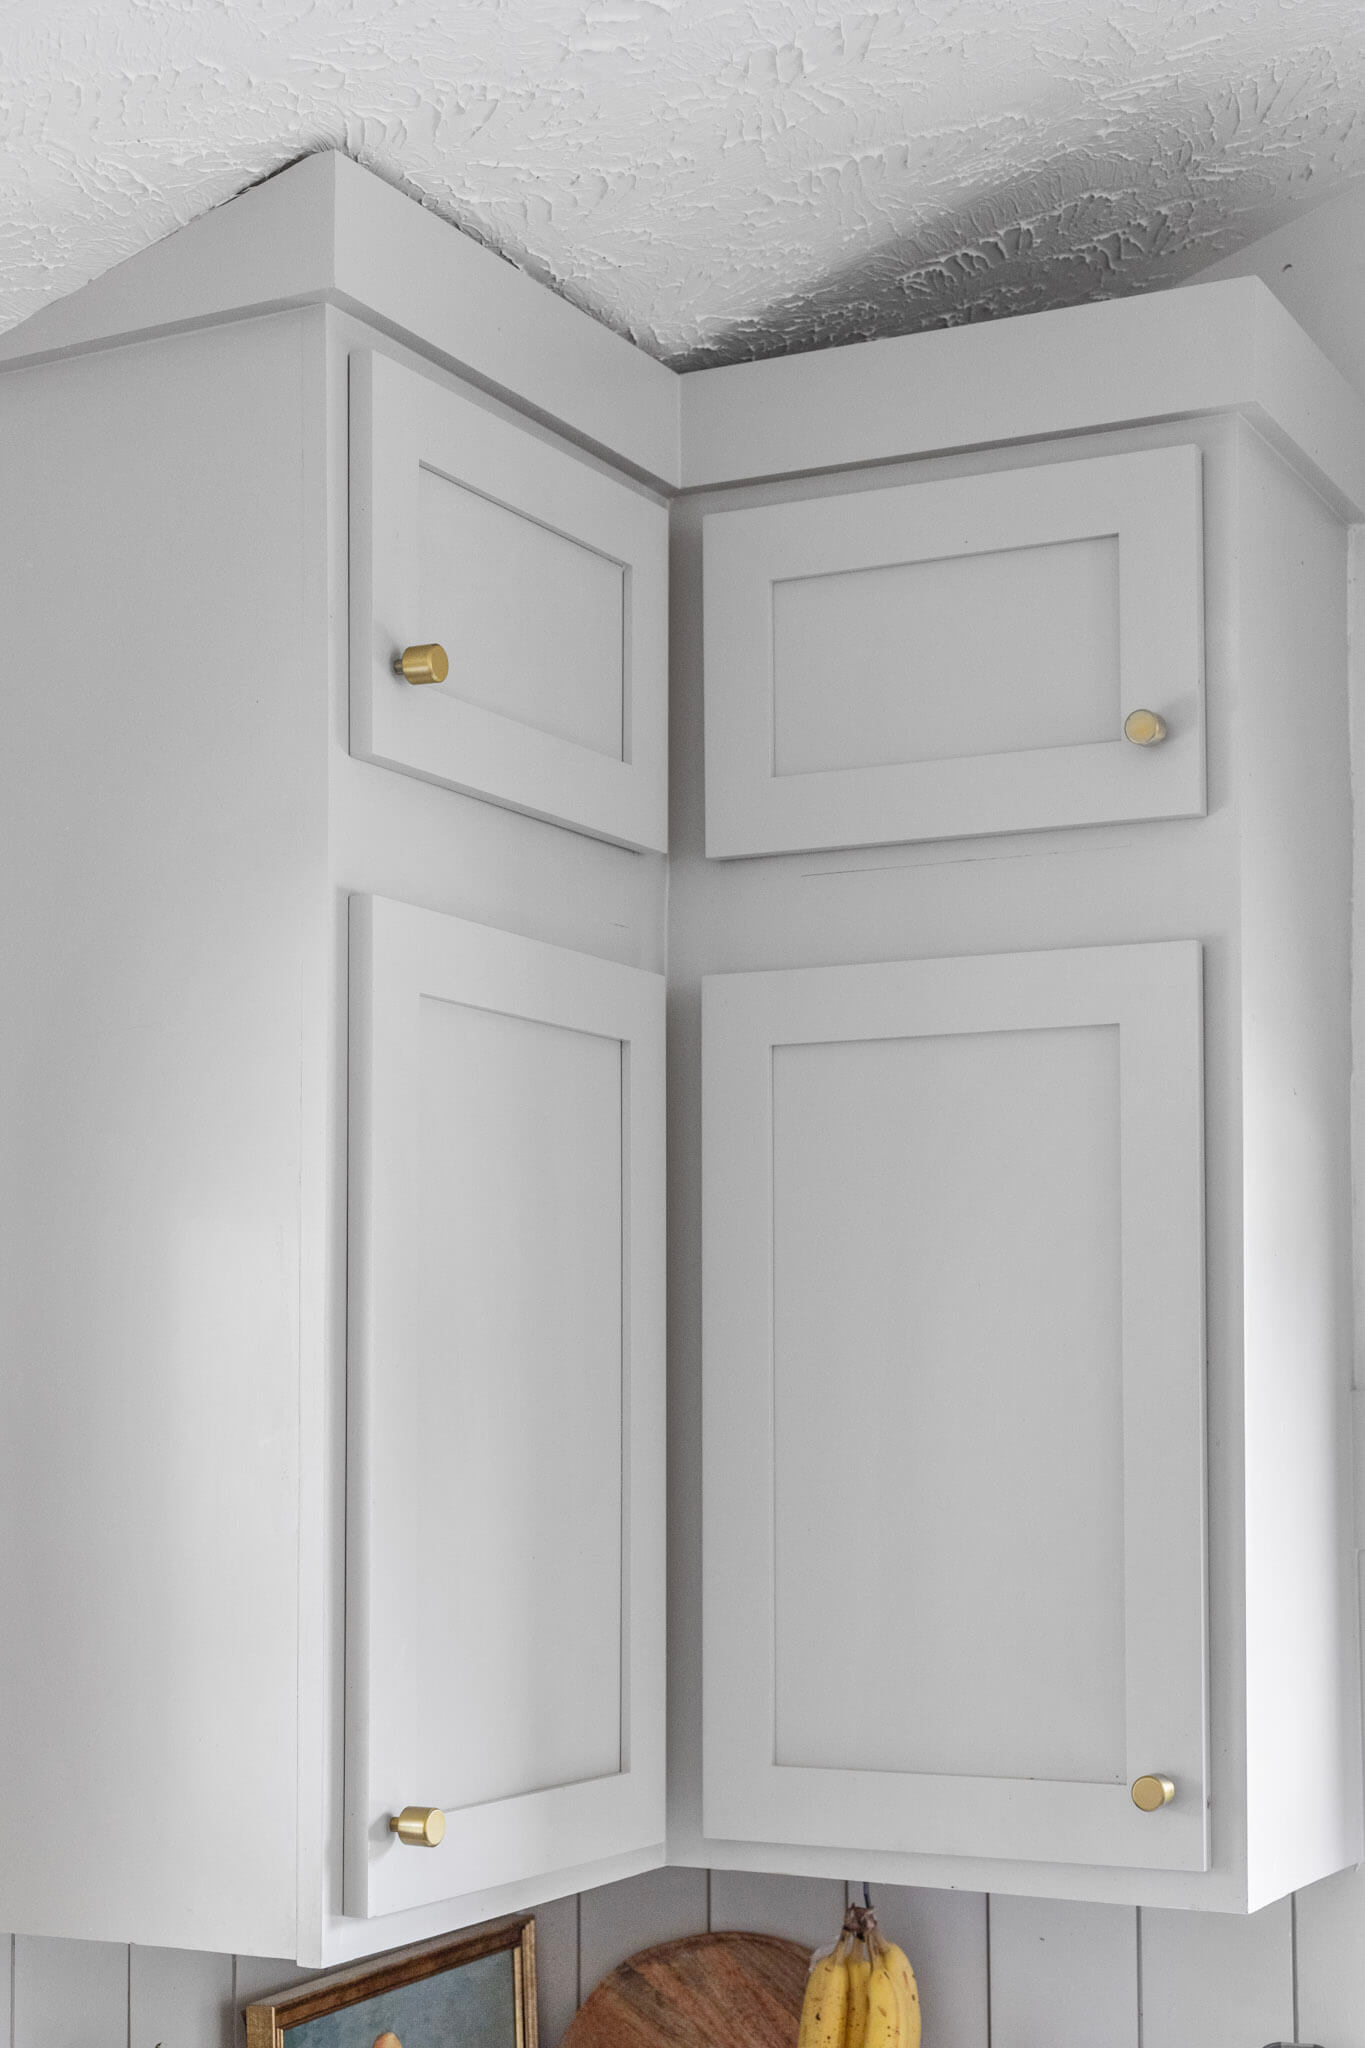
Extending Kitchen Cabinets to the Ceiling – Corner Cabinet
I have already shown you the basic steps of extending kitchen cabinets to the ceiling, so now I’ll repeat those same basic steps with the other upper cabinets in my kitchen to show some variables you may run into.
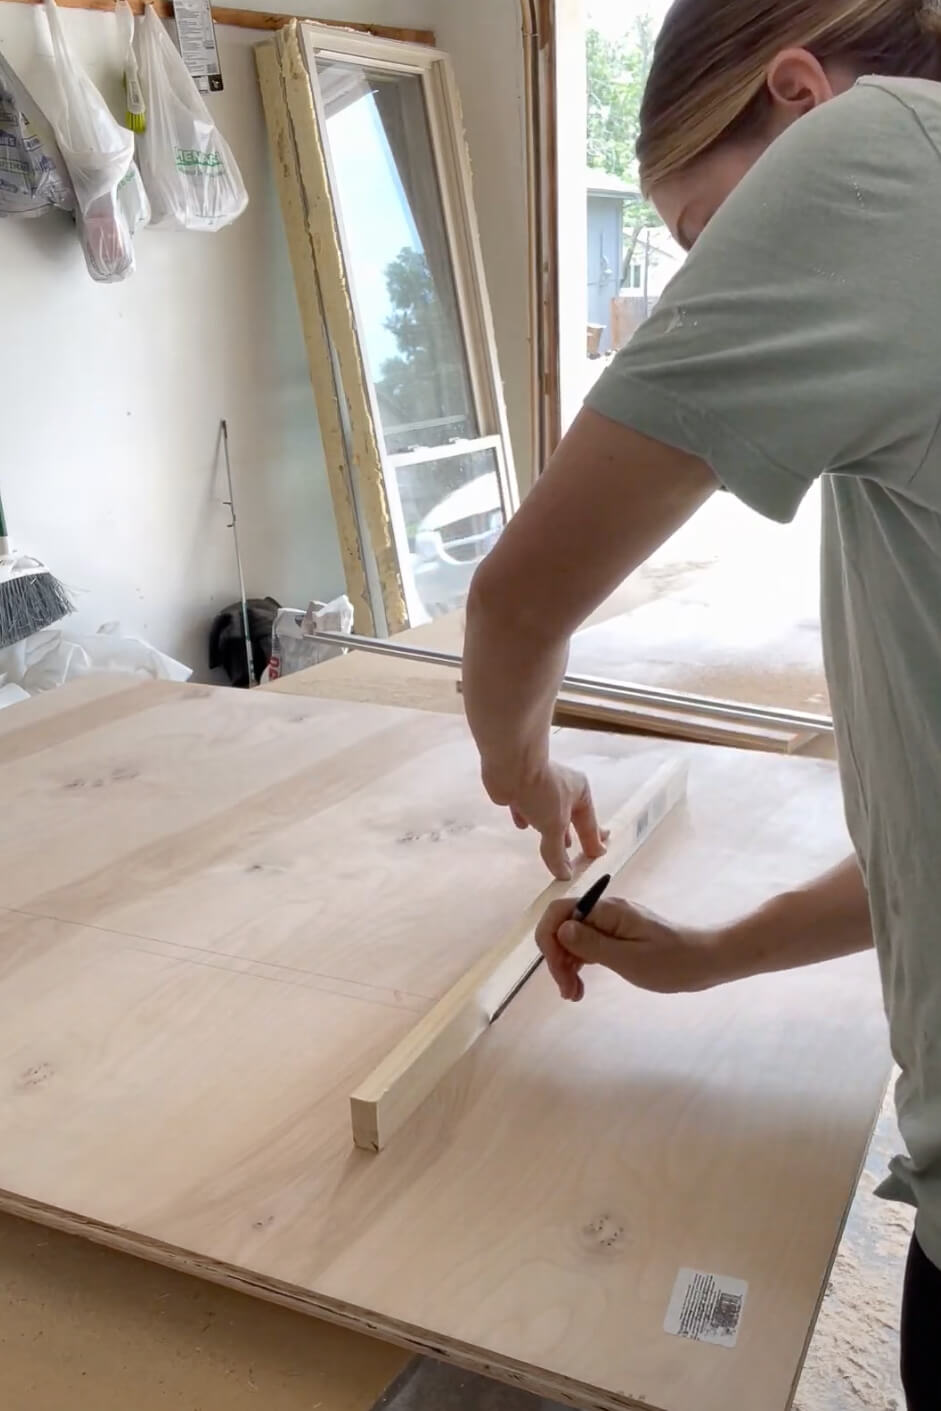
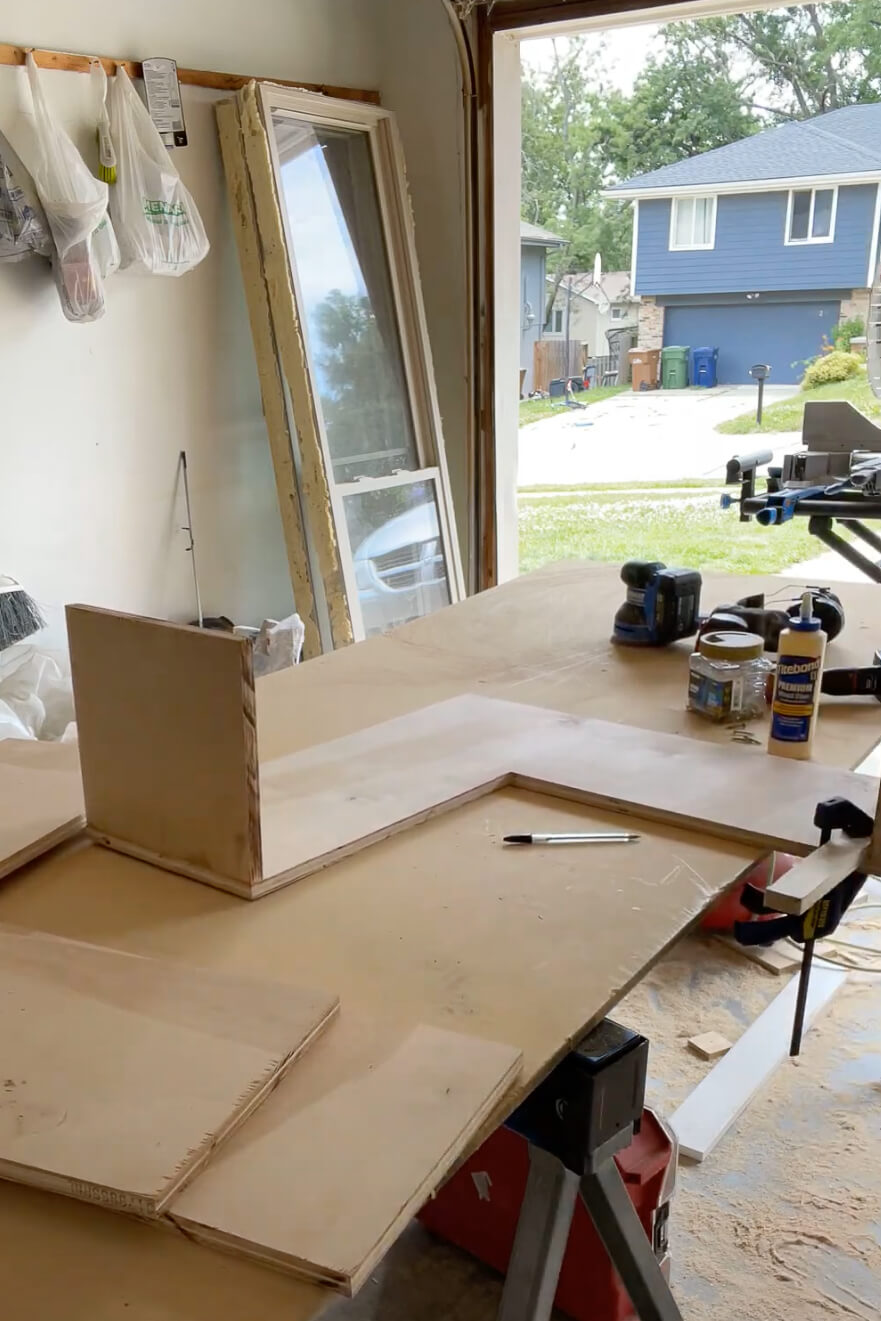
I will build an “L” shaped cabinet box for this corner cabinet. I knew this one would be a little trickier to measure, so I opted to put a board on top of my existing upper cabinet and trace it instead of measuring.
Now that I had traced out my “L” shape, I needed to subtract for the depth of my face frame and backing since I would be adding those on separately from this bottom, “L” shaped piece.
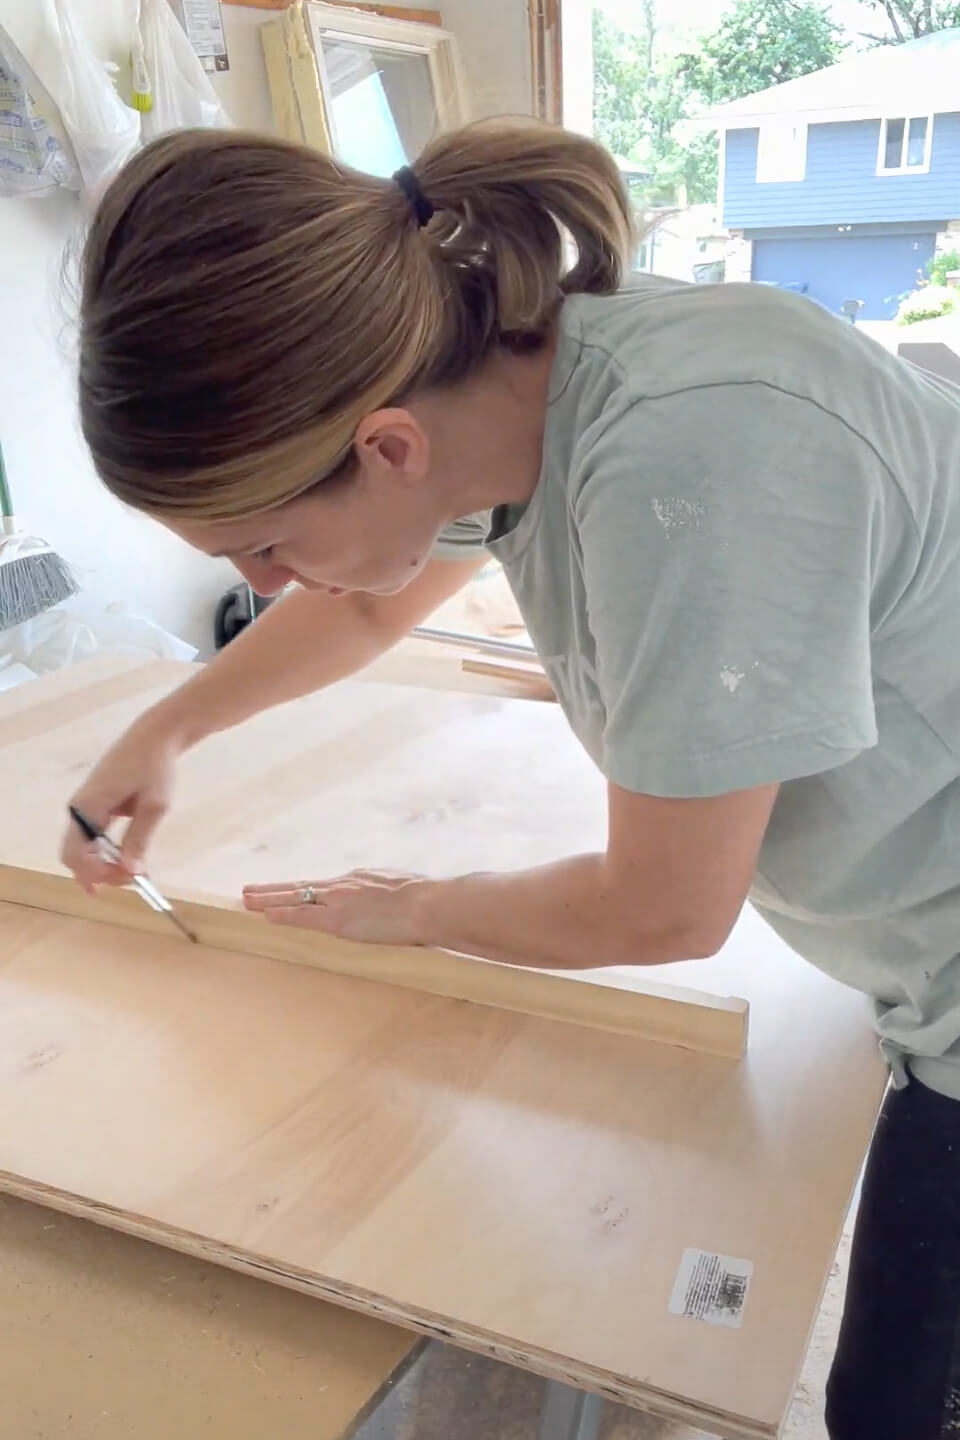
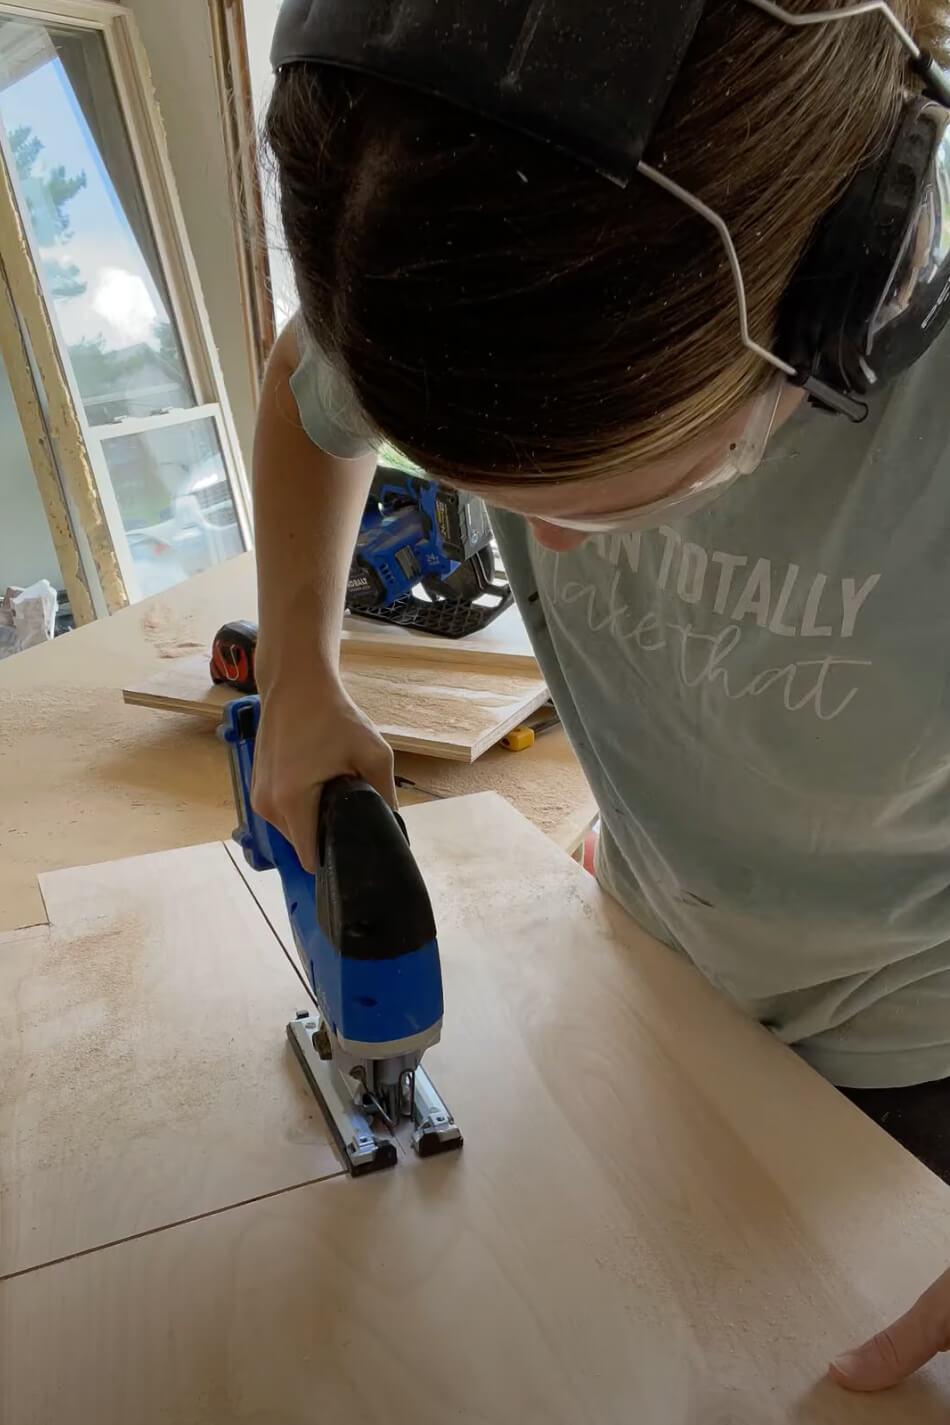
Once I had my lines drawn, it was time to cut. I used my table saw for the long edges but finished off the inside corner with the jig saw. A table saw is great for getting straight edges on the longer runs, but you can’t get a clean corner with the table saw.
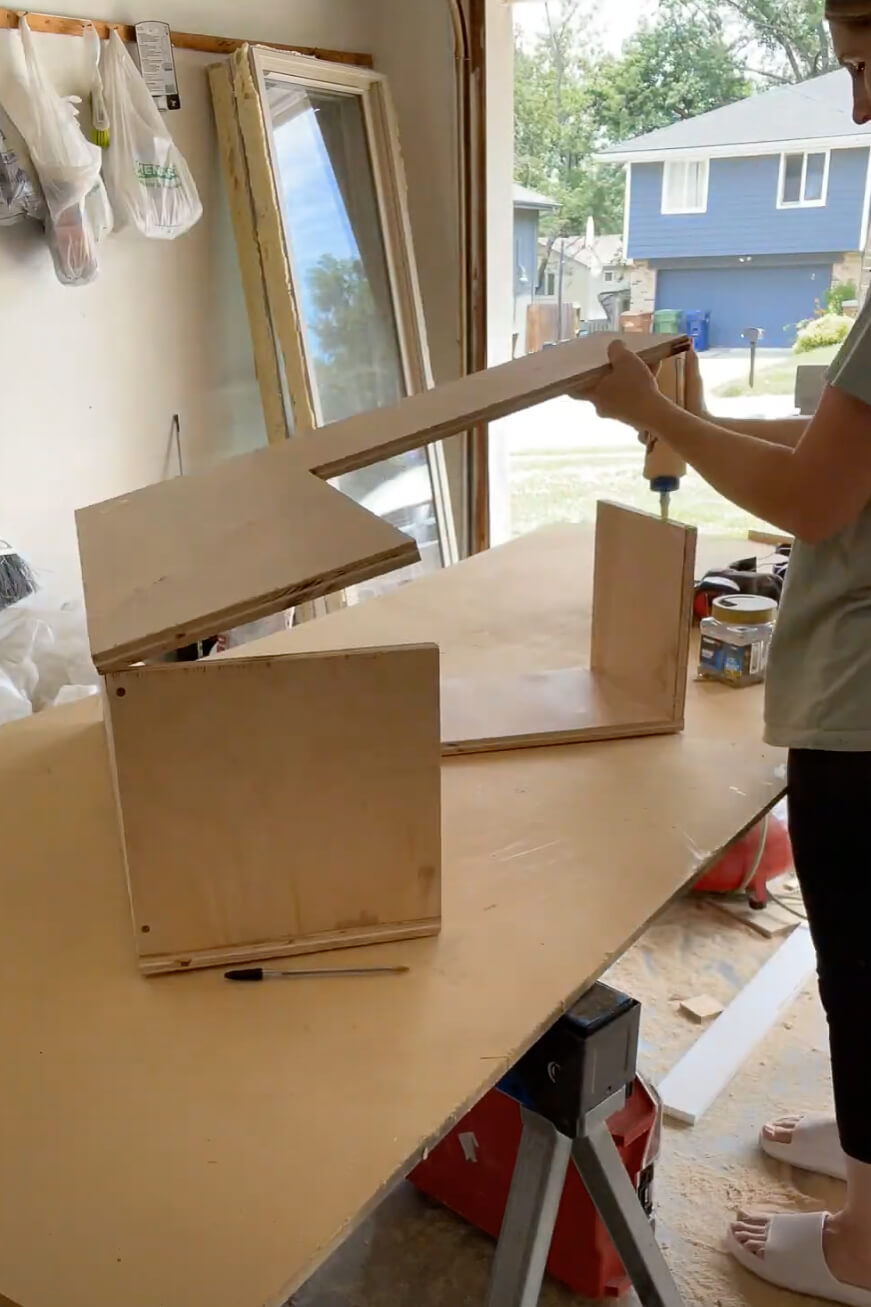
Once I had an “L” for the bottom, I used it to trace for my second “L” for the top, and cut out a second piece exactly the same way.
After I had both the top and the bottom piece for my corner cabinet box, I ran my sander over the edges to clean them up a bit.

After cutting the side pieces and adding pocket holes, I was ready to assemble this corner cabinet box following the same steps as with my first cabinet using wood glue and screwing through the pocket holes.

The corner cabinet needs a little more support in the back, so I’ll use plywood for one of the back sides. I cut a rectangle that fit perfectly in between the side, top, and bottom pieces, then attached with wood glue and screws.
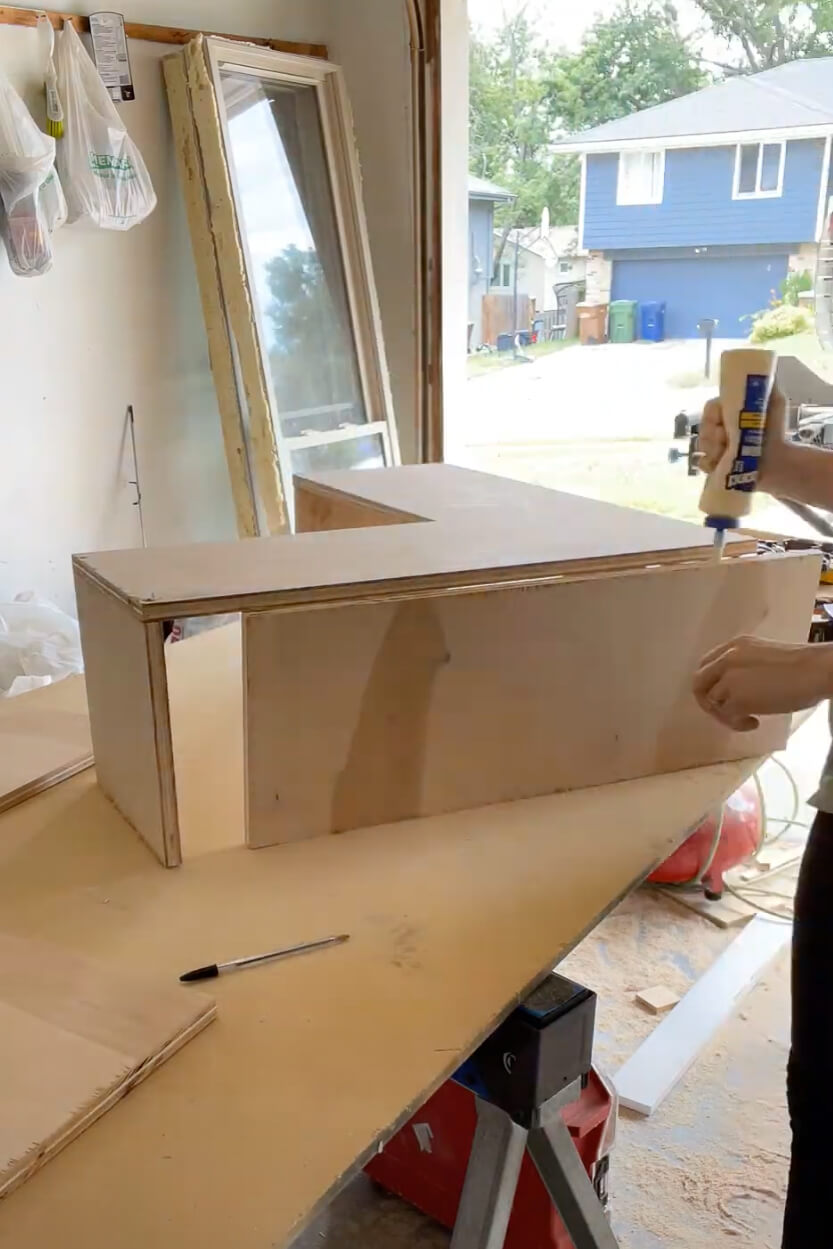
For the other backside, I used the 1/8 inch hardboard and attached it using brad nails just like I did for the first cabinet box.
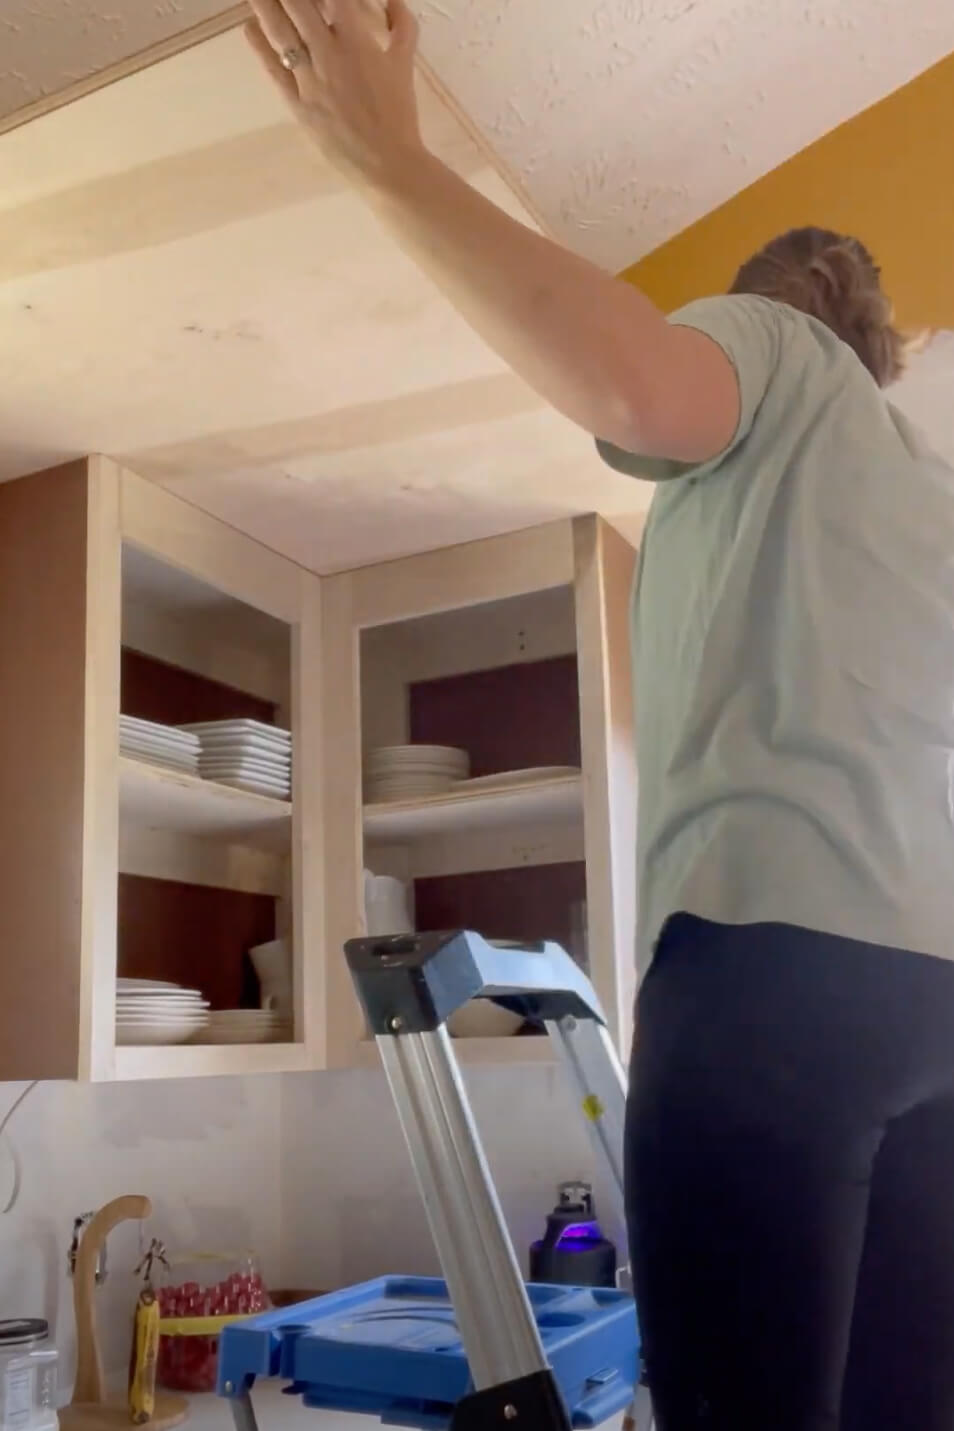
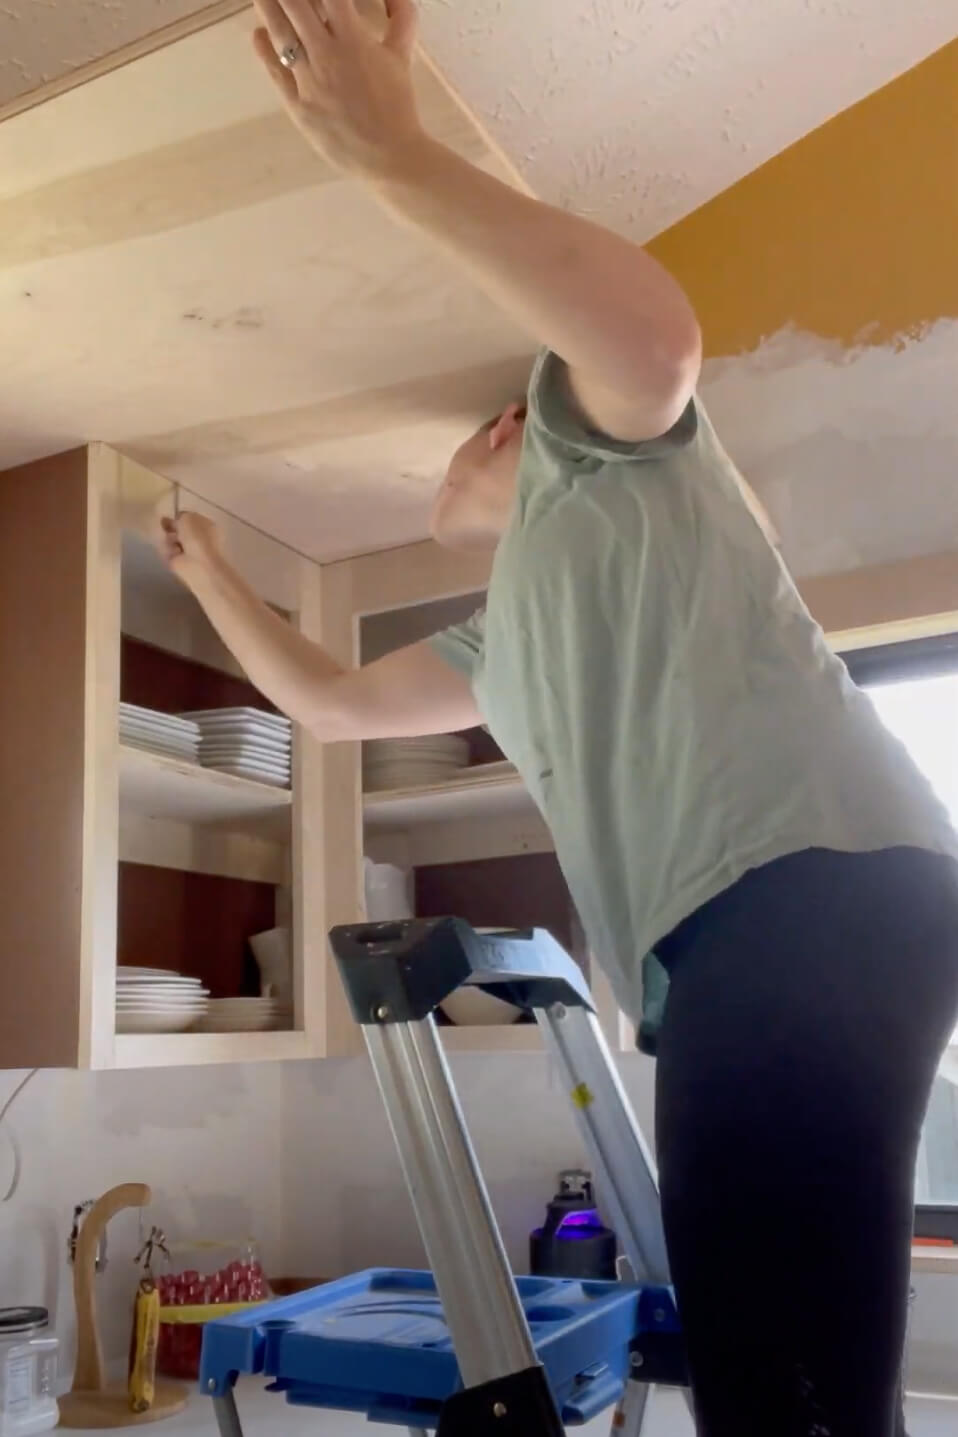
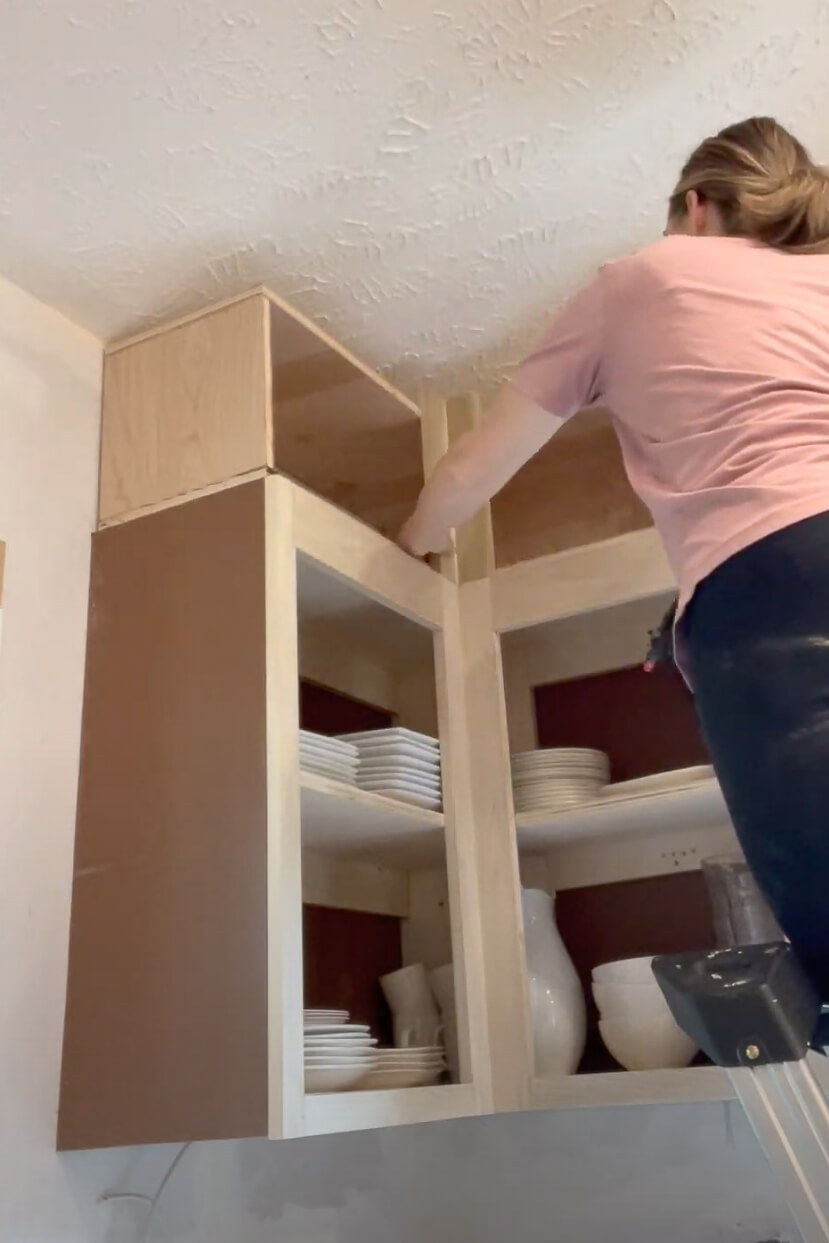
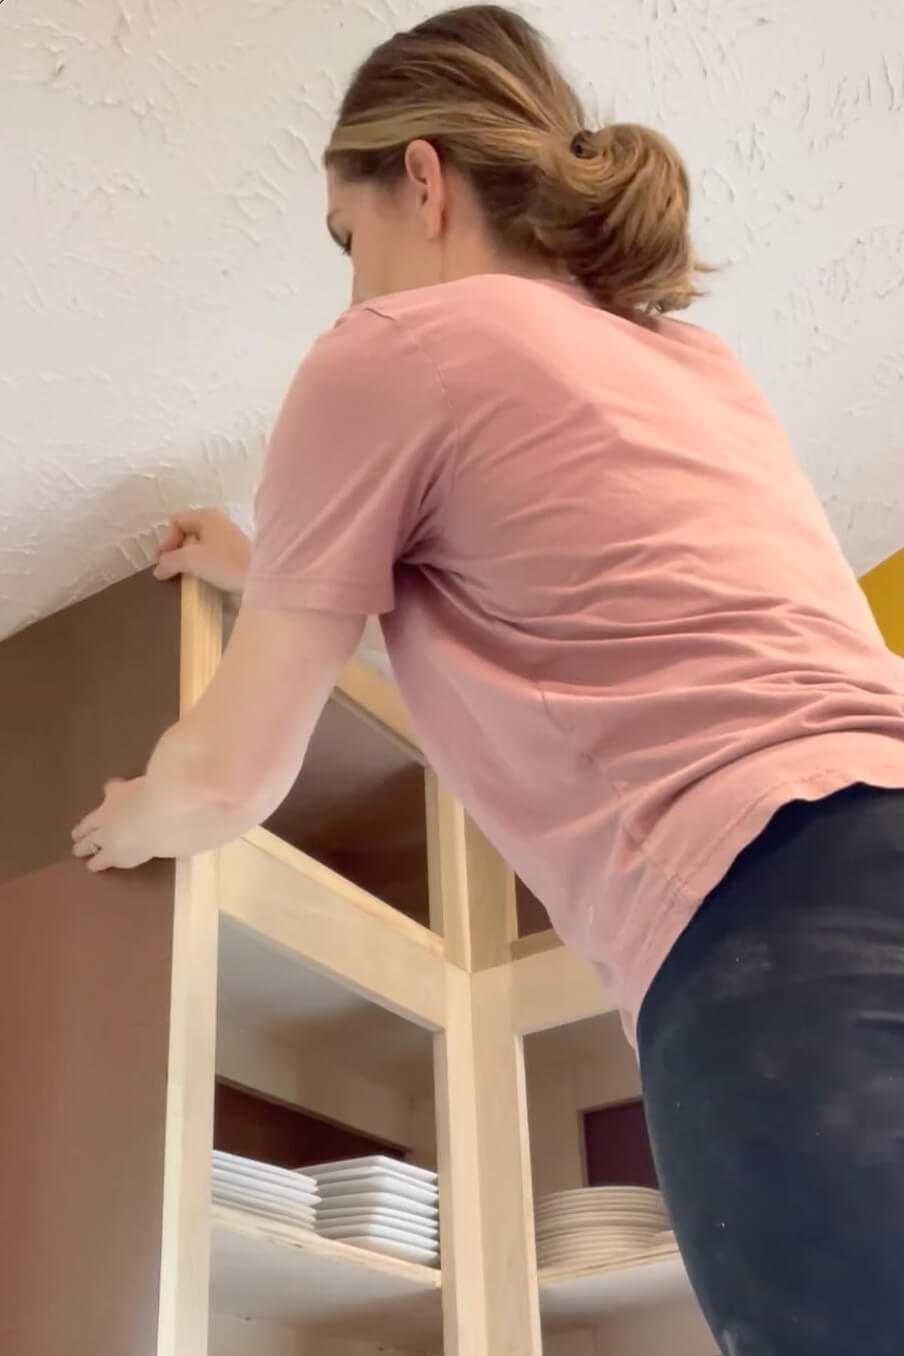
Now it was time to take it inside and make sure that everything fit. For this cabinet, I decided to add the face frame after it was in place. So at this point, I went ahead and attached it to the wall with screws and to the existing upper cabinet with brad nails.
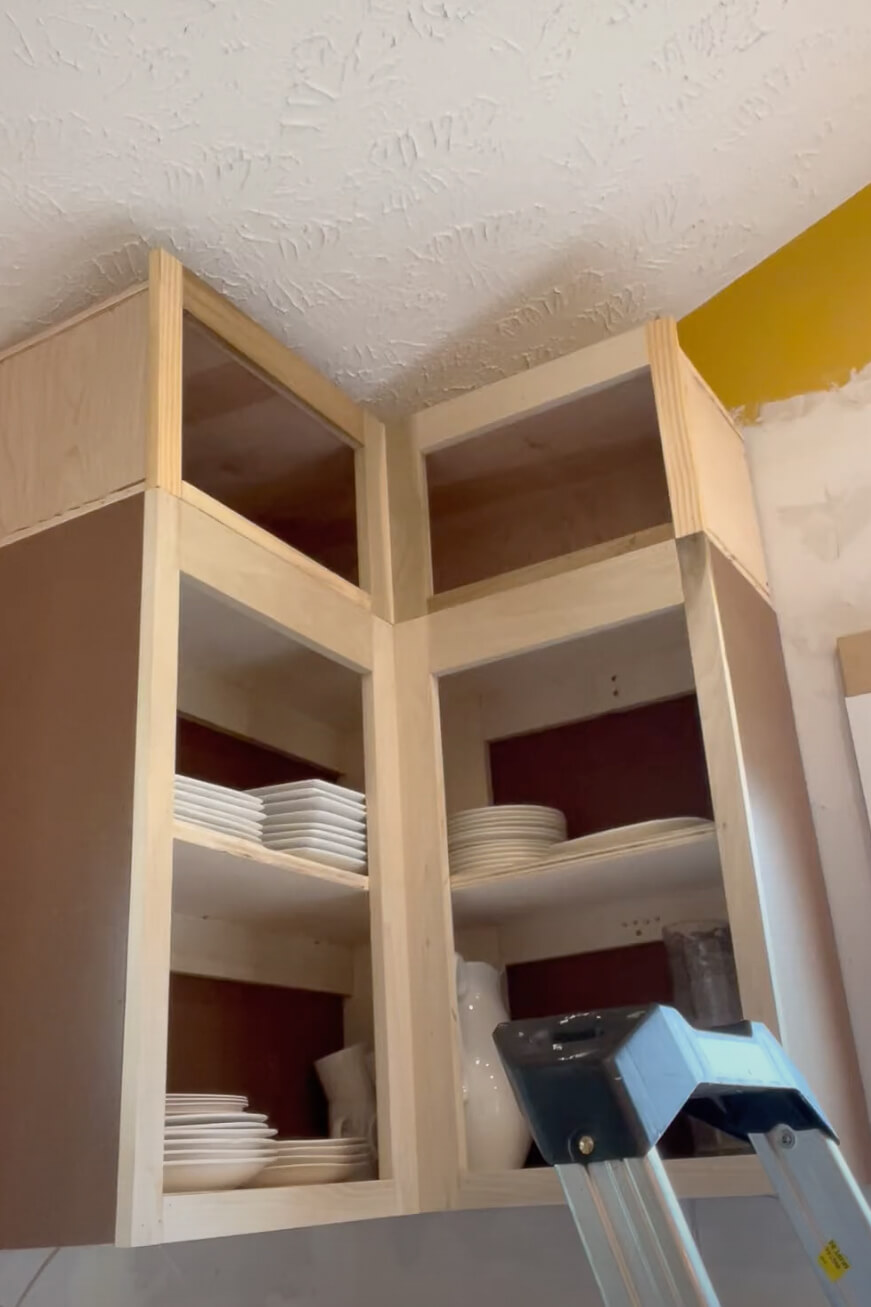
For the face frame on this one, I started with the centerpieces and then moved onto the sides being careful to leave room for the 1/8-inch hardboard panel I still needed to add. Small brad nails are the perfect way to attach these pieces.
As you can see here, I am using the same sizes of wood as you see on the face frame of the cabinets below. It really makes it look more cohesive.
Next, I added the top, bottom, and side panels, which are made of 1/8-inch hardboard.
Now that the face frame was complete, I added the same crown as the other cabinet using my brad nailer. Similar to the first cabinet, I needed to make mitered corners everywhere that the crown would meet, straight edges where it would butt up against the wall, and I also had an angled edge to run along my vaulted ceiling.
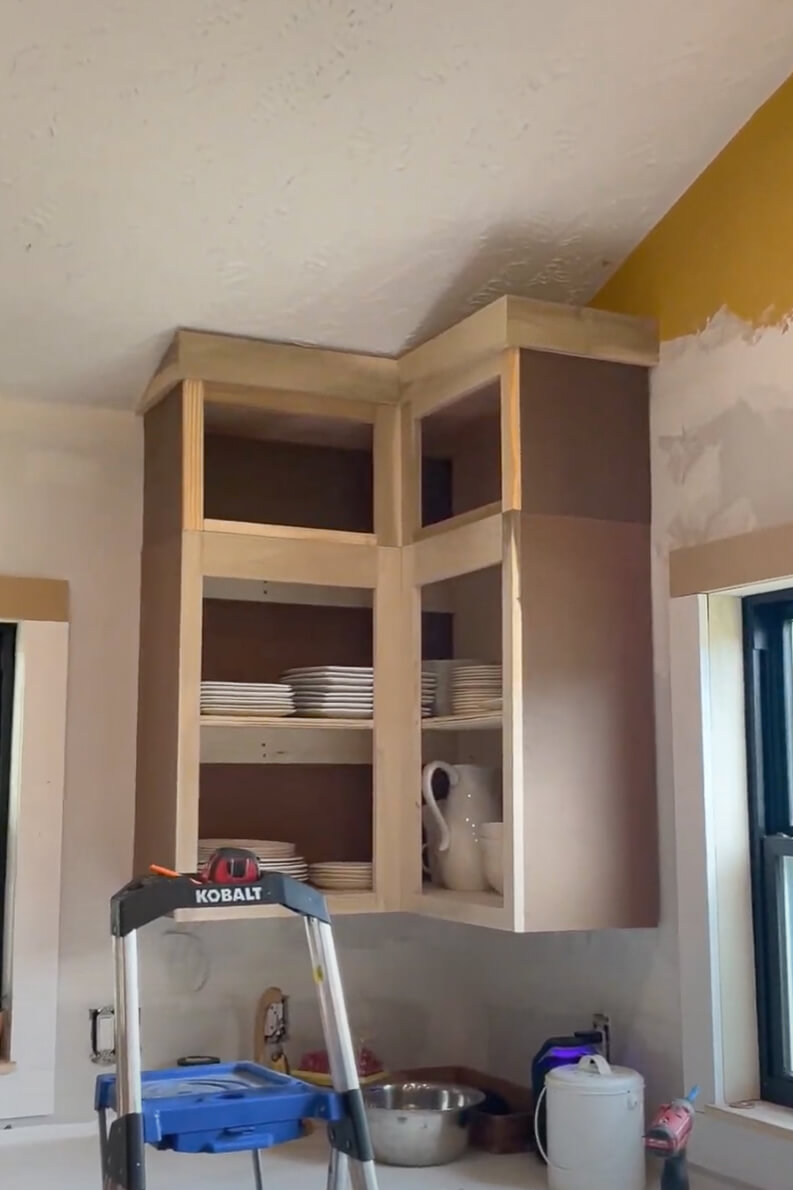
The corner cabinet is done! Even without paint and doors, you can already see how much better these cabinets look by adding the extra height. It is a much better scale for these great vaulted ceilings I have, but even if I just had 8 foot ceilings, it is still a better use of the space than just collecting dust.
Extending Kitchen Cabinet to the Ceiling – Small Cabinet
The last cabinet that I needed to extend in my kitchen is this small one that will be butting up against the refrigerator cabinet that I would also be building. Since my ceilings are vaulted, and this cabinet is in just about the center of the room, I won’t be taking it all the way to the ceiling. Instead I am just adding the same additional height as I did for the other two cabinets.
The steps are going to be pretty much the same.
- Build a cabinet box.
- Attach the cabinet box to the existing cabinet and the wall behind it.
- Add a side panel.
- Add the face frame.
- Add crown molding.
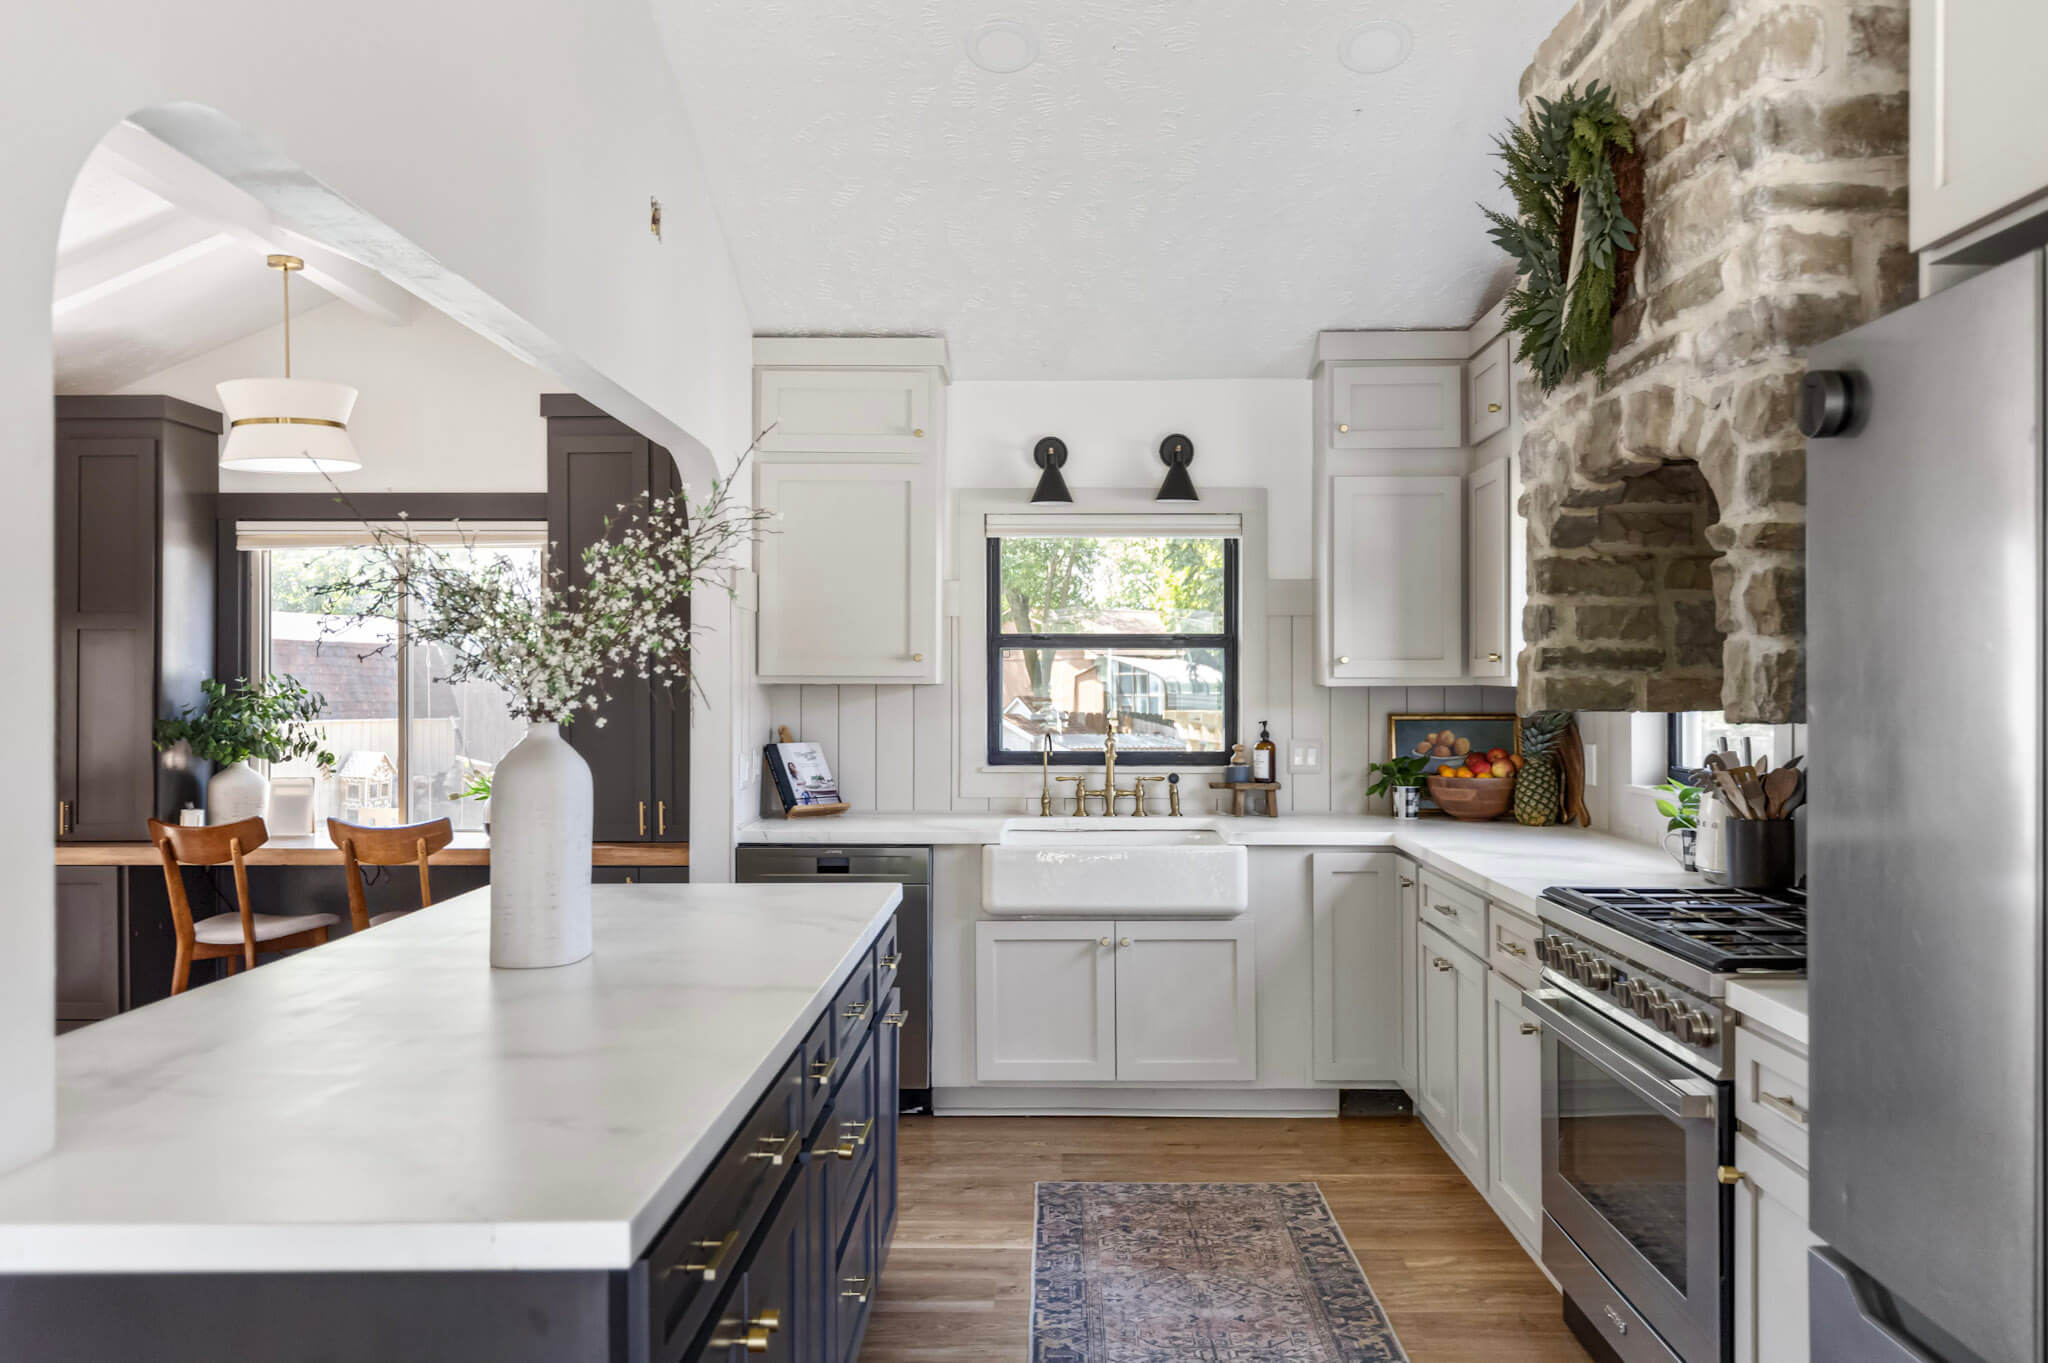
And here it is after I finished building the refrigerator cabinet next to it and finished the painting! It’s amazing what adding the crown and paint does!
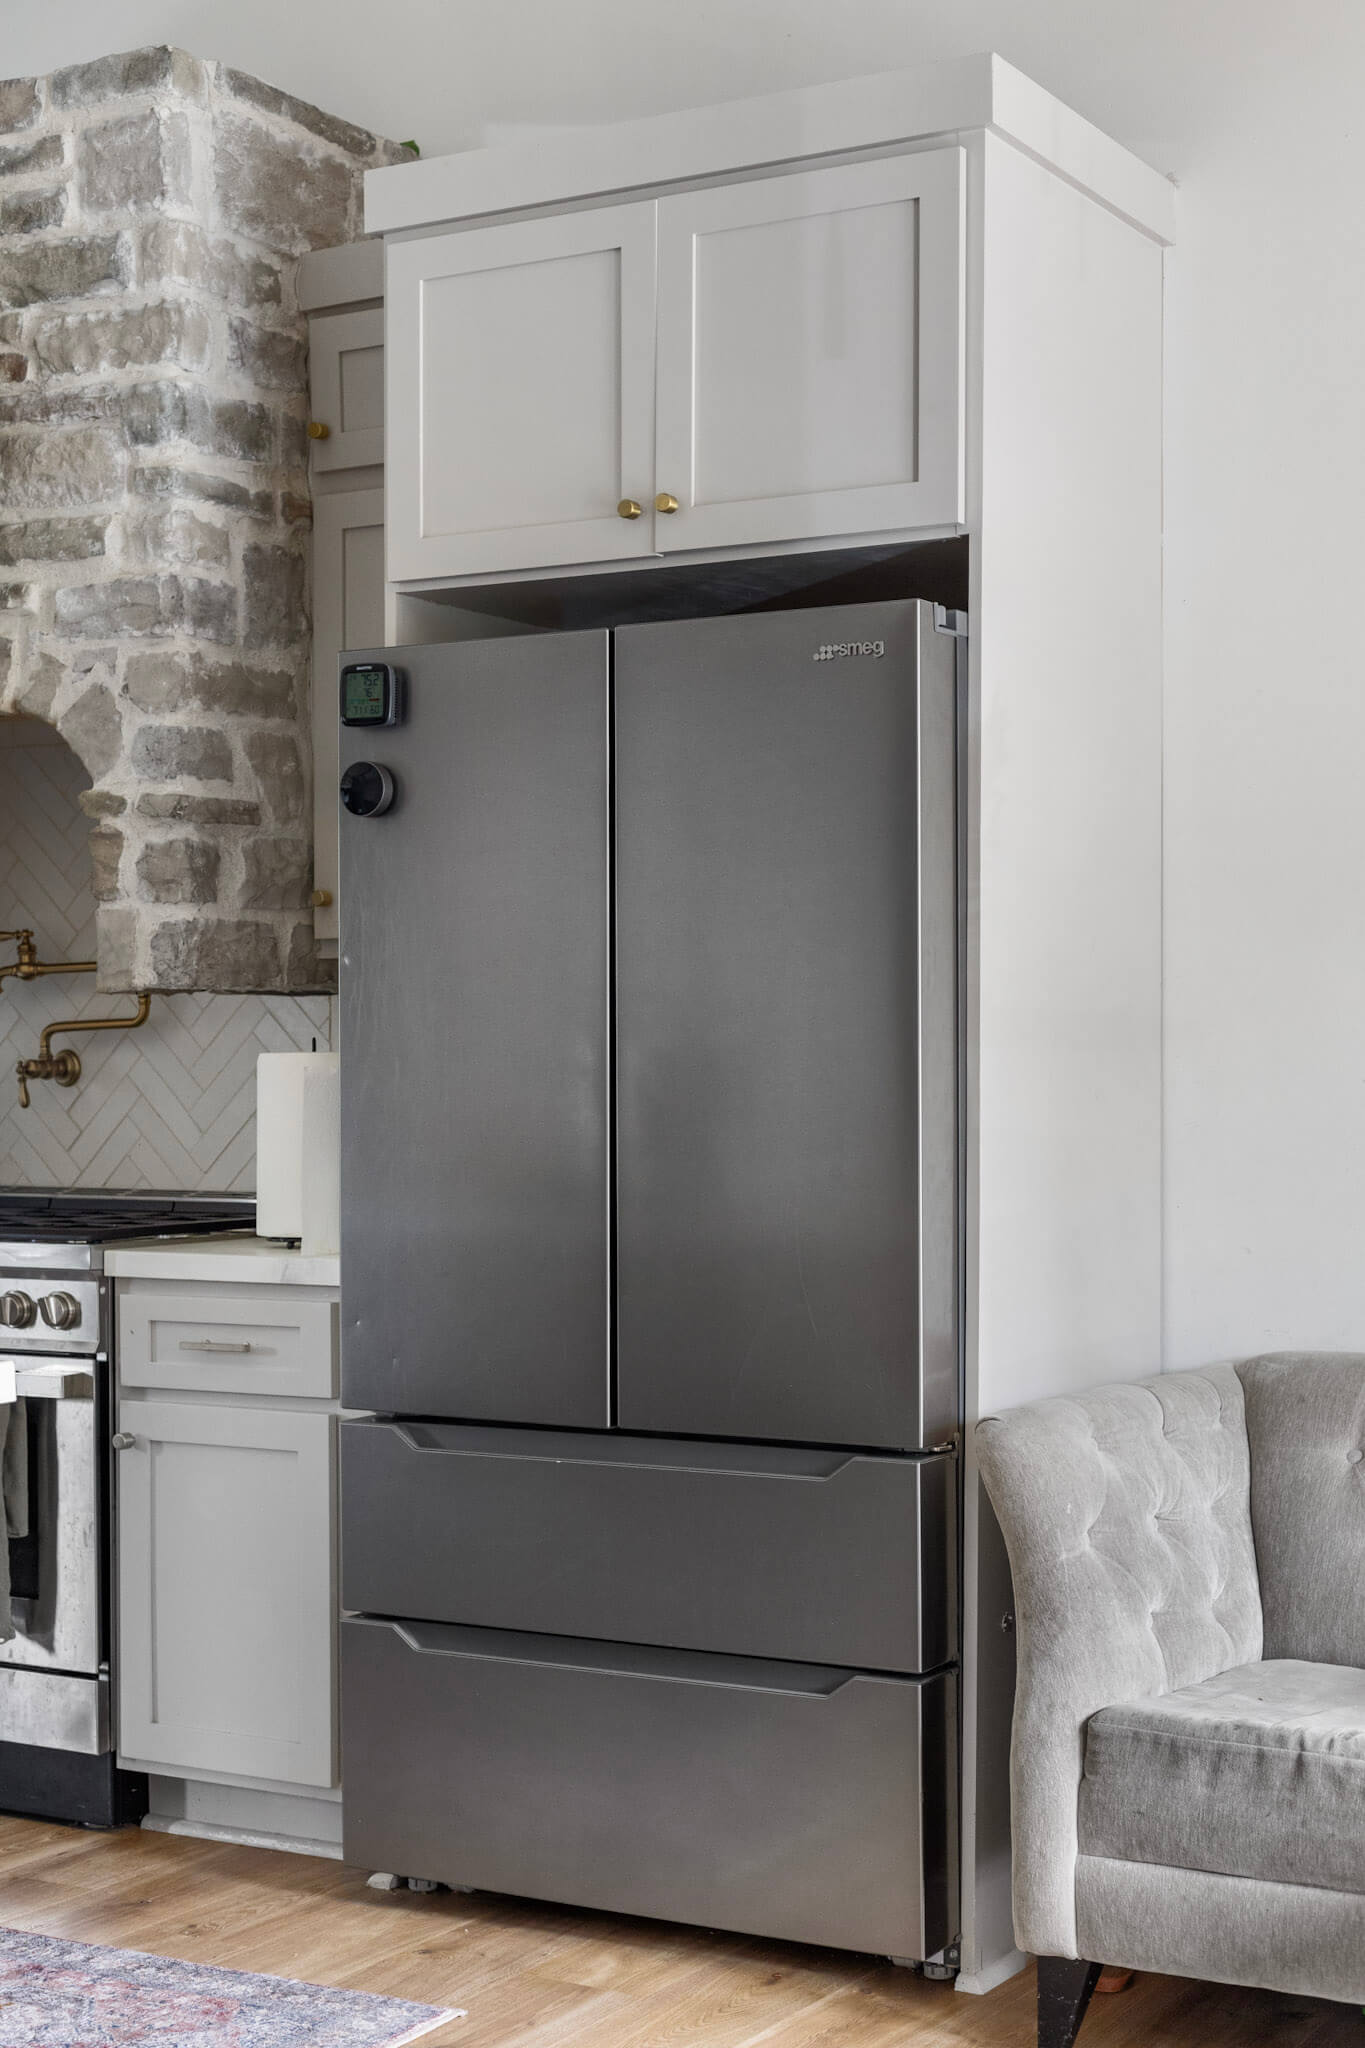
You can see my complete process for priming and painting my kitchen cabinets or for building the refrigerator cabinet in my post here.
Check out this post if you want to see how I added the doors for all the cabinets.
I am so happy with how this project of extending kitchen cabinets to the ceiling went. It really transformed the look of my kitchen and added usable storage space, which we always need more of.

I really appreciate your post showing how you extended your cabinets to the ceiling even with the vault! What is the height of your flat crown trim?
The crown on the cabinets were made from 1×4 poplar.
I LOVE the stone over your stove/hood! Where did you get it and/or what is it called?
Hi Carrie – The stone is from Centurion Stone of Iowa. I wrote a blog post with all the instructions for building this hood and it can be found here: https://crystelmontenegrohome.com/stone-range-hood/
Hope this helps 🙂