


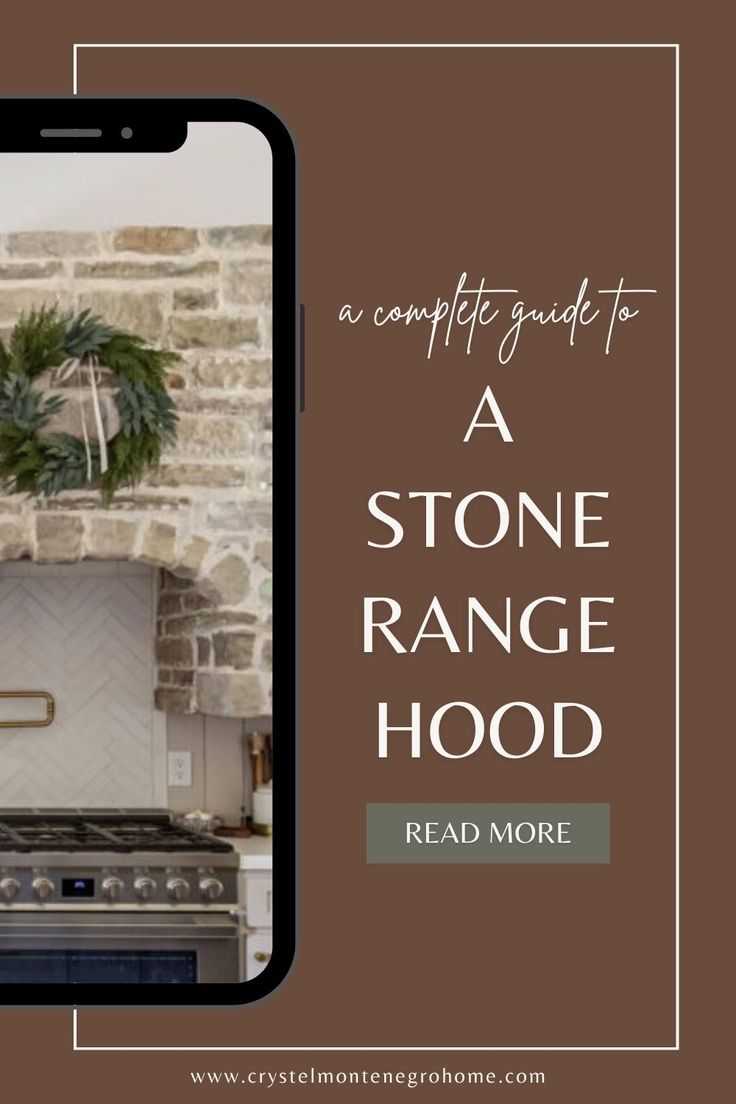
DIY Stone Range Hood for Your Kitchen


Updated July 13, 2026
When I planned this kitchen, I knew I wanted to incorporate a stone range hood in the design to make a statement and add some beautiful old-world, organic character. As you can see below, this is the space we had to work with, which previously wasn’t a kitchen. I’ve got lots of blog posts that share the entire process, that I will link below. Since arches were also found in a lot of other places in my home, I wanted to add some curves to all the squareness of the cabinetry and windows, so I came up with a design that I thought looked absolutely beautiful.
Before I built this stone range hood surround, I’d already done my shiplap backsplash, epoxy countertops, painted stock cabinetry, installed custom doors, and more. But this stone range hood would be the gorgeous focal point of my kitchen design.
If you follow me on Instagram, you will already be familiar with Grandpa, as he is a regular guest star in my IG stories. For those who have not been introduced to him yet, Grandpa is how we all affectionately refer to my father-in-law, and I was so thankful to have his help on this project.
Tools
- Tape measure
- Table saw (or circular saw)
- Drill and Impact driver
- Long level
- Small level
- Putty knife
- Grout bag
- Grout float
- Masonry brush
- Hole saw
- Drywall Cut Out Rotary Tool
- Caulk gun
- Tile saw
Materials
- Painter’s tape
- 2×4’s
- Lag bolts
- Screws
- Hood insert
- Venetian plaster
- Cement board
- Flexible foil duct
- Exterior vent cover
- Caulk
- Mortar
- Tile
- Tile spacers
- Grout
- Large grouting sponge
- Stone
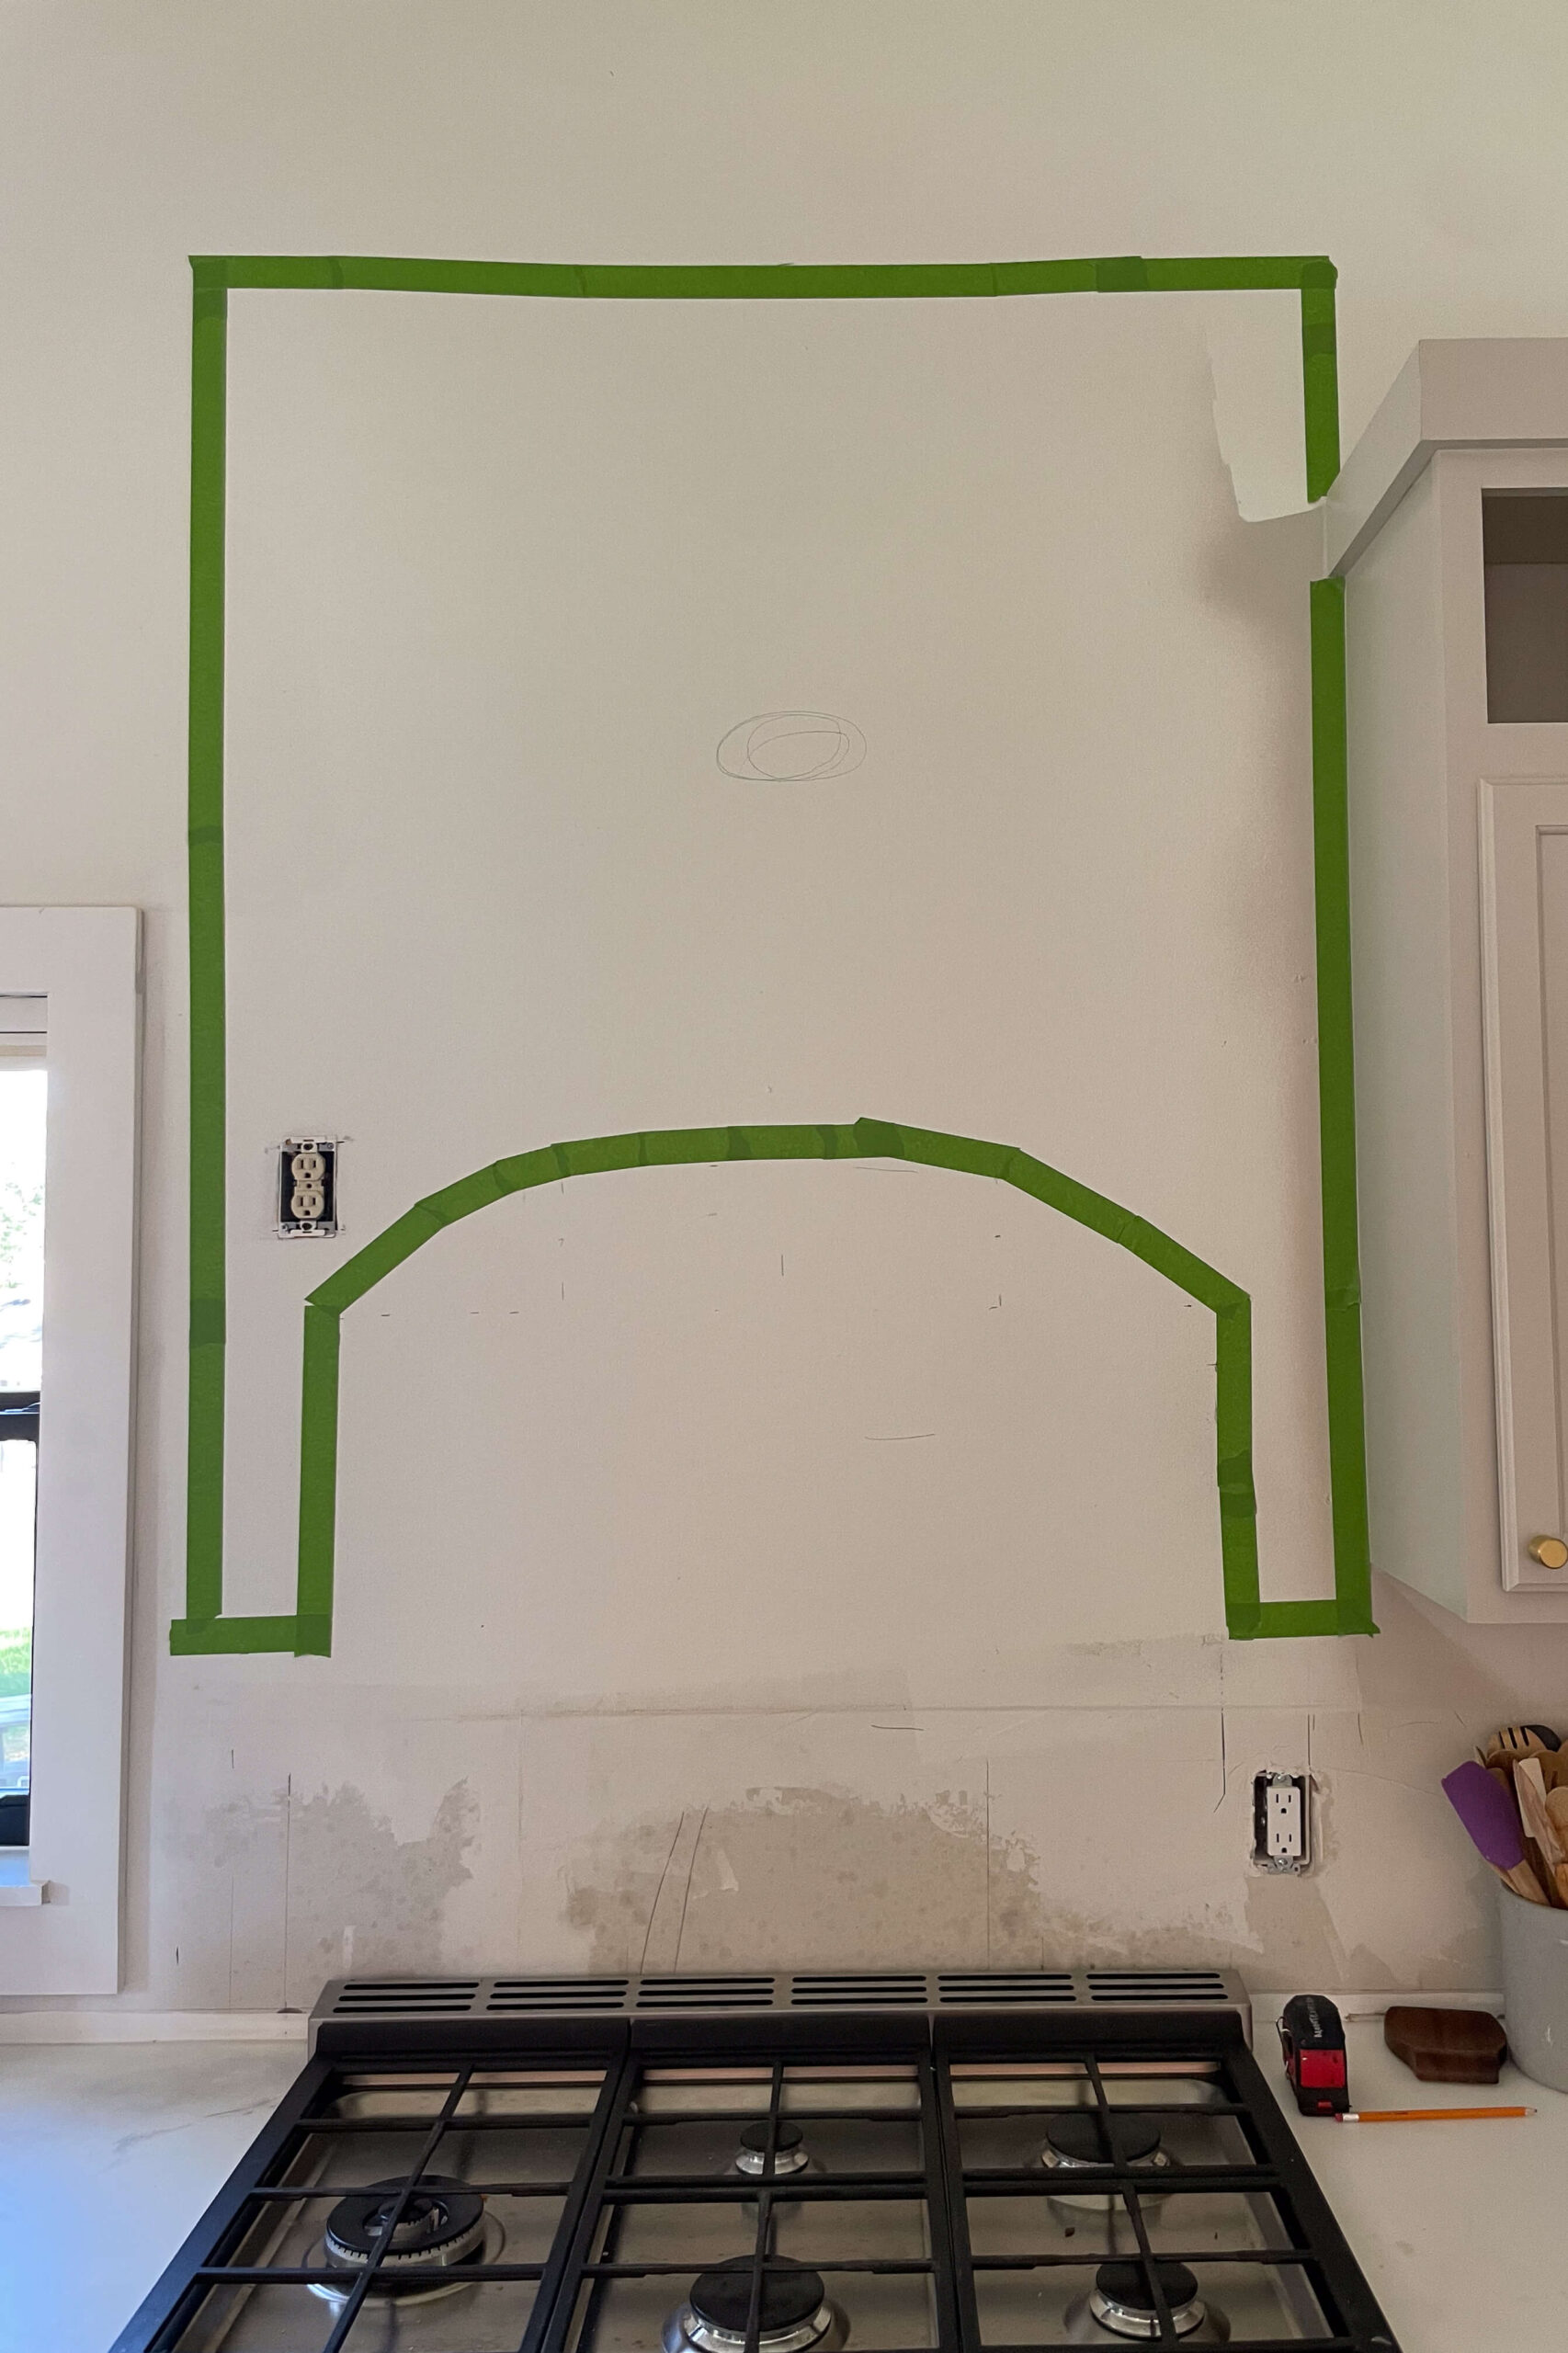
Visualizing My Stone Range Hood
Before starting any building on this project, I used a tape measure and painter’s tape to mark out a rough template for my range hood. This really helped me visualize how big I wanted my stone range hood to actually be.

Building a Basic Wood Frame
Now that I had the basic shape of the stone range hood mapped out, we started building the frame that will support all of the stone that we will be adding later.
This stone range hood will get very heavy so it is important to build a structure that can support all of the weight. To attach our frame to the wall we used lag bolts rather than just screws. These lag bolts were set right into the wall studs and will give us a nice and sturdy hold.


Build a Platform for the Hood Insert
After building our basic frame that would hold the stone, we needed to build the platform that would hold the hood insert.
It’s standard to place the hood anywhere from 24″ to 36″ above your stove top range. Some of this will depend on your personal height and personal preference. Once you decide what height you want your insert at, you simply build a level, wood platform for your insert to sit on. Double check the instructions that come with your insert to make sure that it will fit perfectly.


After building the platform to support my hood insert, we added cement board around the area where the insert will slide in. This covered up all of the unsightly wood and gave us something to add a finish to. It was too small of a strip to try and add stone, plus I wanted to keep it at a low profile, so I decided to cover the cement board with Venetian plaster. It gave it a stone look to match the rest of the surround, and it was a nice touch, even for an area that really won’t be too visible.


Install Hood Insert
Now that the platform was ready it was time to install the hood insert. I chose this one here and I love it. It has so many bells and whistles like a motion sensor, while being super quiet and efficient.
The platform we built was a perfect fit for the insert, so we simply set it in from the top, then attached it by screwing through the provided holes, into the wood platform. (Each insert may have different installation instructions, so just be sure to check the instructions on whichever one you purchase).
After, we just plugged it into the outlet that Grandpa had already put in up above the insert.


Adding the Arch
One of the features I was most excited about adding to this stone range hood is the arched front. I have added arches in a few other places in my home, like my master bathroom shower, or the entrance of my pantry. Repeating details like this throughout your home gives your home design a cohesive feel.
To add the arch front on this stone range hood, we cut out a couple of pieces of scrap wood in the shape that I wanted, then attached them in both corners using screws.
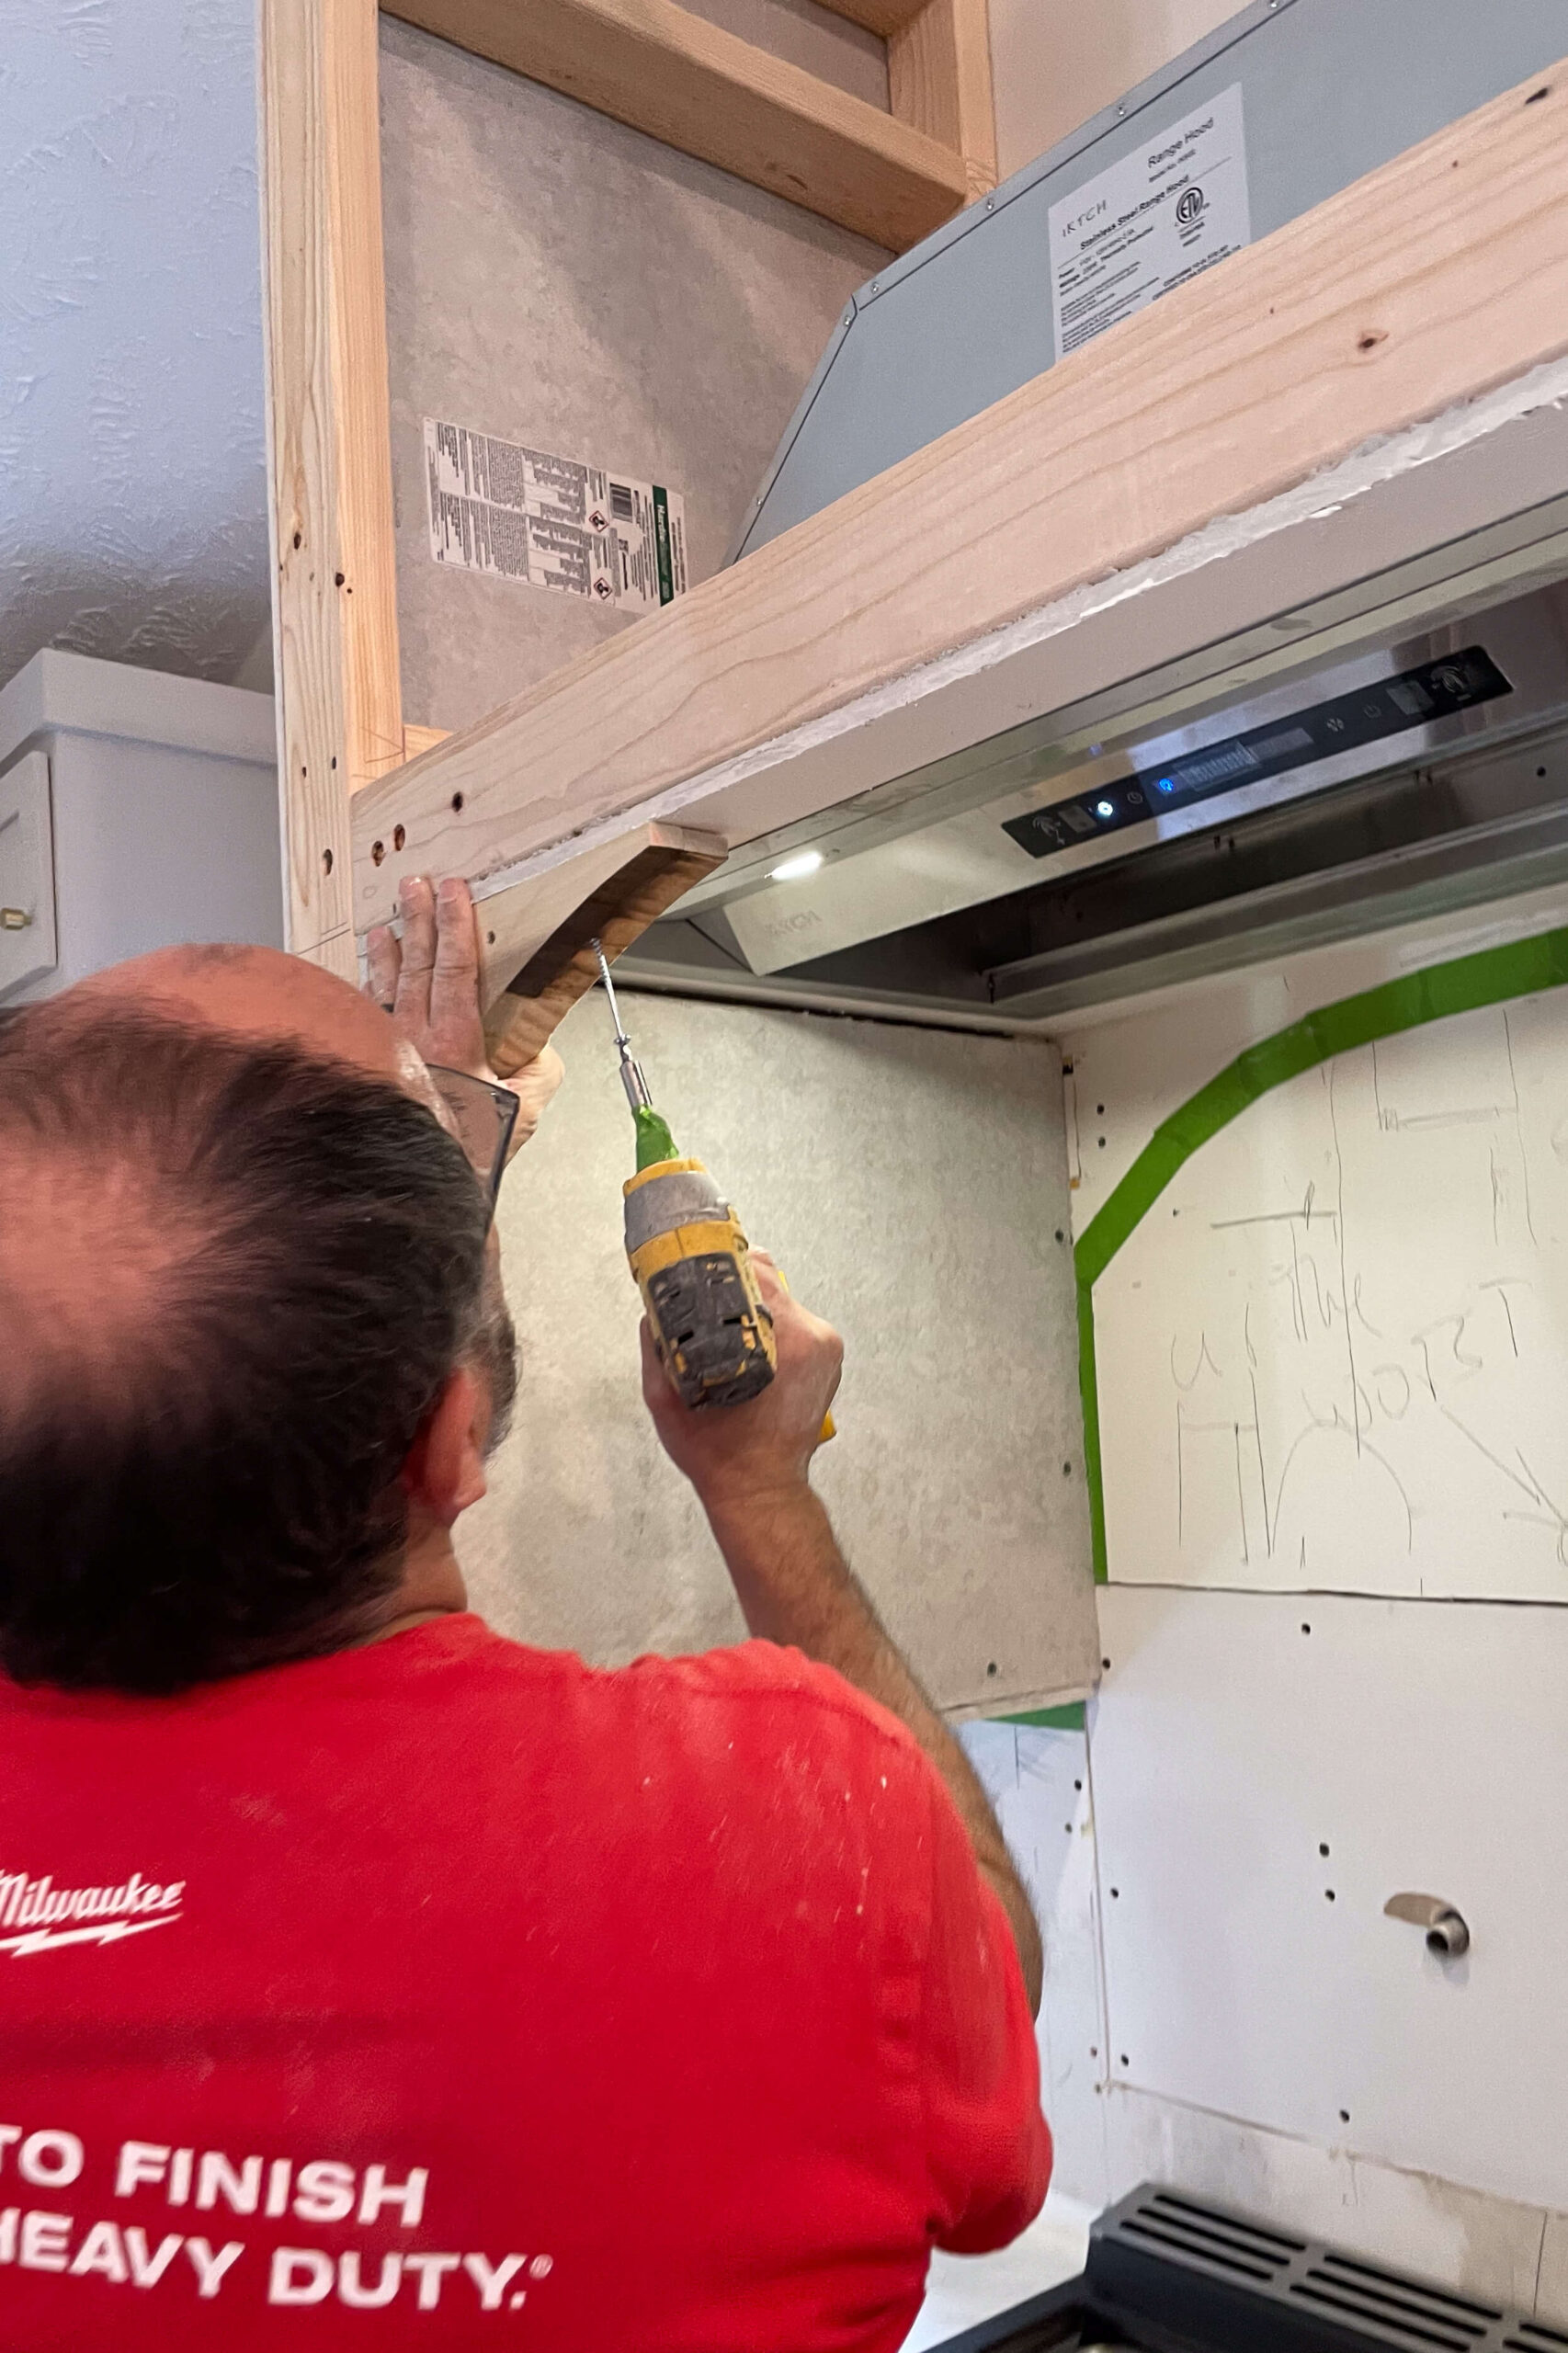

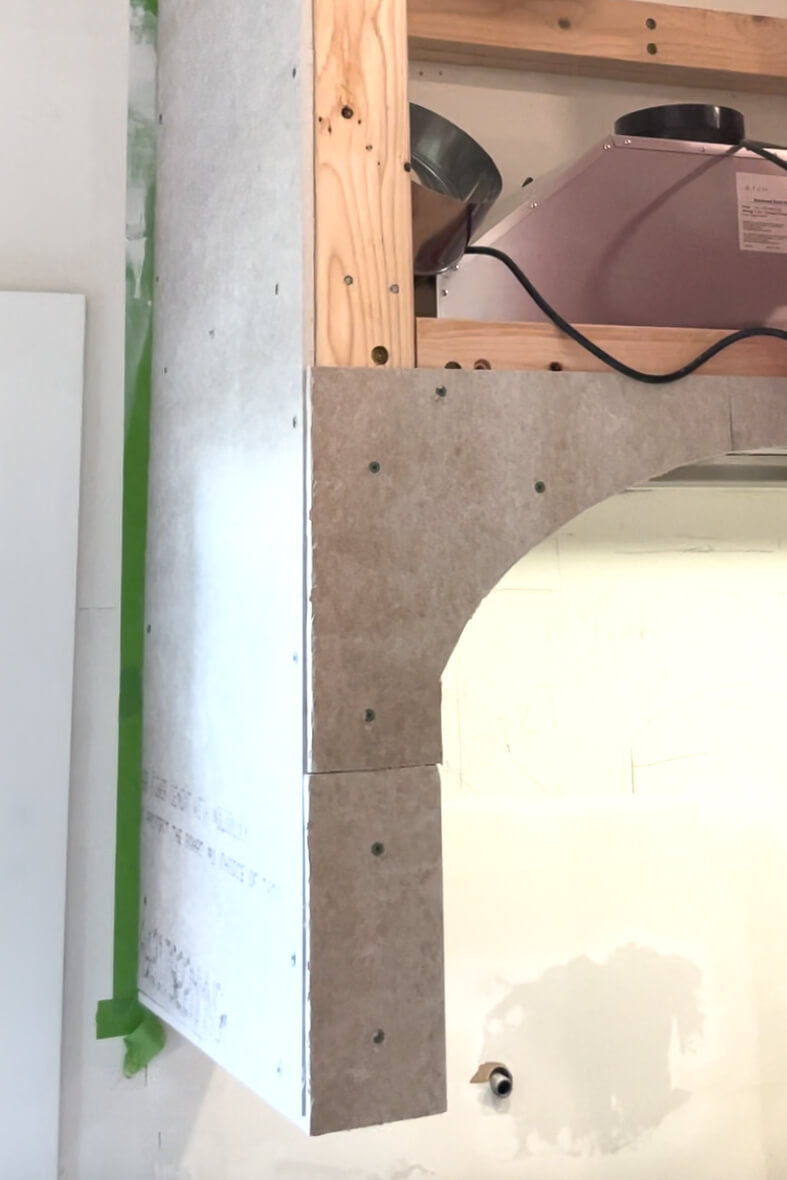
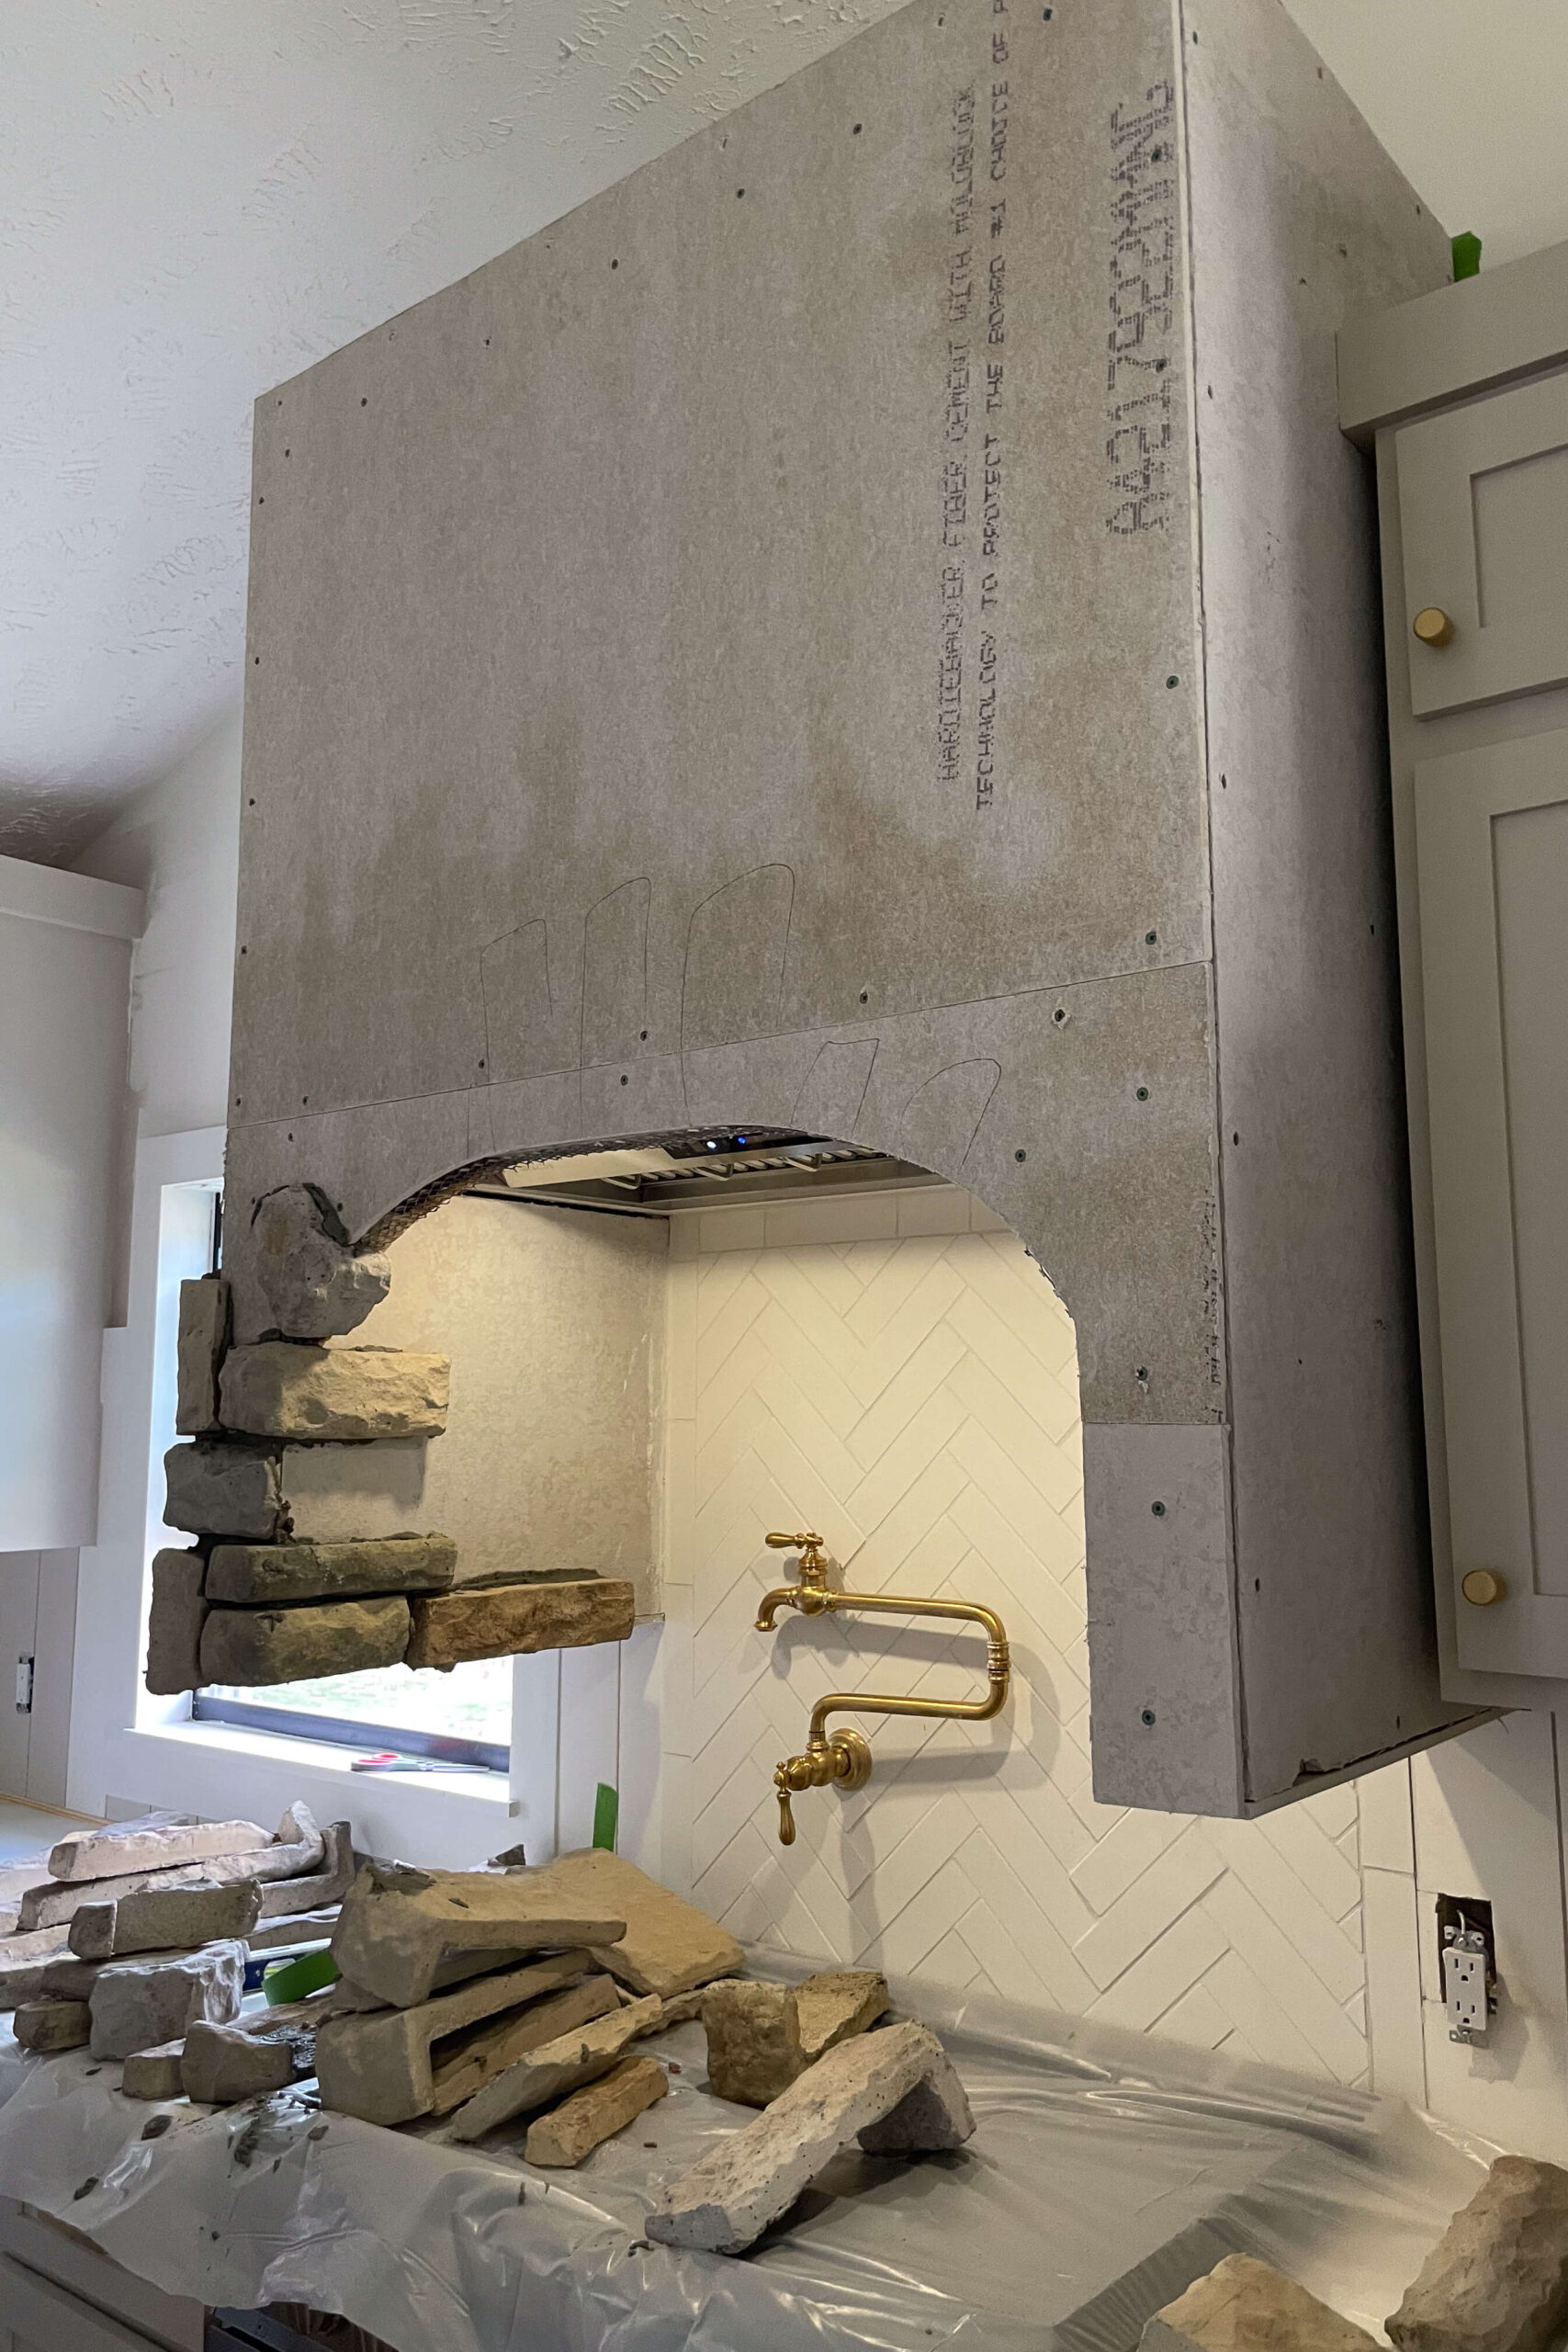
Adding Cement Board
Now that the hood insert is installed and the arch is in place in the front, we moved on to covering the wood frame with cement board. Our stone will attach to the cement board. You simply cut it out in the shape and size you need and then fasten it with screws.
At this point in the project, we covered everything except the top portion, as we still needed to access it to add the vent to the outside for the insert on my stone range hood.
Step Six: Venting to the Outside
The hood insert that I chose for my kitchen has both a ducted and ductless option. So, if cutting a hole to vent to the outside is not an option for you, you can go the ductless route. I do think that venting to the outside is a better choice when possible, though, just so it can send the smoky air outside rather than recirculating it around your house.
Grandpa used the flexible hose we used for our ducting and drew a template on the back wall where he needed to cut the hole out. Then he had to cut through the drywall, insulation, siding… all of it. He started off with a handheld rotary cut out tool, then after he got through some layers he finished it off with this hole saw that attaches to your drill.


Pro Tip: Having a handheld vacuum like this one on hand during projects like this is a game changer. It really helps keep the dust and mess under control.
Now that the hole was there, Grandpa vented the insert out through the hole to the vent cover that I had bought. Then he thoroughly applied caulk around it to keep out the cold, winter air as much as possible.


Now that we had completed the top portion, we could finish covering it with the cement board and move on to the tile.
Adding a Tile Backsplash
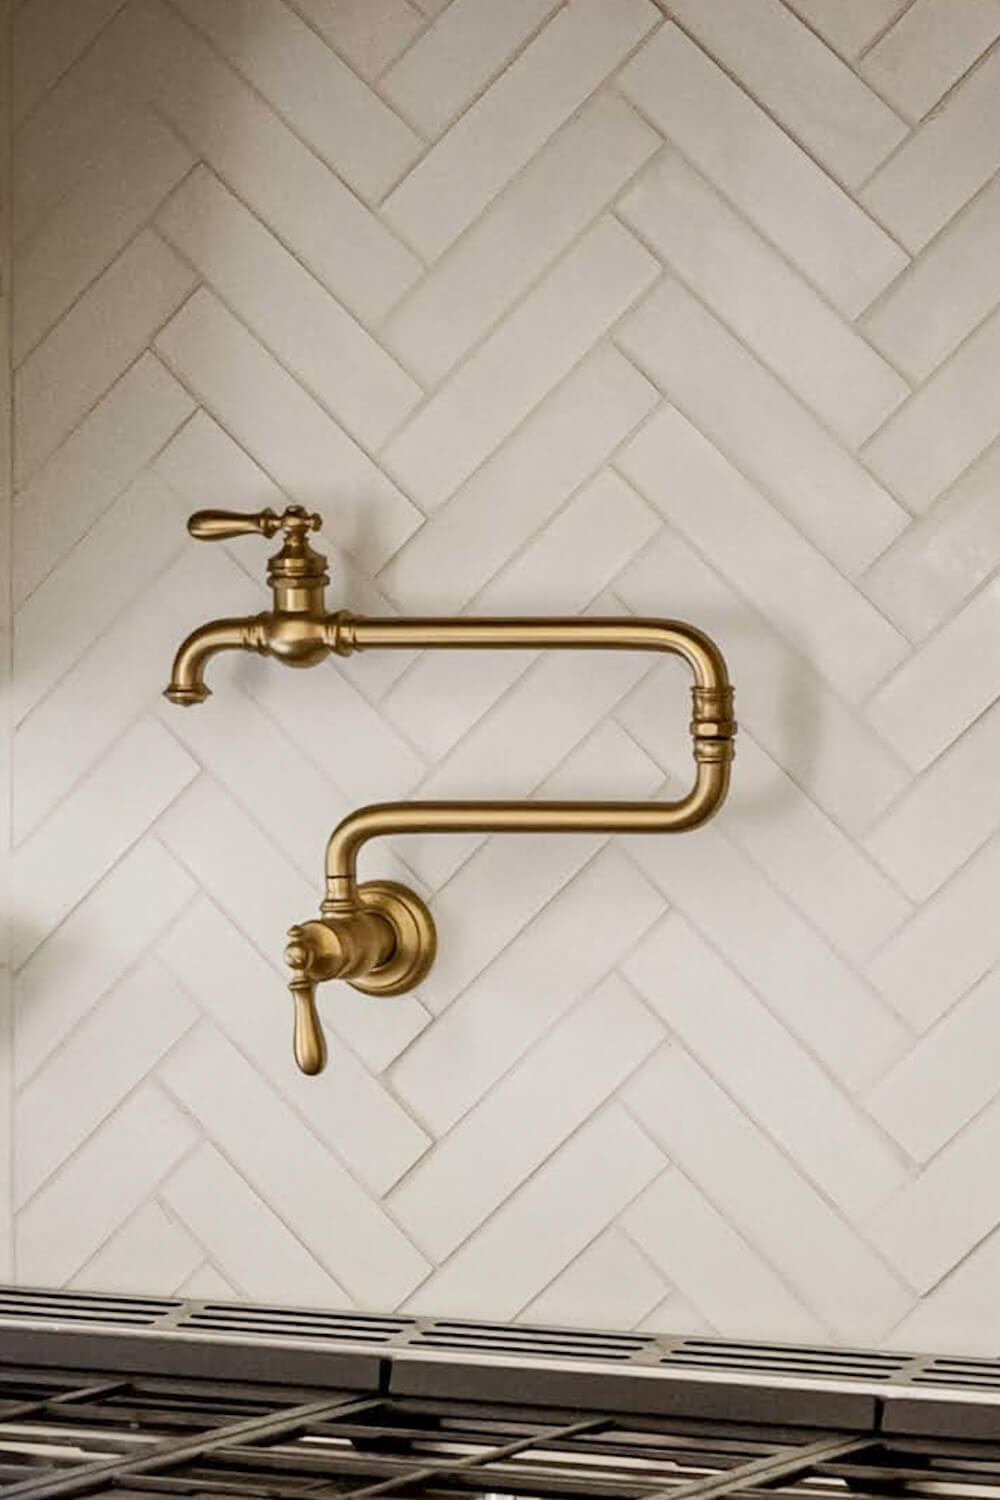
For the rest of my kitchen, I went with a painted shiplap backsplash, which was really cost-effective and has held up great. But I wanted to go with tile for this section of backsplash that would sit underneath my gorgeous stone range hood. I chose these classic white tiles from Riad Tile and we are going to lay them in a herringbone pattern.
The first step was finding the middle, as we wanted the herringbone pattern to be centered, of course.

Next, we added this ledger board to hold the tiles up while we worked on the border. The ledger board keeps the first row of tiles right where we want them, and it comes off after the mortar has had a chance to dry.

Once the border was in place, we moved onto that herringbone pattern, which started in the center. A small level is a must have for keeping everything nice and aligned. A pattern like this one can get all wonky on you real quick if you aren’t careful.


After you have the center done, you can move onto the right and the left, just continuing the pattern as you go.

Now that the tiles are all in place (and you wait however long the mortar/thin set you choose to use says to wait) you are ready for grout.
See how good the tile looks after adding the grout?! I chose a grout color very similar to my tile color for a seamless and clean look. I just love how the brass pot filler pops against it.

Setting the Stone
We finally reached the point where it was time to add the stone to our stone range hood.
I purchased my stone from Centurion Stone of Iowa, you can also use a stone dealer local to you. I chose their Oak Park Summit Blend which I used on both of my fireplaces that I also remodeled which I will hopefully have some blog posts on in the near future!
Before applying the stone you want to make sure your mortar is just the right consistency. Too wet and it won’t suction to the wall, but too dry and it won’t suction to the wall. However, I learned that if it suctions to the wall and is held up independently it’s not necessarily a sign that it will stay there. The stone and the cement board can both absorb moisture from the mortar, causing it to become too dry too fast and you’ll have falling stones on your hand which could be unsafe. So you want to err on the side of more water, but not so much that it won’t suction or you can’t build it up on the back of the stone without it running off. Another tip would be to keep a spray bottle handy and spray your stones with water before you back butter them.
Once you’ve found the right consistency, back butter the individual stone pieces using a trowel, then press onto the cement board, wiggle a little, then hold it in place for a few seconds.
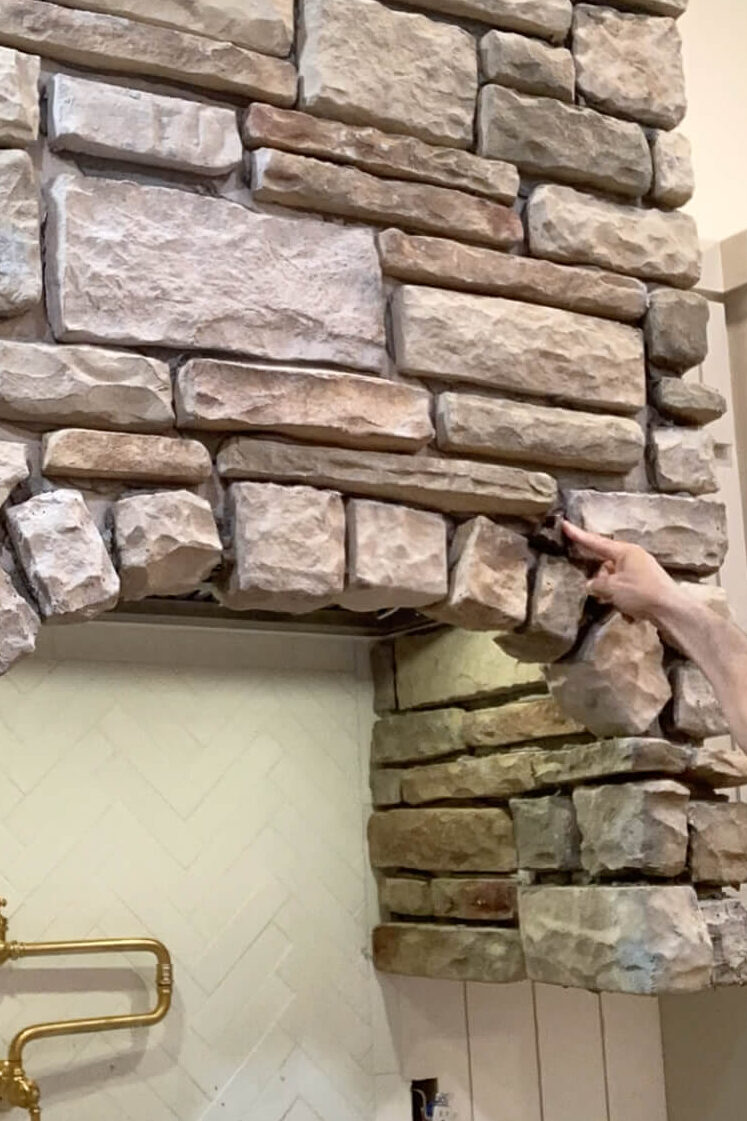
Once we had completed one front corner, we worked our way along the arch to the other corner. Then, after we had completed the second corner, we started filling in the middle.
It’s a bit like doing a puzzle: You want to find the pieces that fit best while mixing up the colors, shapes, and sizes so that everything looks good on your finished stone range hood.


There will be some gaps between the stones, but if you have any gaps that are bigger than what you would like, you can break off smaller pieces to fill them in. My plan was to overgrout the stone, so I made my gaps about a finger width apart.
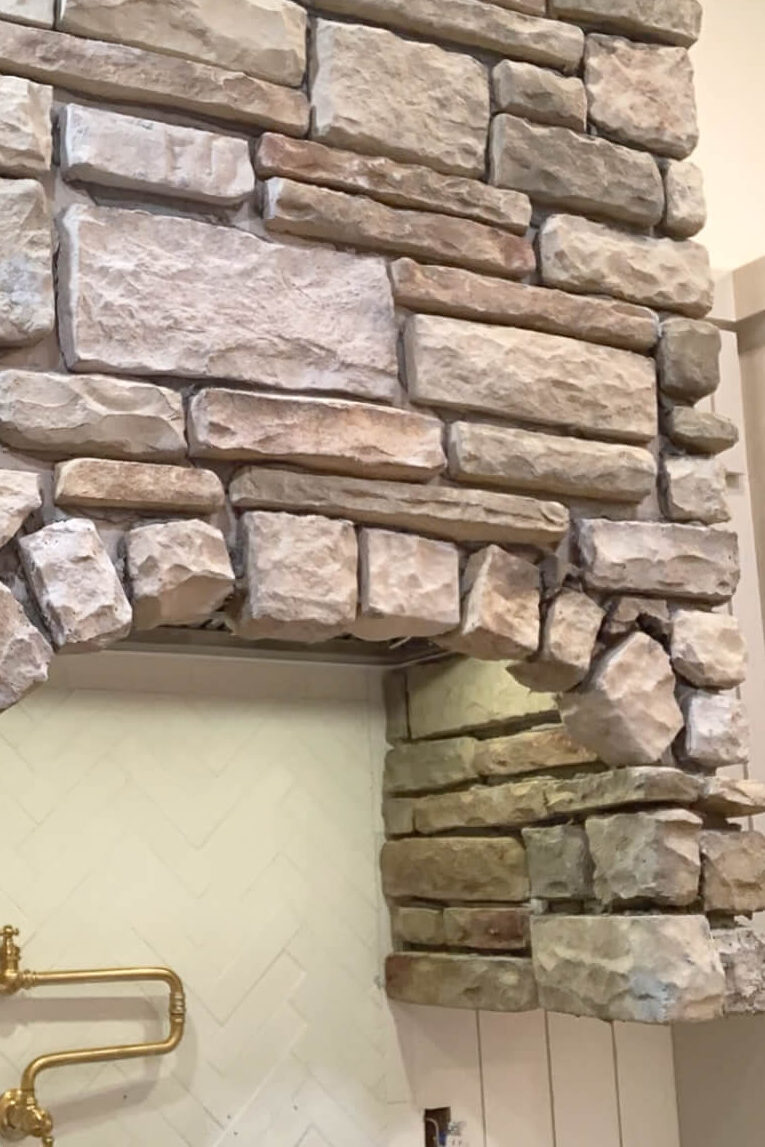
The best way I found to cut these stone pieces is to use a tile saw. I started cutting the backside of the stone, but did not cut all the way through, only about 3/4 of the way. Then I used a hammer to break the stone piece off on the line I cut with the tile saw. This will give you a cleanish cut, but still leave the rustic, imperfect edge we are looking for. This is also really helpful when you are getting close to the wall. If a stone piece you need to use is just a little too long, you can use the tile saw and hammer to make it fit better.
On the front of my stone range hood, I had a few gaps that were just a little too big. You can see here where we had a gap, we added a small piece, and voila… so much better.

Adding Mortar to the Stone Range Hood
Once we were happy with the stone placement we gave it a day or so to dry and then gently tapped each of the stones with a hammer to be double sure they were independently adhering to the wall. This is an important step to be sure none will fall off in the future. If some of them fall off, you know your mortar was too dry.
Then, when you’re sure they’re on there good and tight it was time to grout. I got my grout from Centurion Stone of Iowa, PL-05 in the color Antique white. I was going for a bit of a German smear technique, as I wanted to overfill the gaps and have a little bit of the mortar even smear on top of the stone.
Before you get started, definitely cover up your workspace. This is a messy job and mortar will be dropped. This pre-taped plastic sheeting is awesome for covering your counters and stove top range. You also want to protect any nearby cabinets, walls, or backsplashes.
We started by using mortar bags, which felt like giant icing bags. Use them to squeeze the mortar in all of the cracks and gaps of your stone. It’s going to look terrible at first, but don’t worry.

This where grandpa and I differed a little bit. For my fireplace i just used a gloved finger to smoosh the grout into the surrounding stone for the overgrouted look, which I think was a more efficient way of doing things. When I get a blog post out on my fireplace, I’ll show you how I did that.
Instead, grandpa used a grout float and a masonry brush. He treated the stone more like tile and smothered it all over the stone, and then went back over it with the brush.


Once he applied mortar to the entire stone range hood and smoothed it all out to his liking, he made sure there weren’t any gaps he missed or any area that needs a little more attention. If you find any spots that you aren’t happy with on your stone range hood, just use the mortar bag to fill and then smooth it out.

The final step in adding mortar to your stone range hood is cleaning off the excess with a large sponge and water. You can remove as much or as little as you like to achieve your desired look.
Make sure to do this ASAP before the mortar fully sets, or you’ll have a tough time getting it off and revealing the beautiful stone color. Grandpa learned this the hard way—the mortar set too quickly, and the sponge wasn’t enough. He had to rush and use a wire brush attached to a drill to get the look he wanted!

All Done With the Stone Range Hood Surround
He got it cleaned off pretty well, and after it had time to dry completely, my stone range hood was done! A little (or maybe a lot of) clean up and this is how it looked.
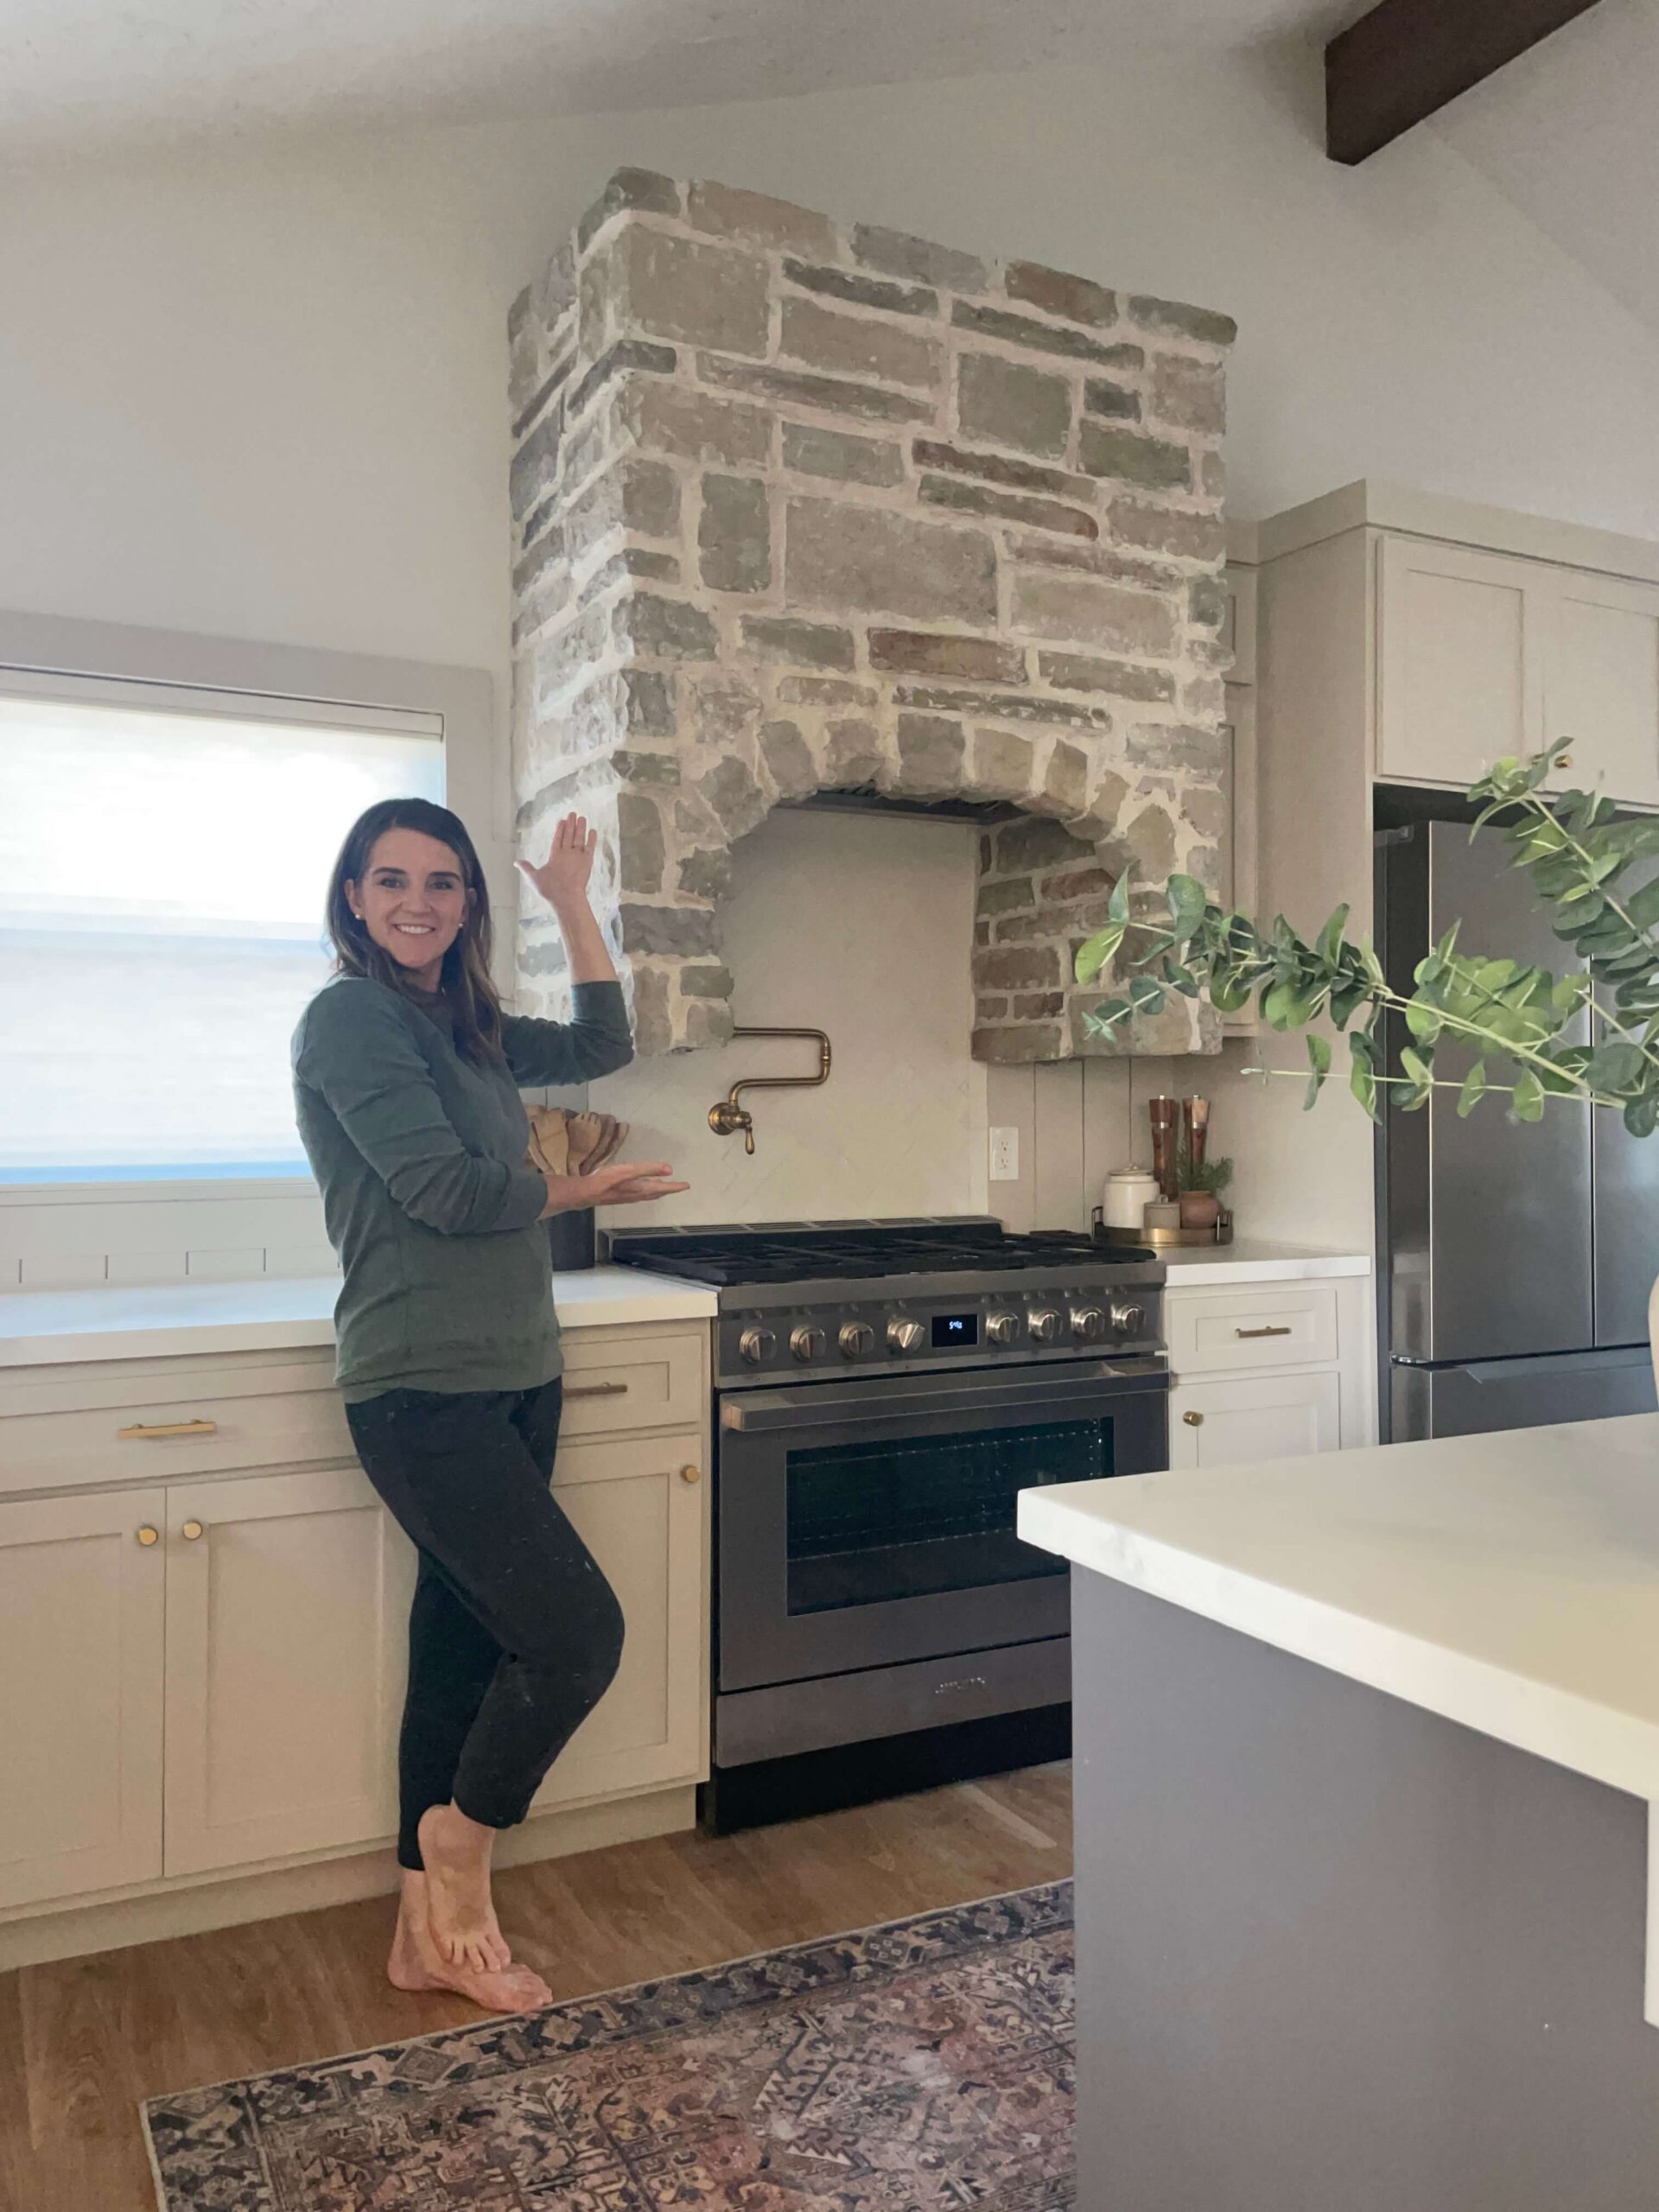
It truly is the cherry on top of my kitchen design. I use my stove and oven everyday, and I love being able to work in such a luxurious space. It’s even more special to me knowing how much hard work Grandpa and I put in on this project to create a beautiful and functional stone range hood.

What a beautiful design! We are looking to do something similar in our kitchen. Can you share the cabinet brand and color? The cabinets match the stone perfectly!
Sherwin Williams Accessible Beige