Build Your Own Pull-Out Trash Drawer!


Updated July 13, 2026
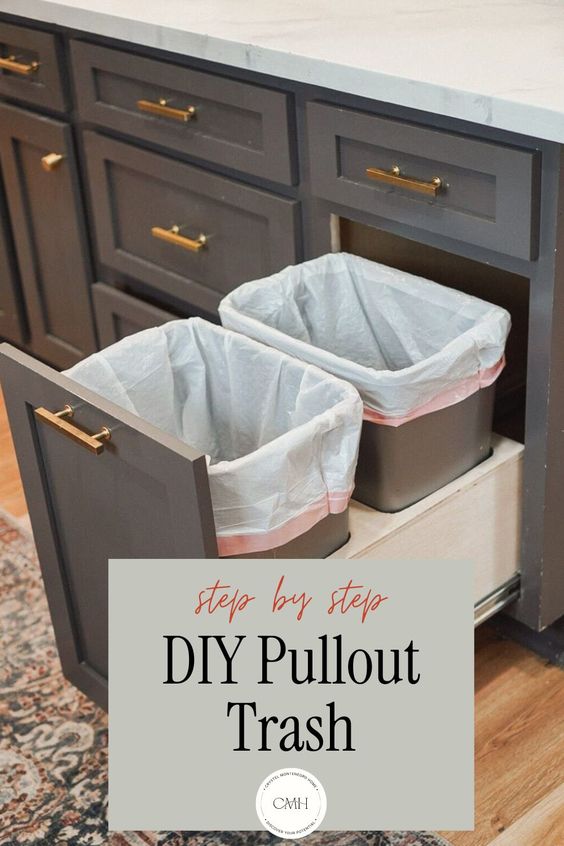
Do you hate having trash cans visible in the kitchen for all house guests to see? You might think those unsightly things can’t be hidden. Look no further because I have the perfect solution! I will show you how to turn any cabinet into a pull-out trash drawer, hidden and out of sight!
When we bought our house, I remodeled the entire kitchen, purchasing stock cabinets from Home Depot and modifying them by building a trash cabinet drawer for my recycling and regular trash bins. It helps the kitchen look and feel cleaner when everything is tucked away, and it’s not as hard to build as you would think! Follow along for the steps to create a sliding pull-out trash drawer.
This post includes affiliate links.
Supply List
Drawer Slides & Screws
Wood Glue
brad nails
1/2″ Plywood
Scrapwood
Tools
Table Saw
Miter Saw
Jigsaw
Drill Combo Set
Brad Nailer
Orbital Sander
Tape Measure
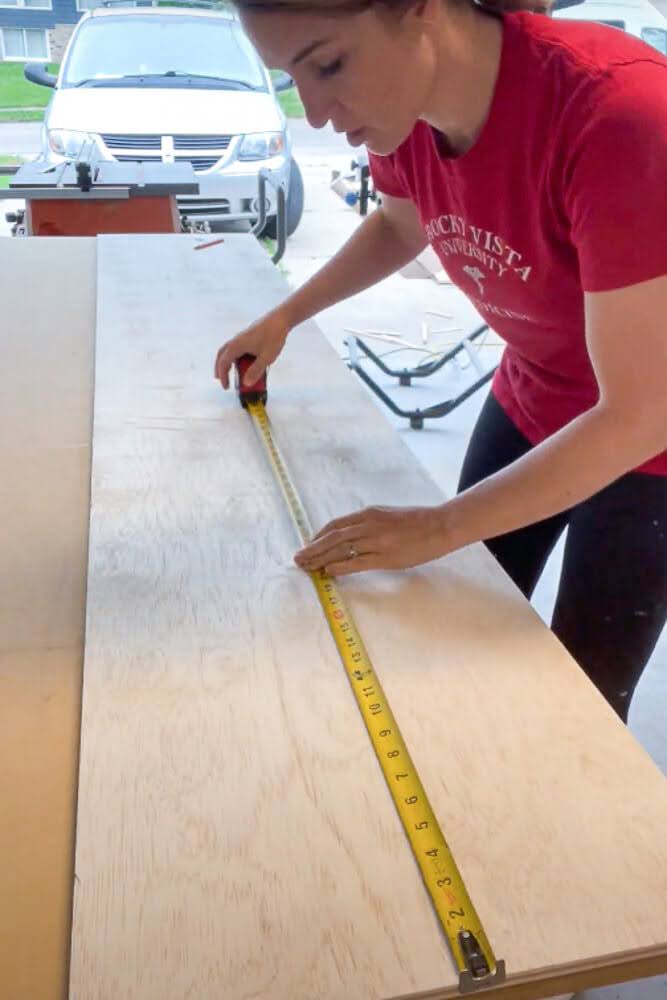
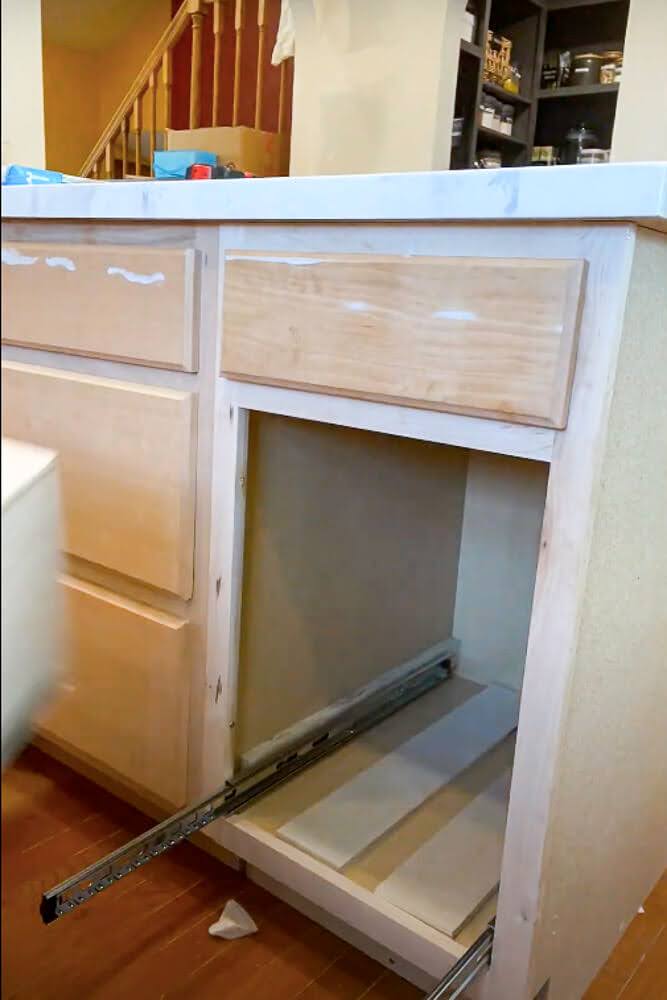
Measuring the Cabinet for the Pull-Out Trash Drawer
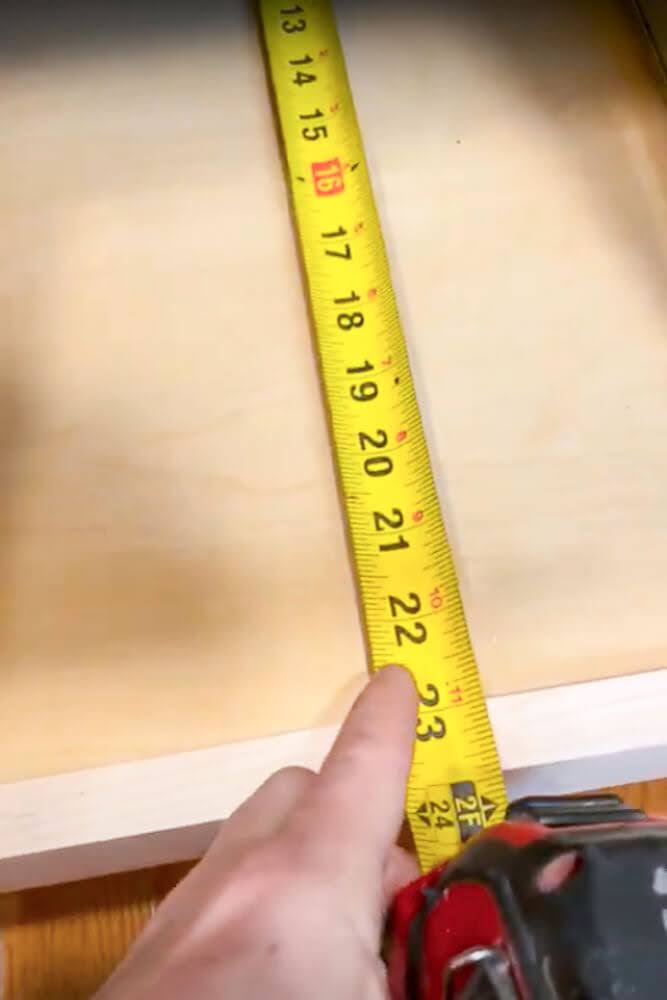
We bought these stock cabinets from Home Depot, and the standard outside depth of lower kitchen cabinets is 24″ deep. I wanted a good half-inch or so open on the back of my drawer, so I measured the distance between the front lip to the back of the cabinet. Then, I subtracted 1/2″, and my measurement came out to 22 1/2″ for the length of the trash drawer.
The slides will sit on the face frame and should be flush with the front edge of the cabinet. Because the drawer slides sit on the face frame, there were gaps between the slides and the sides of the cabinet. I needed to close those up, so I cut two pieces of wood that were the exact thickness of the gaps. Depending on the types of cabinets you have, there may or may not be a gap, and the spacing could be different.


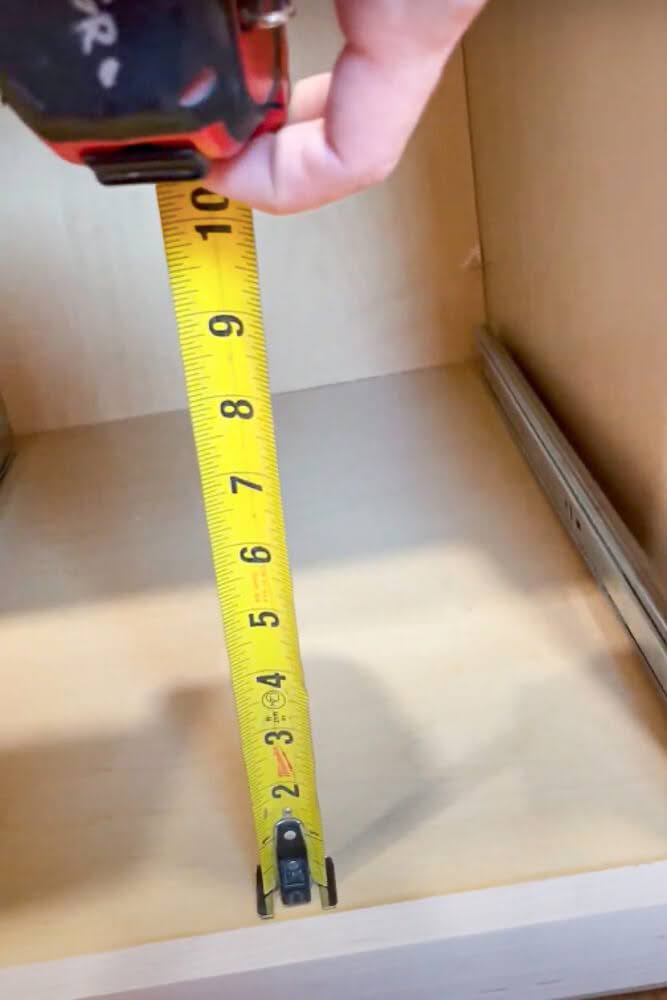
After determining the gap measurements, I needed to find the width of my drawer. To find that, I measured the distance between each drawer slide, which came to 13″.
So, based on my measurements, I determined that my drawer needed to be 22 ½” deep and 14” wide; then, I decided to make the drawer box 10″ tall.
Cutting the Wood Pieces to Size
I used 1/2″ plywood to maximize the amount of space in my cabinet and because it’s less expensive than 3/4″ plywood. First, I cut two pieces that were 22 1/2″ deep to account for the depth I wanted my drawer; then, I cut them 14″ wide to account for the width.
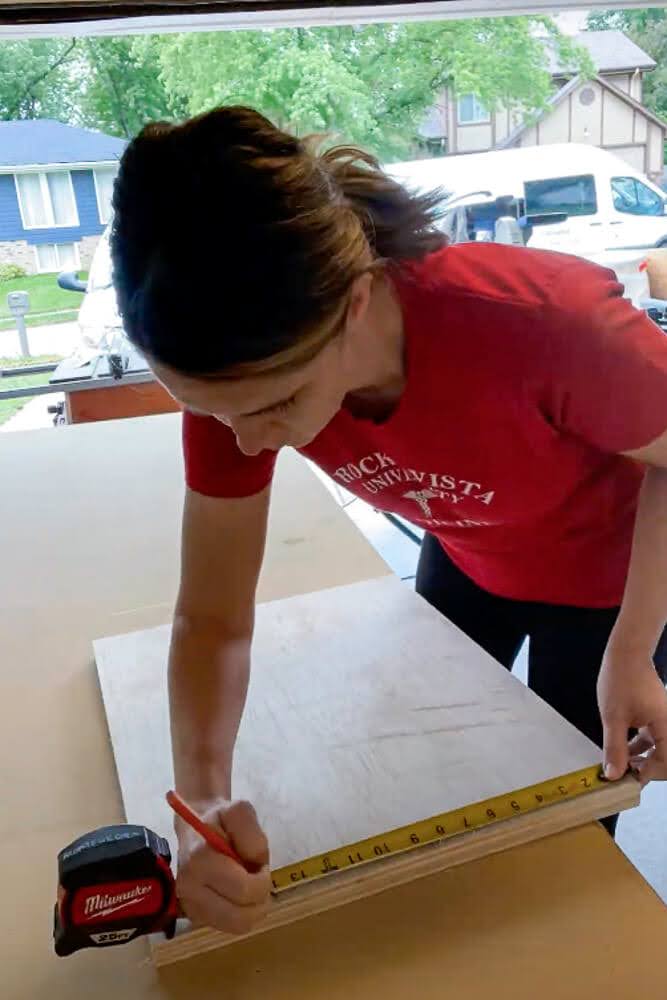
After making my cuts for the bottom and top pieces of the sliding trash drawer, I went on to build the four sides of the drawer. In order to keep the total height at 10″, I had to subtract the thickness of the two boards I just cut for the top and bottom that were 1/2″ tall each. So, my side pieces would measure 9 inches in height.
Next, I needed to cut the side pieces of the board the same distance as the top and bottom, which measured, 22 1/2″. So, the two side pieces of my box measured 22 1/2 x 9.
1″ was subtracted from all dimensions of the front and back pieces to account for the 1/2″ sides on both ends. They ended up being 21 1/2 x 8″.
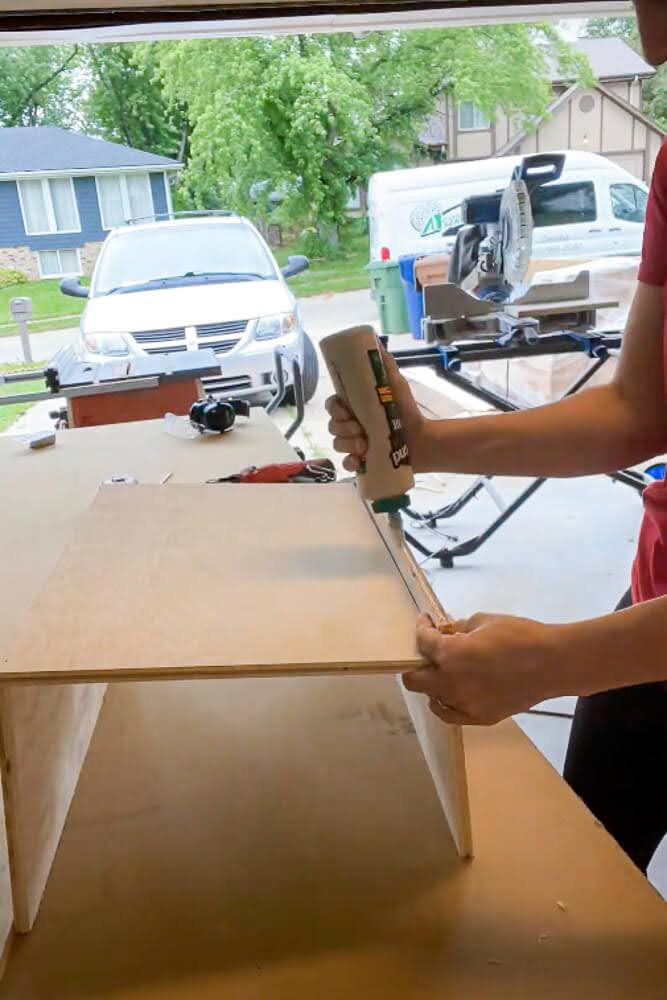
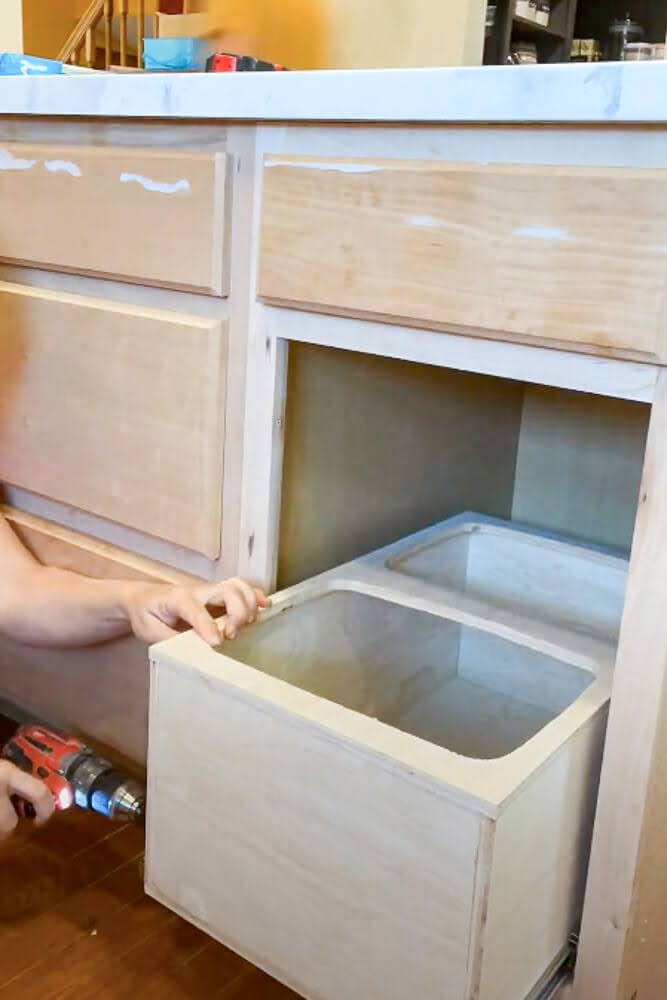
Building the Trash Can Box for the Sliding Trash Drawer
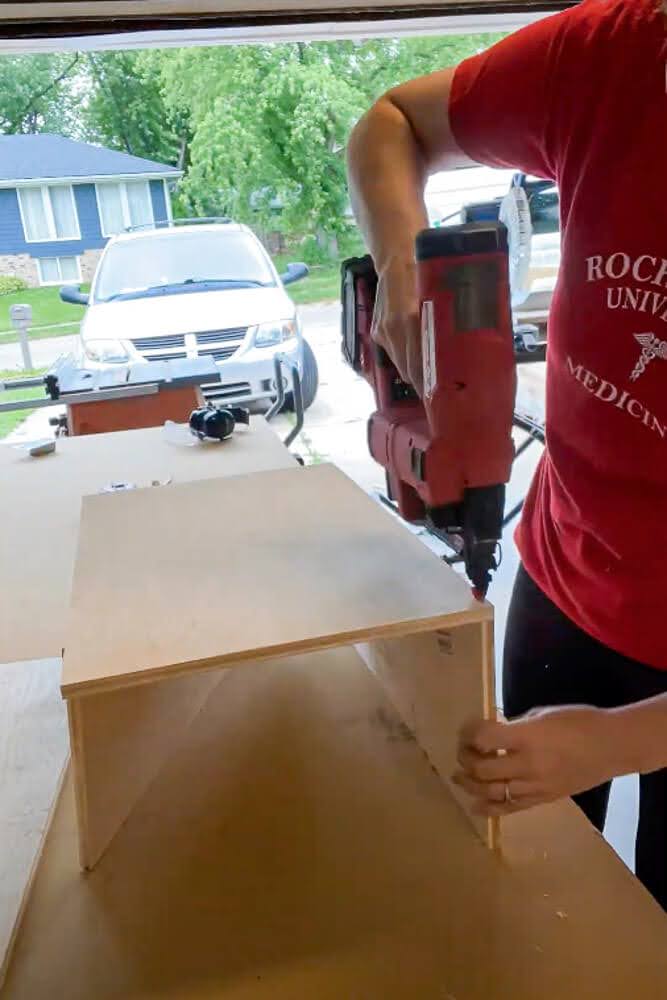
After the final cuts for the drawer were made, I basically built a big box. I attached all the sides together with wood glue. Wood glue is very, very strong! I also inserted brad nails to tack the sides in place while the glue dried completely. Because I used plywood and plywood is made up of layers, I also went ahead and reinforced the bottom of the drawer with a few screws. Even though the glue is strong, it will only adhere to the top layer.
This is the very, very simple way to build a drawer, and there are fancier ways, but I didn’t want to worry about it. Moving along, I needed to create the holes for the trash bins to sit in.
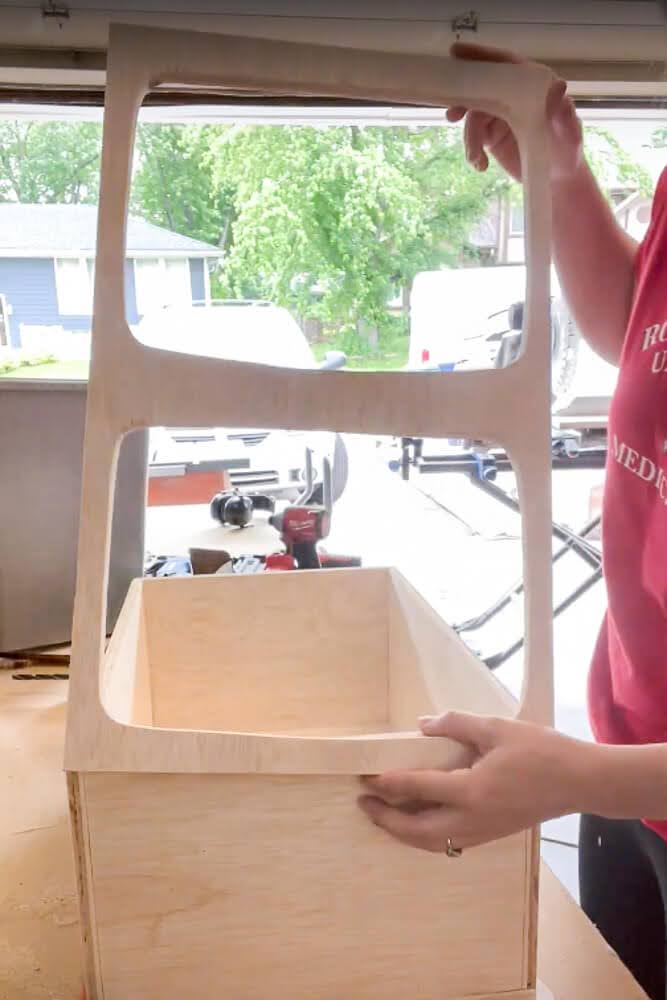
Cutting Holes for the Trash Bins and Sanding the Box
I positioned the trash bin exactly where I wanted it to go. Then, I made sure it was even on both ends and used a pencil to trace out the bottom of it. When cutting this, I went in and cut it about ¼” wider, so the trash bin was able to sit down further into the box, and then I kept trimming it out until it was exactly as big as I needed it to be for the trash can to fit snugly inside.
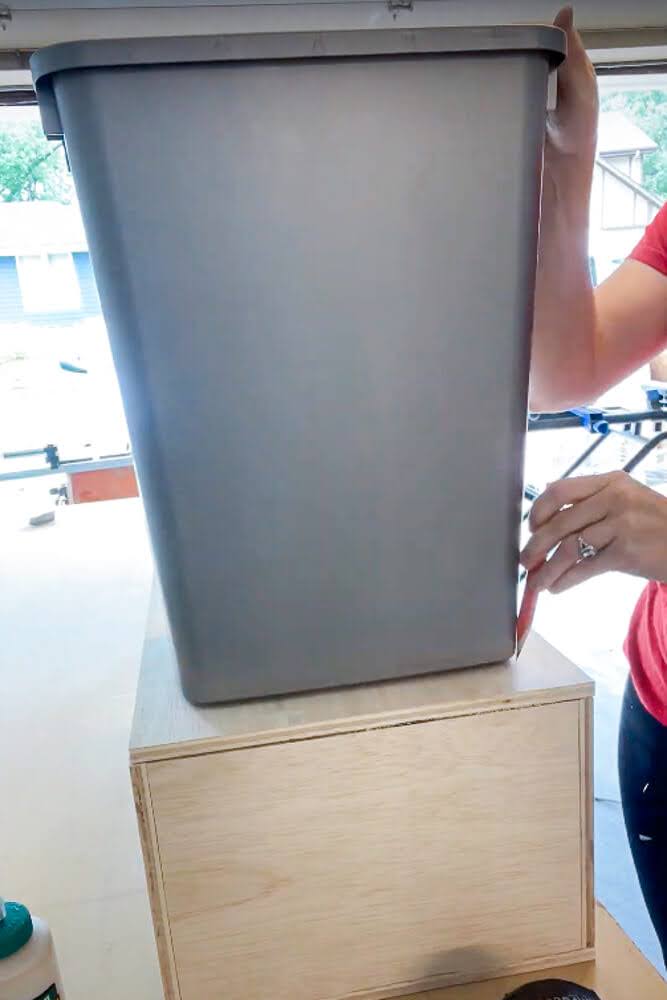
If you have a flexible measuring tape, you could measure the trash bin around the middle section, and cut your hole to the exact measurements right away.
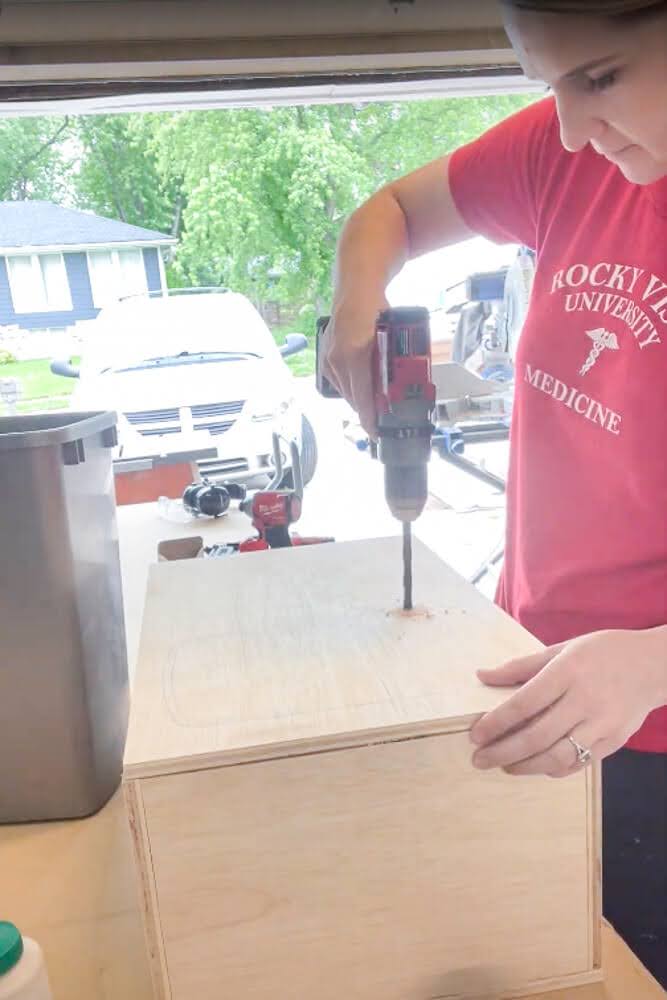
After both trash bins were traced onto the top of the box, I used a drill to puncture a hole into the traced sections and used my jigsaw to cut out the places where the trash bins sit.
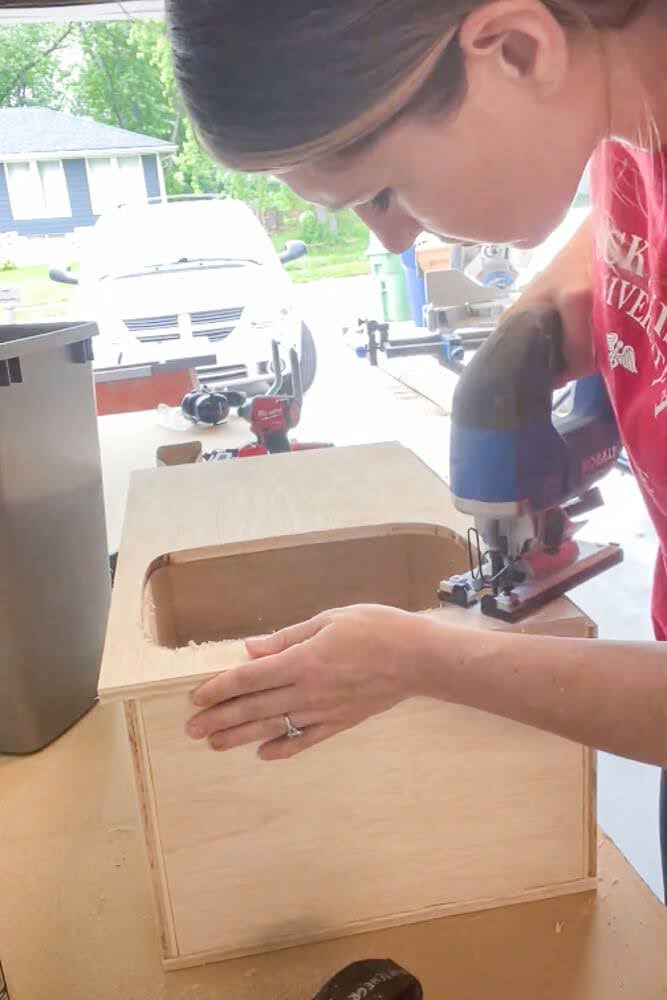
I continued cutting little by little until the trash bin fit snuggly. Then, I took my orbital sander to sand down the edges and all around the trash bin box.
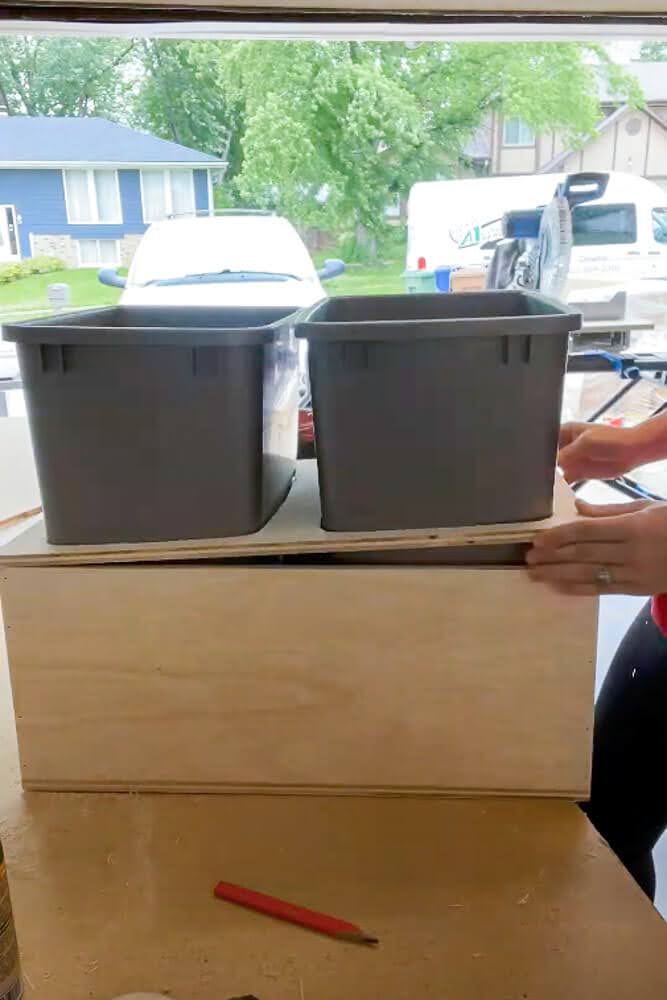

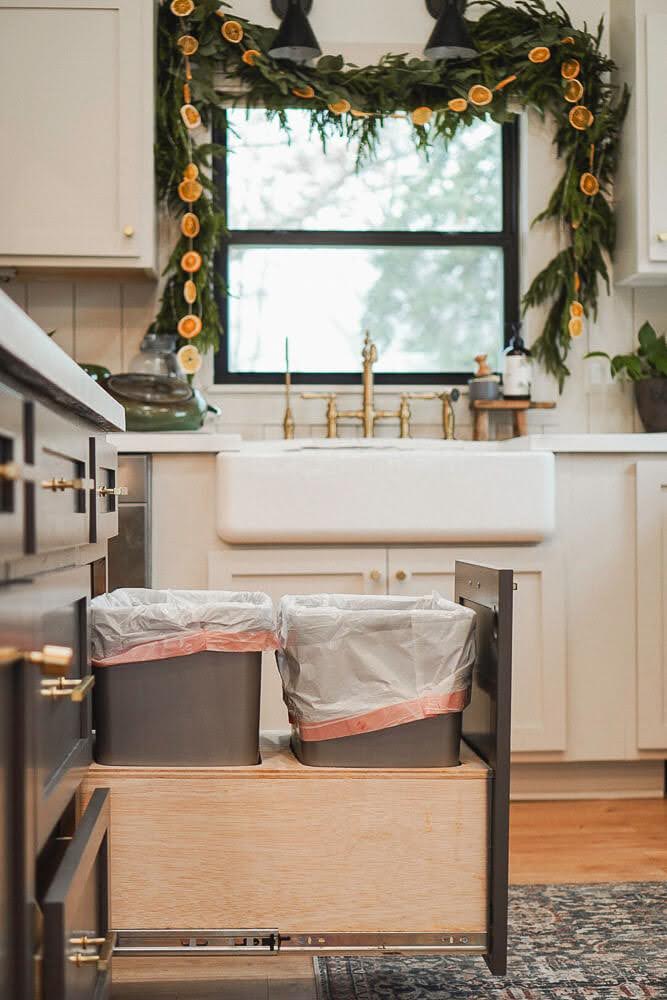
I was hoping there would have been enough room in the back of the drawer where I could store extra garbage bags, but there wasn’t because the trash bins had to be far enough apart so they both fit.
I put wood glue down on the rim of the box and smoothed it out with my finger. I then placed the top part of the box with the trash bin holes onto the glue. Once in place, I brad nailed all around the top to secure it into place. Then, I quickly sanded the top and sides of the box down, especially the edges.
Installing the Trash Drawer Slides
I bought drawer slides from Home Depot that were 22″ long with a 100-pound capacity, so they are a bit overkill. This new drawer fits perfectly between my drawer slides. I used two ¾” pieces of scrap wood to fill the gaps between the drawer slides and the sides of the cabinet that I previously mentioned. I screwed the two boards into each side of the cabinet and then mounted the slides onto each piece of wood. Make sure your drawer slides are installed in the right direction that you want your drawer to slide in and out.
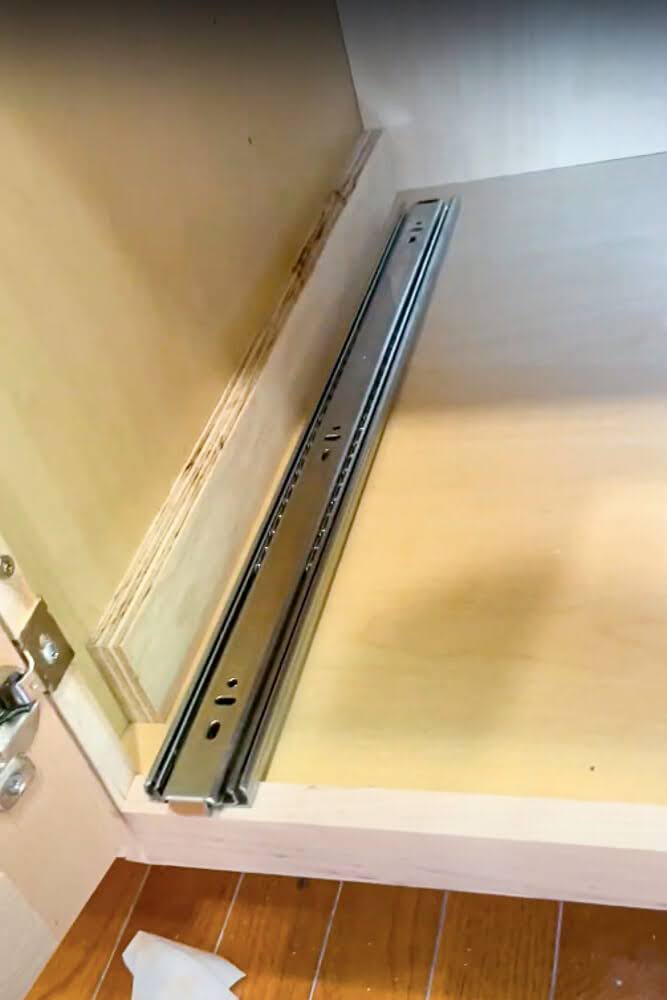
I also used two ½” pieces of scrap wood to set down and use as spacers for my drawer, ensuring the box wasn’t too close to the cabinet’s bottom edge when being installed.
I set one slide on top of one of a spacer so they were flush with each other, then moved it back ⅛” and opened up the slide. You will see holes in the slide where screws will be put through and screwed into the side of the wall or cabinet.
If you are screwing into melamine, it’s best to puncture a hole using a screw and hammer first so it’s easier to screw into. It also helps to know exactly where you need to put the screw in.
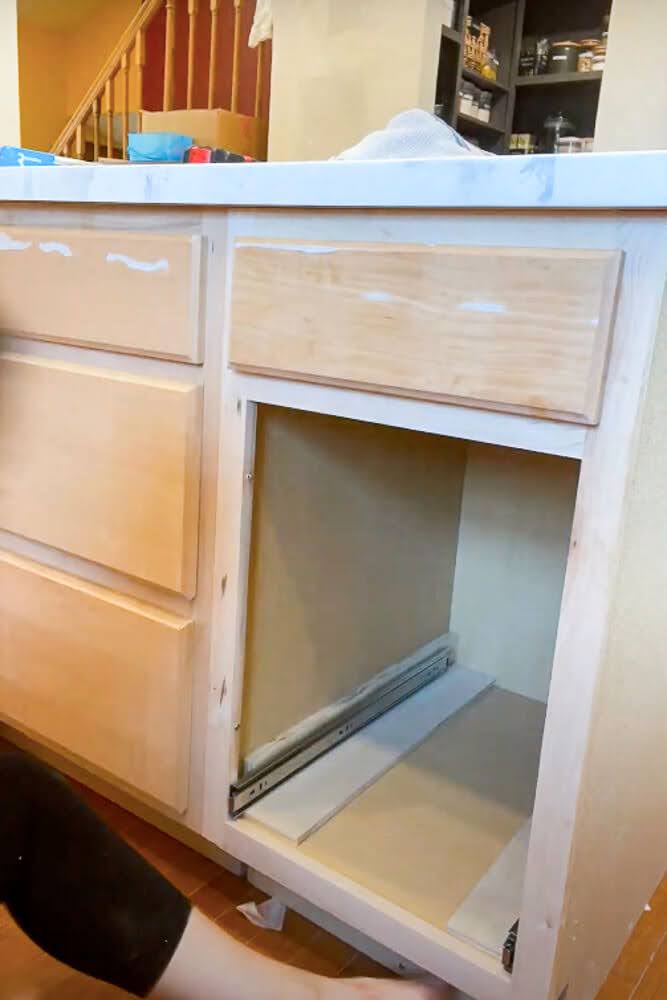
After the first slide was installed, I moved over to the other side, doing the exact same thing on that side of the cabinet with the other slide. When that was complete, I placed the spacers flat down on each side of the inside of the cabinet so there was space between the bottom of where the drawer sits and the bottom of the cabinet.
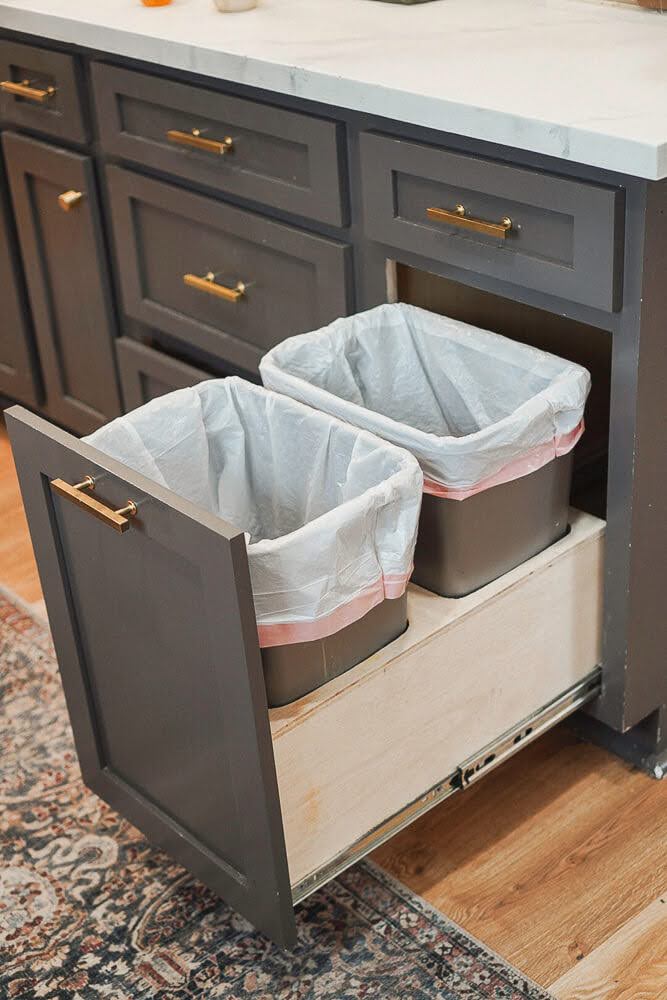
I extended the slides completely out and placed the drawer inside the cabinet on top of the spacers, ensuring the front end of the extended spacer matches up with the front of the drawer. Then, the slides were screwed into the side of the drawer exactly where they needed to go. Now, we have a functioning sliding drawer!
Spacers have a really cool feature on them. If your measurements are off a little bit and your drawer has a slight gap between it and the slide that is already screwed into the inside of the cabinet, the drawer slide can make up for that. Pull the slide completely out of the cabinet, and you will see it has u-shaped cutouts, which are metal tabs that can be pushed out to compensate for any gaps.
Push all the tabs out slightly on the slide and then line it up and screw through those tab holes. That will give you that extra space! When the drawer is pushed back in, it will automatically push the tabs into where they need to go for the drawer to go in straight.
Another tip for you is if you have a cabinet that is too close to the wall and you are not able to get your drill in between the drawer and wall to screw it in, you can extend the slider all the way out; there is a place where you can push or pull a tab on the slider so it separates. Then, measure exactly where you need the slide to go in your cabinet and screw that section in.
Once that section is mounted onto the side of the cabinet, you can mount the other part of the slide onto your drawer, then put the drawer with the slide on back into the slide that was screwed into the side of the cabinet. The slide that was separated will slide right back into place.
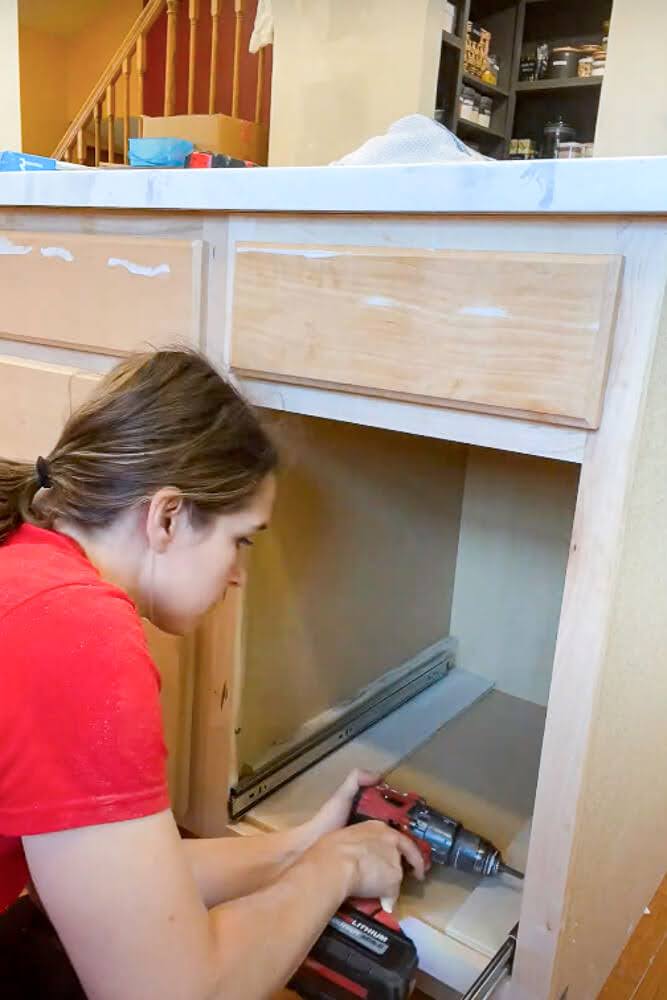
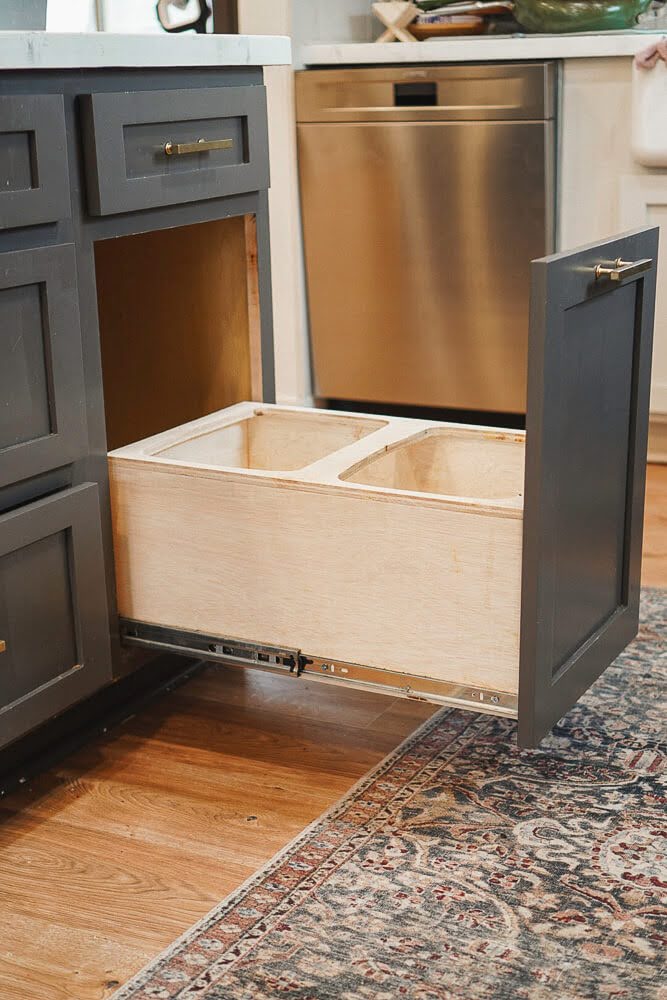
Installing the Cabinet Front to the Pull-Out Trash Drawer
I lined the cabinet door up with the trash drawer. Then, put wood glue on the inside bottom half that comes in contact with the pull-out trash drawer. Next, I used brad nails to help hold the door onto the drawer while the glue was drying.
Lastly, I drilled a few screws going from the inside of the drawer into the cabinet door. Make sure your screws and brad nails are short enough that they don’t go through the door completely. Now, I have a functioning sliding trash drawer!
Building this pull-out trash drawer with slides was a fun little project to do in my remodeled kitchen. The best part was that it wasn’t hard to do and took no time at all!
Take a look at some of the other fun, small projects I have worked on. You may find that you want to DIY your whole kitchen! Maybe you need to reorganize that silverware drawer or the spices in your cabinet that keep falling out every time you open the cabinet door! In the comments, I would love to know if you plan on building one of these small projects.