Updated May 9, 2026
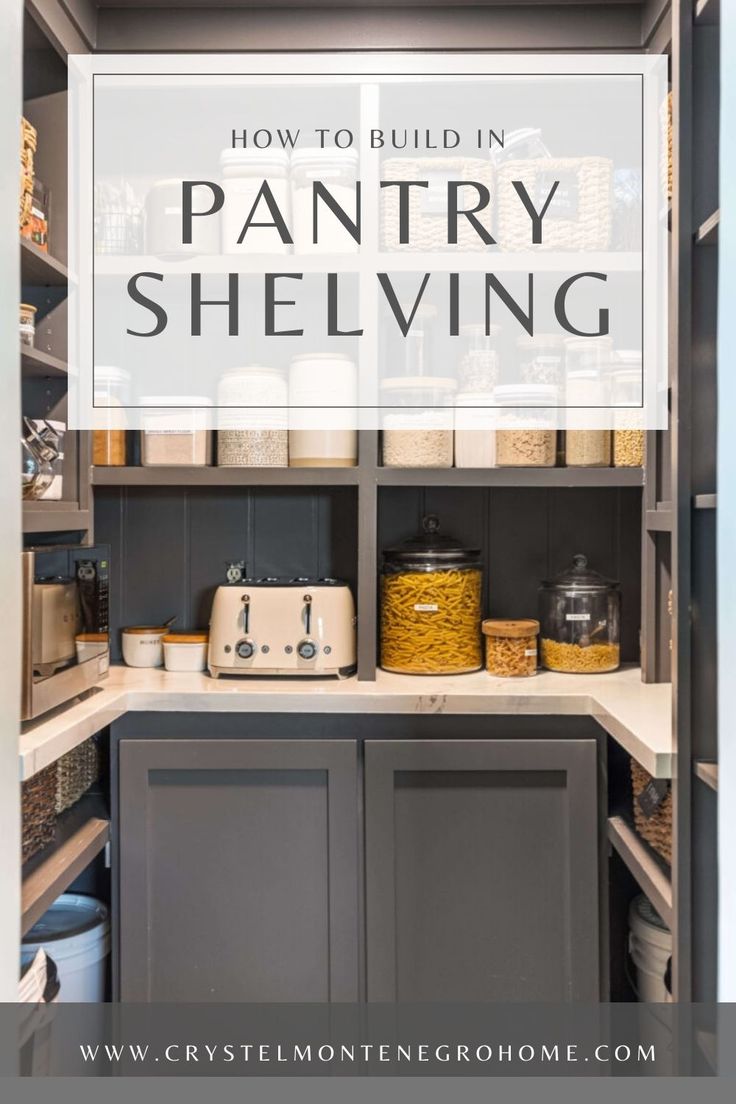
When building DIY pantry shelves, I really didn’t want to have to choose between function and beauty. I have had visions of this pantry for a long time. When we moved into this house it didn’t have a pantry at all, and we studied the layout for hours on end to determine how we could get one. Let me tell you, this was a labor of love! And finally, my dreams came true.
I wanted a space that I enjoyed being in and looking at, but also a space where everything was easy to see and easy to reach. In this post, I’m sharing exactly how I achieved this perfect balance between style and function.
I love how my pantry turned out. I’d originally planned on building a custom door, but it’s just so beautiful as is. It flows great with the rest of the kitchen and looks good from every angle. Keep reading to see how I built these gorgeous DIY pantry shelves.
Tools
- Tape measure
- Framing nailer
- Brad nailer
- Drill or impact driver
- Table saw
- Circular saw
- Pocket hole jig
- Stud finder
- Laser level
- Caulk gun
- Iron
- Edge trimmer
- Small paint roller, foam rollers, and tray
- Pyramid stands
- Paint sprayer
- Shelf pin jig
Materials
- Plywood
- Trim
- Screws
- Wood glue
- Shims
- Wood filler
- Caulk
- Edge banding
- Primer
- Paint
- Shelf pins
Building My Pantry From Scratch
When we moved to our home in Nebraska, we completely gutted and relocated the kitchen. My new pantry would be going in the area where the old kitchen used to be. Whether you’re building your pantry from scratch or working in an existing space, this post has loads of information on designing and building DIY pantry shelves.
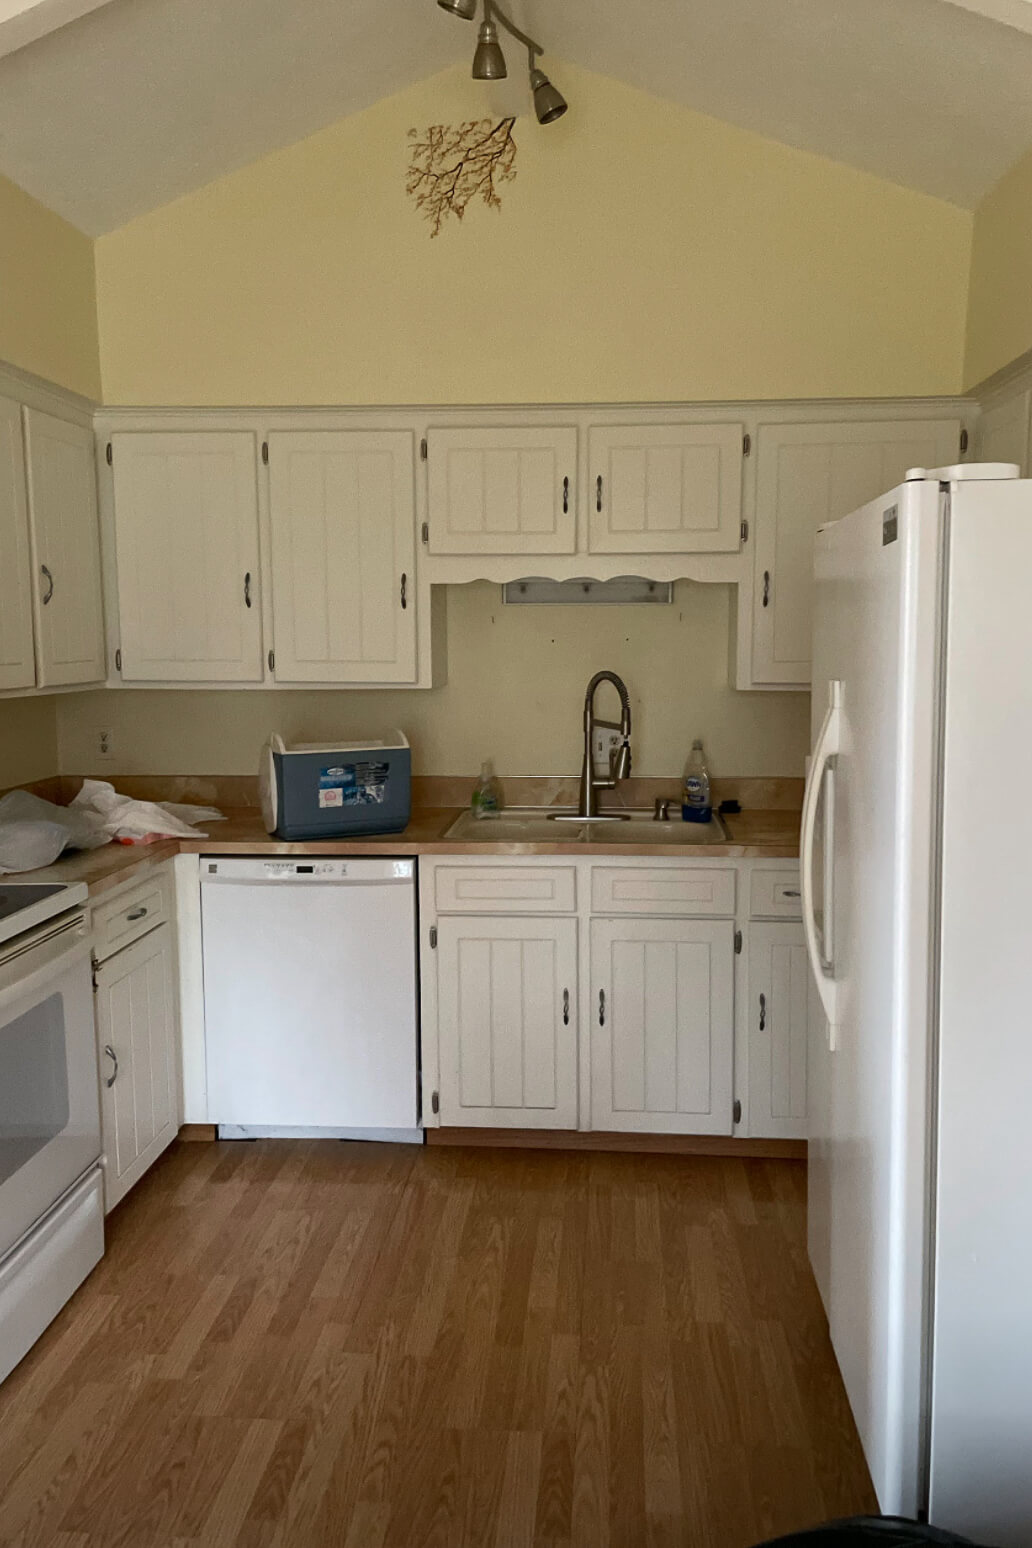
After ripping out the cabinets and an old drywall soffit, I had a blank slate to build the pantry of my dreams.


I framed in new walls using a framing nailer and a laser level to keep it all nice and straight. If your dream pantry requires framing your own walls, I highly recommend YouTube as a source for how to do it! It’s easier than you might think.


I also framed in a lower ceiling above my pantry. The ceilings in this part of the house are all vaulted, but when framing the pantry, I lowered the ceiling in that area so it would be a regular, flat ceiling. This created a bit of a dead space, almost like an attic above my pantry. My followers on Instagram had all kinds of suggestions for what I should do with this extra space, but the best suggestion by far was a hiding place for Christmas presents.

While drywalling the ceiling, I created an easy-access door for hiding presents above my pantry. I cut out a rectangle in the drywall where I wanted the door to be, then used basic trim to make a frame slightly smaller than the opening and attached it to the drywall with my brad nailer.


Then the piece of drywall that I cut out sits just on top of the frame closing off the hole.
Full disclosure – I didn’t plan ahead well when I put the access door in this exact spot. I wanted shelves that went to the ceiling here, but the little access door was in the way. I ended up moving this door over to the area between the light and the entryway. You may notice its new location in later photos.


Next, I finished adding drywall to the inside and outside of the pantry.

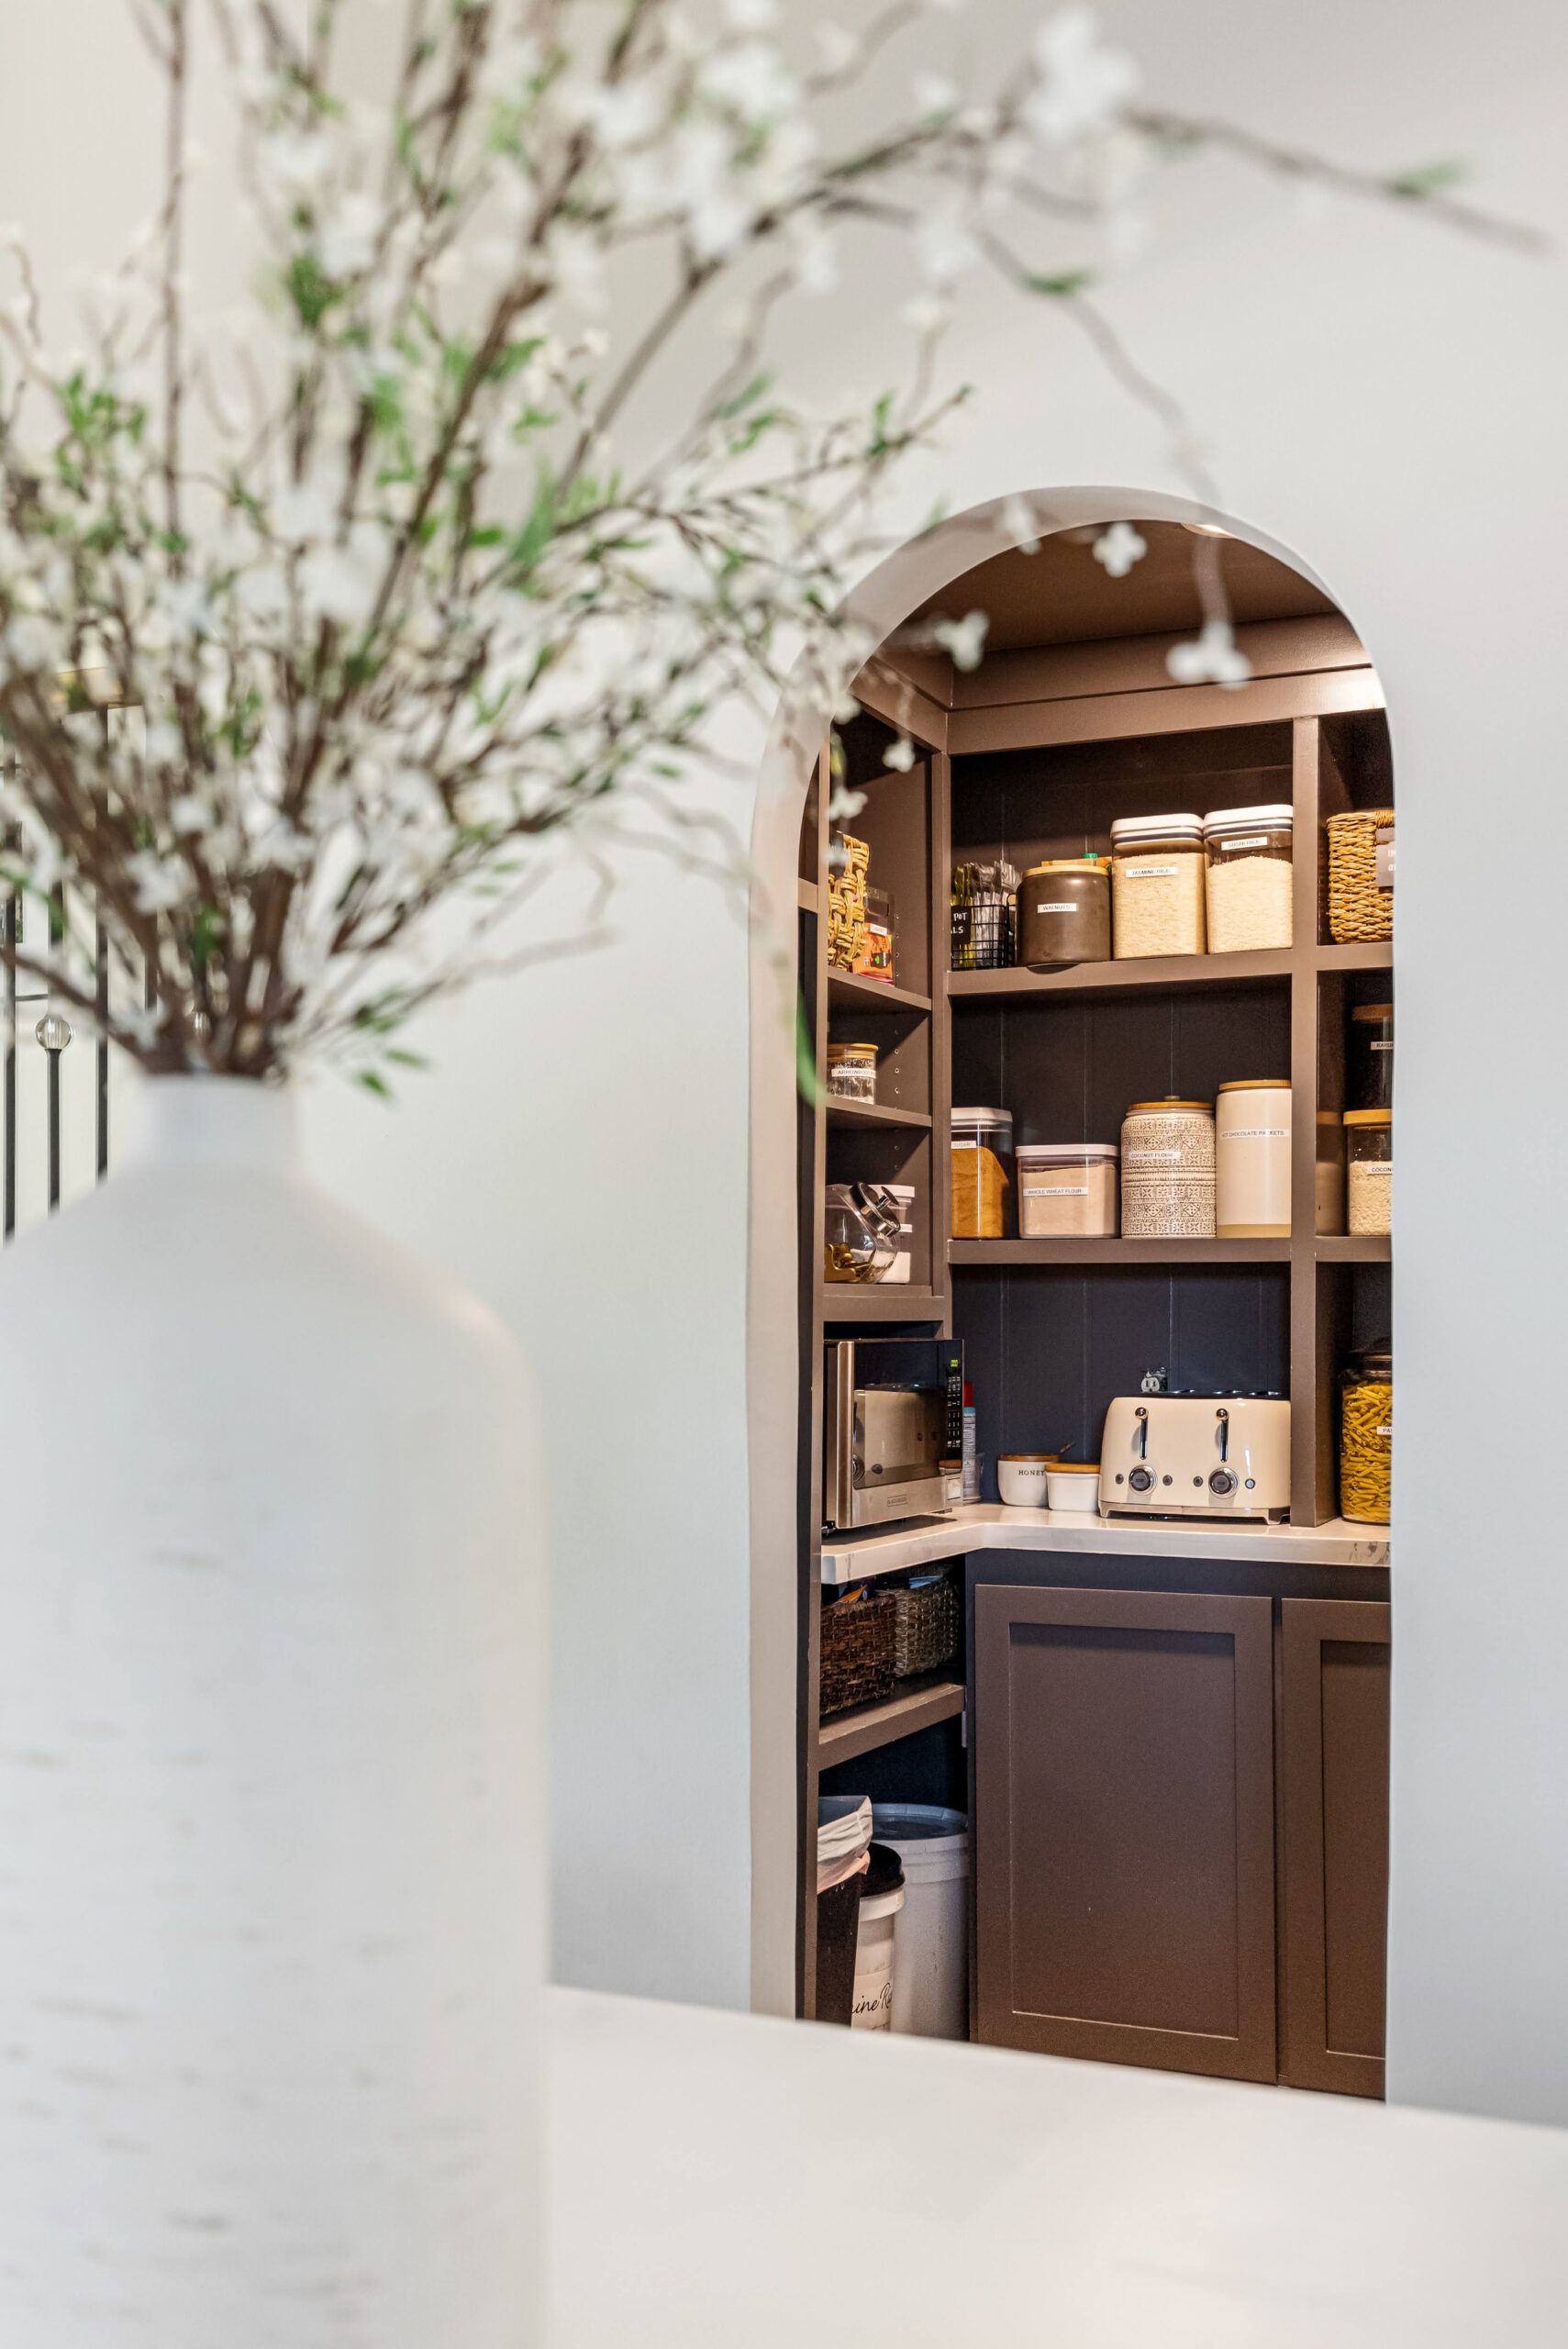
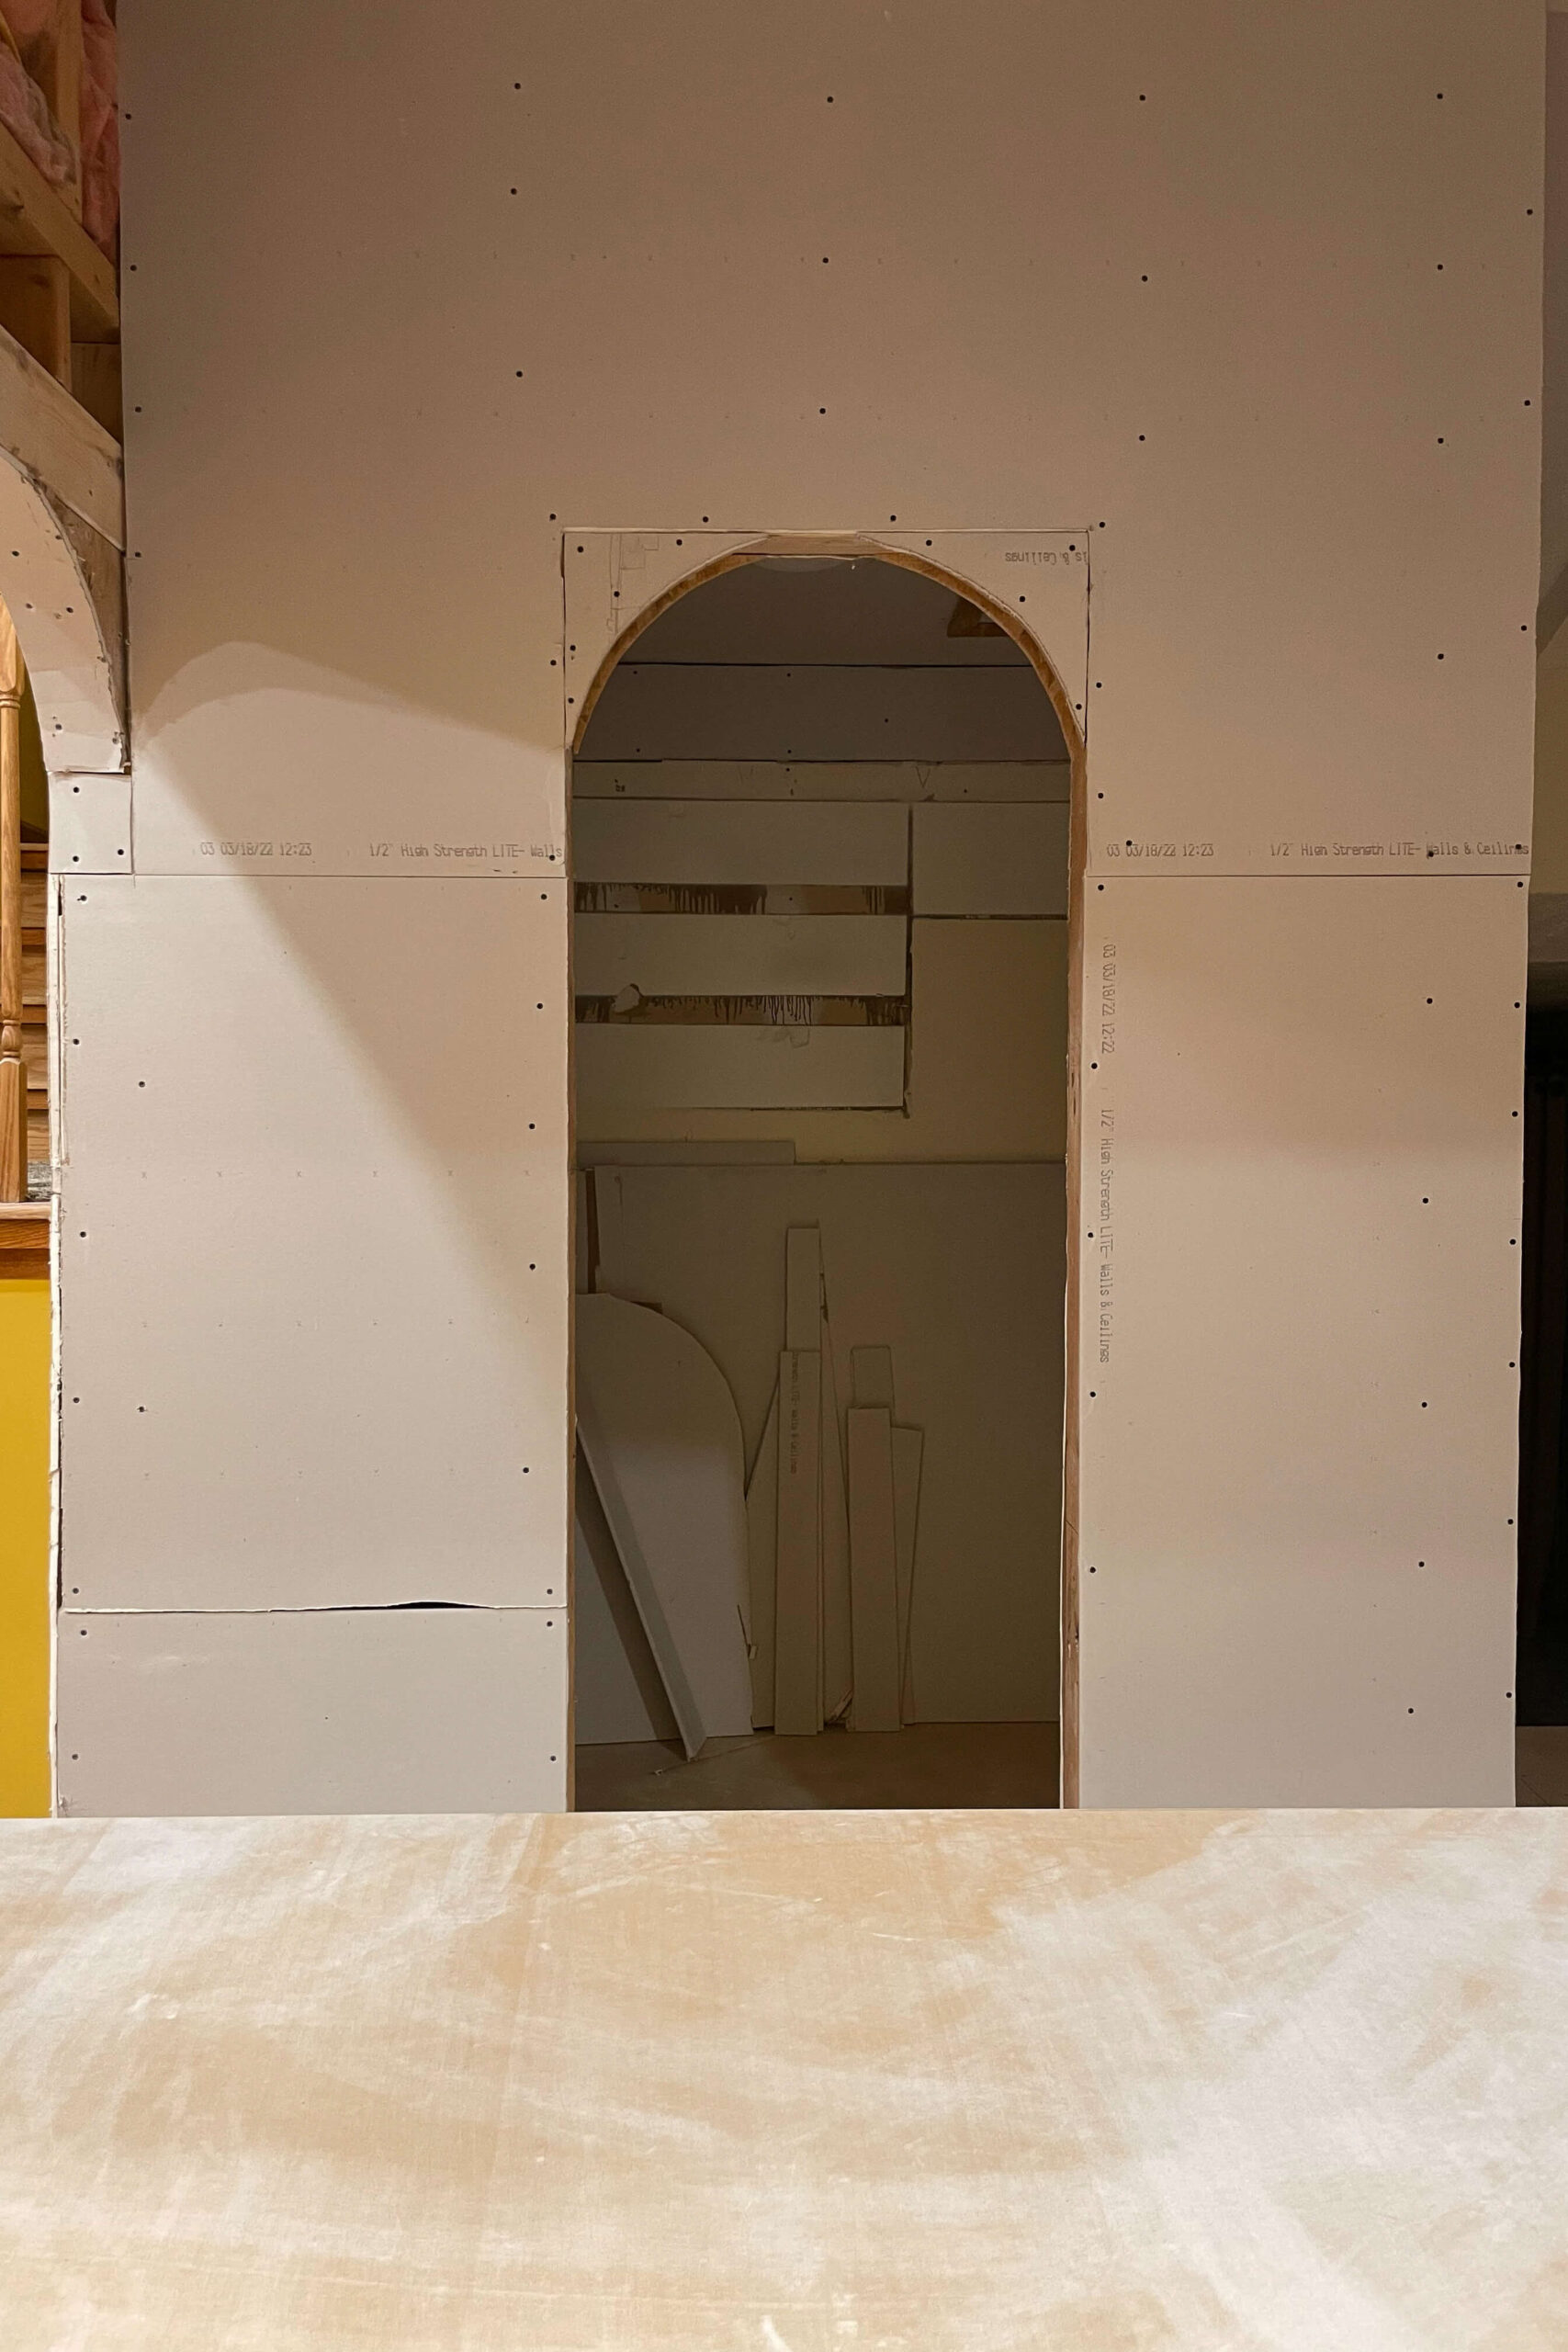
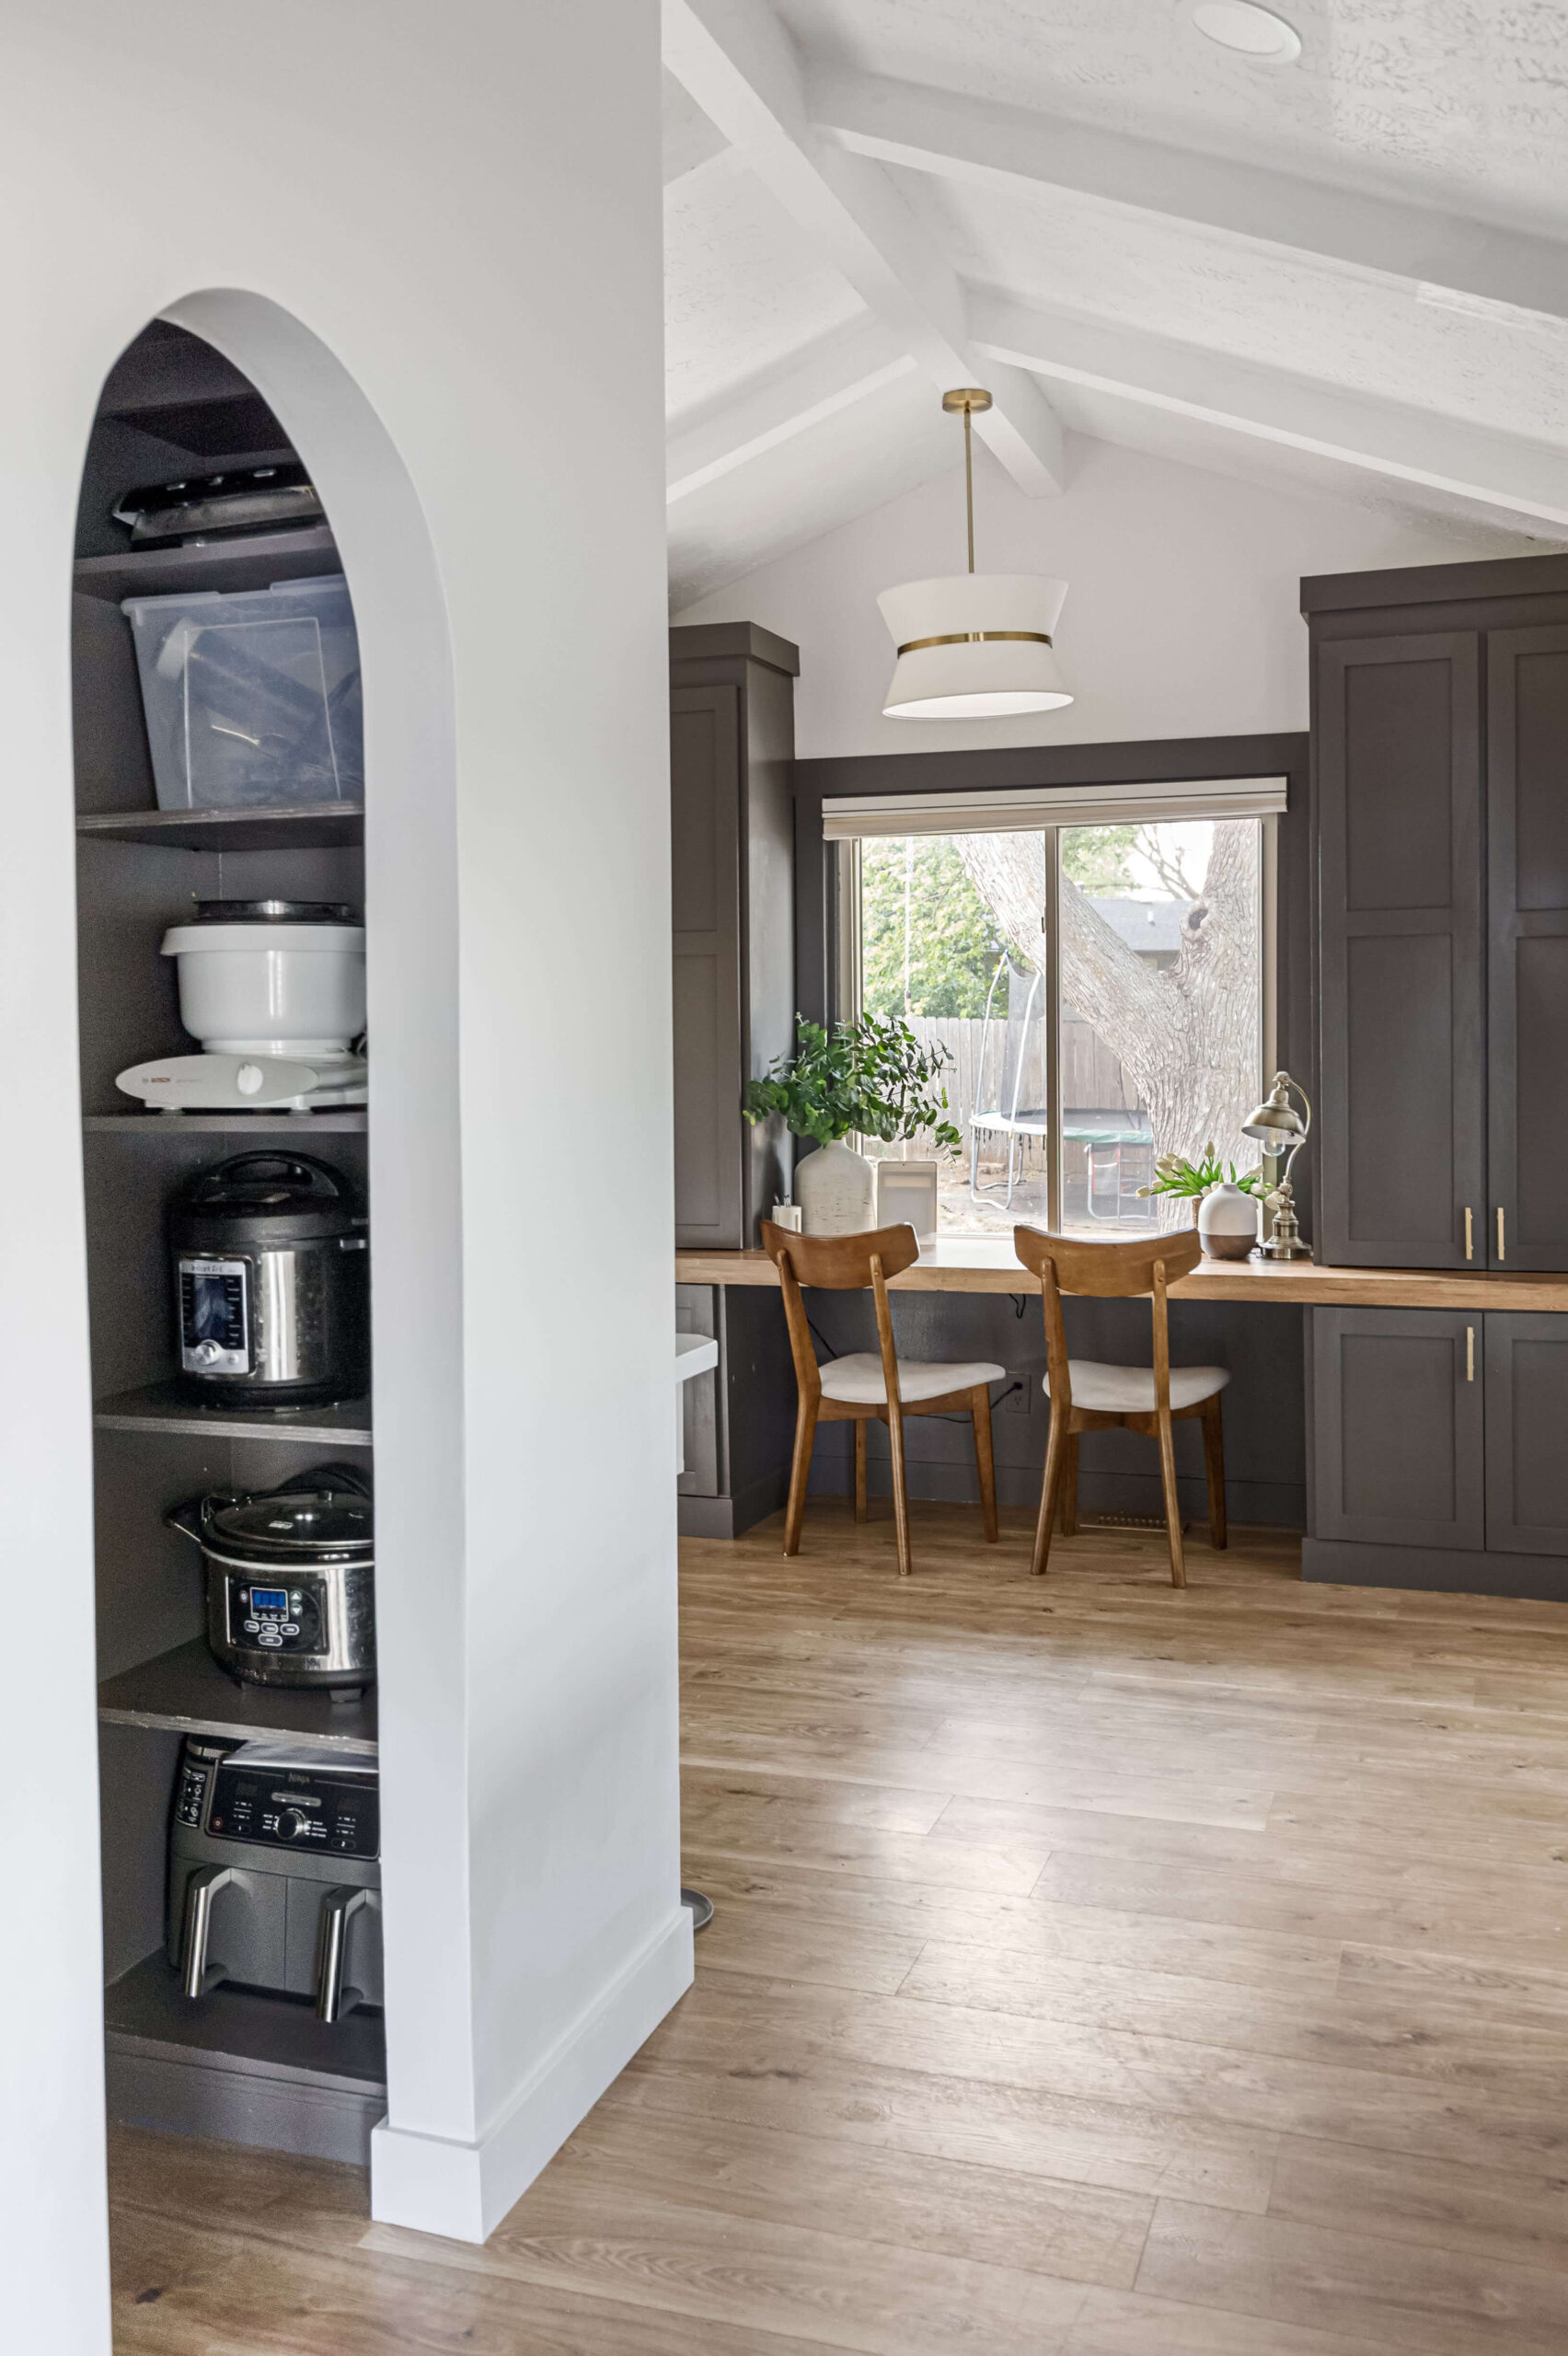
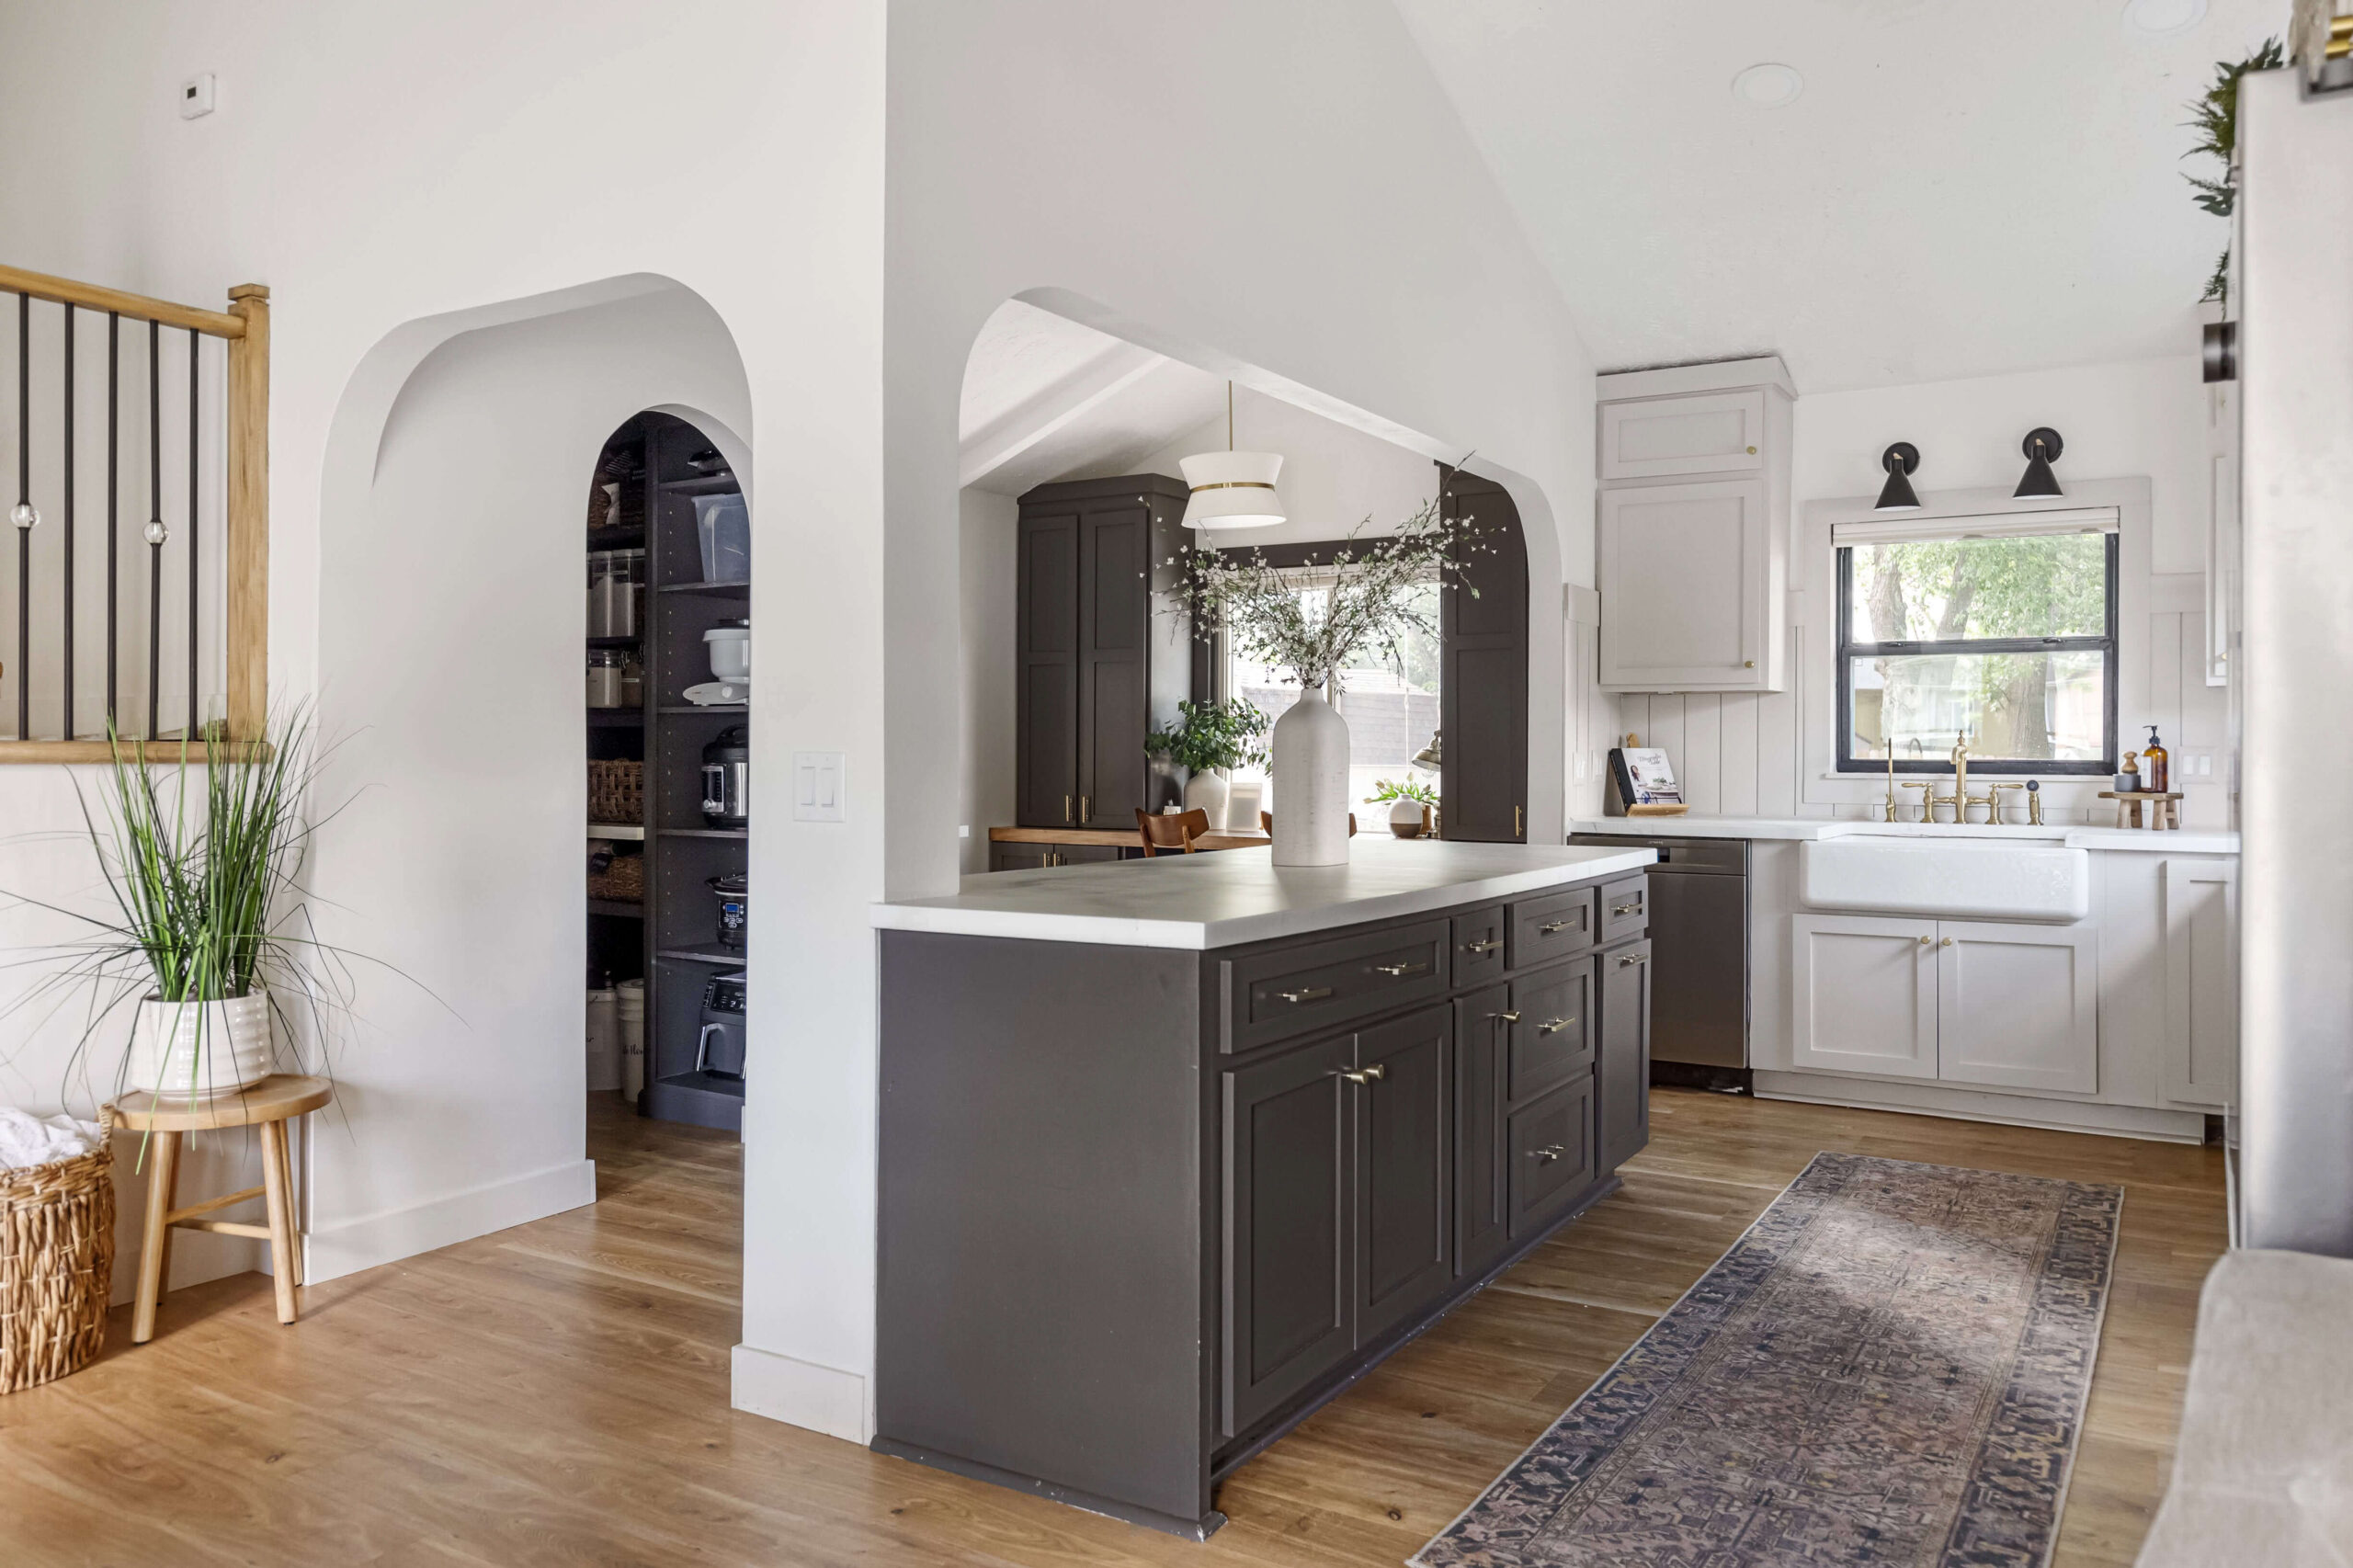
Then I arched my pantry doorway. I have lots of arches in my house—four in my kitchen alone. You can find a full tutorial for how to make an arched doorway here. The arch looks so good! I’m so happy I didn’t leave it as a basic, square doorway because I think it brings so much charm!
Building DIY Pantry Shelves
Now that my pantry was all built, I could start building all my DIY pantry shelves.
I started with a sheet of plywood and measured the depth of the shelves I was making. Then, using my table saw, I ripped the plywood down to the dimensions I needed. For the lower shelves I made them 22″ deep and the upper cabinets I made 13″deep.


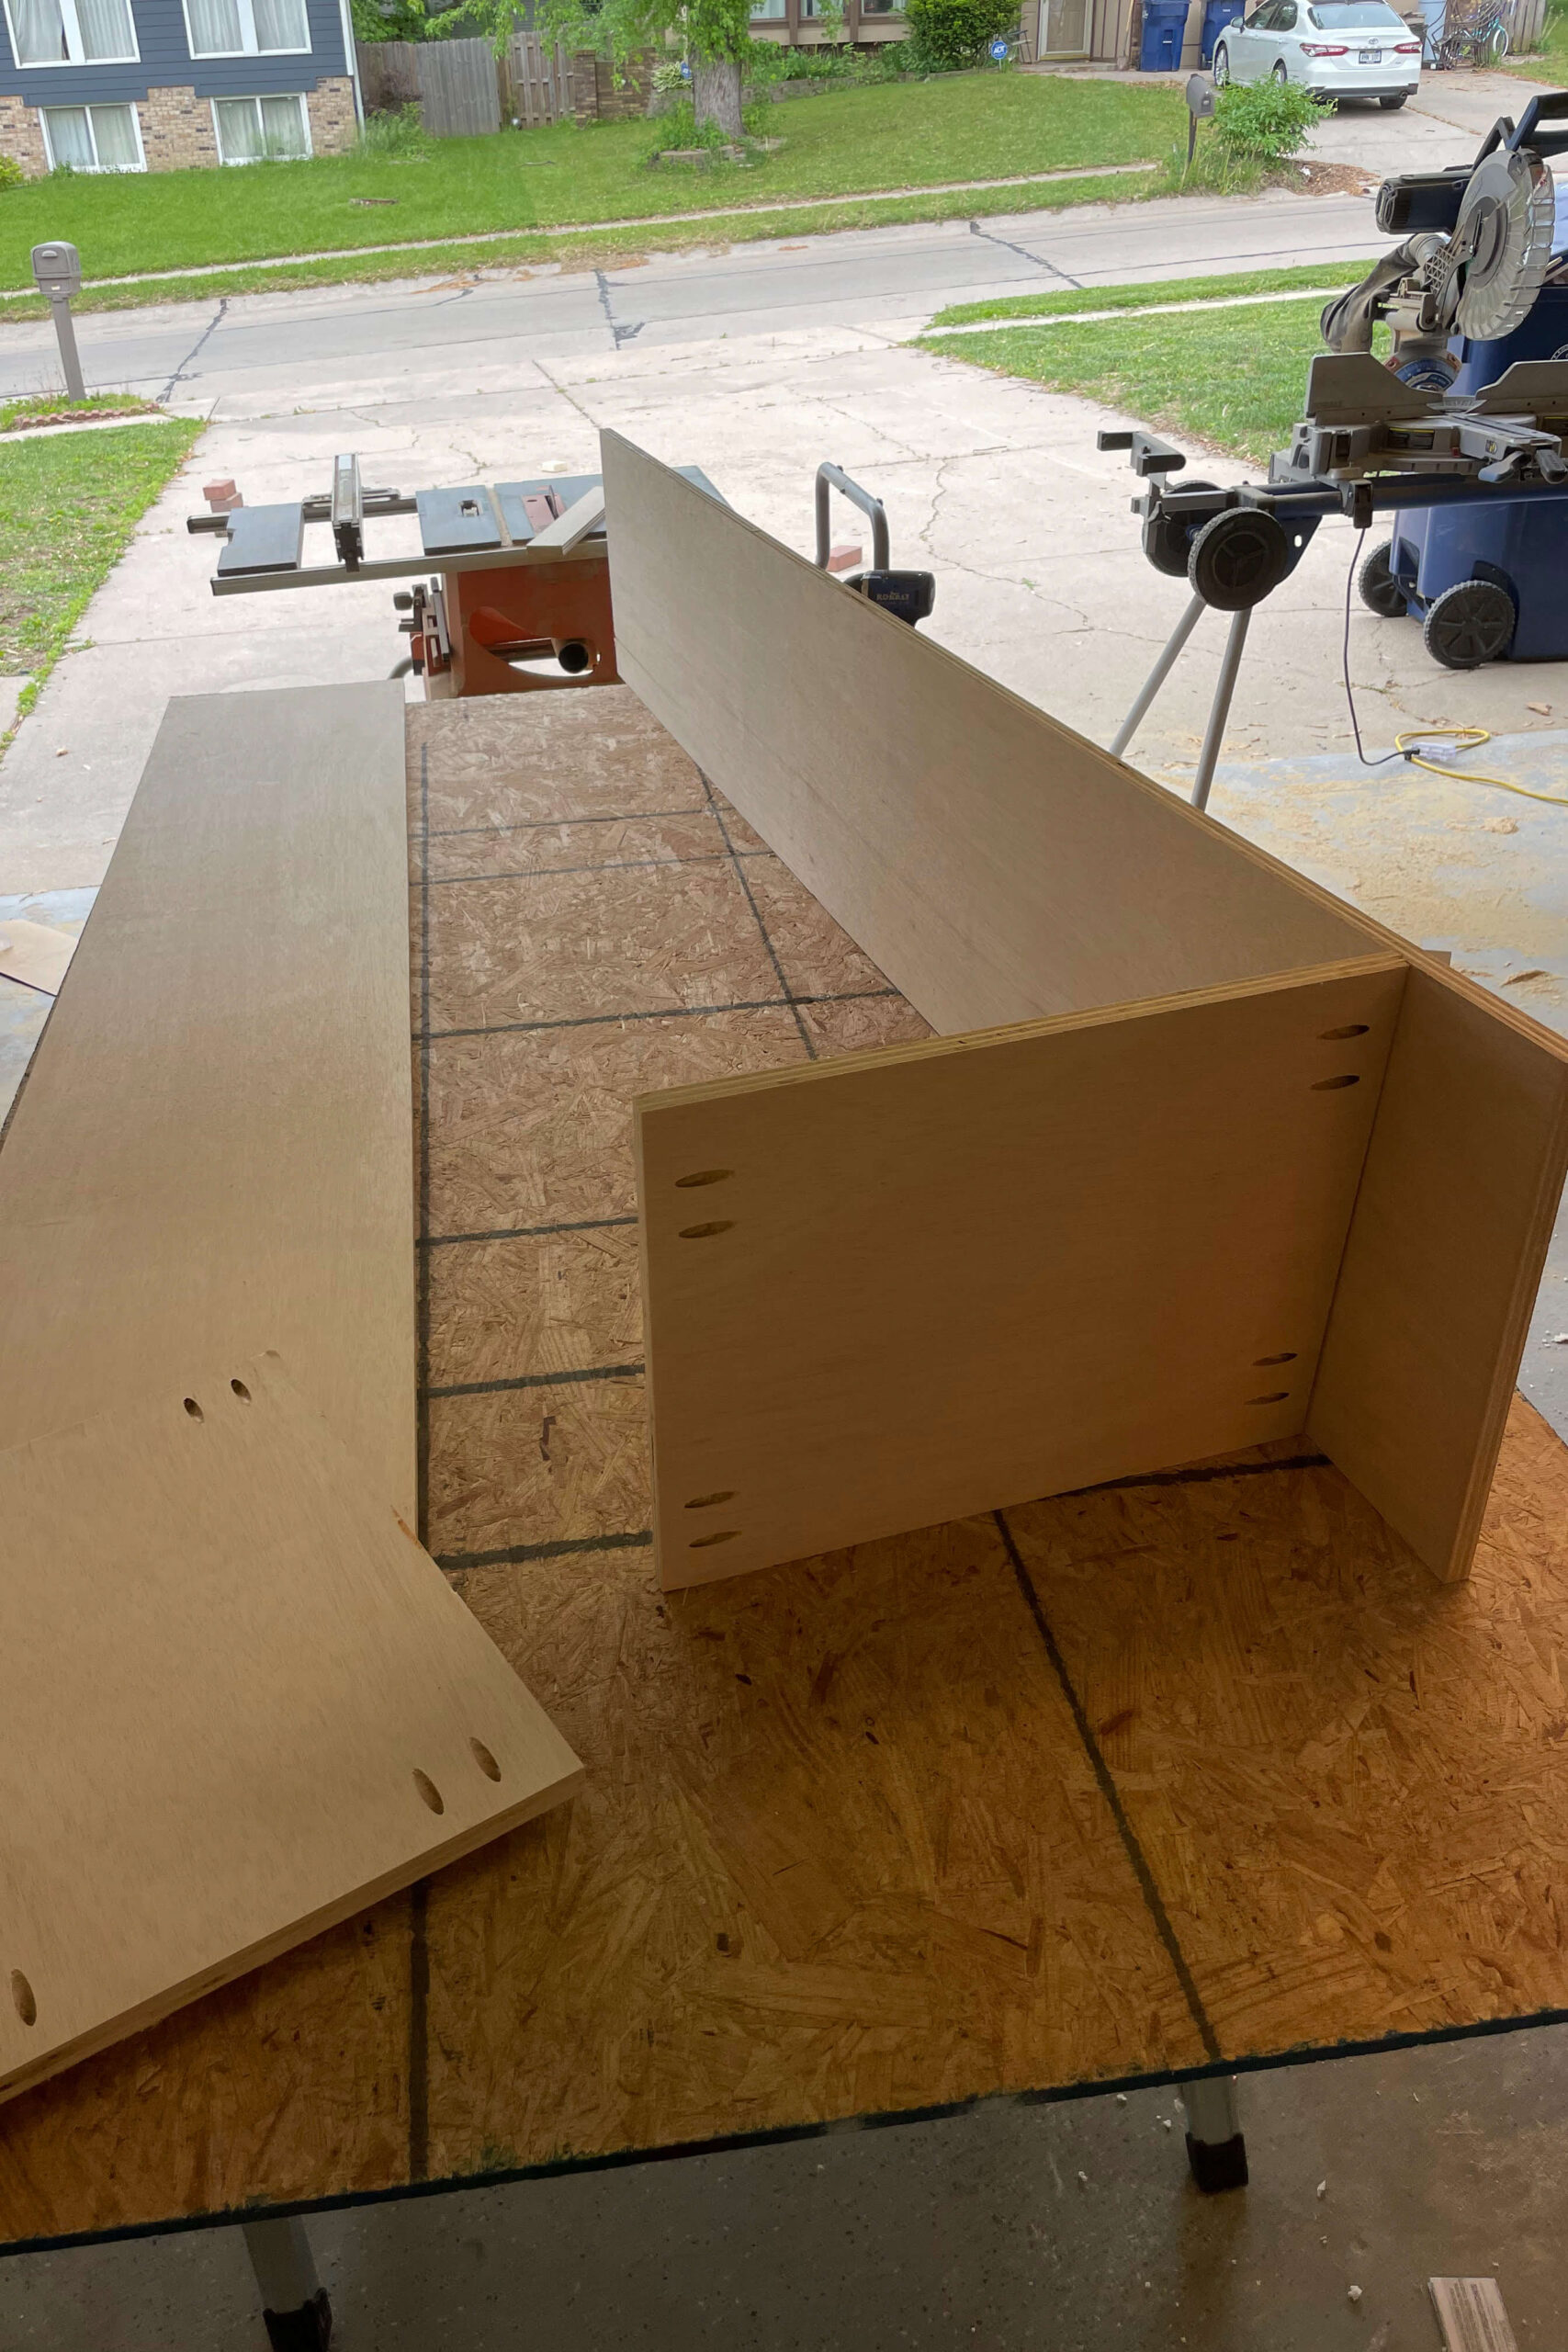
Then I cut some of the boards down even further with a circular saw, for the top and bottom pieces of my DIY pantry shelves. The process is pretty simple. Build a big box.

I used my Kreg jig to add pocket holes to those top and bottom pieces.

If you’ve followed along with my other kitchen projects, like building my refrigerator cabinet, this will start to look very familiar. The piece of plywood that makes up the top of the cabinet box is the exact width and depth I want my cabinet to be. Then, the two side pieces are the exact depth and 3/4″ of an inch shorter than the total height to account for the board that will be sitting on top of them. The bottom piece is the exact depth, and 1 1/2″ narrower in width than the total width of the cabinet, because the two side pieces will be accounting for 3/4″ on each side. In other words, I like to sandwich the bottom shelf between the two side pieces so I can bring it up a few inches to make room for baseboard.
I used a small amount of wood glue on the edges of my horizontal boards, where the wood would touch the vertical side pieces. Then I attached the boards together by screwing through the pocket holes. Make sure to face the pocket holes on either the very top or the very bottom where they won’t be seen for a cleaner look to your DIY pantry shelves.
After putting together one cabinet, I repeated all of those steps to make a second tall cabinet.

In addition to the two tall cabinets, I also made this one lower cabinet. I followed the same steps and procedure, modifying the dimensions for a shorter height and wider width. The only other difference was that I added a center board for bracing. There’ll be a lot of weight on top of this cabinet, so with how wide it is, there’d be too much flex in the top if I didn’t brace it.
To finish off the tall cabinets and the shorter ones, I added bracing in the back. This will allow me to screw the cabinet into the studs in my pantry walls. I cut out a small board that fit flush inside the back of the cabinet, added pocket holes, then attached them with screws.


After adding some hardboard backing and attaching it with my brad nailer, these cabinets were ready to install in the pantry.


Installing DIY Pantry Shelves
When installing shelves or cabinets on the floor like this, your floor might not be perfectly level. You might have to use wood shims to raise the height of your cabinet just a bit until it sits level.

A laser level will be really helpful for this project. Use your laser level to mark where the top of your cabinet should be, then adjust the shims until it is sitting straight. It’s ok if you end up with a gap between the bottom of your cabinet and the floor. Later when we install baseboard, it’ll cover up any gap that you may have.

To install the cabinets into the pantry, you simply screw them right into the wall studs. This will hold them nice and tight.

Installing a DIY Epoxy Countertop
One feature I was excited to add was a countertop. It’ll give me a bit more usable space than just having shelves. When doing my kitchen remodel, I did a faux marble, epoxy countertop, so I used that same technique for the countertop in my pantry.
I had to add cleats for the area where I didn’t have a cabinet for the counter to rest on. Cleats are just pieces of wood that hold up a shelf or a countertop.
First, I used a stud finder, and marked where my wall studs were.

Then I attached the cleats to the studs using screws.

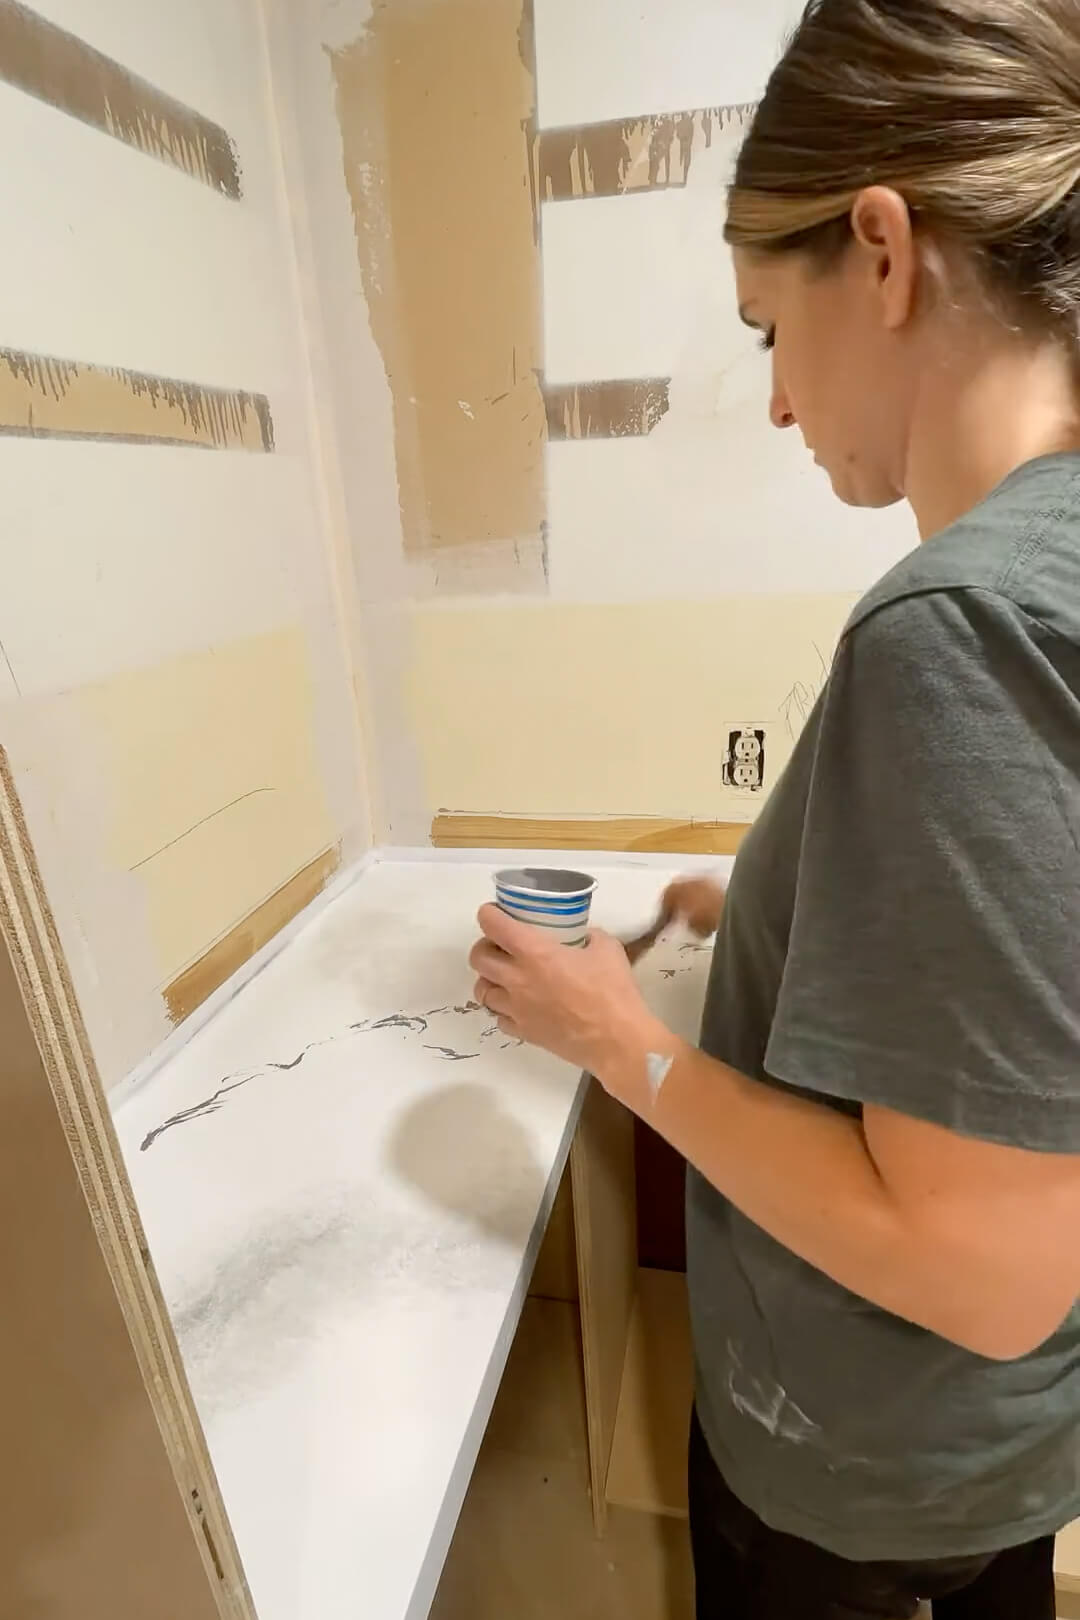
Now I could attach the wood for my countertop. I wanted to leave this space open underneath for large buckets that I have my bulk items in, like bulk flour, sugar and rice. This makes refilling the pantry canisters super easy.

After painting and adding the faux marble veining, I poured the epoxy. For full details on how to DIY your own epoxy countertop, check out my e-book. It has complete step-by-step instructions, with all of my tips and tricks, and a full list of the products I use.

Building the Upper DIY Pantry Shelves
Now that the countertop was done, I could get the rest of my DIY pantry shelves built.
I followed the same basic steps as with my other DIY pantry shelves, just slightly changing the dimensions. These shelves are not as deep, and since they’re sitting right on top of the counter, I didn’t need a bottom piece.


I built two shelves to sit on my back pantry wall, adding a shiplap panel to the back rather than a plain hardboard. These shelves will be visible from the kitchen and the shiplap backing will go great with the shiplap backsplash that I installed in my kitchen.

I made another set of shelves to sit on the sides next to the shelves on the back wall. On the back wall, I went with fixed shelves, but for these shelves on the side, I only have one fixed shelf at the bottom, and the rest of the shelves will be adjustable. We’ll get more into that later.

All of my DIY pantry shelves were in. Now I could move onto trim.

Adding Trim to DIY Pantry Shelves
Adding finishing touches like trim is really what takes your project to the next level. It makes everything look clean, professional and finished.
I did a wider trim board around the top of the cabinets, attaching it with my brad nailer.


Then I made small trim boards for the rest of the shelves. This covers up all the raw edges of the plywood, gives the appearance of thicker shelves, and makes your DIY pantry shelves look like one, solid built-in piece, rather than separate shelving units.


After adding crown molding and some baseboard, my DIY pantry shelves were really starting to look good.

Lastly, I needed to caulk my seams, and use wood filler on all the brad nail holes.


Adding Edge Banding to Plywood Shelves
For the adjustable shelves I cut out the sizes I needed in the same plywood that I used for building my DIY pantry shelves. You can see here that plywood doesn’t have the prettiest edge. That’s where edge banding comes in.

It has a heat activated glue on the back, so it’s easy to apply right to the edge of the shelf using an iron.

The edge banding is just a bit wider than the shelf, so you’ll take this edge trimmer tool and clean up the edge of the banding so it is flush with your wood shelf.


Look how clean and beautiful it looks now!

Priming and Painting My DIY Pantry Shelves
Primer is essential to a long lasting paint job, especially in an area like the pantry that will get a lot of use.
For all of my individual, adjustable shelves, I used a foam roller to apply the primer.

These pyramid stands for painting are great for elevating things like shelves or doors off a worktable so you can get the edges painted.

I used my favorite paint sprayer to paint all my shelves.

The sprayer was again my tool of choice for both priming and painting all of the DIY pantry shelves that were already installed.

Putting in Holes for Adjustable Shelves
Now that my DIY pantry shelves were all painted, I could add the holes for my adjustable shelves. I’m using a Kreg shelf pin jig. It comes with everything you need, including this cool guide and the special drill bit.


I used my laser level to mark my first row of holes, then drilled holes in my shelf following the Kreg guide. It’s vital that you get these first two holes exactly the same height as the two holes on the other side, otherwise you’ll have a wobbly shelf.

When it’s time to move up, the kit comes with a pin that you put into the last hole you just drilled, and provides a template for you to drill the other holes perfectly spaced above it.

Just slide the guide onto the pin and continue up, drilling holes through the guide holes.

Repeat on the back of your DIY pantry shelves until you have as many shelf pin holes as you want. Now that all of my holes are drilled, I can add some shelf pins and my shelves.

Stocking My DIY Pantry Shelves
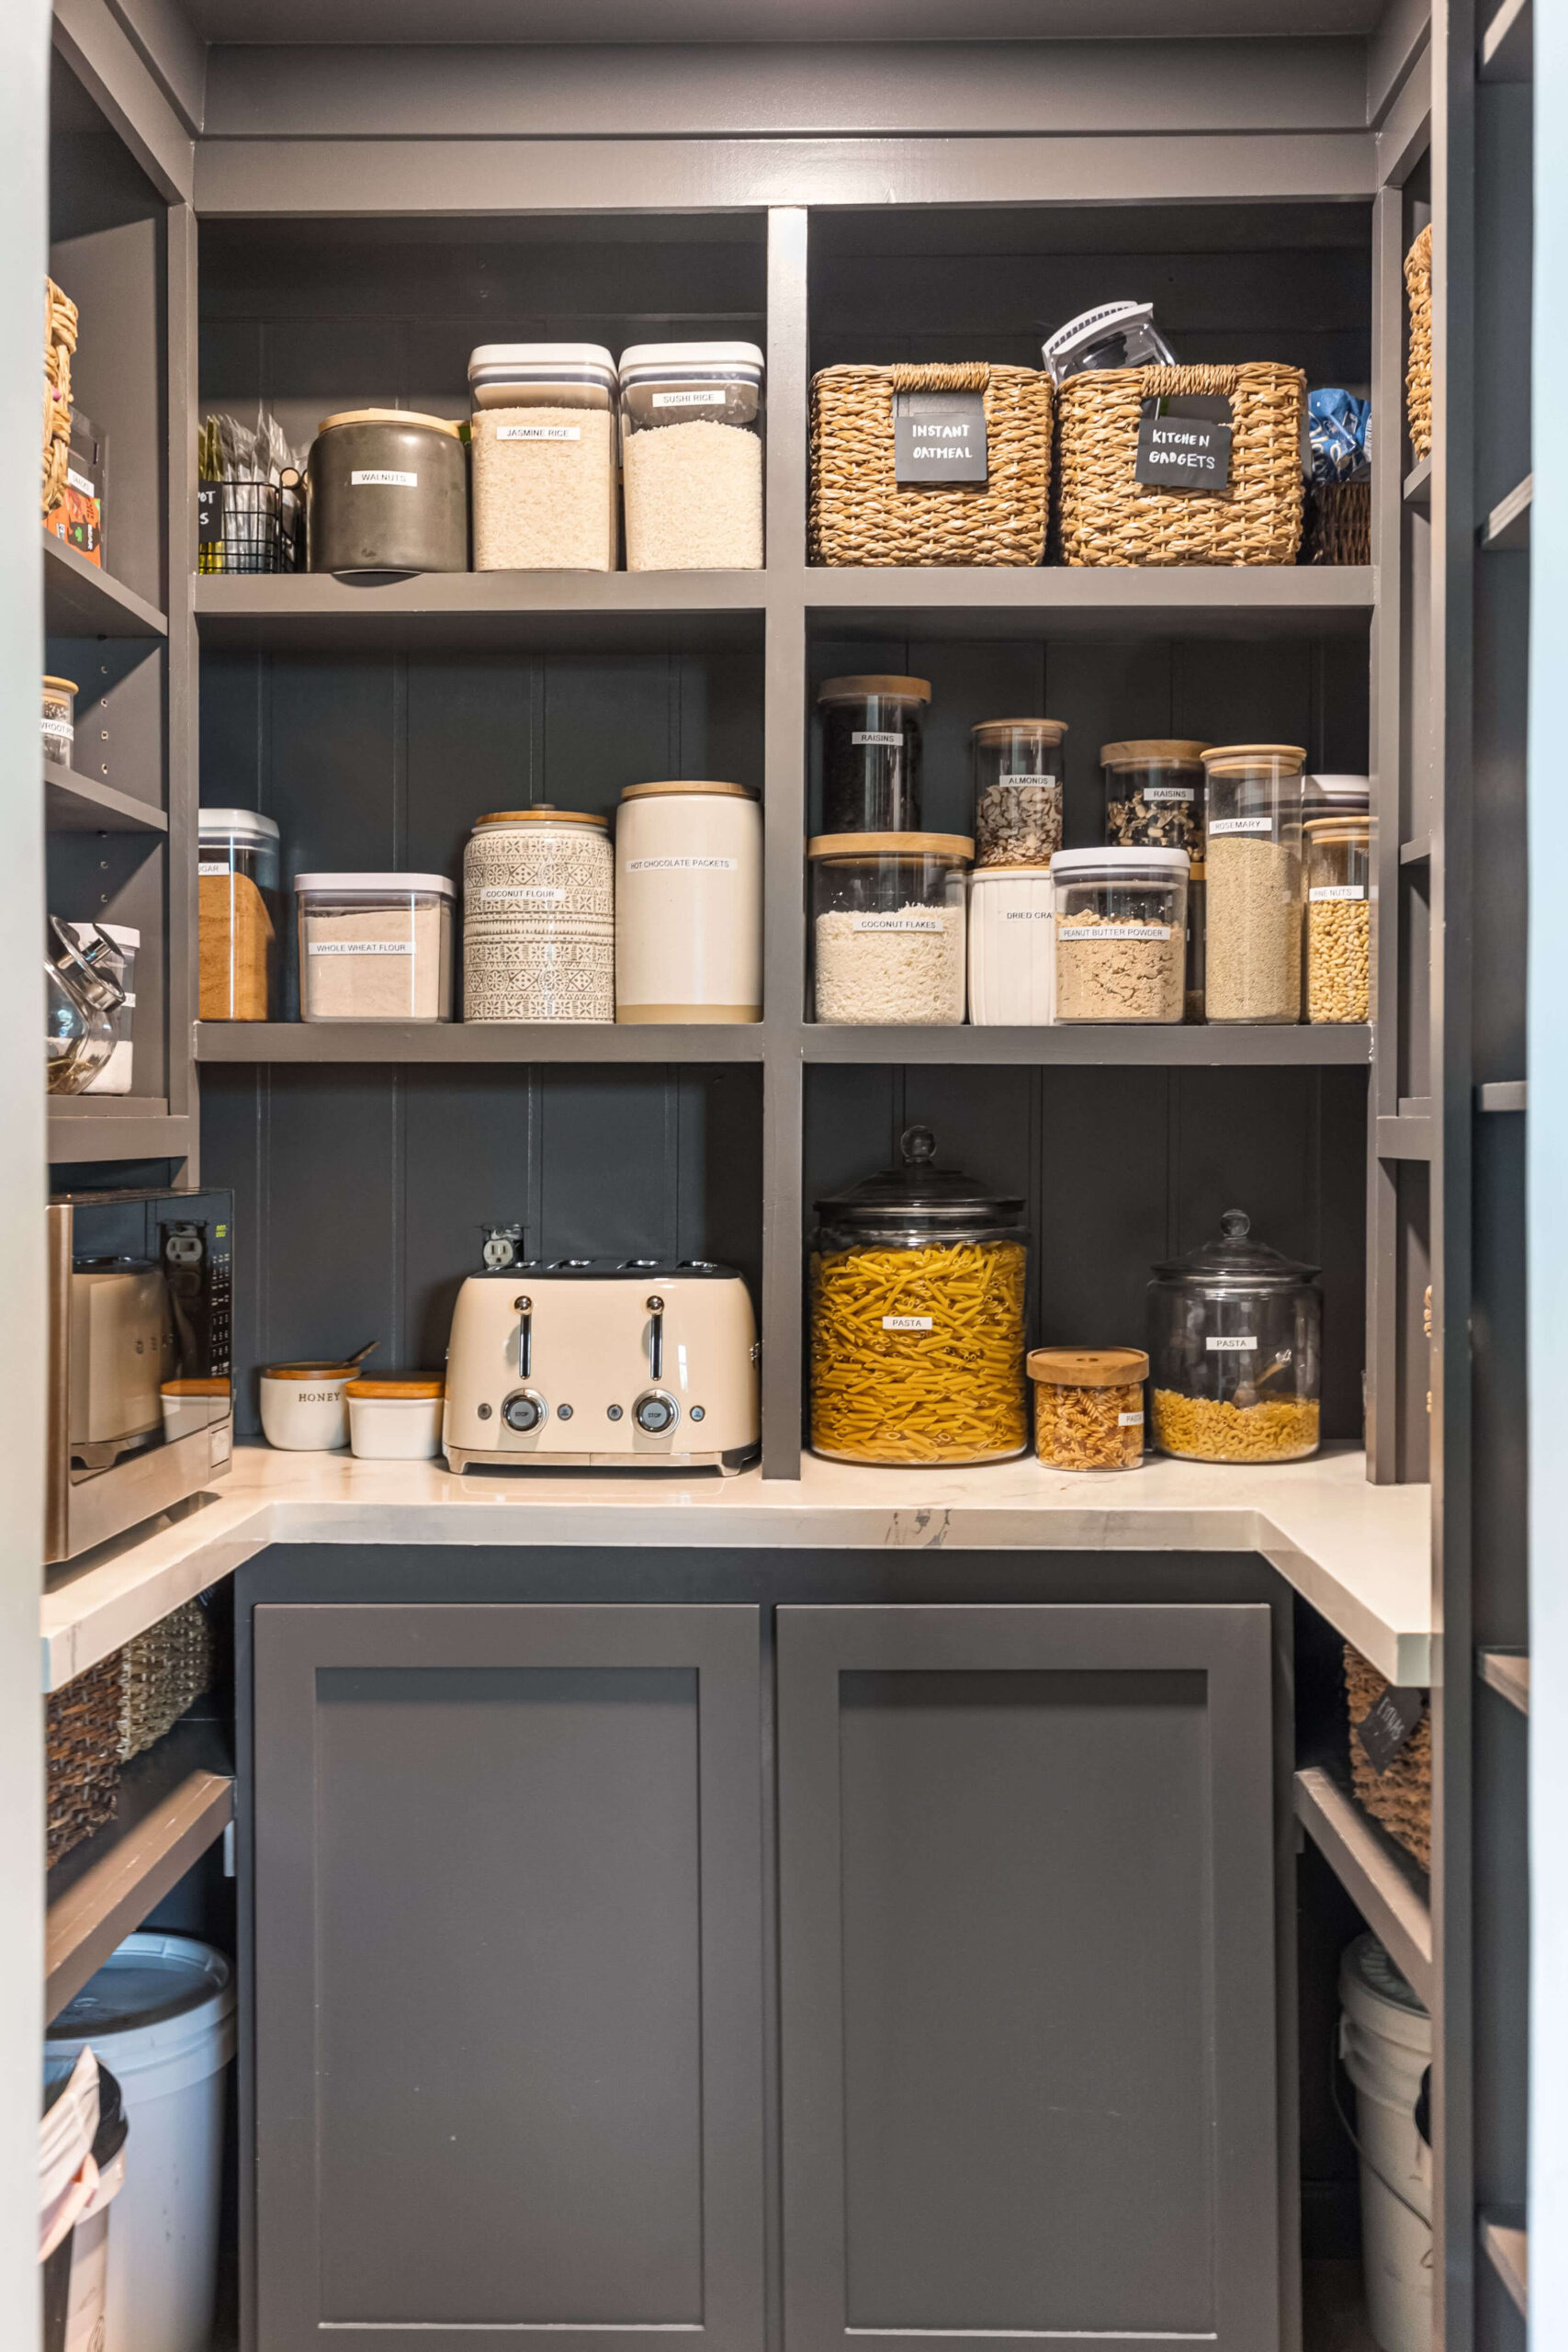
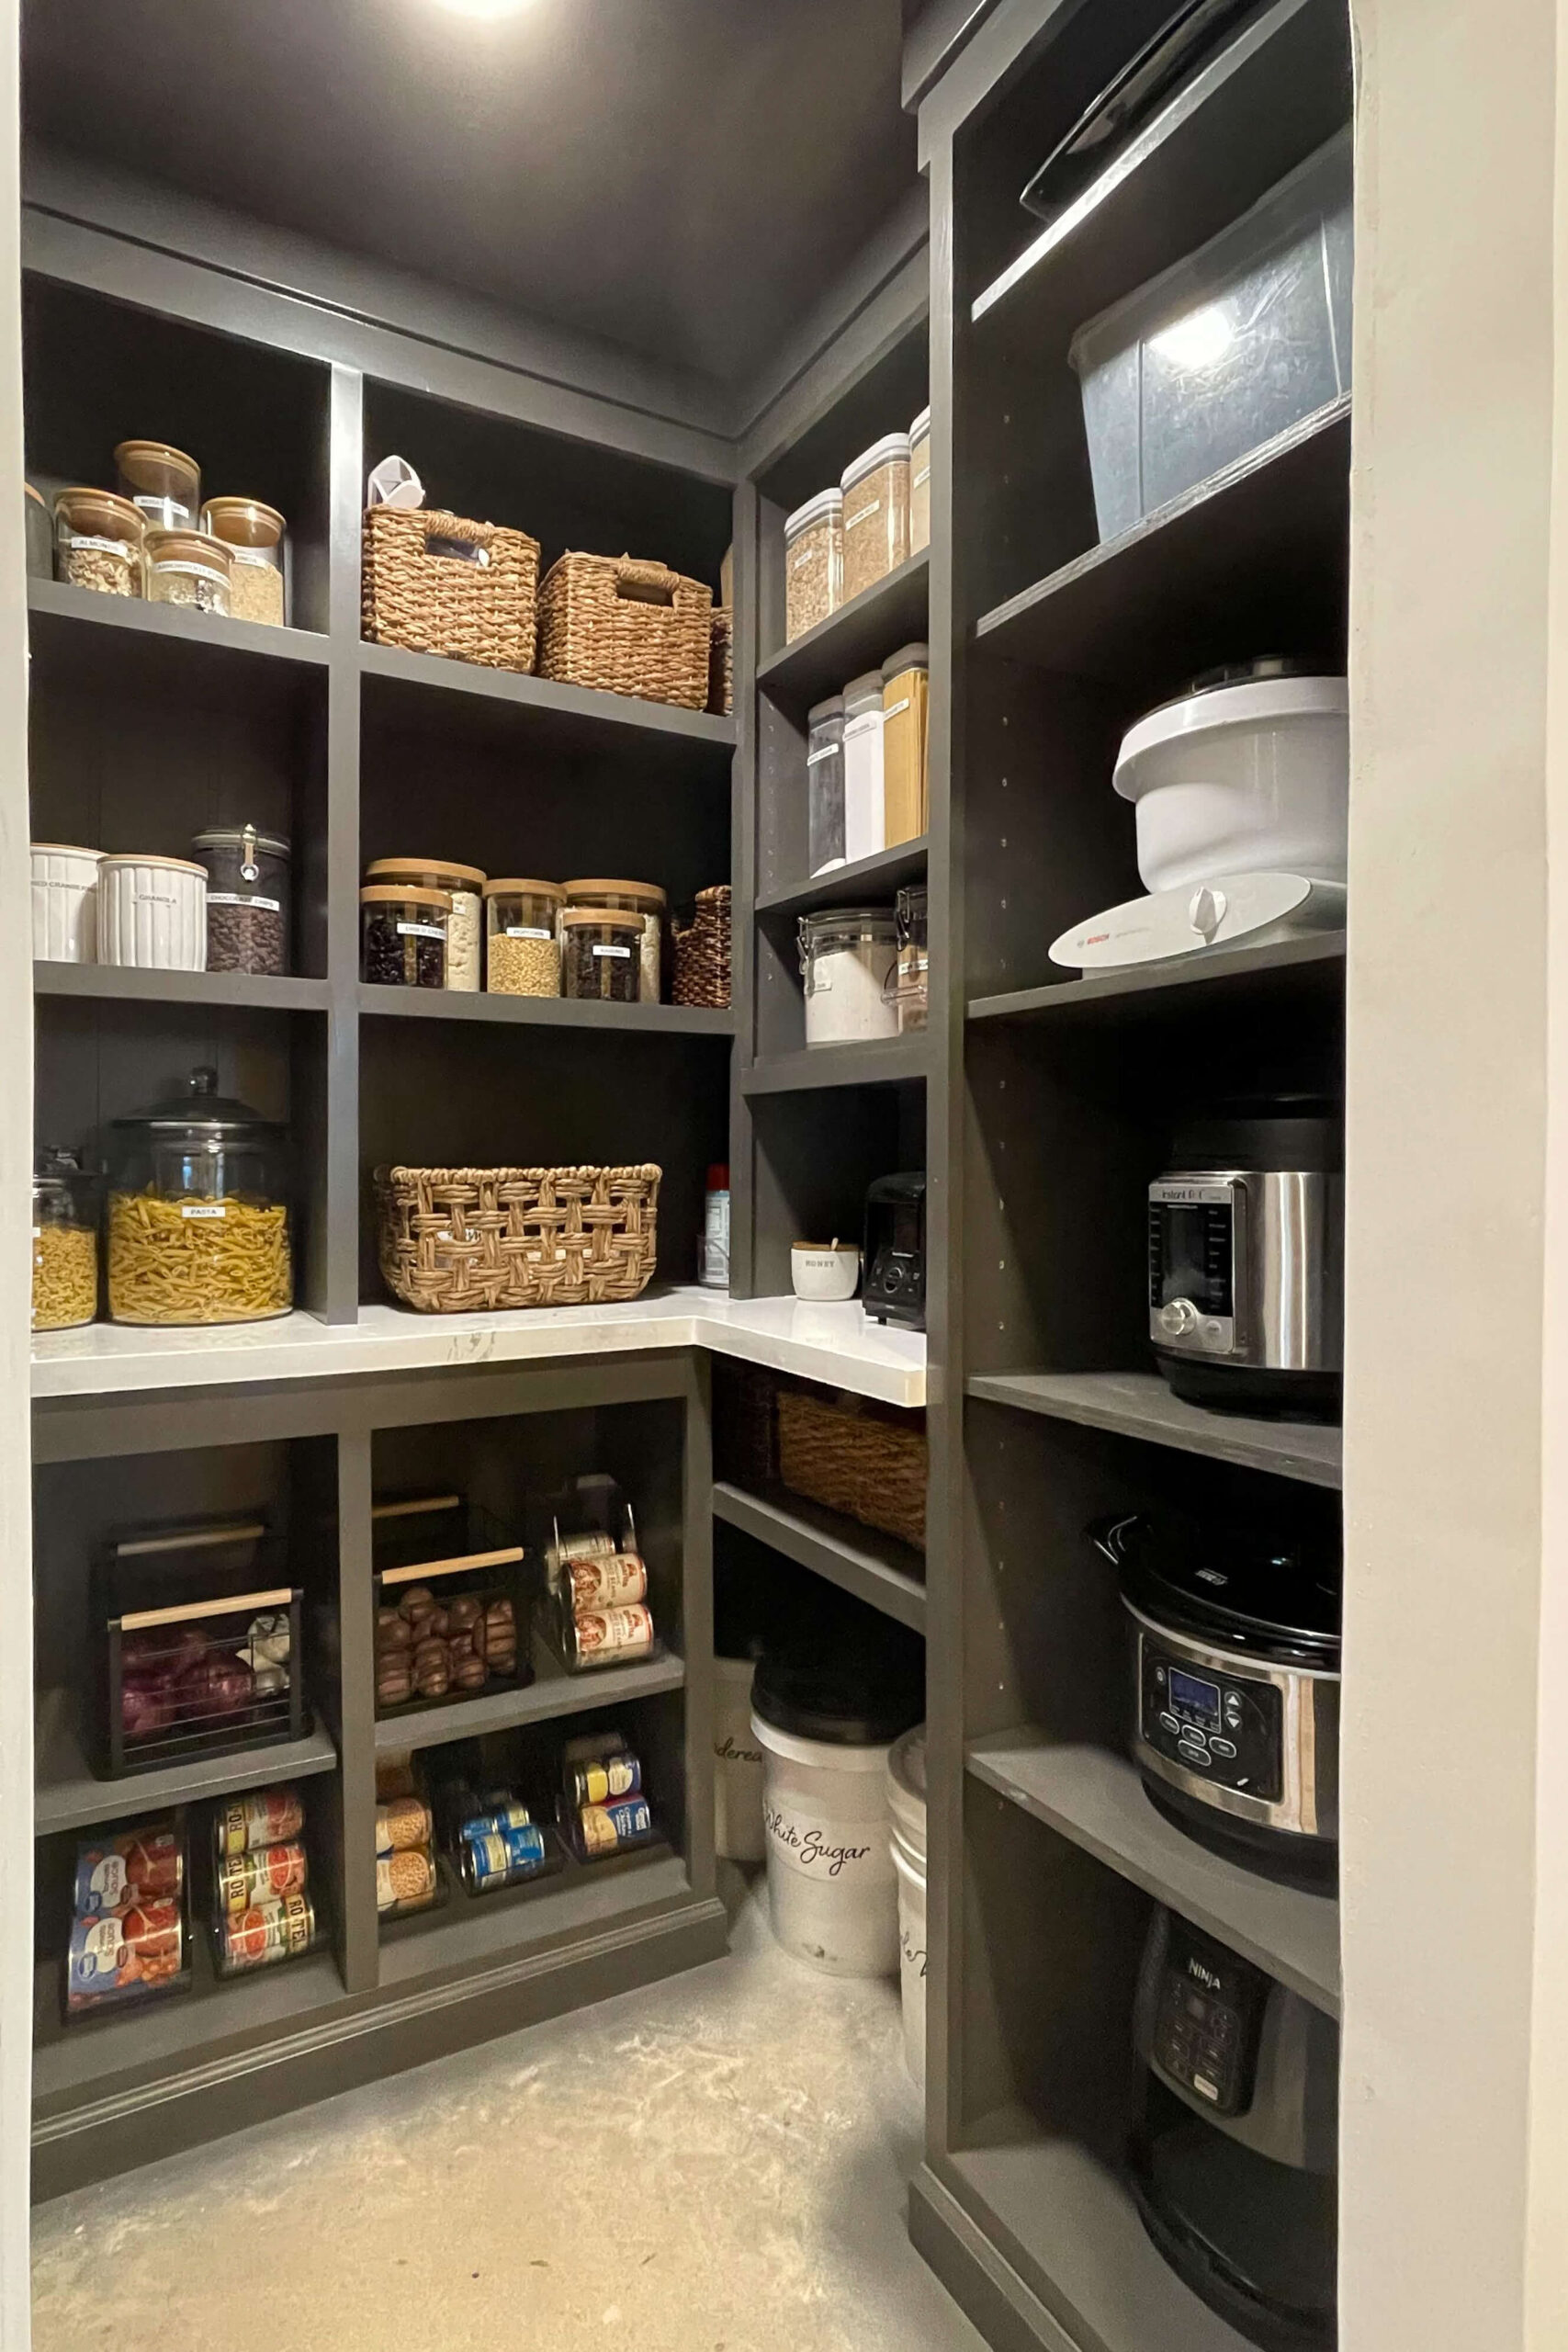
Now it’s time for a tour of the finished pantry!
This tall cabinet on the left is where I keep my broom, vacuum, etc. I have an outlet in there so I can keep my vacuum charged. I also have an outlet behind the microwave. I love that my microwave can be in here, rather than taking up valuable countertop space in the kitchen. When planning your pantry definitely think ahead to where you want any outlets to be.
When designing my DIY pantry shelves, I carefully left plenty of space for my large food storage buckets. As I mentioned, I use them to store my bulk items like flour, rice, and sugar.
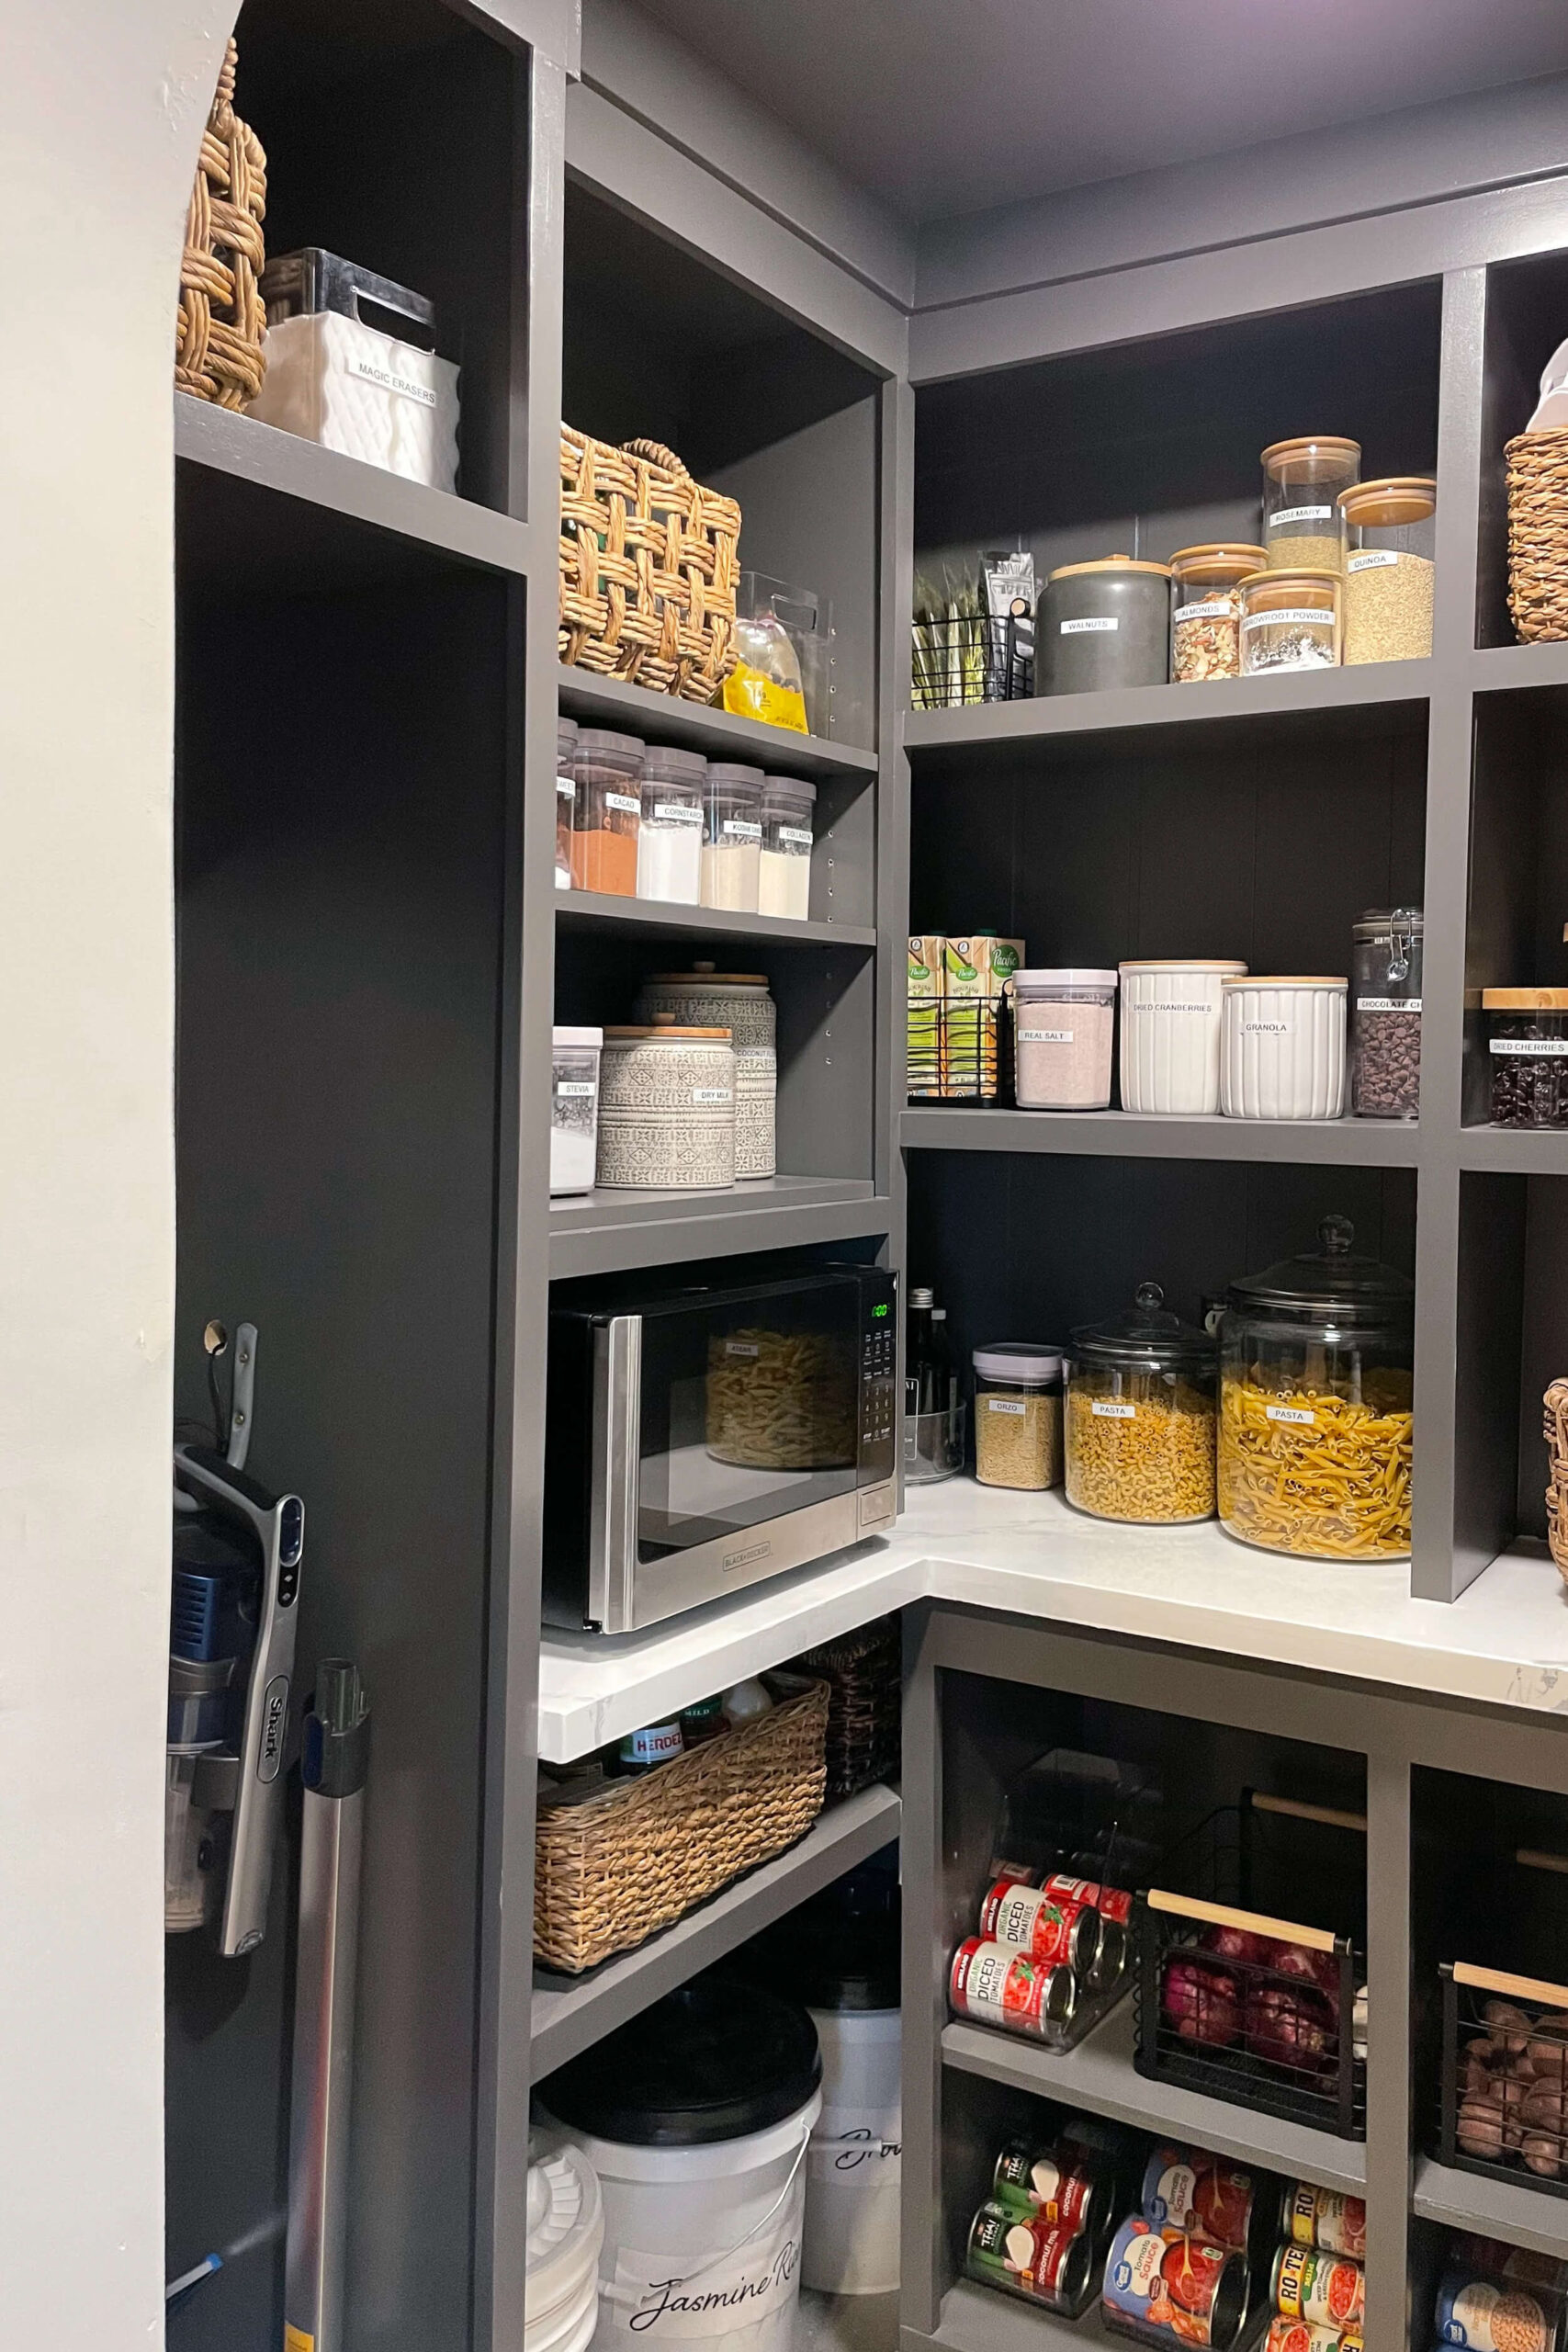
The other tall cabinet on the right side of my pantry has adjustable shelves and I designed this cabinet specifically for small appliances like my Bosch mixer and Instant Pot. I love that they all have a home to live in that’s not on the counter.
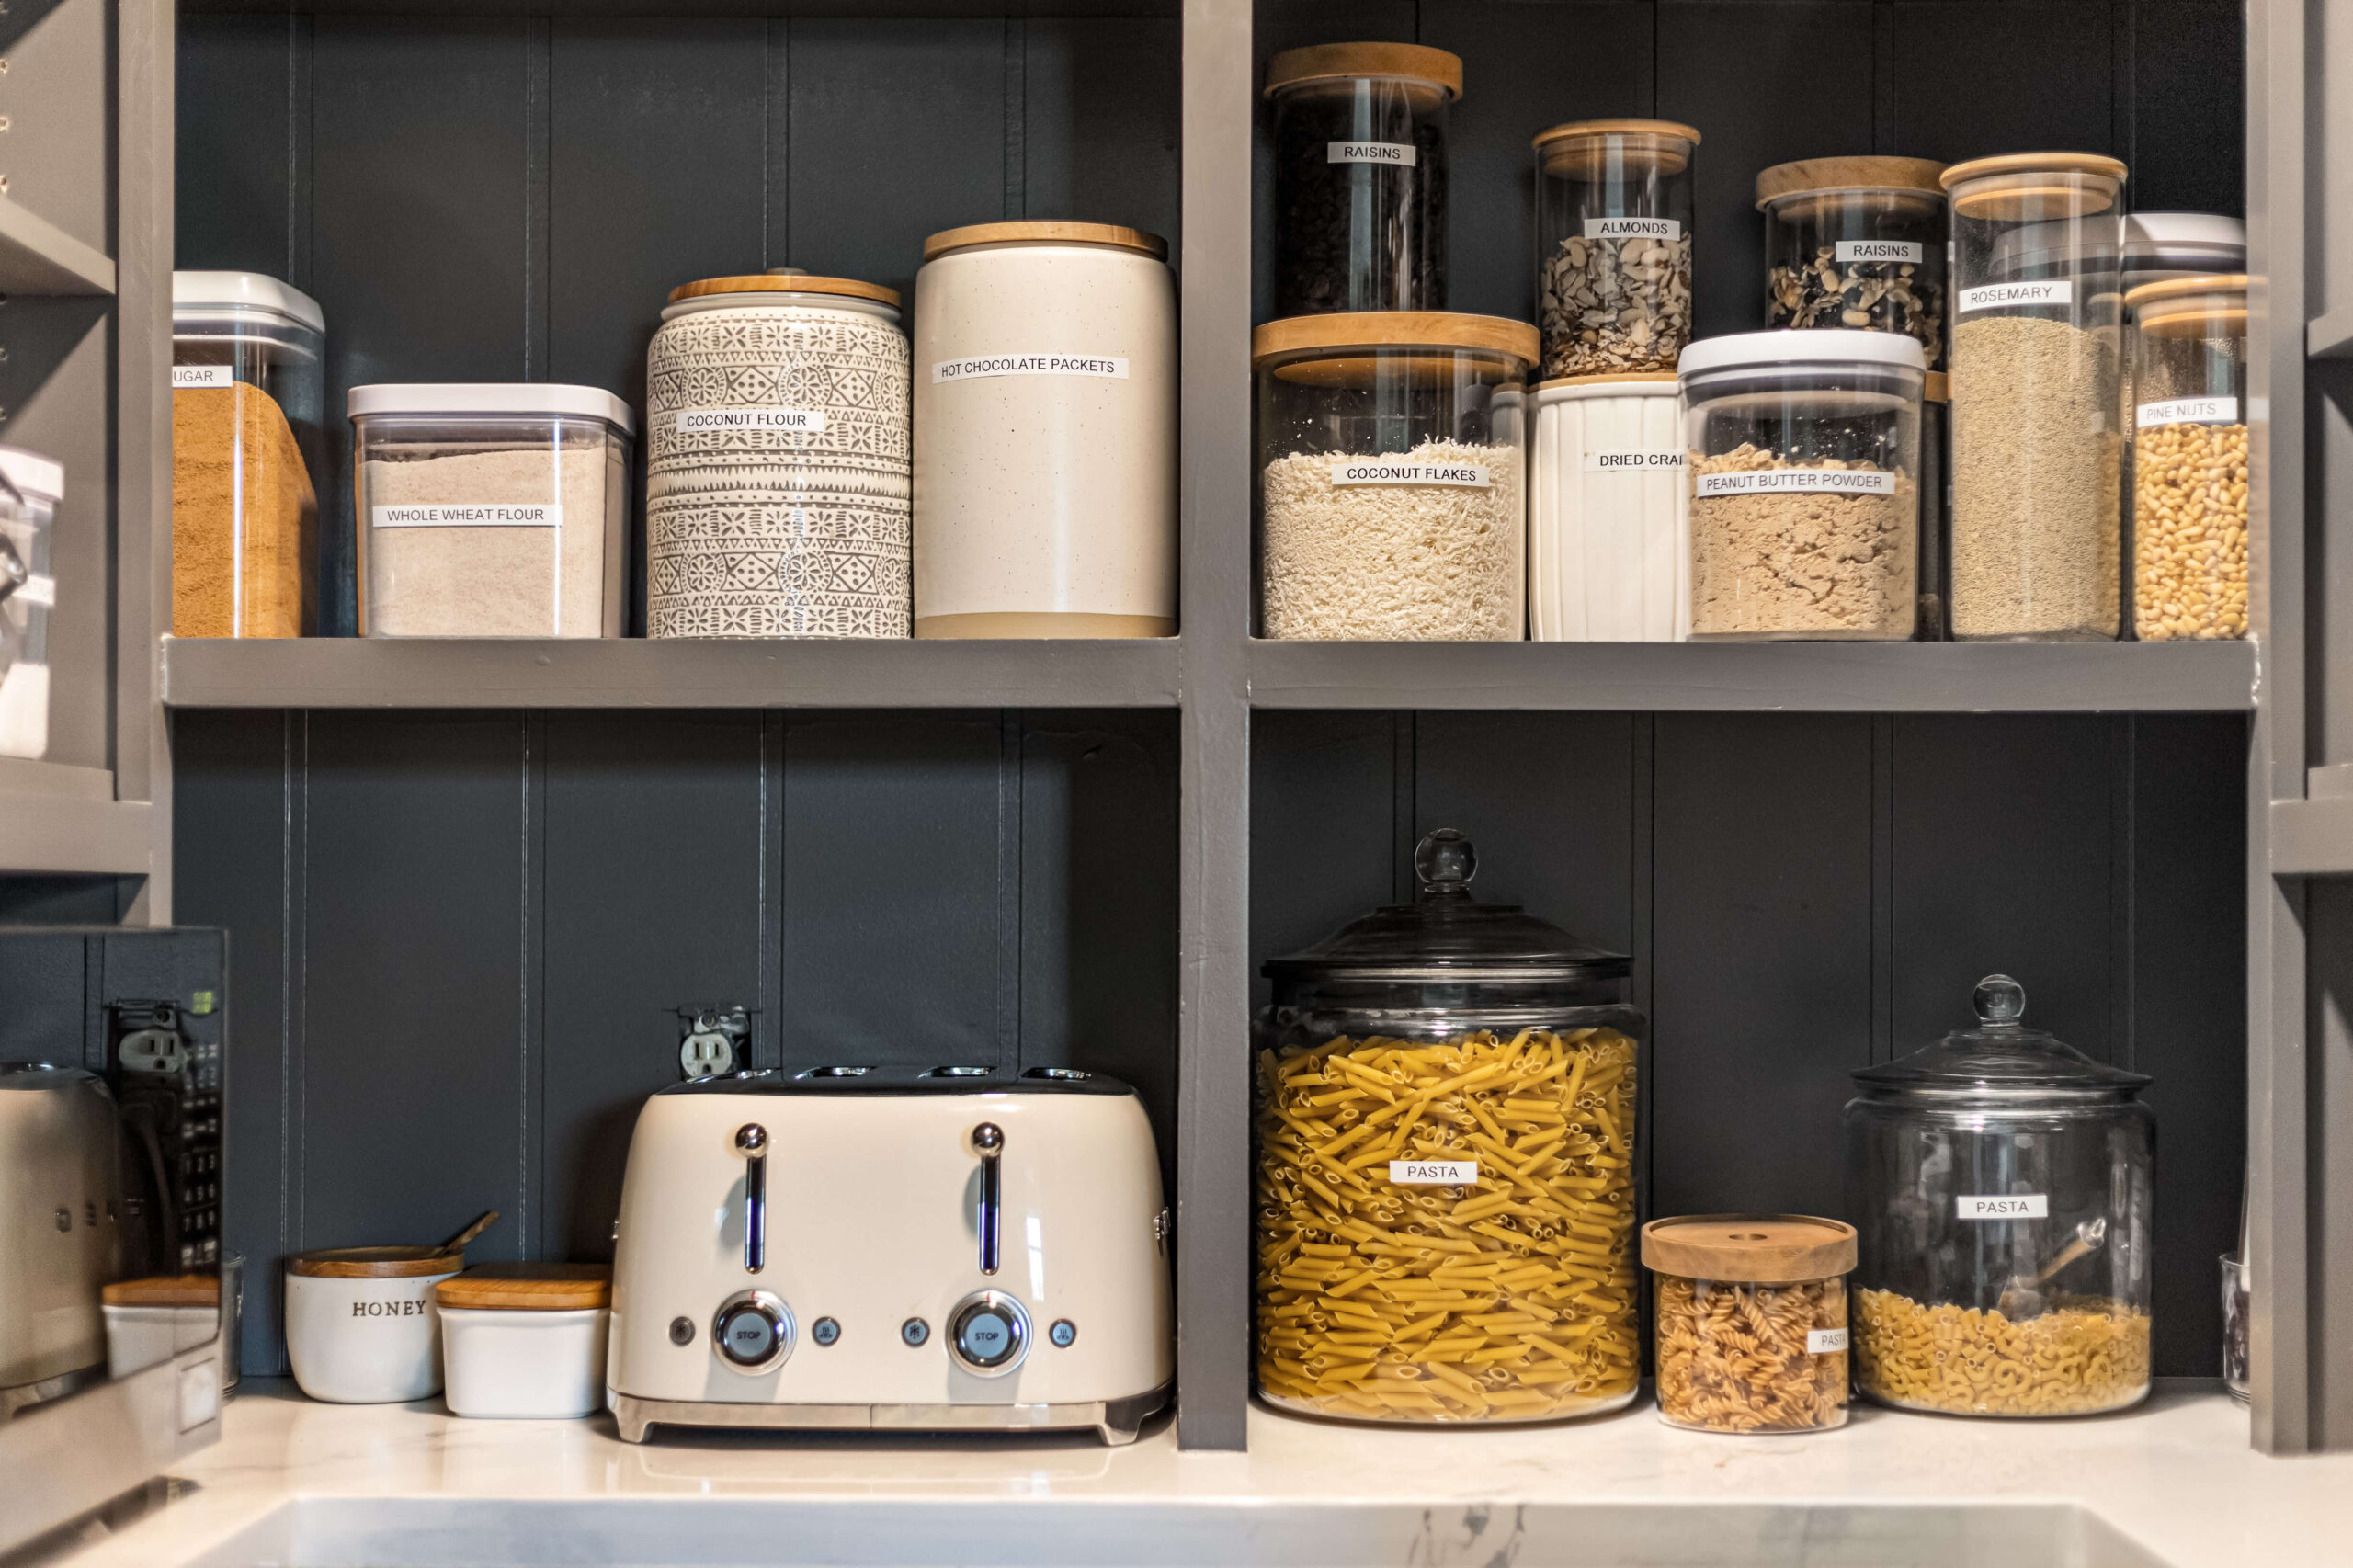
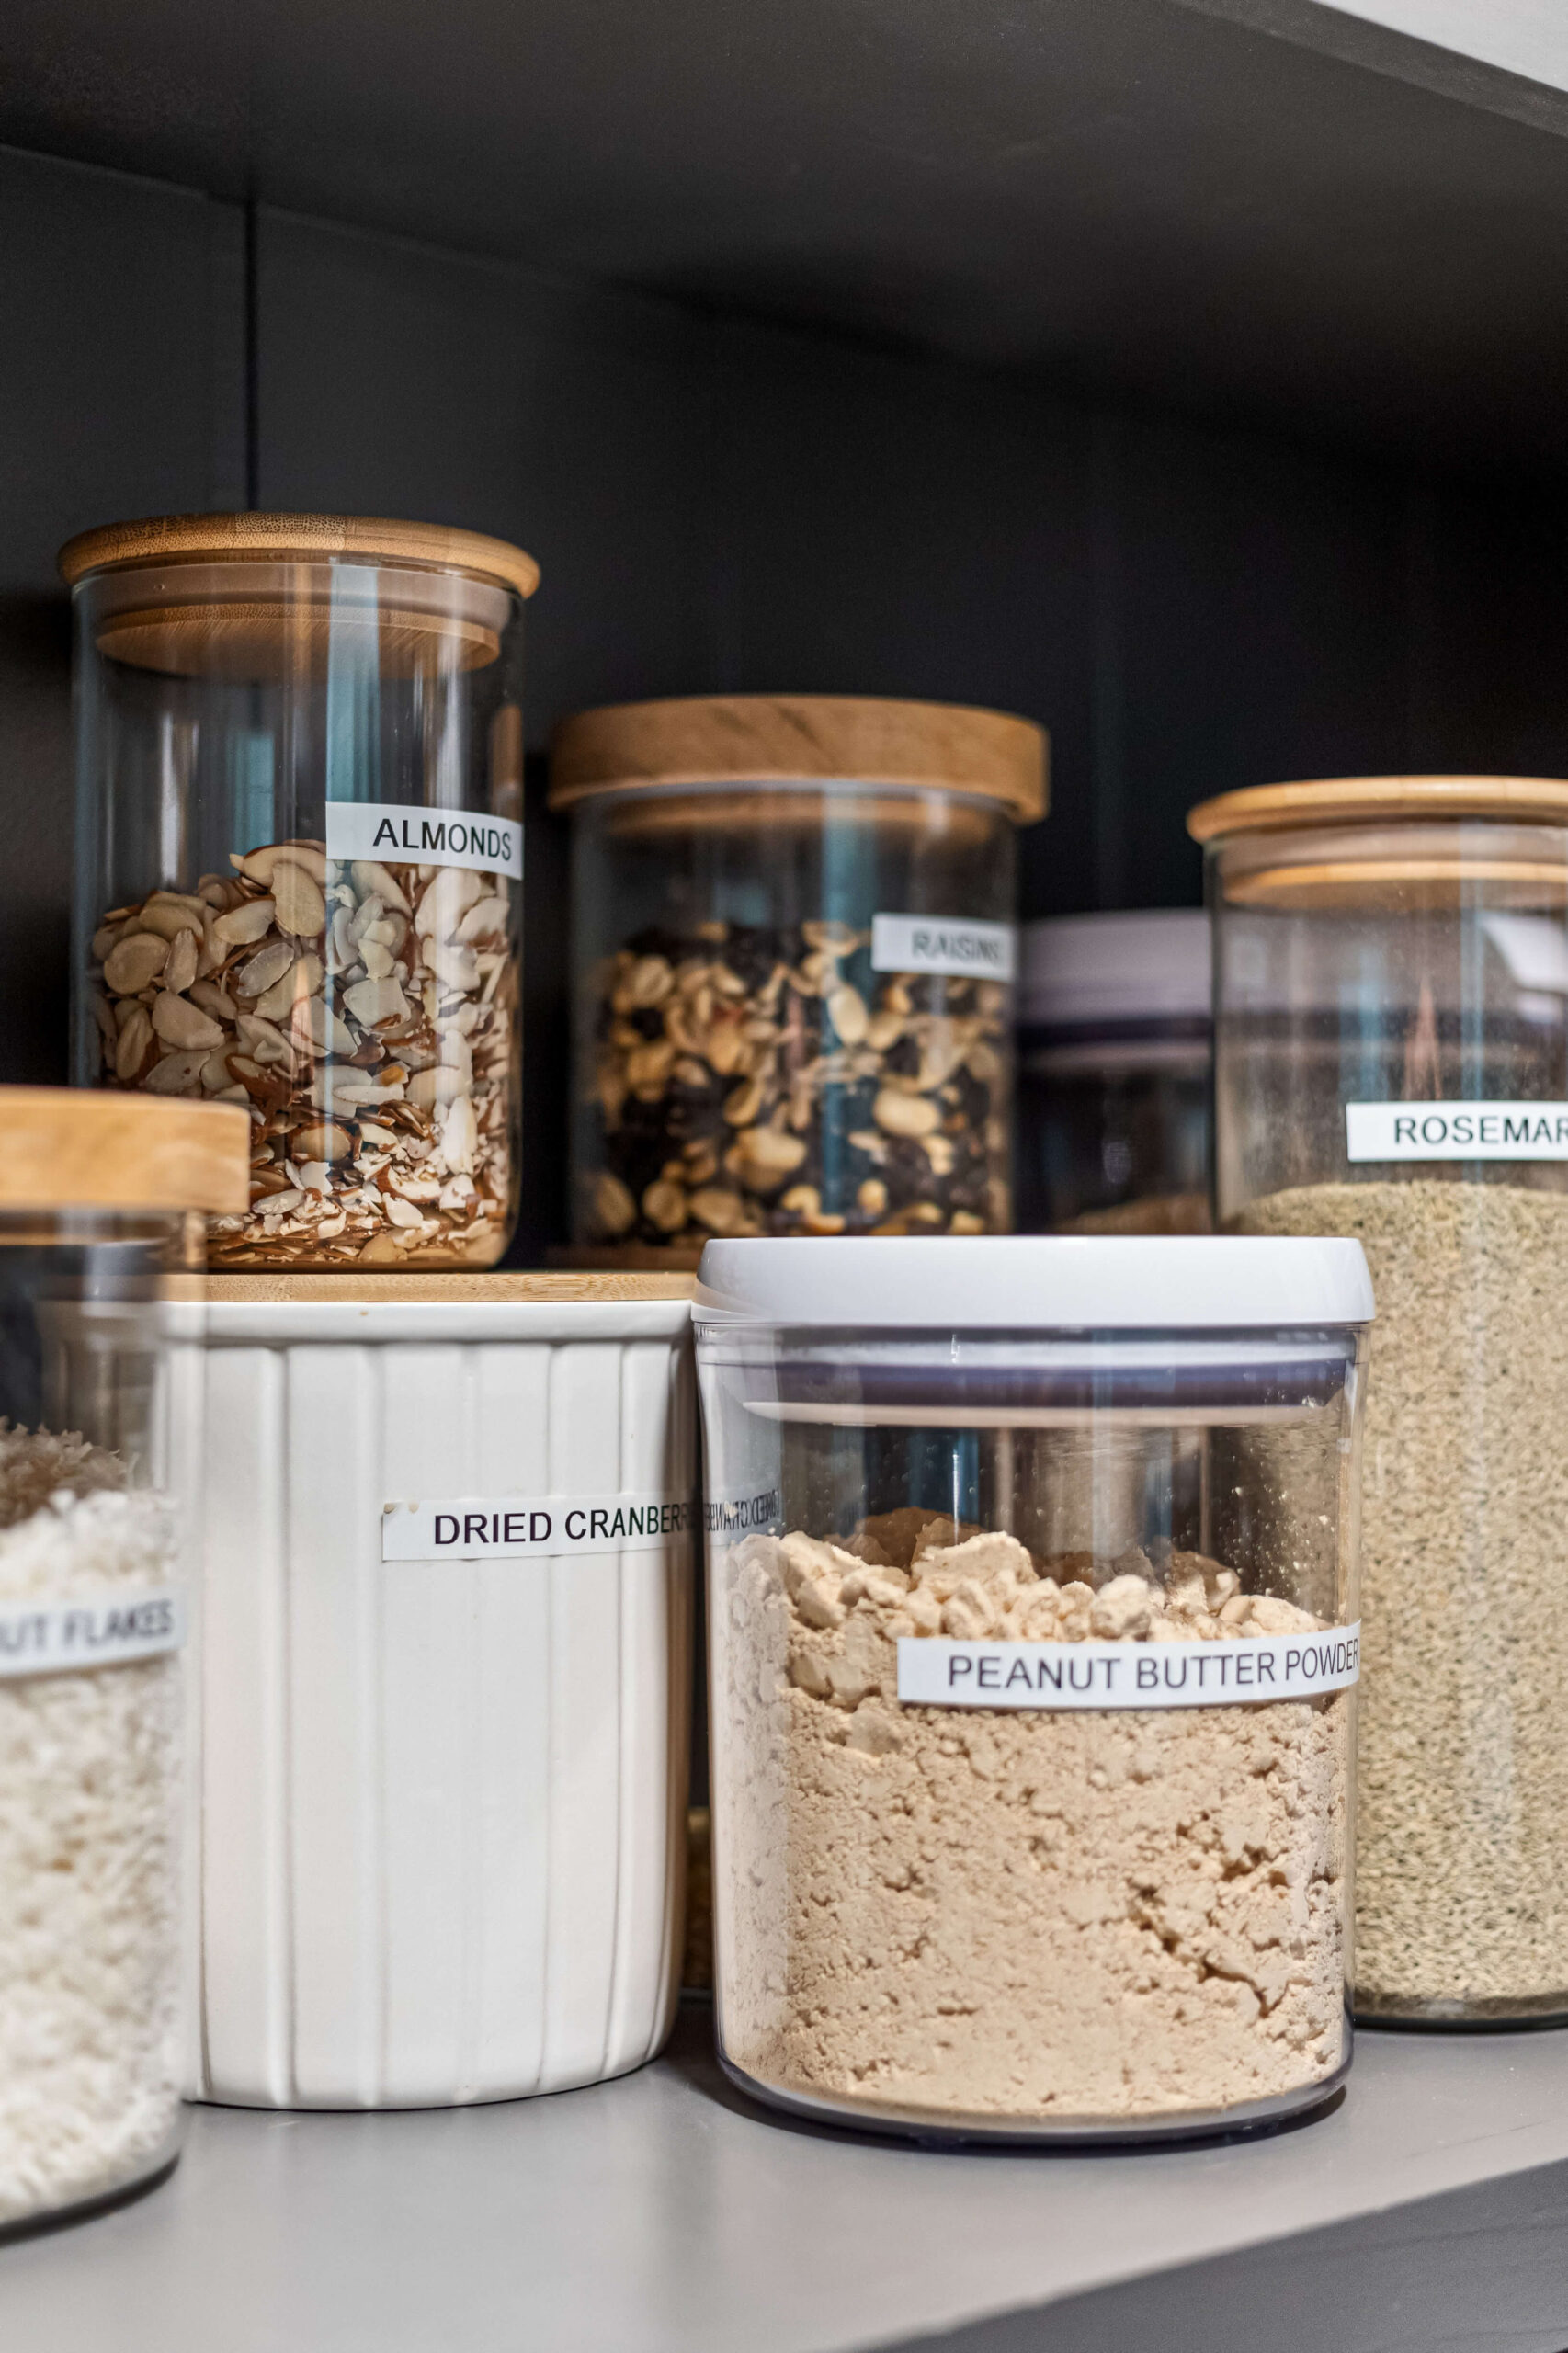
To make items in the corners easily findable, I used lazy susan organizers and baskets, which are great for containing small items. Less pretty items, like canned goods, go in that lower cabinet, which will be getting doors added. I used these can organizers to keep that area clean and organized. I have all of the jars, baskets, and organizers that I used for my pantry linked just a bit further down in this post.
After adding cabinet doors, and finishing the flooring this project was done.
Pantry Sources
- Clear, airtight food storage containers
- Can dispenser/holders
- Lazy susan organizer
- Glass jars with wood lids (large)
- Glass jars with wood lids (various sizes)
- 64 oz glass apothecary jar
- 128 oz glass apothecary jar
- Food scoop
- Black stoneware canister (medium)
- Black stoneware canister (large)
- Cream stoneware canister (medium)
- Cream stoneware canister (large)
- Honey jar
- Clear bins
- Woven baskets
- Large wire baskets
- Rectangle wire baskets
- Chalkboard basket labels
- Label maker
I love how my DIY pantry shelves look from every angle. They create a beautiful, perfectly organized space, making it easy to find what I need.
Looking for more projects to organize your kitchen? Check out my post on a quick and easy tiered spice rack, or for a simple, DIY drawer organizer.