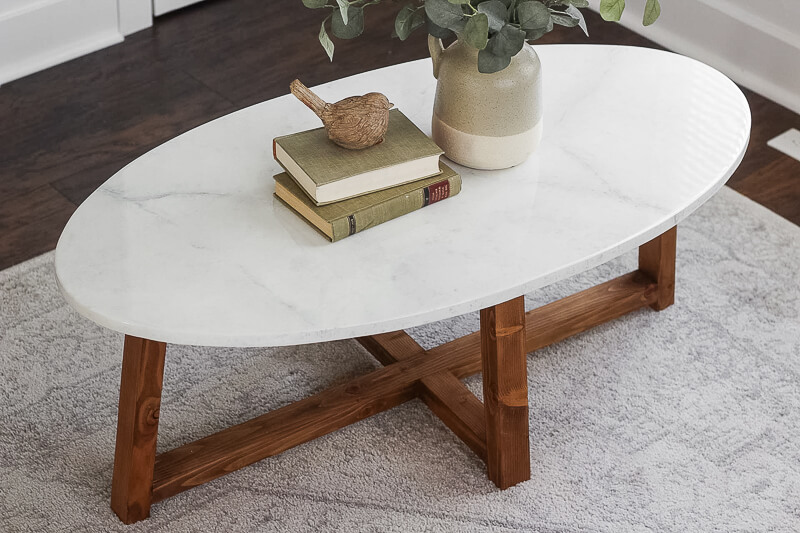
Beautiful DIY Marble Coffee Table


Updated May 9, 2026
Revamp your living space with my easy DIY marble coffee table tutorial! Building your own furniture may sound intimidating, but my step-by-step instructions will give you the confidence you need to take those first steps. You’ll be ready to create one-of-a-kind furniture that reflects your unique style.
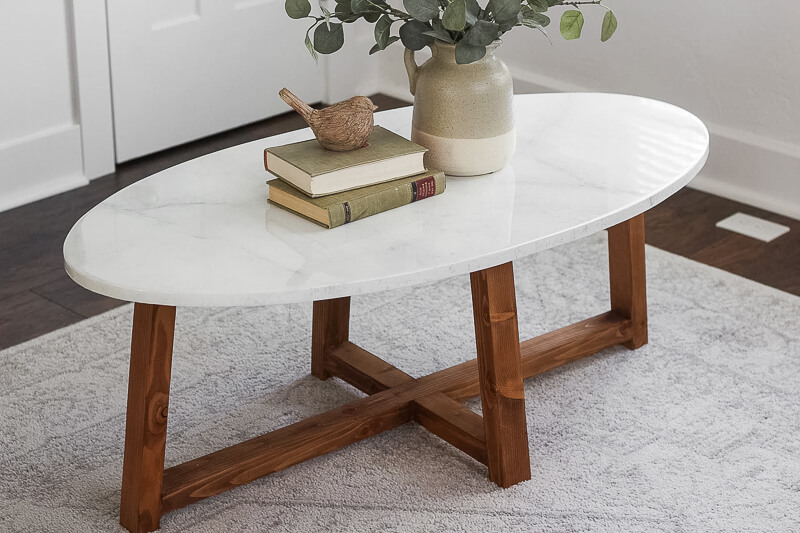
This DIY marble coffee table was a quarantine project for me, so I could only use products I already had on hand. It was made entirely out of scrap wood and some leftover paint and epoxy I had from another project, and it turned out better than I expected!
In my home, I have a lot of squareness. Rectangles, squares, and sharp corners are all over my walls, doors rugs, windows, and basically everything in my house. To add some interest and softness, I opted for an oval shape for the top of my marble coffee table. I’ve always loved throwing in a mix of shapes that are softer, like archways, with all the vertical and horizontal lines that make up a home. It makes it feel much more cozy to me. It also helps that the rounded size helps maximize space in smaller areas, and is overall just a little more kid-friendly.
Tools:
Jigsaw
Orbital Sander
Straight Edge T Square Ruler
Pocket Hole Jig
Drill
Driver
Materials:
MDF 1/2 inch thick
2 x 2 Pine
Nails
String
Pocket Hole Screws
Epoxy
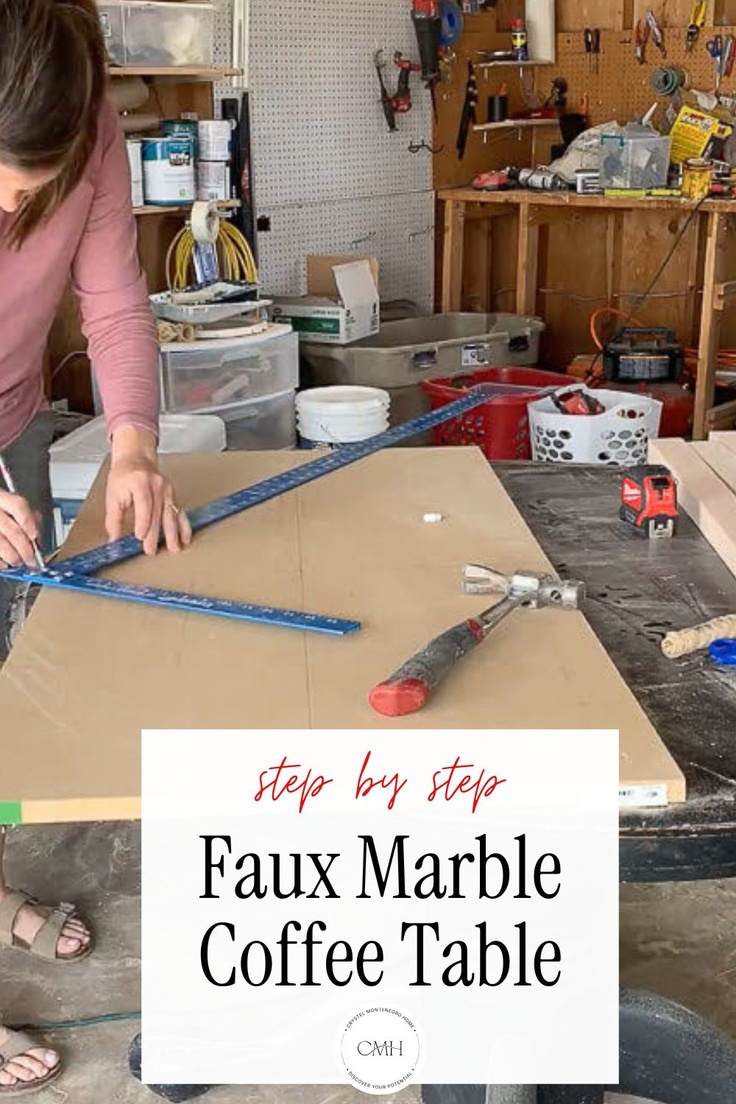
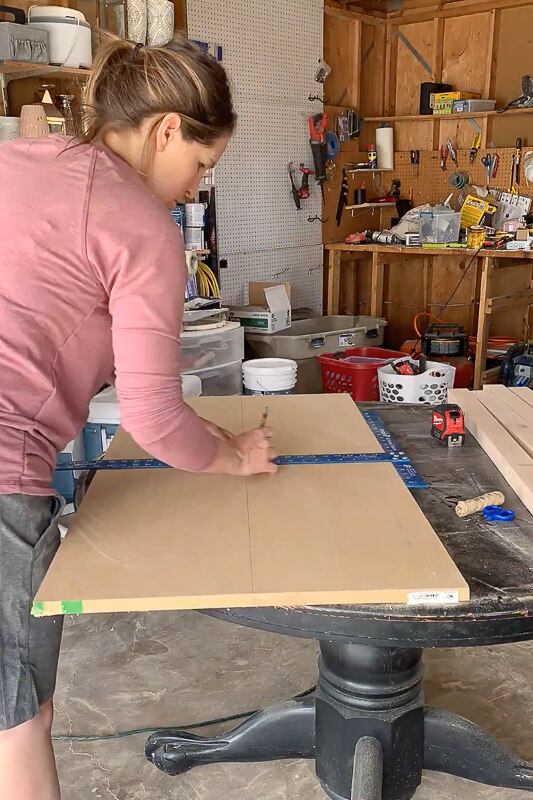
How to Mark Out An Oval
Nope, I did not free-hand the oval, and I don’t recommend you do it either unless you’re some kind of magician.
You’ll need to think about how large you want your oval to be. I wanted mine as large as possible, but I was using some leftover MDF, so the largest I could shoot for was 22 x 44 inches.
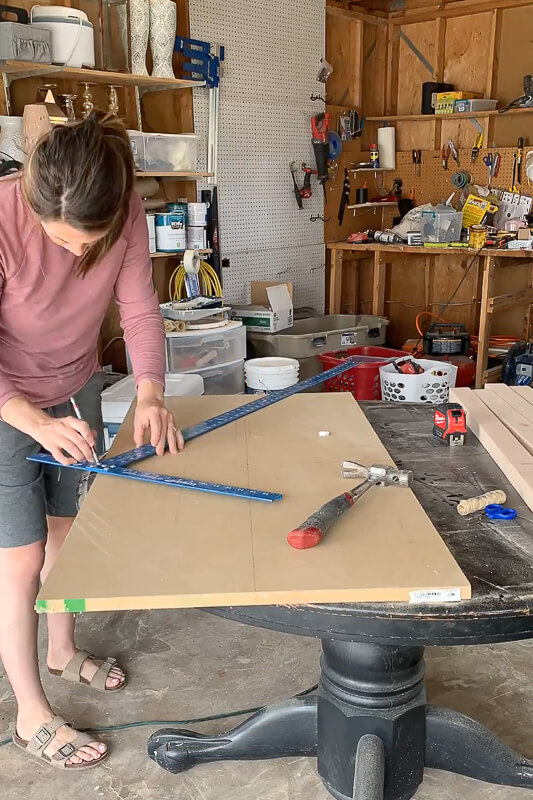
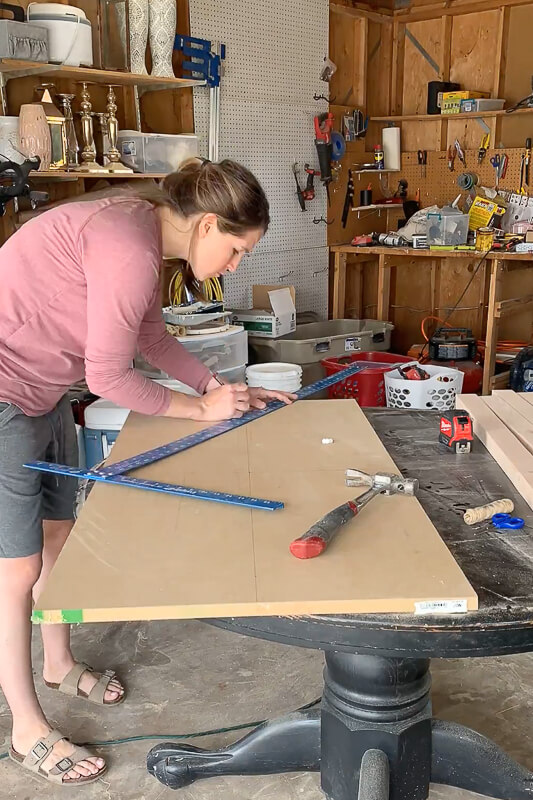
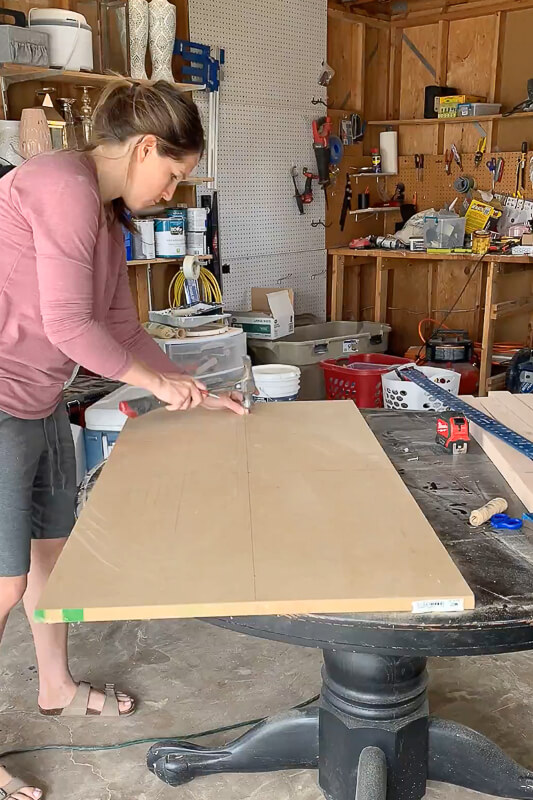
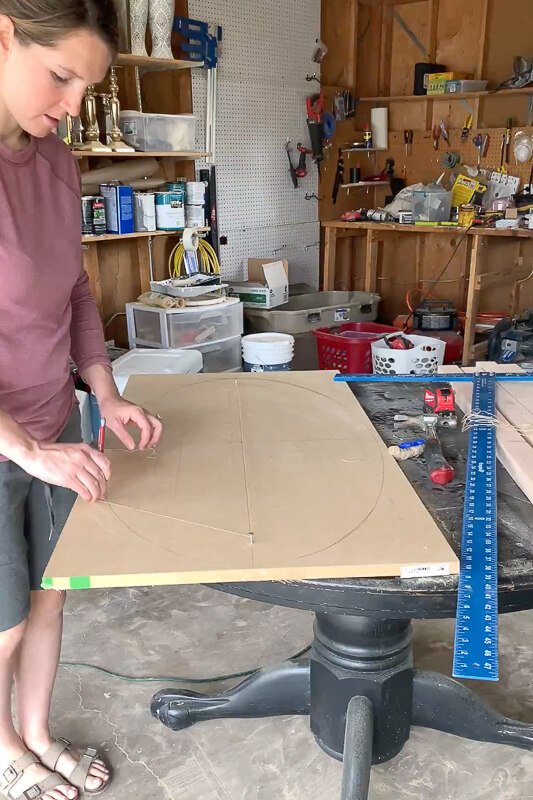
The first step is to mark the center of the board. I would suggest you figure out which side of the board you want on top, and do all of the following steps on the underside of your coffee table top.
I used a straight edge to draw two lines that intersect in the very middle of your board. Precision is key! Now I had a width and length line.
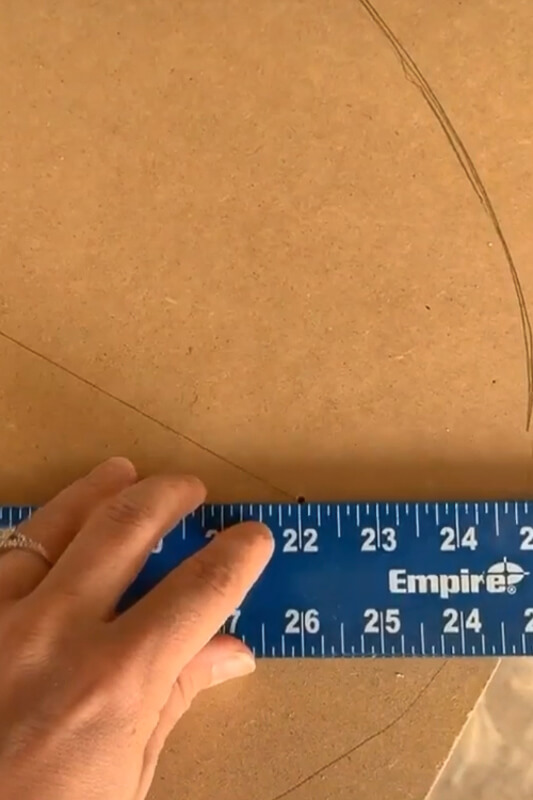
After I had found the center, I needed to mark the width and length end points of my oval. As a reminder, I wanted my oval to be 22 x 44 inches. So, on the width line, I made a mark 11 inches above the center point, and 11 inches below the center point. I did the same on the length line: 22 inches to the right of the center point and 22 inches to the left of the center point.
Essentially, these 4 endpoints were the borders of my oval shape.
After I had the 4 endpoints marked, I took my straight-edge ruler and placed the 0 on that bottom 11-inch mark I had made. Then I slid the other end of the ruler up until the 22 hit the length line, and marked the spot.
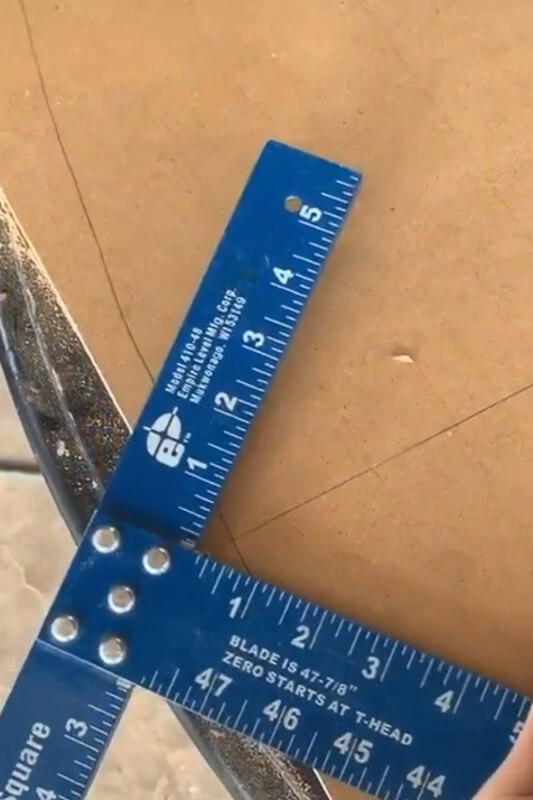
Then I did the exact same on the other side. These marks are going to help me draw out the oval shape.
How to Draw an Oval-Shaped Tabletop
For all of you visual learners, watch this video. He does a fantastic job showing and explaining the process.
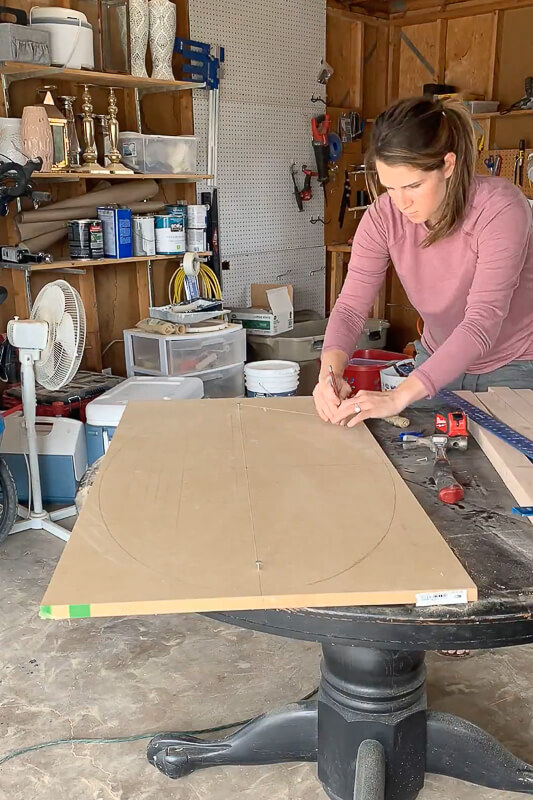
The first step in drawing out an oval is to take 3 nails and drive them into those 2 marks on the length line, and the 11 inch mark on the width line.
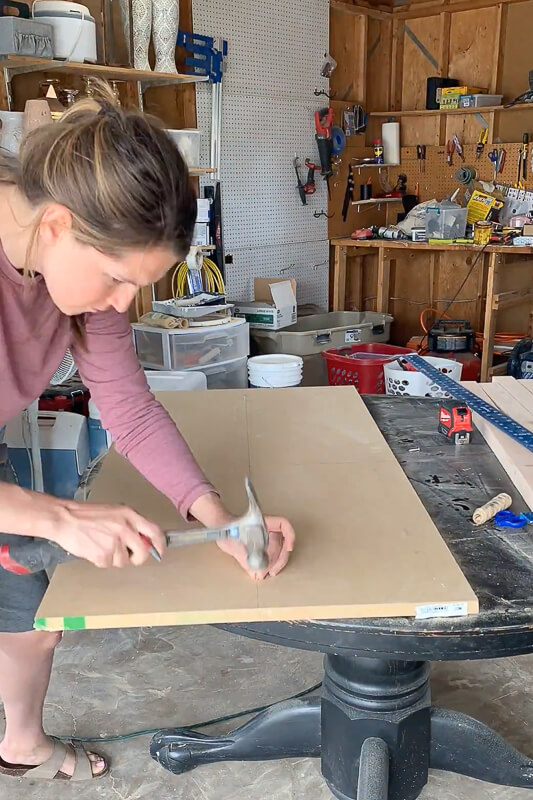
These nails will act as posts for my string. I made sure I didn’t drive the nails all the way through the MDF.
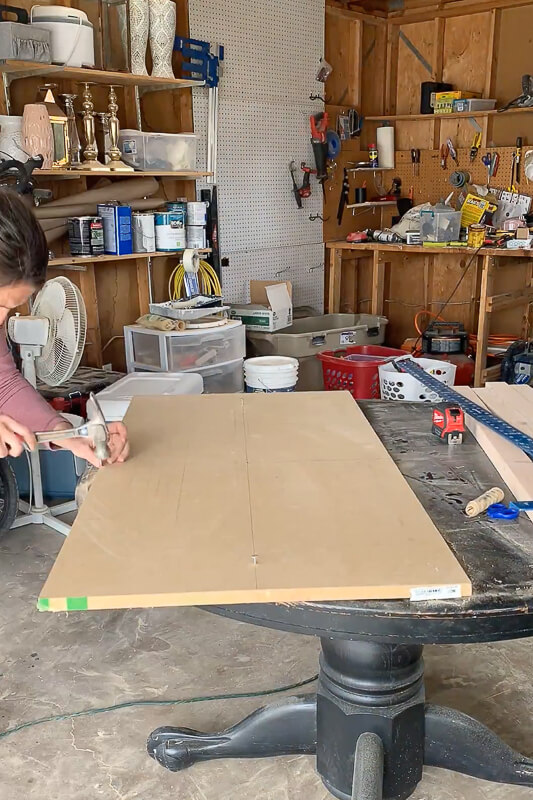
Next, I grabbed some string and tied one end to a nail, and then wrapped it around the other two. It needs to be taut, but not too taut. How accurate your oval is will depend on how tight or loose you tie the string and how much give the string has. Try not to use anything with any elastic in it.
Once my string was as tight as I needed it to be, I took the nail out that was on the width line.
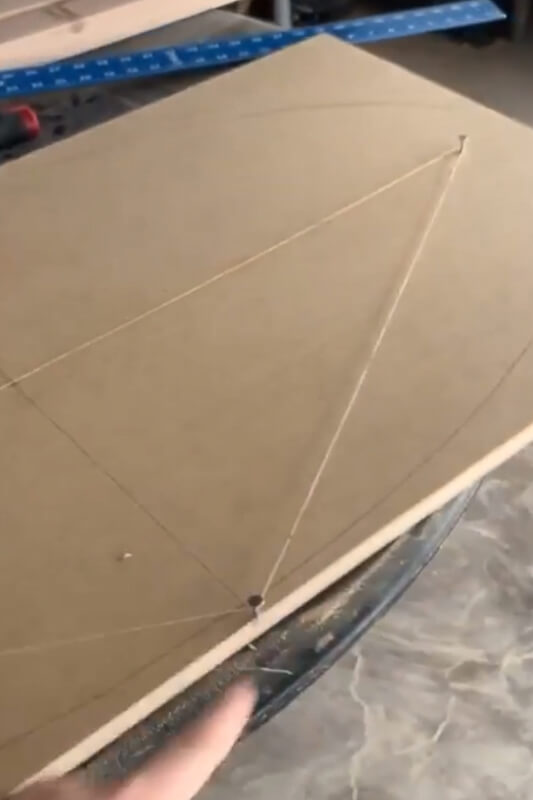
Drawing time! I grabbed a pencil and put it on the inside of the string. Now it gets tricky. I drew my oval along the string, letting the string guide my pencil. It took several times of going around to darken the line.

Cutting the Top out for an Oval Coffee Table
I used a jigsaw to cut the oval. If your blade is dull, definitely trade it out for a newer one. And clamp the board to something to keep it steady. I took my time and stayed on the line as well as I could.
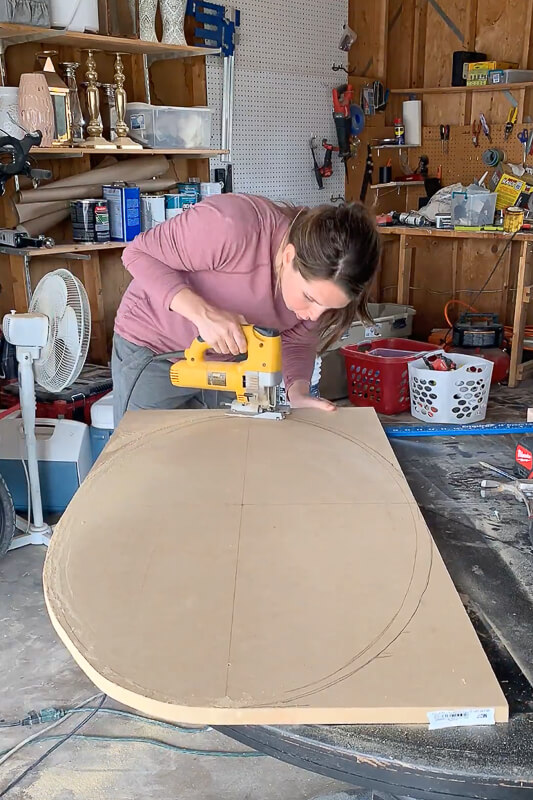
You can see in my image that the sides of my oval were a little wonky, but I was able to smooth them out with my orbital sander. I also slightly rounded the edges for a more finished look.
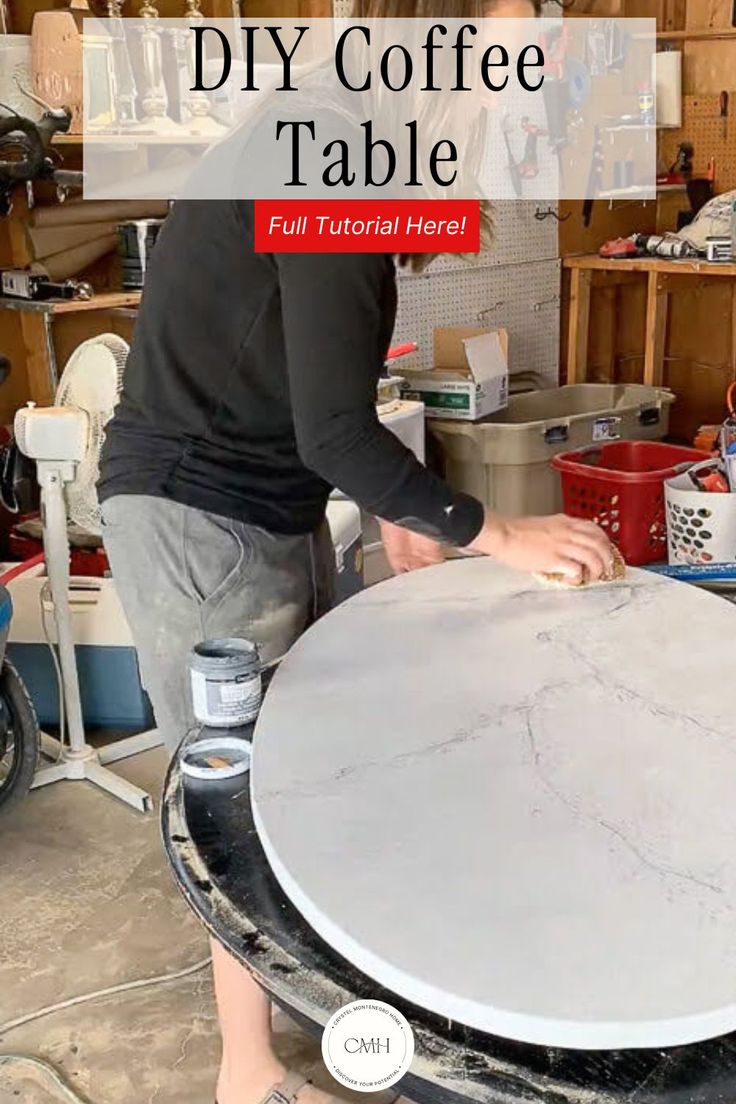
Painting your DIY Marble Coffee Table Top
I chose to create a faux marble look rather than painting the coffee table top. It’s a method I’ve been perfecting over the years, and I’ve shared everything I know in an ebook that explains in detail exactly how to achieve this look. If you decide to go this route, I highly recommend you check out my ebook. I’ve used this method on DIY countertops as well, and it’s amazing how realistic it looks.
Here’s an overview of how to achieve the faux marble effect.
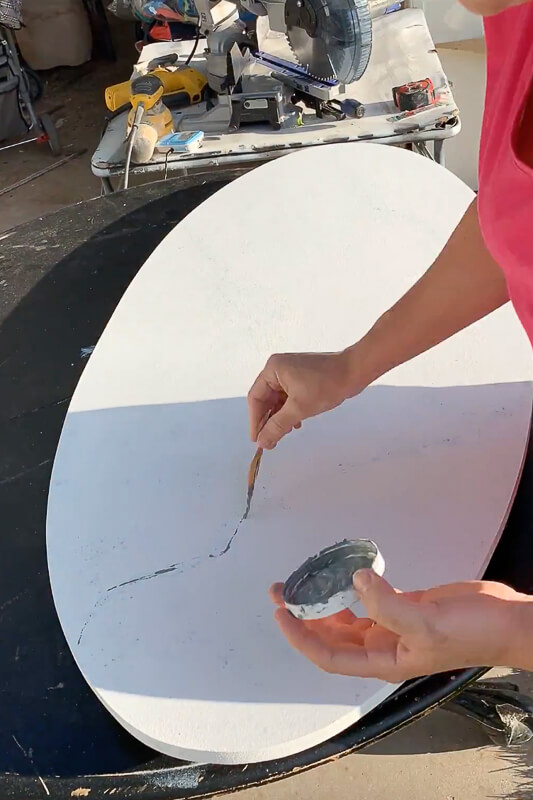
I first primed the MDF. After that was dry, I took a sponge and dipped it into whatever paint I had on hand, and sponged the paint all over the tabletop. Don’t forget the sides!
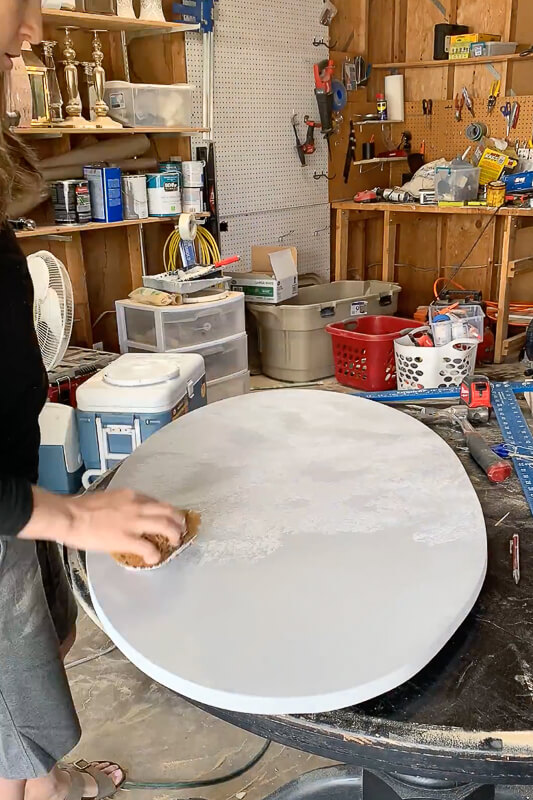
Then I took a feather, dipped it into grey paint, and painted marble veins. I used a paintbrush to feather out those veins, and then I took that same sponge and lightly pressed it on top of the veining. I repeated this process several times. This helps the marble look more realistic because of the layering effect I’m using.

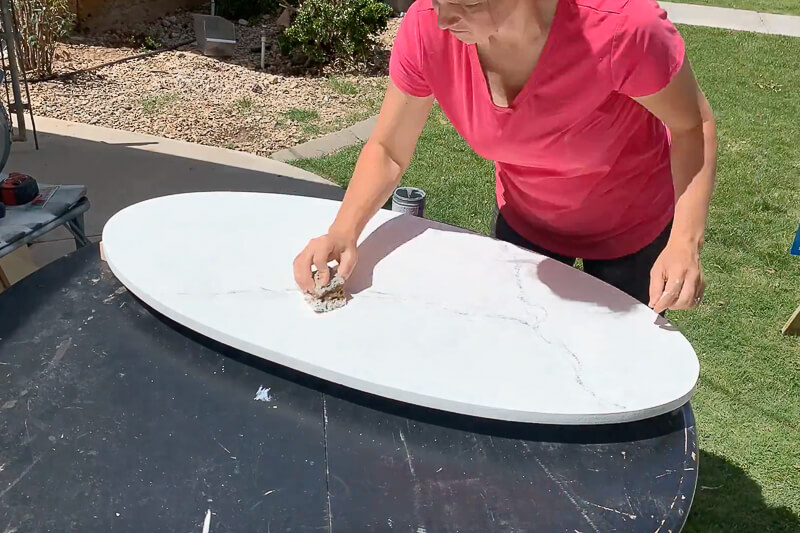
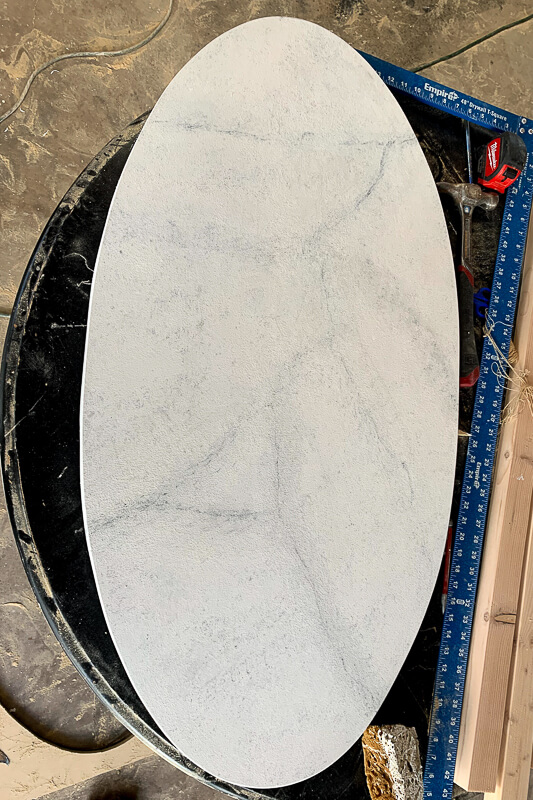
After I was satisfied with how it looked, I covered the entire tabletop with epoxy. That’s another detail I go over in my ebook and it’s what really makes this project look like real marble. The image on the left is before I poured the epoxy, and that beautiful shine in the right picture is after I applied the epoxy.
Cutting the Wood for the Center Base
Now that I had finished the DIY marble coffee table top, I needed to build a sophisticated and modern style base to match.
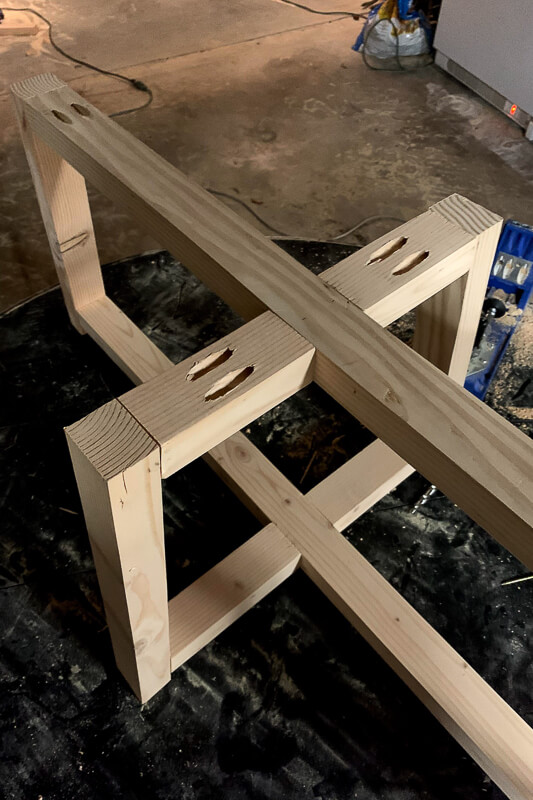
Pro Tip: When building the base, all of the pocket holes on the upper pieces need to be facing up, and all the pocket holes for the lower pieces need to be facing down. This way, all of the pocket holes will be hidden when you are done with your table, giving you a clean and professional look.
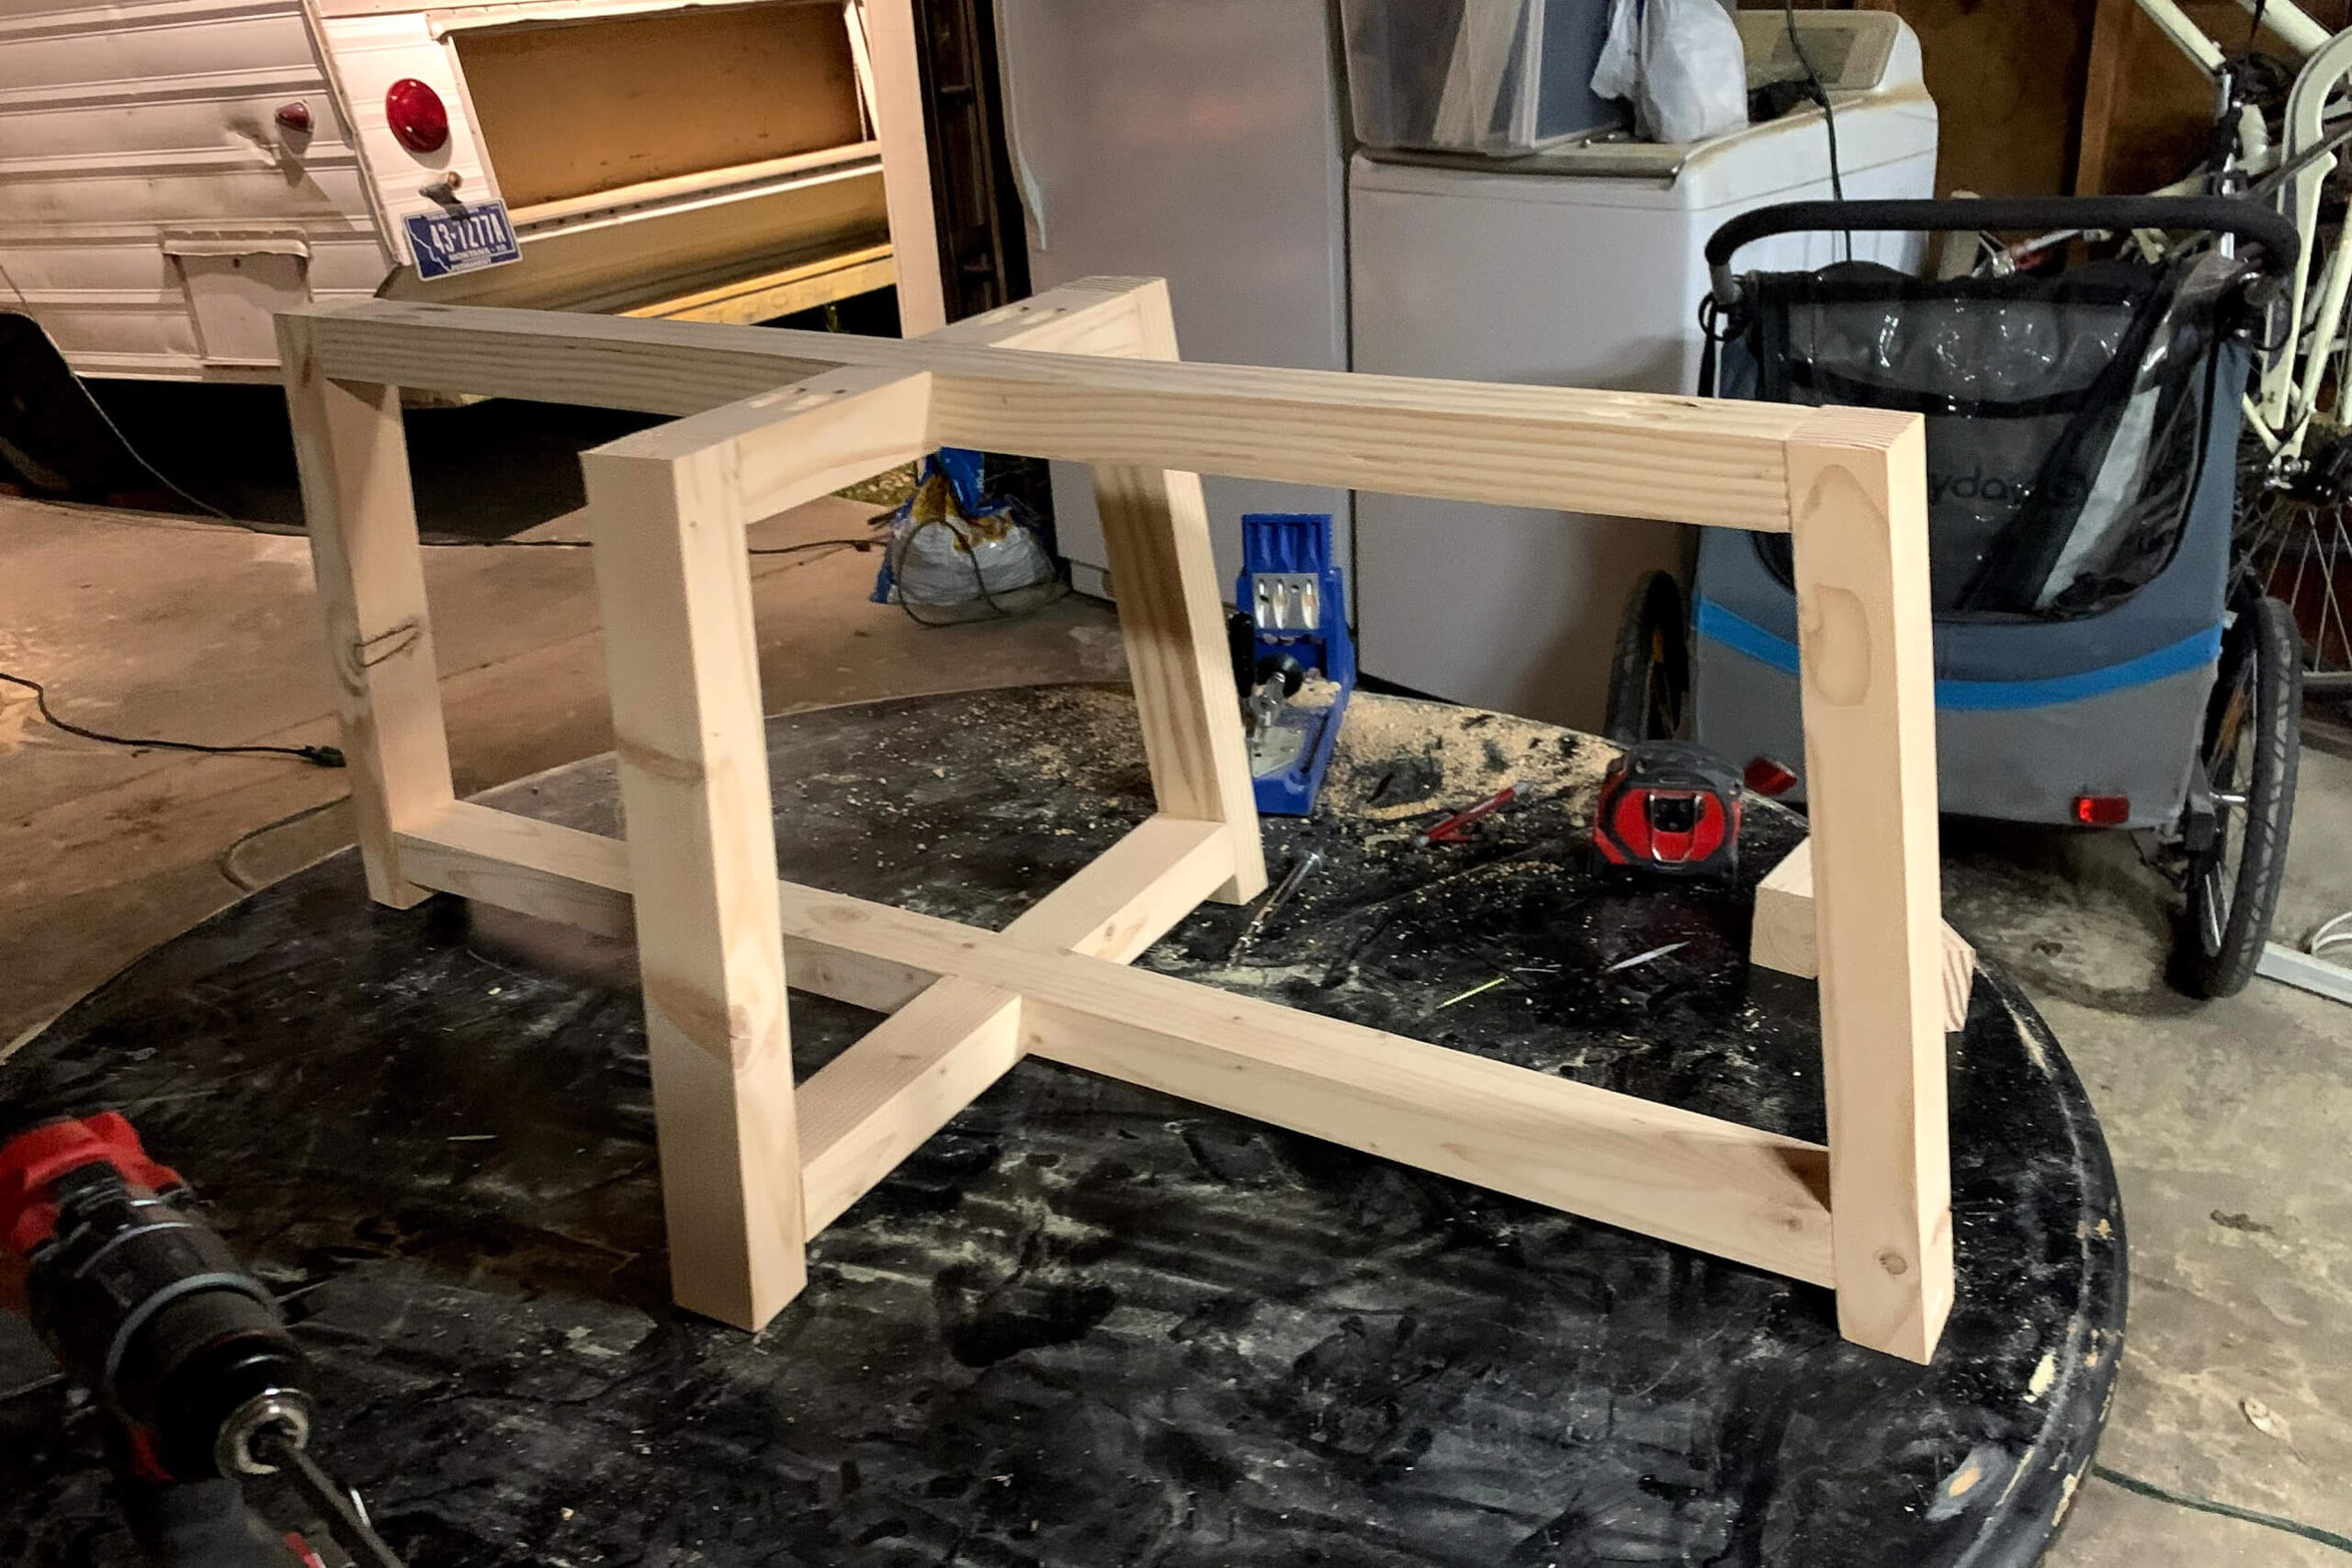
First, I built the center support section that runs the length of the coffee table.
I cut a 2 x 2 into:
- 2 pieces at 16 in. long (for the vertical legs)
- 1 piece at 32 in. long (for the upper beam)
I needed to cut the ends at an angle so the legs would have that slanted, modern look I was going for, rather than just straight up and down. So, I moved my miter saw guide over 10° and that’s all it needed!
For my two vertical legs, I cut 10° from both the top and the bottom, being sure to angle both cuts in the same direction, so that the top and the bottom of each leg are parallel to each other. On my upper beam, I cut 10° off both ends at an outward angle from the top.

If I were going to make this table again, I think I would go for even more of a slant and cut 15° off. That’s the beauty of DIY. You can take this project as inspiration and make it your own.
Assembling the Wood for the Center Base
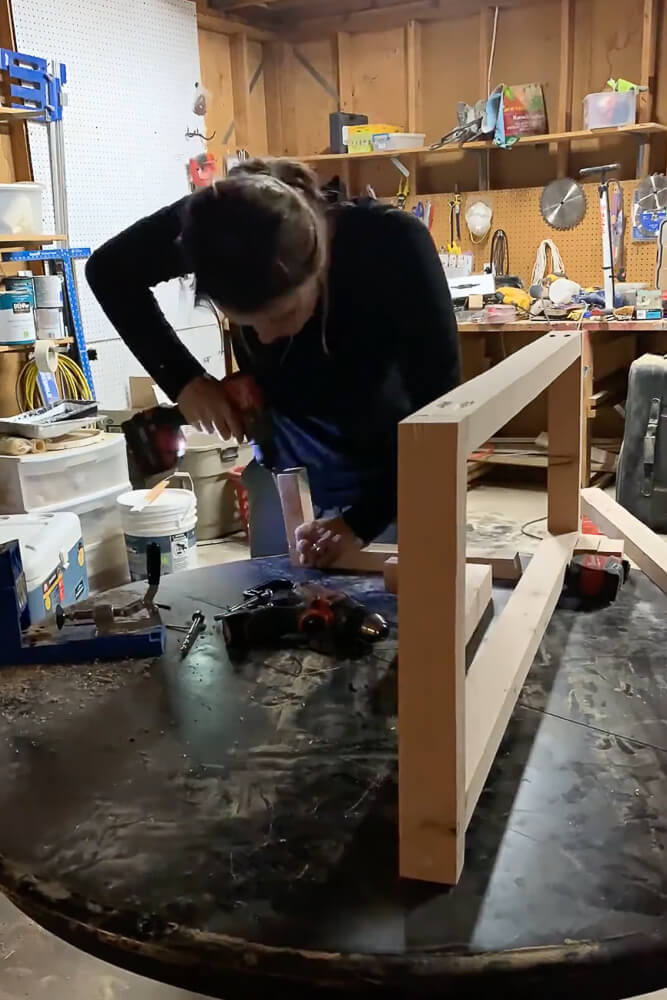
Next, using a pocket hole jig, I created two holes at each end of my upper beam. Then I lined it up to be flush with the top of a leg and clamped it in place while I screwed them together through the pocket holes. I repeated this step at the other end of my center support piece.


Now I needed to add a lower beam to my center support piece. Since I didn’t want the lower beam to be flush with the floor, I marked one inch up from the bottom of both legs.
Lots of people who DIY like to do measurements and math, but the math gene apparently skipped me because it’s not really my thing. The way I get around it is by placing my uncut wood wherever it needs to go, then making pencil marks and cutting based on those.
In this case, I took a 2 x 2 and laid it on top of my center support piece. I lined up the bottom with the pencil marks I had just made and then marked on both ends where I would need to cut to fit perfectly between the legs.

Pro Tip: Remember you can always cut more off, so if you’re new at this it is ok to be conservative with your cut, check it, and if it is too big, cut a little more off until it fits just right.
Lastly, I made two pocket holes at each end on the bottom, clamped everything in place, and attached the lower beam to the legs by screwing them together through the pocket holes.

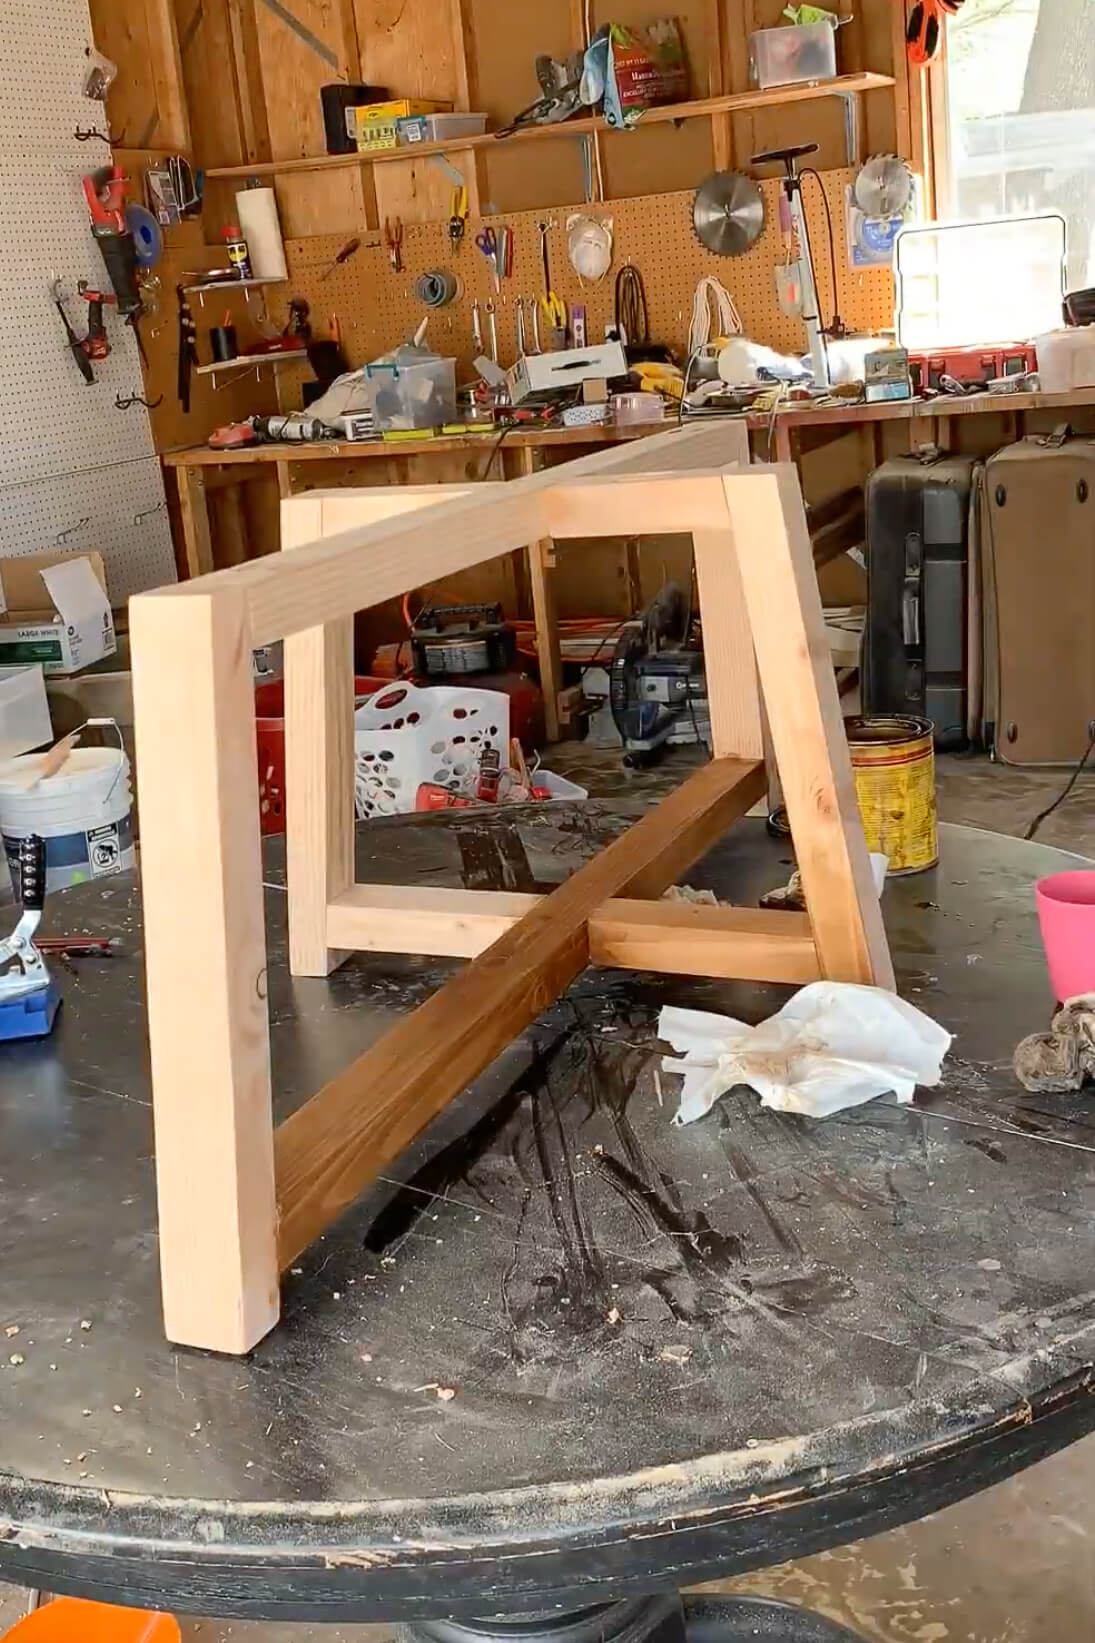
Cutting Wood for the Sides
It was time to make the side pieces for my base.
I cut a 2 x 2 into the following lengths.
- 2 pieces at 16 in. long (for the vertical legs)
- 2 pieces at 6 in. long (for the upper beams)
I cut the top and bottom of the legs at a 10° angle going in the same direction, just as I had done earlier. Then for the two upper beams, I cut 10° off of just one edge at an inward angle from the bottom to the top. The other edge I left straight.
Attaching the Sides of the Coffee Table Base
These upper beams are pretty short, so I made pocket holes in the center going in both directions. Then I attached them to the legs.
Now I needed to figure out the length for my lower beam.
I cut the end of a 2 x 2 at a 10° angle so it sat flush against my vertical leg. Then, I lined up the tops and made a mark on the lower beam where it needed to be cut.

Once I had cut off enough for it to fit perfectly, I added pocket holes on the bottom and screwed everything together. Then I repeated those steps to make a second side piece.
I marked the center of both horizontal pieces to know where to attach the side pieces. I clamped the sides to the base and screwed everything together through pocket holes.

Finishing the Coffee Table Base with Stain
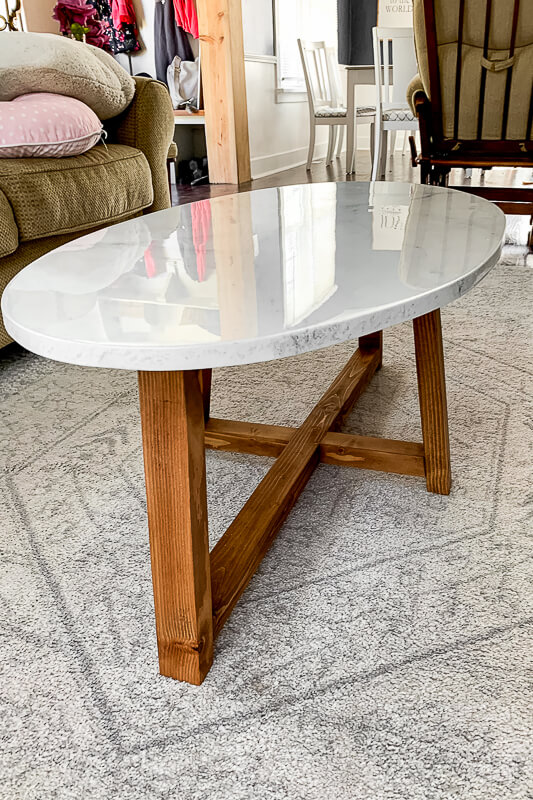
After giving the base a quick sanding with 150-grit sandpaper, I wiped off the dust and stained it using Special Walnut by Minwax, which I already had on hand. I also thought this color of stain would really compliment the marble coffee table top that it is now time to attach.
Attaching the DIY Marble Top to the Wood Base
Now that I had a sleek and sophisticated base for my table, I needed to attach the faux marble top. This part is very quick and simple.
Lay your beautiful marble table top face down on your workspace, so that the back/unfinished side is facing up. Set your base upside down and use a tape measure to ensure it’s centered. Once you have it exactly where you want it, clamp it and use an impact driver to drive 2 1/2 in. wood screws through the underside of the center section and both side pieces of your wood base into the back of your tabletop.
The 2 1/2 in. screws are the perfect length for biting into the back of the MDF without poking through the top layer and messing up your faux marble finish.
Pro Tip: You may want to protect your new marble table top from getting scratched by placing a rag or old t-shirt in between the clamp and the finished side of your table.
Time to Style Your DIY Marble Top Coffee Table!
How’s that for a DIY Marble Coffee Table?! It turned out so much more stunning than I could have imagined, enough so that people asked me where I bought it. What a compliment!
For other furniture ideas, check out these DIY nightstands I made with no tools of my own except a drill! And leave a comment if you use these instructions to build your own DIY Marble Coffee Table. I’d love to know how it turned out!