Updated May 9, 2026
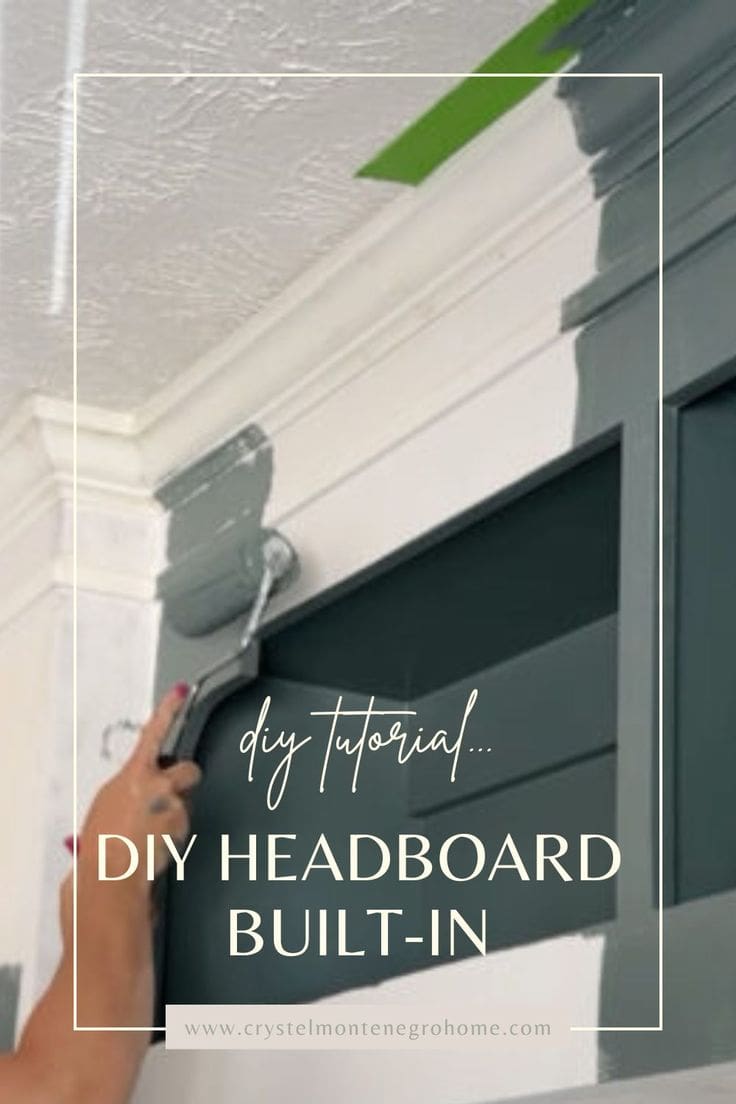
Looking to maximize storage in a small bedroom? A headboard with storage is one of my favorite ways to add function without sacrificing style. Since moving into this fixer-upper, we’ve renovated just about every space in the house… except my son’s room. And with a baby on the way, it was time.
I wanted something practical – shelving that could double as a nightstand, built-in lighting, and room to grow with him. But of course, it also needed to look custom and high-end. This DIY headboard with storage checked all the boxes.
Keep scrolling for the full tutorial, my materials list, and tips for getting a smooth finish – plus, how I made a weird room bump-out completely disappear.
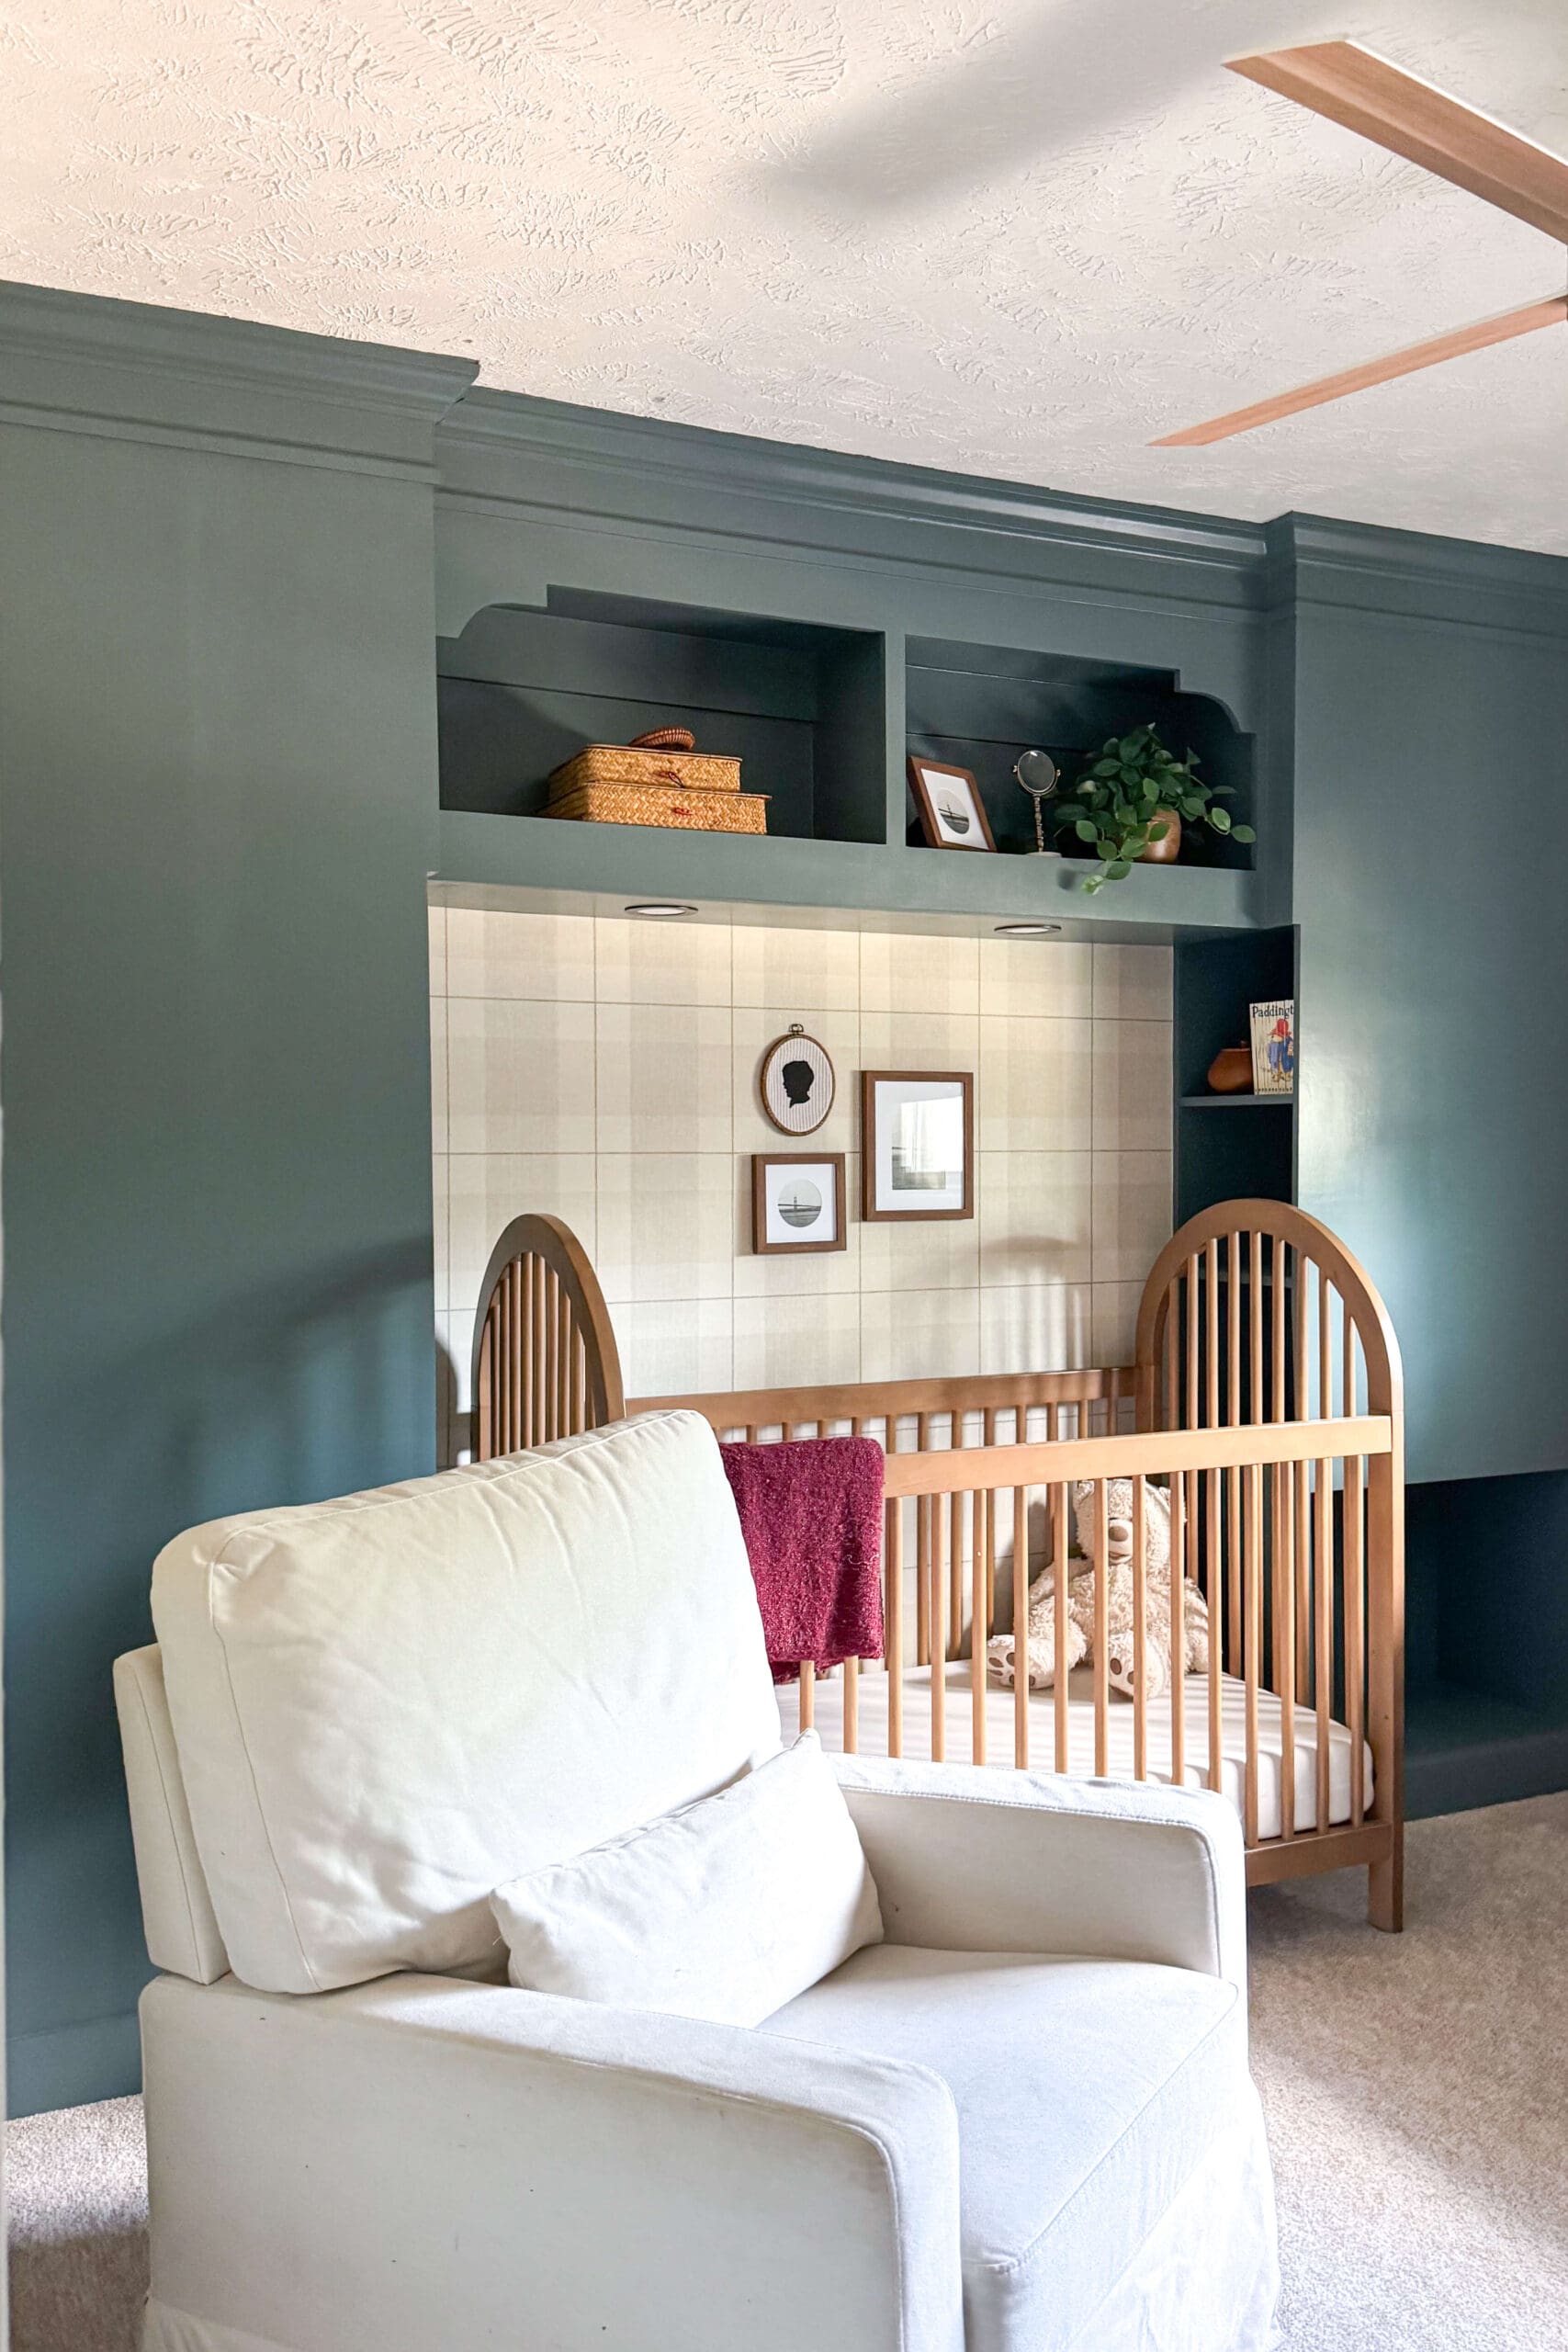
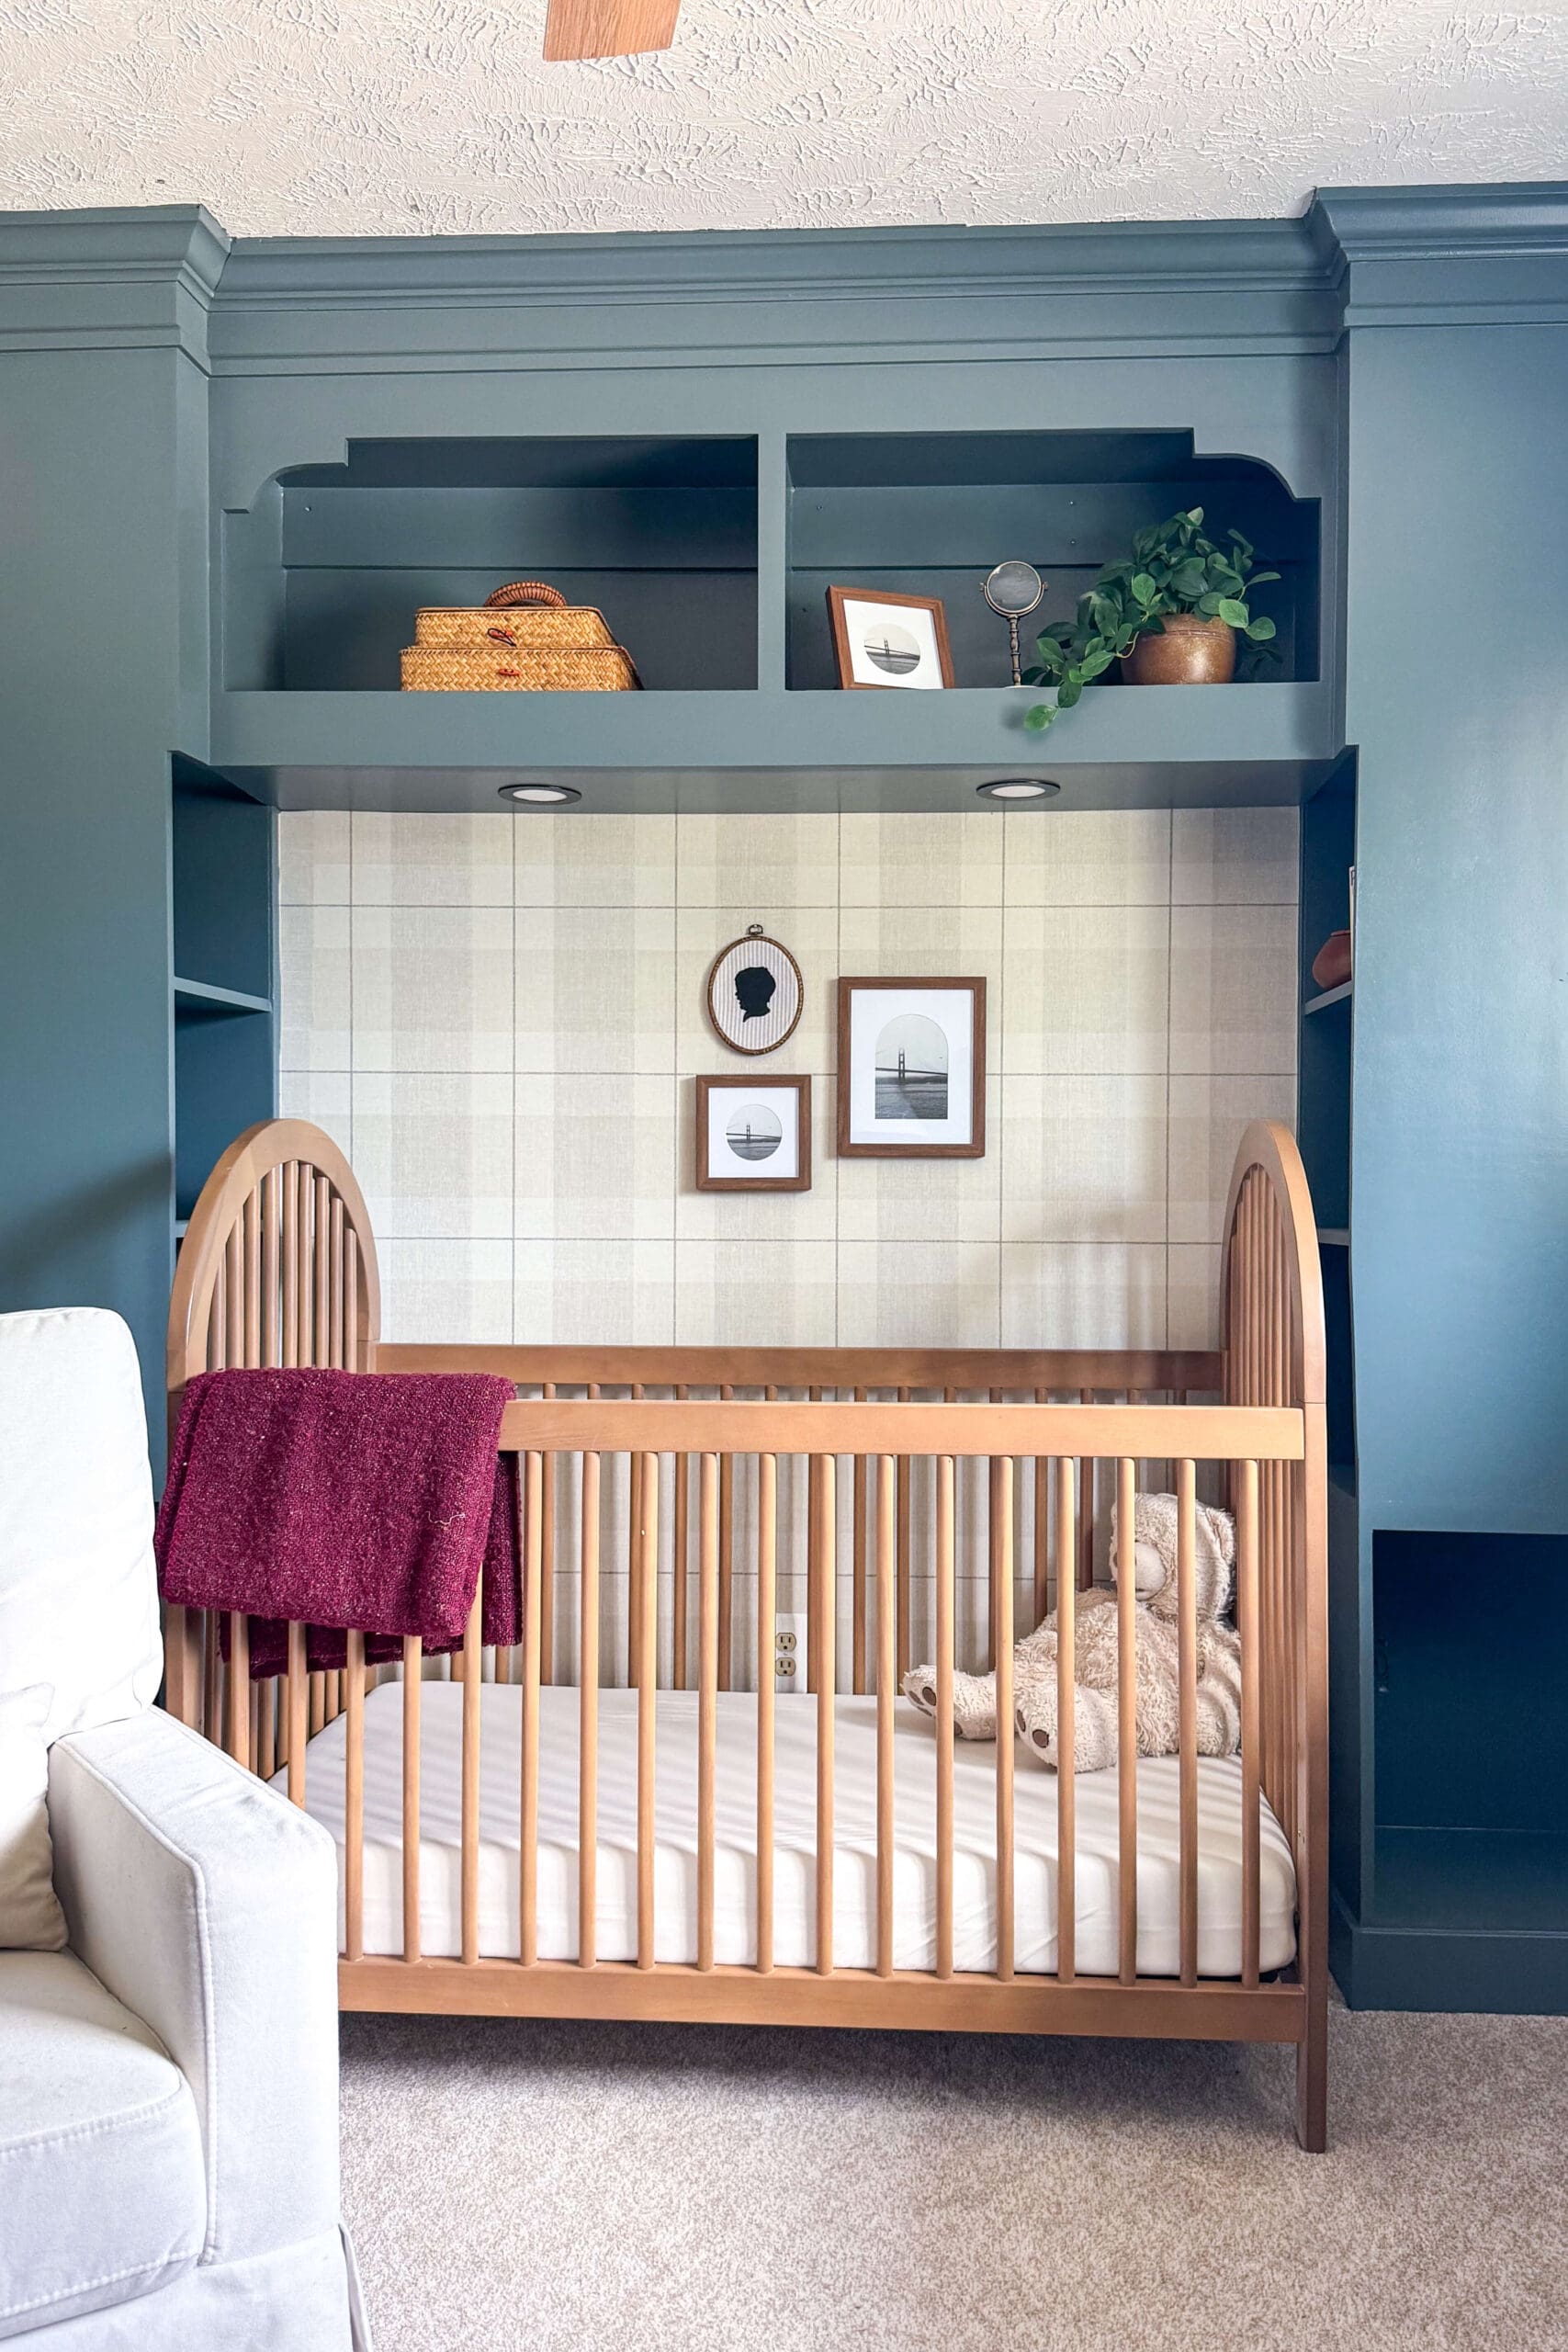
Table of Contents
- Tools I Used to Build a Headboard with Shelving
- Materials for a DIY Headboard with Built-In Storage
- The Before: A Plain Room and a Duct Bump-Out
- Step 1: Cutting the Wood
- Step 2: Assembling and Installing the Headboard with Storage
- Step 3: Adding the Cross Shelf + Lighting
- Step 4: Building the Face Frame
- Step 5: Adding Trim for a Built-In Look
- Step 6: Filling Seams with Bondo
- Step 7: Final Trim Details
- Step 8: Painting the Headboard with Storage
- The Finished Headboard with Storage
- 📌 Save This DIY Headboard Idea for Later
- F&Q About Built Ins Around a Bed
Tools I Used to Build a Headboard with Shelving
Here’s a list of the tools I used to build this DIY headboard with storage:
- Circular saw
- Miter saw
- Tape measure
- Brad nailer
- Drill
- Speed square
- Jigsaw
- Stud finder
- Pocket hole jig
- Clamps
- Handheld sander
- Level
- Caulk gun
- Paintbrush
- Foam paint roller
Tip: If you’re new to woodworking, don’t be intimidated! You don’t need a fancy workshop to do this—just some basic tools, a little planning, and a lot of caffeine.
Materials for a DIY Headboard with Built-In Storage
- 3/4″ maple plywood
- Wood glue
- Wood screws
- Recessed lights
- Baseboard
- Crown molding
- Bondo
- Caulk
- Primer
- Paint
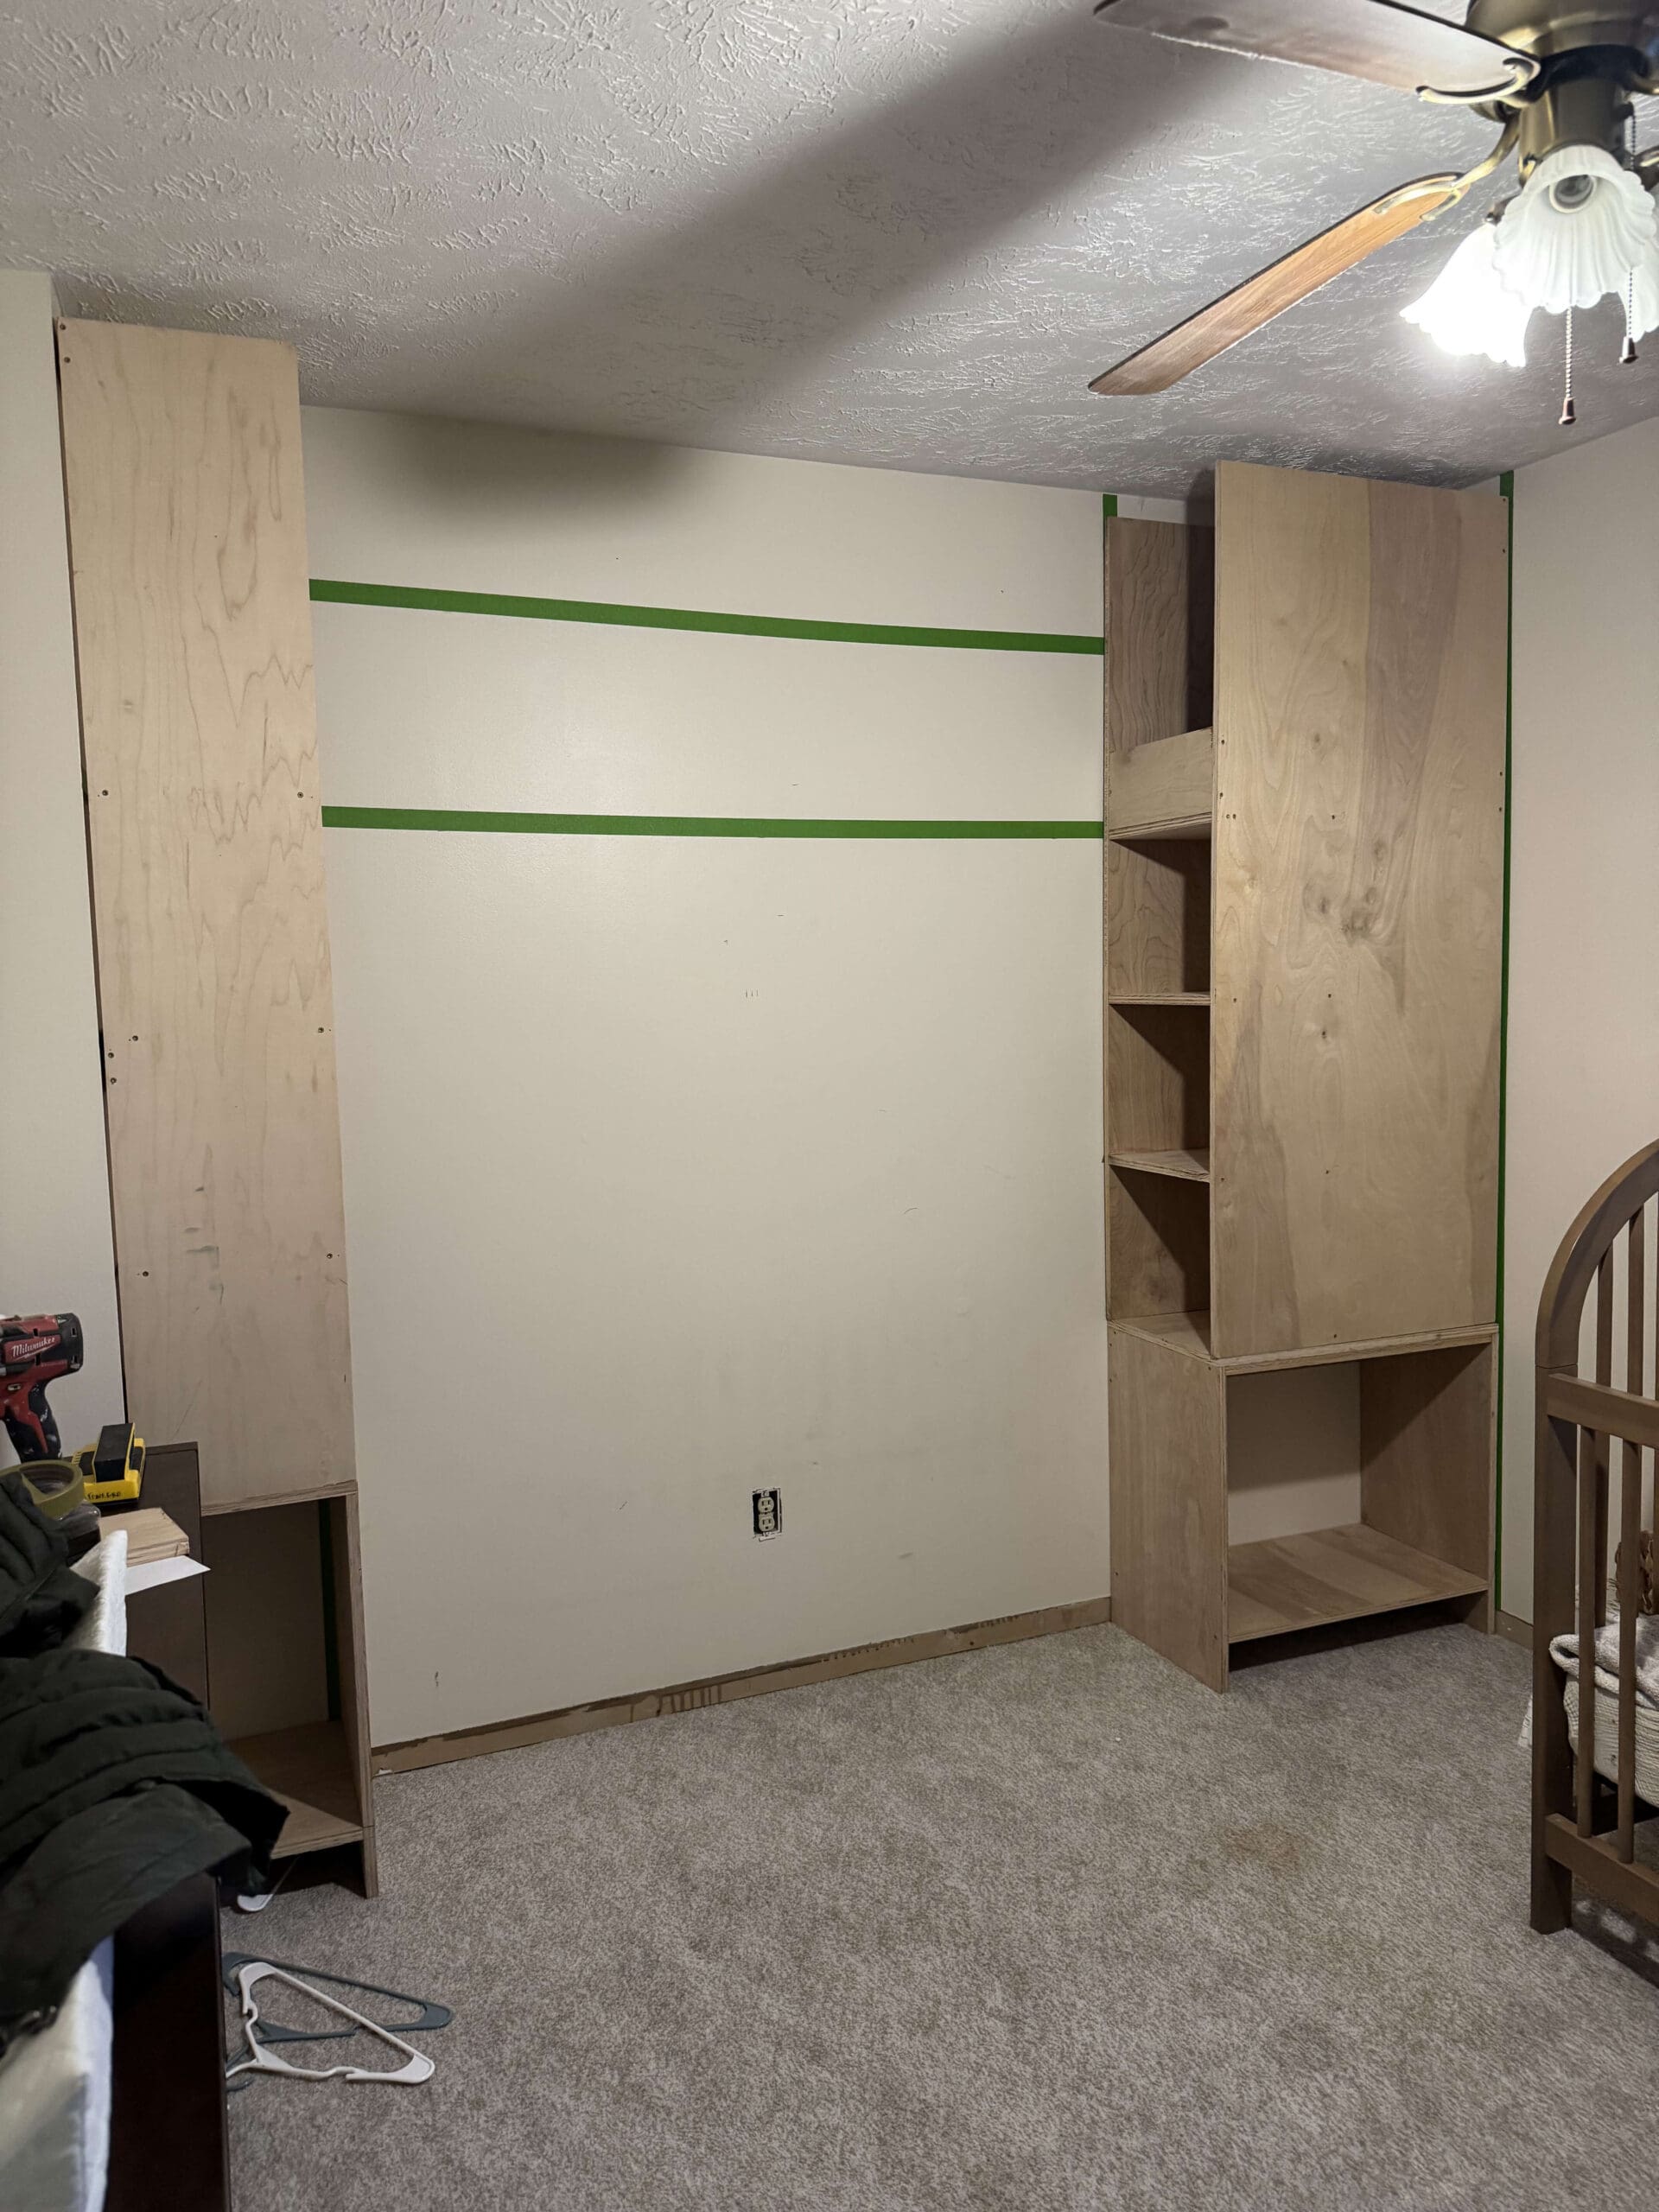
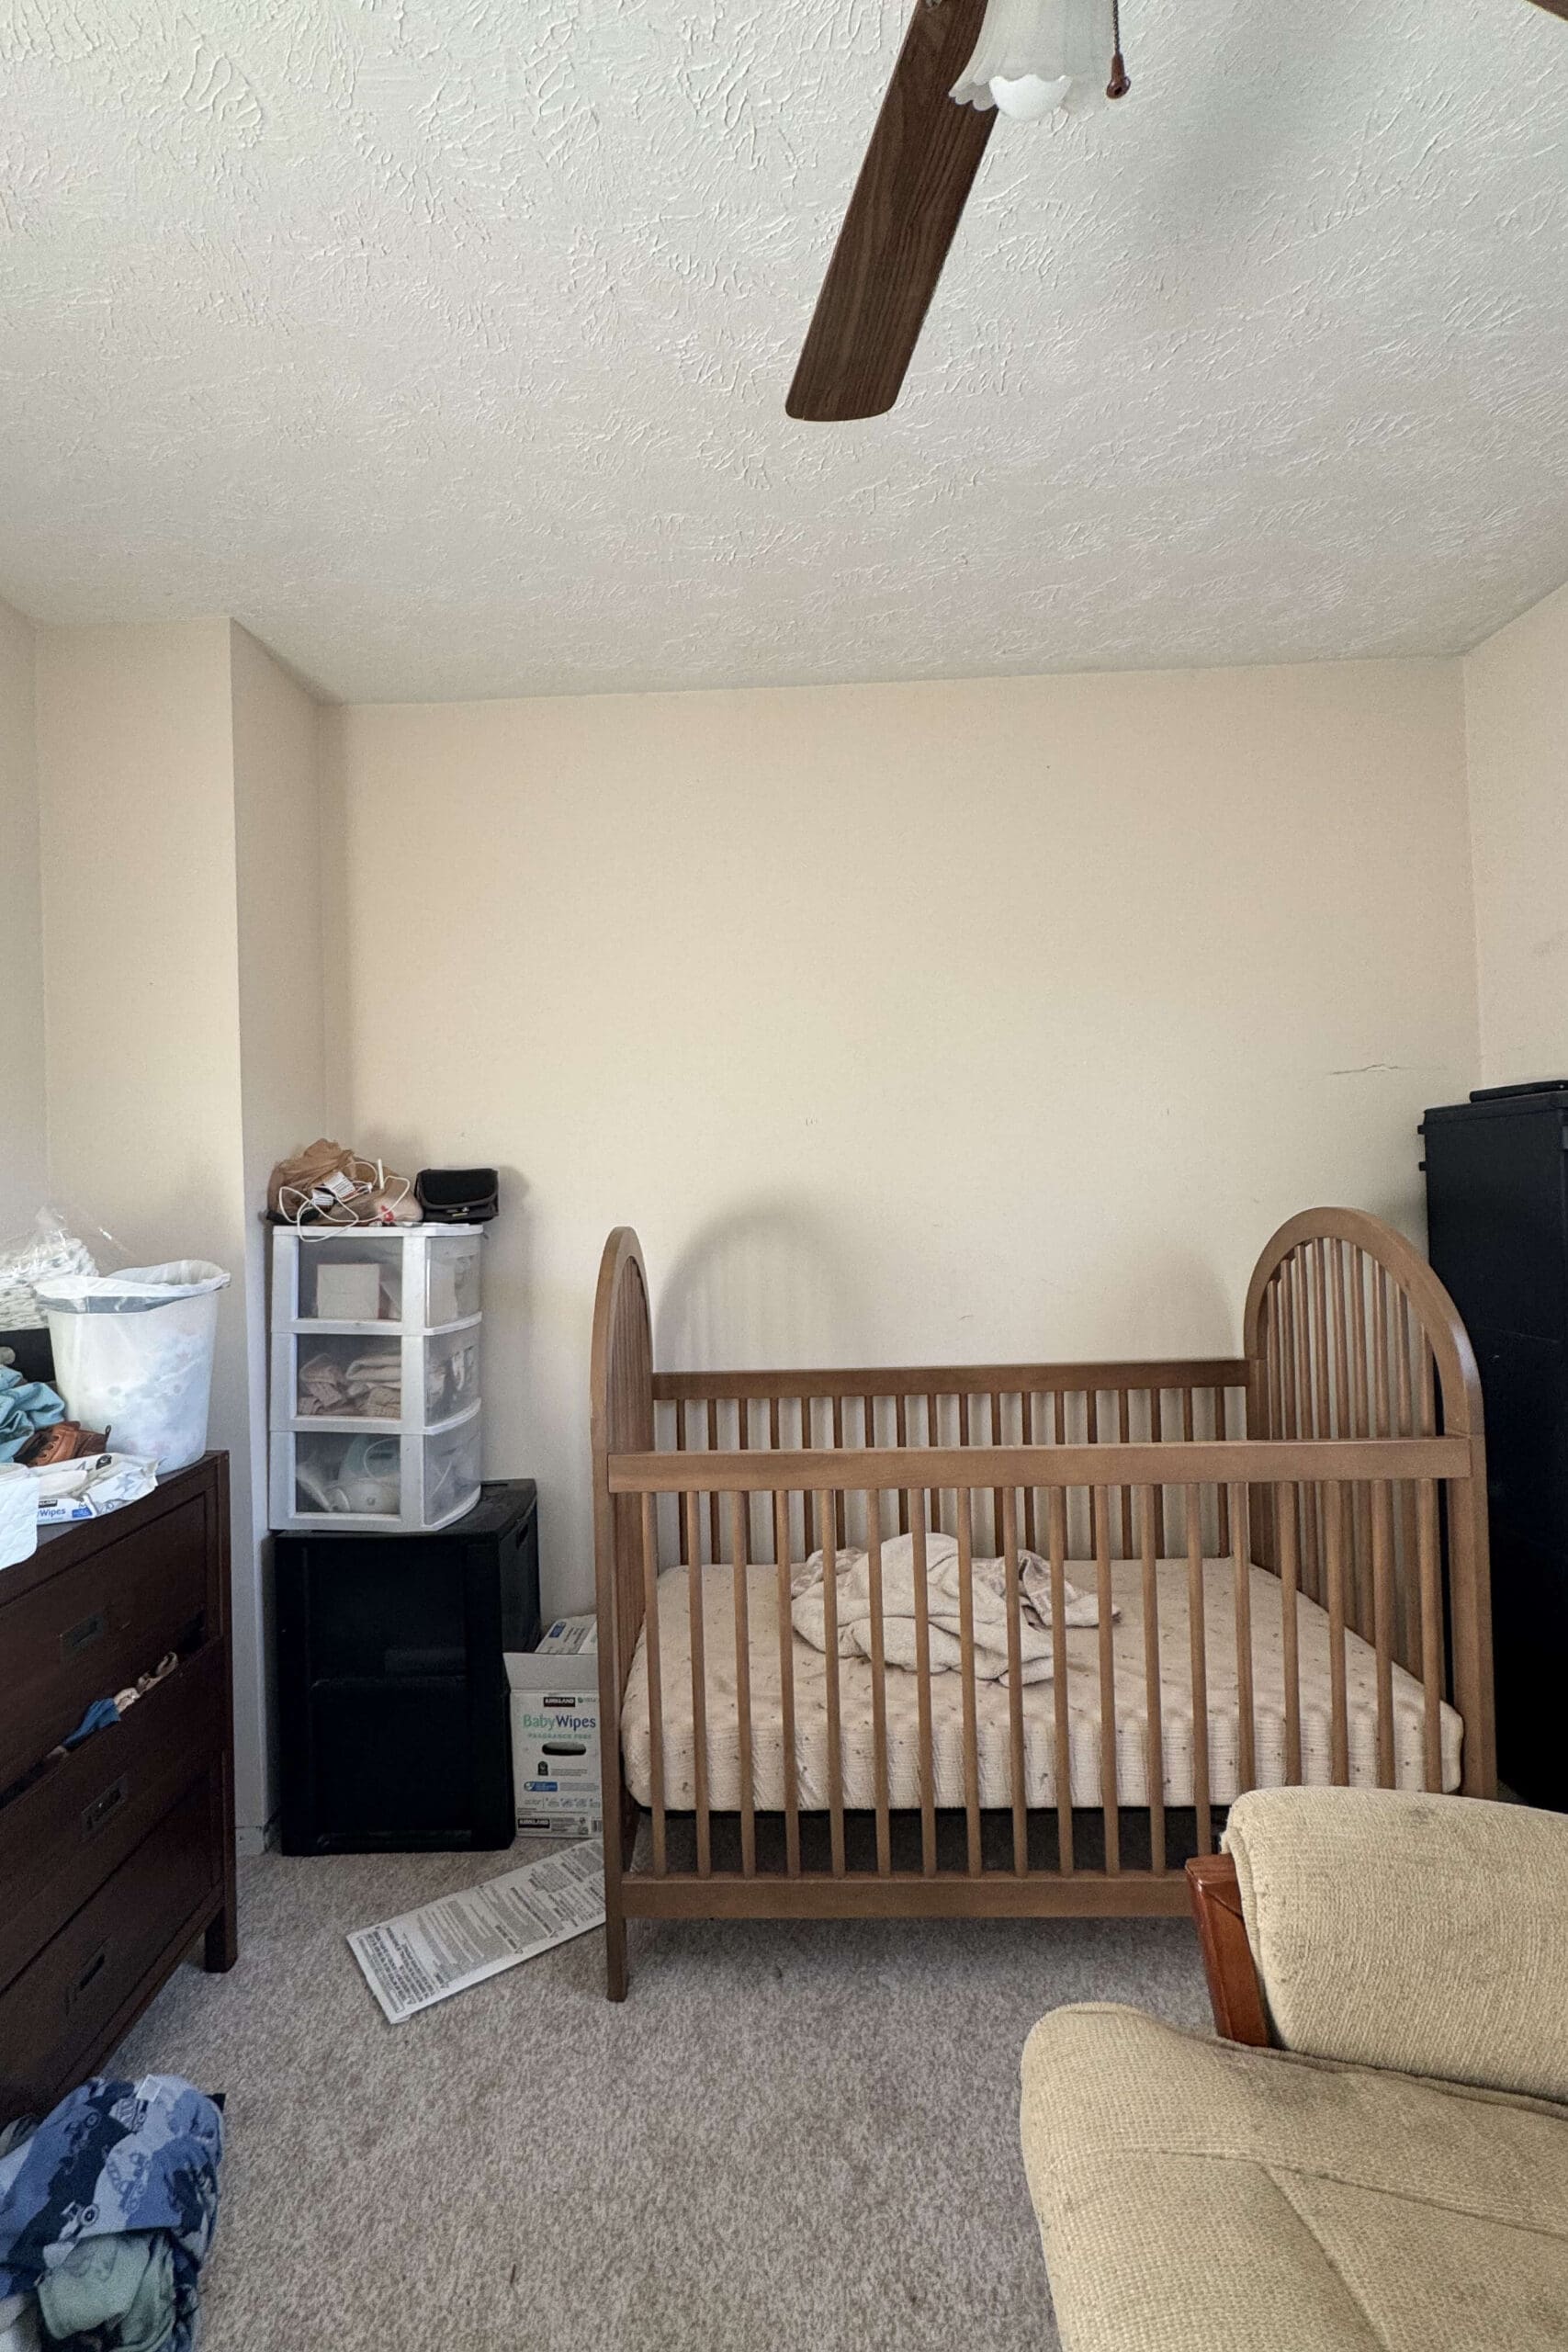
The Before: A Plain Room and a Duct Bump-Out
Here’s what the room looked like on move-in day—basic, beige, and a little tricky thanks to that bump-out in the corner. My goal? Create a functional DIY headboard with shelving that works around the duct, adds storage, and totally transforms the space.
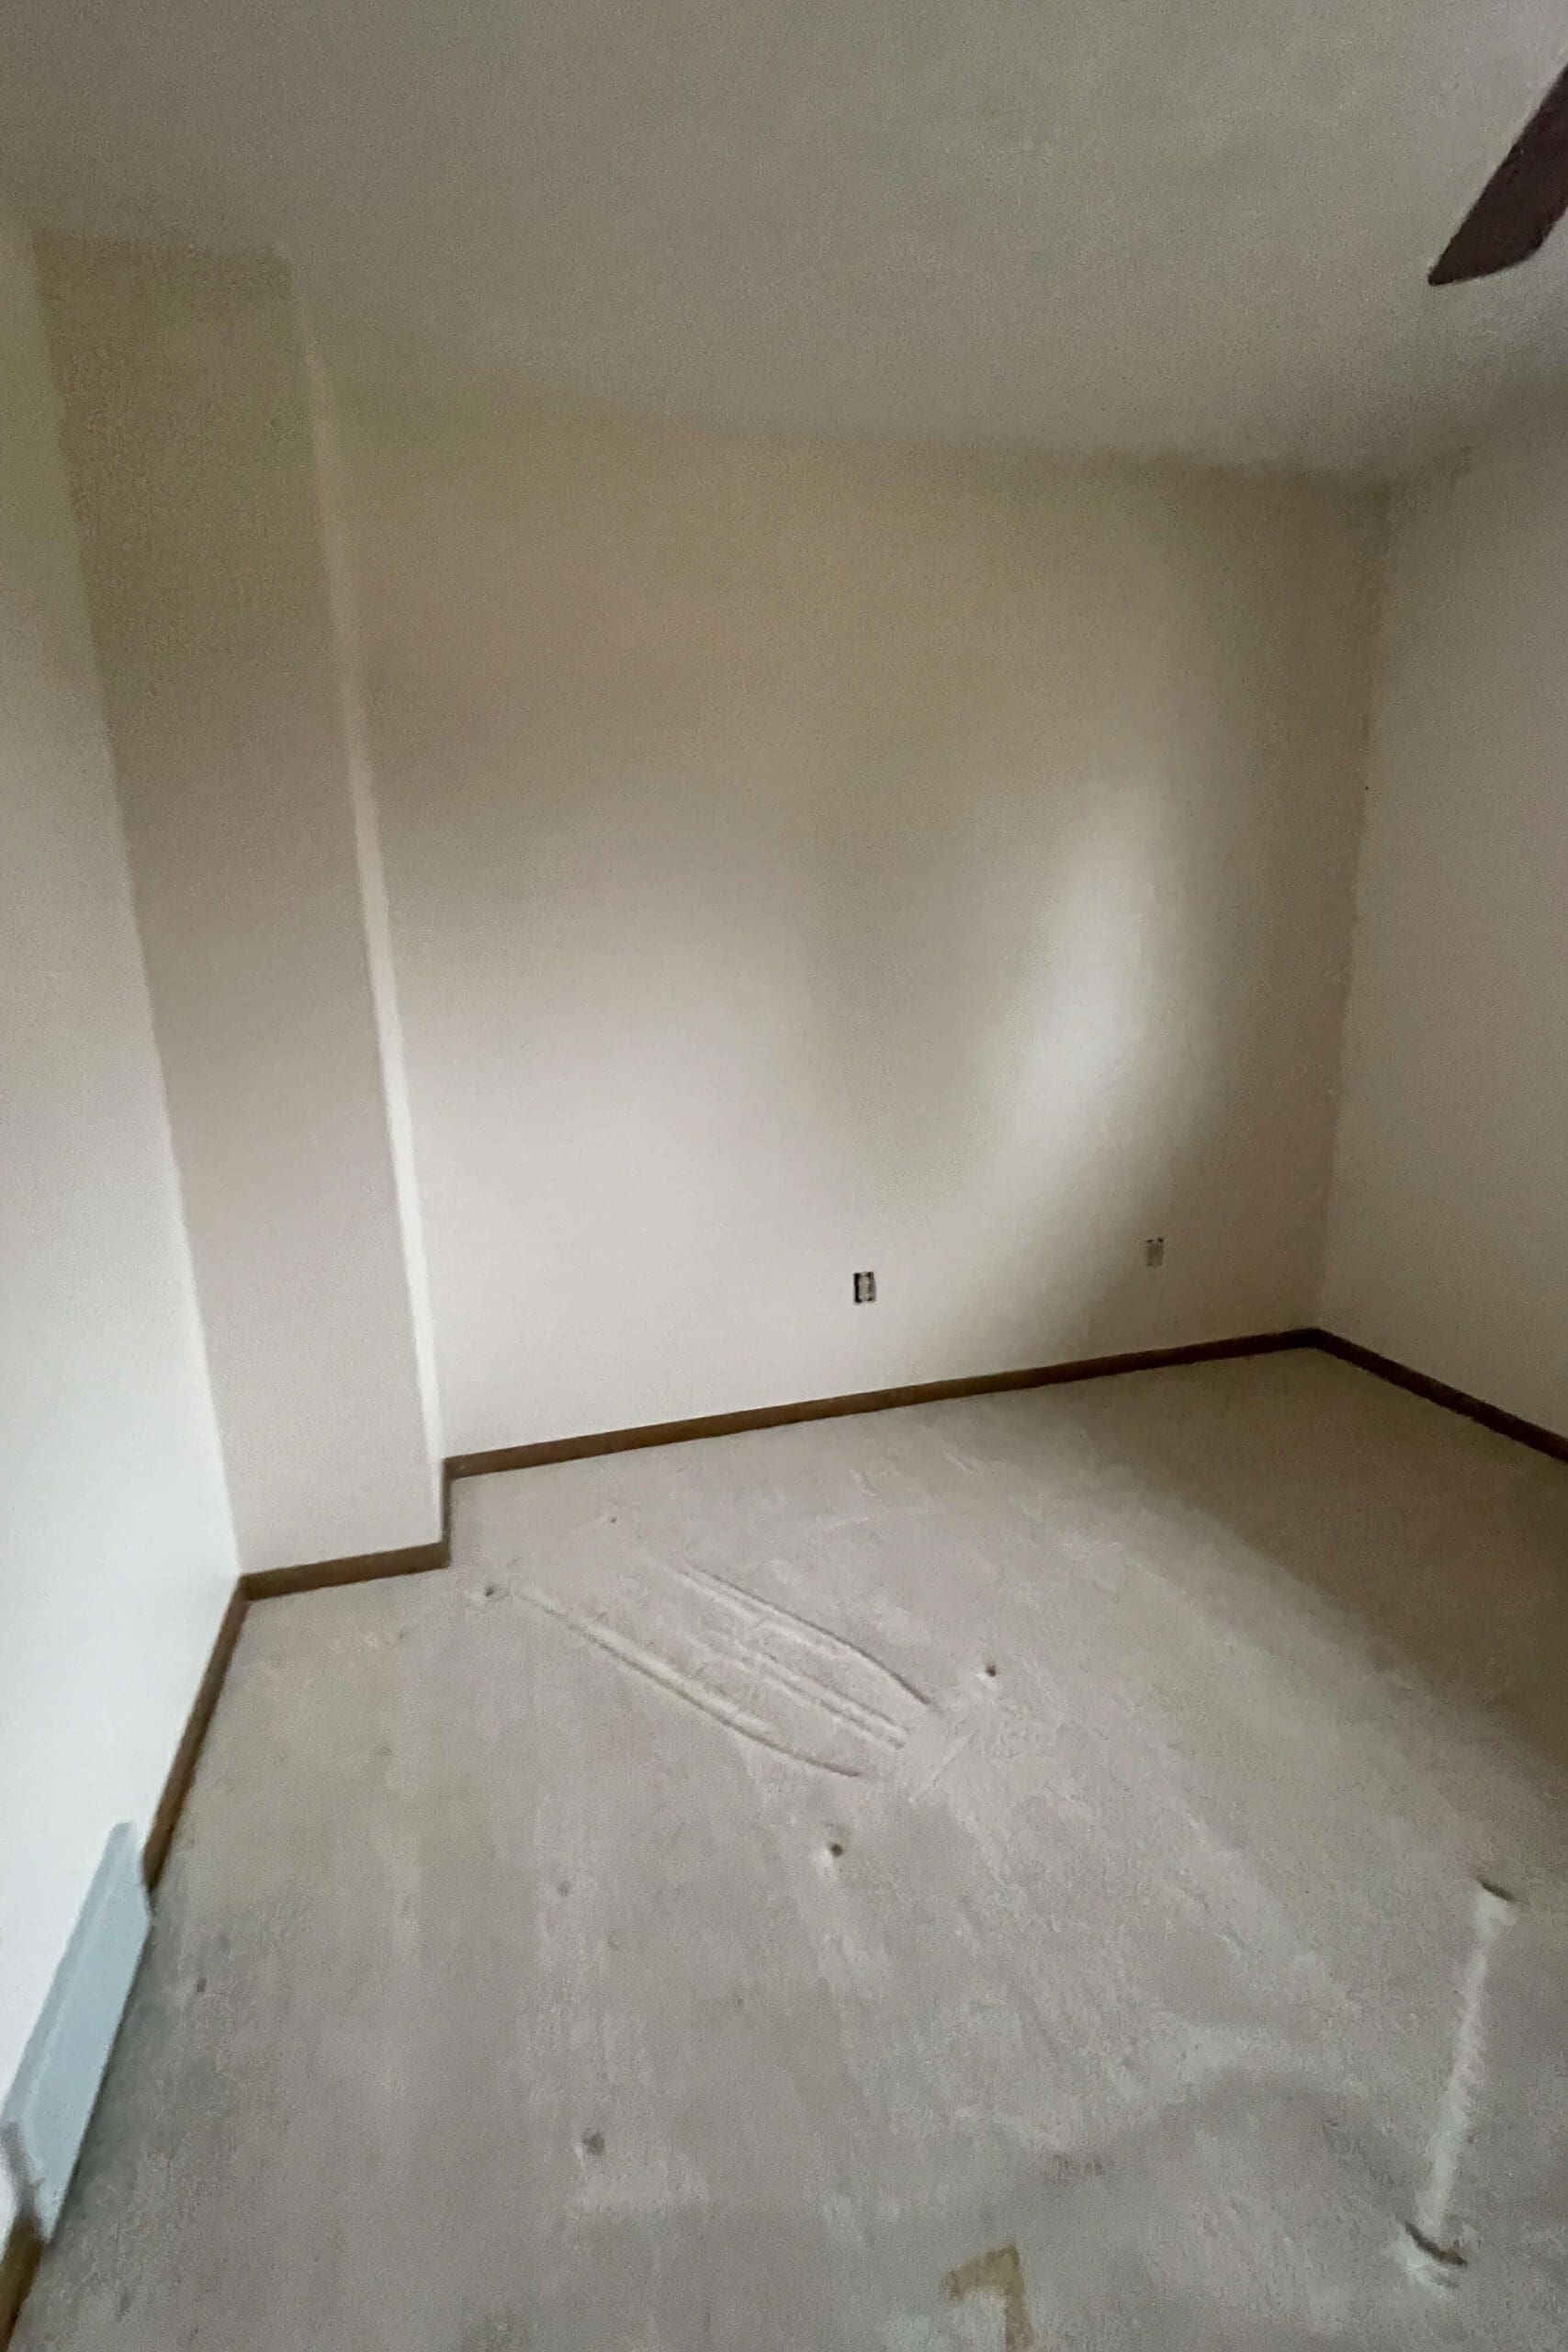
This is the last major project we’re tackling before the big move, so I designed the dimensions to fit a queen bed so that future owners could use it as a guest room or office. For now, it’s the perfect spot for Malcolm’s crib.
Step 1: Cutting the Wood
For this project, I used 3/4-inch maple plywood—it’s durable and paints up beautifully. Large sheets of plywood are tough to maneuver through a table saw when working solo, so I opted for my circular saw with a guide for long cuts and my miter saw for shorter ones.


Step 2: Assembling and Installing the Headboard with Storage
Once my pieces were cut, it was time for assembly! A few of my must-do methods for building furniture:
- Always apply wood glue where pieces meet.
- Use a brad nailer for quick, one-handed attachment (so much easier than a drill!).
- Double-check that all corners are perfectly square—otherwise, you’ll run into major issues later.


After checking the angles with my speed square, I used my drill to reinforce the structure, adding screws where I had originally placed brad nails. I also installed a back bracing piece for extra support and as an anchor for mount it to the wall.


Using that same method, I built four sections for this headboard with storage:
- Two shorter pieces with open fronts
- Two taller pieces that open toward the bed
After attaching the sections securely to the wall (making sure to anchor them into studs!), I moved on to the next step: the cross shelf.
Step 3: Adding the Cross Shelf + Lighting
This cross shelf makes the whole piece feel like a custom built-in headboard with storage. Before mounting it, I flipped it upside down to cut out holes for the built-in lights. To do this, I:
- Measured and marked where each light should go.
- Drilled a hole big enough for my jigsaw blade.
- Used my jigsaw to cut circular openings.
(You can catch more of this step in my upcoming YouTube video.)


To attach the center section to the side shelves, I added boards at the top and bottom using wood glue and pocket holes (so the screws are inset and won’t get in the way). Then, I secured the cross section to the back wall studs and the sides using screws. This headboard with storage isn’t going anywhere – it’s rock solid!


Before installing the center section, I ran the electrical for the recessed lights. (If you’re curious about that process, I’ll have a YouTube video up soon.)

Step 4: Building the Face Frame
Now that the lights were installed, it was time to close everything up. First, I built a face frame for the front of the center section. Using a pocket hole jig, I drilled two pocket holes at both ends of my three vertical pieces. Then, I attached those pieces between the top and bottom with wood glue and screws.
Pro Tip: Clamps are a must to keep everything flush while screwing it together!


Once the face frame was constructed, I attached it to the front of my headboard with storage. Then, I closed up the side openings with more 3/4-inch plywood.


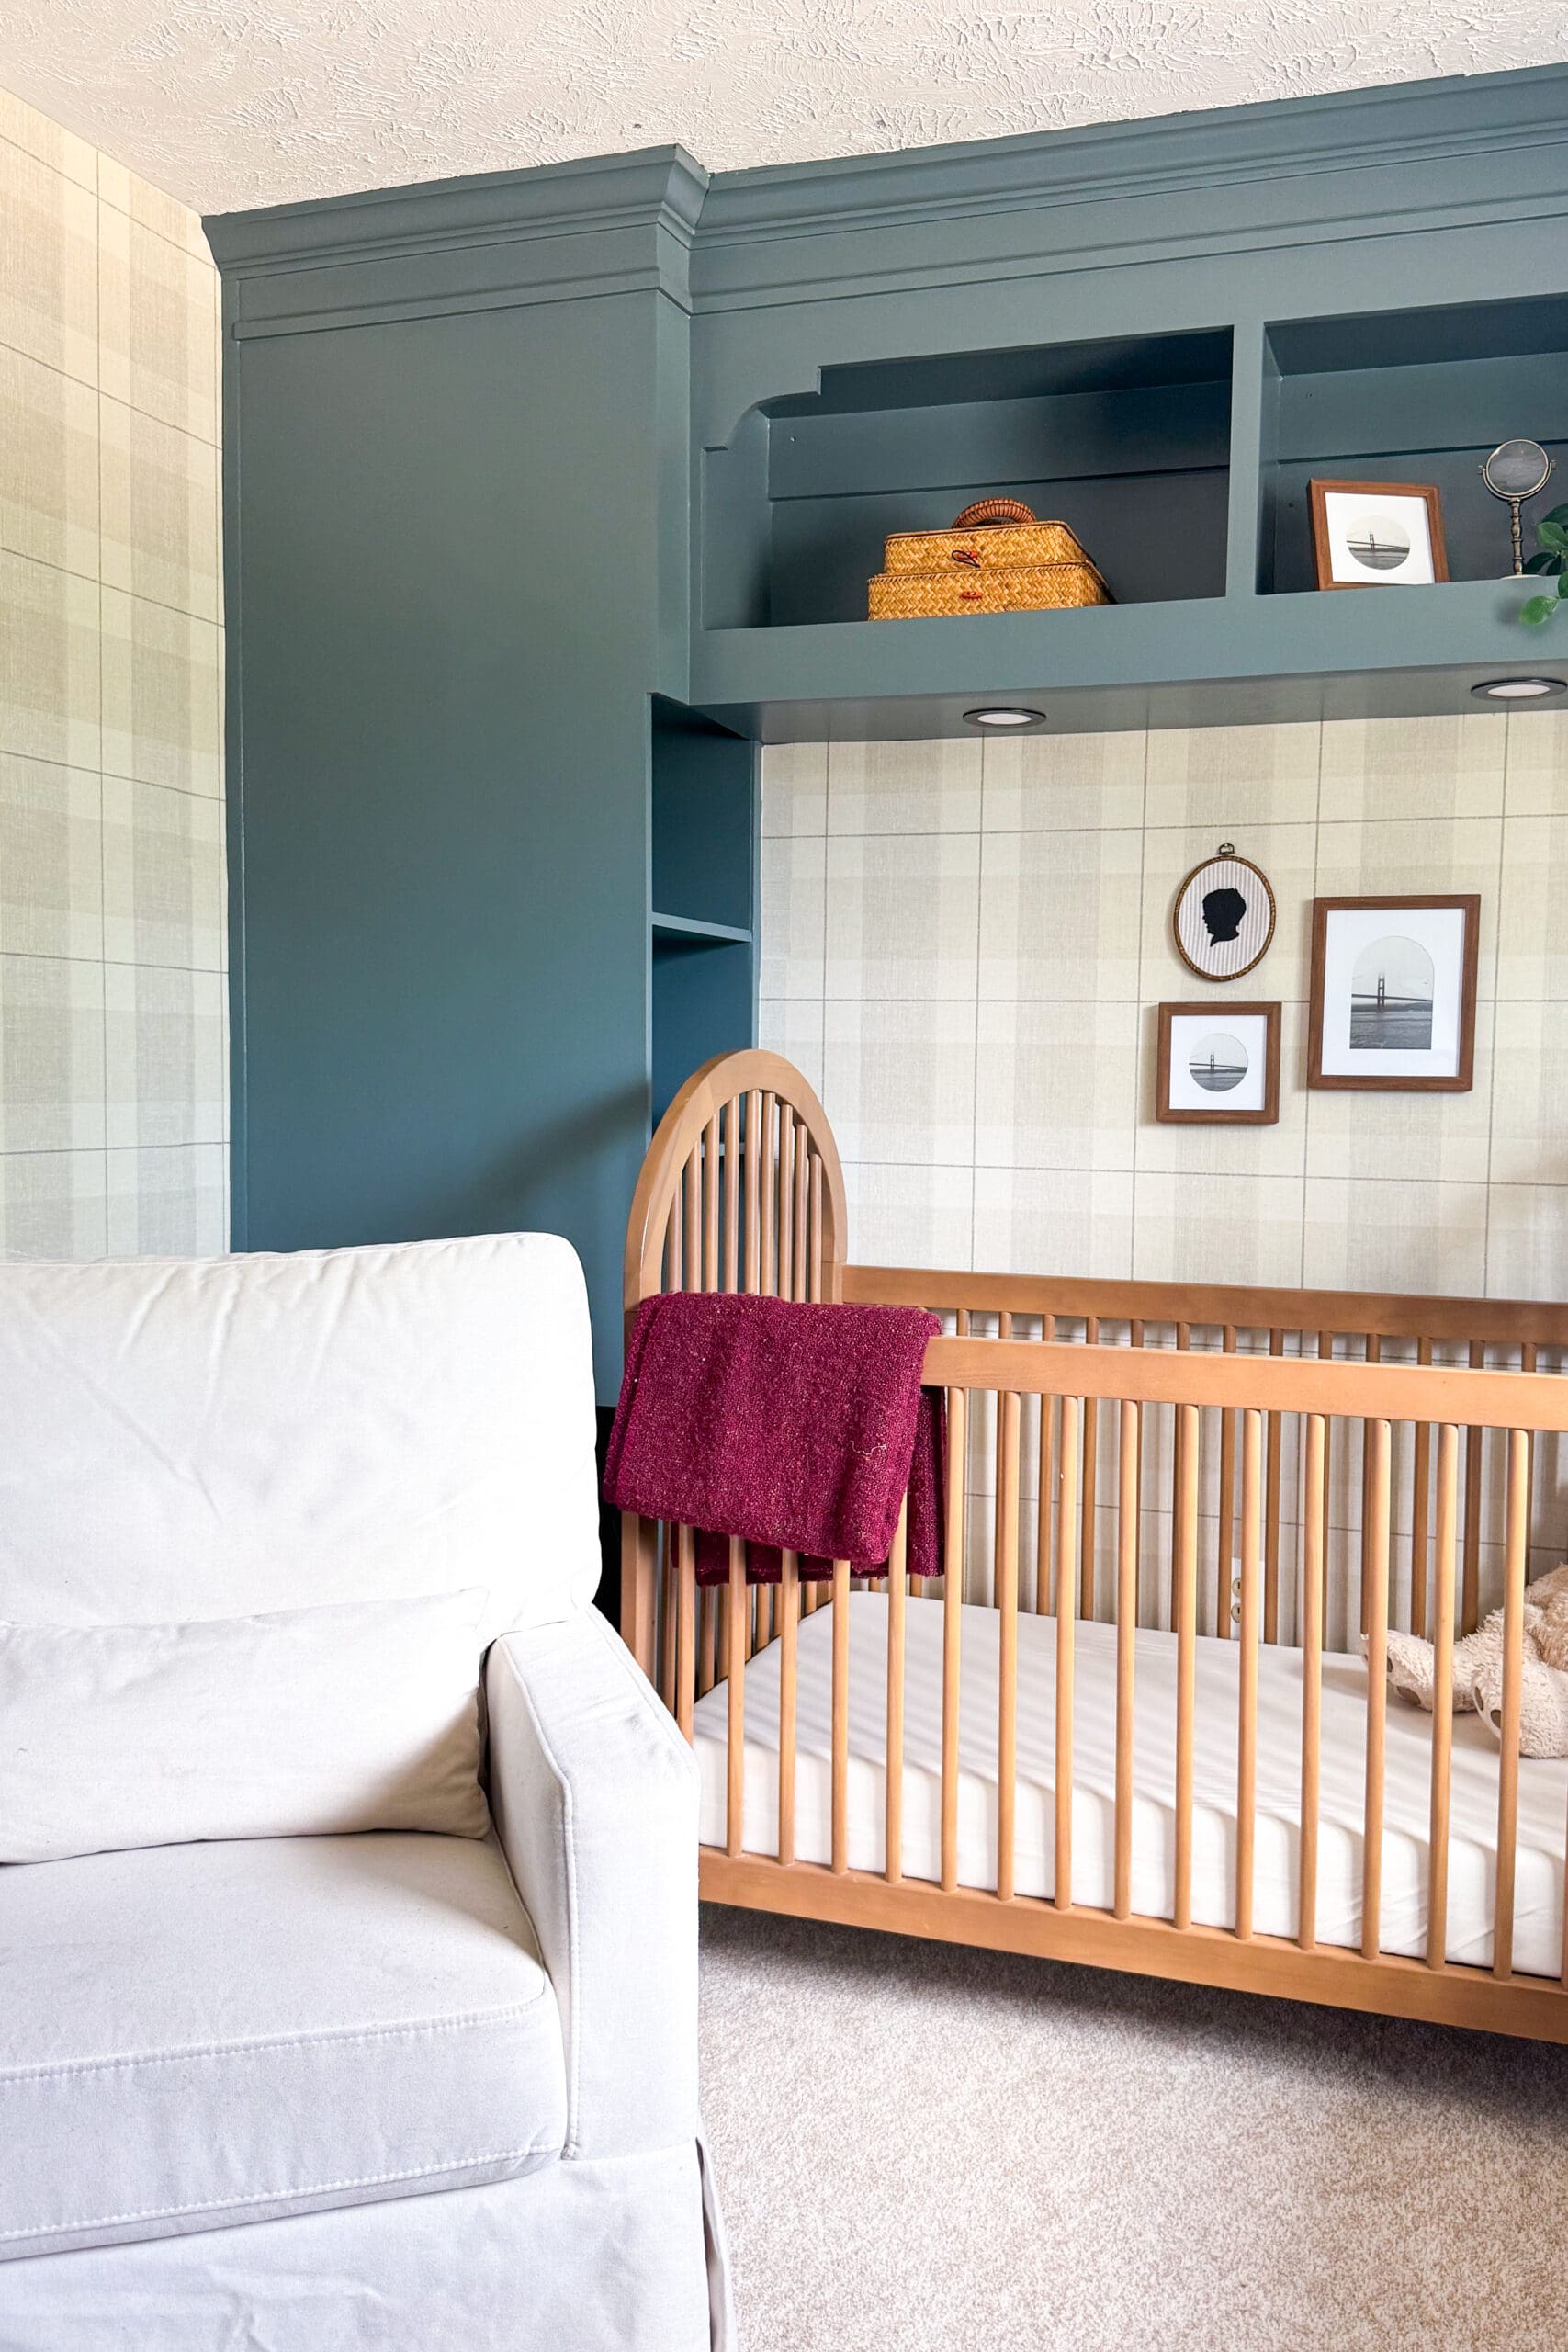
Step 5: Adding Trim for a Built-In Look
Here’s where the magic happens. Crown molding across the top, baseboard along the bottom, and custom curved trim for the center shelf made this feel like it had always been there. These little touches tie it into the rest of our home’s style and make the piece feel high-end.


Next, I created a pair of curved corner trim pieces for the center shelf. These subtle curves remind me of the corbels I used on the girls’ bunk beds, which helps tie this project into the rest of our home’s style.
I used scrap 3/4-inch plywood and a saw blade to trace an arch. I cut the first curve with my jigsaw and used it as a template to make a second identical piece. After cutting and sanding both, I used my Kreg pocket hole jig to add pocket holes on the back. A little wood glue, a few screws, and they were in!


Step 6: Filling Seams with Bondo
One of my goals for this DIY headboard with storage was not just to build something beautiful, but to make that awkward bump-out disappear. After the trim was installed, I used Bondo to fill in seams and screw holes, and smooth everything out, including the unfinished plywood edges.
Yes – it smells and it’s messy, but it gives you that perfectly seamless, furniture-quality finish that sets a DIY headboard apart from store-bought ones.


Step 7: Final Trim Details
With the Bondo dry, I added one last detail to this headboard with storage: a tiny trim piece just under the crown molding. It gives the crown more dimension and interest. I used my level as a spacer and my brad nailer to secure it evenly across the top.


Step 8: Painting the Headboard with Storage
With all the trim in place, the last step before paint was caulking. I ran a bead of caulk along every seam, corner, and edge—anywhere trim met the wall or another surface. This is a must for getting that clean, professional finish.
After testing a few colors, I landed on Sherwin Williams Mountain Pass. It’s not quite blue, not quite green—just that perfect in-between. I have a whole method and a full tutorial for getting a smooth, professional-looking finish on painted built-ins, but here are a few quick tips:
- Use a quality primer like this one
- Sand after priming
- Use high-quality paint
If you’re not using a paint sprayer:
- Apply to large areas with a roller
- Get into grooves with a good brush
- Smooth it all out with a foam roller


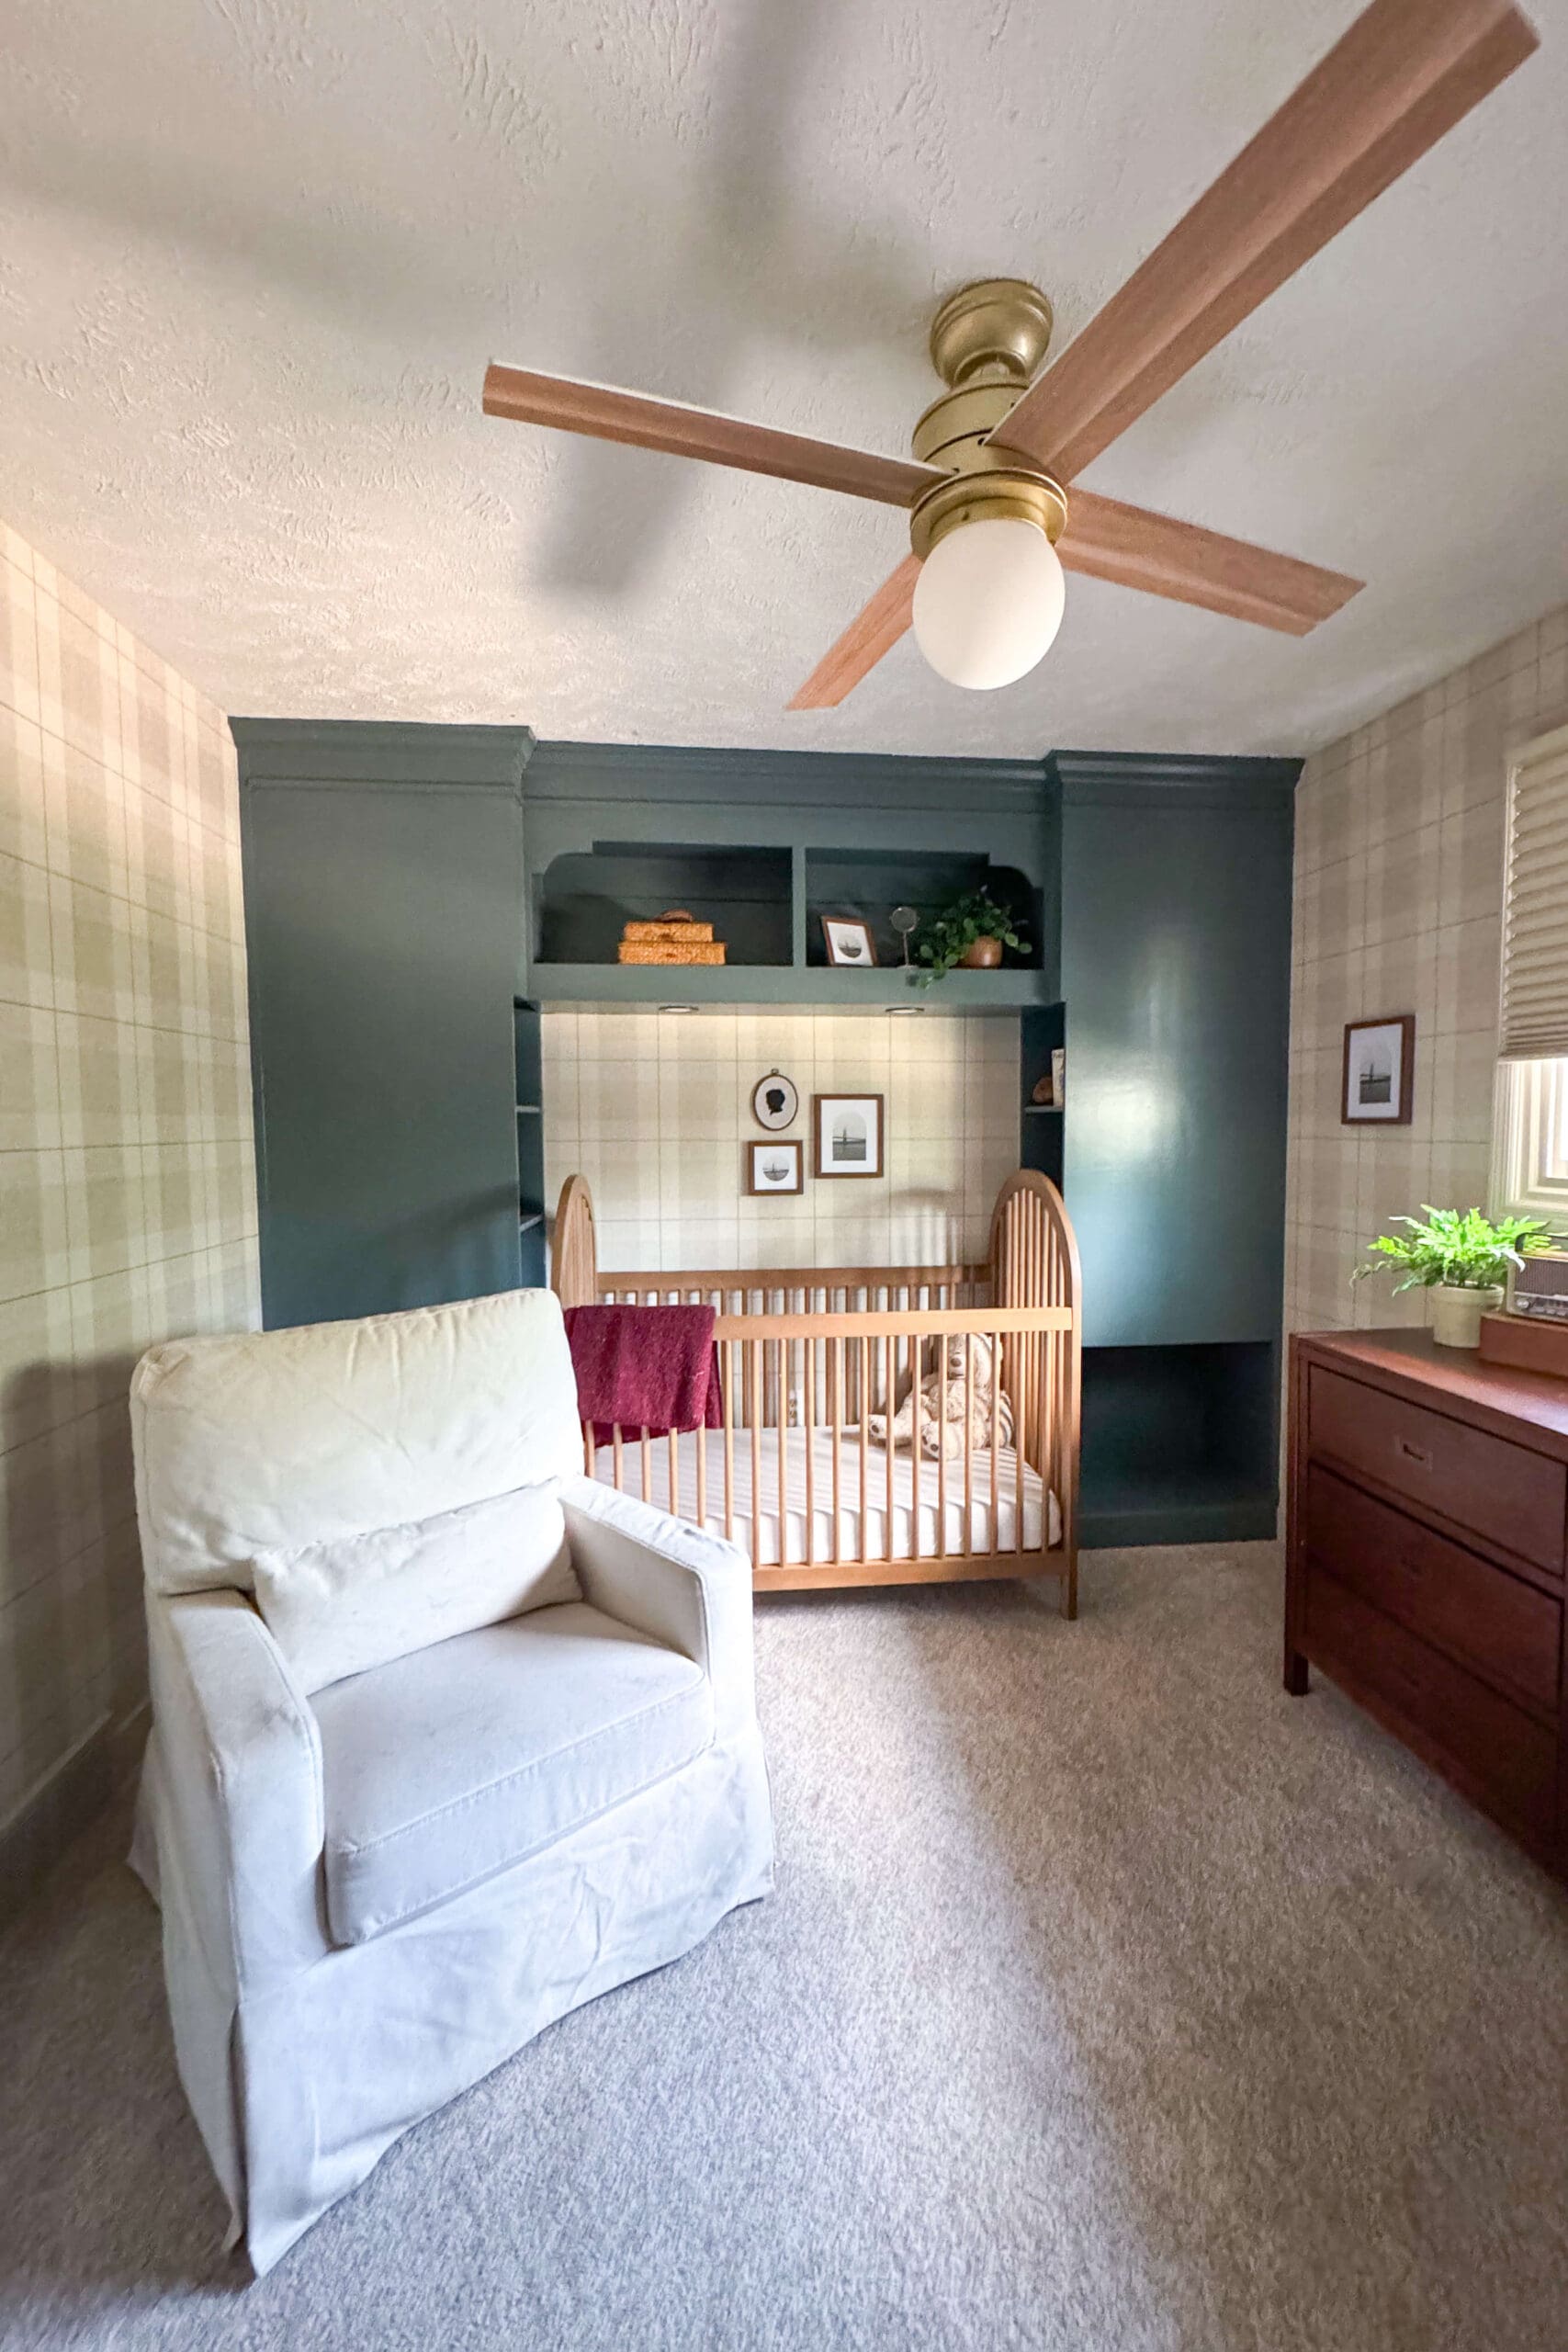
The Finished Headboard with Storage
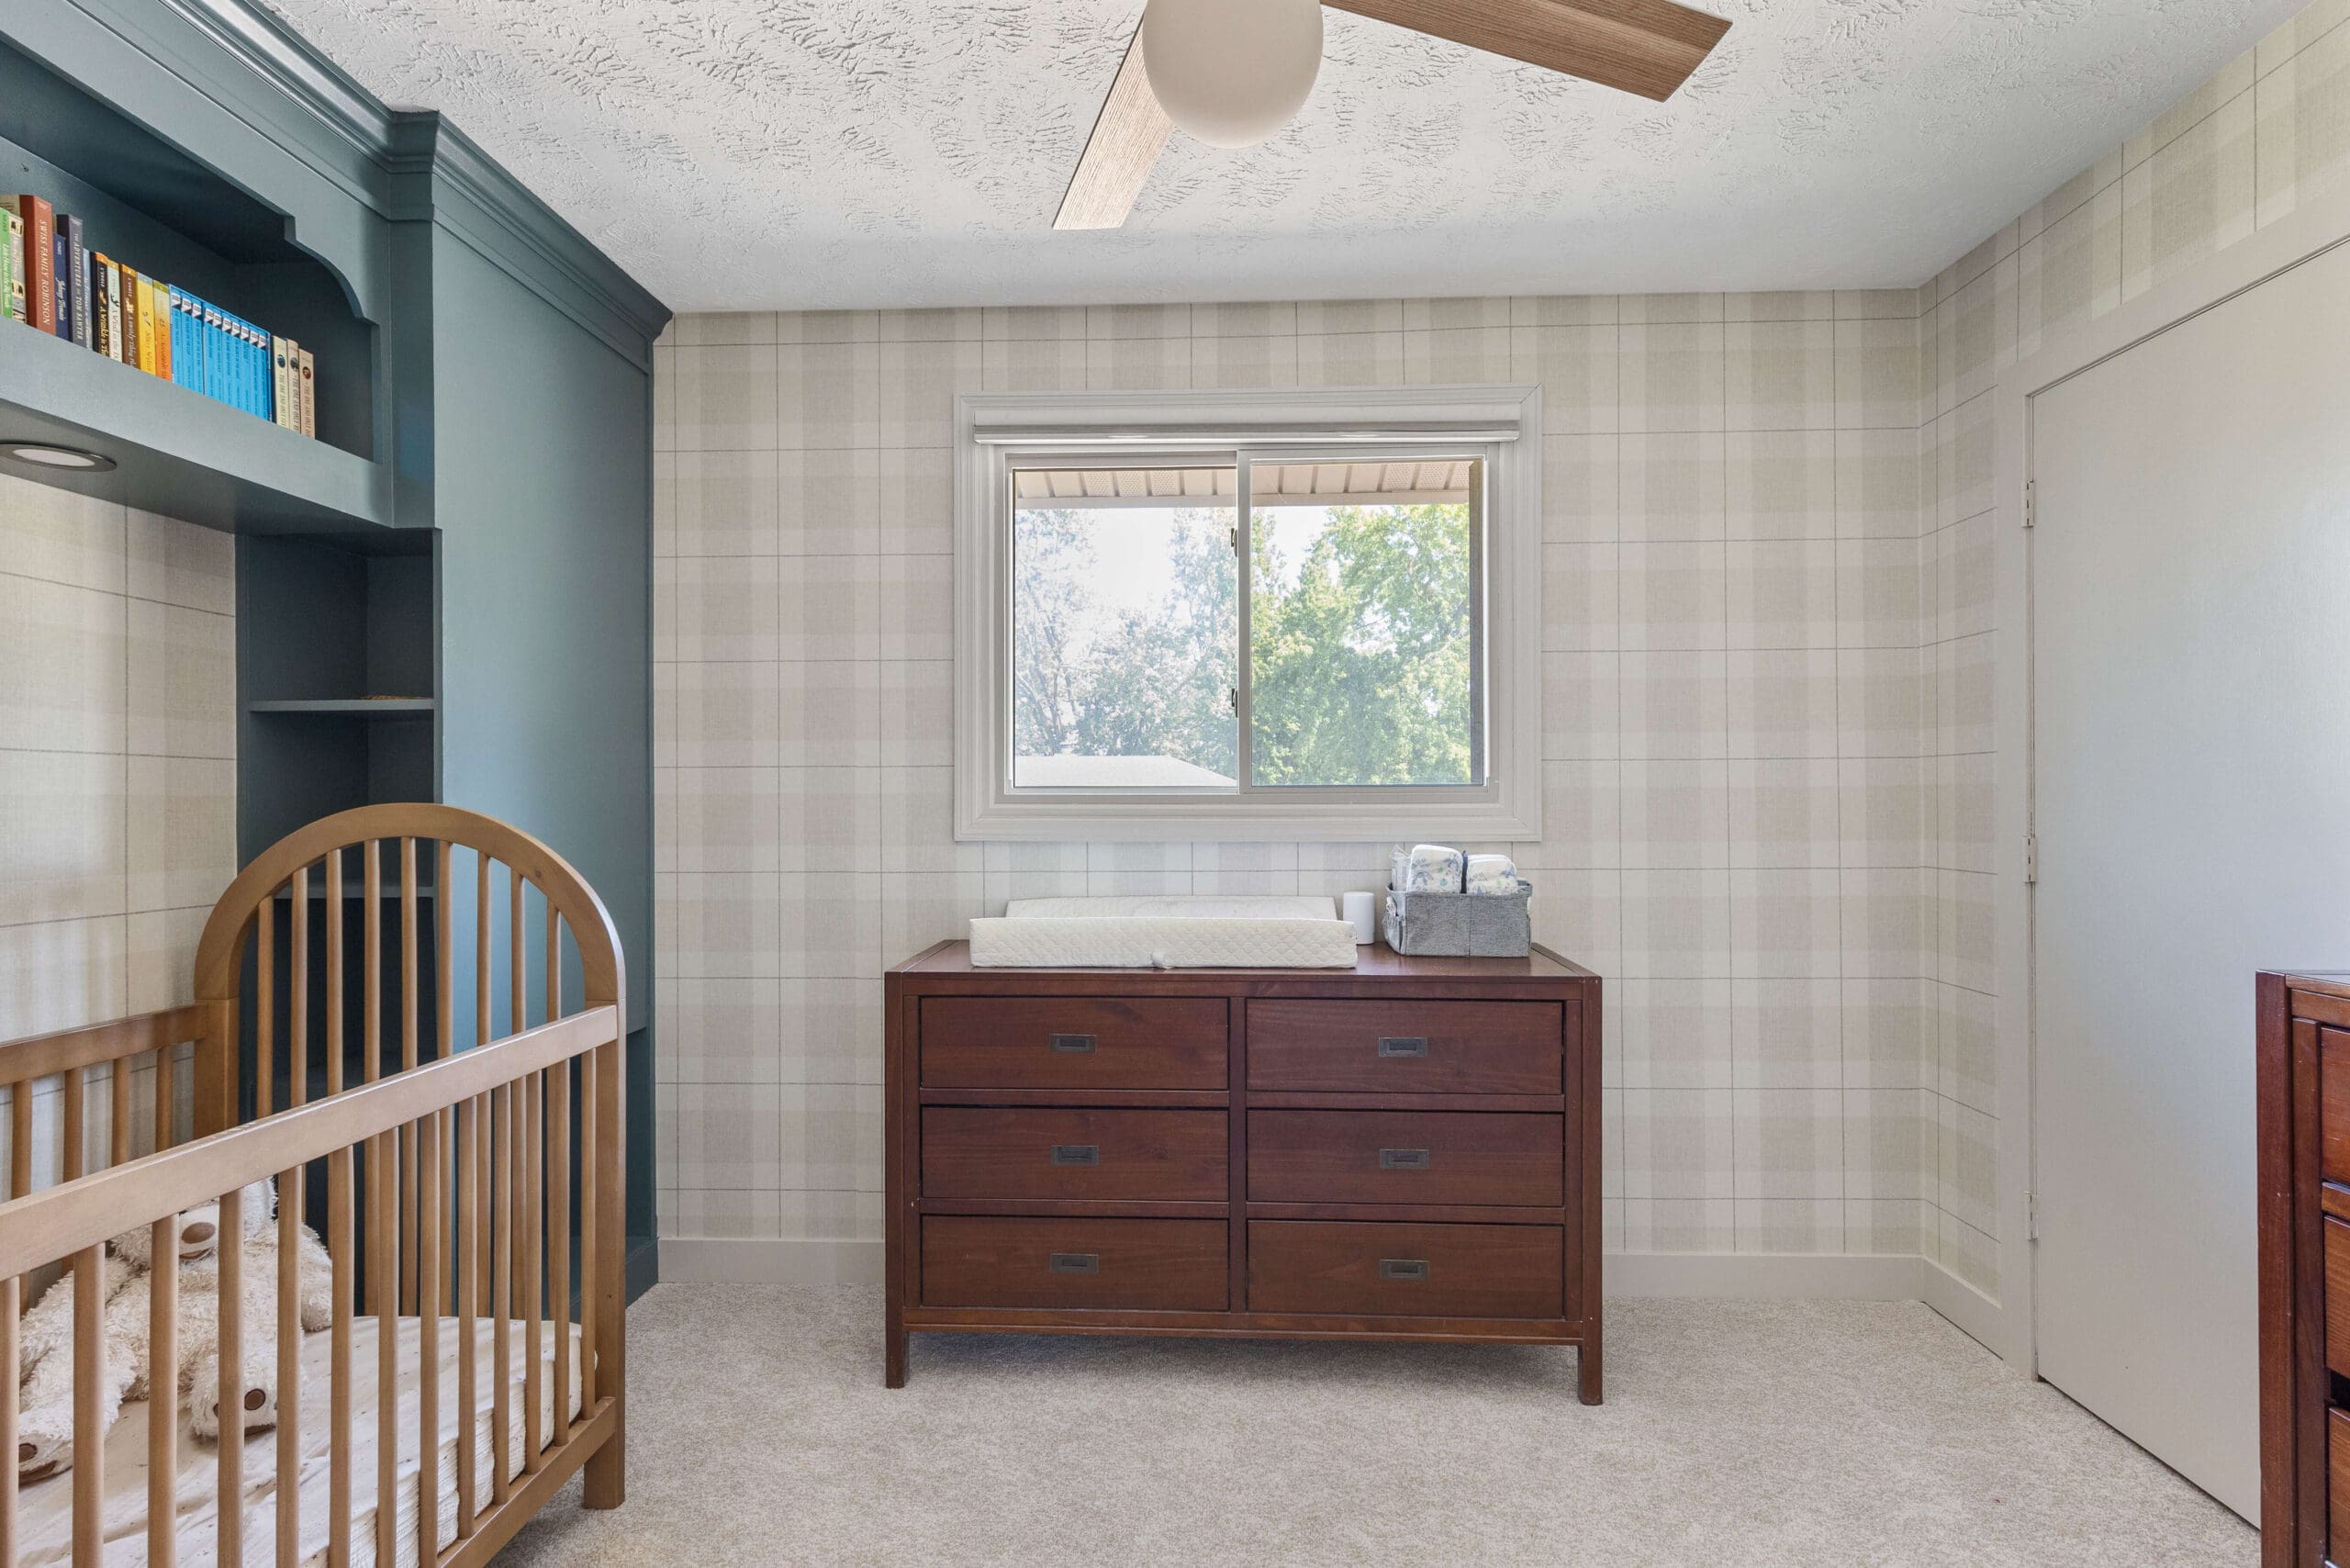
Once the headboard with storage was painted, I gave the rest of the room a little love too with this gorgeous plaid wallpaper, and fresh paint on the trim and door using my my go-to neutral: Accessible Beige.
I’m thrilled with how the weird bump in the corner has been completely camouflaged by building this headboard with storage! It looks so much better now.
Here’s a close-up shot of that bump-out side. See… gone! You would never know.
I am so happy with how this DIY headboard with built-in storage turned out. It’s a cozy, functional spot for Malcolm’s crib for now, but it’s versatile enough to serve future owners however they need – whether that’s a kid’s room, guest room (this will fit a queen-sized bed), or even an office. This custom headboard with storage adds charm, function, and flexibility to the space!
📌 Save This DIY Headboard Idea for Later
F&Q About Built Ins Around a Bed
The best way to build a headboard with storage is to use durable plywood, anchor it securely to the wall studs, and incorporate both open shelving and hidden compartments. Adding built-in lighting and a face frame helps create a custom, high-end look.
The cost will vary depending on materials and whether you already own tools, but most DIYers can build a headboard with built-in storage for under $300 – much less than buying a custom piece.
To add recessed or puck lighting to a DIY headboard with shelving, use a jigsaw to cut holes in the top panel, then wire the lights before installing the shelf. Always follow electrical safety guidelines—or consult a licensed electrician if needed.
For a painted finish, ¾” maple plywood is ideal. It’s smooth, strong, and easy to work with. If you want a stained wood look, consider oak or birch plywood instead.