


The ULTIMATE Guide to Painting Cabinets & Furniture


Updated May 9, 2026
Over the years, I’ve perfected a foolproof method for painting cabinets and furniture, and now I’m sharing all my tips in this step-by-step guide! Whether it’s kitchen cabinets, bathroom vanities, or furniture, this system delivers a flawless, durable finish that stands up to daily life.


Table of Contents
- Tools for Painting Cabinets and Furniture
- Materials for a Durable Painted Finish
- How to Prep Cabinets and Furniture for Painting Success
- The Best Primer for Cabinets and Why You Should Never Skip It
- How to Paint Cabinets for a Smooth, Durable Finish
- Trick for Perfect Paint Lines on Cabinets and Built-Ins
- How to Paint Cabinet Doors and Drawer Fronts Without Flipping
- Before and After Results: Painted Cabinets with a Factory Finish
- 📌 Save This Cabinet Painting Tutorial for Later
- FAQ About Painting Cabinets and Furniture for a Professional Finish
Tools for Painting Cabinets and Furniture
Materials for a Durable Painted Finish
- Sanding block
- Primer
- Paint
- Painter’s Tape
- Pre-taped plastic
- Drop cloths
- Carpet protection film
- Brown masking paper
- Tack cloth
- Caulk
- Hooks
- Hangers
How to Prep Cabinets and Furniture for Painting Success
Before diving into painting cabinets, prep is key! It’s not the most exciting step, but it’s what makes the difference between a DIY job and a pro-level finish.
Step 1: Clean Cabinets or Furniture to Remove Grease and Grime
Paint won’t stick to dirt or grease, so give cabinets a deep clean – especially in the kitchen, where grease buildup is common.
Step 2: Lightly Sand for Better Paint Adhesion
I’d love to say this is a no-sanding method, but let’s be real – you need to sand if your cabinets have a finished surface (unless you’re working with unfinished, ready-to-paint pieces – like the ones I used in my Omaha kitchen remodel). A light sanding gives primer something to grip onto, ensuring your paint job lasts. And don’t forget – wipe off all that sanding dust before you move on.

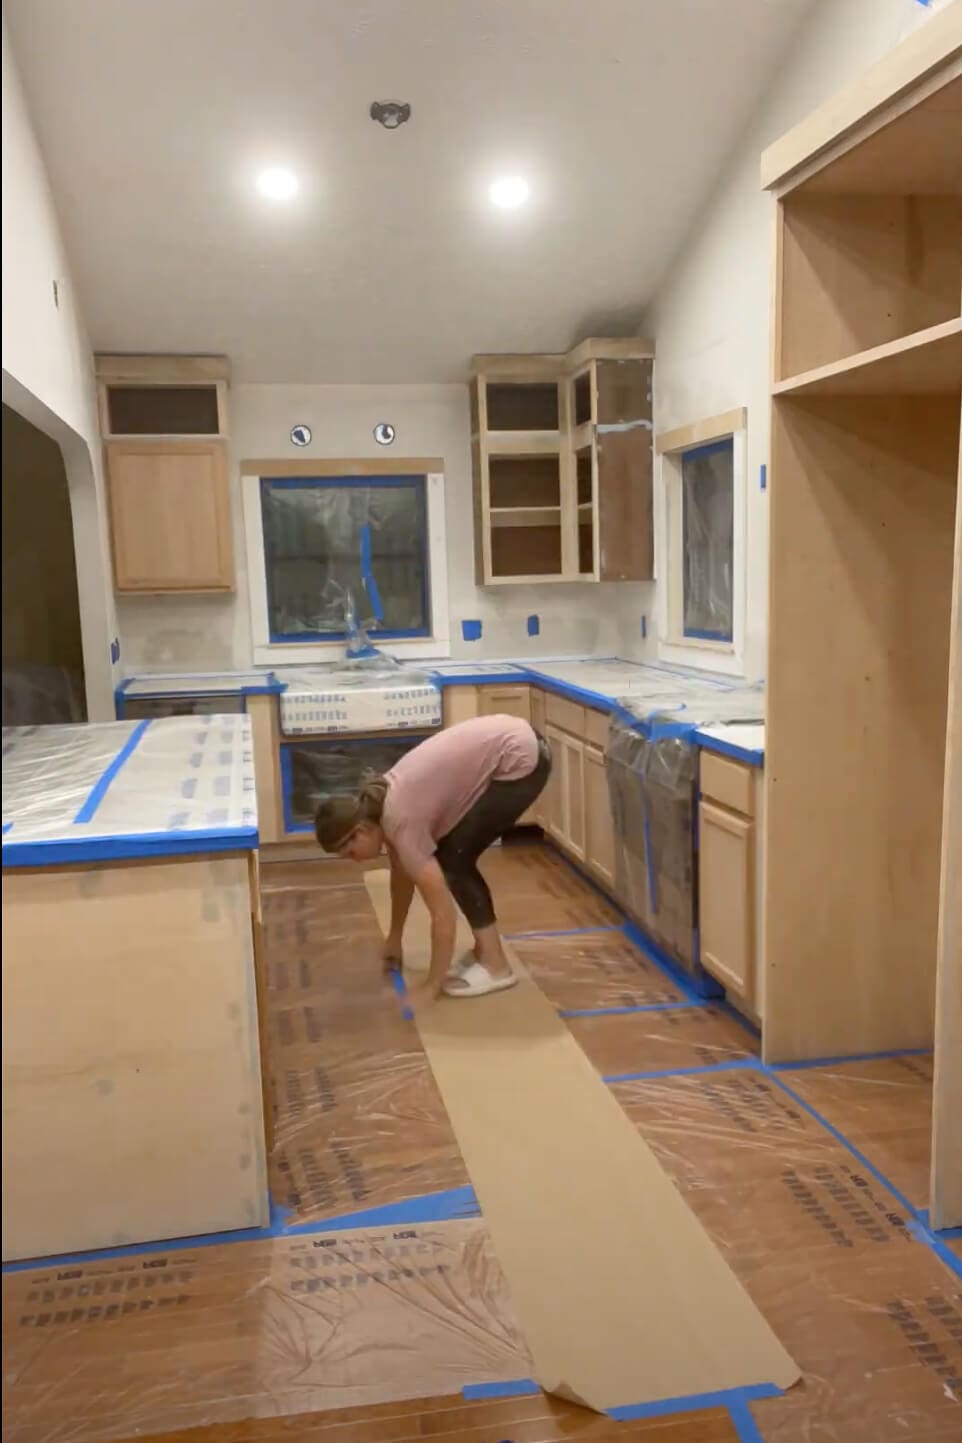
Step 3: Mask Off Surrounding Areas to Protect from Overspray
Protect everything you don’t want covered in paint splatter or overspray. I use a combination of:
- Painter’s tape – Creates crisp, clean lines.
- Pre-taped plastic – Covers large areas quickly.
- Brown masking paper – Great for edges and trim work.
- Plastic drop cloths – Protects floors and countertops from drips.
- Carpet protection film – Shields rugs and carpets from paint spills.
The Best Primer for Cabinets and Why You Should Never Skip It
Primer is non-negotiable when painting cabinets. Skip it, and you’ll regret it! It’s the secret to making paint stick like glue and giving your cabinets that smooth, long-lasting finish. My go-to? B-I-N Shellac-Based Primer—it sticks to slick surfaces (even IKEA furniture) and dries in 45 minutes.
Why a Paint Sprayer is the Secret to a Smooth Cabinet Finish
Now, let’s talk paint tools. A paint sprayer is worth every penny. It’ll save you loads of time and give you a smooth, pro-level finish. I love my plug-in version for large projects and my cordless model for quick jobs.
Pro Tips for Spraying Primer on Cabinets
After putting on my paint suit and respirator, I follow these steps to get a smooth, professional finish:
- Test the sprayer – Check the flow on cardboard or scrap wood and adjust your settings.
- Start & stop off the surface – This prevents drips and splatters.
- Work top to bottom – Use smooth passes to ensure even coverage, and angle the sprayer as needed for nooks and crannies.
The shellac-based primer dries super fast – just 45 minutes.

Once the primer dries, lightly sand with 180-grit sandpaper to smooth texture and bumps the primer may have left behind.
Then wipe away dust with a tack cloth, shop vac or blow it away with an air compressor. A clean surface = the best paint adhesion!

How to Paint Cabinets for a Smooth, Durable Finish
If you want a pro-level finish when painting cabinets, you need high-quality paint. My #1 pick? Sherwin Williams Emerald Urethane Enamel – it dries rock hard, resists scratches, and usually covers in one coat.
Using my paint sprayer, I follow the same steps as priming for a flawless, factory-like finish.
- Test the sprayer.
- Start & stop off the surface.
- Work top to bottom.
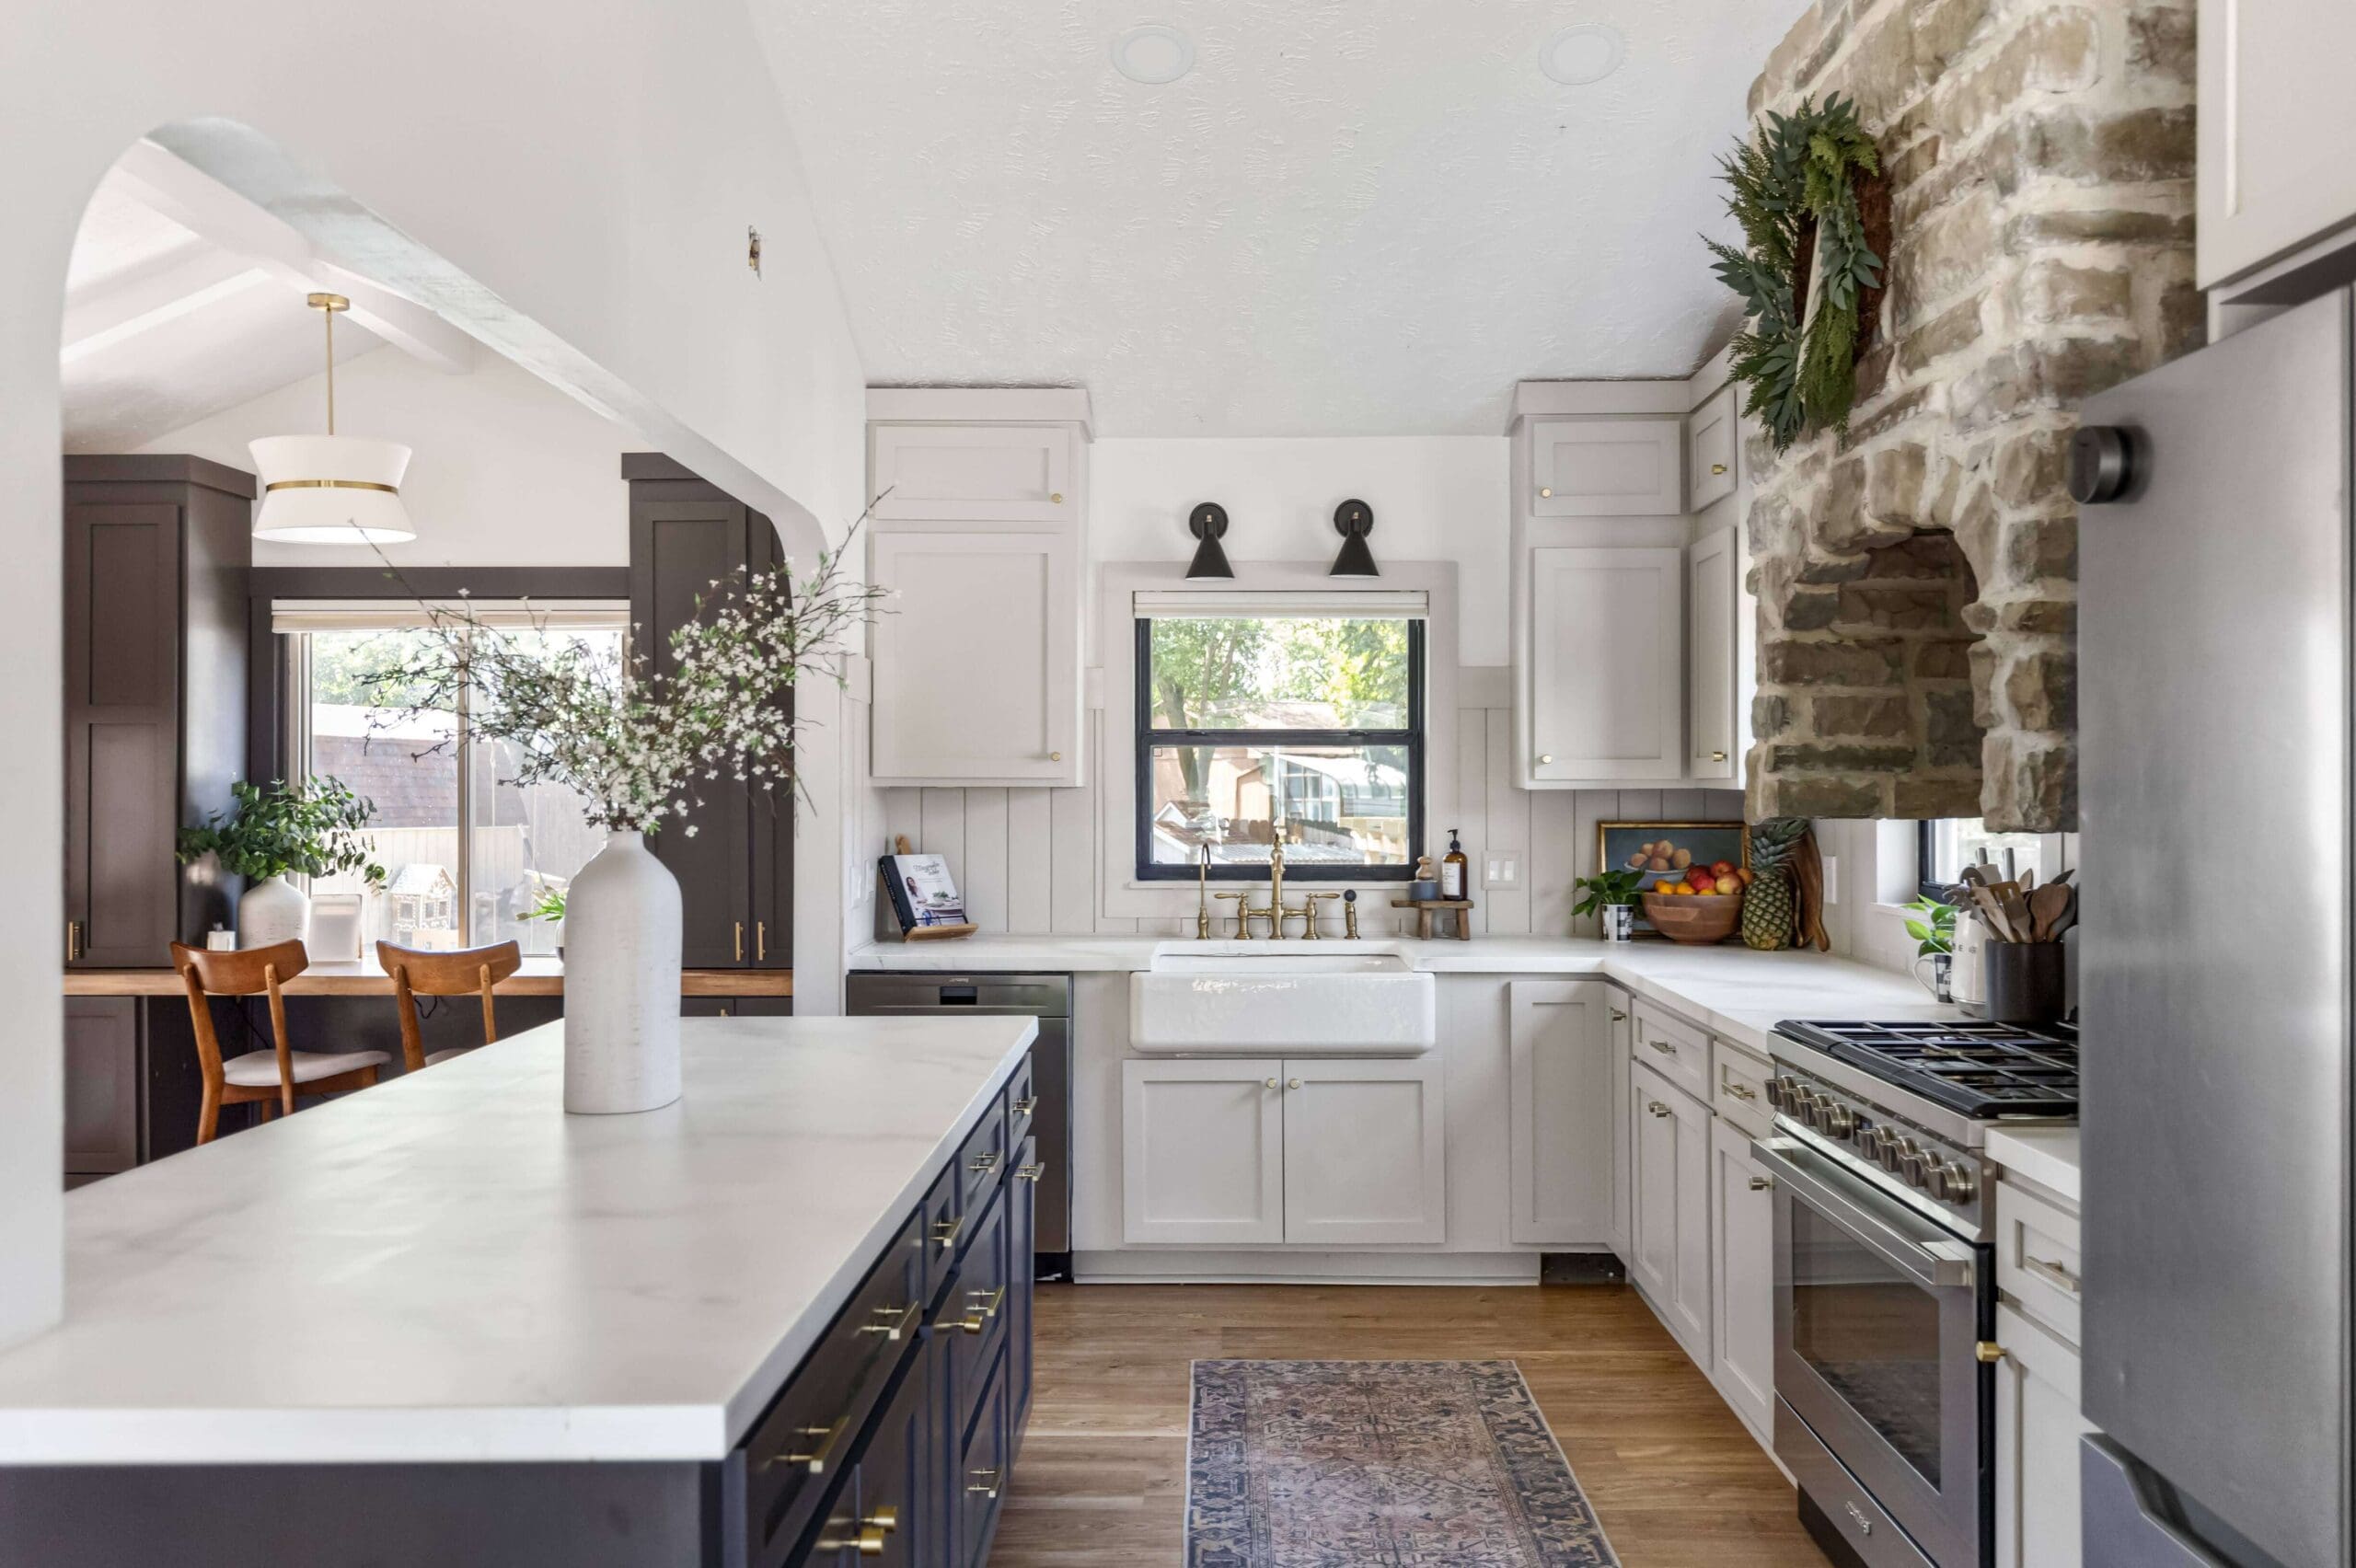
See that transformation on my living room built-ins? It’s amazing what a little paint can do to update your space.

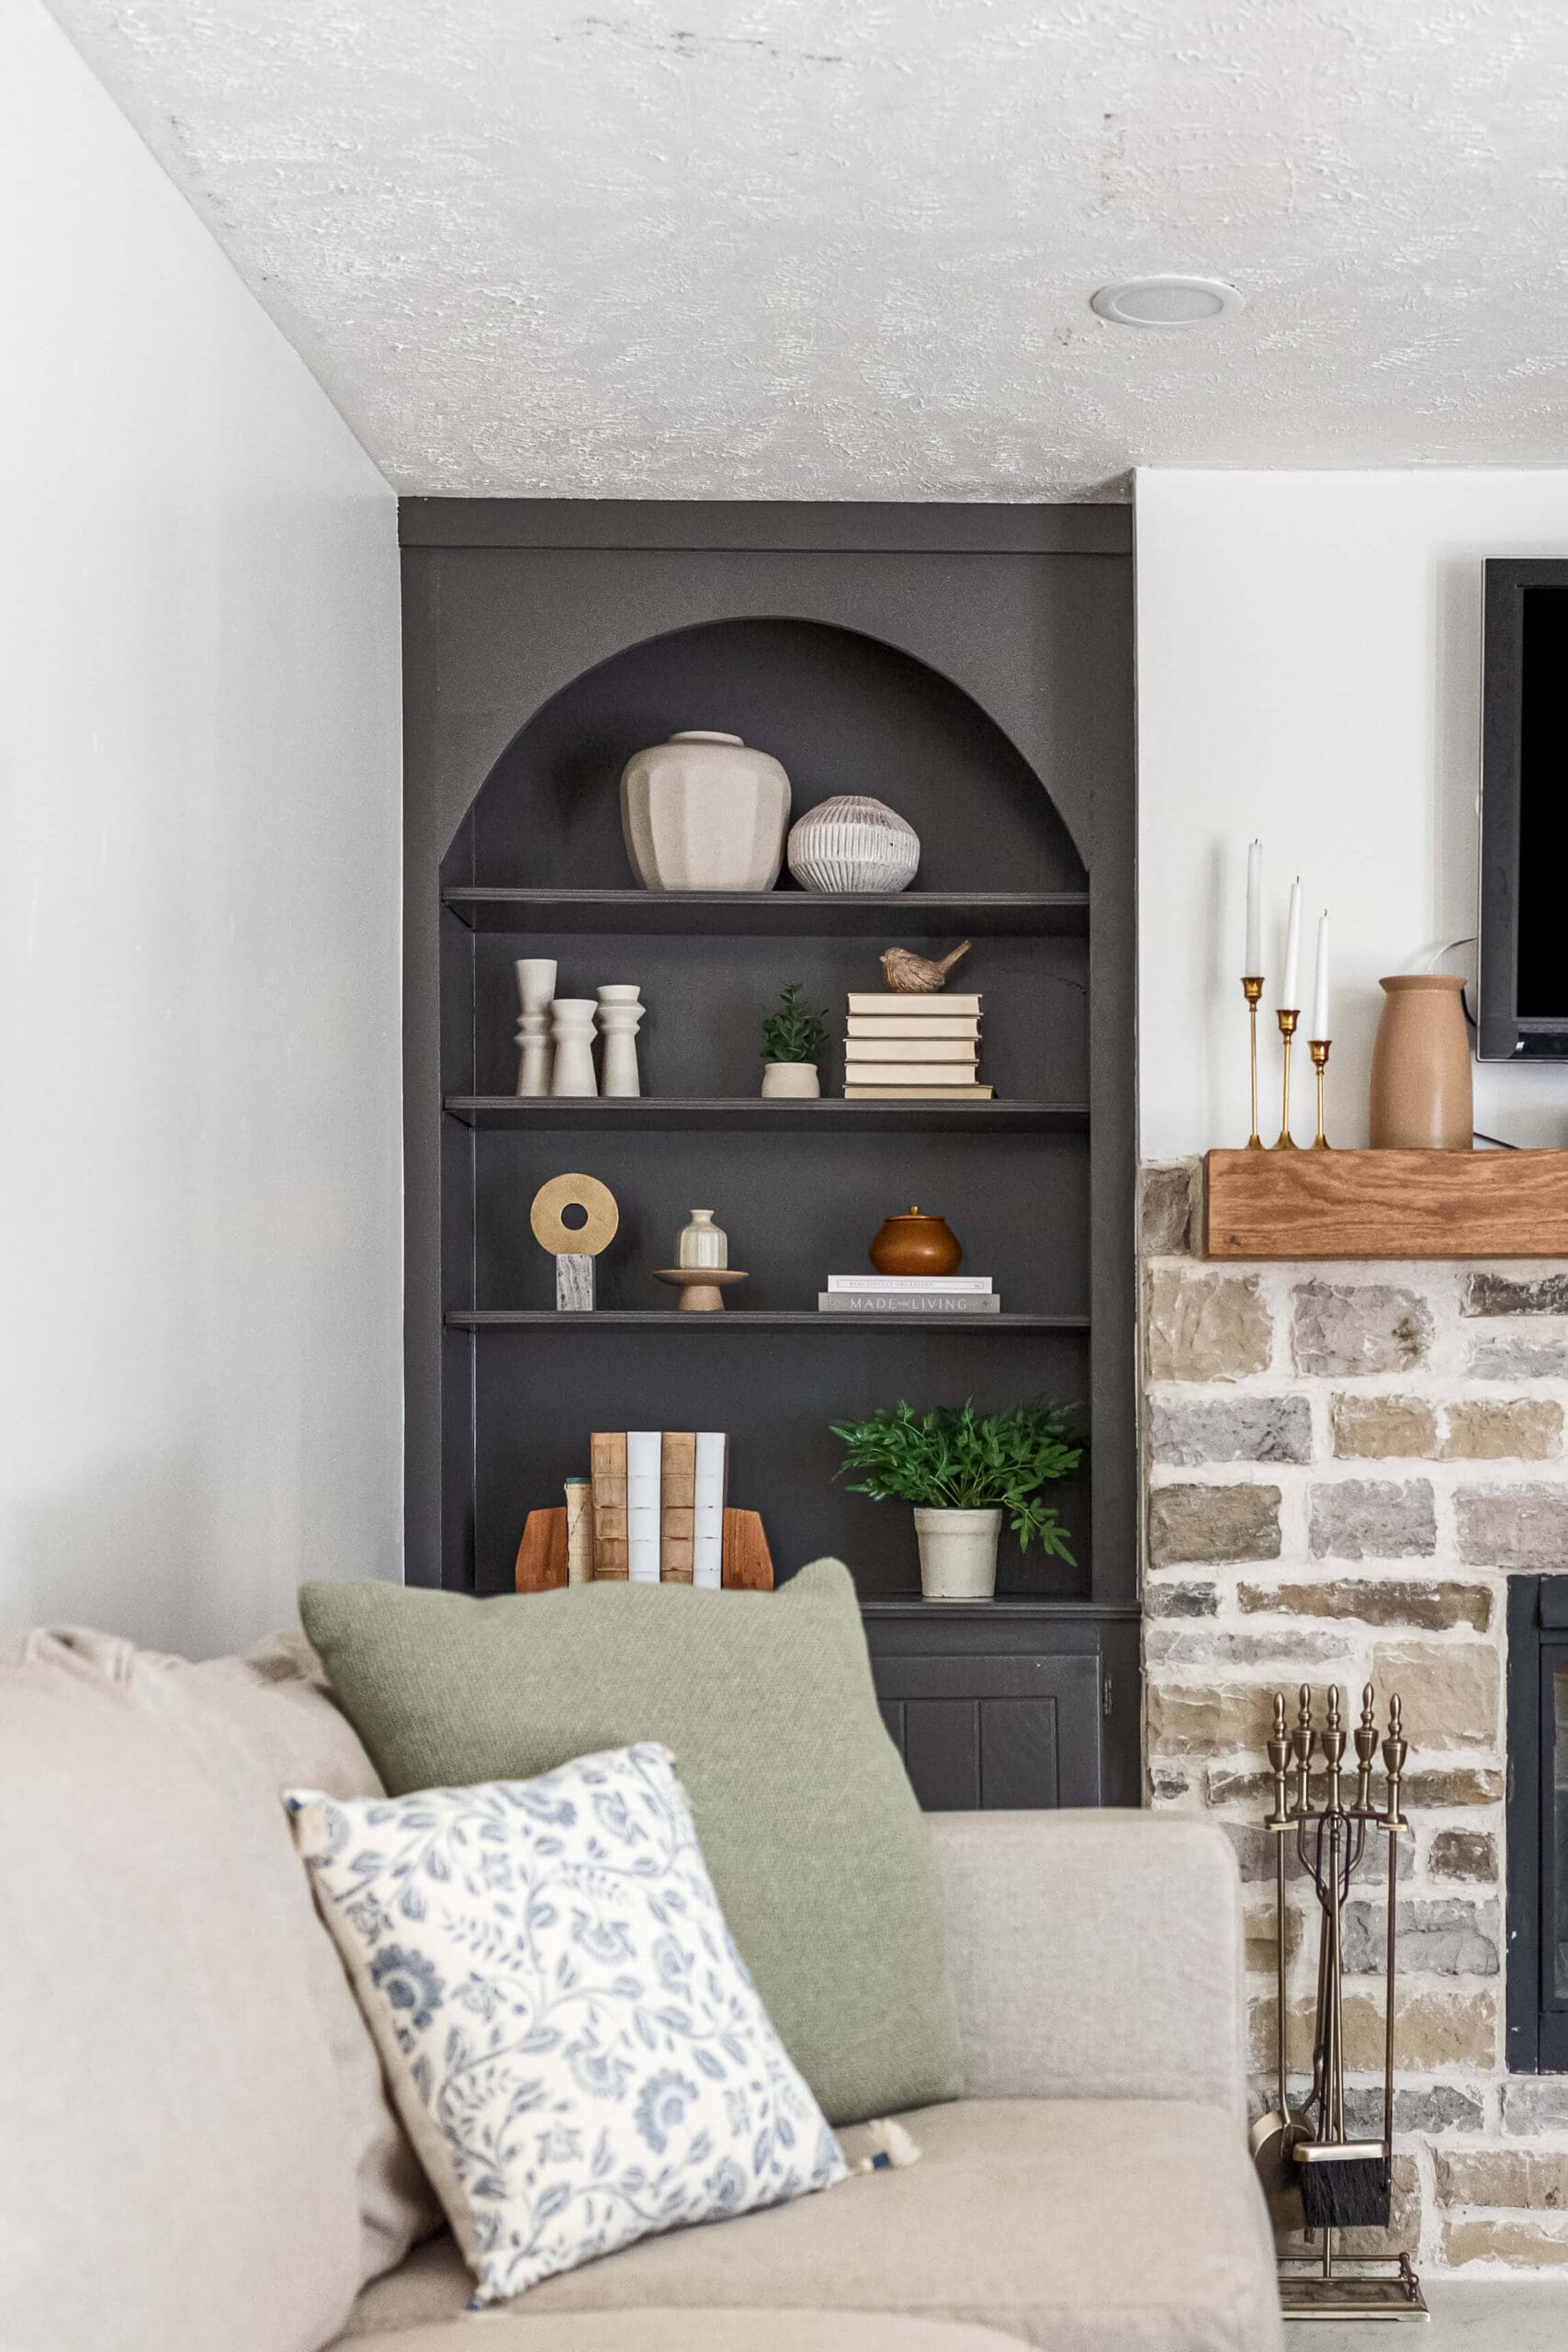
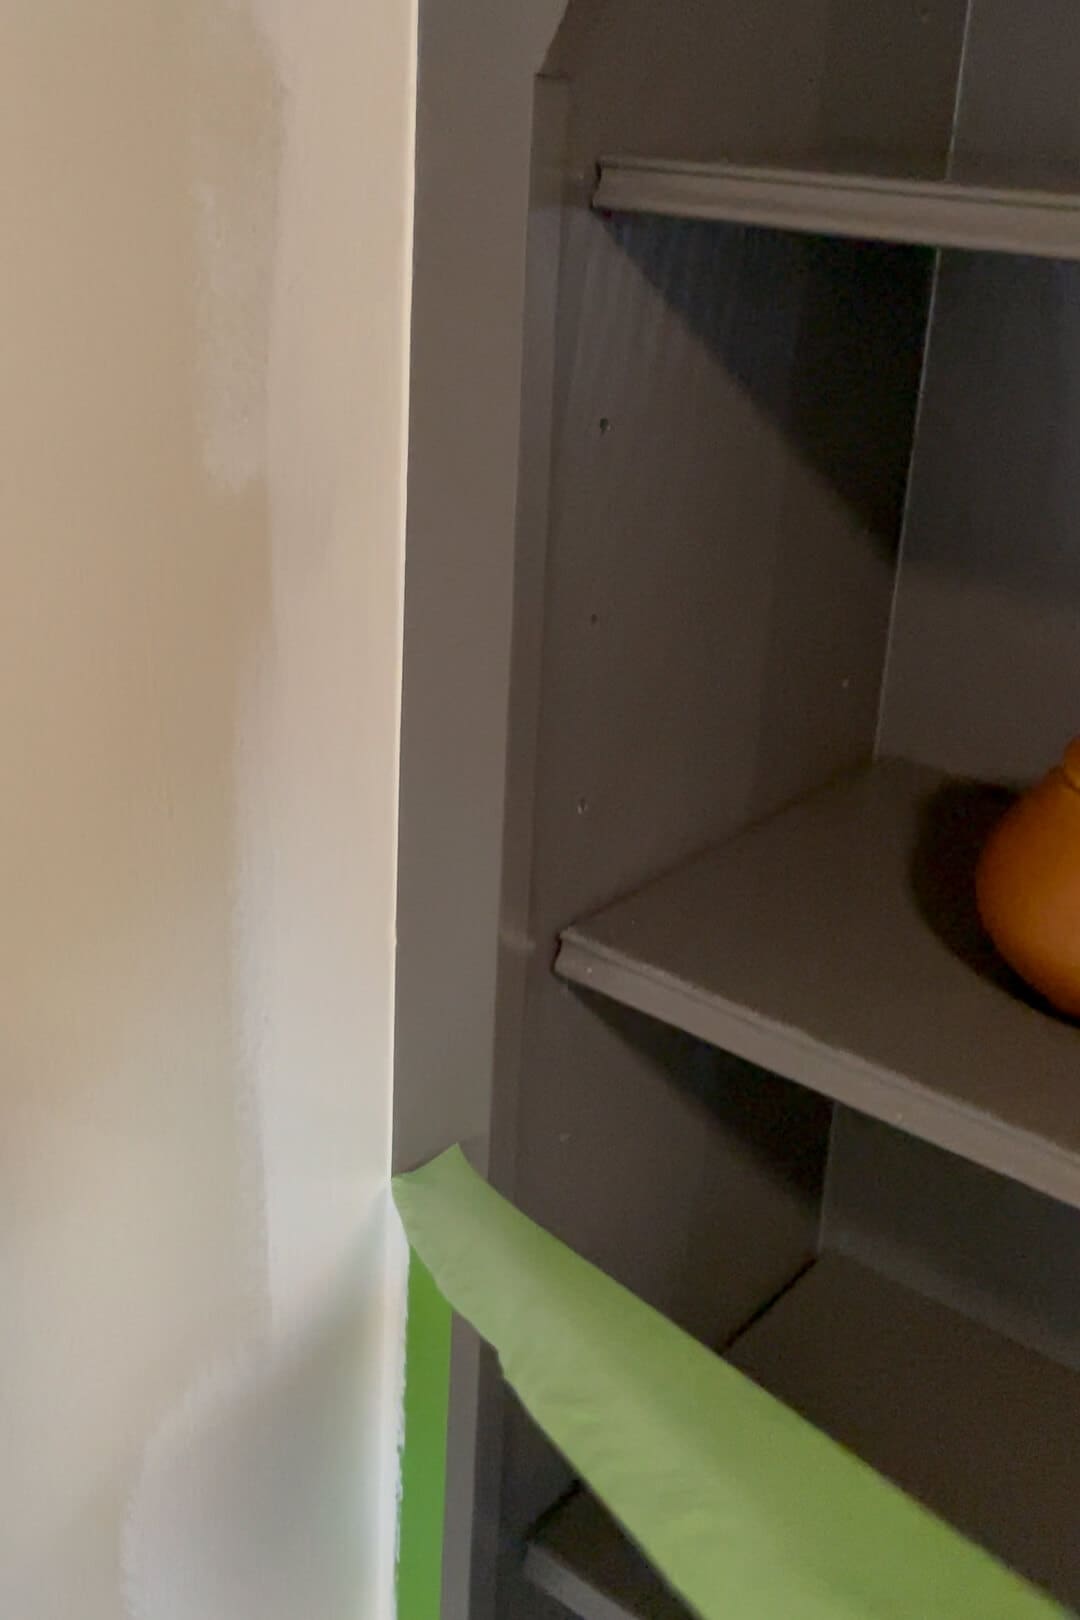
Trick for Perfect Paint Lines on Cabinets and Built-Ins
When painting cabinets or built-ins, clean paint lines make a huge difference. Here’s my foolproof trick:
- Paint the built-in first: Whether it’s a cabinet or shelving, let it dry completely.
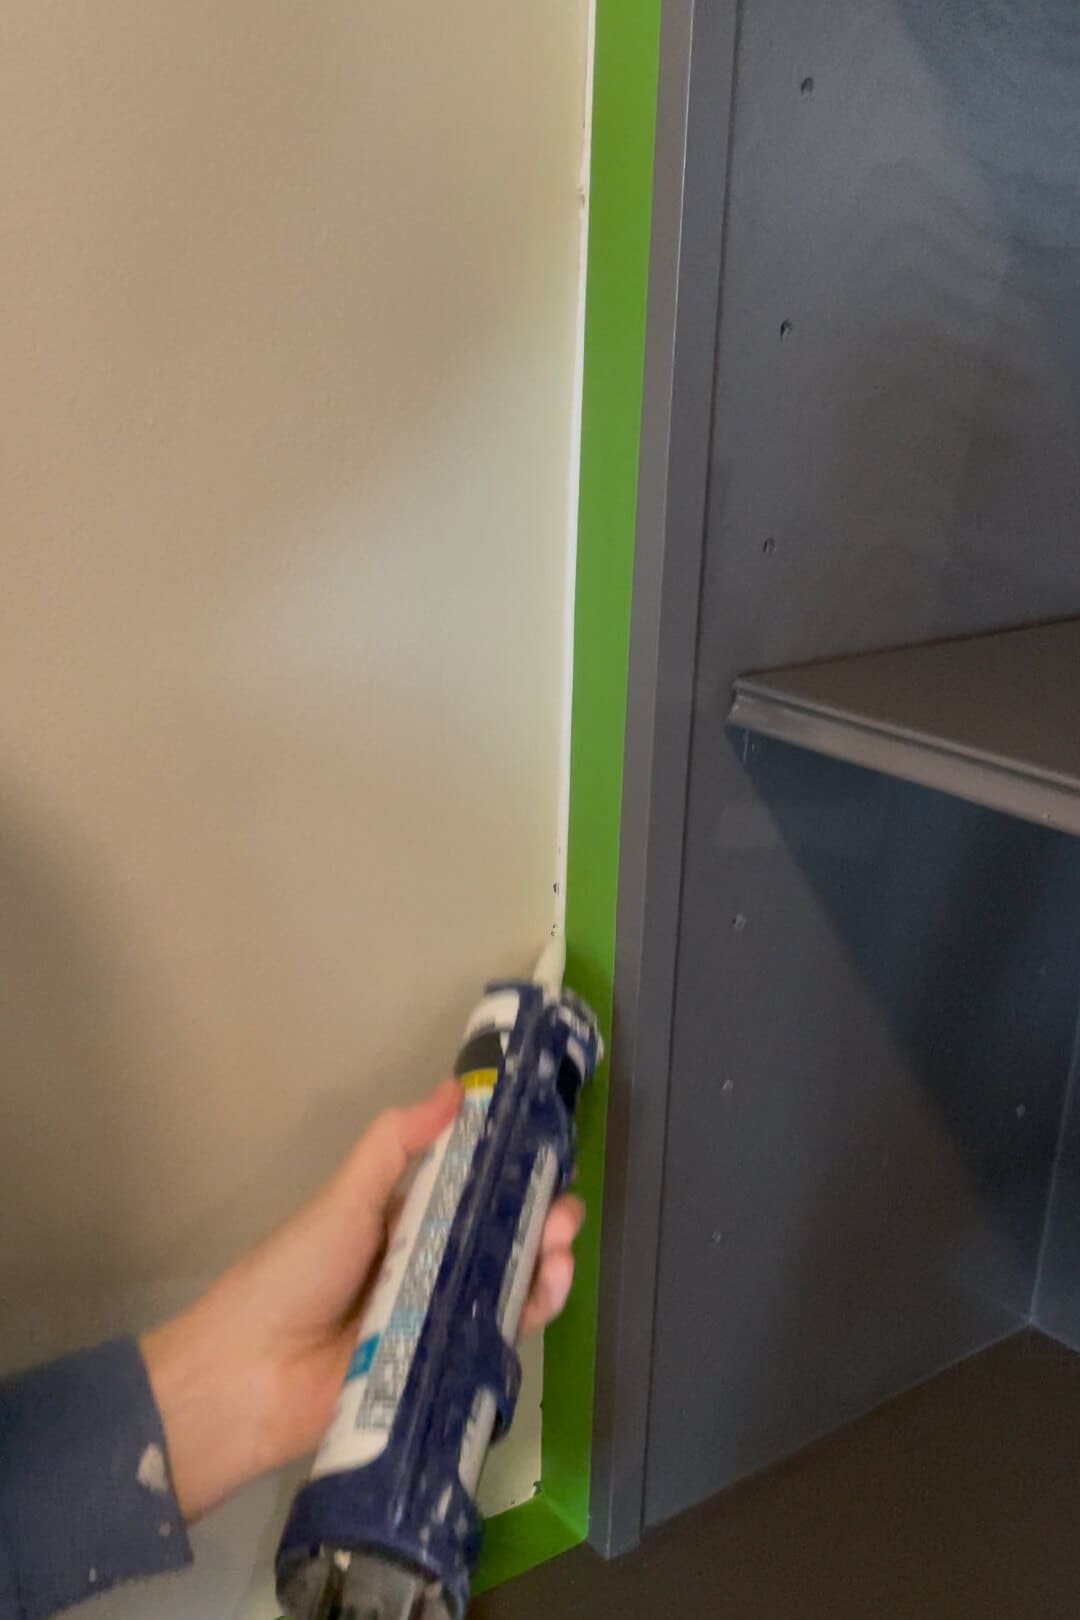
- Mask the edges: Use high-quality painter’s tape to mask the edge where your built-in meets the wall.
- Caulk the seam: Apply a thin bead of caulk along the tape edge and smooth it out with your finger.
- Paint the wall over the caulk: Once the caulk dries, paint your wall color over the caulk and tape. While the paint is still wet, score with a utility knife and remove the tape—voila! You’ll have a flawless, clean, and crisp edge.
It’s a little extra effort, but the results are so worth it!

How to Paint Cabinet Doors and Drawer Fronts Without Flipping
This section of my painting method is a total game-changer!
Painting cabinet doors and drawer fronts used to be a nightmare. I tried those little plastic cones to prop them up, painting one side, waiting for it to dry, then flipping it to do the other. Talk about a time suck! Then, I discovered the hanging method. No more flipping them over or waiting for one side to dry!
My Hanging Method for Painting Cabinet Doors Like a Pro
- Drill pilot holes: Drill pilot holes in a hidden spot (bottom for lowers, top for uppers).
- Screw in hooks: Twist in hooks and align them for easy hanging.
- Hang & spray – A garment rack + paint tent keep everything organized.
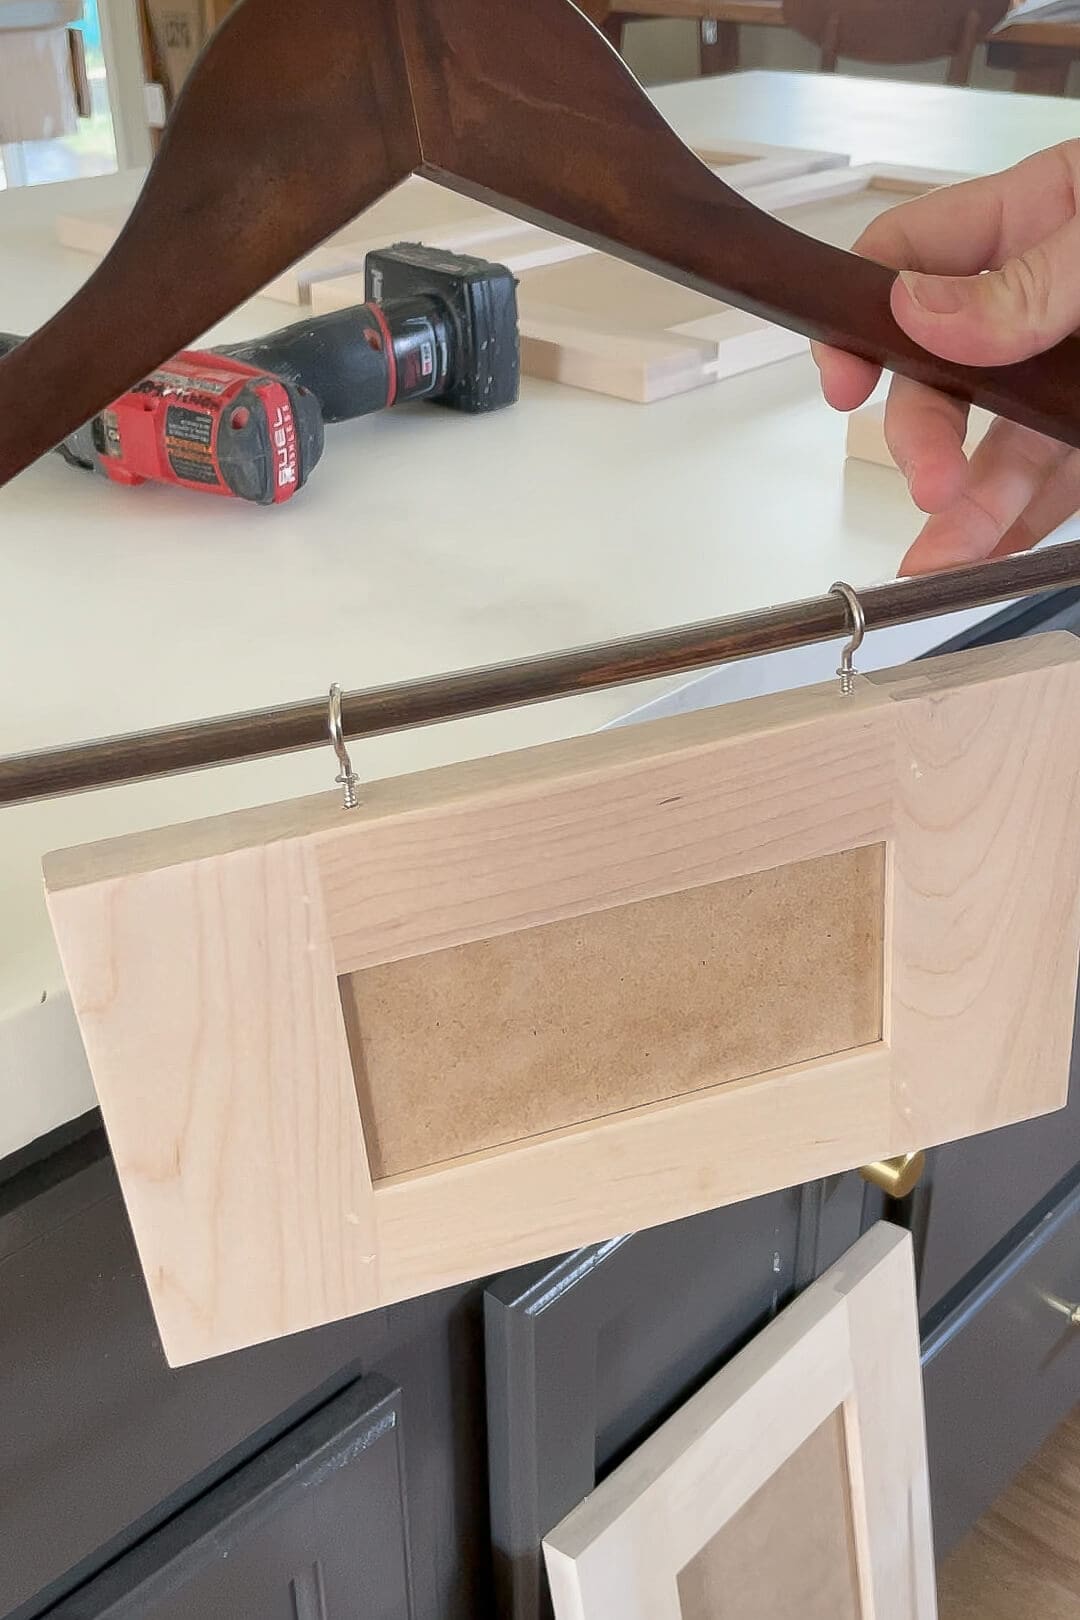

For drying, I repurpose an old closet rod in my garage – works like a charm.
For drying, I repurpose a closet rod in my garage – works like a charm. No garment rack? Suspend a rod between two ladders!

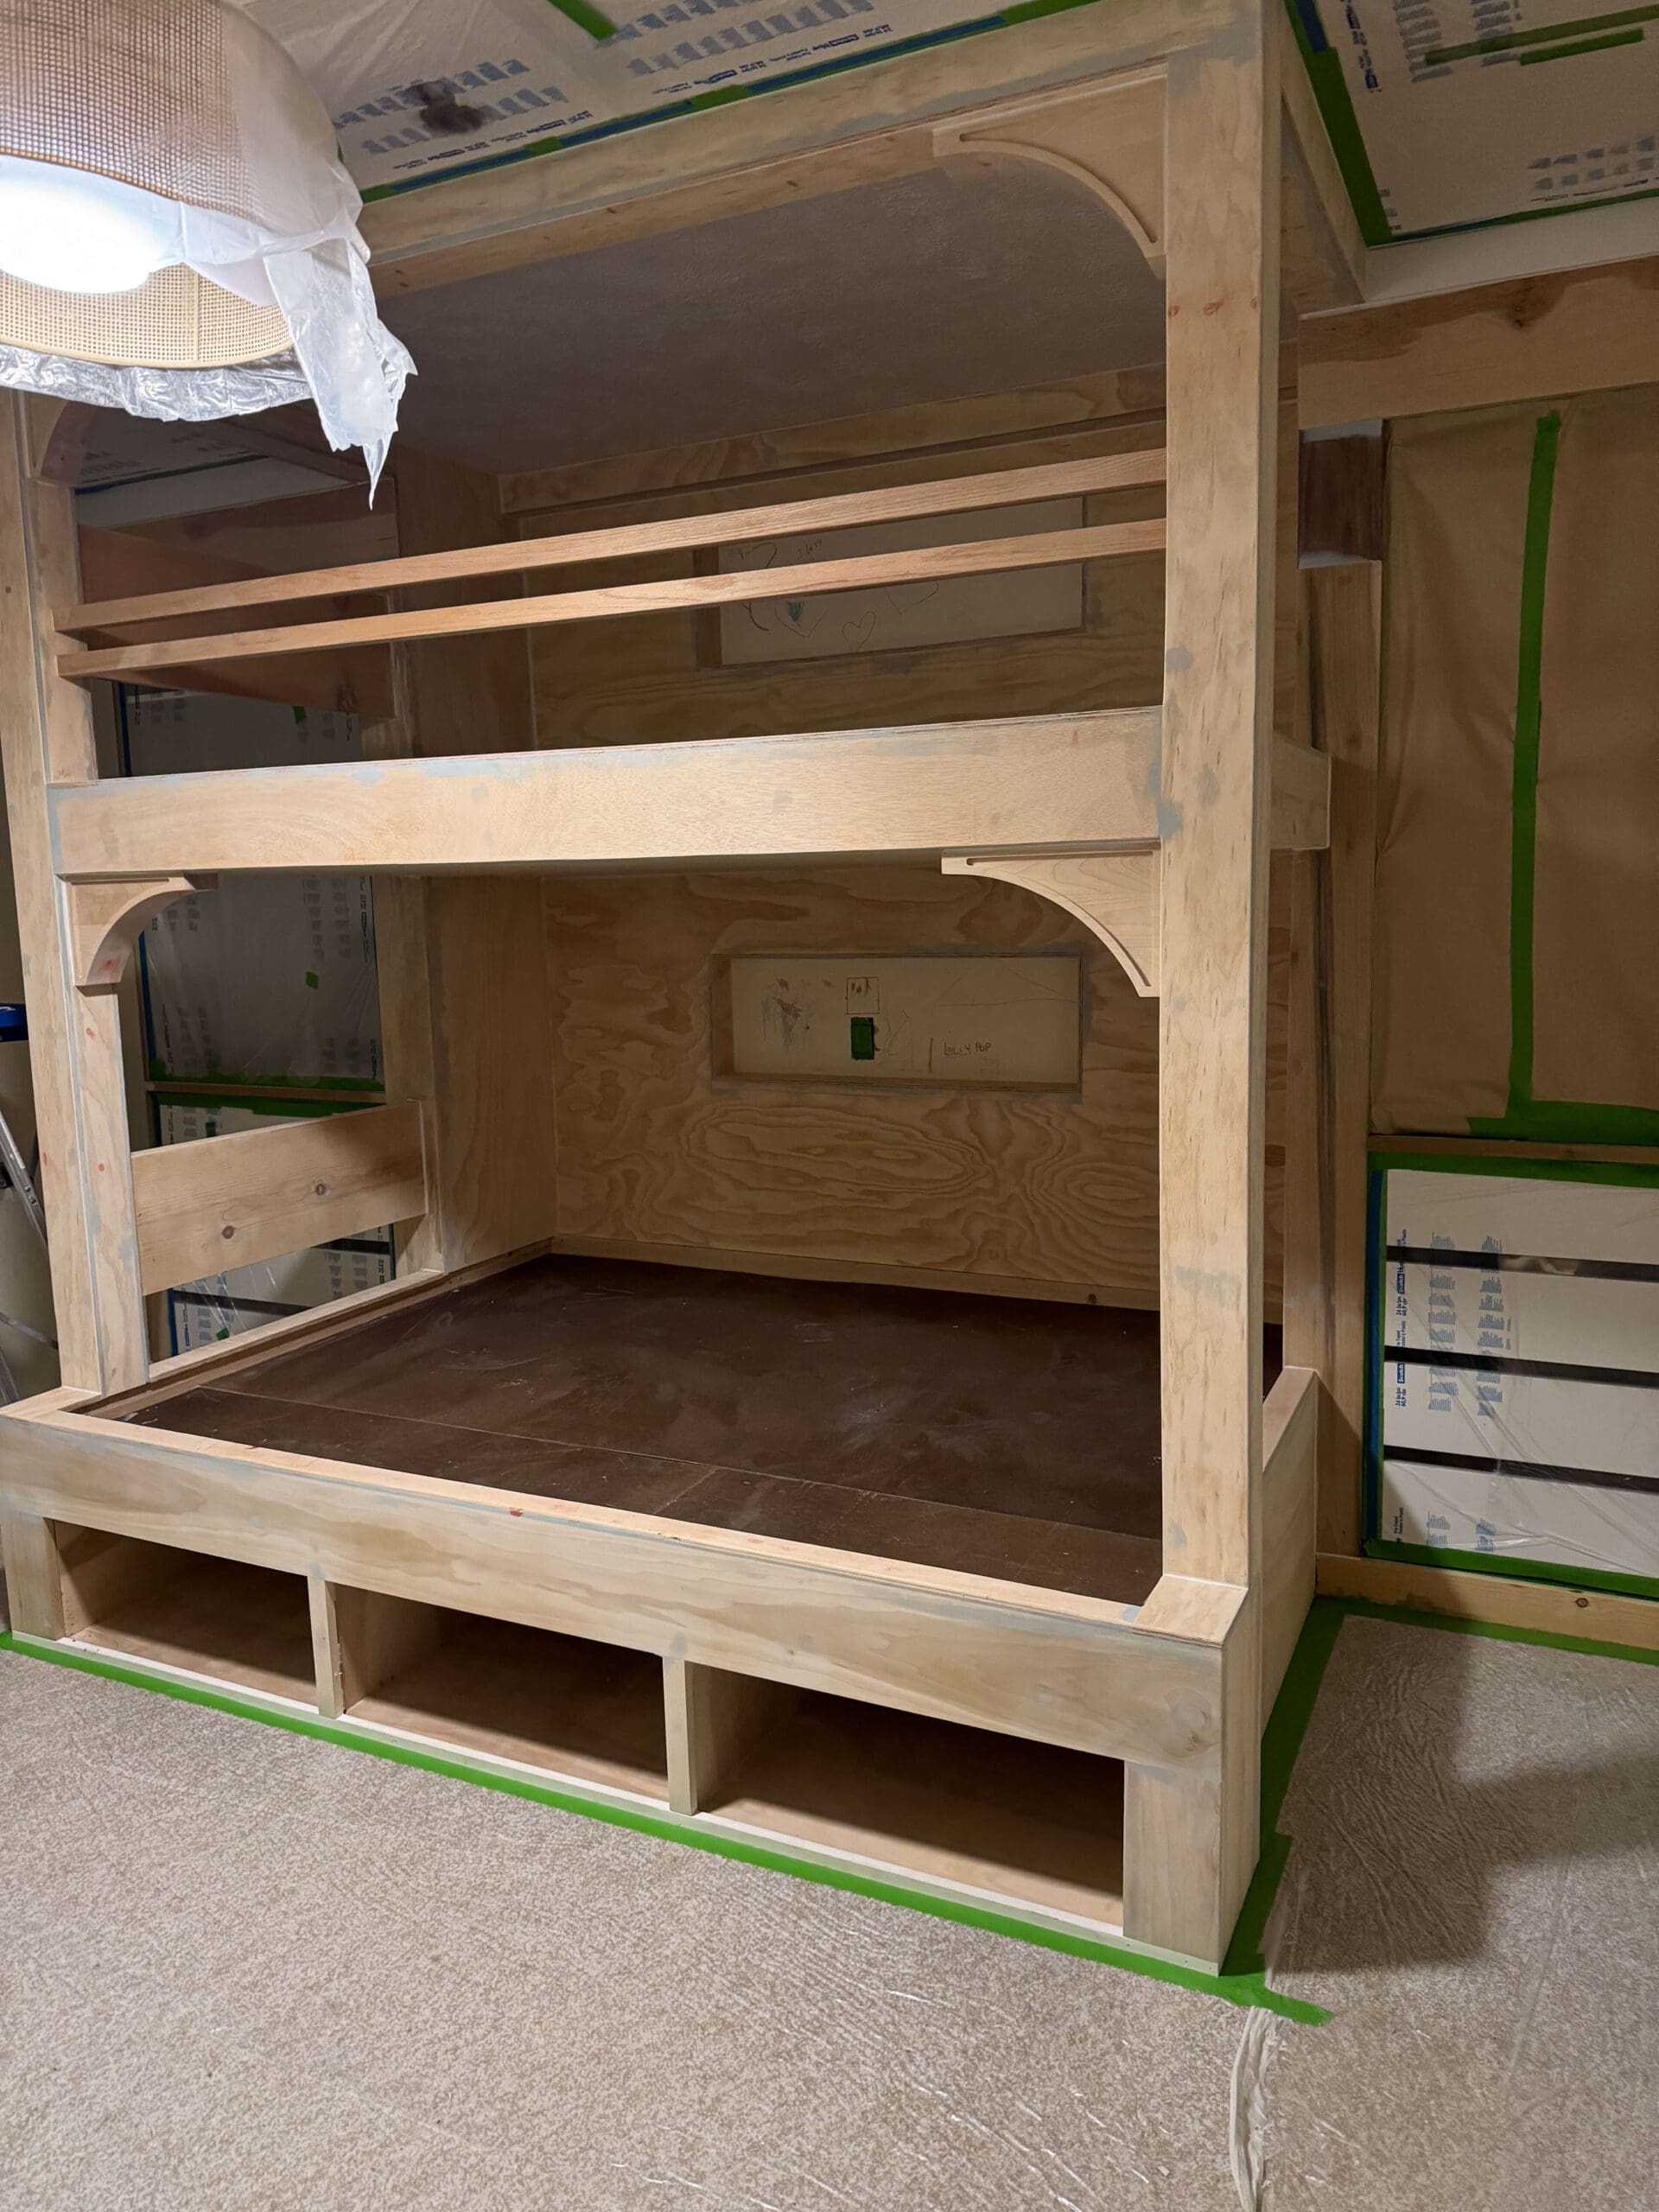
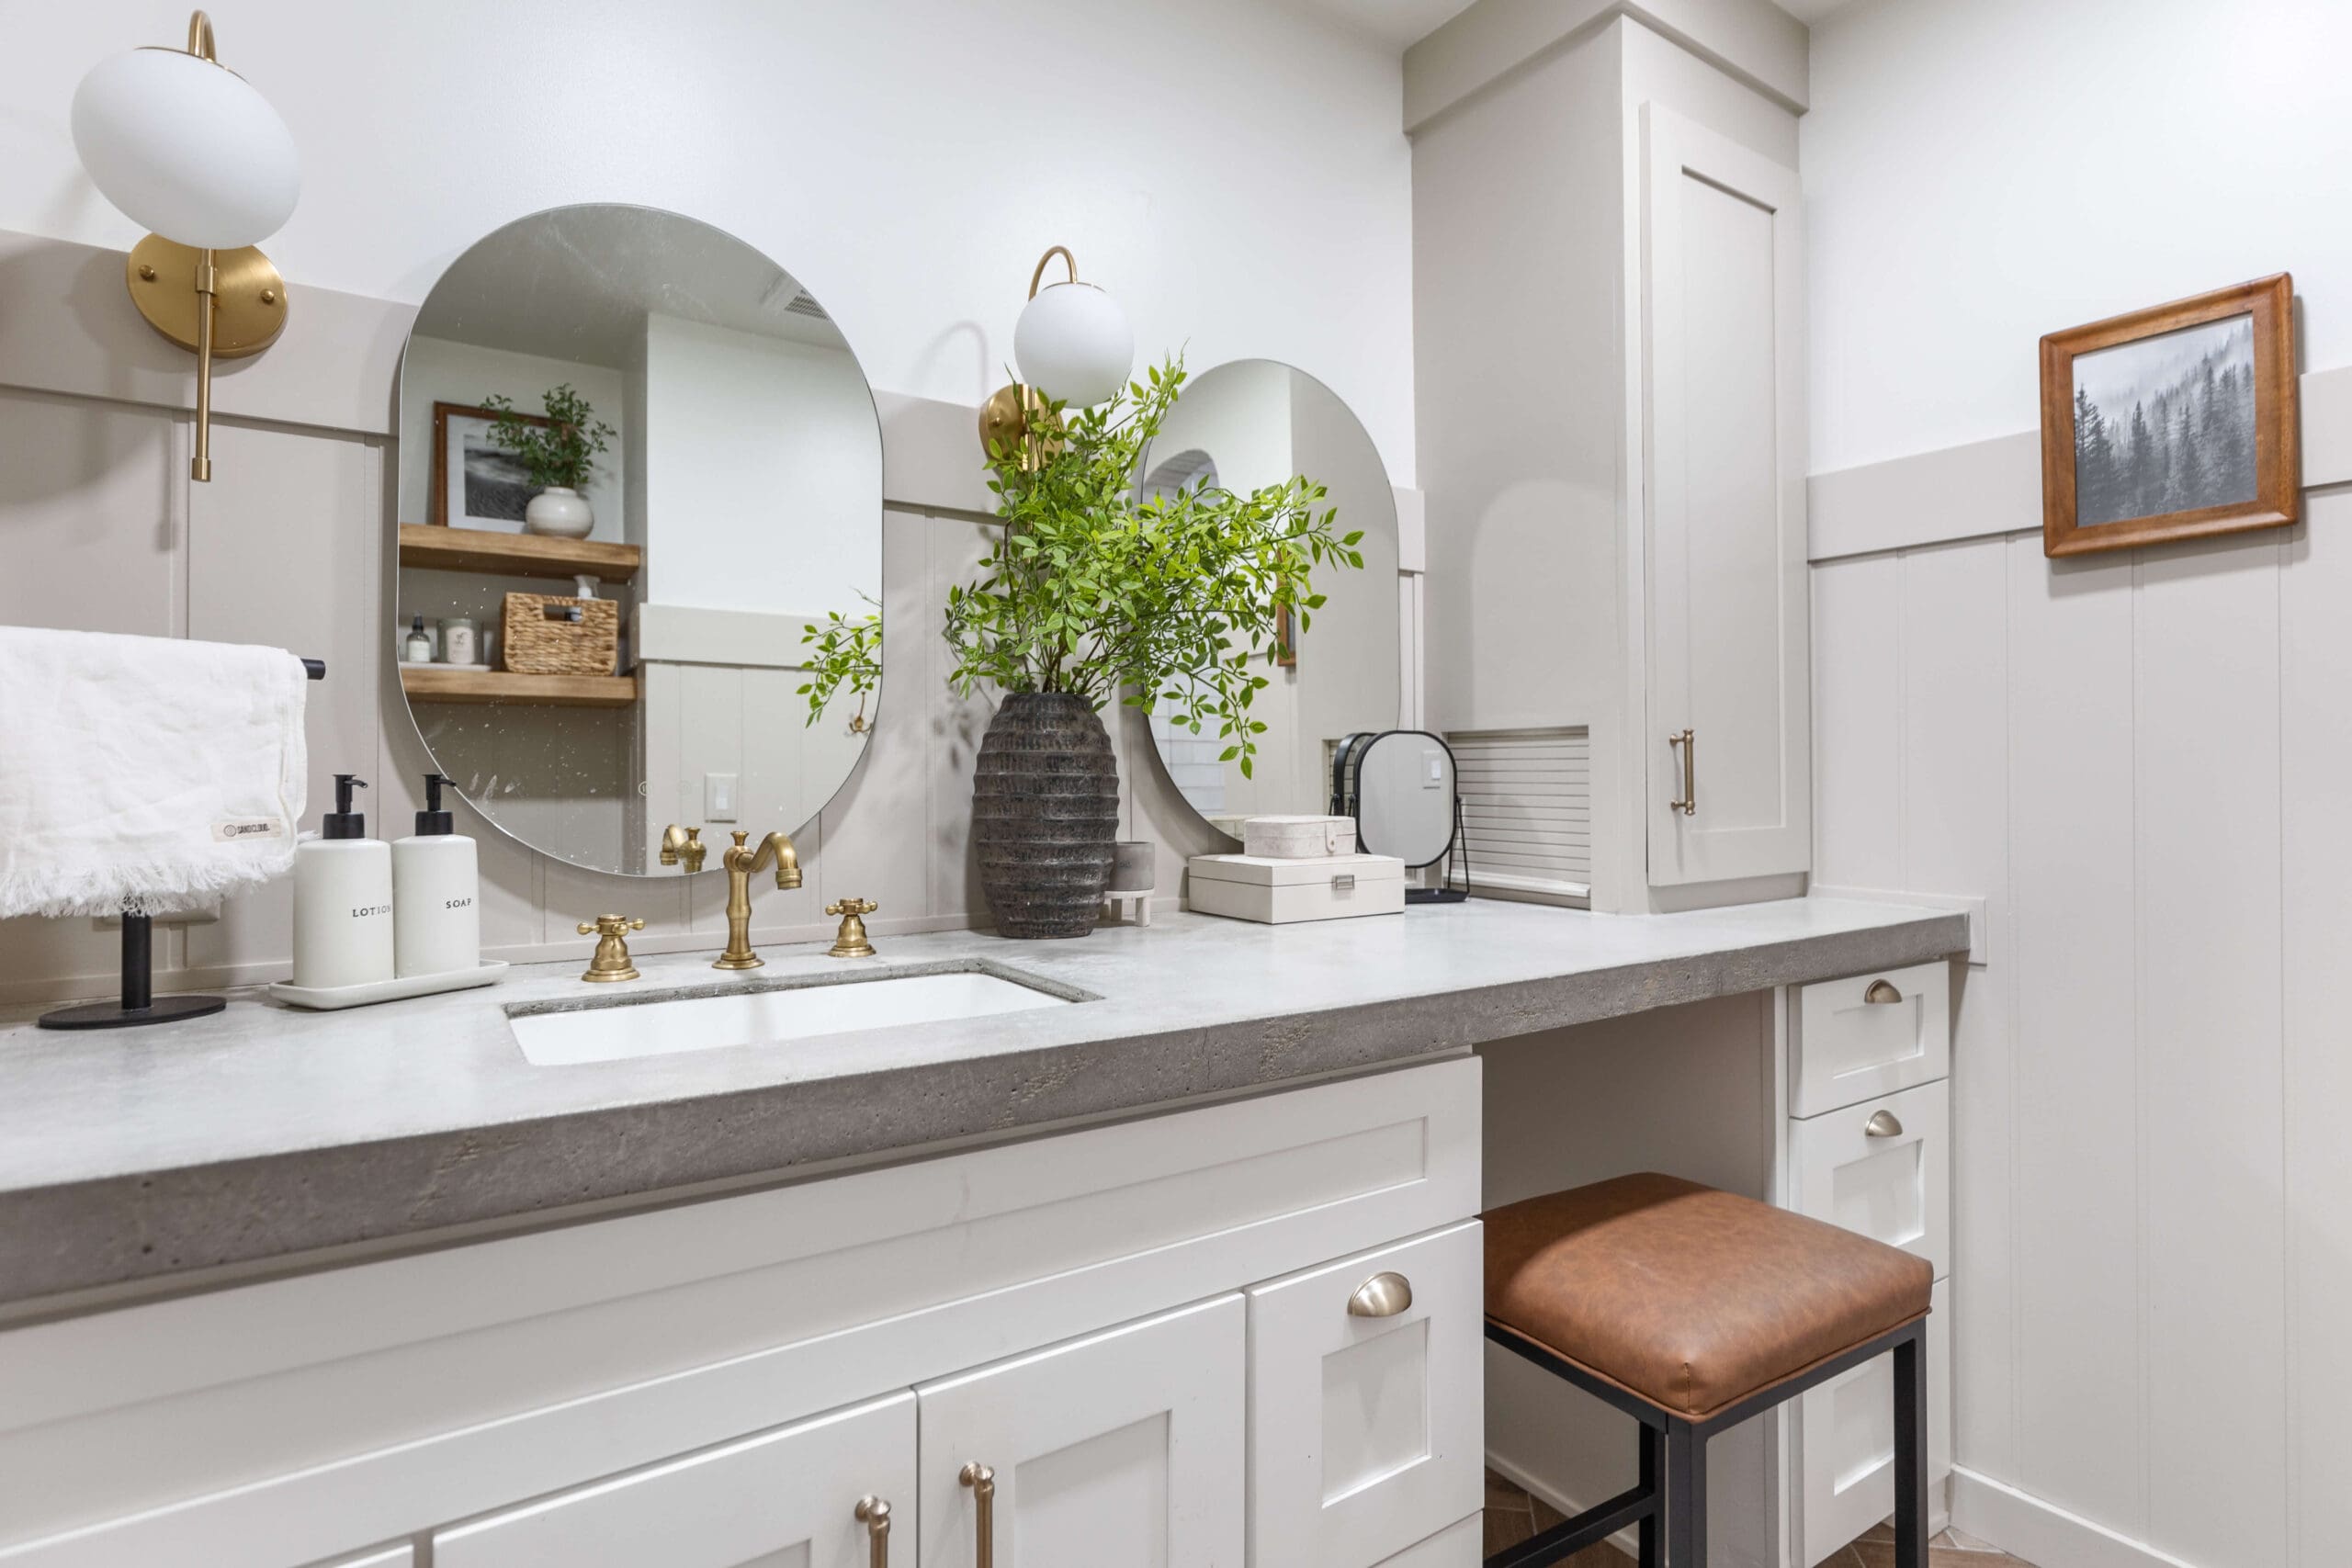
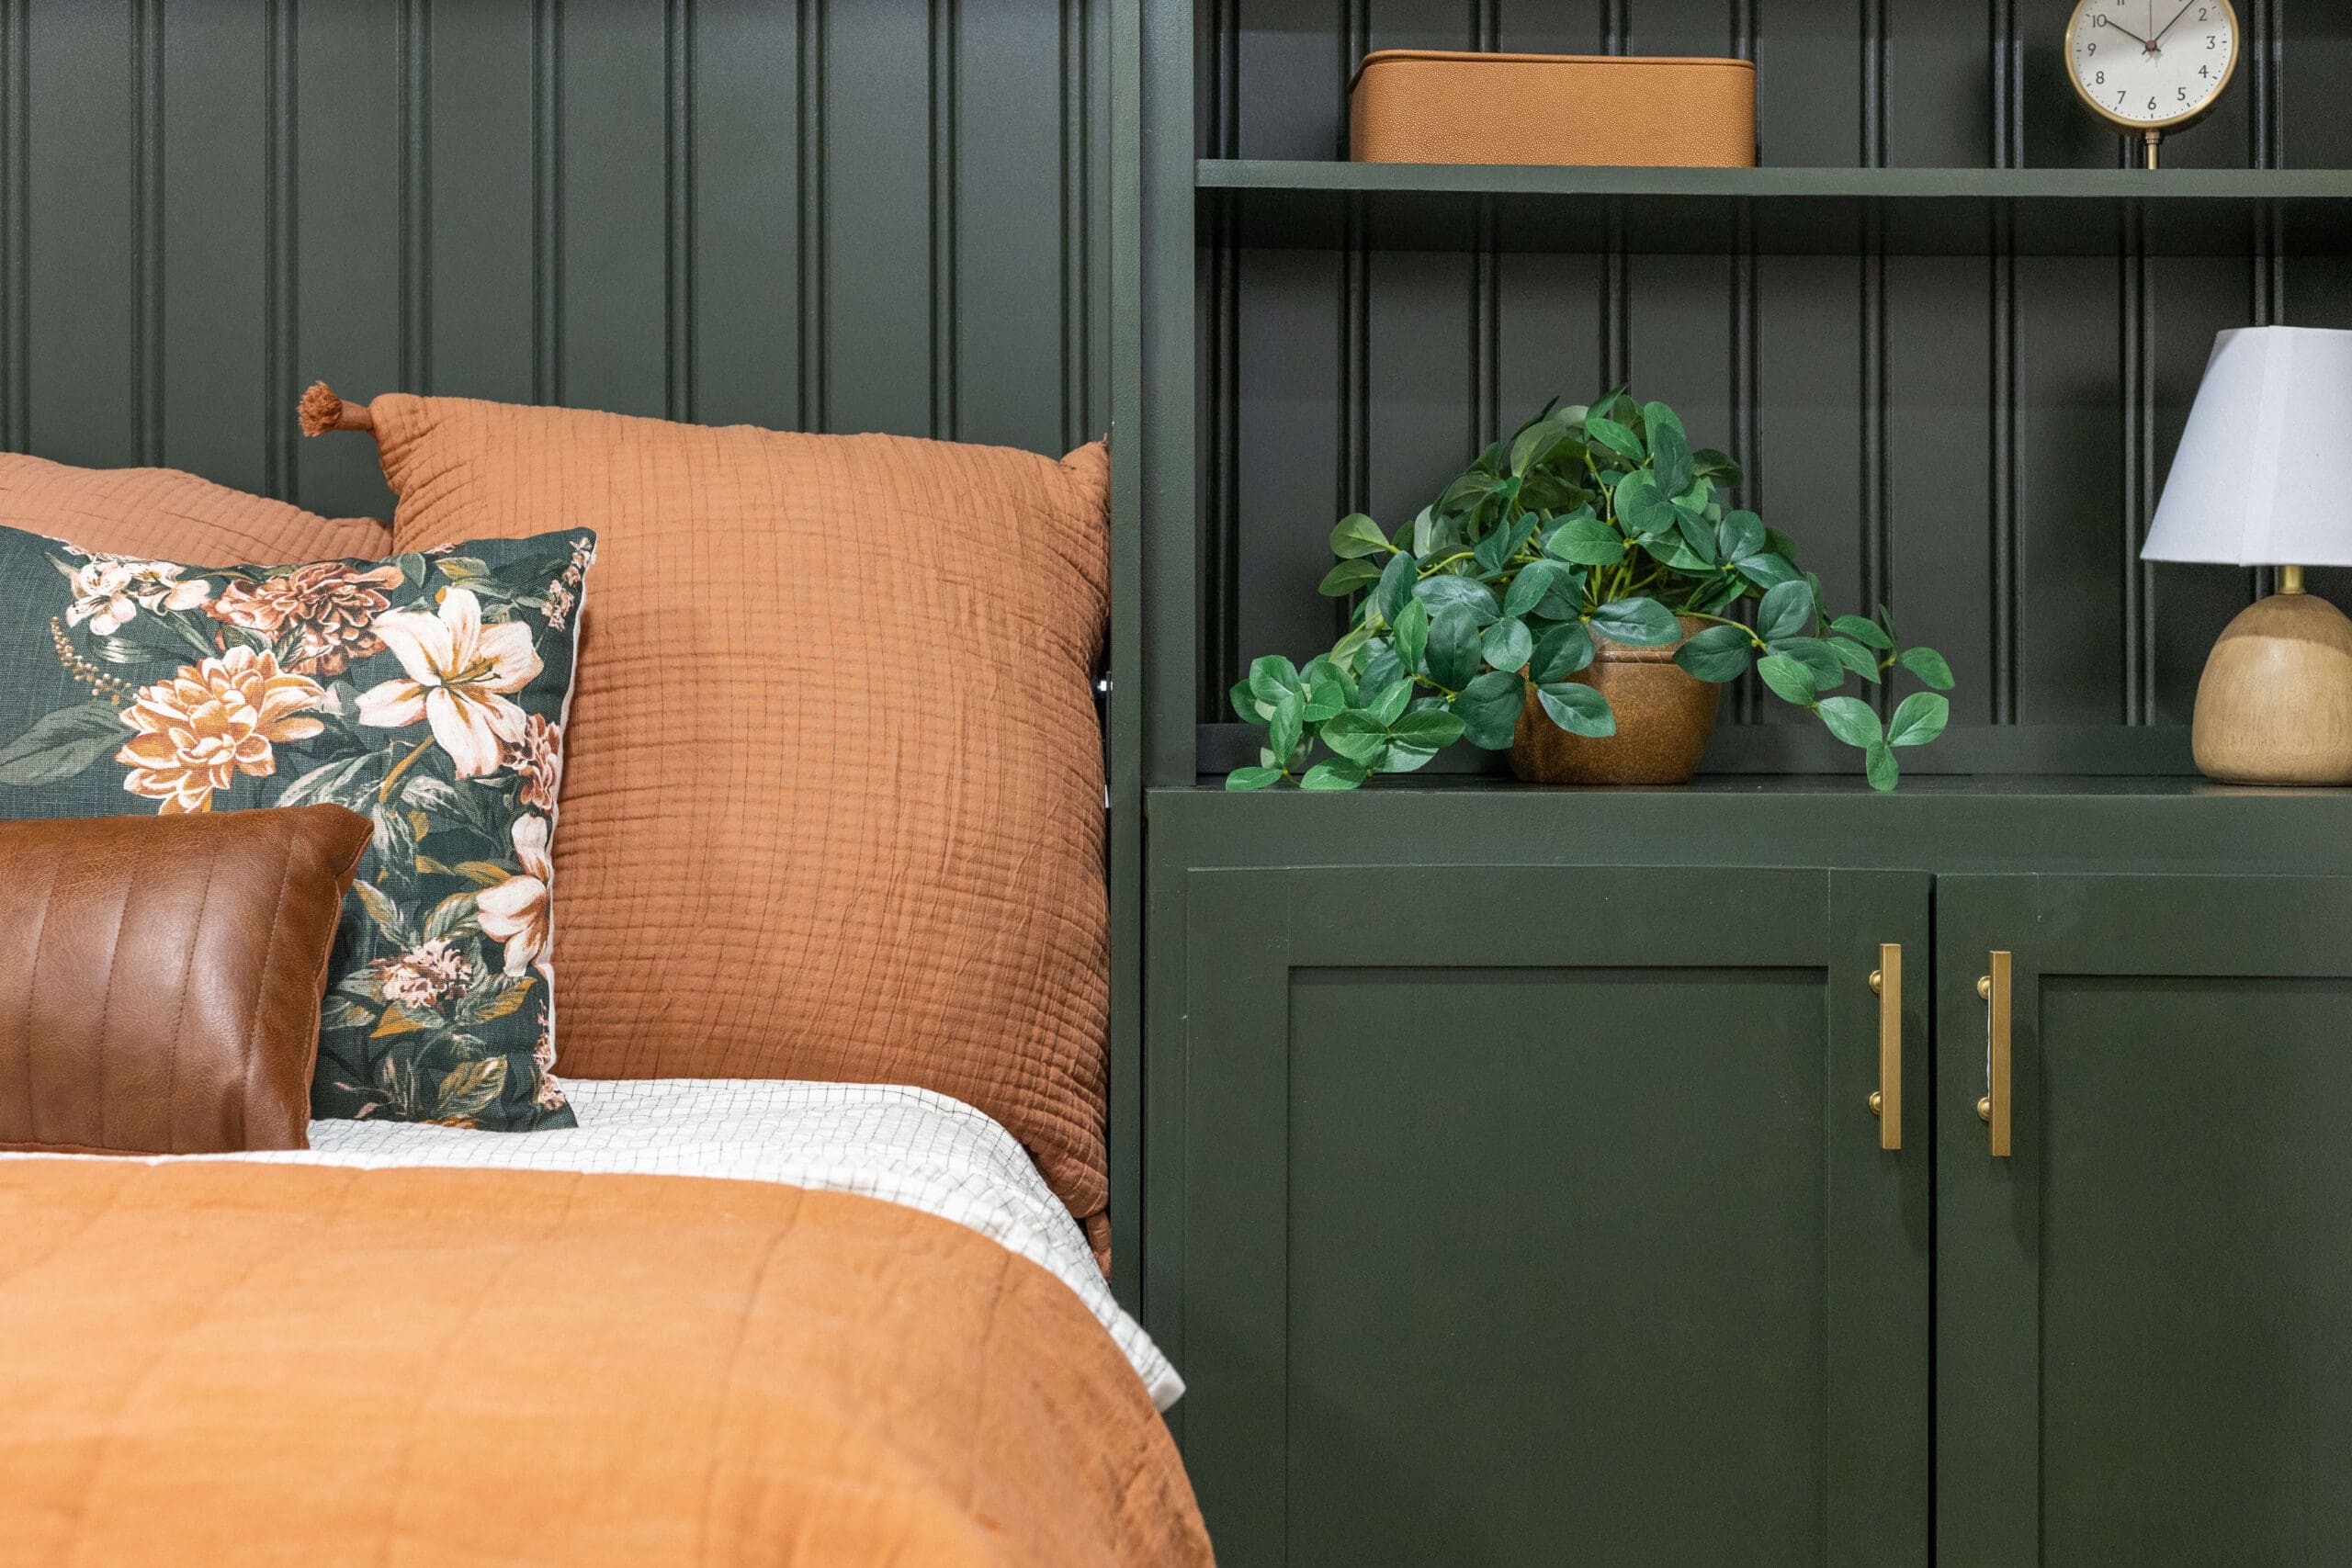
Before and After Results: Painted Cabinets with a Factory Finish
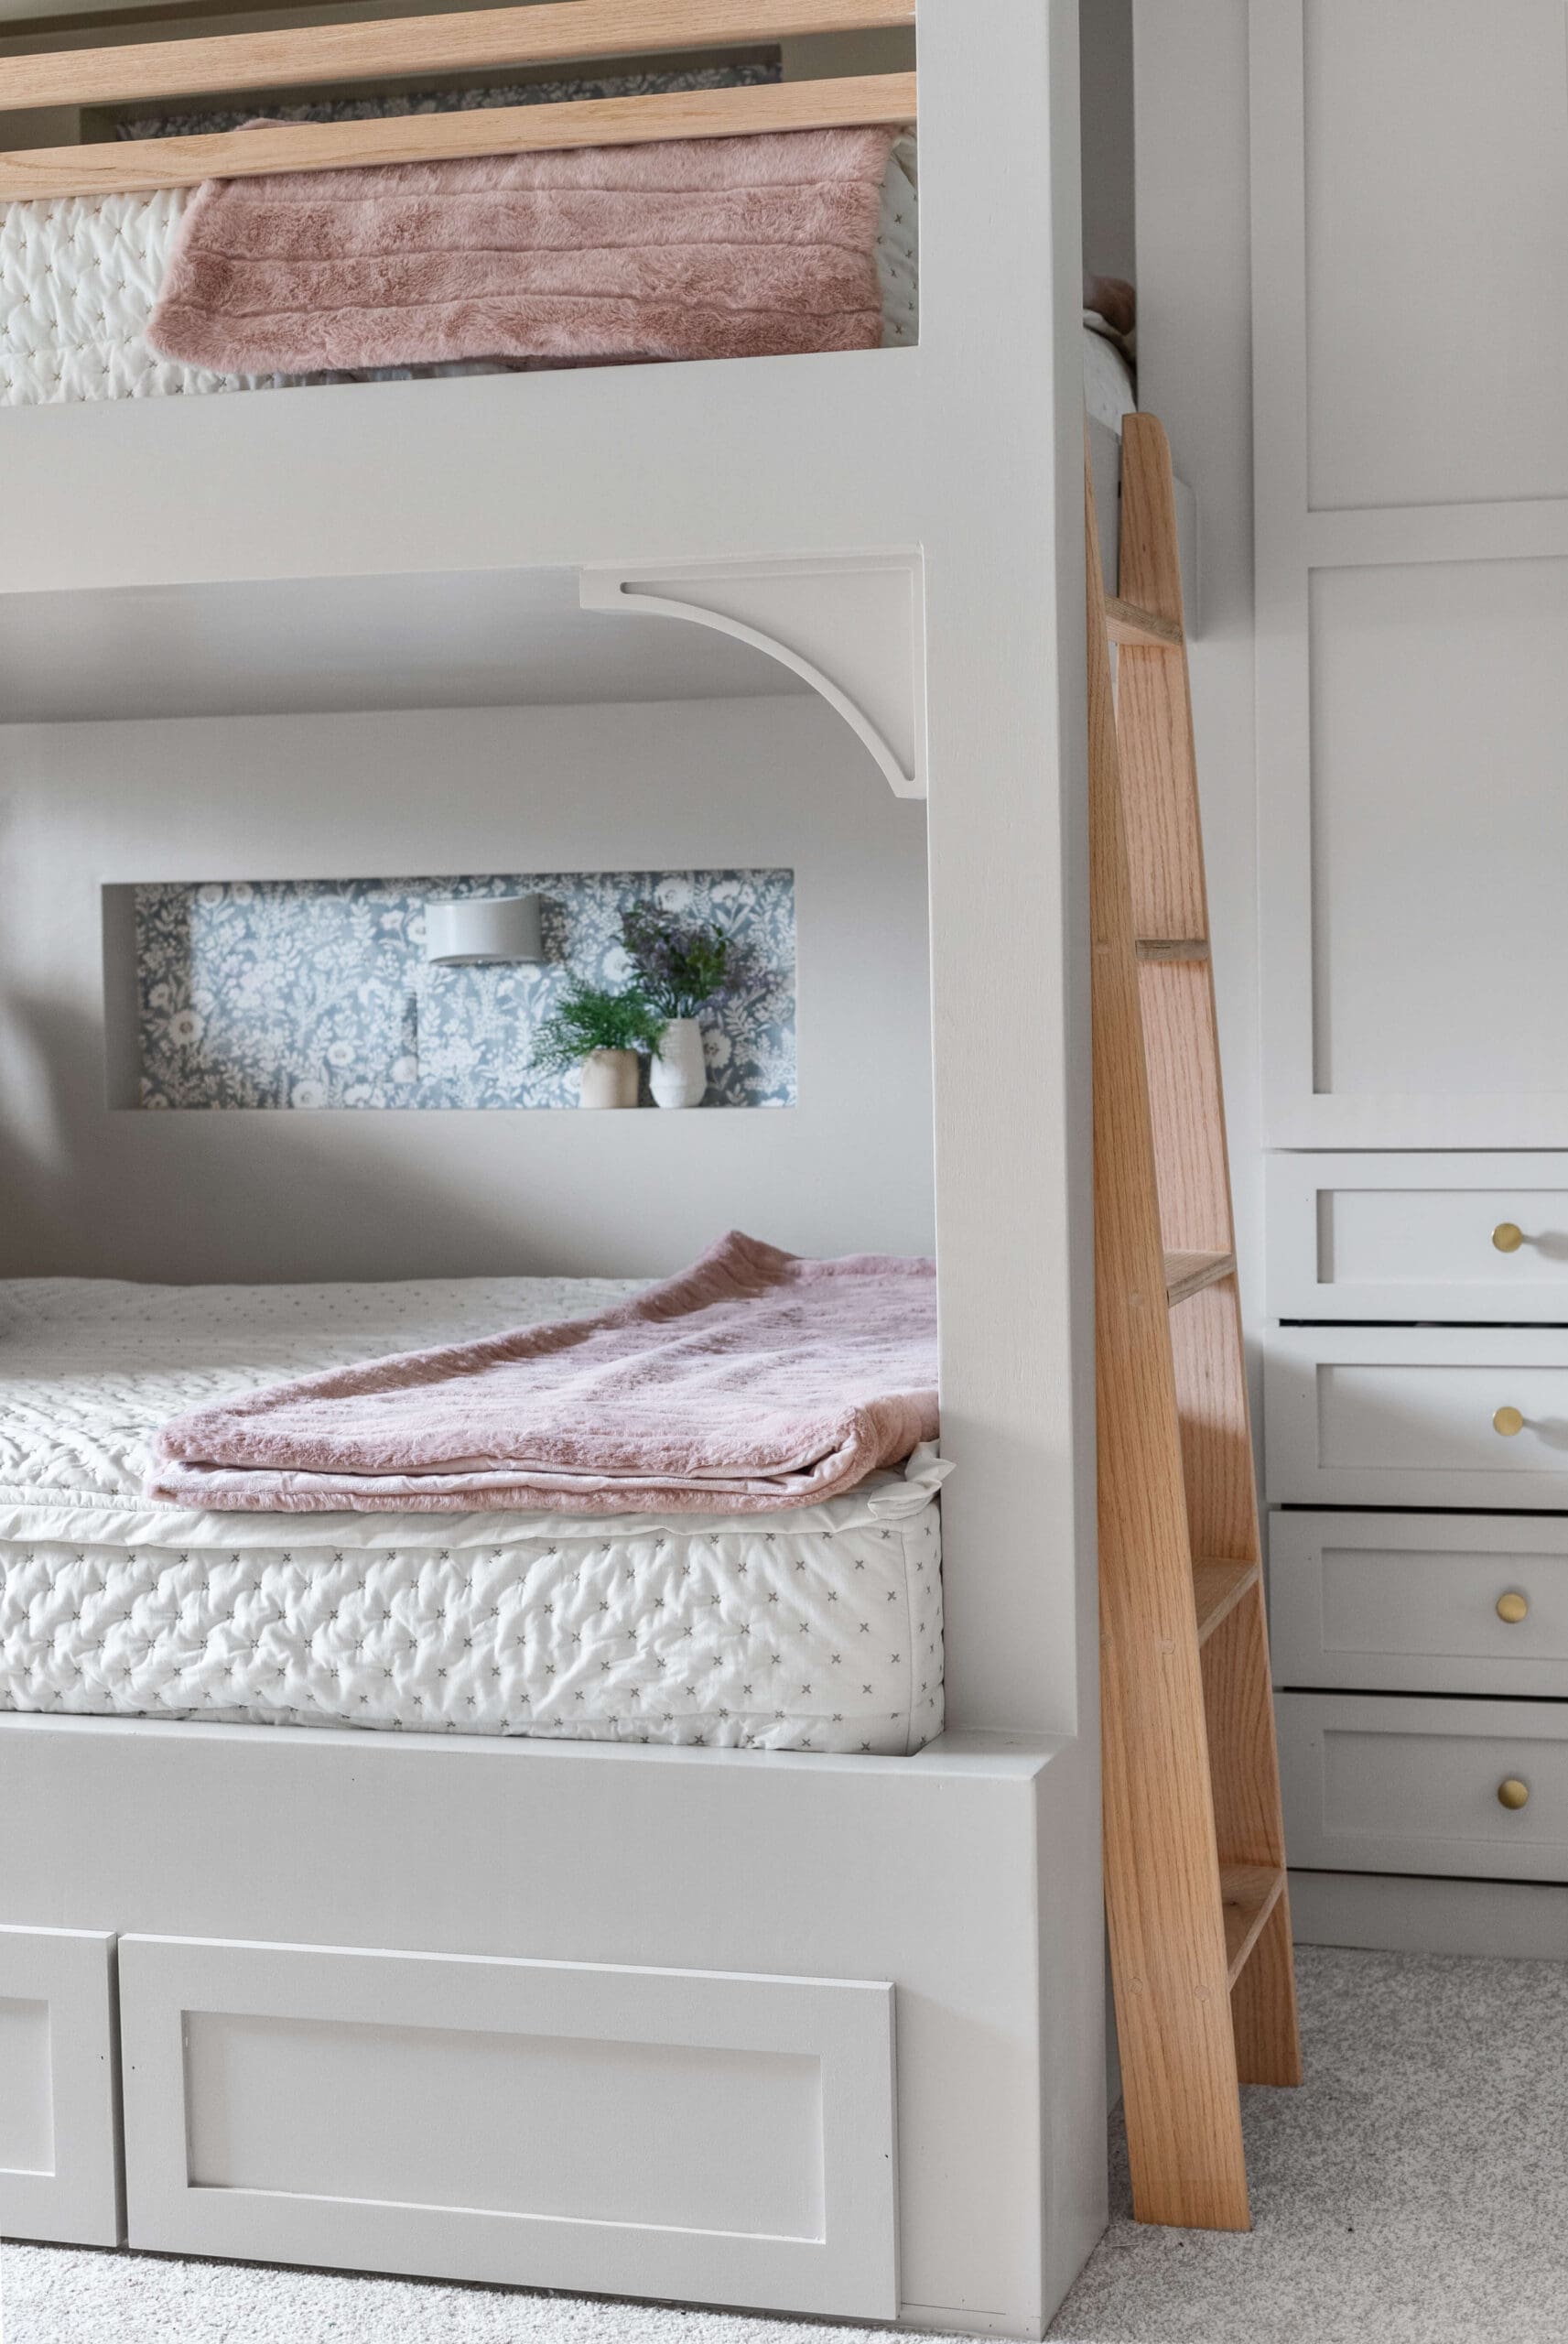
I’ve used this method for so many projects—from our bathroom vanity, DIY Murphy bed, kitchen cabinets, DIY built-ins, and even my girls’ custom bunk beds. Whether you’re painting cabinets or furniture, this approach delivers a clean, professional finish every time!
📌 Save This Cabinet Painting Tutorial for Later
FAQ About Painting Cabinets and Furniture for a Professional Finish
The best paint for painting cabinets is Sherwin Williams Emerald Urethane Trim Enamel or Benjamin Moore Advance. Both dry to a hard, durable finish that resists chipping and wear.
Yes! Even if you’re using a bonding primer, lightly sanding helps the primer and paint stick better. Use 220-grit sandpaper for a smooth surface.
For the best adhesion, use B-I-N Shellac-Based Primer or Zinsser Cover Stain. These primers block stains, seal wood, and help paint stick for long-lasting results.
For a smooth, professional finish:
Use a paint sprayer instead of a brush.
If using a brush, apply thin coats and follow with a foam roller.
Sand lightly between coats for a flawless look.

This is seriously so helpful! My goal this year is to finally remodel my bathroom, so I’ve been trying to learn all of the little tips and tricks to make sure everything looks nice. I’ve heard really good things about the Sherwin Williams Emerald Urethane Enamel paint, but my biggest worry is how it will hold up under high levels of moisture from my kids taking hot showers. Have you used it on your bathroom vanity by chance?
Yes! Just make sure you prime the vanity beforehand, then two coats of SW Emerald, and it will look fabulous.