


DIY Custom Bathroom Vanity Using a Kitchen Cabinet


Updated July 13, 2026
Renovating a bathroom can be exciting – and expensive – especially if you want a design that’s uniquely yours. When it came to our remodel, I didn’t want a cookie-cutter vanity. I envisioned a custom bathroom vanity that would maximize storage, fit the space perfectly, and stay within budget. With a little creativity, I combined a stock vanity with an unfinished kitchen drawer unit to create a stunning, functional centerpiece. Here’s how I made it happen!
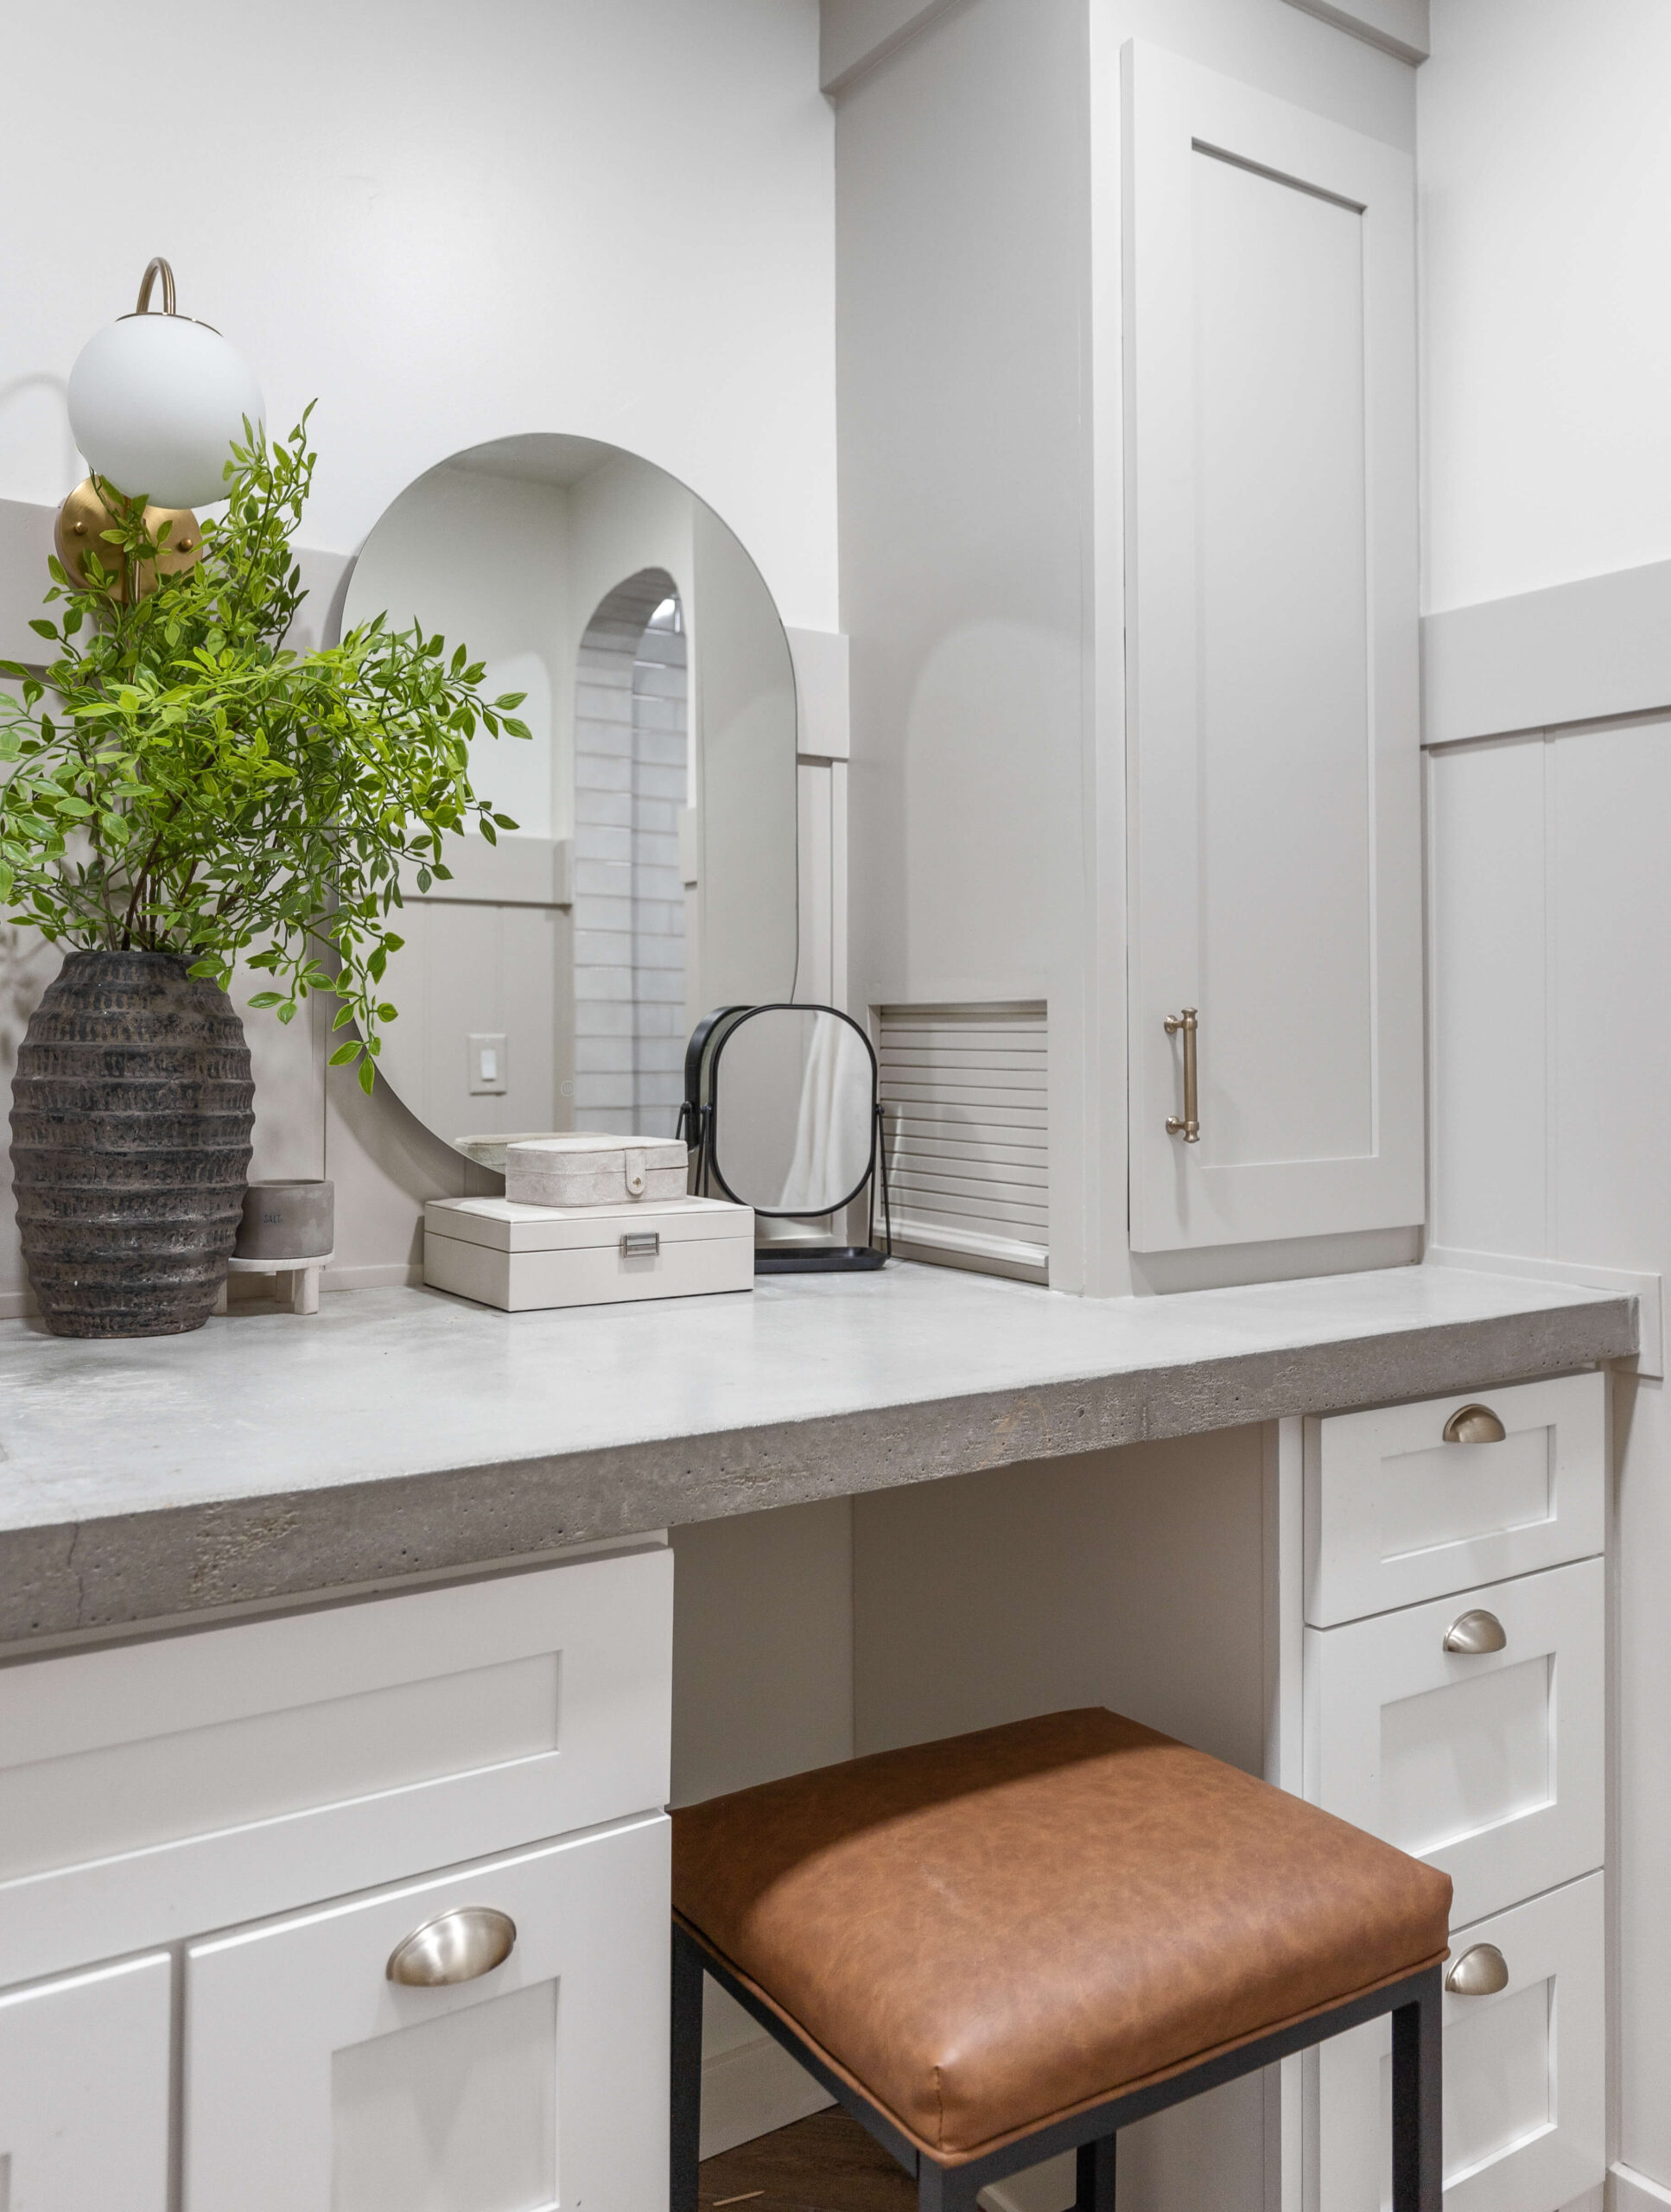
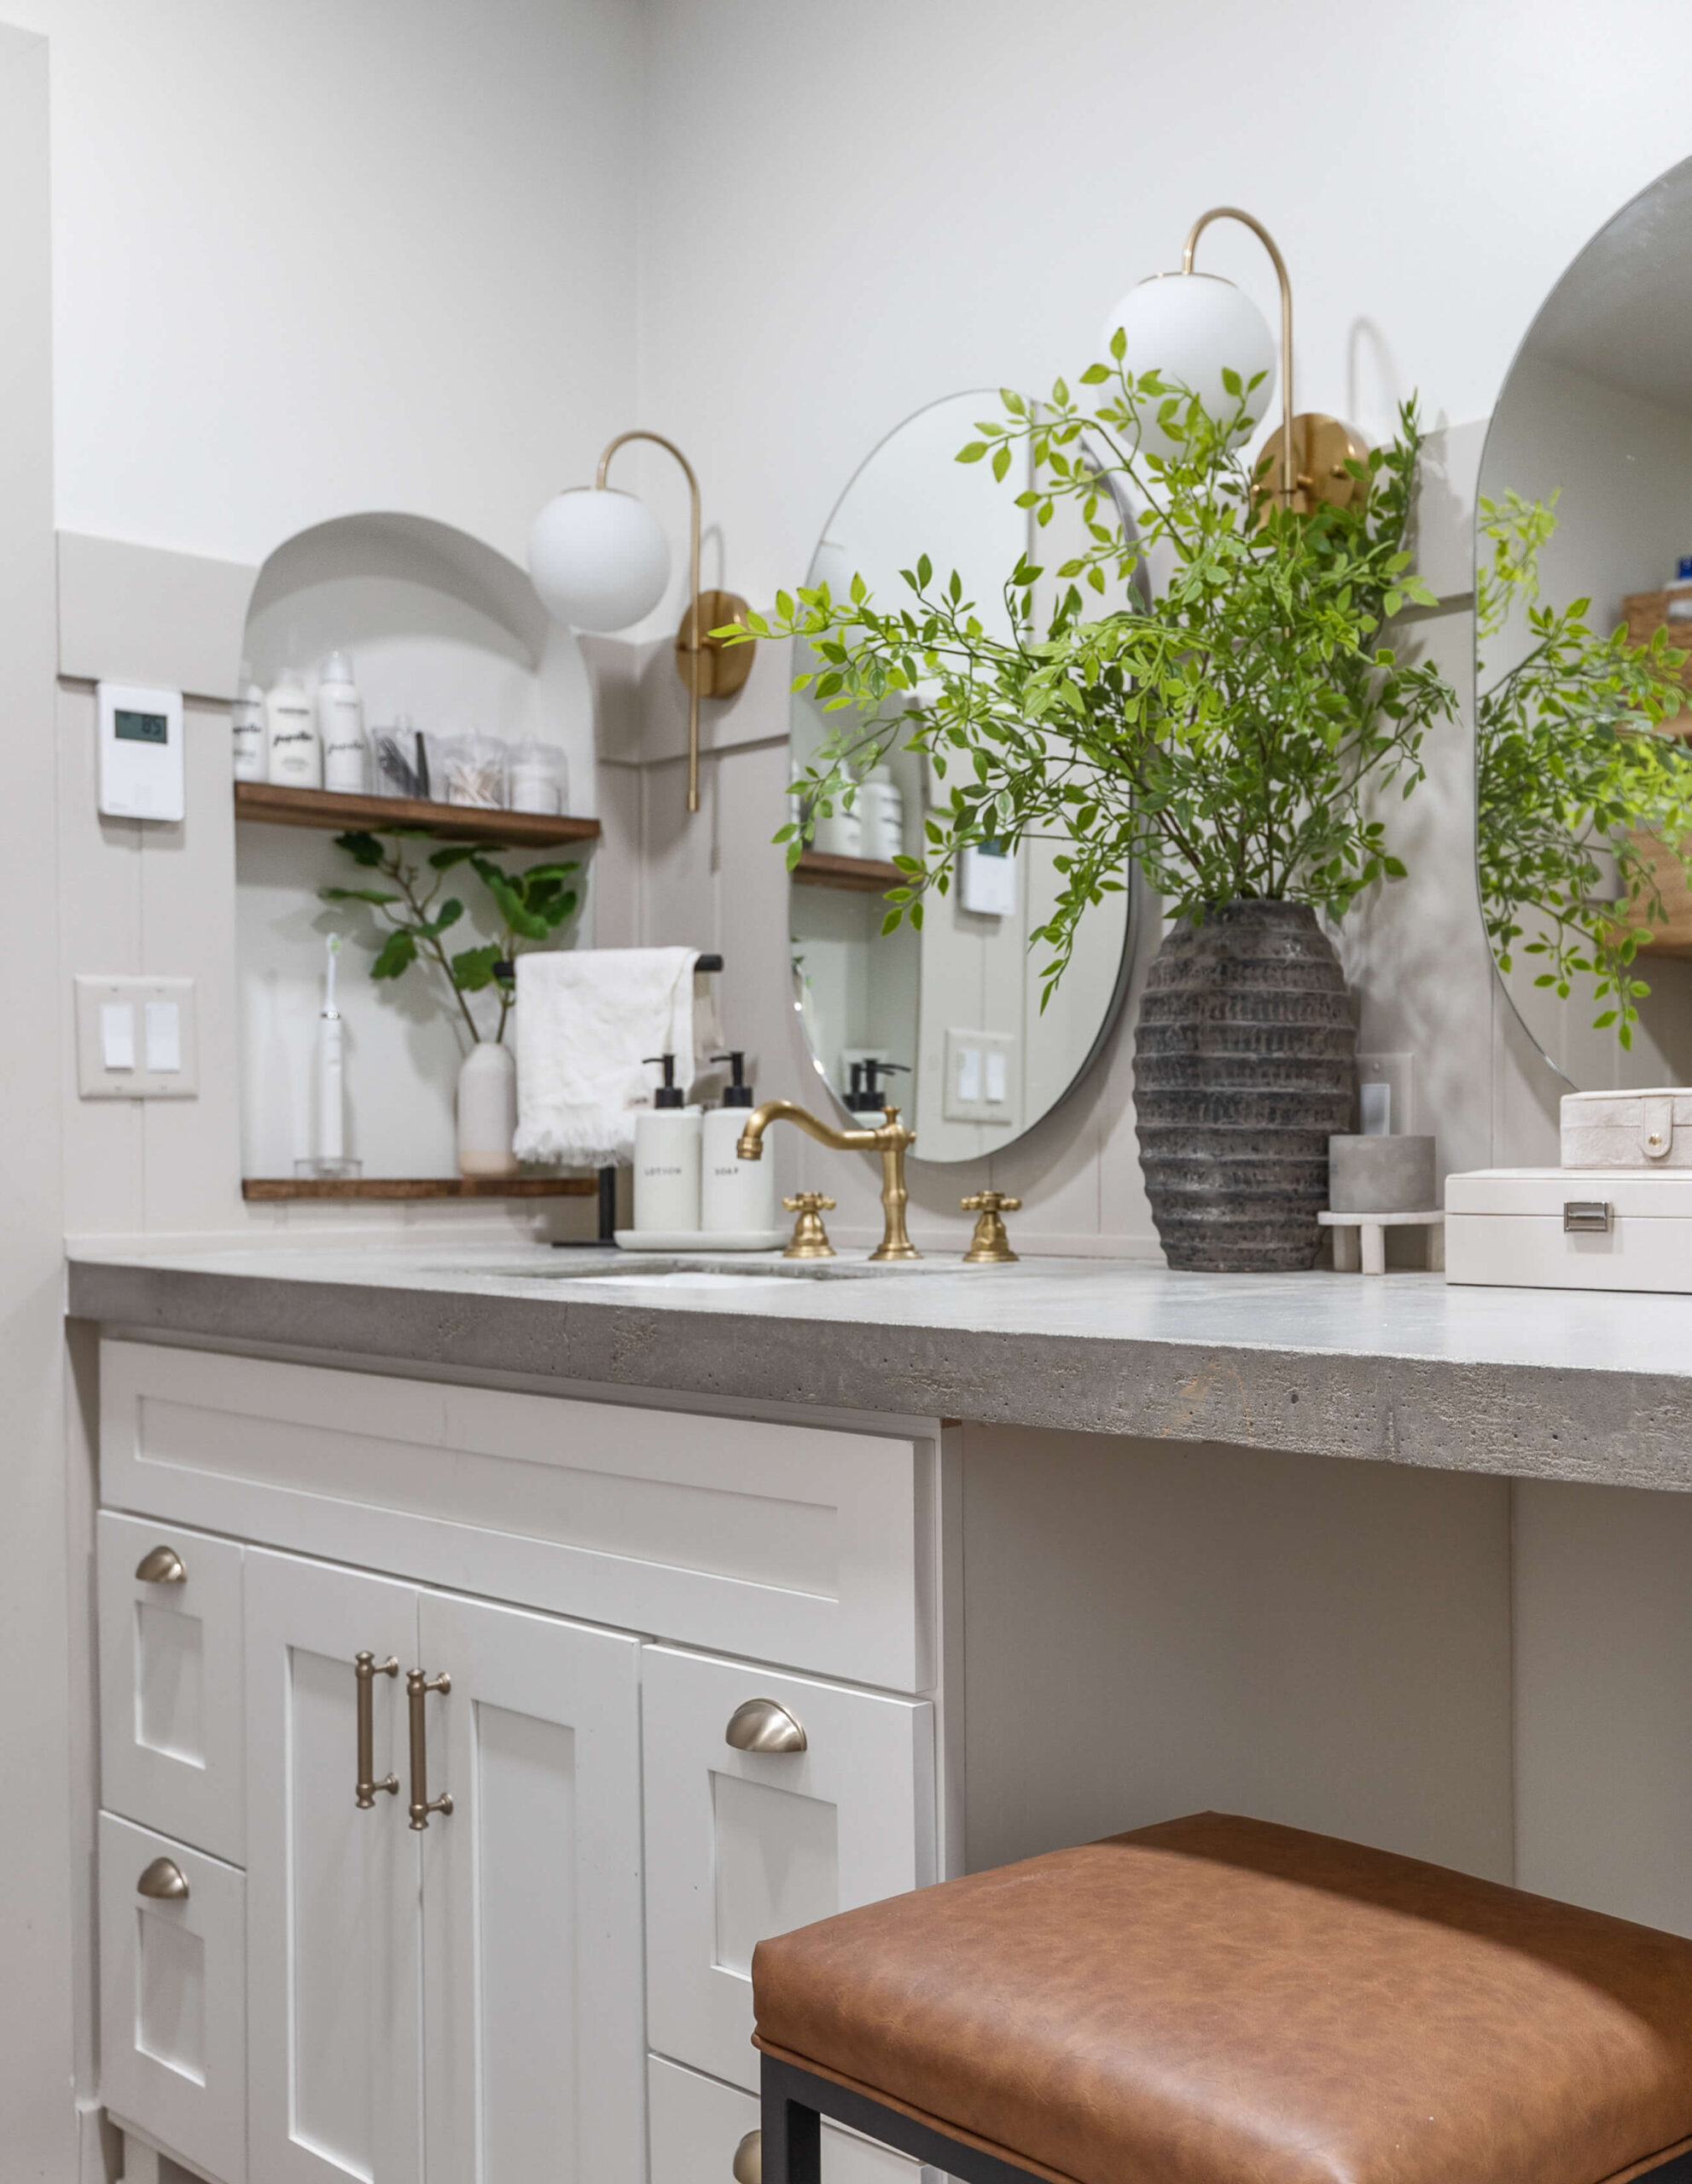
Table of Contents
- Tools for Building a Custom Bathroom Vanity
- Materials You’ll Need for Building a Vanity
- Why I Chose to Build a Custom Bathroom Vanity
- Step 1: Build the Vanity Base and Fix Depth Differences
- Step 2: Level and Secure the Cabinets in Place
- Step 2: Install a DIY Concrete Bathroom Countertop
- Step 4: Add Panels, Filler Pieces, and Trim for a Built-In Look
- Step 5: Paint Your Vanity Like a Pro
- Step 6: Update Drawer Fronts for a Seamless Finish
- The Final Reveal: My Custom Bathroom Vanity Makeover
- 📌Save this Project for Later
- Frequently Asked Questions About Building a Vanity
Tools for Building a Custom Bathroom Vanity
Materials You’ll Need for Building a Vanity
- Vanity
- Three drawer kitchen cabinet box
- 2×4’s
- Shims
- PVC shoe molding
- 1/4 inch plywood
- 1/2 inch plywood
- Caulk
- Long cabinet pulls
- Cup drawer pulls
Why I Chose to Build a Custom Bathroom Vanity
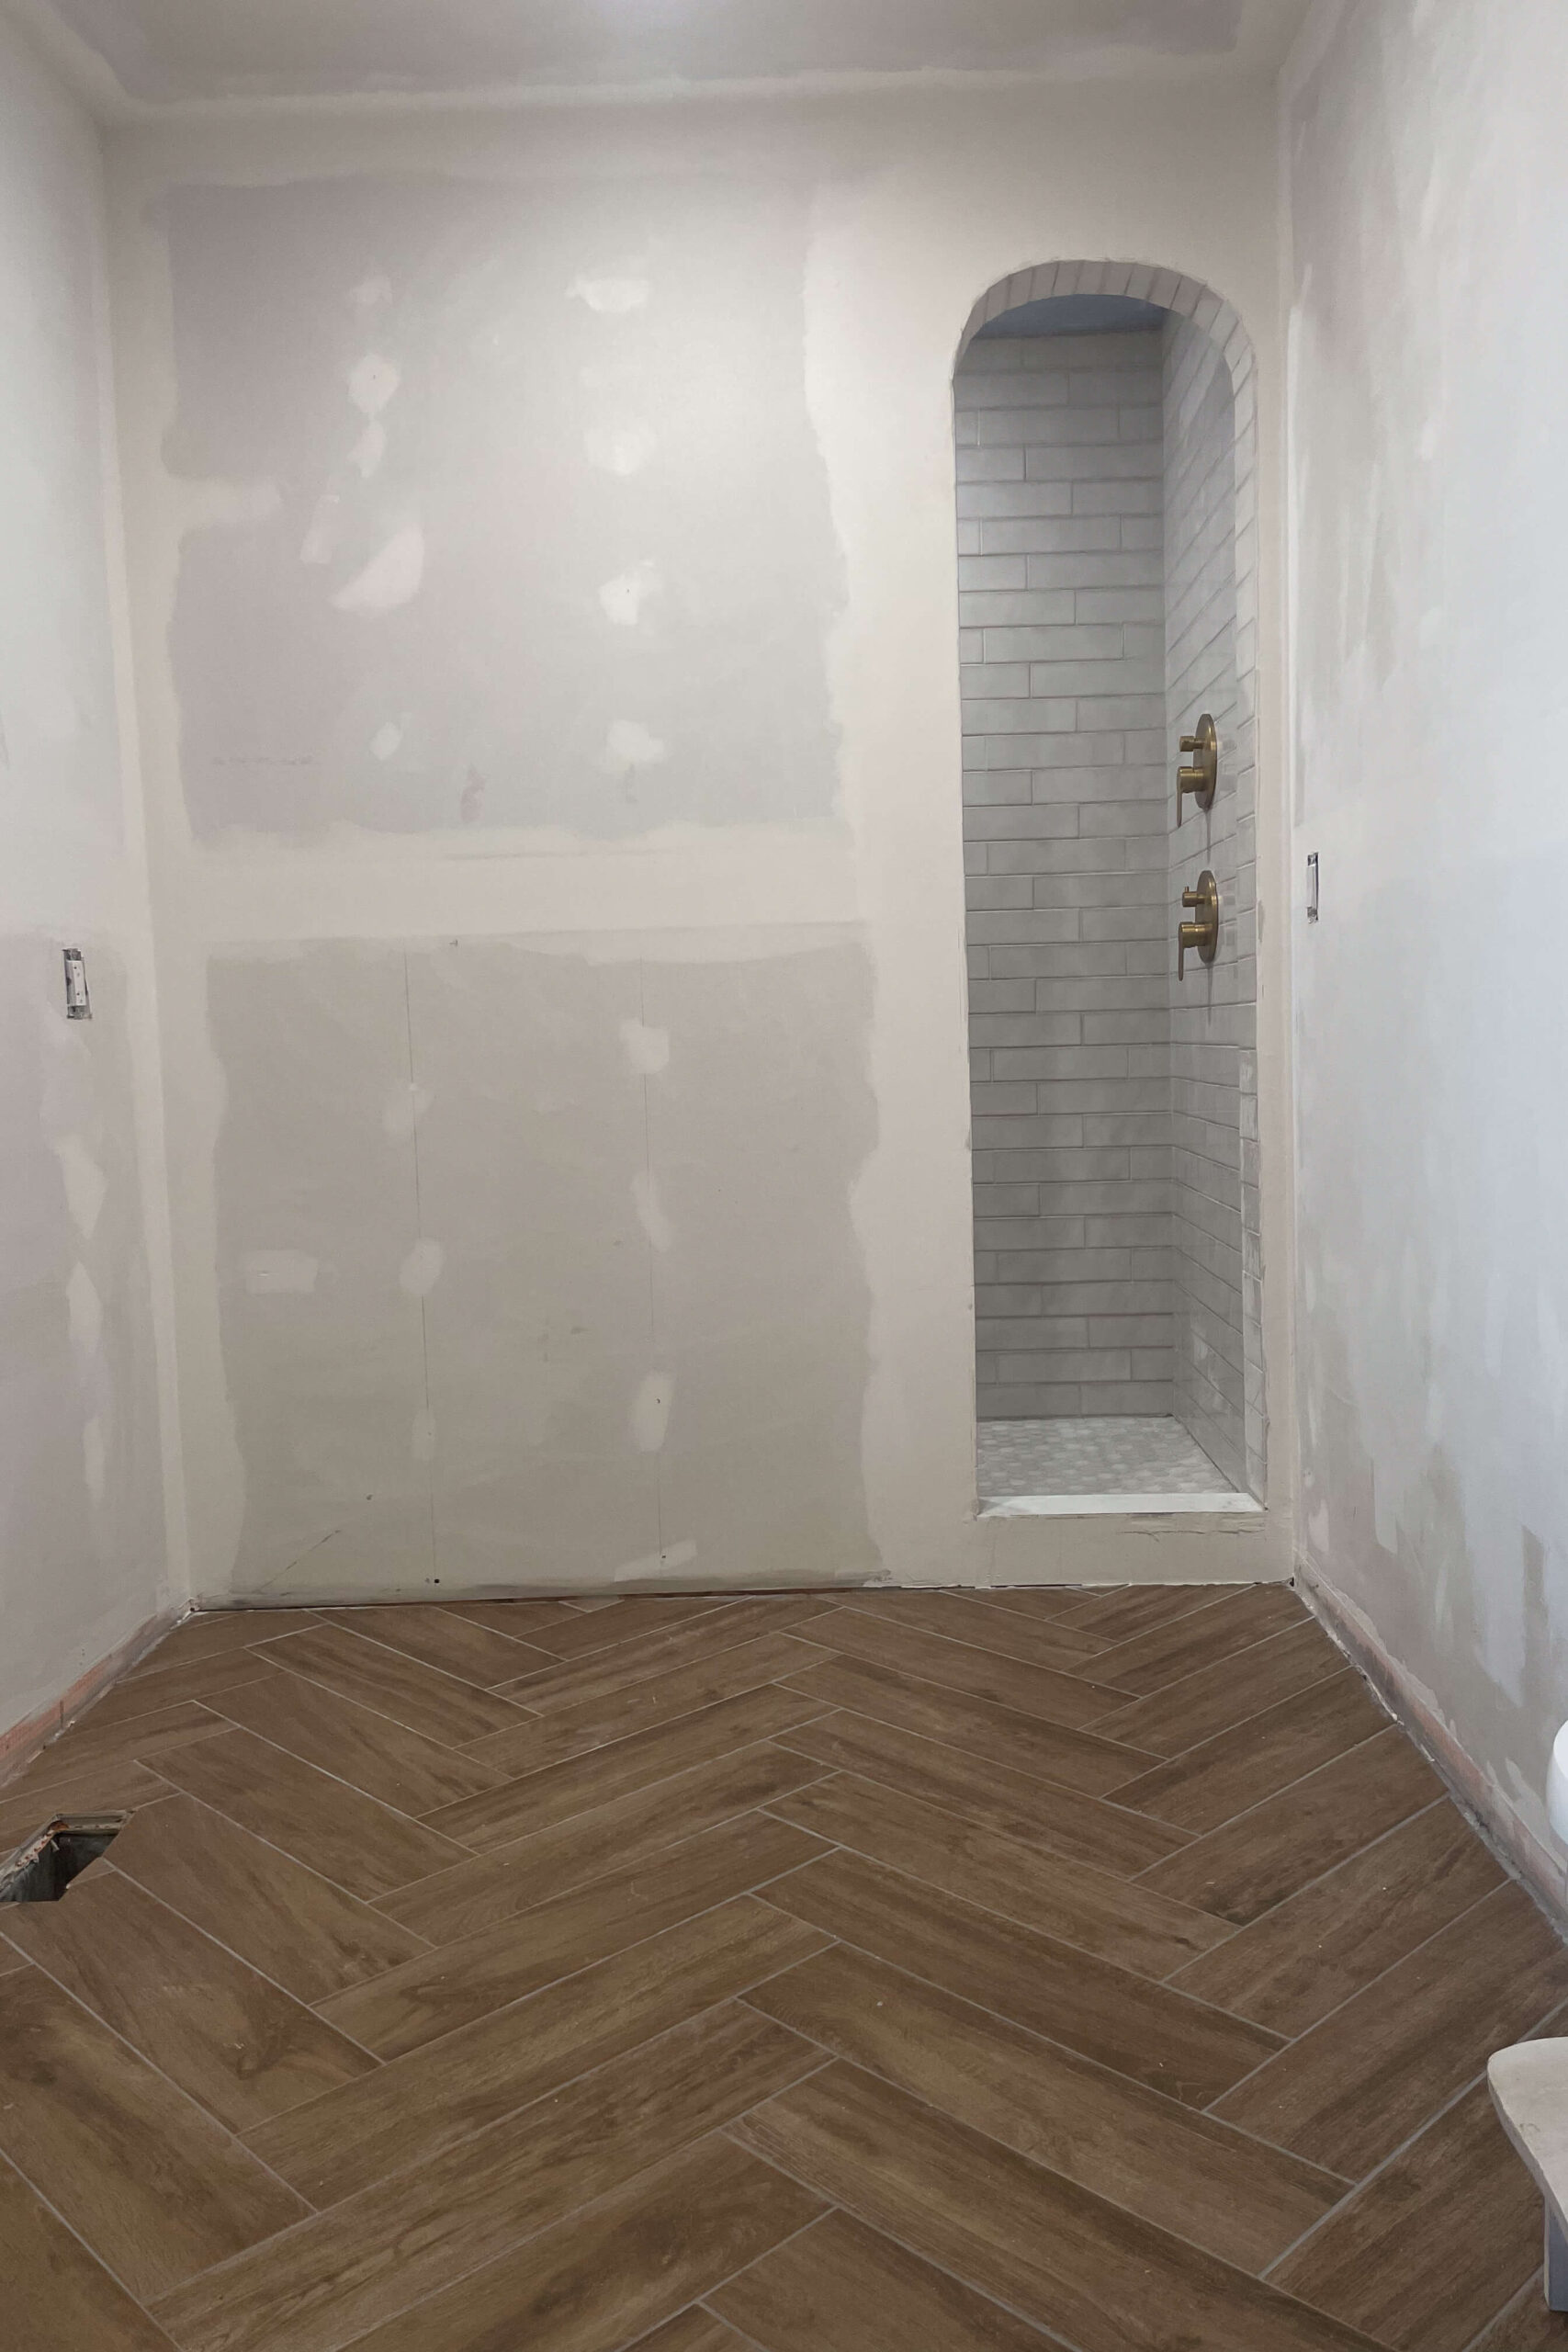
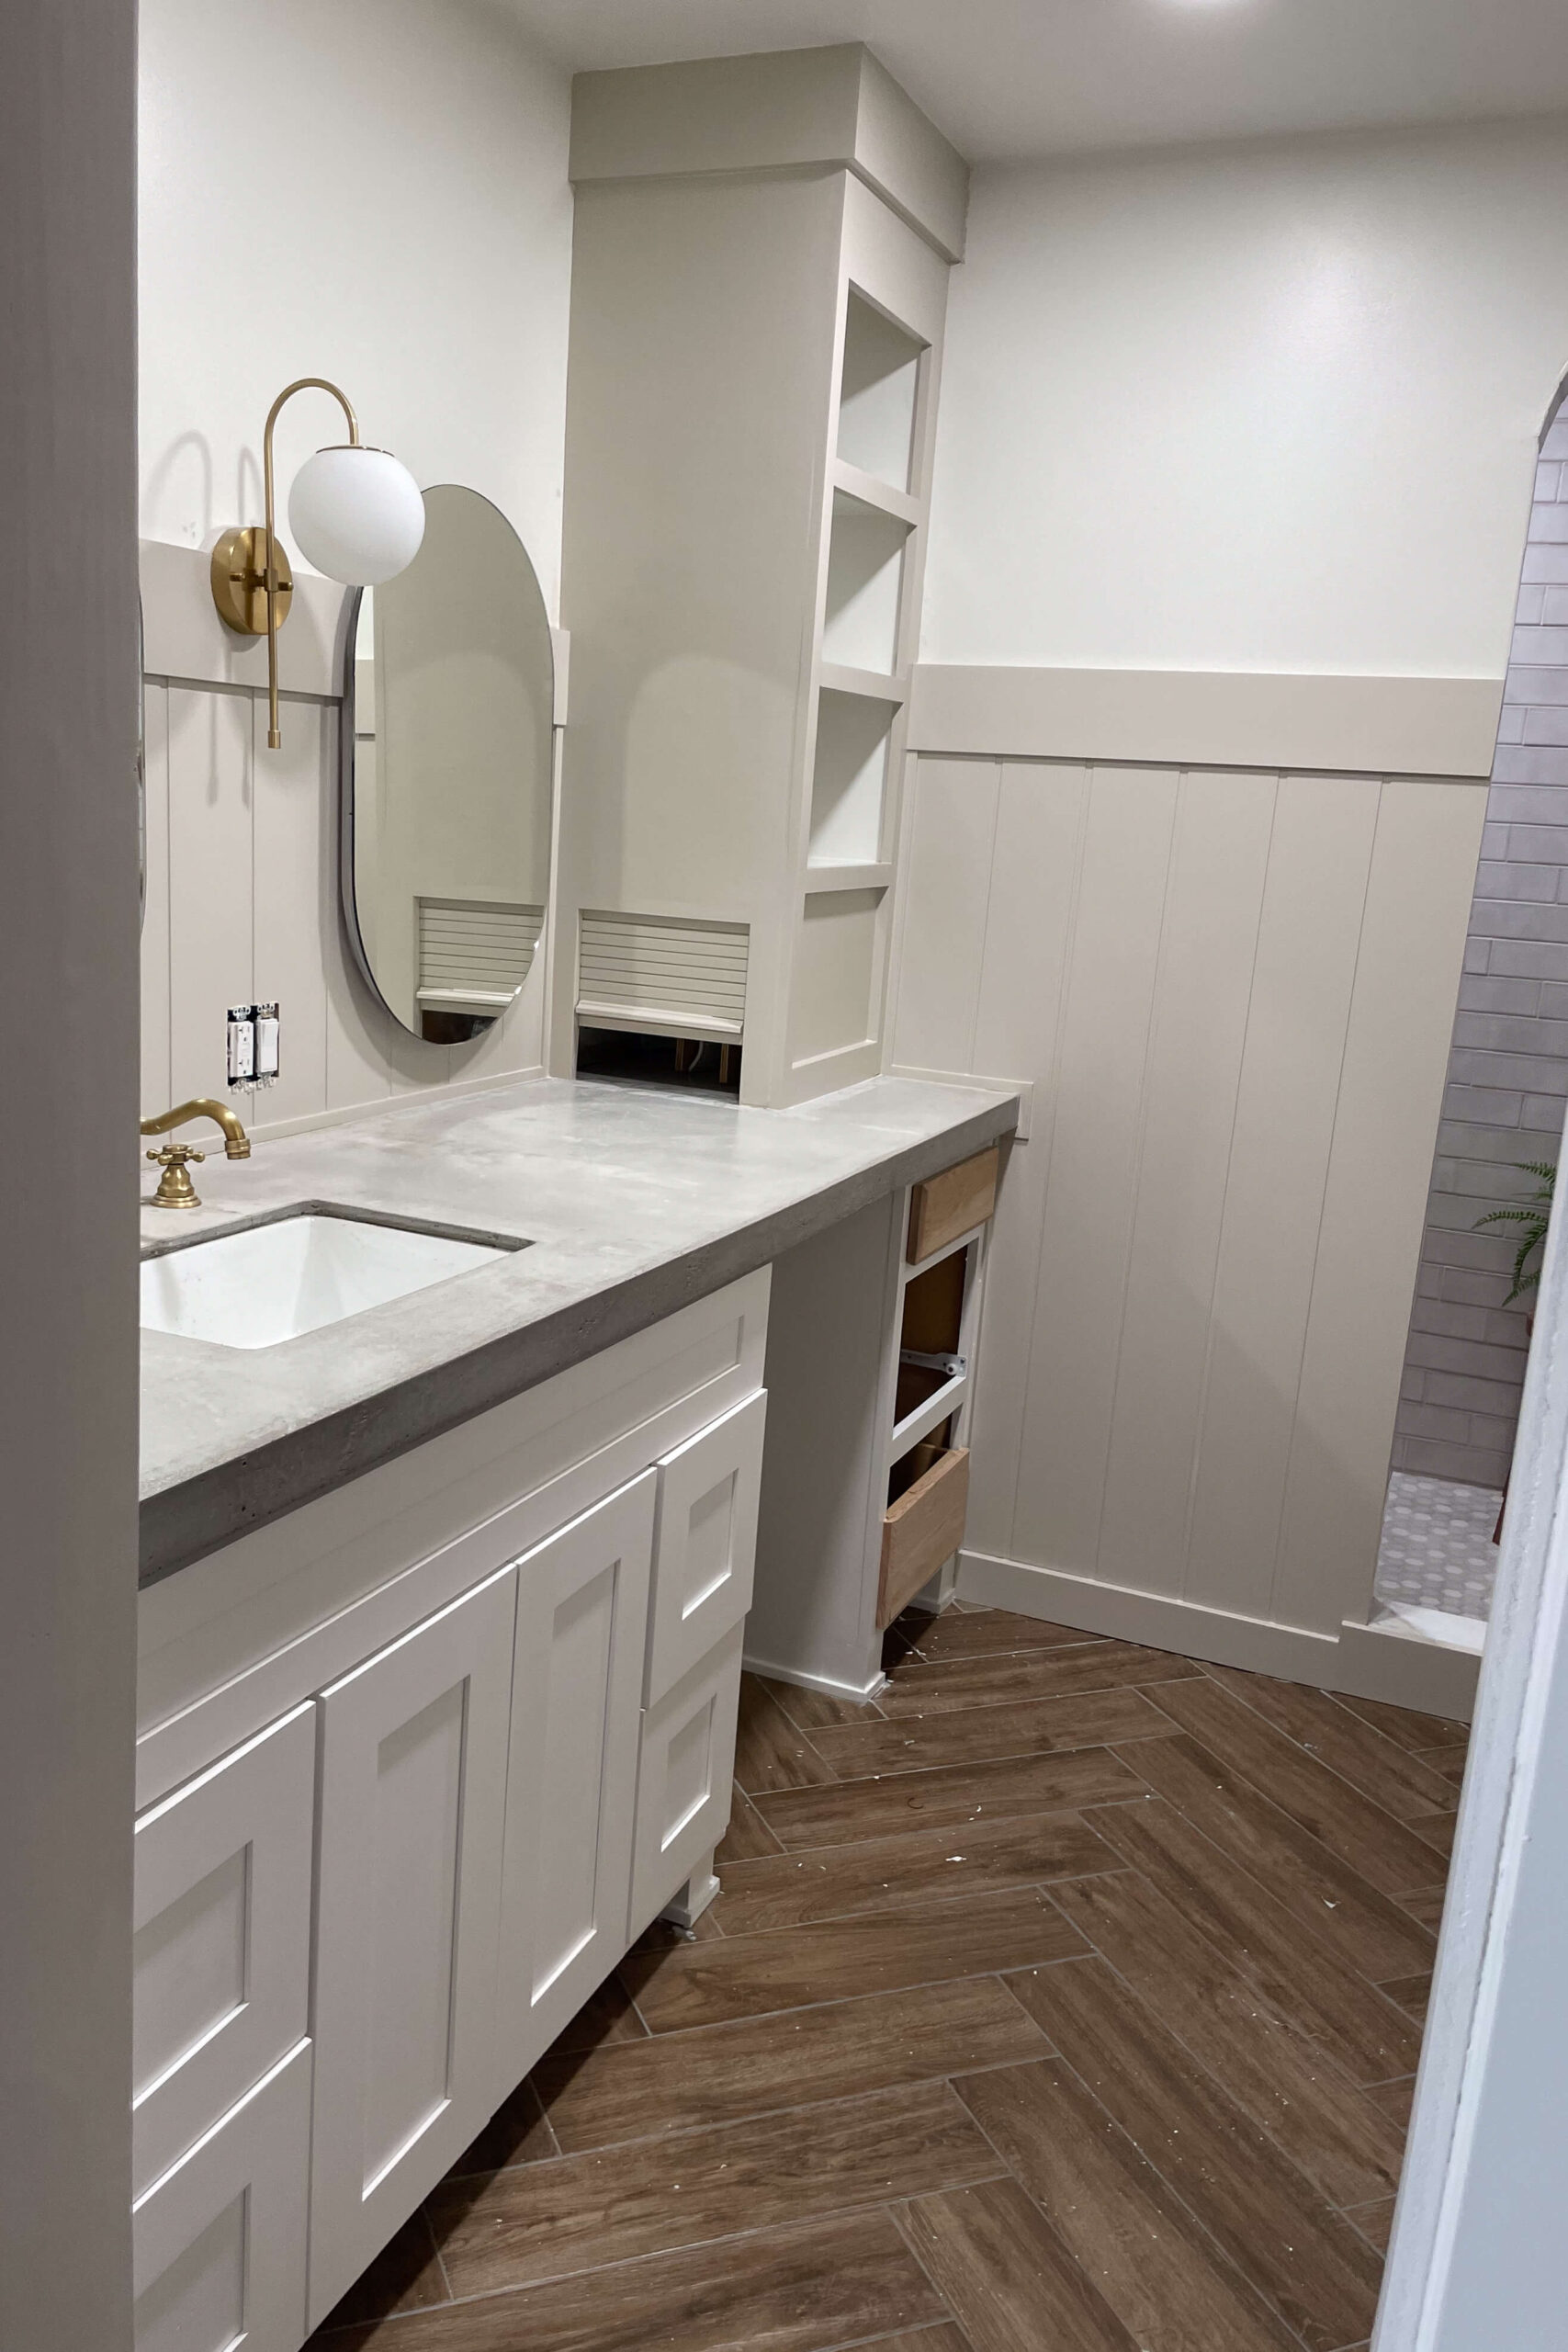
After gutting our bathroom, installing a walk-in shower, and laying heated tile floors, the next step was creating the custom bathroom vanity. I wanted a single sink with a sit-down area for makeup and hair—something I couldn’t find off the shelf.
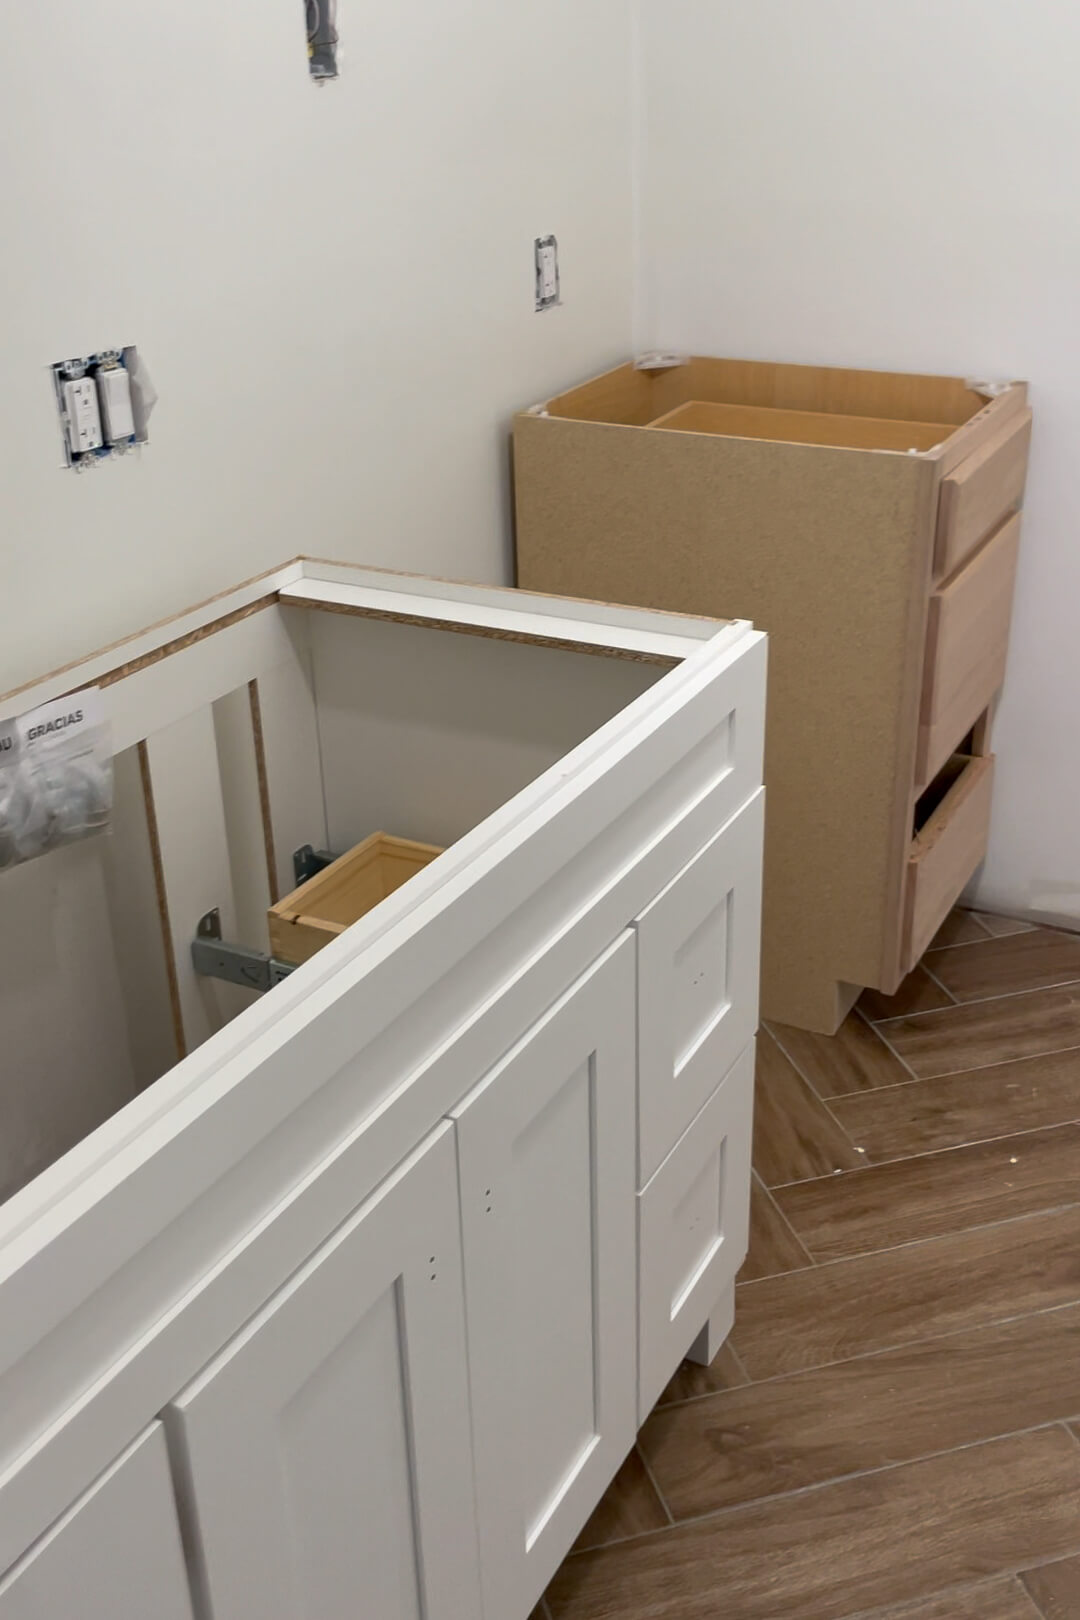
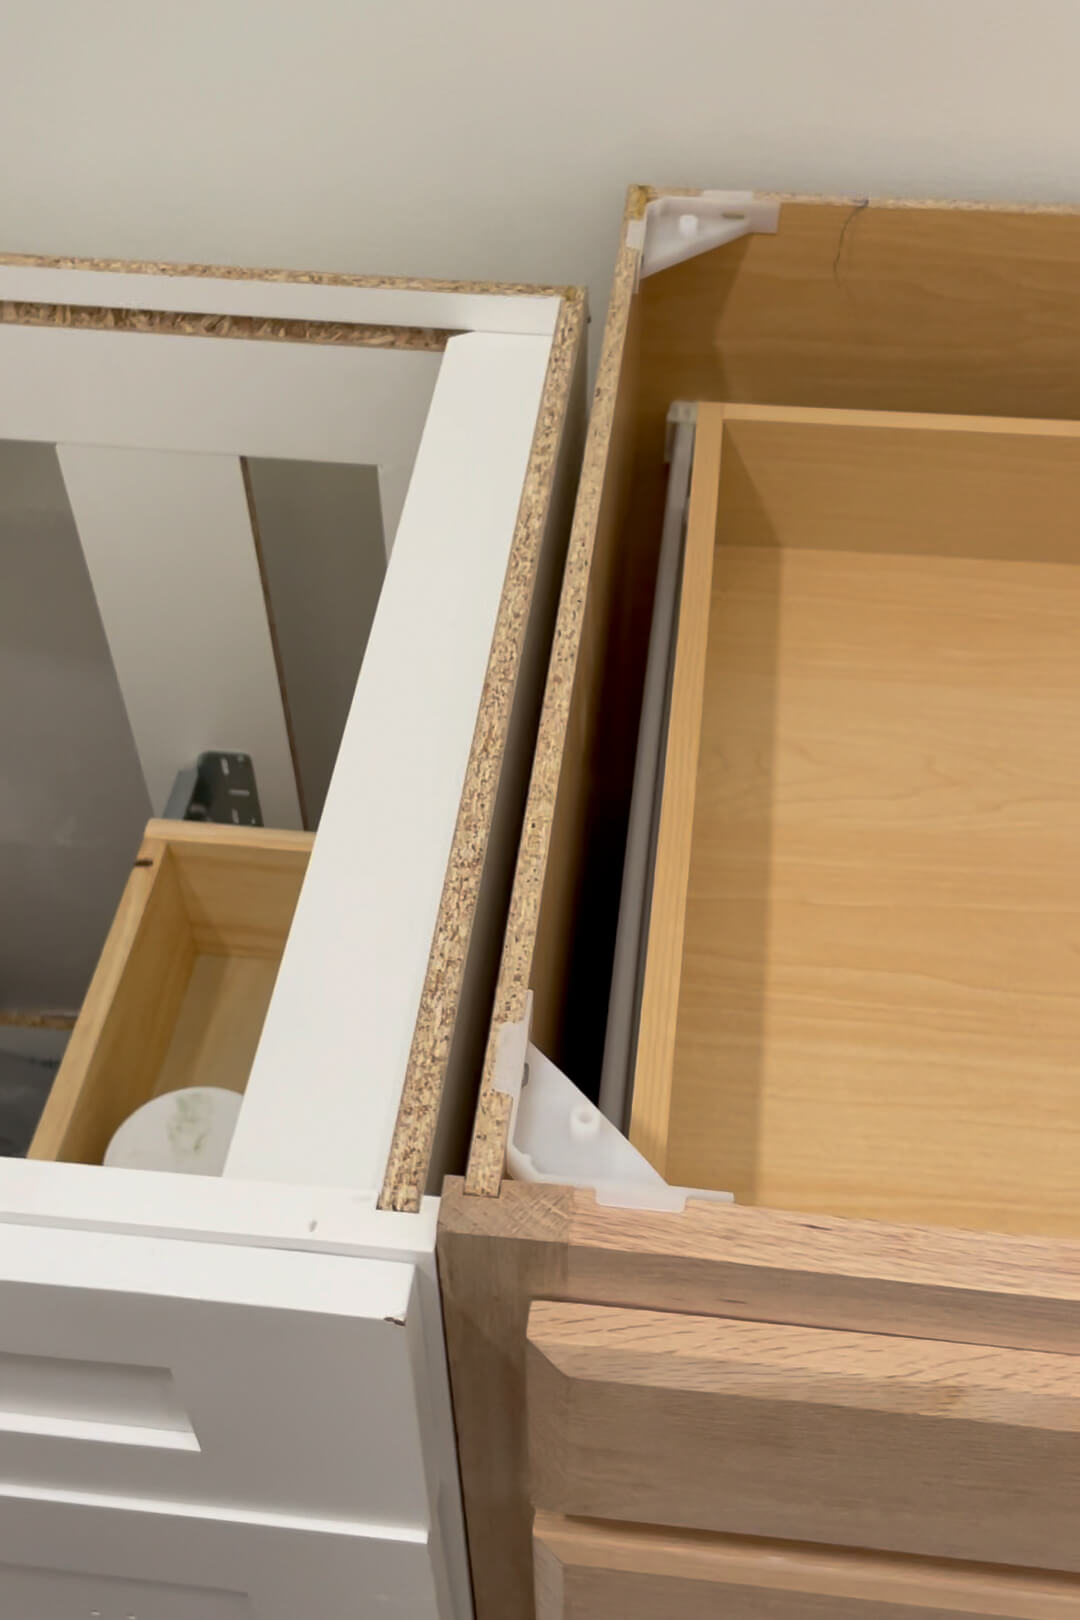
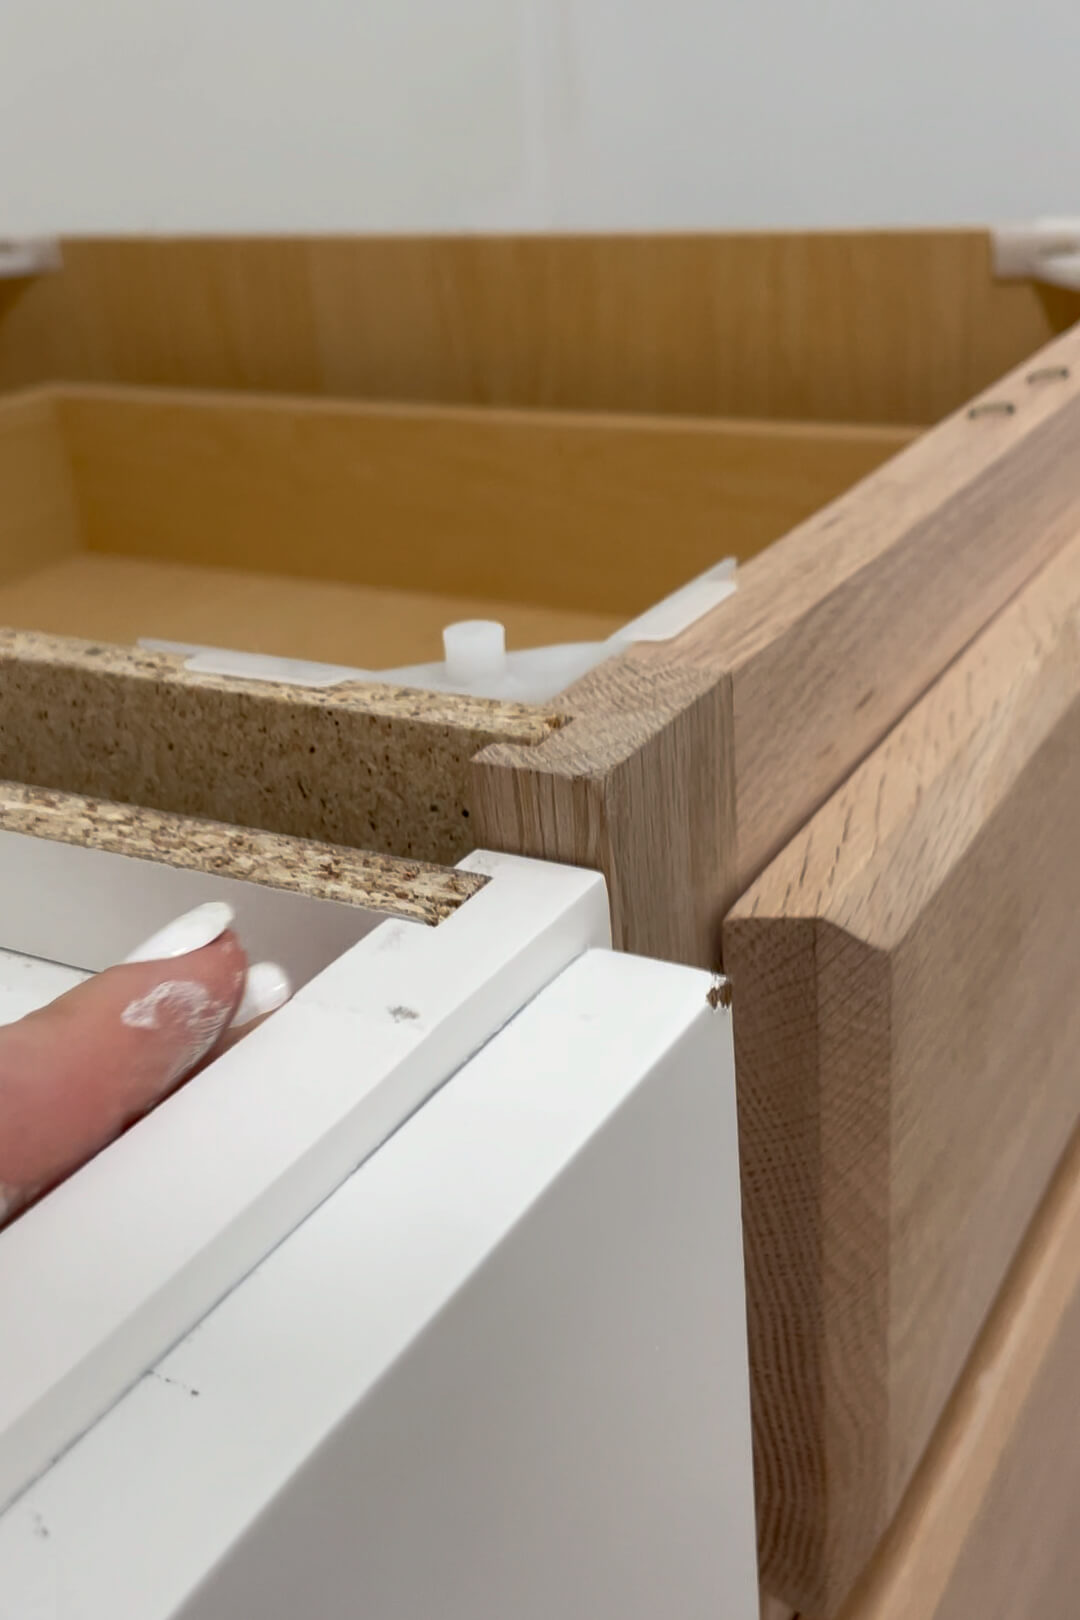
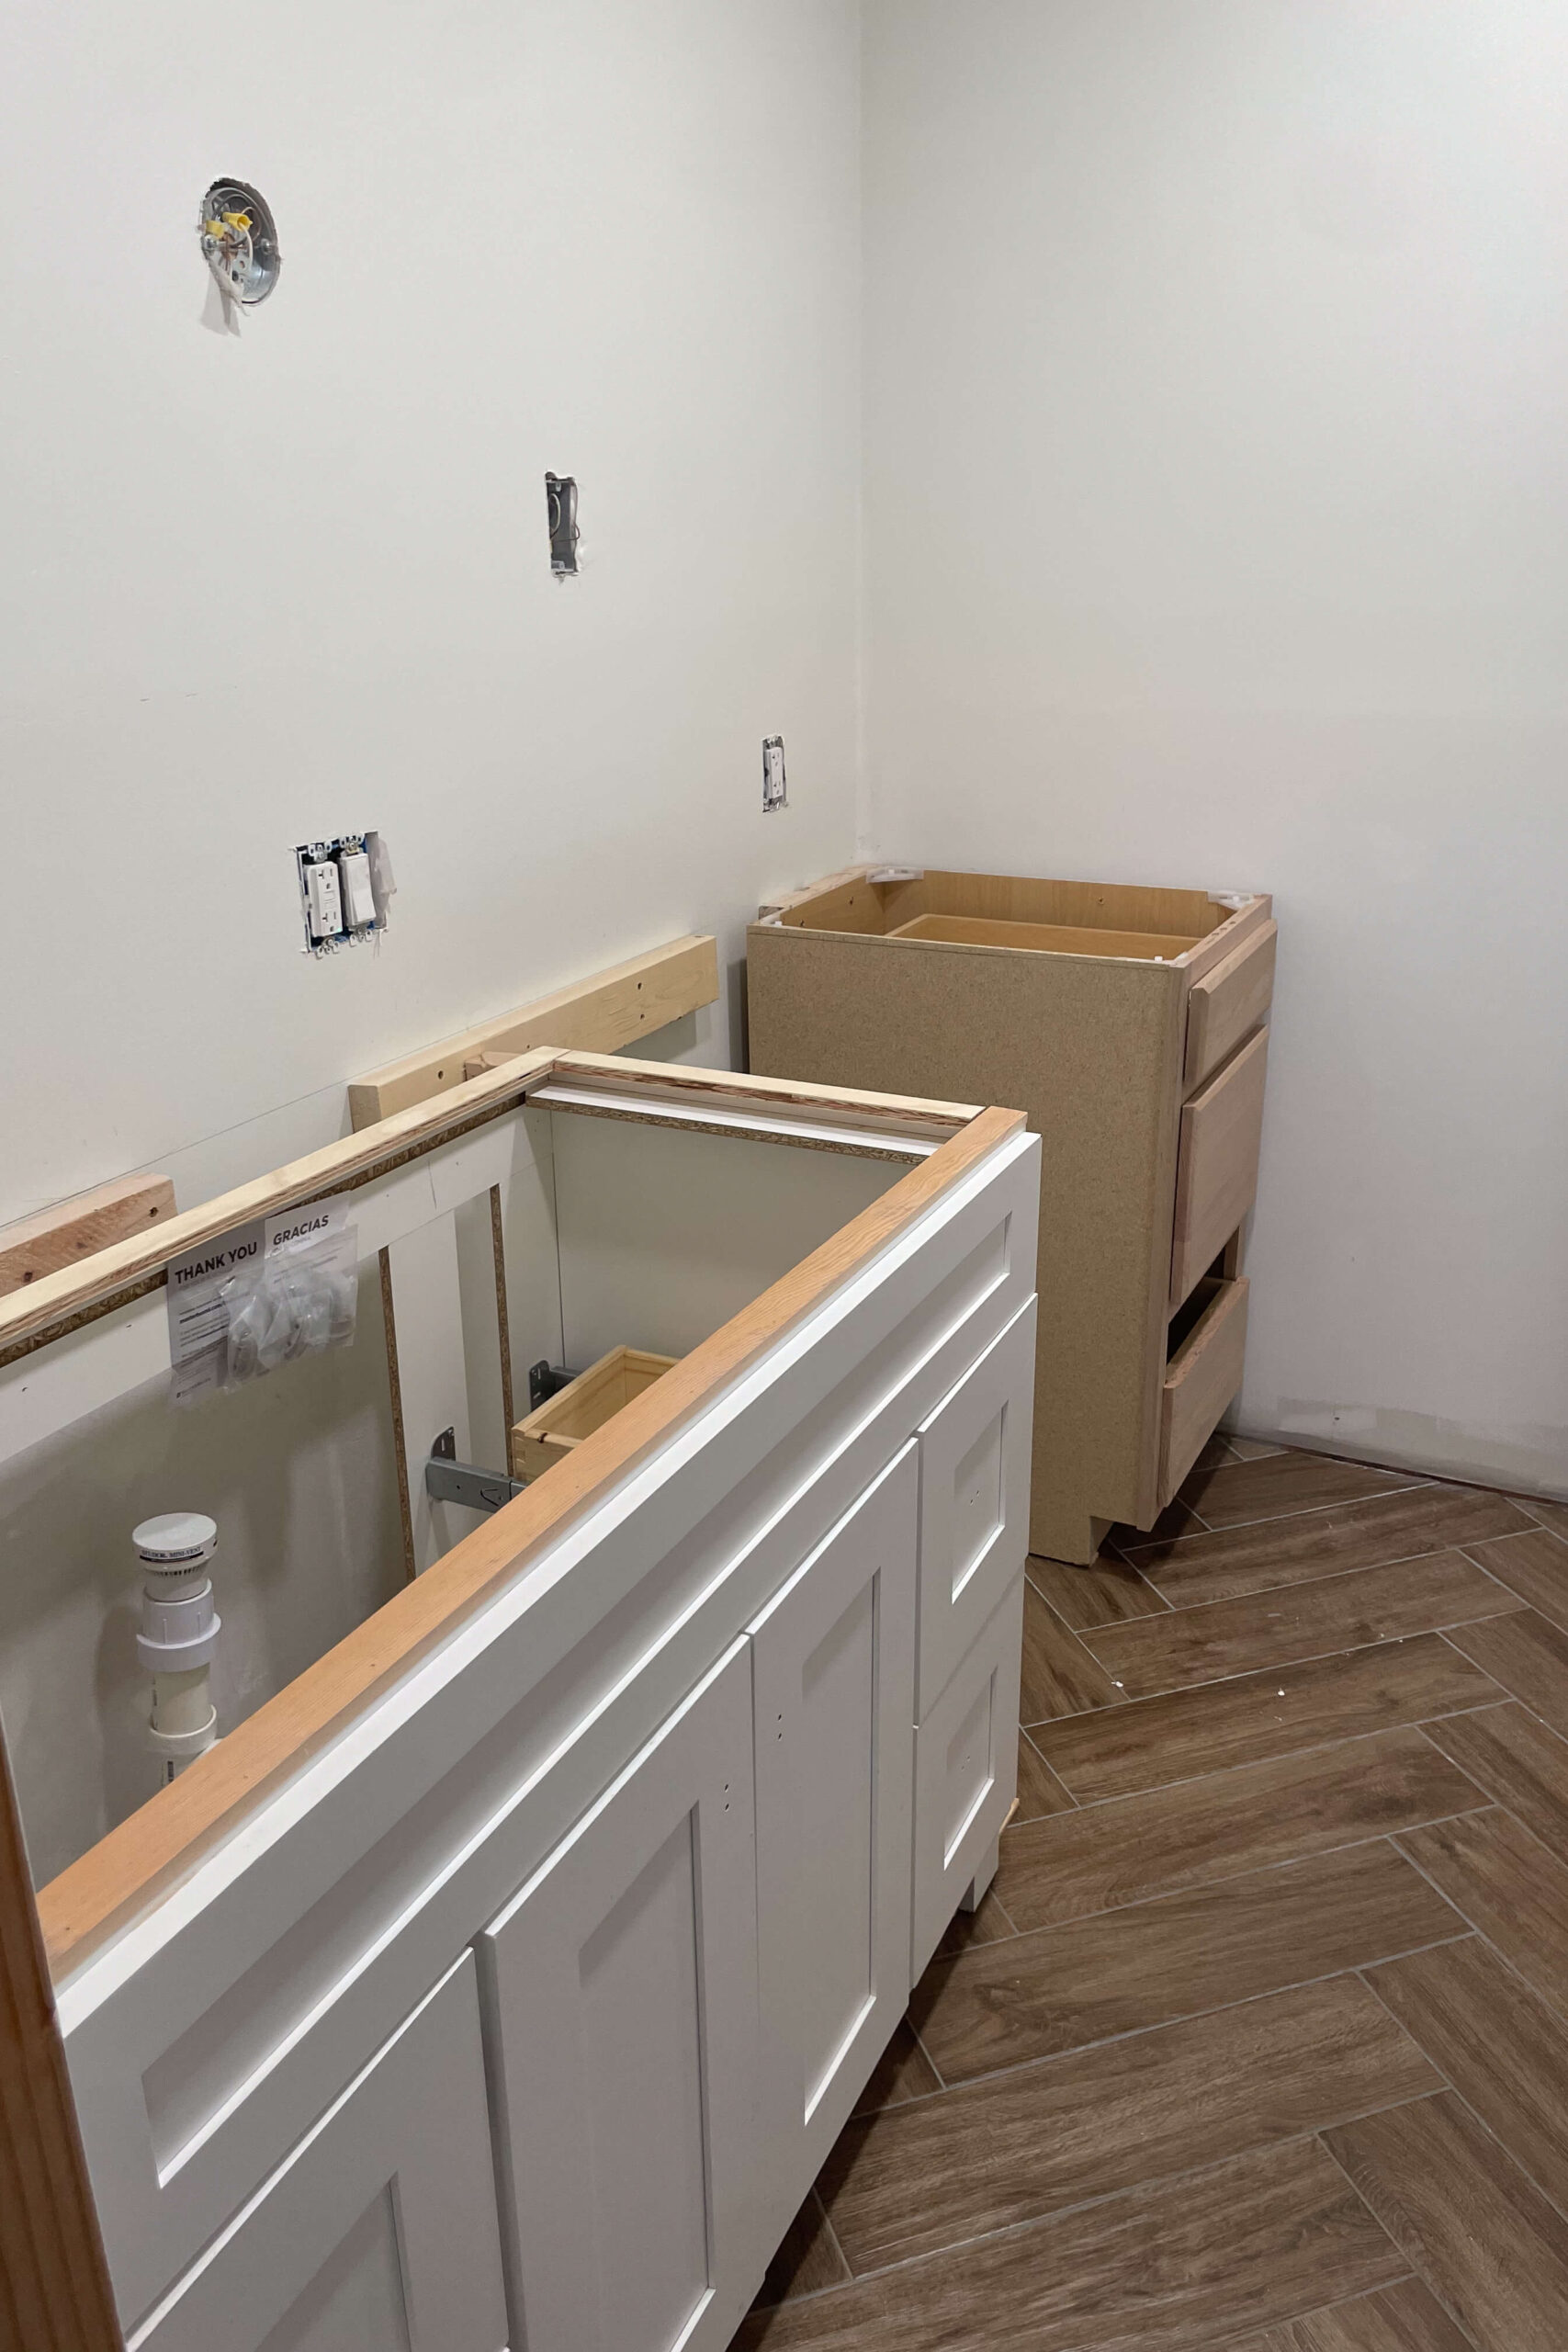
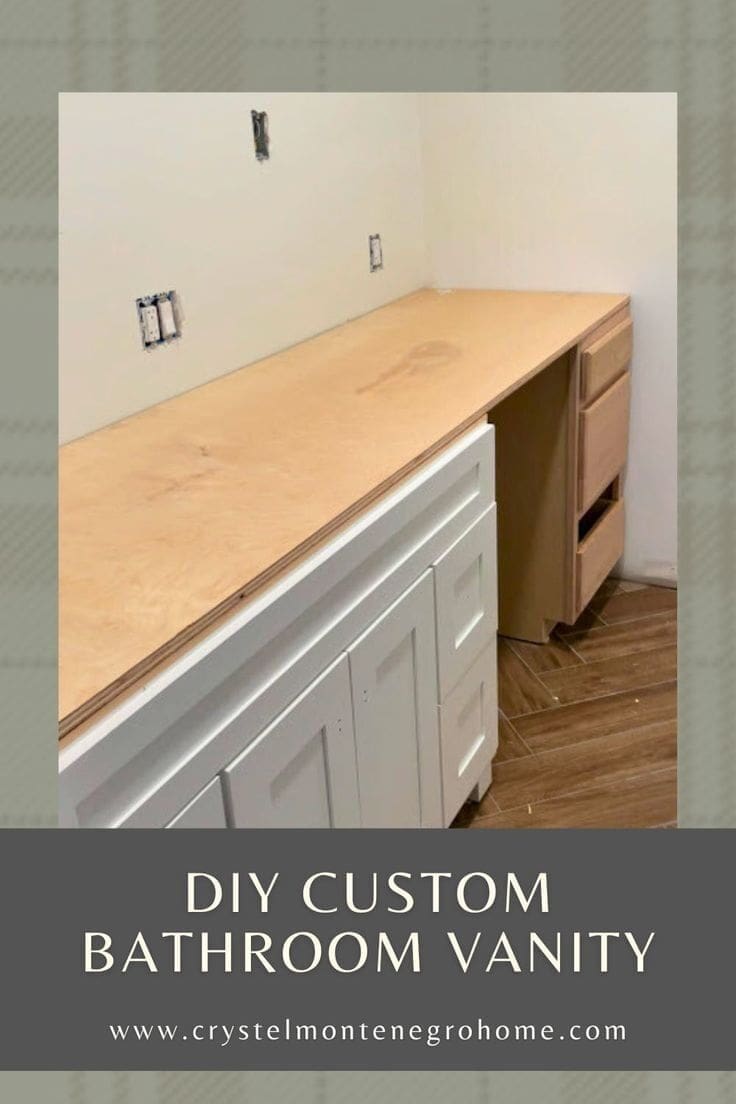
To create my custom bathroom vanity, I used a stock bathroom vanity and paired it with a three-drawer kitchen cabinet. The kitchen drawer unit added extra storage and functionality, but there was one issue: the two pieces weren’t the same size. The kitchen cabinet was a few inches deeper and slightly taller, but I had a plan to fix that.
Step 1: Build the Vanity Base and Fix Depth Differences
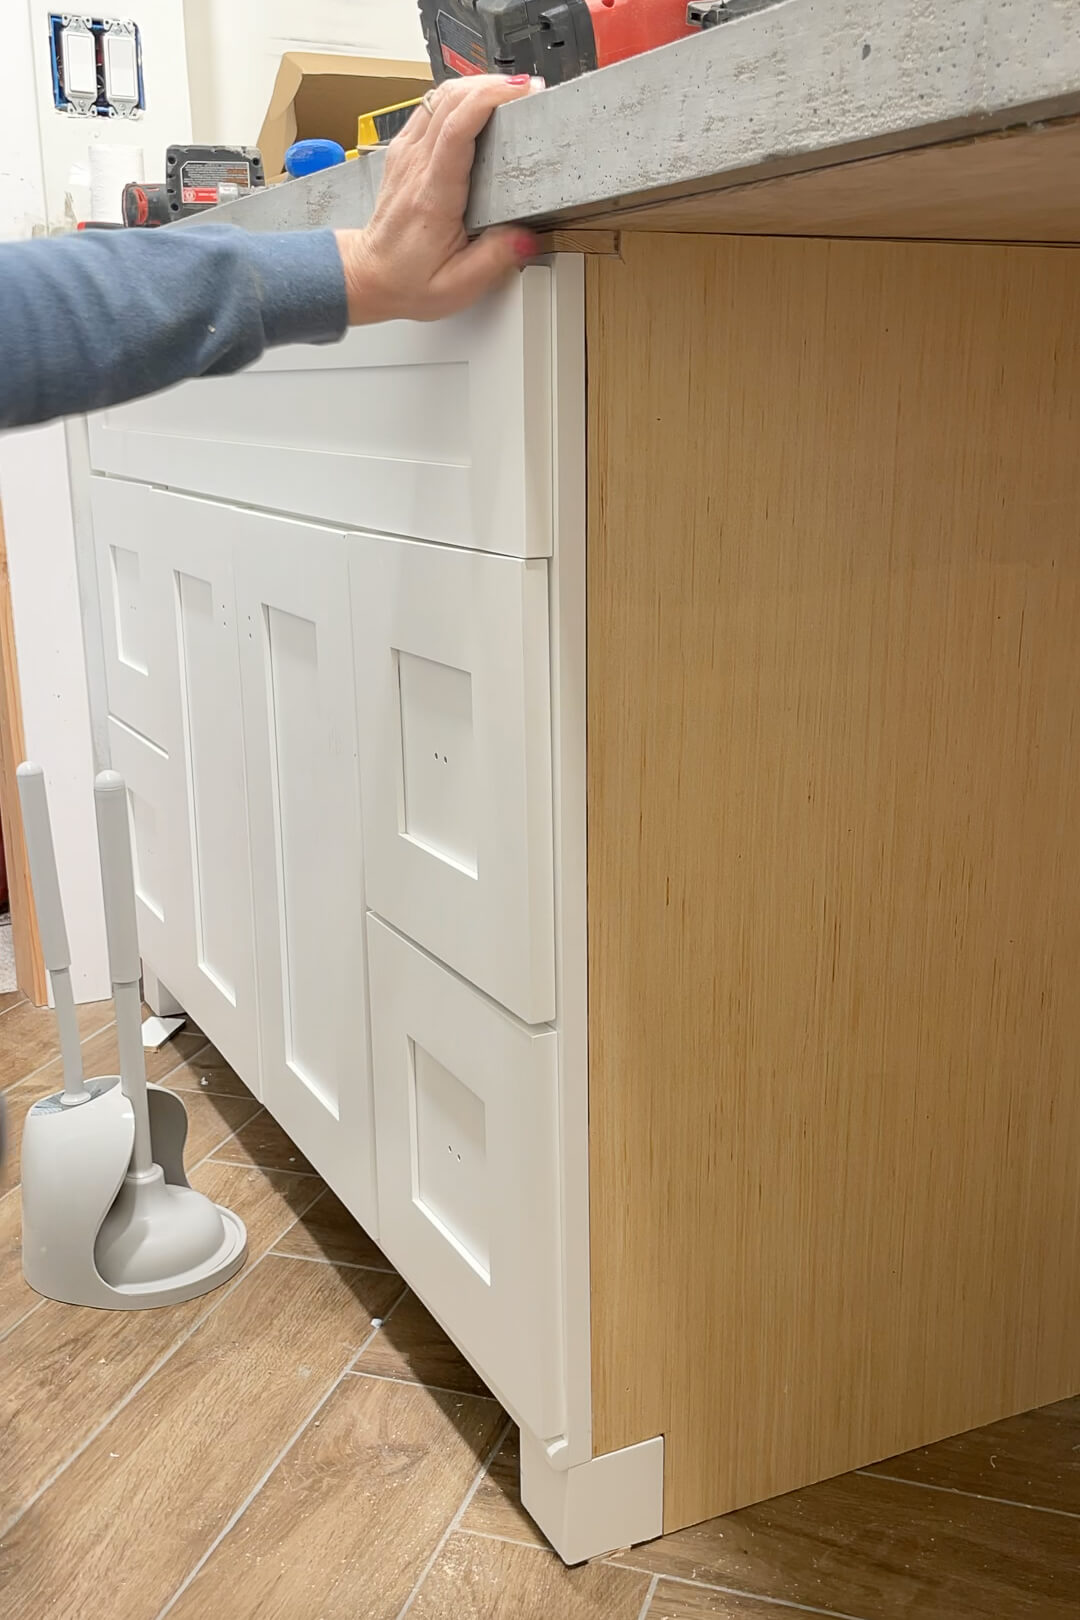
To make the two pieces look like one cohesive unit, I adjusted their dimensions without losing storage space. Instead of cutting down the deeper kitchen cabinet, I pulled the stock bathroom vanity forward to match its depth, leaving a gap behind the vanity.
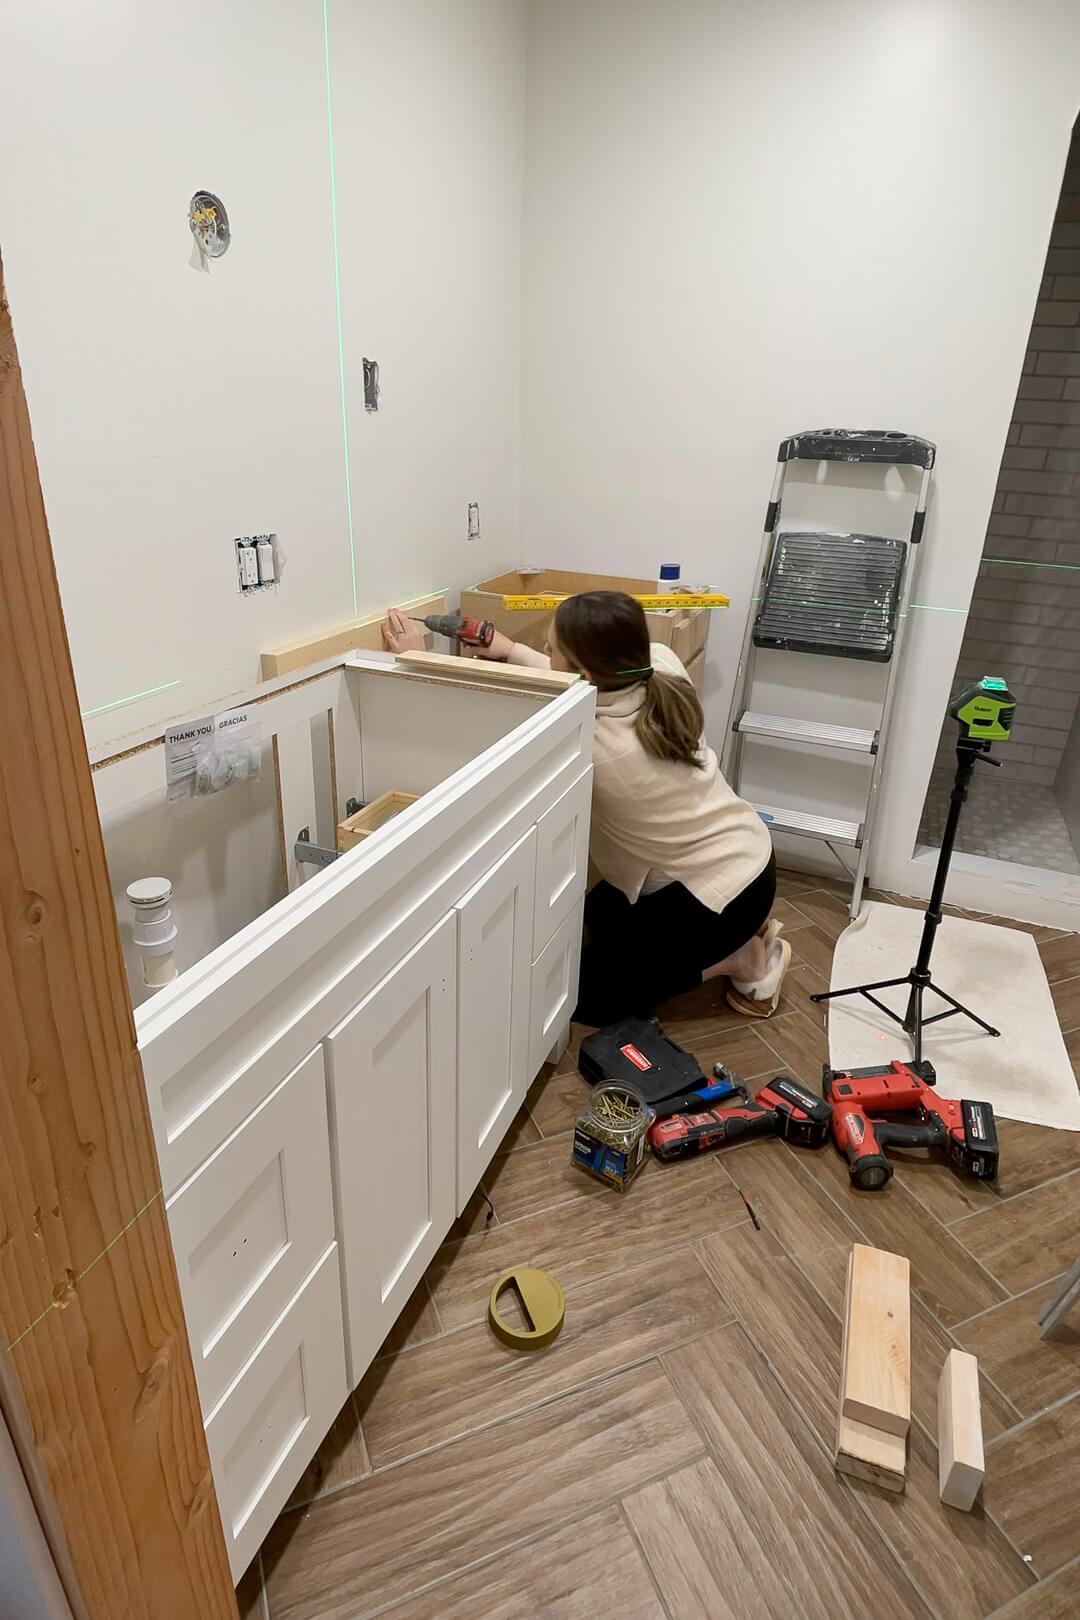
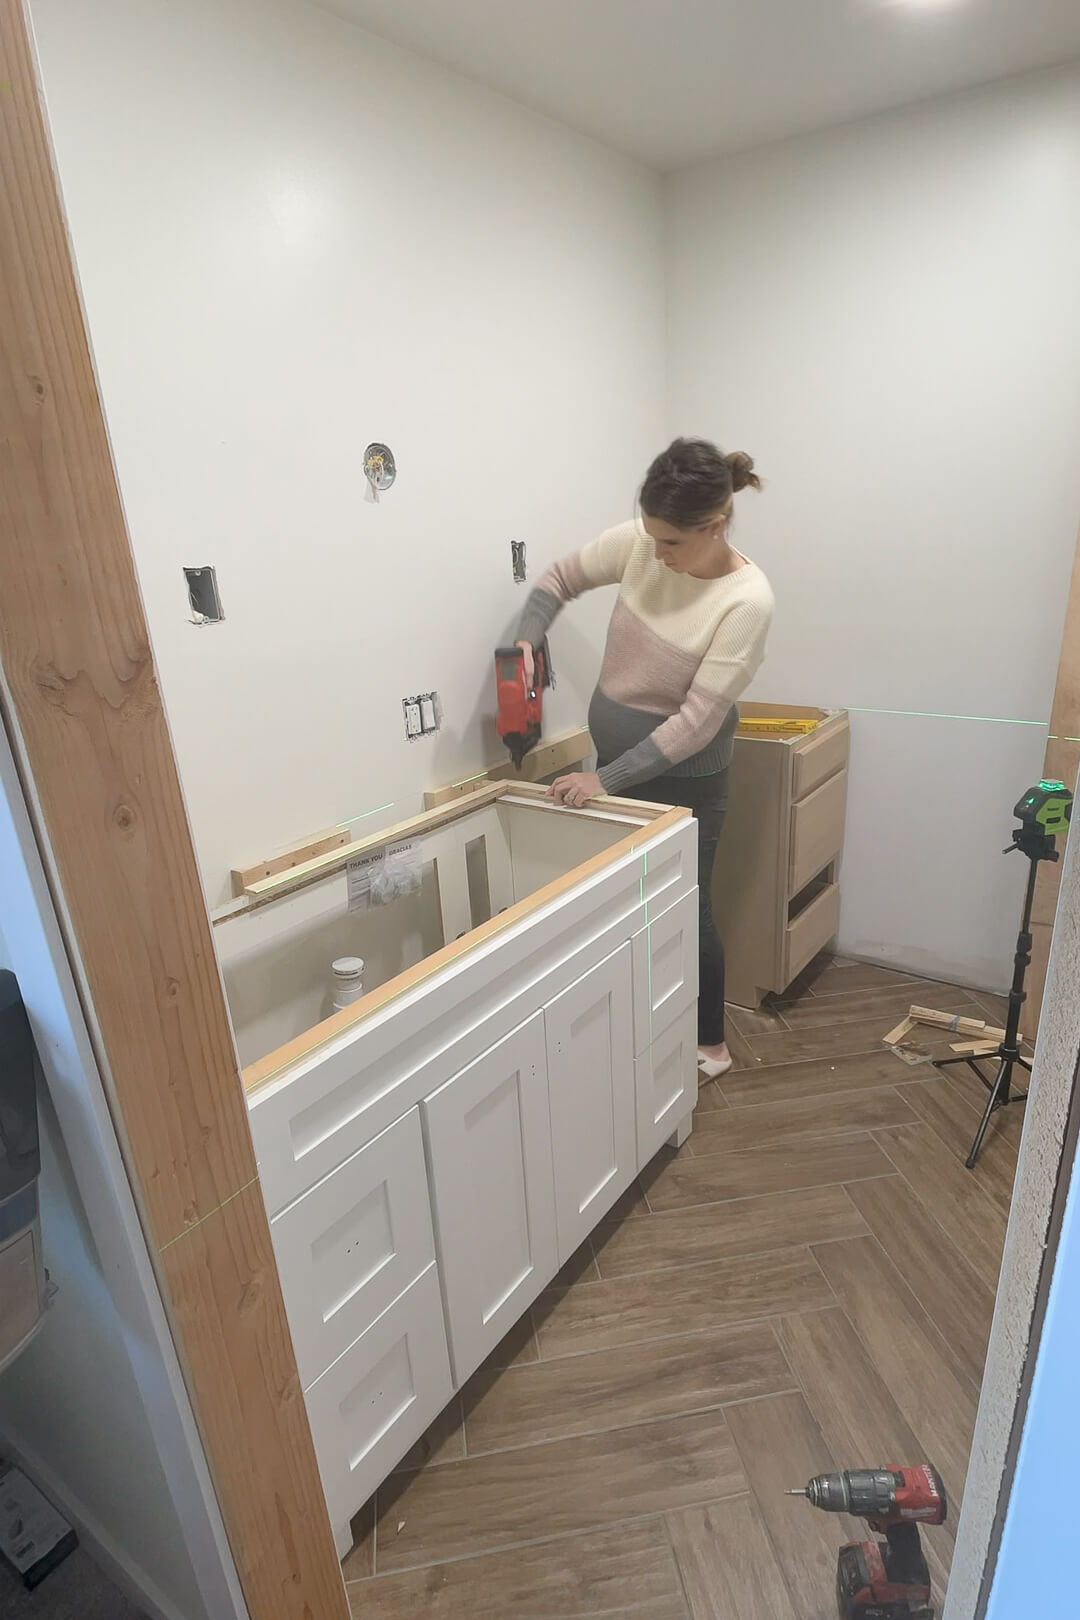
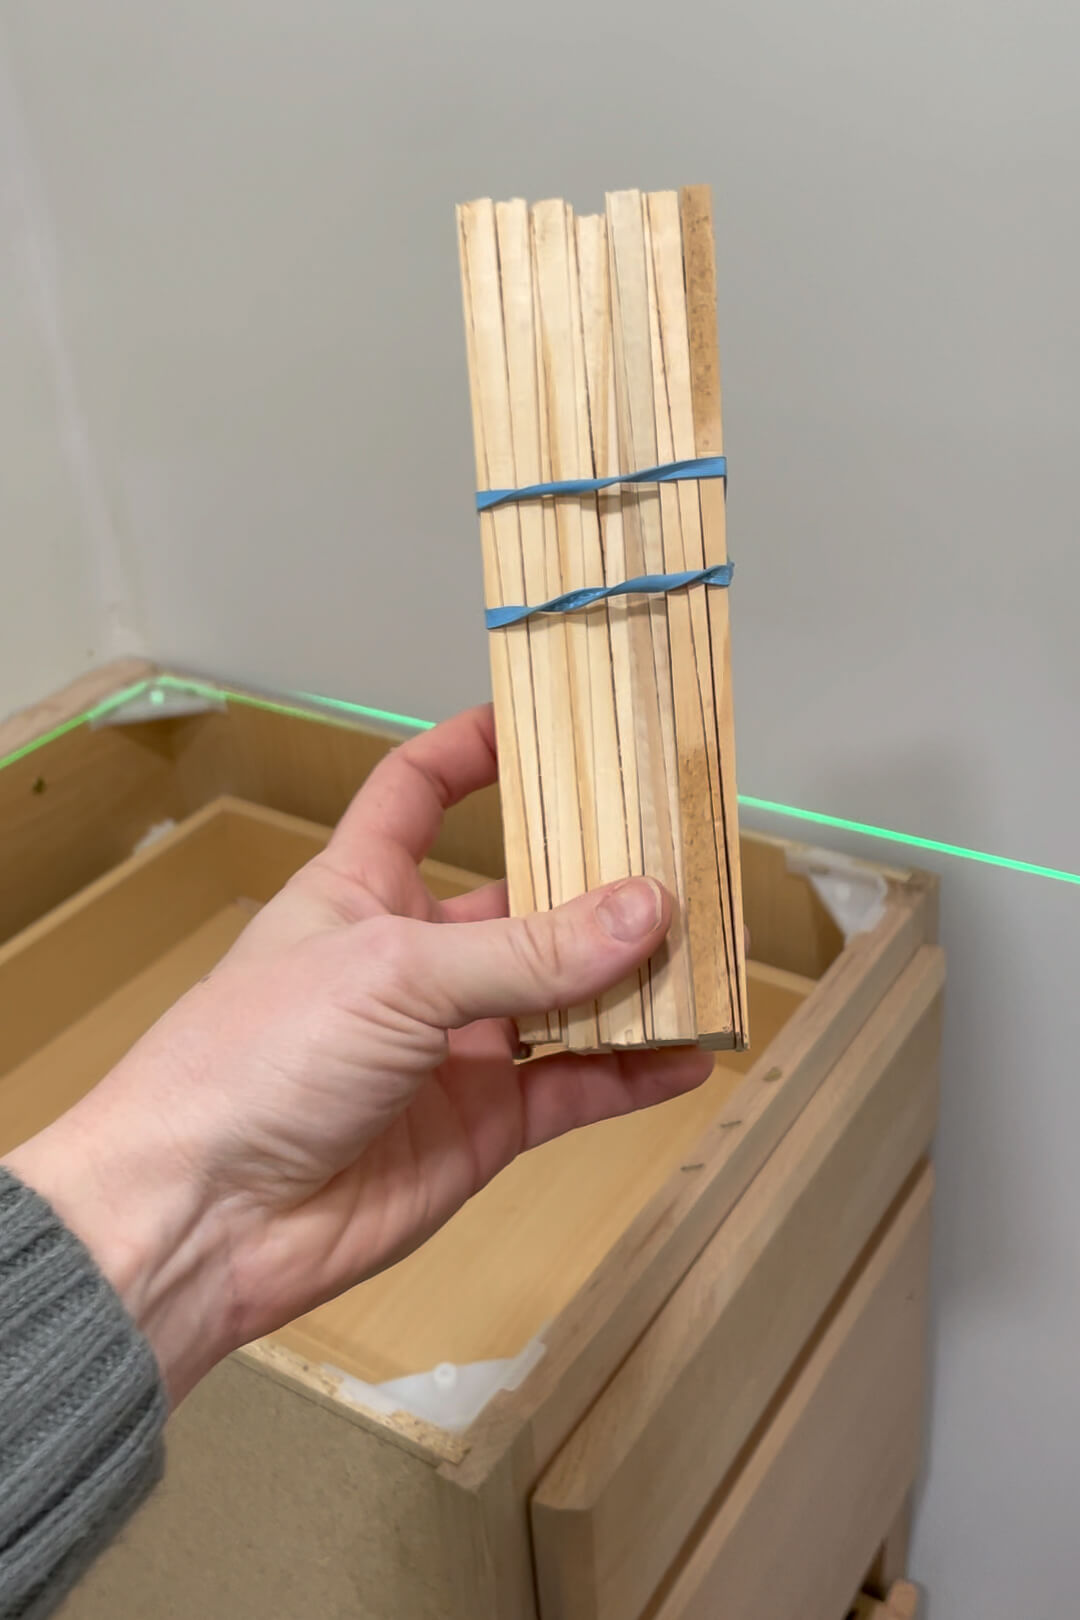
To fill the gap, I built 2×4 cleats where the countertop would sit. Using a stud finder, I marked the wall studs, and a laser level ensured the cleats were perfectly even. Once secured, I added 2×4 blocking between the cleats and the back of the vanity. To match the taller kitchen cabinet’s height, I topped the vanity with 1/2-inch plywood, creating a smooth, level surface for the countertop.
Step 2: Level and Secure the Cabinets in Place
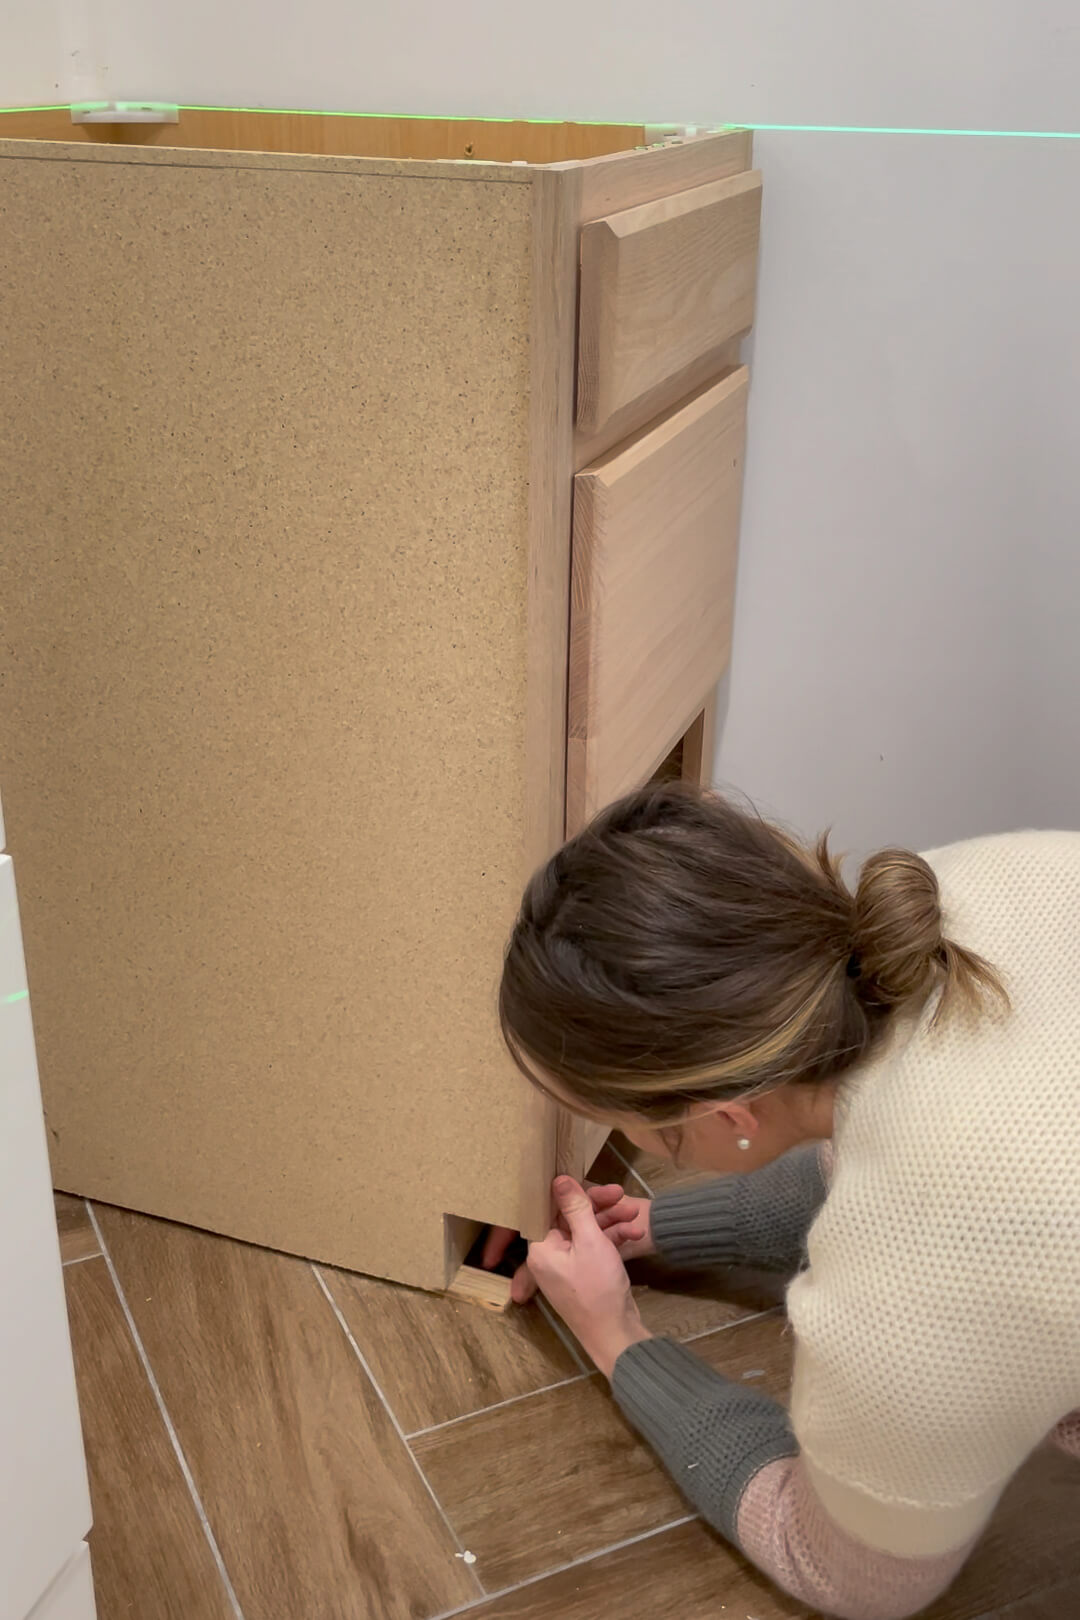
Floors are rarely perfectly level, so I used wooden shims to adjust the cabinets, ensuring they lined up with the laser level. Once everything was leveled, I secured the cabinets to the wall by screwing them into the studs, ensuring the vanity could support the countertop.
Step 2: Install a DIY Concrete Bathroom Countertop
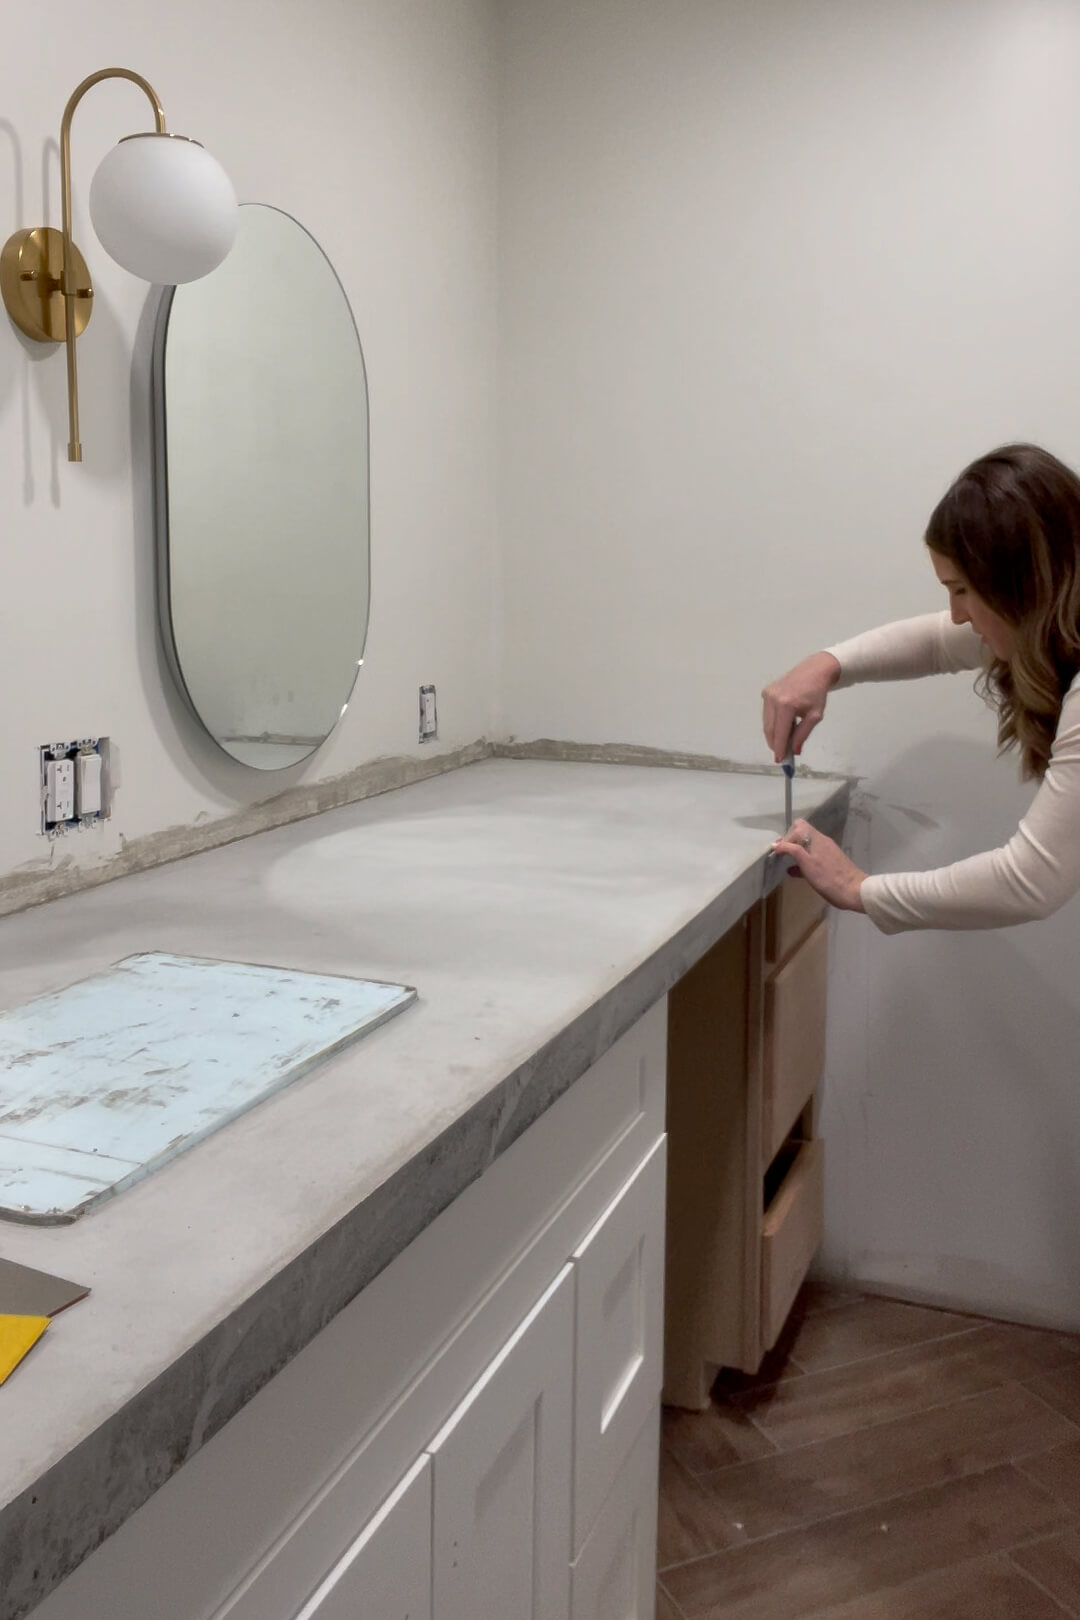
For the countertop, I opted for DIY concrete. Concrete countertops are durable, affordable, and add a unique texture to the bathroom. If you’re curious, check out my full tutorial on making concrete countertops – it’s easier than you think!
Step 4: Add Panels, Filler Pieces, and Trim for a Built-In Look
The finishing touches are what make a DIY project look professional. To cover the exposed sides of the kitchen cabinet and the gap behind the vanity, I cut 1/4-inch plywood panels with a jigsaw and attached them with a brad nailer.

For the gap between the vanity and the wall, I used 1/2-inch plywood as filler, ensuring everything looked seamless. Around the base, I added PVC shoe molding for a polished, water-resistant finish.
Once everything was caulked, I painted the entire unit.


Step 5: Paint Your Vanity Like a Pro
Over the years, I’ve painted my fair share of cabinets. Everything from kitchen cabinetry to home office built-ins to Murphy bed enclosures. With a lot of experience under my belt, I’ve nailed down a process for achieving a smooth, professional finish. If you’re looking for tips, check out my detailed guide on painting cabinets to get the perfect finish on your custom bathroom vanity.
If you’re curious about the colors I used in this primary bathroom, the walls are Alabaster by SW. The countertop cabinet and shiplap are painted in one of my fave colors, Accessible Beige by SW. For the lower cabinets, I left the vanity as is and painted the drawer unit on the right to match. I don’t have the color match information.
Step 6: Update Drawer Fronts for a Seamless Finish
With both pieces painted the same color, I replaced the kitchen cabinet drawer fronts with shaker-style ones to match the stock vanity. Using a torpedo level, I aligned each front, secured it temporarily with a brad nailer, and screwed it into place from inside the drawer. Along with the matching drawer pulls, you’d never guess this custom bathroom vanity started as two different cabinet styles.


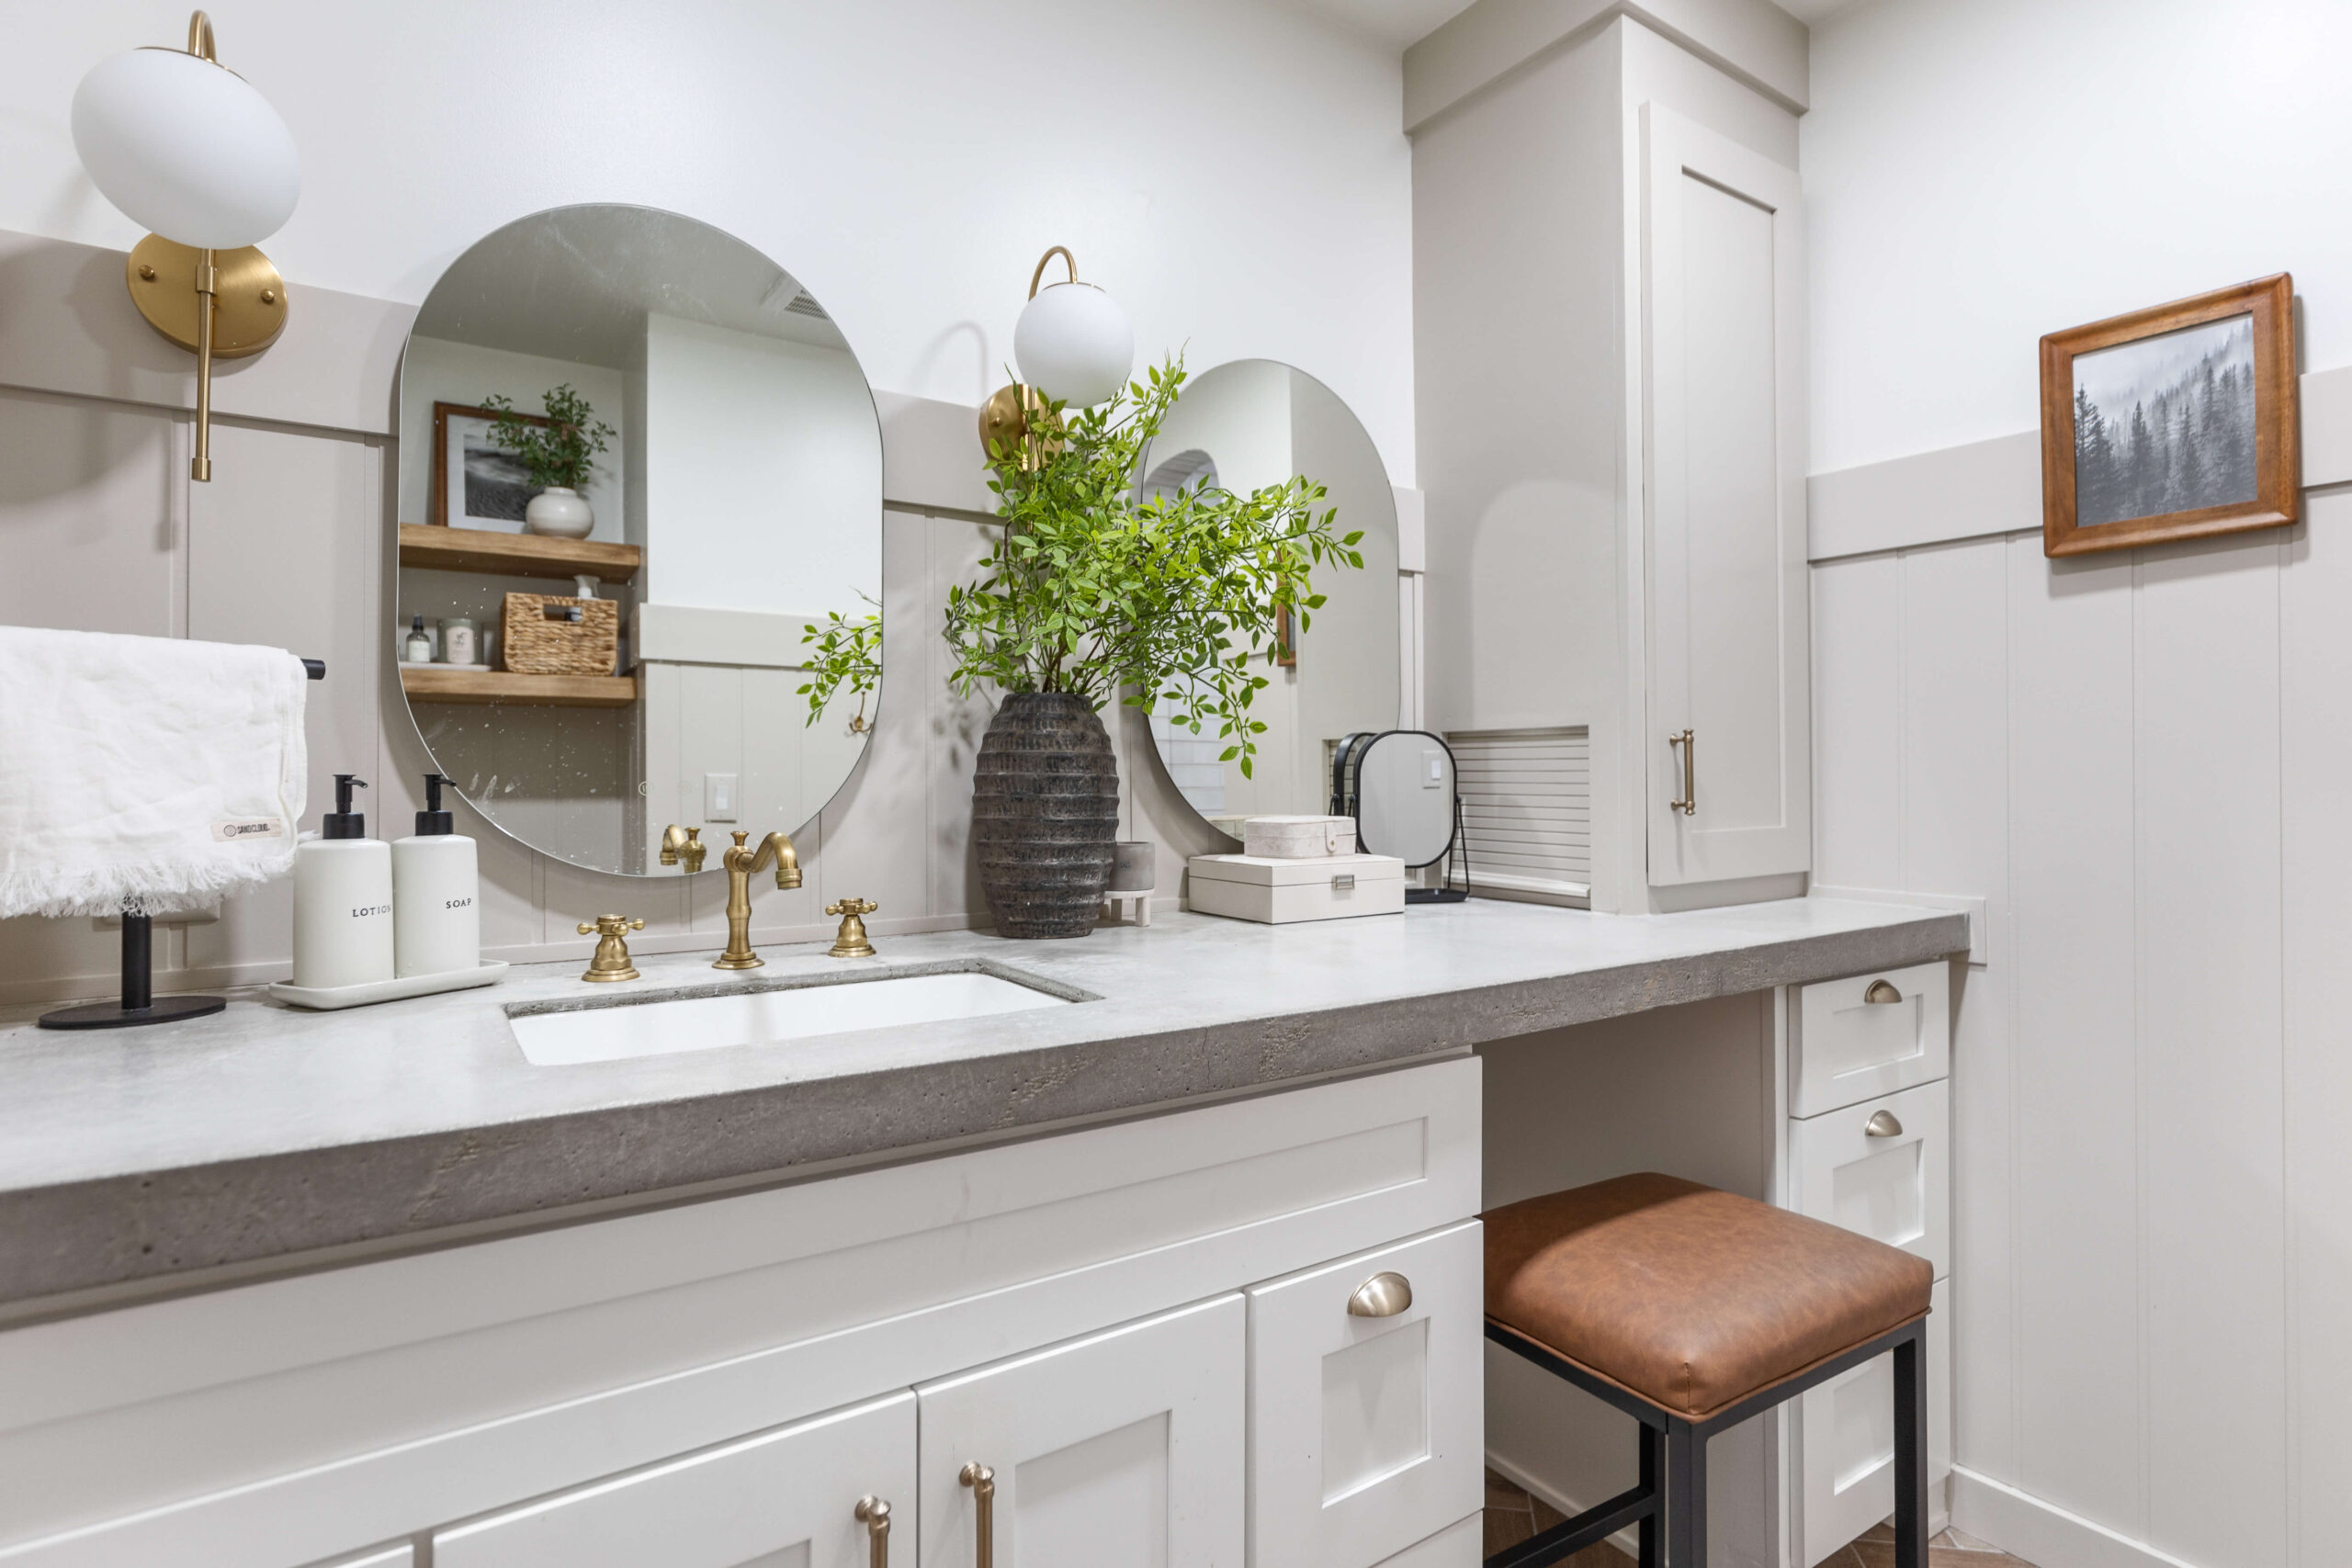
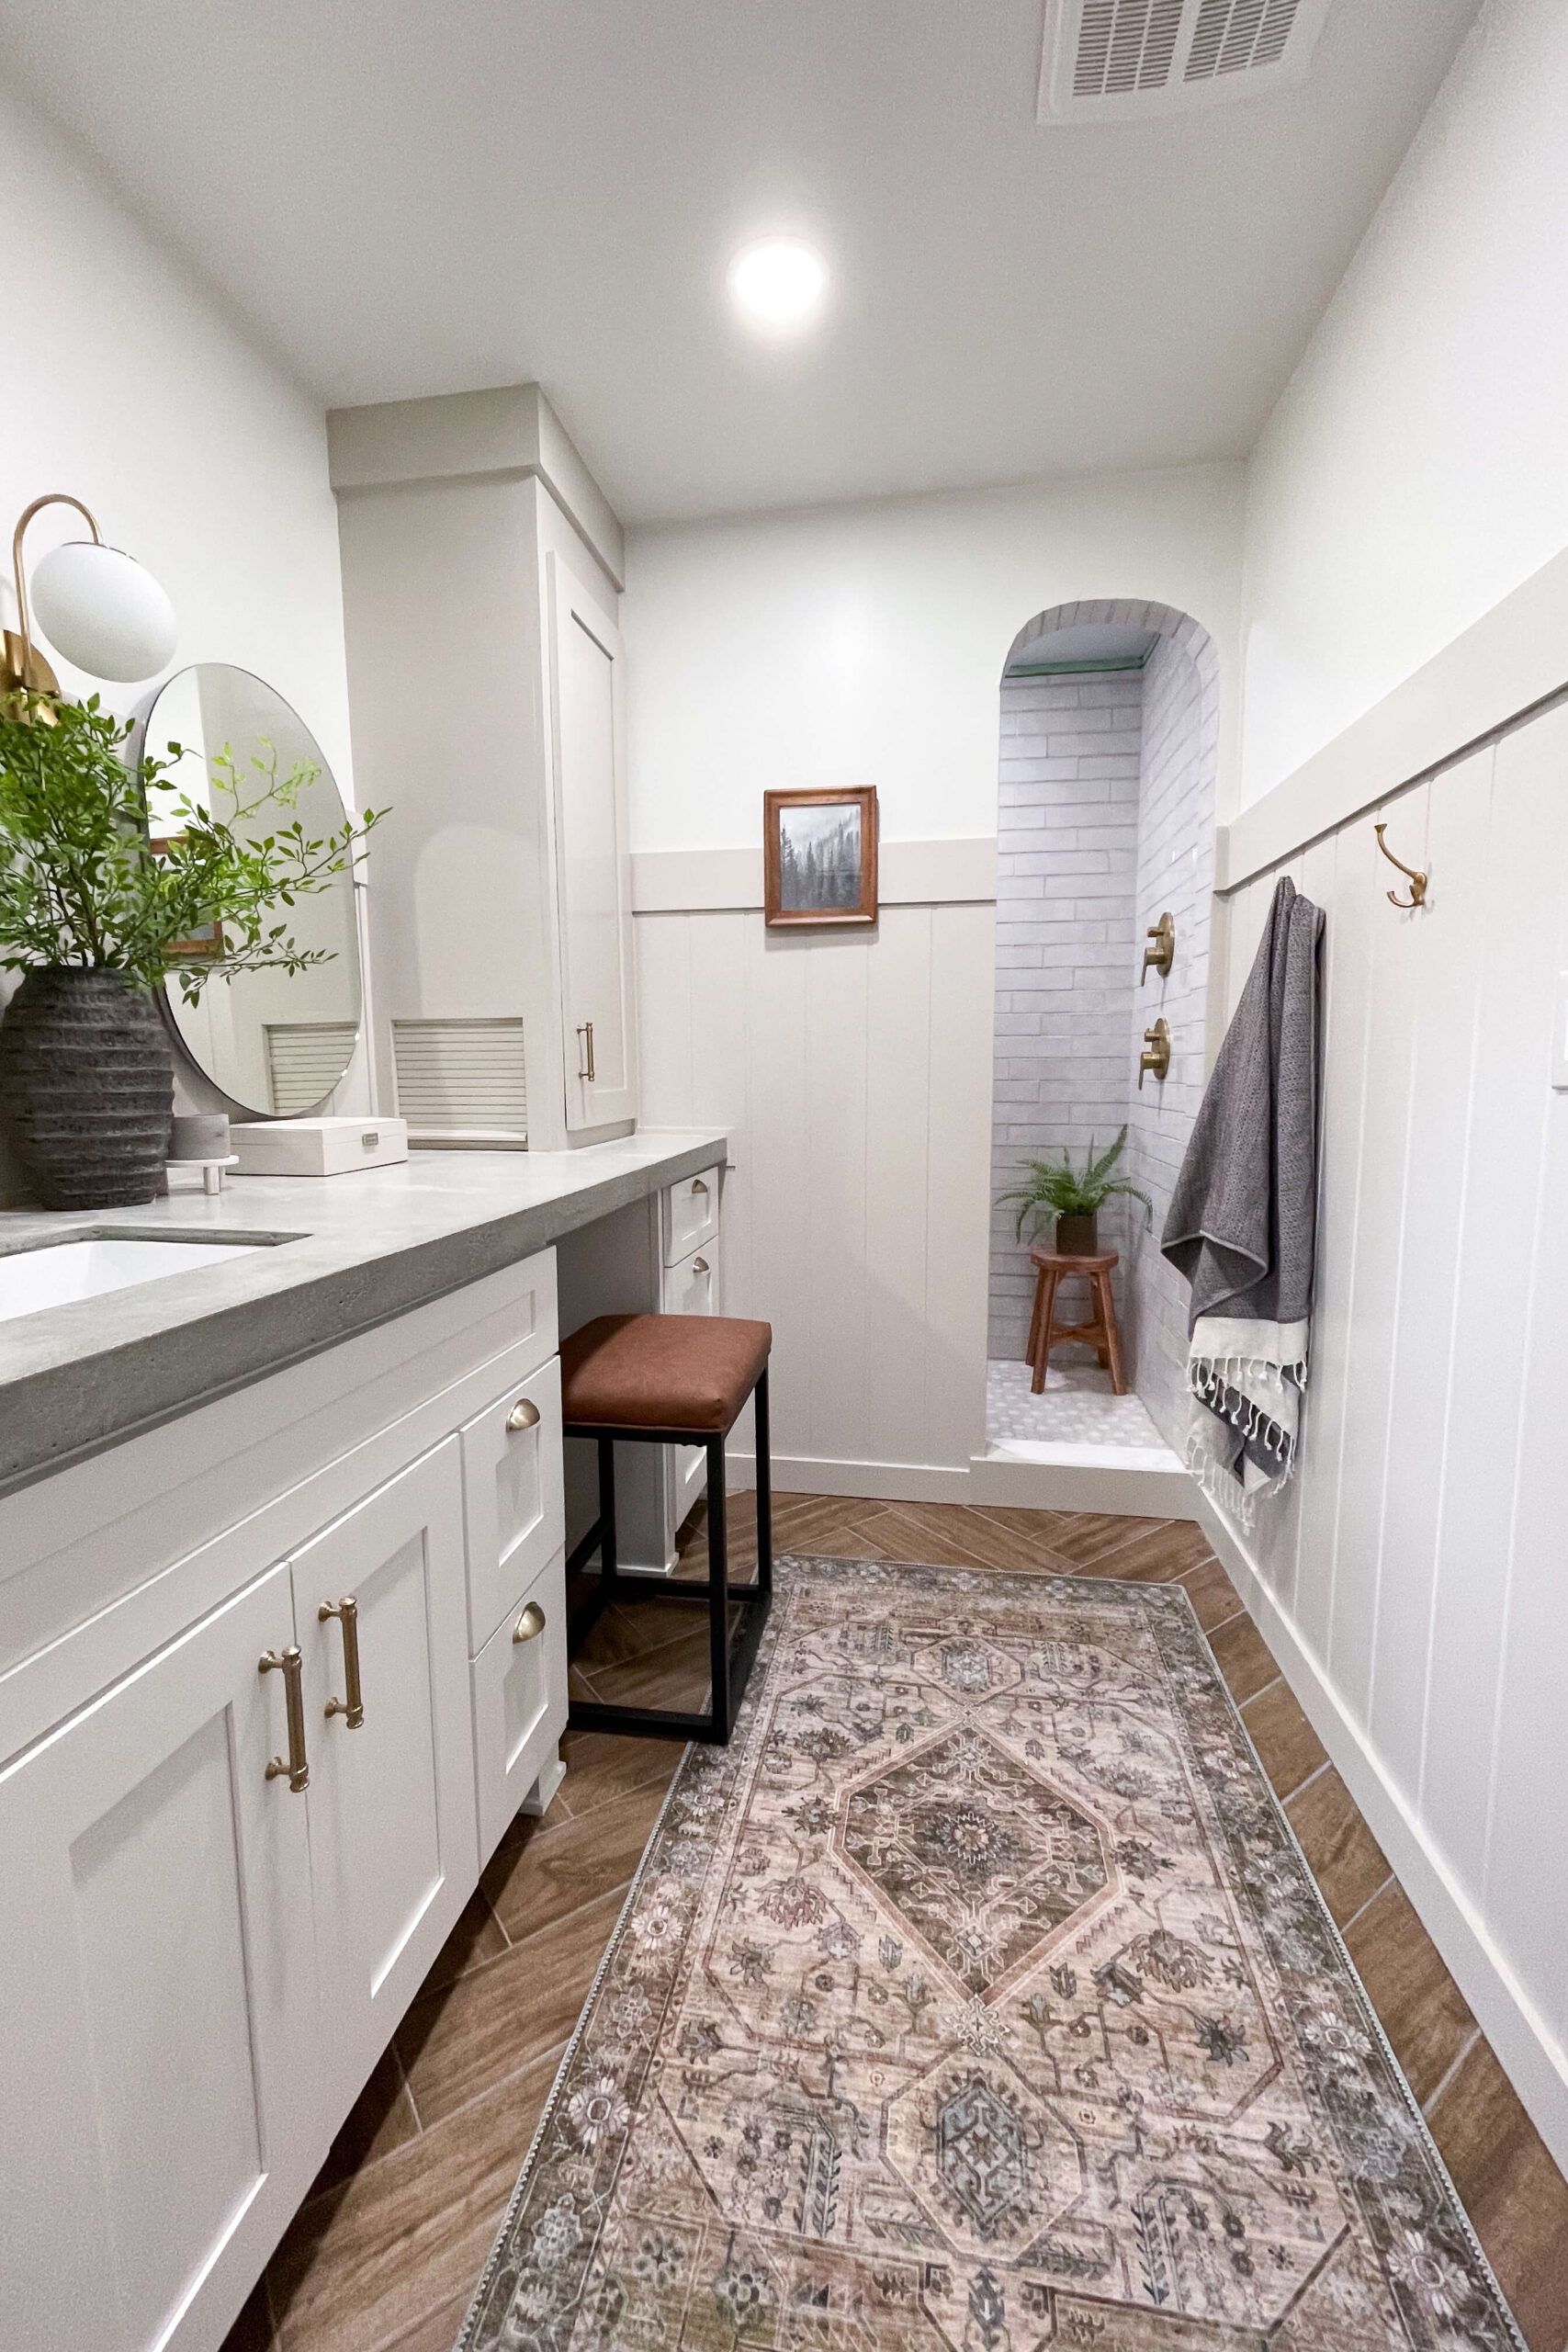
The Final Reveal: My Custom Bathroom Vanity Makeover
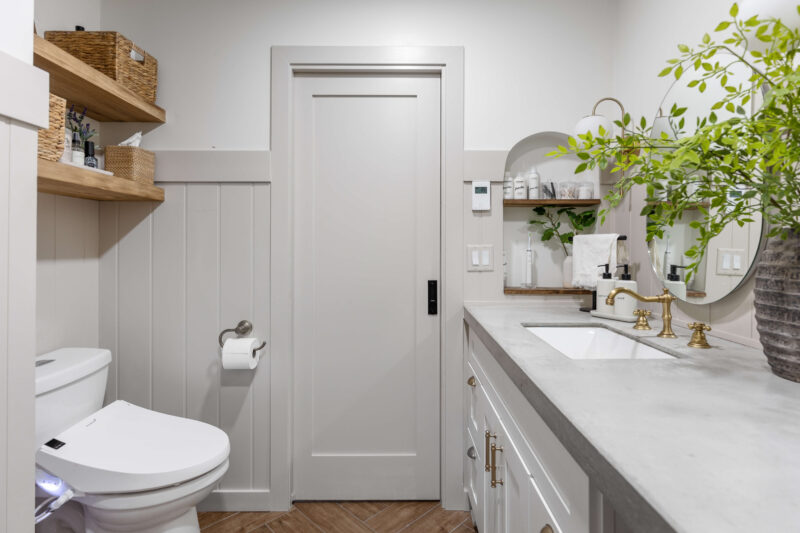
And just like that, my custom bathroom vanity was complete! I couldn’t be happier with how it turned out. Forgoing the second sink in favor of a sit-down makeup area was the perfect choice for us. This vanity looks seamless and high-end.
If you’re looking for links to anything you see here in this bathroom, I’ve got them all listed here. Don’t be afraid to get creative and build a custom bathroom vanity that works perfectly for your space!
📌Save this Project for Later
Frequently Asked Questions About Building a Vanity
Common materials include stock cabinets or drawer units, plywood for adjustments or filler panels, 2x4s for cleats and support, shims for leveling, and tools like a brad nailer, drill, and saw. Additional materials depend on your countertop and finish choices.
Yes! Kitchen cabinets are often sturdier and offer more storage options, making them a great choice for a custom bathroom vanity. Modifications may be needed to adjust depth or height, but the results can be stunning and functional.
Use filler panels or trim to close gaps between the vanity and the wall. Plywood, painted to match the vanity, works well as a filler, while PVC or wood molding adds a polished touch.
Plywood is generally better for bathroom use due to its durability and resistance to moisture. MDF is less expensive and smoother for painting but may swell or warp if exposed to water.

This looks amazing! I never would have guessed that you used a stock vanity and a kitchen cabinet. I would love to be able to renovate my bathroom cabinets and have it turn out as good as this did. This gives me so many ideas for what I can do in mine. Thanks so much for sharing!