


How We Built Our Gorgeous Subway Tile Shower


Updated July 13, 2026
When we moved into our Omaha home, I couldn’t wait to transform the old bathroom into my dream subway tile shower. I’ve always loved the clean, classic look of subway tile, and I knew a walk-in shower without a glass door or curtain would be both practical and beautiful. Now, it’s the centerpiece of our primary bathroom and feels like a little oasis. Stick around – I’ll walk you through exactly how we built it step by step so you can create your own dreamy subway tile shower too!
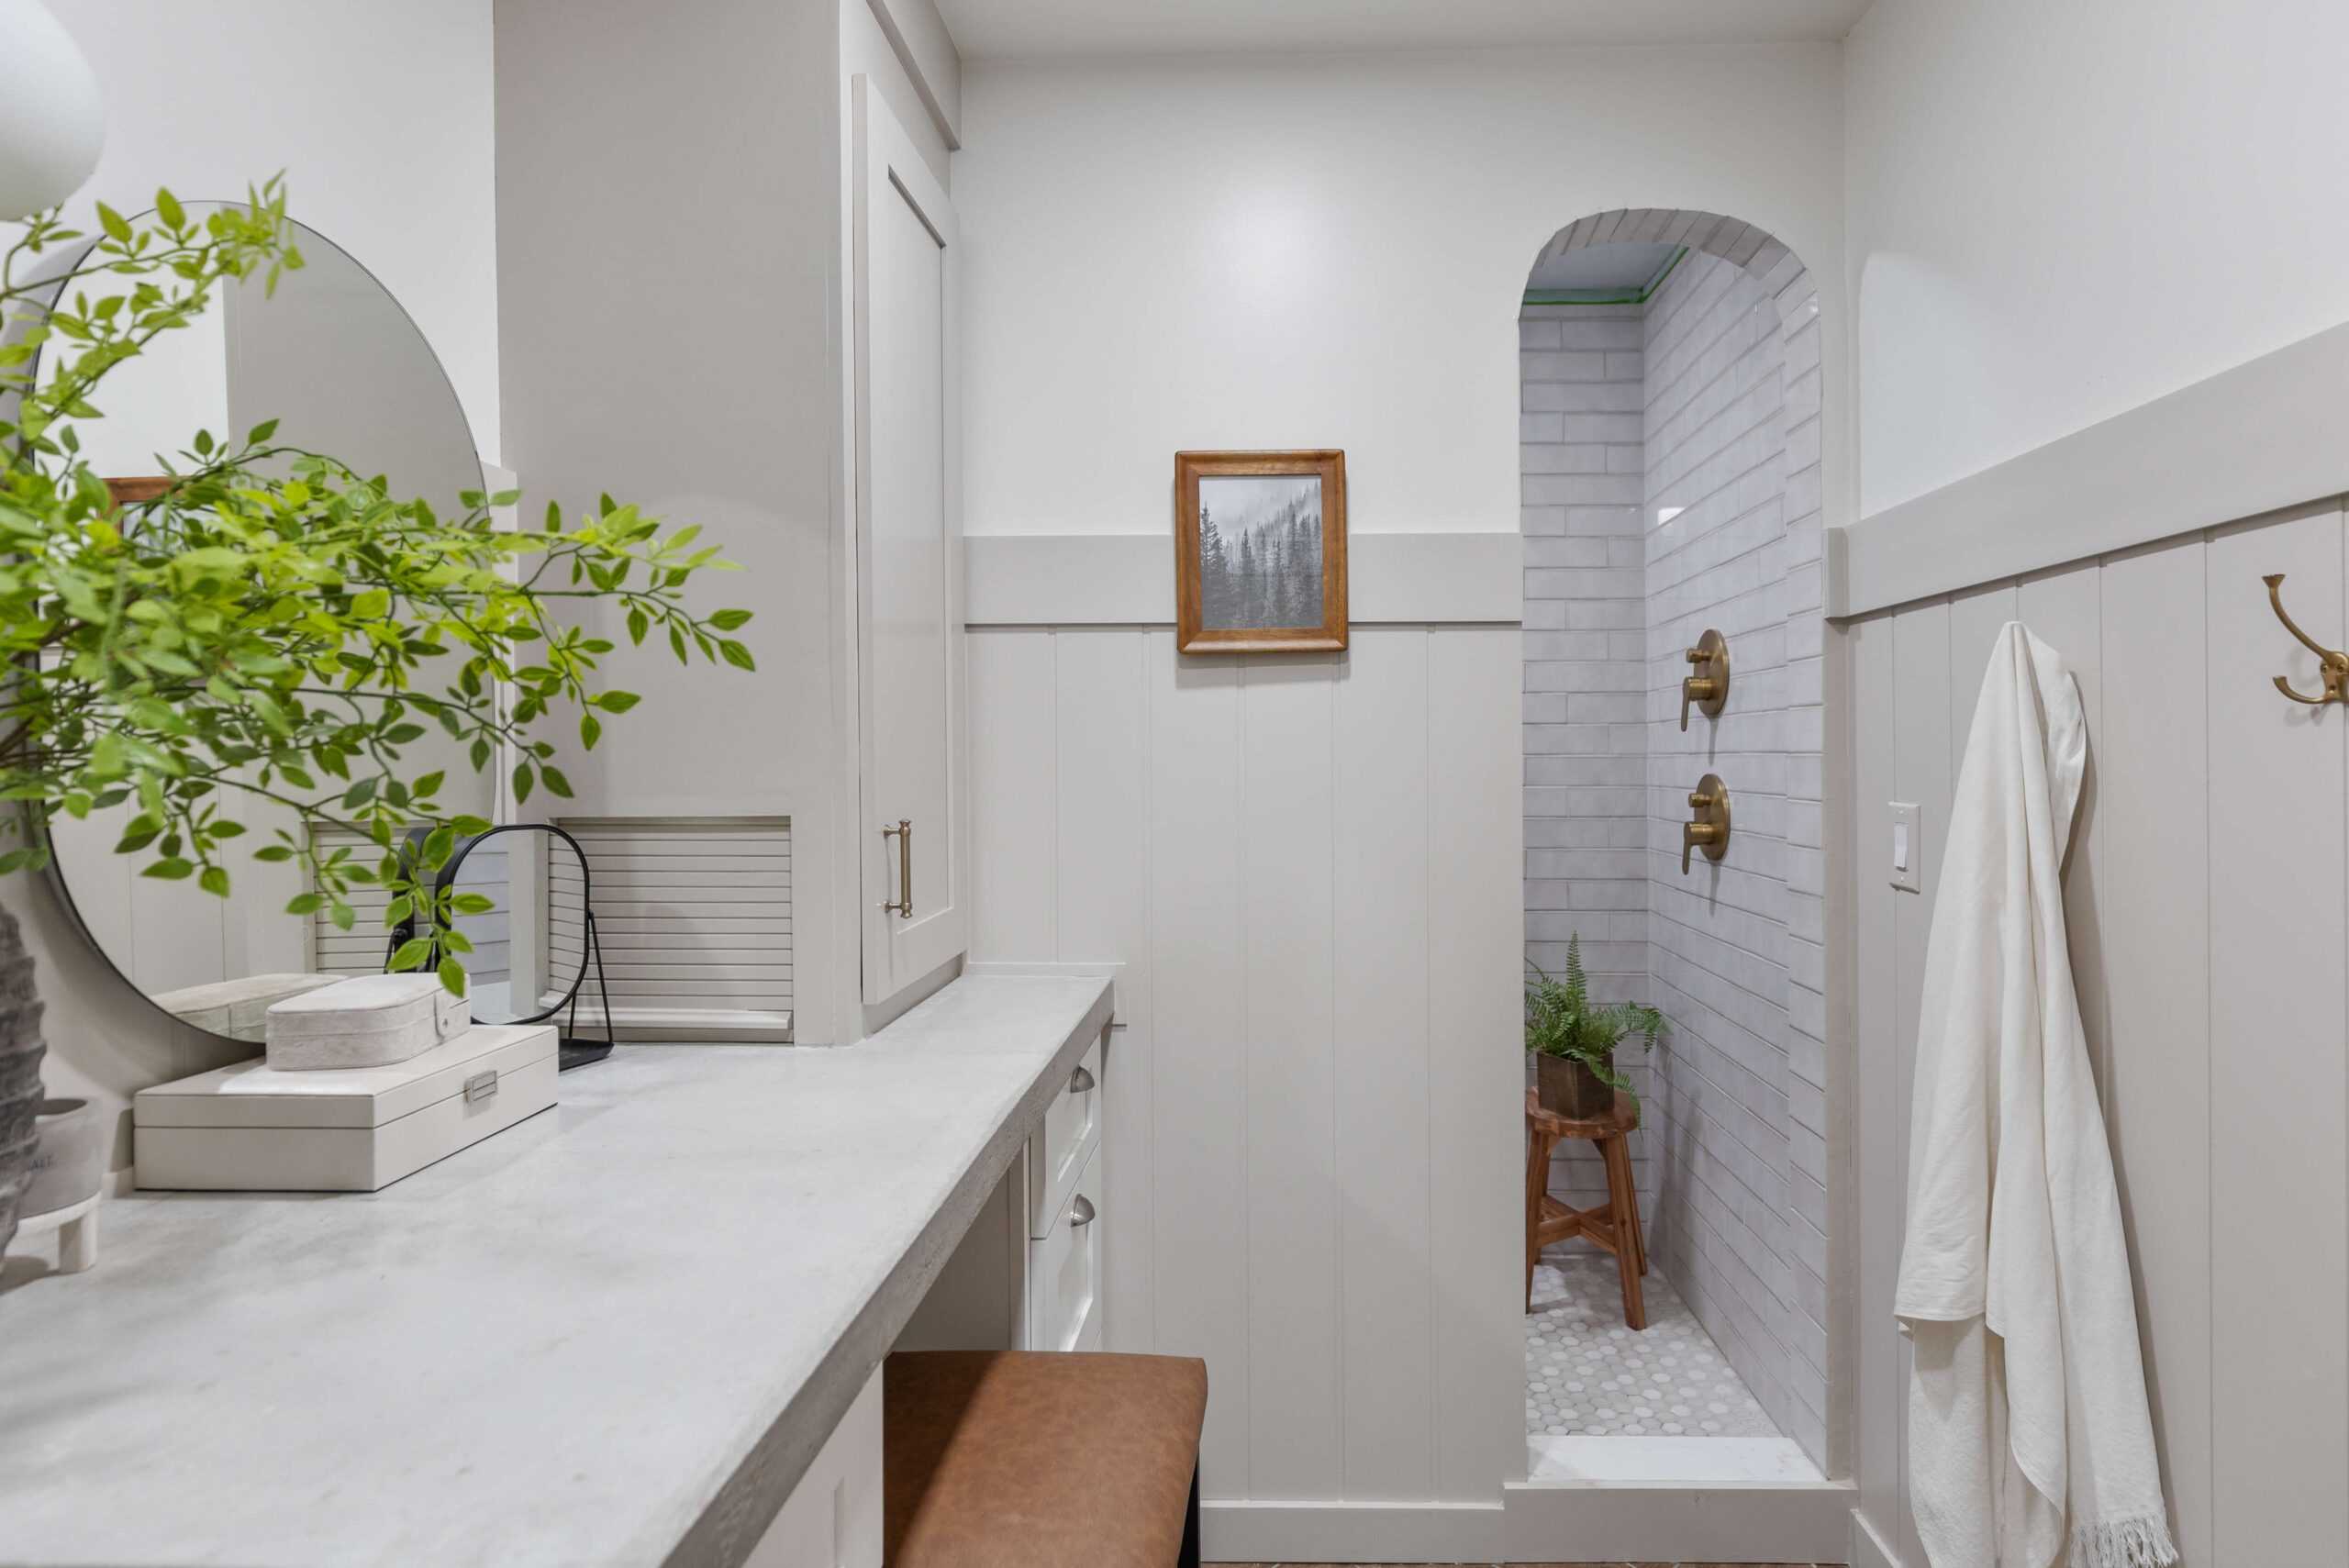
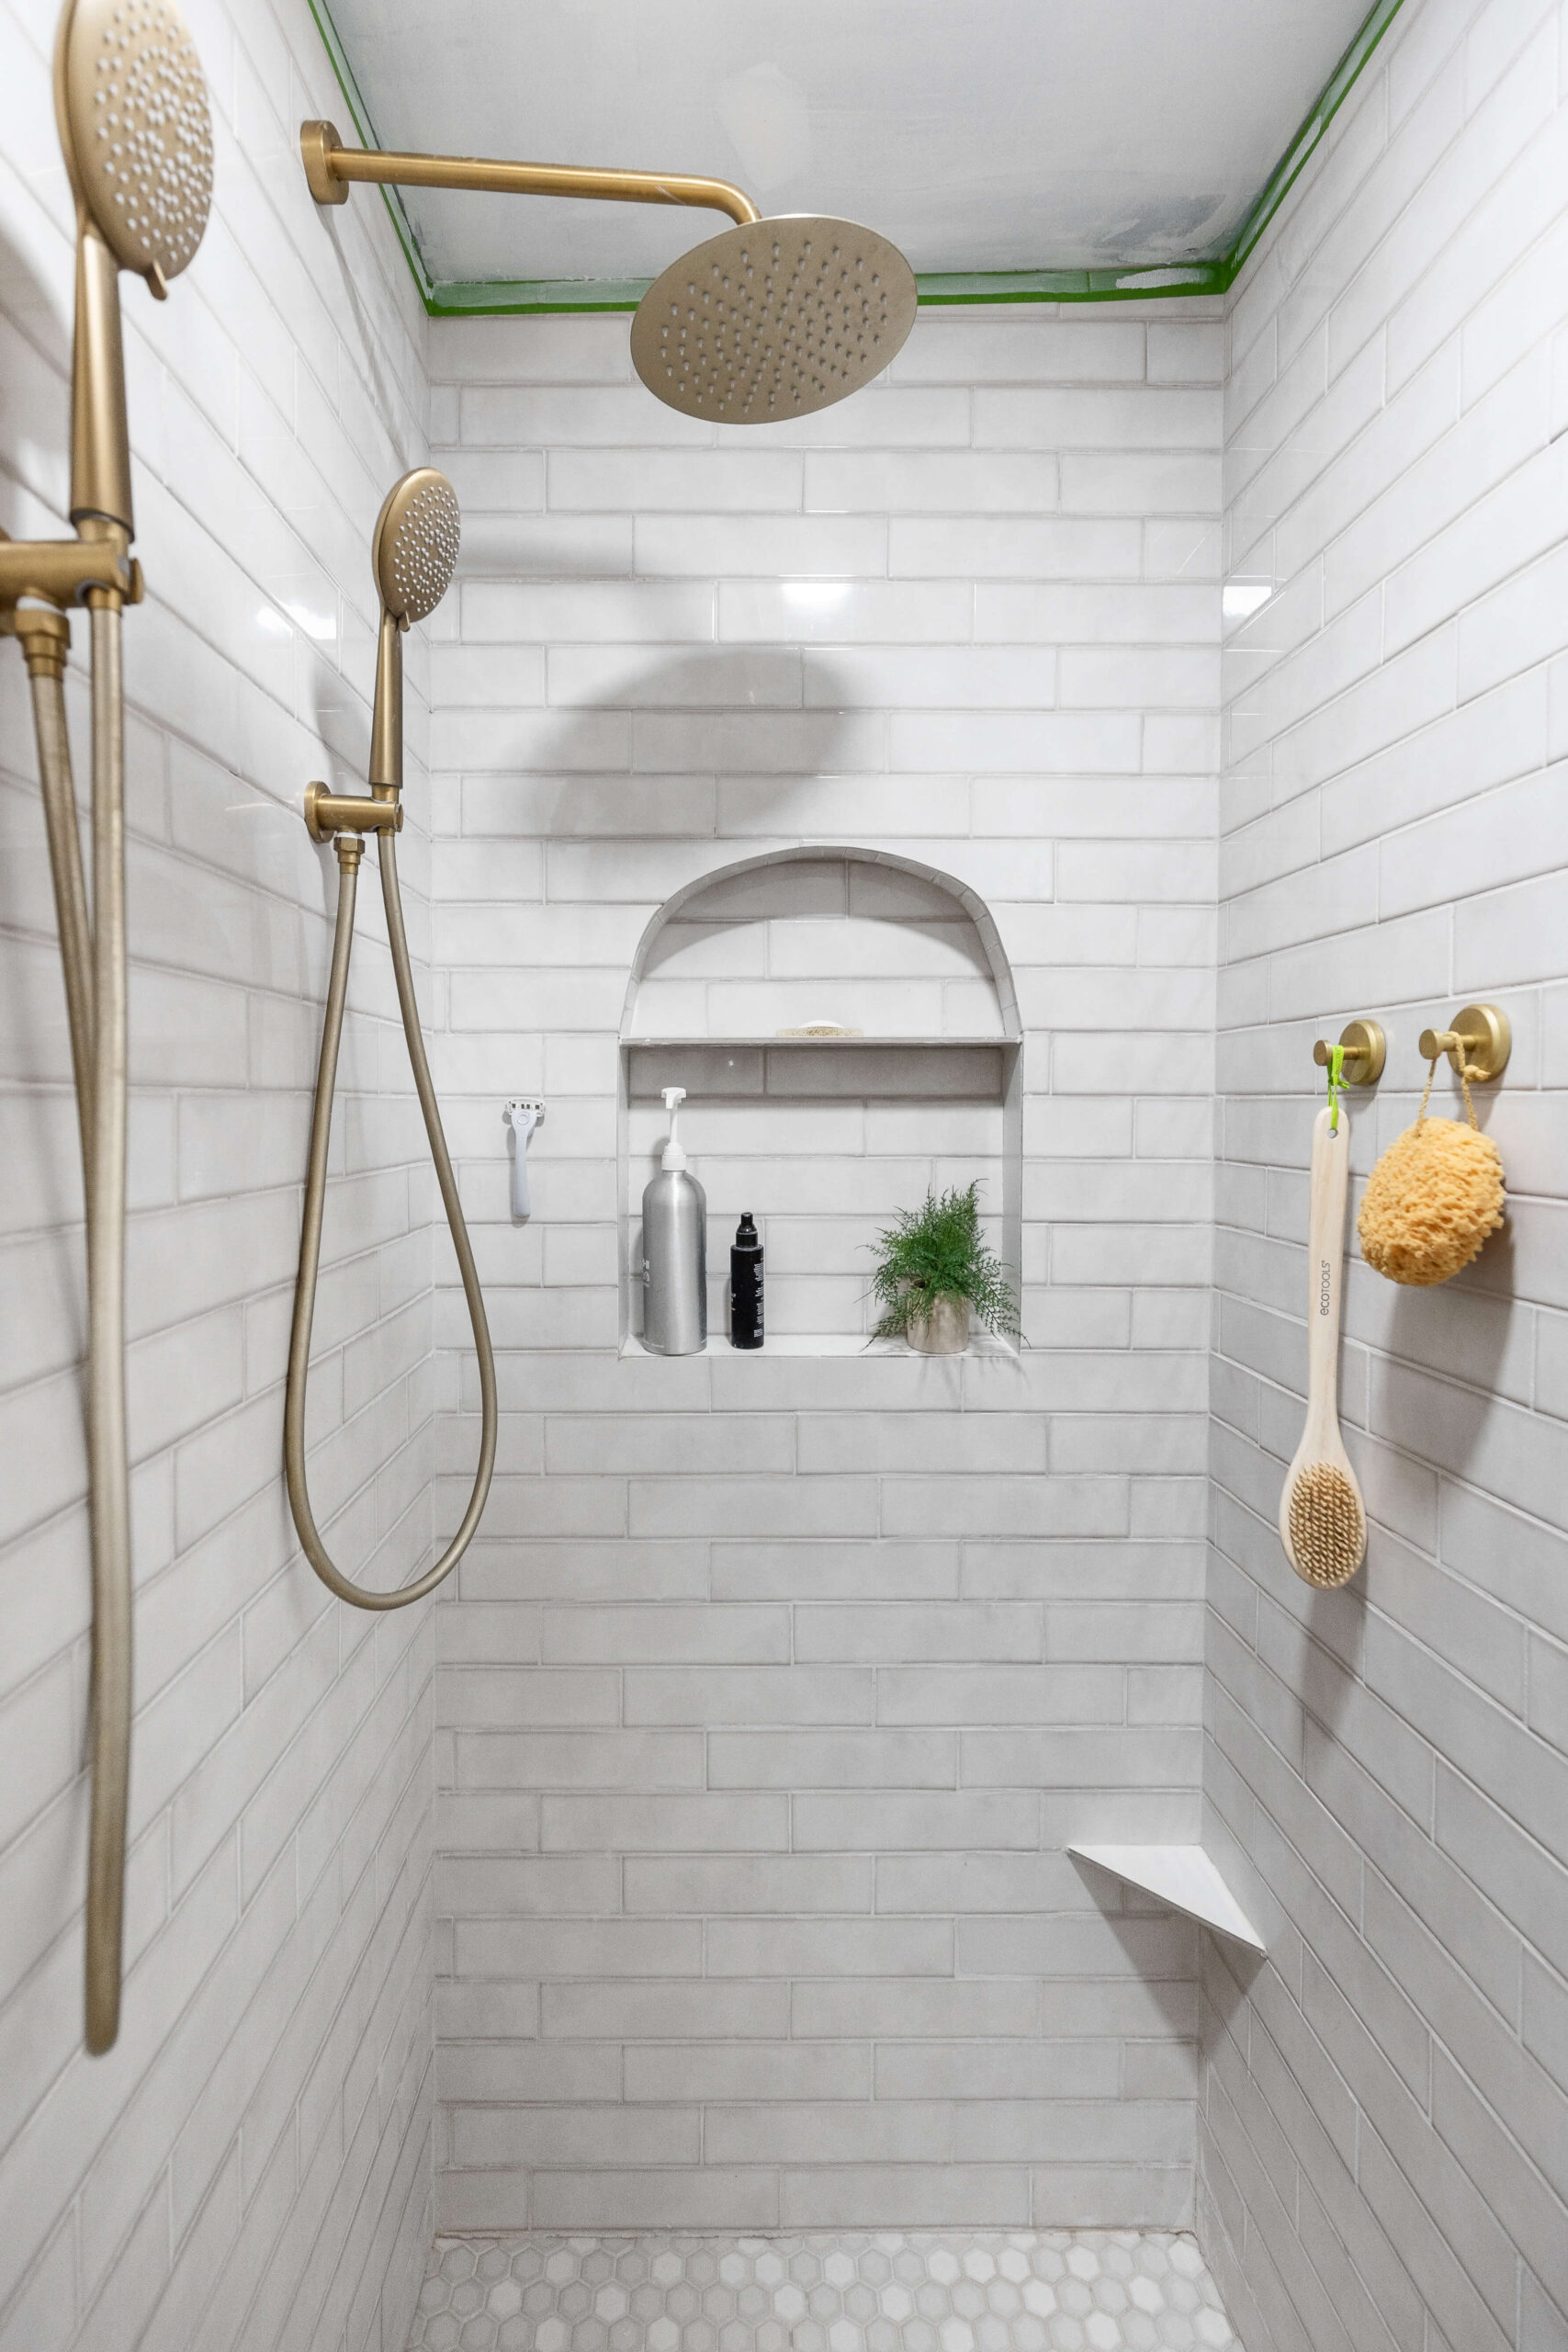
Table of Contents
- Tools You’ll Need to Tile a Walk-In Shower
- Materials for a DIY Subway Tile Shower Build
- Primary Bathroom Before the Shower Remodel
- Tiling the Shower Floor: Where to Start
- How to Create a Shower Floor Slope
- Step-by-Step Waterproofing for a Tile Shower Floor
- Why We Chose Penny Tile for the Shower Floor
- Installing Shower Wall Tile with a Built-In Niche
- Waterproofing Shower Walls Before Tiling
- How to Install Subway Tile in a Shower
- How to Grout a Subway Tile Shower Wall
- Installing Shower Fixtures After Tiling
- Our Finished DIY Subway Tile Shower Reveal
- 📌 Save This Project for Later
- FAQs About DIY Subway Tile Showers
Tools You’ll Need to Tile a Walk-In Shower
- Laser level
- Torpedo level
- Tape measure
- Magnesium float
- Notched trowel
- Grout float
- Tile saw
- Caulk gun
- Putty knife
- Foam Roller
Materials for a DIY Subway Tile Shower Build
- MAPEI 4-to-1 mud bed mix
- Schluter systems thinset
- Schluter Kerdi waterproofing membrane
- Penny tile (for shower floor)
- Tile grout
- Foam waterproof backer board
- Vulkem polyurethane sealant
- Roll-on waterproofing membrane
- Mortar
- Subway tiles
- Wedge spacers
- Large grout sponges
- Painter’s tape
- Shower fixtures (handle, shower head, etc.)
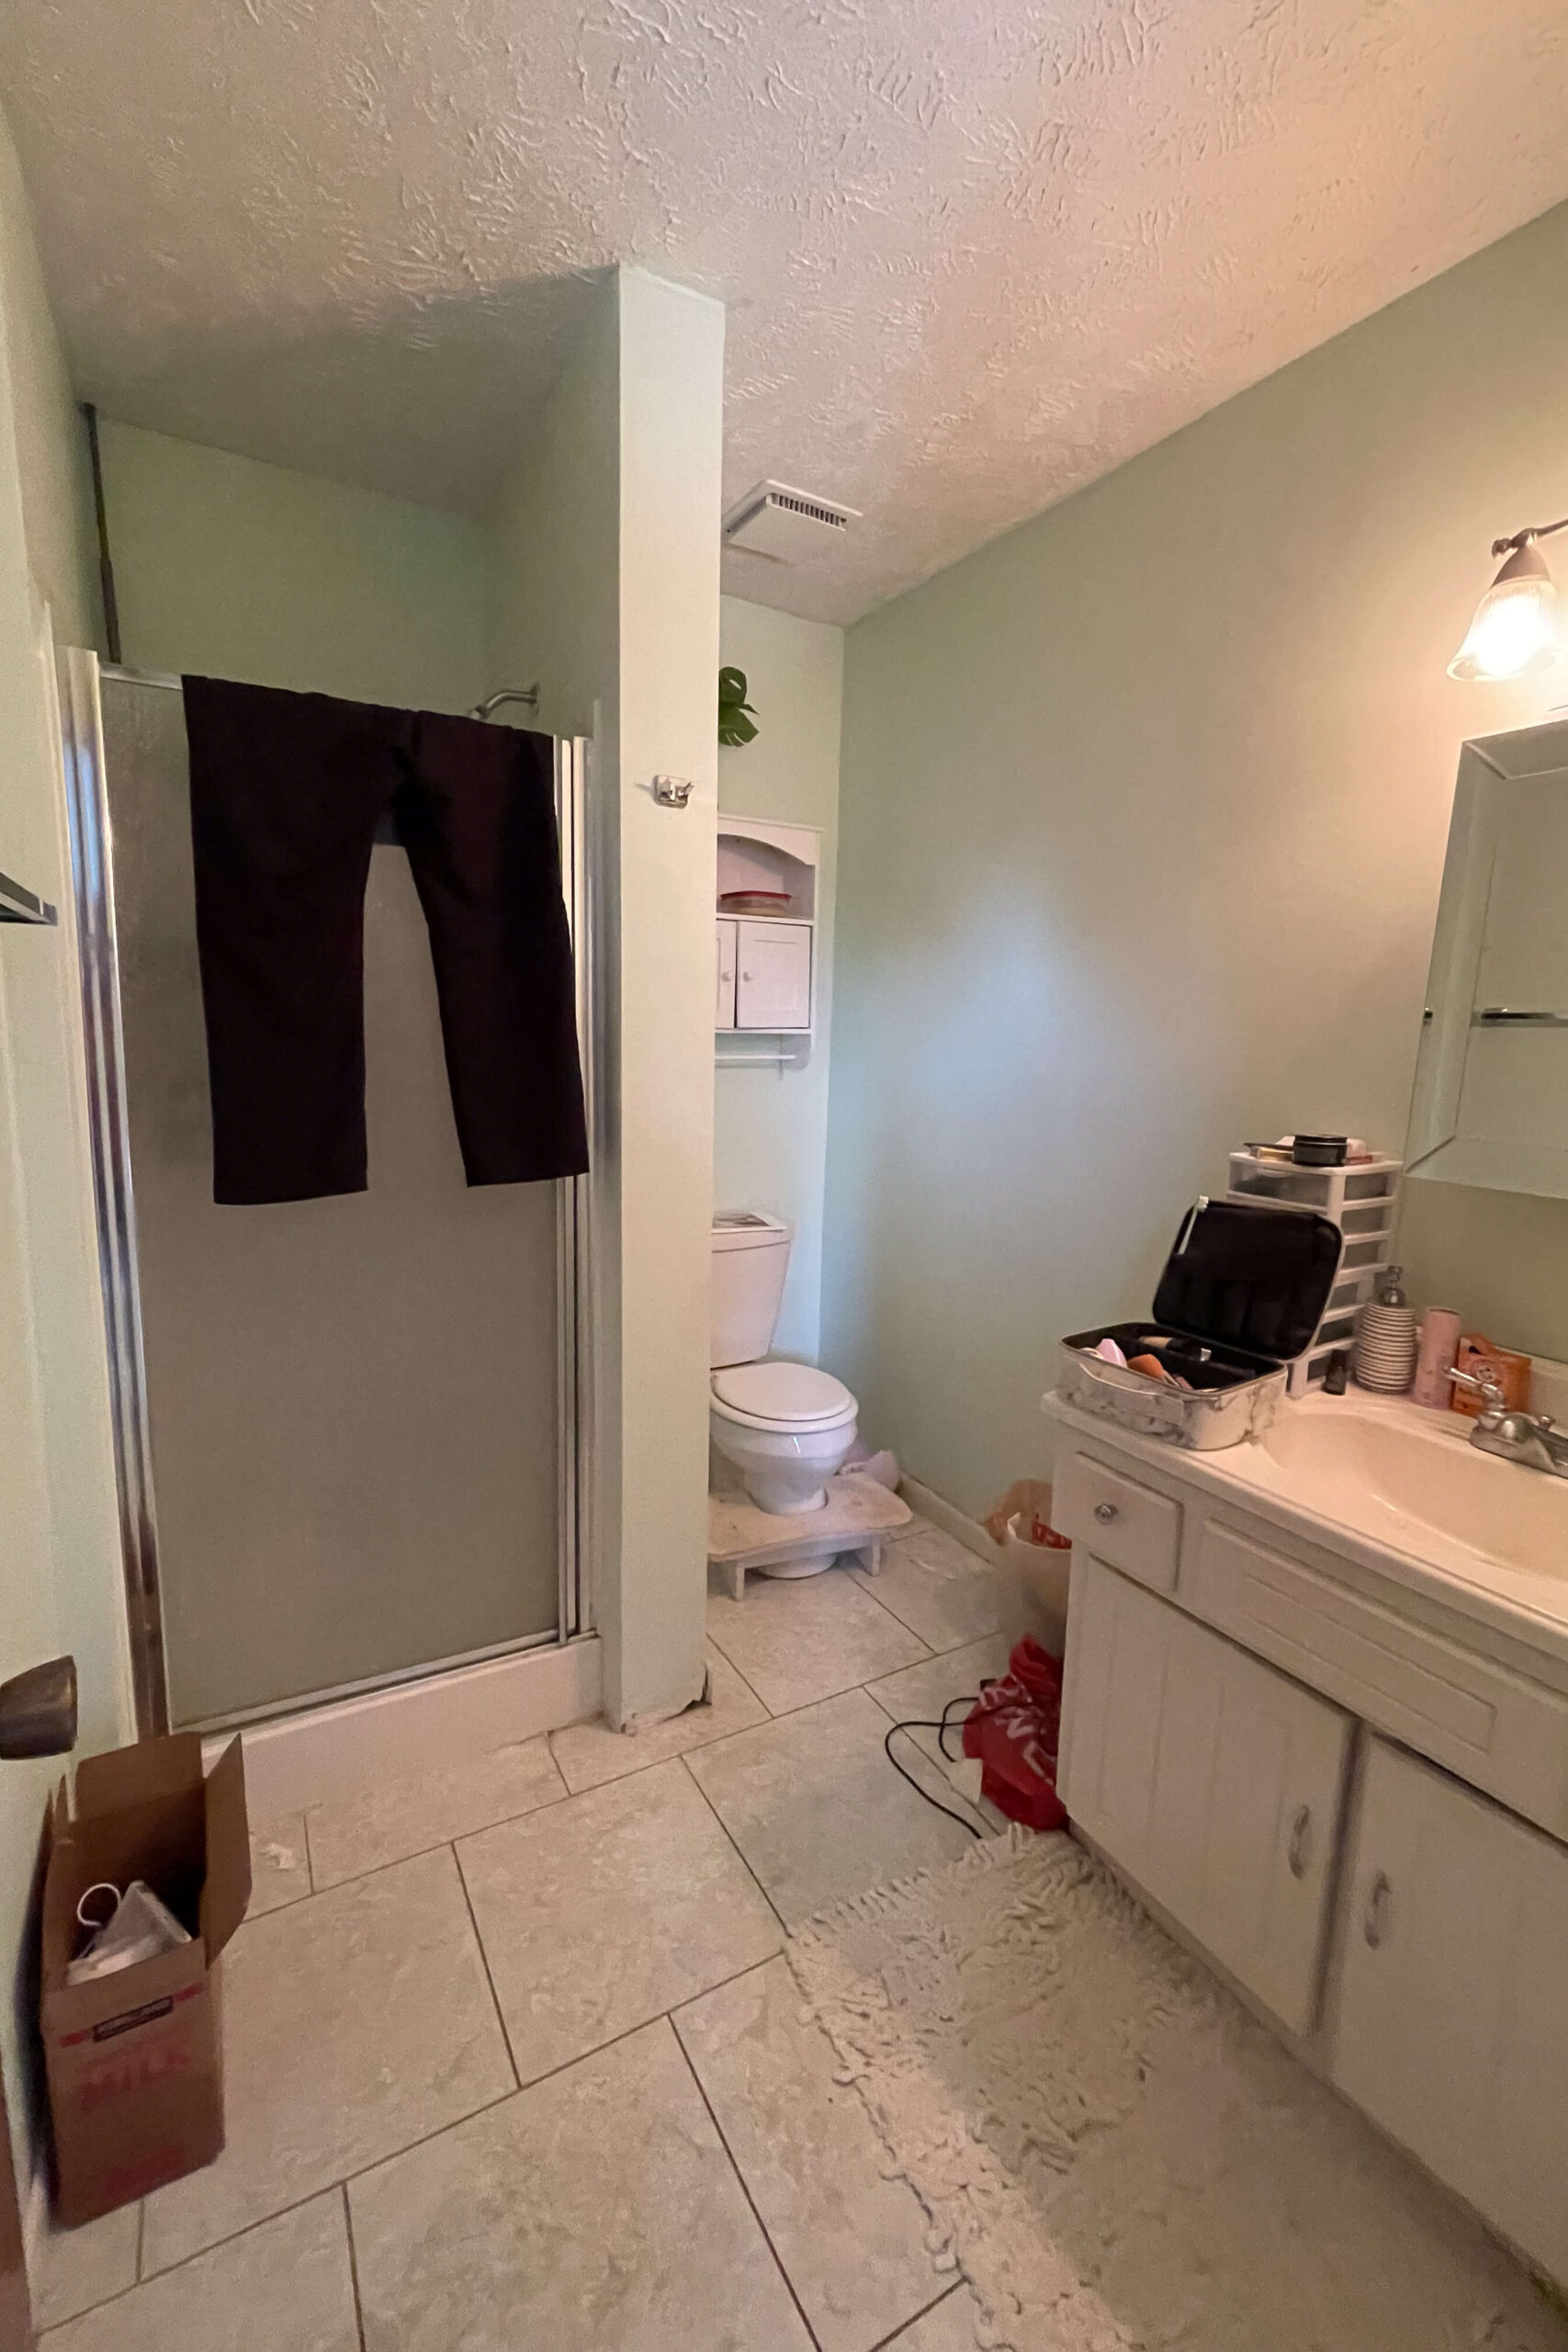
Primary Bathroom Before the Shower Remodel
The original bathroom? Let’s just say it wasn’t winning any design awards. It was cramped and outdated, with a tiny shower insert that didn’t make the most of the space. I had my heart set on a spacious, walk-in subway tile shower, and to make it happen, we decided to sacrifice some bedroom space and rework the layout entirely.
We went all-in – ripped everything down to the studs, opened up the wall into the primary bedroom, and framed out a massive walk-in shower spanning the back wall. On the left side, we left space for a shower nook, and on the right, we planned the entryway into my subway tile shower dream.
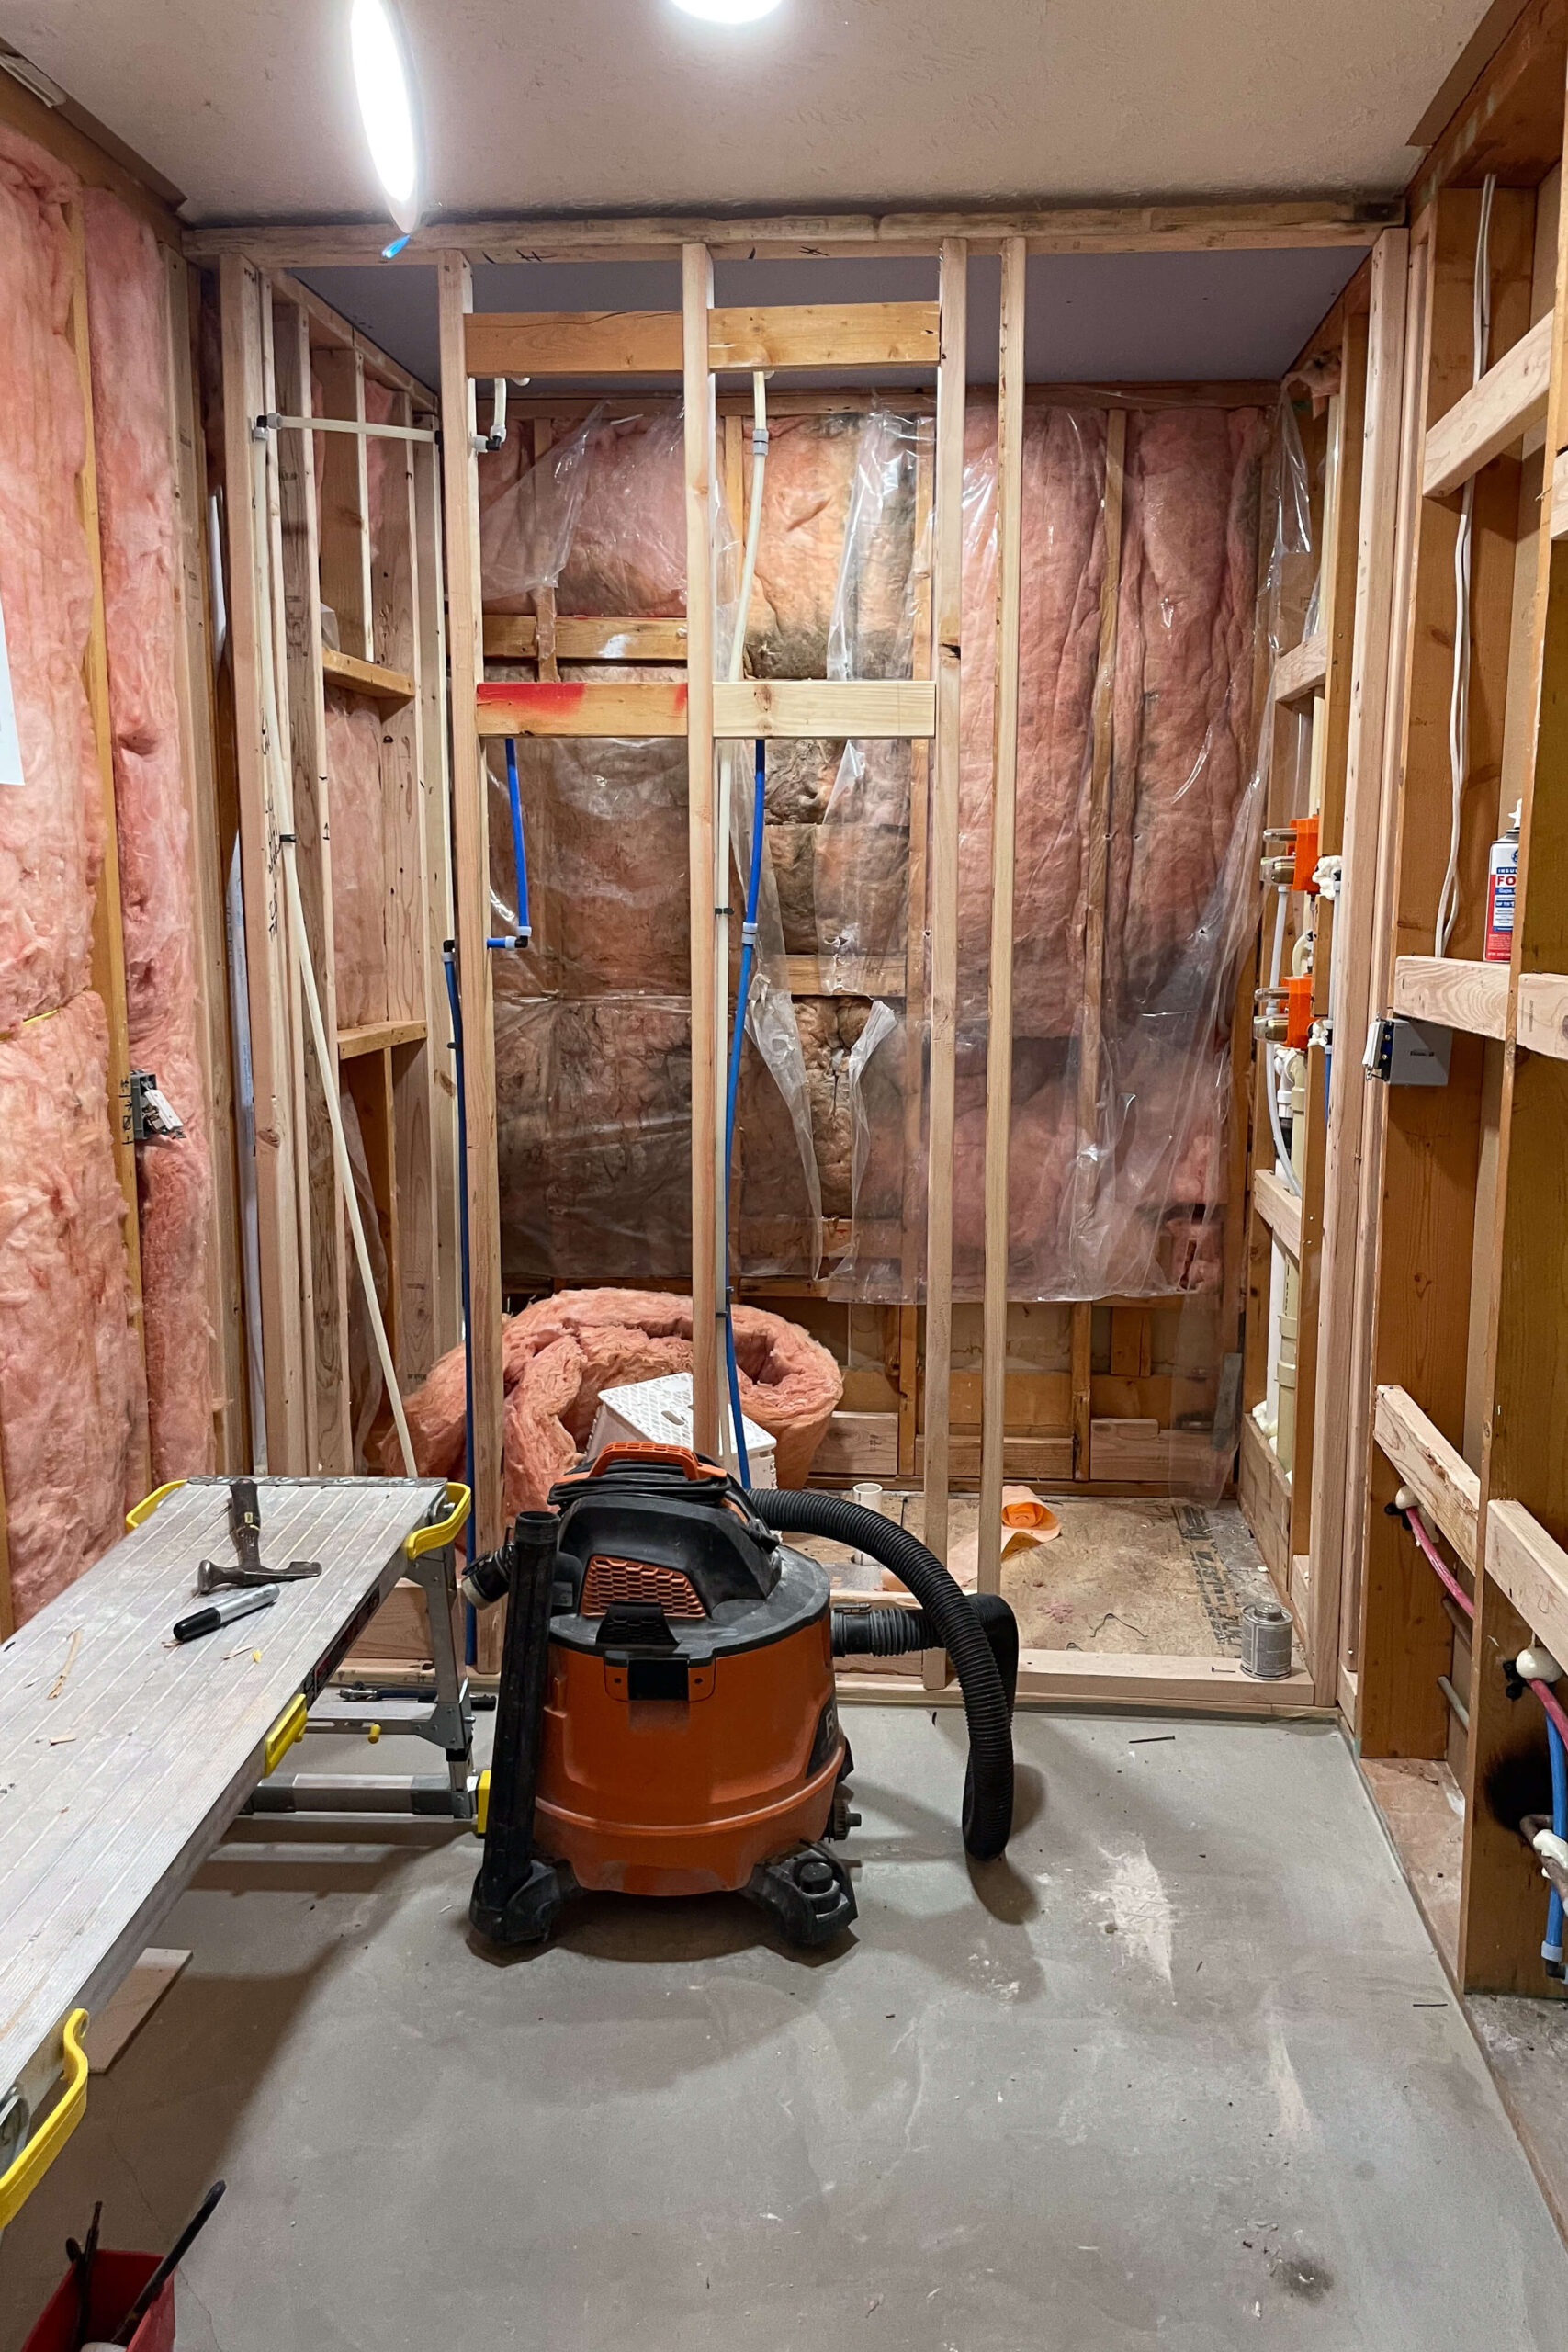
Next, we tackled the plumbing – installed the drain and ran all the lines for the shower heads and handles. Since winters get brutally cold where we live, we made sure to keep all the plumbing on interior walls. Frozen pipes? No, thank you!
Tiling the Shower Floor: Where to Start
When tiling a shower, the golden rule is to start with the floor. Why? Because overlapping the wall tiles over the floor tiles creates a watertight seal, essential for a leak-free shower.
How to Create a Shower Floor Slope
A proper slope guides water straight to the drain and prevents pooling, but it has to be subtle enough to feel natural underfoot. The usual rule of thumb is a 1/4–1/2 inch drop per foot away from the drain.
My father-in-law – known to everyone as Grandpa – carefully mapped out the perfect slope using his laser level, torpedo level, and a mix of sand and cement mortar, smoothing it out to create the foundation.


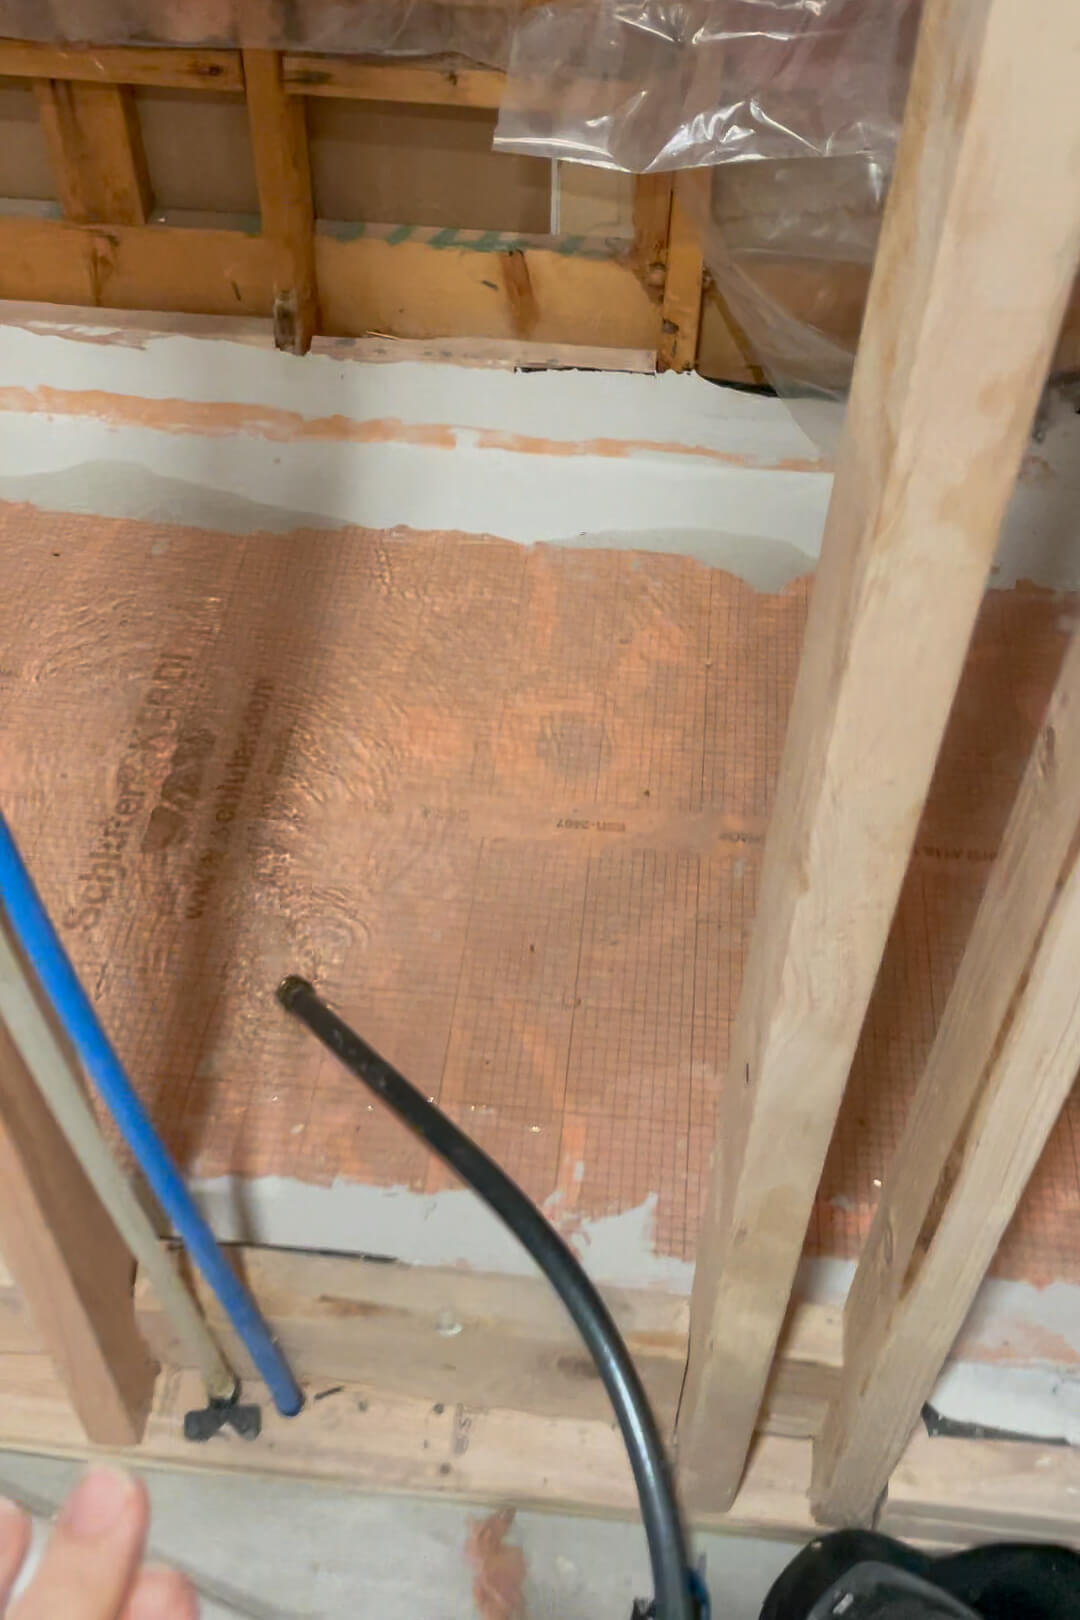
Step-by-Step Waterproofing for a Tile Shower Floor
Waterproofing is the most critical step in building a subway tile shower. To start, we spread a thin layer of specialized thinset under the waterproofing membrane. Grandpa folded up the edges and corners to form a solid shower pan. While he made his own corners, I recommend using pre-made ones if you’re new to tiling – this isn’t a step to risk getting wrong!
We applied thinset along the edges, seams, and corners to fully seal the waterproofing layer—key to keeping your shower leak-free for the long haul. Once it dried, we tested it by filling the base with water and marking the waterline. After a few hours, the level held steady – no leaks! With that done, we were ready to move on.

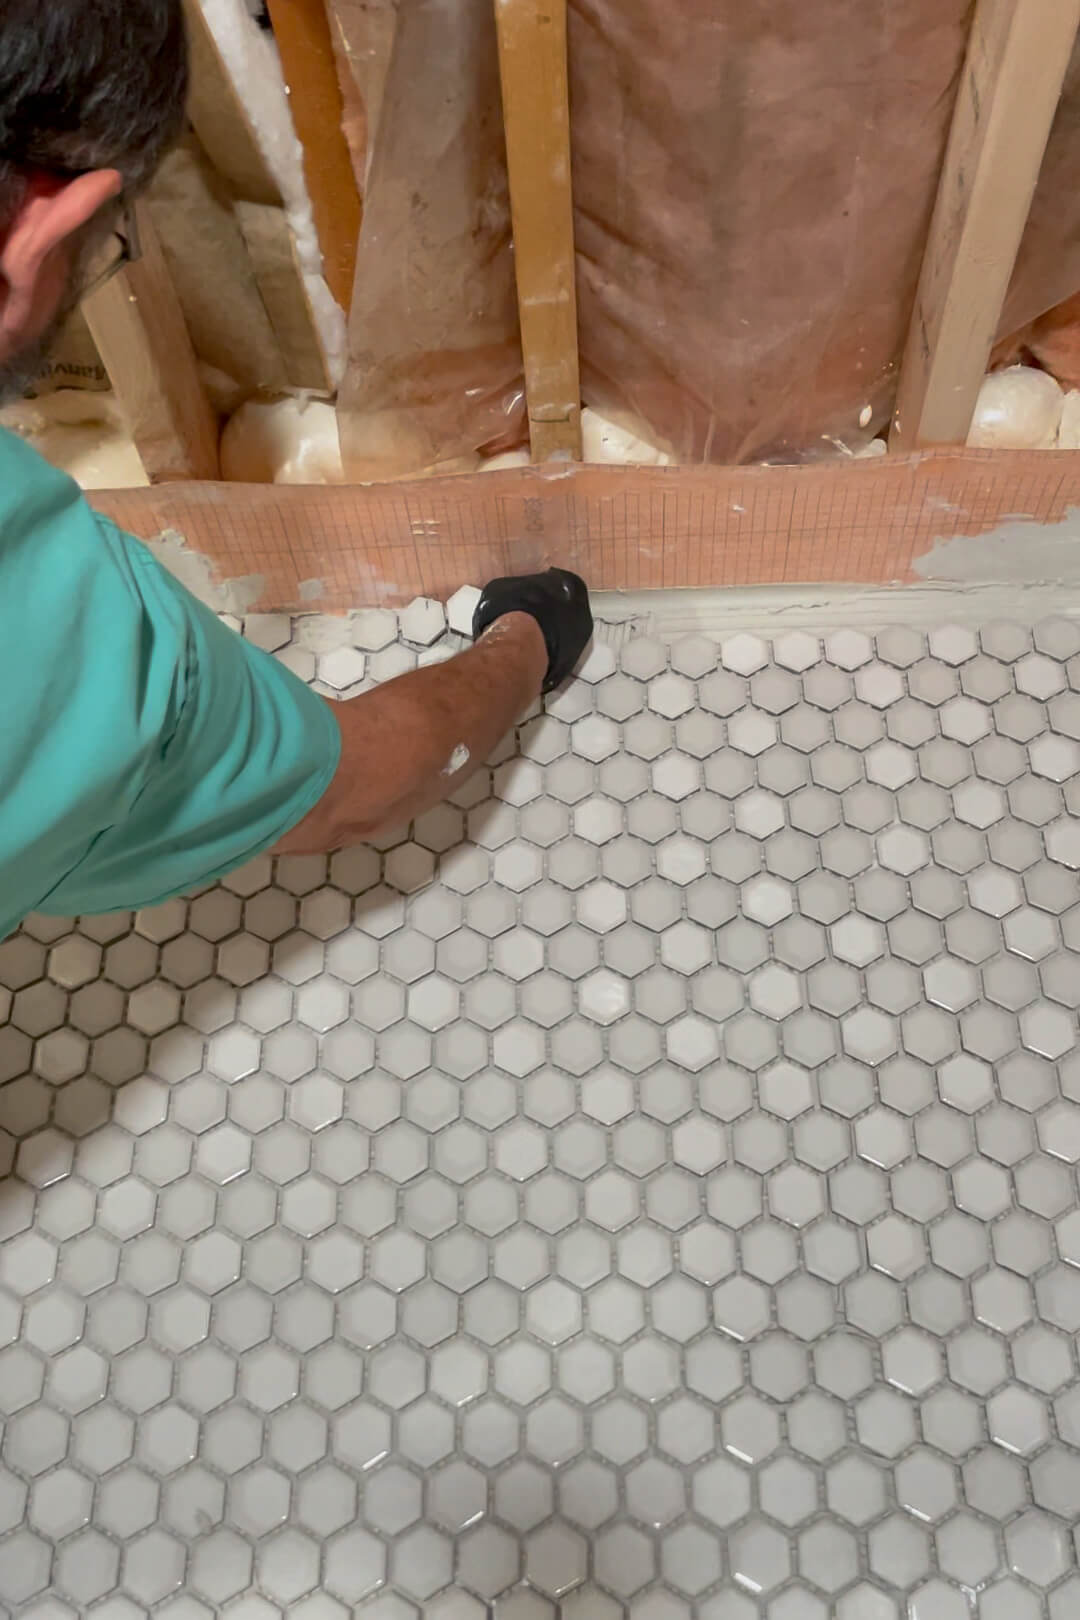
Why We Chose Penny Tile for the Shower Floor
For the floor, we opted for penny tile instead of subway tile. Why? The smaller tile pieces work better with the slope of the shower floor, creating a smooth surface that’s still grippy enough to prevent slips. Grandpa meticulously laid each sheet of penny tile, grouted the floor, and we were ready to move on to the walls.
Installing Shower Wall Tile with a Built-In Niche
Tiling the walls of a subway tile shower is where things get exciting – and a bit more challenging.
In addition to waterproofing and tiling, we had to work around the built-in nook, plumbing fixtures, and doorway. There are a lot of steps involved, but if you take your time, follow them carefully, and double-check your work, it’s absolutely a doable DIY project!
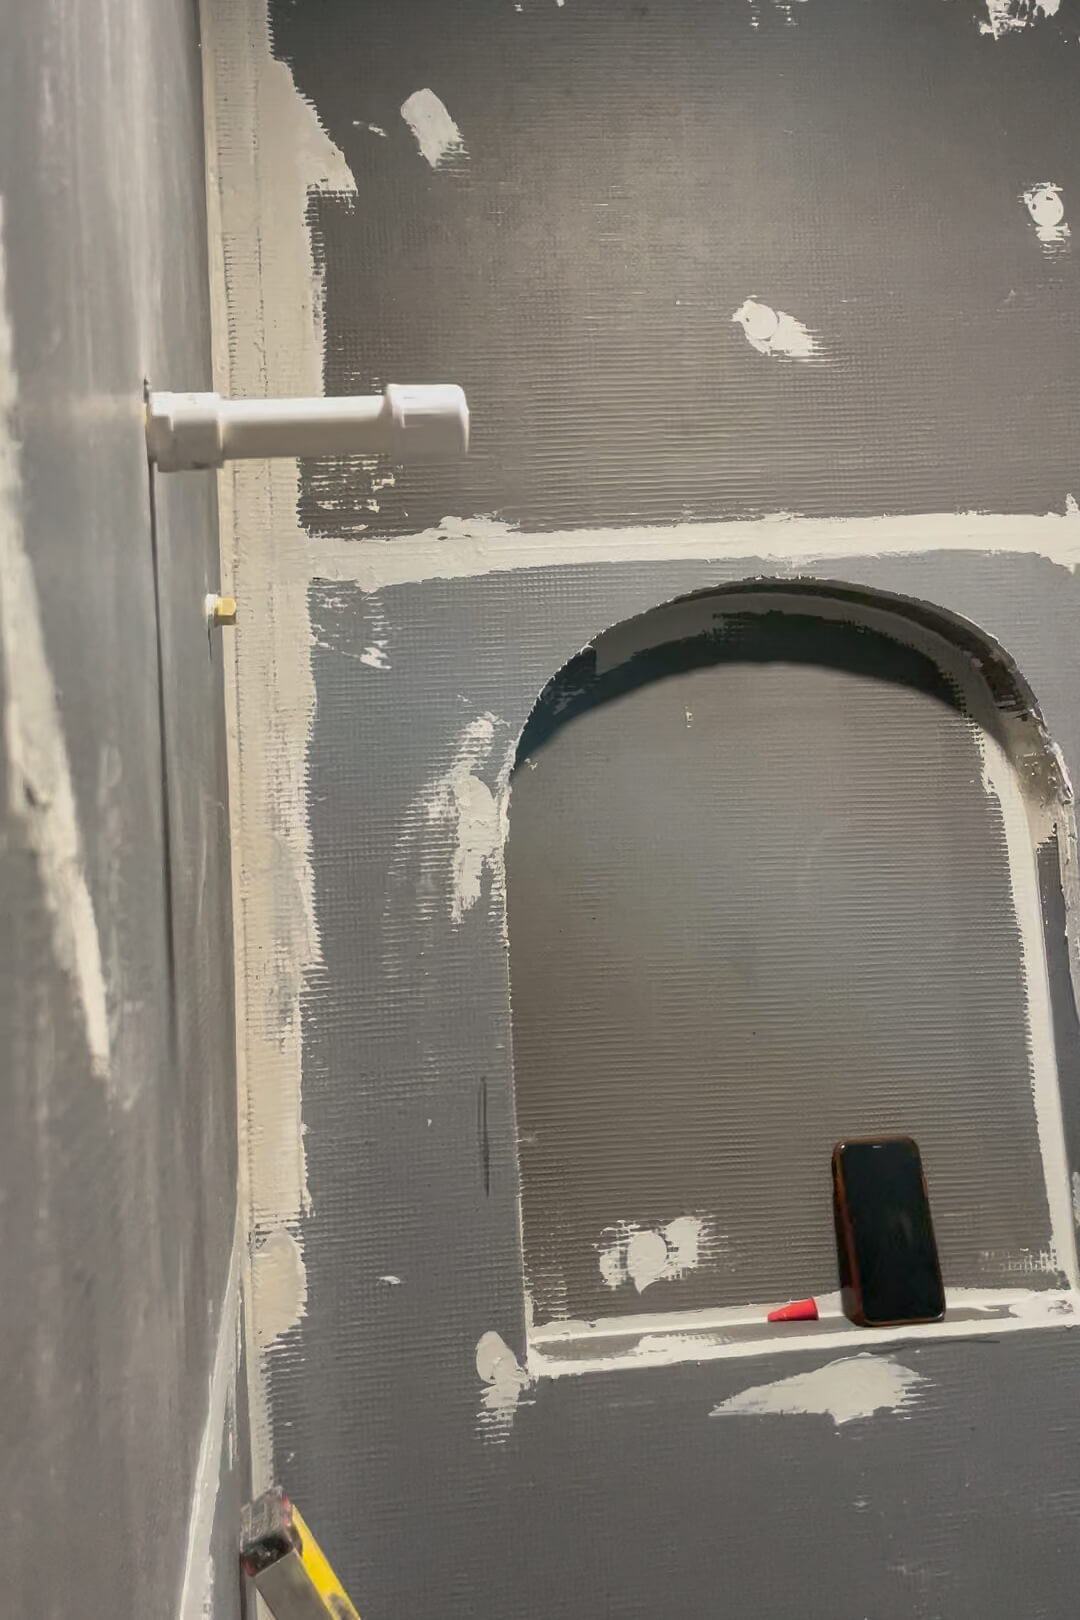
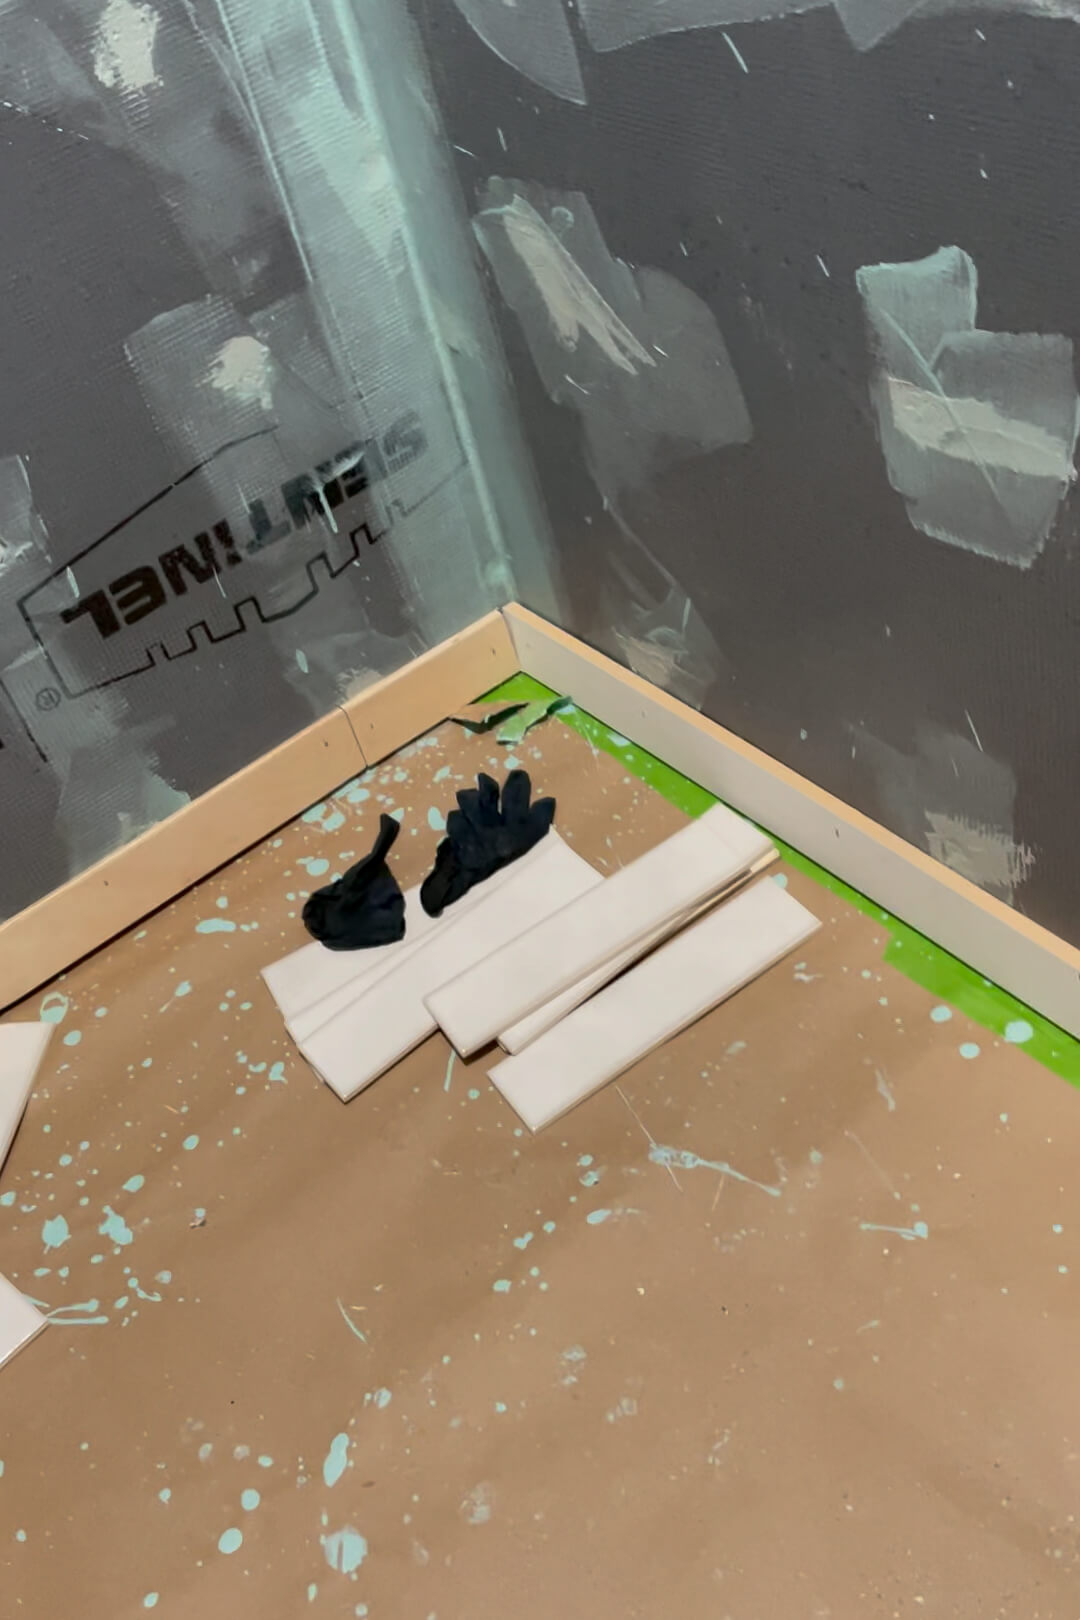
Waterproofing Shower Walls Before Tiling
Waterproofing your shower walls is just as crucial as the floor. We used foam waterproof backer boards, which attach to wall studs with screws, just like drywall. These boards overlap the floor membrane to ensure water flows into the shower base and out the drain – no leaks!
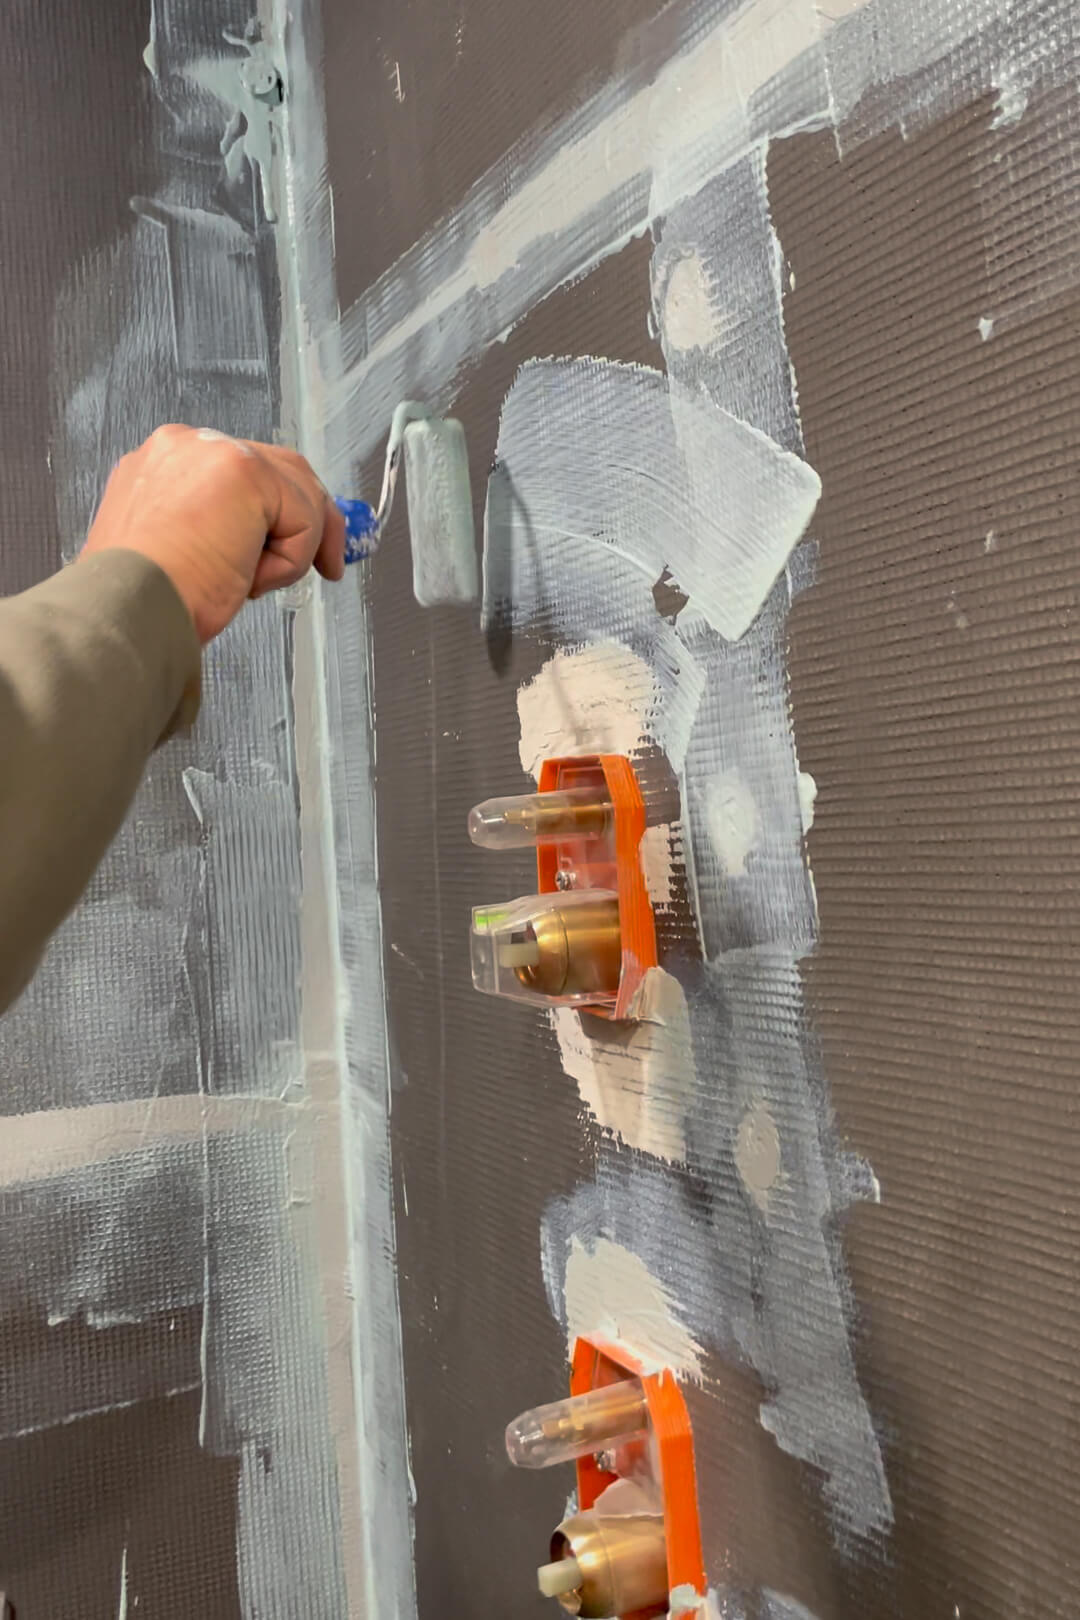
Next, we sealed every potential leak point – seams, gaps around fixtures, and screw holes—using polyurethane sealant smoothed out with a trowel. Once it dried, we rolled on a waterproofing membrane that applies like paint but dries into a thin, rubbery layer. It’s a bit of extra work, but absolutely essential for a watertight, long-lasting shower.
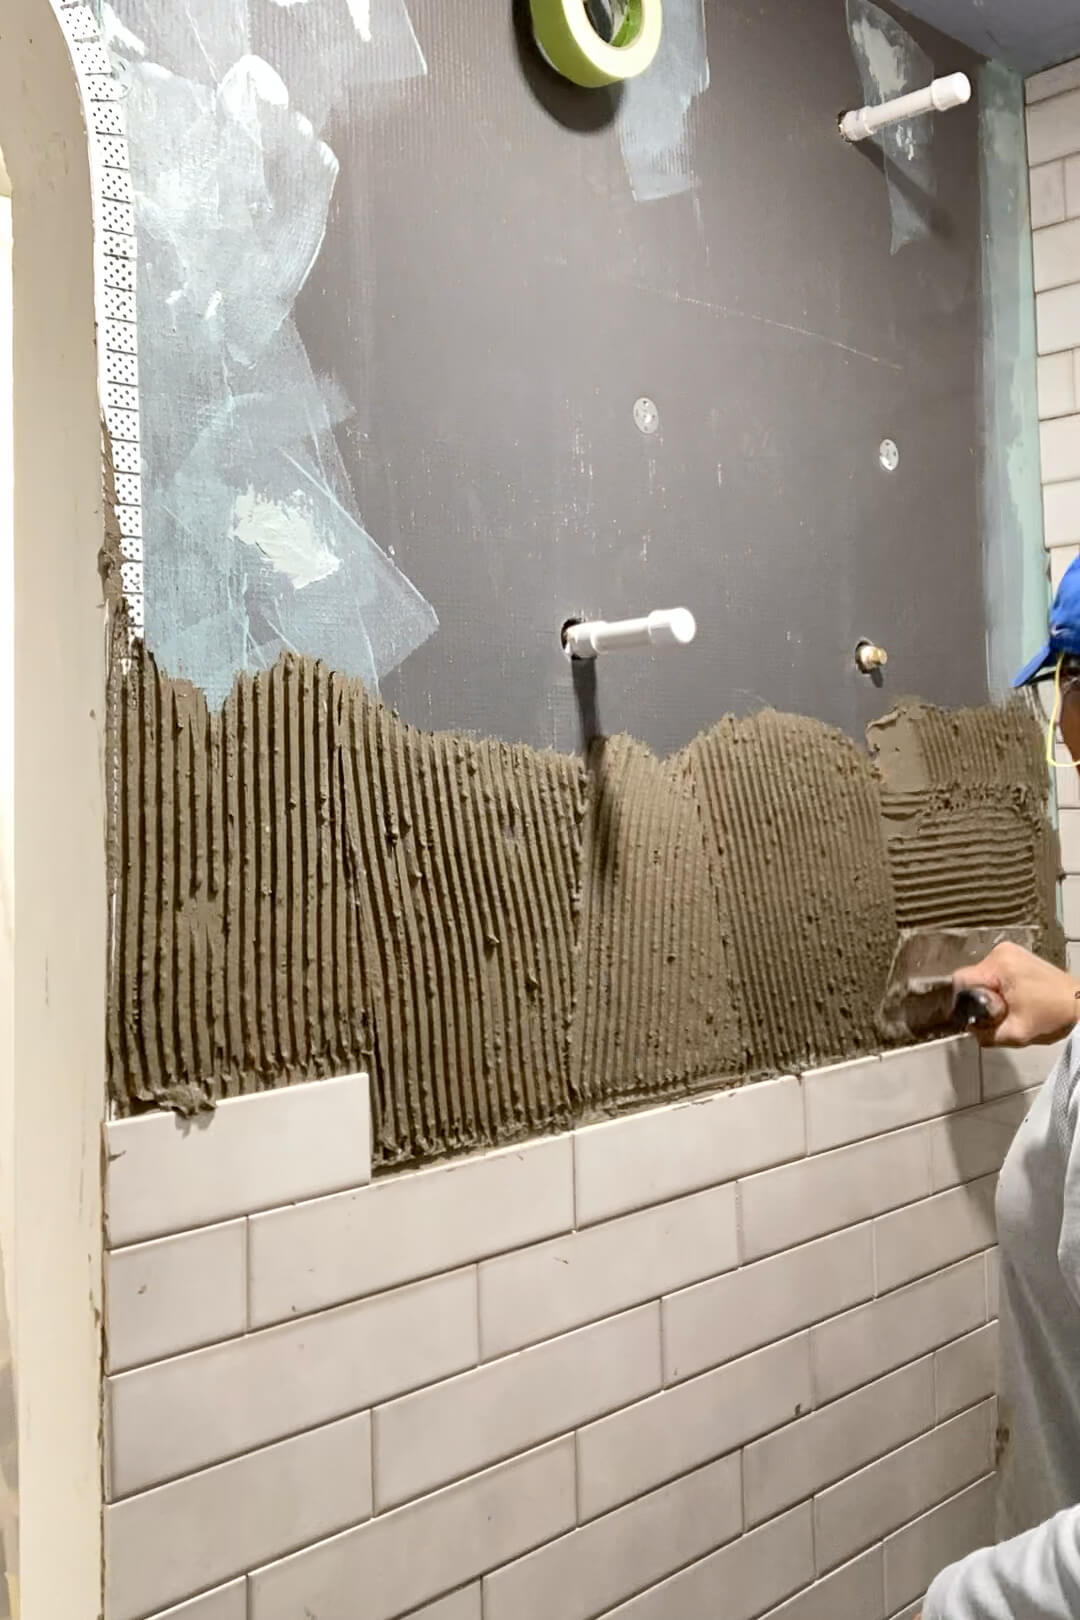
How to Install Subway Tile in a Shower
Floors in homes are rarely perfectly level, but we wanted our tiles to be straight and even. That’s where a ledger board comes in handy. Using a brad nailer, we attached a level board around the base of the shower, creating a solid starting point for the first row of tiles.
Once all the tiles were up, we removed the ledger board, sealed the tiny nail holes, and trimmed the bottom tiles to fit neatly into the gap. Don’t skip this step – uneven tiles would be glaringly obvious here.
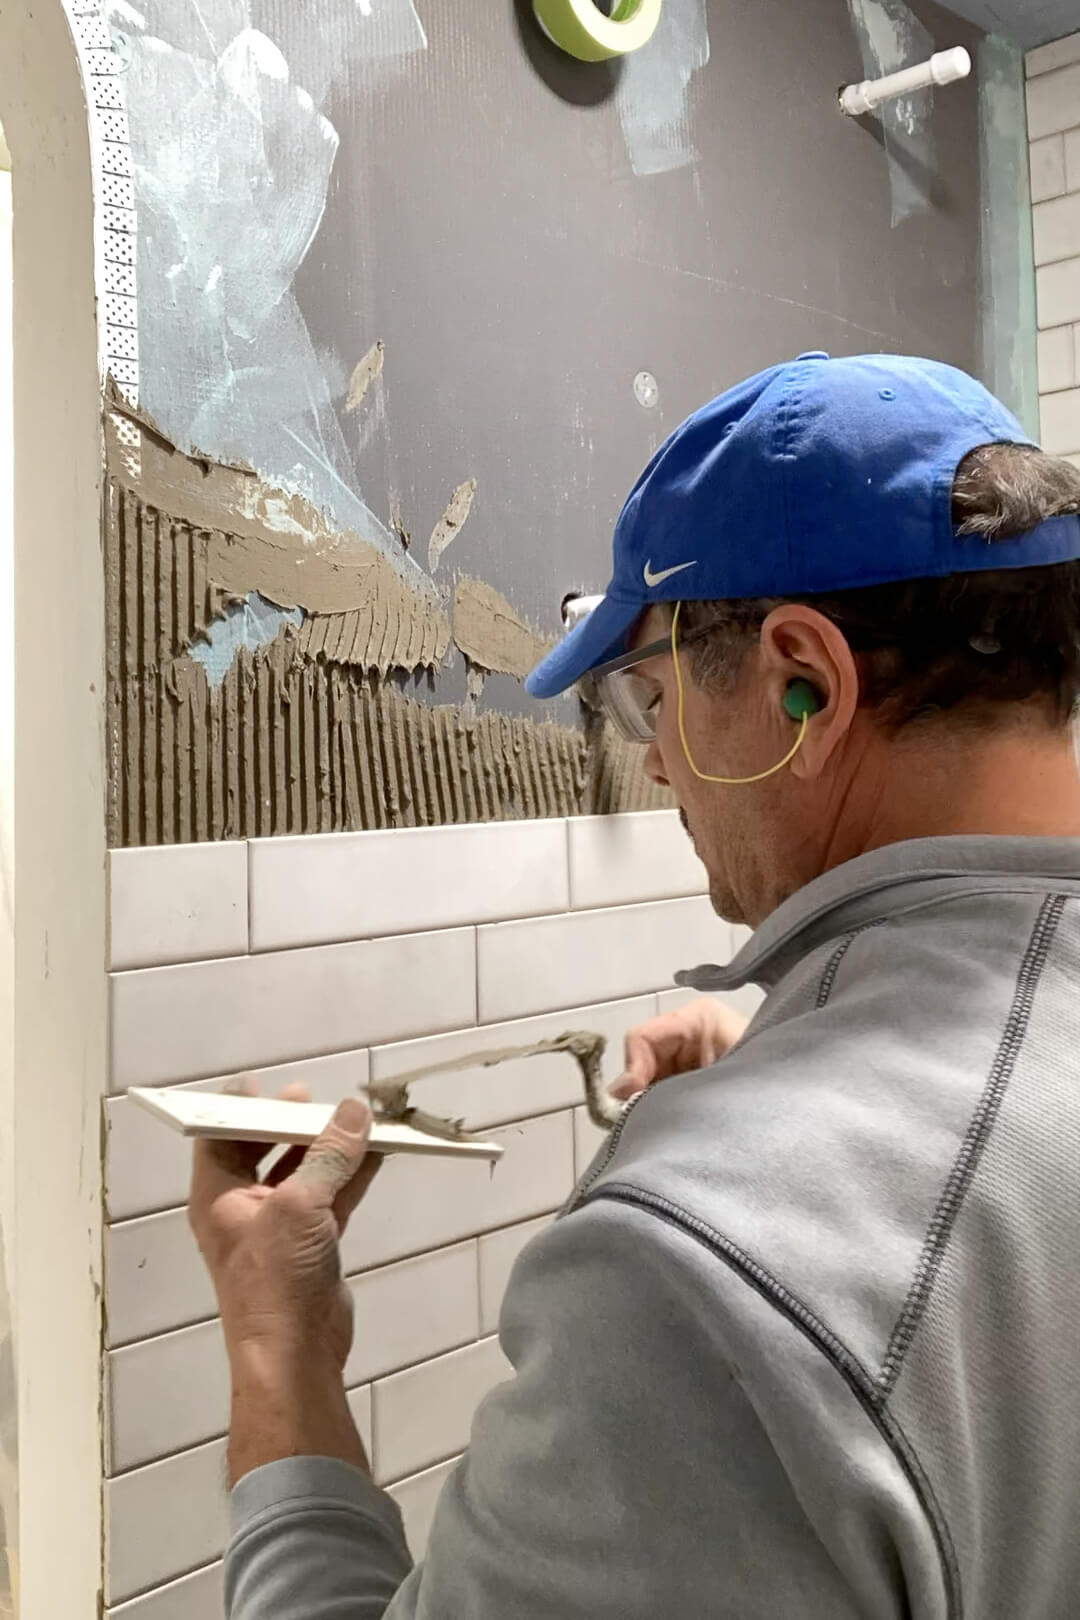
Tiling a subway tile shower at this stage is much like any other tiling project. Starting at the bottom, we spread mortar with a notched trowel – just enough for a few rows at a time to prevent it from drying out. Grandpa also back-buttered each tile with a thin layer of mortar before pressing it onto the wall, ensuring a strong, secure bond.
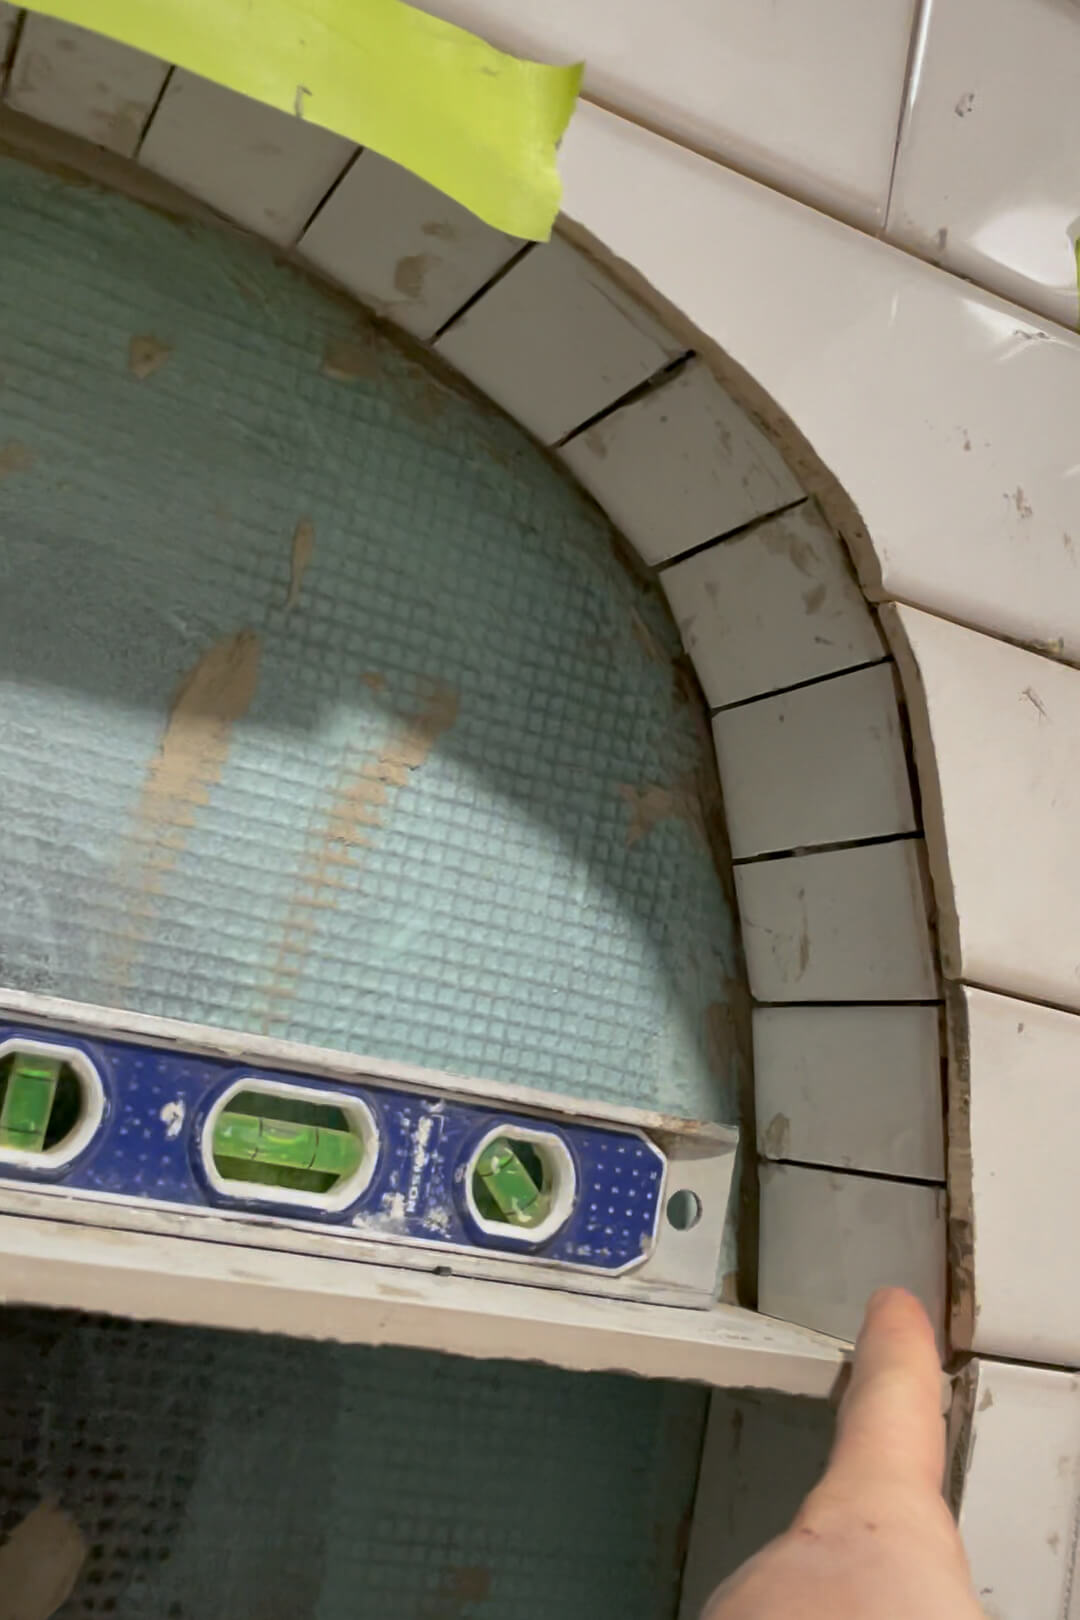
Arches are a big theme in my home – they’re everywhere! From the kitchen openings to the pantry doorway and even the built-in shelves in the living room. I couldn’t resist adding a couple to the bathroom.
For the shower nook and entrance arches, we got creative. Using a tile saw, we cut small sections to fit along the curves, securing them with tiny wedge spacers. Once each piece was set with mortar, Grandpa added painter’s tape to hold everything steady while it dried.

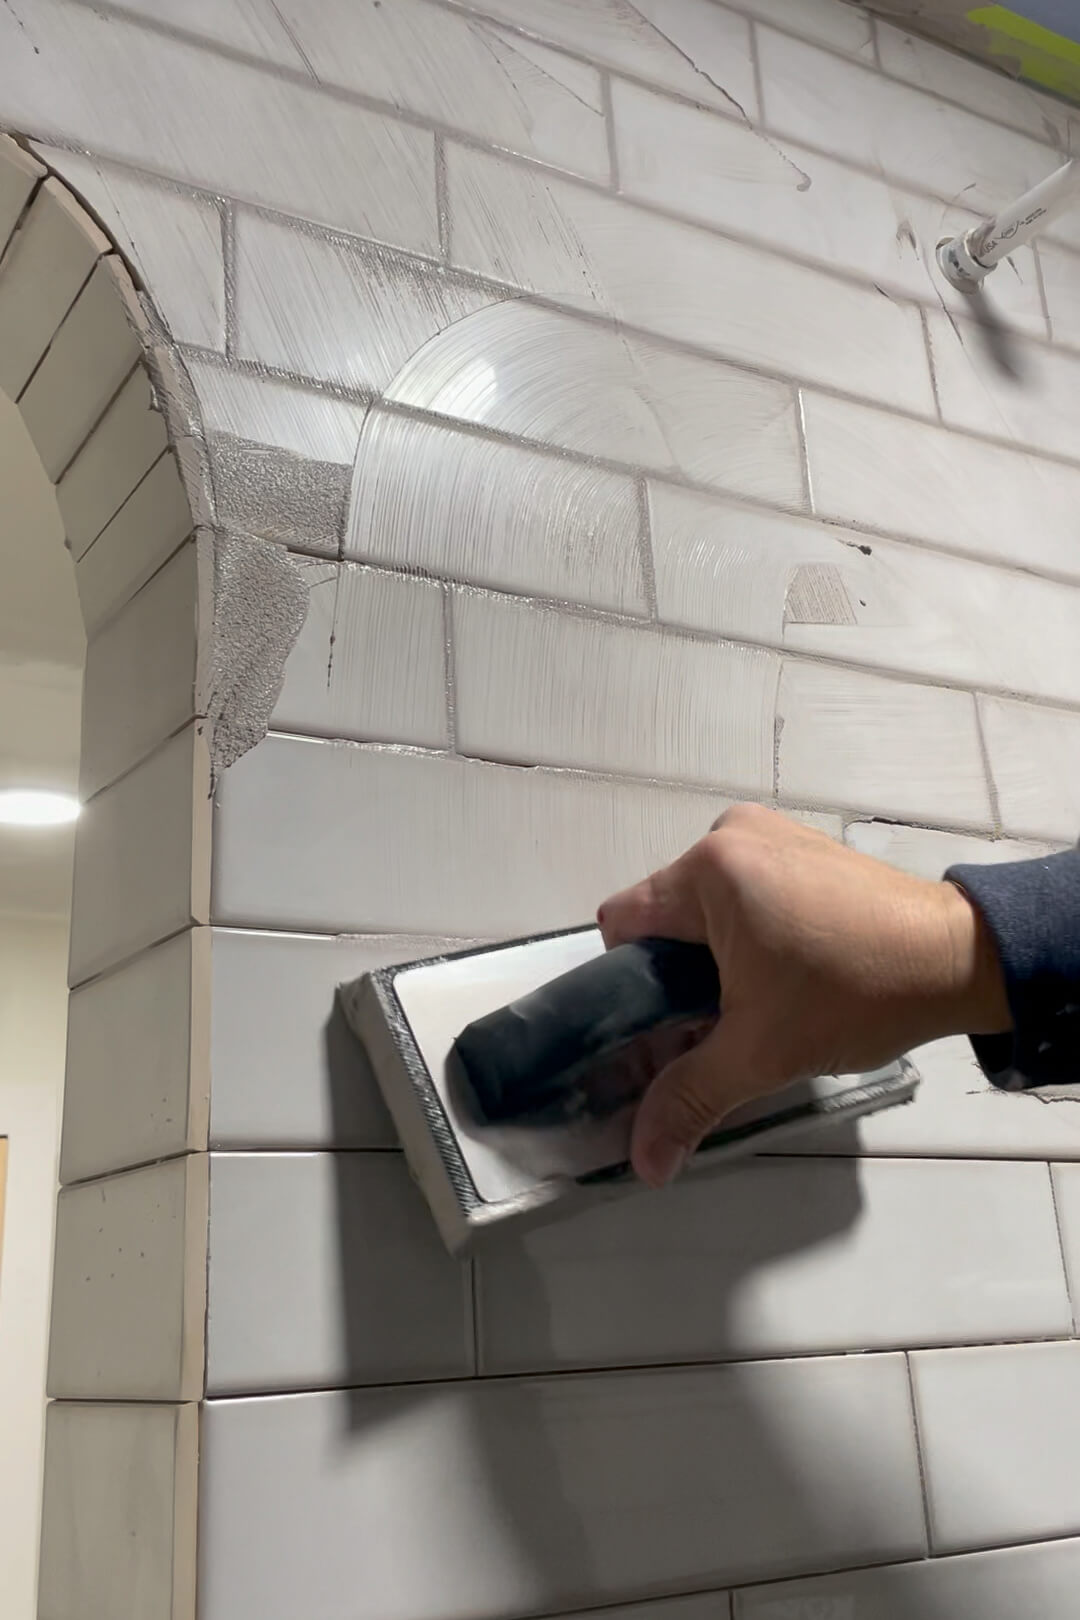
How to Grout a Subway Tile Shower Wall
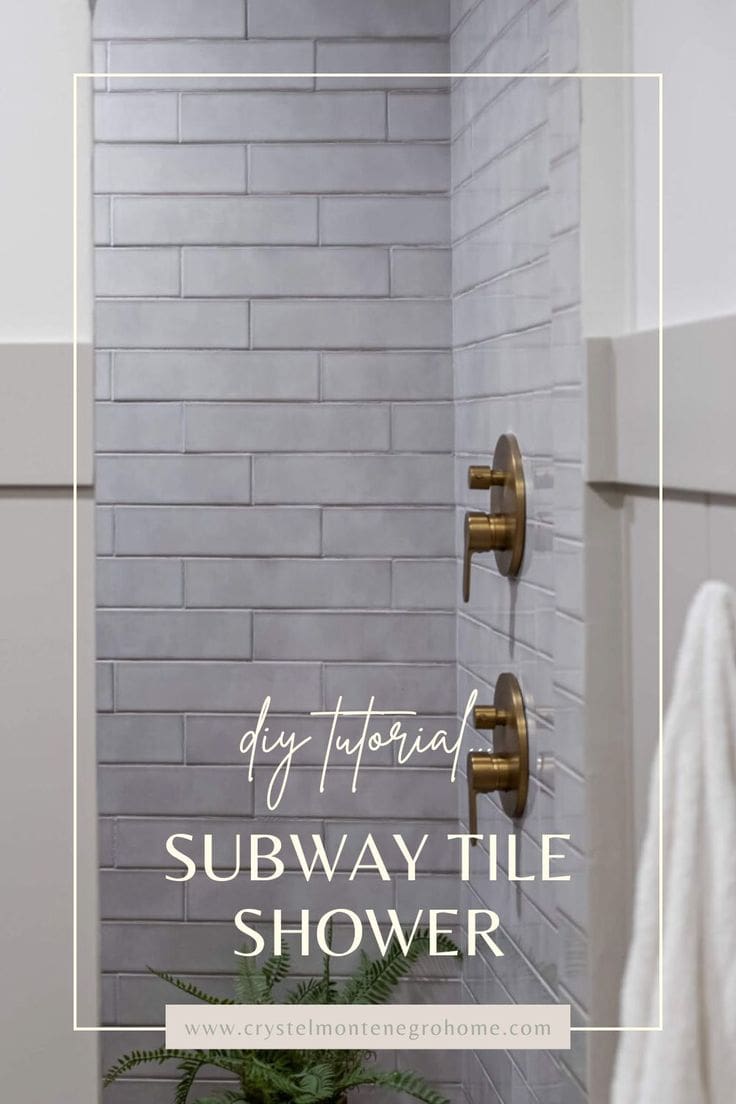
Once the mortar was dry (24–48 hours, it was time for grout. I chose a warm gray grout to complement the white subway tile shower without being too stark. Using a grout float, we filled in the joints and wiped away the excess with a damp sponge. The grout made the tiles pop and gave the shower a finished, polished look.
For a visual guide on exactly how to grout a subway tile shower, you might find this tutorial helpful. It’s from one of our previous homes, but the process is the same:
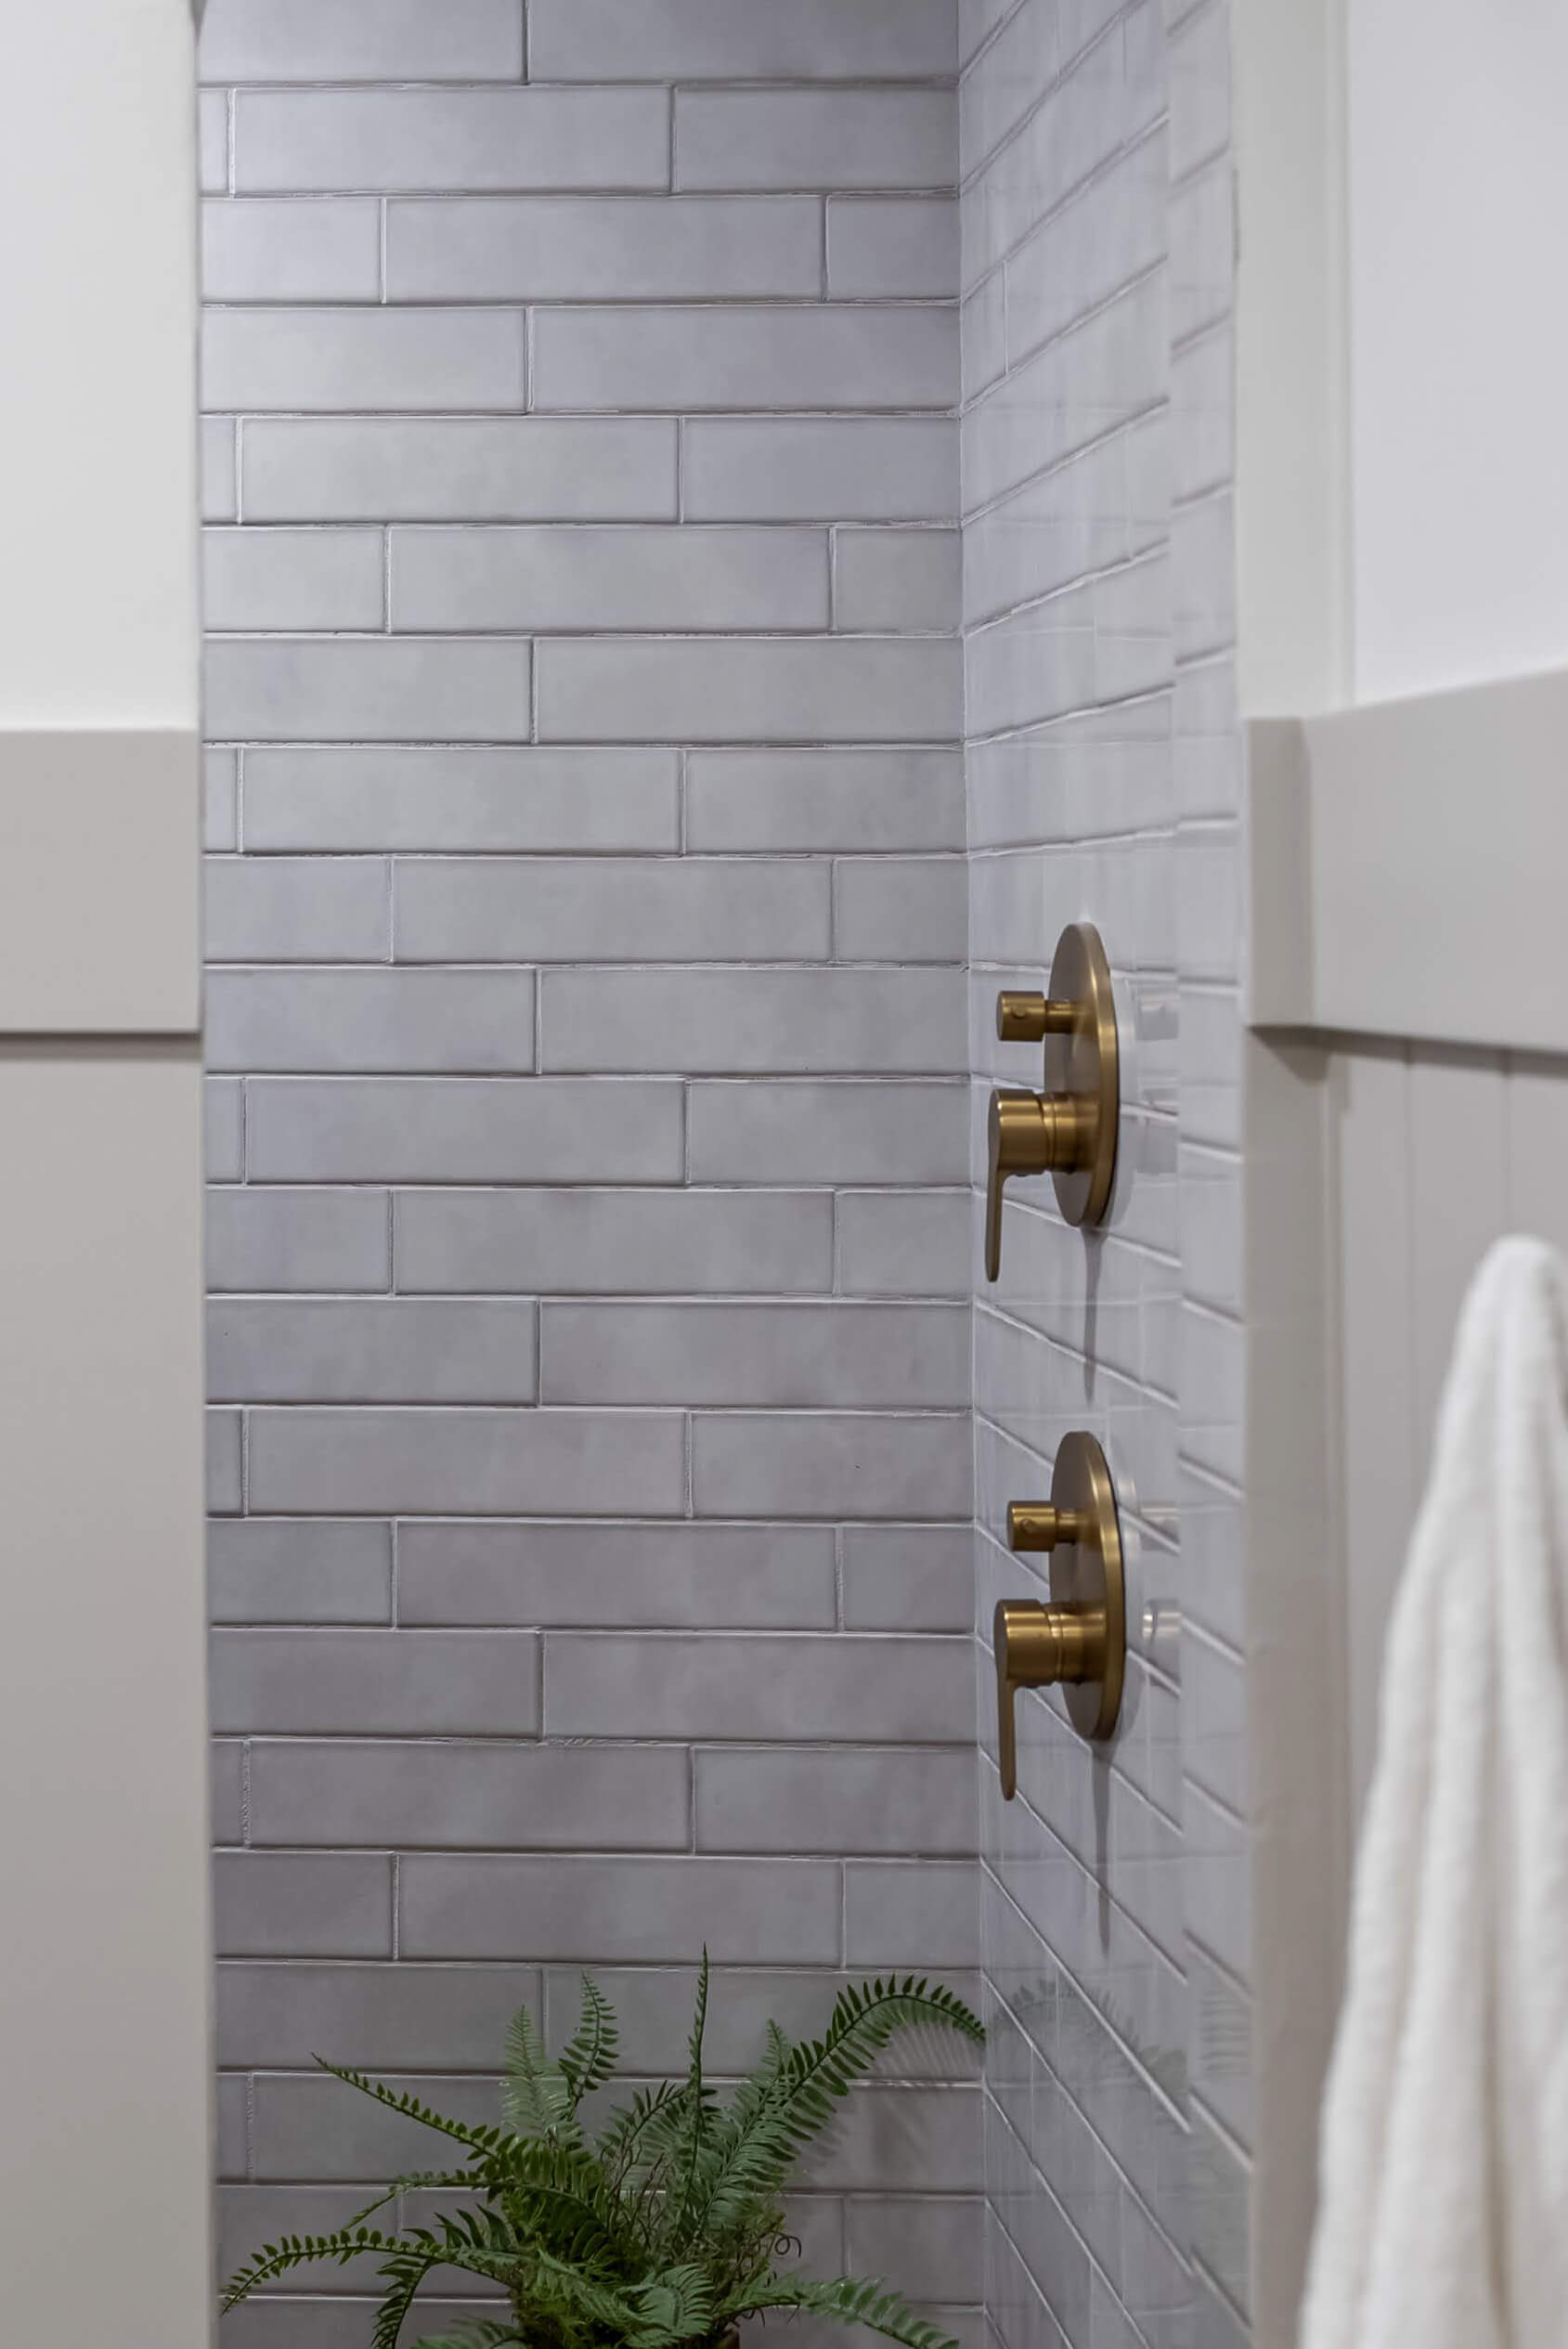
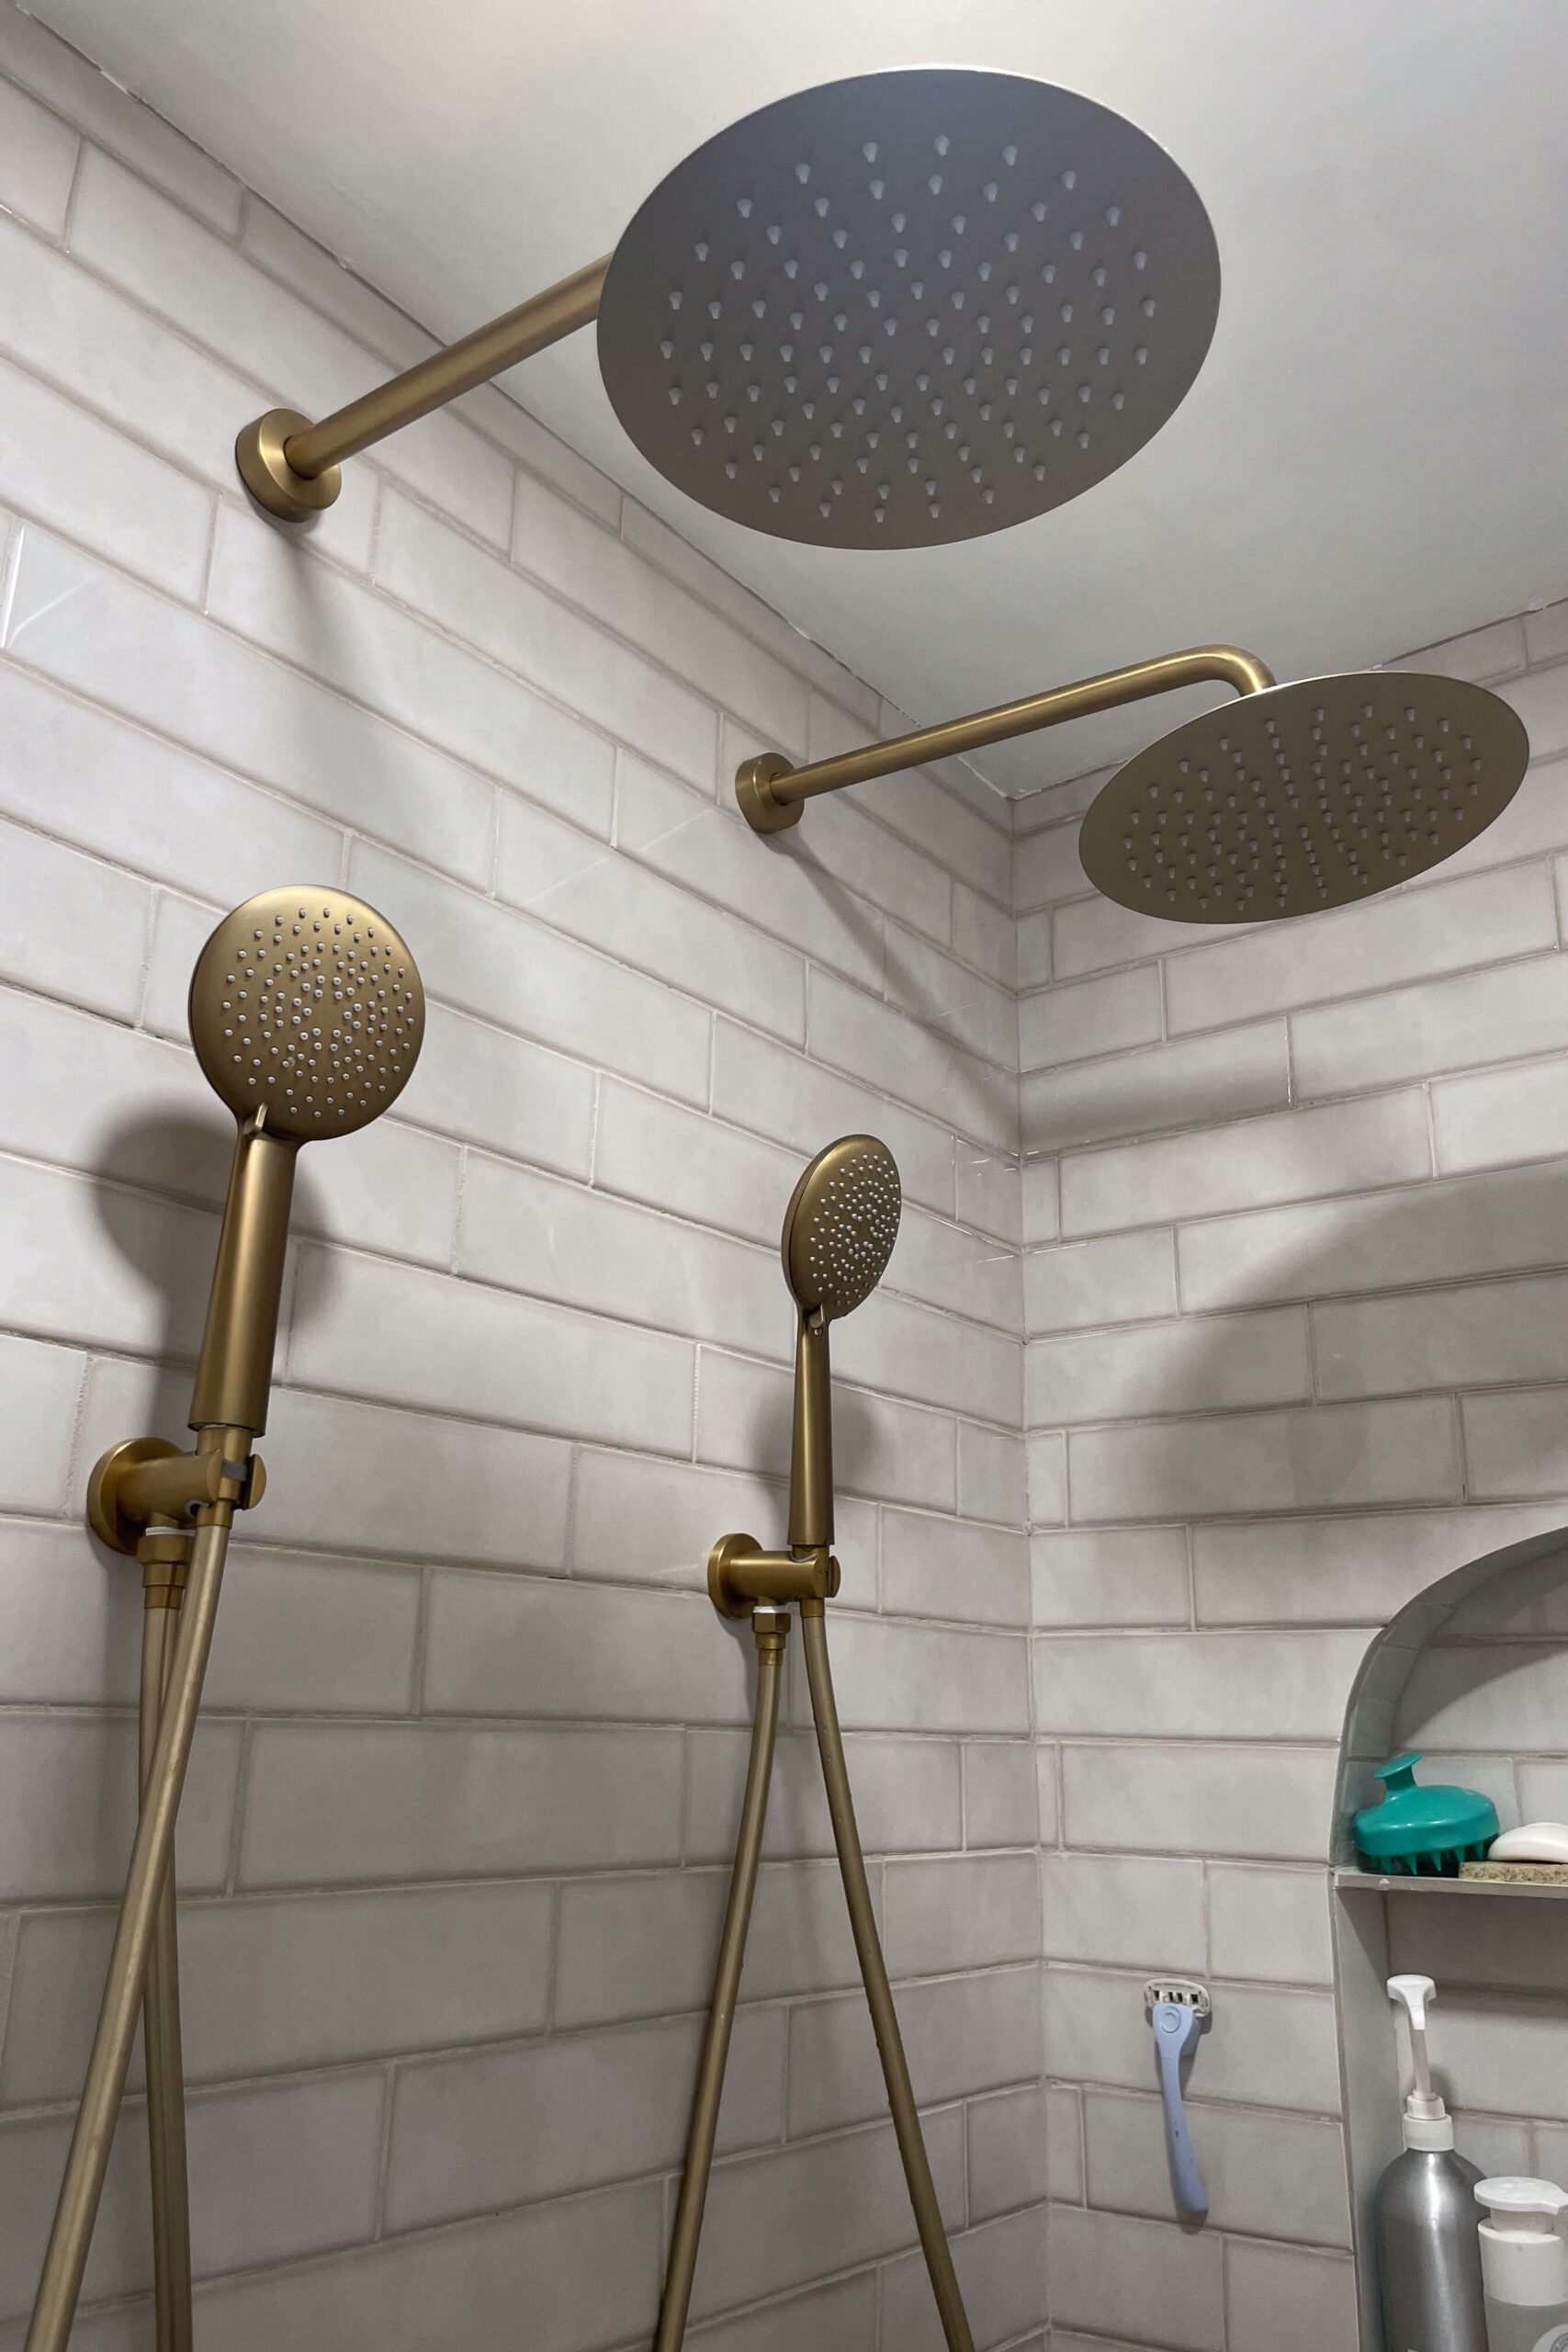
Installing Shower Fixtures After Tiling
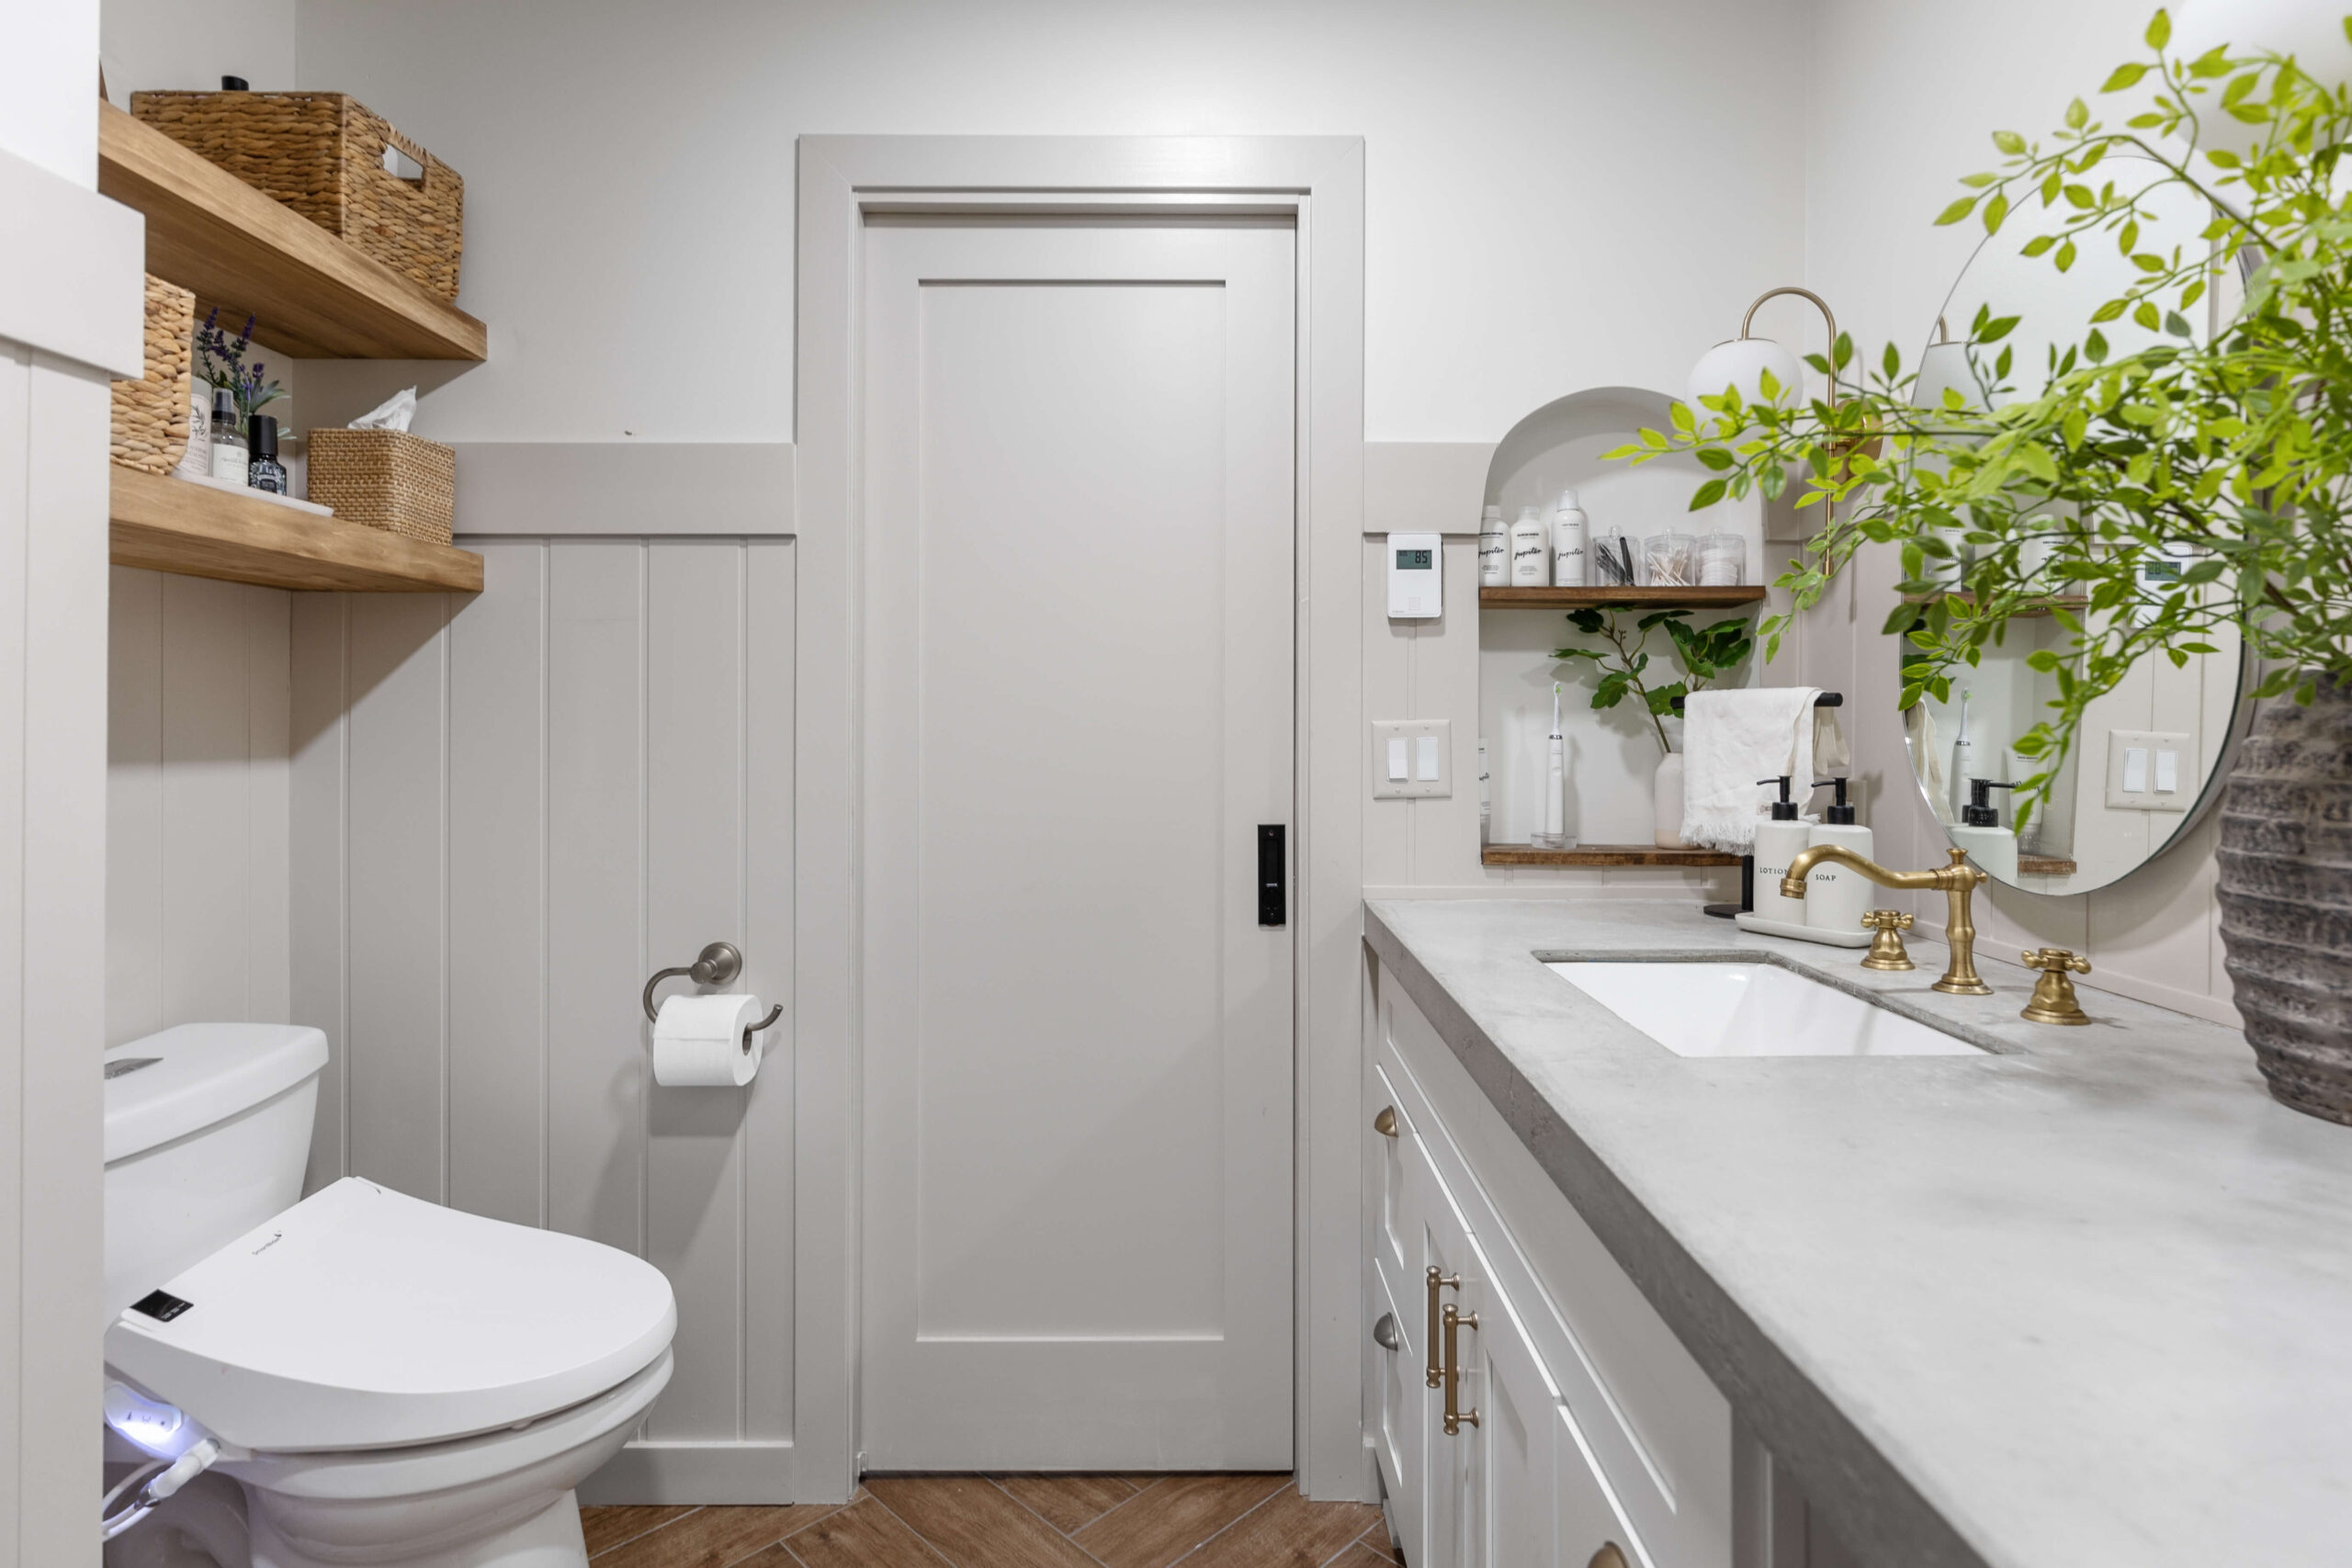
The brass fixtures we chose added a touch of warmth and elegance. With double rain heads, handheld options, and smart placement of handles outside the shower, the setup is both beautiful and functional.
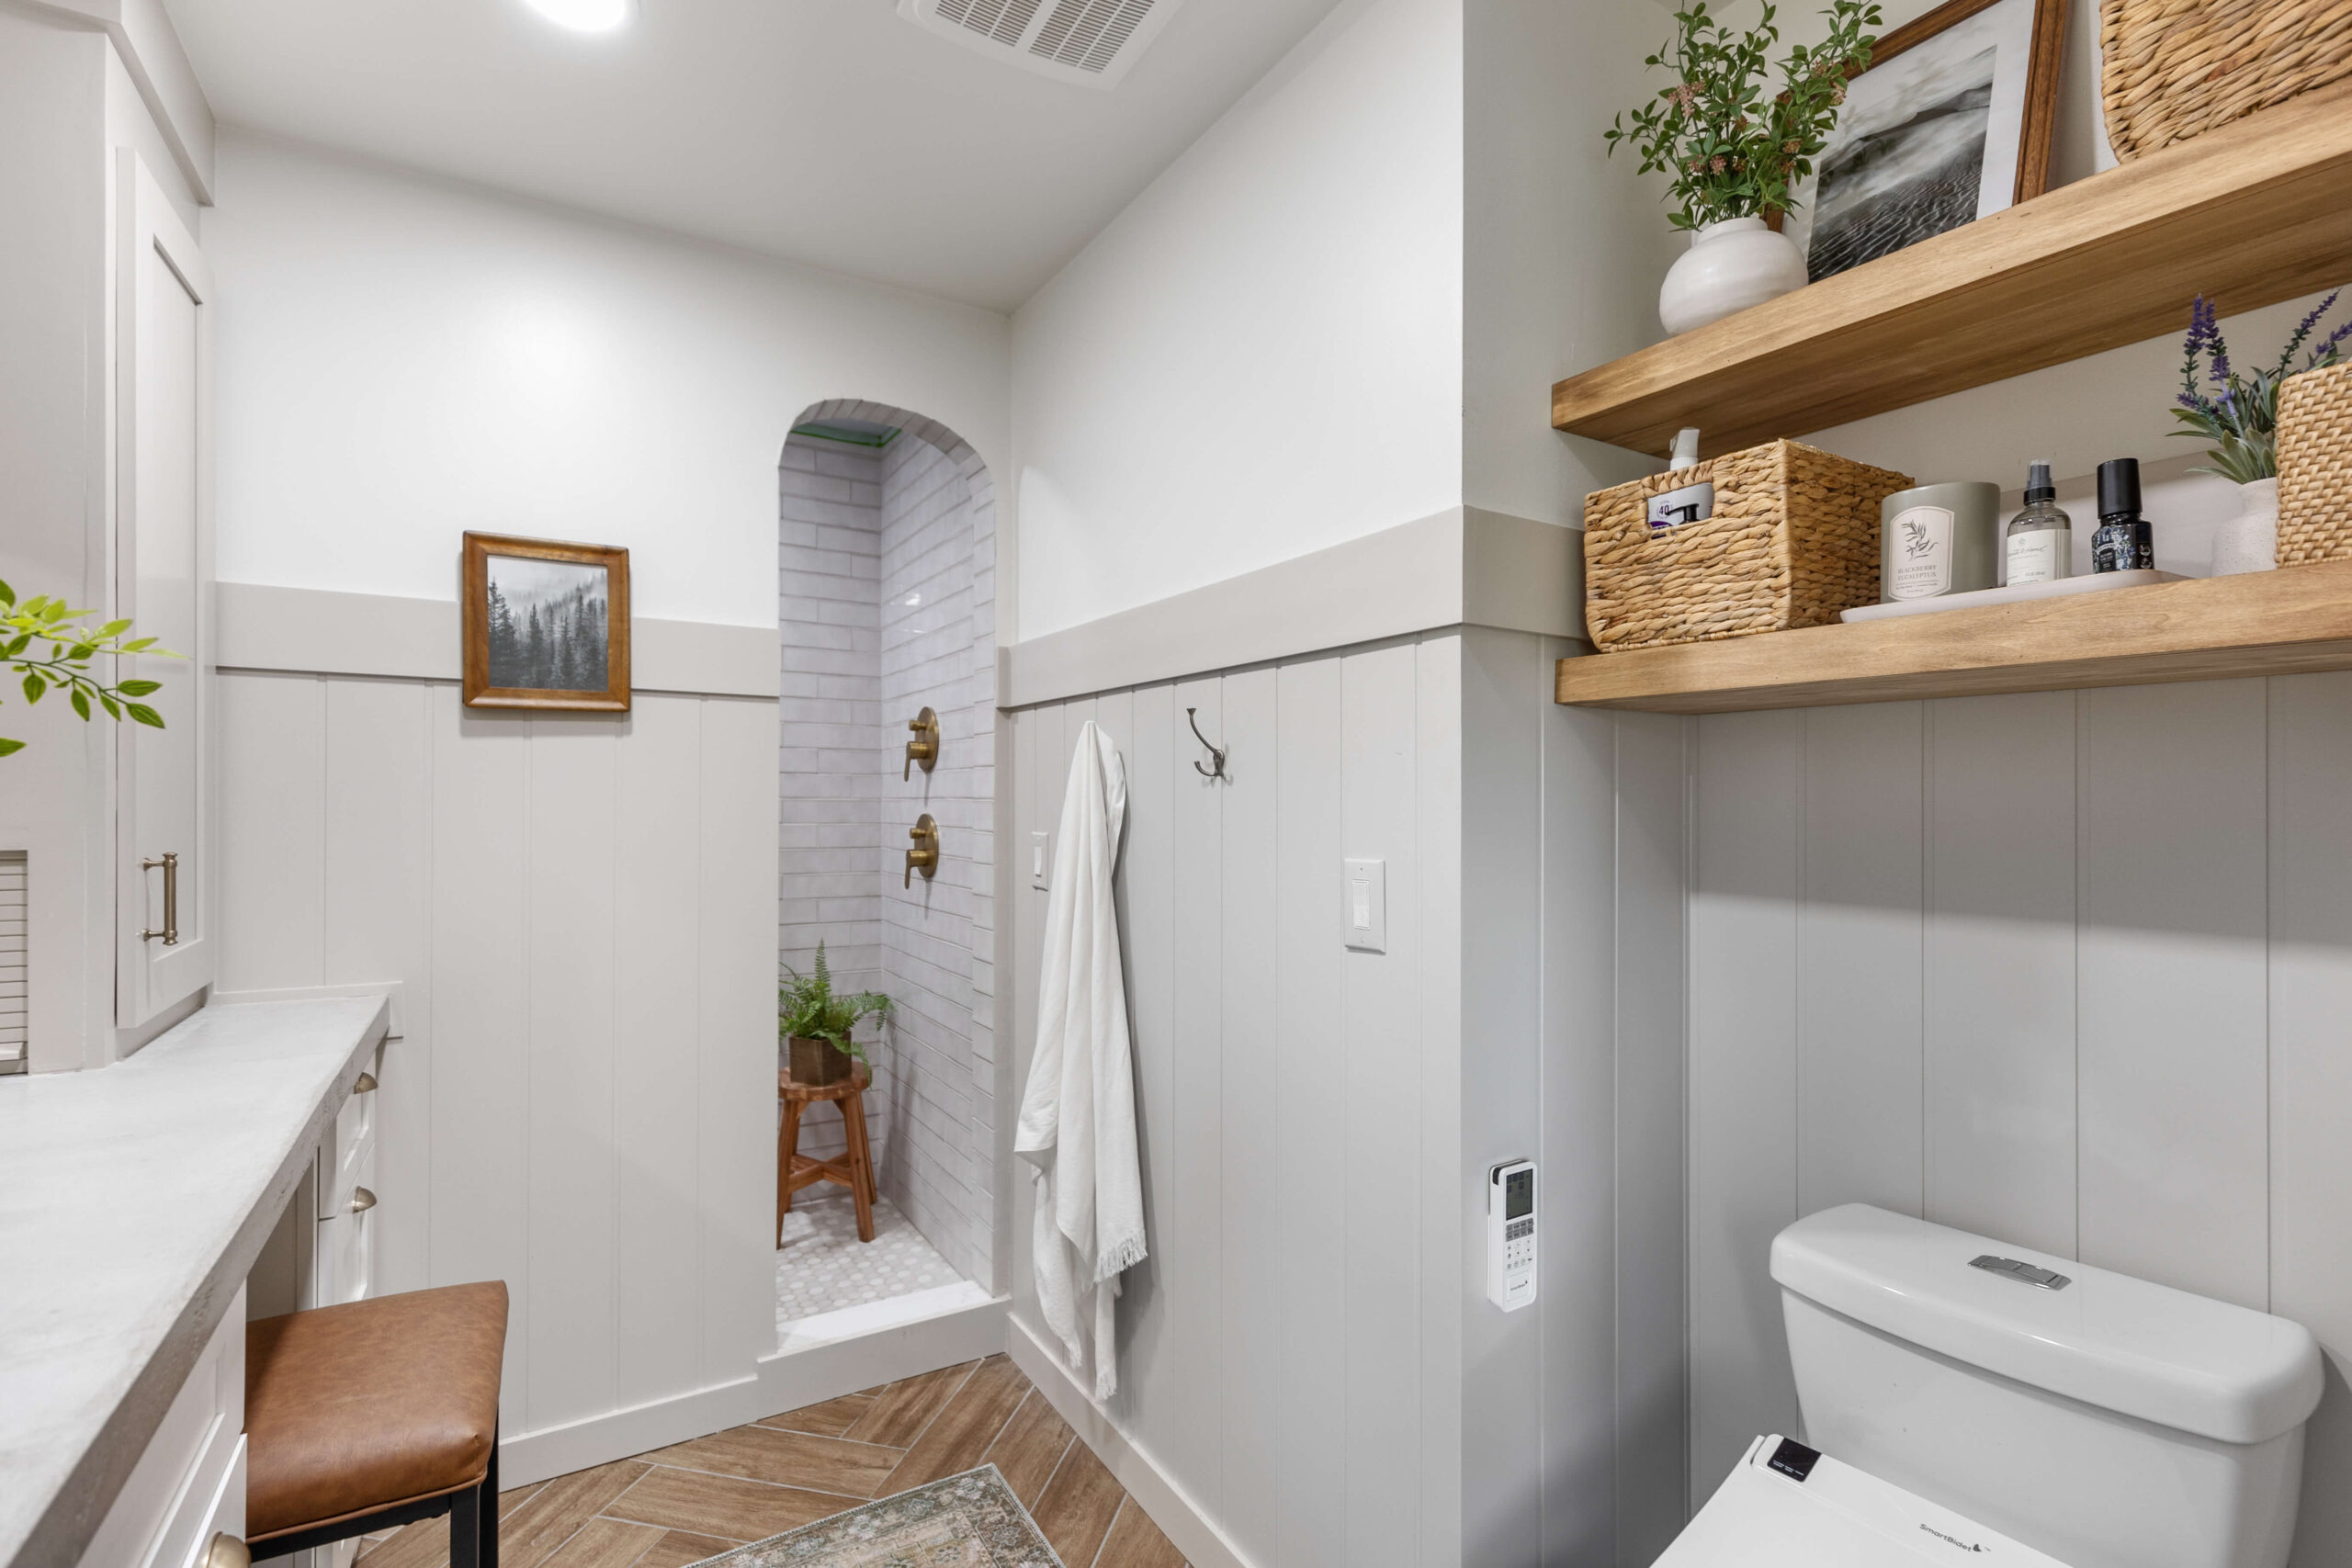
Our Finished DIY Subway Tile Shower Reveal
I couldn’t be happier with how our subway tile shower turned out. It’s stylish, spacious, and so much more functional than the old setup. What started as a cramped, outdated bathroom is now a calming retreat that feels like a spa just off our bedroom.
I’ll be sharing posts on all the projects that went into this bathroom transformation—there’s so much to cover! From the heated herringbone floors to a custom vanity we created from a stock kitchen cabinet, every detail has its own story. This space was a labor of love, and I can’t wait to take you through it all!
Curious about any of the items you see here? You can find links to everything over on my Shop My Home page!
📌 Save This Project for Later
Pin now and come back anytime you’re planning your own DIY shower upgrade!
FAQs About DIY Subway Tile Showers
Subway tile is a classic, versatile option that works with many design styles, from modern to traditional. It’s durable, easy to clean, and offers a timeless look that never goes out of style.
Building a subway tile shower can be a DIY project if you have basic tiling and plumbing skills. However, if you’re unsure about waterproofing or cutting tiles for tricky areas like arches, hiring a professional ensures a flawless finish.
Grout color depends on the look you want. White grout creates a seamless, clean look, while darker grout (like gray or black) highlights the tile pattern and adds contrast.
No, subway tile is too large for a sloped shower floor. Smaller tiles, like penny tile or mosaic, are better suited because they conform to the slope and provide more grip.
Regular cleaning with mild soap and water prevents soap scum buildup. A squeegee after each use helps keep grout lines clean. Sealing the grout annually can also protect against stains and moisture.