


Laying a Herringbone Tile Floor in the Bathroom


Updated July 13, 2026
Transforming a bathroom into a cozy, stylish retreat is all about the details, and nothing makes a bigger statement than a herringbone tile floor. When we tackled this DIY renovation, we didn’t stop at making it gorgeous – we added radiant floor heating for that luxurious, toasty feel on chilly mornings. From waterproofing to nailing that all-important first tile, here’s the step-by-step process.

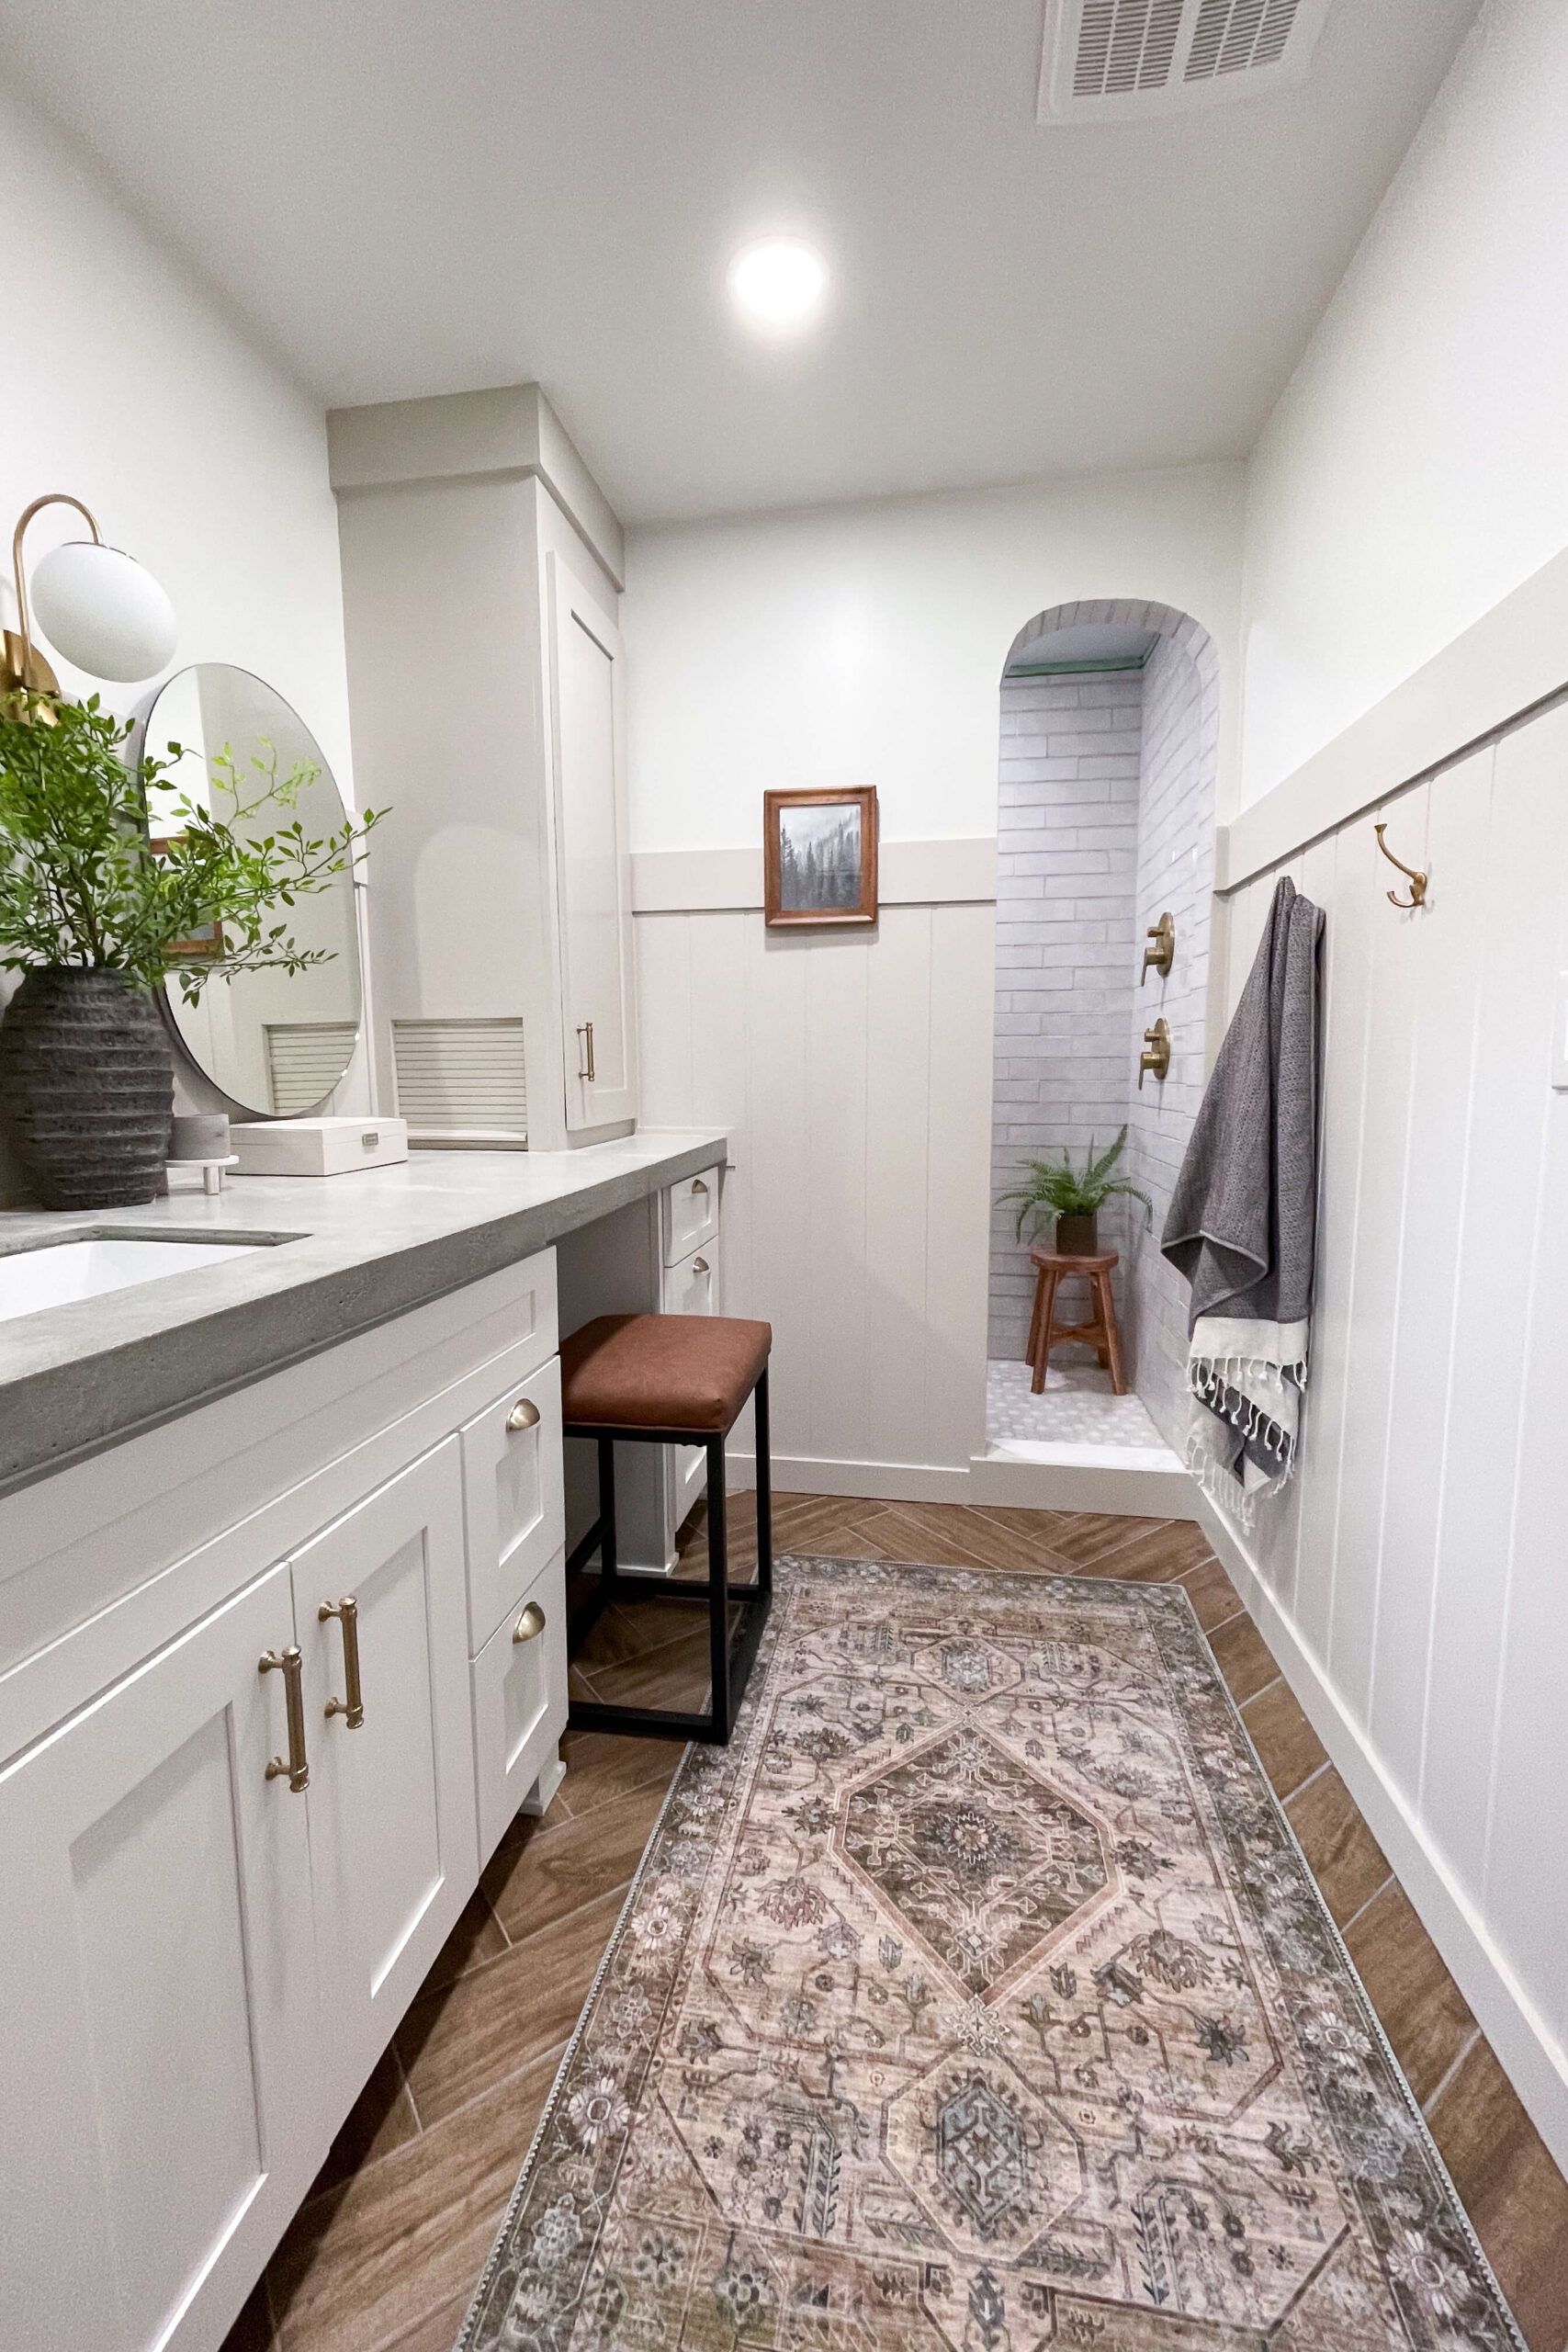
Table of Contents
- Tools You’ll Need to Install a Herringbone Tile Floor
- Materials for a DIY Herringbone Tile Floor with Radiant Heat
- Waterproofing the Bathroom Floor
- Install Radiant Floor Heating Kit
- Laying a Herringbone Tile Floor
- My Finished Herringbone Tile Floor
- The Before and After
- Common Questions About Heated Tile Floors and Herringbone Patterns
Tools You’ll Need to Install a Herringbone Tile Floor
Materials for a DIY Herringbone Tile Floor with Radiant Heat
- Floor tile ( I used this one )
- Schluter thinset
- Waterproofing membrane
- Radiant floor heating kit
- Mortar
- Tile leveling system with pliers
- Grout
- Large grout sponges
Waterproofing the Bathroom Floor
When working on a bathroom floor – especially one near a dreamy open shower like mine – waterproofing is a must. We used the Schluter Ditra membrane paired with Schluter thinset to lock it down. My father-in-law (aka Grandpa) spread thinset evenly with a float to ensure the membrane had solid coverage under the herringbone tile floor.

Pro tip: Dry-fit and cut the membrane to size before attaching it with thinset. It makes the process so much smoother!
Install Radiant Floor Heating Kit
If you’re skipping heated floors, you can move straight to laying your herringbone tile floor – but trust me, you don’t want to skip this step. Picture stepping out of the shower on a freezing winter morning onto warm, toasty tiles. It’s pure magic!
The radiant floor heating mat sits right on top of the waterproofing membrane. We installed it on the right side of the floor, avoiding areas like under the cabinets to save energy. Make sure the mat’s electrical cord lines up with the wall where the thermostat will go. Once positioned, we secured it with a layer of Schluter thinset.


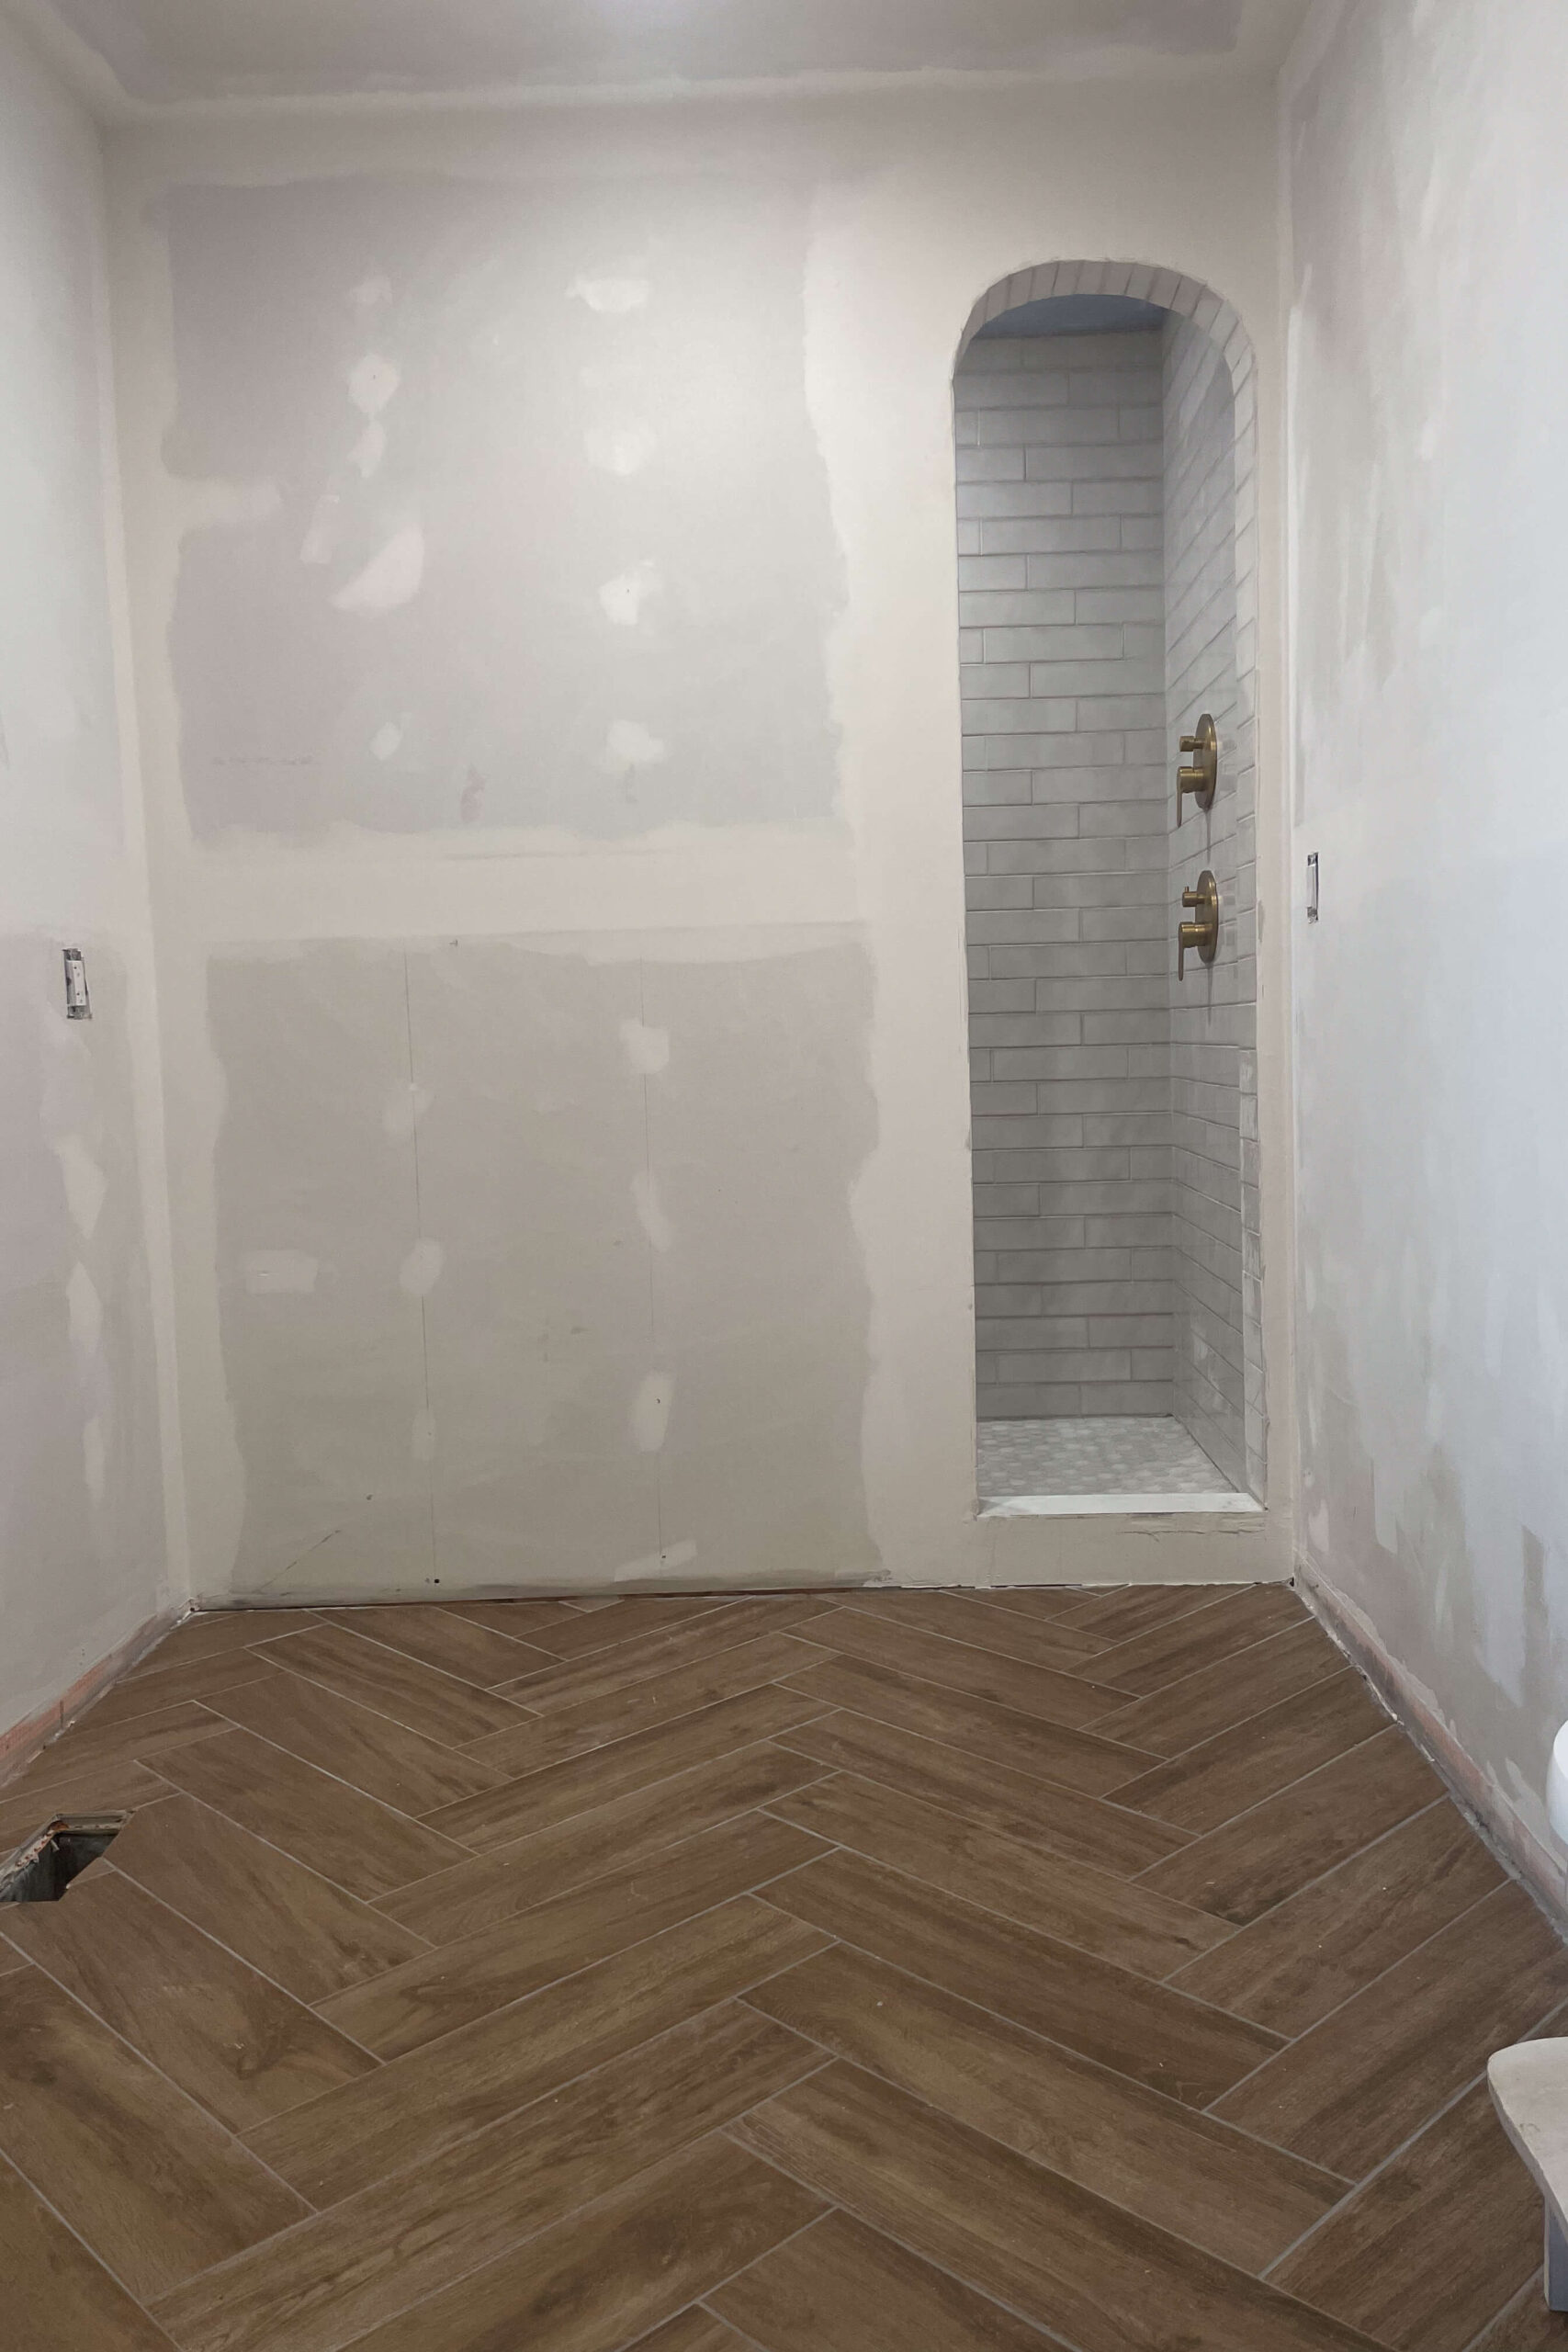
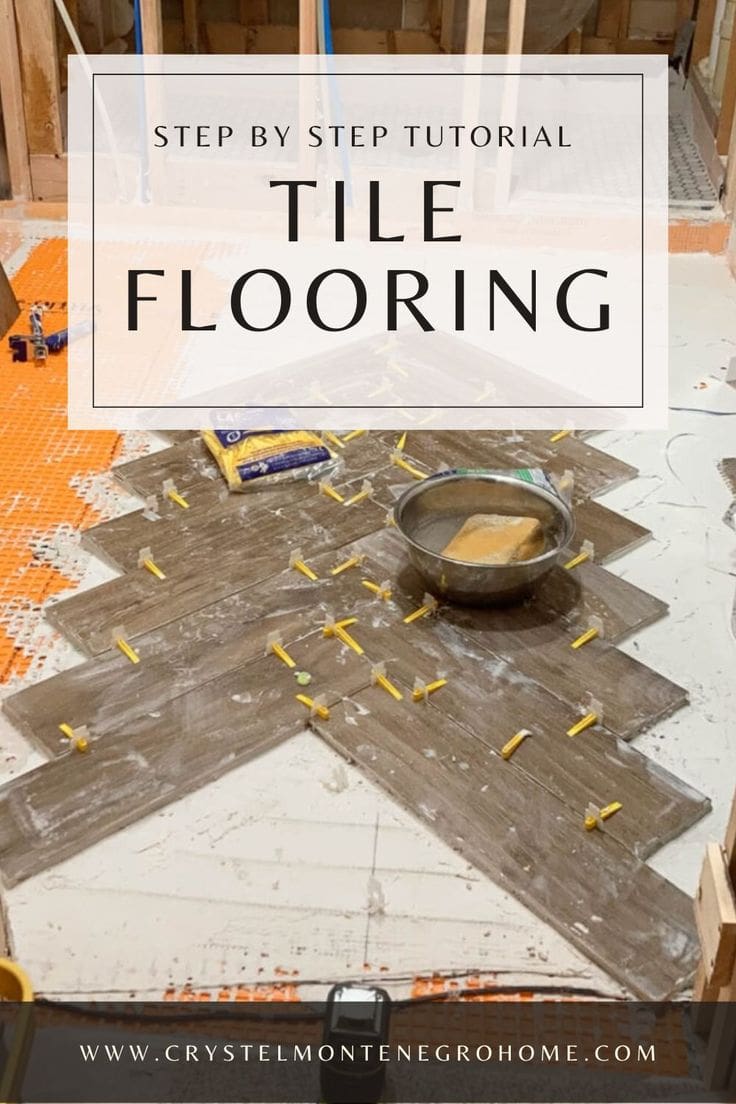
Laying a Herringbone Tile Floor
When it comes to a herringbone tile floor, the first tile is everything. If it’s off, the whole pattern will be, so take your time.
Using a laser level, I aligned the first tile with the center mark of the pattern, ensuring the laser line cut across it at a perfect 45° angle. Once that tile was down, the rest fell beautifully into place.
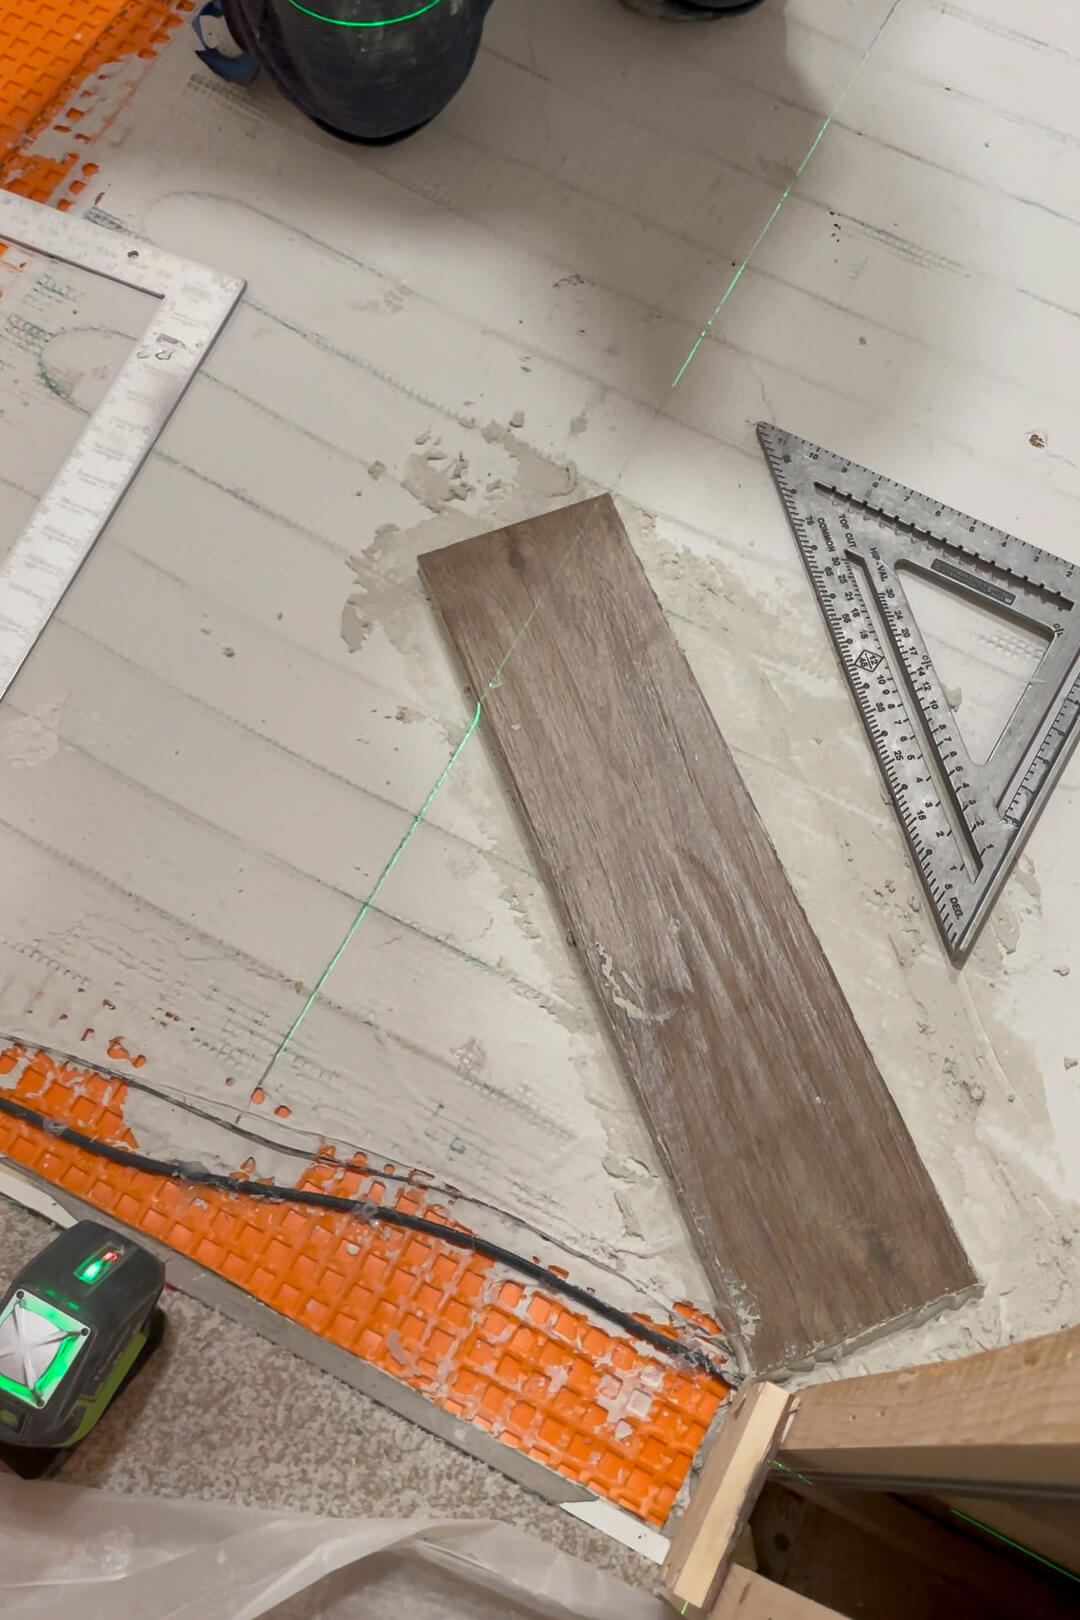
As we worked, we kept each tile straight and level with its neighbors. Floor tile levelers and a bubble level were game-changers for a polished, professional finish – no uneven edges or stubbed toes here!


We tackled the herringbone tile floor one piece at a time. Grandpa spread mortar on the floor, back-buttered each tile for extra adhesion, and carefully aligned it with the laser guide. We used a tile saw to cut pieces as needed and repeated the process: mortar, place tile, level, and adjust until the floor was complete.


Pro tip: Keep a bucket of water and a sponge handy to wipe away mortar from the tile surface before it sets – it’s so much easier to clean while fresh!
After the mortar dried (typically 24–48 hours), we moved on to grouting. If you need a refresher on grouting, check out the video below – it walks you through the process step by step.
My Finished Herringbone Tile Floor
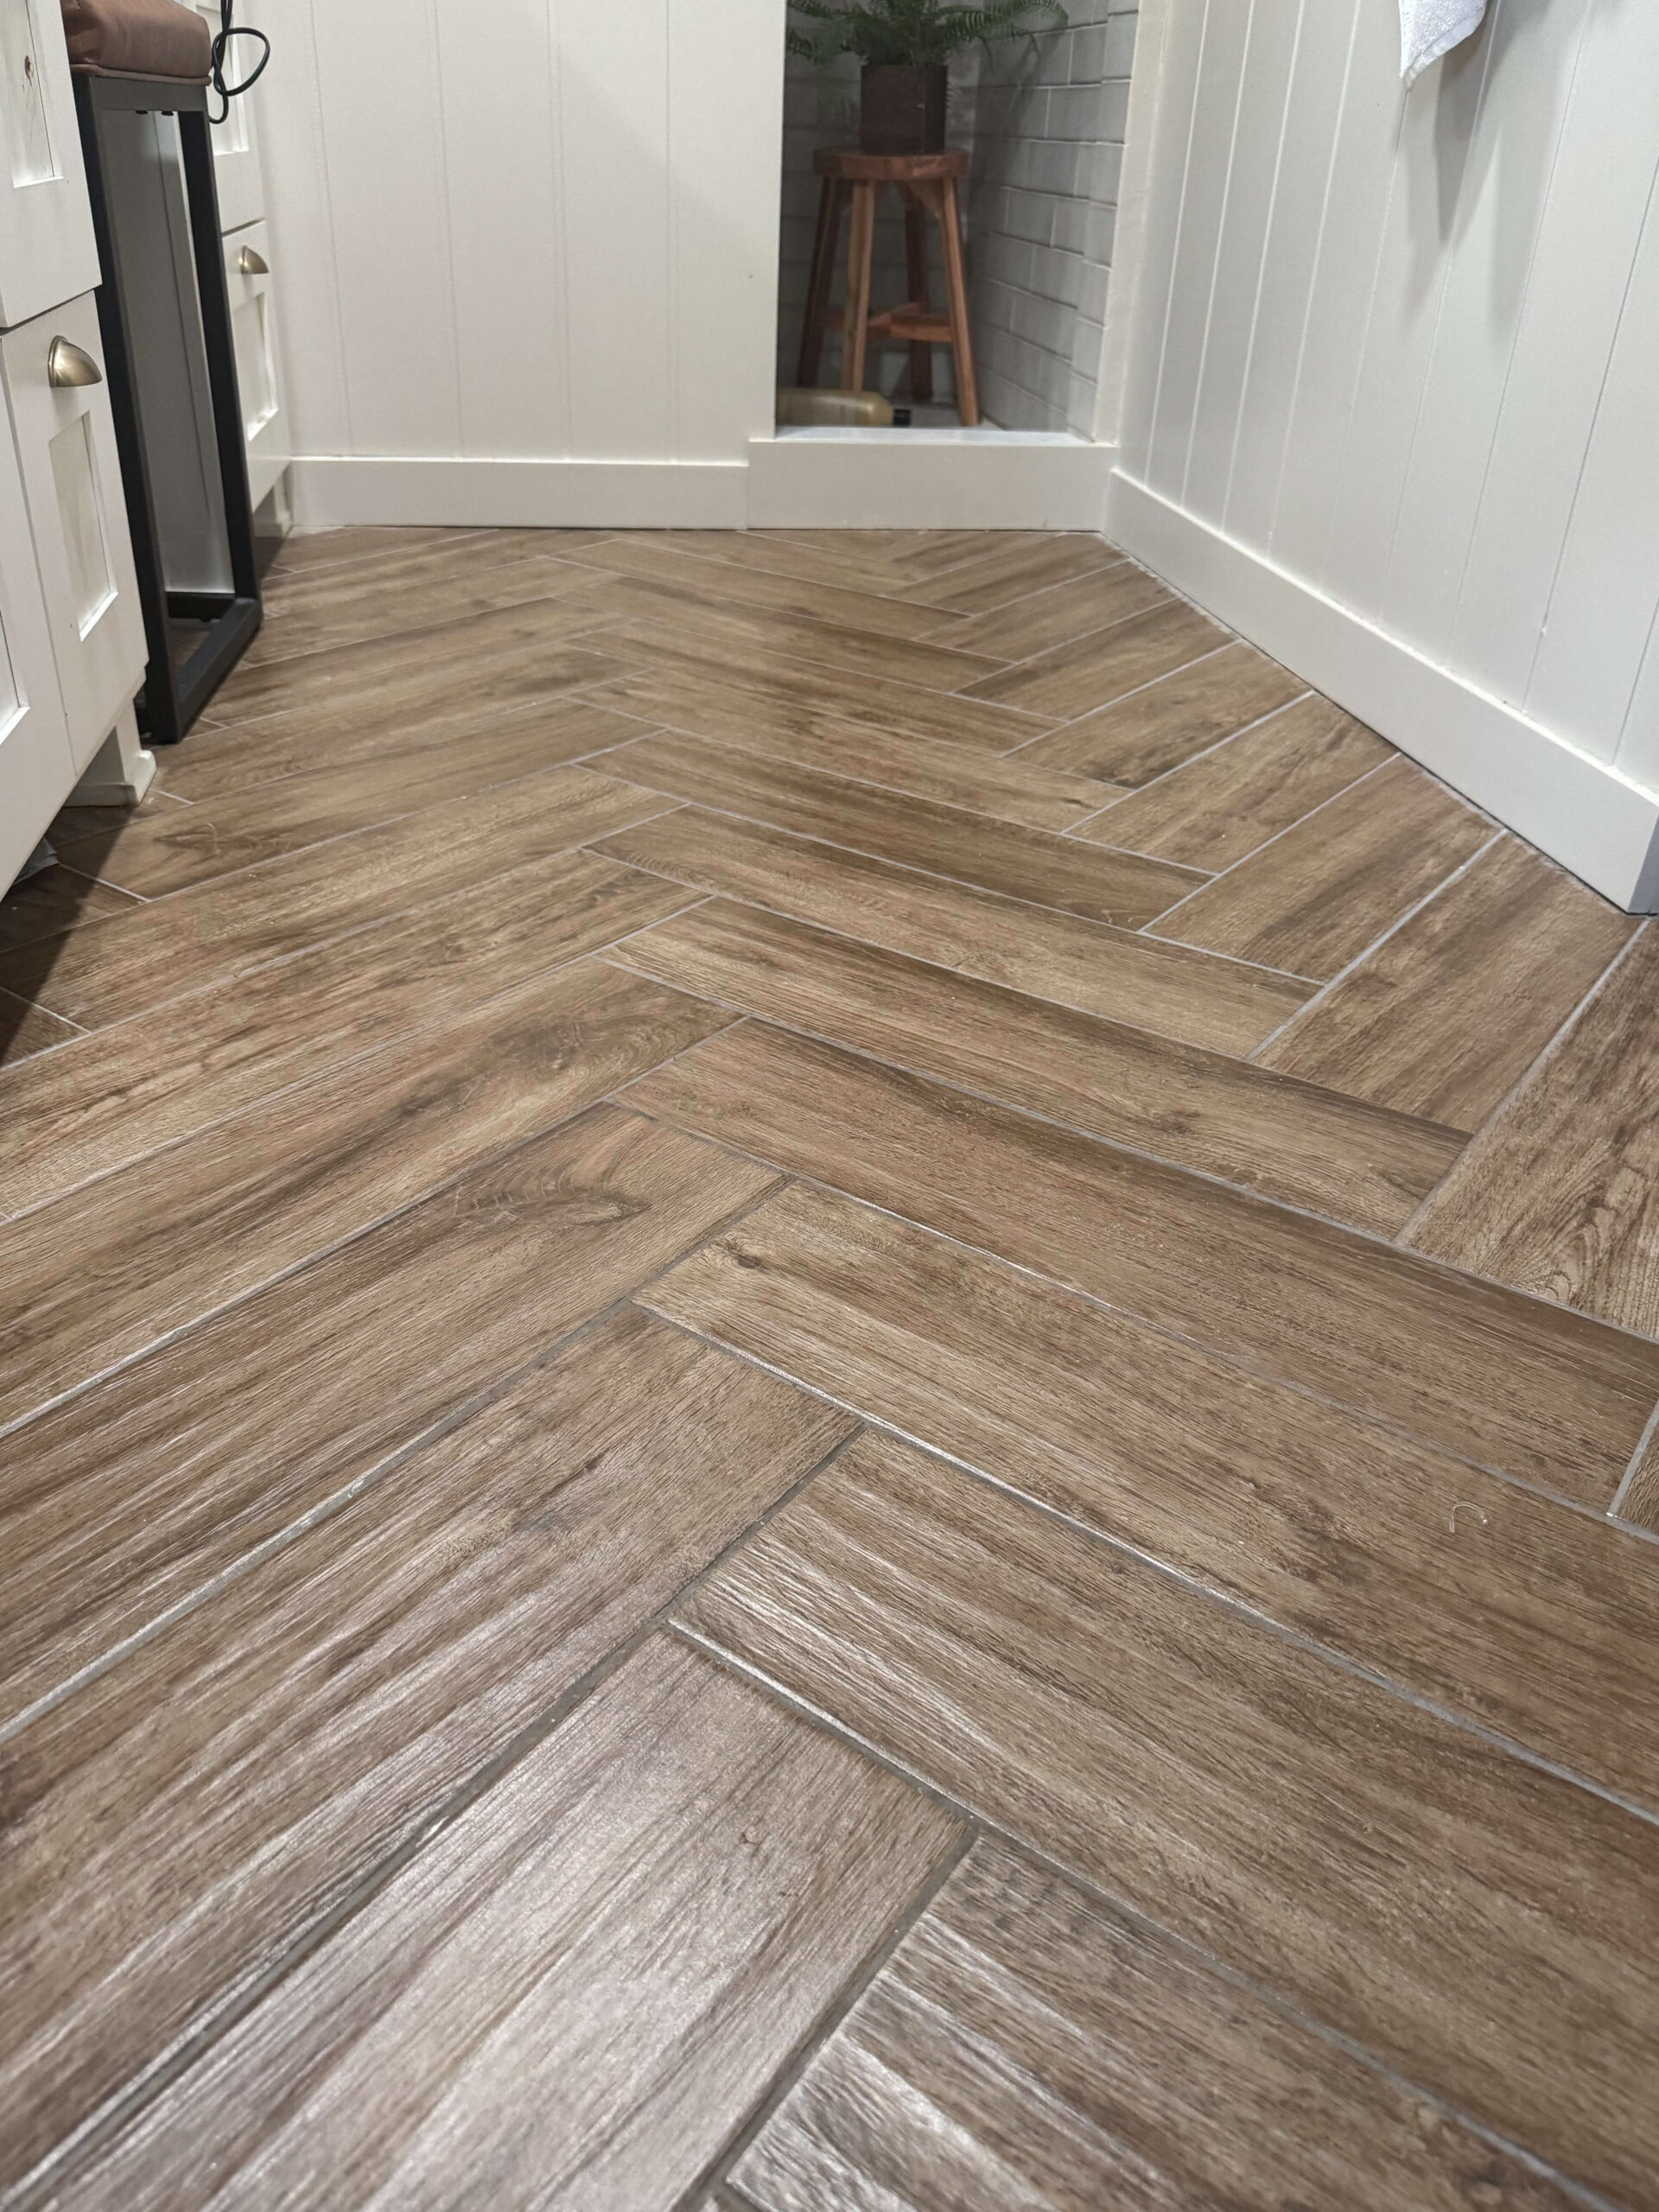
Here’s the result: a gorgeous herringbone tile floor with a wood-look finish that perfectly complements the rest of the flooring in my home. Plus, that gorgeous subway tile shower in the back! It’s durable, waterproof, and absolutely stunning – ideal for a bathroom.
The pattern is eye-catching, and the runner I chose adds just the right touch of texture and warmth.

This space now feels polished, cozy, and 100% me. The herringbone tile floor is truly the foundation of my dream bathroom!
The Before and After
As we wrap up this herringbone tile floor post, let’s take a quick walk down memory lane. Remember where this bathroom started? Here’s the ‘before’ photo, then keep scrolling to soak in the stunning ‘after’ transformation.
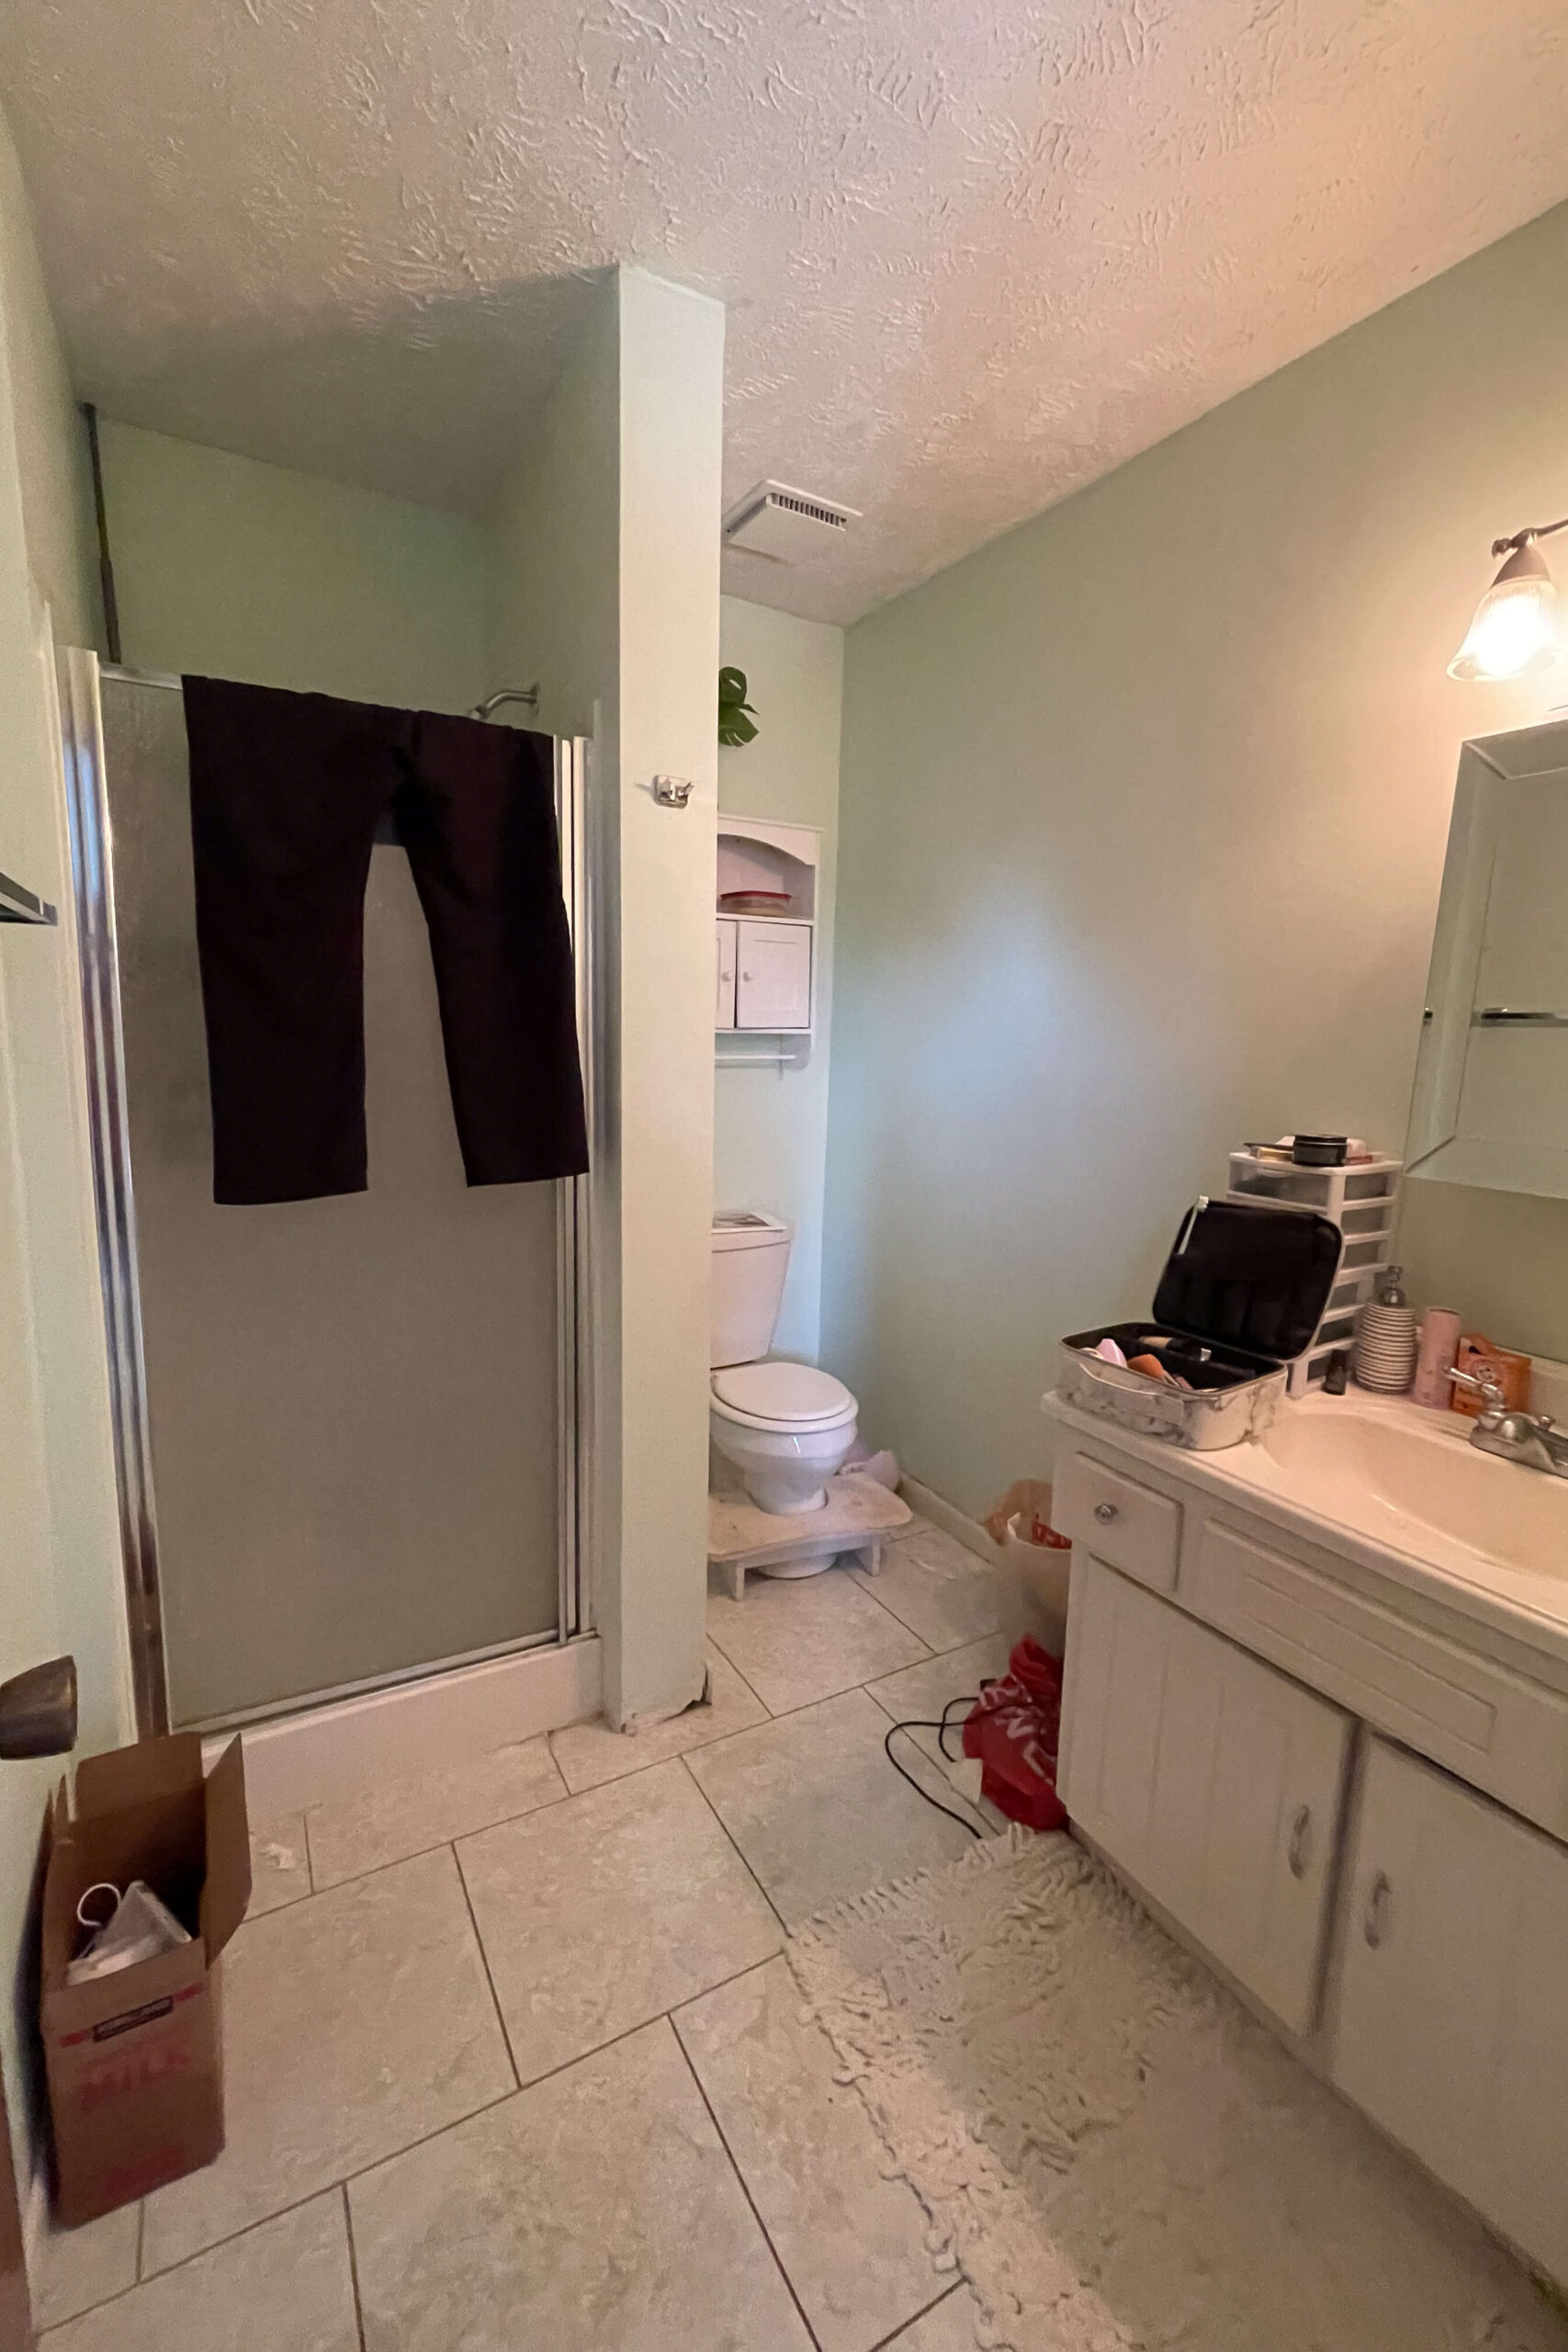
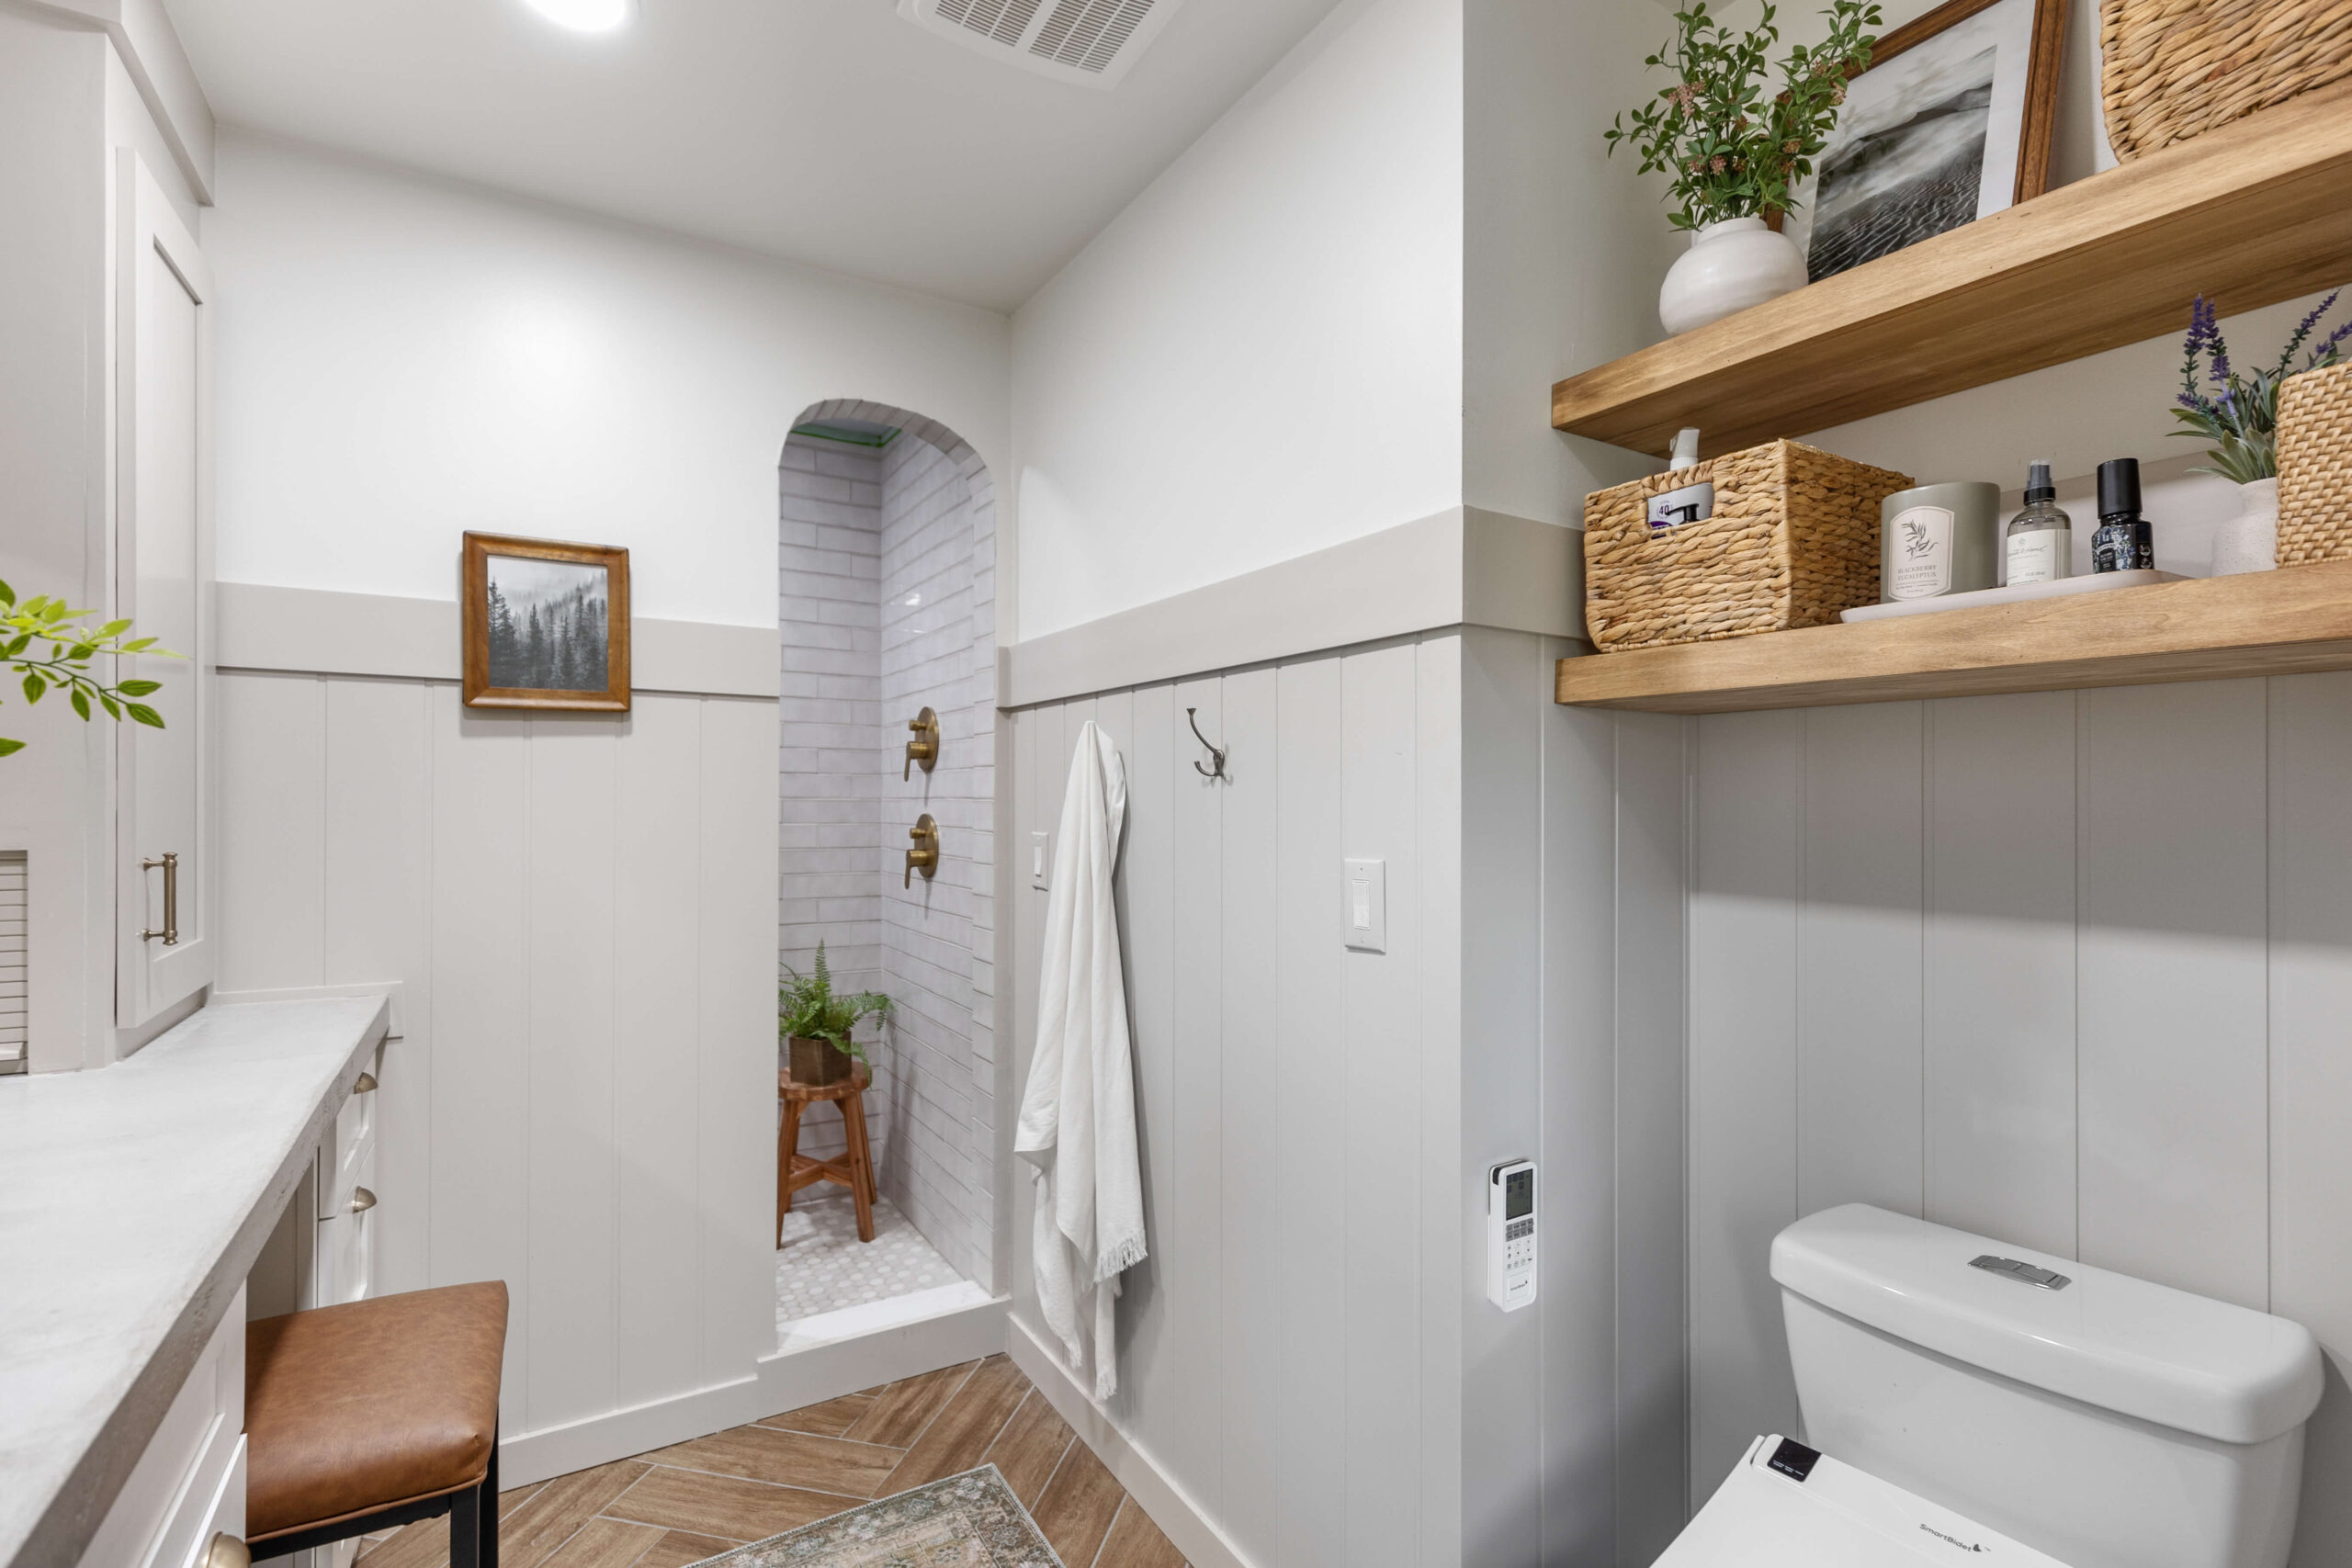
Such a HUGE transformation, right?! I still can’t get over how far this bathroom has come from that ‘before’ photo. It’s packed with DIY goodness—from the shiplap walls and floating shelves to the concrete countertops and more. I’m working on tutorials for all the projects, so stay tuned! If you’re looking for links to any of the items in this bathroom, don’t worry—I’ve got you covered. They’re all posted right here for easy access!
📌 Save This Herringbone Tile Floor Transformation
Common Questions About Heated Tile Floors and Herringbone Patterns
Yes, installing a herringbone tile floor can be a DIY project if you have basic tiling skills and the right tools. However, it does require precision, especially with the initial tile placement. Using tools like a laser level can help ensure success.
Yes! Radiant floor heating works perfectly under a herringbone tile floor. Heating mats are installed between the waterproofing layer and the tile, adding warmth and luxury to your bathroom.
Using floor tile levelers and a bubble level ensures the tiles sit evenly, preventing any edges from sticking up. This not only improves the appearance but also makes the floor safer to walk on.
Yes! A herringbone tile floor can make small bathrooms feel larger by drawing the eye across the pattern. Opt for lighter-colored tiles to enhance the sense of space.