DIY Dark Green Bathroom Remodel: Complete Guide


Updated June 18, 2026
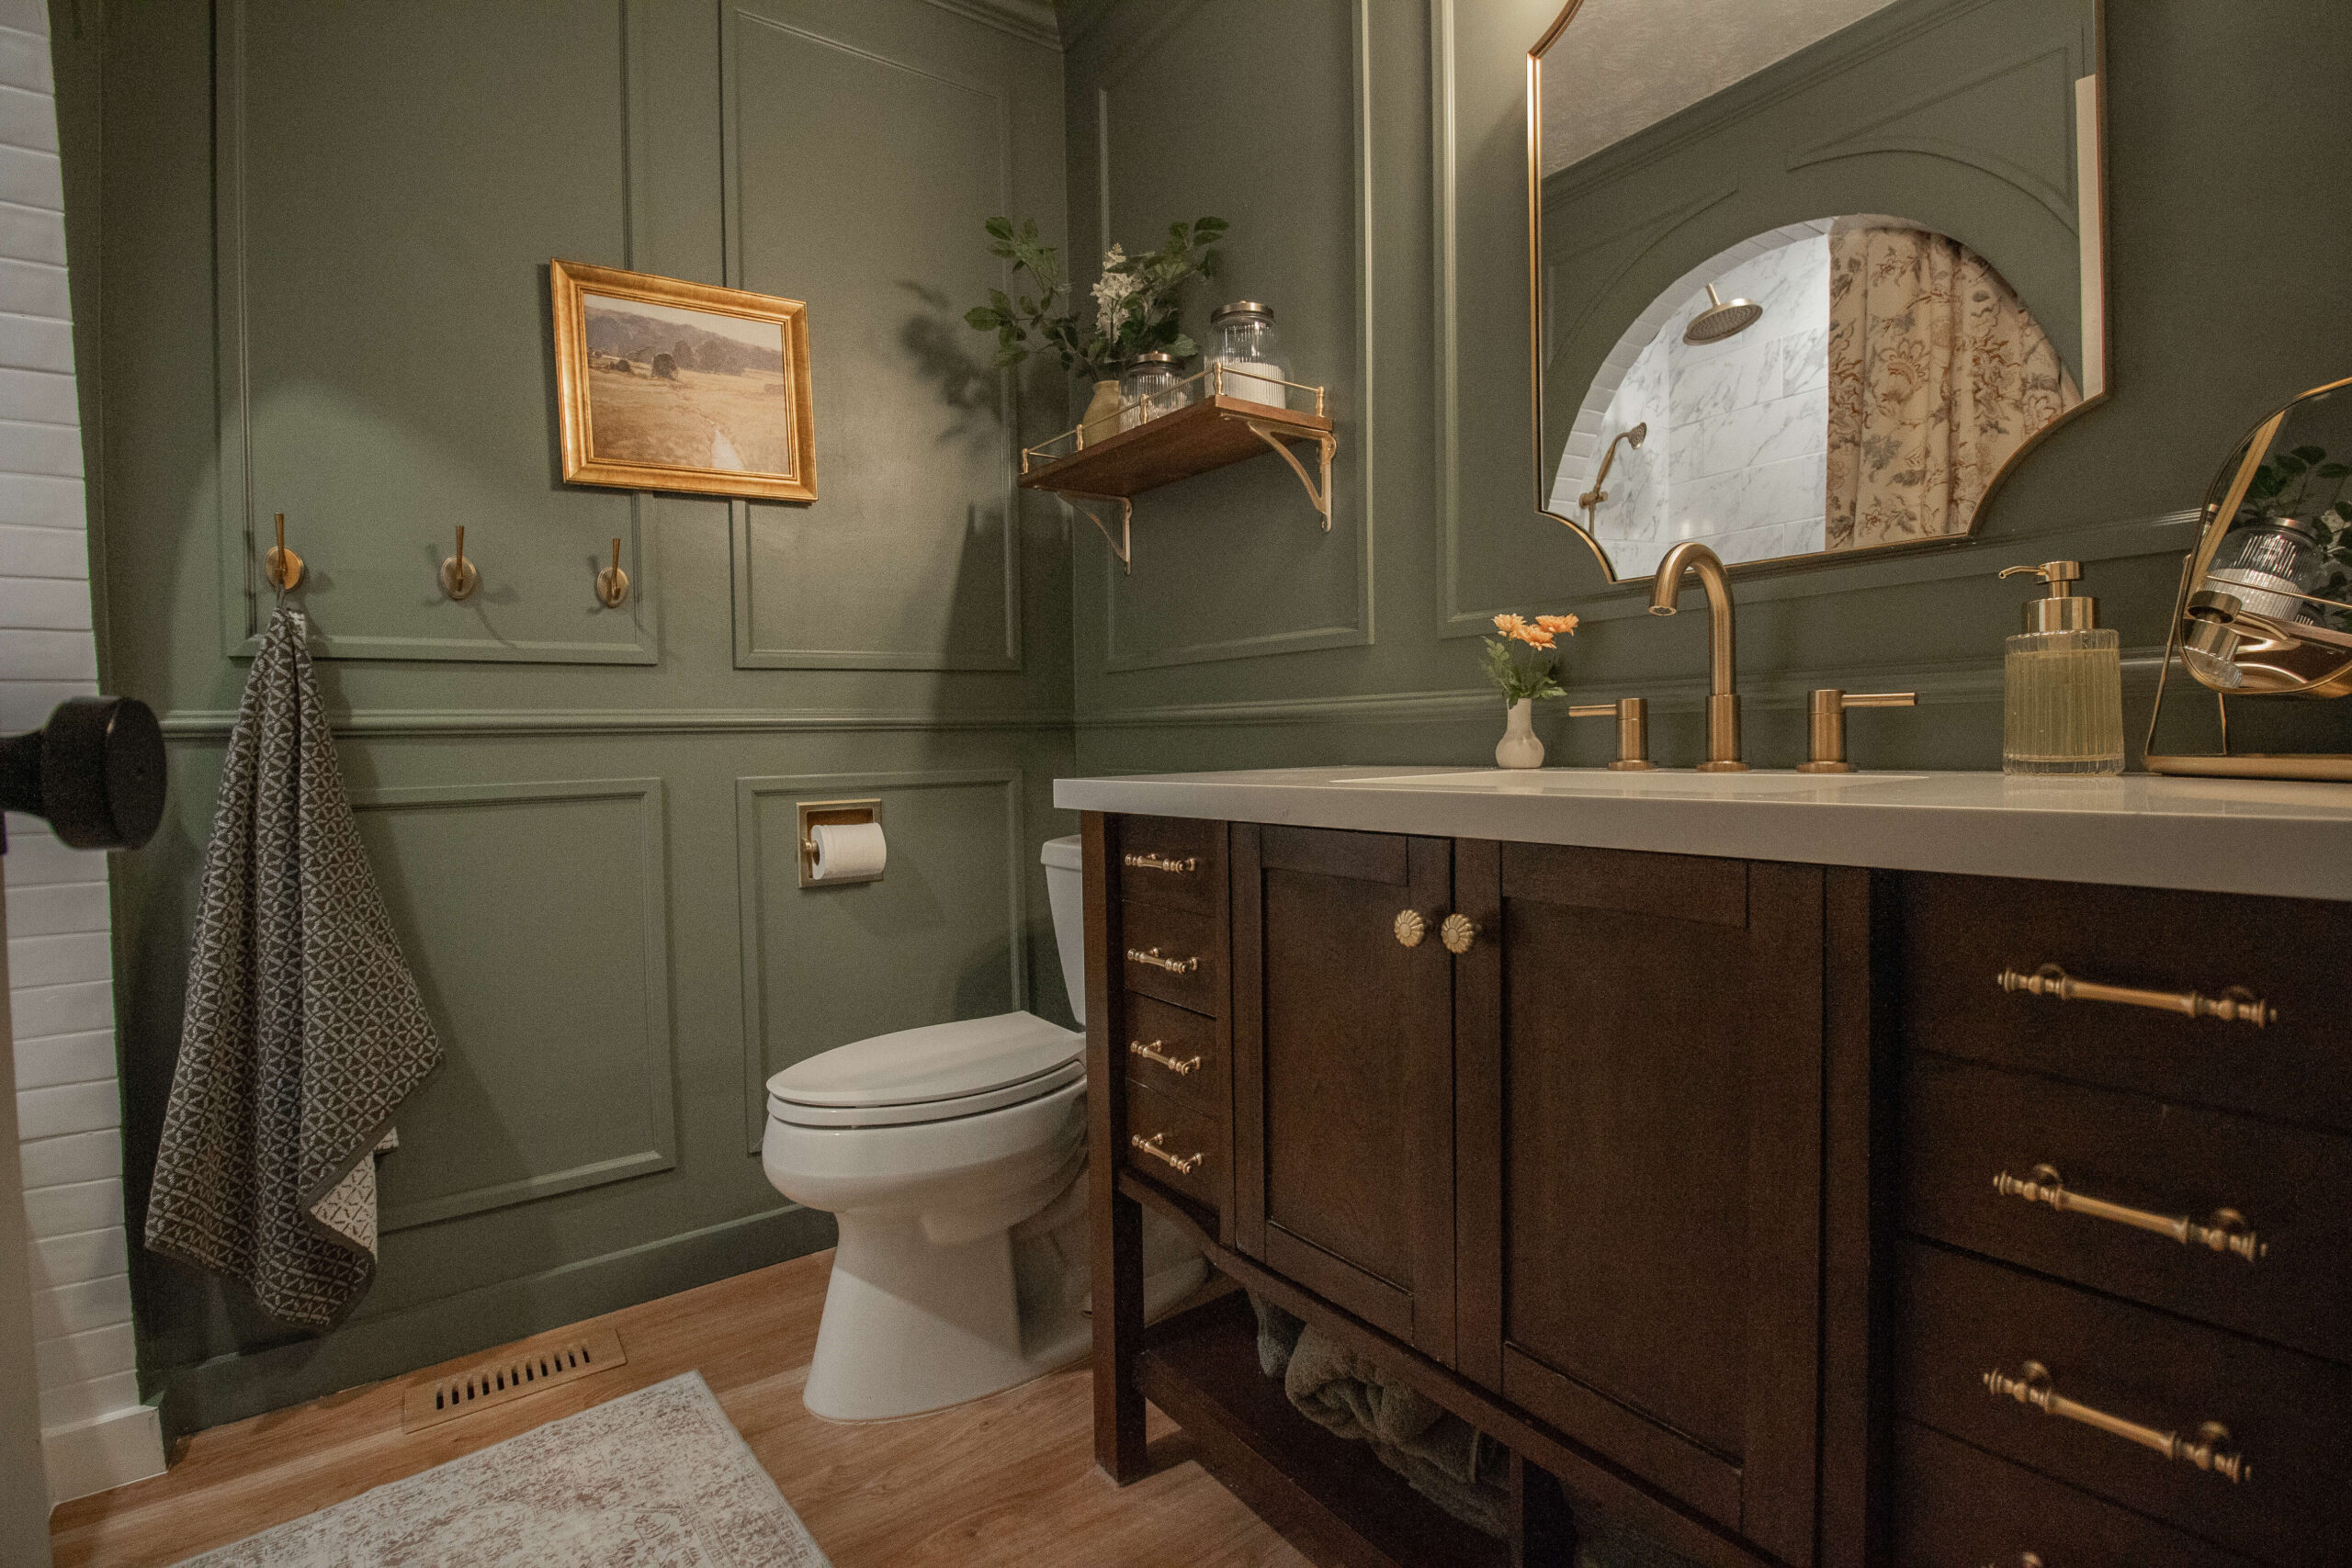
I recently took on the challenge of transforming my guest bathroom from “meh” to magnificent, and the result? A dark green bathroom that looks straight out of a magazine. Seriously! Who knew you could pack so much style and character into a small space? I completely transformed this space adding details like picture frame molding, an arched bathtub alcove, and a stunning marble tiled tub surround. To get all the details on my dark green bathroom transformation, keep reading!
Related DIY Bathroom Projects
– Upgrading Our Guest Bath with DIY Picture Frame Molding
– DIY Curved Molding Around an Arch
– How I Installed a Beautiful Tile Tub Surround (And You Can Too!)
– How To Build an Arched Bathtub Alcove
– How To Build a Brass Rail Shelf (high-end dupe)
Table of Contents
- Related DIY Bathroom Projects
- Tools for a Dark Green Bathroom Remodel
- Materials I Used for This Dark Green Bathroom Makeover
- Before Photos of Our Guest Bathroom Makeover
- Step 1: Demo Day for the Bathroom Remodel
- Step 2: Building an Arched Shower Alcove
- Step 3: Installing a Waterproof Shower Light
- Step 4: How I Waterproofed and Tiled the Shower
- Step 5: Painting and Adding Decorative Trim Work
- Step 6: Styling and Decorating a Dark Green Bathroom
- Dark Green Bathroom Before and After Reveal
- 📌 Save this project for later:
- Frequently Asked Questions About Designing a Dark Green Bathroom
Tools for a Dark Green Bathroom Remodel
- Miter saw
- Multi-tool
- Jig saw
- Brad nailer
- Drill
- Paint Roller
- Tile saw
- Laser level
- Caulk gun
- Stud finder
- Paint brush
- Foam paint roller
Materials I Used for This Dark Green Bathroom Makeover
- 2×4’s
- OSB
- Cement board
- Moisture resistant drywall
- Fiberglass tape
- Thin-set mortar
- AquaDefense
- Small tile for niche and arch
- Large tile for shower wall
- Grout
- Shower light
- Silicone
- Crown molding
- PVC baseboard
- PVC trim
- Chair rail
- Caulk
- Spackle
- Primer
- Paint (I used this color)
Before Photos of Our Guest Bathroom Makeover
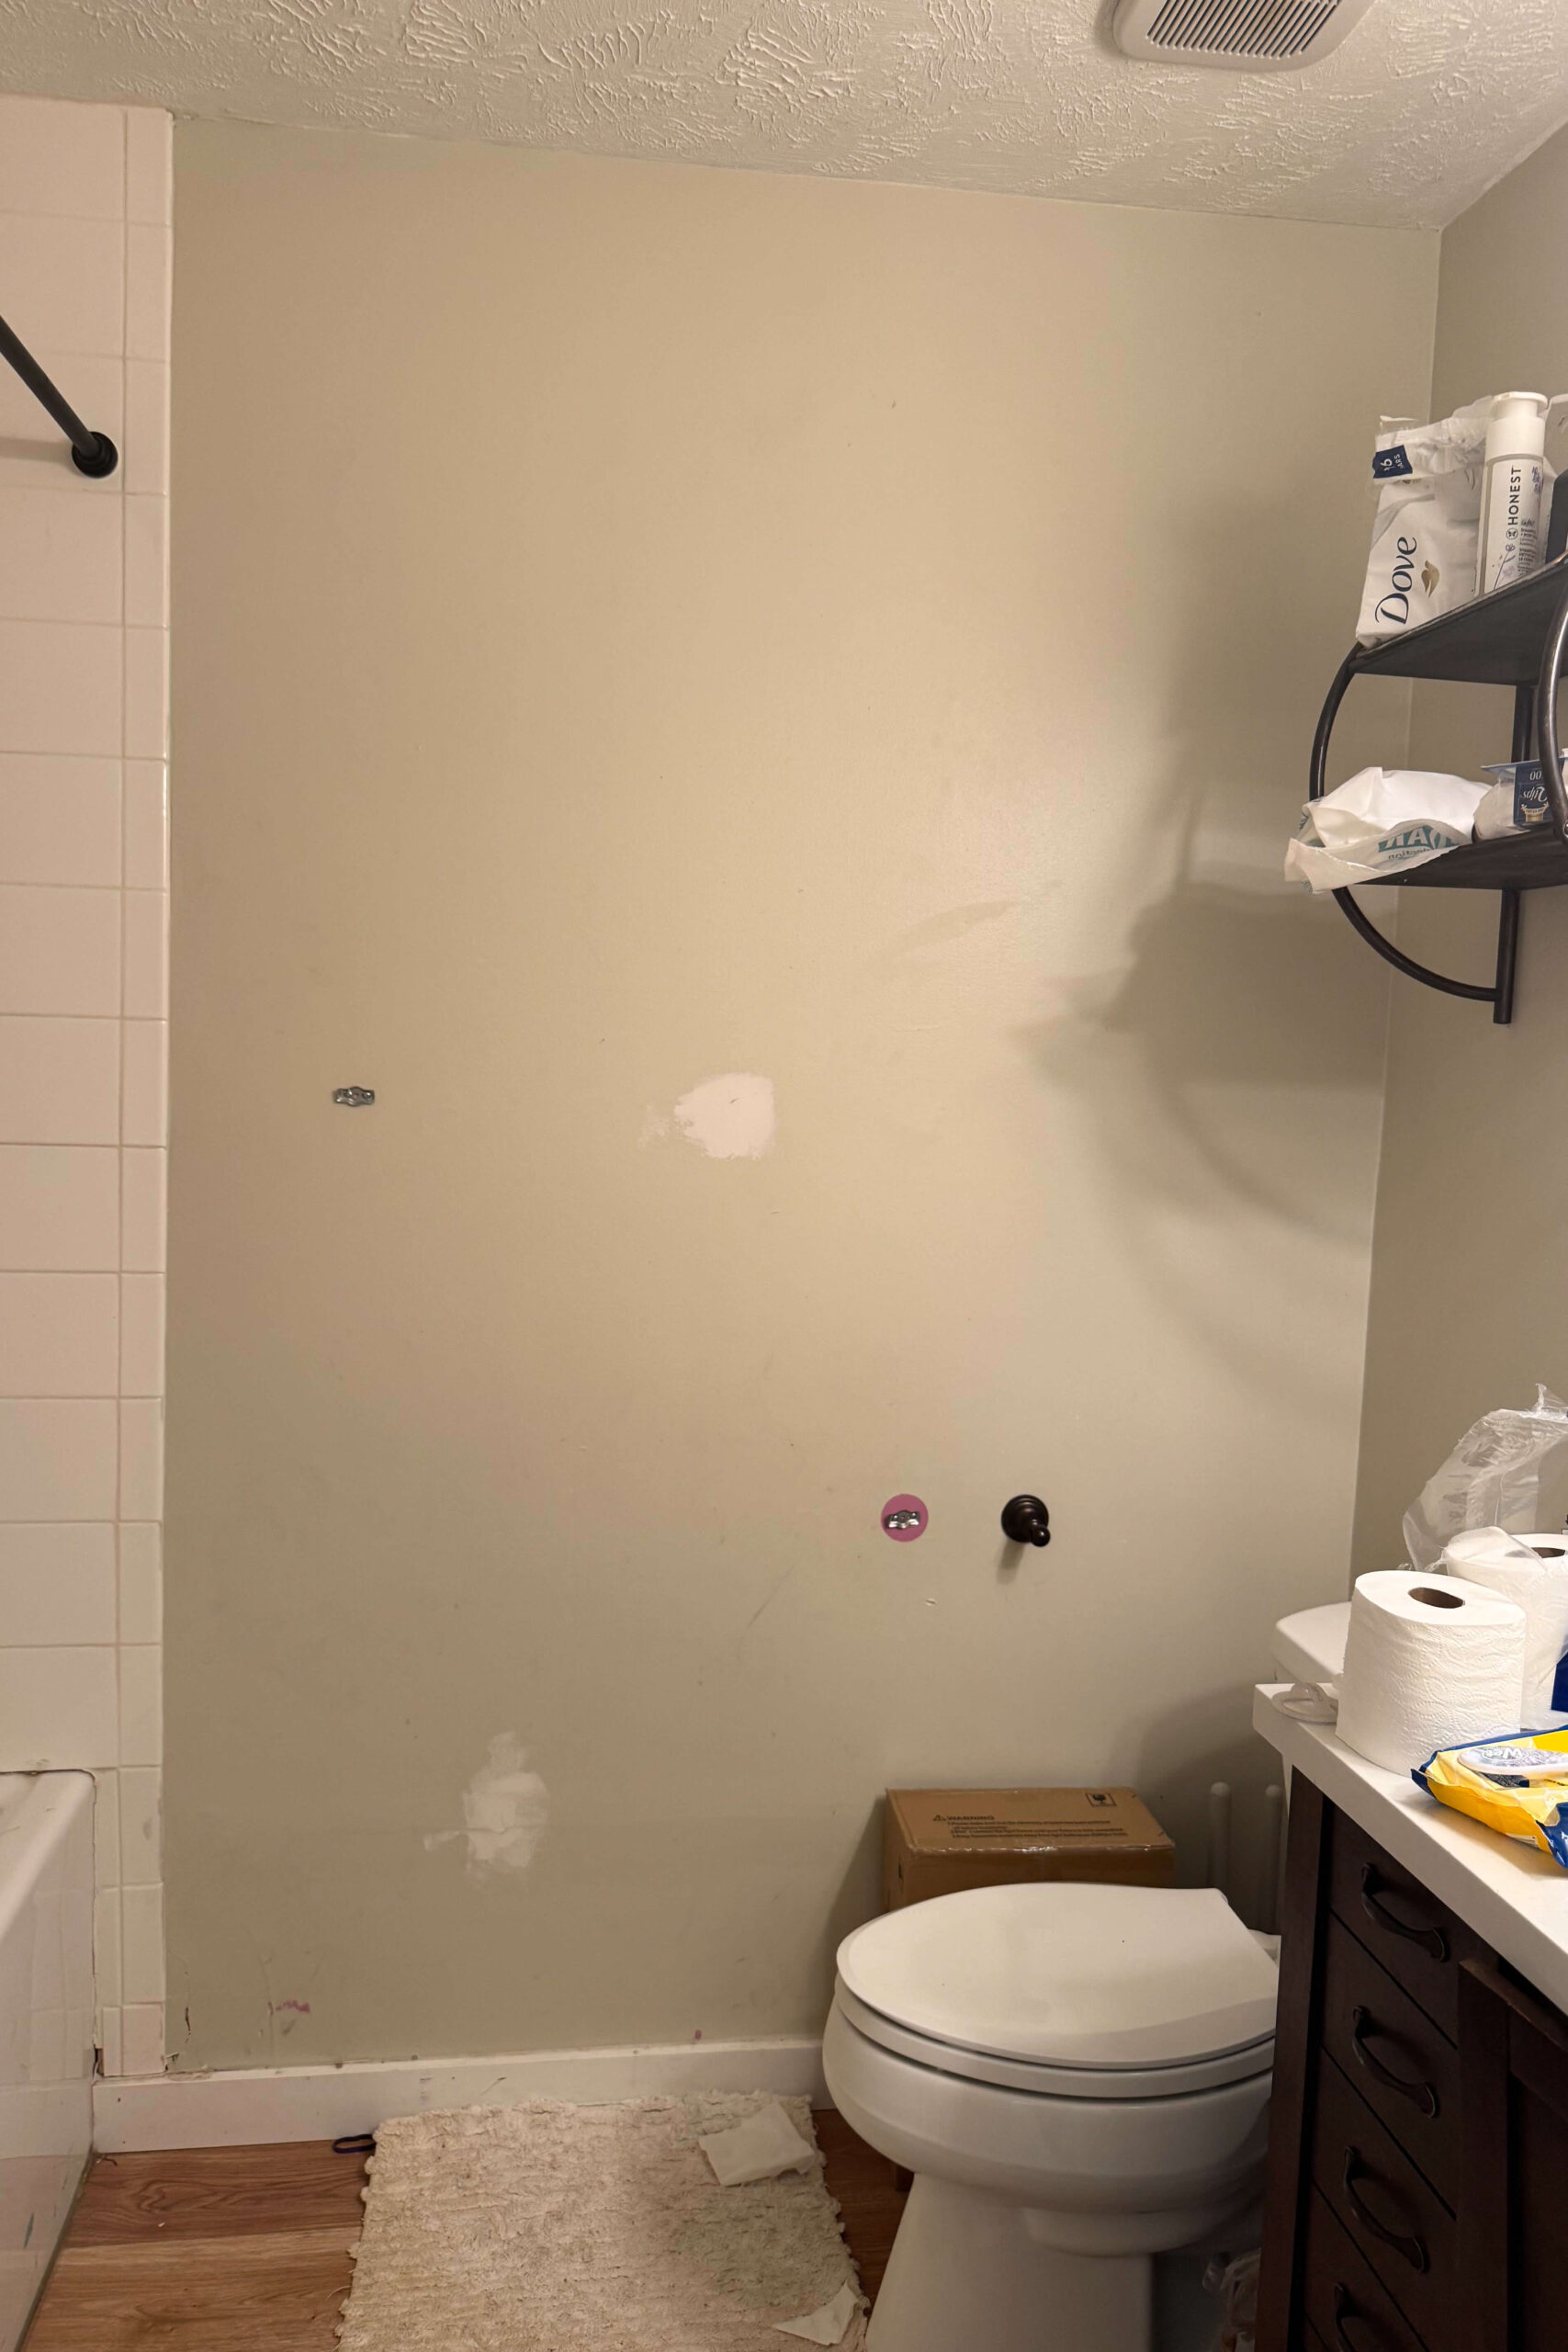
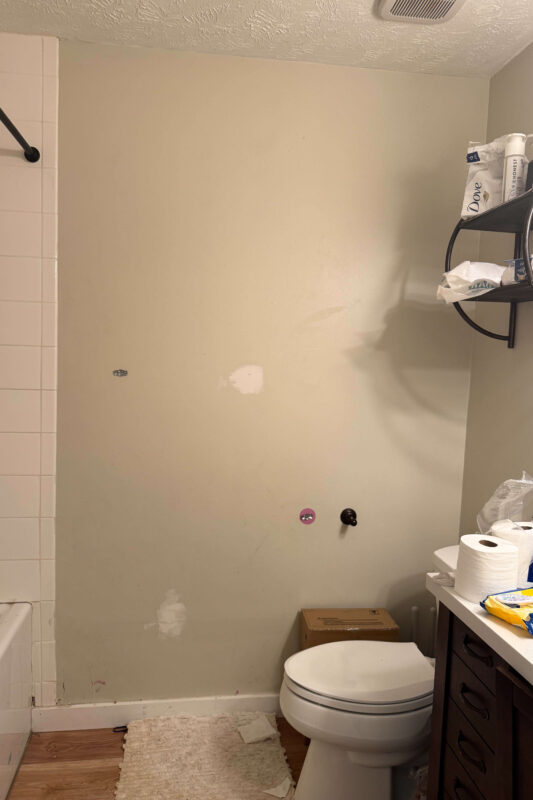
Before this stunning dark green bathroom makeover, the space was nothing special – basic fixtures, plain walls, and no personality. We had already updated the flooring and vanity, but the rest of the bathroom had been completely ignored. That is, until now!

Step 1: Demo Day for the Bathroom Remodel
The first phase of my dark green bathroom transformation was demolition. Out came the old tile, and I even removed some drywall to start fresh. My multi-tool was a lifesaver for this part of the project.


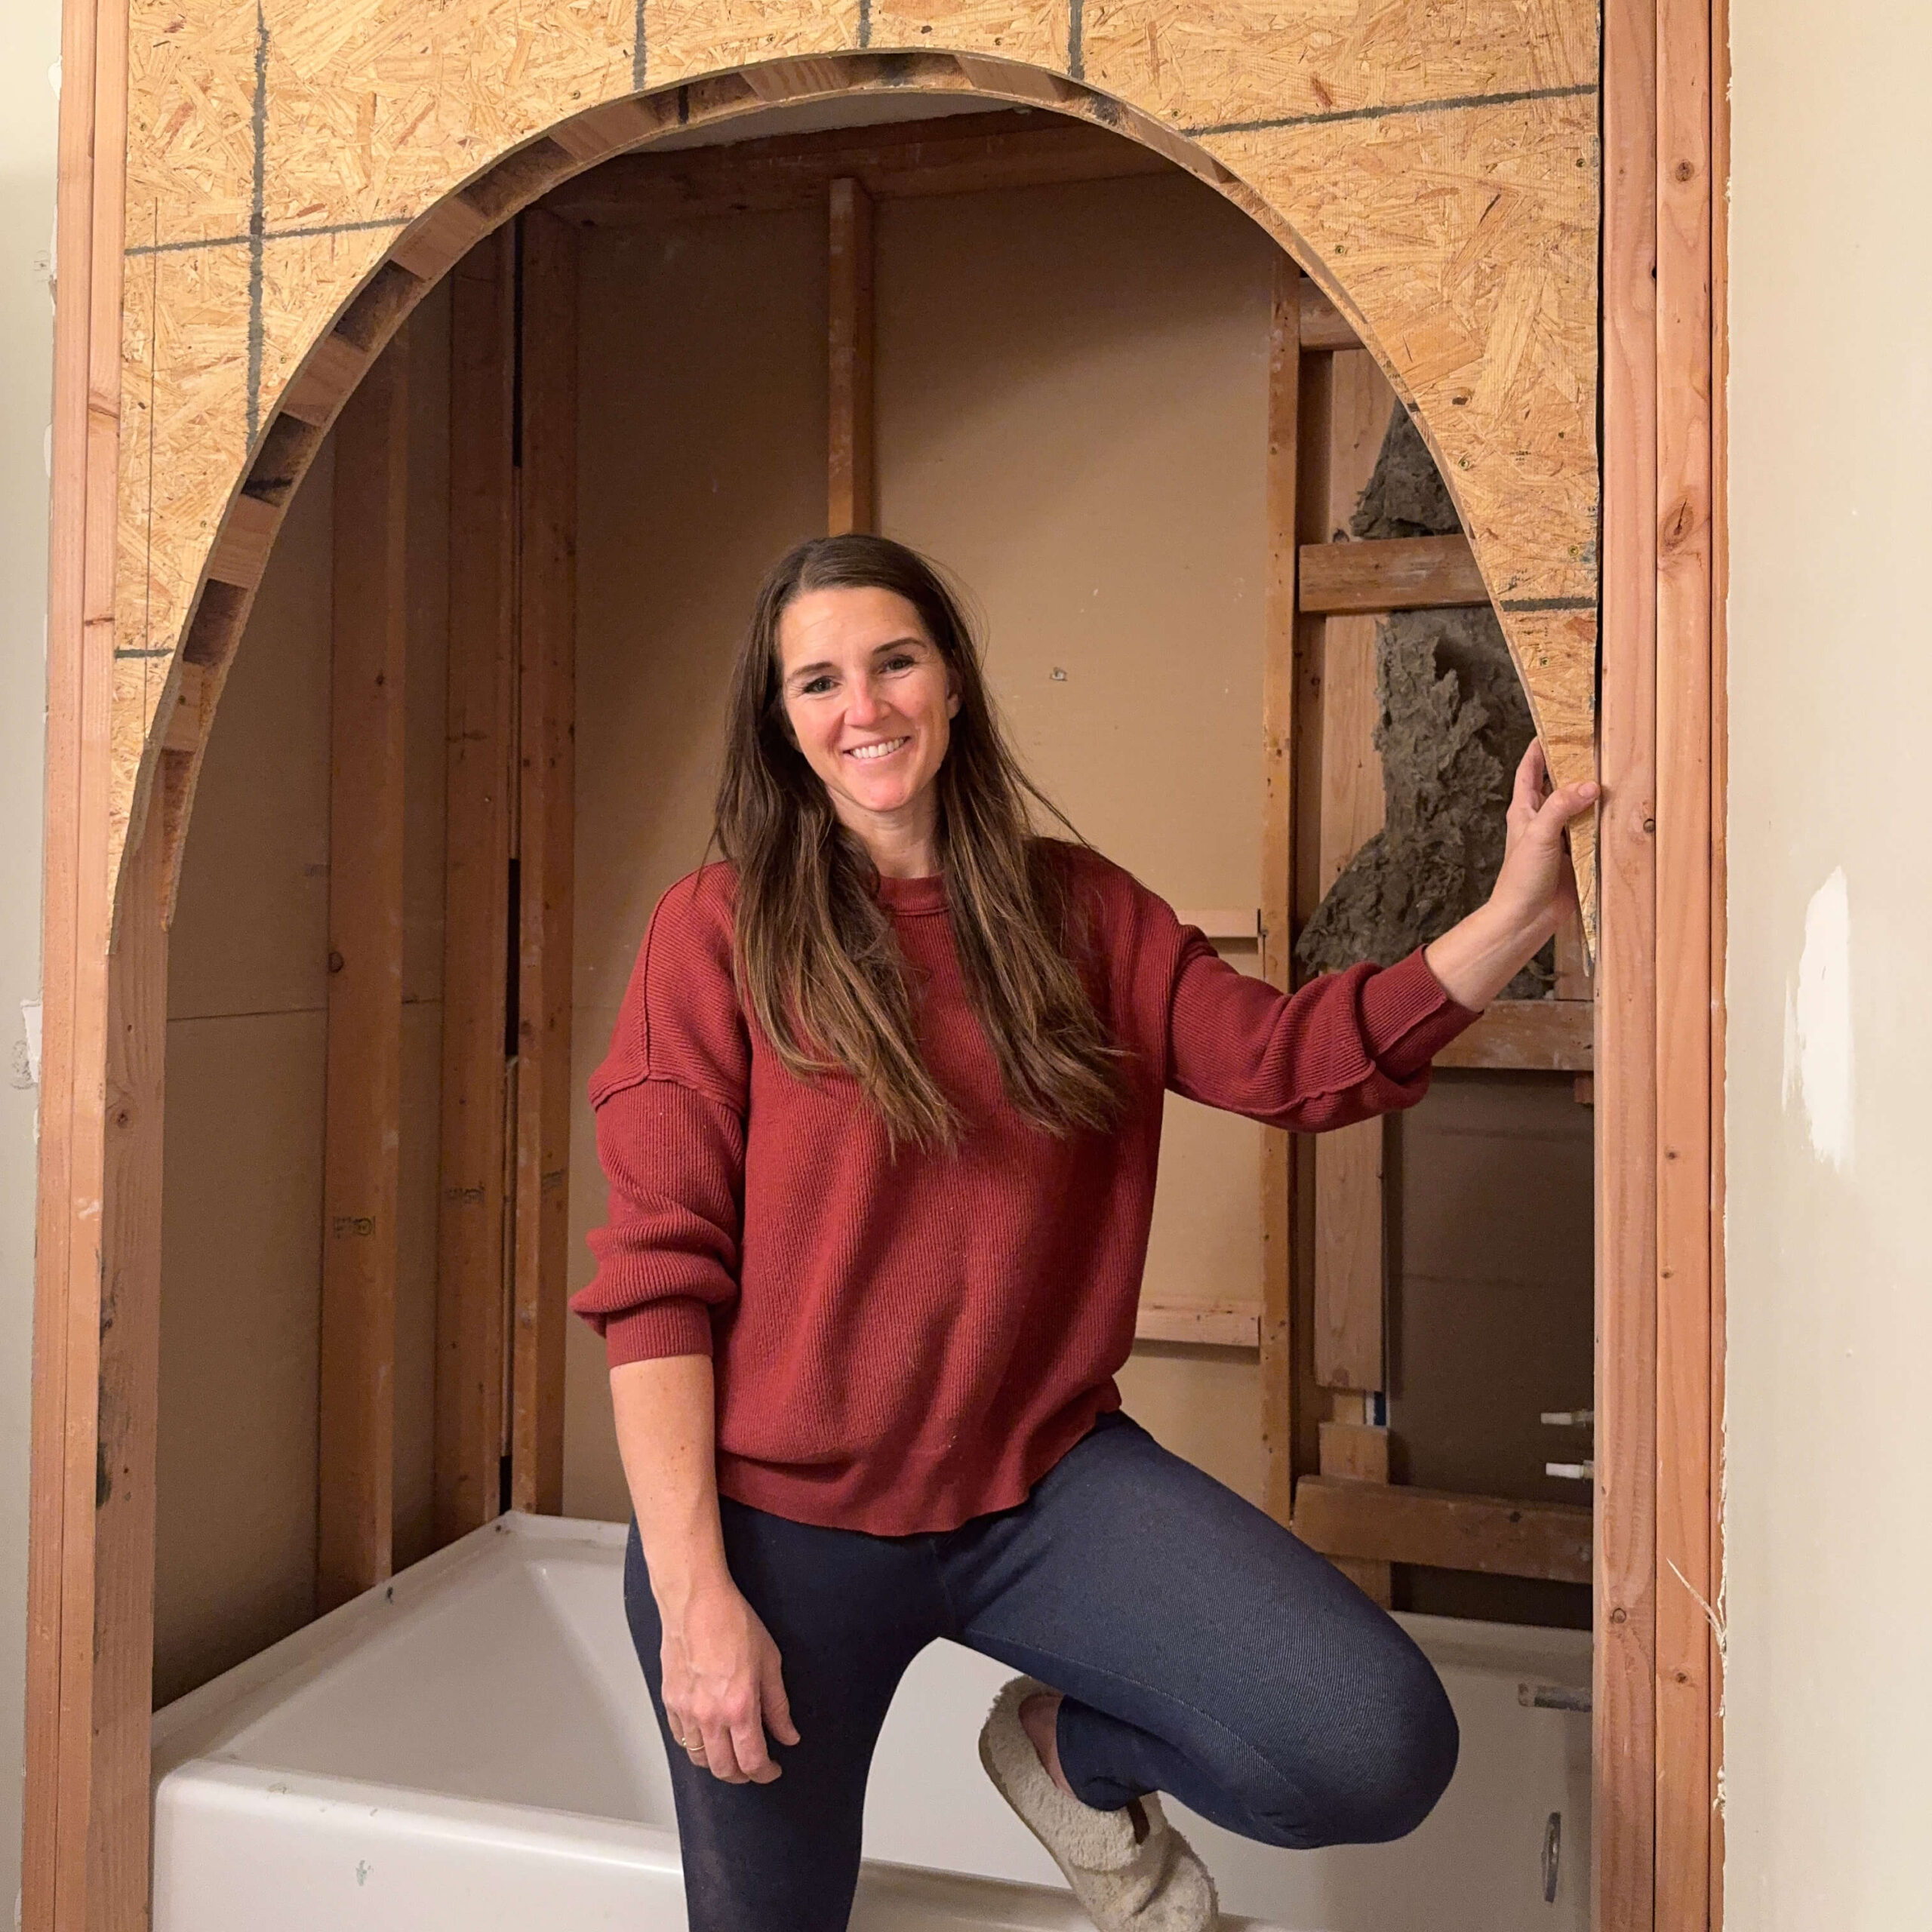
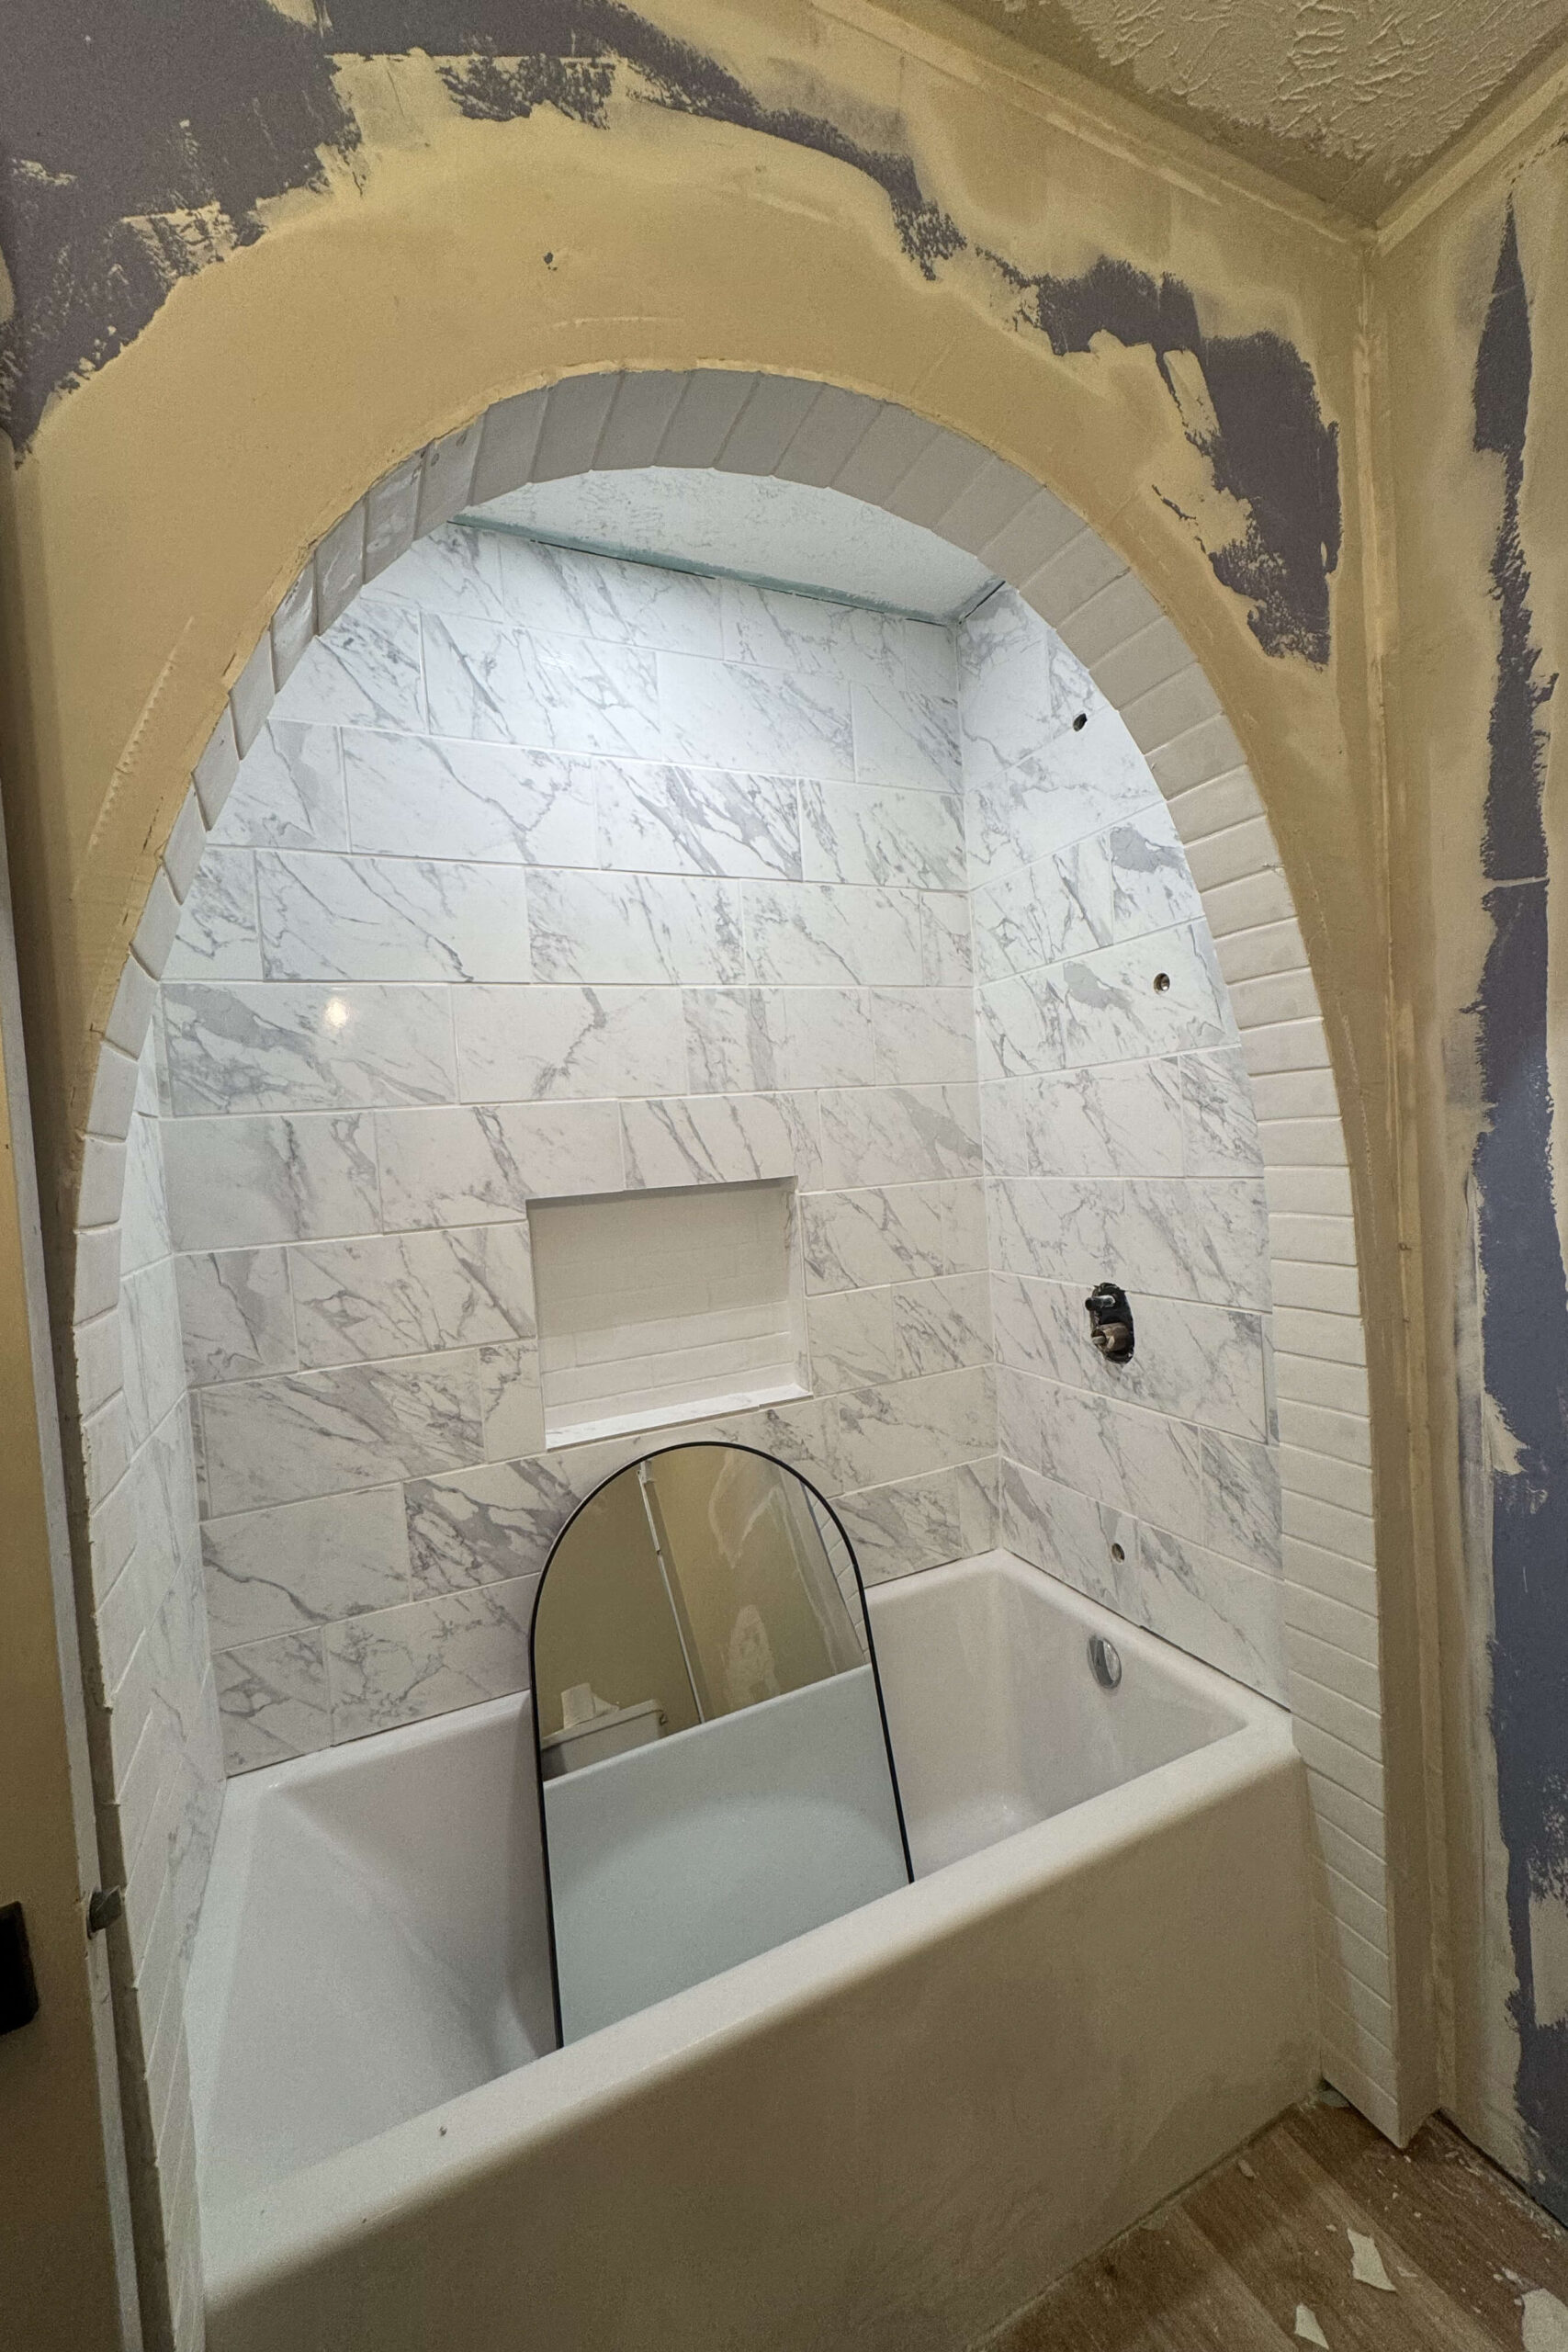
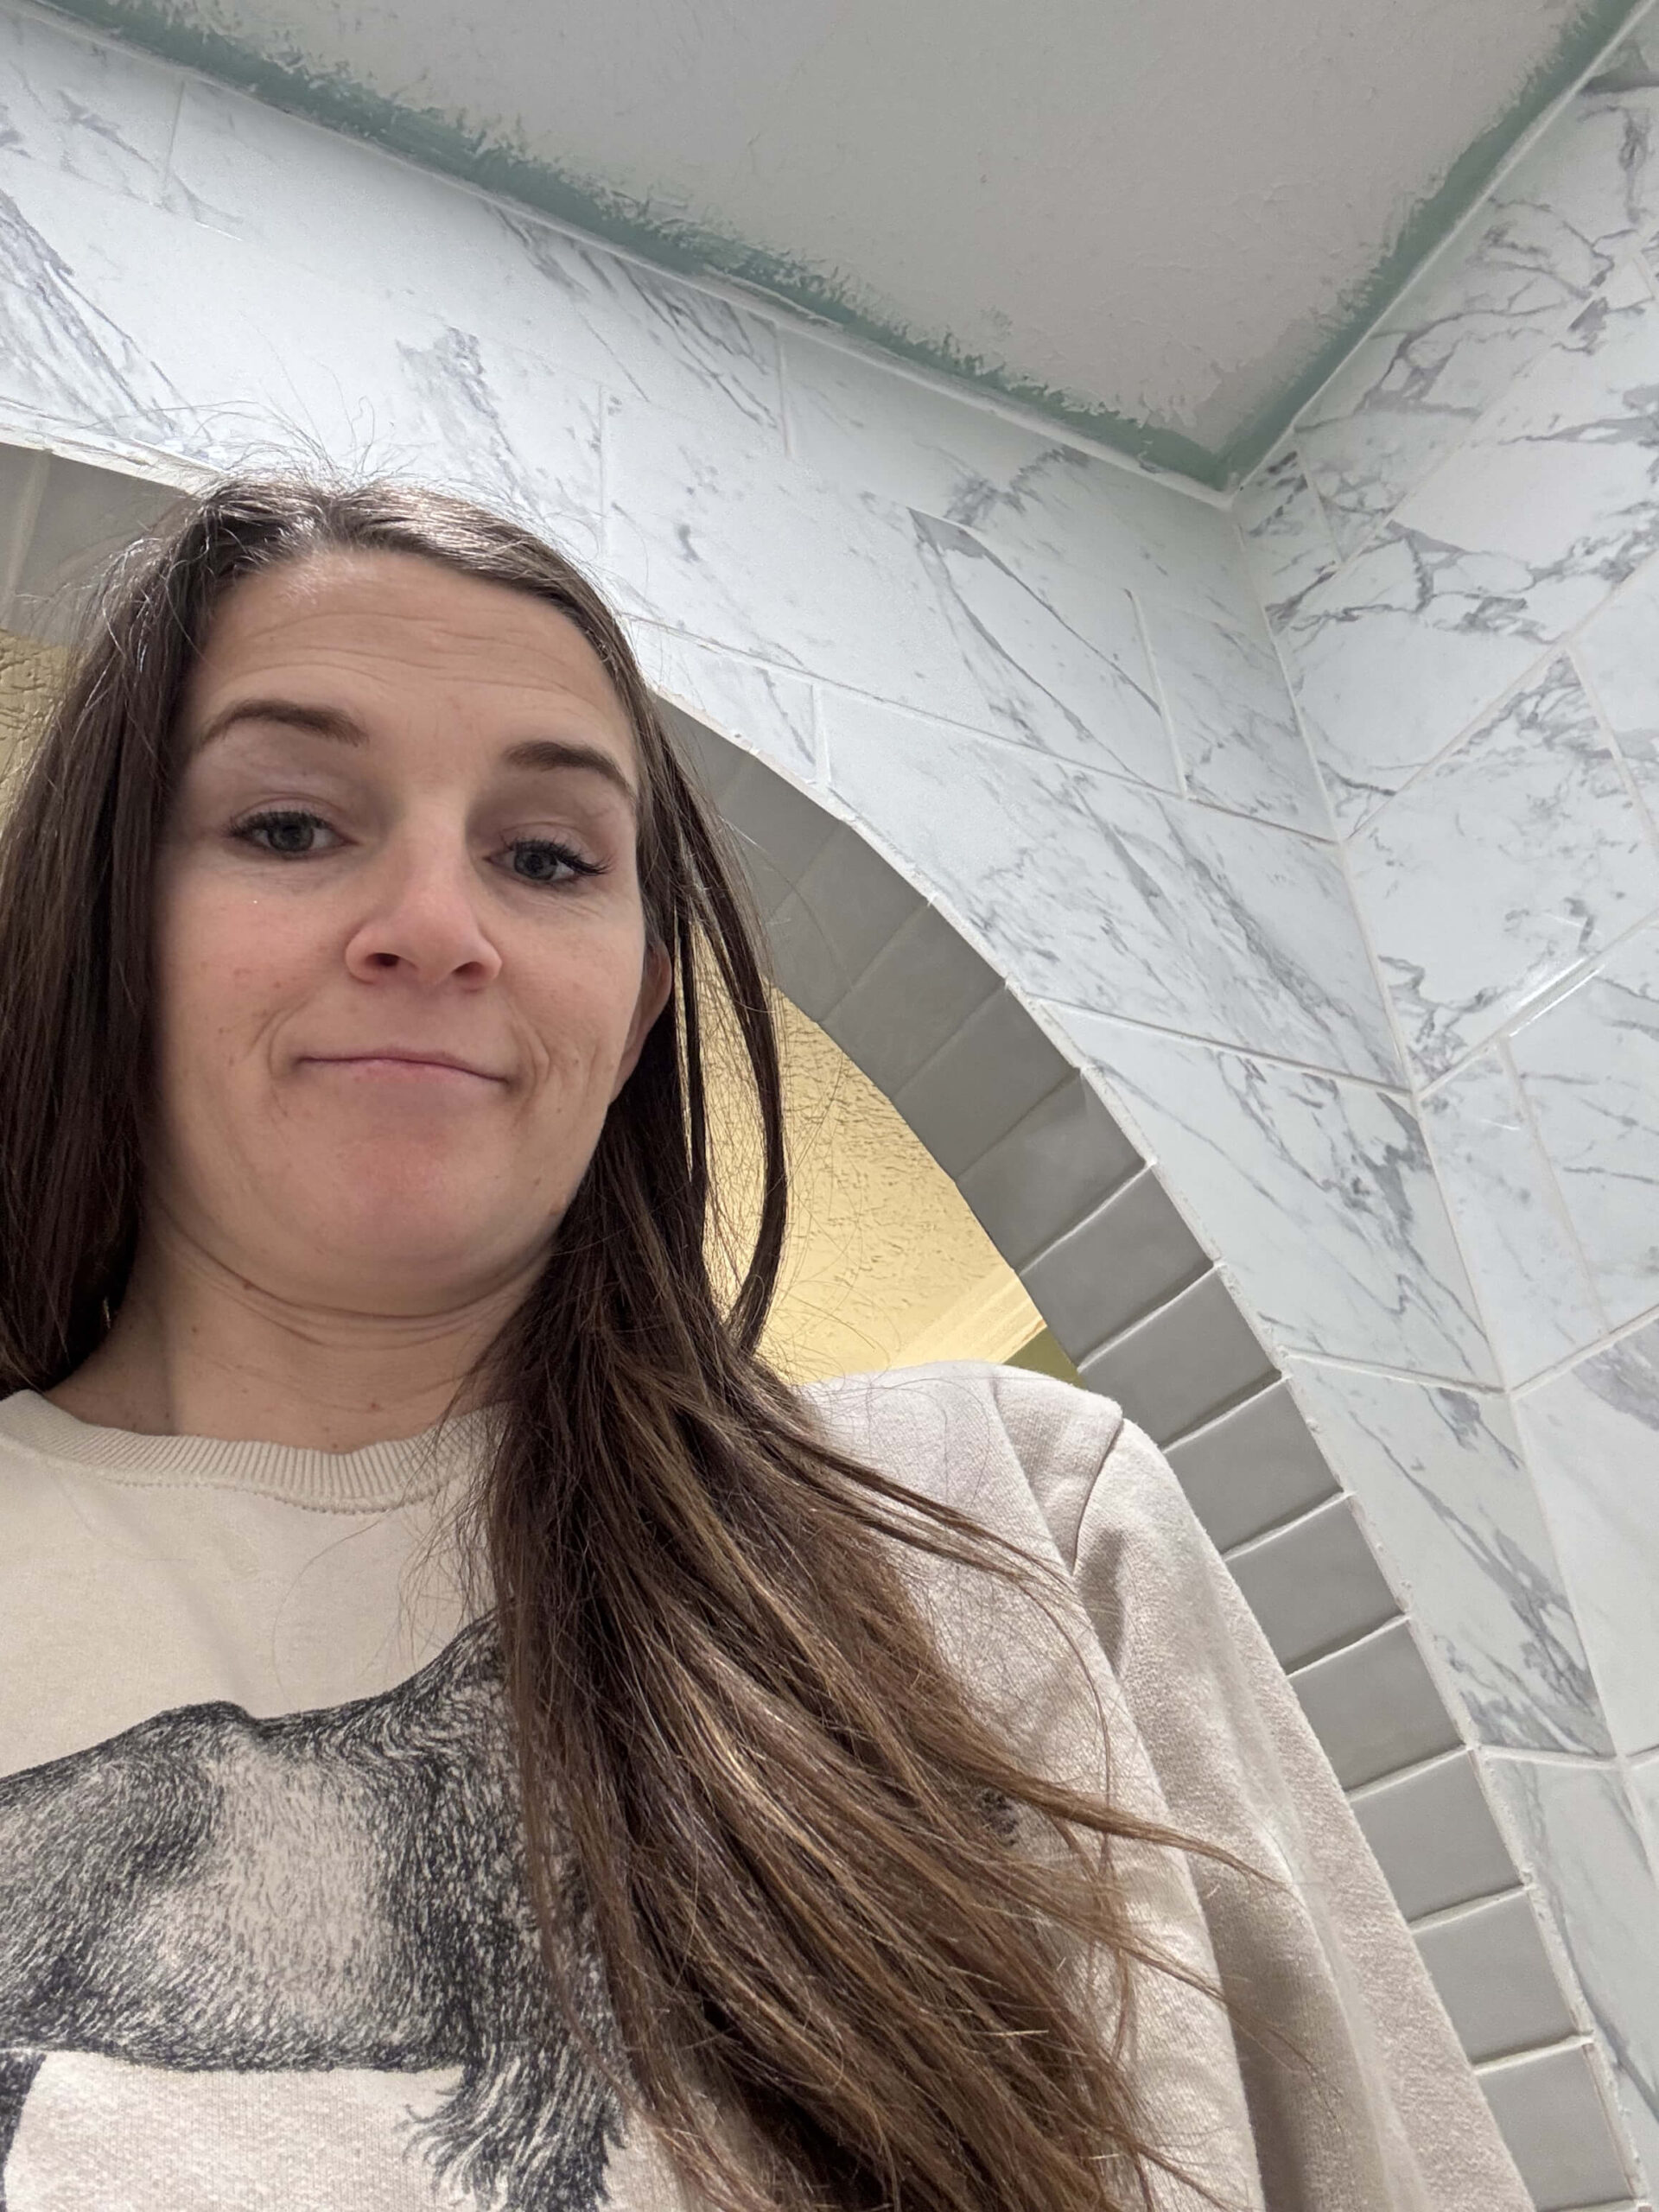
Step 2: Building an Arched Shower Alcove
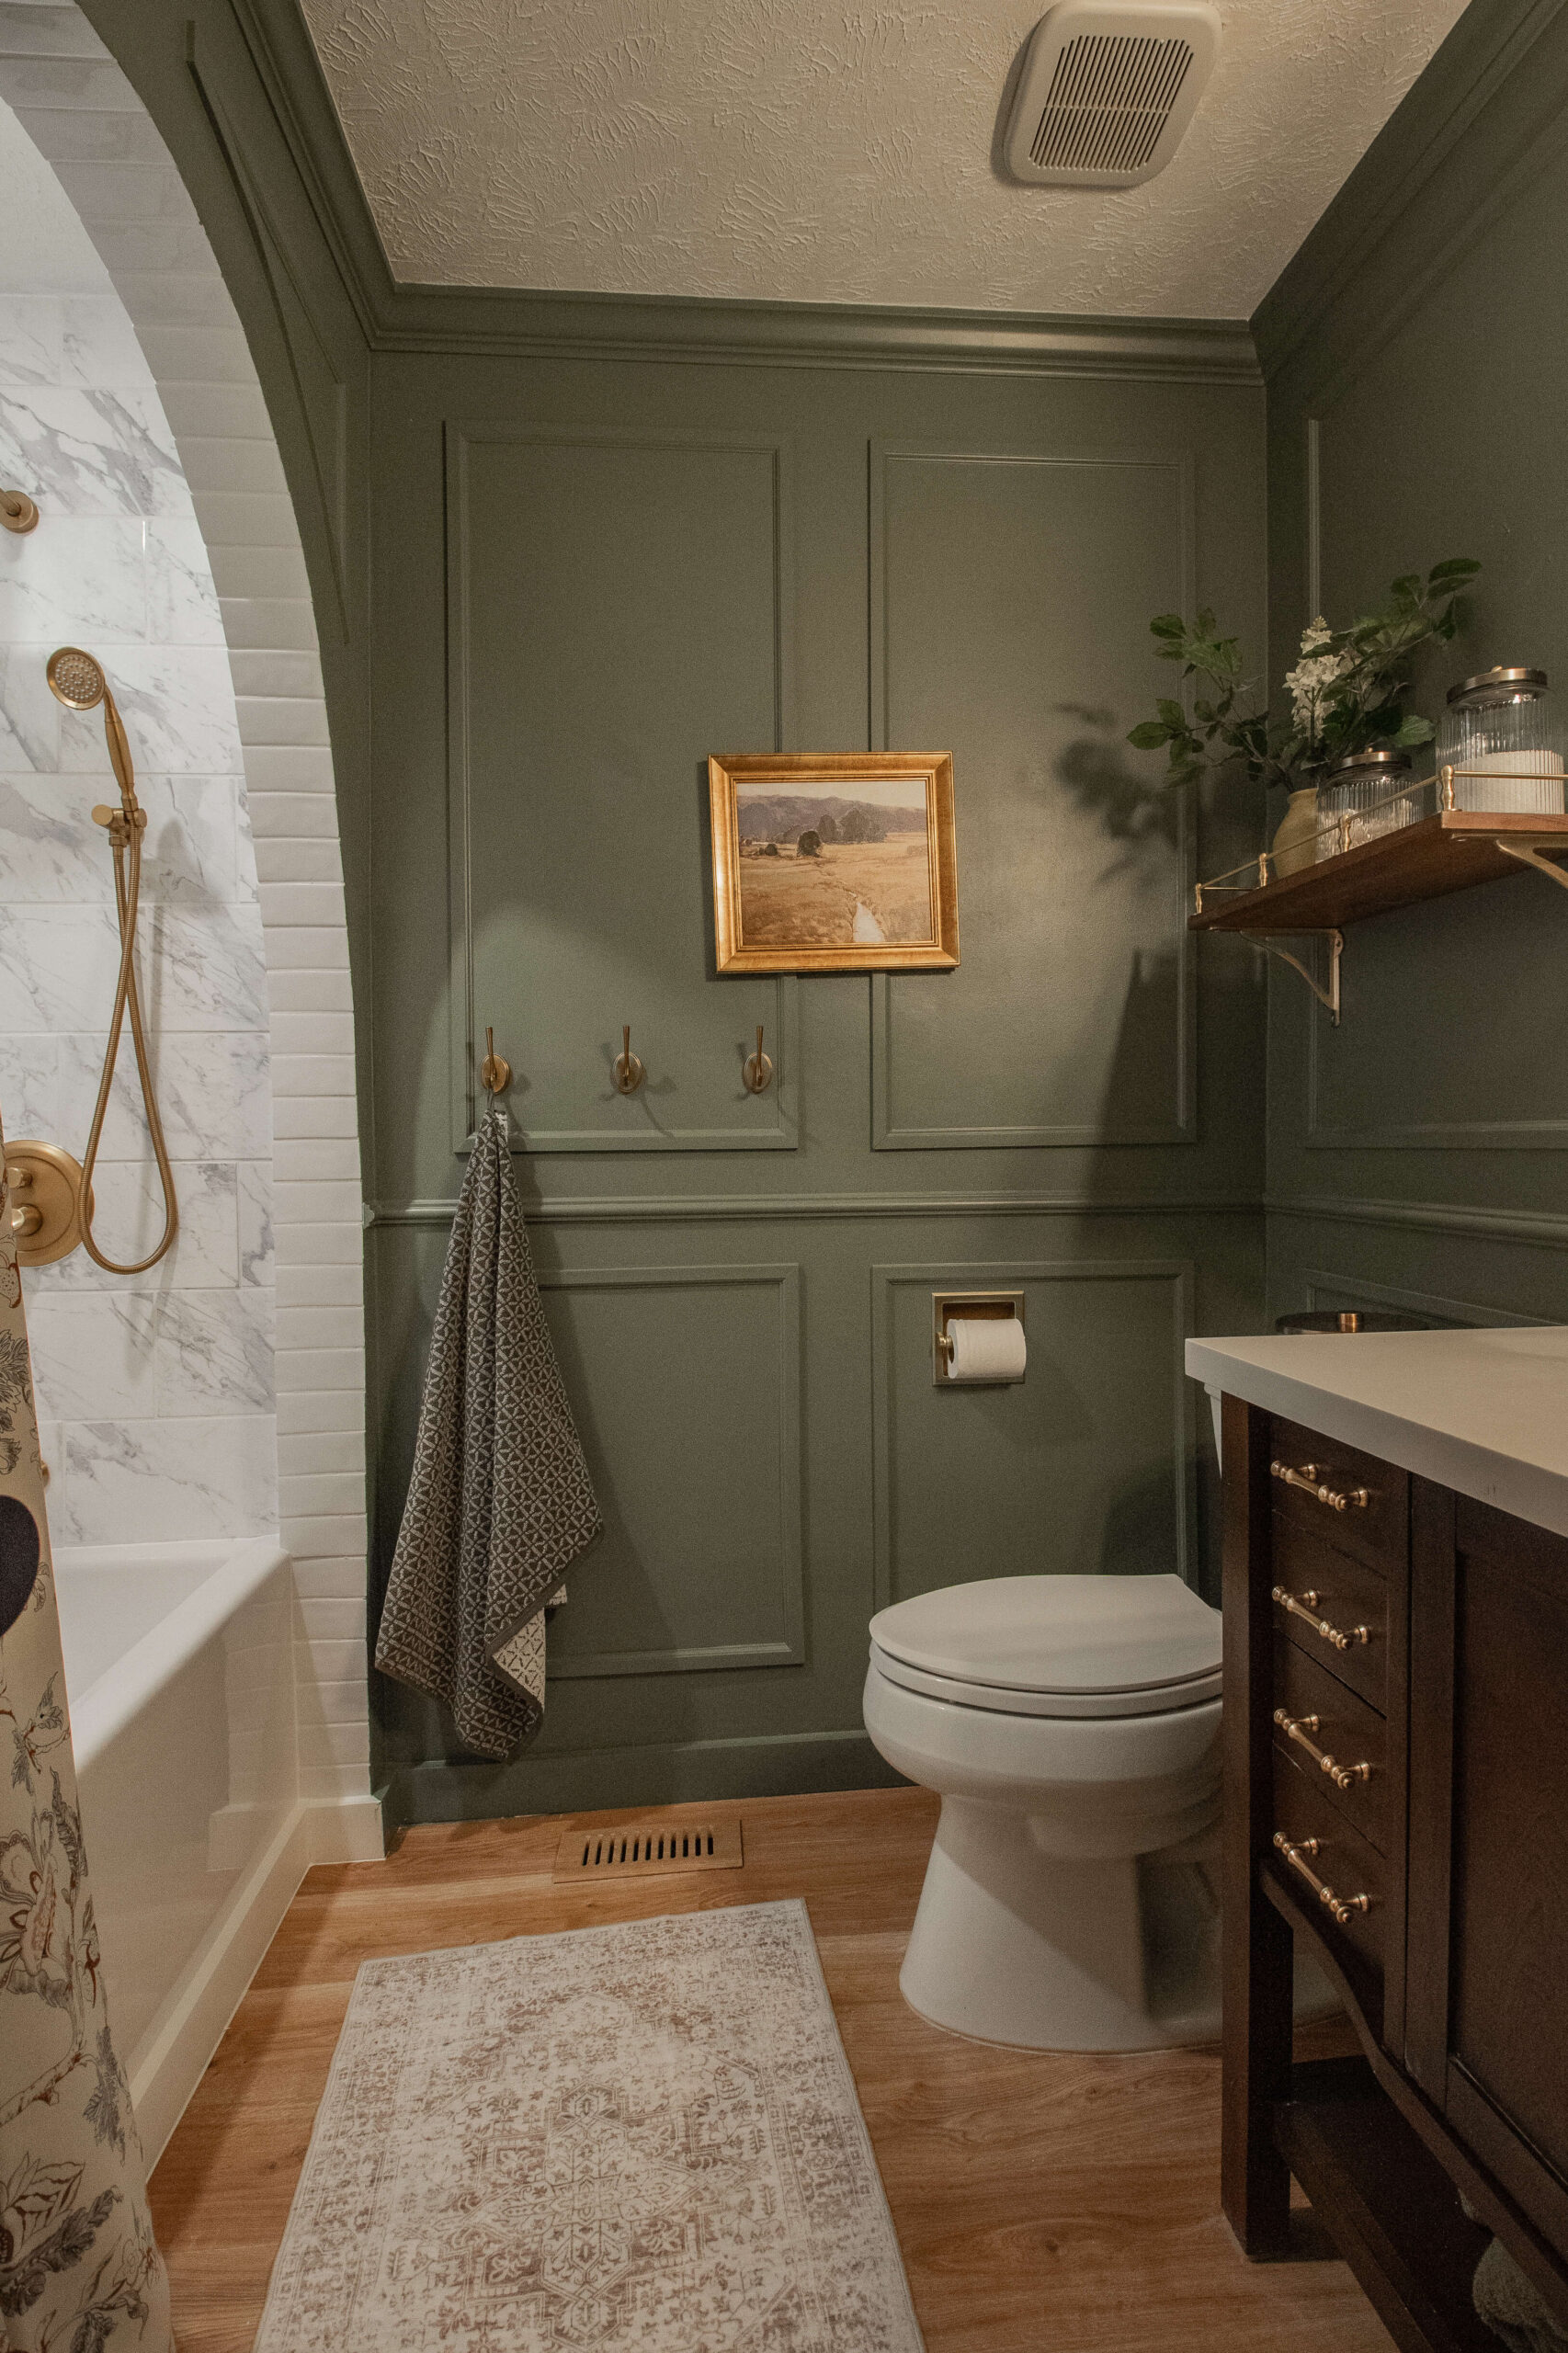
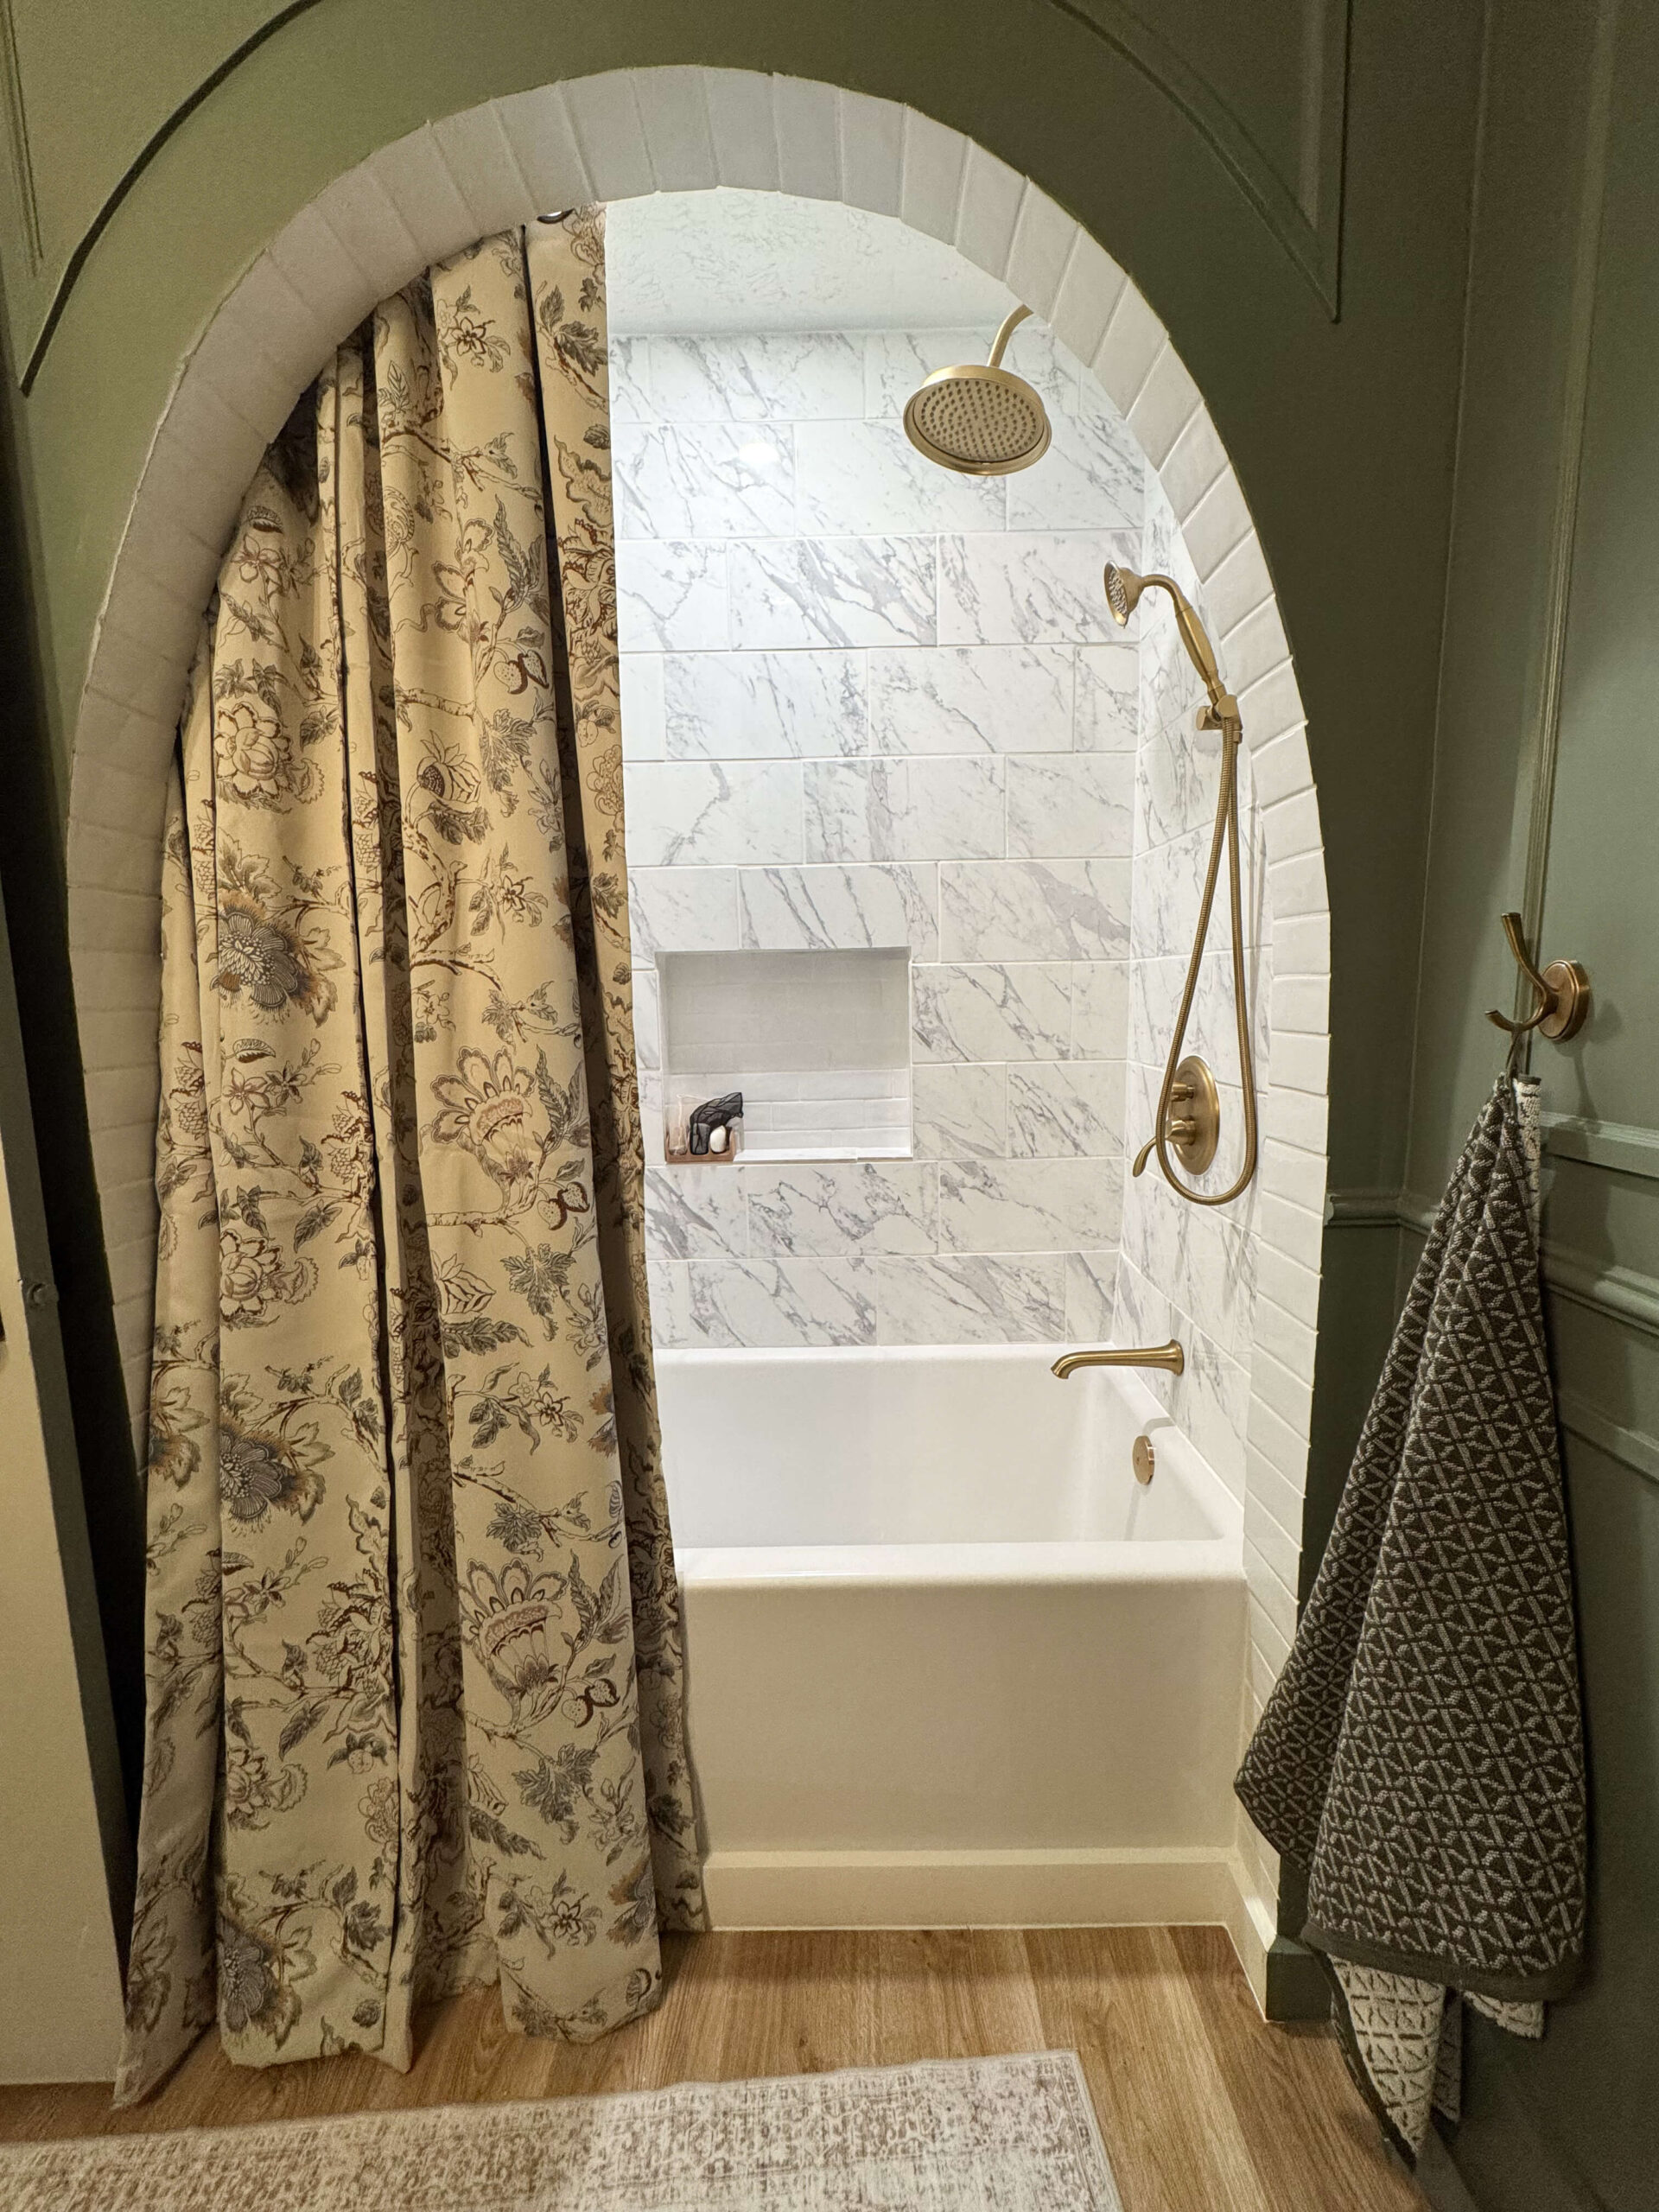
Once the space was cleared, I framed a gorgeous arched alcove for the shower. Adding arches has been a recurring theme throughout our Omaha home, so it felt fitting to bring that design element into the dark green bathroom. If you’re curious about how I created the arch, you can find my full tutorial here.

Step 3: Installing a Waterproof Shower Light
With the new arch in place, the shower area felt darker than before, so I installed a water-resistant shower light. Wiring it to the existing light fixture above the sink was a simple solution that didn’t require adding a separate switch. Now, the shower is bright, functional, and totally inviting.


Step 4: How I Waterproofed and Tiled the Shower
Proper waterproofing is essential for any bathroom renovation, and this dark green bathroom was no exception. Inside the shower, I used cement board and water-resistant drywall. Then I applied fiberglass tape, followed by a layer of thinset, and finished with two coats of AquaDefense for a moisture-proof finish. If you want a detailed breakdown of my waterproofing steps, check out my guide here.


With the prep work complete, it was time to tile! I opted for marble in the shower area, accented with smaller subway tiles for the arch and shower niche. And yes, I even tiled the backside of the arch! The tiling process was meticulous and time-consuming, but it’s the element that truly elevated the look of my dark green bathroom. I’ve got a full tutorial on the tile installation process linked here.
Step 5: Painting and Adding Decorative Trim Work
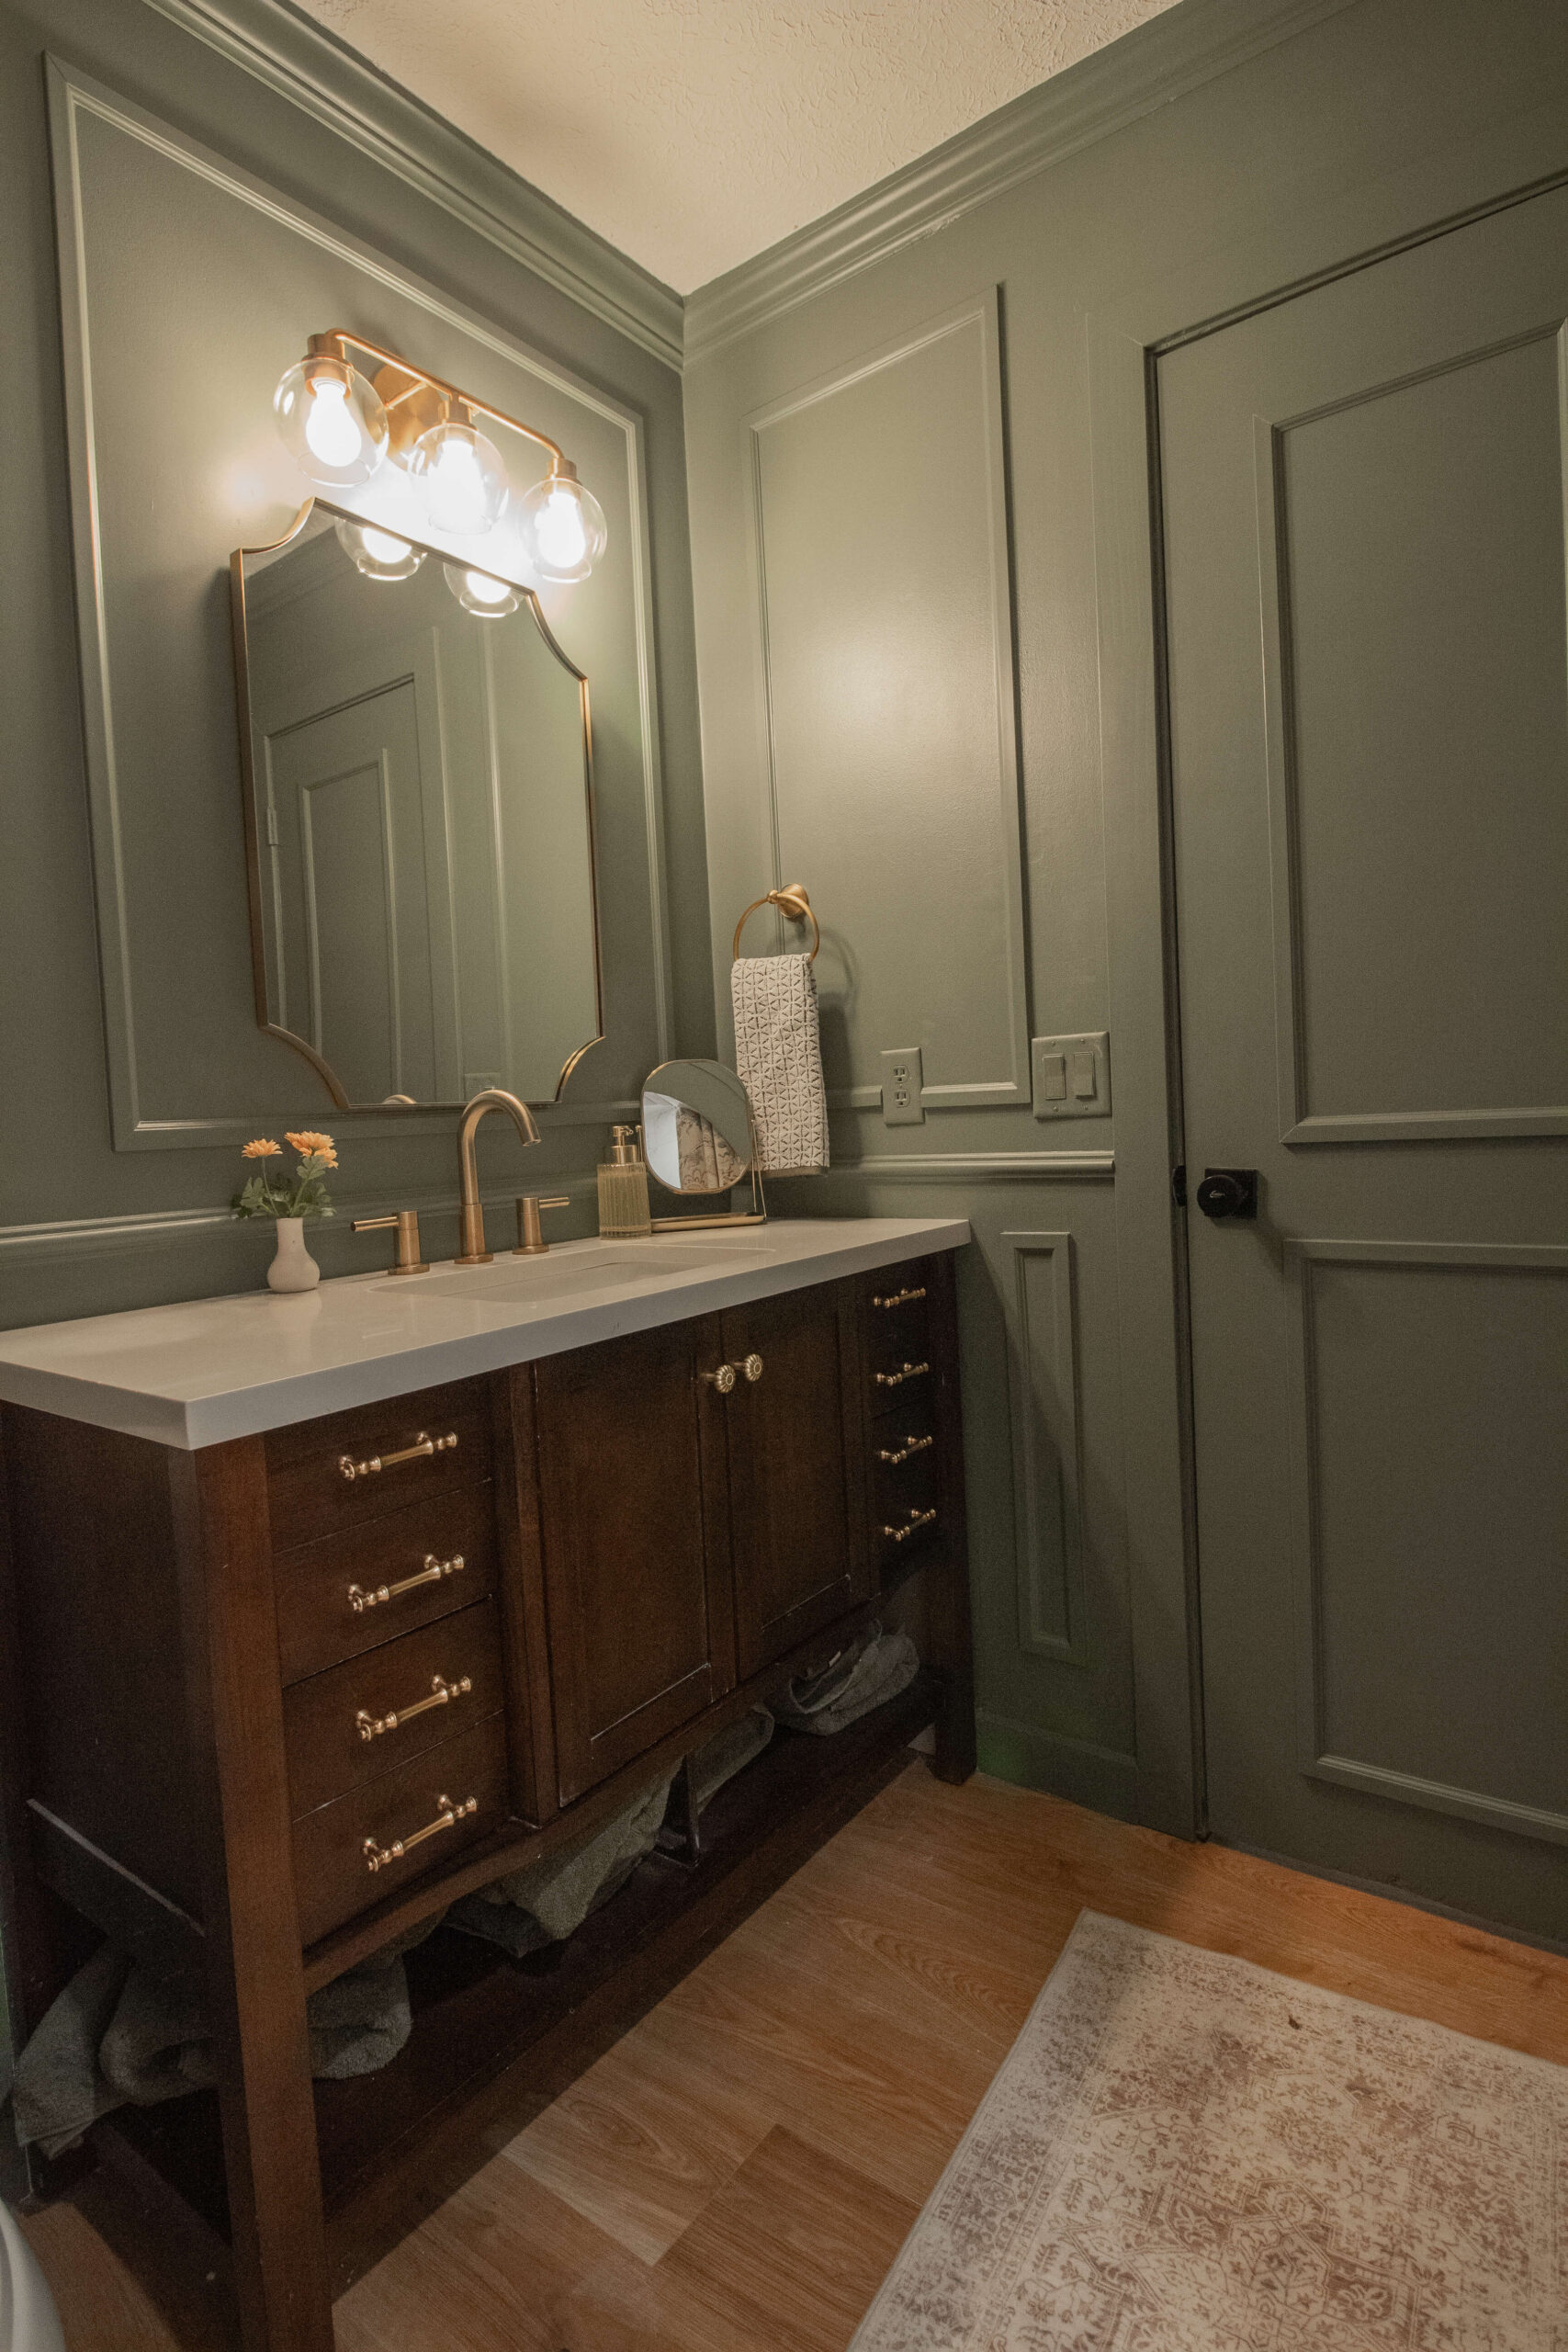
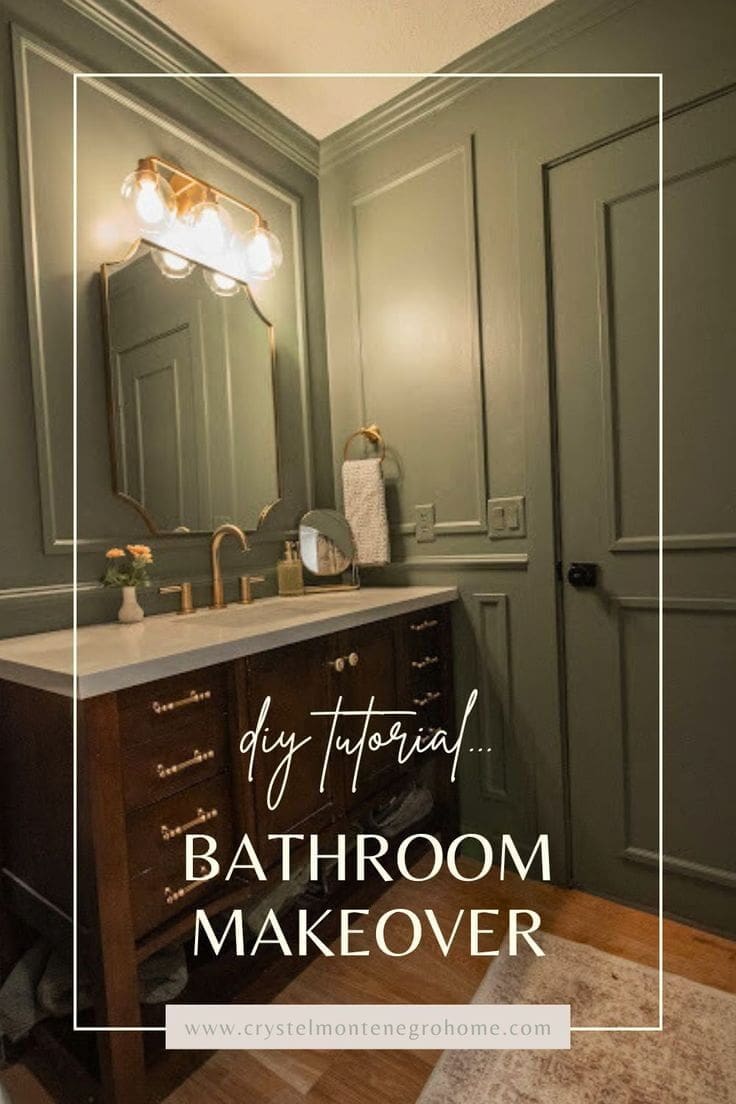
I tried a few different paint colors before settling on Sherwin Williams Dried Thyme. It’s the perfect shade for a moody dark green bathroom without being too dark.
After painting the walls, I installed crown molding, baseboards, and box trim for added architectural character. The pièce de résistance? A custom-made curved molding detail that frames the shower arch beautifully. This combination of trim and color turned my dark green bathroom into a cohesive and polished space.


A little caulk, some nail hole filling, and a fresh coat of paint on the trim brought my dark green bathroom together beautifully. For a tutorial on the box trim details go here, and to learn how I custom made the arch detail go here.


Step 6: Styling and Decorating a Dark Green Bathroom
With all the renovation work done, it was finally time for the fun part: decorating! I chose brass fixtures throughout to complement the dark green bathroom walls… brass shower fixtures, a mirror, a new light fixture, three towel hooks, a toilet paper holder, and a hand towel hanger.


I found the perfect shelves for hanging over the toilet, but sadly, they were unavailable. So, I did what any good DIYer would do – I built them myself! The simple DIY shelves perfectly offset the moody tones of the dark green bathroom while adding storage and style.

Dark Green Bathroom Before and After Reveal
Look at the before and after! I can barely believe the transformation!

If you were following this dark green bathroom makeover on my Instagram stories, you’ll know I was trying to get the whole project done in 10 days… it ended up taking me 12, but thats ok. I’m so happy with how this room turned out. The moody green walls, elegant brass accents, and thoughtful details make this guest bathroom feel like a high-end retreat. It’s also a little nod to the style I’ve planned for our new home in St. Louis.
Wanna know a little secret? I couldn’t find a shower curtain I loved for this bathroom, so I bought these floral curtains and used a shower curtain liner behind them. Worked perfectly.
What do you think of the transformation? Are you tempted to try a dark green bathroom in your home? Let me know in the comments below!
📌 Save this project for later:
Frequently Asked Questions About Designing a Dark Green Bathroom
To balance the richness of dark green walls, incorporate elements like:
Brass or gold fixtures to add warmth
Ample lighting, such as wall sconces or a shower light
Lighter tiles, countertops, or accessories to provide contrast
Bright, warm lighting works best to complement dark green walls. Consider adding sconces, pendant lights, or a shower light for a well-lit yet cozy atmosphere.
Dark green pairs beautifully with neutrals like white, beige, and gray. It also works well with metallic accents, such as brass, gold, or chrome, and natural textures like wood or marble.
Not necessarily! While dark colors can feel cozy, pairing dark green walls with light-colored tiles, mirrors, or brass accents can create balance and make the room feel larger and more luxurious.


Hi! Where is the shower curtain from?
Here is a link to the curtains I bought. They are just regular curtains; then I put a shower curtain liner behind them.
such a beautiful bathroom and awesome step by step guide, thank you for sharing!
Thank you!
This dark green bathroom remodel is absolutely gorgeous, The bold color choice adds such a rich and elegant feel to the space. It would be great to hear more about any challenges faced during the DIY process and how they were overcome.