


DIY Curved Molding Around an Arch


Updated July 13, 2026
Creating and installing curved molding might sound intimidating, but with PVC trim and a little patience, it’s completely doable. When I faced an empty space above the arch in my guest bathroom, it was the perfect opportunity to try out this technique. Let me walk you through exactly how I made it happen. Grab your heat gun, and let’s elevate your space with custom curved molding!
Related DIY Bathroom Tutorials You’ll Love
– Complete DIY Guide to My Dark Green Bathroom Remodel
– How I Installed a Beautiful Tile Tub Surround (And You Can Too!)
– Upgrading Our Guest Bath with DIY Picture Frame Molding
– How To Build an Arched Bathtub Alcove
– How To Build a Brass Rail Shelf (high-end dupe)
Table of Contents
- Related DIY Bathroom Tutorials You’ll Love
- Tools You’ll Need to Make Curved Molding for an Arch
- Materials You’ll Need for Arched Molding
- Step 1: Prep the Wall for Custom Bathroom Molding
- Step 2: Heat and Shape the PVC Trim to Match Your Arch
- Step 3: Cut Clean Angles for a Professional Trim Fit
- Step 4: Install and Fine-Tune the Curved Molding Trim
- Step 5: Caulk, Spackle, and Paint for a Seamless Look
- Finished Curved Molding: The Final Touch That Elevates the Whole Bathroom
- 📌 Save This Project for Later
- Frequently Asked Questions About Installing DIY Curved Molding
Tools You’ll Need to Make Curved Molding for an Arch
Materials You’ll Need for Arched Molding
Step 1: Prep the Wall for Custom Bathroom Molding
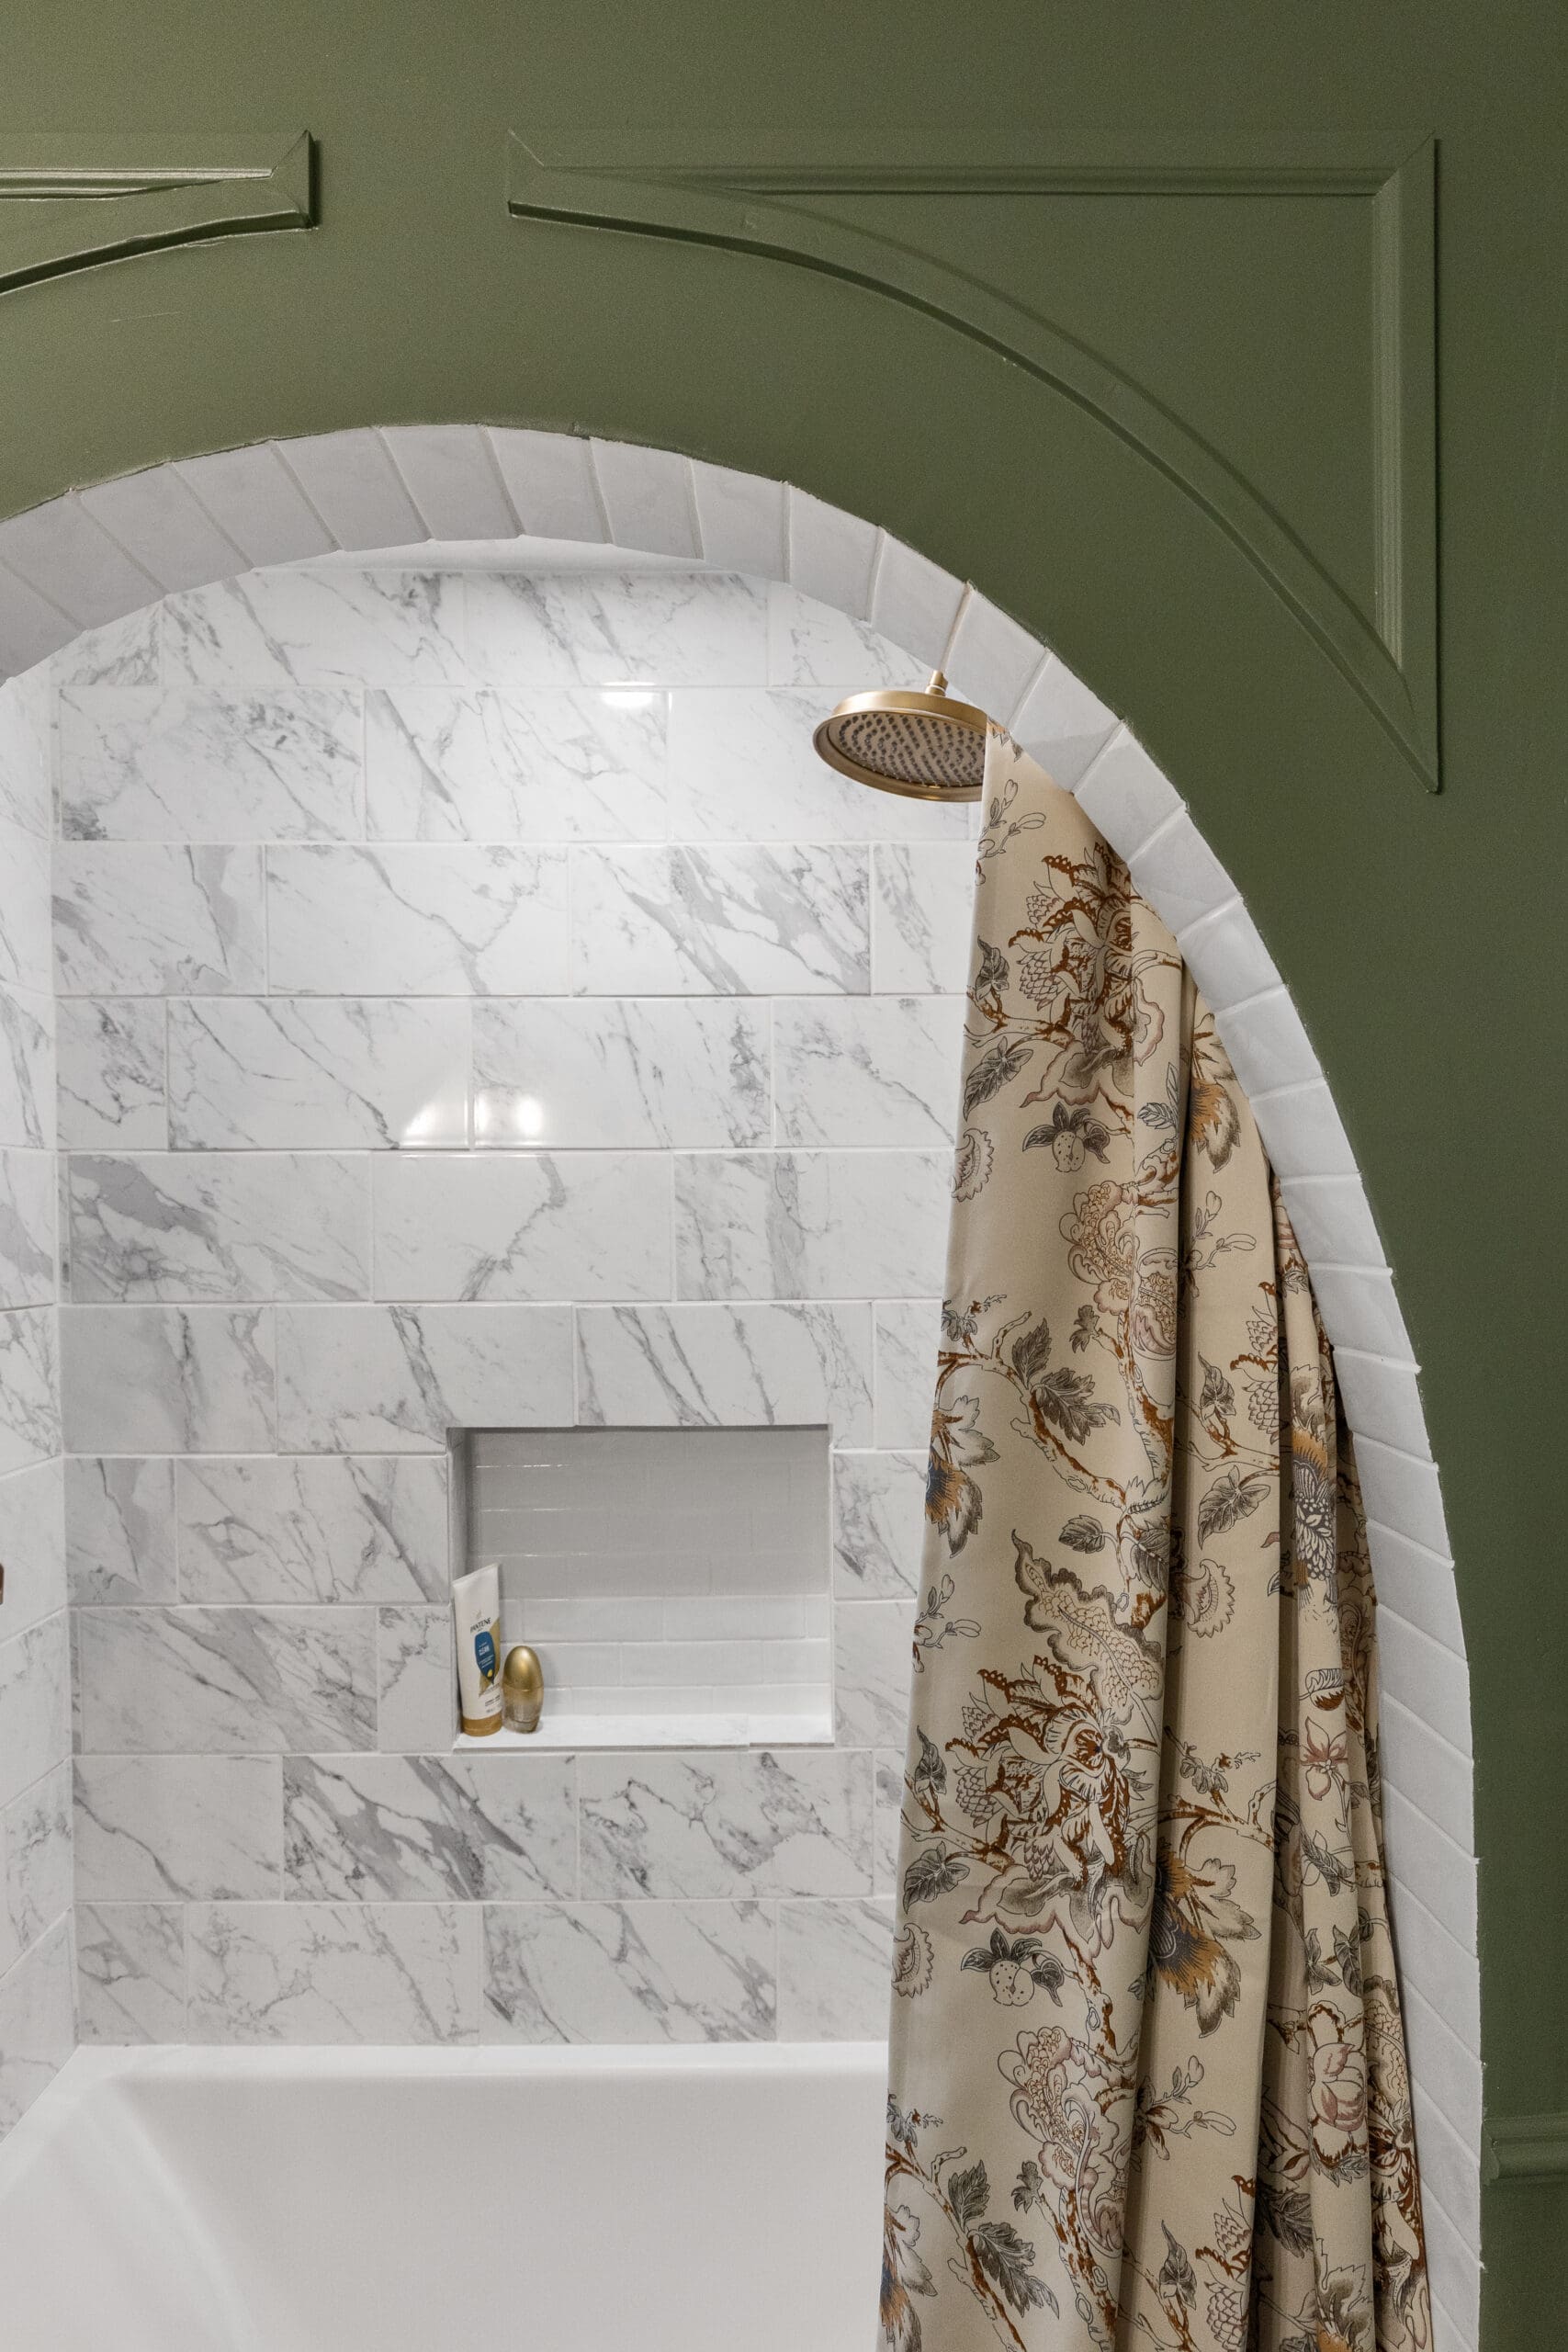
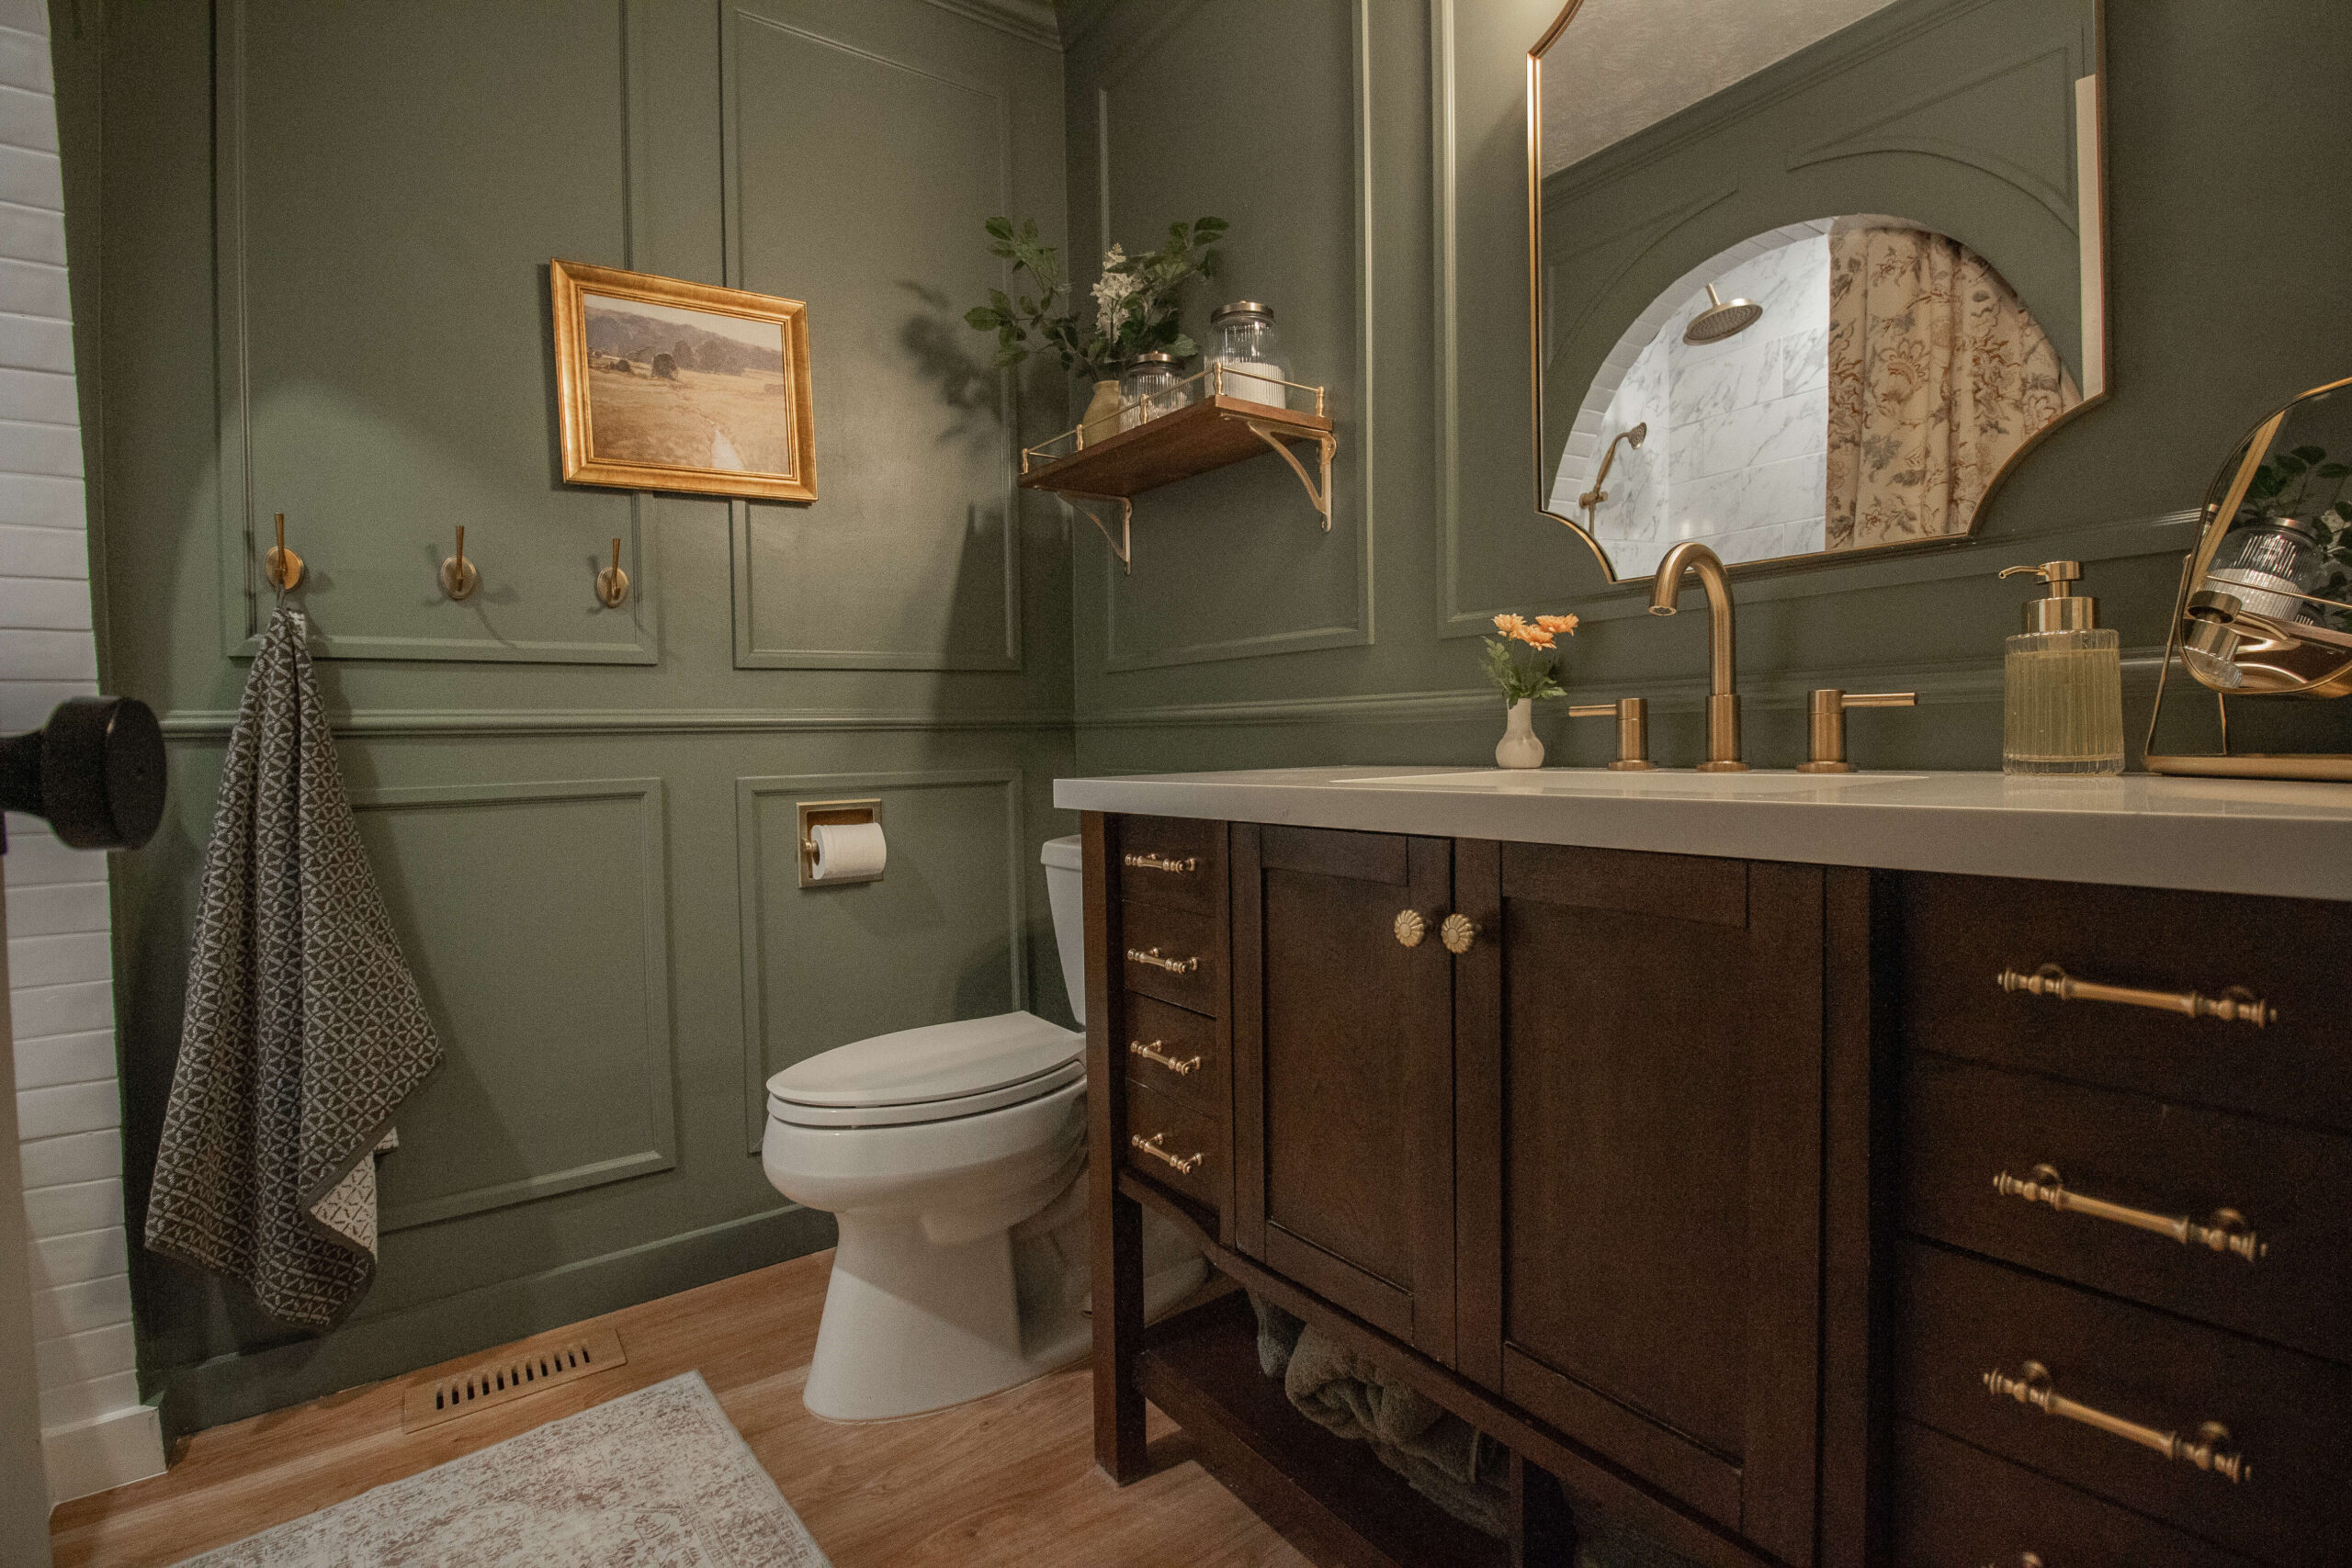
During my guest bathroom remodel, I built a stunning arched shower alcove that turned out even better than I imagined – it instantly elevated the entire space. When it came time to add box trim to the bathroom walls, I hit a creative roadblock: what should I do with the space above the arch? The solution? DIY curved molding.
Before tackling the curved molding, I first installed crown molding and box trim around the rest of the bathroom. This gave me a clear idea of how much space I had to work with above the alcove. With a vision in mind, I got started.

After taking careful measurements of the arch, I cut out the straight-edged trim details and attached them to the wall using my brad nailer – easy enough. But the real challenge was figuring out the curved section at the bottom.

Step 2: Heat and Shape the PVC Trim to Match Your Arch
If you’re working in a bathroom, PVC trim is a game-changer. Not only is it waterproof and resistant to swelling, but it’s also highly flexible when heated. This makes it ideal for creating custom curved molding.
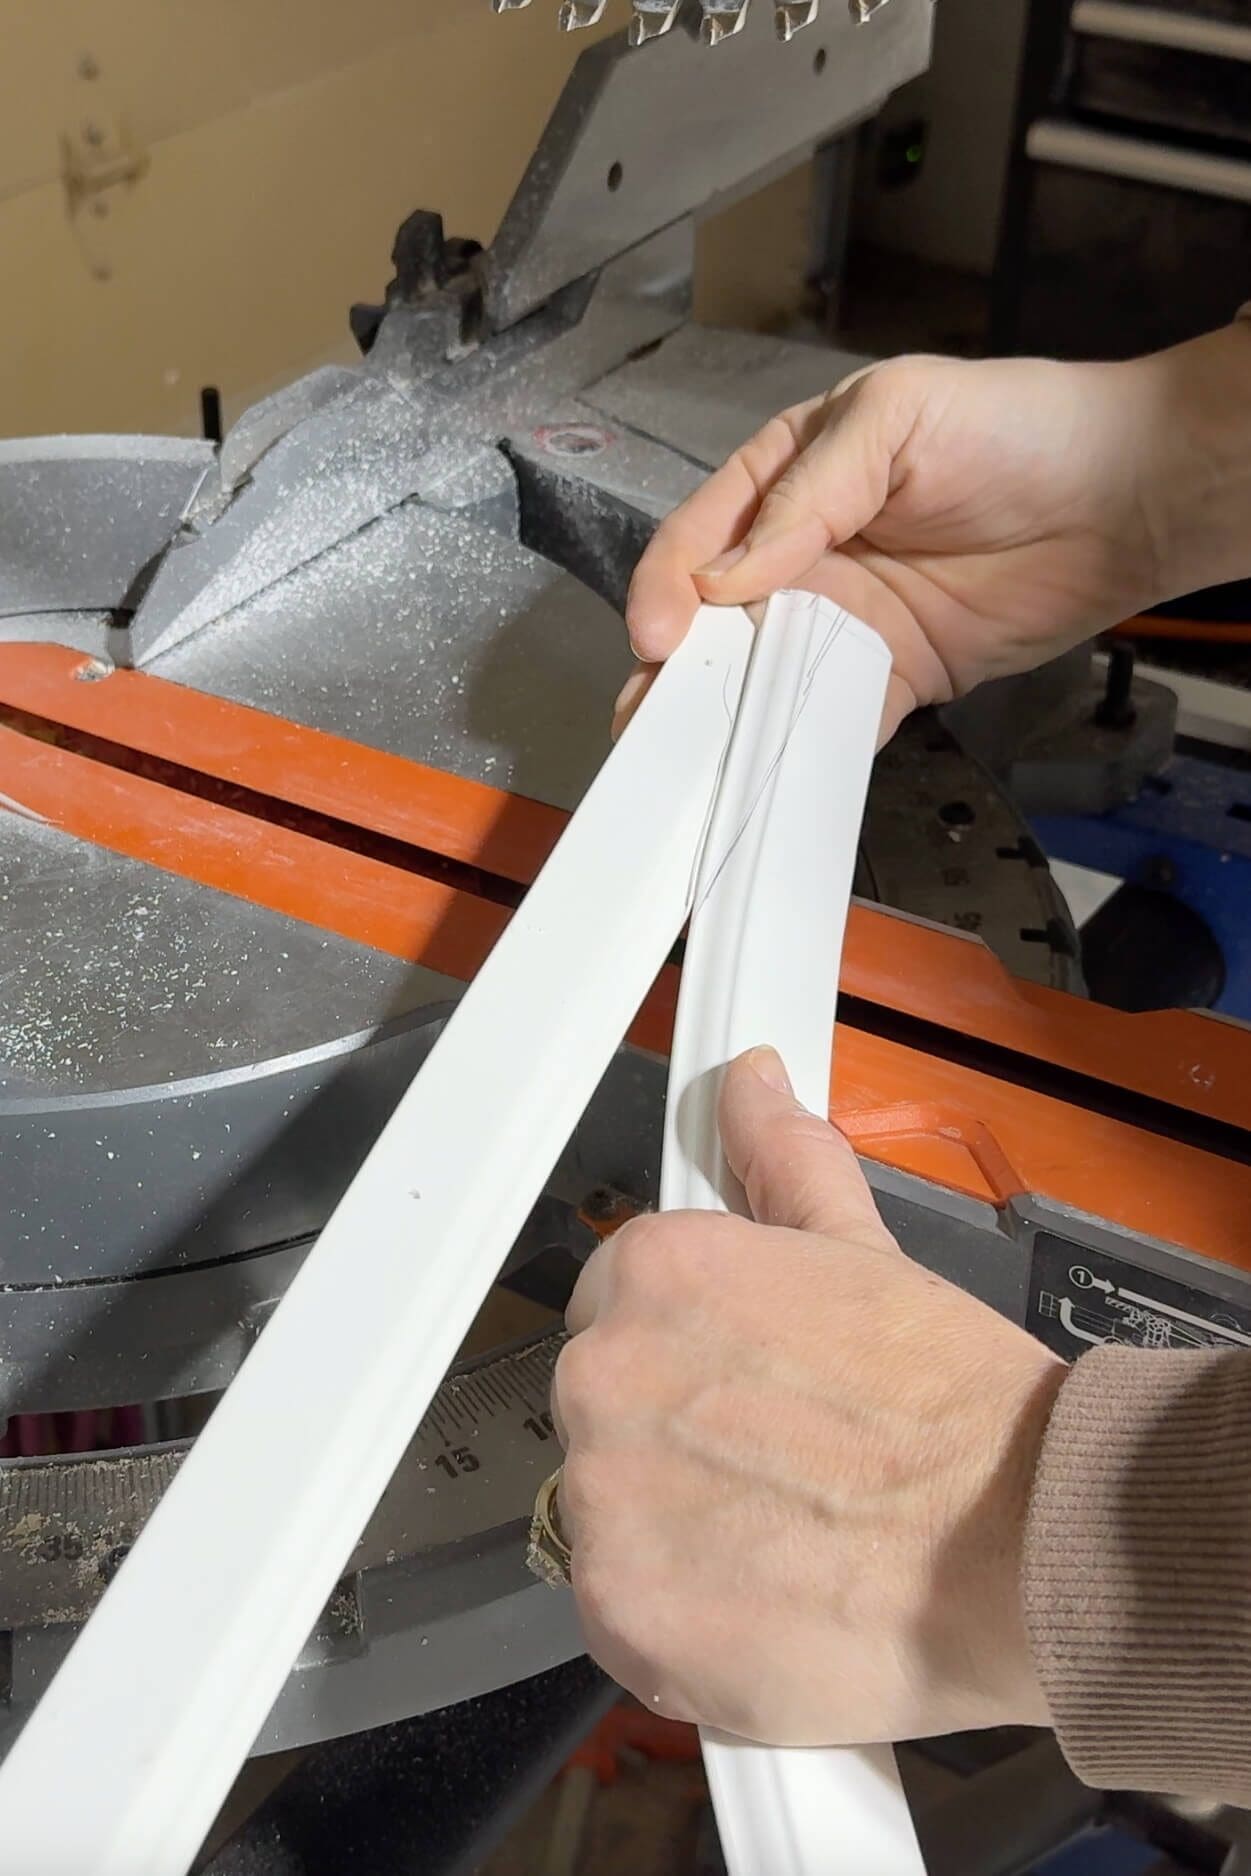
I started by cutting a piece of PVC trim slightly longer than I needed. Then, using one brad nail, I temporarily attached it to the wall at the center of the arch. With a heat gun, I carefully warmed the PVC trim, bending it gently to follow the curve of the arch.
Once I was satisfied with the shape, I marked where the ends needed to be cut for a perfect fit.


Step 3: Cut Clean Angles for a Professional Trim Fit
Lower Corners: Creating a Seamless Angle Cut
After removing the curved trim from the wall, I used my miter saw to cut the lower corners. By marking where the pieces overlapped and splitting the difference, I achieved a clean, pointed angle that looked seamless.


Upper Corners: Trimming for a Polished Finish
The top corners required a slightly different approach. Instead of a pointed edge, I wanted a flat, finished look.

To achieve that look, I marked where the trim overlapped, split the difference, and trimmed off the extra.

Step 4: Install and Fine-Tune the Curved Molding Trim
With all the pieces cut, I reattached the molding to the wall with my brad nailer and fine-tuned the fit.

Then I used my multi-tool to cut an angled notch and filled it with a small triangular piece of PVC trim. Voila!!! A little extra effort, but the result was perfection.

Step 5: Caulk, Spackle, and Paint for a Seamless Look
Once the curved molding was securely in place, it was time to finish the job. I caulked along the edges to create a smooth transition, and then filled the seams and nail holes with spackle (yes, spackle works great here!). Then I primed and painted everything for a cohesive, polished look.

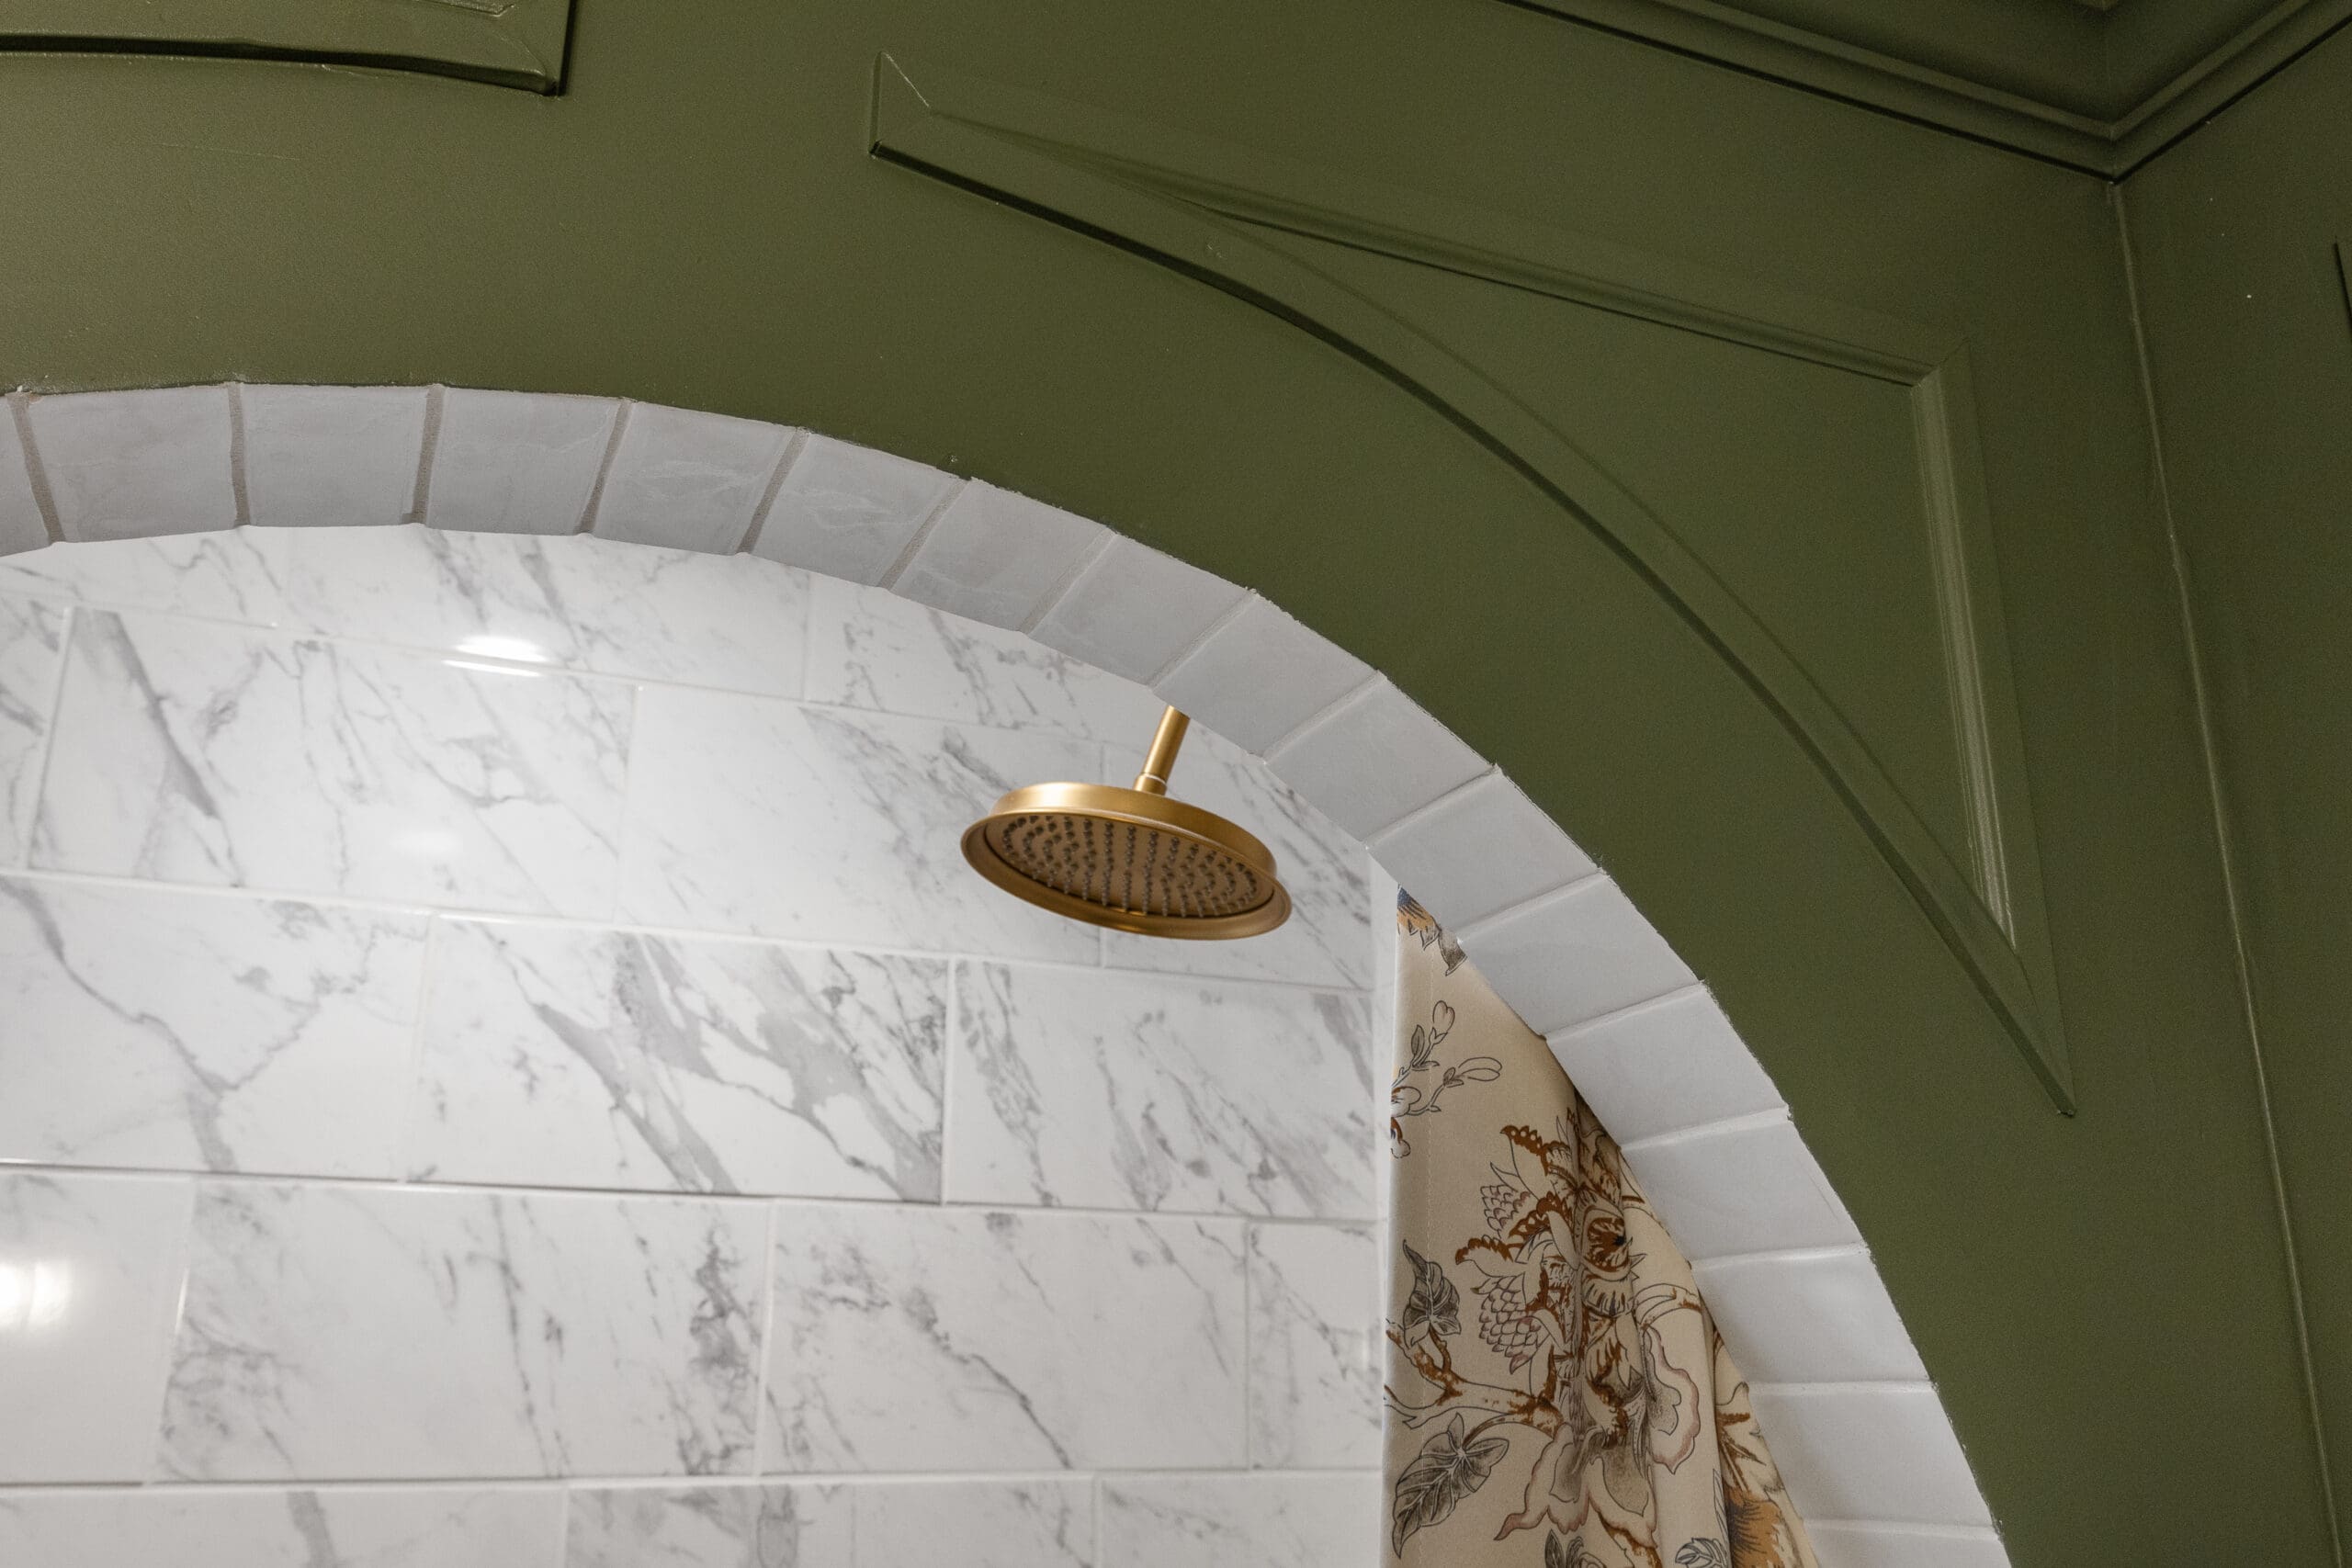
Adding curved molding to the space above the arch tied the entire bathroom design together. While I could’ve left the area blank, the custom trim brought an extra level of detail and sophistication that perfectly complemented the box trim on the walls.
Finished Curved Molding: The Final Touch That Elevates the Whole Bathroom
So, if you’re looking to elevate your space, don’t be afraid to try your hand at creating curved molding. It’s easier than you think and delivers big design impact!
Would you like to see the full bathroom reveal? Click this link for all the details in one blog post.
📌 Save This Project for Later

Frequently Asked Questions About Installing DIY Curved Molding
Curved molding is a type of decorative trim designed to follow rounded or arched architectural features, such as doorways, windows, or alcoves. It adds a polished, custom look to any space.
PVC trim is lightweight, flexible, and waterproof, making it ideal for bathrooms or areas with moisture. It can also be shaped with heat, which is crucial for creating smooth curves.
The tools you’ll need include:
A heat gun for shaping the PVC trim
A miter saw for precise cuts
A brad nailer for attaching the trim to the wall
Caulk and spackle for finishing touches
Yes, custom details like curved molding can elevate a home’s aesthetic appeal, making it look more high-end and cohesive. This can potentially boost a home’s value by enhancing its overall design.