


DIY Garden Arbor – How to Build a Beautiful Backyard Arbor


Updated July 13, 2026
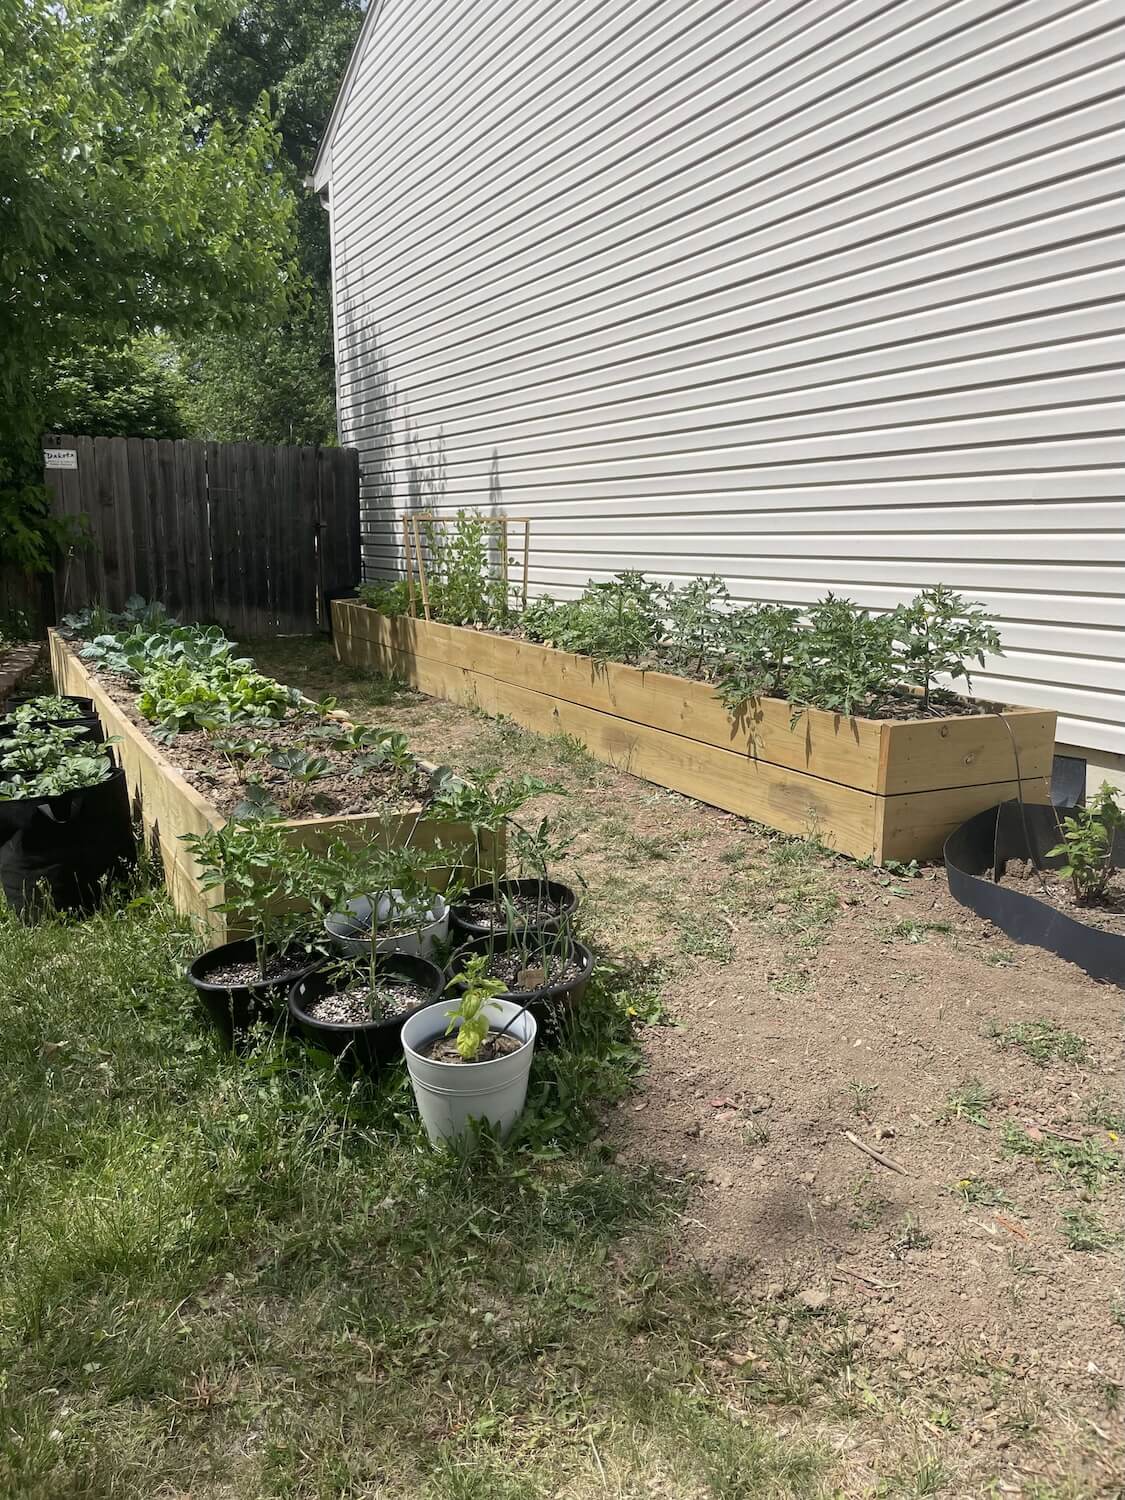
When we transformed our unused side yard into a vegetable garden, it was missing a beautiful focal point – so I decided to build a DIY garden arbor. I couldn’t be happier with how it turned out. Not only does it create a gorgeous entryway into our garden, but it also adds major curb appeal to our home. If you love backyard projects like this one, check out my tutorial on building DIY tall outdoor planter boxes for the garden – they’re what inspired this whole space.
If you’re dreaming of adding a DIY garden arbor to your space, follow along as I walk you through the step-by-step process to build your own!
Watch the Full DIY Garden Arbor Build
Table of Contents
- Watch the Full DIY Garden Arbor Build
- Tools for Building a DIY Garden Arbor
- Materials You’ll Need for a DIY Garden Arbor
- Step 1: Design and Plan Your DIY Garden Arbor Layout
- Step 2: Cut and Build the DIY Garden Arbor Frame
- Step 3: Assemble the DIY Garden Arbor Frame
- Step 4: Cut and Attach Decorative Arched Braces
- Step 5: Secure and Install the Garden Arbor Posts
- DIY Garden Arbor Reveal – Before and After Transformation
- Finishing Touches That Made This Garden Arbor Shine
- More DIY Outdoor Projects
- 📌 Save This DIY Garden Arbor Tutorial for Later
- FAQs About Building a DIY Garden Arbor
- More Backyard DIY Projects
Tools for Building a DIY Garden Arbor
These are the exact tools I used to build this garden arbor. You don’t need anything fancy, but having the right tools makes the job so much easier – especially when it comes to cutting curves and setting posts straight. I’ve linked my favorites that held up great through this whole project.
- Miter saw (for crosscuts and cutting brace angles)
- Jigsaw (for cutting the decorative curved arches)
- Handheld sander (for smoothing curved cuts and edges)
- Tape measure (for layout and spacing)
- Speed square (for checking square joints during assembly)
- Drill (for driving exterior screws)
- Post hole digger (for digging 2-ft-deep post holes)
- Post level (for keeping posts plumb while concrete sets)
- Laser level (for aligning header boards perfectly straight)
- I-Beam level (for checking overall structure level)
- Staple gun (for attaching welded wire fencing trellis)
Materials You’ll Need for a DIY Garden Arbor
We chose pressure-treated wood for everything since this arbor lives outside year-round. I also sealed the finished structure with an outdoor-rated stain to help it last for years.
Lumber
- Pressure-treated 4x4s (for the vertical posts)
- Pressure-treated 2x6s (for the header boards and frame)
- Pressure-treated 2x12s (for the decorative arched braces)
- Pressure-treated 2x4s (for the crossbeams along the top)
Supplies
- Exterior wood screws (for all structural connections)
- Concrete (for anchoring the posts in the ground)
- Welded wire fencing (for the climbing plant trellis panels)
- Outdoor stain and sealer (for weather protection and finish)
Step 1: Design and Plan Your DIY Garden Arbor Layout
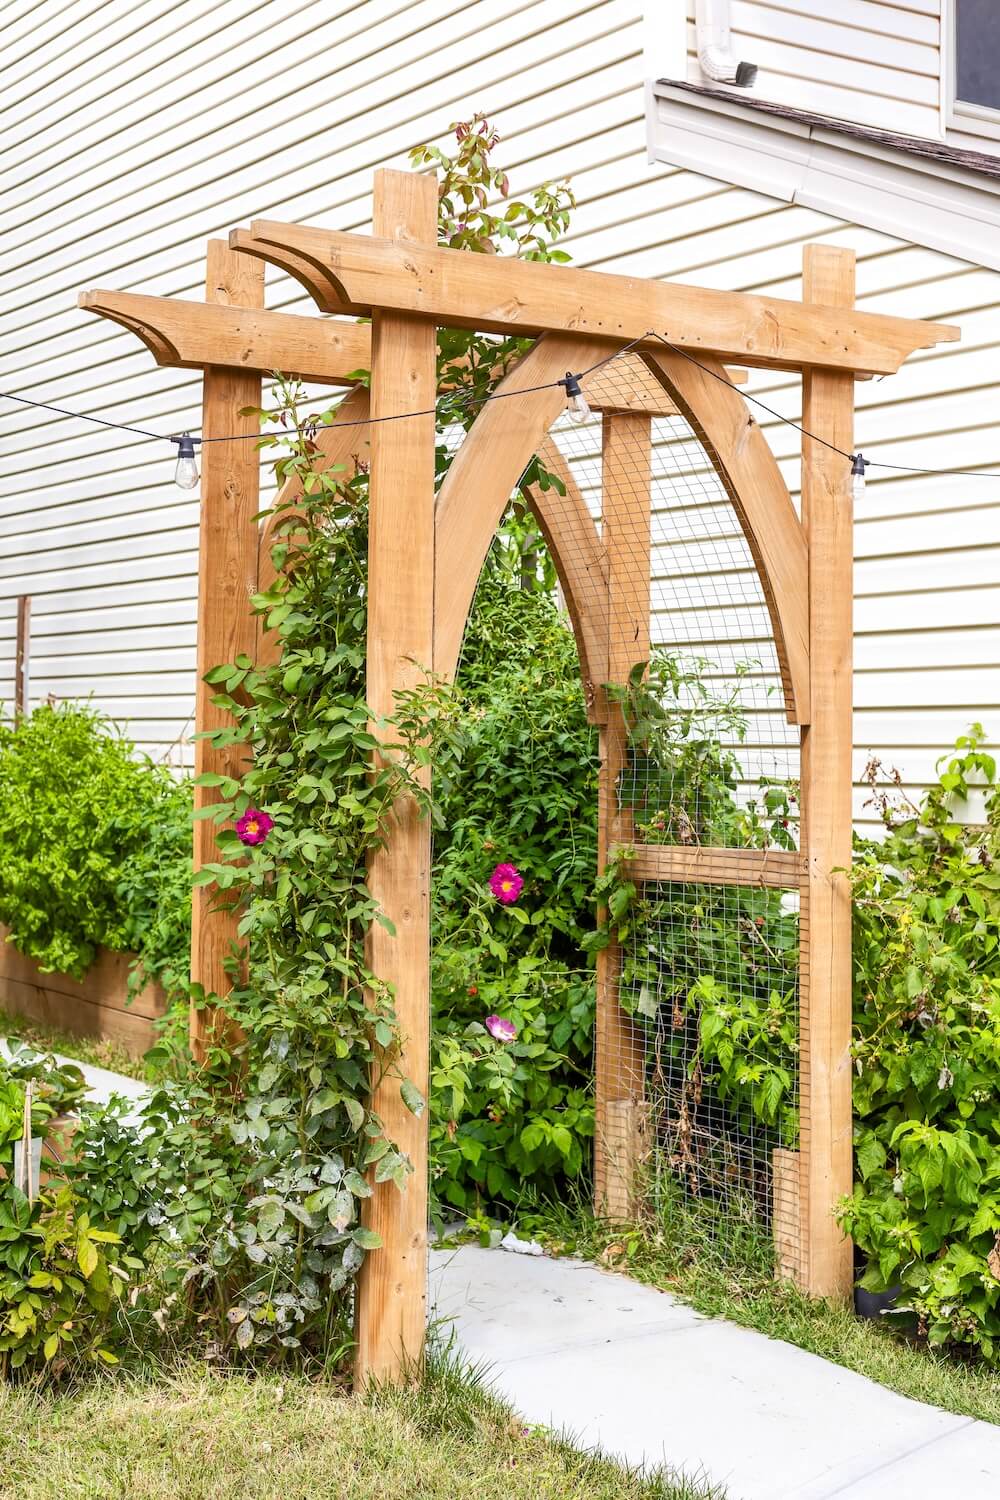
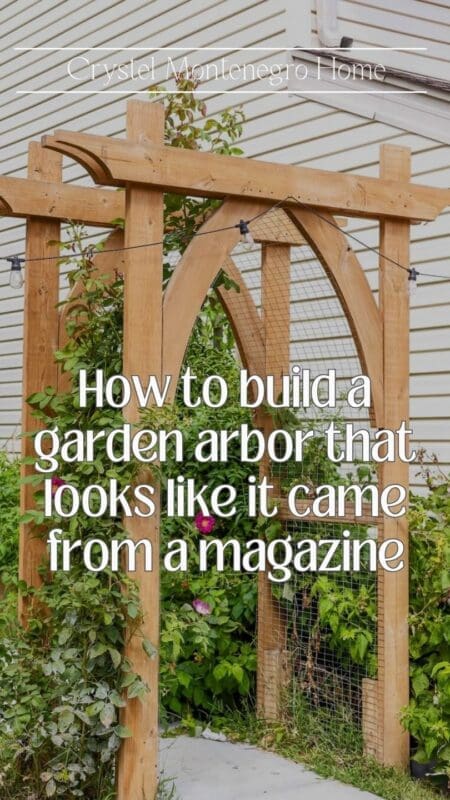
Our raised garden beds made the space more functional, but since our arbor would be visible from the street, I wanted something elegant yet functional. I decided on a classic wooden garden arbor with a curved top – it softens the structure and gives it a timeless look that feels intentional, not slapped together.
⚠️ Important: Before you dig any post holes, call 811 (or your local equivalent) to have underground utilities marked. It’s free and takes two minutes. Post holes need to go at least 2 feet deep – you don’t want to hit a line.
Step 2: Cut and Build the DIY Garden Arbor Frame
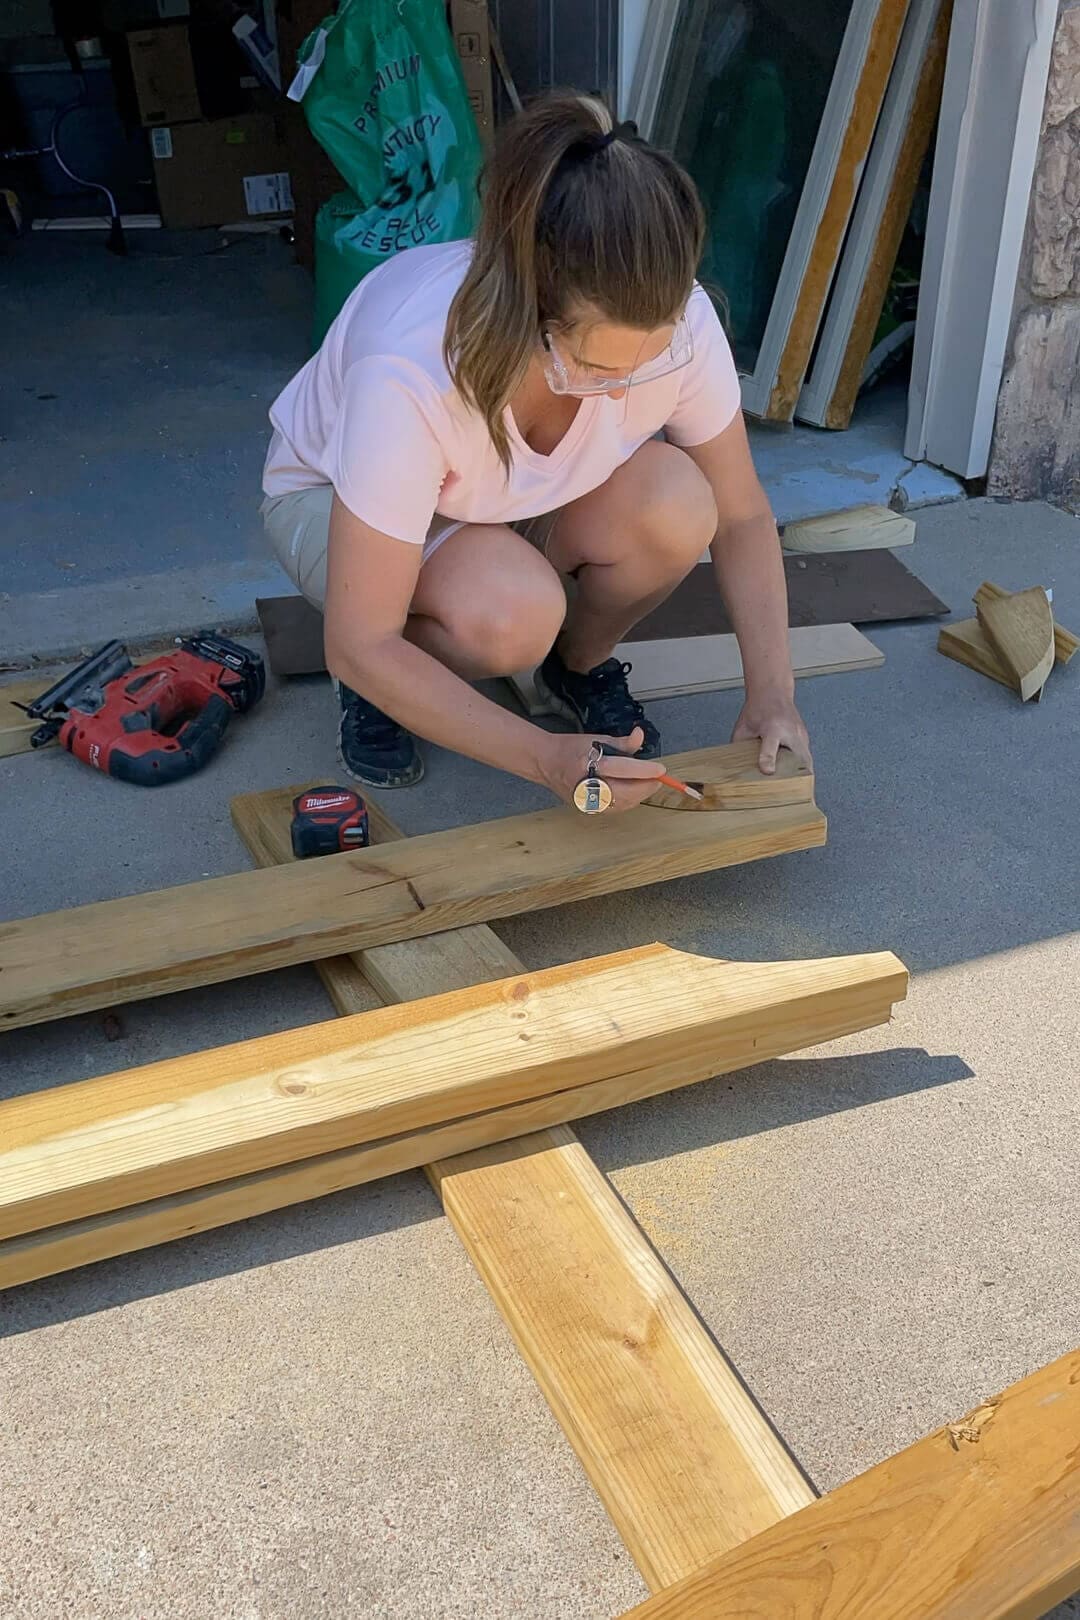
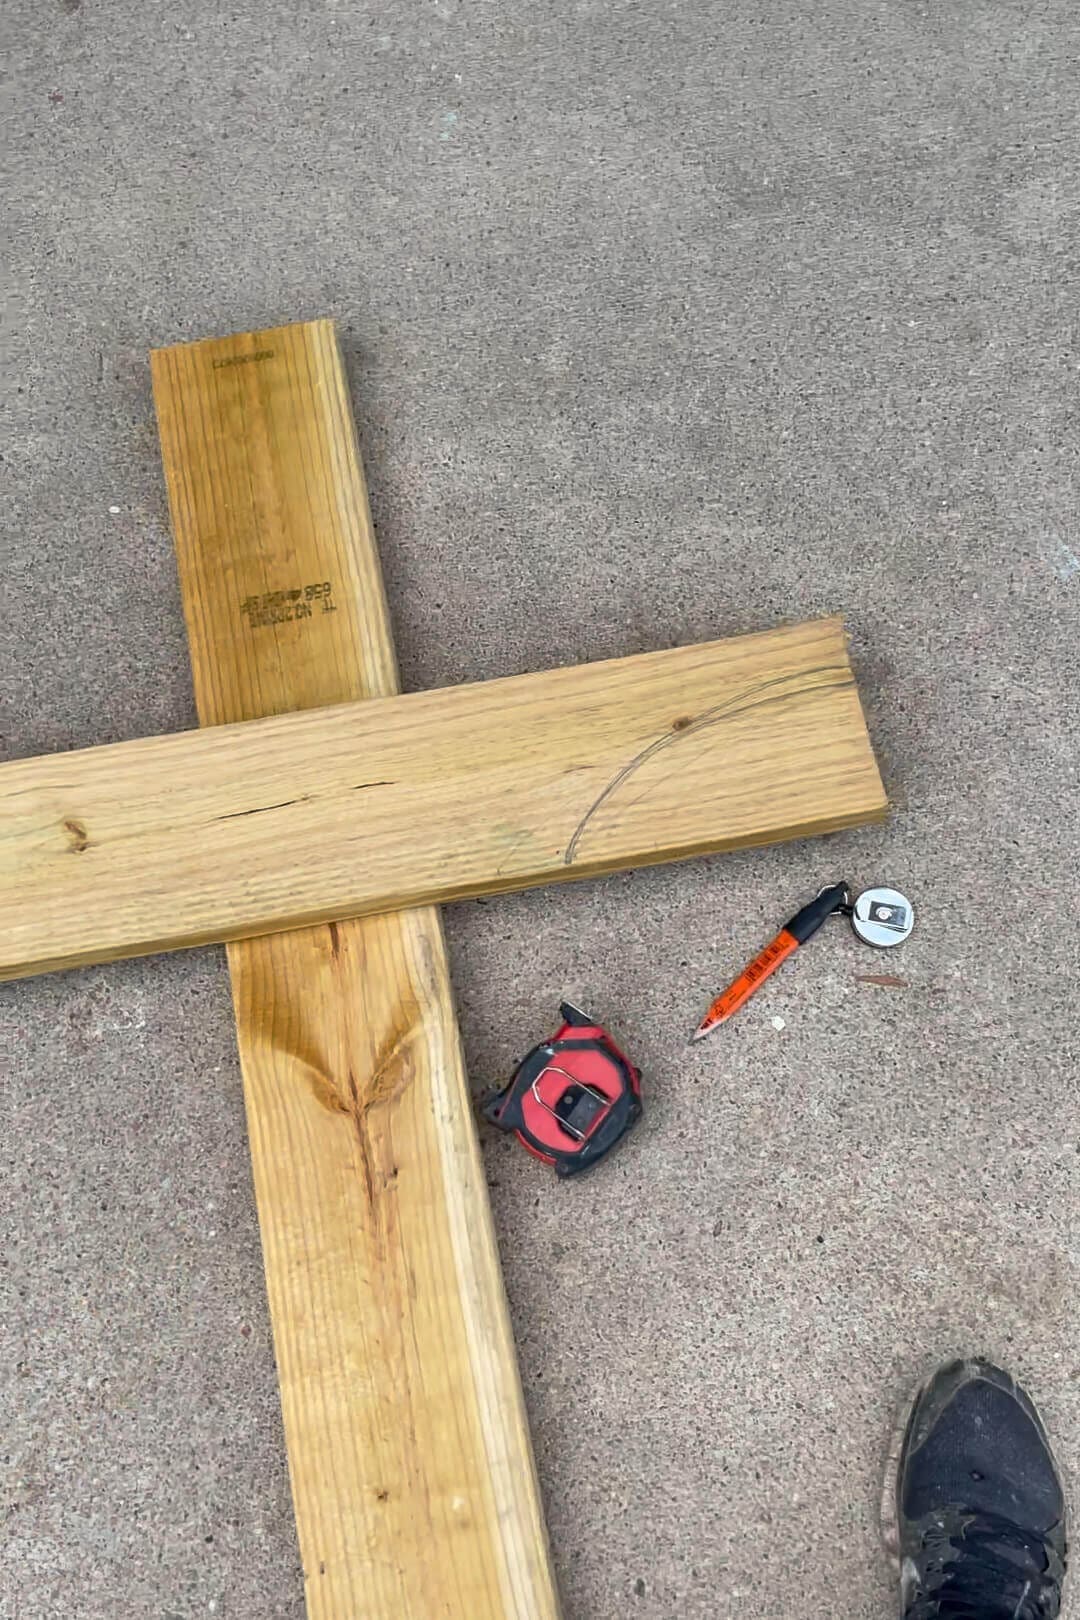
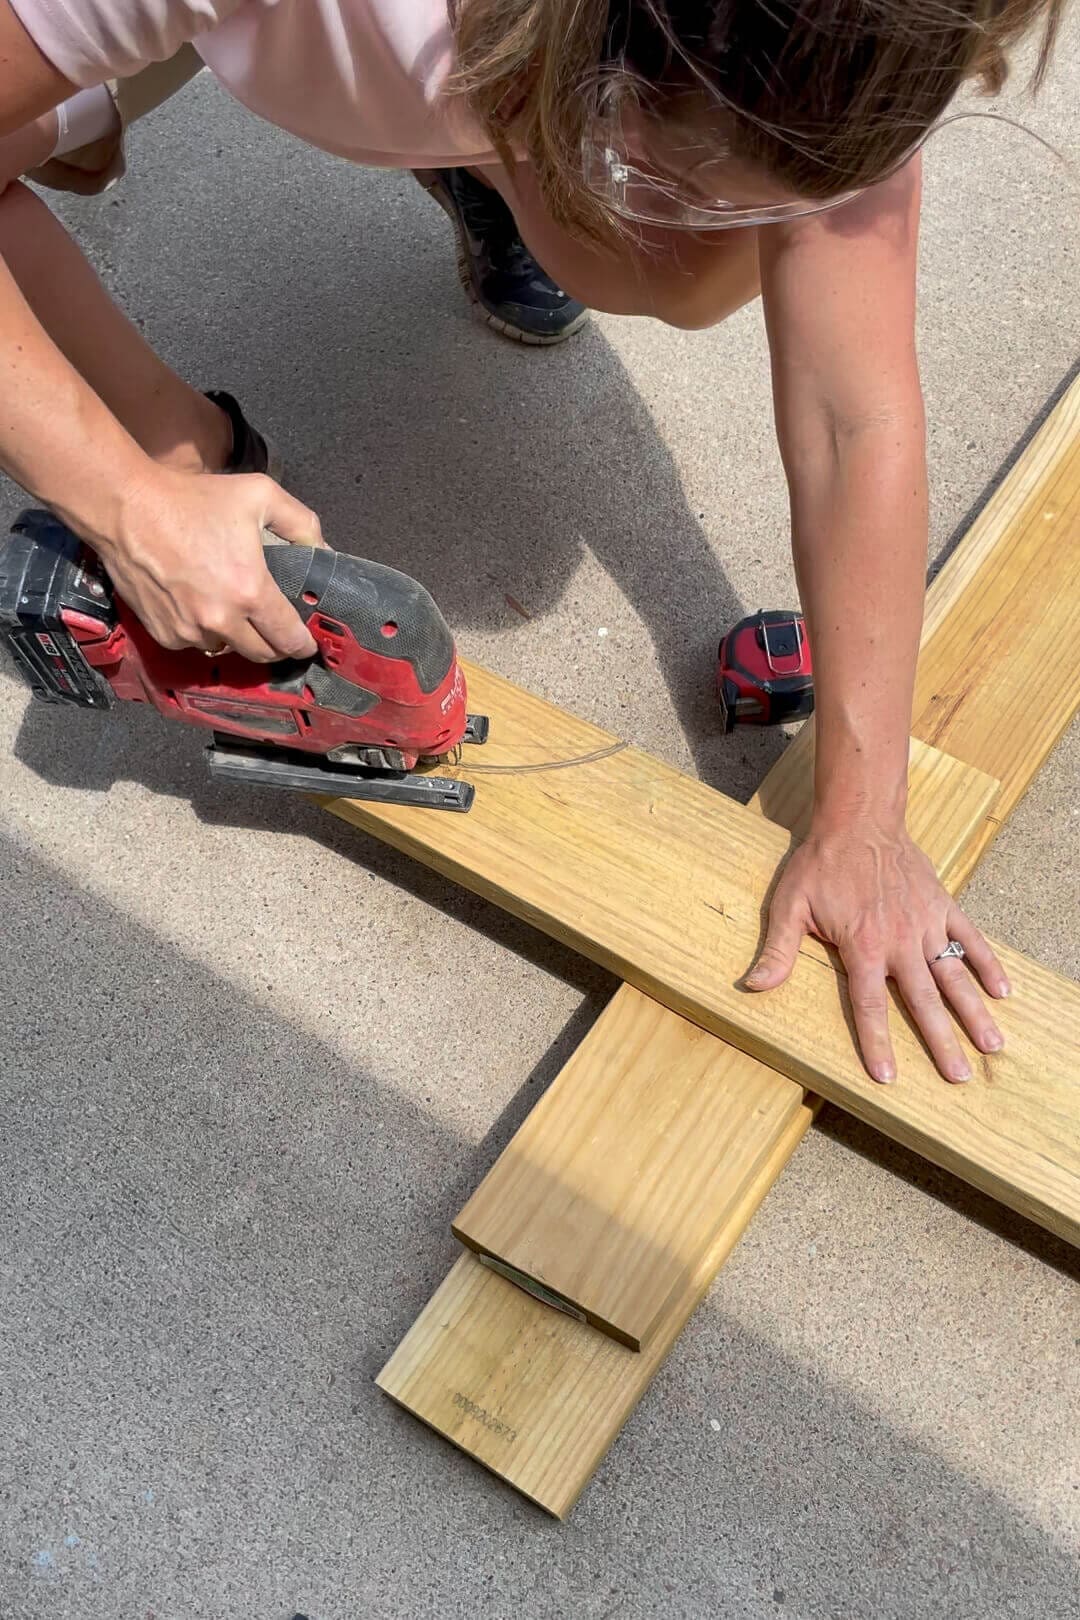
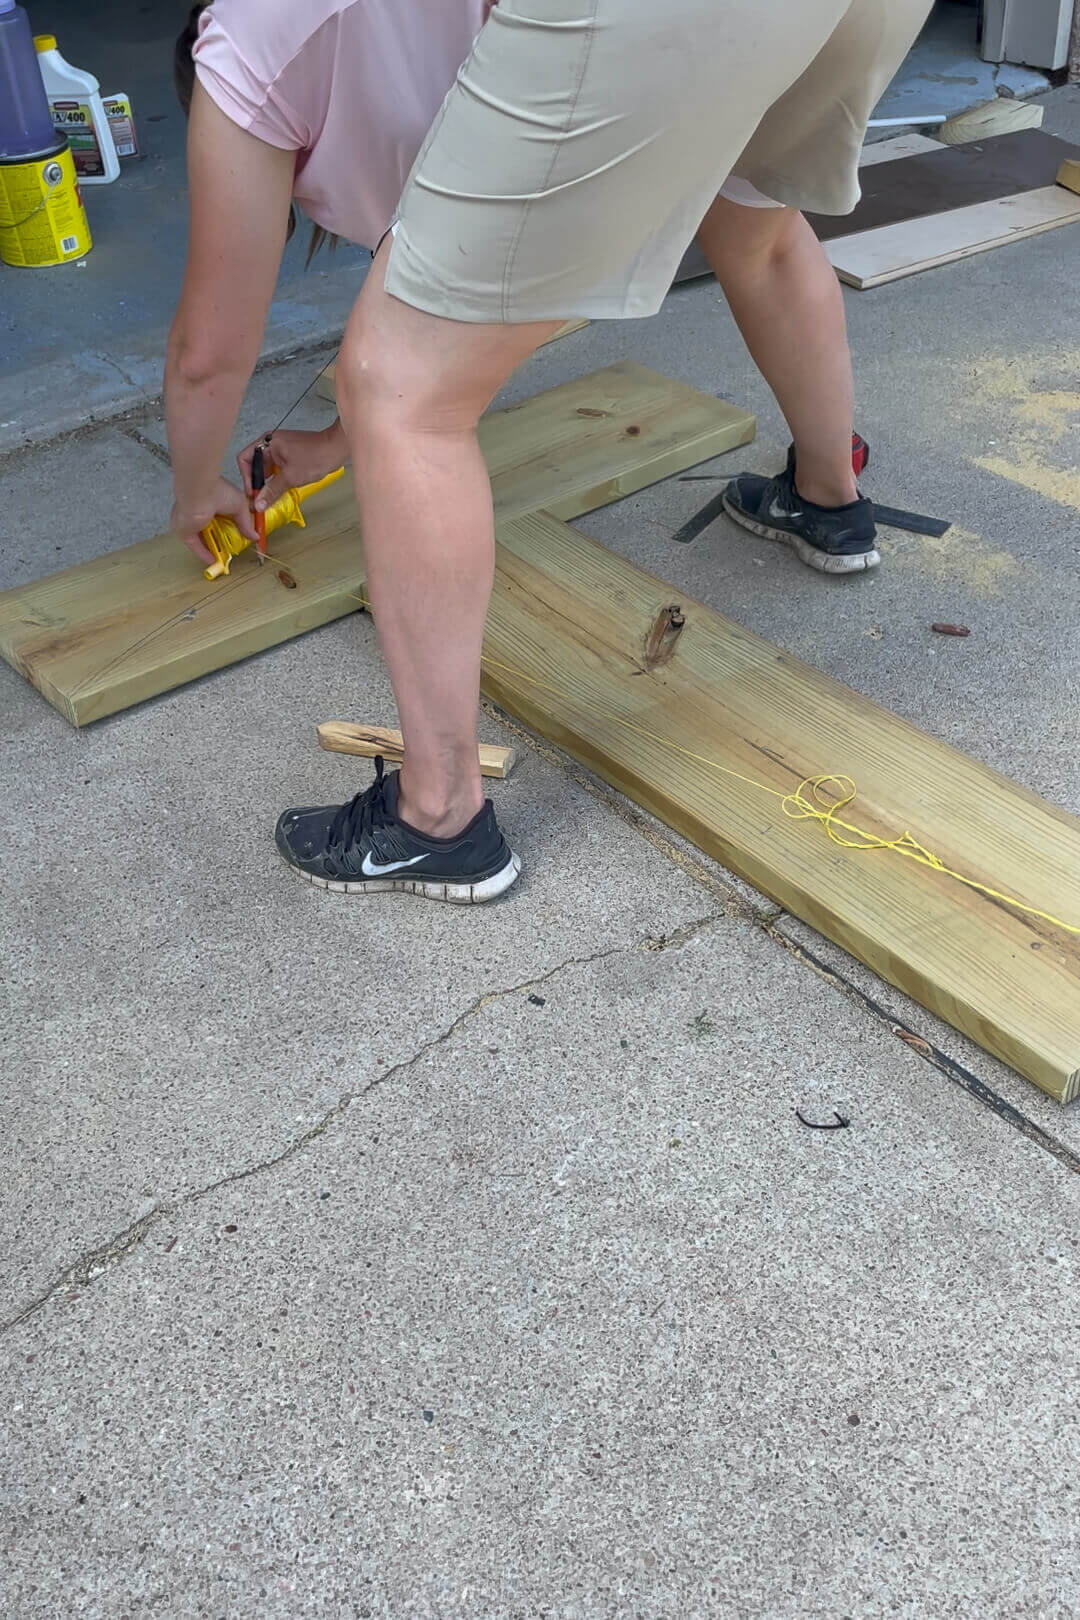
To get the proportions right, I first laid out the frame on our driveway using pressure-treated 2x6s. I measured and marked the arched details, then used a jigsaw to cut out the curves. To make sure both sides matched perfectly, I used the first cut piece as a template for the others – highly recommend this approach, it saves a ton of time and keeps everything symmetrical.
Step 3: Assemble the DIY Garden Arbor Frame
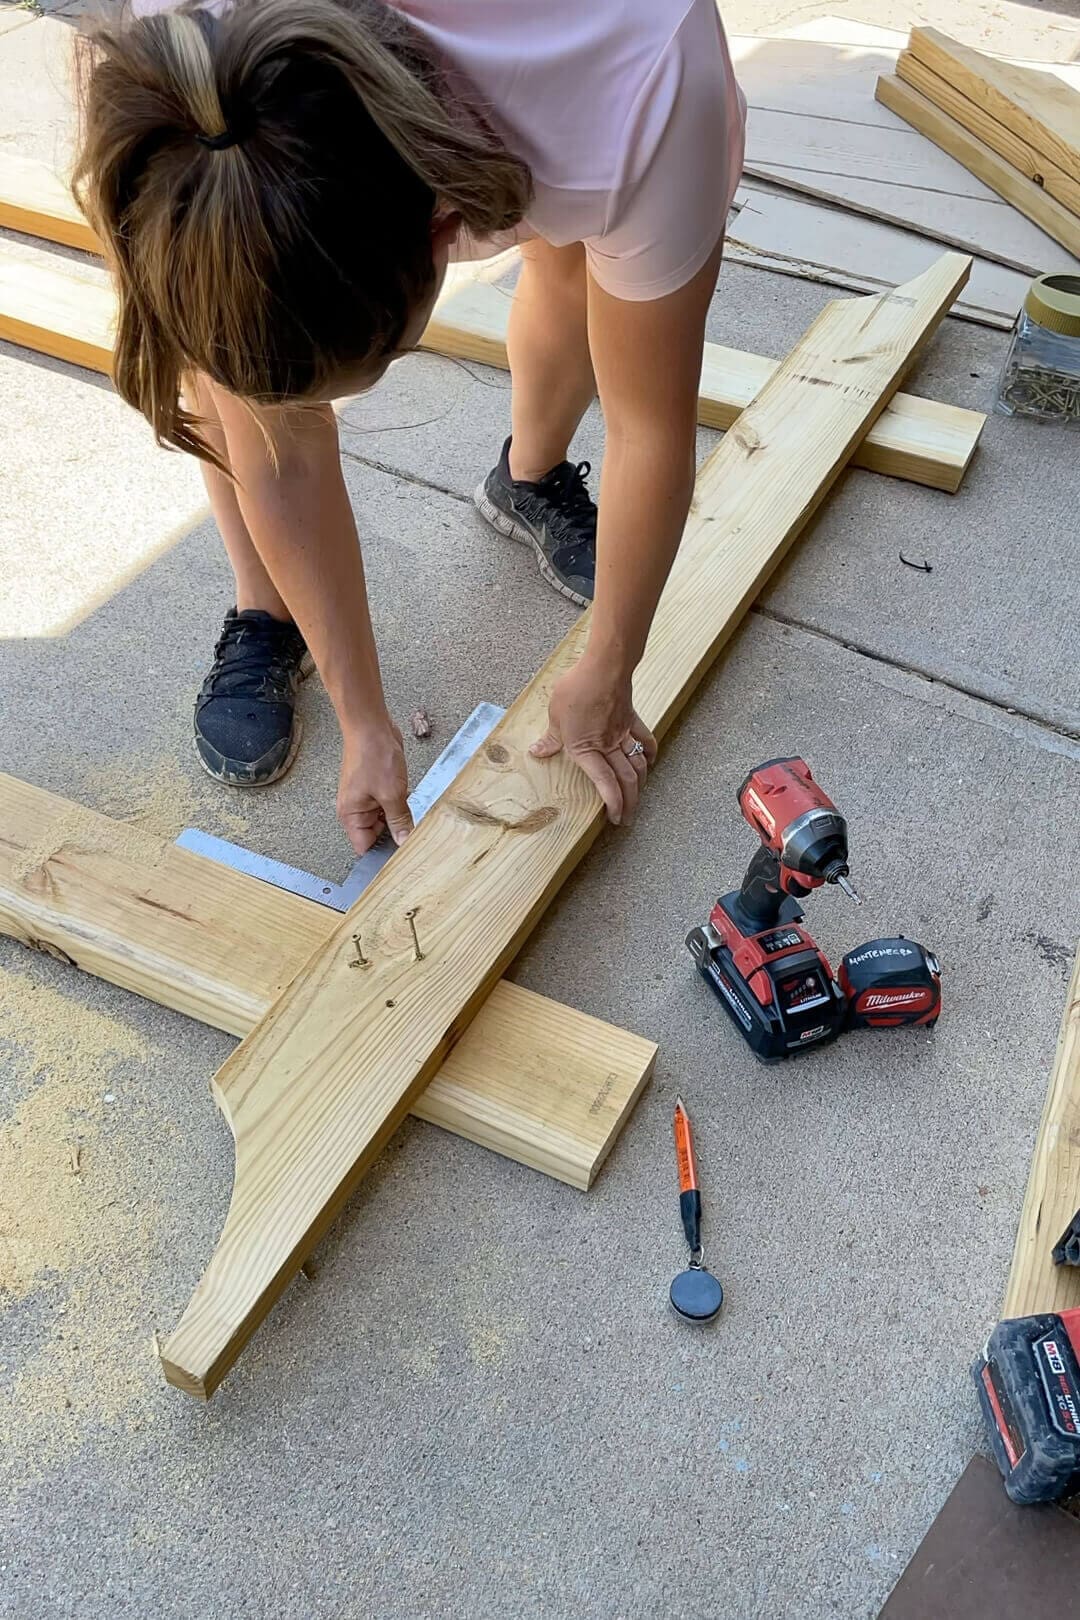
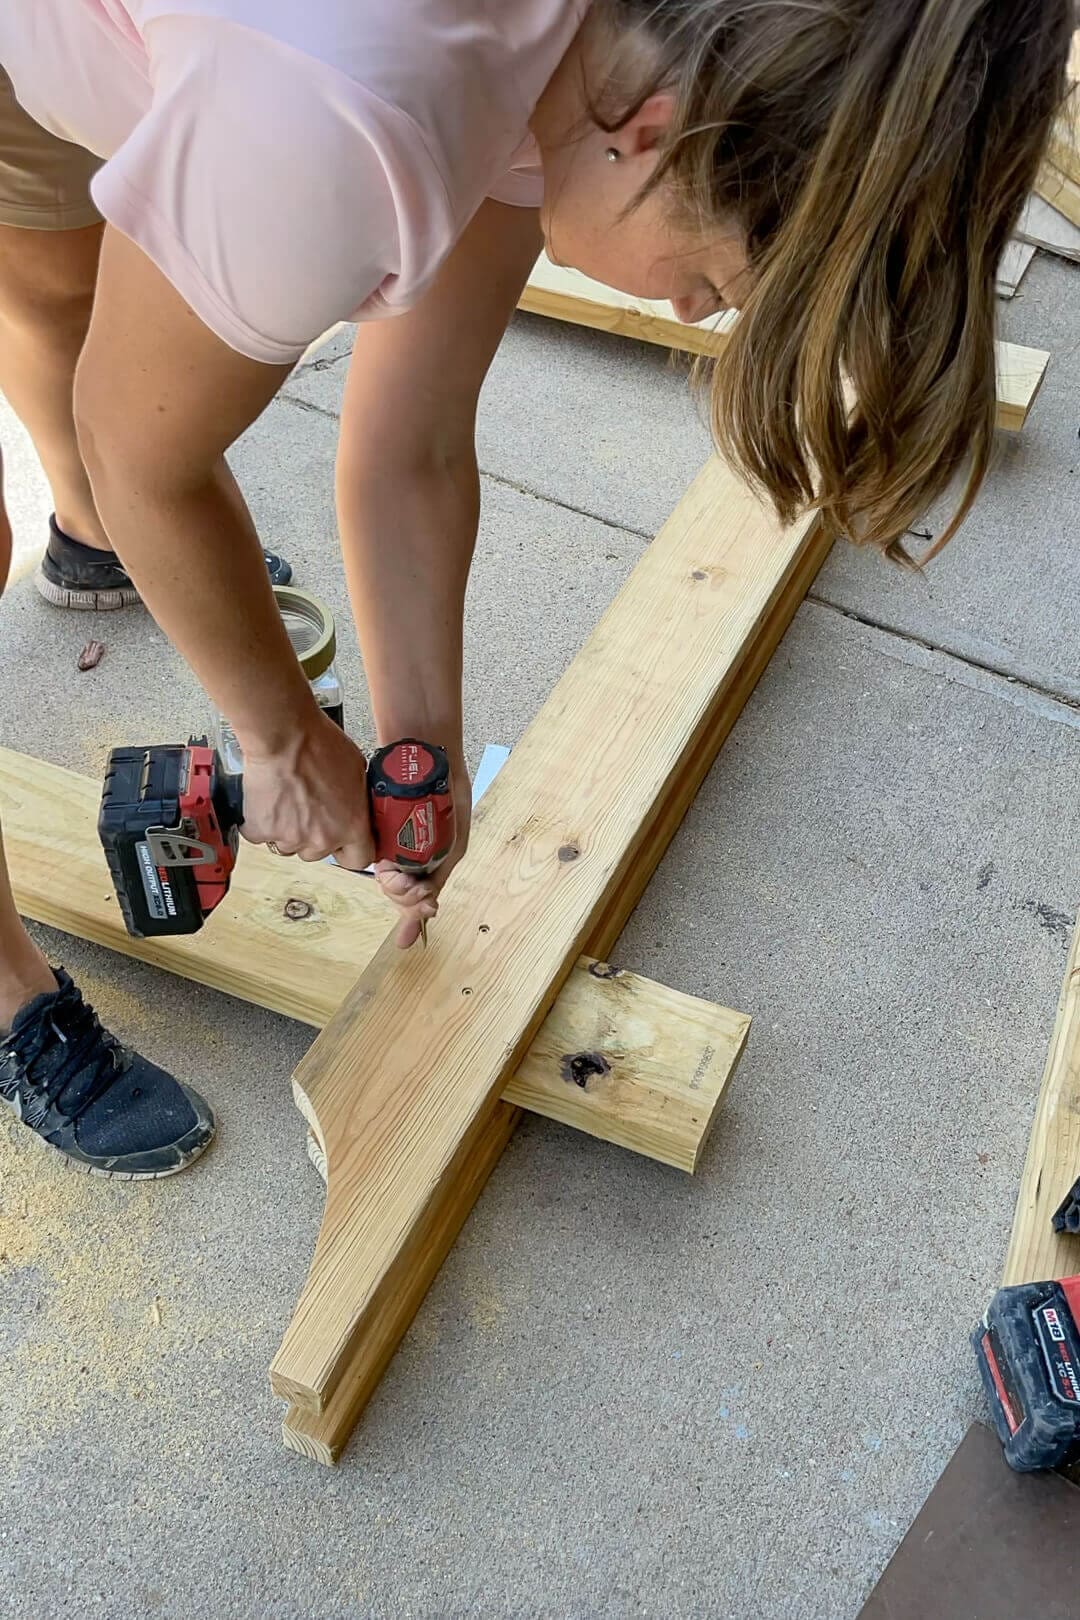
Once the header boards were cut, it was time to assemble the frame. I attached the horizontal header boards to the vertical posts using three screws per joint, making sure everything was square and level. This step matters more than almost any other – if your frame isn’t aligned properly, your garden arbor will look lopsided and no amount of stain will fix it.
Once one side was done, I flipped it over and attached another header board to sandwich the vertical post between them. This created a strong, stable structure that isn’t going anywhere.
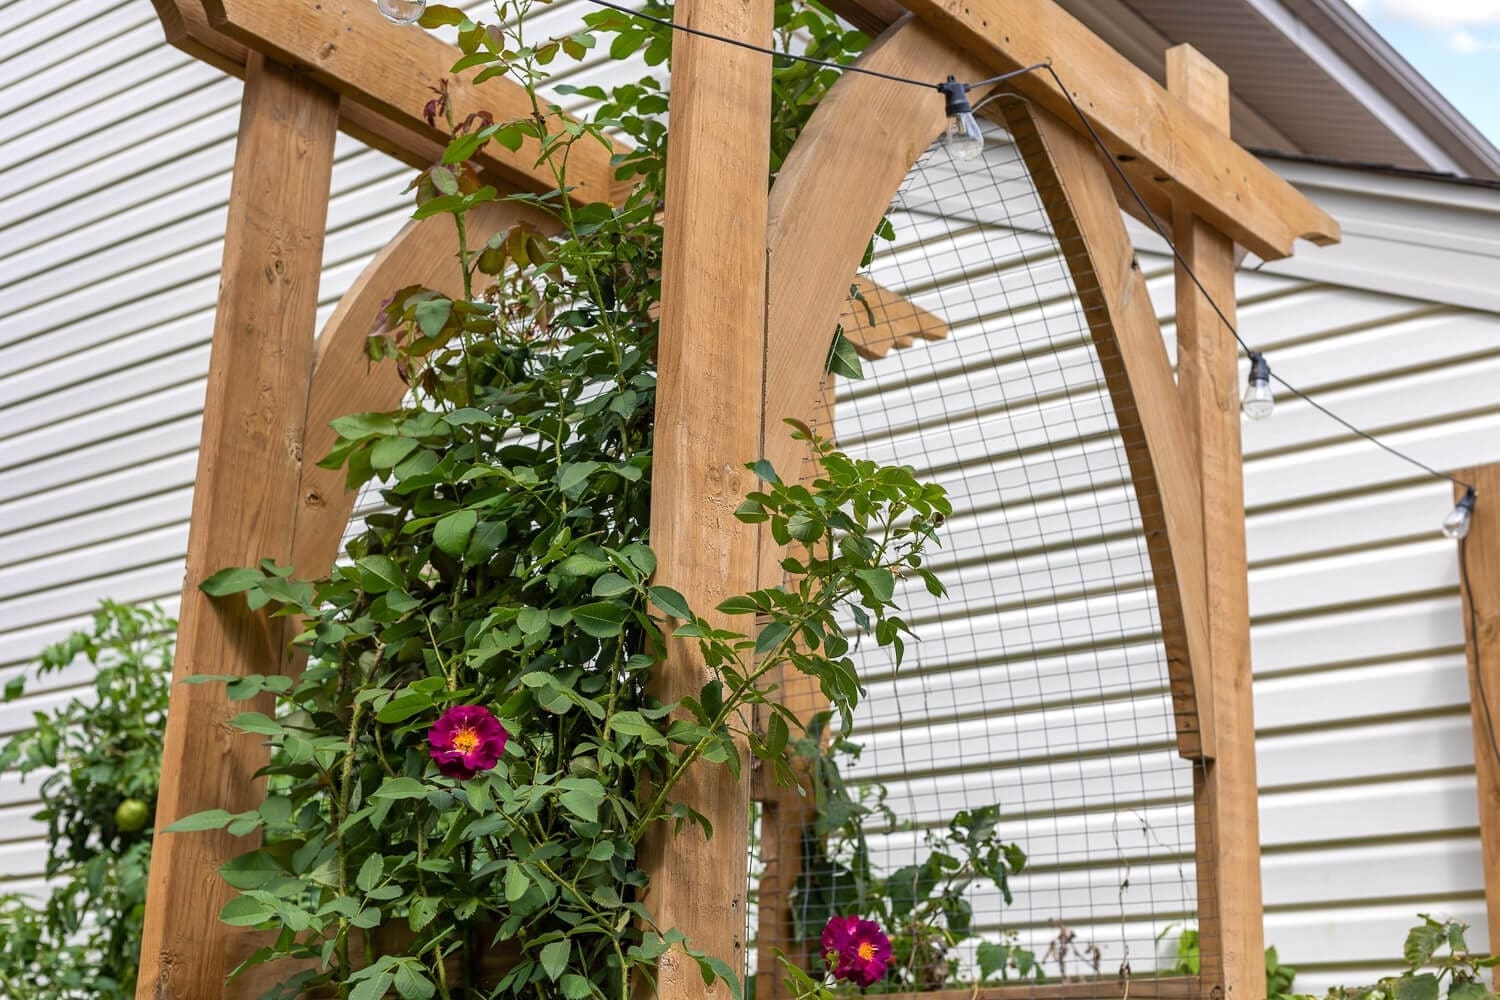
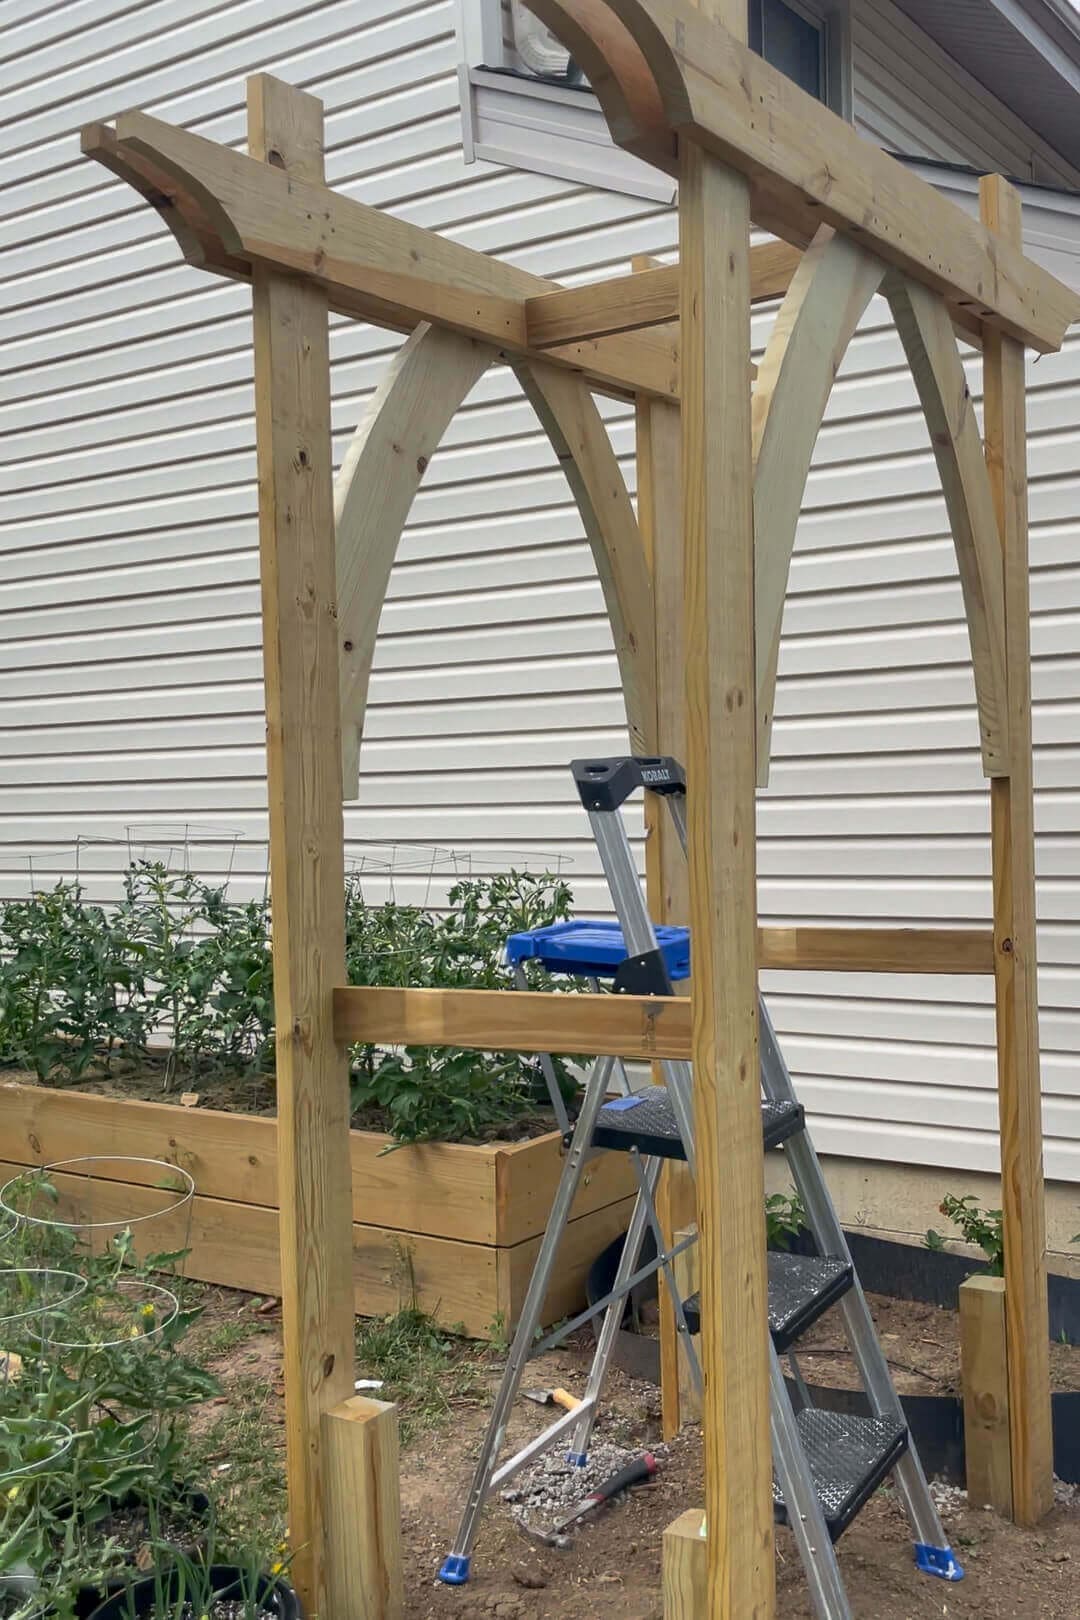
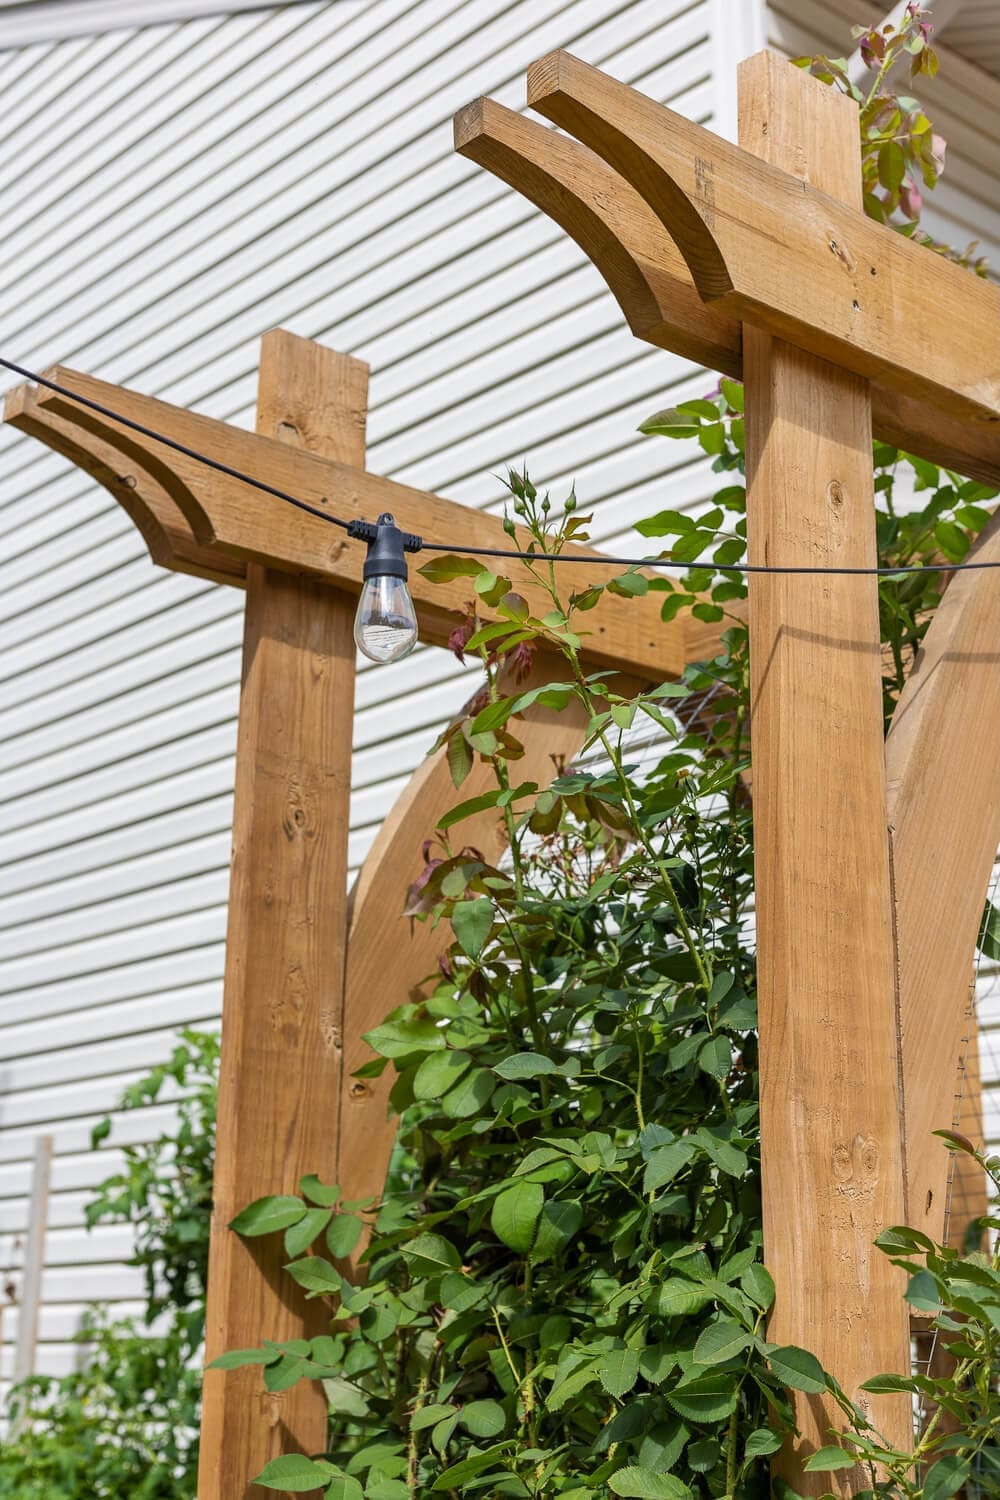
Step 4: Cut and Attach Decorative Arched Braces
To add both structural support and a decorative touch, I installed curved center braces. Since the piece was too large to freehand, I used a string and pencil to draw a perfectly symmetrical arch onto a 2×12-similar to the technique I used for my DIY marble coffee table.
Cutting the arches was honestly the most fun part of this whole build. Once I had the first piece cut, I used it as a template for the rest. Do it this way – it keeps everything symmetrical and cuts your layout time in half.
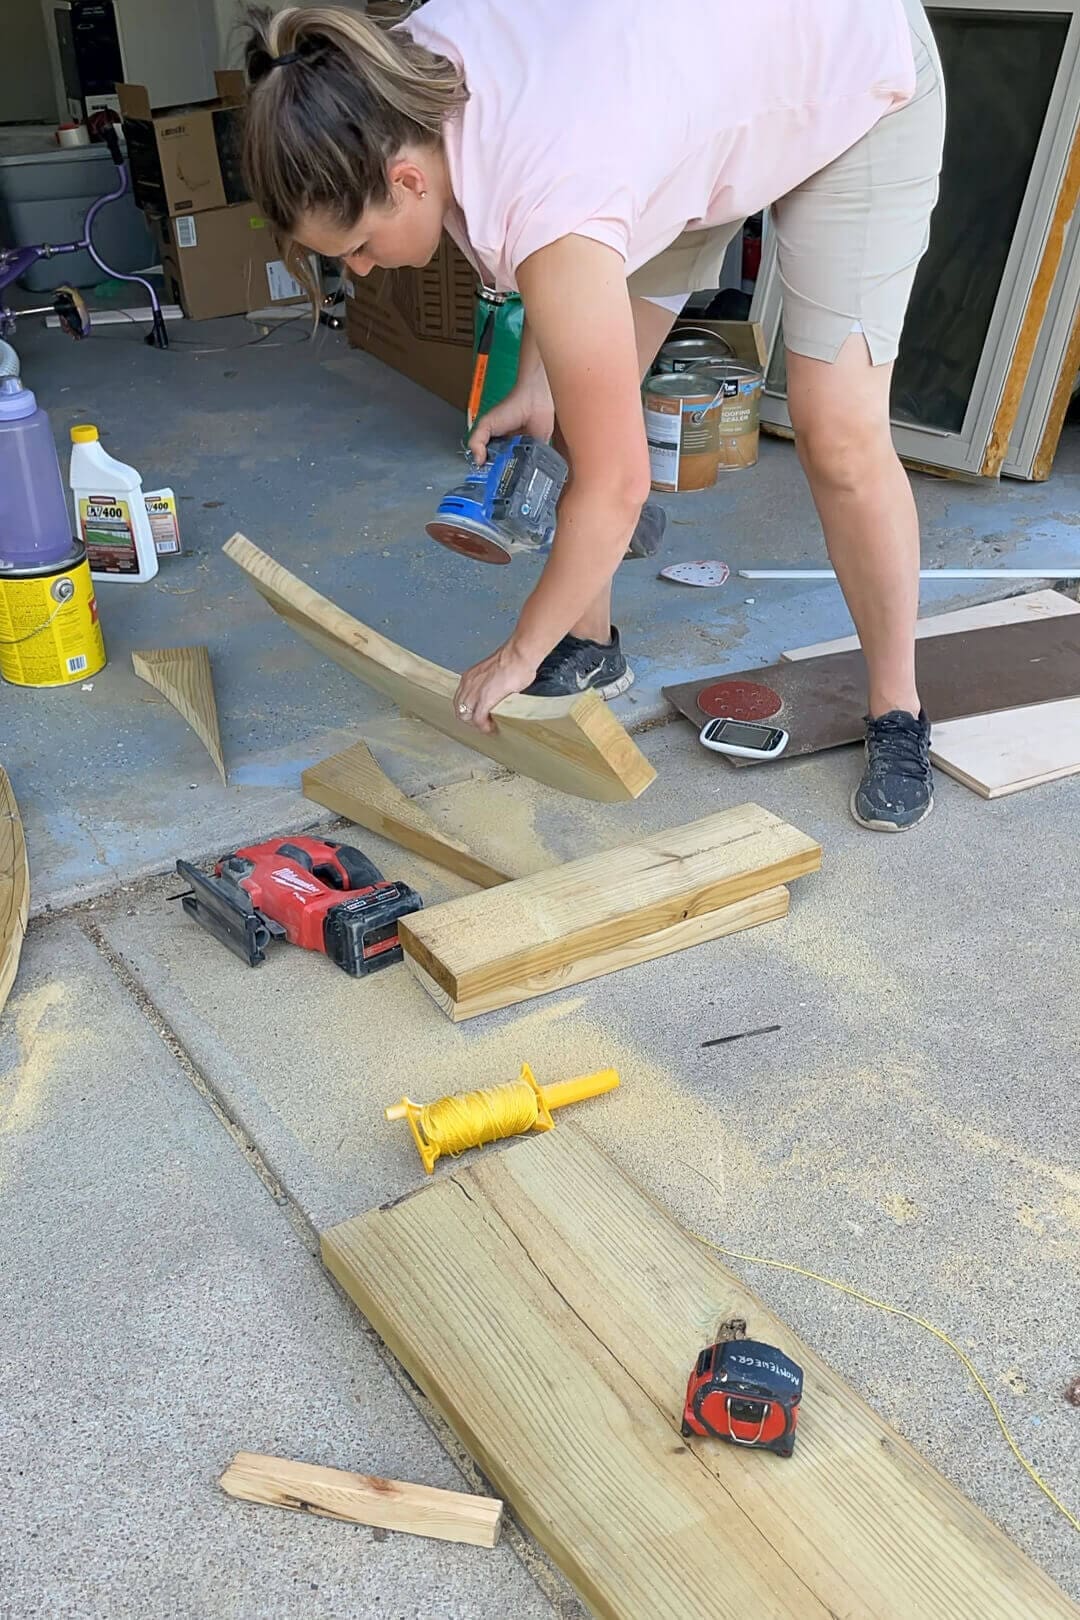
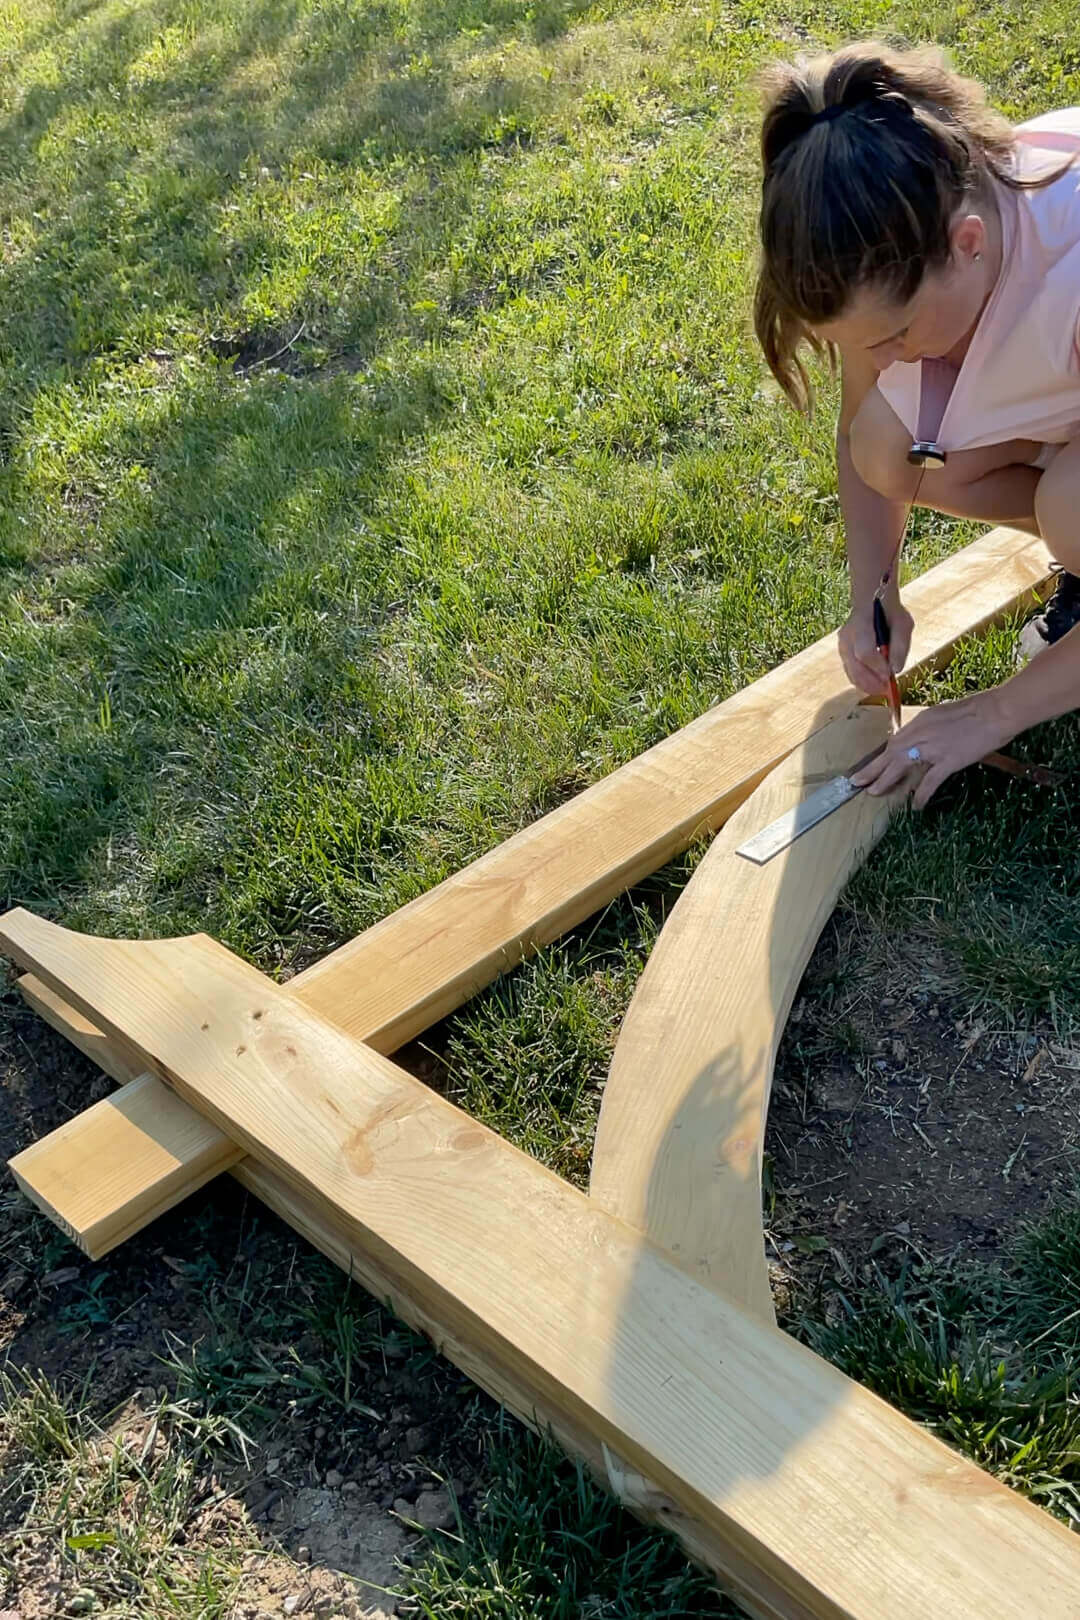
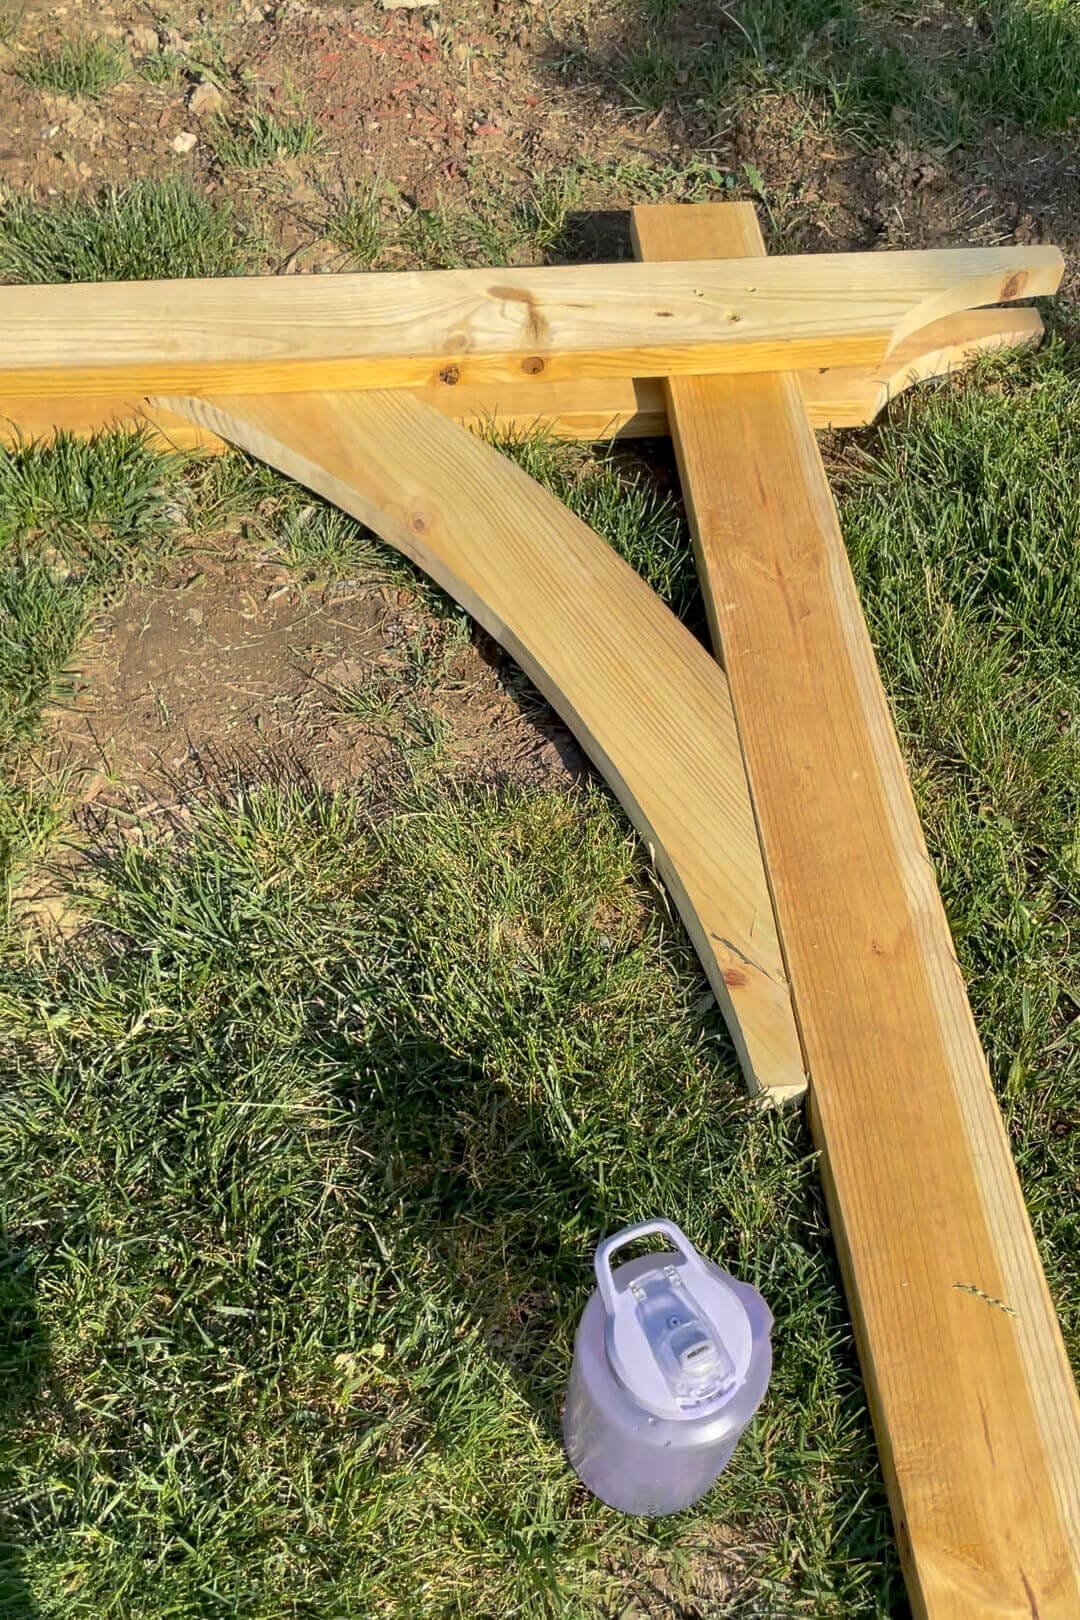
Before attaching the braces to the arbor frame, I trimmed the sides for a flush fit using a miter saw to cut both ends at precise angles. I then used this first finished brace as a template to cut three identical pieces total.
Once all four were cut, I fastened them to the arbor frame with exterior wood screws, evenly spaced and properly aligned.
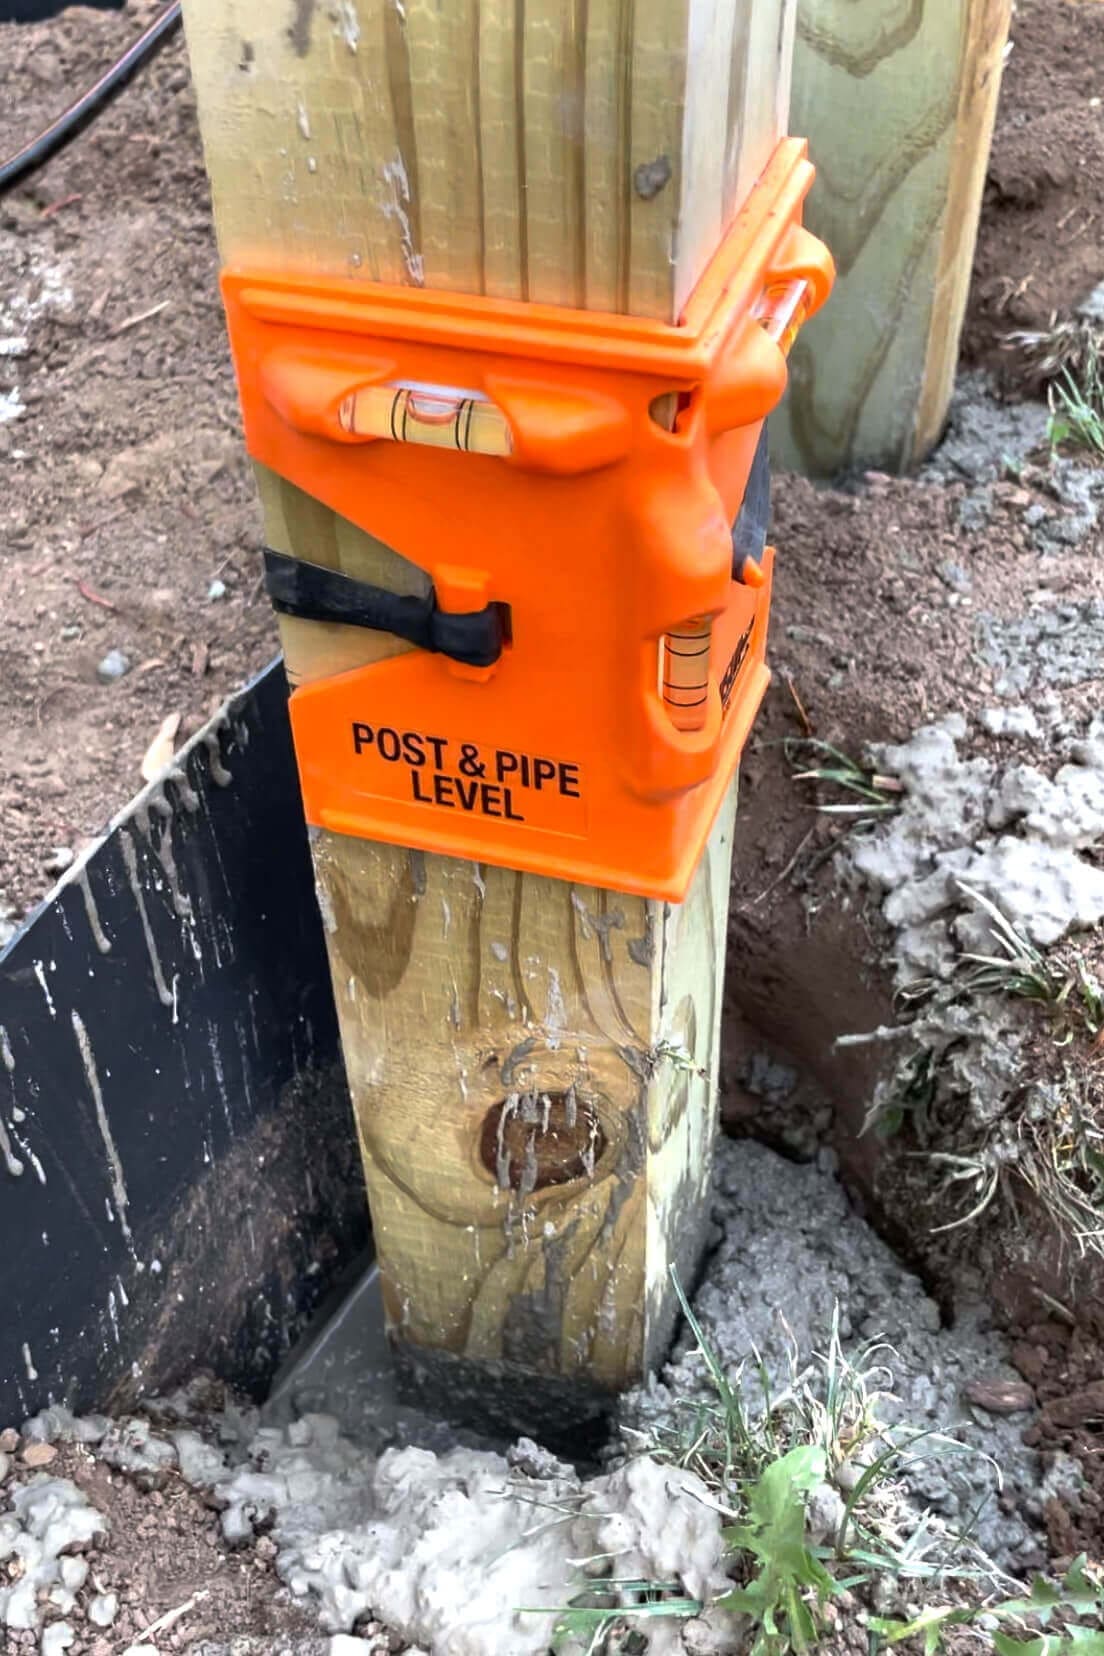
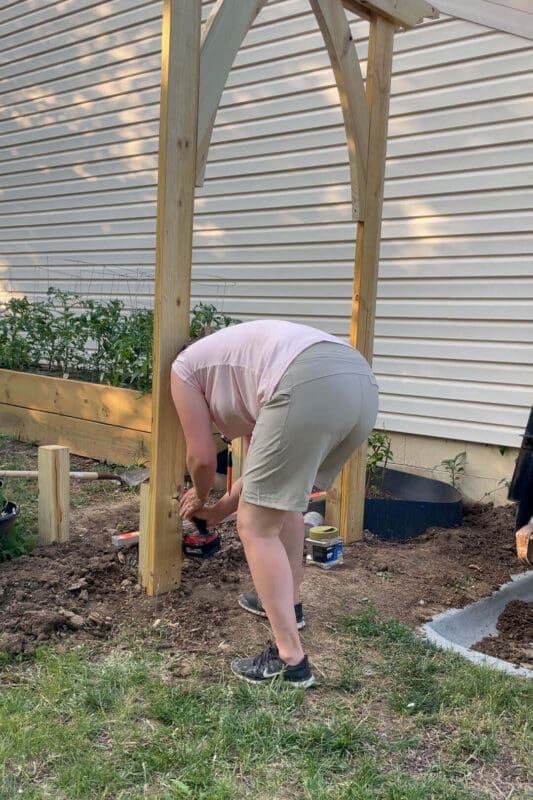
Step 5: Secure and Install the Garden Arbor Posts
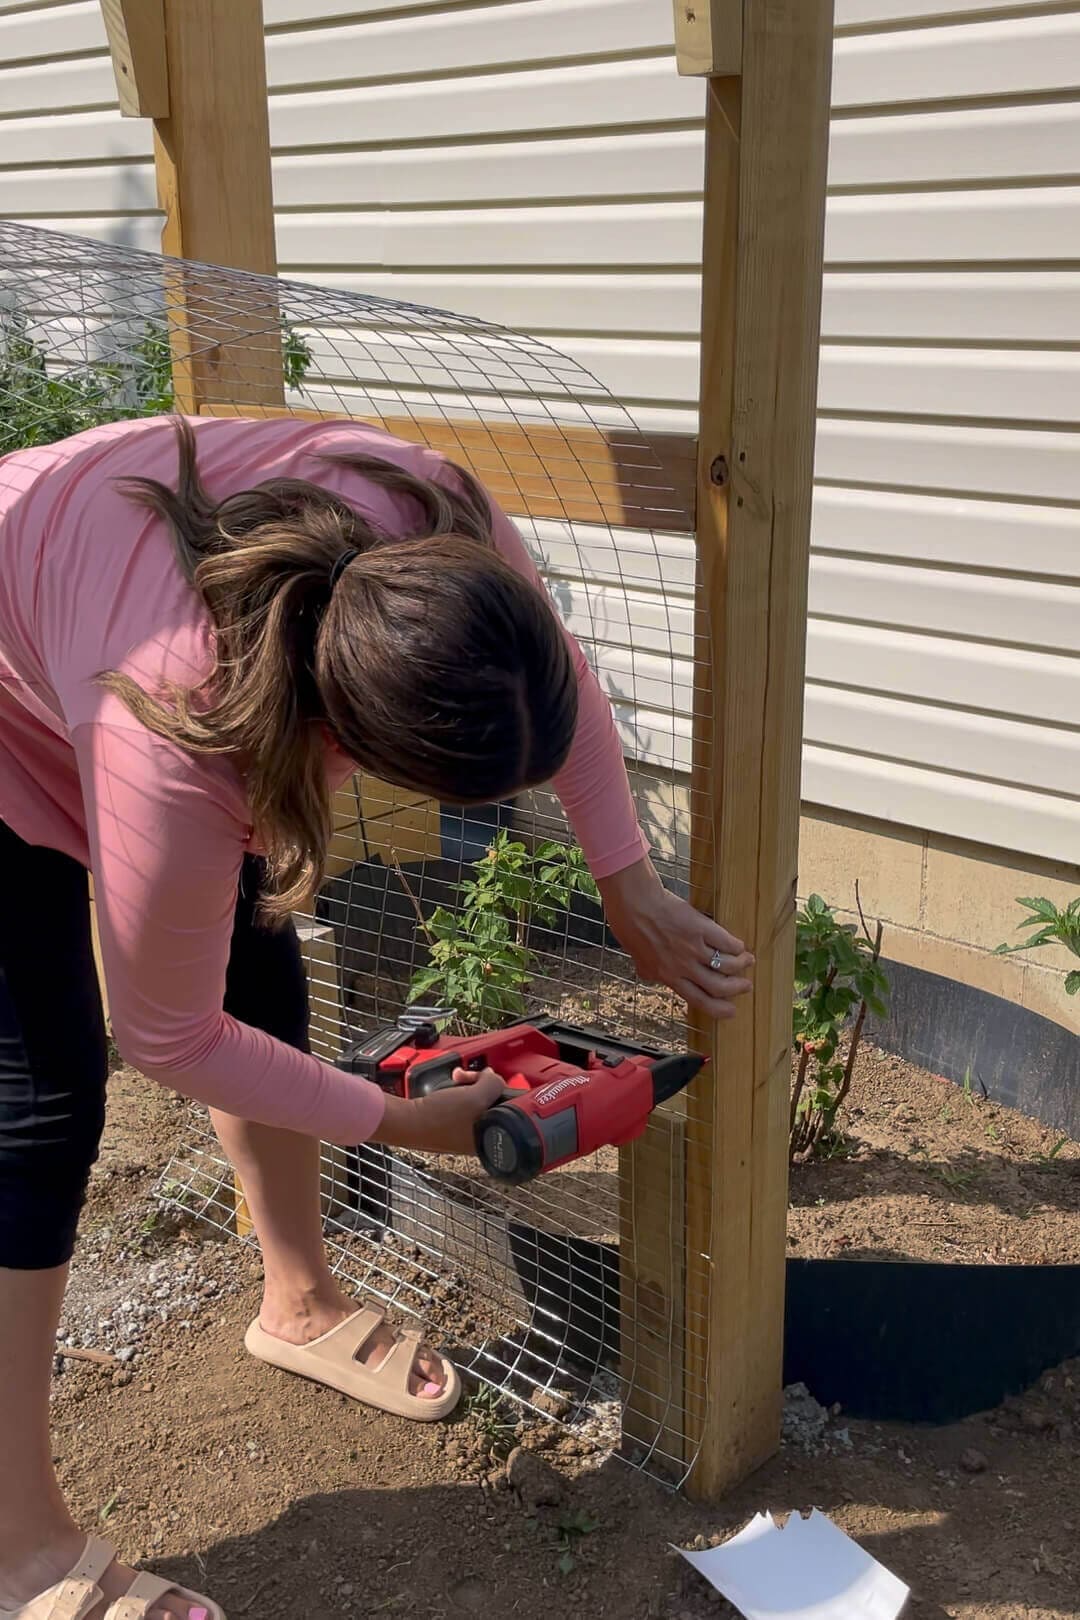
To anchor the garden arbor, we dug 2-ft-deep post holes and set pressure-treated 4×4 posts inside. We poured in quick-set concrete and used a post level to make sure each post was perfectly plumb before the concrete dried. Don’t skip the post level – once concrete sets, you’re not straightening anything.

Once the posts were set, I attached the header boards using a laser level to make sure everything was perfectly straight across. Then I added three crossbeams along the top, which reinforced the structure and created a beautiful overhead detail.
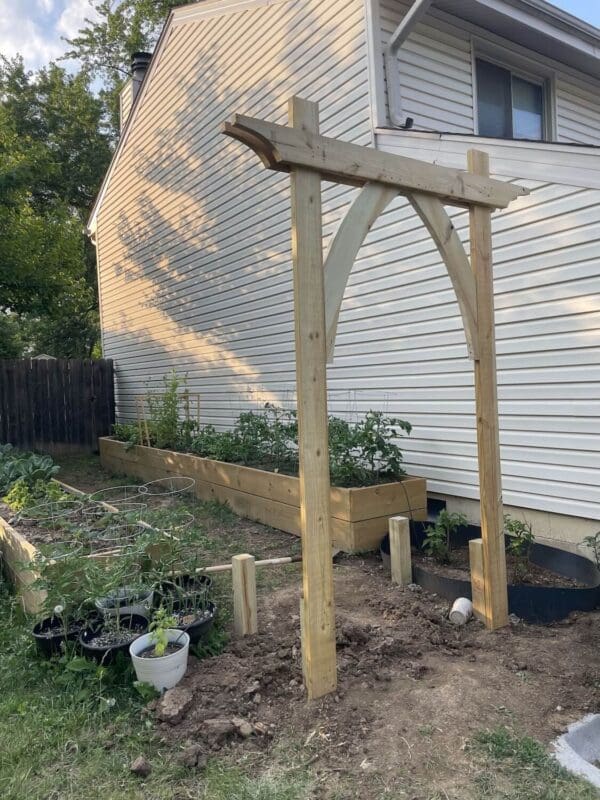
Finally, I attached 1×2 welded wire fencing using the staple gun to create the trellis panels for my climbing roses.
DIY Garden Arbor Reveal – Before and After Transformation
Once the structure was complete, I let the wood dry out fully, then applied an outdoor stain and sealer to protect it from the elements. To make the space even more magical at night, we installed solar string lights along the top and placed soft garden lighting around the raised beds for a warm glow.
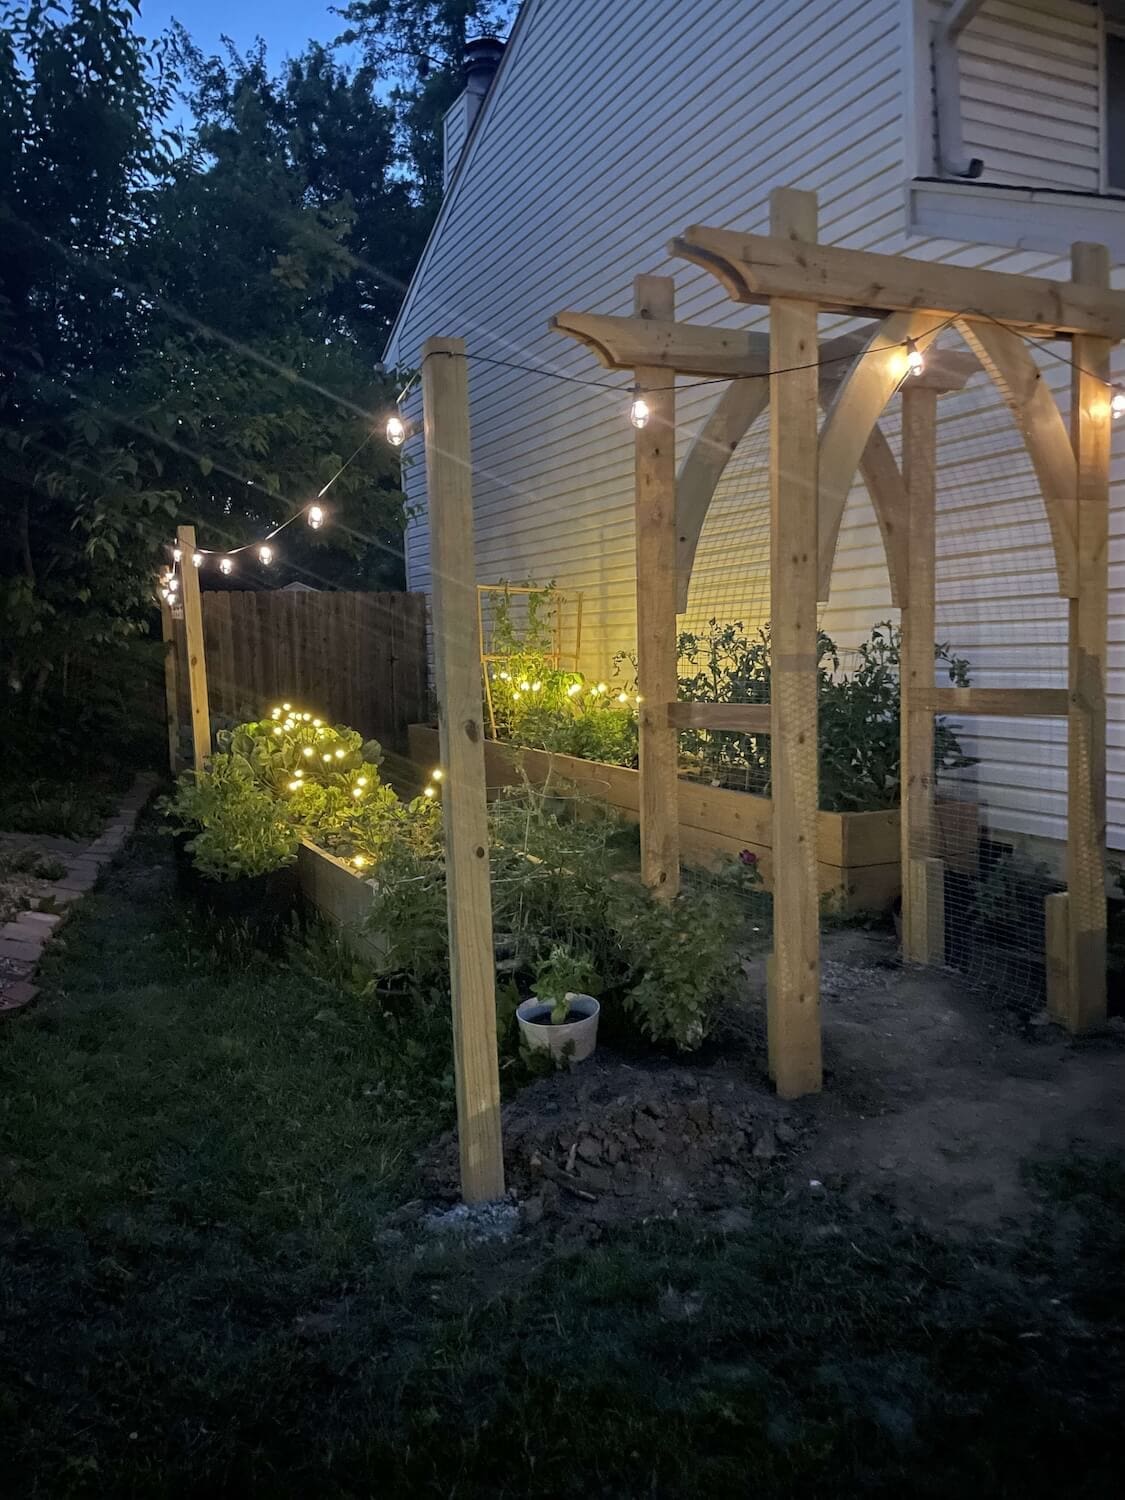
We also added a concrete sidewalk leading through the entryway, and once the landscape had a chance to mature, the transformation was complete. Whether it’s day or night, this garden arbor is an absolute showstopper.
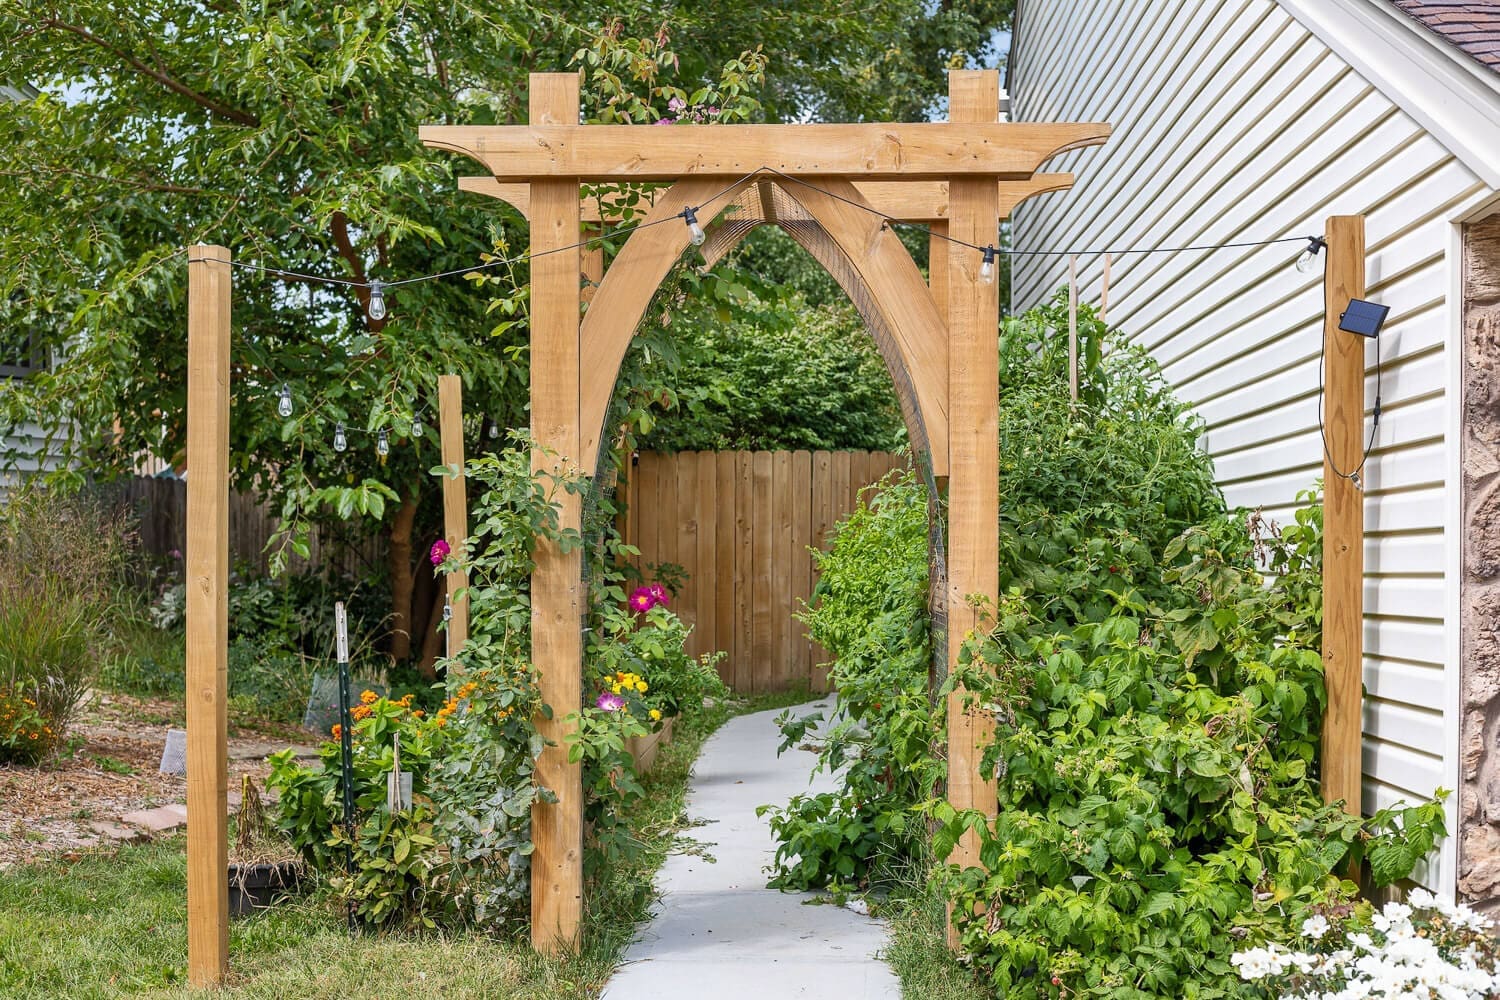
And of course, it became the perfect backdrop for our 2024 family newsletter photo!

Finishing Touches That Made This Garden Arbor Shine
- Climbing roses planted at the base and trained up the trellis panels
- A stone garden pathway leading through the entryway
- Solar string lights strung along the top for evening ambiance
- Soft garden lighting placed around the raised beds for a warm nighttime glow
This DIY garden arbor completely transformed our side yard. It’s more than just an entryway – it’s a functional, beautiful feature that welcomes you into the garden and makes the whole backyard feel intentional.y transformed our space. It’s more than just an entryway – it’s a beautiful, functional feature that welcomes you into our backyard.
This project was a labor of love, but so worth every hour. If you’ve been thinking about building a garden arbor, I say go for it. It’s one of those DIY projects with a big visual payoff for a relatively straightforward build. Drop a comment below – where would you put yours?
More DIY Outdoor Projects
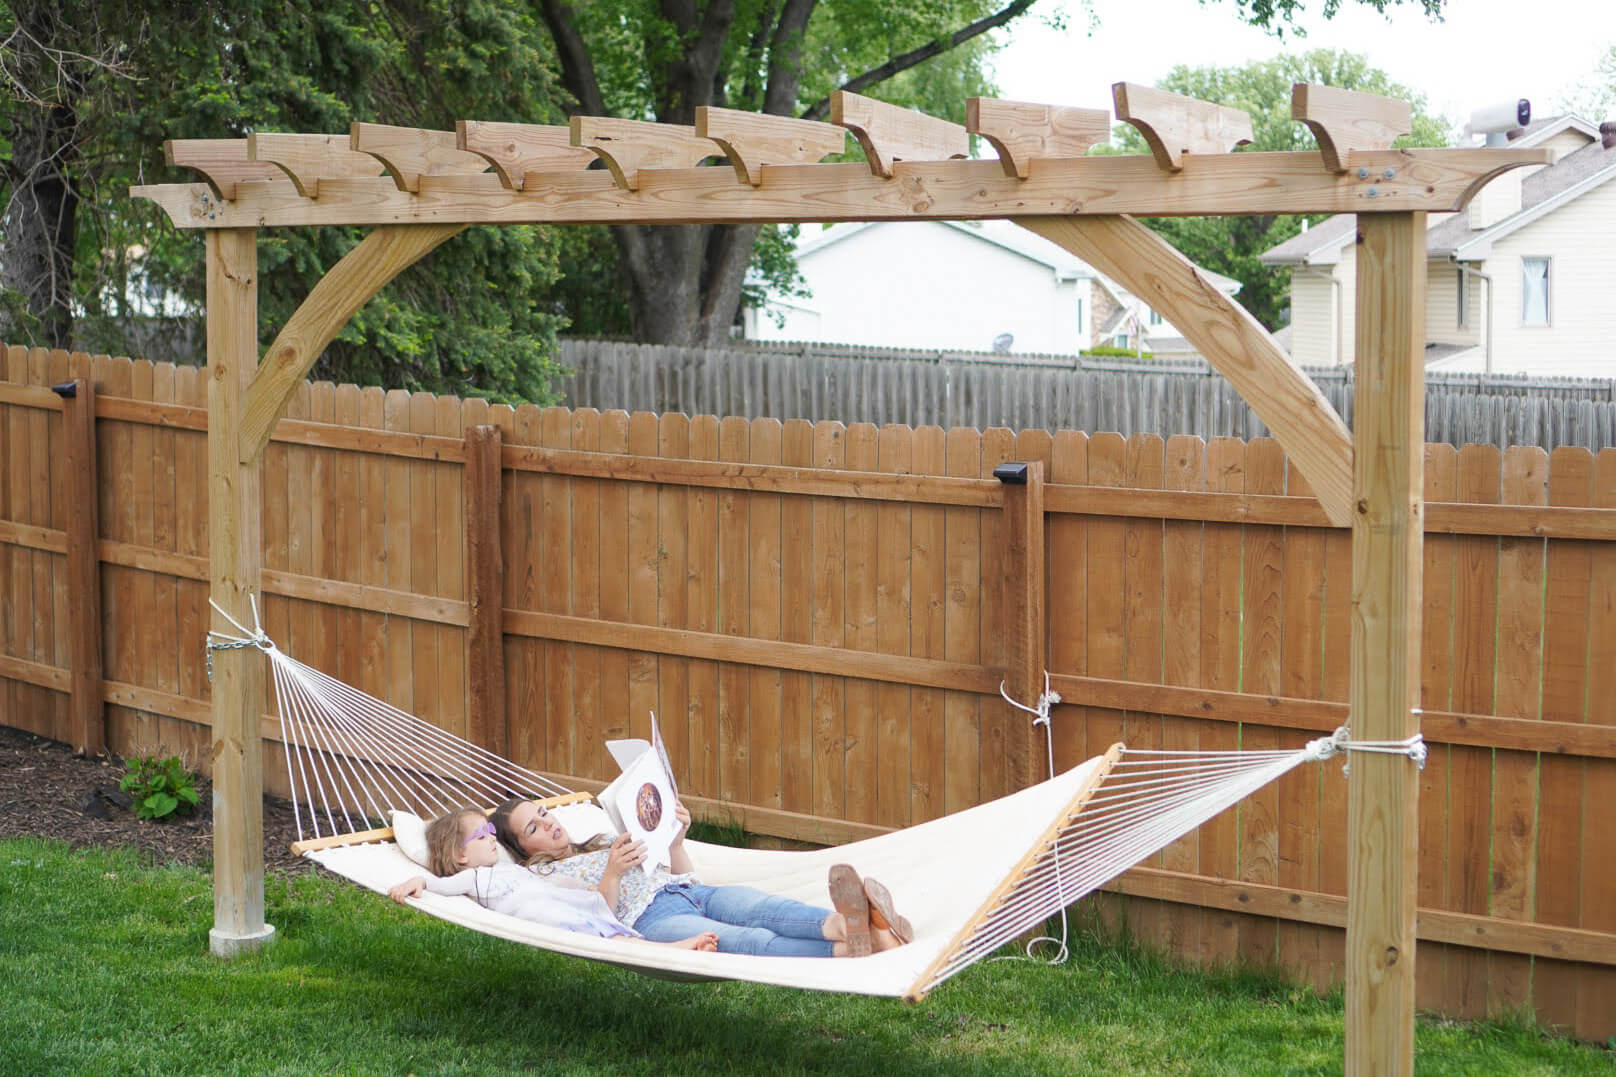
I loved the style of this garden arbor so much that I recreated it for a hammock stand in our backyard — check out the full tutorial here!
📌 Save This DIY Garden Arbor Tutorial for Later
Love this DIY garden arbor? Pin it now so you can find it when you’re ready to build!
FAQs About Building a DIY Garden Arbor
Arbor: A freestanding or attached structure with an arched or flat top, often used as an entryway or decorative feature.
Pergola: A larger structure with an open roof, often extending over patios or walkways for shade and style.
Trellis: A flat, latticed panel used to support climbing plants against walls or fences.
Start by designing your layout and cutting your header boards and curved braces from pressure-treated lumber. Assemble the frame flat on the ground, then dig 2-ft-deep post holes, set your posts in quick-set concrete, and attach the pre-assembled frame once the concrete cures. Finish with crossbeams, a wire trellis, and outdoor stain.
Pressure-treated pine is the most practical choice for a DIY garden arbor – it’s affordable, widely available, and rated for ground contact. Cedar and redwood are also excellent options if you want natural rot resistance without chemical treatment, but they’ll cost more.
The key dimensions to nail down first are post spacing (width of your entryway), post depth (at least 2 feet in the ground), and header height. Sketch it out before you cut anything, and always cut your curved pieces using a template so both sides match perfectly.
Climbing roses are a classic choice and look stunning against wood — that’s what we planted. Clematis is another great option because it’s fast-growing and comes in beautiful colors. Wisteria grows aggressively and needs strong support, so make sure your structure is solid before planting it.
Dig post holes at least 2 feet deep and use quick-set concrete to anchor each post. Use a post level while the concrete is still wet to make sure each post is perfectly plumb. For extra stability, make sure the posts are spaced evenly and the frame is fully square before the concrete cures.
More Backyard DIY Projects
If you loved this DIY garden arbor, here are more backyard projects worth tackling:
- DIY Tall Outdoor Planter Boxes for the Garden – The raised beds that inspired this whole garden transformation.
- DIY Backyard Hammock Stand – Built with the same arched style as this arbor.
- Install a Concrete Sidewalk – The pathway that completed the garden entryway.
What are the cut dimensions for the arbor please. Like the length of the 4×4 post. The length of the cross header use for the top part and decorative brace
Since this was at our old house, I can’t go measure it, so these are all rough guesses. The whole arbor is built from 2x6s. The vertical 2x6s are about 7 feet tall, and I attached them to 4×4 posts that stuck up about 24 inches from the ground. The opening is around 36 inches wide. The top cross header was about 67 inches long, since I left roughly a 10-inch overhang on each side. The decorative braces I just cut to fit, but they were somewhere around 18 inches. Hope that gives you a good starting point to make a custom arbor that fits your space!