


How to Tile a Shower Wall


Updated July 13, 2026
If you’re ready to learn exactly how to tile a shower wall, you’re in the right place. This is the step where your bathroom finally starts to look pretty, not just like a construction zone. I’ll walk you through my full process for tiling a shower wall step by step: planning your layout, deciding where to start (hint: not at the tub), setting a ledger board, finishing the outside edges, tiling around and inside a shower niche, grouting, and sealing everything with silicone so it lasts.
If your walls still need demo, rebuilding, or waterproofing, start with the prep first in my shower mold and waterproofing post. Once you’ve got cement board and a shower waterproofing membrane installed and cured, you’re ready for tile.
Part of my Small Bathroom Remodel series. Tiling the shower walls is one of 7 weekend projects that transformed our basement bathroom. See the full small bathroom remodel breakdown →
How to Tile a Shower Wall: At a Glance
Here’s the big-picture flow before we dive into photos and details:
- Plan your shower tile layout on the floor so cuts and decorative tiles land where you want them
- Mark a level line and install a ledger board one full tile above the highest point of the tub
- Install metal tile edge trim on open vertical corners for a clean finish
- Spread thinset on the wall, back-butter tiles, and start tiling from the ledger board up
- Tile around and inside the shower niche, keeping grout lines aligned
- Use spacers and a laser (or long level) to keep rows straight as you go
- Grout the shower walls once the thinset cures
- Finish with 100% silicone in corners and at the tub for a flexible, watertight seal
Quick Answer: Where Do You Start When Tiling a Shower Wall?
Start one full tile above the highest point of the tub, not at the tub edge itself. Tubs are almost never perfectly level, so if you tile up from the tub, every grout line above will drift. Instead: find the highest point of the tub, measure up one full tile height, draw a level line, and install a straight ledger board (a 1×3 or 1×4 scrap) along that line. Tile up from the ledger board, then remove it once the upper rows are set and cut the bottom row to follow the tub’s slope. This single trick separates “looks like I tried” from “looks pro.”
Watch the Full Bathroom Makeover Tutorial
Table of Contents
- How to Tile a Shower Wall: At a Glance
- Watch the Full Bathroom Makeover Tutorial
- Before You Tile: Where This Bathroom Started
- Tools for Tiling a Shower Wall
- Materials for This Shower Tile Project
- Step 1: Plan Your Shower Tile Layout on the Floor
- Step 2: Where to Start Tiling a Shower Wall (and Why Not at the Tub)
- Step 3: Finish the Outside Edge First for Clean Lines
- Step 4: Mix and Apply Thinset (Grooves and Back-Butter)
- Step 5: Tile Around and Inside the Shower Niche
- Step 6: Keep Rows Straight with Spacers and a Laser
- Step 7: How to Grout a Shower Wall
- Step 8: Where to Use Silicone Instead of Grout
- How to Retile a Shower (vs. Tiling From Scratch)
- Cost and Time: How Much It Takes to DIY a Shower Tile Job
- Troubleshooting and Pro Tips for DIY Shower Tile
- The Finished Shower Reveal
- More Small Bathroom Remodel Projects to Try
- 📌 Pin This Shower Tile Tutorial for Later
- FAQ: How to Tile a Shower Wall
Before You Tile: Where This Bathroom Started
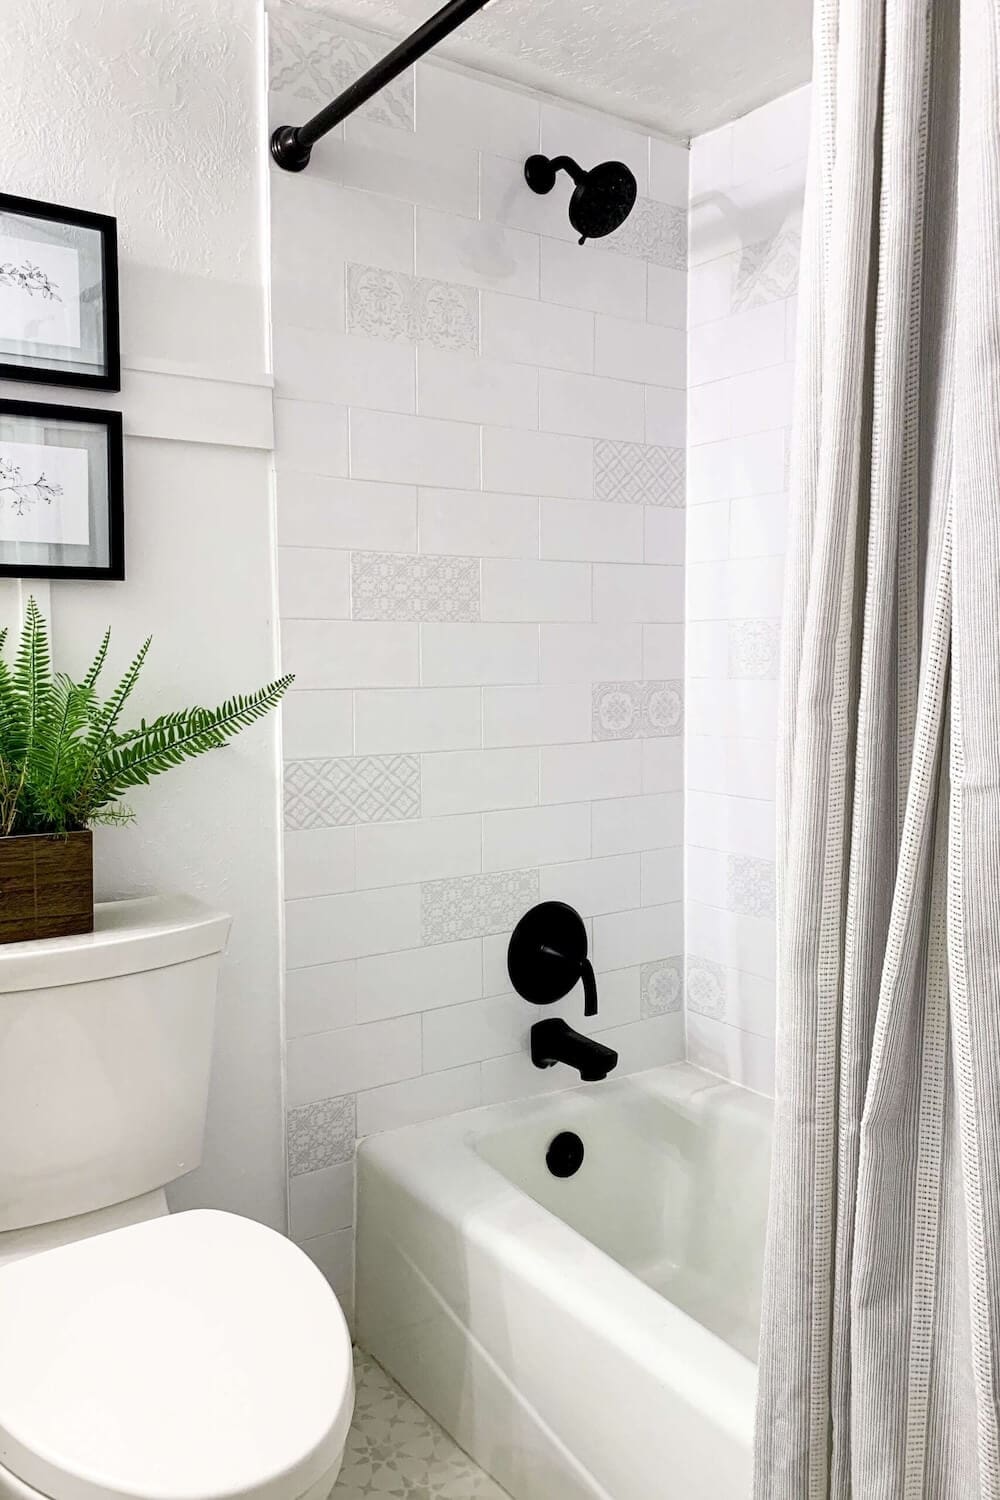
Before we get to the pretty white subway tile shower wall, here’s what the bathroom looked like at the beginning.
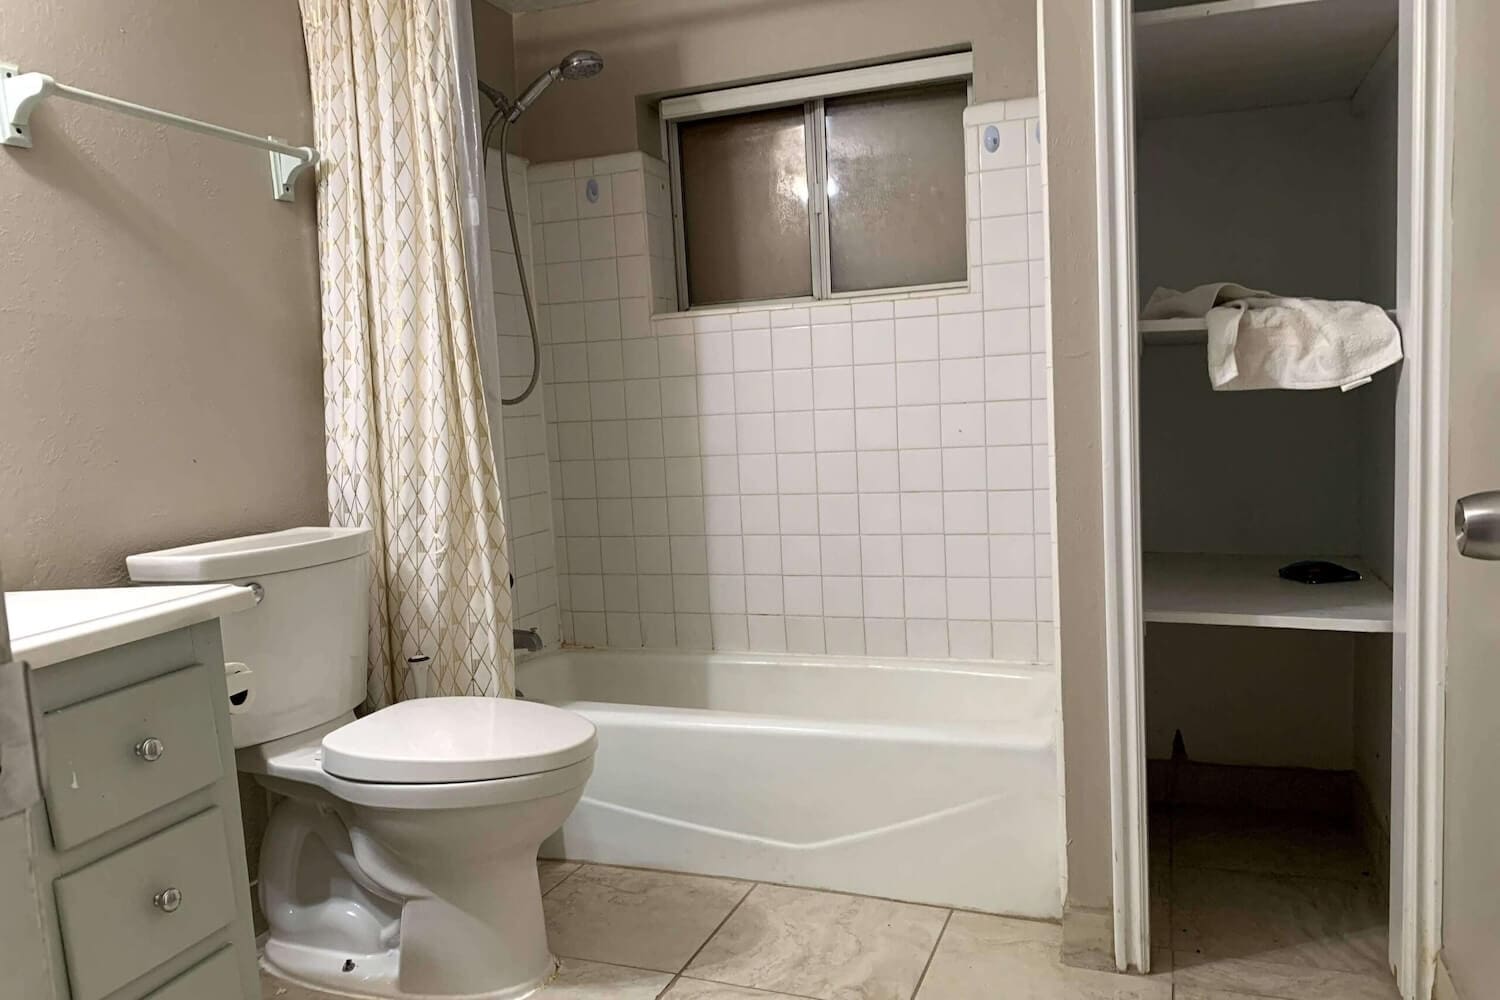
This small bathroom started out dark, dated, and a little sad. The original tile was stained, the grout was cracking, and moisture had worked its way behind the walls. I demoed the surround, removed mold, rebuilt with 1/2-inch cement board, and rolled on a full waterproofing membrane so the new tile would have a solid, long-lasting base.
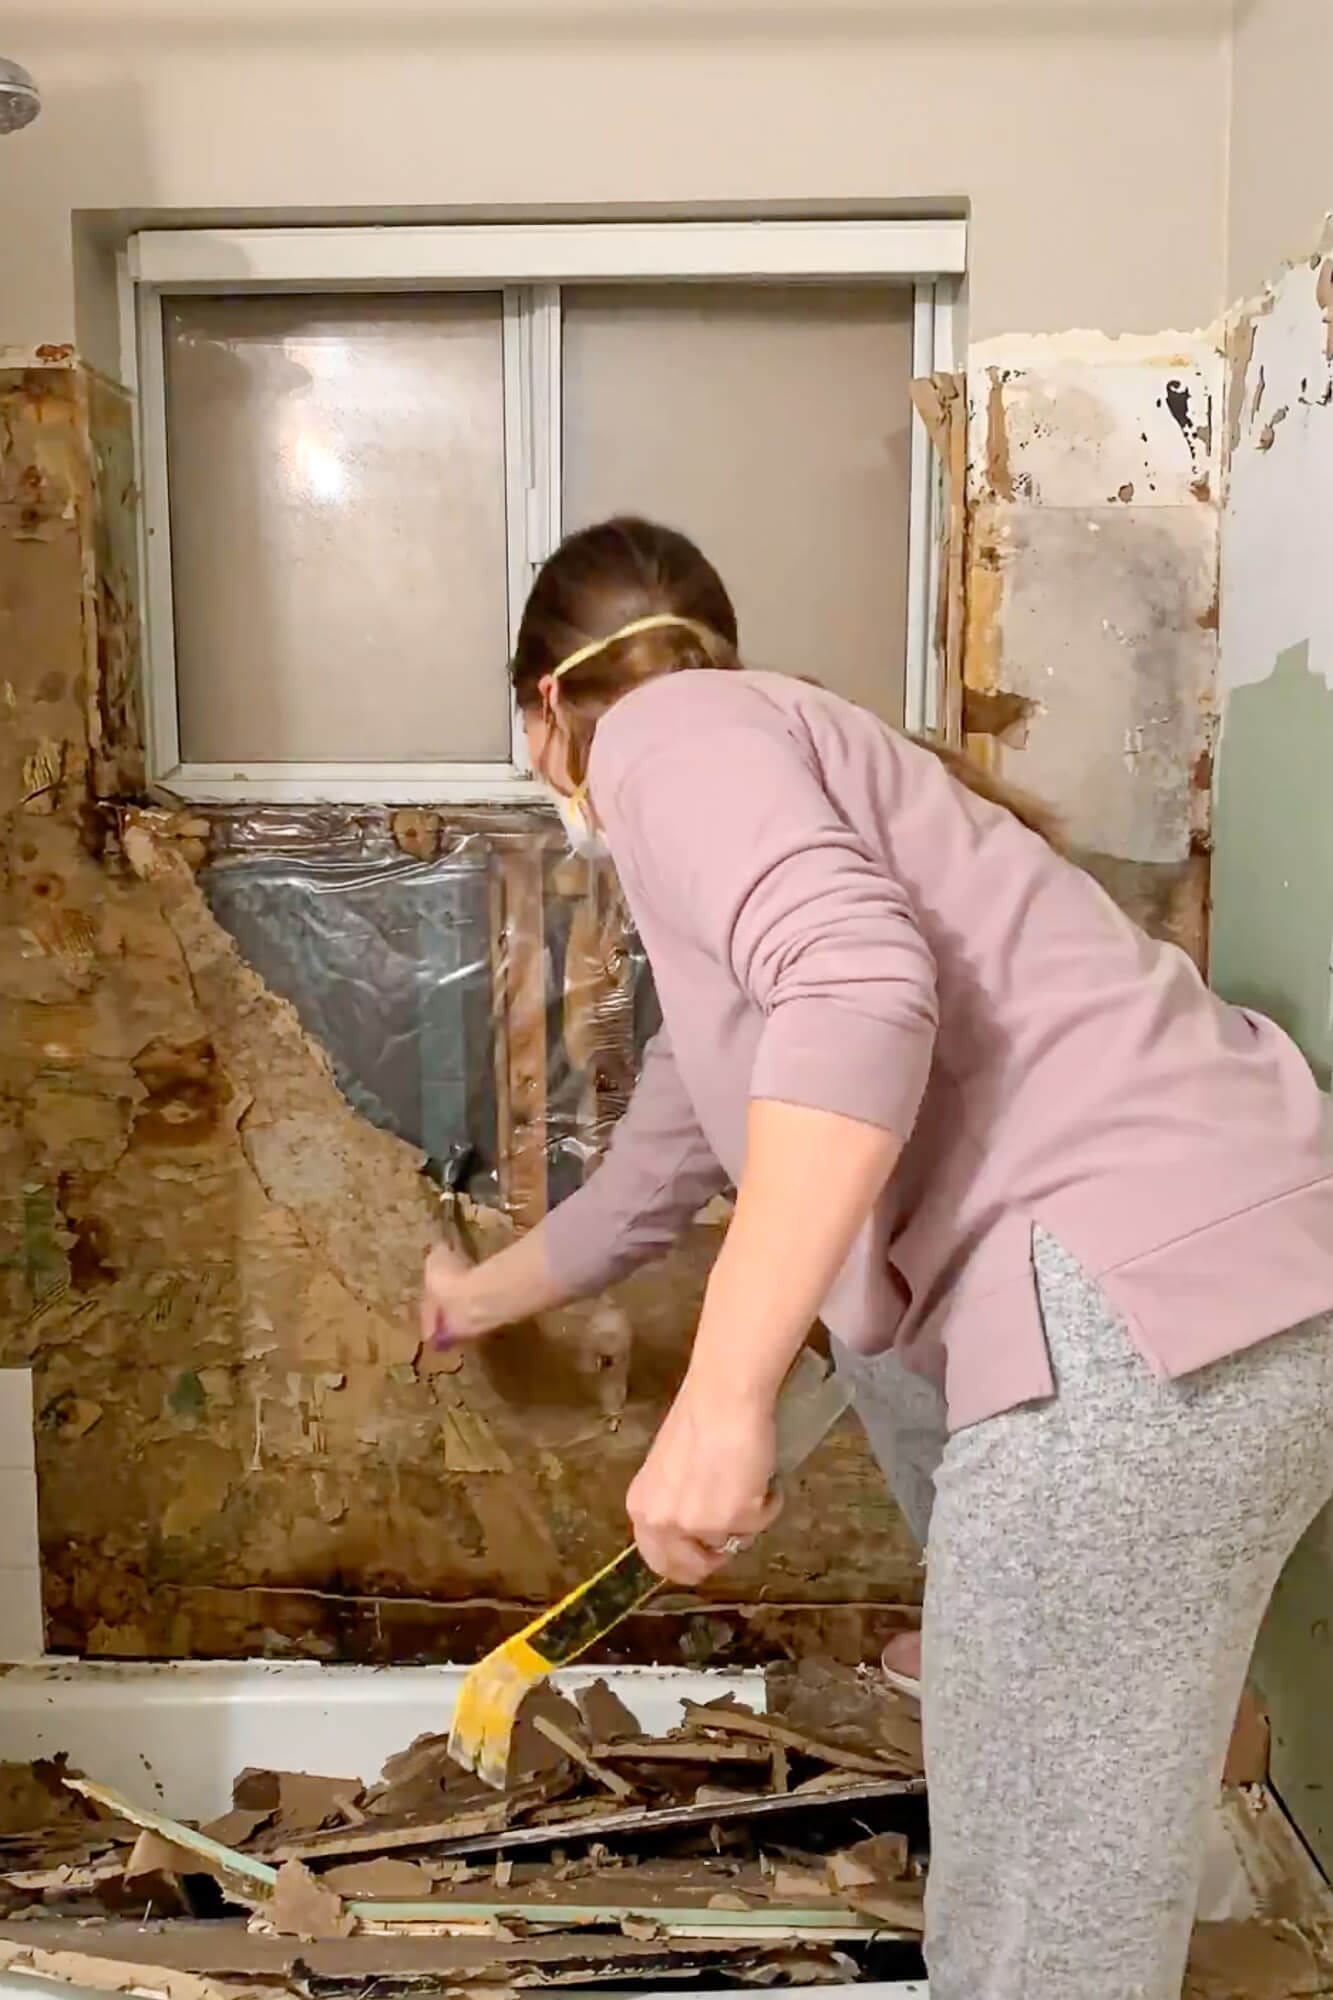
Once the surround was waterproof and the shower niche was framed and pitched, it was finally time for the fun part: tiling the shower walls.

Tools for Tiling a Shower Wall
Here are the tools I actually used while tiling this shower wall, perfect if this is your first DIY tile shower:
- Laser level or long bubble level
- Notched trowel
- Tile spacers
- Grout float
- Sponge
- Tile saw
- Caulk gun
- Drill
- Hole saw
Most of these tools work for other tile projects too, like a bathroom floor or kitchen backsplash, so they’re worth owning if you love DIY.
Materials for This Shower Tile Project
Your exact materials will depend on your tile and grout choices, but here’s what I used and why:
- Thinset mortar (appropriate for your tile and substrate)
- For the best thinset for shower walls, choose a polymer-modified thinset that’s rated for wet areas and compatible with your waterproofing system.
- Ready-mixed white grout
- Color-matched 100% silicone caulk
- Metal tile edge trim for the open vertical edges
- Plain white subway tile
- Decorative patterned subway tile
- Shower faucet and trim kit (I used the Pfister Karci matte black set)
If you’re still collecting subway tile shower ideas, simple white tile is super forgiving for beginners and plays well with almost any vanity, mirror, and wall color.
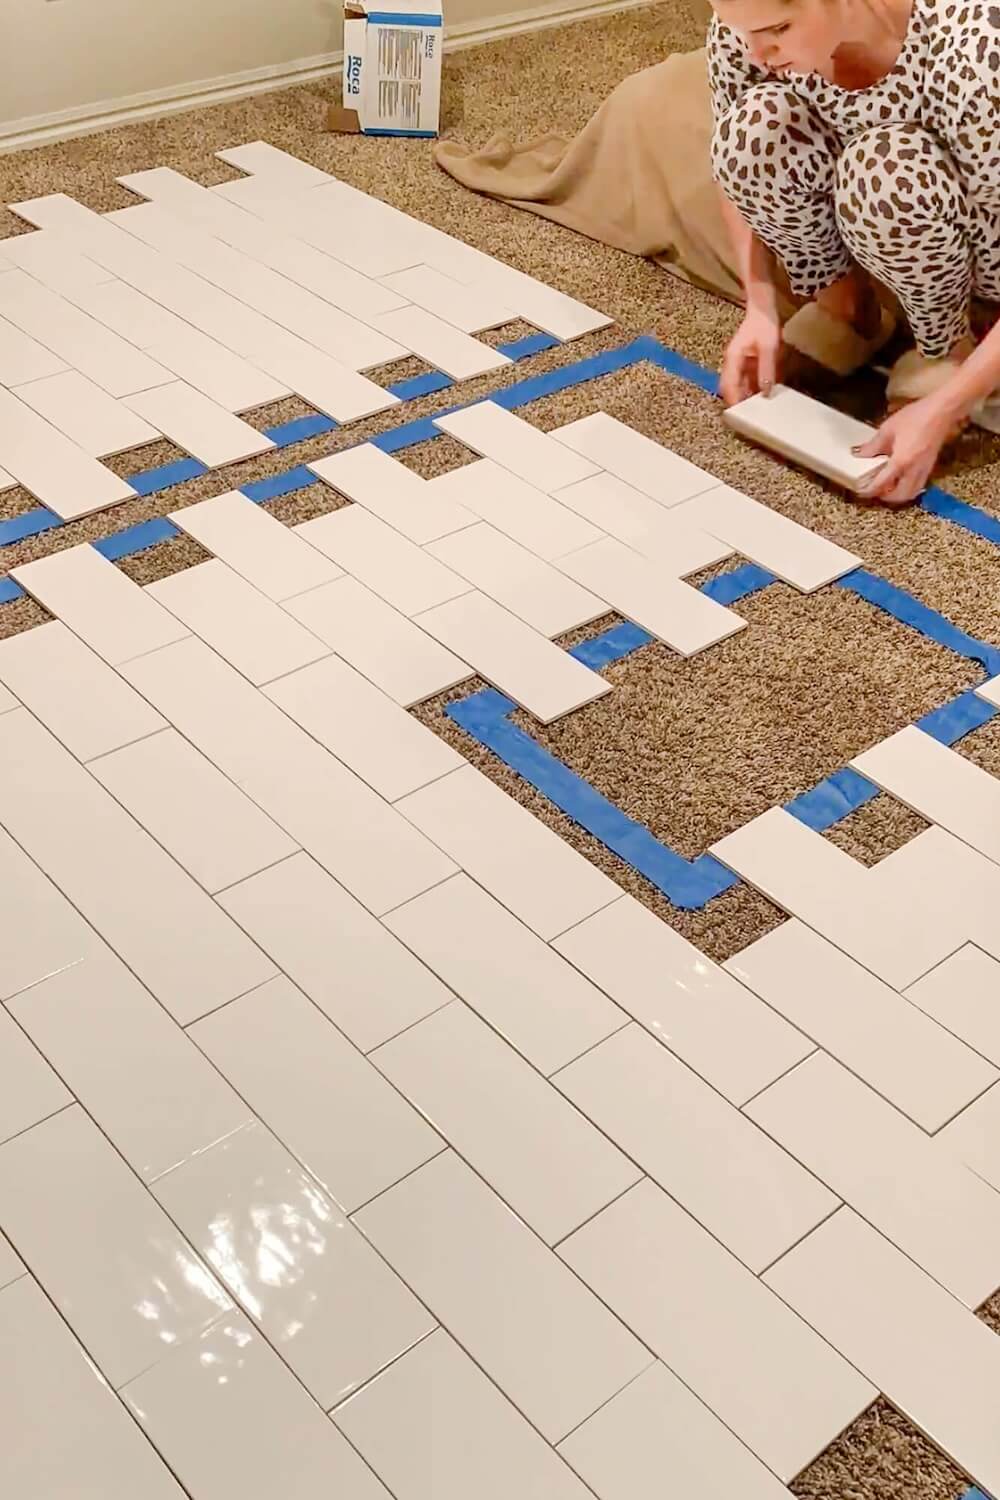
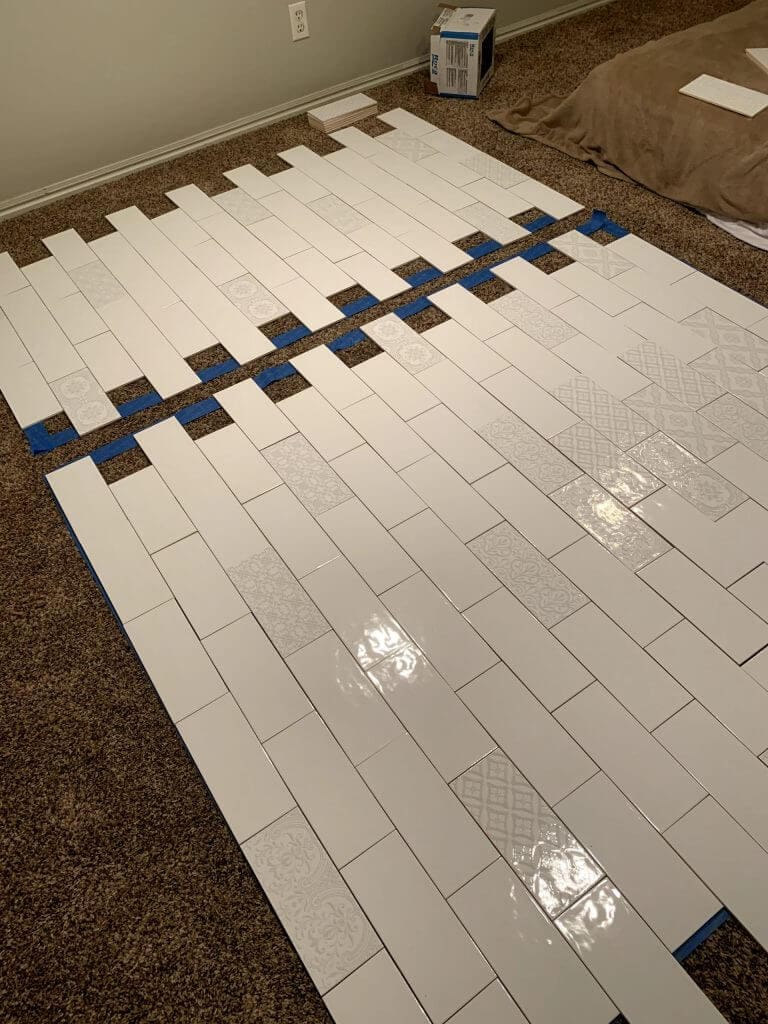
Step 1: Plan Your Shower Tile Layout on the Floor
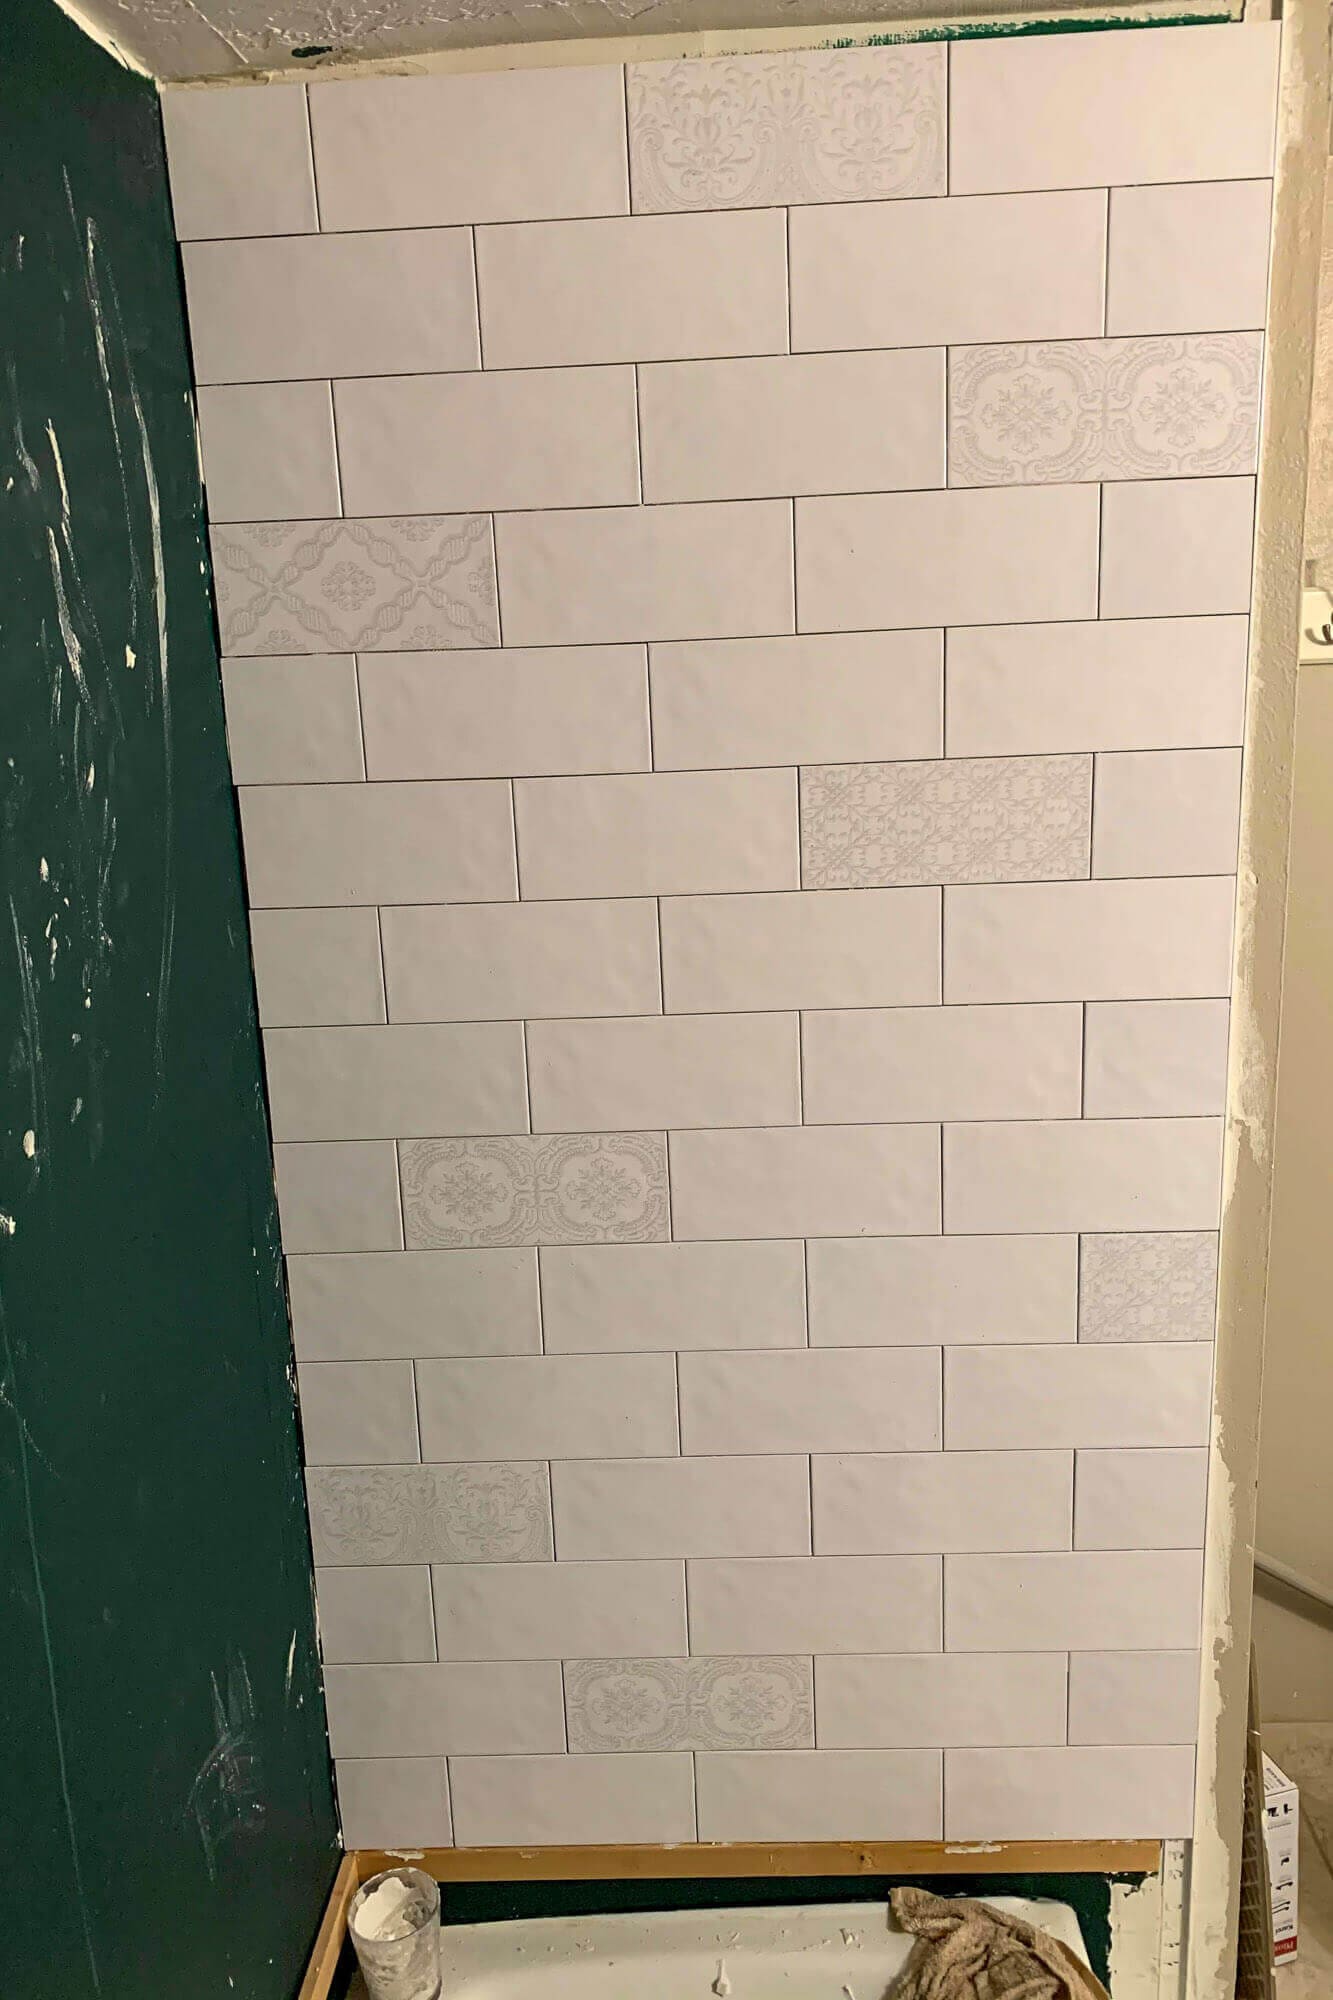
Lay out a row of tiles on the floor before you put any thinset on the wall. This dry-fit lets you spot ugly slivers, decide where decorative tiles land, and plan grout-line alignment with the niche before you commit. Taking 20 minutes here prevents most layout regrets later.
What to Watch For During Layout
Avoid having a sliver of tile less than a third of a full tile width at any visible edge. If you see one in the dry-fit, shift the whole row by a half-tile to balance the cuts on each side. The same applies vertically: aim for a full tile (or close to it) at the top of the tile field where it meets the ceiling or trim.
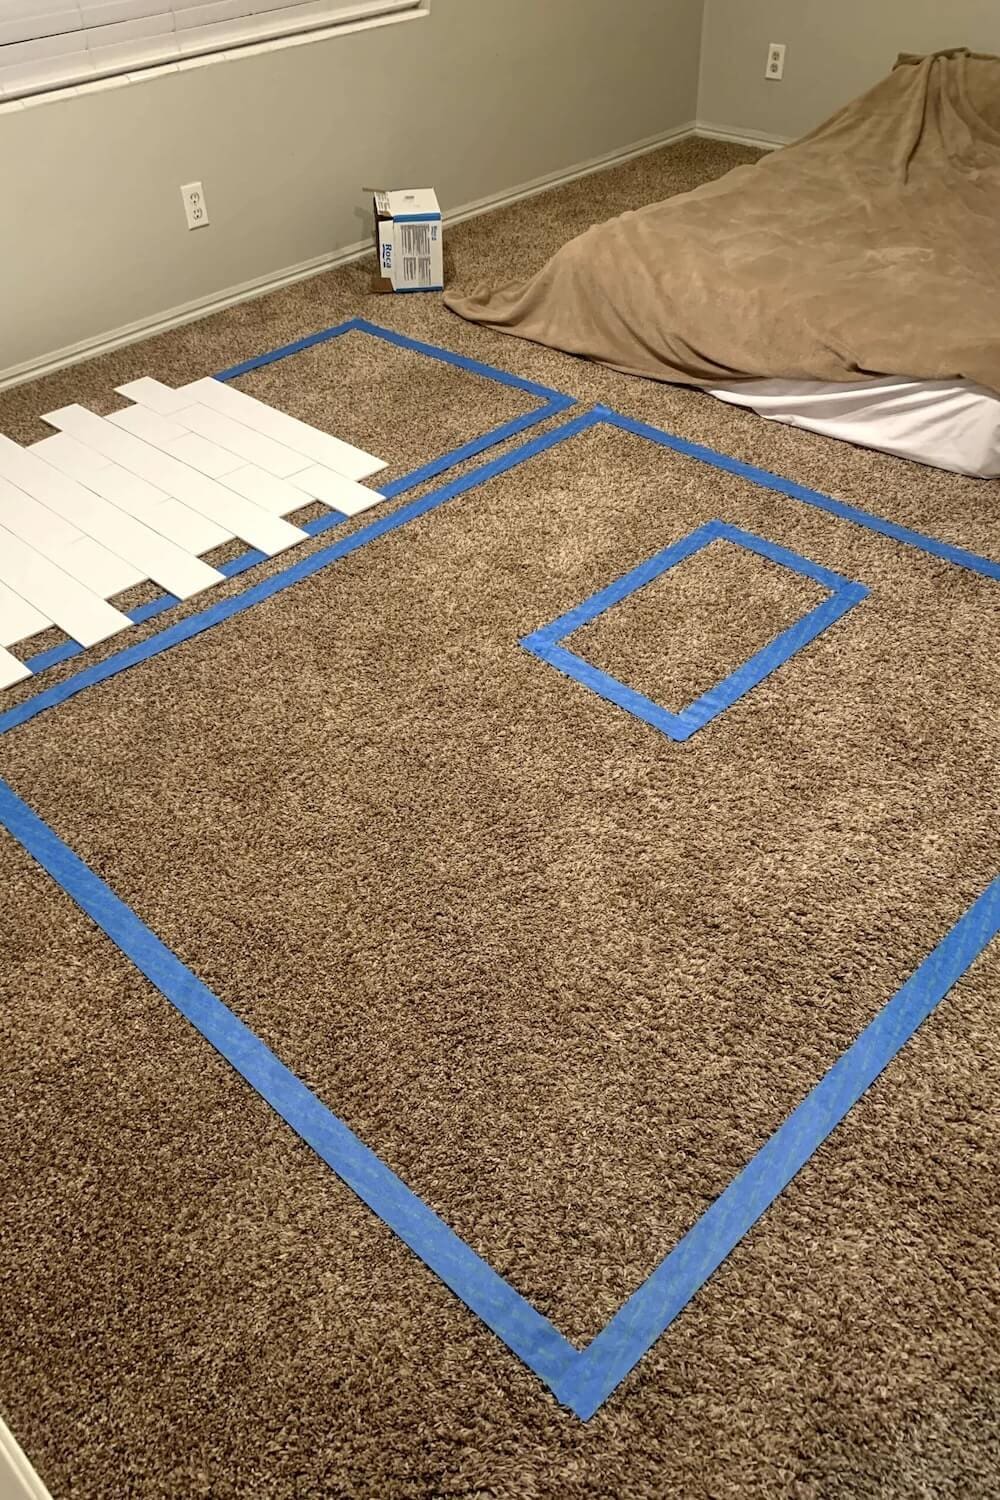
If you’re wondering how to tile a shower for beginners, this layout step is your best friend. Spend time here and everything else feels calmer.
Step 2: Where to Start Tiling a Shower Wall (and Why Not at the Tub)
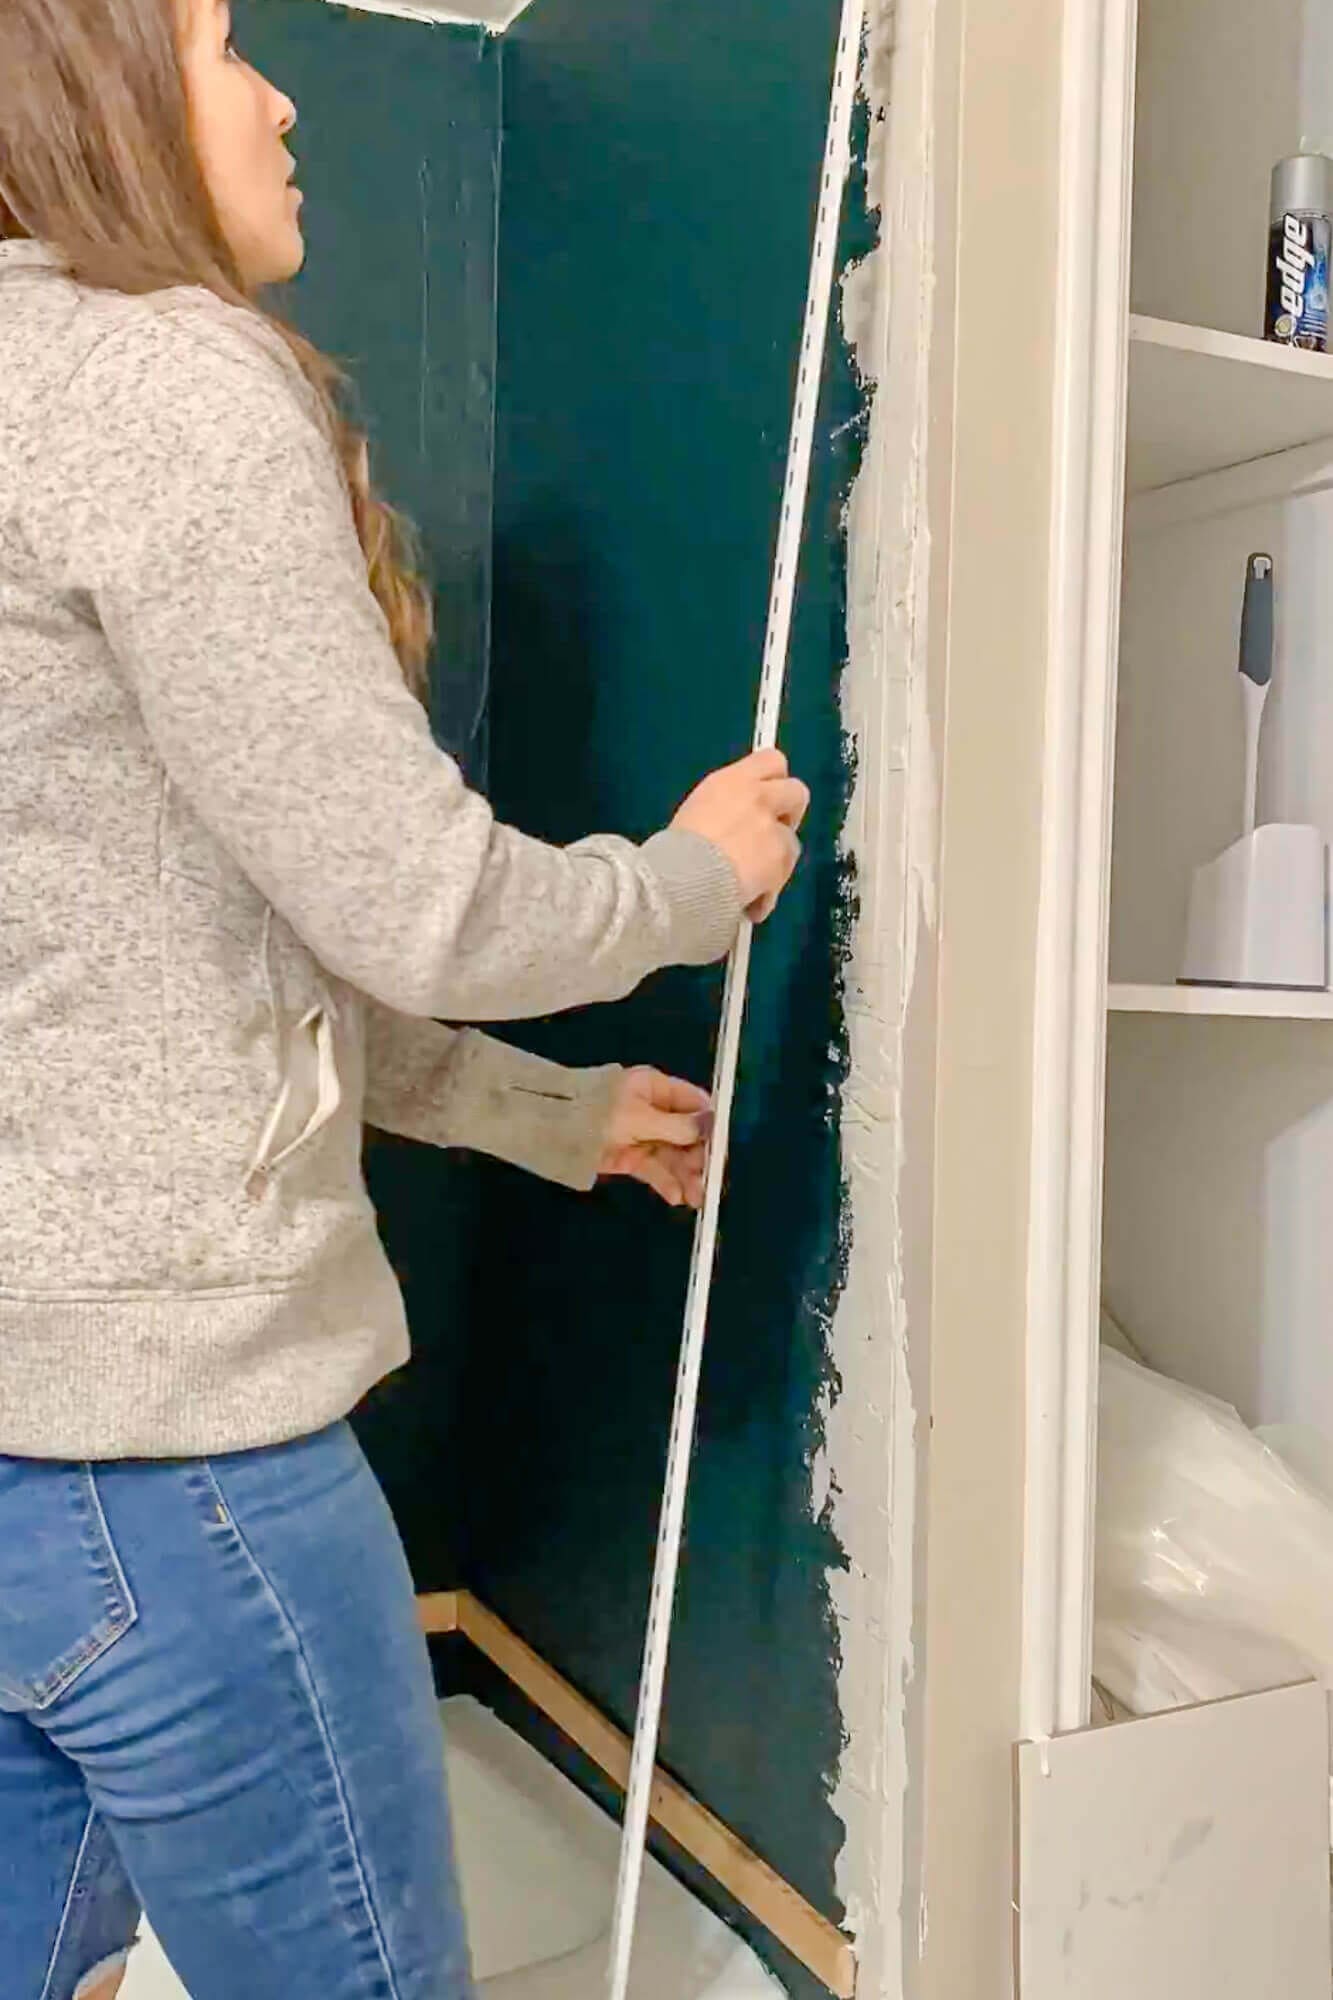
It’s tempting to start tiling right on the tub ledge, but tubs are almost never perfectly level. If you follow a slightly sloped tub edge, your grout lines will drift as you go up the wall. Find the highest point of the tub, measure up one full tile, draw a level line, and screw a straight ledger board (a 1×3 or 1×4) into the wall along that line.
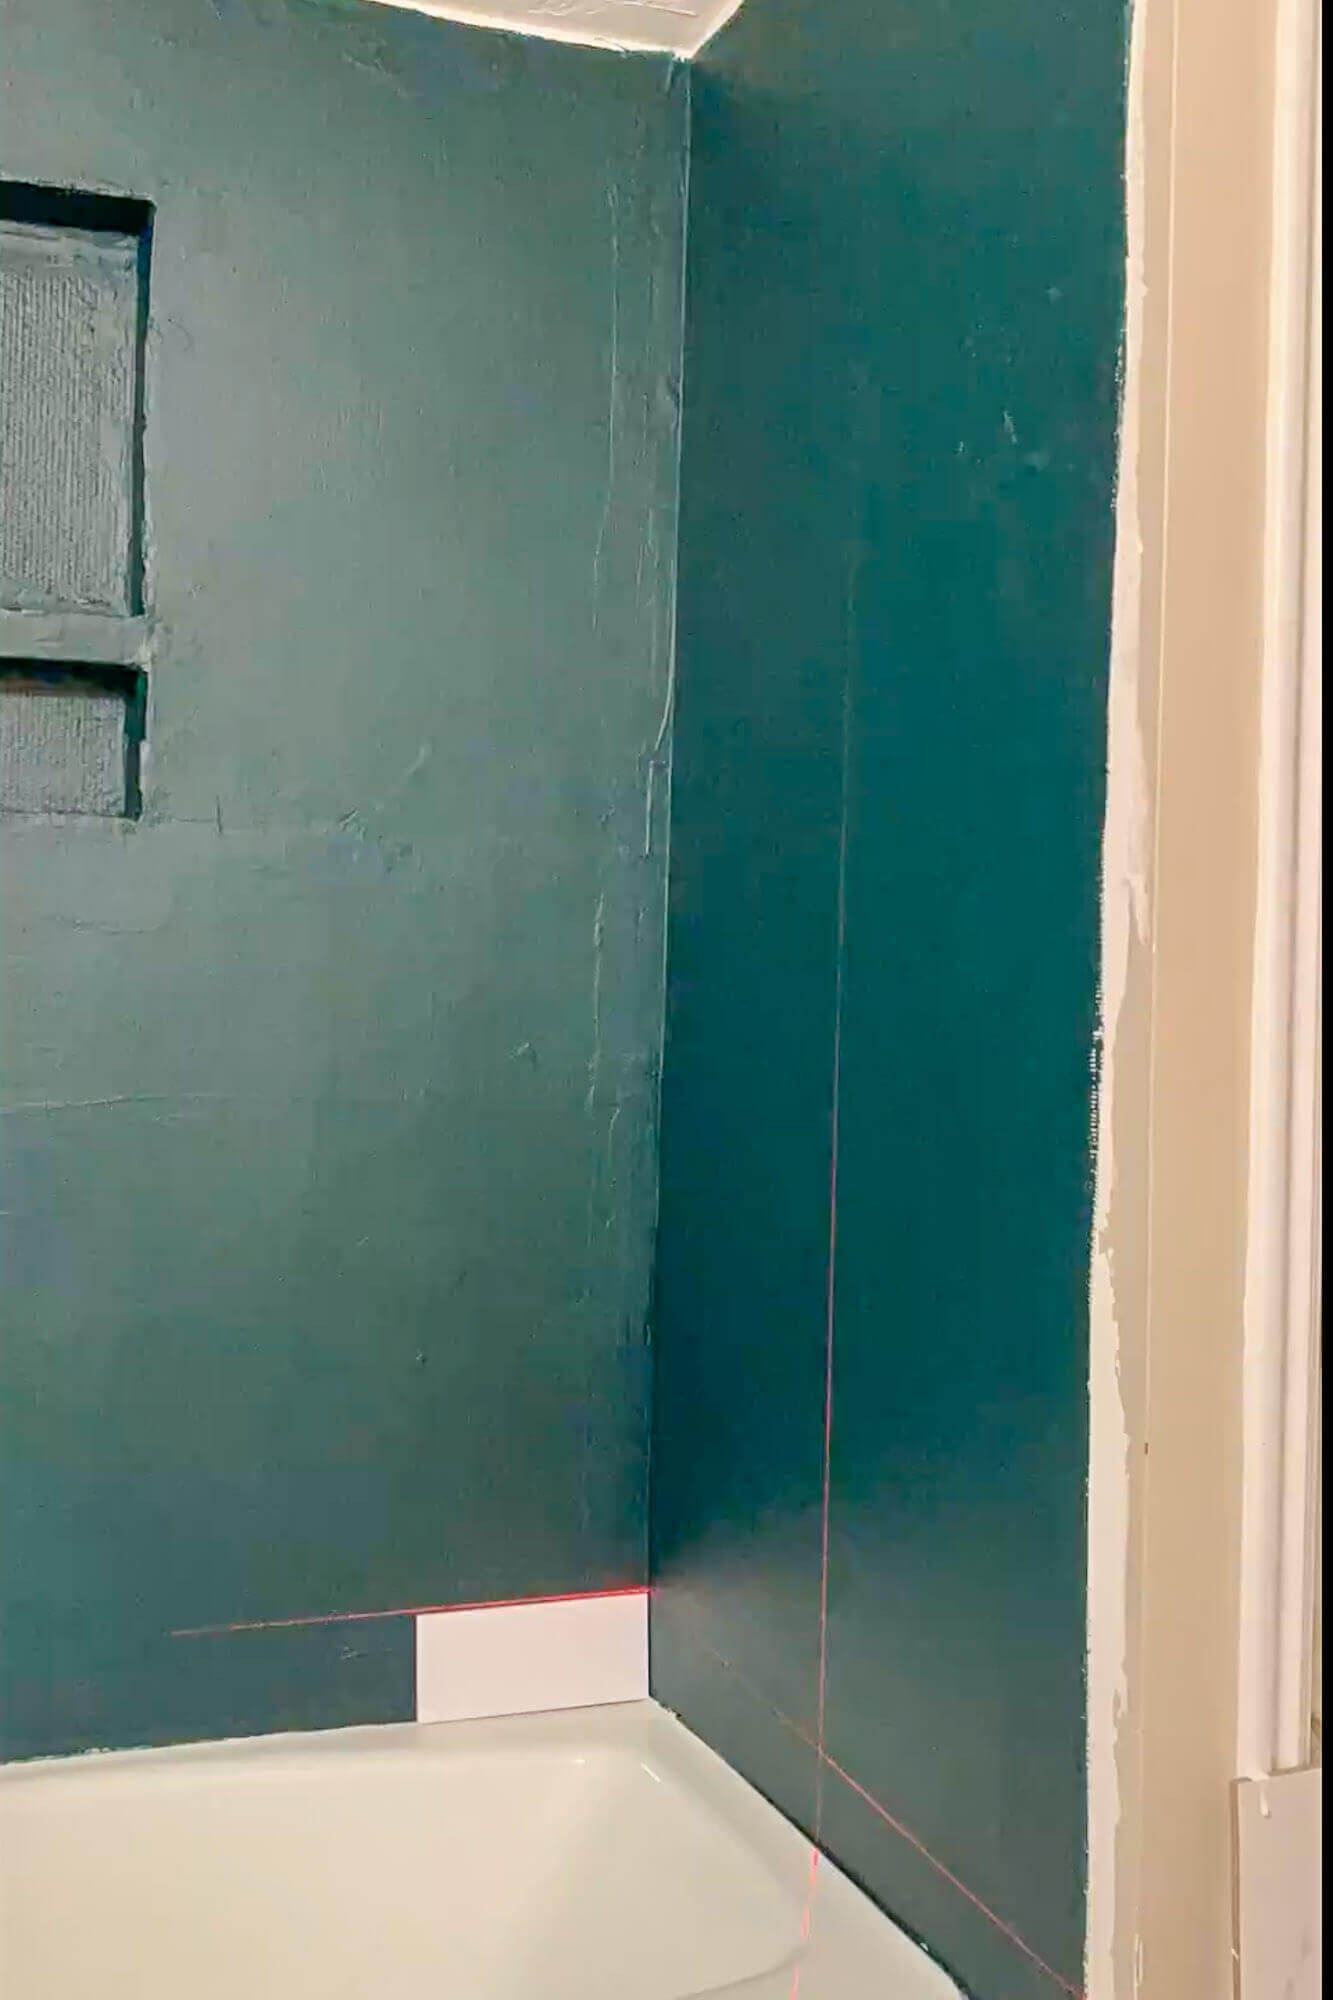
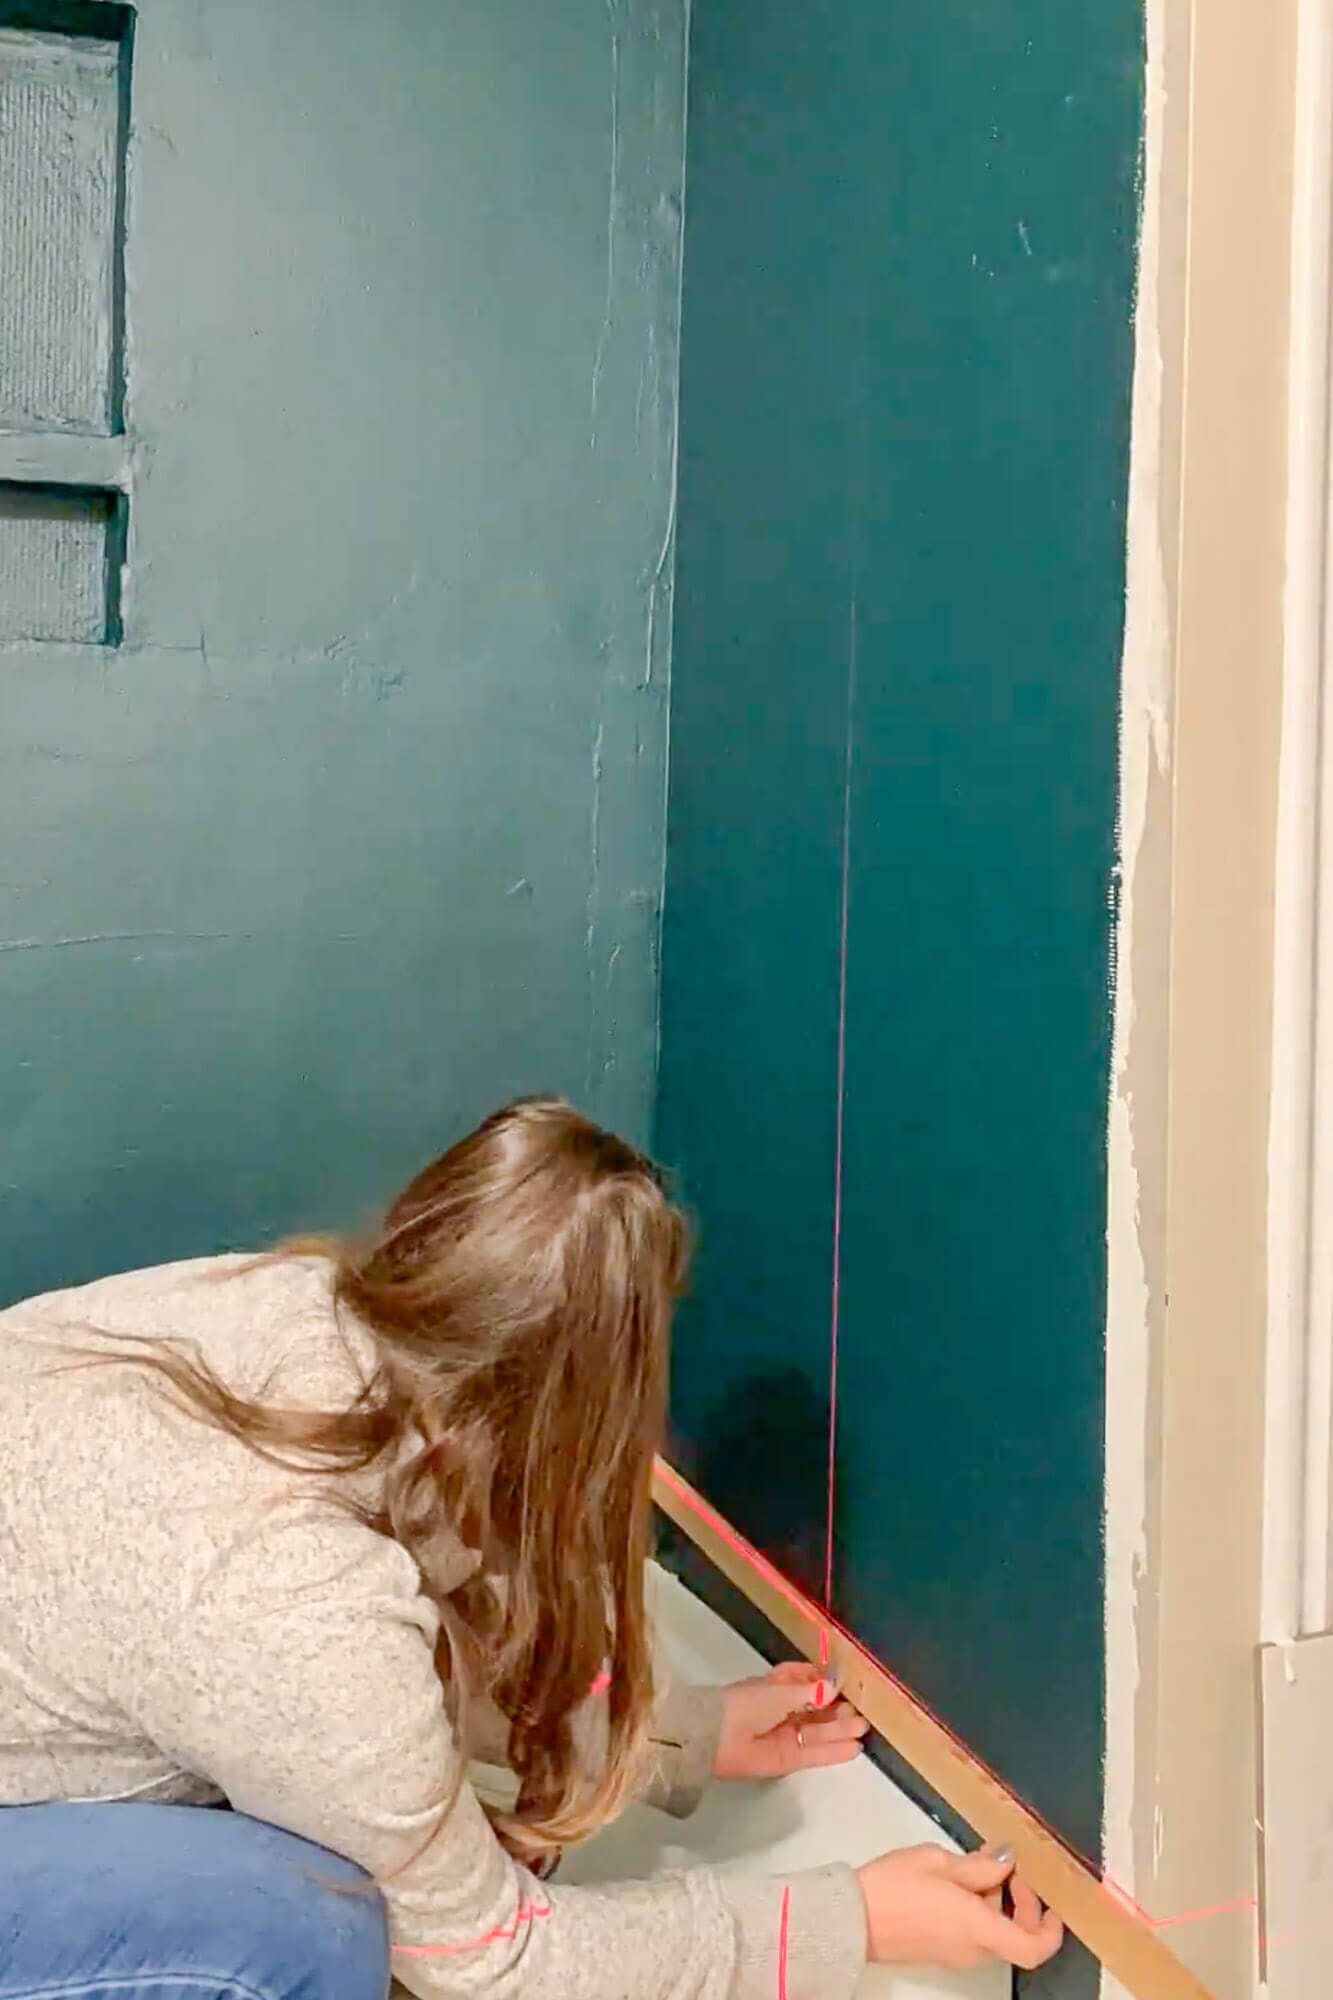
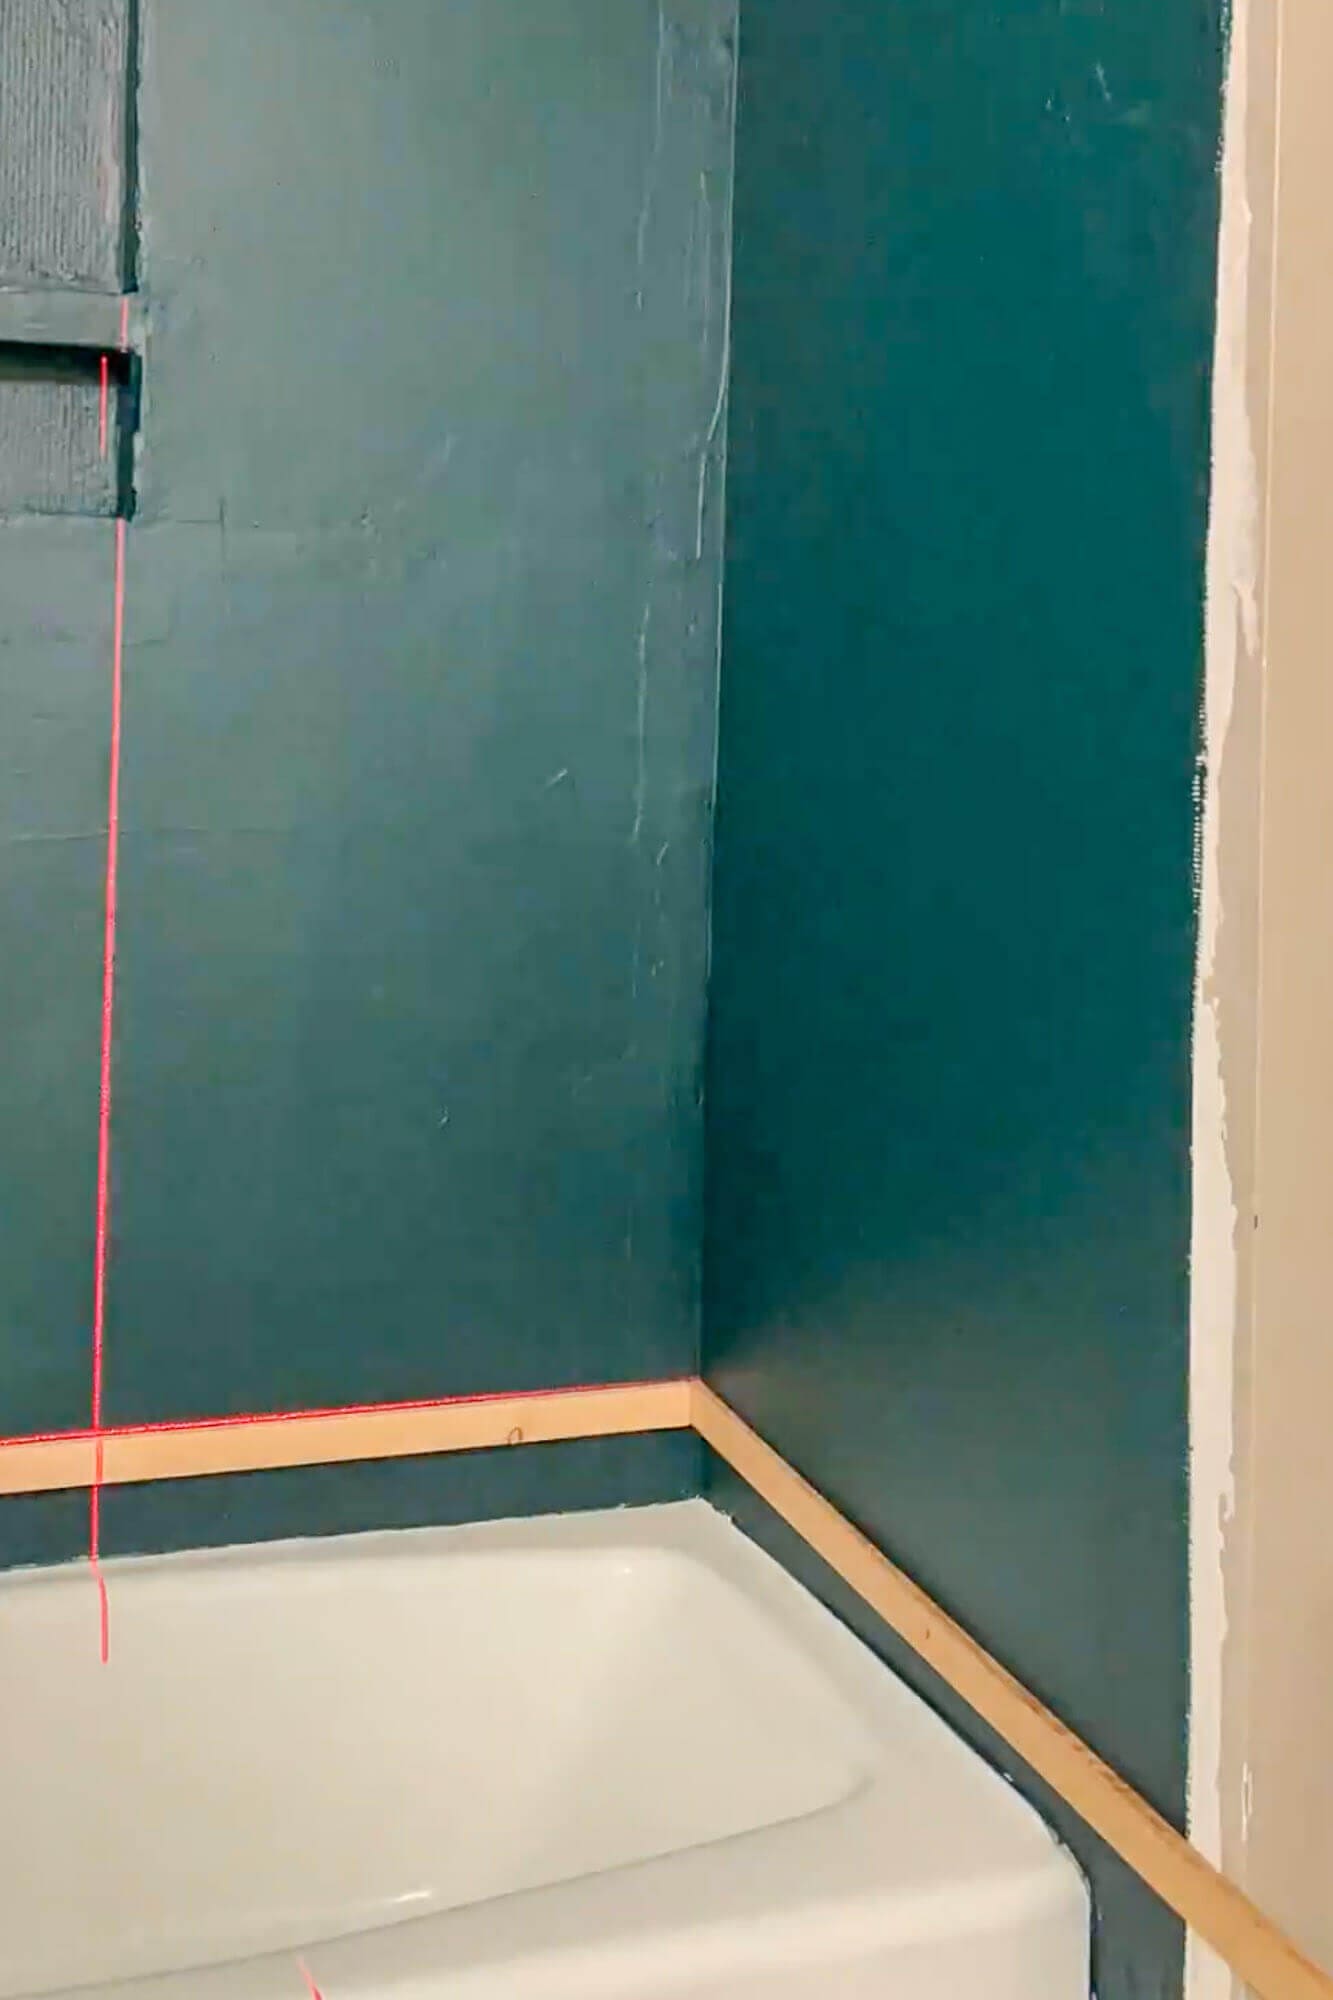
The ledger board acts like a temporary shelf to support your first full row of tiles. Once the upper rows are set, you’ll remove the ledger and cut the bottom row to follow the tub’s slope. This simple trick is one of the biggest upgrades from “I tried tiling once” to “this looks professionally done.”
Why You Don’t Start at the Tub Edge
Bathtubs are almost never level. If you tile straight up from the tub edge, every horizontal grout line above will drift, and the drift compounds as you go up. Even a 1/8″ tilt at the tub becomes a glaringly visible 1″ tilt 12 rows up.
How to Set a Ledger Board
FFind the highest point of the tub with a level. Measure up one full tile height plus 1/16″ (for the grout joint). Draw a level line around the shower walls at that mark. Screw a 1×4 ledger board into studs along the line. The ledger gives you a perfectly level reference to tile up from. Once the upper rows are set and the thinset has cured overnight, remove the ledger and cut the bottom row to follow the tub’s slope.
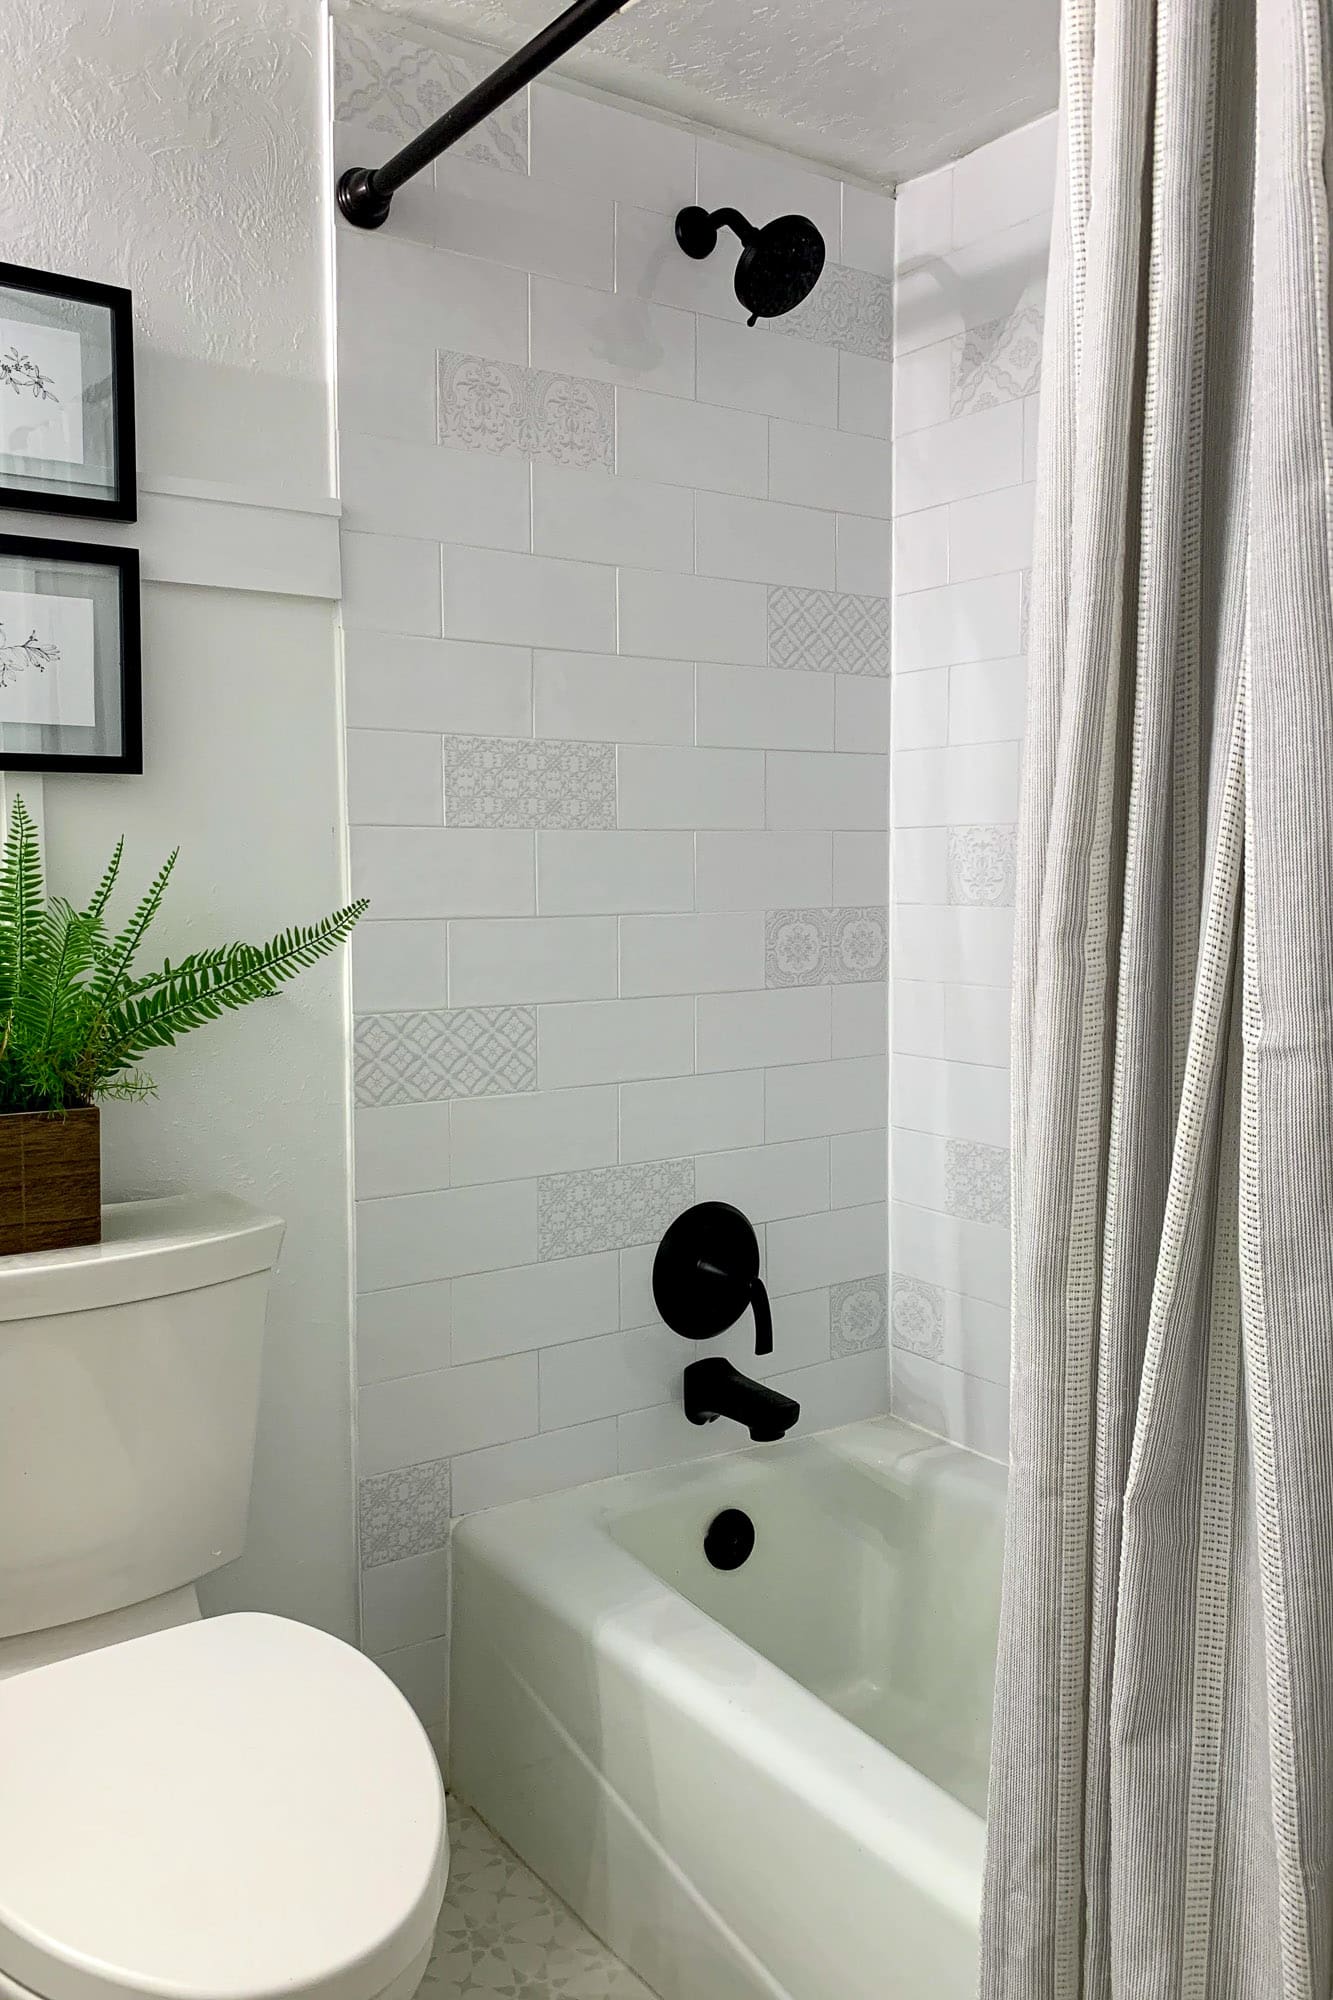
Step 3: Finish the Outside Edge First for Clean Lines
Before tiling the main field of the wall, I installed metal tile edge trim on the two open vertical corners of the shower. It gives the shower a clean, finished edge and keeps the vertical lines arrow-straight from top to bottom.
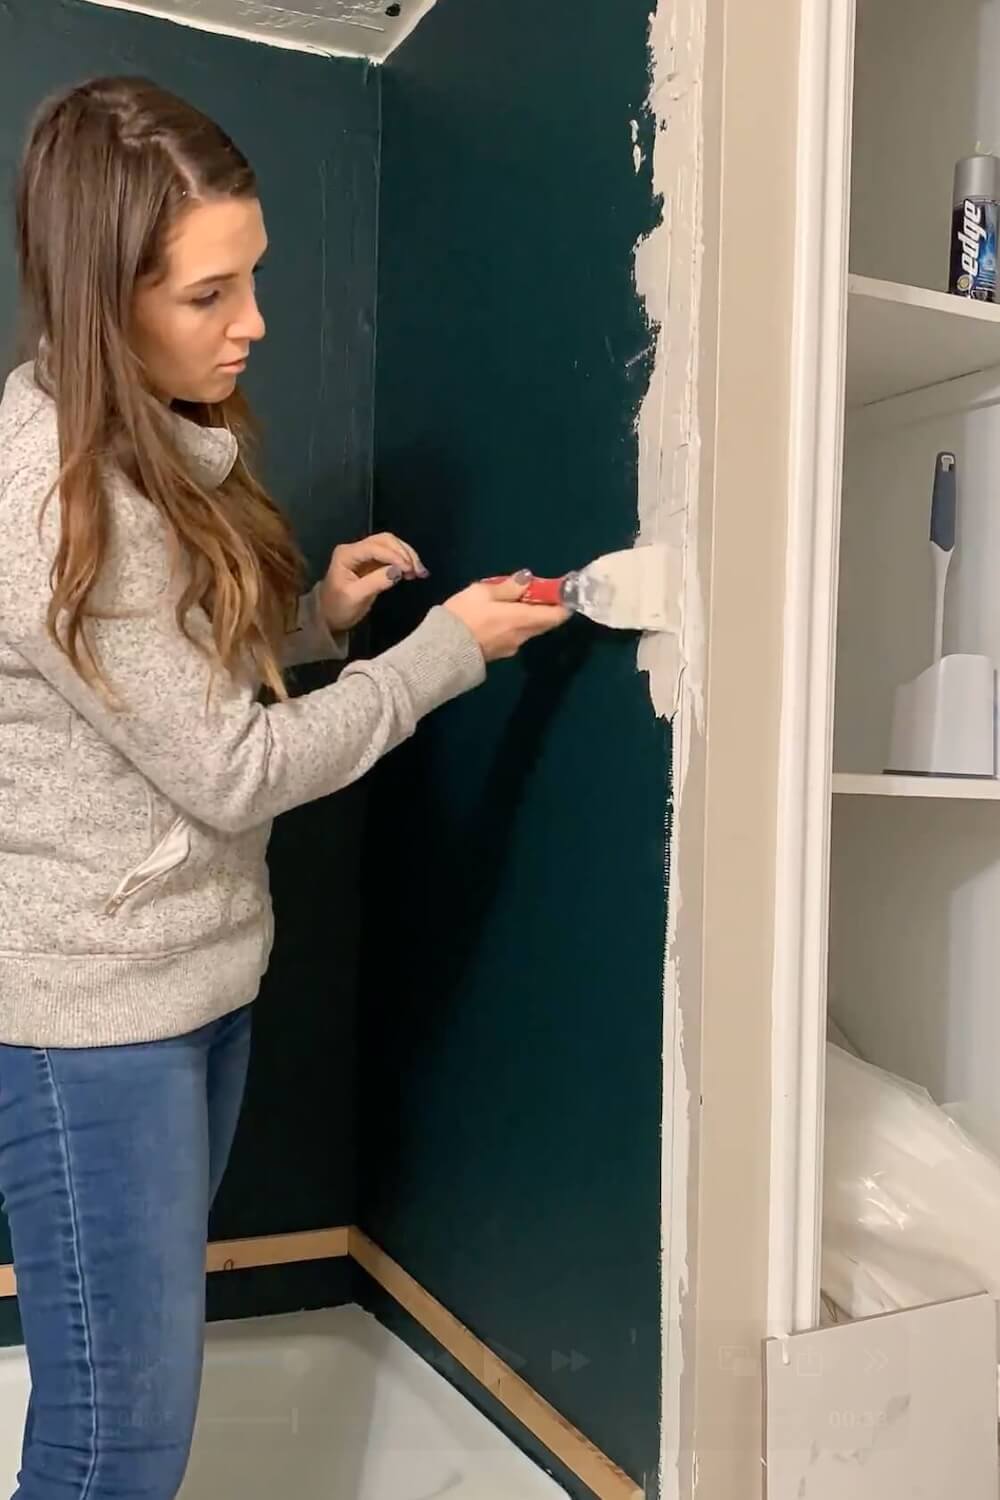
Once the trim was set in thinset, I started tiling from that outside edge and worked inward – one side wall, then the other, saving the back wall for last so I could line up the corners and keep everything symmetrical.
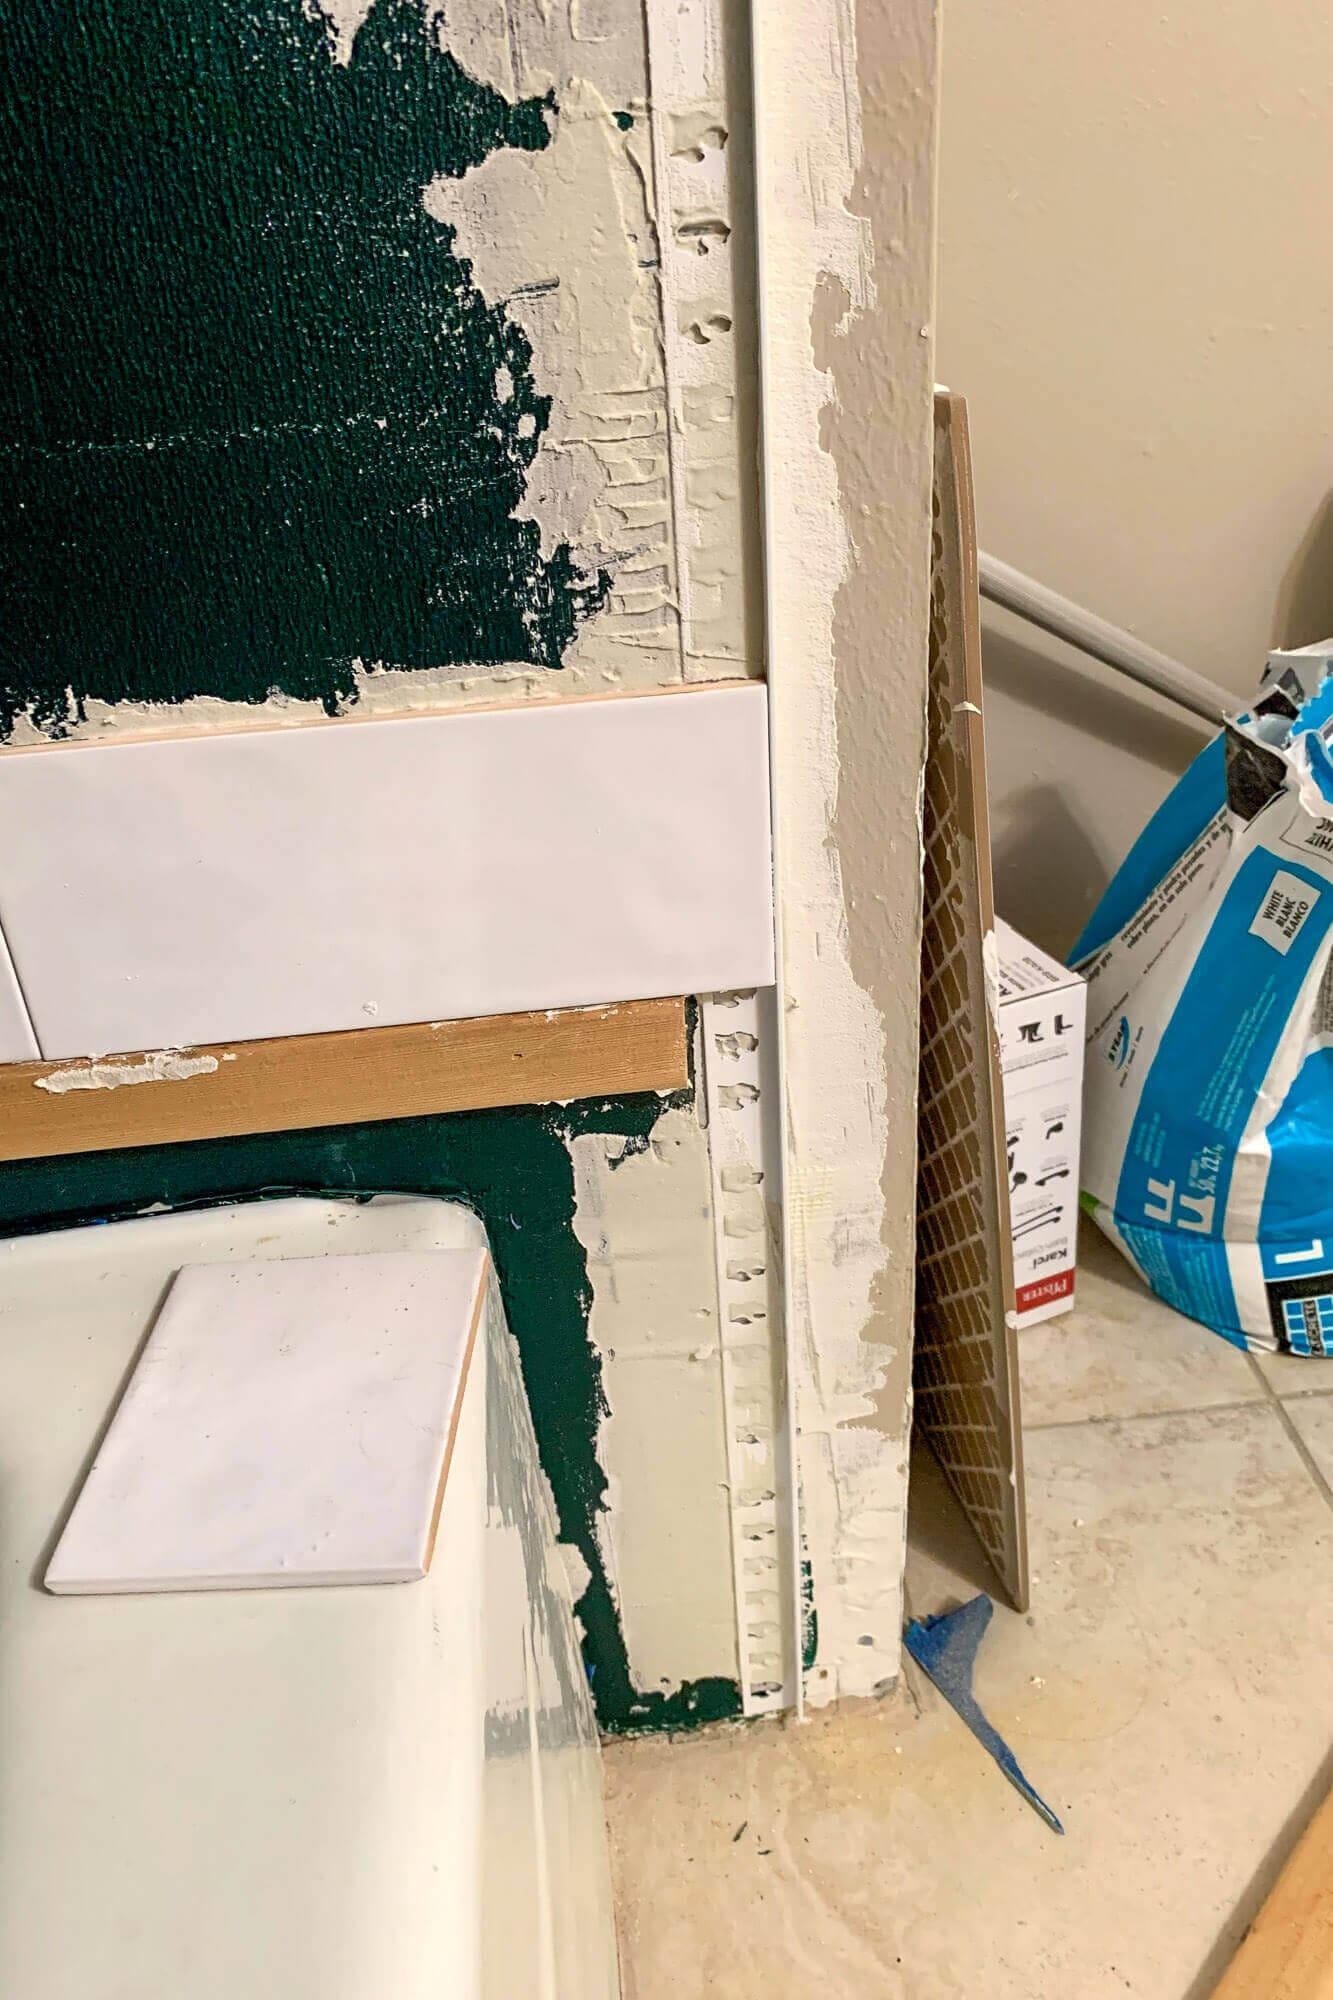
If your tile doesn’t come with bullnose pieces, metal edge trim is one of the easiest and most budget-friendly ways to finish a DIY shower tile project.
Choose Your Edge Trim
Schluter metal trim is the cleanest option for vertical outside corners and gives you a finished edge that doesn’t need bullnose tile or precisely cut tile edges. Pencil trim or chair-rail tile work too if you want a more traditional look. Whatever you pick, install it BEFORE the field tile so you can tuck the field tile up against it cleanly.
Step 4: Mix and Apply Thinset (Grooves and Back-Butter)
This is the step where most DIYers either go too thick (tiles slide and lippage shows) or too thin (tiles fall off). Here’s the system that works:
Mix the Thinset to the Right Consistency
Aim for a peanut-butter texture: it should hold ridges from a notched trowel without slumping, but not be so stiff that it crumbles when you spread it. Mix in small batches – thinset starts curing in the bucket the moment you add water, and a too-stiff bucket is dead weight after 30-45 minutes.
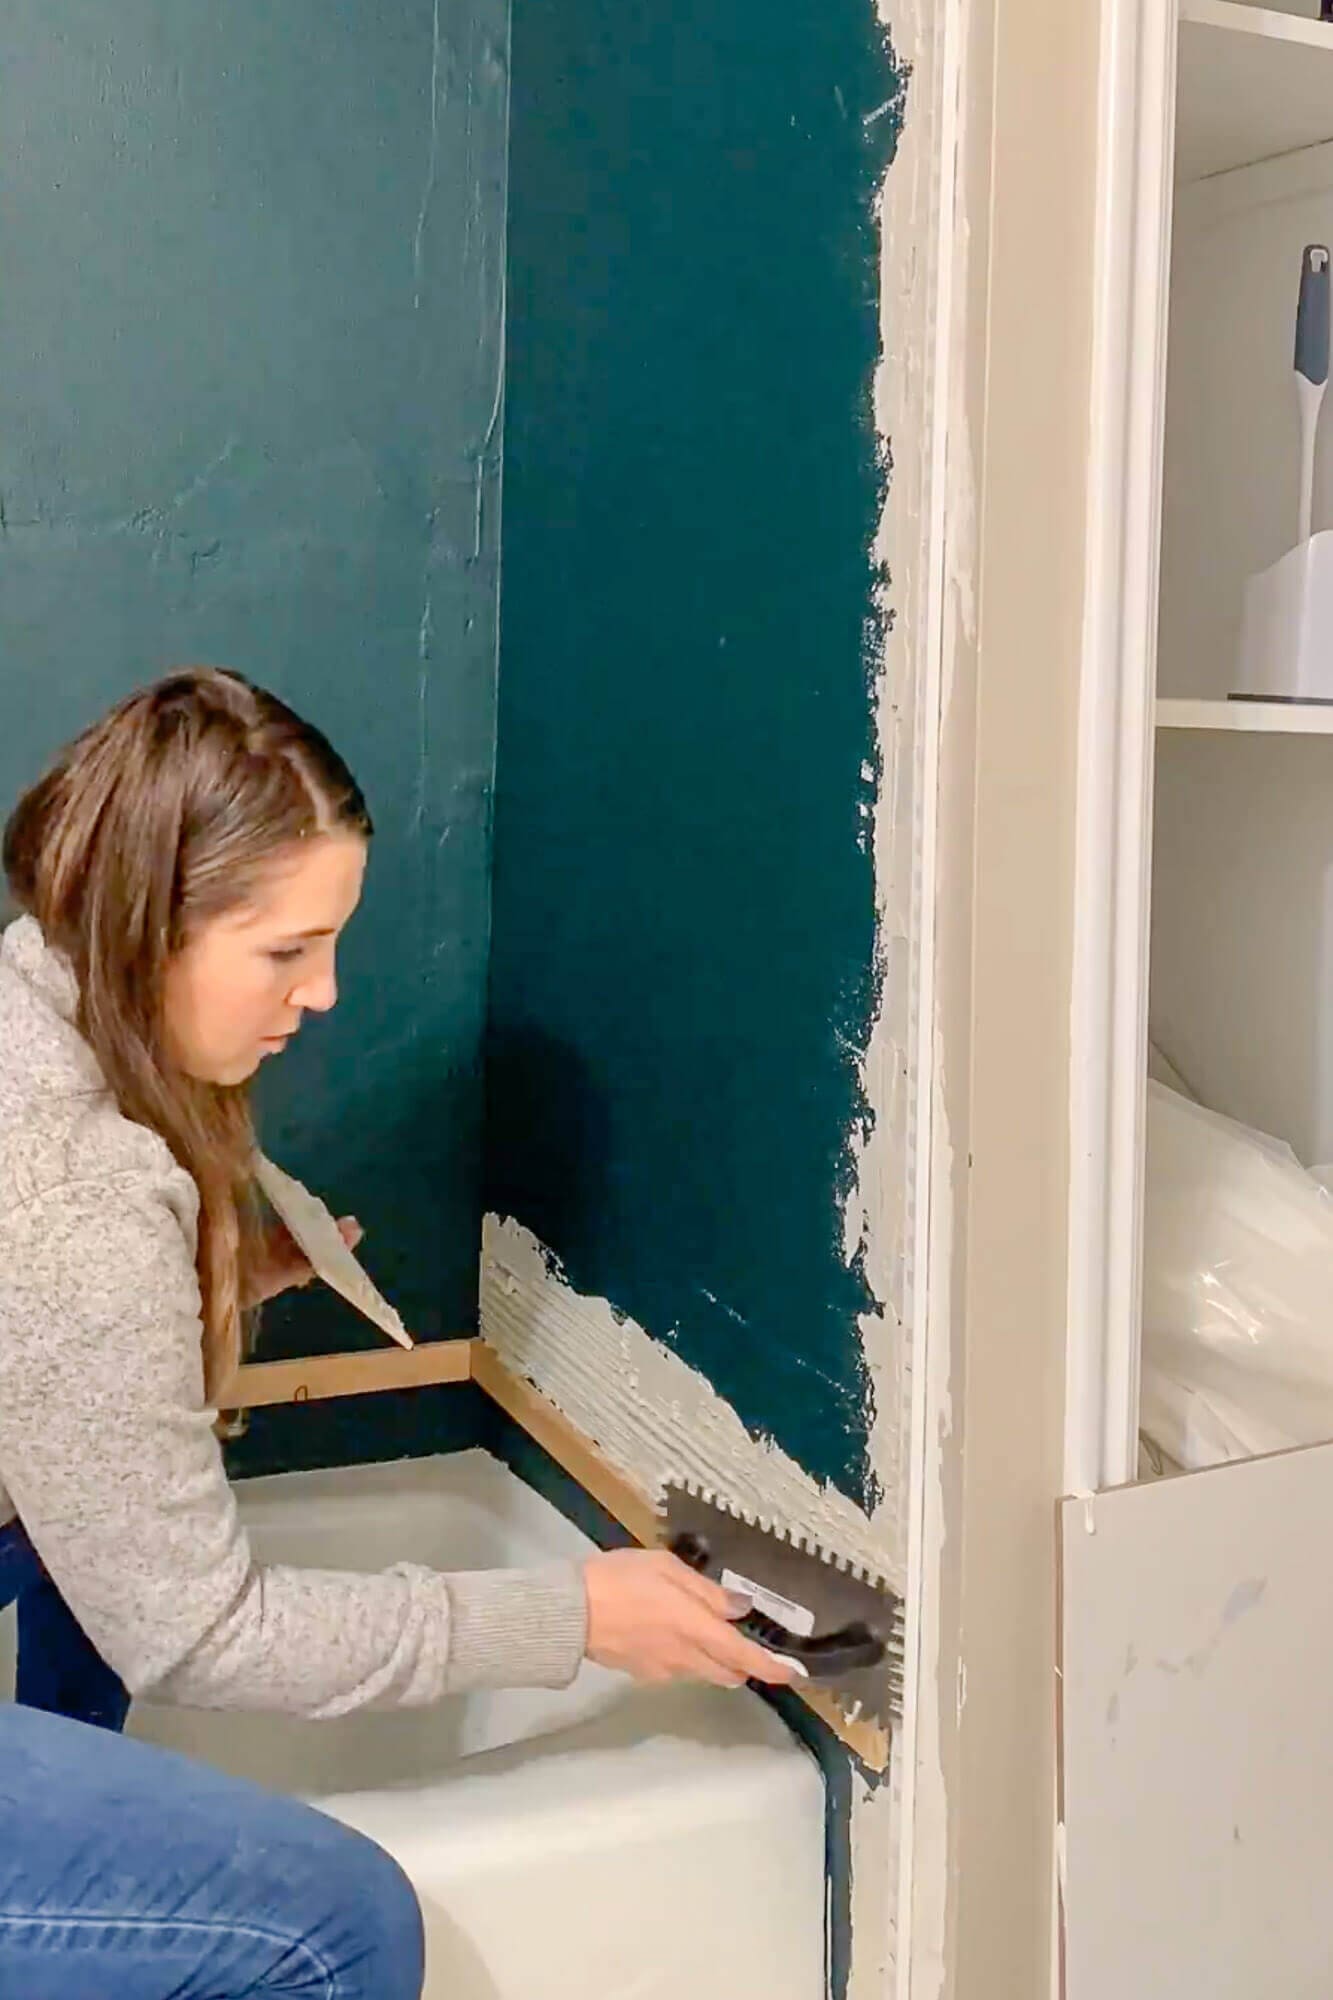
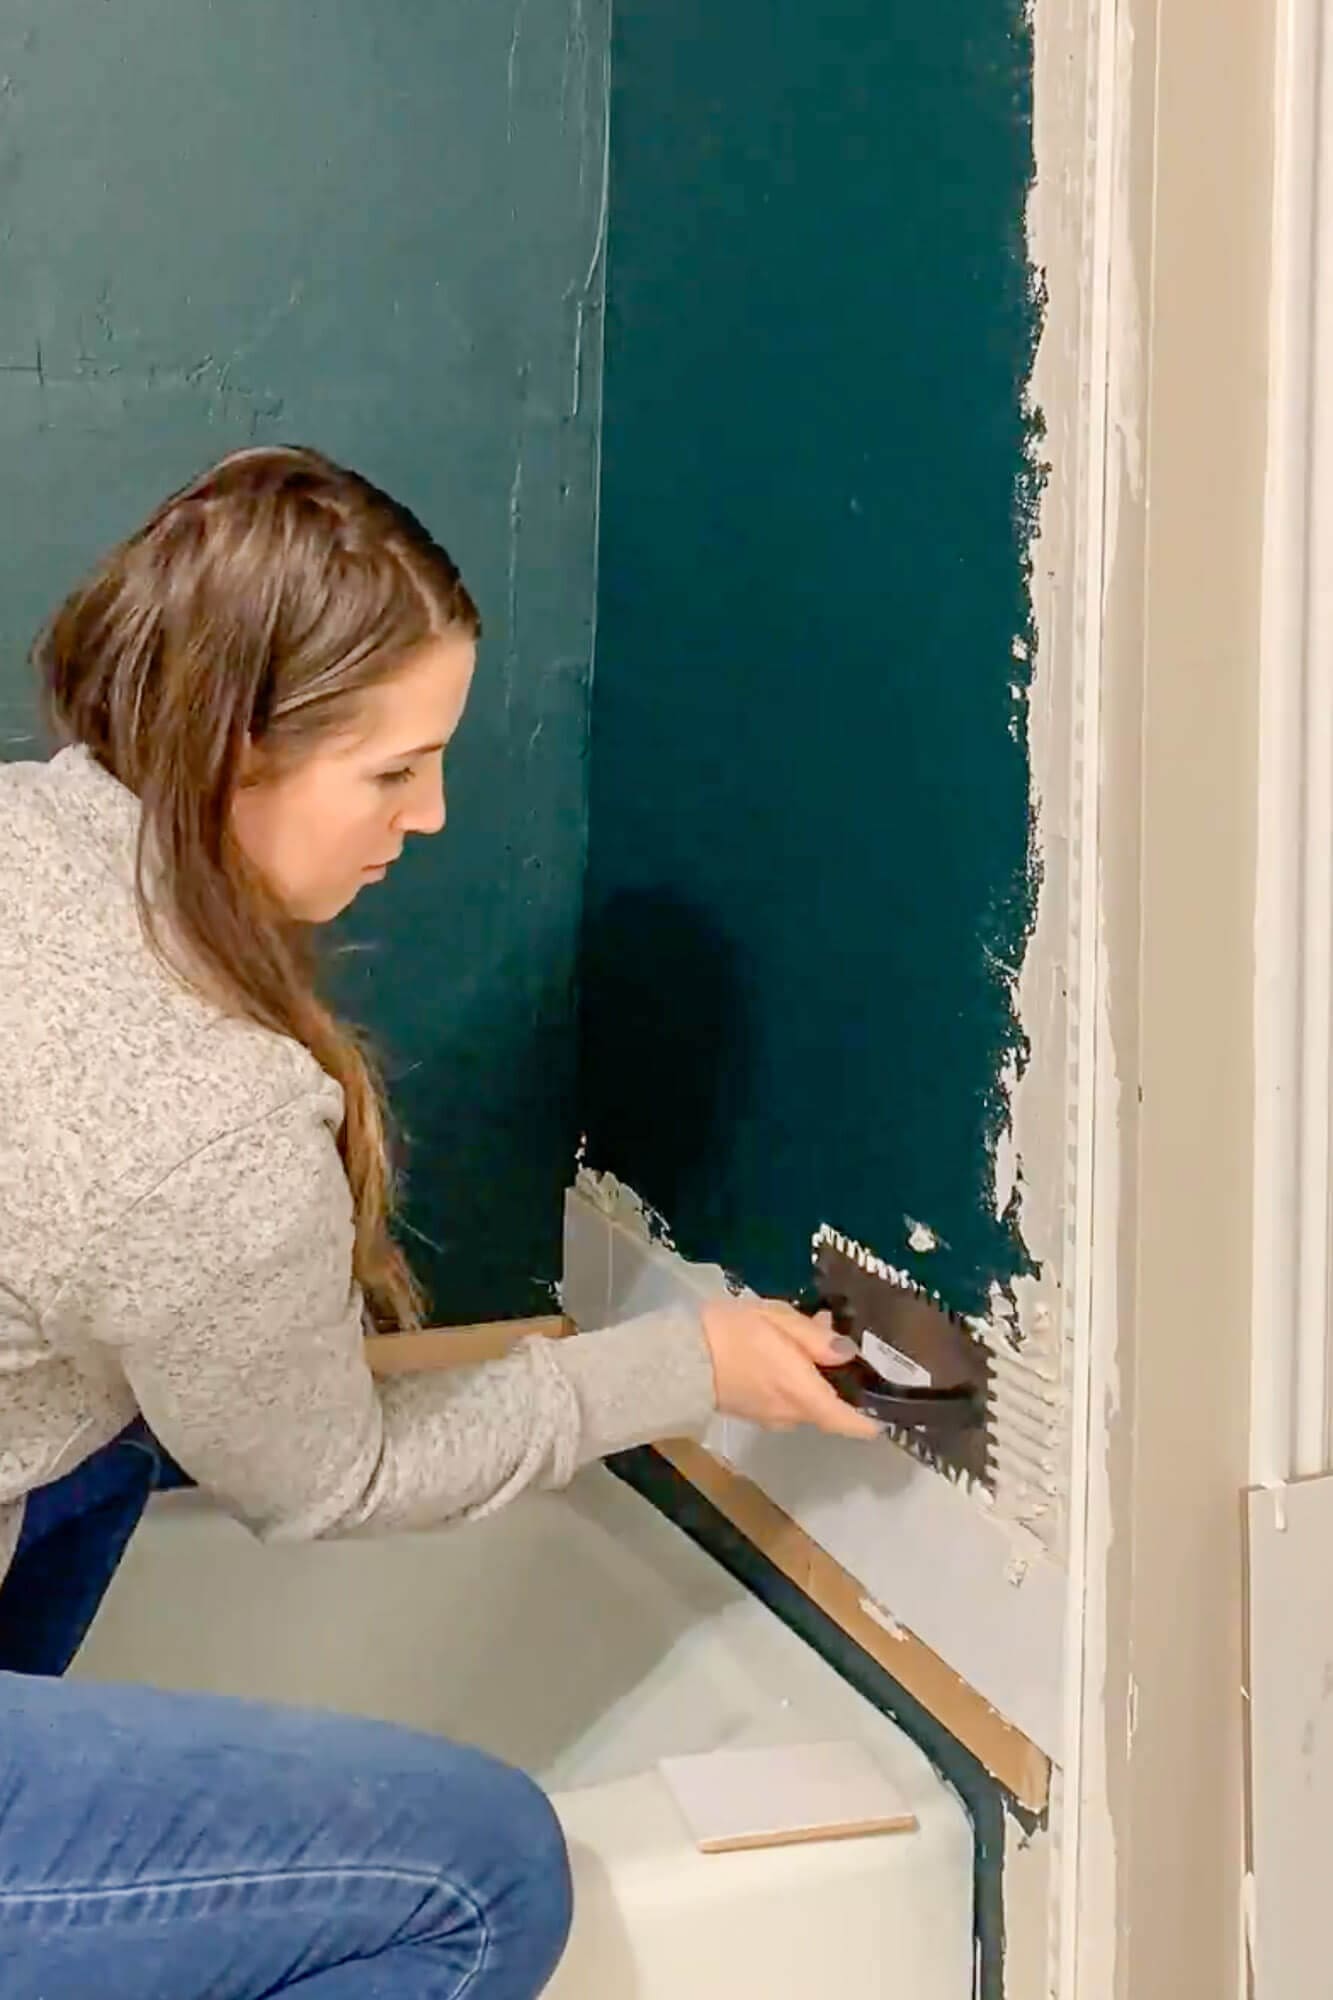
Spread Thinset on the Wall
Use the flat side of a 1/4″ x 3/8″ notched trowel to apply thinset to the wall, then comb the surface with the notched edge held at a 45-degree angle. The grooves let air escape as the tile gets pressed in, which prevents hollow spots that can crack the tile under stress later.
Back-Butter Each Tile
Apply a thin skim coat of thinset to the back of each tile before pressing it into the wall. This step is what gives you a fully bonded tile (vs. just edge-bonded). For 3×6 subway tile especially, back-buttering takes 15 seconds and prevents 90% of the failure modes that show up two years in.

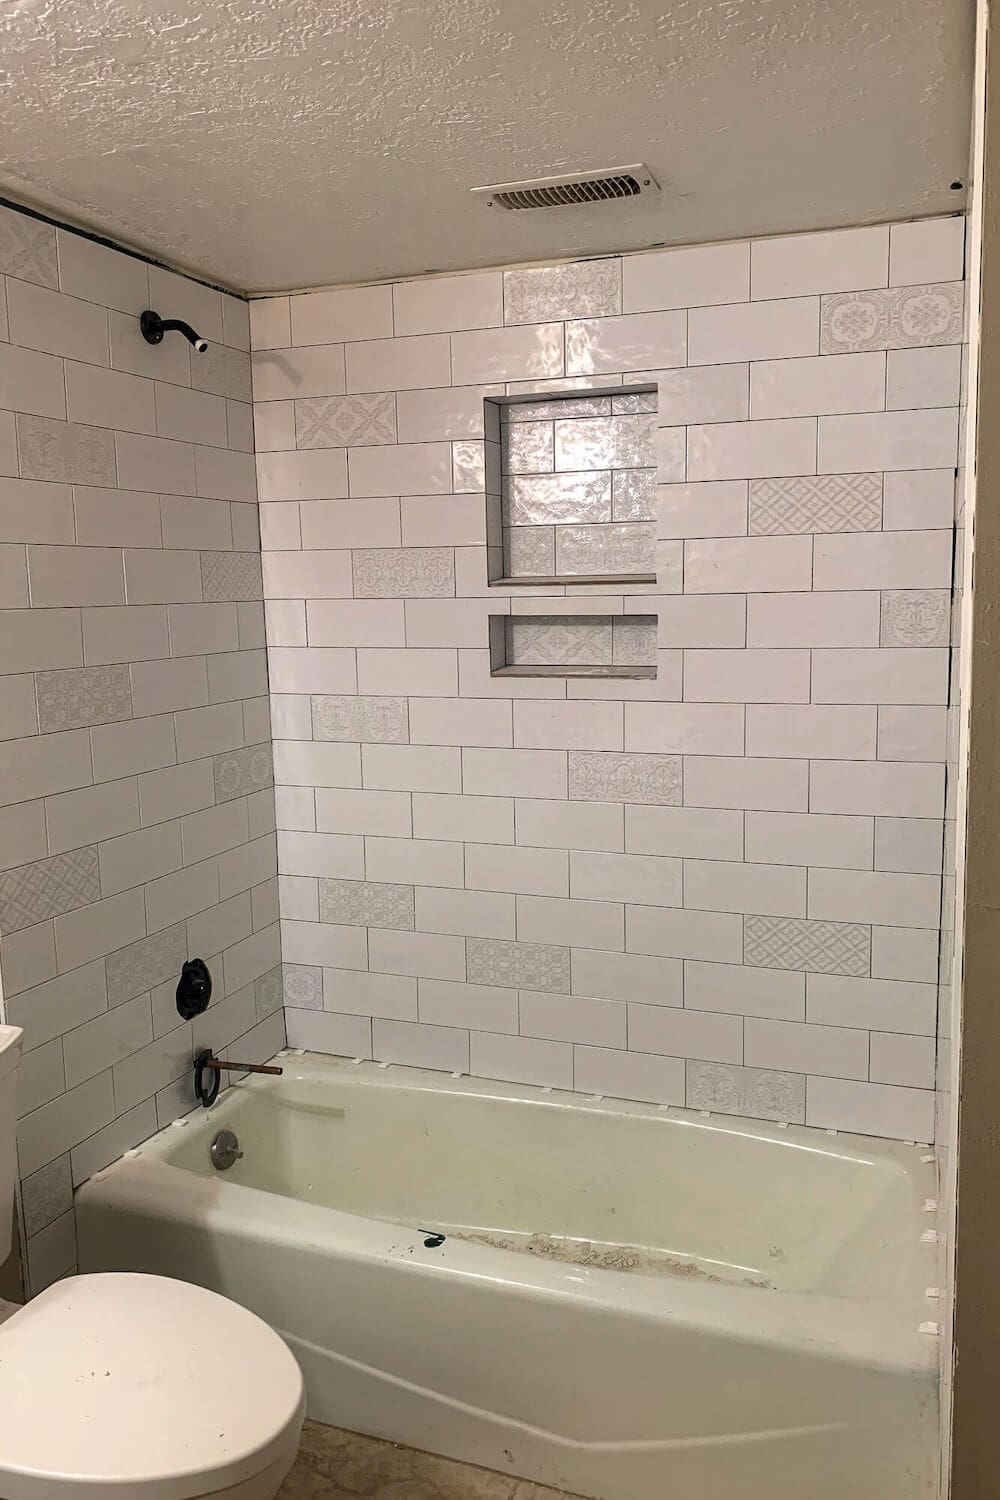
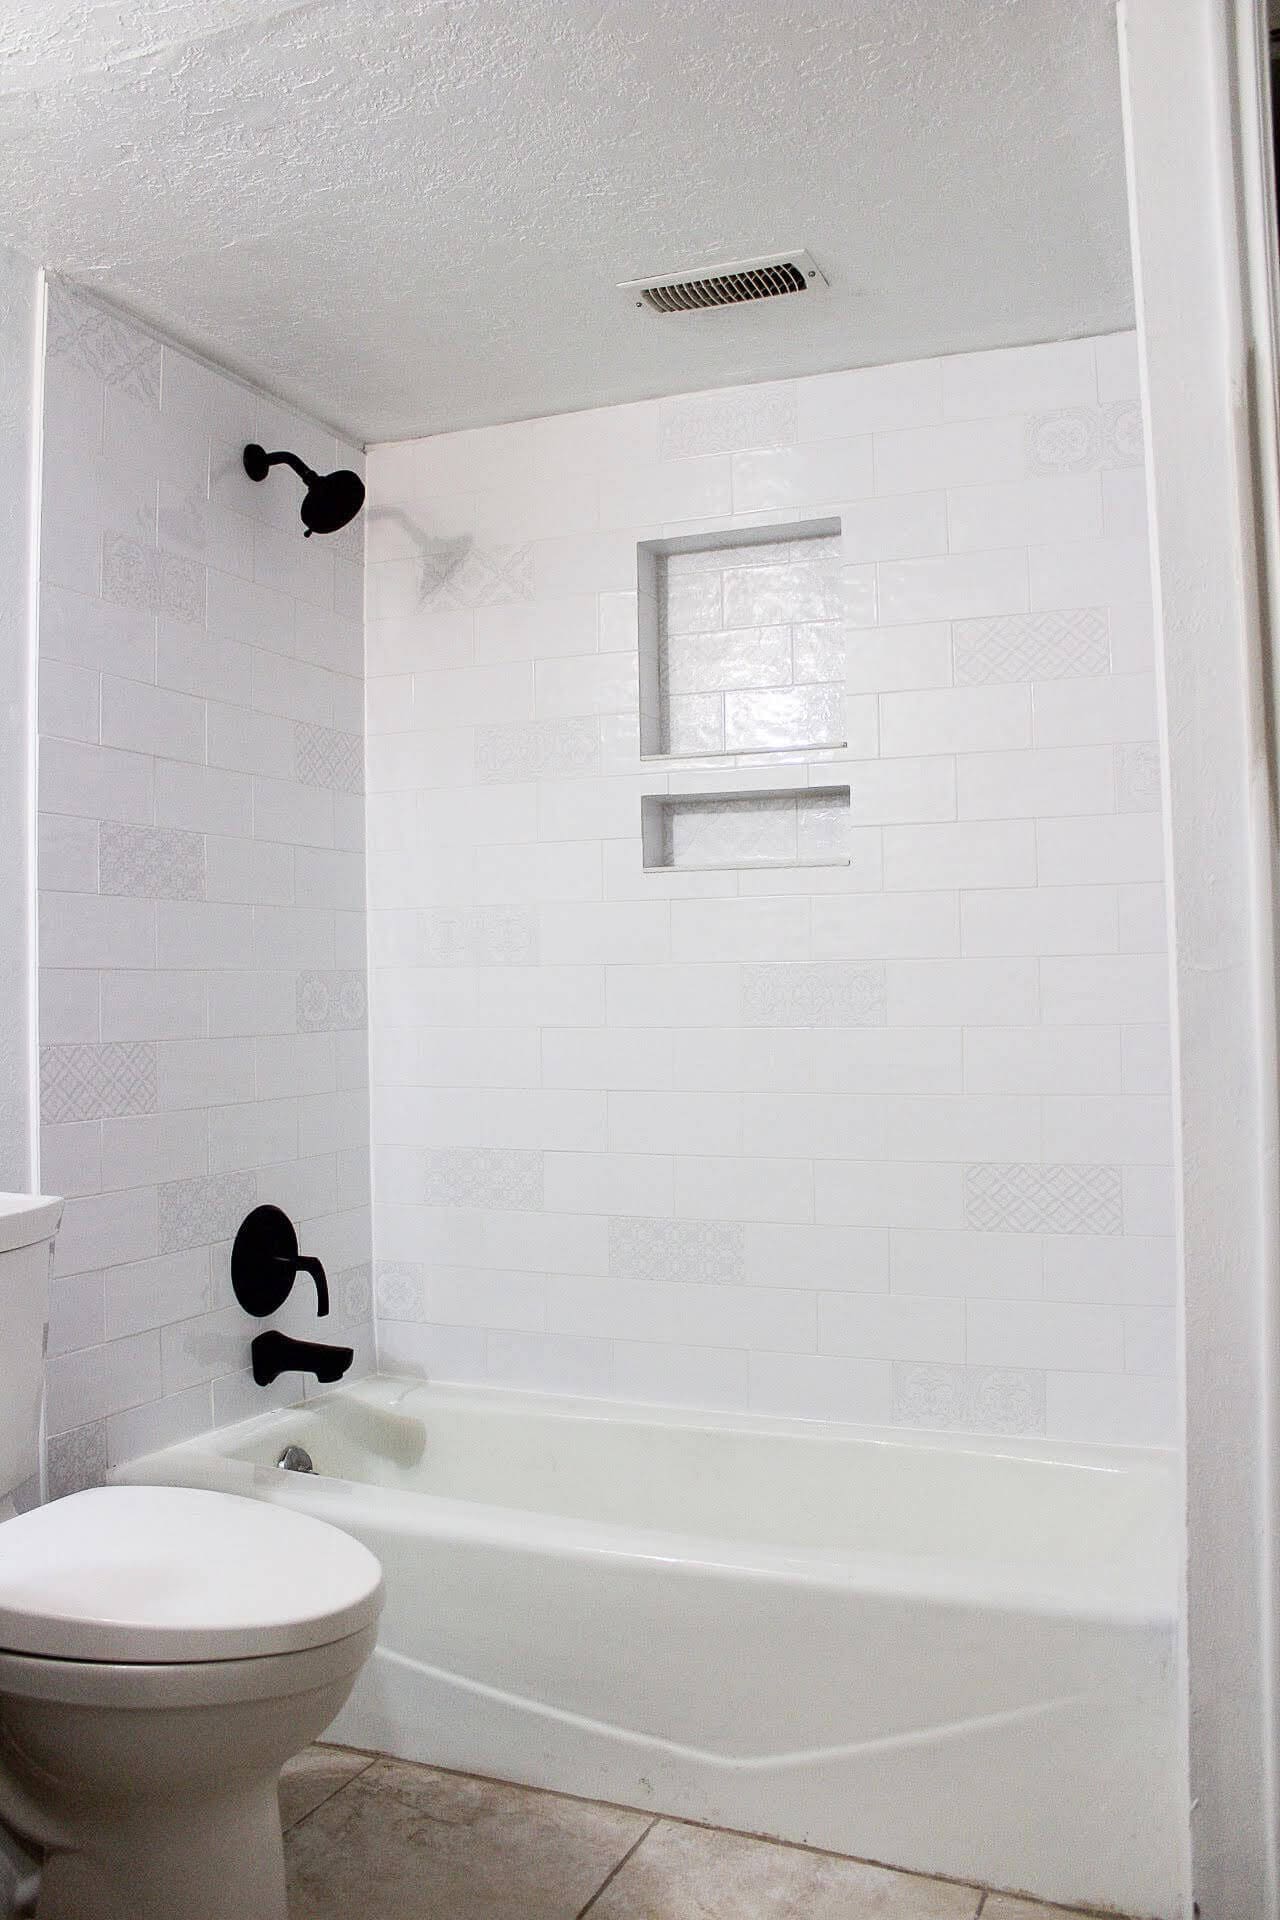
Step 5: Tile Around and Inside the Shower Niche
If you haven’t built your niche yet, see how to build a shower niche first – that’s the framing and waterproofing tutorial that comes before this tile step. Once the niche is waterproofed and cured, tile the back wall first, then sides, then top, then bottom (so any thinset drips fall onto a surface you haven’t tiled yet).
Match Niche Grout Lines to the Field
Plan the niche so the field-tile grout lines run continuously across the niche opening. Measure the niche from the nearest grout line in the field, and adjust the niche position (during framing) or your starting cut (during tiling) so the horizontal grout joints meet cleanly at the niche opening. A niche that floats between rows looks fine. A niche that breaks the grout grid looks like a mistake.
Tile the Inside of the Niche Last
Once the field around the niche is set, tile the inside faces in this order: back wall first (so it reads cleanly when someone looks straight at the niche), then the two side walls, then the top, then the bottom. Tiling the bottom last means any thinset that drips during the side and top installs lands on a surface you’ll cover next, not on a finished face.
Step 6: Keep Rows Straight with Spacers and a Laser
The secret to a professional-looking DIY shower tile job is consistency: consistent grout lines, straight rows, and even gaps at the corners. Use firm tile spacers, keep the laser line projected, and wipe away any thinset that squeezes into the joints before it dries.
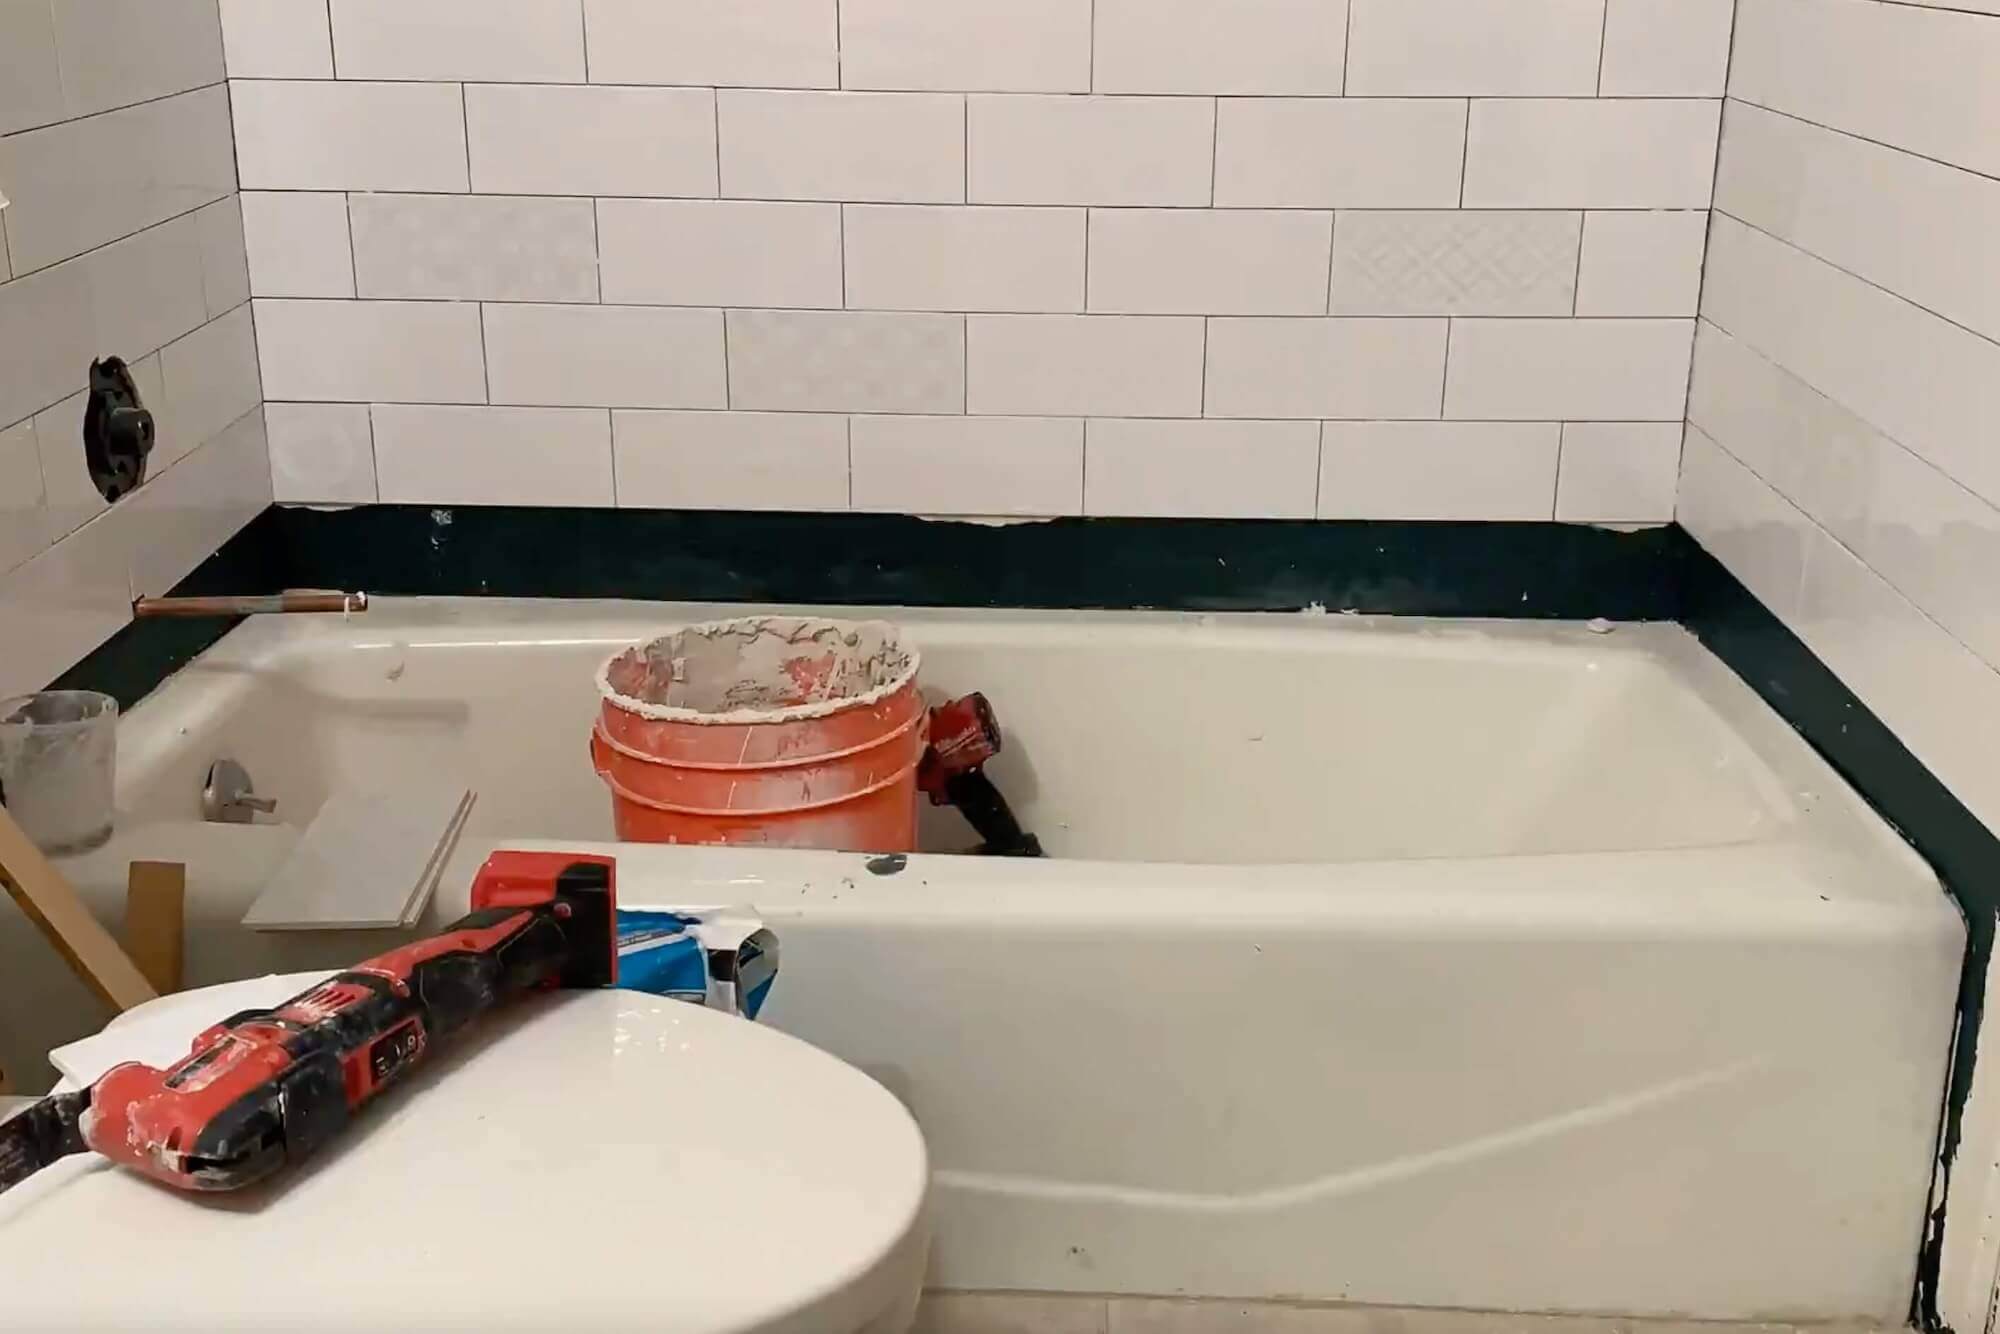
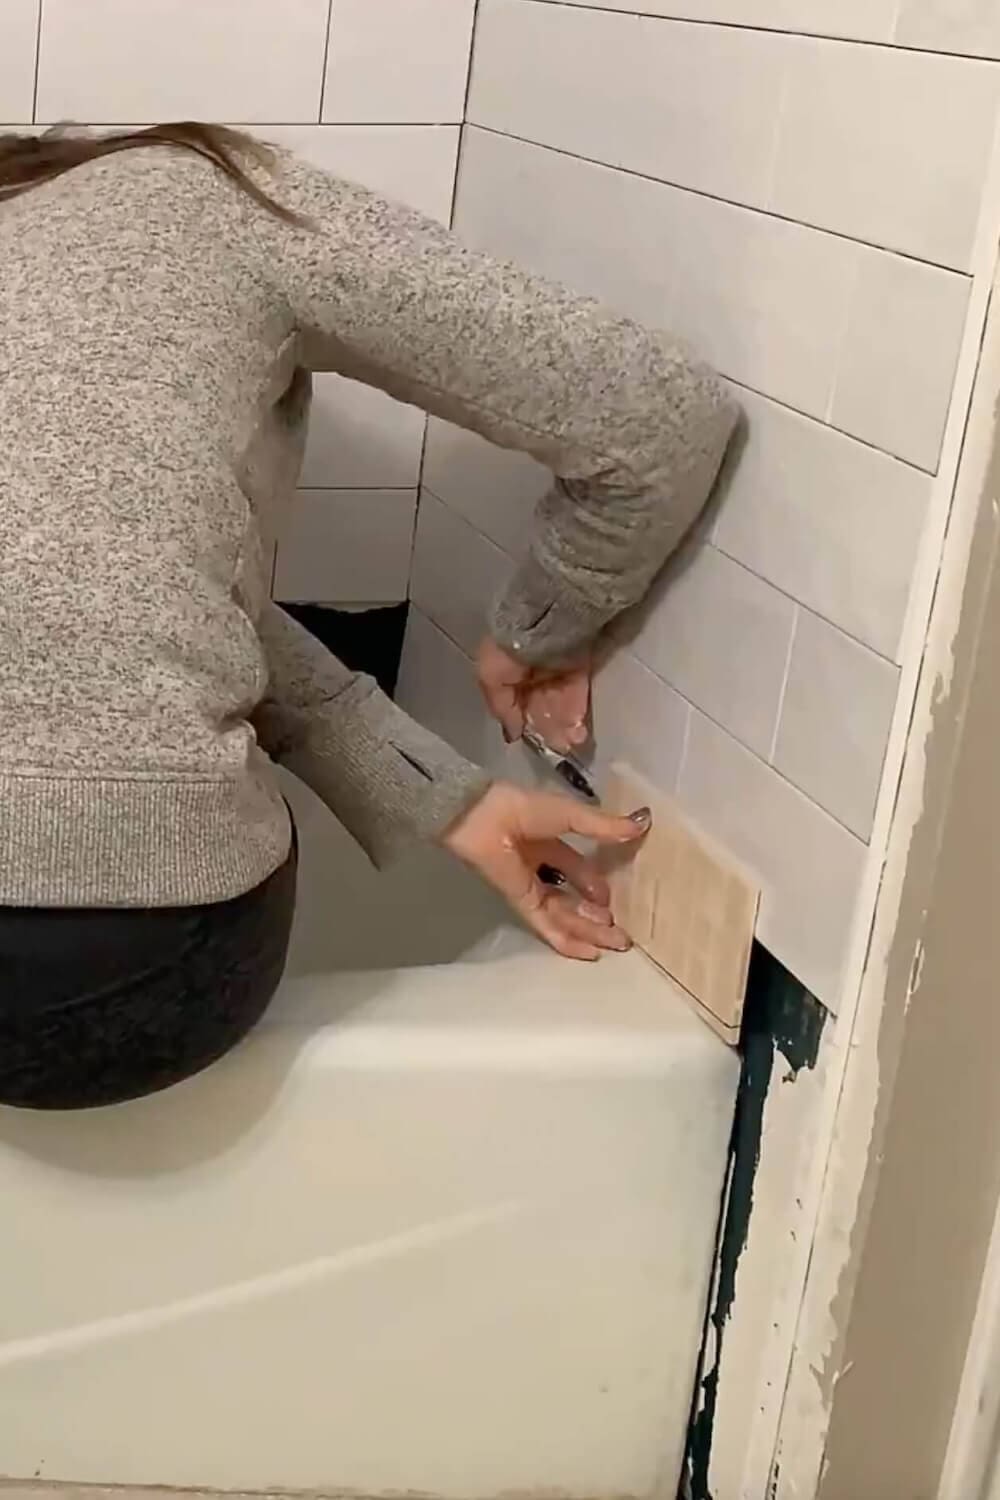
Once the upper rows were secure, I removed the ledger board, touched up waterproofing over the screw holes, and cut and installed the bottom row of tiles so they followed the tub’s slope while still hitting the grout lines cleanly.
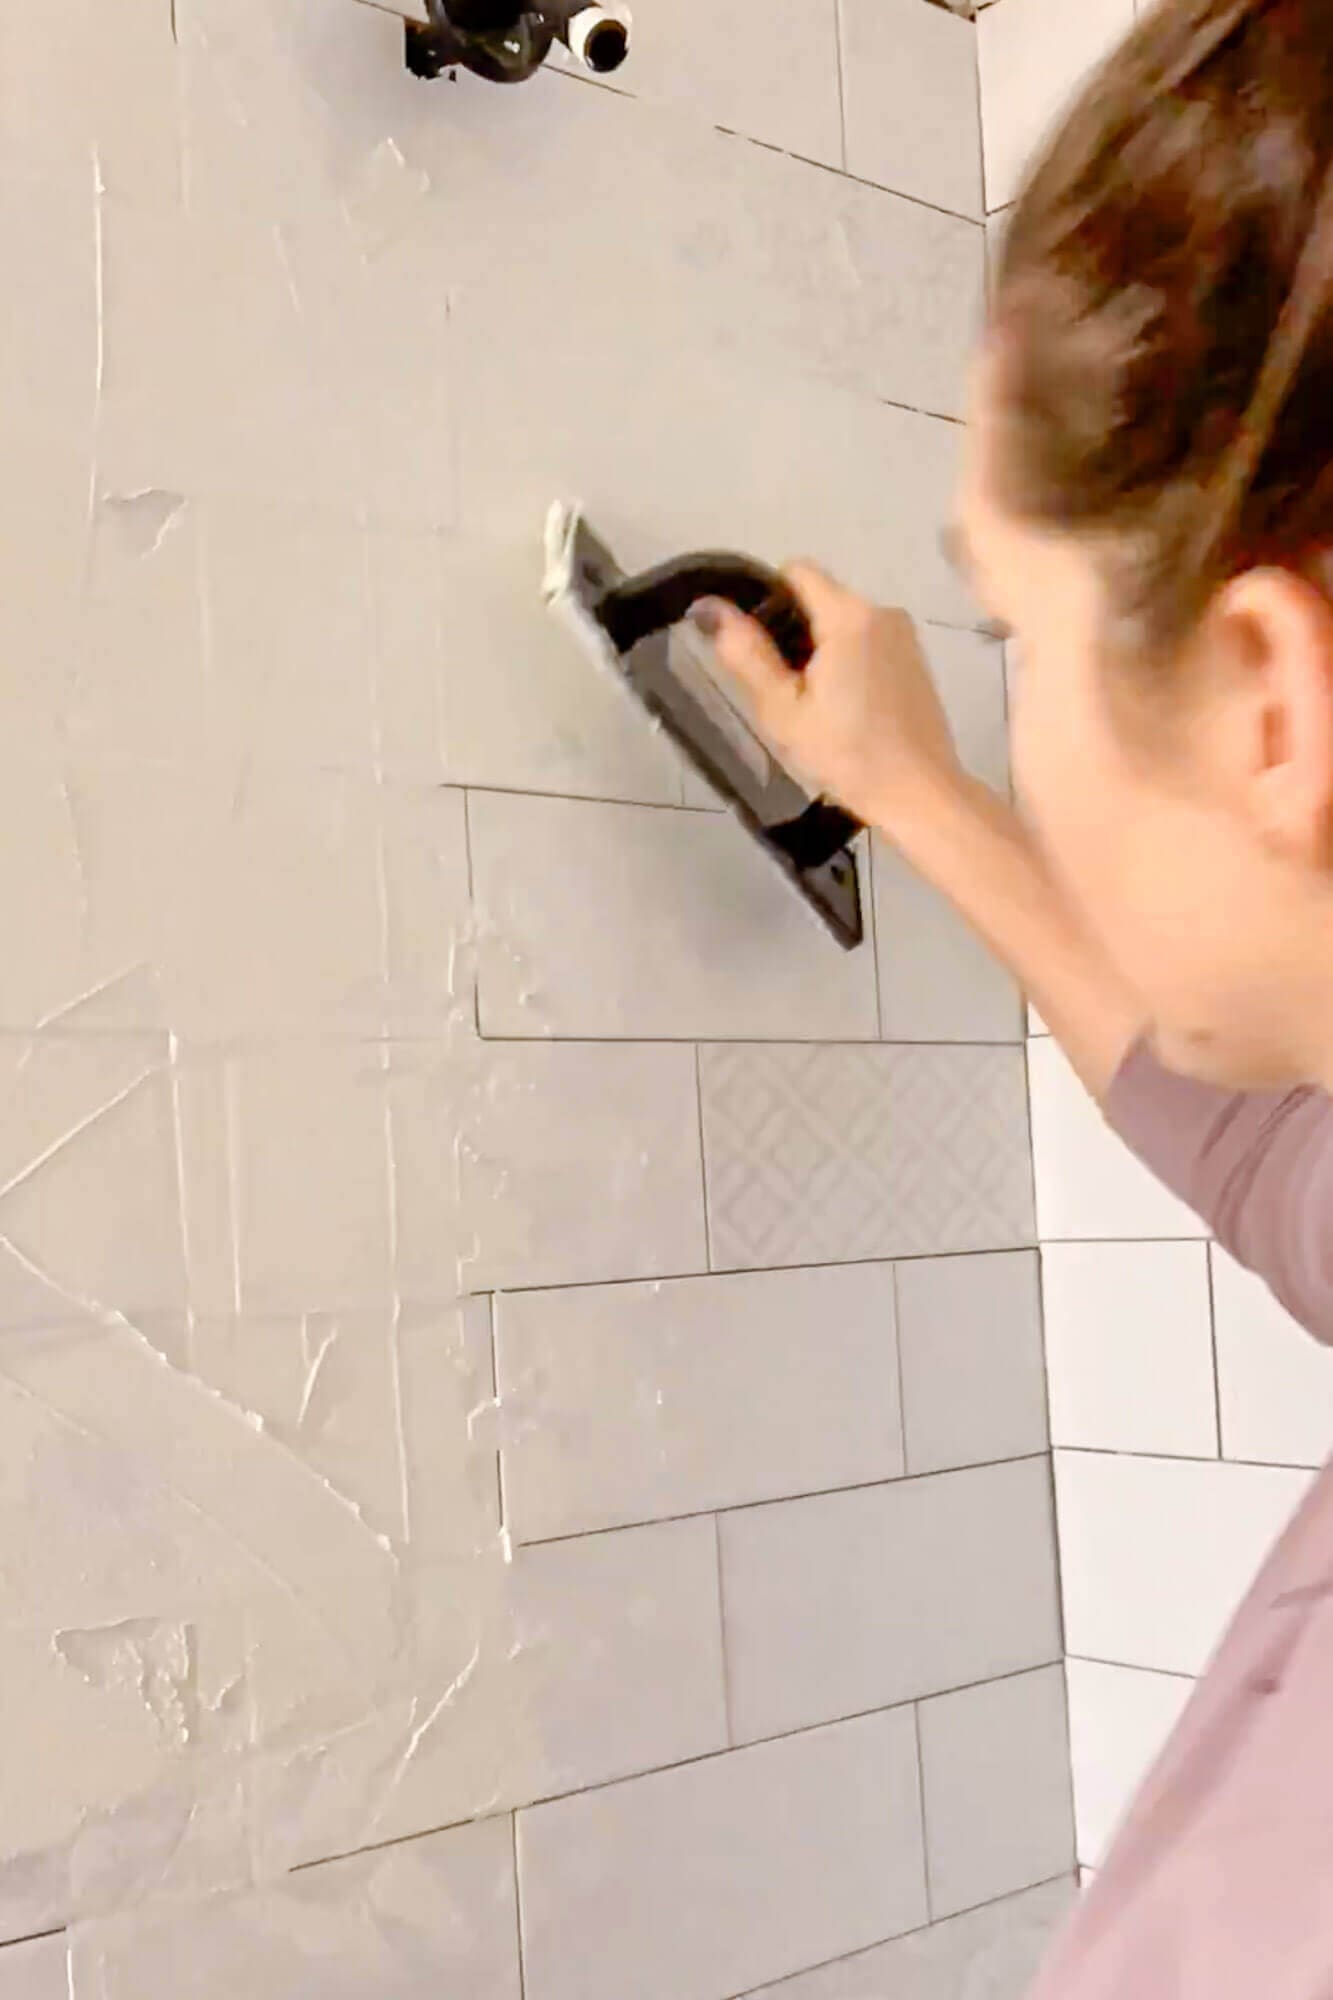
Step 7: How to Grout a Shower Wall
Once the thinset has fully cured (read the can – most products need 24 hours minimum), you’re ready to grout.
Mix the Grout
Mix in small batches – 1 to 2 cups at a time. Add water gradually until the grout is the consistency of thick toothpaste. Let it slake for 5-10 minutes (this lets the powder fully hydrate), then remix briefly before applying.
Apply and Spread
Use a rubber grout float held at a 45-degree angle to push grout diagonally across the joints. Force it into every joint by working in multiple directions. Don’t worry about excess on the tile face – that gets cleaned next.
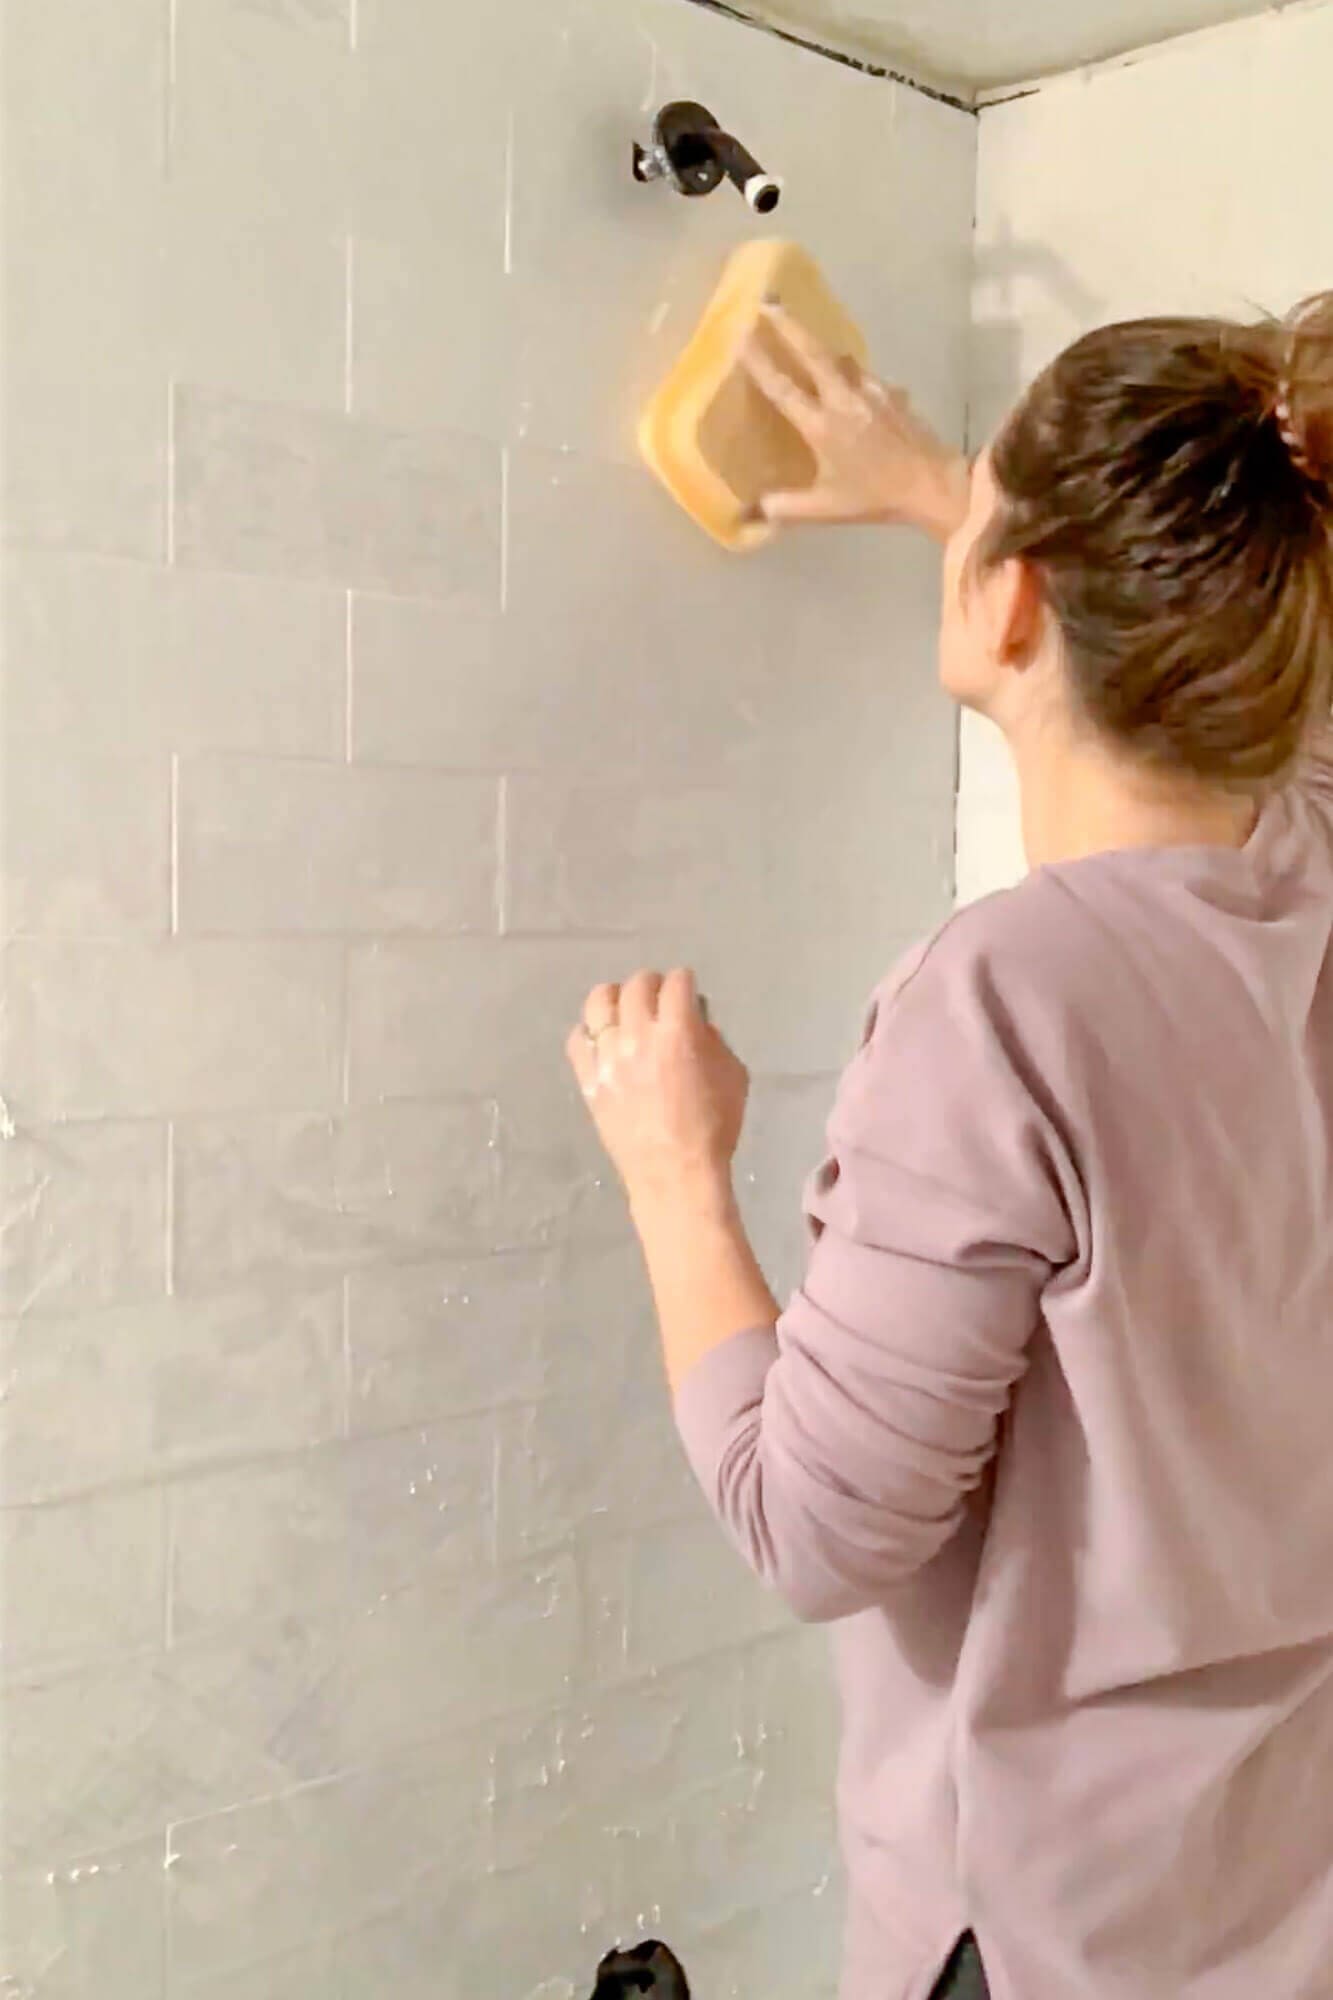
Wipe Clean
Wait 15-20 minutes (per the can) for the grout to firm up, then wipe the tile face with a damp grout sponge. Rinse the sponge often, and don’t soak the joints – too much water dilutes the grout color. After 24 hours, buff the haze off the tiles with a dry microfiber cloth.
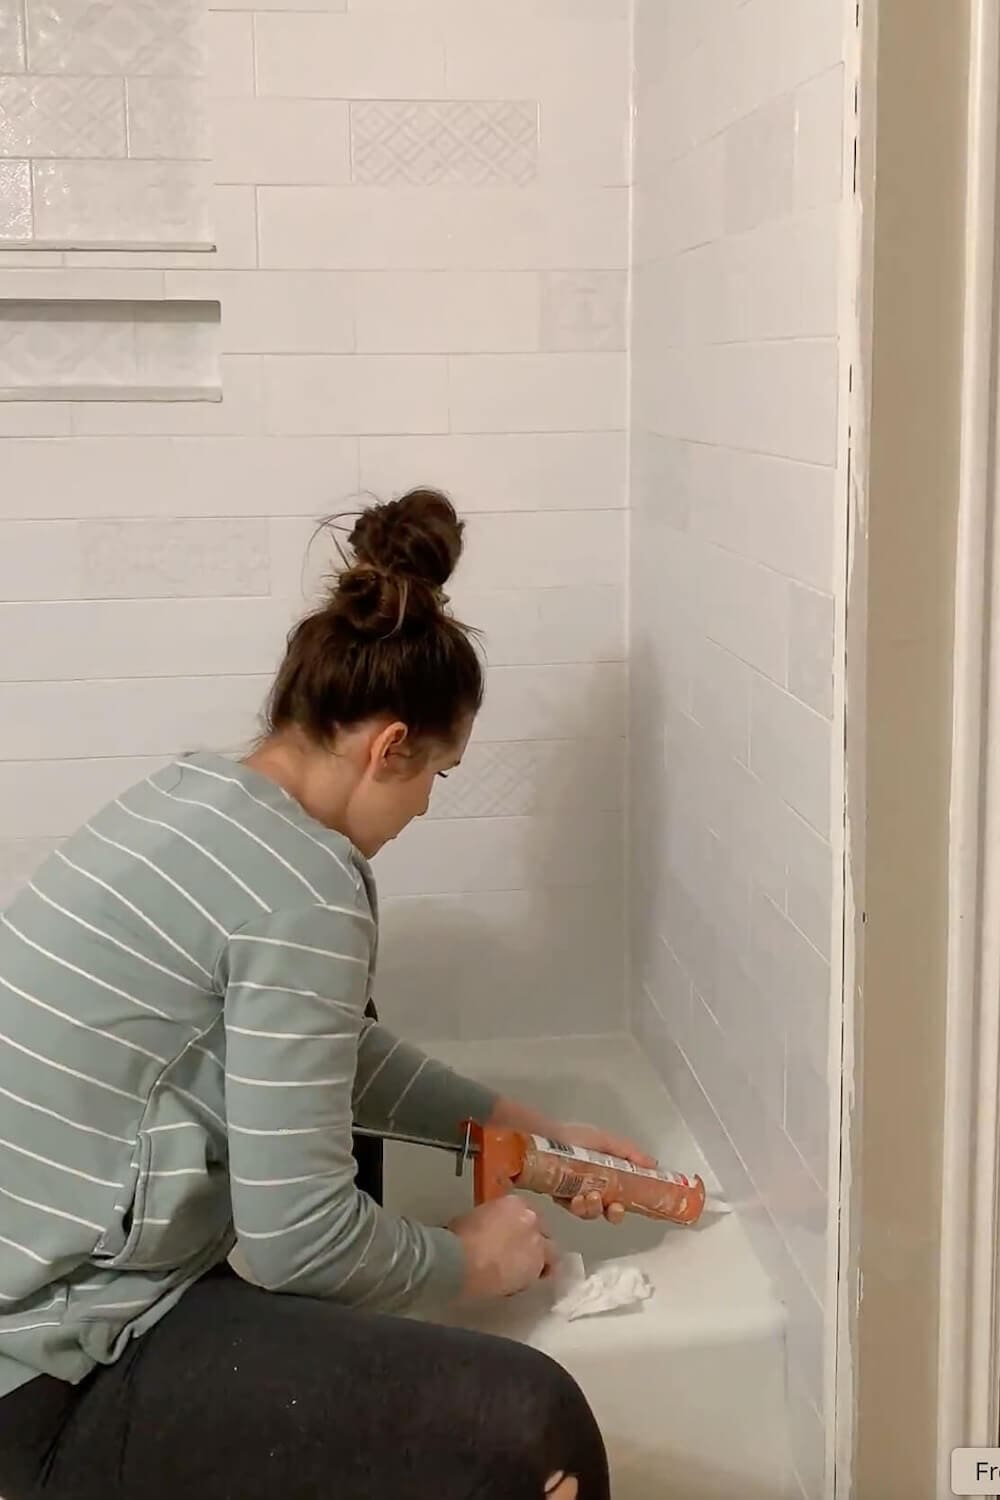
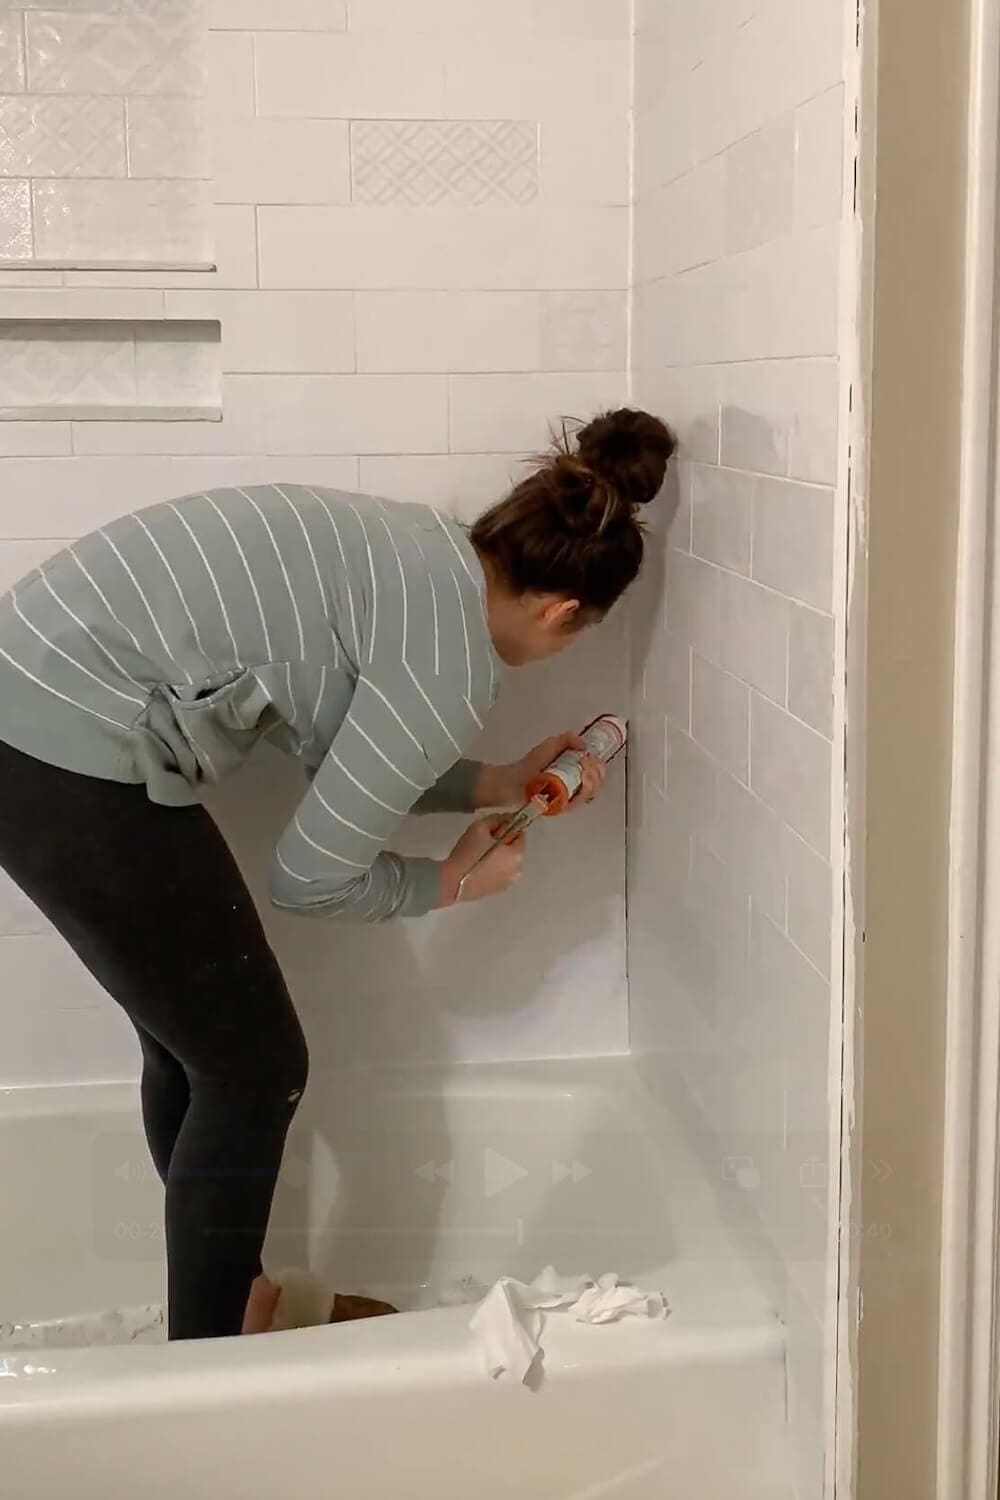
Step 8: Where to Use Silicone Instead of Grout
Grout is rigid. Silicone flexes. Anywhere two surfaces move independently (tub edge, inside corners, where the tile meets the floor or the niche edge), use 100% silicone caulk instead of grout. Grout in those spots will crack within months as the surfaces expand, contract, and shift.
Where to Apply Silicone
Inside corners (vertical and horizontal), the tub-to-tile joint, the niche-to-tile joint at all four edges, and any transition between the tile field and a different material. Match the silicone color to your grout – most major grout brands sell color-matched silicone in the same shade.
How to Apply It Cleanly
Tape both sides of the joint with painter’s tape, leaving the joint exposed. Run a thin bead of silicone, then smooth with a damp finger or silicone tool. Pull the tape immediately while the silicone is still wet. That’s how you get the crisp lines that read as professional.
How to Retile a Shower (vs. Tiling From Scratch)
If you’re wondering how to retile a shower rather than tile one from scratch, the steps are similar but with one big addition at the start: you have to remove the old tile and verify what’s underneath is still sound before you install new tile.
- Demo the existing tile. Use a hammer and pry bar (or an oscillating multi-tool) to remove every old tile and any thinset still clinging to the wall.
- Inspect the substrate. If you find greenboard, drywall, or any soft/wet/moldy material behind the old tile, stop and rebuild the wall properly first. See my shower mold removal guide.
- If the cement board and waterproofing are still good, scrape any old thinset off, fill any holes, and you’re ready to start with Step 1 above.
- If the cement board is damaged or there’s no waterproofing membrane, you have to rebuild the wall before you tile.
Don’t skip the substrate inspection. Putting beautiful new tile over a failing wall is the most expensive shortcut you can take.
Cost and Time: How Much It Takes to DIY a Shower Tile Job
Honest breakdown of what tiling a shower wall actually costs and takes:
Materials: Around $300 to $600 for a typical small shower surround, depending entirely on tile selection. Plain white 3×6 subway tile runs $0.30 to $1 per square foot. Patterned ceramic and porcelain run $5 to $15 per square foot. Add thinset (around $25 per bag, you’ll likely need 2), grout ($25 to $40 per bag), silicone ($8 per tube), and metal edge trim ($15 to $25 per piece).
Tools: If you don’t already own them, the big-ticket items are a wet tile saw ($120 to $300 to buy, $50 to $80 to rent for a weekend) and a laser level ($30 to $80). Renting is usually the right call for a one-time project.
Time: A focused weekend if you’re tiling one shower wall, or a long weekend (3 to 4 days) for a full surround with niche.
| Phase | Active hours | Notes |
|---|---|---|
| Plan layout on floor | 1 to 2 | Photo your tile map for reference |
| Install ledger + edge trim | 1 | Laser line is your friend |
| Tile side walls | 3 to 4 | Side walls are easier than back |
| Tile back wall + niche | 3 to 4 | Niche takes the longest |
| Cut bottom row + remove ledger | 1 to 2 | After upper rows are set |
| Grout | 2 | Plus full cure time |
| Silicone corners + tub joint | .5 | Last step before showering |
Troubleshooting and Pro Tips for DIY Shower Tile
- If a tile doesn’t sit right, adjust it immediately. Thinset waits for no one.
- Step back every few rows to make sure your decorative tiles still look balanced.
- Don’t rush cure times. Follow the thinset and grout labels.
- Keep a damp rag handy to wipe tools, buckets, and tile edges as you go.
- If you’re nervous about tiling your first shower wall, start on the least visible wall.
- If your thinset is going on lumpy, your trowel angle is probably inconsistent.
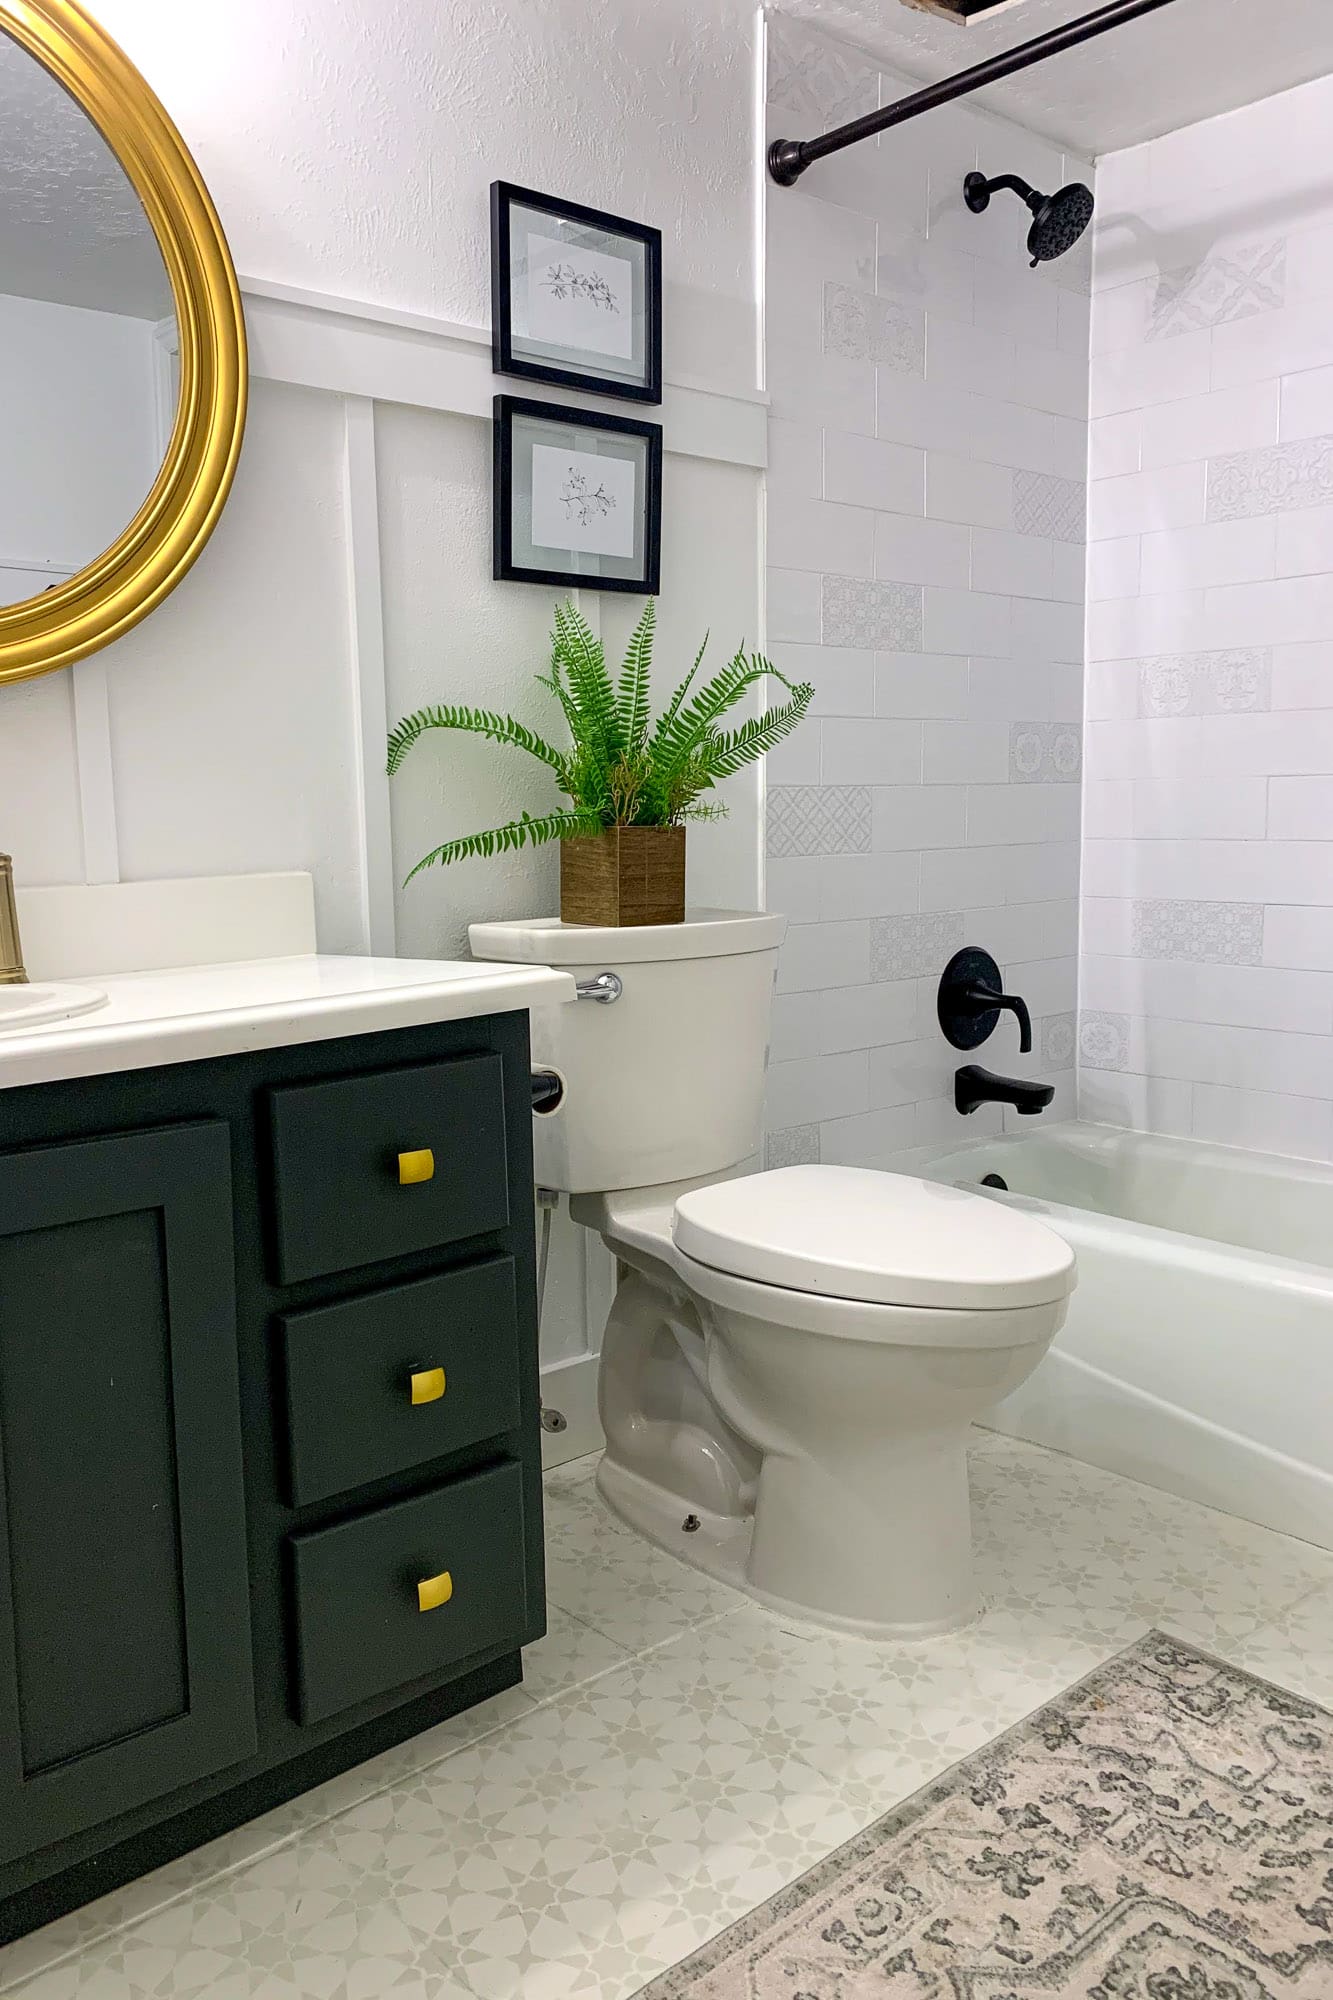
The Finished Shower Reveal
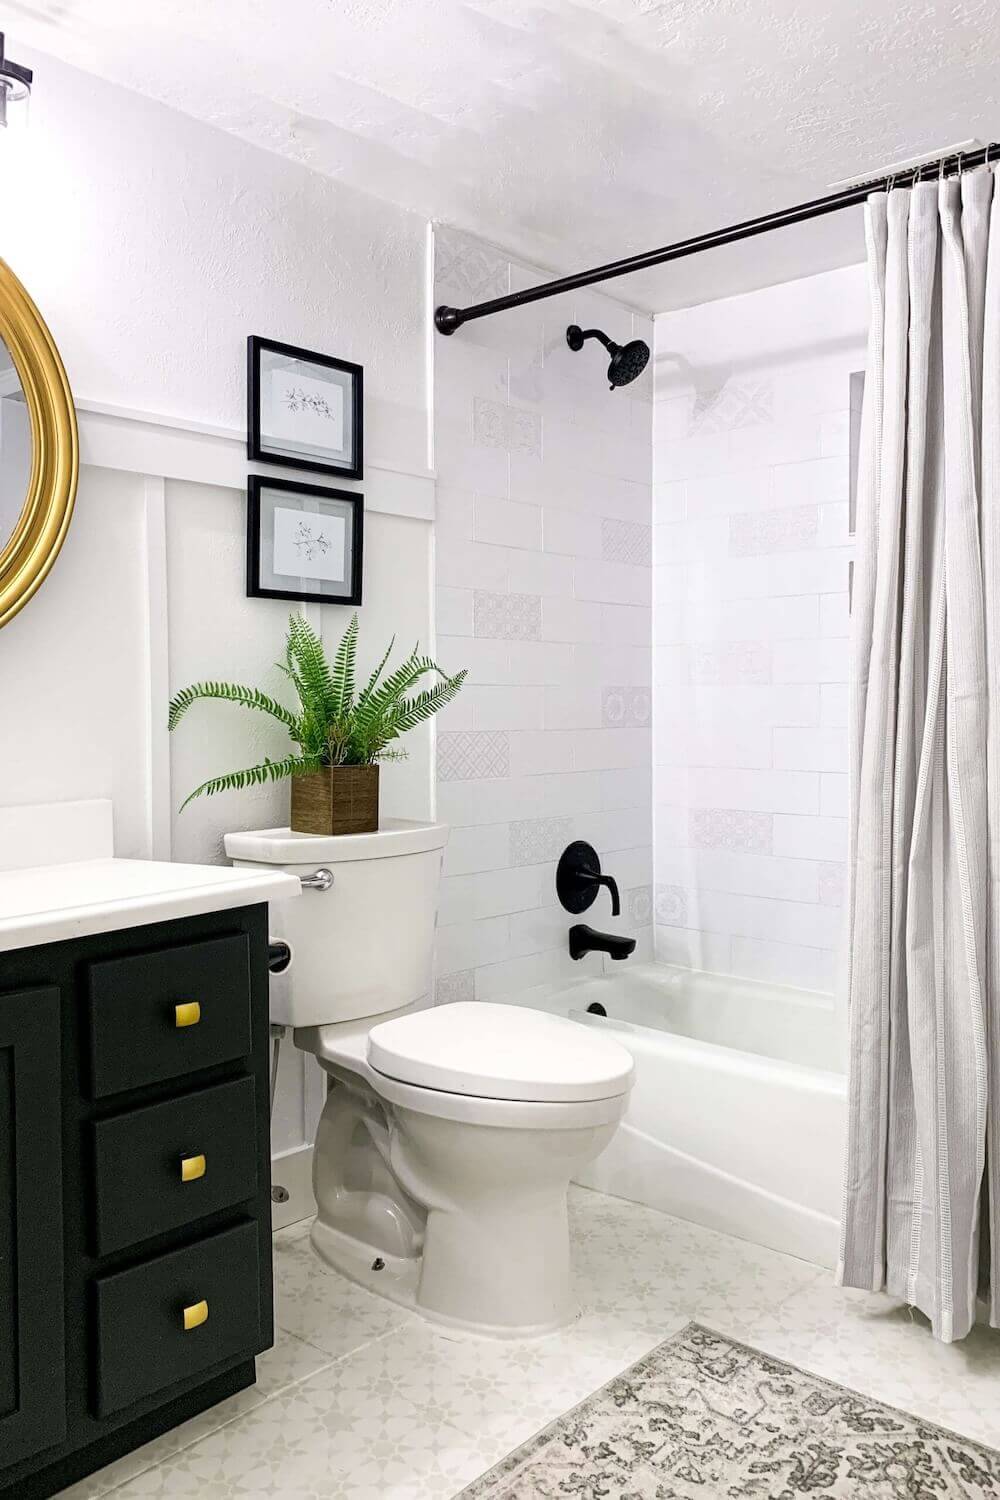
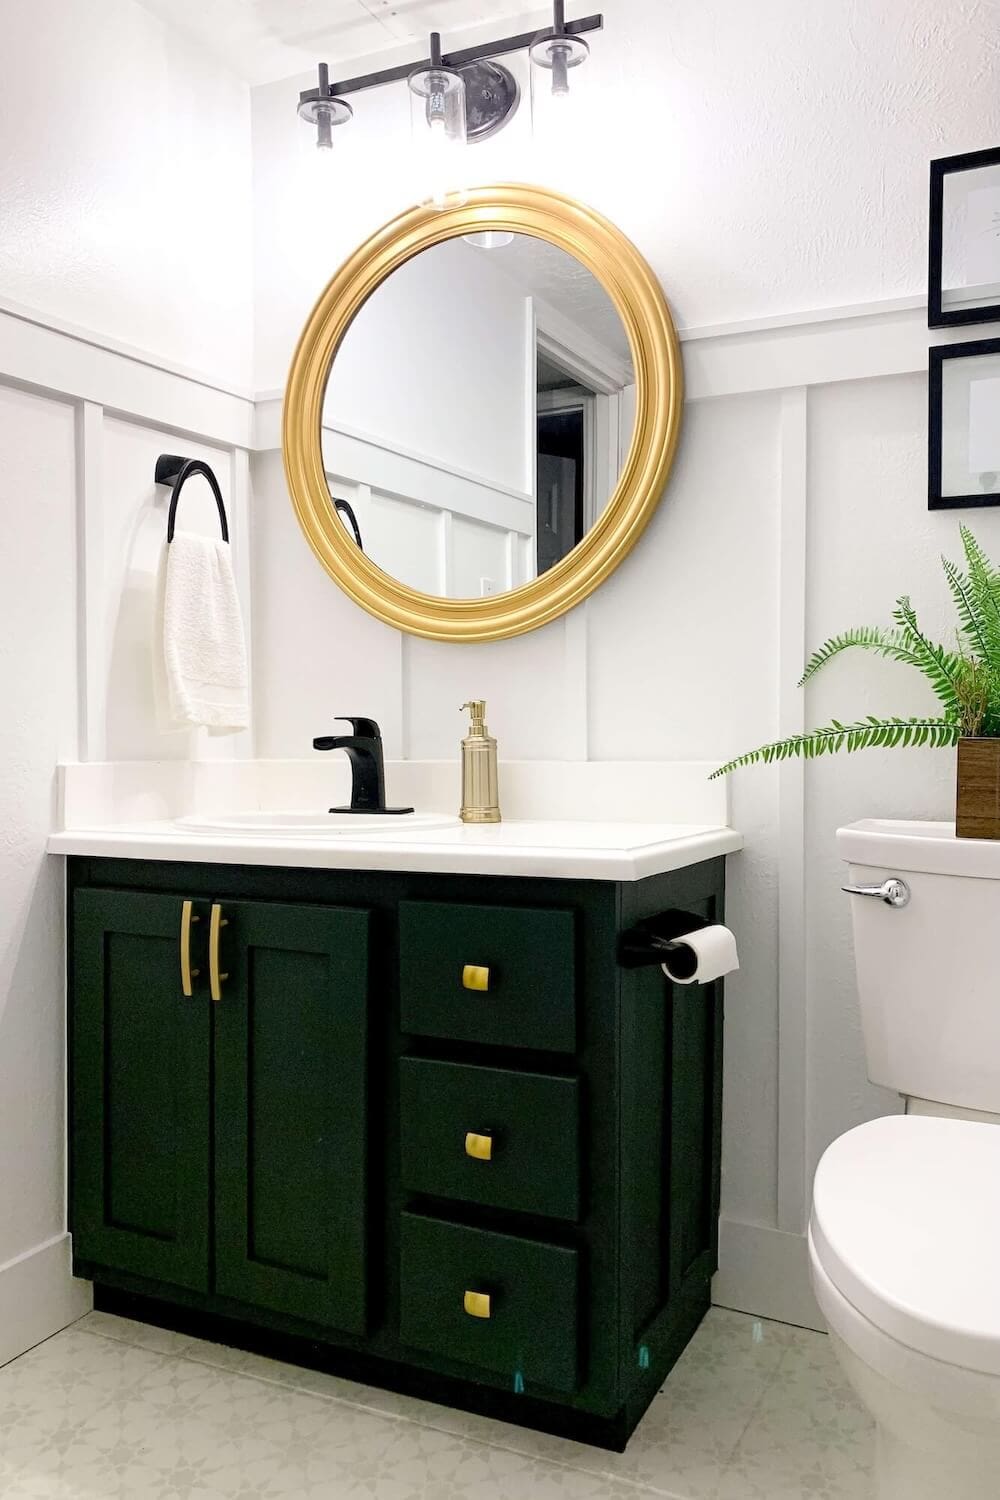
After all the tiling, grouting, and caulking were done, I installed my matte black faucet and showerhead and finished the rest of the bathroom with a DIY board and batten wall, a freshly painted vanity, a gold bathroom mirror, and painted floor tiles.
More Small Bathroom Remodel Projects to Try
- Small bathroom remodel hub (all 7 projects in one place)
- How to get rid of mold in a shower (the rebuild that comes before tiling)
- How to build a DIY shower niche
- How to paint a bathroom vanity
- DIY gold bathroom mirror with Rub ‘n Buff
- Painting bathroom floor tiles (stencil method)
- DIY board and batten bathroom wall
And for more shower-specific tile and trim builds:
- How we built our subway tile shower (the project showcase that complements this tutorial)
- How to install a tile tub surround
- Building a stunning arched bathtub alcove
- DIY curved molding around an arch
- DIY box molding wall trim tutorial
📌 Pin This Shower Tile Tutorial for Later
If you’re still in the dreaming and planning phase, save this tutorial so you can come back when you’re ready to tackle your own shower wall.
FAQ: How to Tile a Shower Wall
Start one full tile above the highest point of the tub, not at the tub itself. Tubs are rarely level, so install a ledger board along a perfectly level line and tile up from there. Cut the bottom row last to follow the tub’s slope.
Caulk inside corners with 100% silicone, not grout. Anywhere two surfaces meet at an angle (vertical corners, niche corners, tub-to-tile joint), the surfaces flex slightly with temperature and humidity. Silicone flexes with them, grout cracks.
Yes. Cement board is water-stable but not waterproof. You need a continuous liquid waterproofing membrane (like RedGard or Hydro Ban) over the cement board before you tile, or a sheet membrane like Kerdi.
At minimum, 24 hours after grouting for light use. Most thinset and grout manufacturers recommend 72 hours of full cure before regular shower use. Patience here pays off in durability.
Yes, especially with subway tile. Subway tile is forgiving because the grid pattern hides minor imperfections, the tiles are small enough to handle easily, and they’re cheap if you mess one up.
Demo the old tile, inspect what’s behind it, rebuild the wall with cement board and waterproofing if needed, then follow the same step-by-step process as tiling fresh. The retile-specific challenge is that older bathrooms often have failing greenboard or drywall behind the old tile.
A polymer-modified thinset rated for wet areas. Look for “modified” on the bag and check the data sheet for shower wall use. Avoid pre-mixed thinset in tubs because it doesn’t cure as hard and isn’t appropriate for wet zones.
It depends on the grout type. Cementitious grout needs to be sealed annually to prevent staining and water absorption. Epoxy grout doesn’t need sealing because it’s already waterproof. Check your specific grout’s instructions.
Around $300 to $600 in materials for a typical small shower surround, depending on tile choice. Hiring it out runs $1,500 to $4,000+ depending on labor rates and tile complexity. DIY saves the bulk of the cost since labor is the biggest line item.
1/16-inch spacers for traditional subway tile creates the tight, classic look. 1/8-inch is a more forgiving option for beginners and slightly larger tile. Match your spacing to your tile size and the look you want.
Doing the whole bathroom? This shower tile tutorial is one of 7 projects in my DIY small bathroom remodel. The hub post has the full breakdown of every project, the cost-saving framework, and links to all the other tutorials.
About Crystel
I’m Crystel Montenegro, a stay-at-home mom of five turned home DIY expert. I share budget-friendly DIY projects, home design, garden, recipes, and lifestyle content from my own home – every project here is one I actually built or made. Read more about me or follow along on Instagram.
