


How to Build a Shower Niche (DIY Tutorial)


Updated July 13, 2026
A built-in shower niche is one of the most functional upgrades you can add to a bathroom, and learning how to build a shower niche yourself saves the $300 to $800 most contractors charge. This tutorial walks through the exact steps I used to build a recessed shower niche in our basement bathroom: how to frame it, waterproof it the right way, and prep it for tile so you don’t end up with a leak six months later.
Whether you’re working with open studs in the middle of a remodel or planning your first tile shower from scratch, the same approach works. The biggest mistake people make with DIY shower niches isn’t the framing. It’s the waterproofing. I’ll walk you through both. (And if you’re prepping a shower for tile from scratch, my mold removal and shower wall prep tutorial covers the wall prep that comes before this build.)
Part of my Small Bathroom Remodel series. The shower niche was the upgrade that made our budget shower feel custom-built. See the full small bathroom remodel breakdown →
Shower Niche Build: At a Glance
- Decide niche height, width, and location between studs
- Frame a niche box and add cement board to the back
- Pitch the bottom slightly so water drains forward
- Secure the niche box between studs
- Wrap cement board around the niche opening
- Tape, thinset, and smooth all seams
- Waterproof the niche and surrounding wall
- Tile the shower niche to match the surrounding shower wall
Quick Answer: How Deep Should a Shower Niche Be?
A standard shower niche is about 3.5 inches deep, which is the depth of a 2×4 stud cavity and fits most shampoo and body wash bottles. If you want more storage, build into a 2×6 wall and you can go up to 5.5 inches deep. The single most important detail isn’t depth though. It’s the slight forward pitch on the bottom of the niche (1 to 2 degrees) so water drains out instead of pooling. Skip that step and your beautiful niche will mildew within a year.
Watch the Full Bathroom Makeover Tutorial
Table of Contents
- Shower Niche Build: At a Glance
- Watch the Full Bathroom Makeover Tutorial
- Before: The Shower That Needed a Built-In Niche
- Tools You’ll Need to Build a Shower Niche
- Materials You’ll Need for a Shower Niche
- How High Should a Shower Niche Be?
- Step 1: Choose the Shower Niche Height and Size
- Step 2: Frame the Shower Niche
- Step 4: Cut and Install Cement Board Around the Niche Opening
- Step 6: Waterproof the Shower Niche
- Step 7: Tile the Shower Niche
- Common Mistakes When Building a Shower Niche
- Can You Add a Shower Niche to an Existing Tiled Shower?
- How a Shower Niche Fits Into a Small Bathroom Remodel
- More Small Bathroom Remodel Projects to Try
- 📌 Pin This Shower Niche Tutorial for Later
- FAQ: How to Build a Shower Niche
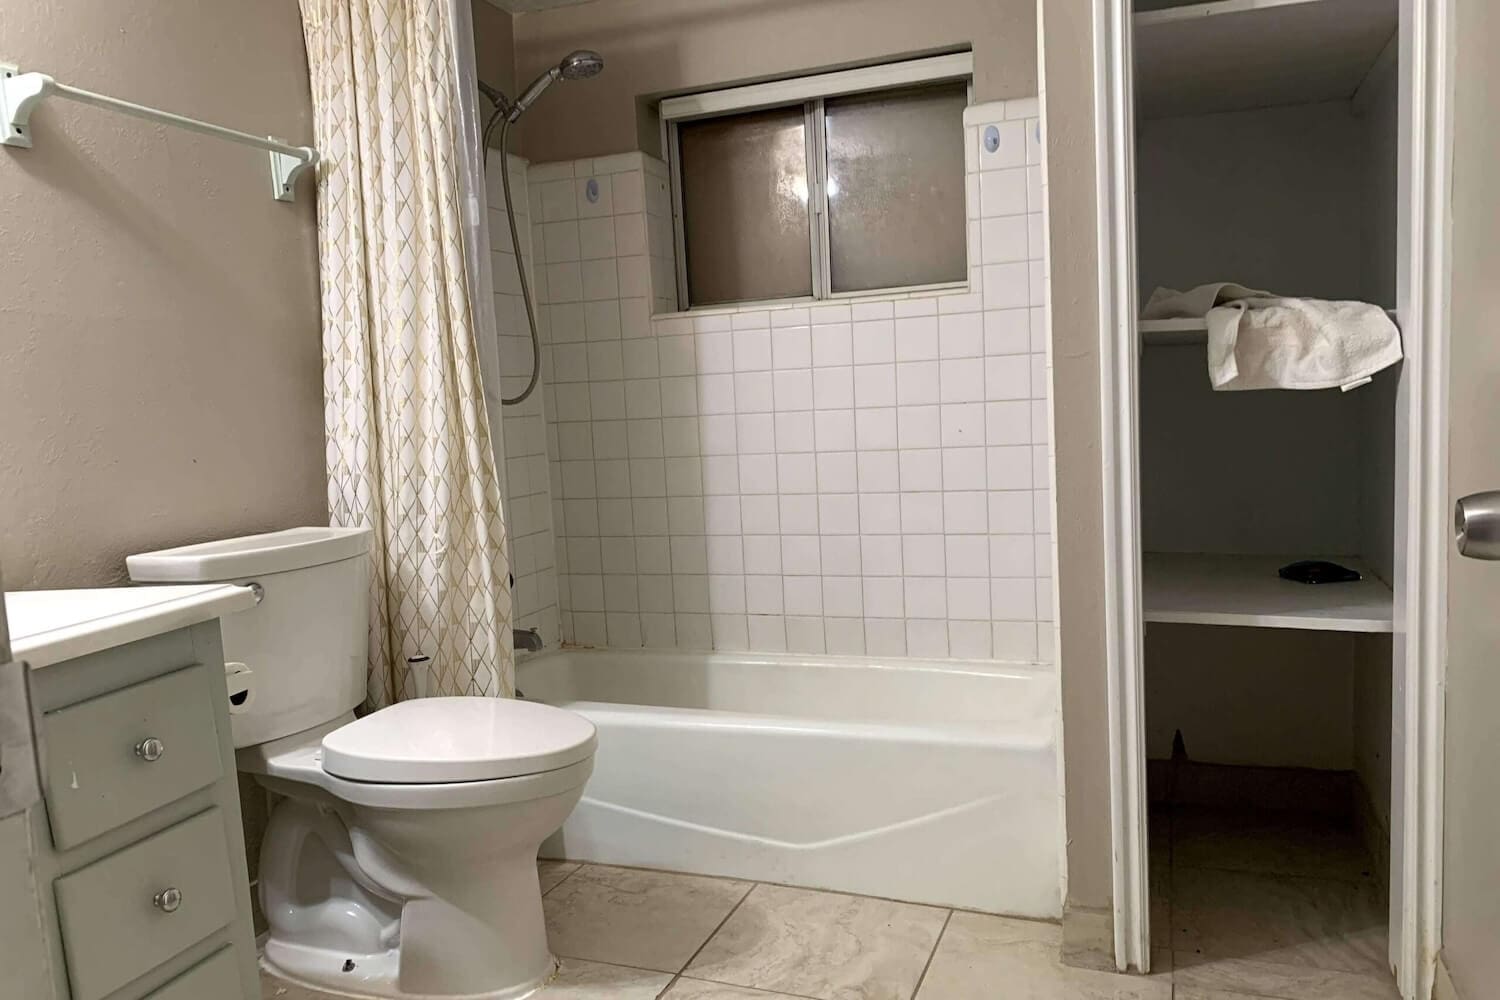
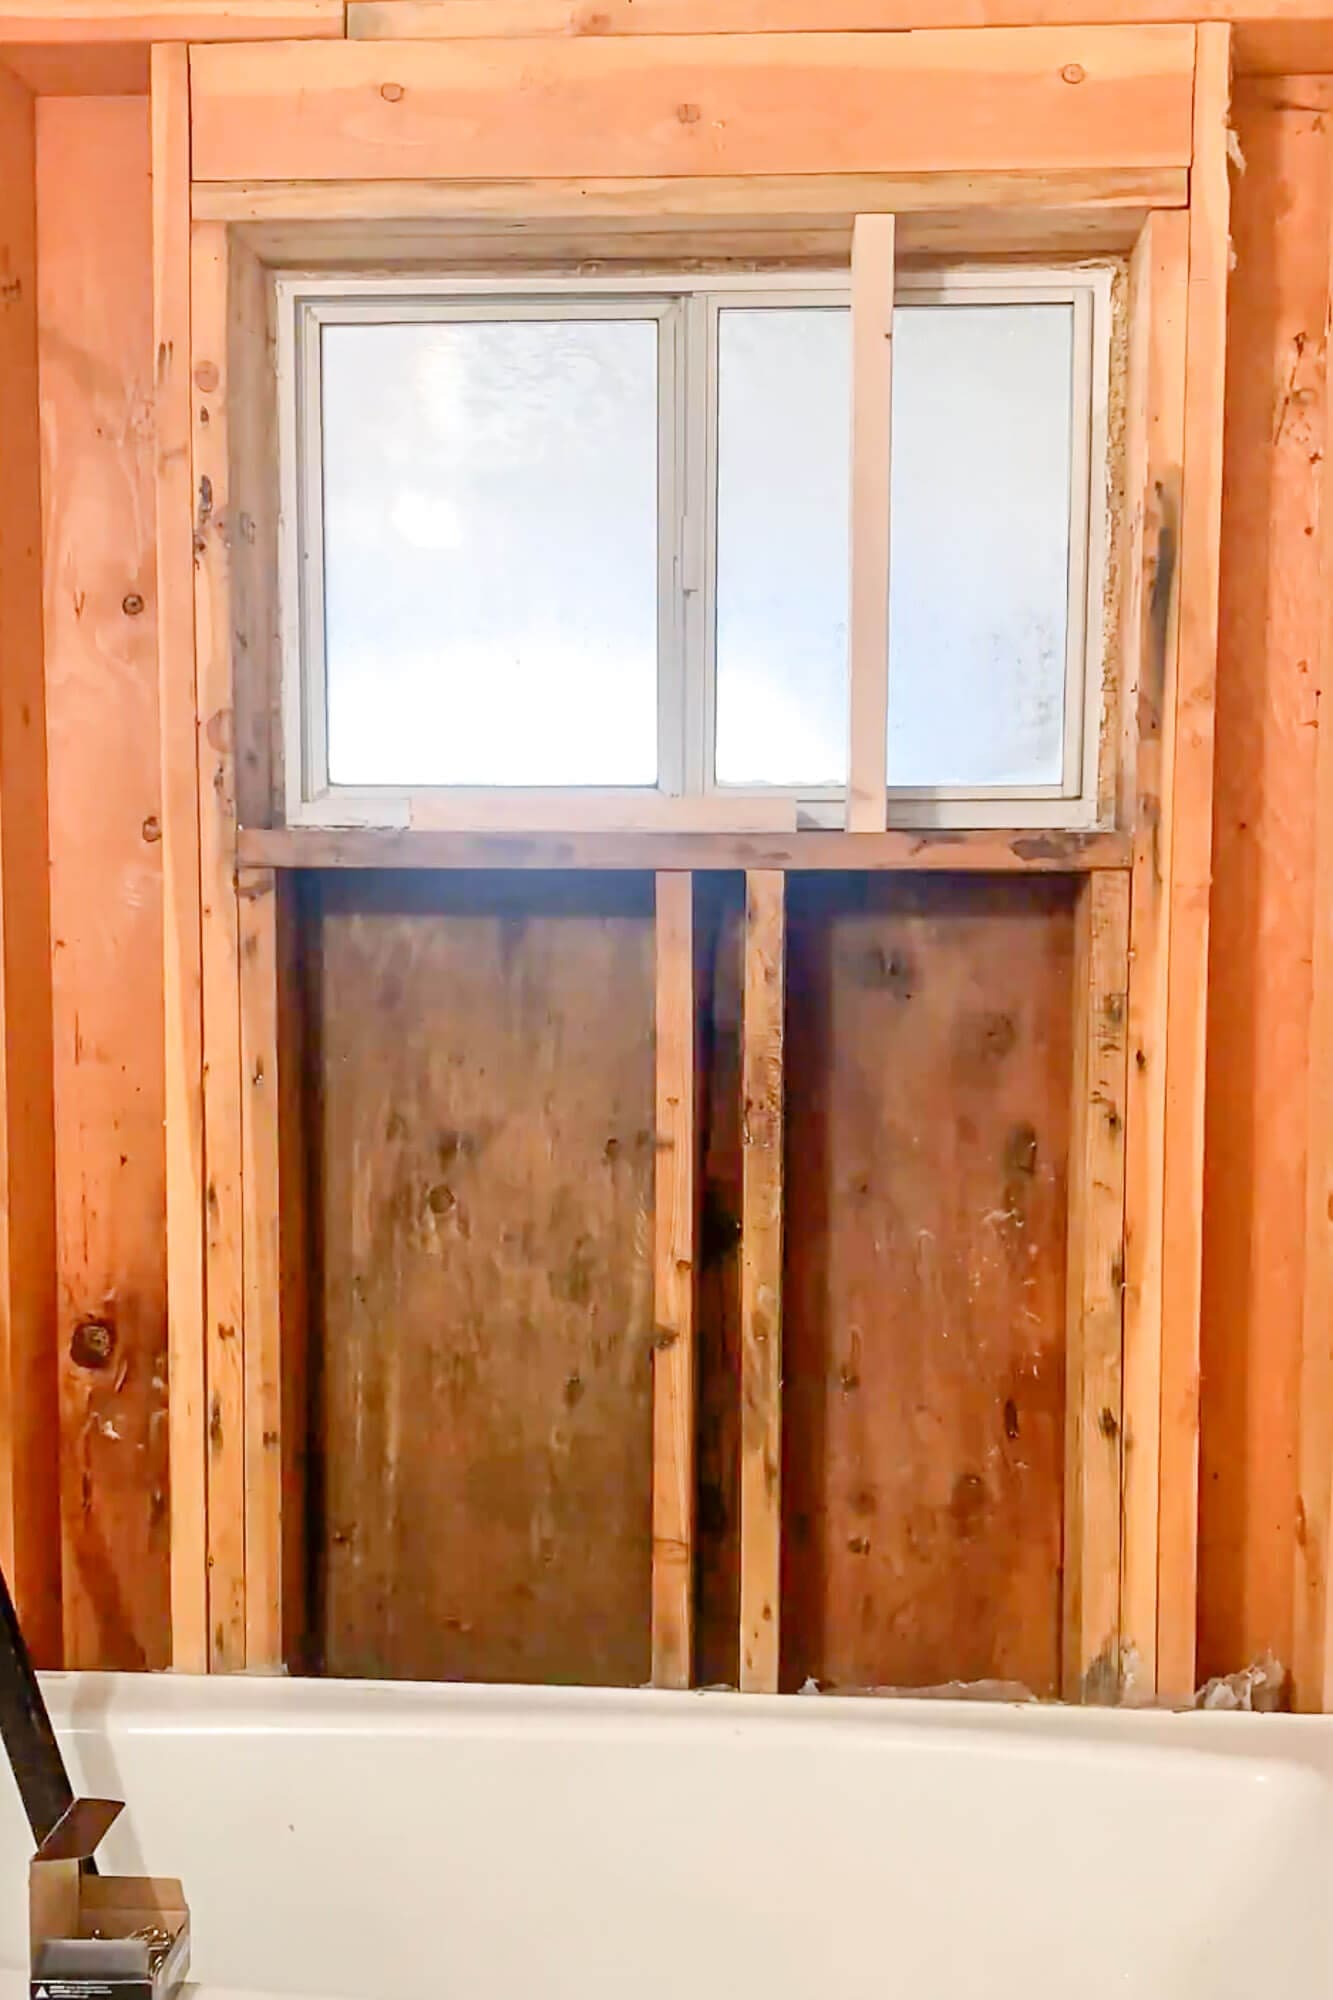
Before: The Shower That Needed a Built-In Niche
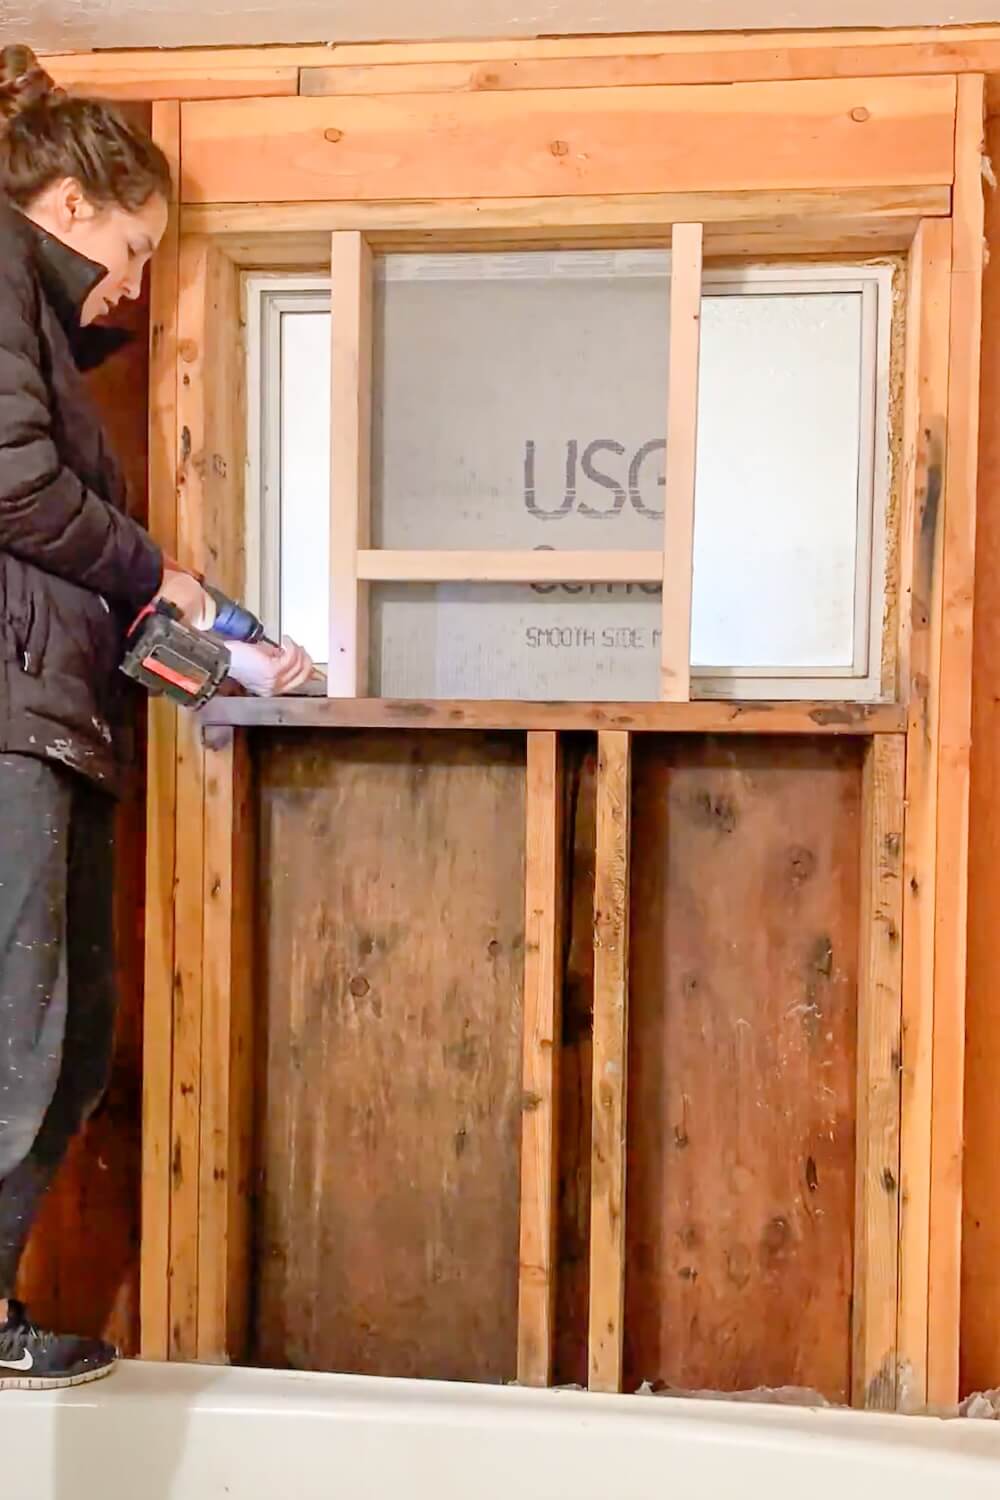
This basement shower had one big challenge: a dead, outdated window right inside the shower wall. It didn’t open or function, but it did make the whole space feel dark, awkward, and dated. There was also no storage for bottles, so everything sat balanced on the tub edge or fell into the tub mid-shower. A built-in shower niche was the most efficient storage upgrade we could add, and turning the old window area into a niche solved both problems at once.
Tools You’ll Need to Build a Shower Niche
- Drill/driver
- Hole saw (if adding plumbing penetrations nearby)
- Tape measure
- Level or Laser level
- Utility knife
- Multi-tool or angle grinder with diamond wheel
- Carpenter square
- Putty knife and Taping knife
- Caulk gun
- Pencil
- Tile saw (needed later, not for framing)
Materials You’ll Need for a Shower Niche
- 2×4 lumber for framing
- ½” Cement board
- Cement board screws
- Alkali-resistant Mesh tape
- Thinset mortar
- Liquid Waterproofing membrane
- Plastic shims (for niche pitch)
- Silicone caulk
- Subway tiles (I used both plain and patterned)
How High Should a Shower Niche Be?
The right shower niche height depends on the tallest person who uses the shower. A safe starting point is chest height for the average adult, which works out to roughly 42 to 48 inches from the floor. That puts the niche where bottles are easy to grab without having to reach overhead, but high enough that the bottom of the niche stays out of the direct stream of water from the showerhead.
If kids will use the shower, you can go a few inches lower. If everyone in the household is over six feet tall, push it up to 50 to 54 inches. The niche height also needs to coordinate with your tile layout, which I cover in Step 1 below.
Step 1: Choose the Shower Niche Height and Size
The best shower niche size depends on who uses the shower and what bottles you’re storing. A good starting point is around chest height for adults, roughly 42 to 48 inches from the floor for most people. Measure your tallest bottles and add an inch or two so they fit comfortably without angling.
For shower niche depth, standard 2×4 wall framing gives you about 3.5 inches inside, which works for most bottles. If your wall allows 2×6 framing, you can go 4 to 5 inches deep for even more storage.
For width, choose a size that aligns neatly with your tile layout. If your subway tiles are 3×6 inches, a niche width of 12, 15, or 18 inches lines up cleanly with grout joints. Planning ahead prevents awkward slivers of tile once you begin tiling the walls.
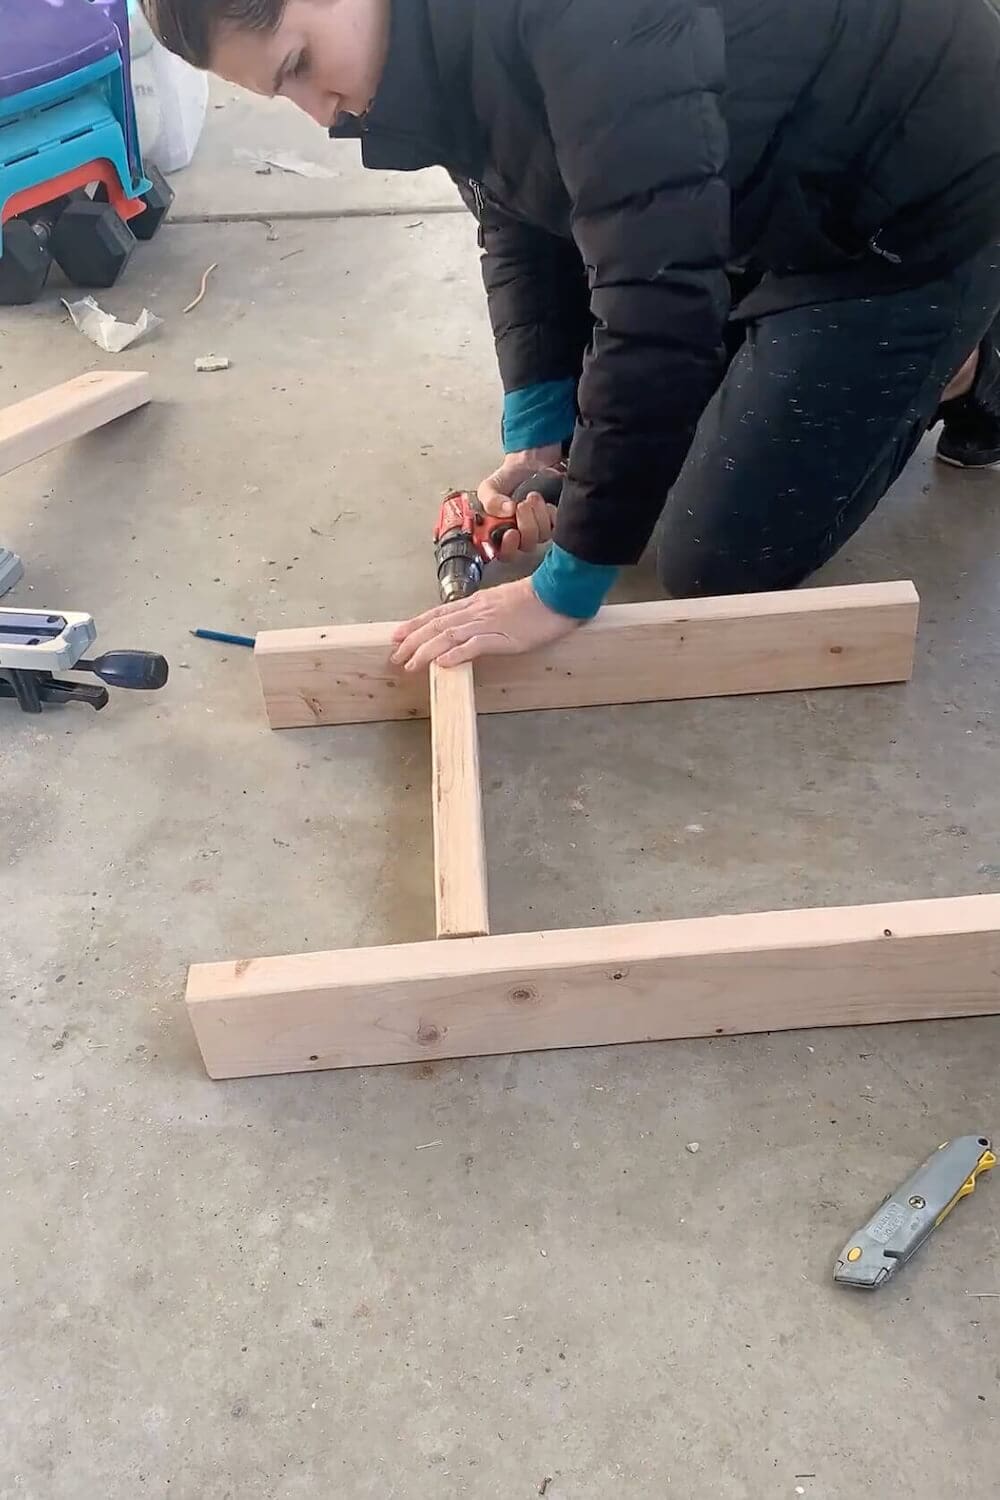
Step 2: Frame the Shower Niche
When you’re learning how to frame a shower niche, assembling the full box on the floor before it goes into the wall makes everything square and easier to handle. Building the niche frame outside the wall is also way faster than trying to nail boards into place inside an open stud cavity.
Build the Frame
- Cut 2×4 pieces for the top, bottom, and sides
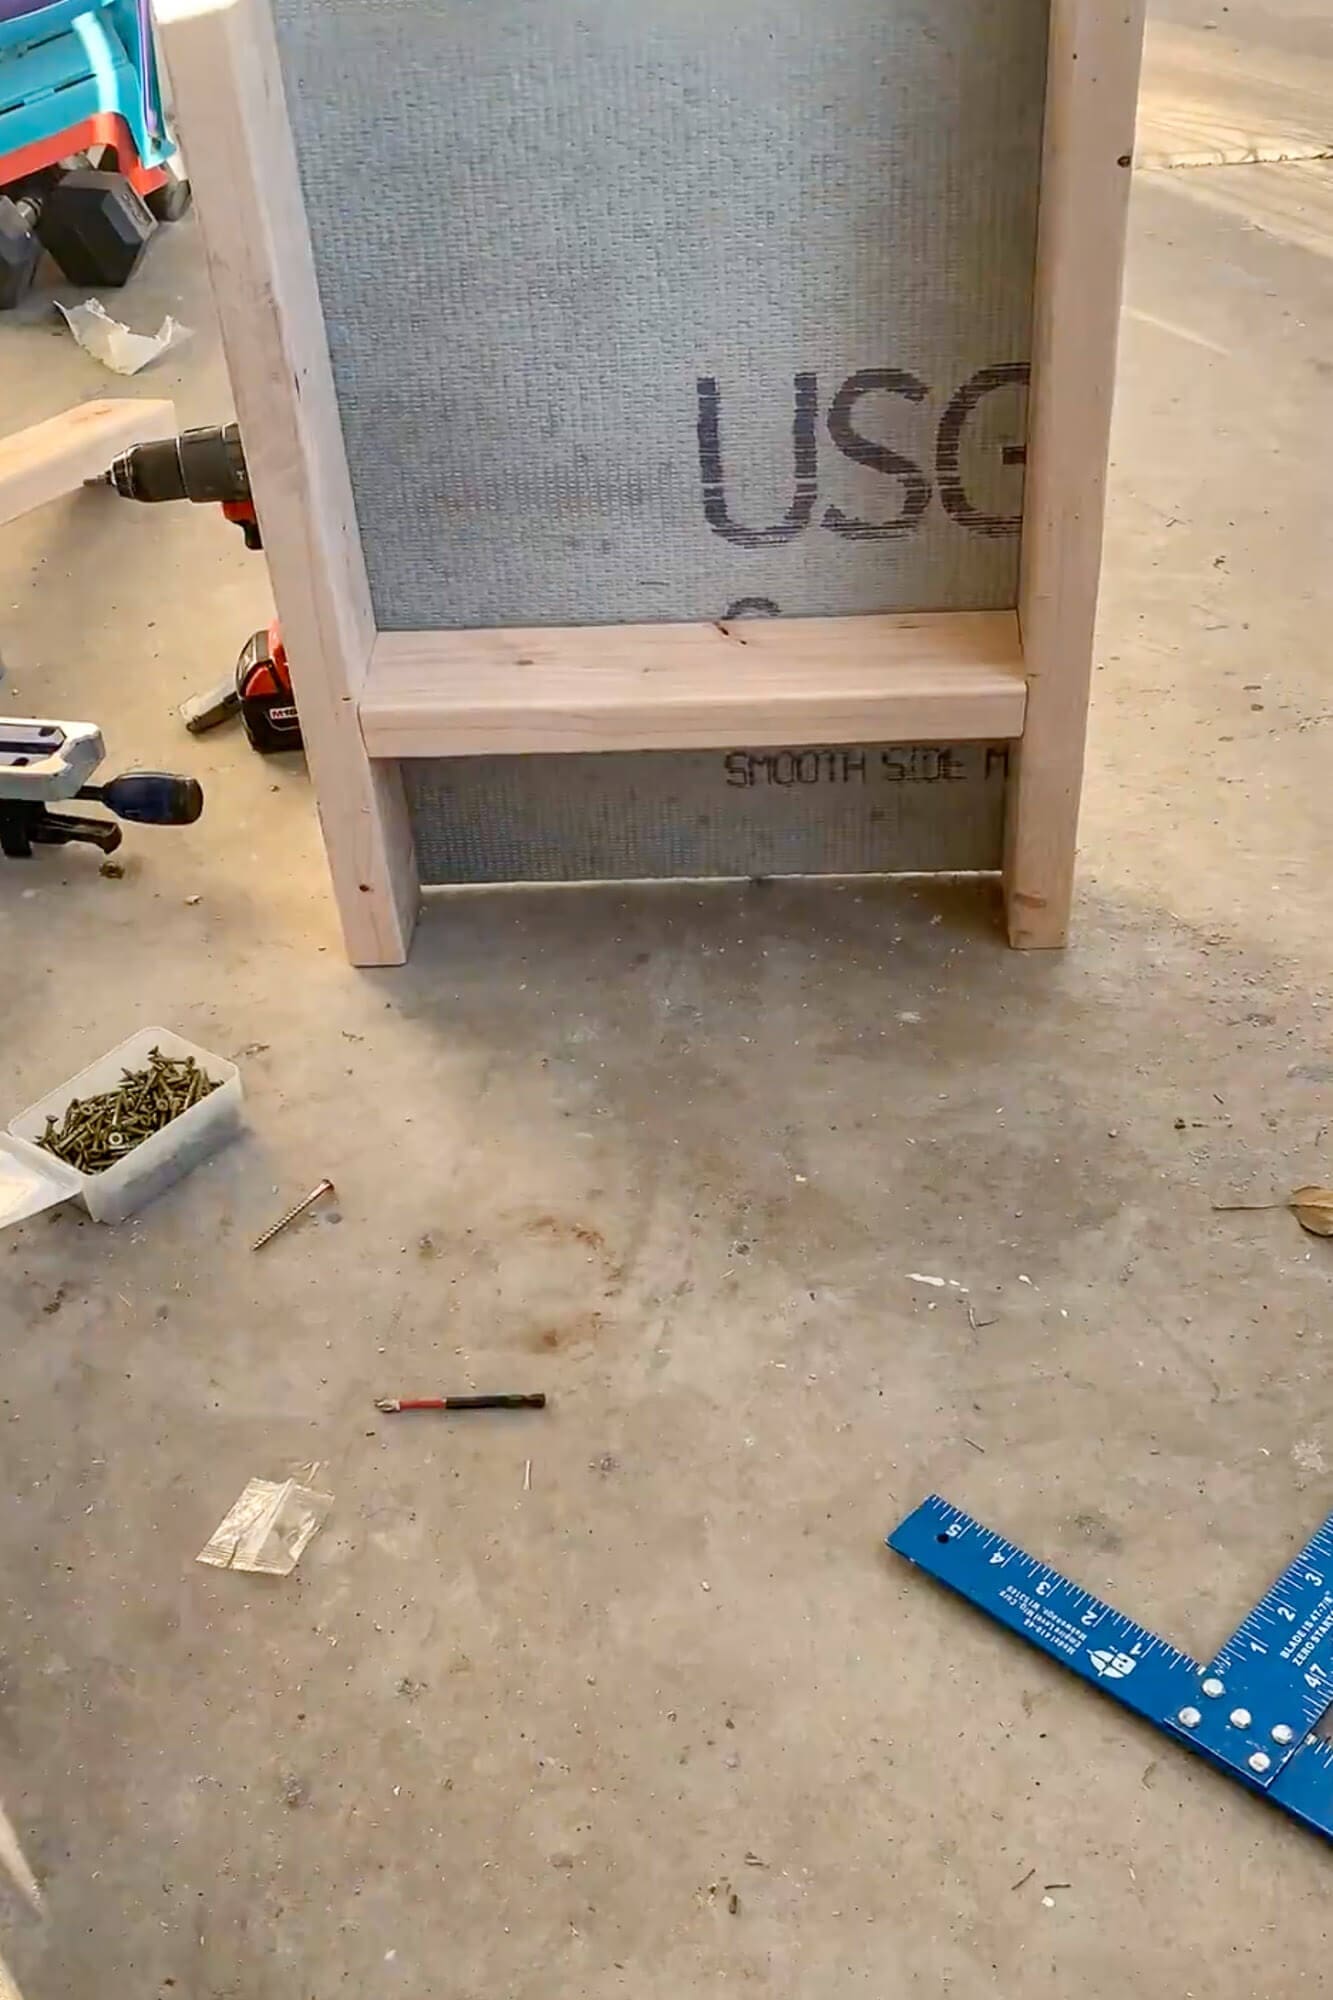
- Assemble the rectangle using screws
- Add a center board if you’re creating a double niche
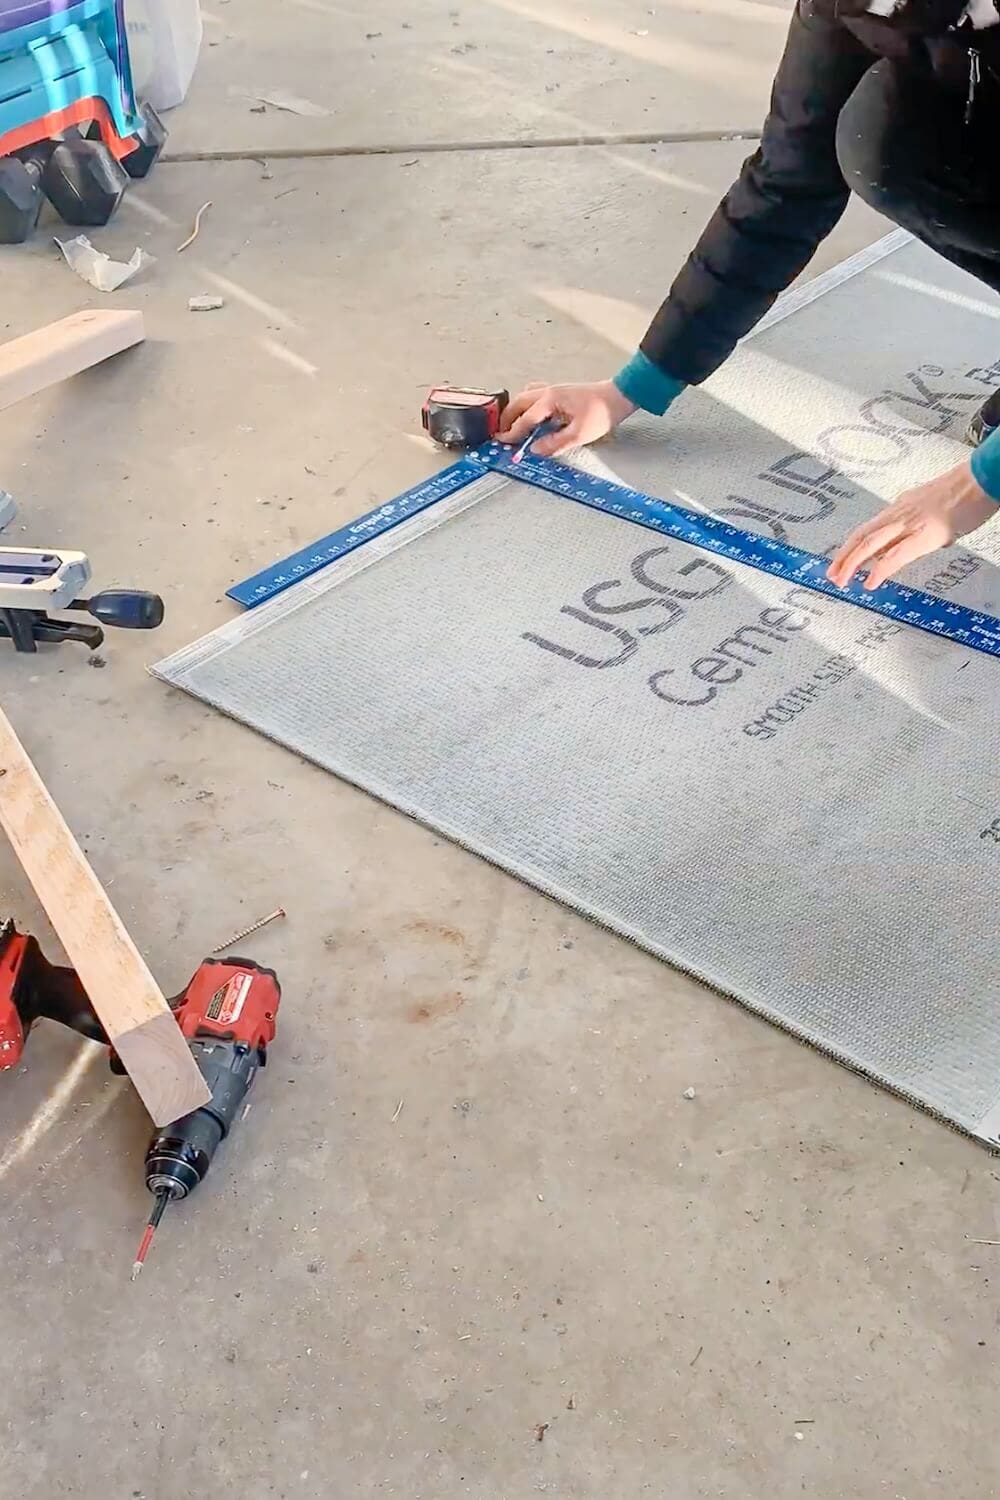
Attach Cement Board to the Frame
- Cut cement board panels to the exact size of the niche back
- Lay the board over the rear of the frame
- Screw it into place with cement board screws
This creates a solid, ready-to-install niche box.
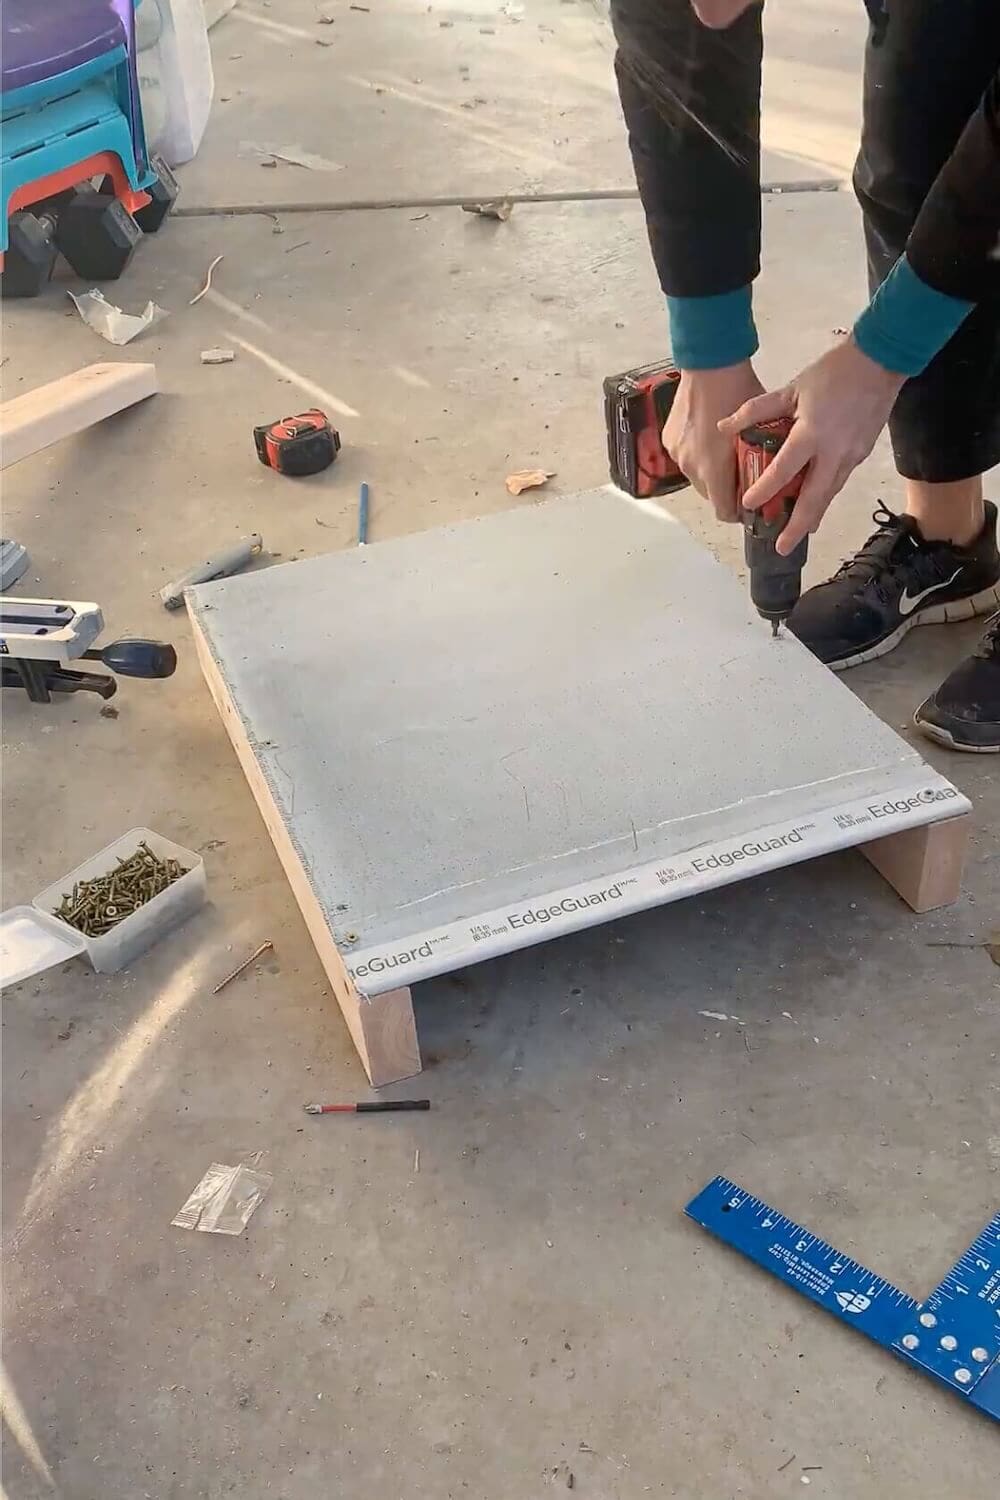
Add a Slight Pitch
The bottom piece needs a very small tilt, about 1 to 2 degrees, so water drains outward instead of pooling. Add a thin shim under the front edge while securing the bottom board. This is the single most-skipped step in DIY shower niches, and it’s the reason so many homeowner-built niches end up with mildew problems within the first year.
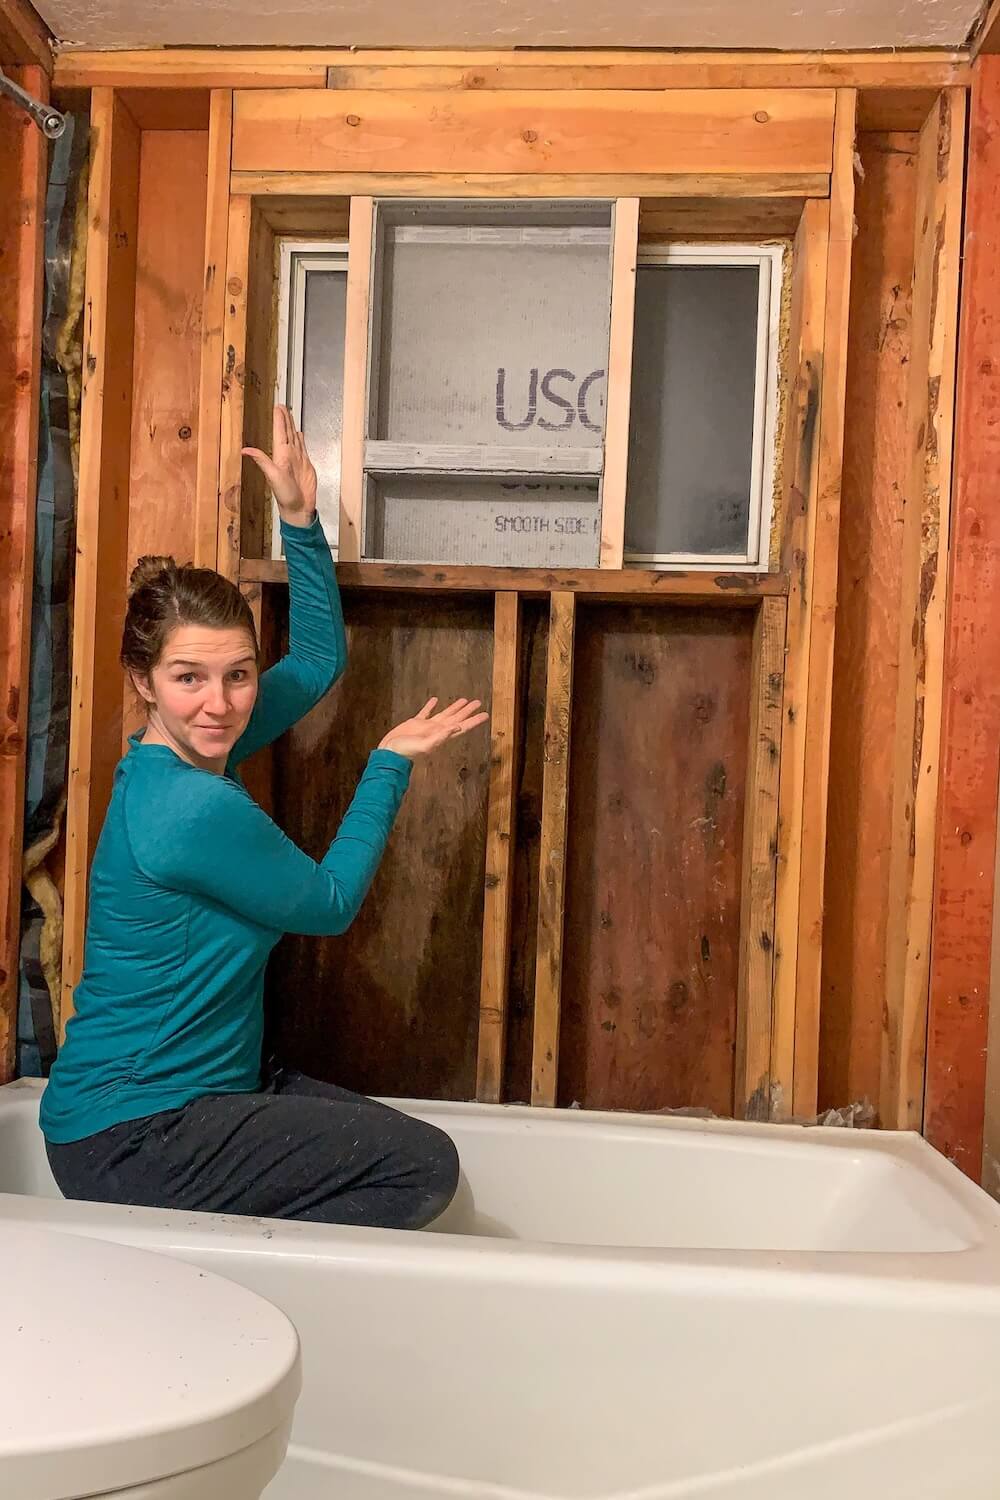
Test Fit the Niche Box
Hold the assembled box between the studs to make sure it fits and sits at the correct height before you start installing it permanently. This is also a good time to confirm the pitch is still angled forward.
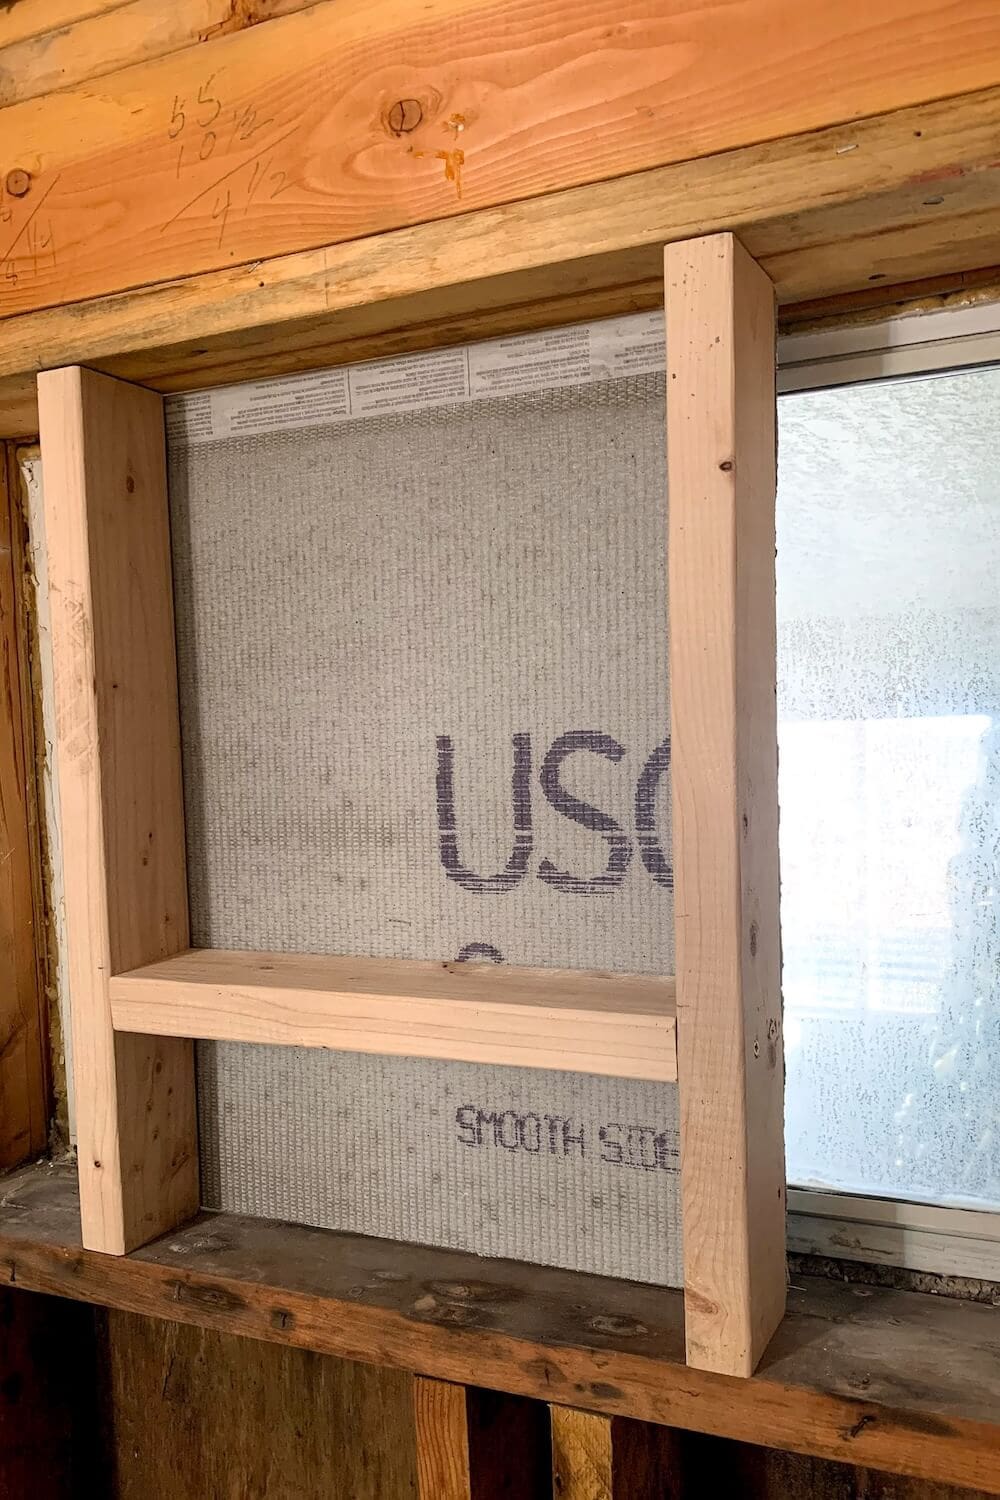
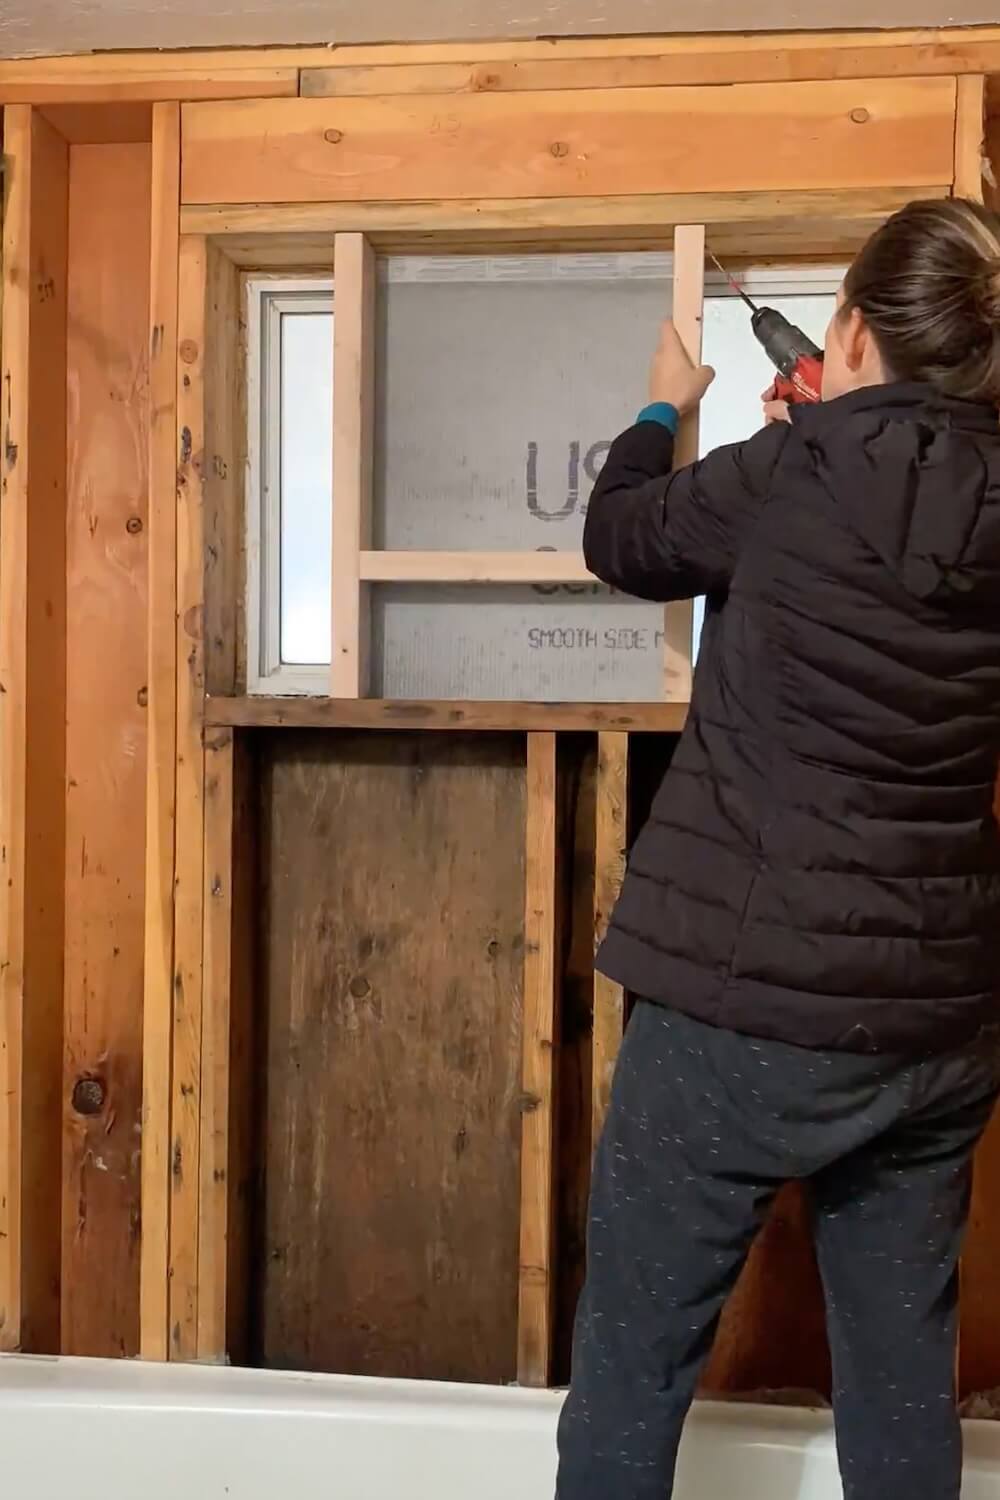
Step 3: Install the Shower Niche Box Into the Wall
Once the niche is built, it’s ready to secure inside the wall cavity.
- Slide the niche between the studs
- Use screws through the side studs to secure the frame
- Add blocking if the studs don’t fully support the sides
- Double-check that the pitch still angles forward after installation
If you need wall prep guidance, like how to attach cement board around the rest of the shower, see how to remove mold from a shower and prep the walls for tile.
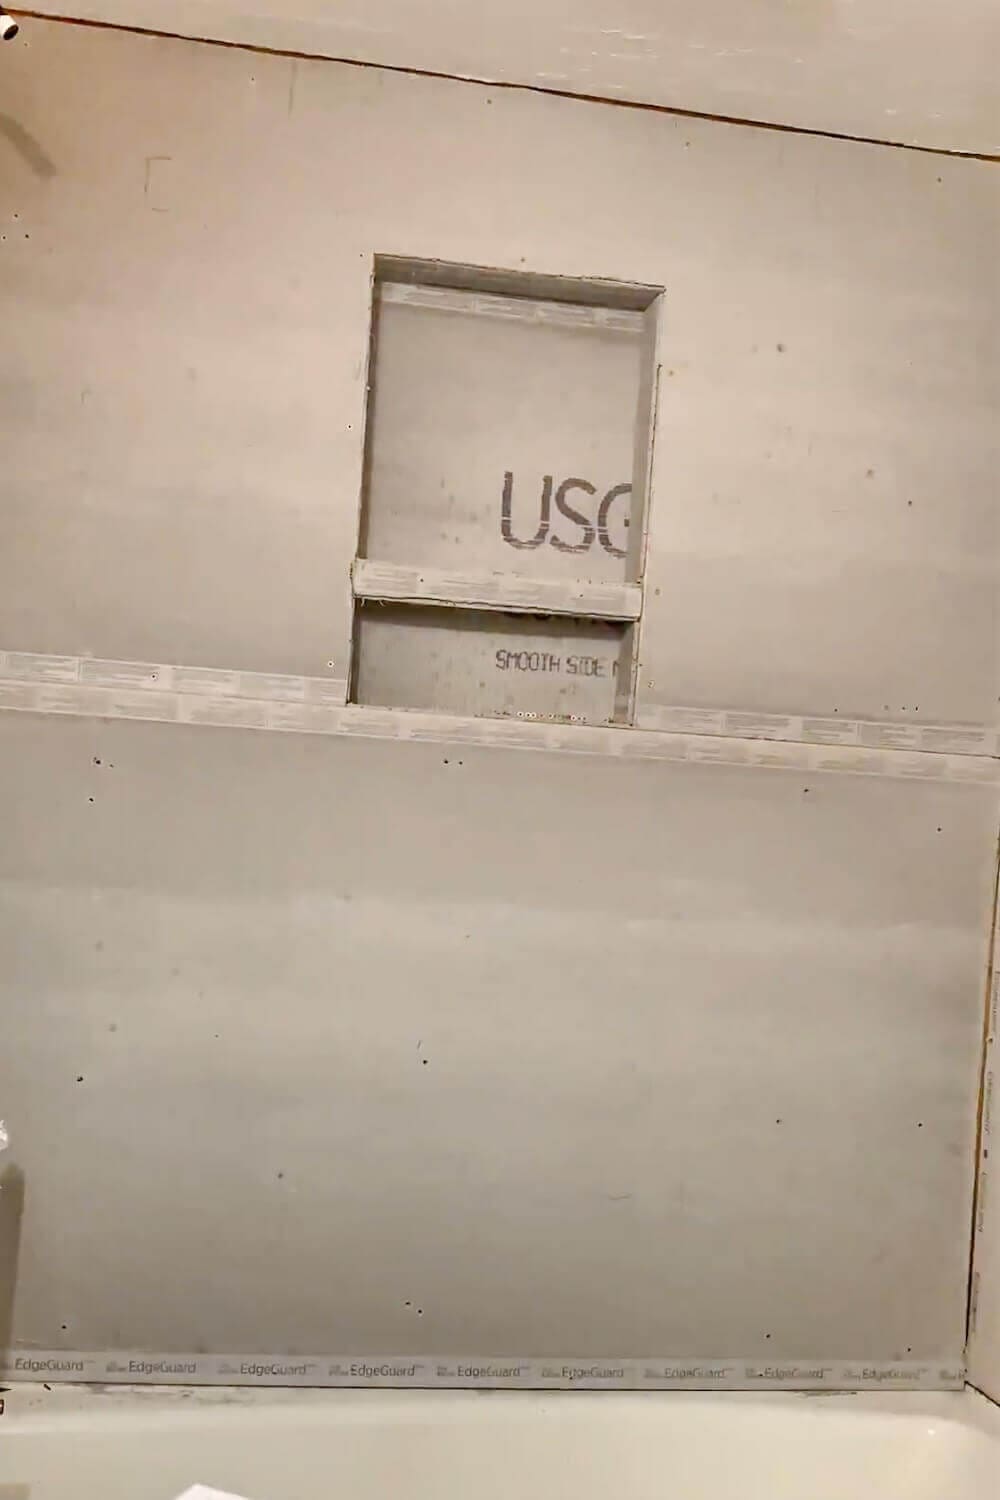
Step 4: Cut and Install Cement Board Around the Niche Opening
With the niche box in place, the surrounding shower walls can be covered with cement board.
- Measure and cut cement board to fit around the niche opening
- Attach cement board to the studs with cement board screws
- Keep edges clean and tight around the niche opening
- Check that seams land where they can be taped properly later
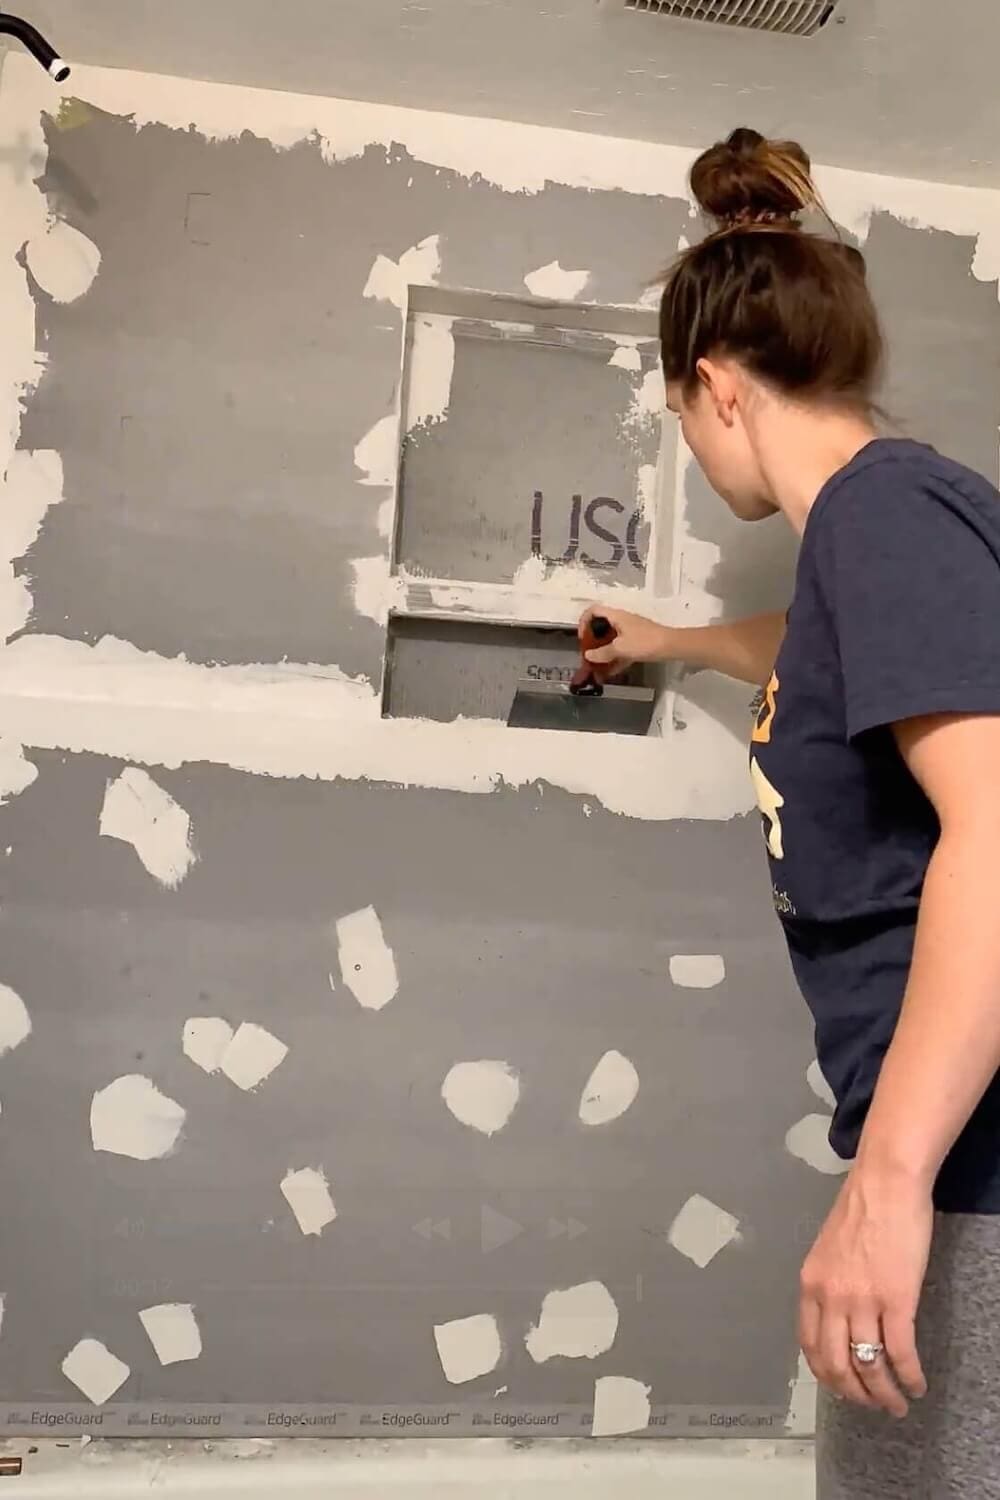
Step 5: Tape and Thinset the Shower Niche Seams
This step reinforces the niche structure and prepares it for waterproofing.
Apply Mesh Tape
Run alkali-resistant mesh tape along all niche seams – corners, where the niche meets the surrounding cement board, anywhere two pieces come together. Don’t skip the inside corners; those are the highest-failure-risk spots.
Cover with Thinset
Mix thinset to a peanut-butter consistency and cover the tape with a thin, smooth layer. Apply over every screw head as well so the screws are encapsulated.
Smooth and Cure
Smooth the edges with a putty knife to keep the niche corners crisp. Let everything dry completely. This step is crucial because it strengthens the box before waterproofing.
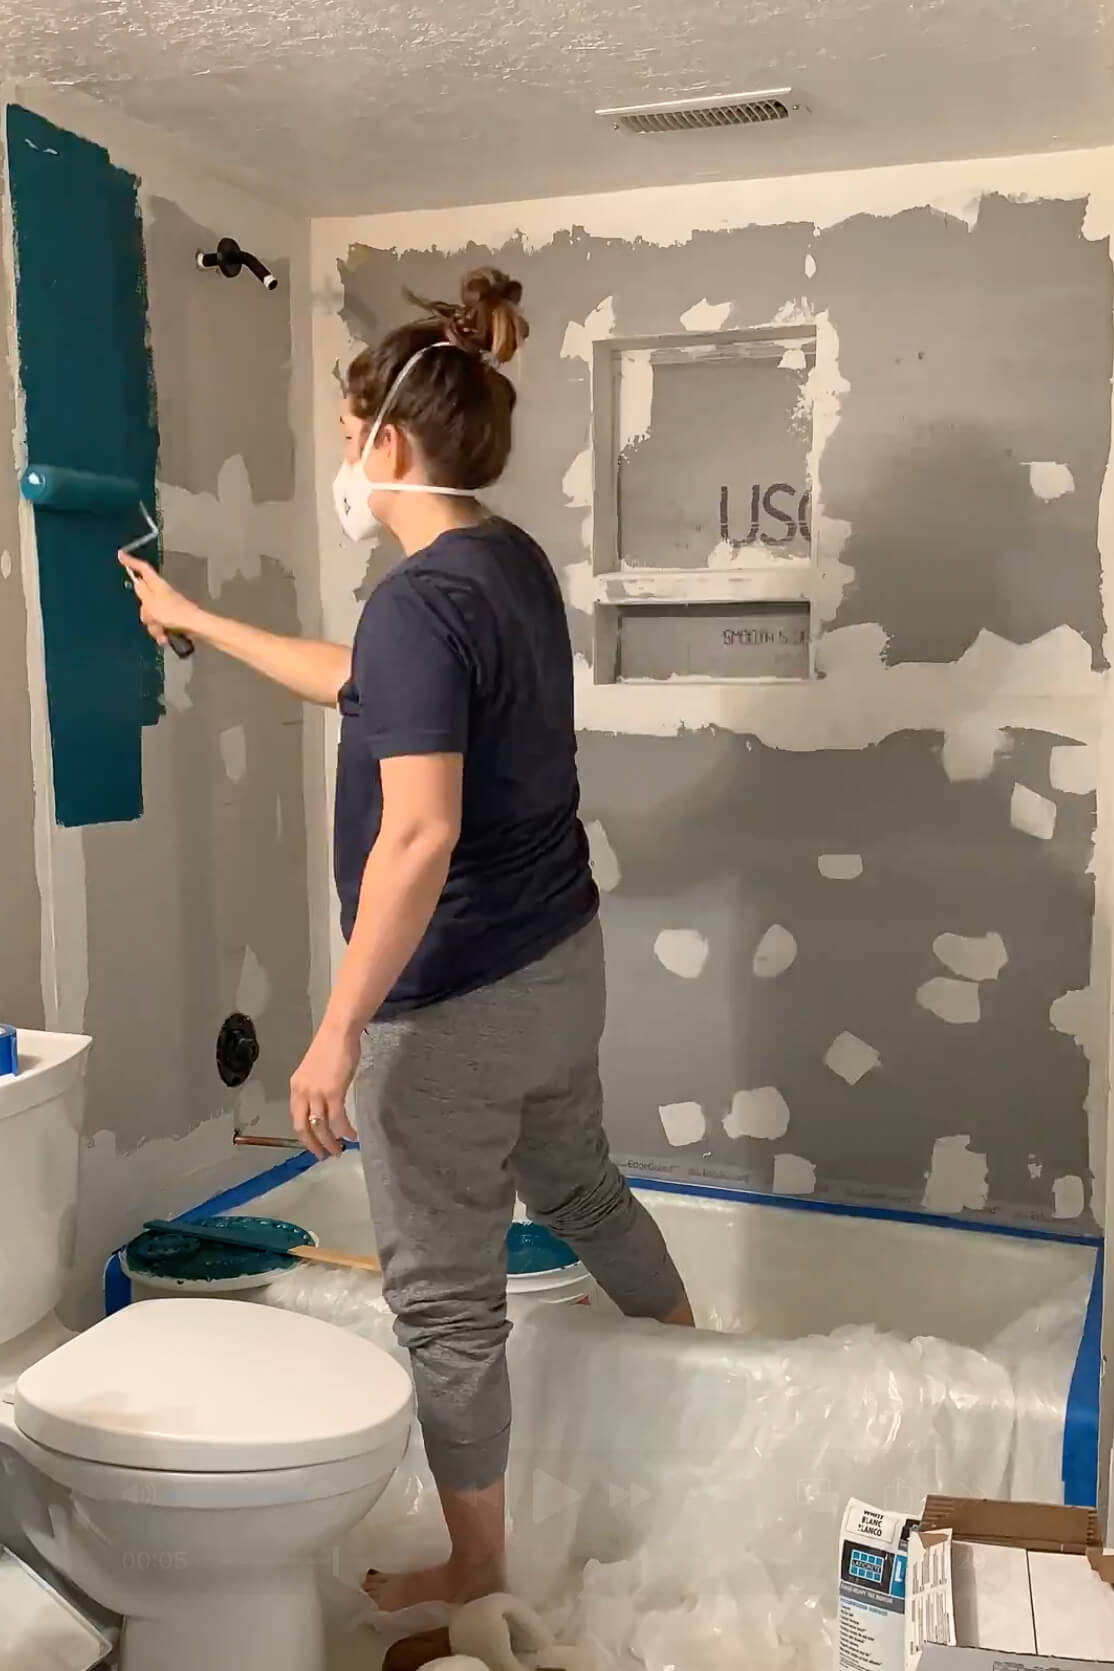
Step 6: Waterproof the Shower Niche
This is the most important step for preventing leaks, and it’s a non-negotiable part of how to waterproof a shower niche. Skip it or do it half-heartedly and you’ll have water seeping behind the cement board within months. The fix later is a full demo and rebuild, so do it right the first time.
First Coat – Inside the Niche
Apply a full coat of liquid waterproofing membrane to every interior surface of the niche. Use a 2-3 inch brush to get into corners and seams thoroughly. Don’t skip the bottom – it’s the highest water-exposure surface.
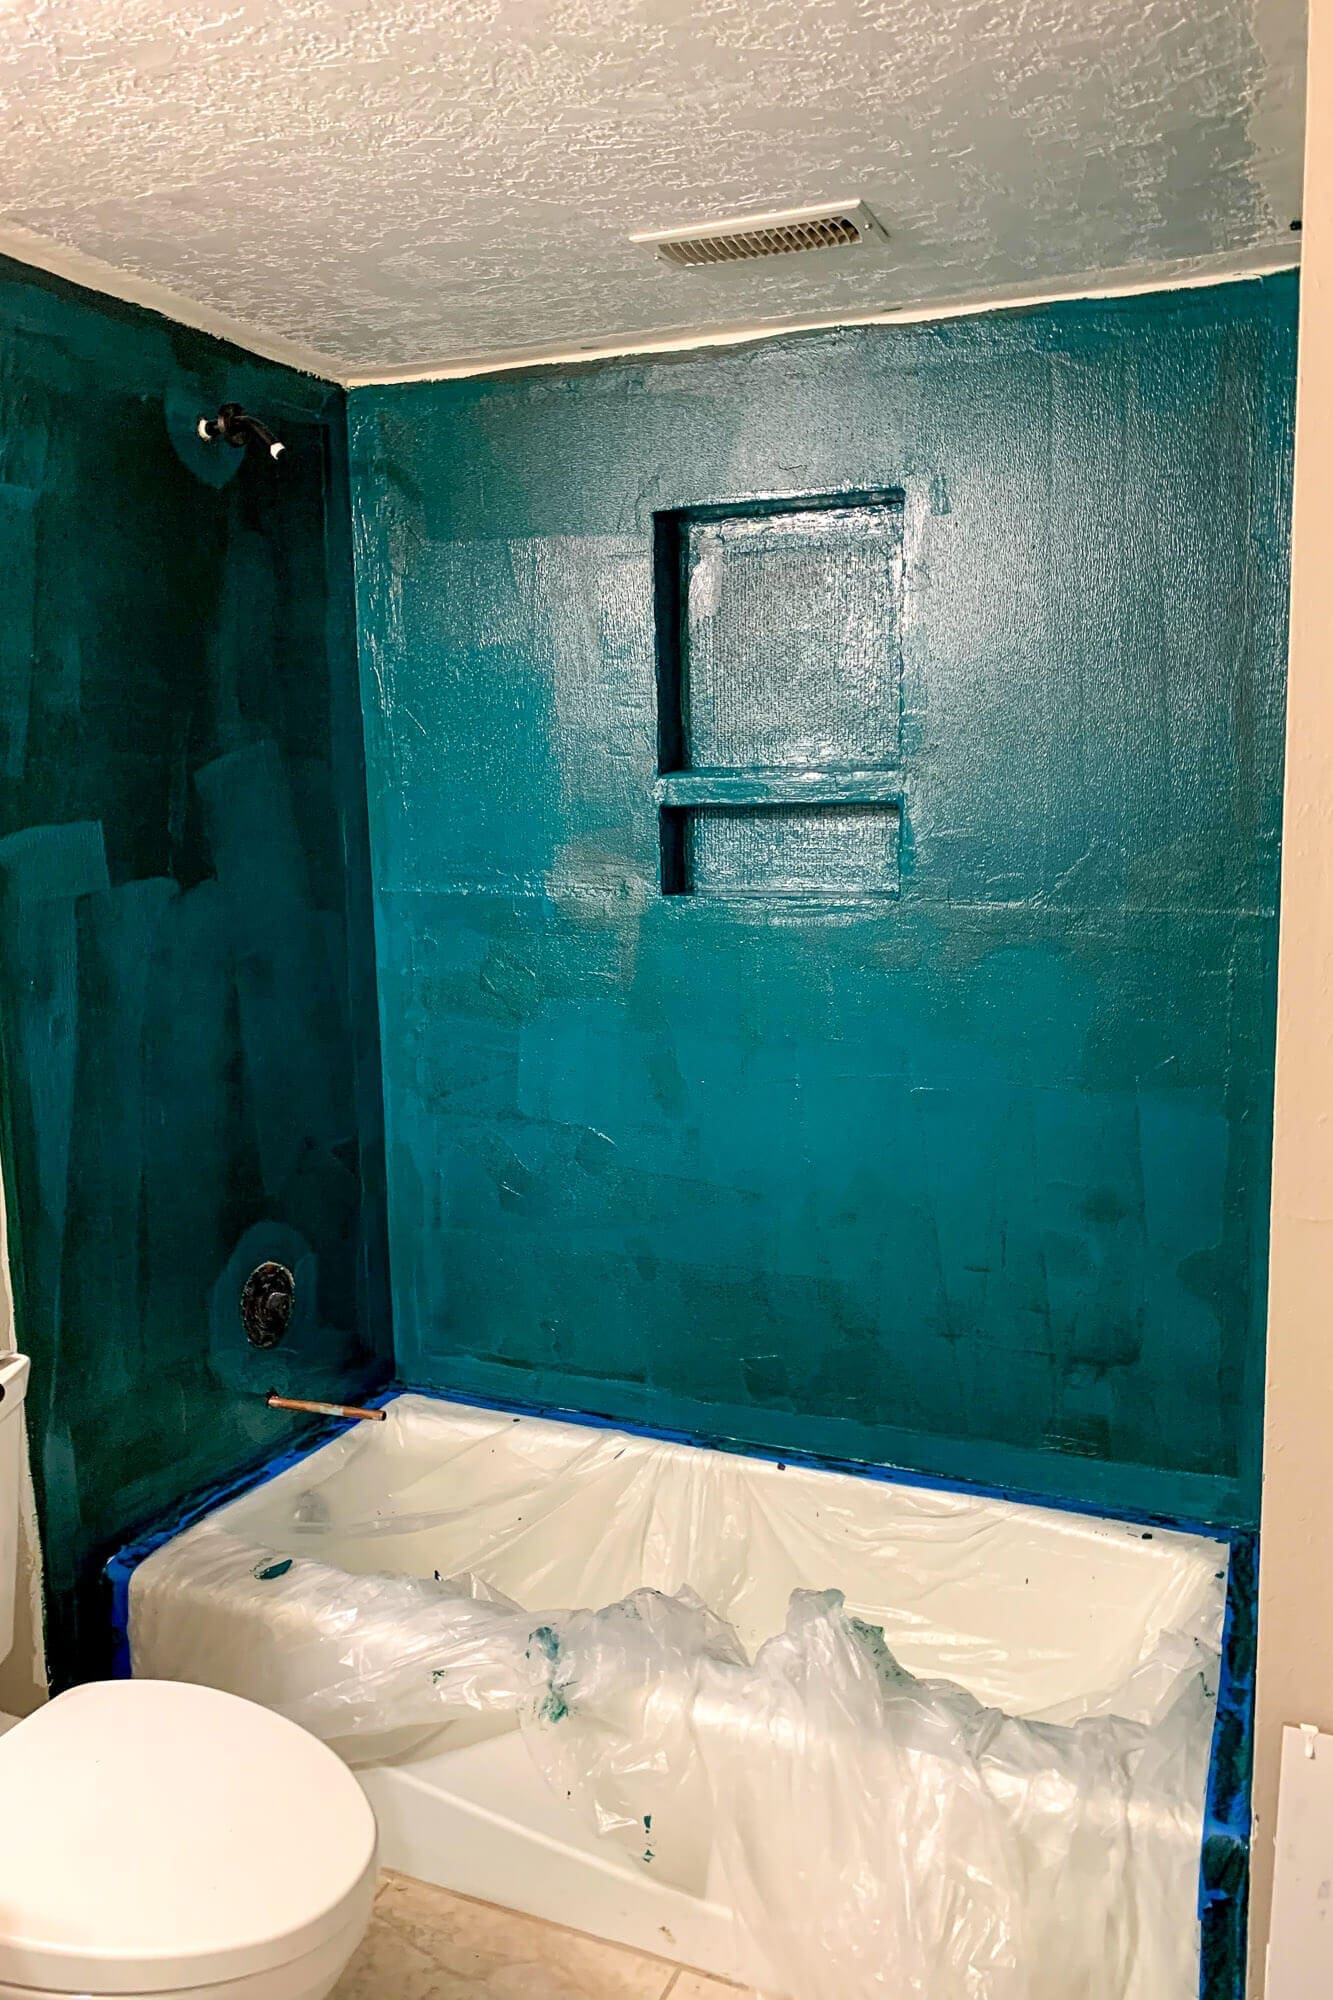
Second Coat – After Full Dry
Allow the first coat to dry completely (read the can – most products need 1-2 hours), then apply a second full coat. Two coats is the minimum for a guaranteed seal.
Tie the Niche Into the Wall Waterproofing
Coat the wall area around the niche opening too, overlapping by 6-8 inches in every direction. This creates a continuous waterproofing layer instead of treating the niche as a separate piece.
For a more detailed waterproofing walkthrough, the same membrane application is covered in how to remove mold from a shower and prep the walls for tile.
Step 7: Tile the Shower Niche
Once the waterproofing is fully cured (give it the full 24 to 48 hours the manufacturer recommends), it’s time for the part most people are most nervous about: tiling a niche in a shower. The good news is the niche itself is the most forgiving place to practice tile work because it’s small and partially hidden.
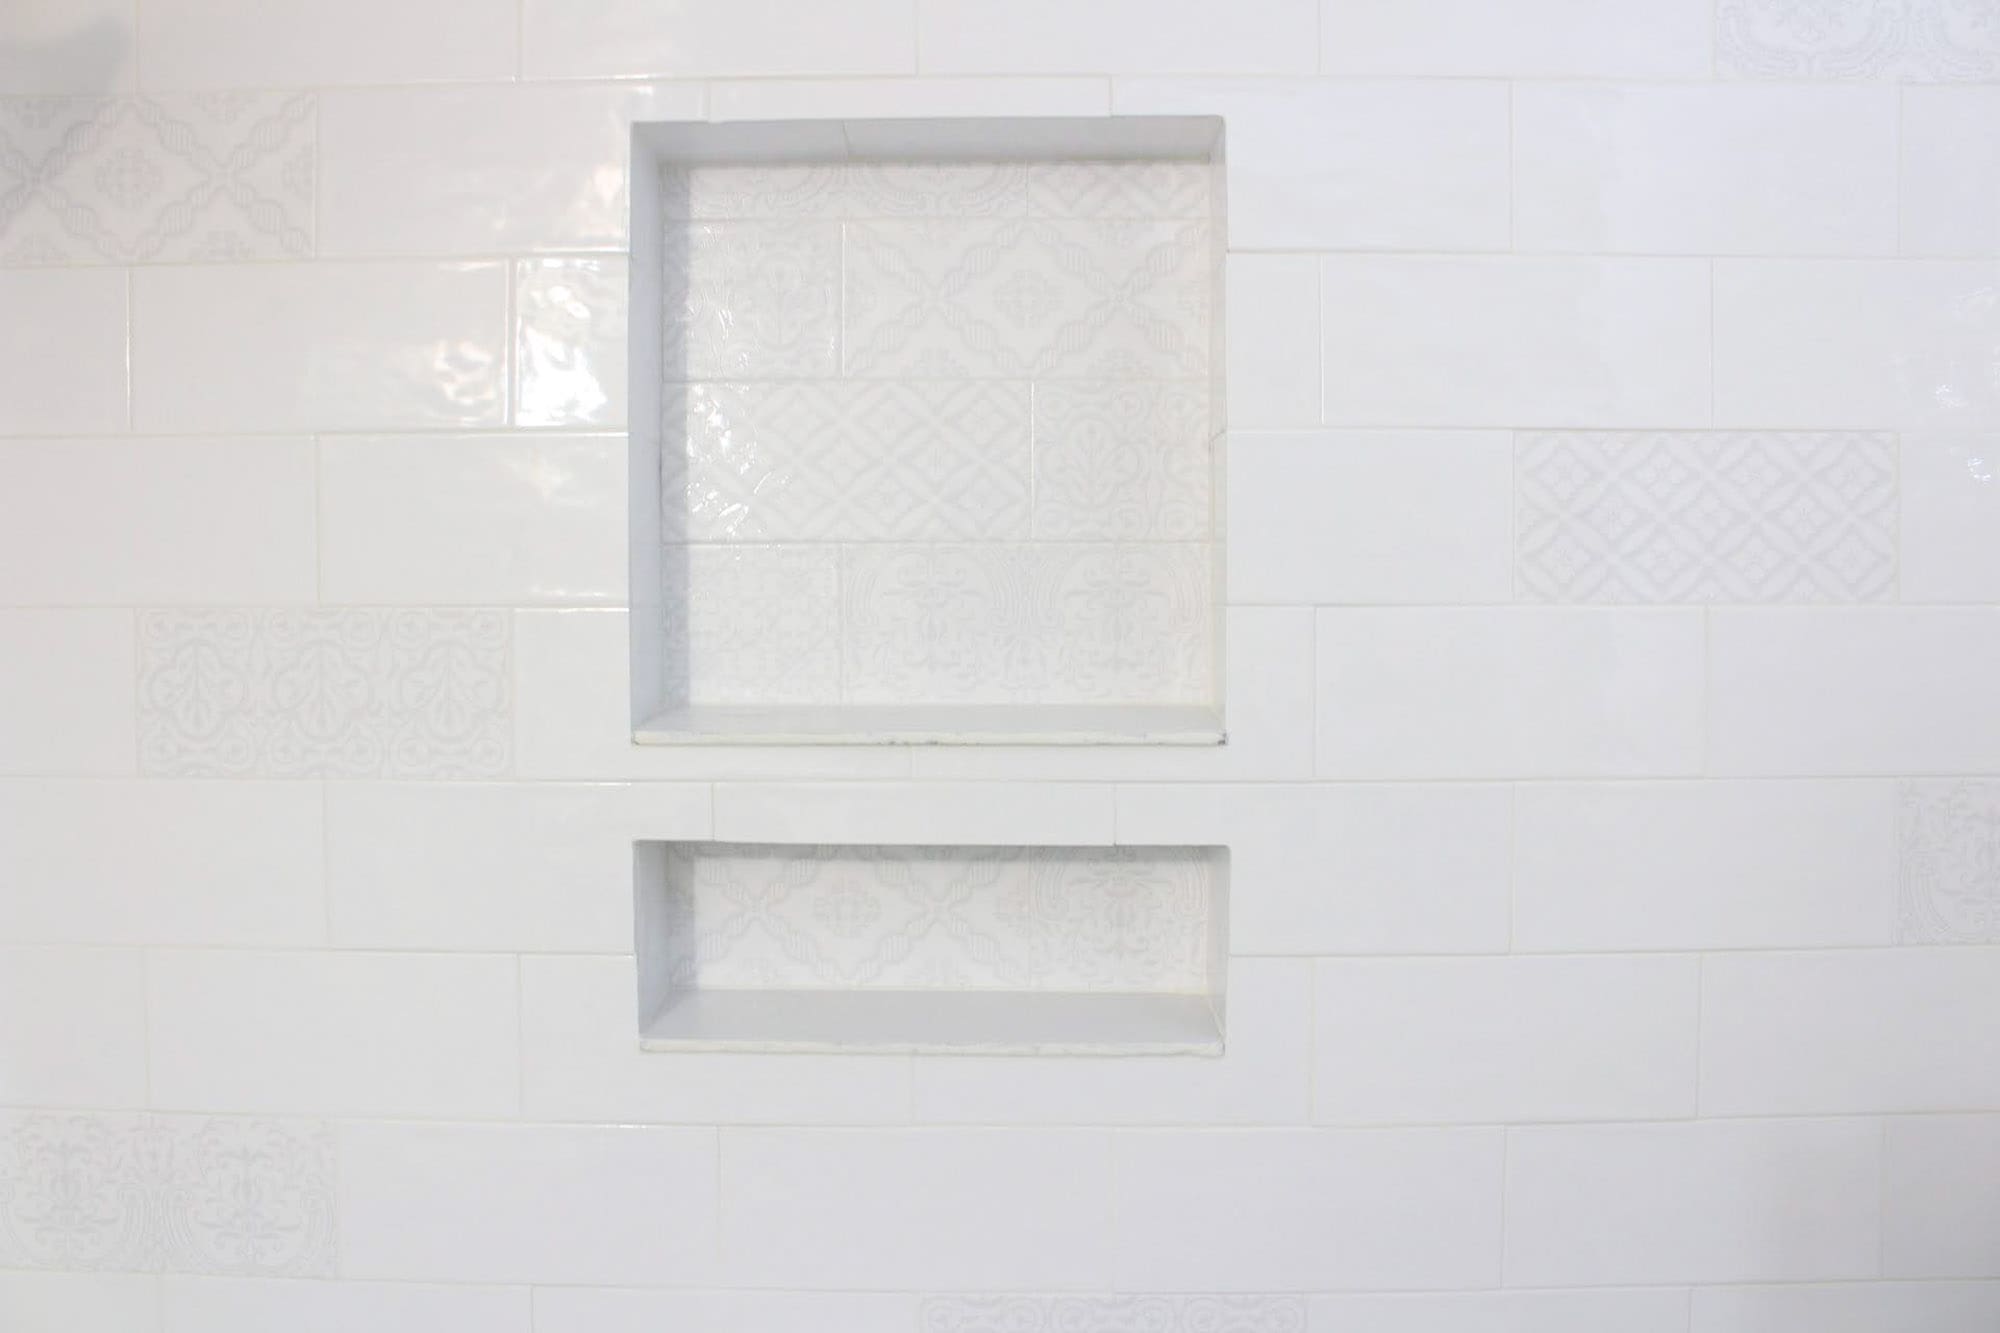
Tile Layout for the Niche
The cleanest visual happens when the niche grout lines flow into the surrounding shower wall. Plan the niche size and position so that horizontal grout joints inside the niche line up with the joints on the surrounding wall. If the math doesn’t work out perfectly, place the niche where the cuts read most naturally – usually centered on a tile or aligned to a row.
Quick pre-tile checklist:
- Confirm the waterproofing is fully cured
- Check the pitch on the bottom one more time
- Wipe away any dust or debris from inside the niche
- Confirm all corners feel solid and smooth
Tiling Order That Works
Tile the back wall of the niche first, then the side walls, then the top, and finally the bottom. Working in this order means any thinset drips fall onto a surface you haven’t tiled yet. Use spacers consistent with the rest of your shower wall layout so the grout lines flow visually from the surrounding tile into the niche.
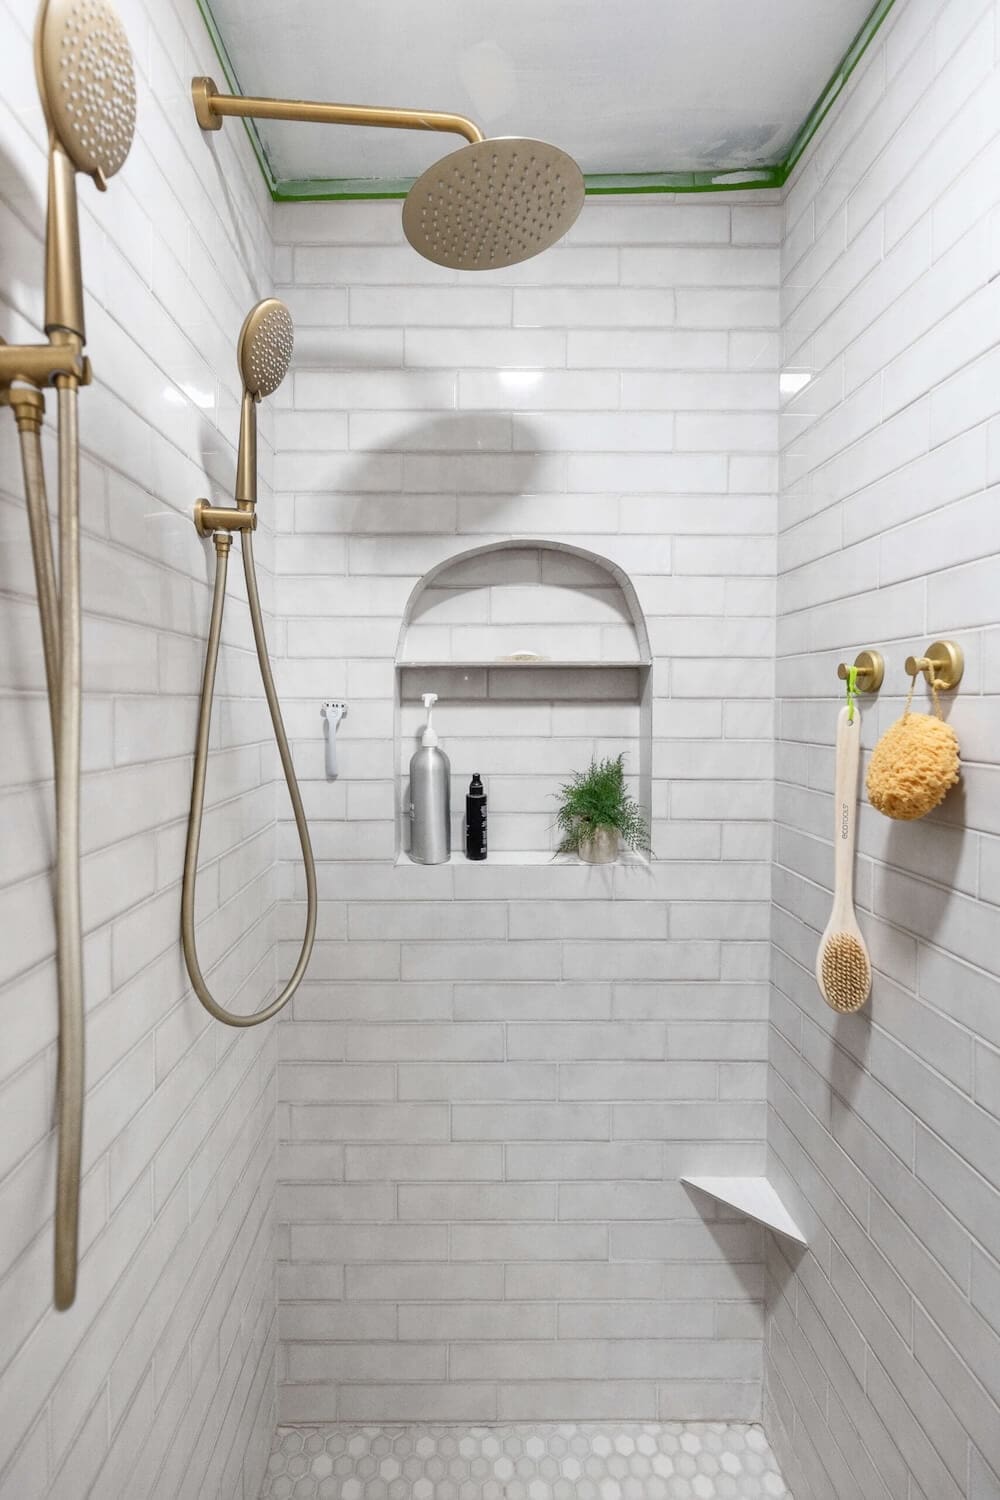
What Tile to Use Inside a Shower Niche
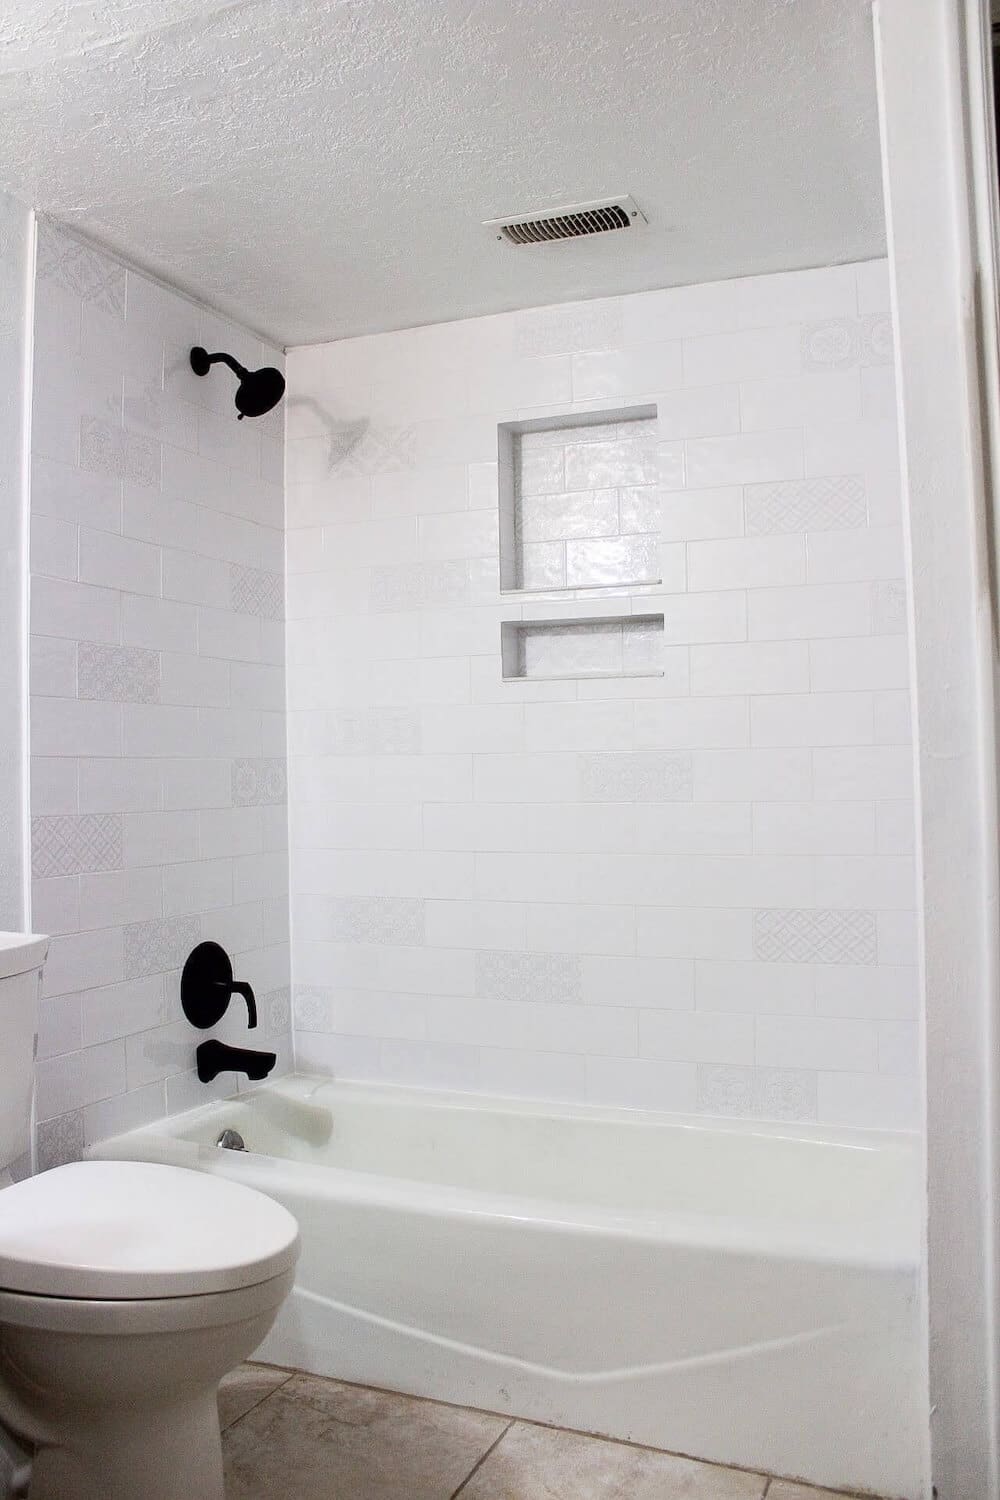
Anything that matches your shower wall tile is the safest bet. For a feature look, use a contrasting patterned tile or mosaic on the back of the niche while keeping the side walls matching the rest of the shower (this is what I did with the patterned white tile on the back). Avoid huge tiles inside the niche – the cuts get awkward and the grout lines don’t read as cleanly.
Trim Around the Niche Opening
For trim, a Schluter metal trim or a contrasting bullnose tile around the niche opening hides the cut edges and gives the whole thing a finished, professional look. This is the detail that makes the difference between “obviously DIY” and “looks like a contractor did it.”
For the full tile setting technique, including layout, back-buttering, thinset consistency, and clean grout lines, continue with my how to tile a shower wall tutorial. The same technique applies inside the niche, just at a smaller scale.
Cost and Time: How Much a DIY Shower Niche Takes
One of the first questions I get is how much it actually costs to build a DIY shower niche. The honest breakdown:
Materials: Around $50 to $80 if you’re building a single niche during a remodel where the studs are already open. That covers a couple of 2×4 boards, a small piece of cement board, a roll of mesh tape, a quart of thinset, a small container of waterproofing membrane, and a few hooks of supplies. The biggest cost driver is the waterproofing membrane (around $30 to $40 per quart) but you’ll likely use the same container for the rest of your shower walls, so the niche itself is closer to $20 to $30 of that.
Tools: If you’re doing any tile work at all, you already own most of these (drill, level, utility knife, putty knife). The only specialty tool is a tile saw or wet saw, and you’ll need that for tiling the rest of the shower anyway.
Time: A weekend if you’re doing it as part of a larger remodel and the studs are already open. Saturday for framing, installing, and taping/thinset. Sunday for waterproofing (two coats with full dry time between). Tile work happens later when you’re doing the rest of the shower walls.
| Phase | Active hours | Notes |
|---|---|---|
| Plan and measure | 1 | Get tile layout right before you cut anything |
| Frame the niche box | 1 to 2 | Faster if you build on the floor first |
| Install in the wall | 1 | Confirm pitch after install |
| Tape, thinset, smooth | 1 to 2 | Wait for thinset to fully cure |
| Waterproof (2 coats) | 2 | Plus 24 to 48 hours dry time |
Common Mistakes When Building a Shower Niche
- Skipping the bottom pitch so water pools instead of draining. This is the single biggest cause of mildew in DIY niches.
- Not fully waterproofing inside the niche and the seam areas. One missed corner is all it takes.
- Forgetting to plan niche size around the tile pattern, which leaves you with awkward sliver tiles.
- Building on an exterior wall in a cold climate without proper insulation and waterproofing. Recipe for condensation problems.
- Rushing thinset or waterproofing dry times. The membrane HAS to be fully cured before you tile or you’ll trap moisture inside.
- Using regular drywall instead of cement board. Drywall in a wet wall = mold guaranteed.
Can You Add a Shower Niche to an Existing Tiled Shower?
This tutorial shows how to build a shower niche when the walls are open and you’re in the middle of a remodel. Adding a built-in shower niche to an existing tiled shower is a more advanced project because it involves cutting tile, backer board, and sometimes adjusting plumbing or insulation behind the wall.
In many cases, it’s safer to:
- Install a surface-mounted corner shelf if you’re not ready to open up the wall
- Have a contractor or experienced tile pro handle the demo and waterproofing if you want a recessed niche in a finished shower
If you’re currently planning a remodel with the studs open, that’s the best time to build a niche. Adding it before any new cement board or tile goes up costs a fraction of what it does retrofit.
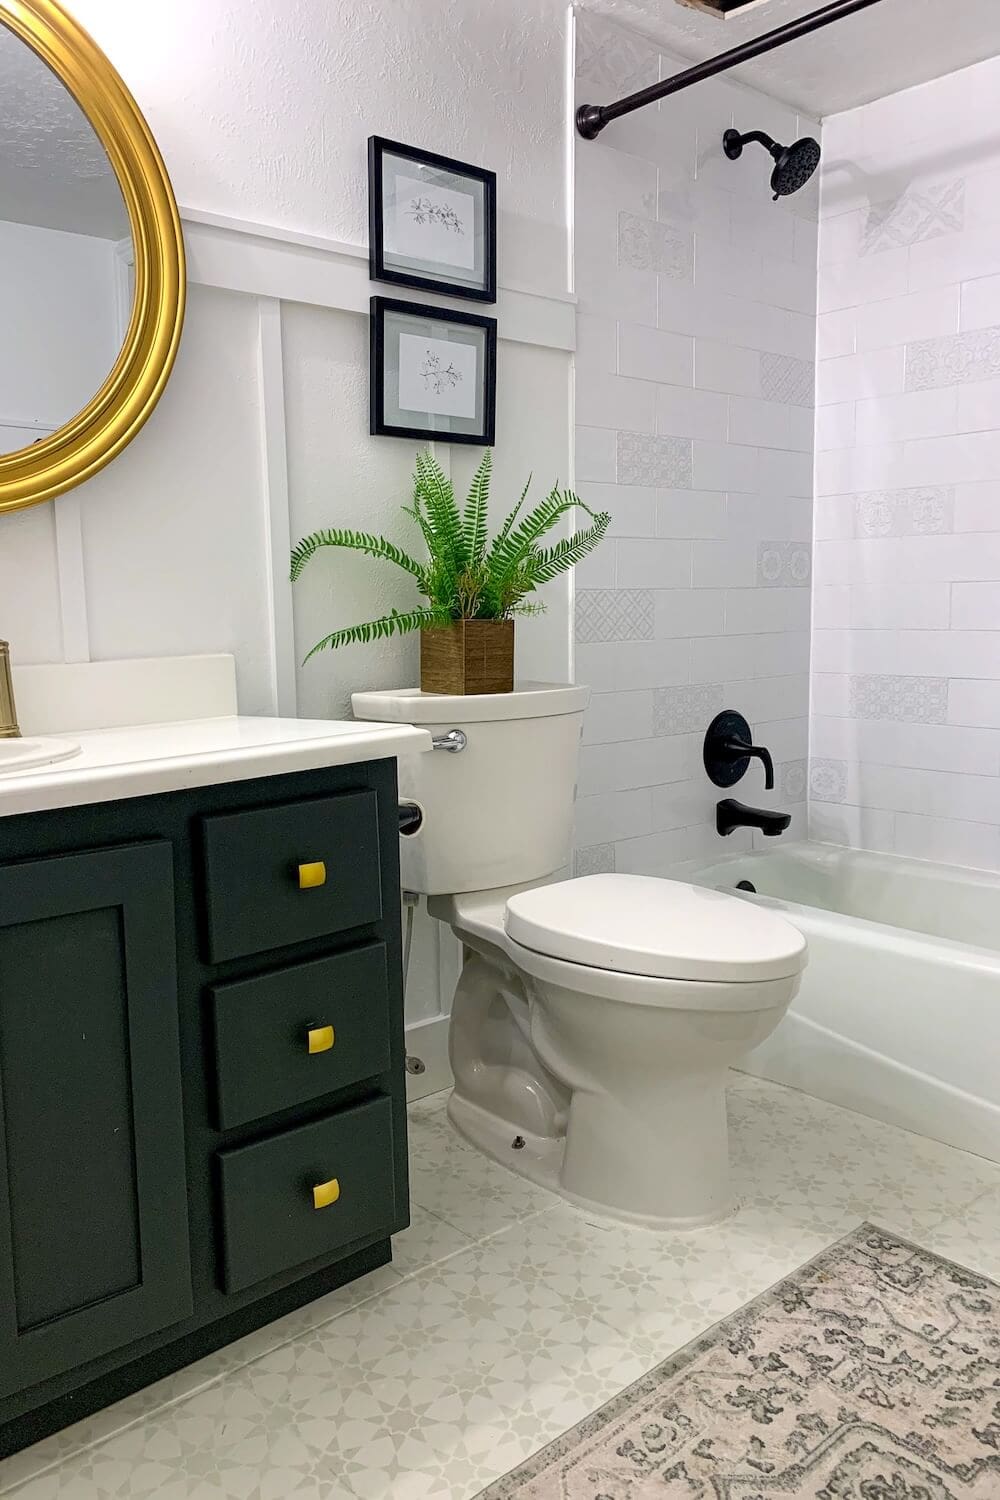
How a Shower Niche Fits Into a Small Bathroom Remodel
This built-in shower niche was just one part of our full basement bathroom makeover, but it’s the upgrade that did the most heavy lifting visually. It made the shower feel like a custom build instead of a box, and it gave us actual storage in a small bathroom that didn’t have any. The rest of the room came together through several budget-friendly DIY projects.
You can see the entire transformation and all the coordinating projects in the small bathroom remodel reveal.
More Small Bathroom Remodel Projects to Try
If you’re planning a bigger remodel or want more bathroom DIY ideas, here are the rest of the projects in this small bathroom cluster:
- How to remove mold from a shower (the right way)
- How to tile a shower (subway tile beginner guide)
- Painting bathroom floor tiles (stencil method)
- How to paint a bathroom vanity
- DIY gold bathroom mirror with Rub ‘n Buff
- DIY board and batten bathroom wall
- Small bathroom remodel hub (all 7 projects in one place)
And if you want more shower-specific tile and trim builds:
📌 Pin This Shower Niche Tutorial for Later
Pin now and come back when you’re ready to build your own shower niche!
FAQ: How to Build a Shower Niche
Standard stud depth is about 3.5 inches, which works well for most shampoo and body wash bottles. If your wall allows 2×6 framing, you can go up to 5.5 inches deep for more storage. Going shallower than 3 inches makes most bottles fall forward, so don’t go below stud depth unless you’re storing something specific.
Most adults are comfortable with a shower niche between 42 and 48 inches from the floor, which puts it at chest height. If kids will use the shower, drop it a few inches lower. The niche should also coordinate with your tile pattern so grout lines align cleanly with the niche edges.
Yes, about 1 to 2 degrees. This forces water to drain forward instead of pooling at the back of the niche, which is the main cause of mildew in DIY niches. Skip this step and you’ll fight mildew issues for the life of the shower.
It’s possible but not ideal in cold climates. Interior walls are safer because they don’t have to deal with temperature differentials that can cause condensation. If you must build on an exterior wall, work with a contractor on insulation and waterproofing details.
Yes. Every surface inside the niche needs a continuous waterproofing layer. The niche has more inside corners than a flat shower wall, and each corner is a potential leak path. Two full coats of liquid membrane is the minimum.
If at all possible, yes. Planning the niche size and position around your tile layout makes the finished niche look intentional instead of crammed in. It also avoids skinny tile cuts at the niche edges, which are both ugly and structurally weak.
Around $50 to $80 in materials if you’re building it as part of a larger remodel where you already have the cement board, thinset, and waterproofing membrane on hand. Hiring a contractor to add a niche typically runs $300 to $800 depending on labor rates in your area.
A focused weekend for the framing, taping, and waterproofing. The actual tile work happens later when you’re tiling the rest of the shower. Plan for 24 to 48 hours of waiting time for the waterproofing membrane to fully cure between applying it and starting tile.
Technically yes, but it’s a much more advanced project that involves cutting tile, removing backer board, and re-waterproofing the area. Most DIYers are better served by a surface-mounted corner shelf, or having a tile pro handle the retrofit if a recessed niche is non-negotiable.
Anything that matches your shower wall tile is the safest bet. For a feature look, use a contrasting patterned tile or mosaic on the back of the niche while keeping the side walls matching the rest of the shower. Avoid huge tile inside the niche because the cuts get awkward.
About Crystel
I’m Crystel Montenegro, a stay-at-home mom of five turned home DIY expert. I share budget-friendly DIY projects, home design, garden, recipes, and lifestyle content from my own home – every project here is one I actually built or made. Read more about me or follow along on Instagram.
Doing the whole bathroom? This shower niche tutorial is one of 7 projects in my DIY small bathroom remodel. The hub post has the full breakdown of every project, the cost-saving framework, and links to all the other tutorials.