


How to Paint Bathroom Floor Tiles


Updated July 13, 2026
If you’ve ever stared at outdated tile and wished you could change it without demolition or a huge budget, learning how to paint bathroom floor tiles is a game-changer. That’s exactly what I did in our basement bathroom. With the right primer, paint, and a simple tile stencil, I turned old beige tile into a fresh, patterned floor that looks custom without the cost of new tile.
In this guide I’ll show you how to paint bathroom floor tiles step by step: primer, base coat, stenciling, and sealing. The result is a durable, pretty floor instead of a peeling paint disaster. This method works on most ceramic and porcelain tile, and I’ll share notes about vinyl and other surfaces too.
Part of my Small Bathroom Remodel series. The painted floor was the budget MVP of my basement bathroom transformation. See the full small bathroom remodel breakdown →
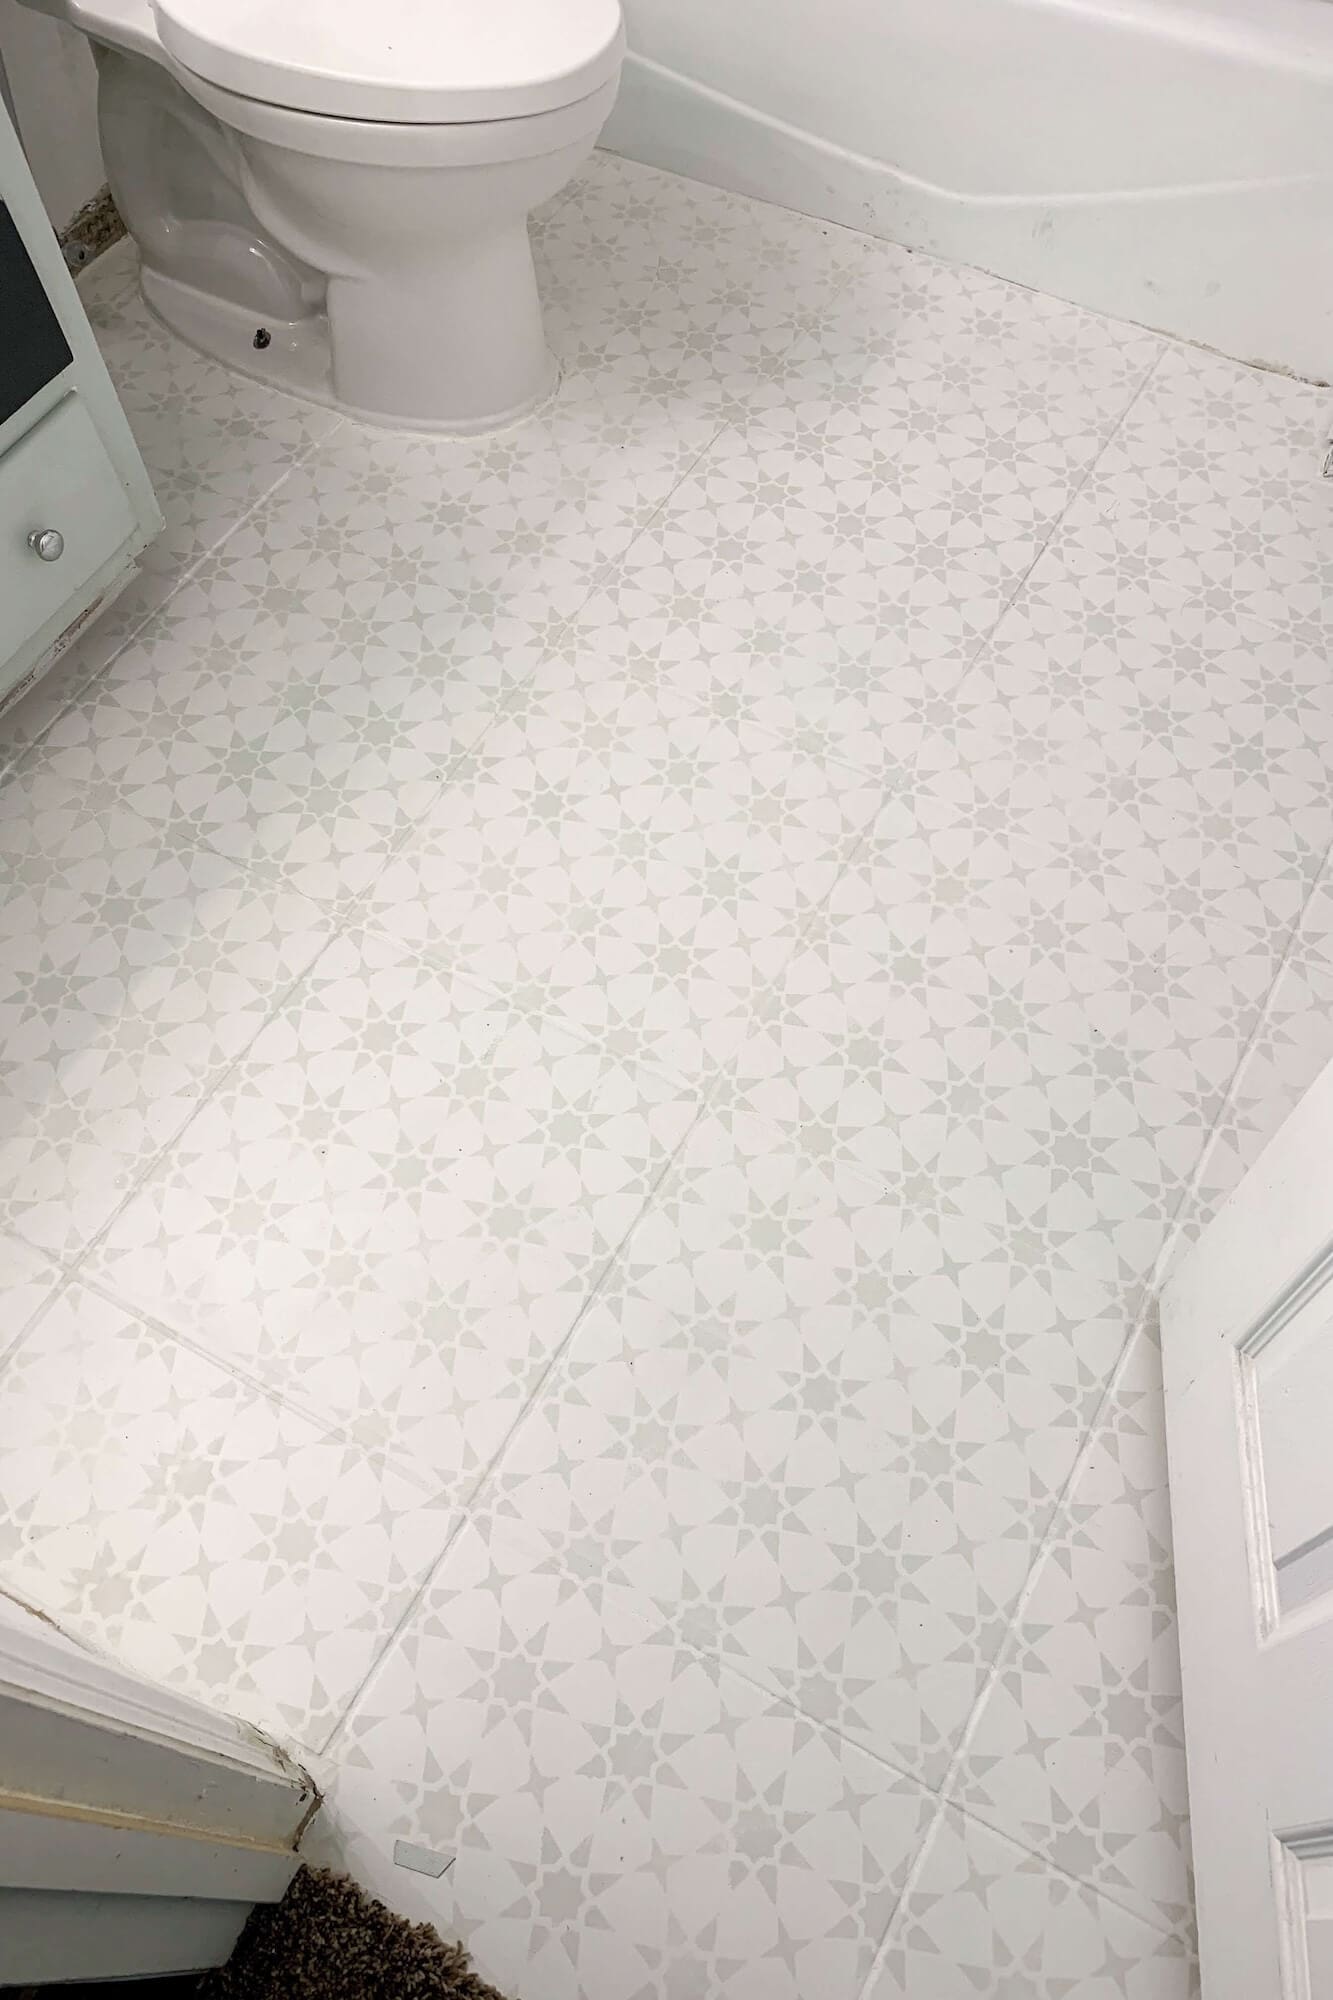
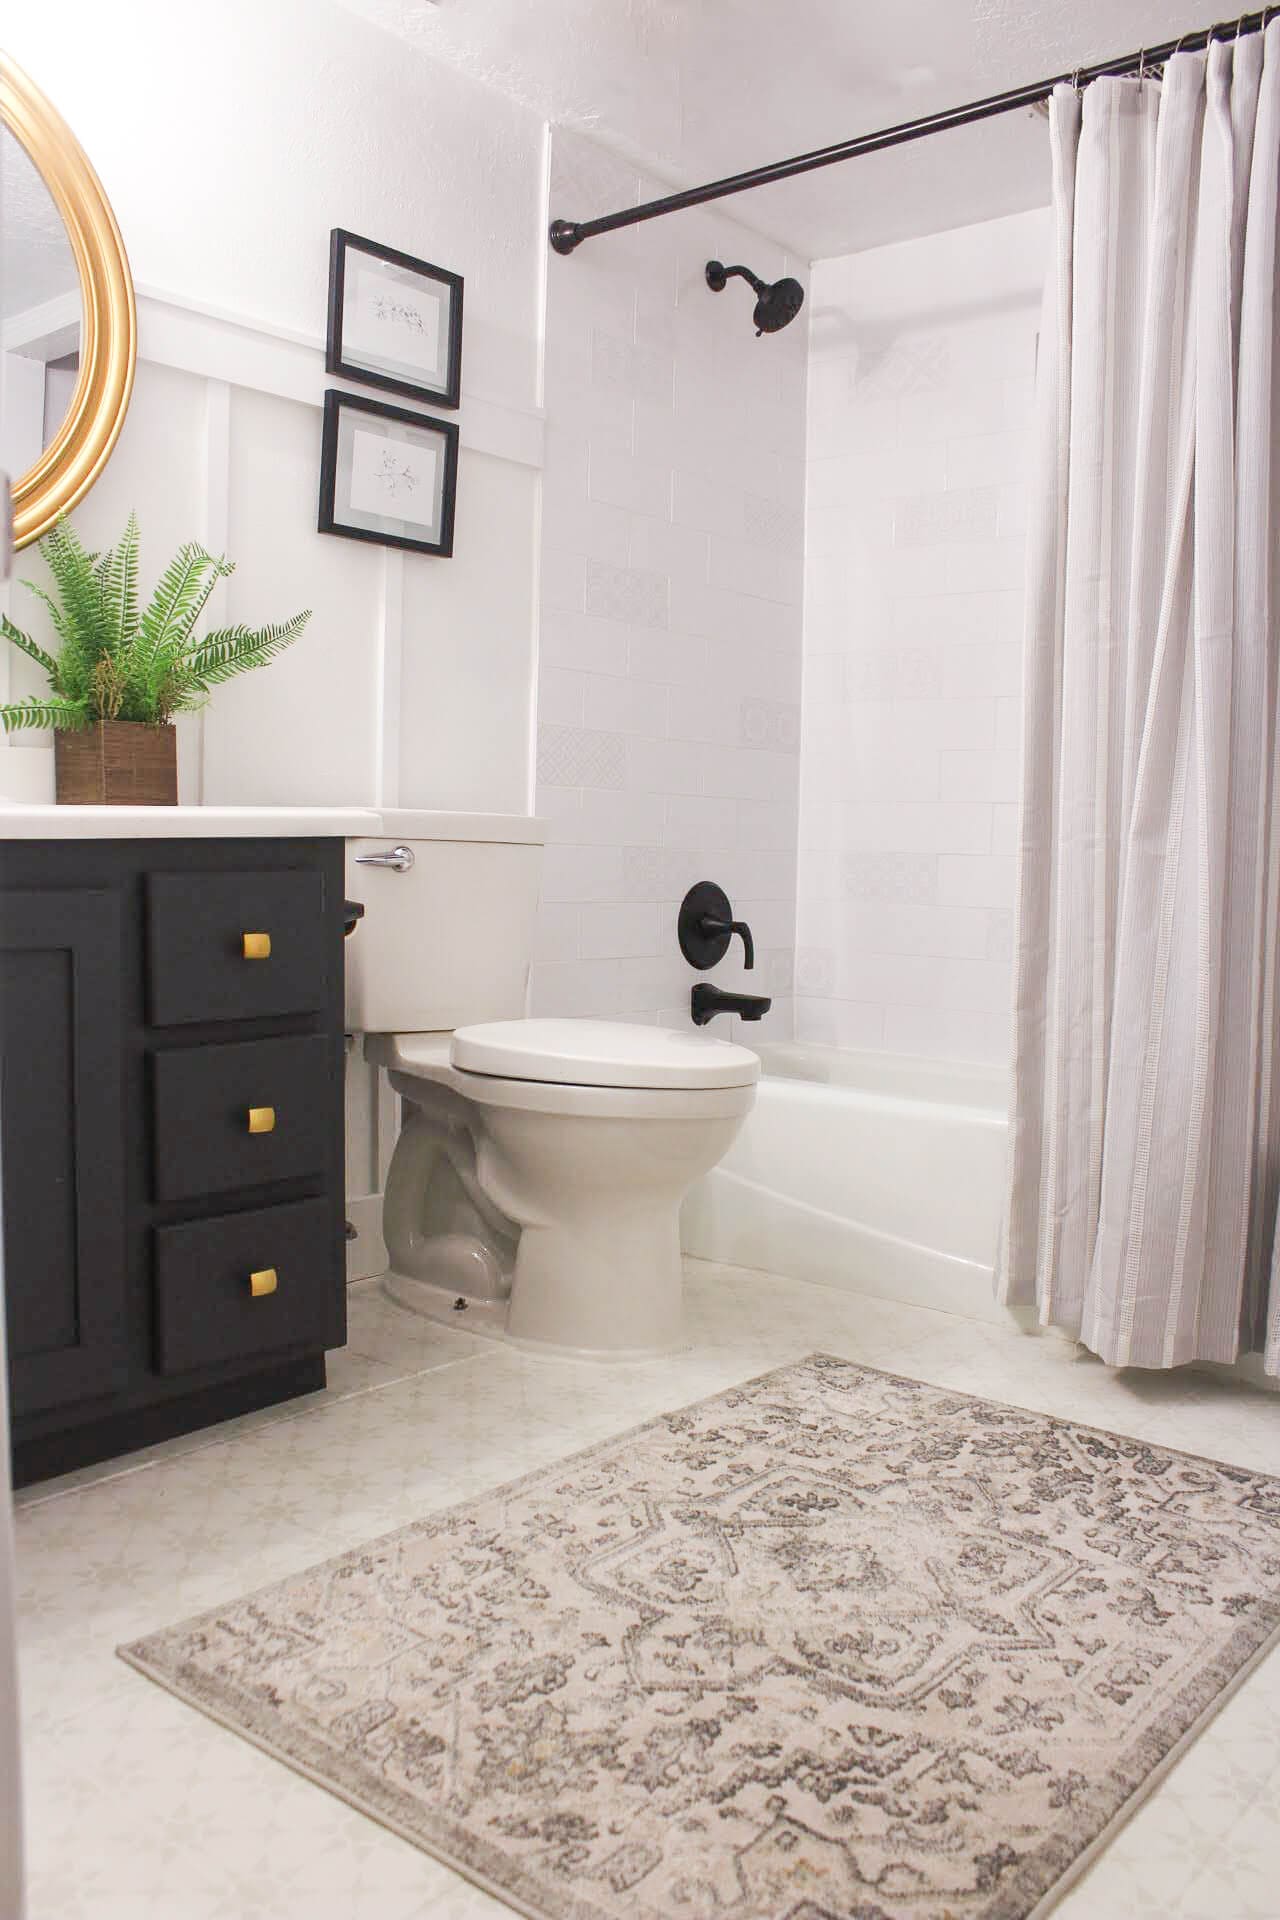
In this post, I’ll show you exactly how to prep, paint, and stencil your own tile floors from start to finish. Whether you’re working with ceramic, porcelain, or even vinyl tiles, this project walks you through everything you need to know about stenciling a floor.
Quick Answer: How to Paint Bathroom Floor Tiles in 5 Steps
Here’s how to paint bathroom floor tiles the right way: deep-clean and degrease the tile so the primer can grab on, roll on a high-adhesion bonding primer made for slick surfaces, then layer on a durable floor or enamel paint as your base coat. Optionally add a stencil pattern with a contrasting color, and finish with a clear polycrylic sealer for high-traffic rooms. Skip prep and your paint will peel within months. Do it right and your floor can last several years.
Watch the Full Bathroom Makeover Tutorial
Table of Contents
- Quick Answer: How to Paint Bathroom Floor Tiles in 5 Steps
- Watch the Full Bathroom Makeover Tutorial
- How to Paint Bathroom Floor Tiles: At a Glance
- Tools and Materials You’ll Need
- The Before: Budget Bathroom Floor Makeover Without Replacing Tile
- Step 1: Prep the Bathroom Floor Tiles for Paint
- Step 2: Prime and Paint Bathroom Floor Tiles
- Step 3: Stencil the Painted Bathroom Floor
- Step 4: Stencil Tight Spots Around the Toilet and Tub
- Step 5: Seal Painted Bathroom Floor Tiles (Optional but Helpful)
- How Much Does It Cost to Paint Bathroom Floor Tiles?
- Common Mistakes When Painting Bathroom Floor Tiles
- Final Thoughts: Budget Bathroom Floor Makeover
- 📌 Pin This Painted Tile Floor Tutorial for Later
- FAQs How to Paint Bathroom Floor Tiles
How to Paint Bathroom Floor Tiles: At a Glance
Before we get into photos and details, here’s the basic flow for a budget bathroom floor makeover without replacing tile:
- Deep-clean and degrease the tile so primer and paint can actually bond.
- Sand lightly if needed and tape off baseboards, tub, and toilet.
- Roll on a bonding primer. The best primer for painting tile floors is one made to grab smooth surfaces.
- Apply a solid base coat of floor or enamel paint.
- Use a tile stencil to add your pattern with a contrasting color.
- Tackle tight spots around the toilet and walls with a trimmed stencil.
- Optionally seal everything with a clear topcoat for extra durability.
Tools and Materials You’ll Need
You don’t need fancy tools to learn how to paint bathroom floor tiles, but you do need the right products so the finish actually holds up.
- Krud Kutter degreaser
- Vacuum
- Painter’s tape
- High-adhesion bonding primer (the best primer for painting tile floors is specifically labeled for glossy or tile surfaces)
- Durable floor paint, cabinet enamel, or trim enamel (look for something rated as the best paint for bathroom floor tiles or for high-traffic surfaces)
- Foam roller plus paint tray
- Angled paint brush
- Small stencil brush (a stippling brush works best)
- Tile stencil
- Scissors (for trimming the stencil as needed)
- Optional: water-based polycrylic topcoat for sealing painted bathroom floor tiles in high-traffic rooms
The Before: Budget Bathroom Floor Makeover Without Replacing Tile
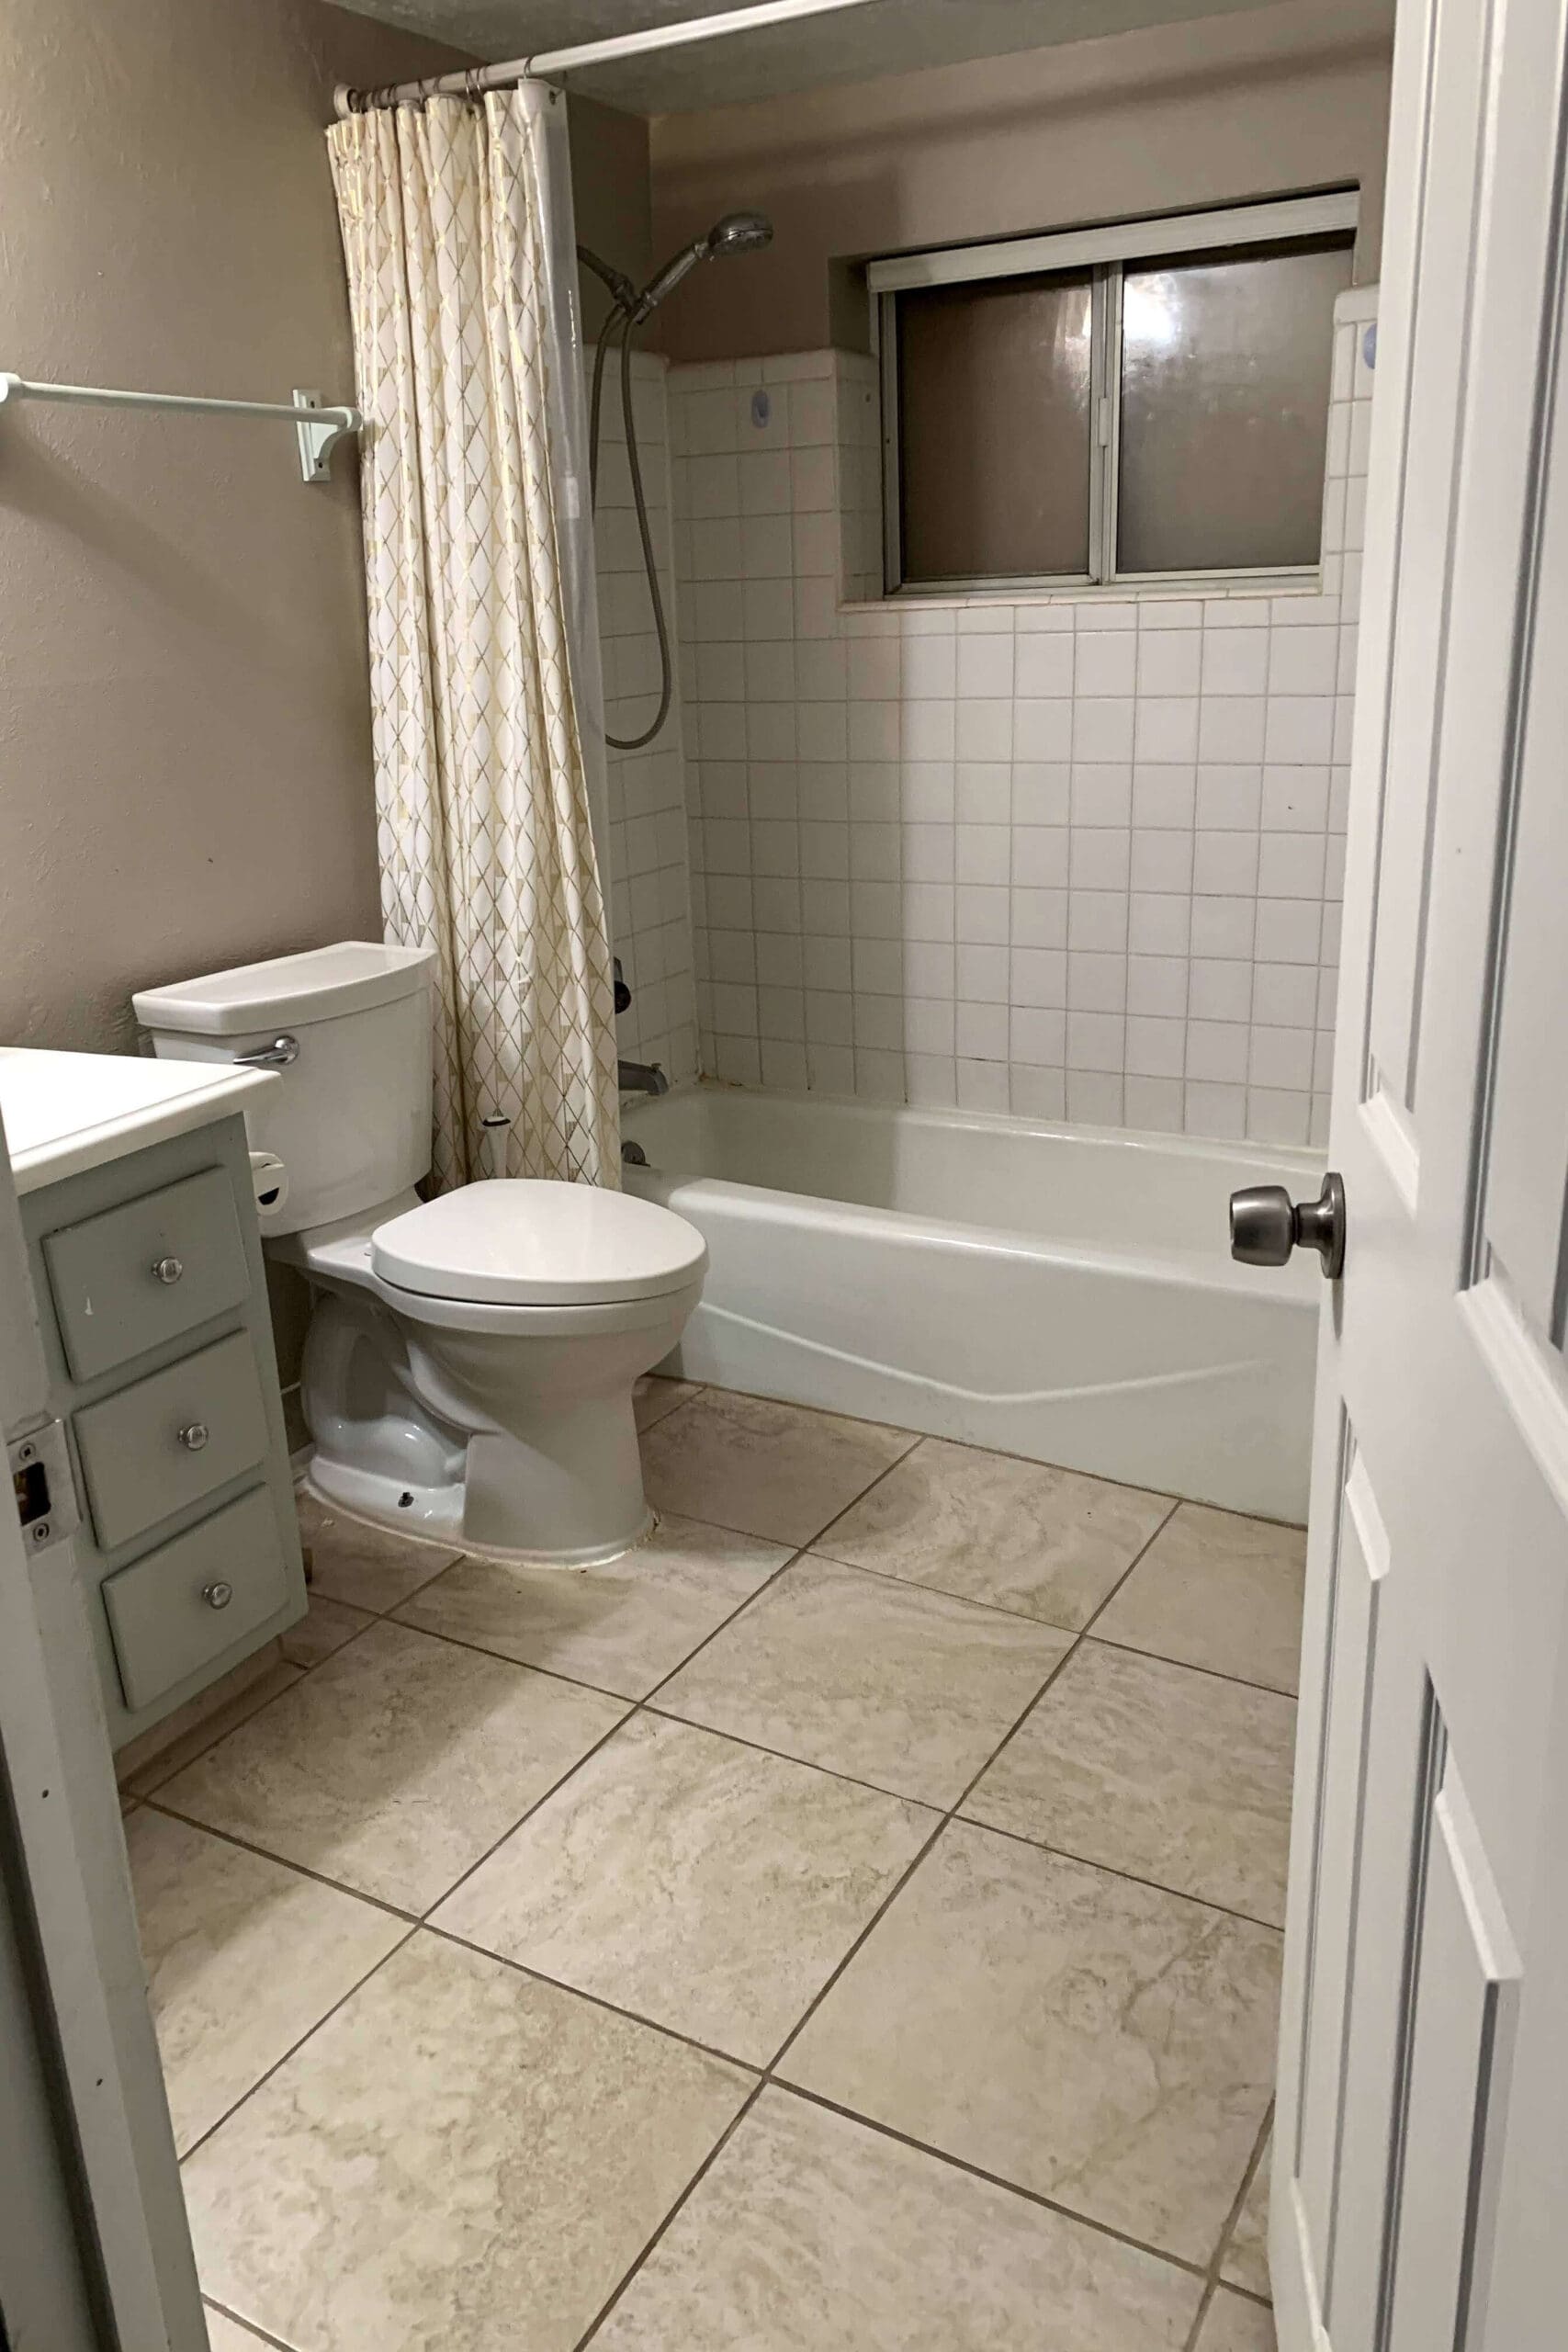
This basement bathroom started with large beige tiles that felt heavy and dated, especially paired with tan walls and a basic shower surround. I’d already retiled the shower to freshen things up, but the floor still made the whole room feel tired.
Instead of ripping out all the tile, I wanted a cheap bathroom floor idea that still looked intentional, something that could pass as patterned cement or artisan tile. That’s when I decided to figure out how to paint bathroom floor tiles with a stencil: keep the existing tile, but give it a totally new look with paint and pattern.
Step 1: Prep the Bathroom Floor Tiles for Paint
Prep is where a DIY tile floor succeeds or fails. Paint will not stick to a dirty, dusty, or glossy surface, period.
Remove Baseboards If Needed
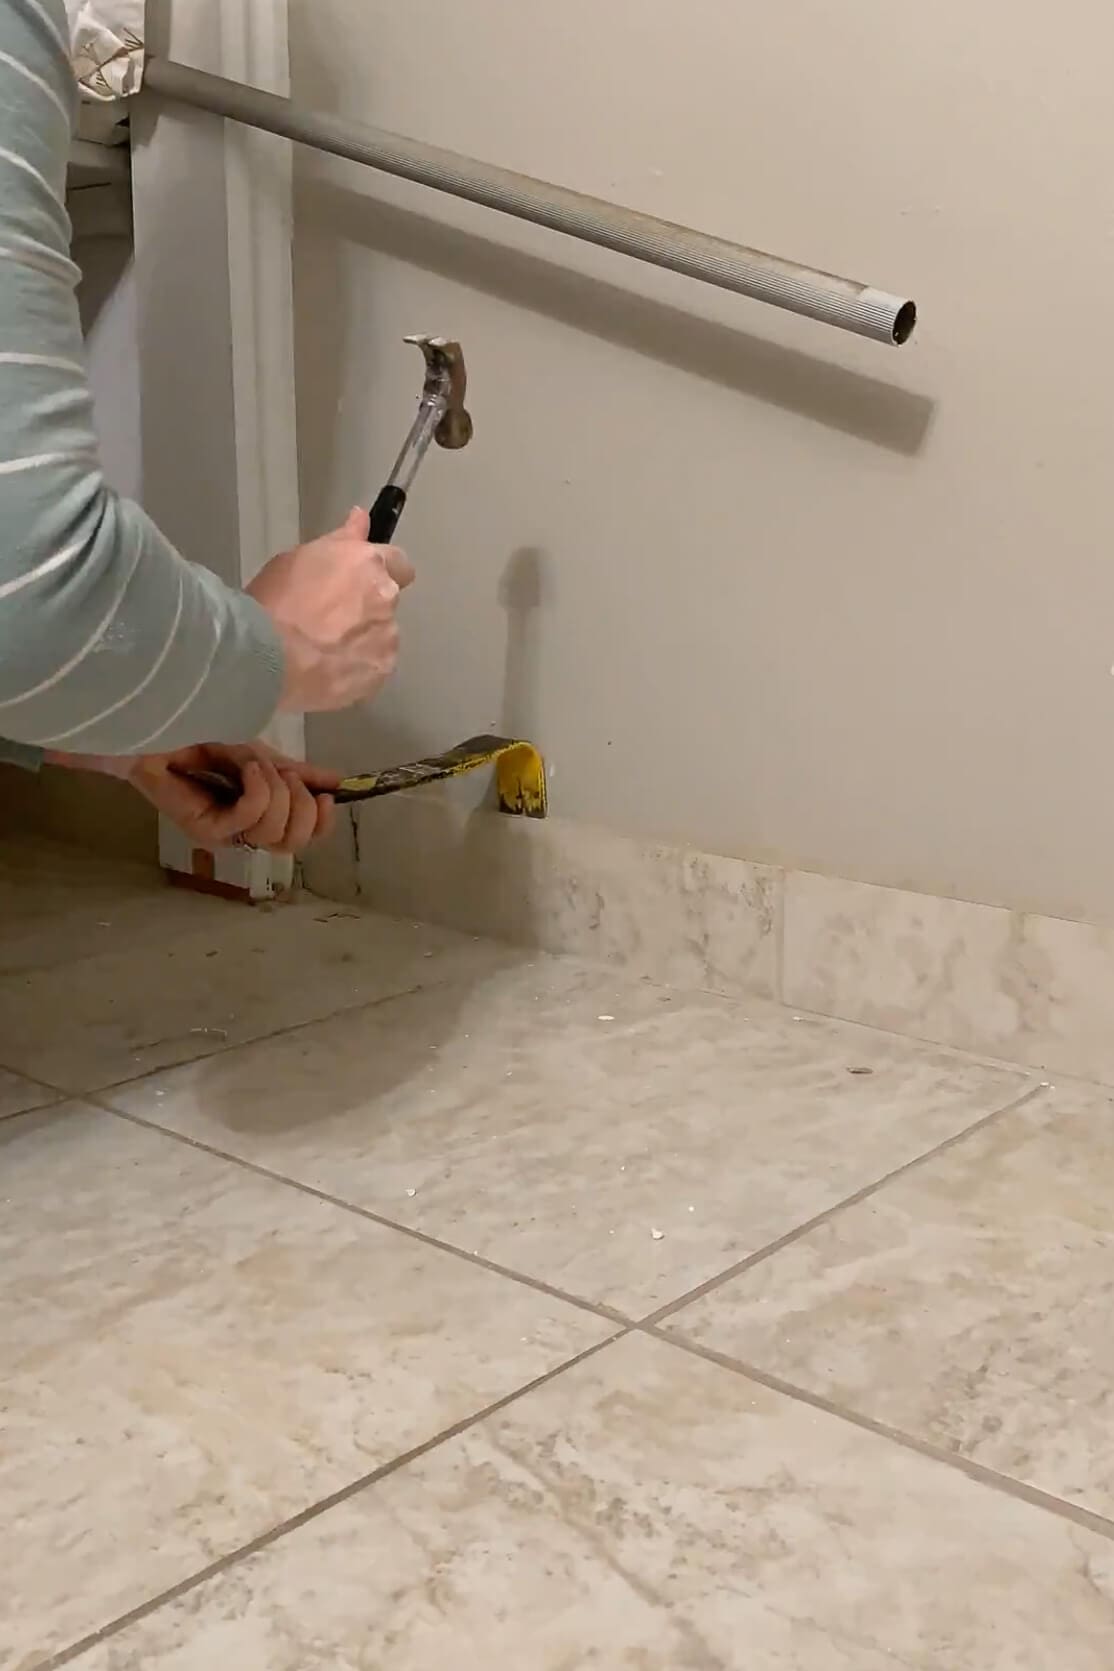
In this bathroom the “baseboard” was actually a row of tile, so I carefully pried it off with a hammer and pry bar. Removing it gave me a clean edge and kept the painted pattern from looking chopped off at the wall.
Vacuum Thoroughly
Vacuum the entire floor, including along the tub and behind the toilet, to pick up grit and dust. Any debris left behind will get trapped under the primer and ruin your finish.
Deep-clean with degreaser
Spray the tile with a strong cleaner or degreaser and scrub well. This step matters whether you’re working over ceramic, porcelain, or vinyl. Any residue (soap scum, hairspray, oils) will keep the primer from bonding.
Let It Dry Completely
Don’t rush this. Moisture hiding in grout lines can mess with adhesion. I let mine sit overnight before priming.
Can You Paint Ceramic Bathroom Floor Tile?
Yes, if you clean it thoroughly and use a bonding primer plus a durable paint. The same applies to porcelain tile. Vinyl tile can sometimes be painted too, but it needs extra cleaning and a product that’s approved for flexible surfaces, and it won’t usually last as long as paint on ceramic or porcelain.
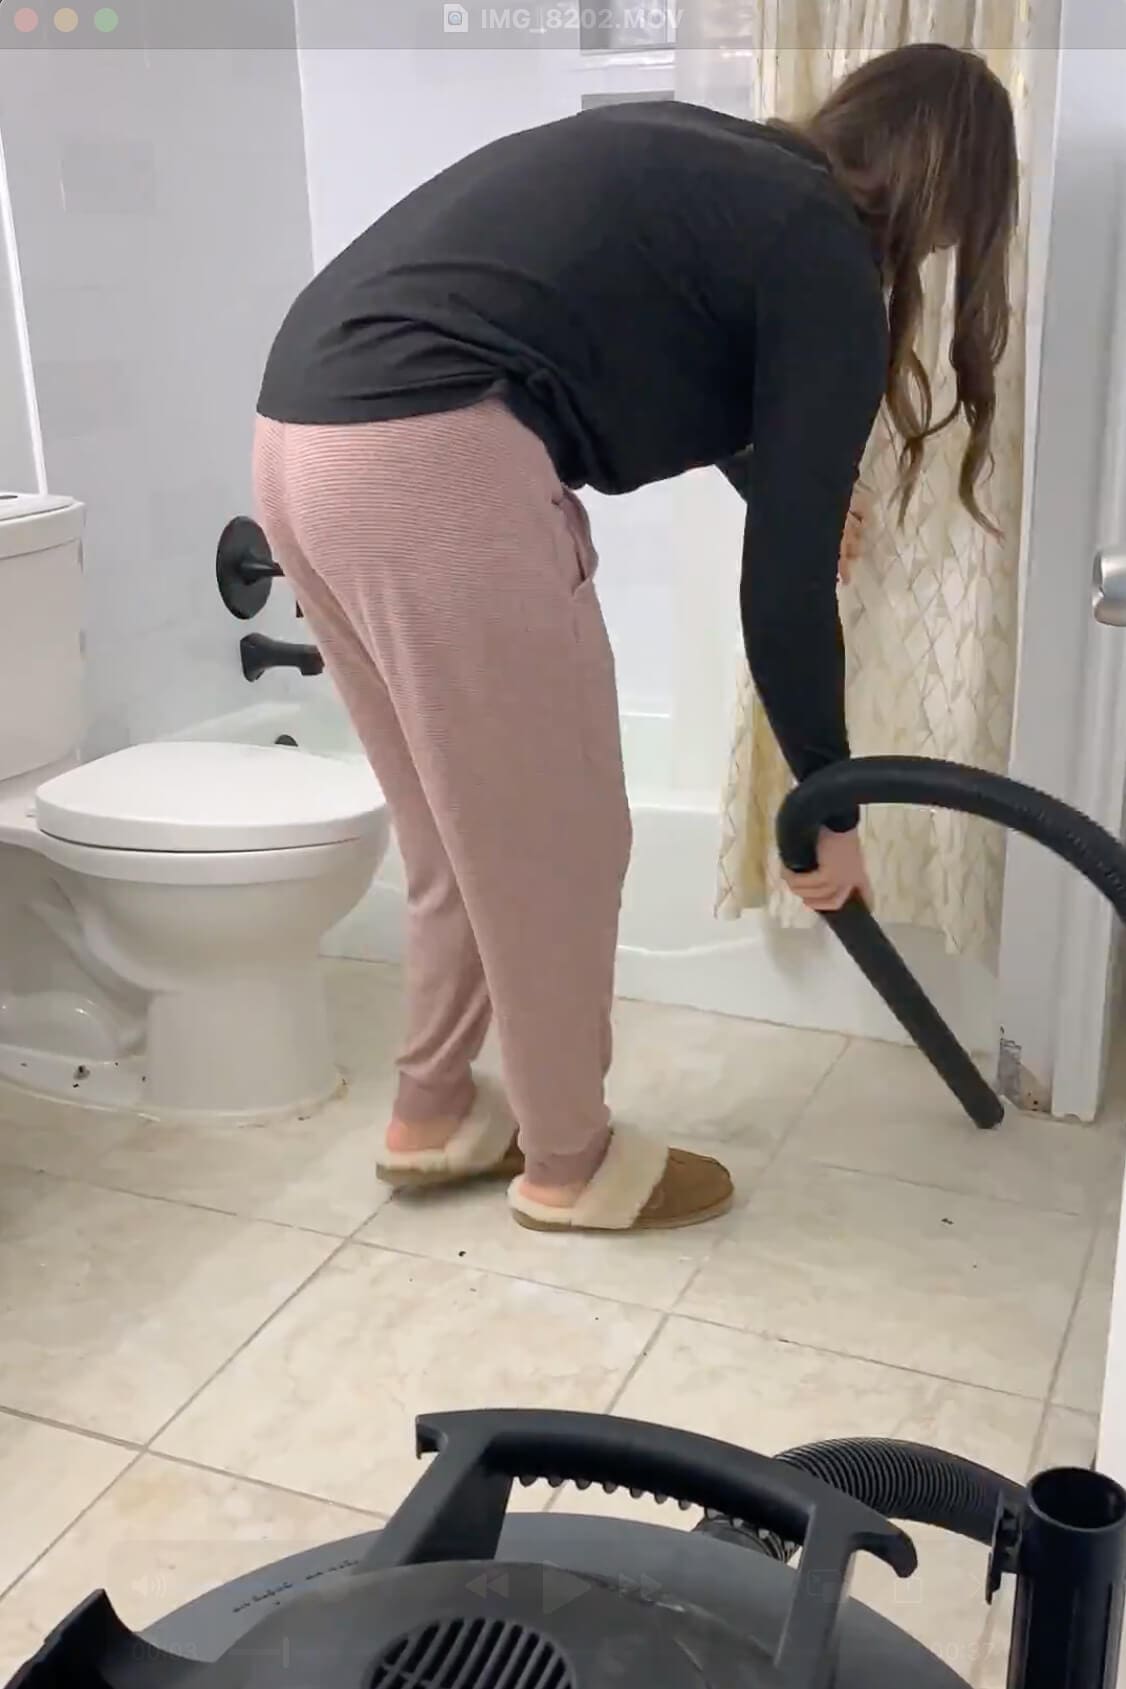
Step 2: Prime and Paint Bathroom Floor Tiles
With the tile spotless and dry, it’s time to lock in the surface and build your base color. This is the make-or-break step for painted tile that doesn’t peel.
Roll On Bonding Primer
Use a roller for the main areas and a brush for edges and around the toilet. The primer is what lets paint grab onto the tile, so don’t skip it or skimp on coverage.
Let the Primer Cure According to the Can
Follow the time on the label. This is not the place to rush. Most bonding primers need at least 4 hours, sometimes overnight, before you can paint over them.
Paint the Base Color
Once the primer is dry, apply your base coat. Mine was a warm white to brighten the room. Cut in around edges and fixtures with an angled brush, then roll the rest with a foam roller.
Add a Second Coat If Needed
For most paint tile floor projects, two thin coats look better and last longer than one heavy coat. Always thin and even beats thick and patchy.
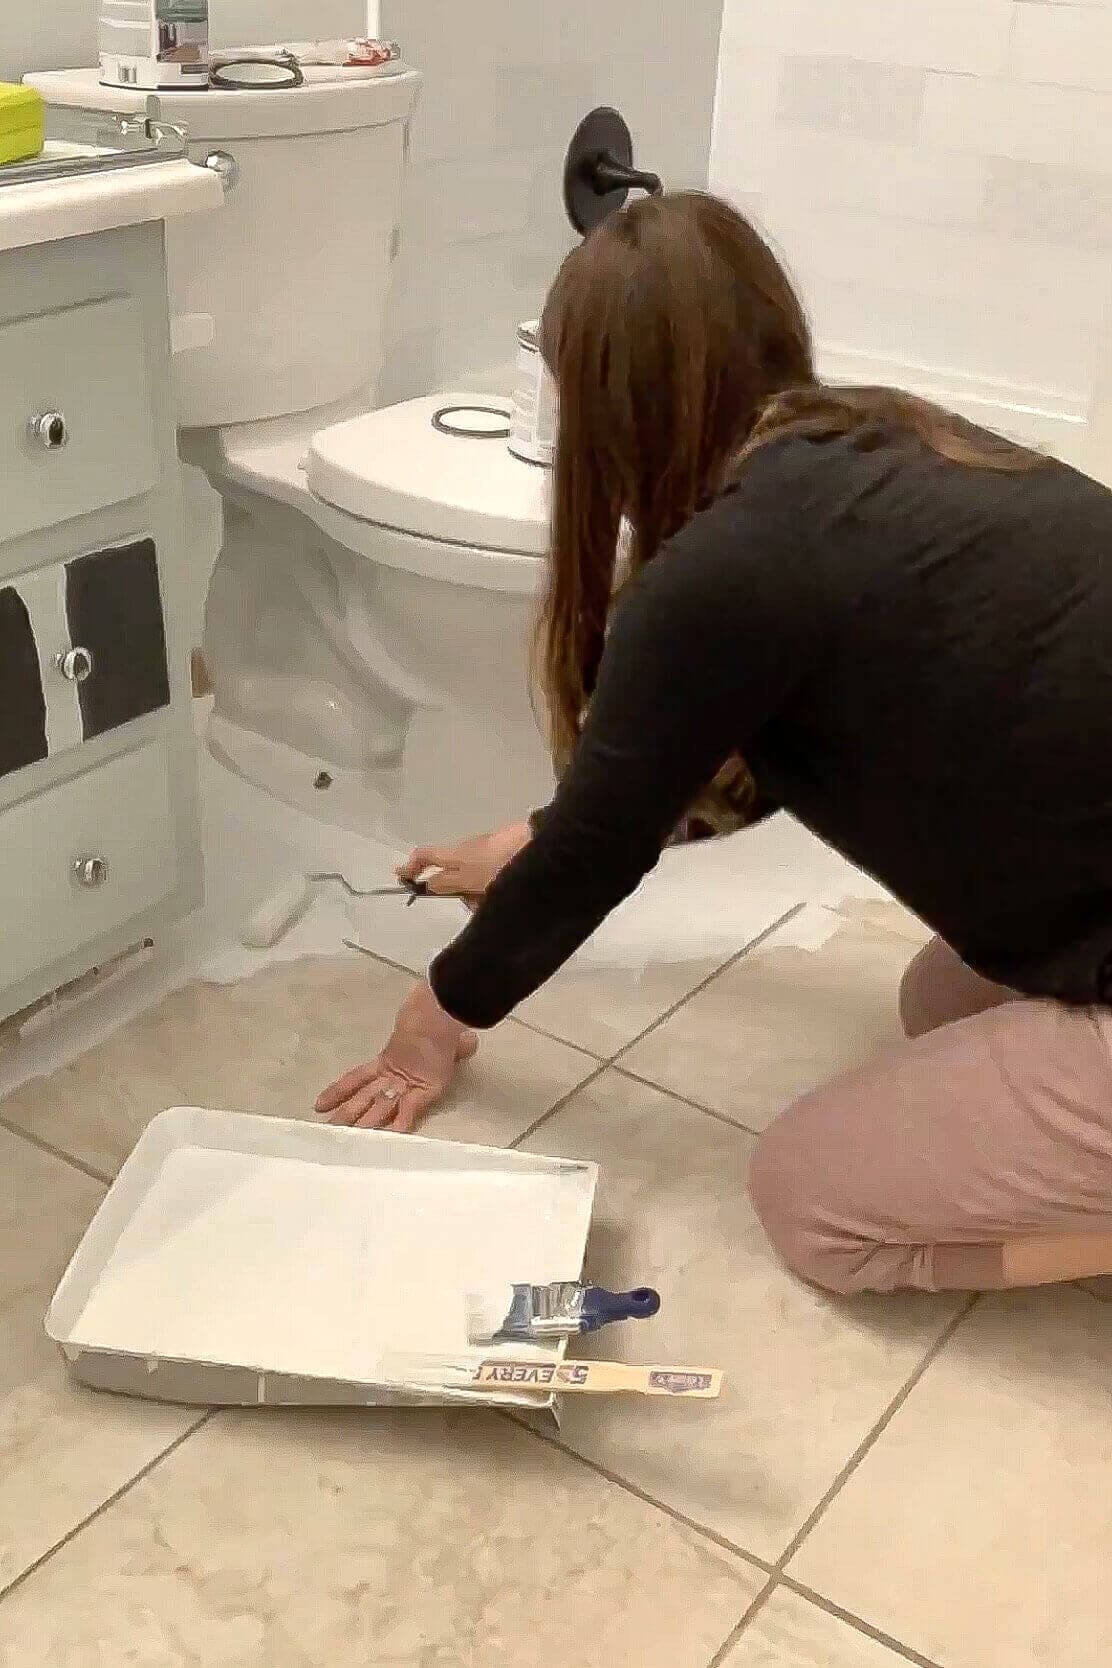
You’ve now finished the “solid color” part of how to paint bathroom floor tiles. You could stop here and keep a clean painted floor, or move on to stenciling for that custom look.
Step 3: Stencil the Painted Bathroom Floor
Now for the fun part: turning a plain painted floor into a stenciled bathroom floor.
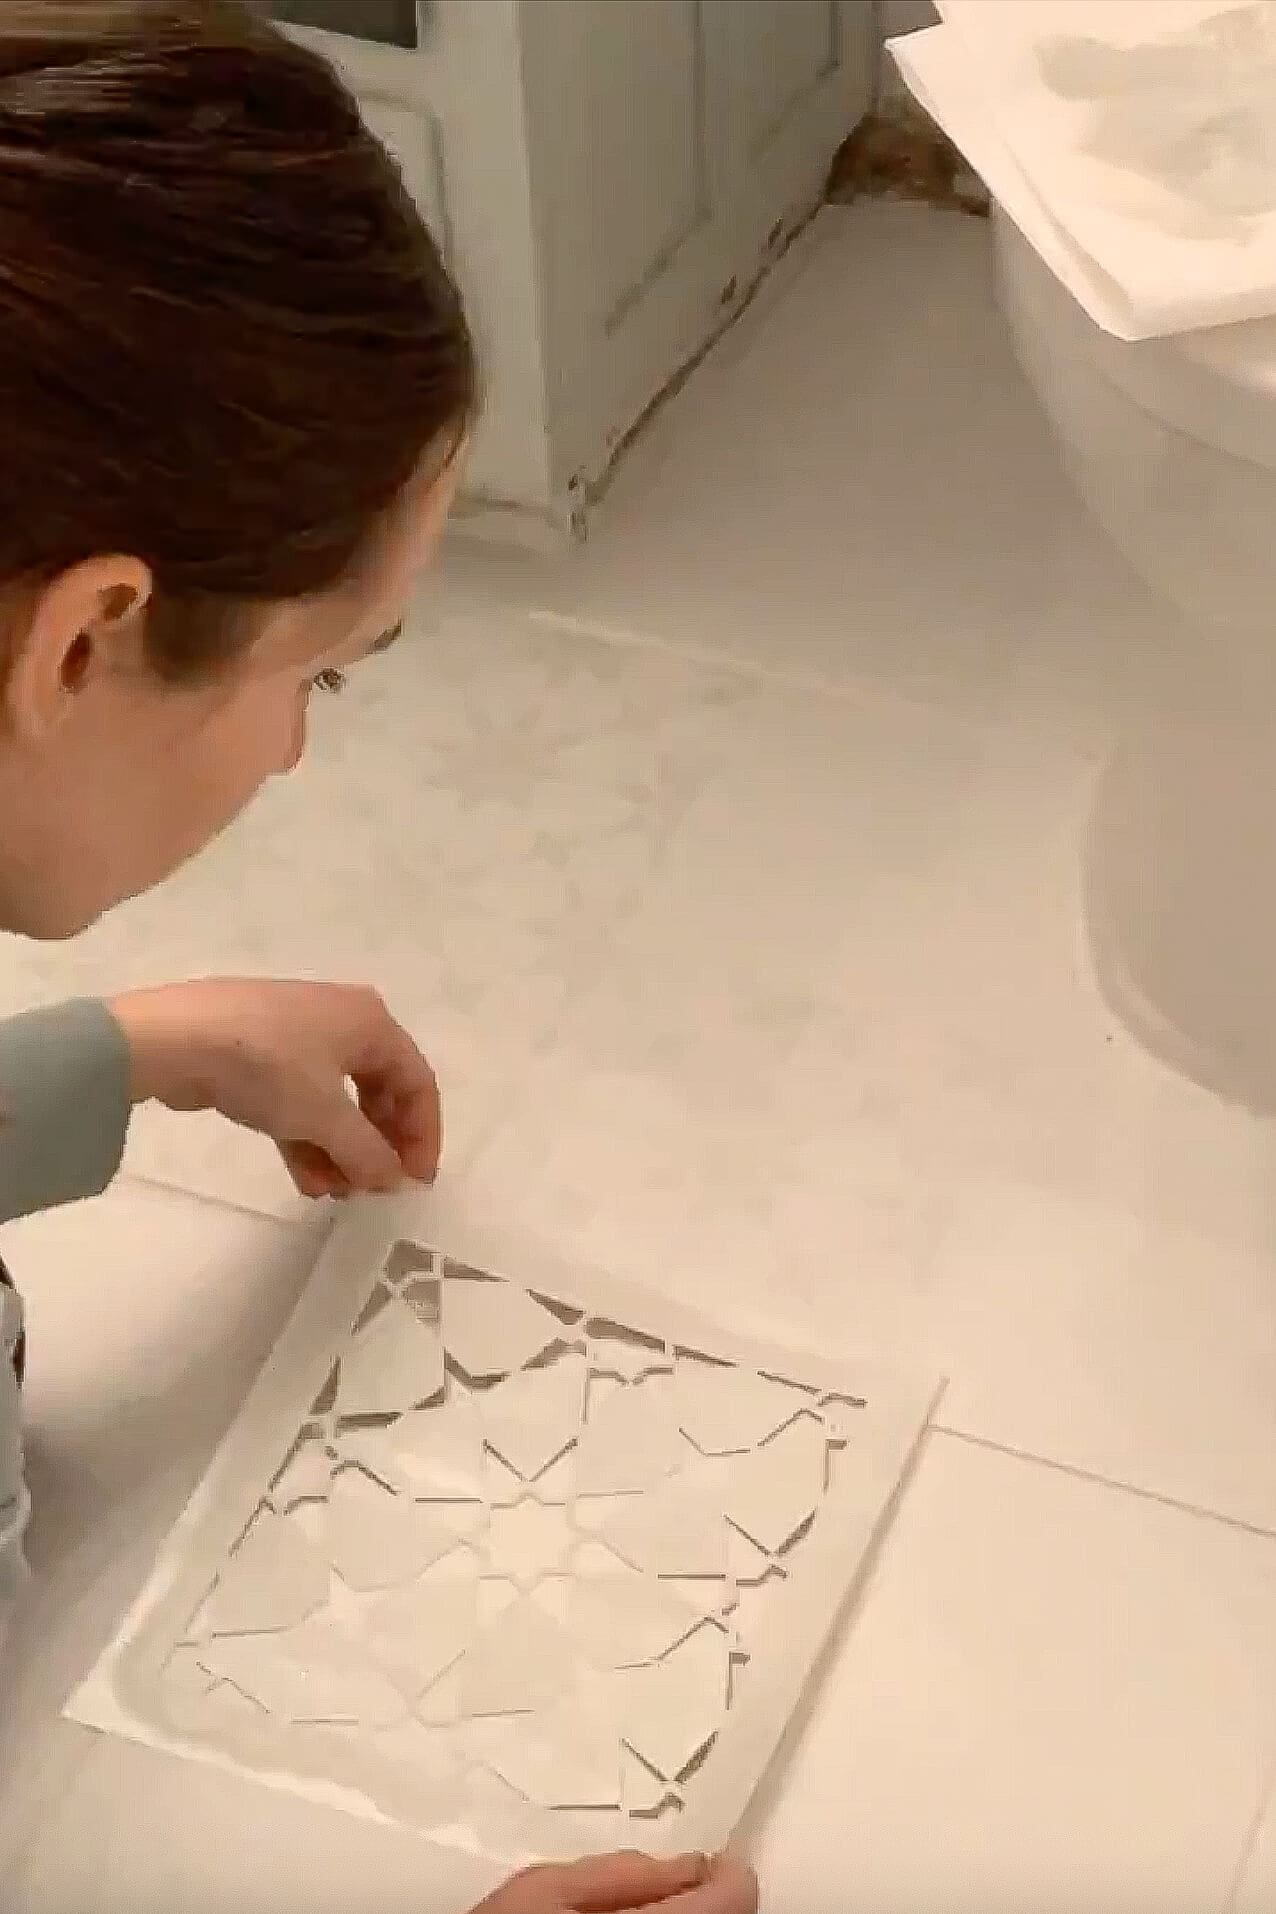
- Lay the stencil over your first tile or group of tiles, making sure it’s straight.
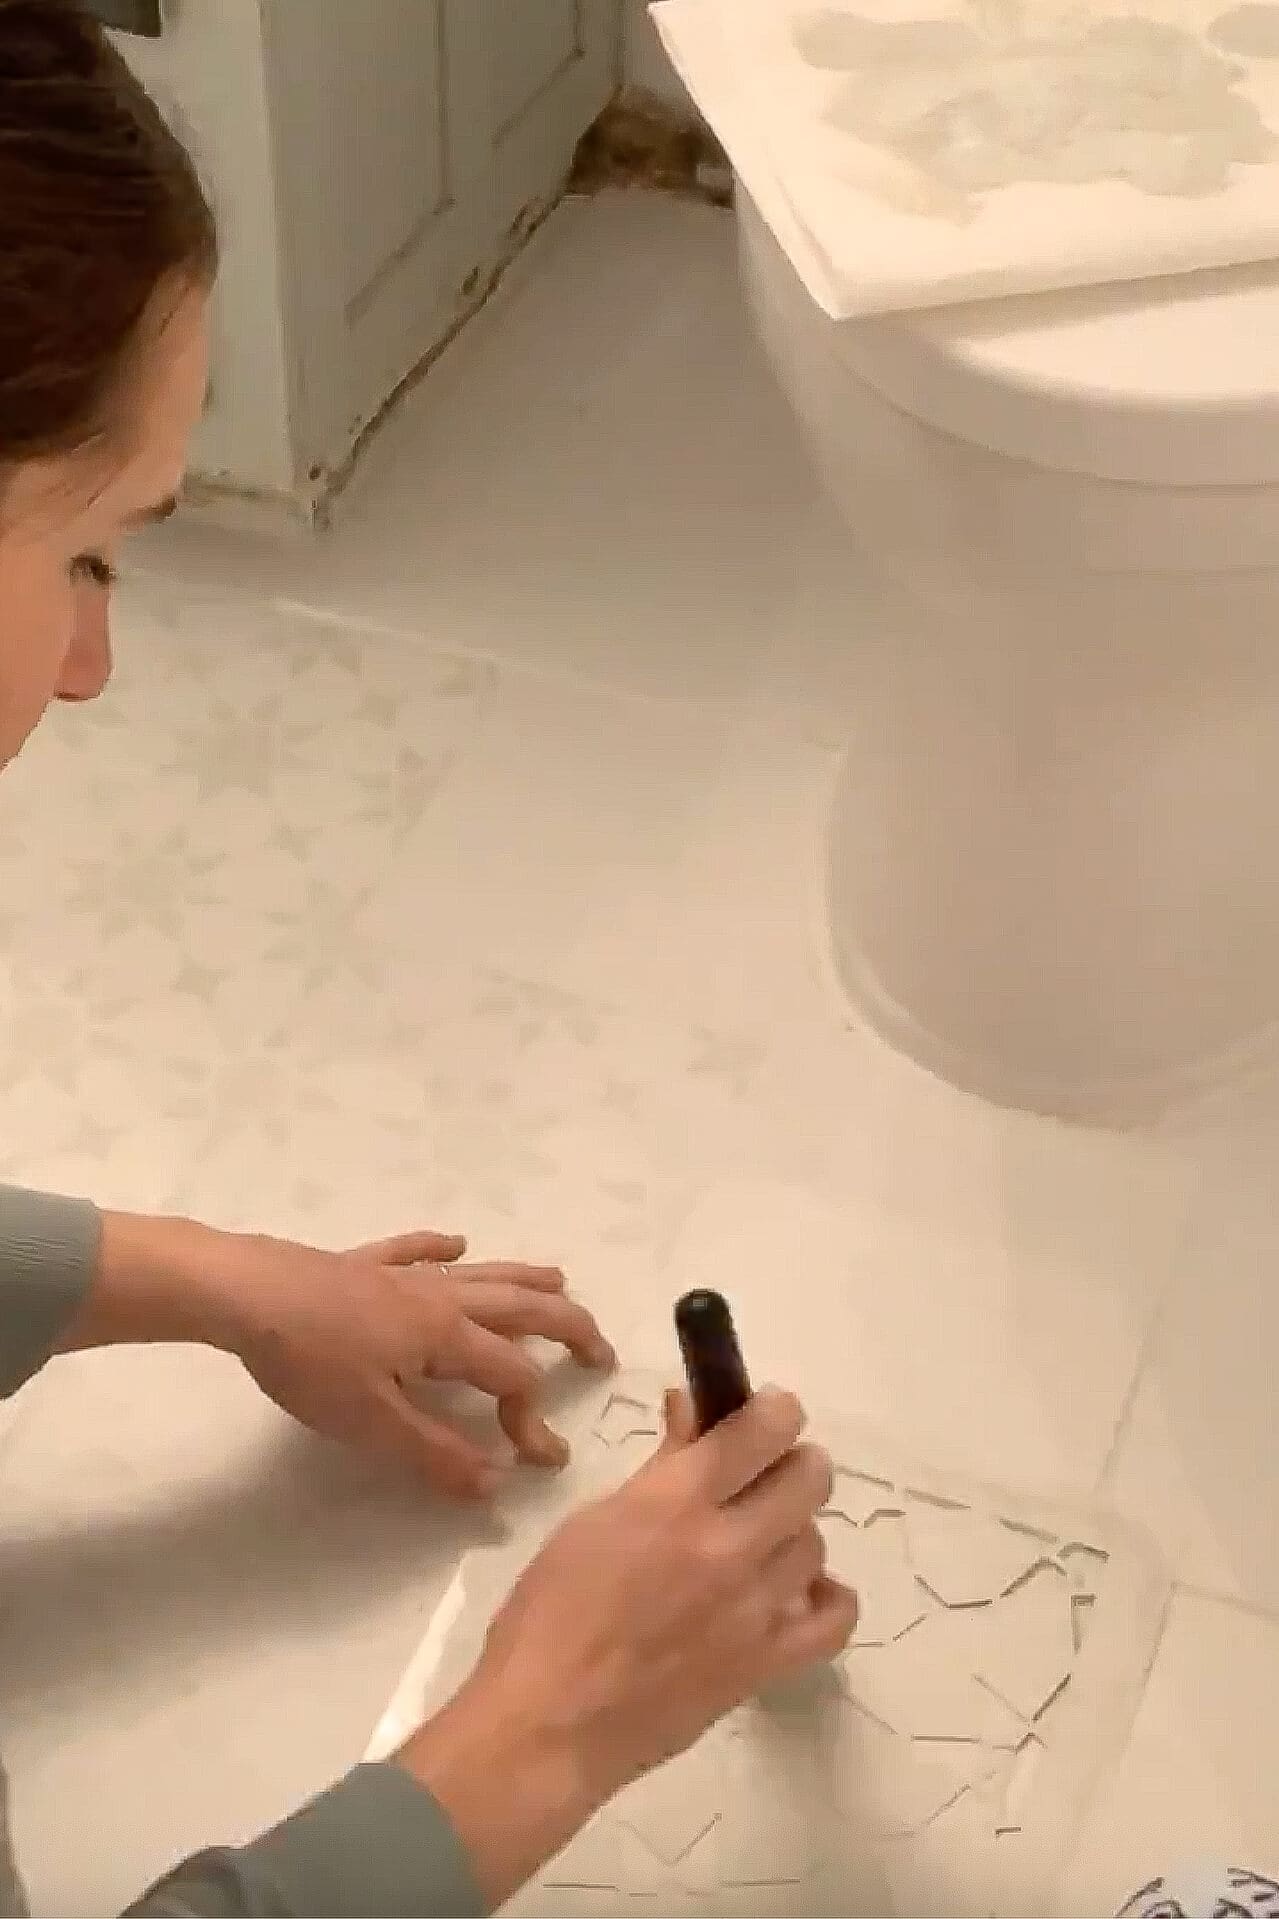
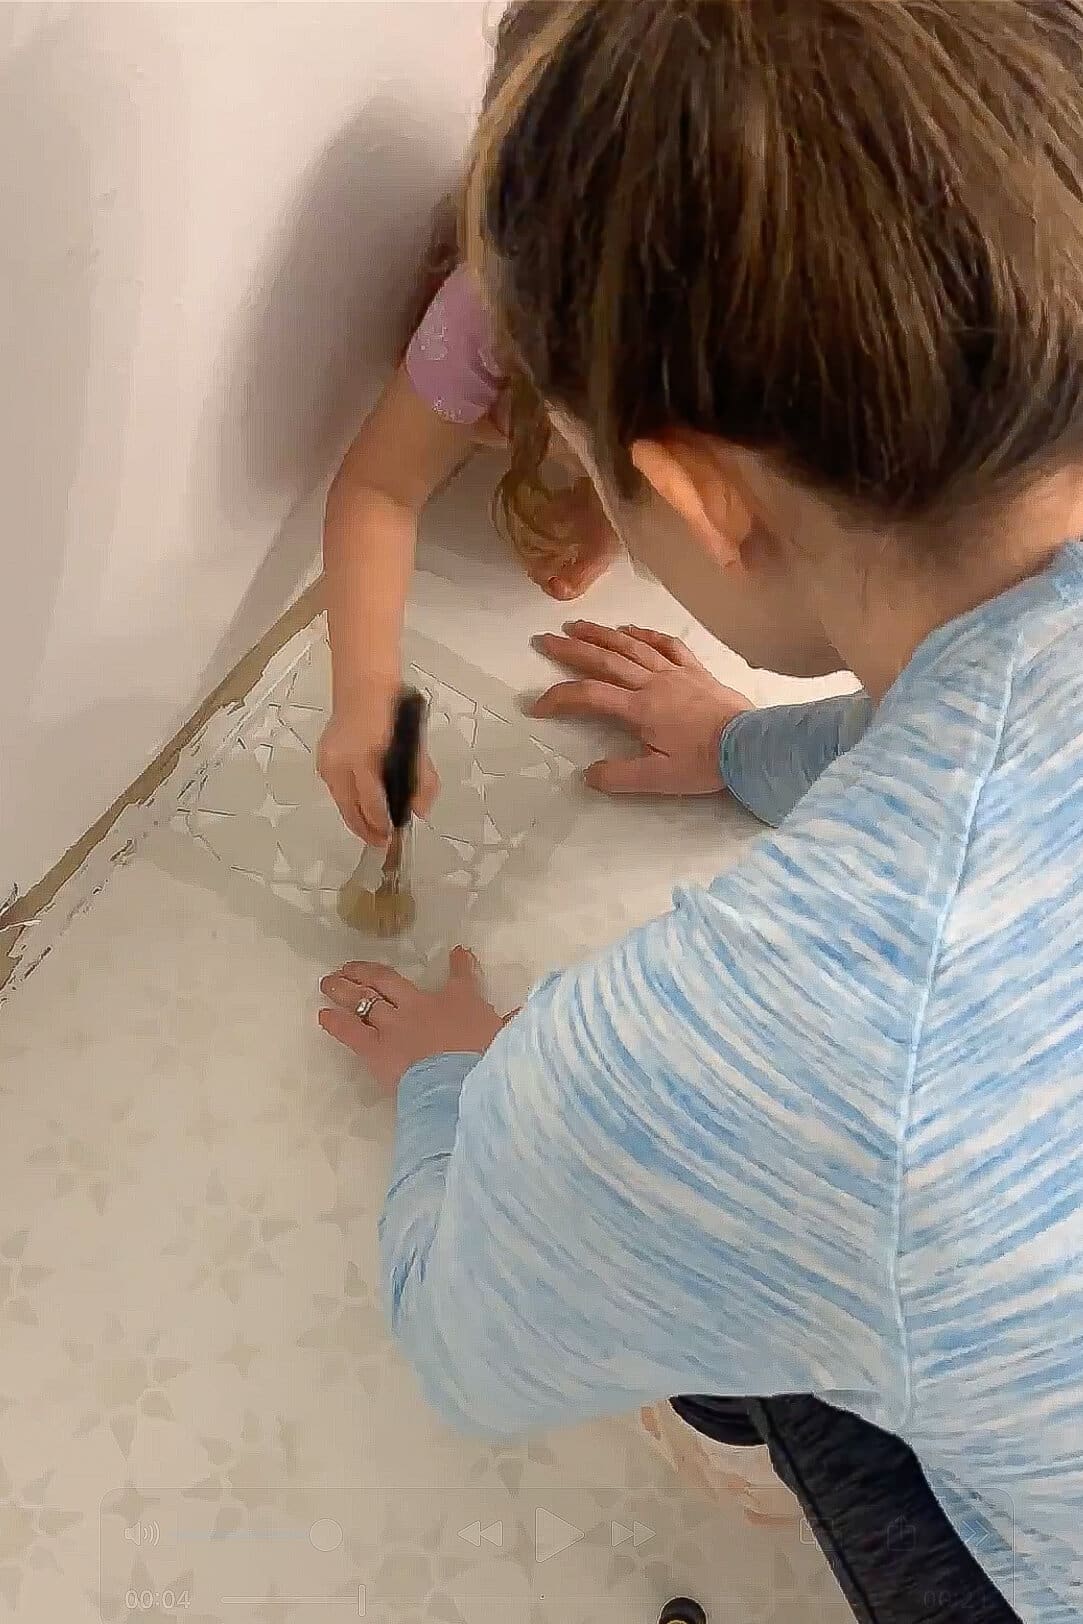
- Load a small round stencil brush with just a little paint, dab off the excess on a paper towel, and use an up-and-down stippling motion. Rolling tends to push paint under the stencil; stippling keeps lines crisp.
- Once you’re done with the first repeat, lift the stencil straight up, reposition it using the built-in registration marks, and continue.
I worked through all the easy, full-stencil areas first. That let me see the repeating pattern and get my rhythm before dealing with corners and tight spots.
This method works for lots of bathroom floor tile stencil ideas: geometric shapes, stars, florals, or simple borders. The color contrast doesn’t need to be huge. Even a soft gray over white looks beautiful and hides dirt well.
Step 4: Stencil Tight Spots Around the Toilet and Tub
Every stenciling a tile floor project has a few awkward areas, especially in a small bathroom.
Around the Toilet
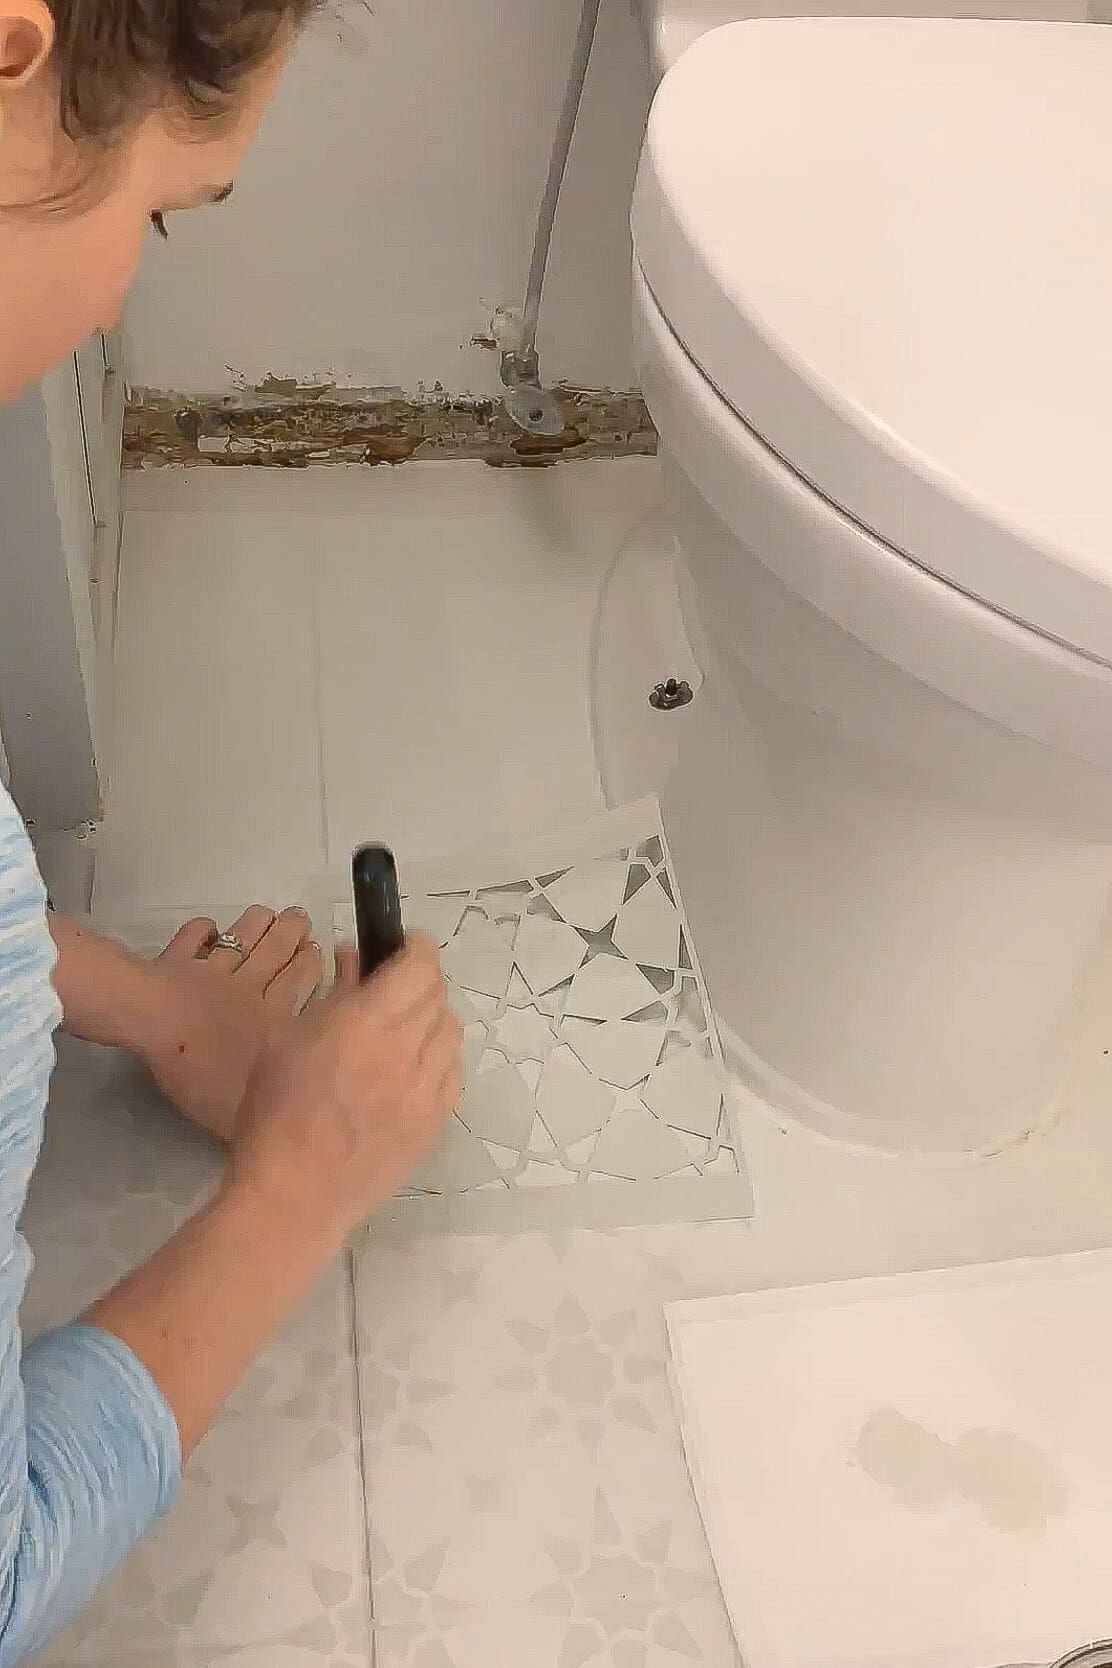
Gently bend the stencil up the wall and around the toilet base so you can get as much of the pattern as possible without smearing paint.
Along Walls and Tub Edges
When the full stencil no longer fits, trim a second stencil with scissors so you have smaller pieces, one for edges and one for tight corners. This saves your original stencil and makes it easier to get close to walls.
Work Last in These Areas
Finish all the full-tile repeats first. Once those are done and dry, move on to the trimmed stencil to fill in gaps. This keeps the dominant pattern looking clean and gives the trickier work a stable visual reference.
Step 5: Seal Painted Bathroom Floor Tiles (Optional but Helpful)
Once the stencil layer is completely dry, step back and decide if your floor needs extra protection.
- In a low-traffic bathroom like a basement guest bath, I chose to skip a topcoat and the floor has held up well.
- In a main bathroom, hallway, or laundry room, I recommend sealing with a water-based polycrylic designed for floors.
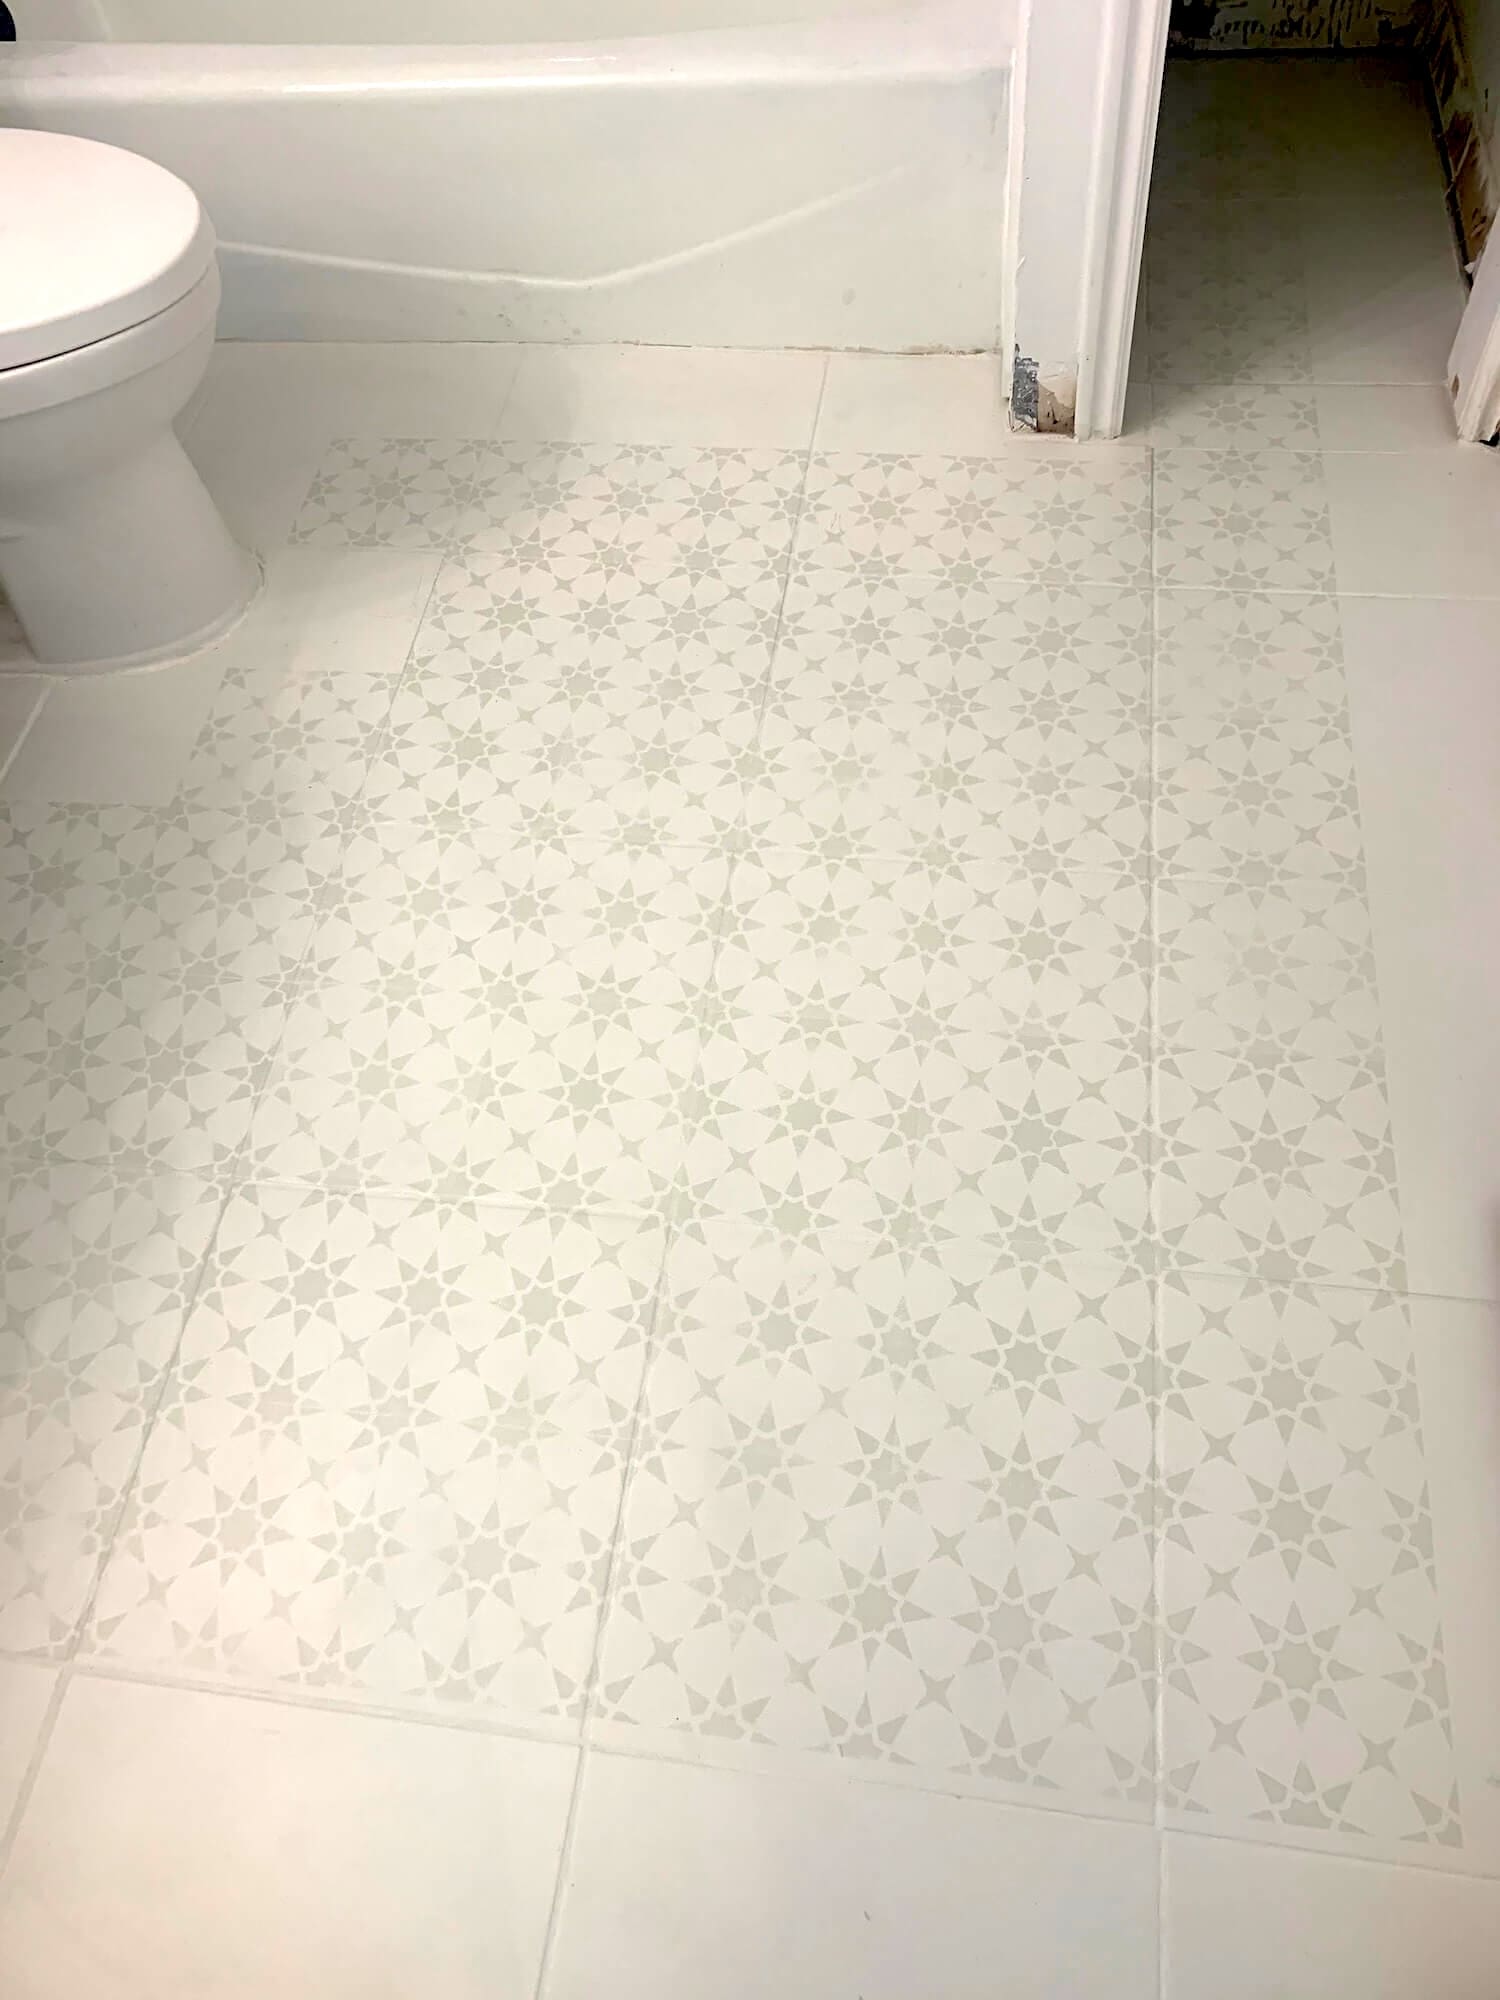
Do you need to seal painted tile floors? Technically, no, but sealing painted bathroom floor tiles in high-traffic or splash-heavy rooms will help protect the design from scuffs, scratches, and moisture.
Apply the topcoat in thin, even layers with a clean roller, following the manufacturer’s dry times. Avoid heavy coats that can puddle in grout lines.
How Much Does It Cost to Paint Bathroom Floor Tiles?
One of the biggest reasons to paint instead of replace is the cost. Here’s a real breakdown:
Materials: Around $80 to $150 total for a small bathroom (40 to 60 sq ft). That covers a quart of bonding primer ($25 to $40), a quart of floor or trim enamel ($30 to $55), a tile stencil ($15 to $30), painter’s tape, a foam roller and tray, and a stencil brush. Optional polycrylic adds another $20 to $30.
Tools: Most prep tools you probably own already (vacuum, scrub brush, hammer for baseboard removal). A pry bar and angled brush run $5 to $15 each if you need them.
Time: A weekend, with active work spread across two or three days to allow for primer and paint cure times. Plan to be patient: rushing dry times is the fastest way to ruin a freshly painted floor.
| Phase | Active hours | Notes |
|---|---|---|
| Prep + clean + degrease | 1.5 | Plus full overnight dry time |
| Roll on bonding primer | 1 | Plus 4 to 24 hour cure (read can) |
| Apply base coat (2 coats) | 2 | Plus 4 hours dry between coats |
| Stencil the pattern | 3 to 5 | Slowest part. Stippling brush only |
| Tackle tight spots | 1 to 2 | Use a trimmed stencil for corners |
| Optional sealer | .5 | Polycrylic in thin coats |
Common Mistakes When Painting Bathroom Floor Tiles
Most painted tile floor failures trace back to one of five mistakes. Avoid these and your finish will last for years:
- Walking on a “dry” floor too soon. Paint can feel dry to the touch in 2 hours but isn’t fully cured for 5 to 7 days. Light foot traffic only after 24 to 48 hours; no rugs or furniture for a week.
- Skipping the degrease step. Visible “clean” doesn’t mean primer-ready clean. Soap scum, hair products, and skin oils form a barely-visible film that prevents bonding. Always degrease, even on tile that looks spotless.
- Using regular wall primer instead of a bonding primer. Standard primers can’t grip glossy tile. You need a high-adhesion bonding primer specifically labeled for slick or non-porous surfaces.
- Painting over moisture. If grout lines are still damp from cleaning, primer will trap that moisture and bubble within weeks. Let the floor dry overnight before priming.
- Rushing cure time between coats. Re-coating before the previous layer is fully cured creates a soft, fingernail-soft surface that scuffs the moment furniture moves. Read the can – most floor enamels need 4 to 24 hours between coats.
Best Paint for Bathroom Floor Tiles (By Tile Type)
Not all tile takes paint the same way. Here’s what works best for each:
Ceramic tile. The most paint-friendly. A high-adhesion bonding primer plus a durable floor enamel or cabinet enamel handles ceramic well. Sherwin-Williams Emerald Urethane Trim Enamel (used in this tutorial) is a great example – formulated for high-traffic surfaces and self-leveling.
Porcelain tile. Denser than ceramic, so make sure your primer is rated specifically for porcelain (some bonding primers explicitly list “porcelain” on the can – choose those). Lightly scuff any high-gloss porcelain with 220-grit sandpaper before priming.
Vinyl tile. Trickier because vinyl flexes. You need a primer designed for flexible surfaces (some sold as “all-surface bonding primers”). Even with the right products, vinyl-painted floors typically last 1 to 3 years versus 5+ years on ceramic. Replacing the vinyl is often easier than painting it.
Stone tile. Don’t paint natural stone (slate, travertine, marble). Paint can’t bond well to porous stone surfaces, and you’ll lose the natural variation that makes the stone valuable.
How Long Do Painted Bathroom Floor Tiles Last?
If you’ve used good products and followed the prep, painted bathroom floor tiles can last several years. Factors that affect durability:
- How well the tile was cleaned and degreased
- Whether you used a true bonding primer
- The quality of the paint and topcoat
- How much traffic and water the room sees
For best results, avoid dragging heavy furniture across the floor, wipe up standing water quickly, and add washable rugs in front of the sink and tub. If painting isn’t durable enough for your space, installing Duravana plank flooring is the next-most-affordable upgrade and lasts much longer in wet rooms.
Another Idea: DIY Painted Tile Floor in a Laundry Room
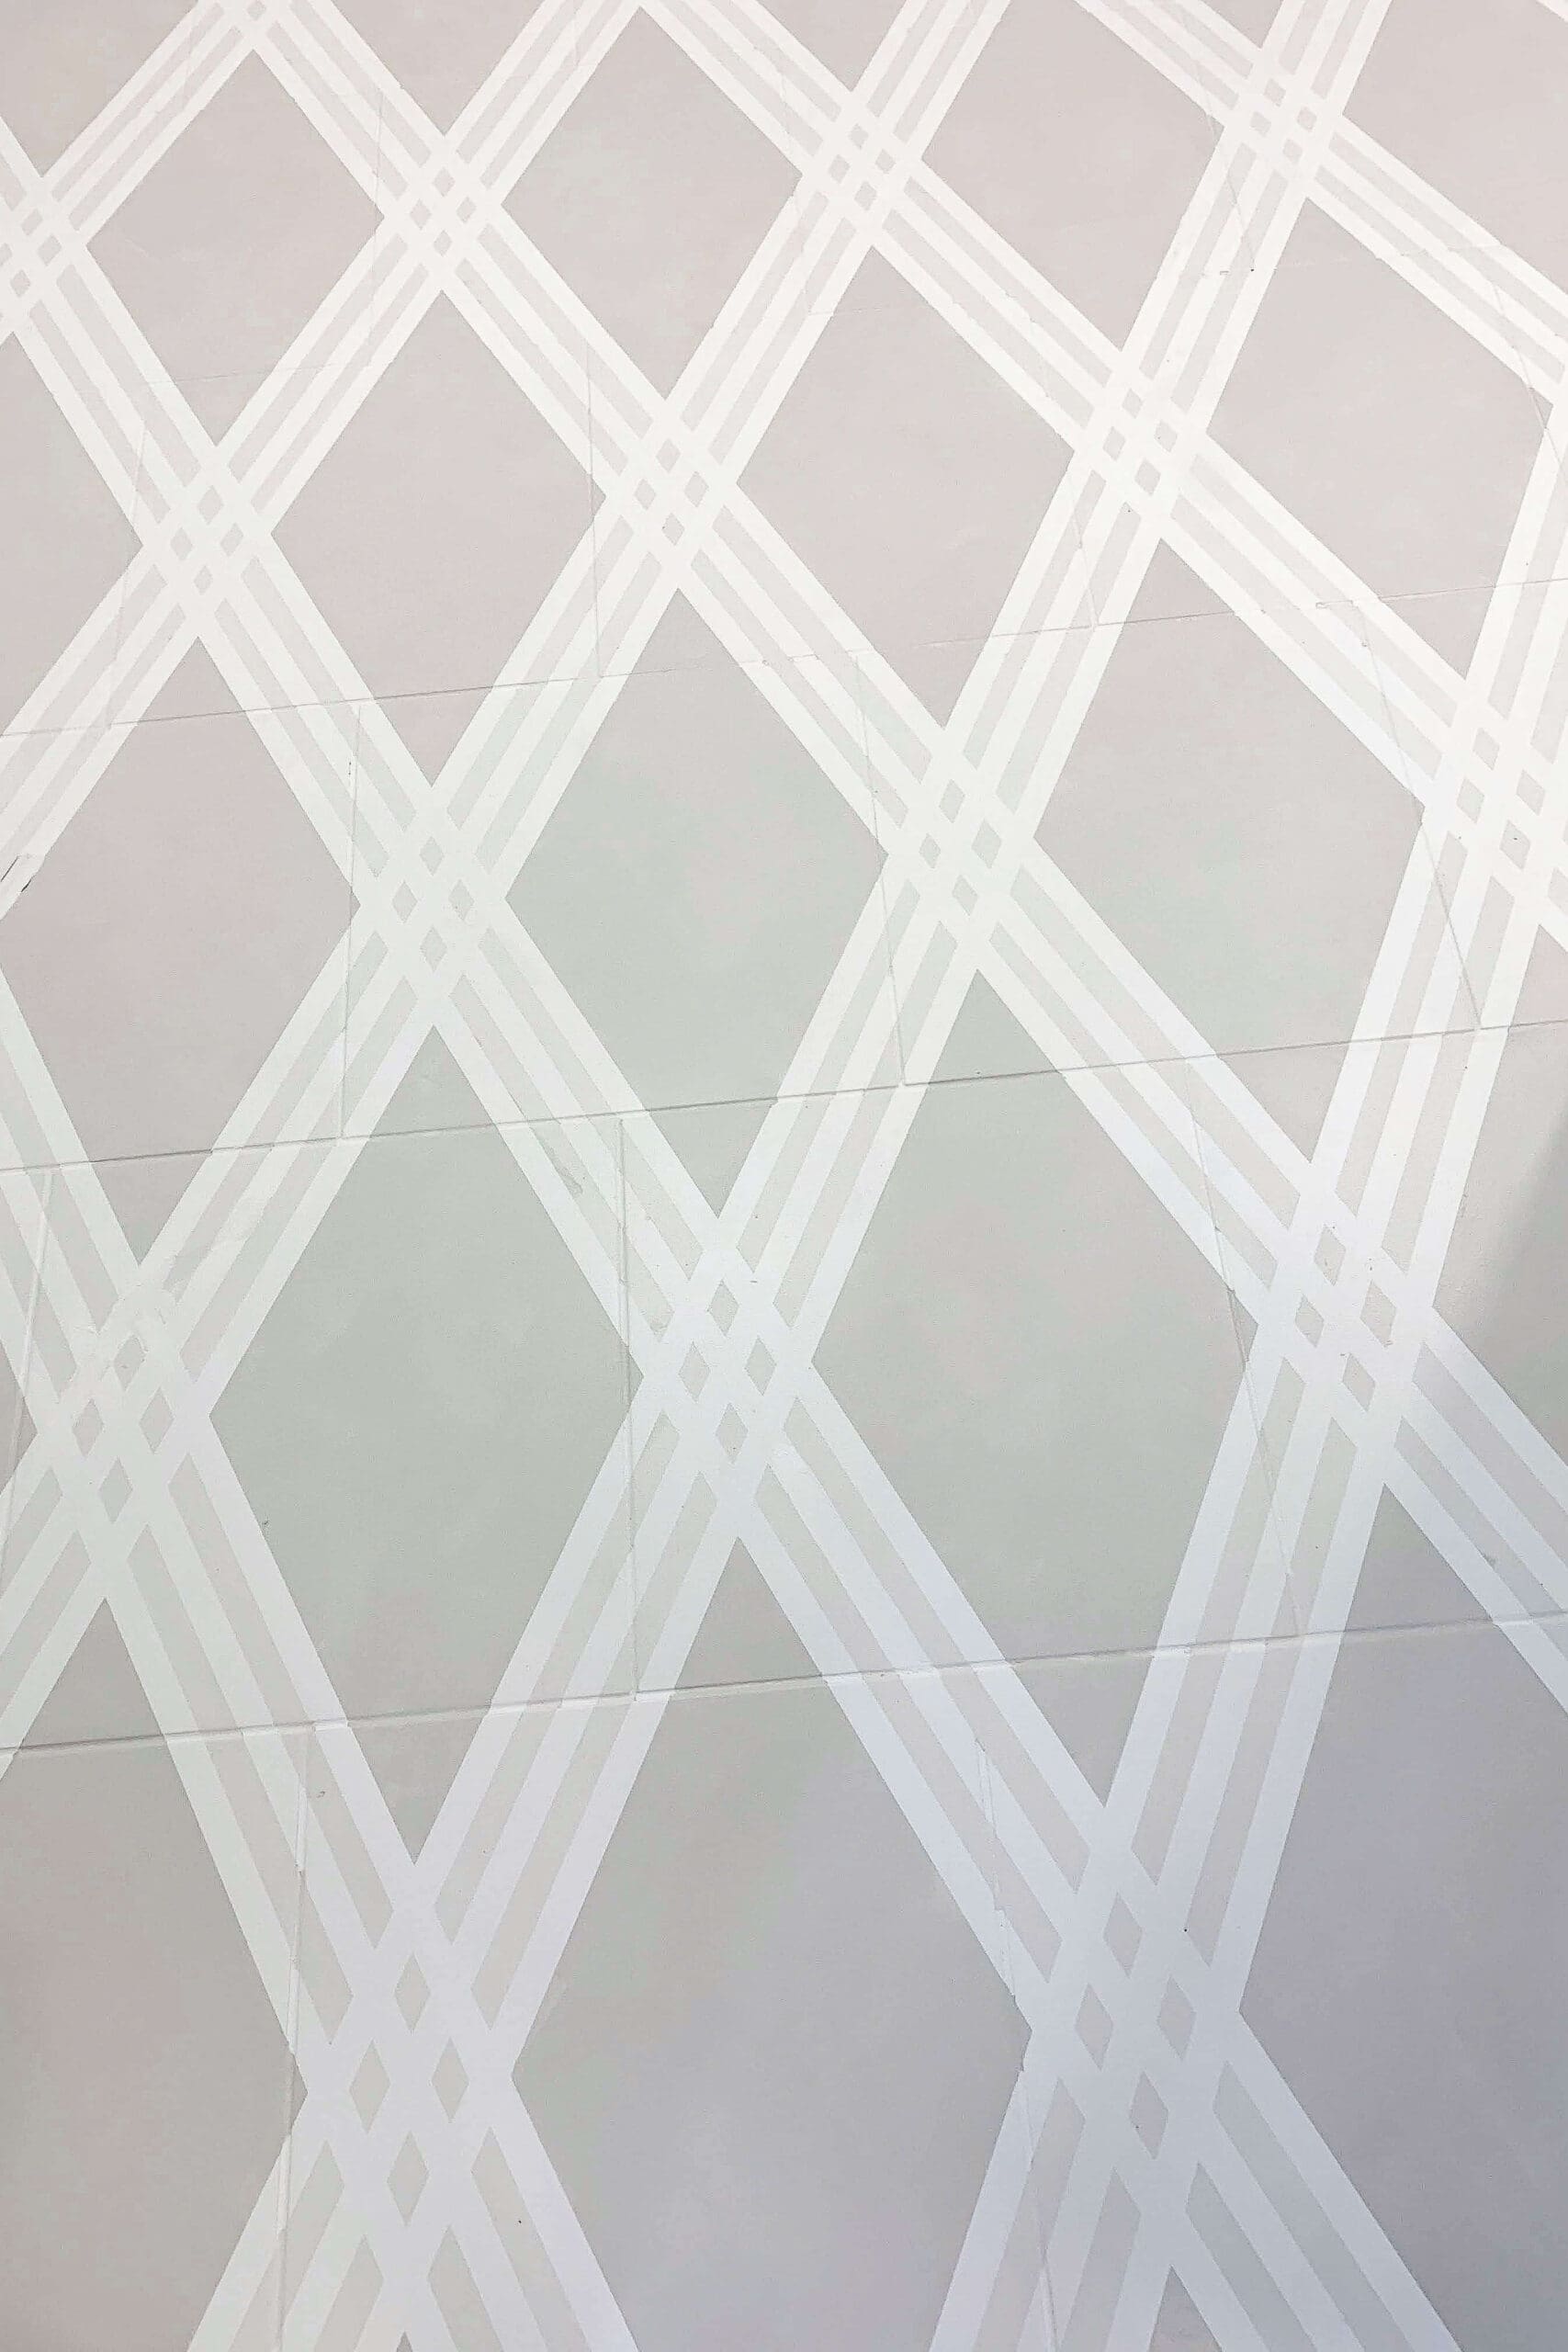
This bathroom wasn’t my only DIY painted tile floor project. I also updated my aunt’s laundry room tile using painter’s tape to create a plaid pattern instead of a stencil. It’s a great example of painted tile floor ideas if you prefer straight lines over repeating motifs, and the process uses the same prep, primer, and paint steps. If you finish your floor and want to keep going with the room, box molding wall trim is a natural next project.
Final Thoughts: Budget Bathroom Floor Makeover
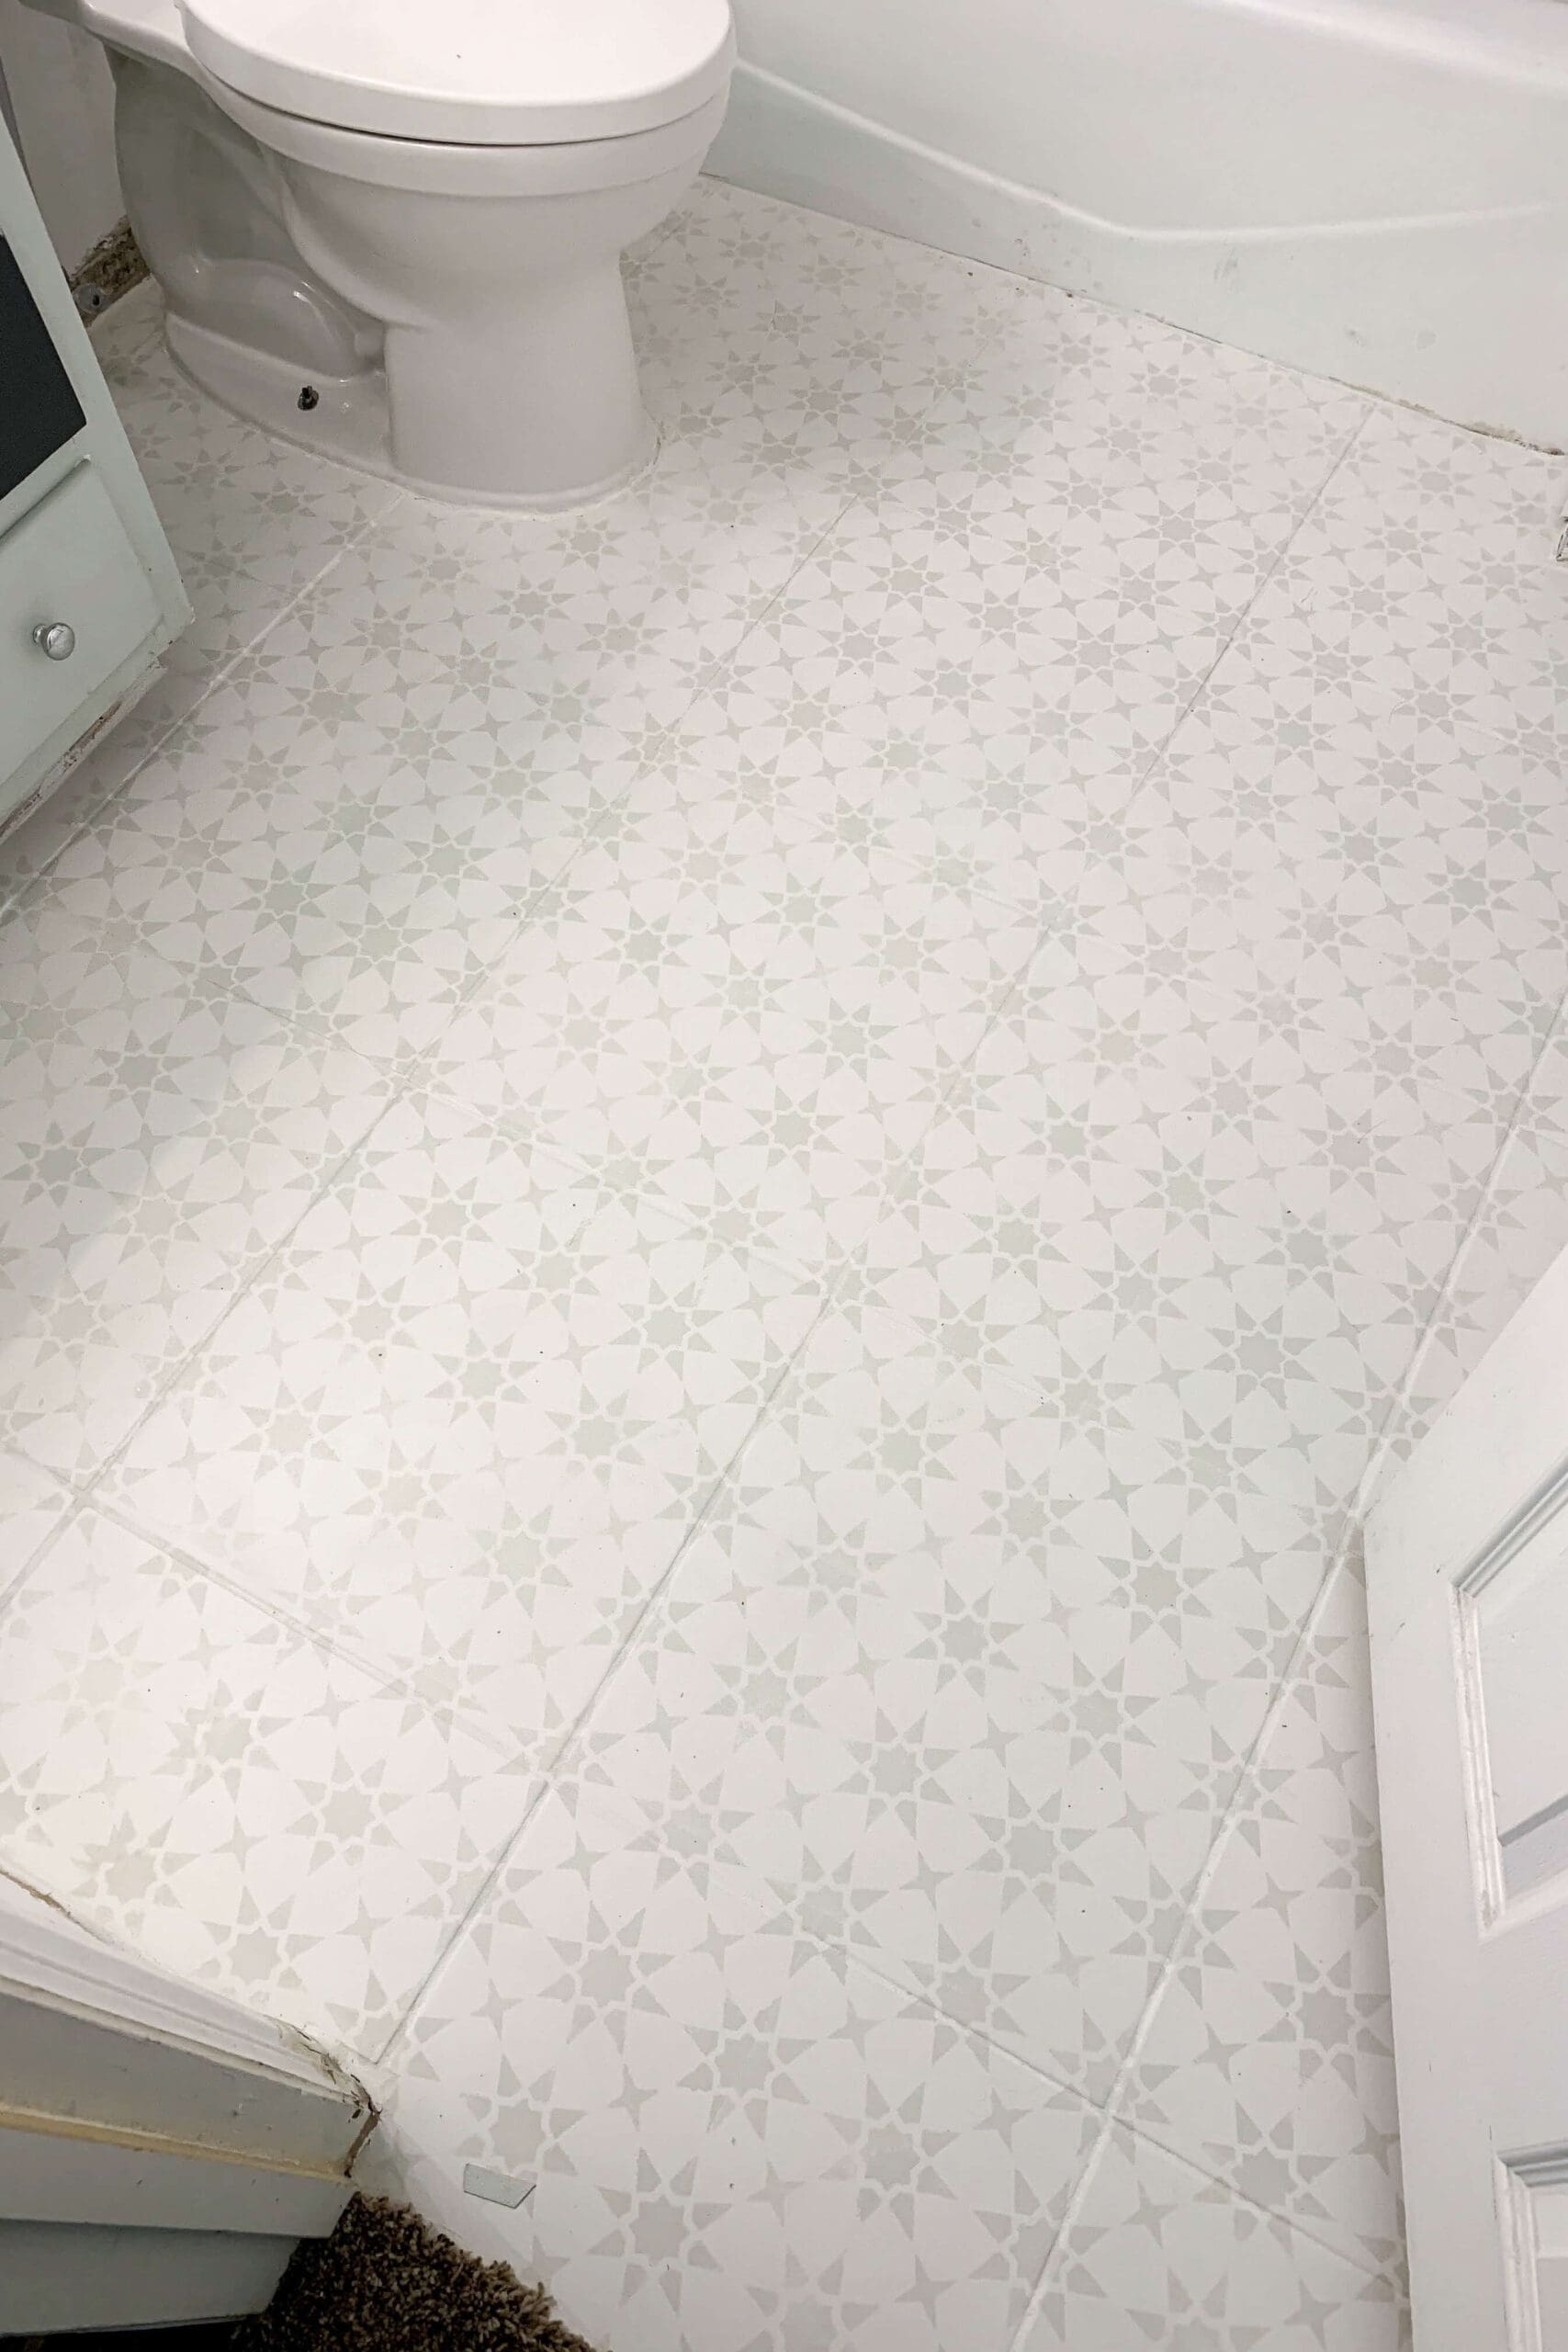
This budget bathroom floor makeover completely changed the personality of our basement bath. The stenciled pattern looks like hand-laid artisan tile, but it cost a fraction of a full replacement and didn’t require a single piece of demo.
If you’re craving a new look but full retiling isn’t in the budget, learning how to paint bathroom floor tiles and stencil a pattern is a practical, creative way to get there. Clean carefully, choose the right primer and paint, take your time with the stencil, and you’ll end up with a floor you’re excited to show off every time you walk into the room.
More Small Bathroom Remodel Projects to Try
If you’ve been following along, this painted floor was just one piece of the full basement bathroom makeover. Here’s everything that went into transforming the space:
- Small bathroom remodel hub (all 7 projects in one place)
- How to Tile a Shower Wall: full step-by-step tiling tutorial for a bright, waterproof shower surround.
- DIY Board and Batten Bathroom Wall: adds texture and height to small bathrooms for a custom look.
- How to Paint a Bathroom Vanity: the exact method I used for a smooth, durable vanity finish.
- DIY Gold Bathroom Mirror: a quick project that elevated the whole room’s style.
- How to Build a Shower Niche: a simple recessed niche for shampoo and soap.
- How to Get Rid of Mold in a Shower: the essential first step before tiling began.
📌 Pin This Painted Tile Floor Tutorial for Later
Pin now and come back anytime you’re ready to try how to paint bathroom floor tiles in your own home.
FAQs How to Paint Bathroom Floor Tiles
If the tile is properly cleaned, primed, and sealed (especially in high-traffic areas), painted bathroom tile can last several years. Using a bonding primer and an optional topcoat like polycrylic will extend the durability.
For best results, use a high-adhesion bonding primer followed by a durable floor paint, cabinet paint, or trim enamel designed for high-traffic surfaces. Avoid chalk paint or anything not made for heavy wear.
Yes. Stenciling a floor works great over painted tile. Once the base coat is dry, just align your stencil over each tile and use a stippling brush. It’s an easy way to mimic the look of custom or artisan tile without replacing anything.
Sealing isn’t always necessary in a low-traffic bathroom, but if your painted floor will get a lot of use or water exposure, applying a water-based polycrylic topcoat will help protect the paint and stencil from scratches, chipping, and moisture.
Yes to both, as long as you clean and degrease the tile thoroughly and use a bonding primer made for slick surfaces. Porcelain is denser than ceramic, so make sure your primer is rated for it specifically. Either tile should be sanded lightly only if it has a high gloss finish that the primer can’t grab on its own.
Not always. A high-adhesion bonding primer is designed to skip the sanding step on most tile. If your tile has a heavy gloss or any surface contamination, a quick scuff with 220-grit sandpaper before priming gives the primer extra grip. Wipe off all dust before priming.
Cracking or peeling almost always traces back to skipped prep or the wrong product. Tile that wasn’t degreased, a primer that wasn’t truly bonding, or a paint not rated for floors will fail. Done correctly with a good primer and a floor-rated topcoat, painted tile holds up well for years.
For a small bathroom (40 to 60 sq ft), expect to spend around $80 to $150 in materials: bonding primer, durable paint, a stencil, painter’s tape, foam roller, and a stencil brush. Optional polycrylic adds another $20 to $30. Compared to replacing tile, even a budget tile job runs $400 to $1,200, so paint is a big saving.
No. Wait at least 24 to 48 hours after the final coat of paint or sealer for light foot traffic, and ideally 5 to 7 days before you put rugs back down or drag any furniture across. Cure time is what makes the floor durable. Walking on it too soon can leave marks or compromise the bond.
Sometimes. Vinyl tile is flexible and slick, so regular floor paint can crack or peel. If you want to try it, use a primer specifically rated for vinyl plus a paint formulated for flexible surfaces. Even then, expect a shorter lifespan than paint on ceramic or porcelain. Replacing the vinyl is often easier and longer-lasting than painting it.
Supply and Product Links for Painting Bathroom Floor Tiles
Everything I used for this project, organized by category. Where I have favorites, I’ll note why.
Tools
- Vacuum – for picking up grit and dust before primer
- Foam roller plus paint tray – for the main floor area; smoother finish than a regular nap roller
- Angled paint brush – for cutting in around edges, the toilet, and fixtures
- Small stencil brush – a stippling brush; foam brushes will push paint under the stencil
- Scissors – for trimming a second stencil for tight spots
Supplies
- Krud Kutter degreaser – strips soap scum, oils, and residue so primer can bond
- Painter’s tape – protects baseboards, tub edges, and the toilet base
- High-adhesion bonding primer – the most important product in the project; pick one labeled for glossy or tile surfaces
- Sherwin-Williams Emerald Urethane Trim Enamel – what I used for the base coat; self-leveling and rated for high-traffic
- Tile stencil – pick a pattern you can repeat consistently; geometric and star patterns hide minor stencil-shift better than florals
Optional
- Water-based polycrylic topcoat – for sealing painted bathroom floor tiles in high-traffic or splash-heavy rooms
About Crystel
I’m Crystel Montenegro, a stay-at-home mom of five turned home DIY expert. I share budget-friendly DIY projects, home design, garden, recipes, and lifestyle content from my own home – every project here is one I actually built or made. Read more about me or follow along on Instagram.
Doing the whole bathroom? This painted floor tutorial is one of 7 projects in my DIY small bathroom remodel. The hub has the full breakdown of every project, the cost-saving framework, and links to all the other tutorials.