

Updated May 9, 2026
If you’re trying to figure out how to get rid of mold in a shower, especially mold hiding behind tile, you’re not alone. When we renovated our small bathroom, I discovered moisture damage and mold behind the old tile surround. It’s the kind you only notice once demo starts. With research, patience, and the help of my contractor father-in-law, I learned how to get rid of mold in a shower, clean the framing, rebuild the walls properly, and fully waterproof the space so it’s ready for tile.
This guide shows you exactly how to get rid of mold in a shower and rebuilt everything the right way. It’s the same approach for whether you’re searching for how to remove mould from a shower (UK/Australian spelling) or how to get rid of moldy shower walls. The core method is identical: remove what’s contaminated, dry everything, rebuild with cement board, and waterproof properly.
Part of my Small Bathroom Remodel series. Removing the mold and prepping the walls for tile was the foundation of our 7-project basement bathroom transformation. See the full small bathroom remodel breakdown →
How to Get Rid of Mold in a Shower: At a Glance
Here’s the big-picture overview of how to get rid of mold in a shower before we get into the photos and steps:
- Set up basic containment and safety gear (gloves, N95, goggles)
- Demo the tile and remove wet greenboard or damaged drywall
- Clean, treat, and fully dry the wall framing
- Frame and pitch a shower niche if you’re adding one
- Install 1/2-inch cement board and add blocking anywhere the walls flex
- Tape seams with alkali-resistant mesh and thinset
- Roll on two full coats of shower waterproofing membrane over the surround
- Do final checks so the shower is ready for tile
Quick Answer: What’s the Fastest Way to Get Rid of Mold in a Shower?
For surface mold on grout or caulk, scrub with a mold cleaner or 1:1 white vinegar and water solution, then keep humidity down with a working fan. For mold that’s spread behind the tile (loose tiles, musty smell, soft drywall), surface cleaning won’t work. The only durable way to get rid of mold in a shower at that point is a full demo: remove the tile, pull out the wet greenboard, treat and dry the studs, then rebuild with cement board and a continuous waterproofing membrane. Bleach lightens stains but doesn’t fix mold inside saturated drywall, which is why so many DIY mold-removal attempts fail and the mold comes right back.
Watch the Full Bathroom Makeover Tutorial
Table of Contents
- How to Get Rid of Mold in a Shower: At a Glance
- Watch the Full Bathroom Makeover Tutorial
- Before: The Moldy Shower That Needed Fixing
- Tools You’ll Need to Get Rid of Mold in a Shower
- Materials You’ll Need
- Step 1: Safety Prep Before You Get Rid of Mold in a Shower
- When to Call a Professional for Shower Mold
- Step 2: Demo the Tile and Remove Wet Greenboard
- Step 3: Clean, Treat, and Dry Shower Framing After Mold Removal
- Step 4: (Optional) Build and Pitch the Shower Niche
- Step 5: Install 1/2-Inch Cement Board (The Right Substrate)
- Step 6: Add Extra Blocking Where the Walls Flex
- Step 7: Tape Seams with Alkali-Resistant Mesh and Thinset
- Step 8: Waterproof the Shower (Two Full Coats)
- Step 9: Final Checks Before Tiling
- Cost and Time: What It Takes to Get Rid of Mold in a Shower
- Why Showers Develop Mold (and How to Prevent It)
- Black Mold in Showers: What to Know
- Pink Mold in Showers
- Pro Tips for the Best Mold Removal Results
- Common Mistakes to Avoid During Shower Mold Removal
- Troubleshooting Common Shower Mold Problems
- You Did It!
- More Small Bathroom Remodel Projects to Try
- 📌 Pin This Shower Mold Removal Tutorial for Later
- FAQ: How to Get Rid of Mold in a Shower
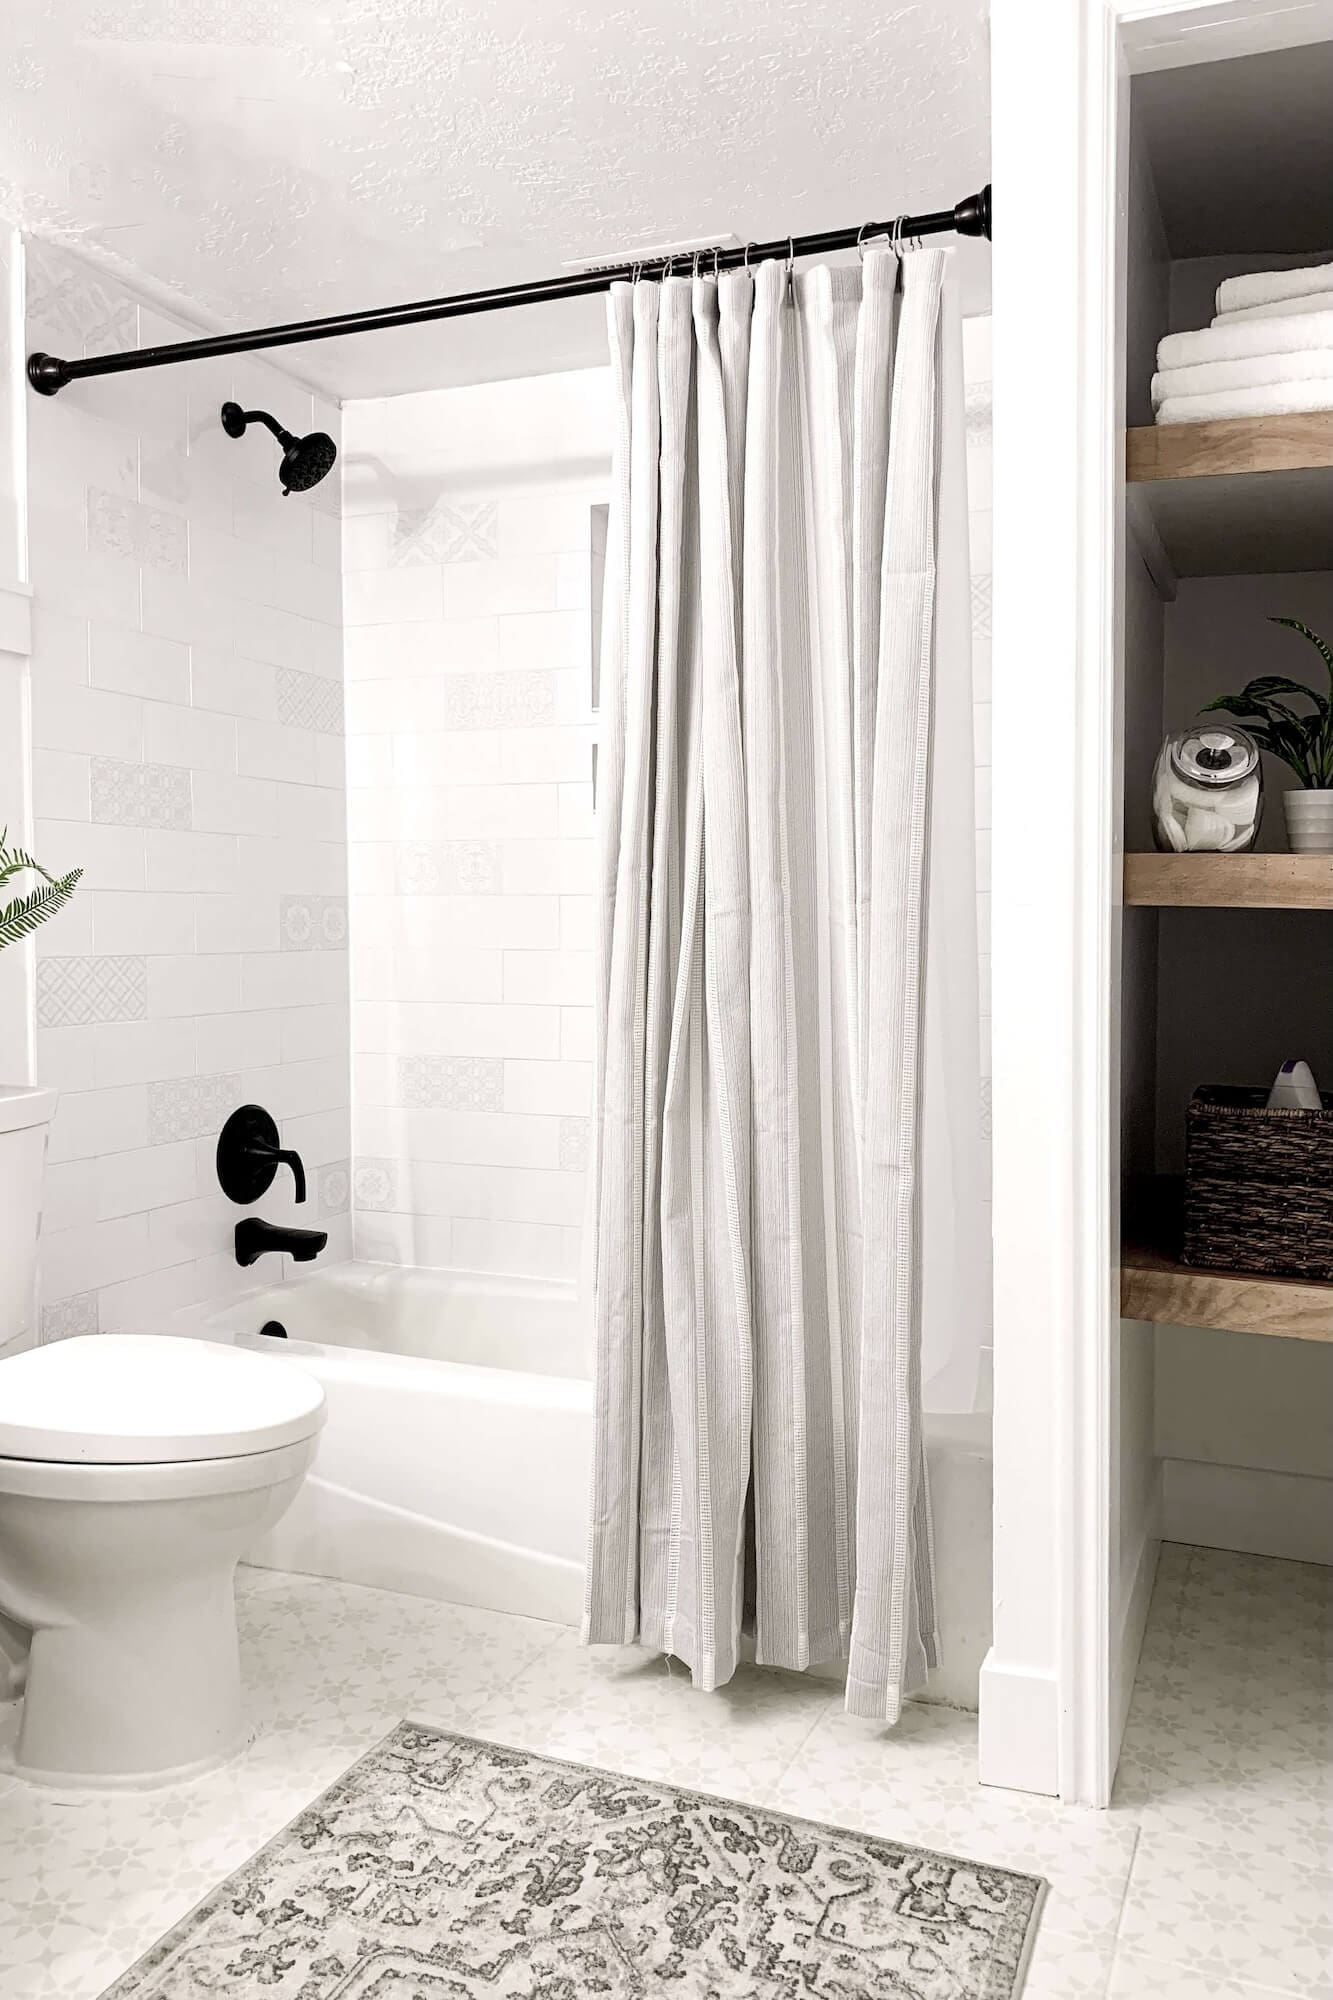
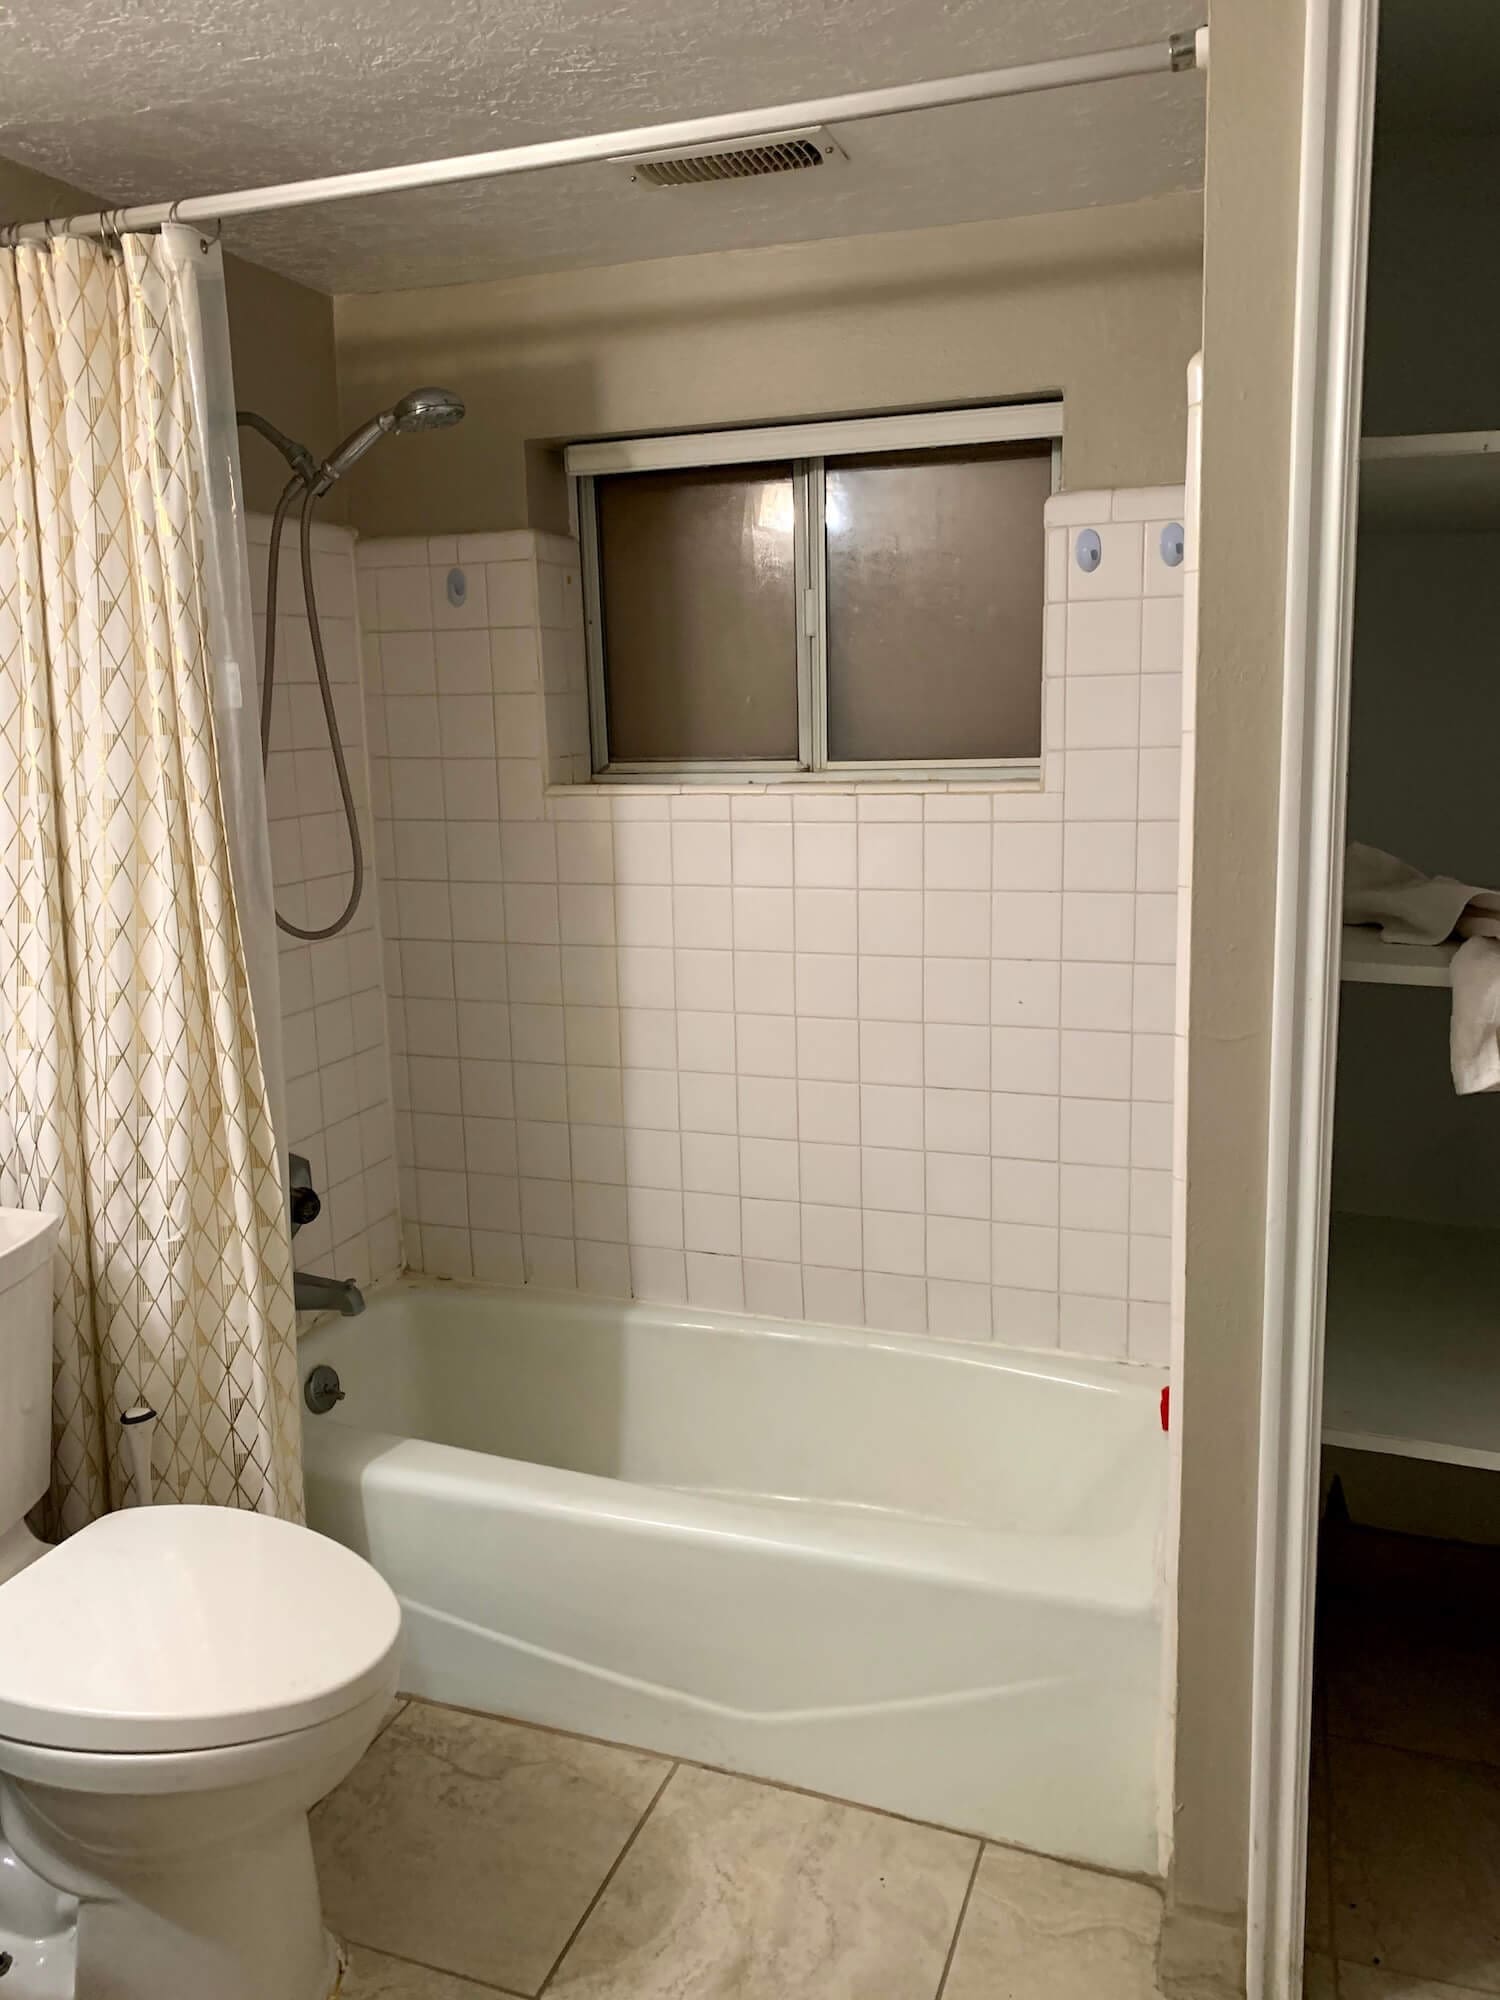
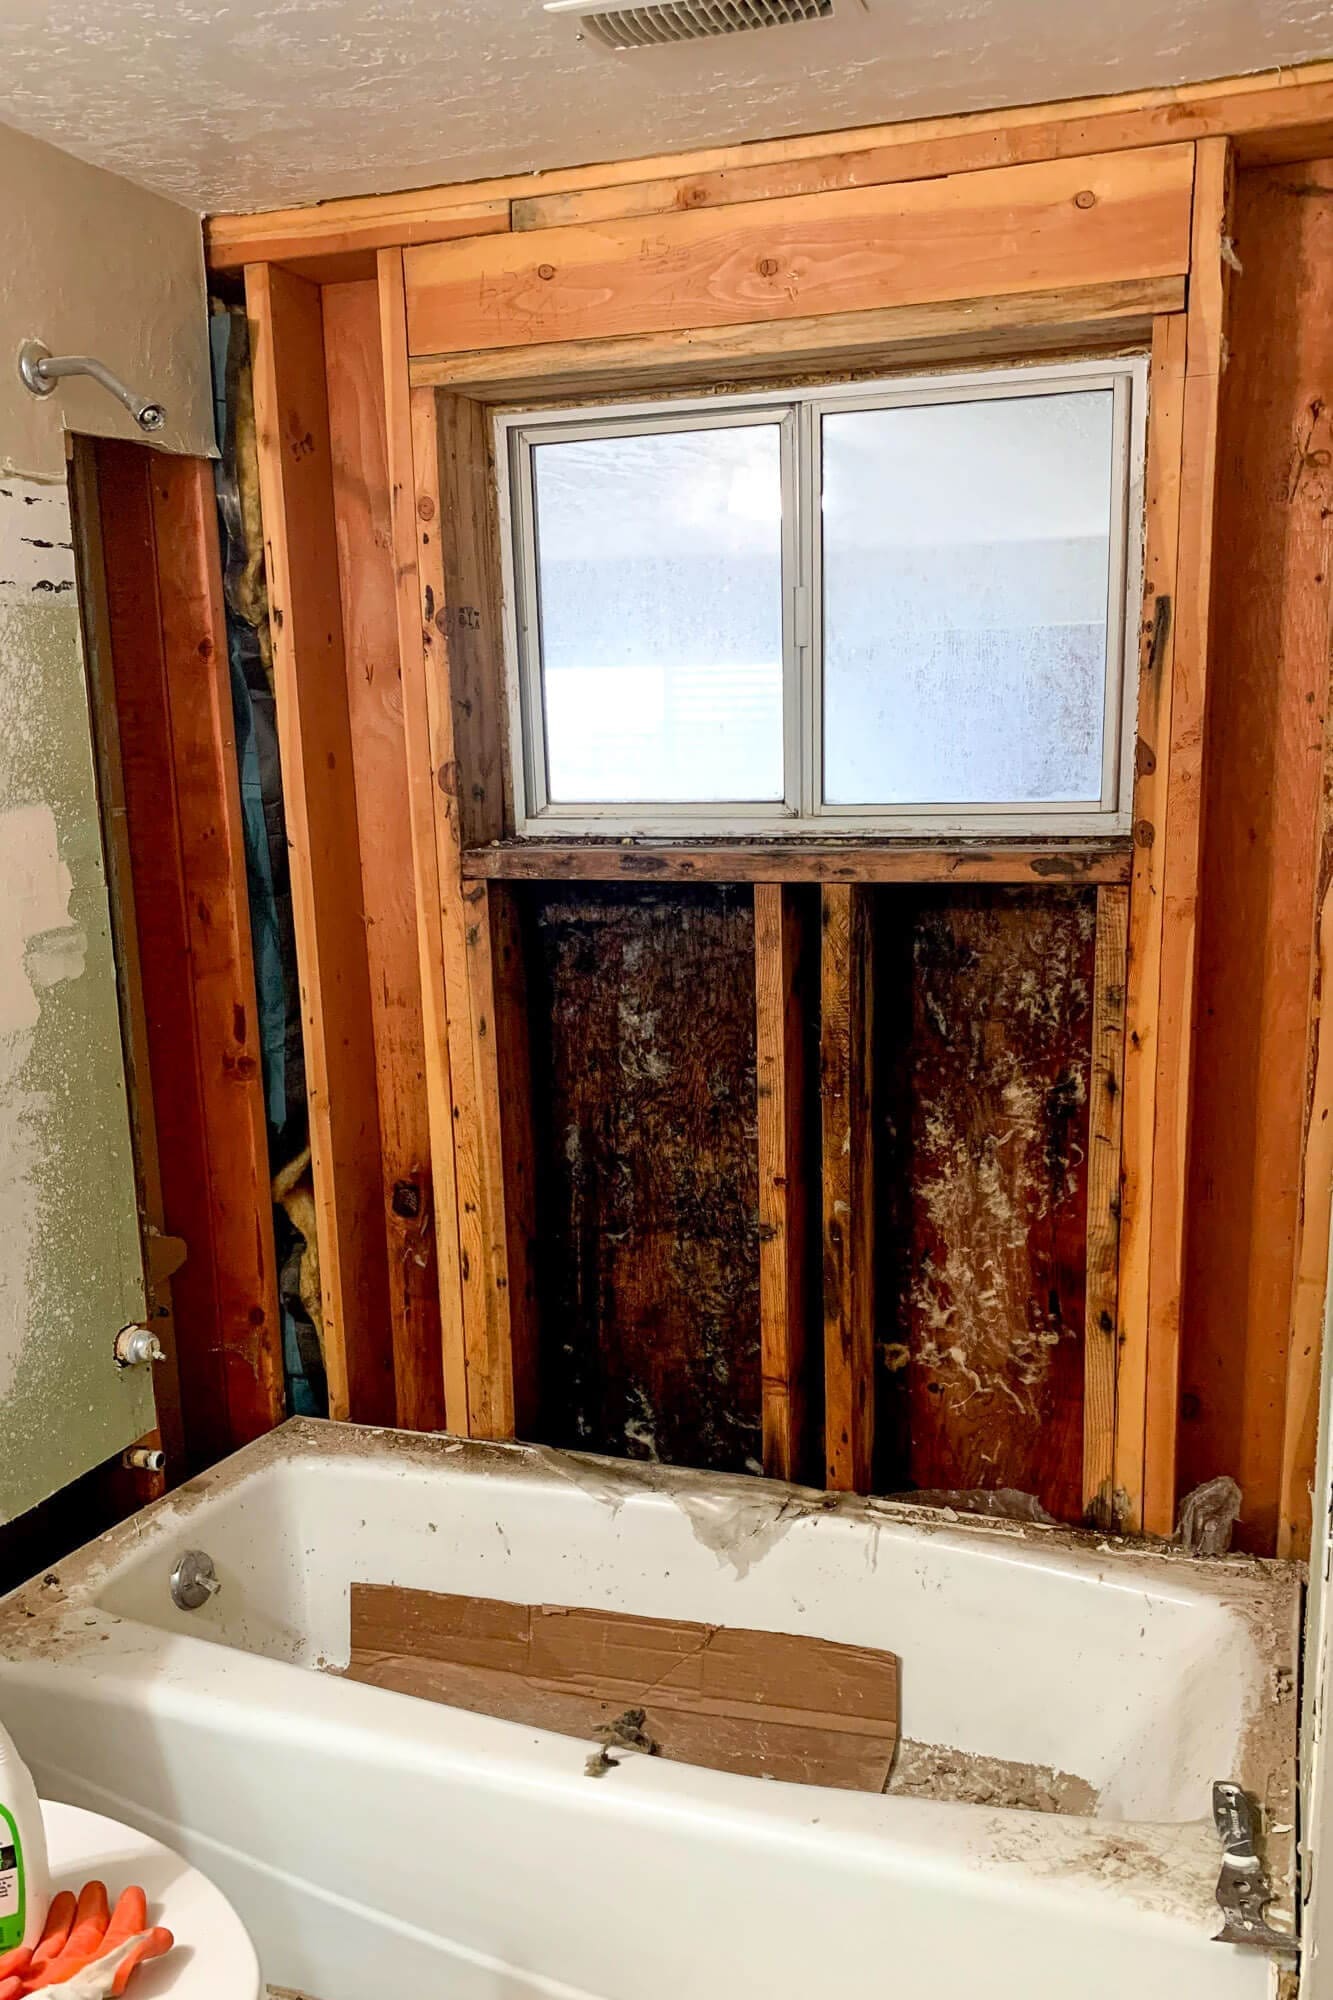
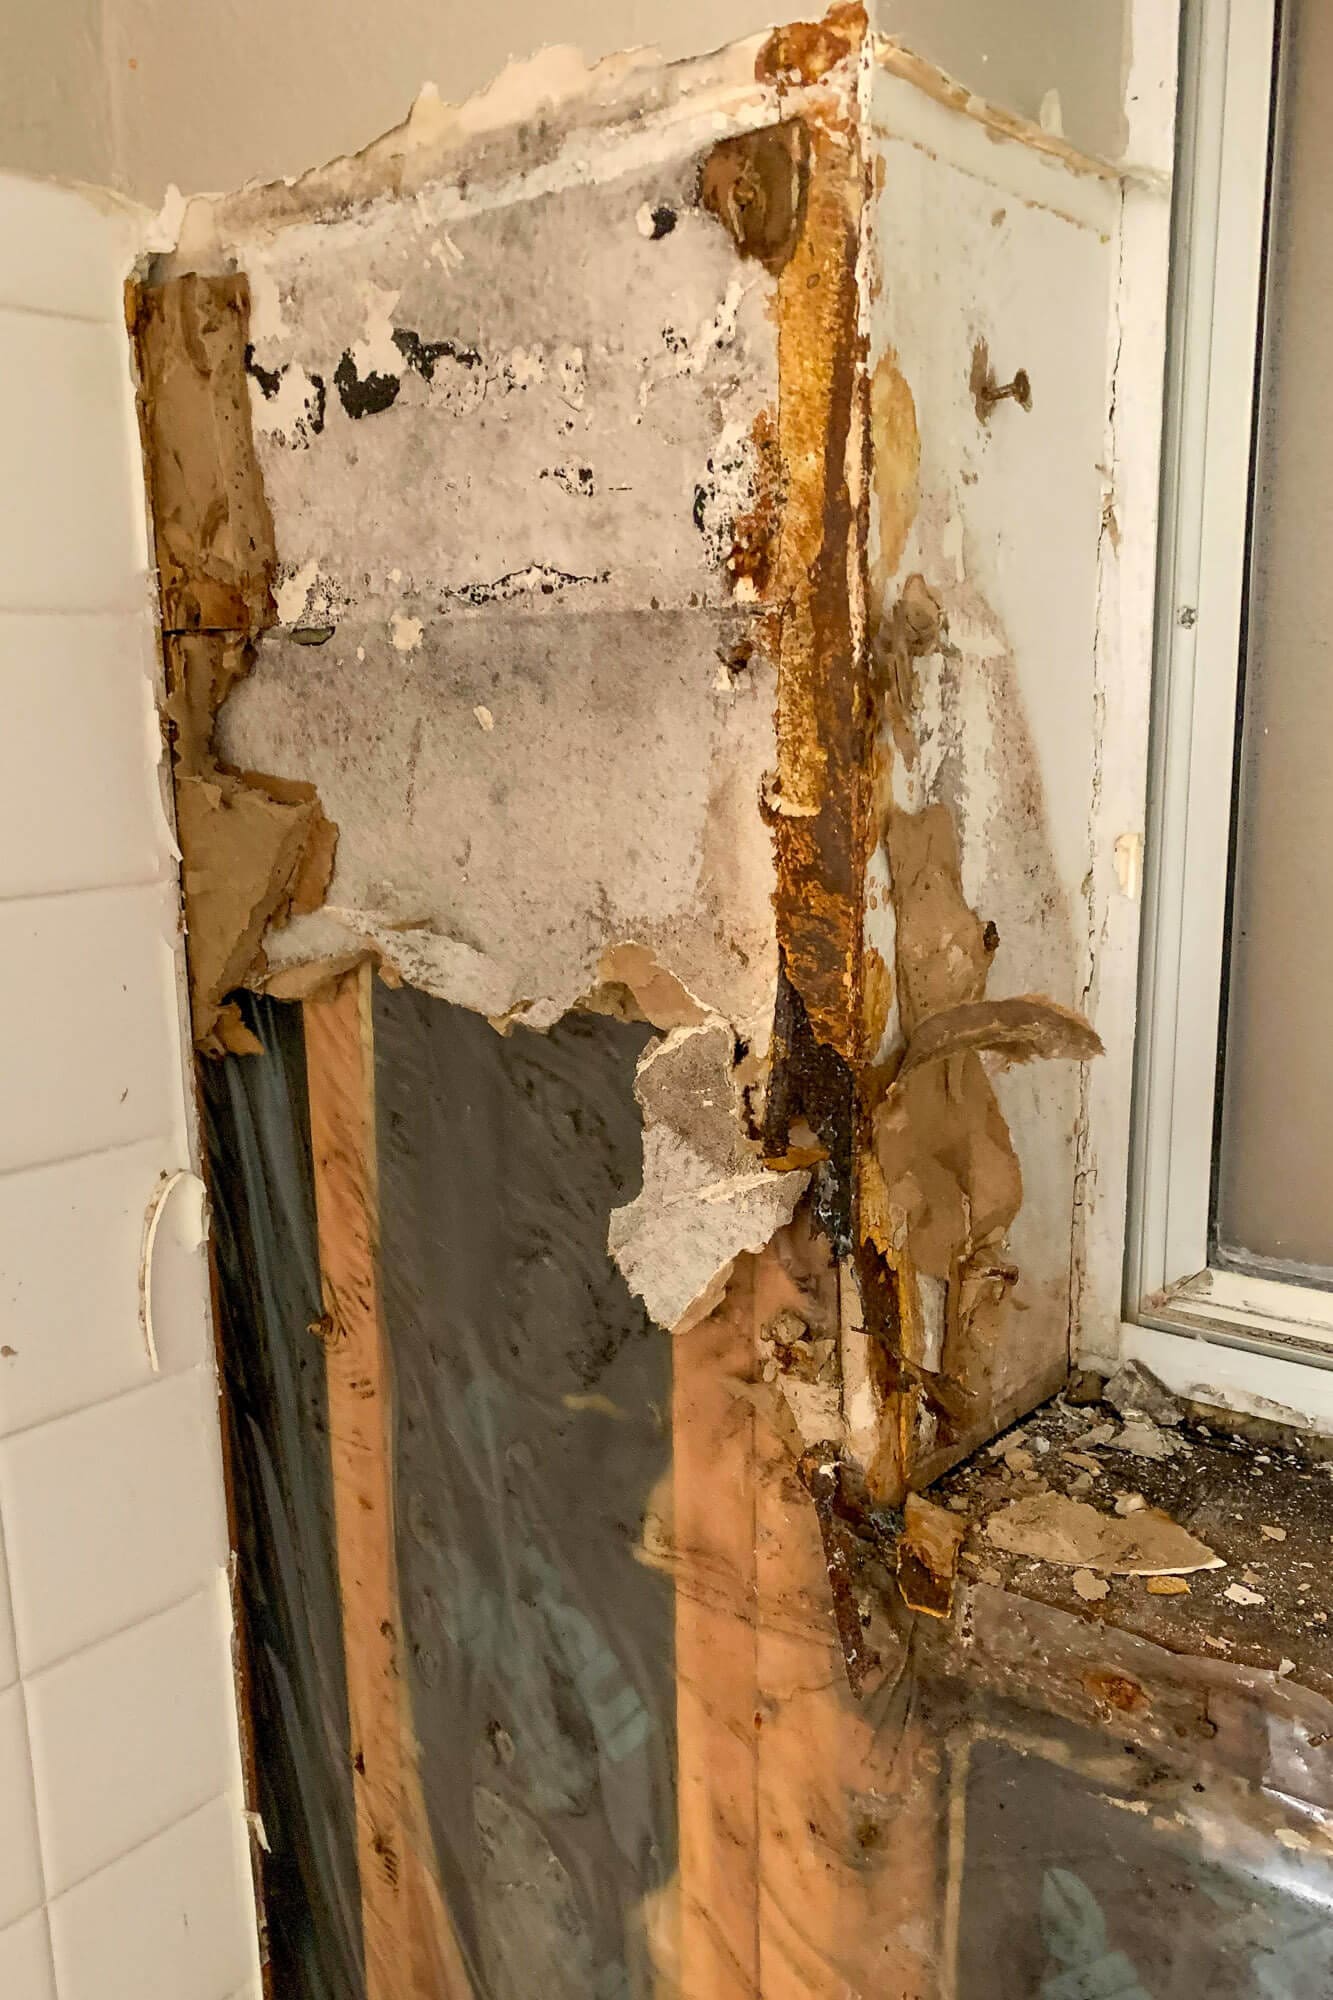
Before: The Moldy Shower That Needed Fixing
The original surround had stained, discolored tile, grout that was cracking and lifting, caulk separating from the tub, and obvious moisture behind the walls. This wasn’t a “clean it with bleach” kind of moldy shower situation. It was a “demo and rebuild correctly” situation, which is the right approach when you need to get rid of mold in a shower for good.
Below is the full process I followed to get rid of mold in the shower and prep it for tile.

Tools You’ll Need to Get Rid of Mold in a Shower
A quick list of the essential tools:
- Safety glasses
- Gloves + N95 or respirator
- Utility knife, pry bar, hammer
- Oscillating multi-tool (super helpful but optional)
- Tape measure + level (laser level helps)
- Drill/driver with cement board bit
- Buckets, scrub brush, sponges, rags
- Paint roller + brush for waterproofing membrane
Materials You’ll Need
- Plastic sheeting + painter’s tape (basic containment)
- Mold cleaner and white vinegar
- 1/2 inch cement board + cement board screws
- Yellow alkali-resistant mesh tape for seams
- Liquid waterproofing membrane + seam fabric
- 2×4 lumber for niche framing
- Plumbing valve and trim kit (I used the sponsored Karci Pfister Faucet and loved the quality)
- Heavy-duty contractor trash bags
Step 1: Safety Prep Before You Get Rid of Mold in a Shower
Before demo, close the bathroom door, crack a window if possible, and get some airflow going. Wear gloves, eye protection, and an N95 respirator at minimum.
If you see widespread or unusual mold growth, consider testing or calling a remediation pro. For typical moisture-related mold behind tile, homeowners can usually handle it safely with the right precautions.
When to Call a Professional for Shower Mold
Most typical moisture-related mold behind a tub surround can be handled by a careful DIYer, but there are times when it’s safer to call a pro:
- Mold covers a very large area or has spread into several rooms
- Anyone in your home has asthma, significant allergies, or a compromised immune system
- The framing or subfloor is soft, rotten, or structurally damaged
- You see mold spreading into adjacent rooms, ceilings, or under flooring
- You’re not comfortable opening up walls, dealing with plumbing, or following a rebuild plan
If you’re unsure, it’s always okay (and smart) to have a remediation specialist or trusted contractor take a look before committing to a full DIY shower mold removal.
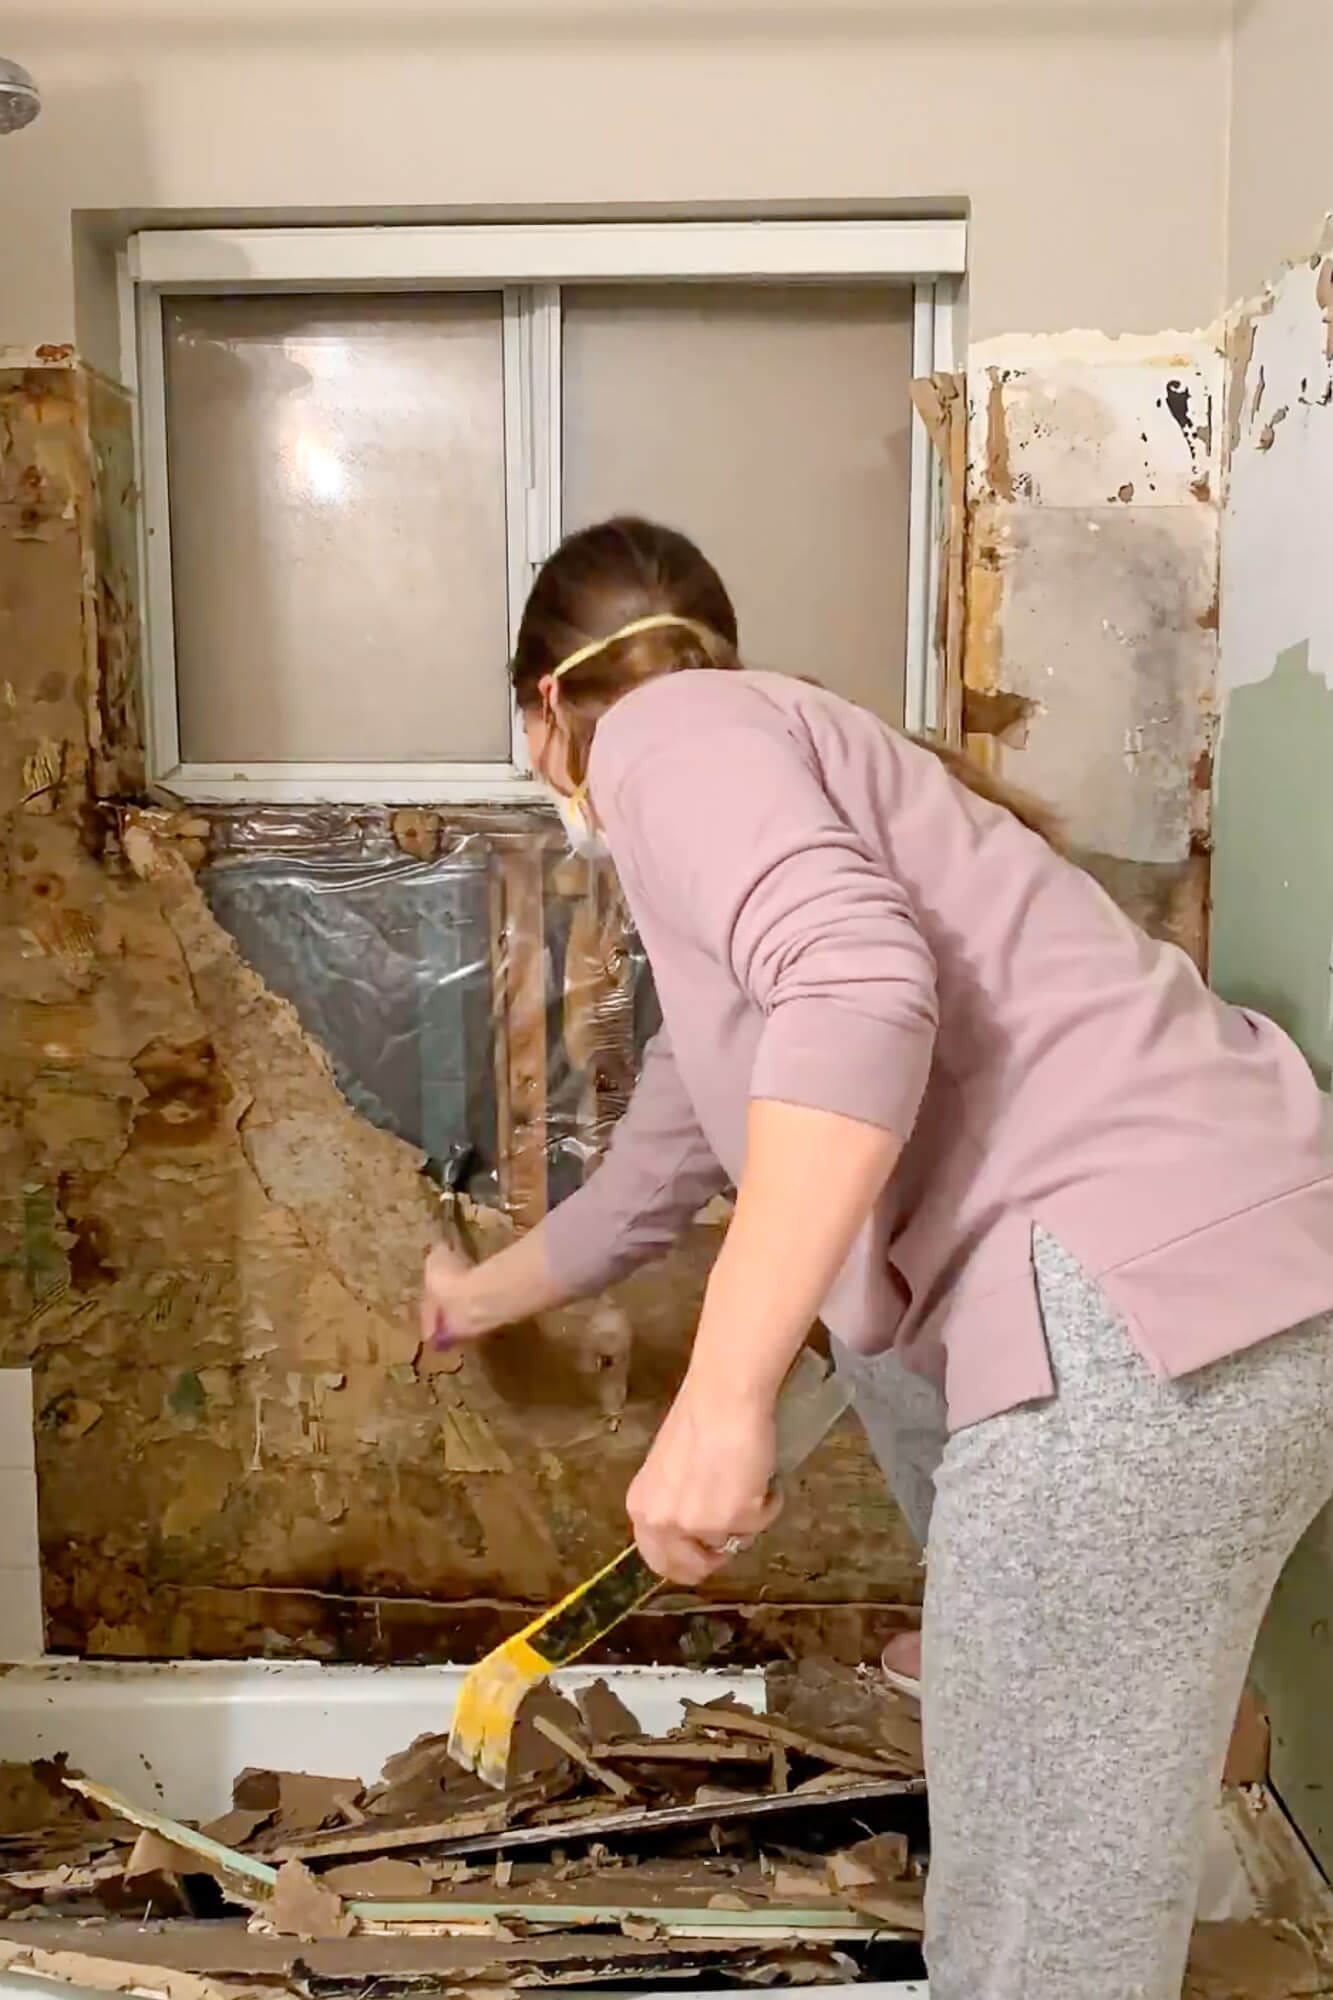
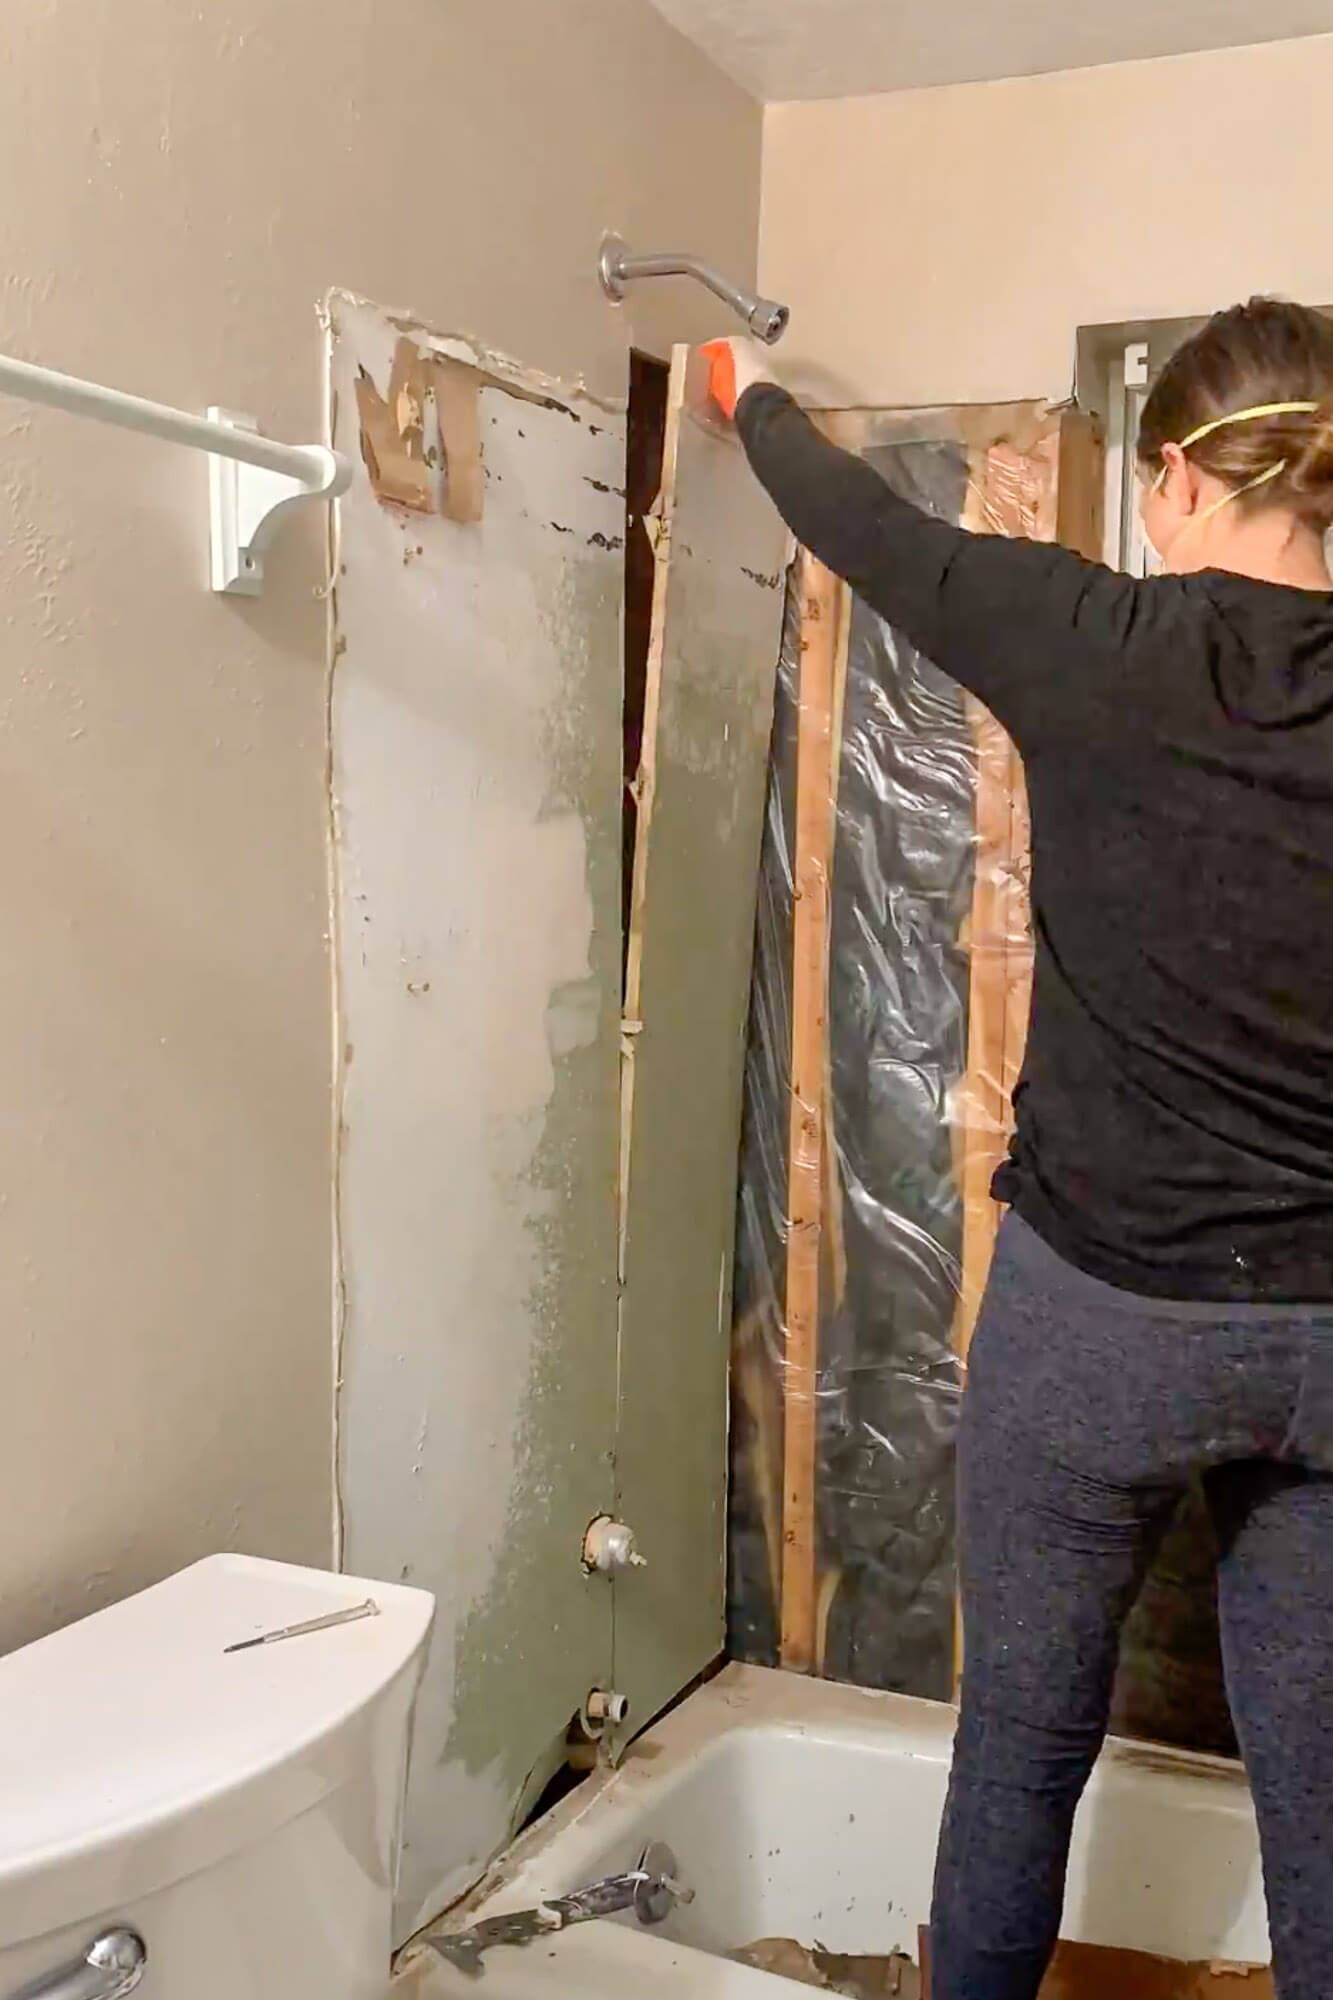
Step 2: Demo the Tile and Remove Wet Greenboard
As soon as I started removing tile, the pieces practically fell off, which is a clue that the greenboard behind them was saturated. Tile doesn’t detach unless moisture has been sneaking behind it for a while, and that usually means mold behind the shower tile and saturated greenboard underneath.

Everything went straight into contractor bags. This helps contain dust, debris, and mold particles so you’re not dragging them through the house.
Greenboard vs. Cement Board (What You Actually Need)
Many older bathrooms use greenboard behind showers. Greenboard is moisture-resistant, but it’s not waterproof, and it’s not designed for direct-water areas like a shower wall.
For a proper shower wall build, use:
- 1/2-inch cement board (stays stable even if wet)
- A continuous waterproofing membrane over the cement board
- Tile on top of the membrane
Tile itself isn’t waterproof. The membrane is what protects your home.
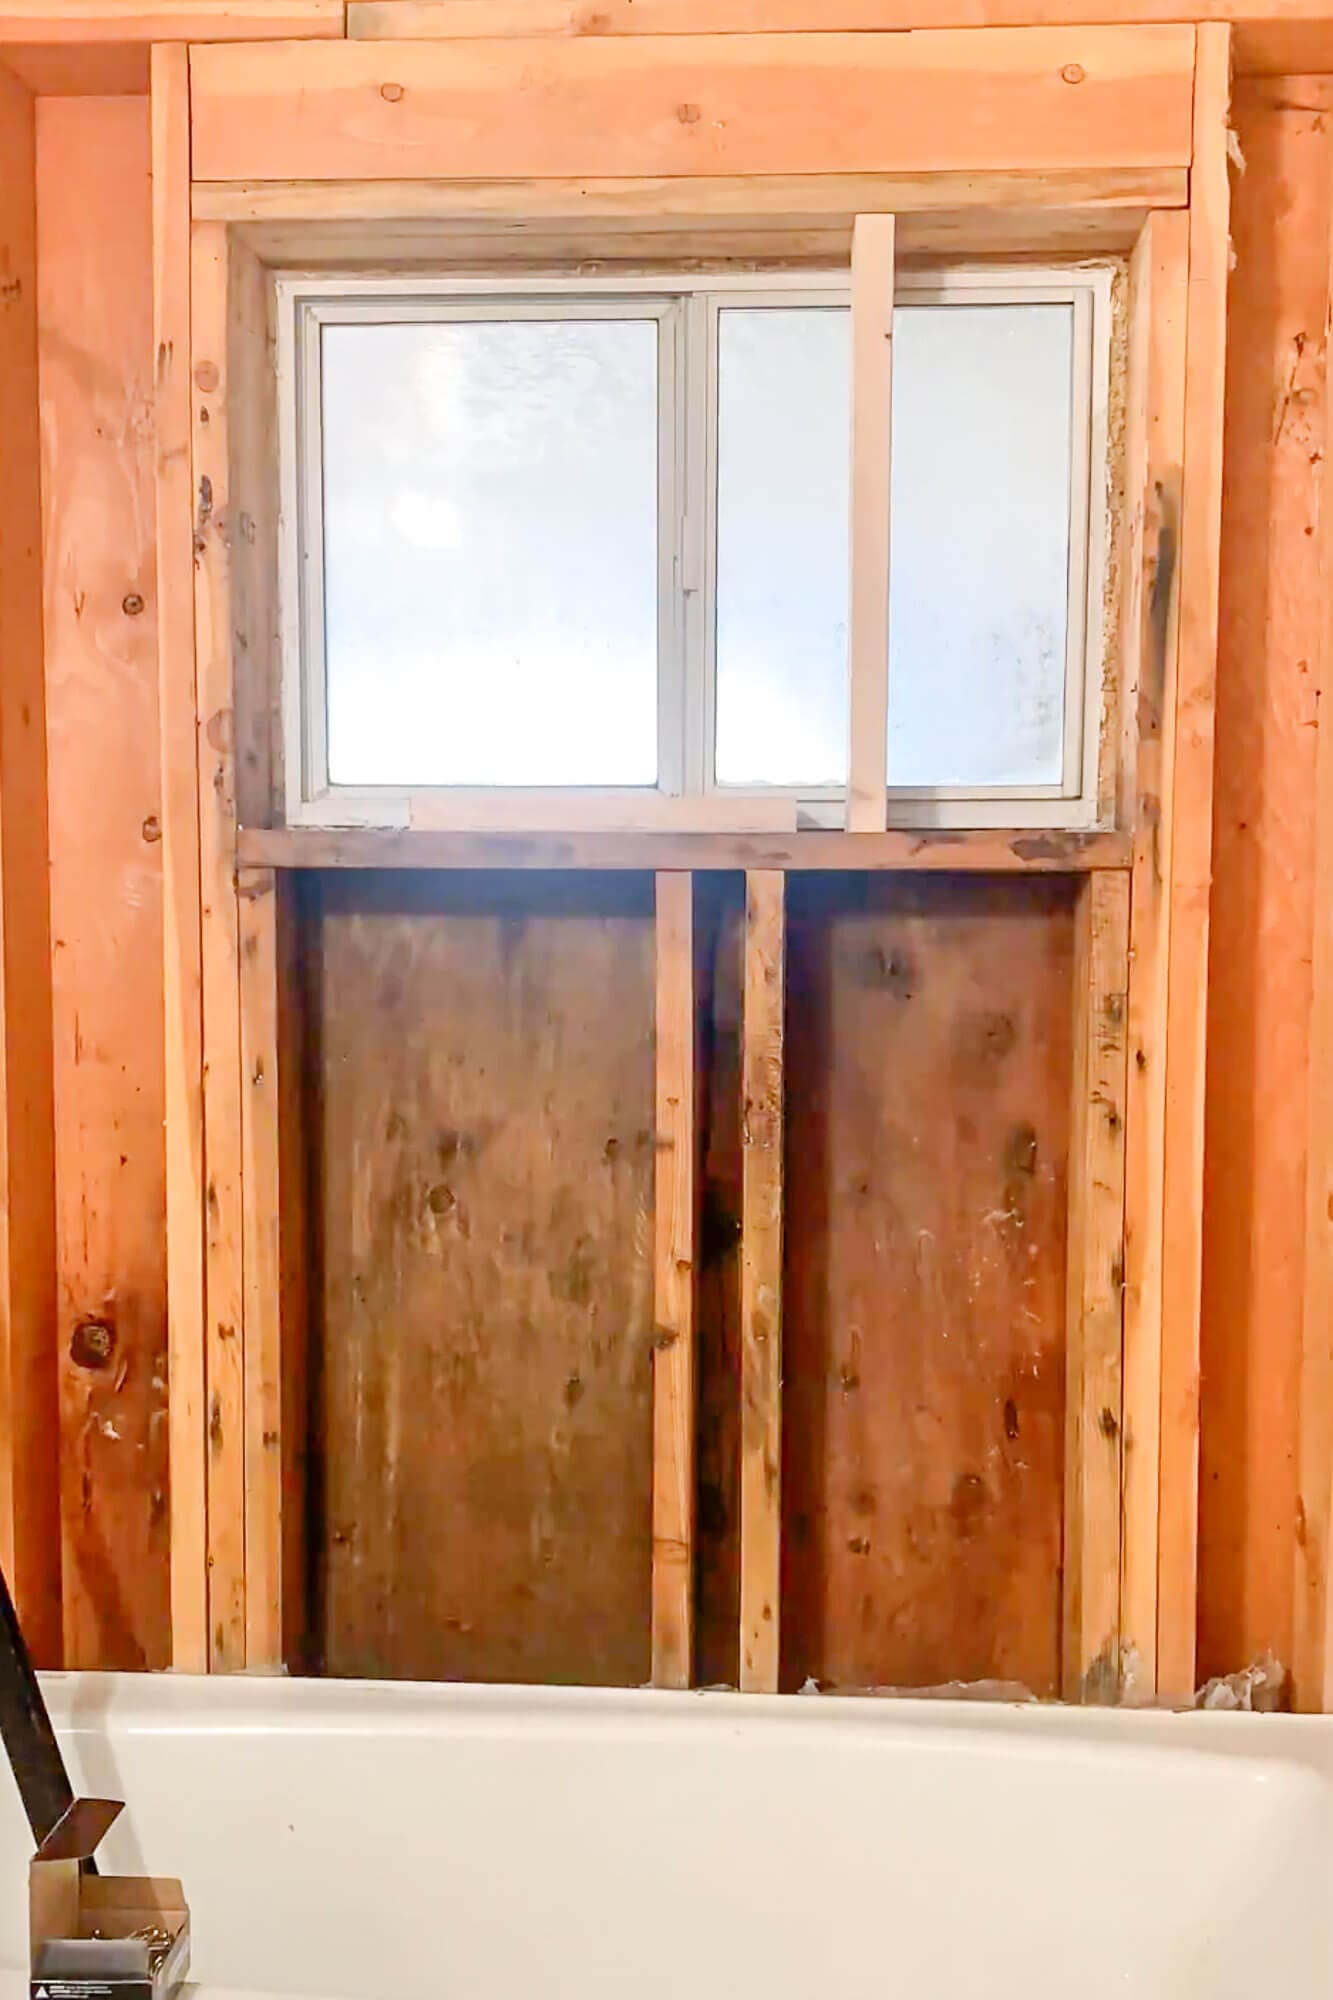
Step 3: Clean, Treat, and Dry Shower Framing After Mold Removal
With everything open to the studs, this is where you actually get rid of mold in a shower at the source.
Here’s the cleaning process I followed:
- Sprayed the framing with mold cleaner
- Scrubbed thoroughly with a stiff brush
- Rinsed with warm water
- Followed up with white vinegar (do NOT mix with bleach)
- Let everything dry completely
Do not rush the drying phase. If the framing stays damp, mold can return even through brand-new walls.
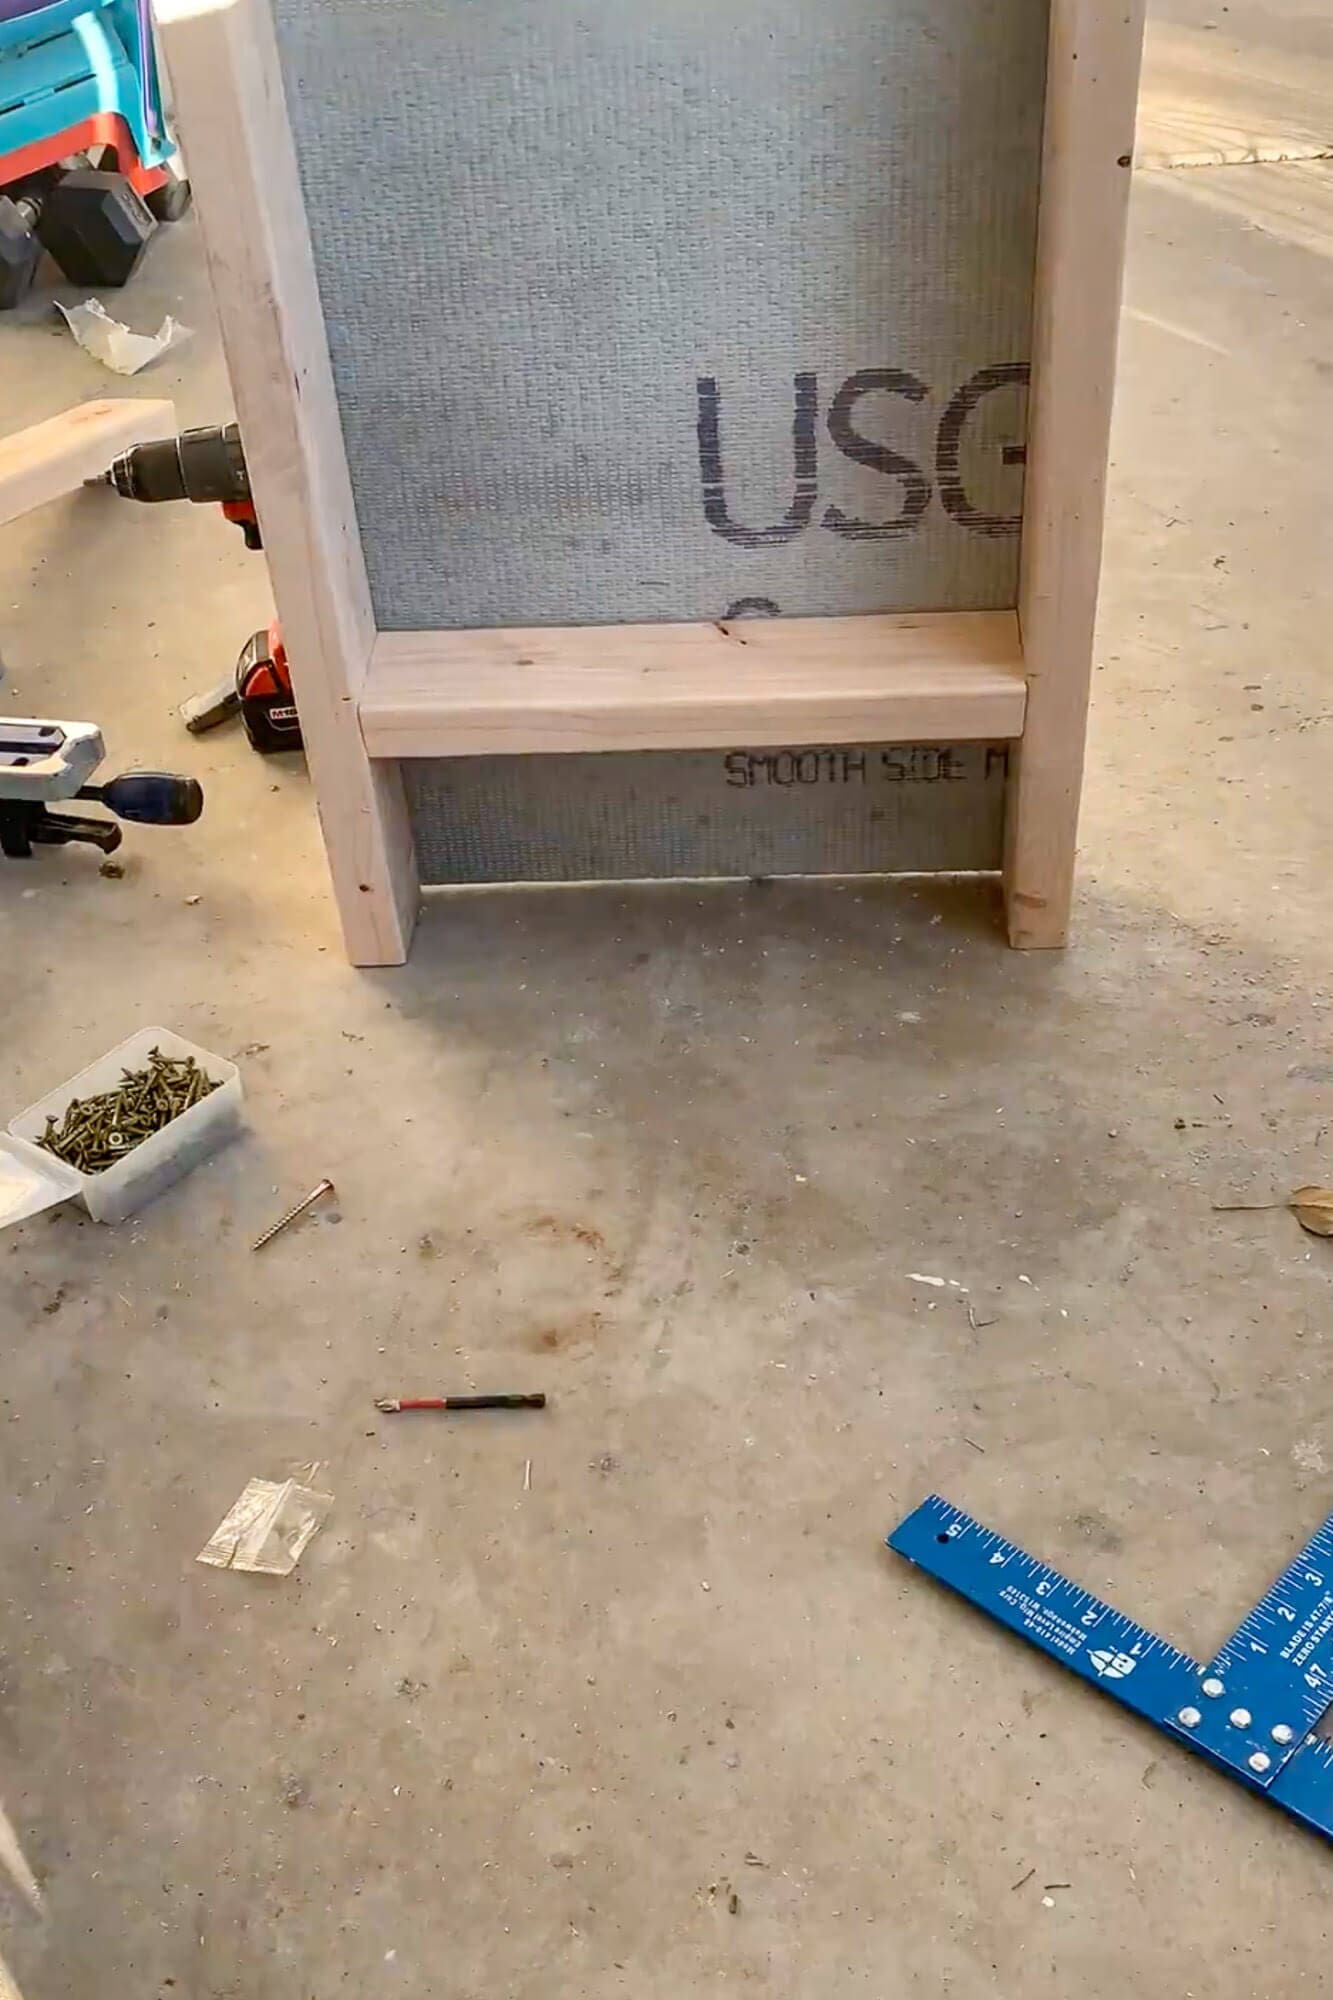
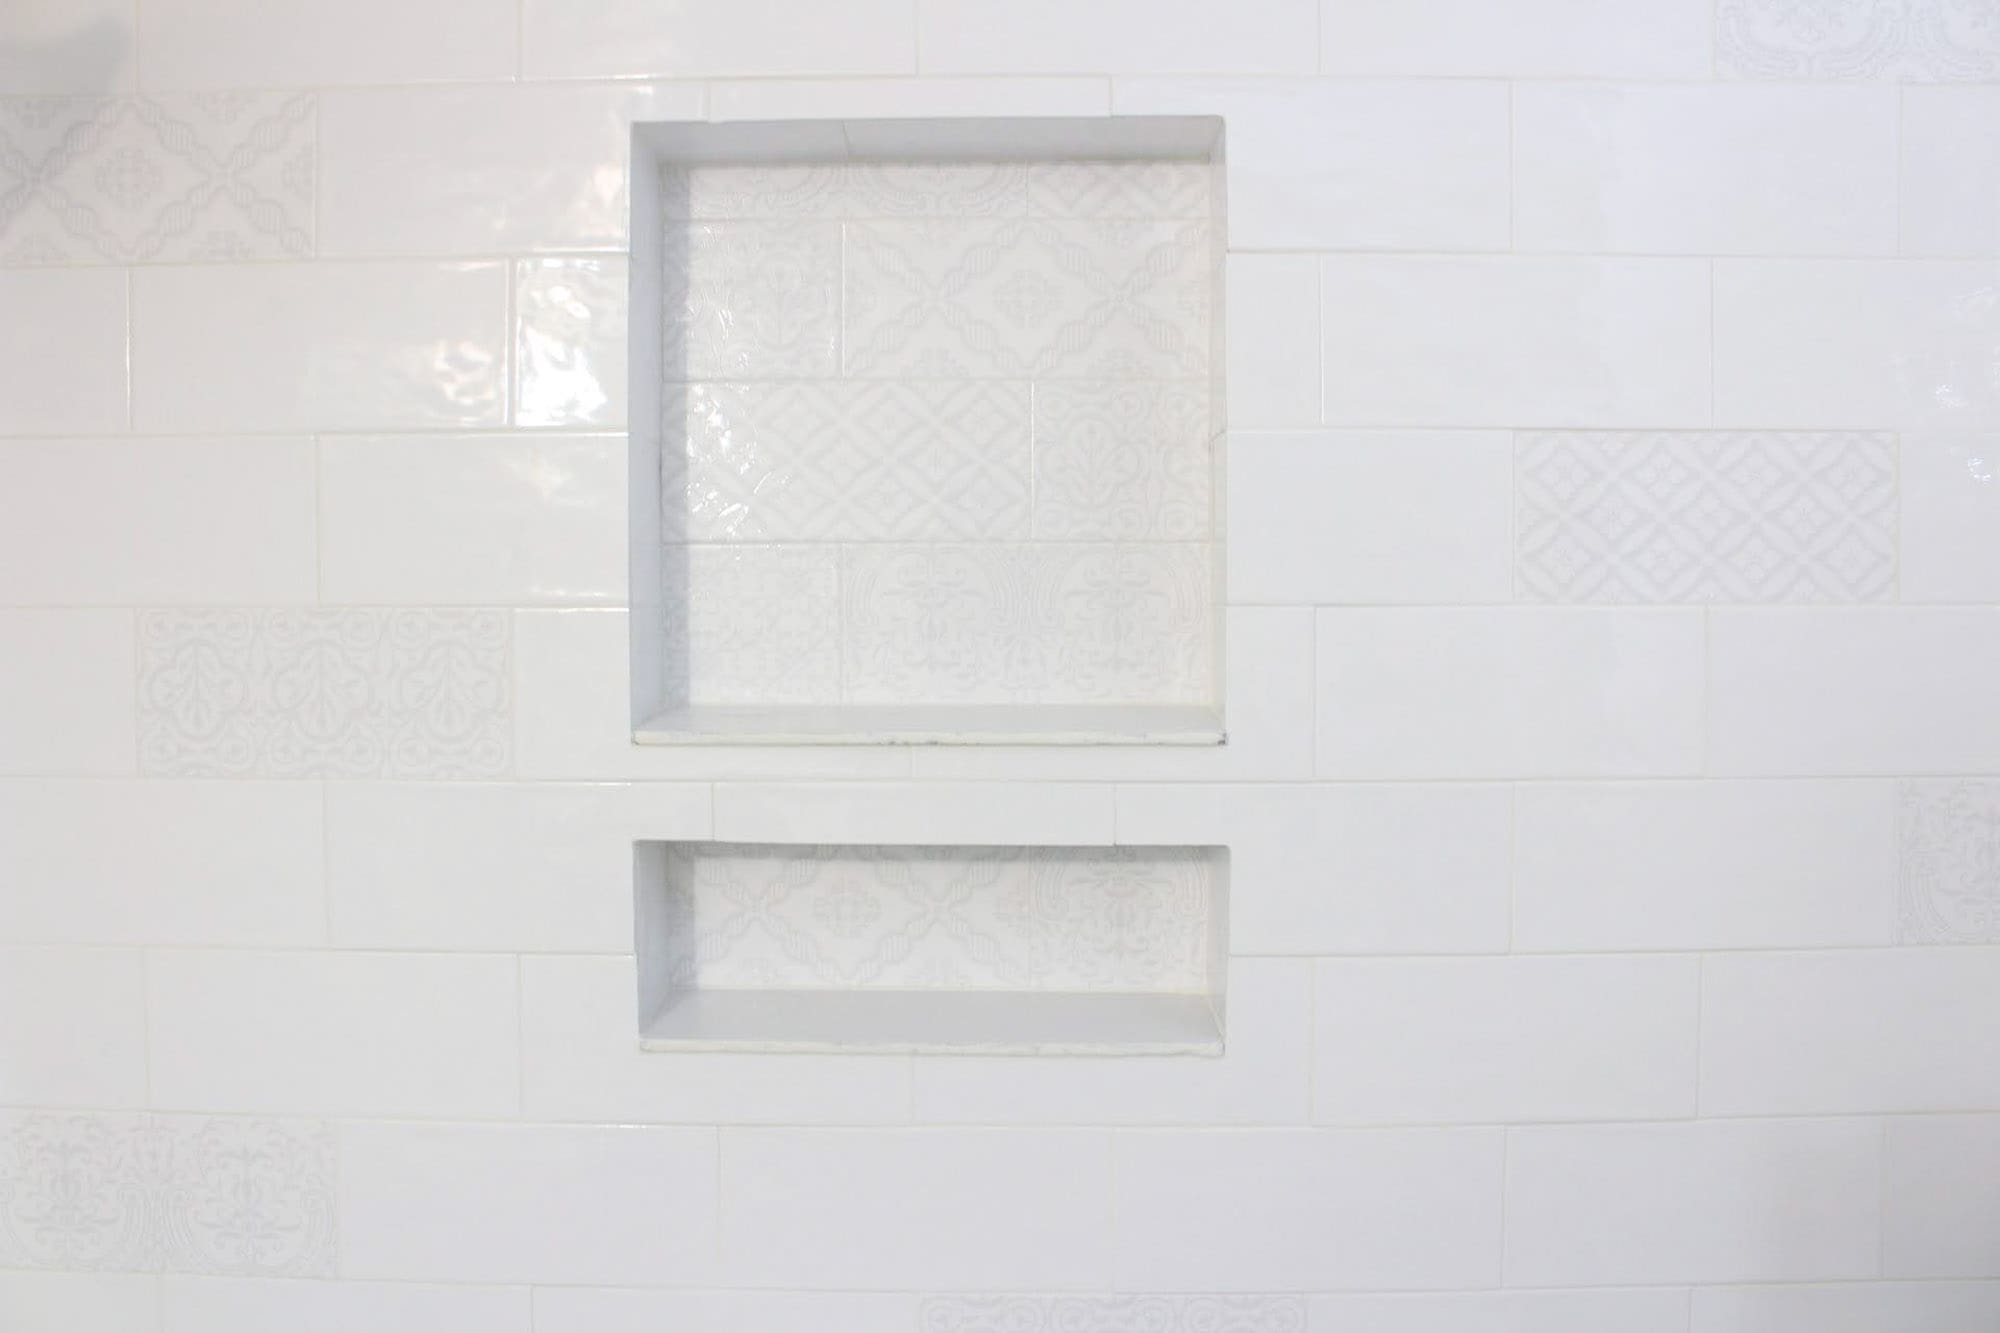
Step 4: (Optional) Build and Pitch the Shower Niche
If you’re not adding a niche, skip this step and move straight to cement board in Step 5. If you ARE adding one, this is the perfect moment because the studs are already open. For the full niche-building tutorial, see my DIY shower niche guide.
Once everything was clean and dry, I framed the niche between studs. The pitch is crucial. A niche must tilt slightly outward so water drains and doesn’t pool against grout.
Quick Niche Build Checklist
- Measure bottle height and choose a niche width that aligns with your tile layout
- Cut 2×4s for top, bottom, and sides
- Install bottom piece first, then top
- Shim the bottom 2×4 forward about 1 to 2 degrees
- Add corner blocking so cement board edges have support
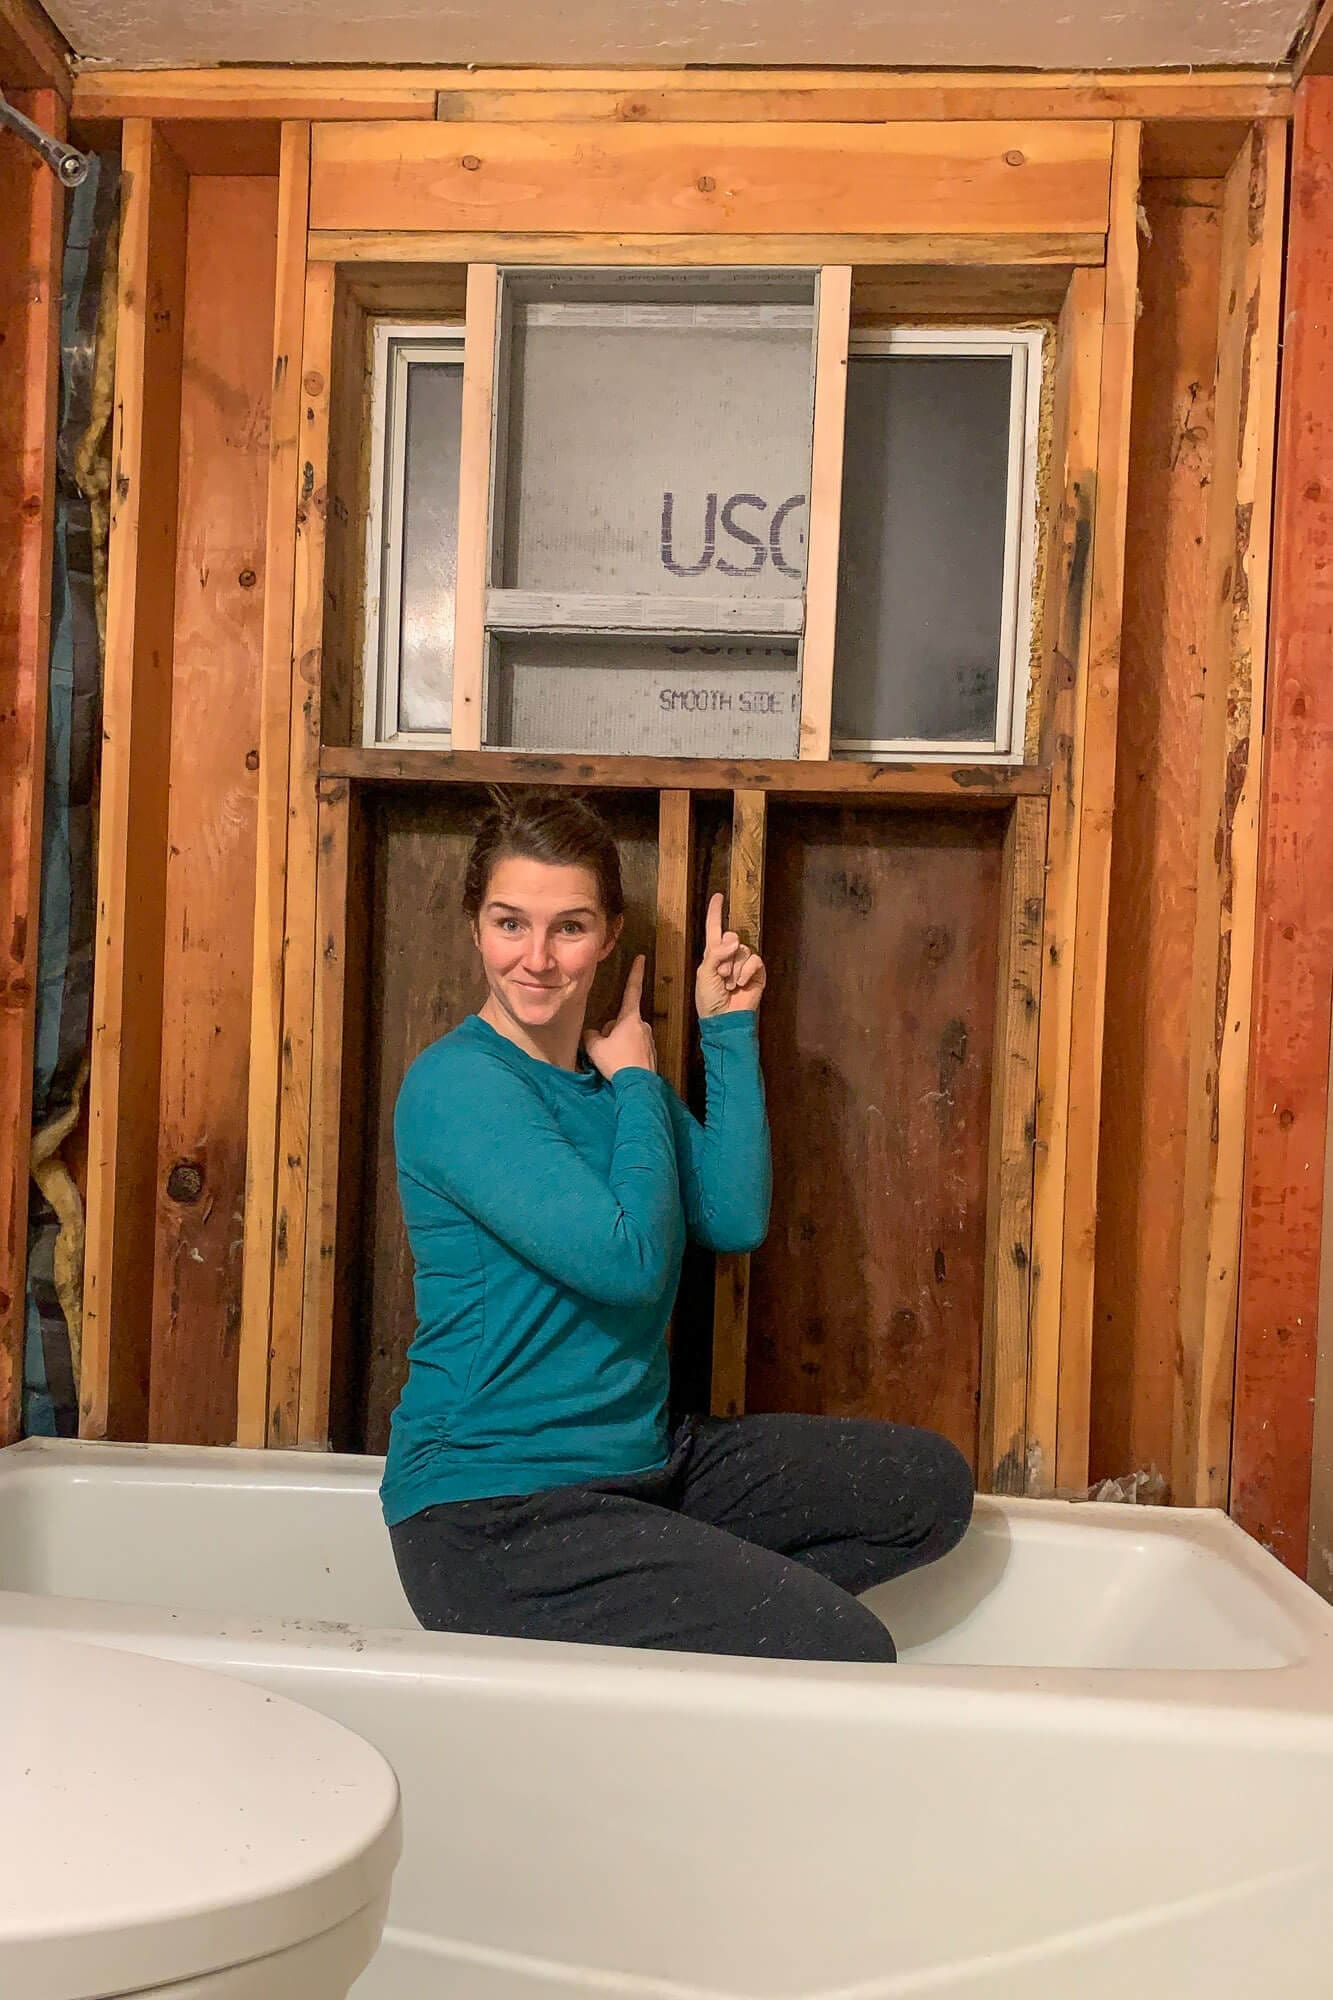
Step 5: Install 1/2-Inch Cement Board (The Right Substrate)
I dry-fit all boards first to plan seams and confirm openings for the niche, window, and plumbing.
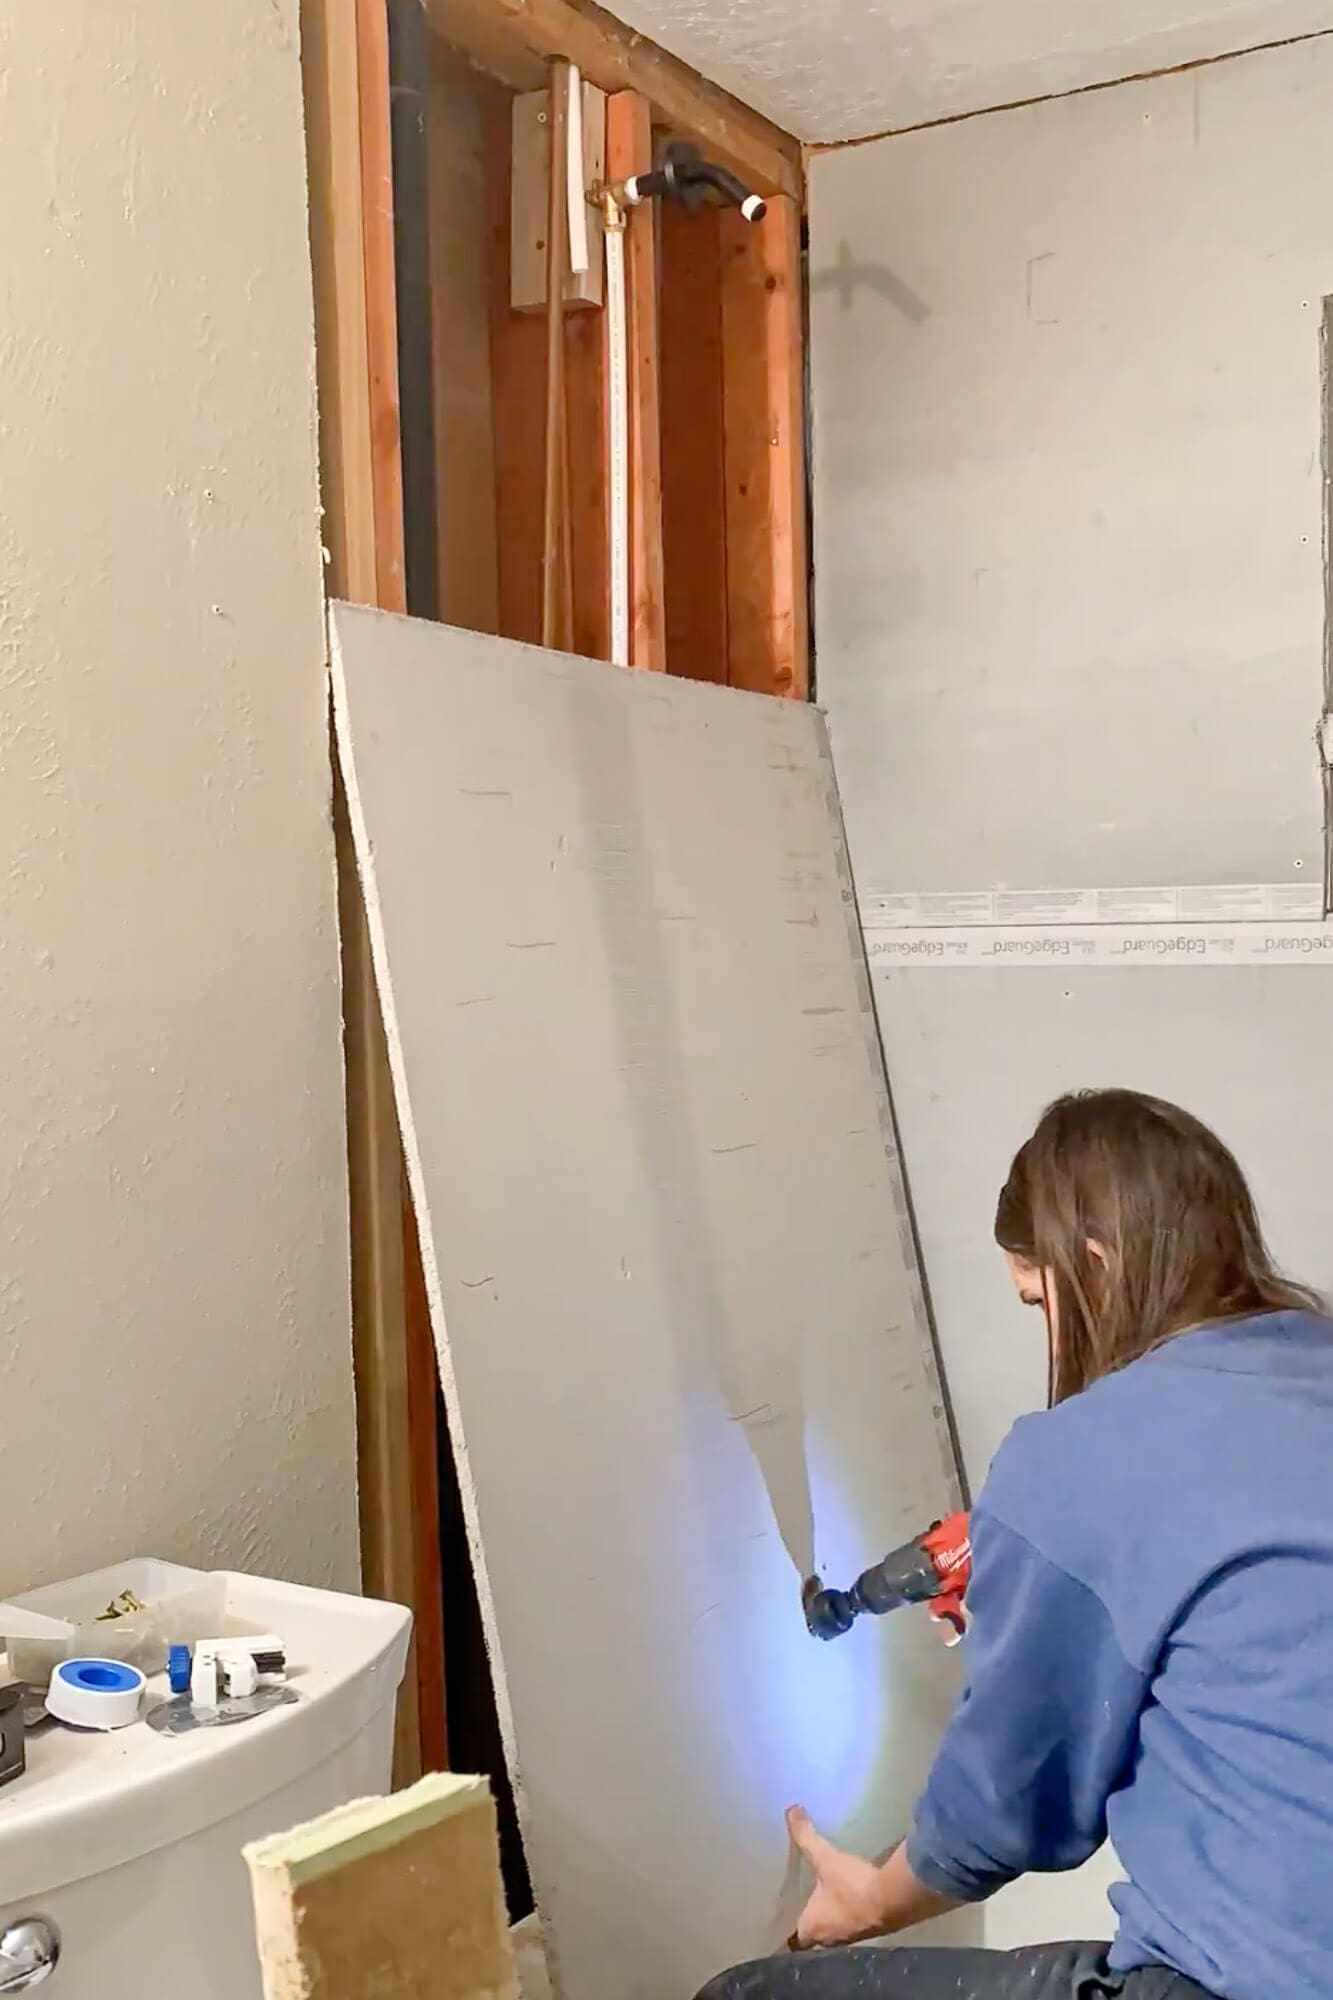
- Screw every 7 to 8 inches into studs
- Keep factory edges together for straighter seams
- Leave a small gap above the tub flange (manufacturer-recommended)
- Cut clean openings for fixtures
- Map seams before committing
After all panels were up, I checked for any areas that flexed. Those spots need extra blocking.
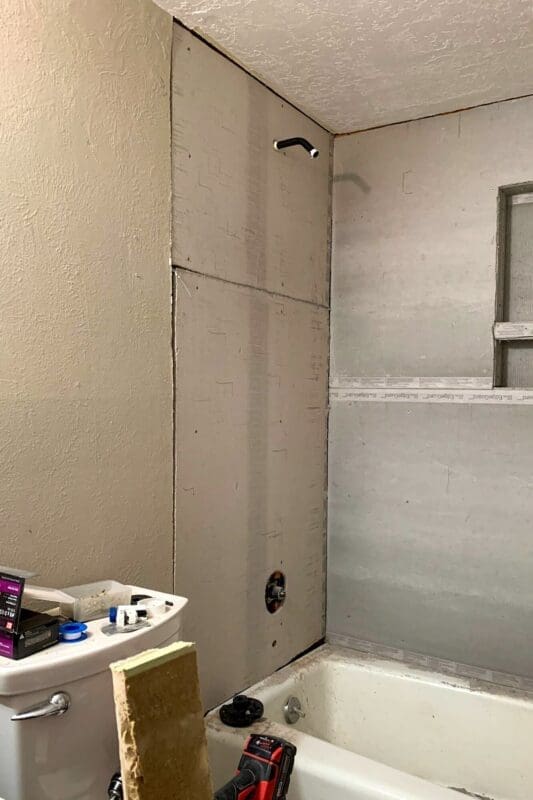
Step 6: Add Extra Blocking Where the Walls Flex
Old walls aren’t always framed perfectly. If seams don’t land on studs, cement board can flex, which causes tile lippage and cracked grout down the road.
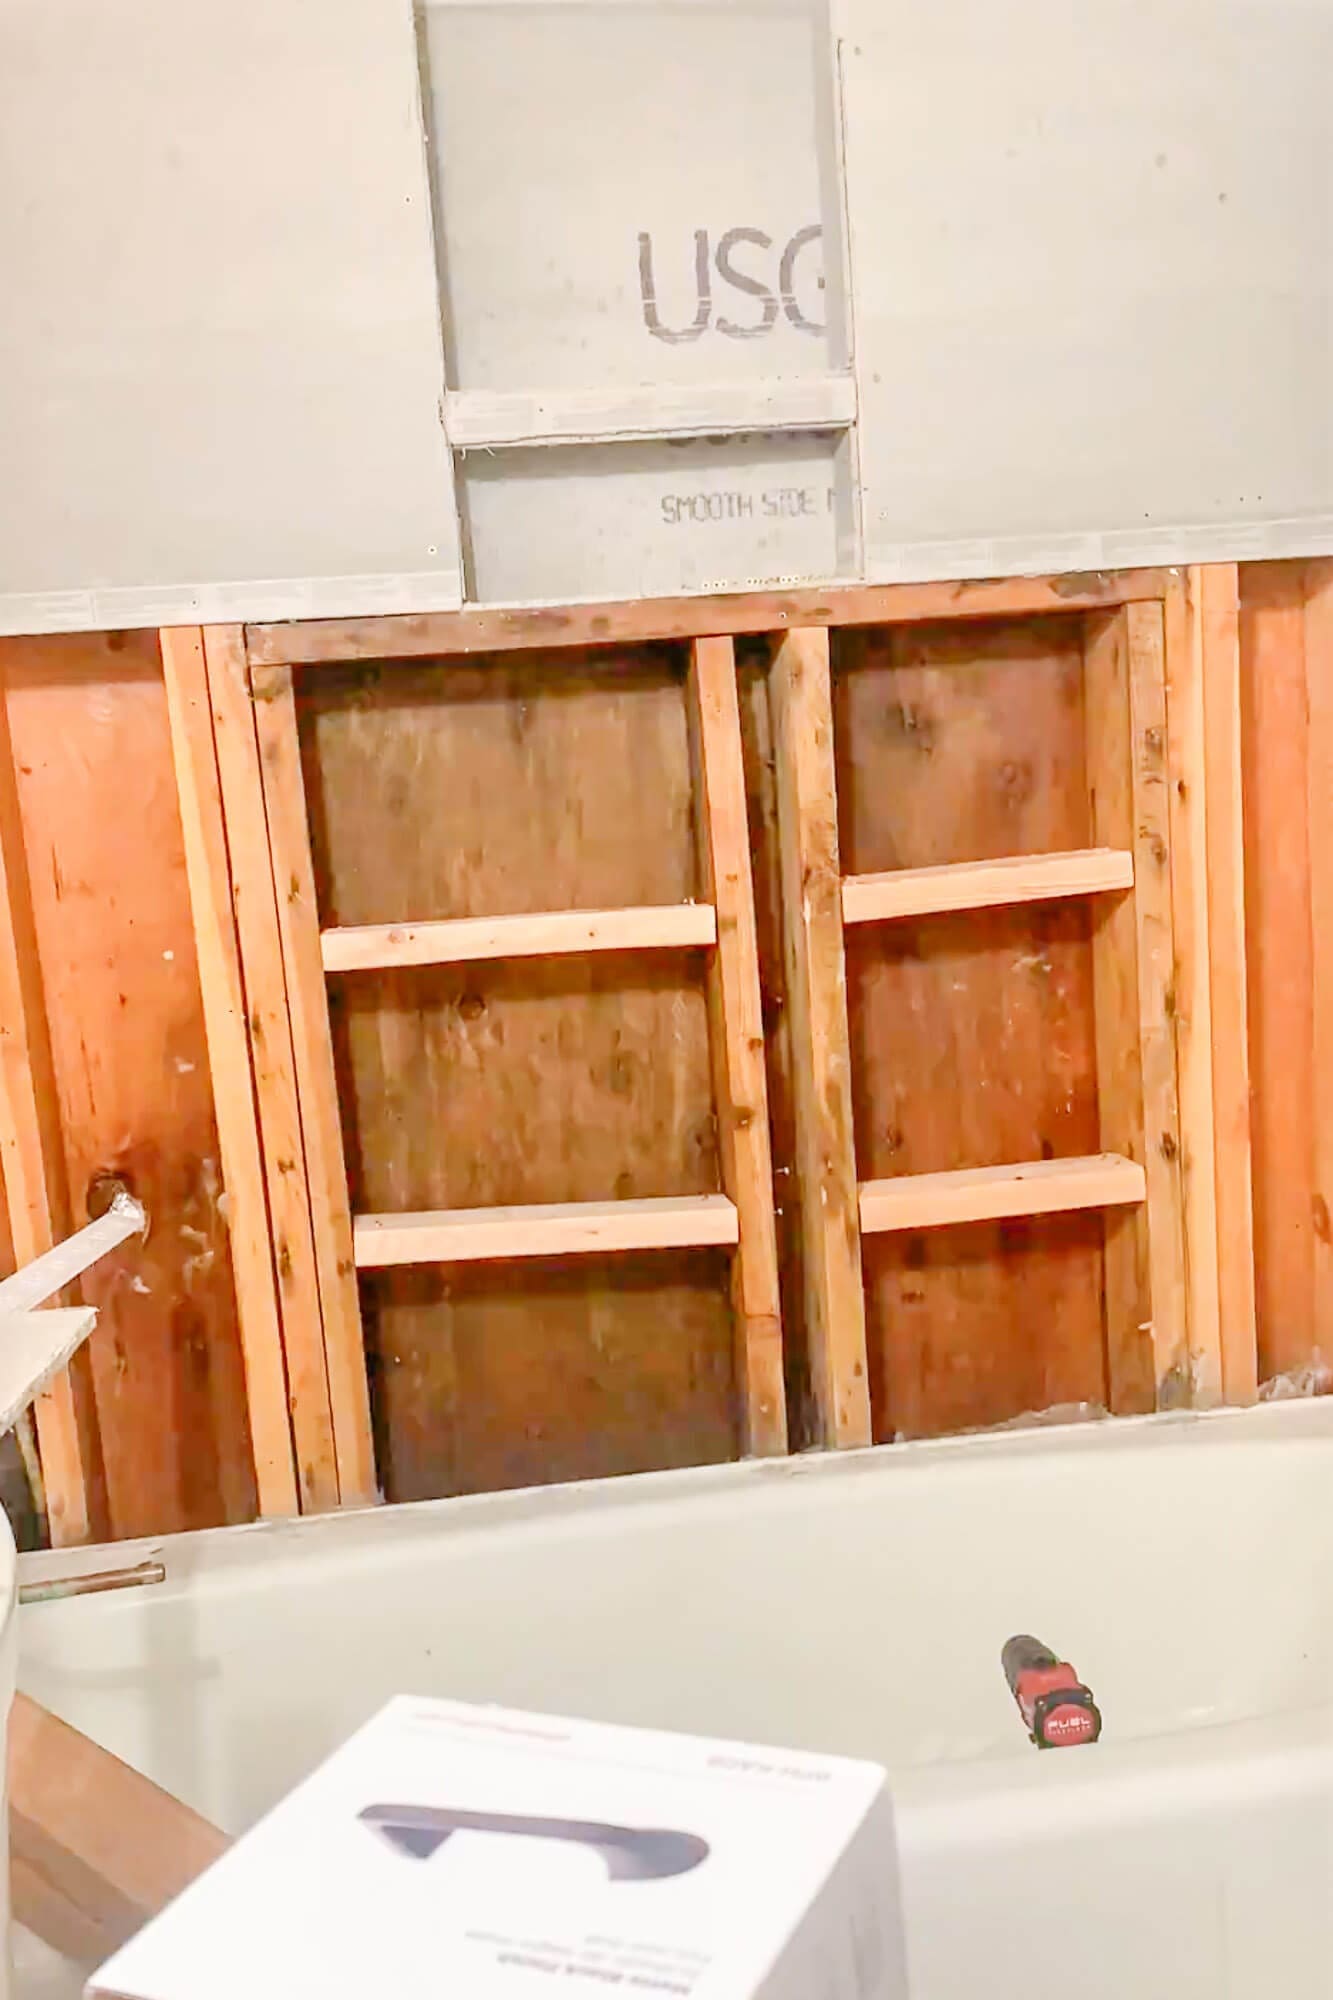
Here’s how I added blocking without removing panels:
- Marked any flexy seam
- Slid short 2×4 blocks behind the wall through the niche or window opening
- Screwed through the cement board into the block
- Sistered studs where needed
- Added blocks at corners for strength
Once blocked, the wall felt solid, exactly what you want before tile.

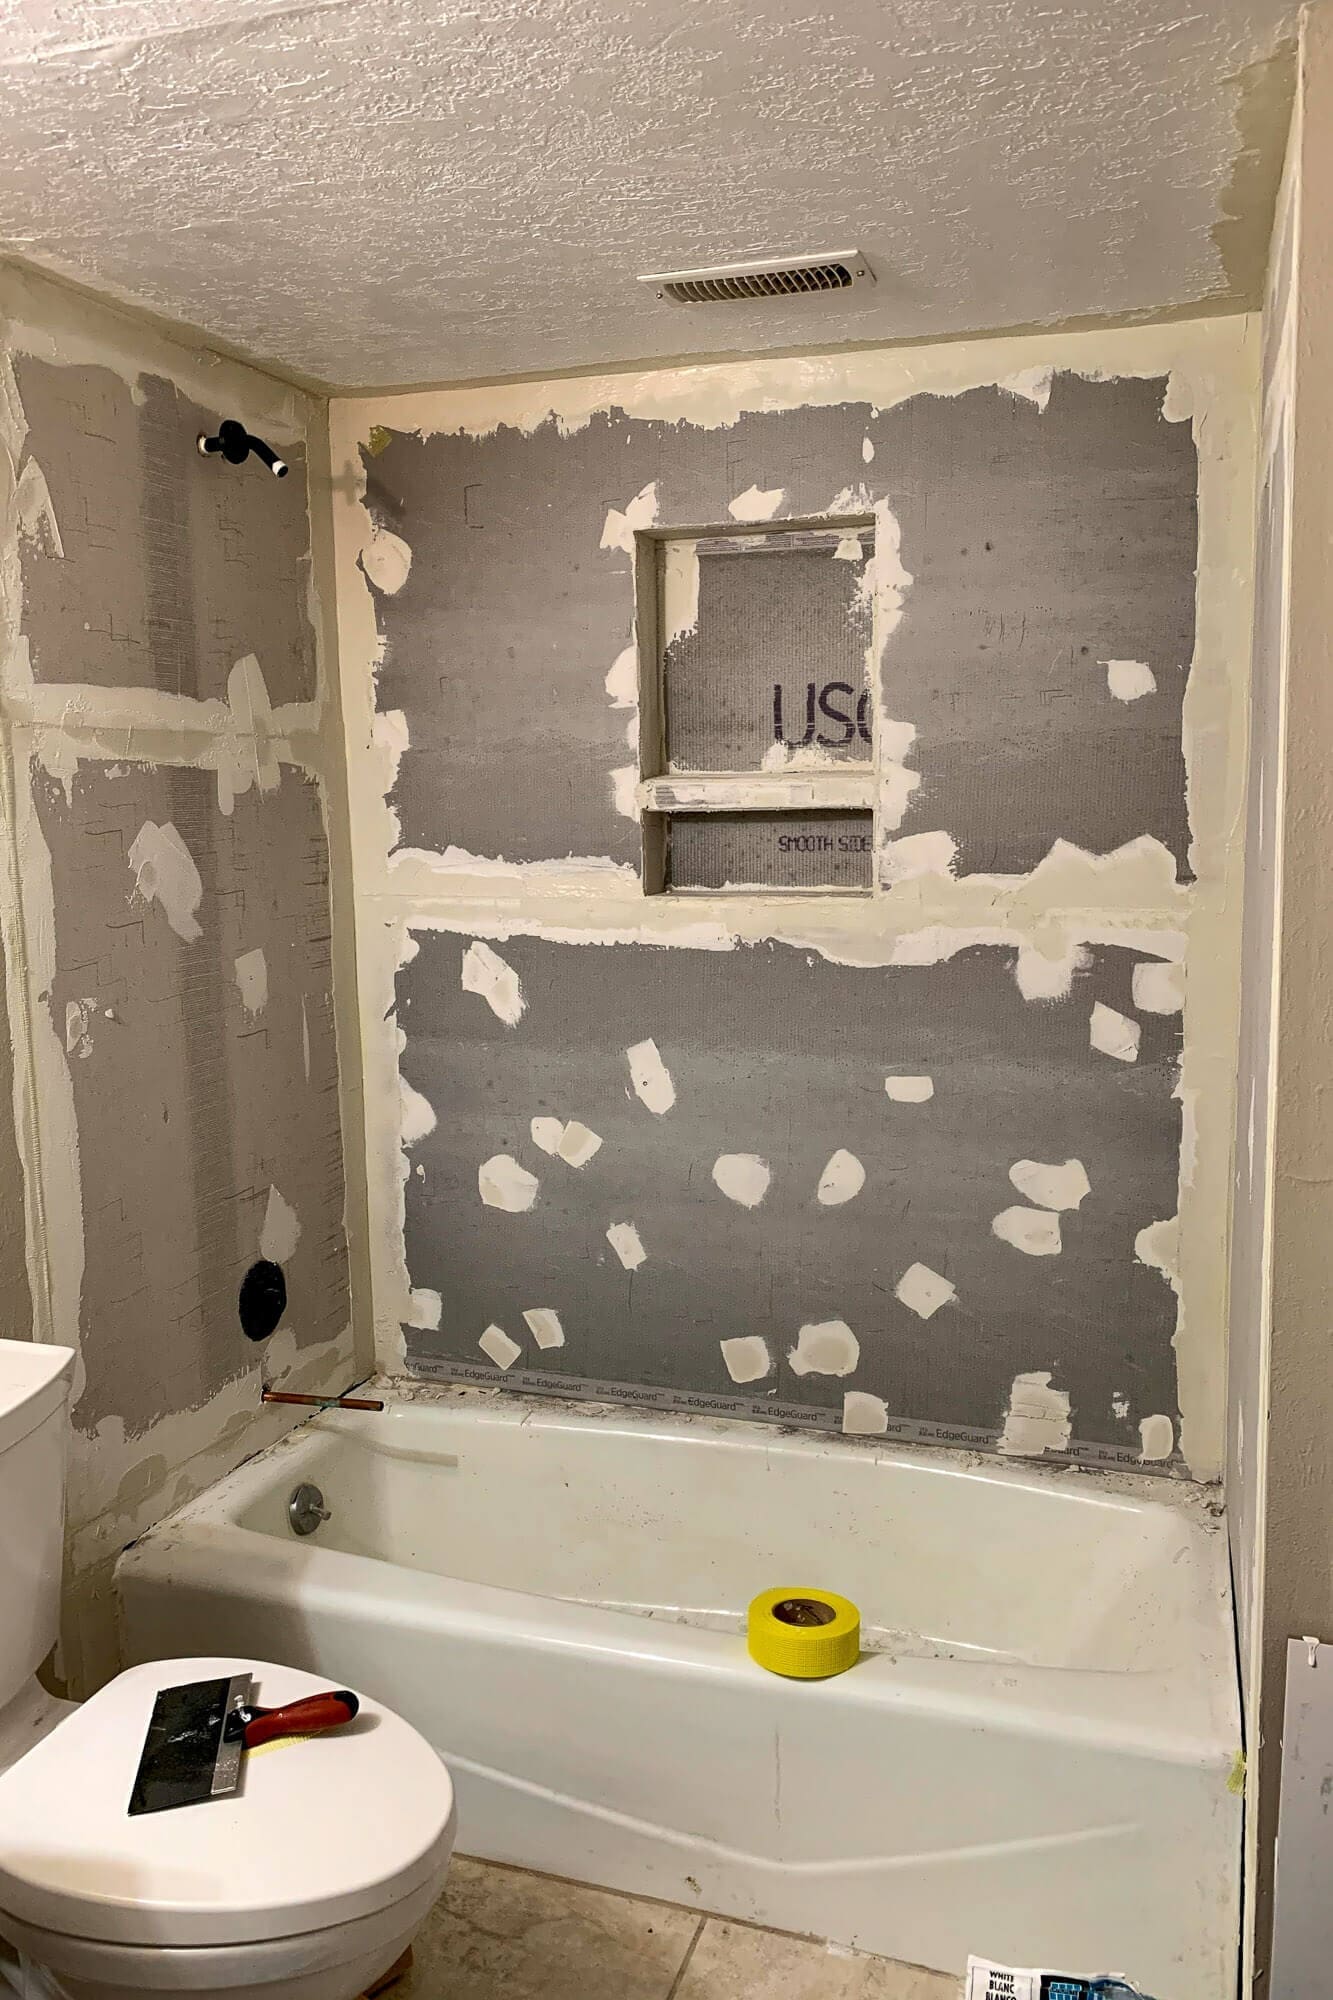
Step 7: Tape Seams with Alkali-Resistant Mesh and Thinset
Use alkali-resistant tape only. Drywall tape will not work in a shower because it dissolves in moisture.
- Mesh tape over every seam
- Thinset to embed the tape
- A light coat of thinset over screw heads
- Tape inside niche corners carefully
Let this fully dry before waterproofing.
Step 8: Waterproof the Shower (Two Full Coats)
This step protects everything behind the tile and is the single most important detail when you get rid of mold in a shower permanently.
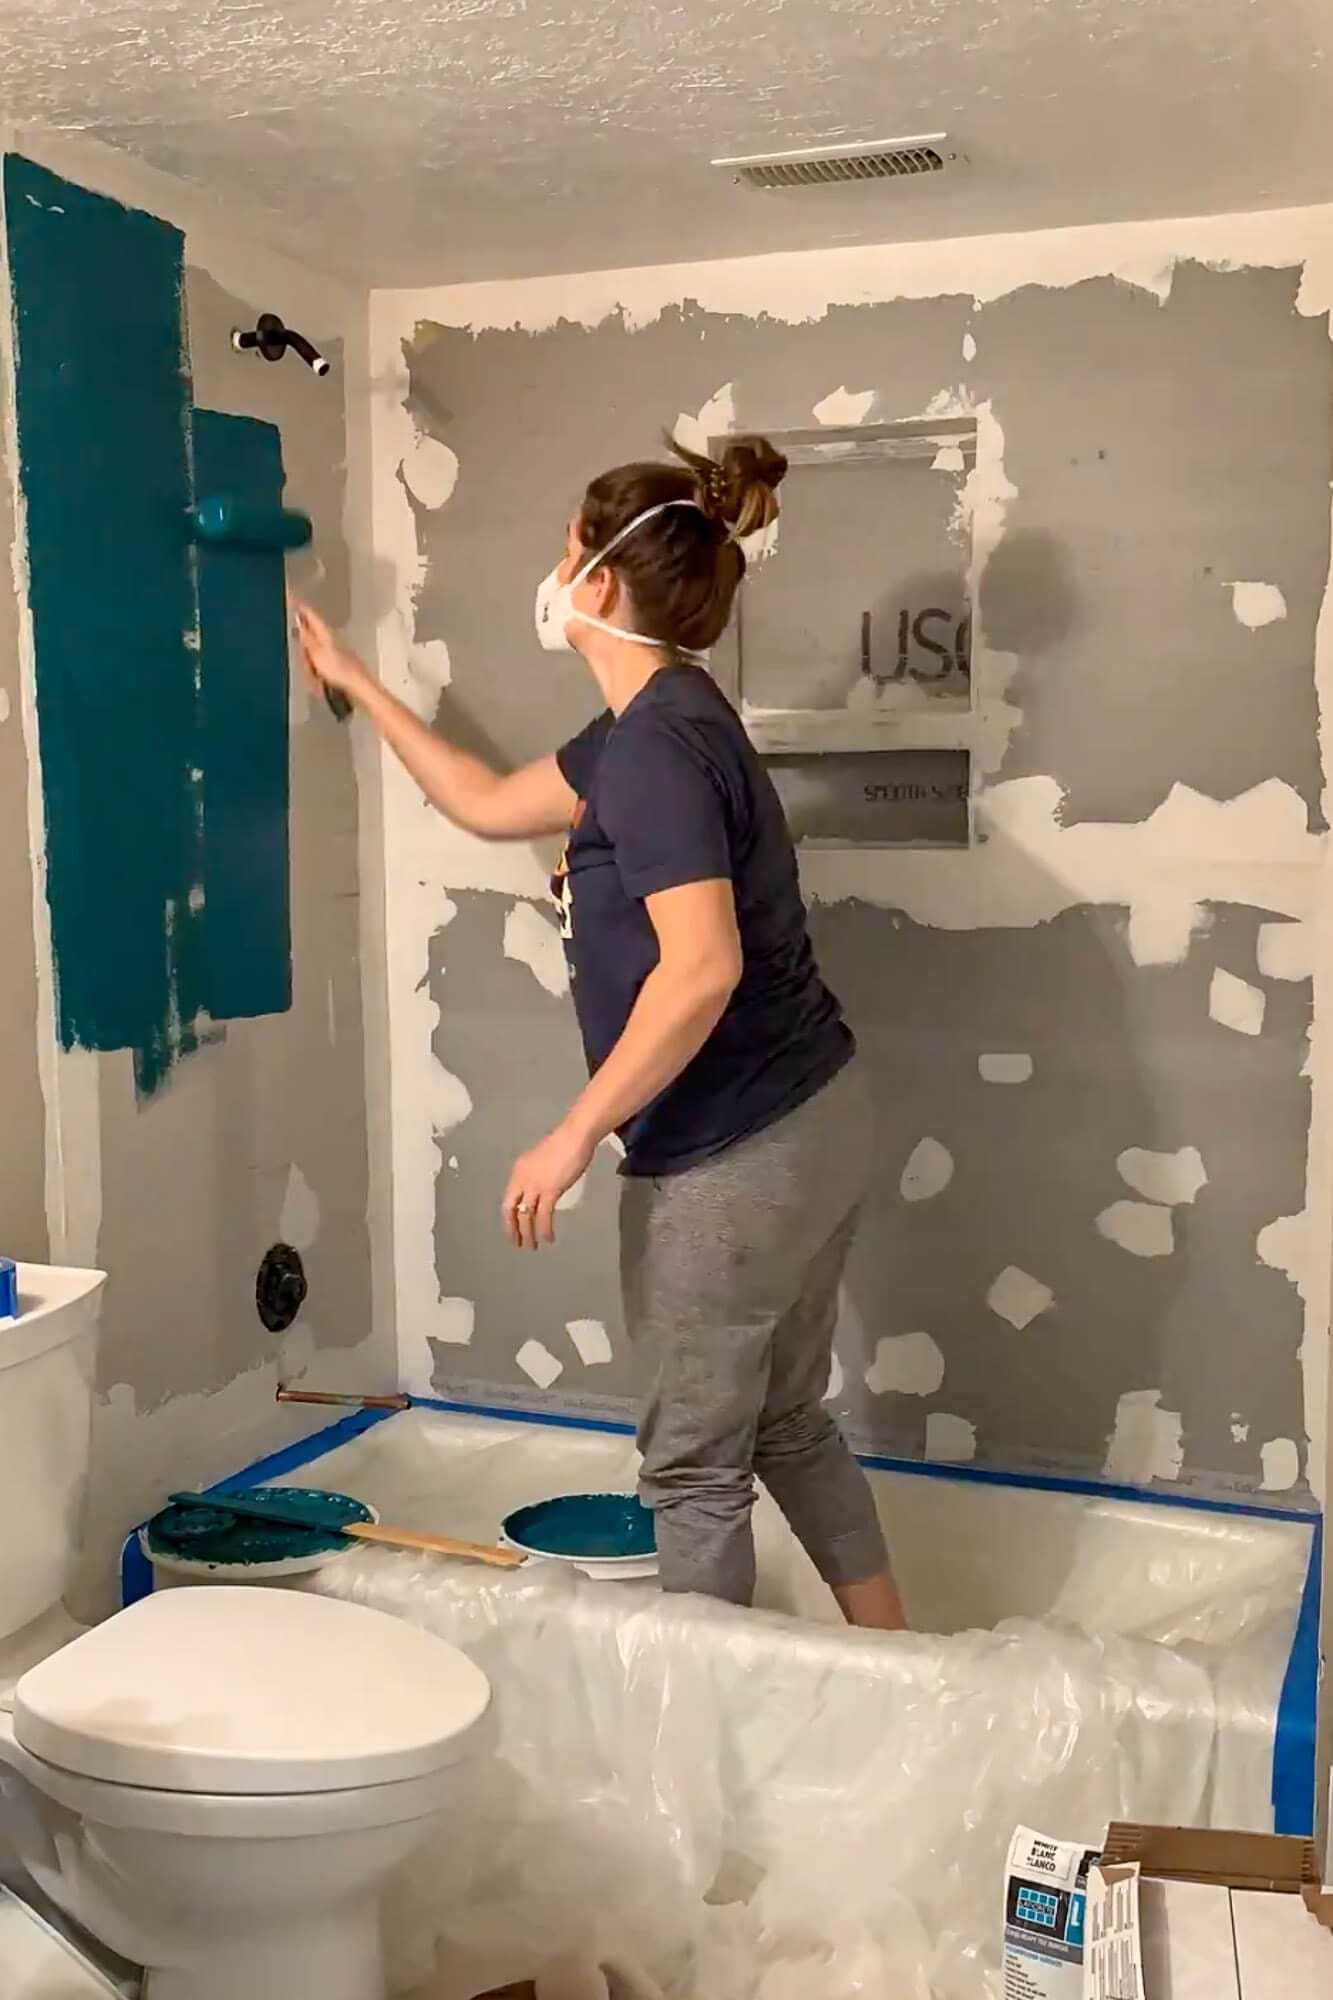
- Roll on the first coat of waterproofing membrane
- Embed fabric where required
- Pay special attention to the niche, corners, and any window opening
- Allow full dry time per manufacturer
- Apply a second complete coat
I coated everything, not just seams, so the surround became a continuous waterproof shell.
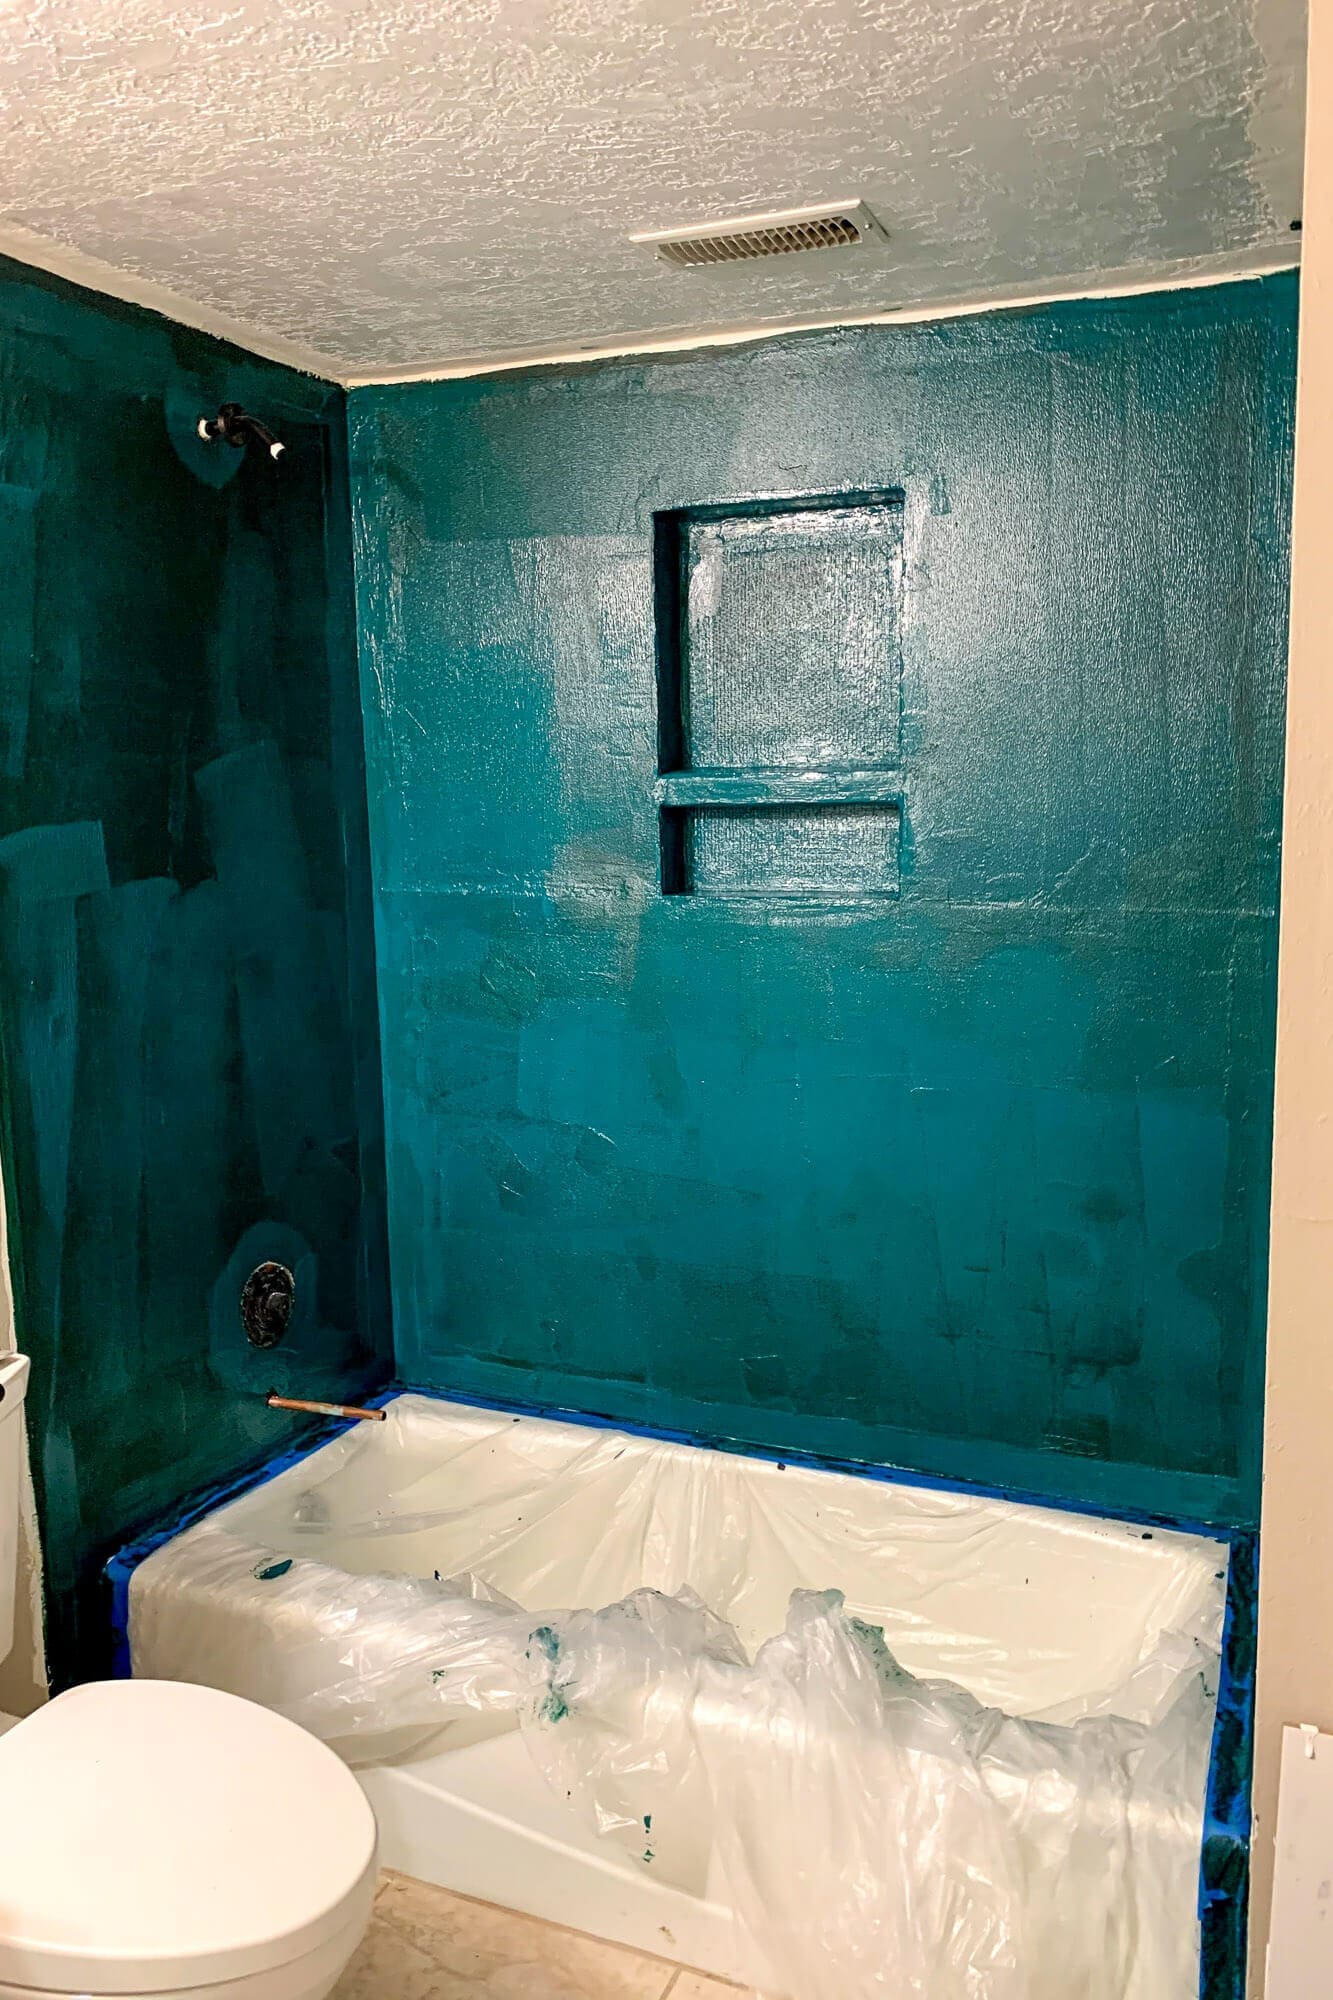
Step 9: Final Checks Before Tiling
Before you set the first tile, walk the surround one more time looking for:
- Thin spots in the membrane
- Missed corners
- Uneven coverage
- Niche corners and edges fully sealed
Once the membrane fully cures, the shower is officially ready for tile. Next step: how to tile a shower wall, even if you’ve never done it before.

Cost and Time: What It Takes to Get Rid of Mold in a Shower
One of the most common questions I get is how much a full shower mold removal and rebuild actually costs. The honest breakdown:
Materials: Around $200 to $400 for a typical small bathroom shower surround. That covers cement board (around $15 per 3×5 panel, you’ll need 4 to 6), waterproofing membrane (around $50 to $80 per gallon, plus a quart of seam fabric), alkali-resistant mesh tape, thinset mortar, plumbing components if you’re swapping the valve, and disposal bags. New tile is on top of this and varies wildly by selection.
Tools: If you already own a drill, hammer, level, and utility knife, your tool cost is essentially zero. A multi-tool ($60 to $120) makes demo dramatically faster but isn’t required. Rent or borrow rather than buy if it’s a one-time project.
Time: A multi-day project. Day 1 for demo and cleanup. Day 2 for treating the studs and letting them dry overnight. Day 3 for niche build and cement board install. Day 4 for taping and thinset. Day 5 for two coats of waterproofing with full cure between. Tile work happens after that’s all complete.
| Phase | Active hours | Notes |
|---|---|---|
| Demo and cleanup | 4 to 6 | Bag everything as you go |
| Clean and treat studs | 2 | Plus 12 to 24 hours dry time |
| Frame niche (optional) | 2 | Skip if not adding one |
| Cement board install | 3 to 4 | Add blocking where needed |
| Tape and thinset seams | 2 | Full dry before next step |
| Waterproof (2 coats) | 2 to 3 | Plus 24 to 48 hours cure |
Why Showers Develop Mold (and How to Prevent It)
Knowing how to get rid of mold in a shower is half the battle. Preventing it from coming back is the other half. Most shower mold prevention comes down to waterproofing correctly during the rebuild and then helping the shower dry out between uses. Most shower mold forms because of:
- Cracked grout and missing caulk that let water behind the tile, which is why you often see mold in shower grout first
- Caulk failures at the tub-to-tile transition
- No waterproofing membrane behind the tile
- Poorly built or non-pitched niches
- Using greenboard instead of cement board
- Excess humidity and slow drying after showers (no fan or weak fan)
With proper rebuild methods, the shower becomes far more durable and mold-resistant for years to come.
Black Mold in Showers: What to Know
If you’re dealing with black mold in a shower (or mold that looks gray or green), the solution for a failing surround is the same: open the wall, remove wet materials, and rebuild the shower with cement board and a continuous waterproofing membrane.
- Color alone doesn’t confirm toxicity. The only way to know what species is present is laboratory testing.
- Never mix chemicals like bleach and vinegar. The combination produces toxic chlorine gas.
- If contamination is widespread or anyone in the house has health concerns, hire a professional remediation specialist.
Pink Mold in Showers
If you’re seeing pink, salmon, or orange-ish discoloration in shower corners or around drains, that’s usually pink mold, which is actually a harmless biofilm called Serratia marcescens that thrives on soap residue and shampoo buildup. It’s not toxic but it’s gross.
- Cleaning with regular bathroom cleaner removes it
- Better drying habits keep it from coming back
- Squeegee the walls after showers if it’s a recurring problem
Pro Tips for the Best Mold Removal Results
These are the lessons I learned about how to get rid of mold in a shower the right way:
- Let framing dry fully (patience here pays off forever)
- Use cement board in wet zones, never greenboard or regular drywall
- Always use alkali-resistant mesh tape, not paper drywall tape
- Apply two full coats of waterproofing membrane, not one heavy coat
- Pitch niche shelves slightly forward so water drains
- Use silicone (not grout) at inside corners where two surfaces meet. Silicone flexes with the building, grout cracks.
Common Mistakes to Avoid During Shower Mold Removal
- Leaving damp framing behind walls (the #1 reason mold returns)
- Skipping blocking behind seams
- Using the wrong type of tape (paper drywall tape will fail in a shower)
- Waterproofing only the seams instead of the entire surround
- Ignoring niche corners (corners are where most leaks start)
- Putting tile up too soon, before the membrane has fully cured
Troubleshooting Common Shower Mold Problems
- Musty smell after demo: Keep fans running and check adjacent walls for hidden moisture migration
- Soft studs: Replace before you install cement board. Soft wood will fail.
- Streaky waterproofing membrane: Add another coat after the recoat window
- Mold returning months later: Almost always a ventilation problem. Upgrade your bathroom fan and run it for 20 minutes after every shower.
You Did It!
If you followed these steps, you’ve successfully completed a full shower mold removal and rebuilt with proper waterproofing. Now you know exactly how to get rid of mold in a shower from start to finish, and your shower is more durable than the original.
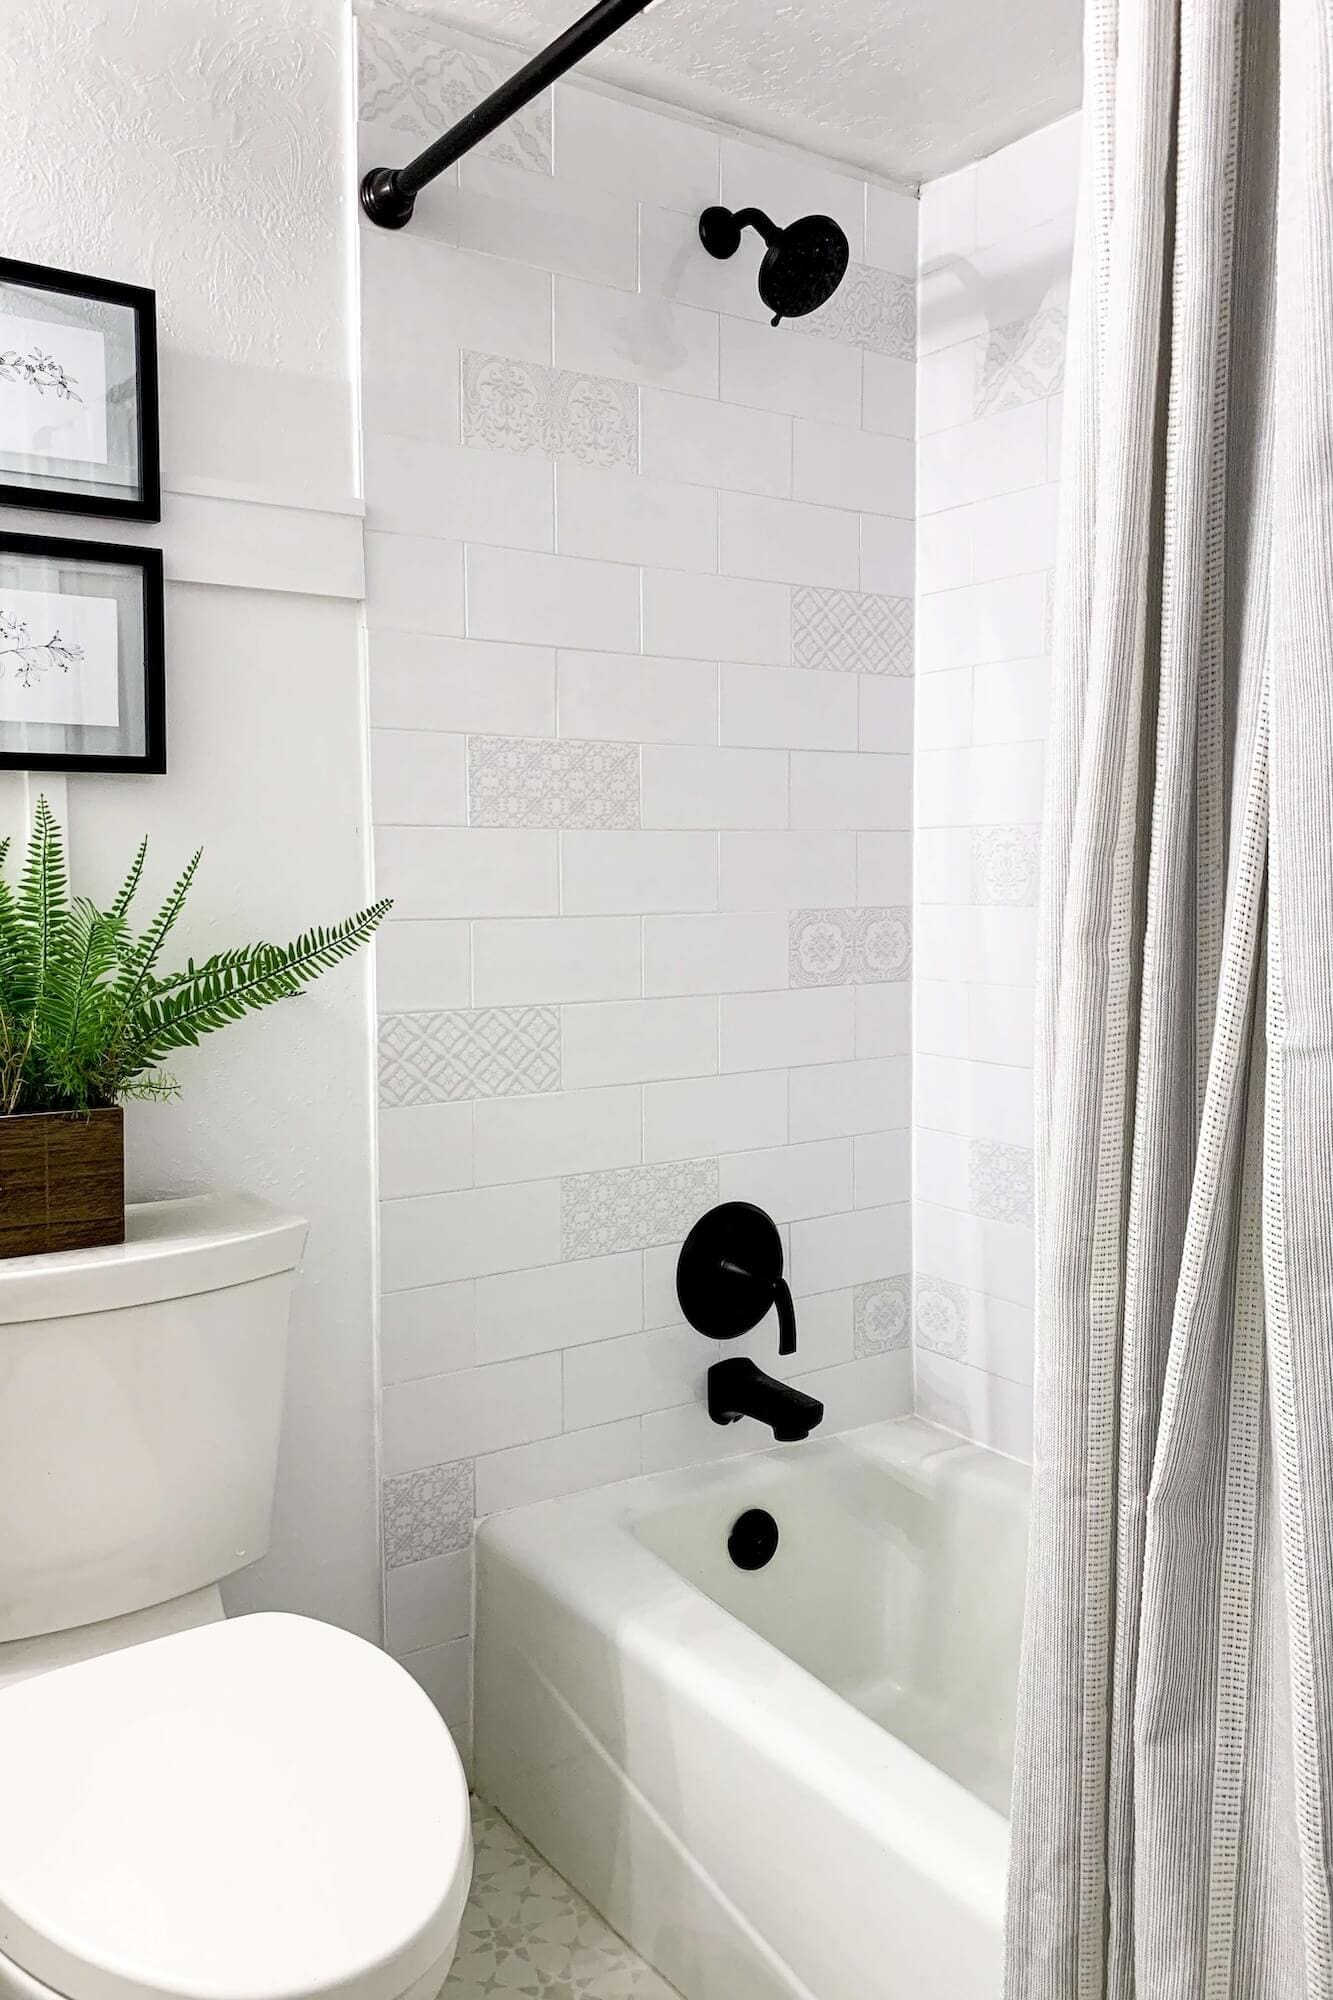
Your next step: how to tile a shower wall, even if you’ve never tiled before.
More Small Bathroom Remodel Projects to Try
If you’re tackling a bigger bathroom makeover, these projects pair well with a freshly waterproofed shower:
- Small bathroom remodel hub (all 7 projects in one place)
- How to build a DIY shower niche
- How to tile a shower (subway tile beginner guide)
- Painting bathroom floor tiles (stencil method)
- How to paint a bathroom vanity
- DIY gold bathroom mirror with Rub ‘n Buff
- DIY board and batten bathroom wall
📌 Pin This Shower Mold Removal Tutorial for Later
Pin now and come back when you’re tackling shower mold and prep.
FAQ: How to Get Rid of Mold in a Shower
The fastest method is demoing the tile, removing wet greenboard, cleaning the studs with mold cleaner and vinegar, and letting everything dry before rebuilding with cement board and waterproofing membrane. Surface cleaning won’t fix mold that’s spread behind the tile.
You can remove surface mold, but if moisture got behind the tile, you need to open the wall. Greenboard or damaged drywall cannot be saved once it’s saturated.
Loose tiles, crumbling grout, persistent musty smells, or soft drywall behind the tile are signs of hidden mold. If you’re seeing two or more of those, the problem is behind the wall.
A mold remover followed by warm water and white vinegar. Make sure the area fully dries before you close the wall back up. Don’t mix bleach and vinegar.
Bleach can lighten stains but won’t fix mold inside wet greenboard or saturated wood. Demo and proper rebuild are the long-term solutions for any mold that’s penetrated past the surface.
Anywhere from one day to several days depending on ventilation, humidity, and how wet the framing was. If you can run a fan or dehumidifier in the bathroom, do it. Don’t close the walls until the wood feels and reads dry.
Yes. Cement board is NOT waterproof, it’s just water-stable. You must apply a full liquid waterproofing membrane on top of the cement board for the shower to actually be waterproof.
Use cement board, apply a full waterproofing membrane, use silicone (not grout) at inside corners, run your bathroom fan during and after every shower, and let the walls dry between uses. Most repeat-mold cases are caused by ventilation problems, not waterproofing failures.
Yes. Wet insulation must be replaced. It traps moisture and leads to future mold even if everything else is rebuilt correctly.
No. Pink mold is usually a biofilm called Serratia marcescens that grows on soap residue and is largely harmless. Black mold is different and can be harmful depending on the species. Color alone doesn’t confirm toxicity, only lab testing does.
Doing the whole bathroom? This shower mold removal tutorial is one of 7 projects in my DIY small bathroom remodel. The hub post has the full breakdown of every project, the cost-saving framework, and links to all the other tutorials.


You got rid of the window? From the outside too? In a similar situation
Yep when the previous homeowners added on the addition, they just drywalled right on over the window.