How to DIY Picture Frame Molding


Updated May 9, 2026
I love the classic look of picture frame molding and have always wanted a house with beautiful molding on my walls. But when I looked into the cost I realized that if I bought enough molding of even the cheapest stuff I found, I would have spent $50 for just this one wall. $50 might not seem like a lot to some, but at the time $50 was more than I had for this project. I would need to buy 12 eight foot pieces for this size of wall.
So as I got to thinking about it, I realized that I could improvise by using what I had on hand. Let me show you what I did!
In case you missed it, click here to see how I removed the door that was going into our backyard. At the time it was the only door going to out backyard, so we remedied that very quickly. Since we freed up this wall space, I wanted to do something extra special before I put my bed back on it.
I realized that I could use some of the scrap pieces of MDF I had left over from when I built out my mudroom HERE. It took little bit more work cutting them down and sanding them all, but in the end it was totally worth it!
*As an Amazon Affiliate, I may be eligible to earn compensation from my recommendation
Getting Started
Materials:
- 1 sheet 1/2″ or 3/4″ MDF
- Finish Nailer
- Miter Saw
- Table Saw
- 48 inch Level
- Measuring Tape
- Pencil
- Paintable Caulk
- Caulk Gun
- Wood Filler
- Paint and Paint Brush
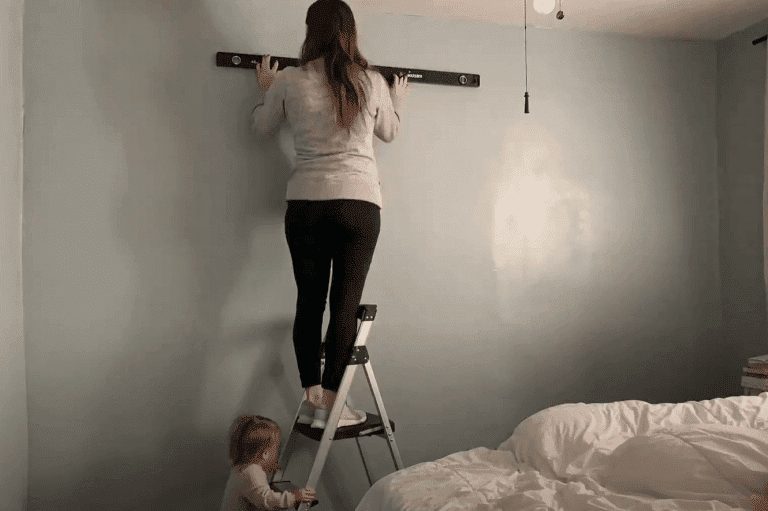
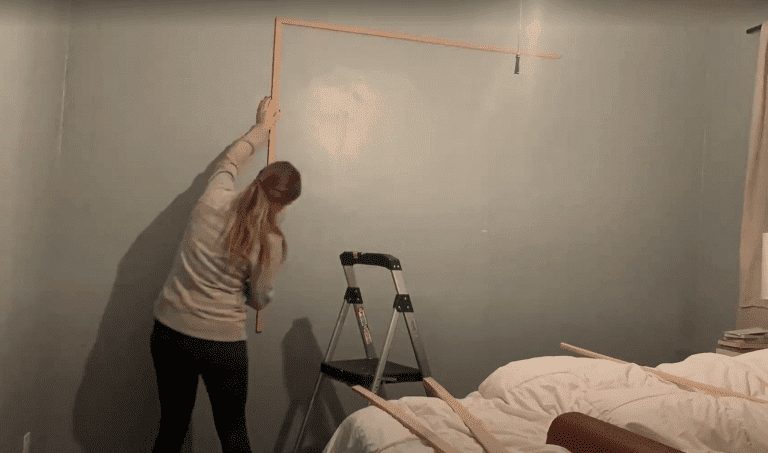
I started out by measuring my wall and using a level to make marks where I wanted my molding to be, with 4 inches in between. I was sure to go off the level and not off my wall. Our home is 96 years old and nothing is straight. If I had gone off my wall or ceiling it would have looked lopsided and I would have been frustrated.
Prepping the Molding
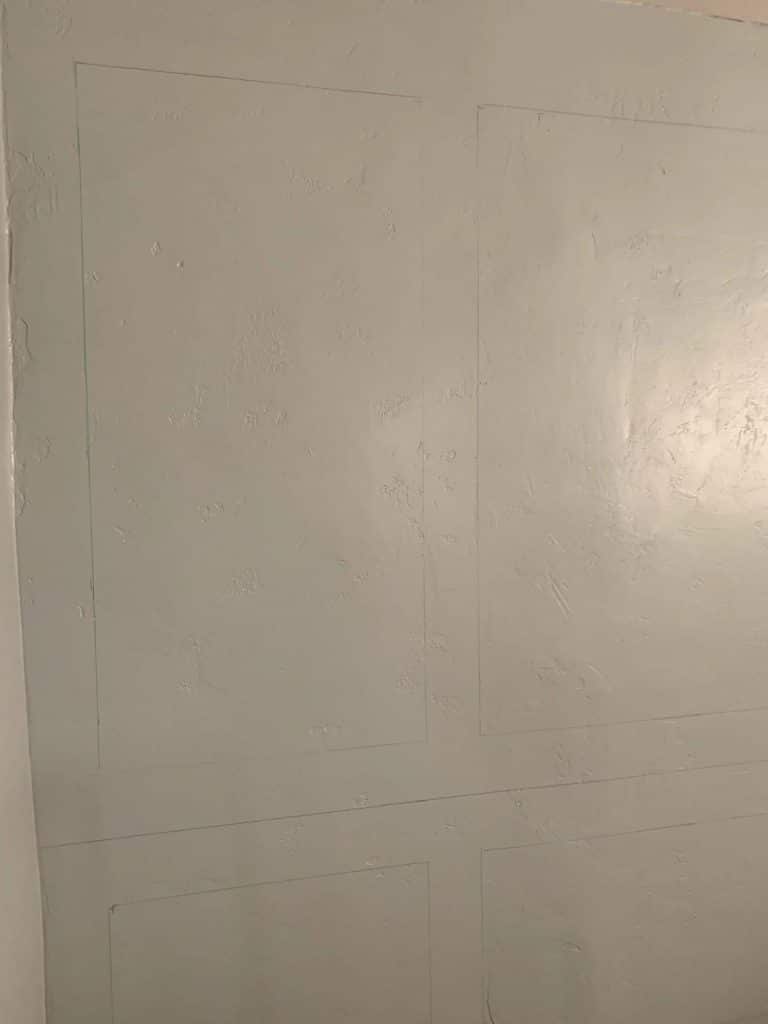
After I drew all my lines, I prepped and cut my boards.
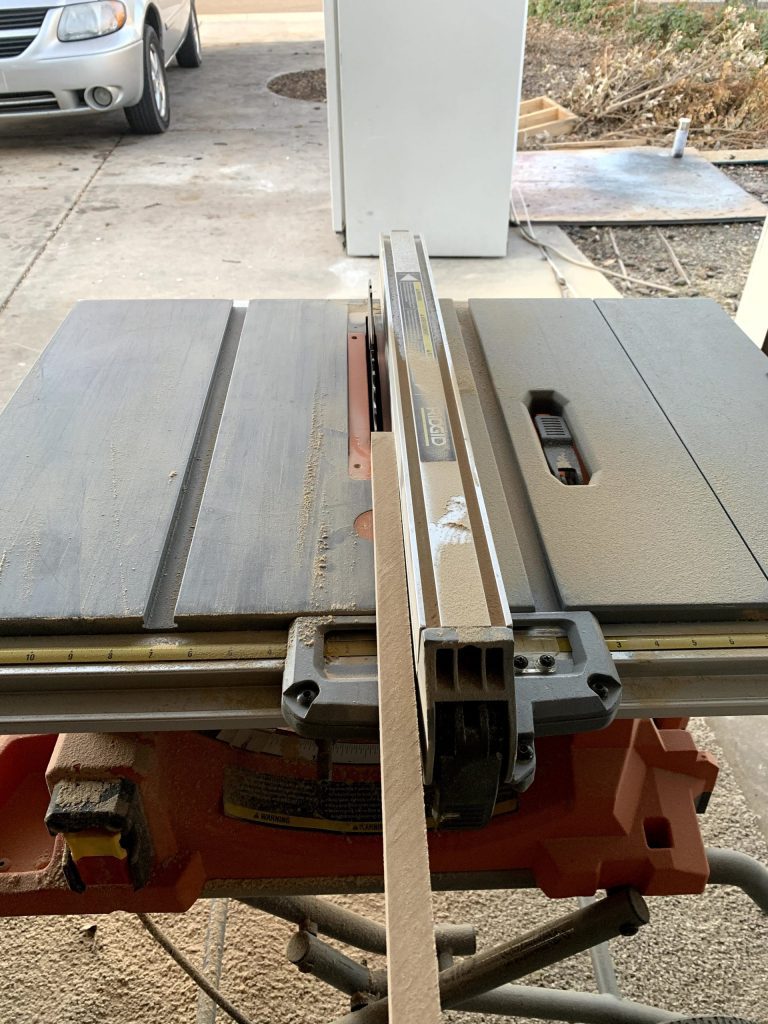
The MDF I had was 3/4″ thick, so I cut it down into 1″ strips and then trimmed it down depthways so that it was only 1/2″ thick. (Pretty sure “depthways” isn’t a word but you get the picture 🙂 ) Then I sanded down the sides with 150 grit sandpaper on my orbital sander to remove saw marks. When I put it up on my wall I made sure the factory smooth side was facing out.
When I started cutting I mitered the corners at a 45 degree angle. I cut my boards with identical lengths all at once to make things go more quickly. This also ensured that my picture frames were square even if my markings on the wall were not.
I attached them to my wall using 1 1/4″ brad nails in my finish nailer. I also continued using my level as I put them up because I didn’t trust my lines completely.
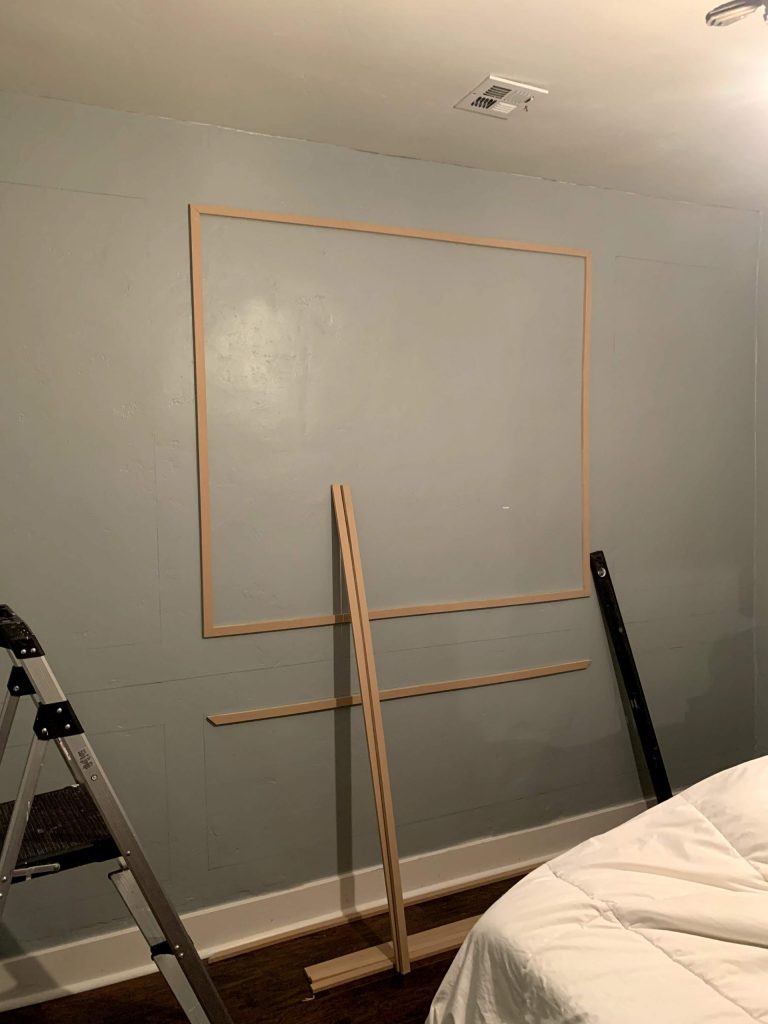
For the chair rail, since my wall was longer than 8 feet I cut the two joining pieces at an angle. Doing it this way allowed them to hide the seam better. I didn’t get a picture of this, I’m sorry!
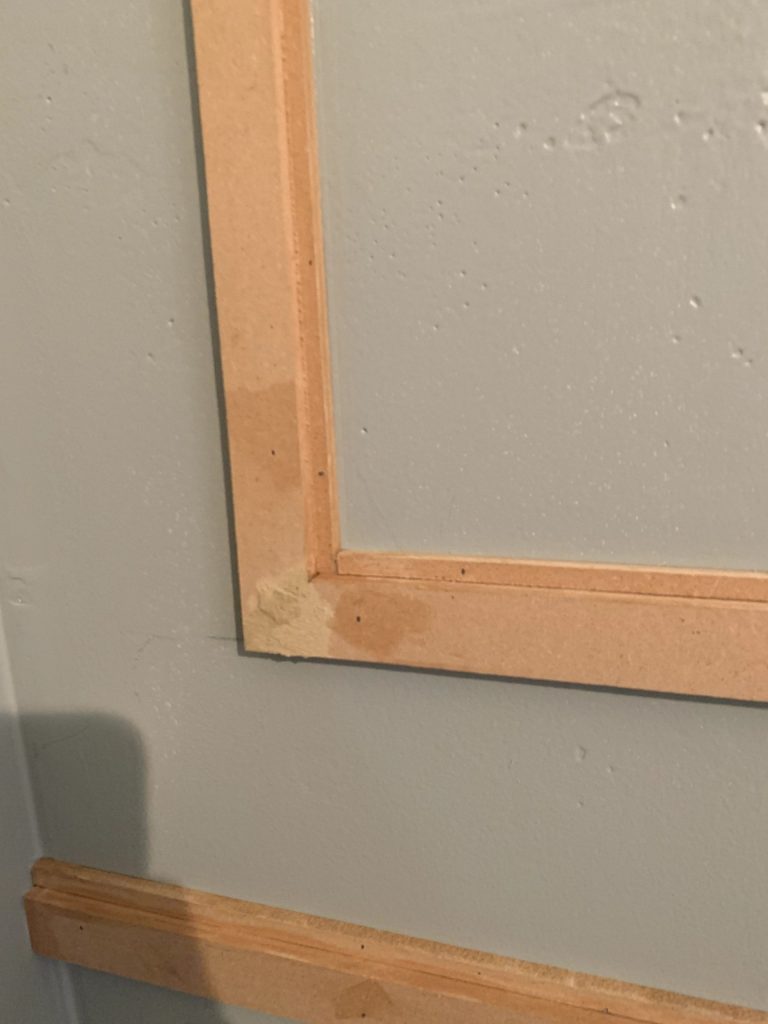
I could have left it with just the 1″ pieces, but I wanted to add a little more interest by adding some 1/4″ strips onto the insides of my boxes. While I felt like this gave it some good dimension, in hindsight I’m wishing I would have kept it 1/4″ deep but made it 1/2″ wide, since the added detail is not very visible from the doorway. One thing to note is that doing this extra step doubles the amount of caulking that needs to be done.
Caulk, Wood Filler, and Paint
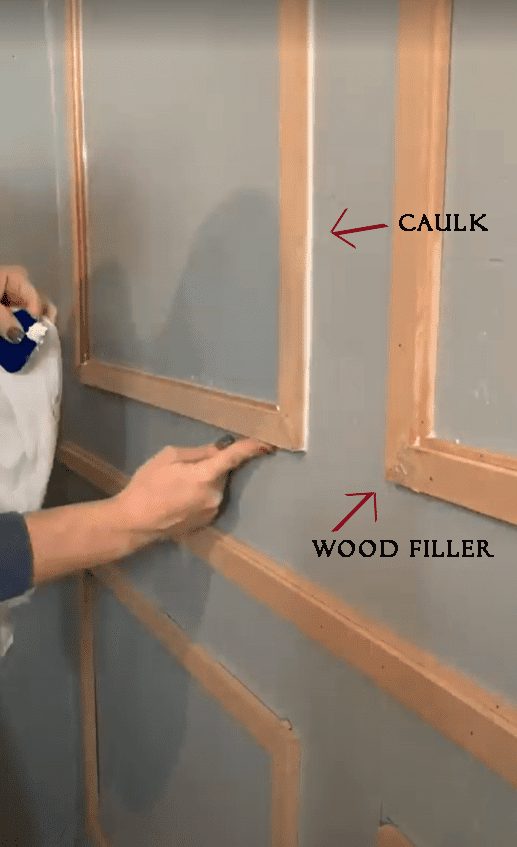
Next up, wood filler! I always do this step before caulking because wood filler needs time to dry so it can be sanded down. I used wood filler on the flat parts of the joint, and caulk on all the inside and outside corners. You can use either caulk or wood filler on nail holes, but keep in mind that caulk has a tendency to shrink significantly when it dries so the nail holes might be slightly visible still. Wood filler will also shrink, but you can overfill your holes and it will sand down smooth.

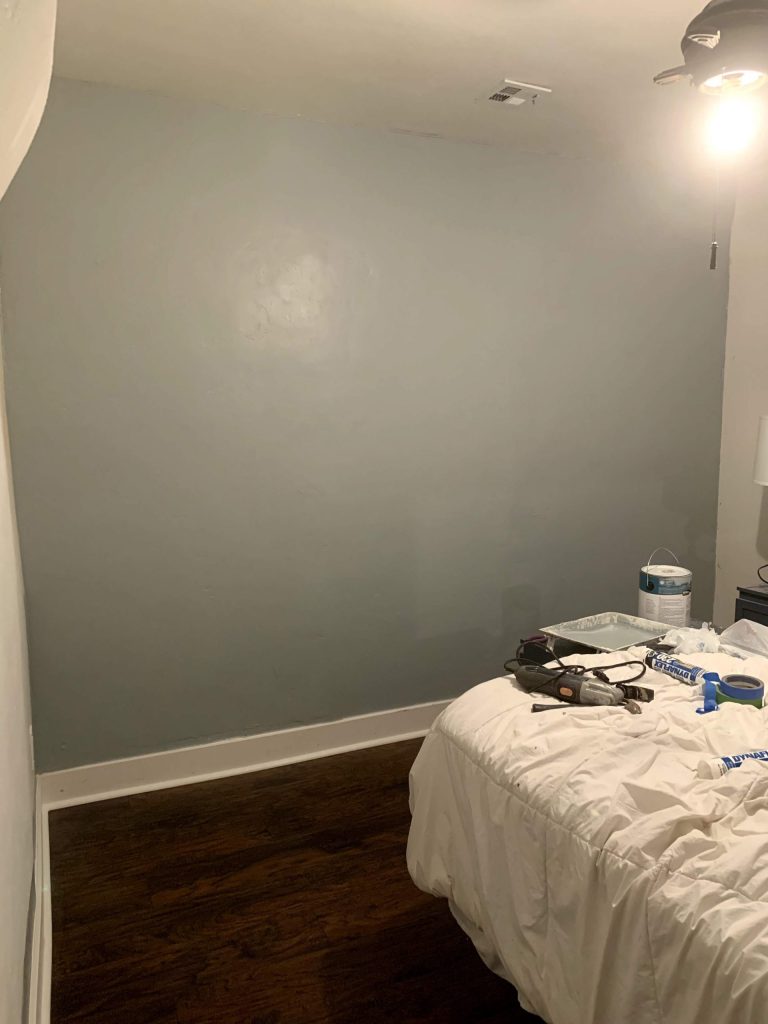
I painted my wall Boothbay Gray by Benjamin Moore before I added my molding. I painted my wall beforehand which made it easier to hand brush my molding when it was done.
Something else to take into consideration is that the cut sides of the MDF will soak up the paint. You may want to first prime your MDF, or you can be like me and put on multiple coats of paint.
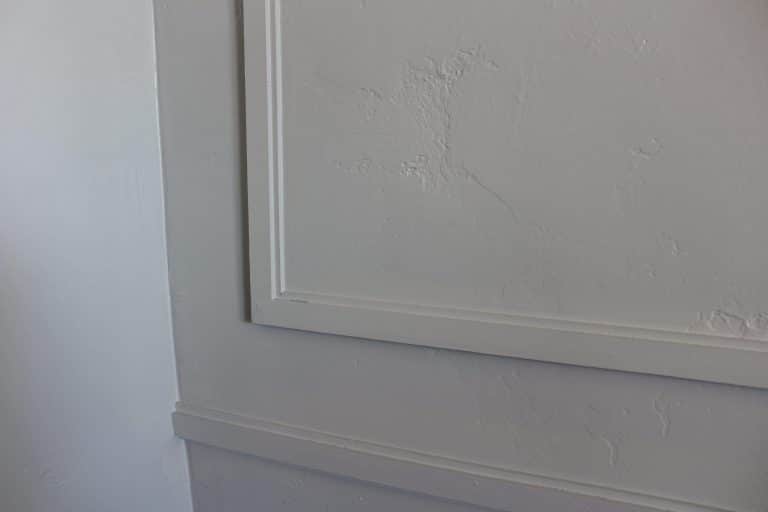

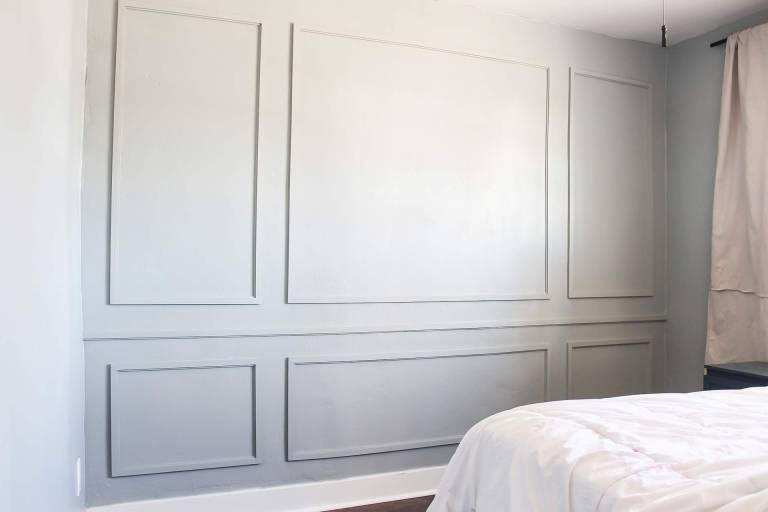
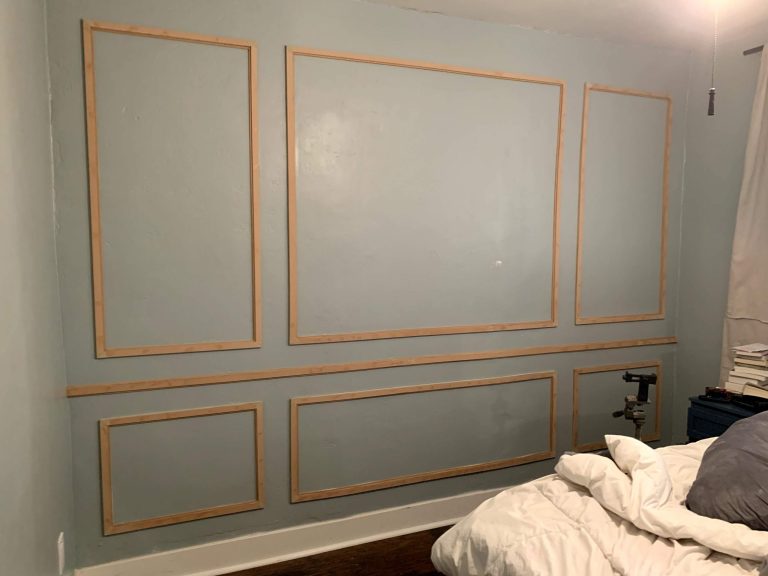
And there she is! Isn’t she purdy? The total cost for this project was the cost of a tube of caulk since I already had the nails, the MDF, the wood filler and the paint. But if you were trying to do this sort of molding without having scraps, you could get yourself a sheet of 1/2″ MDF which would be enough to do many walls for about 25 bucks.
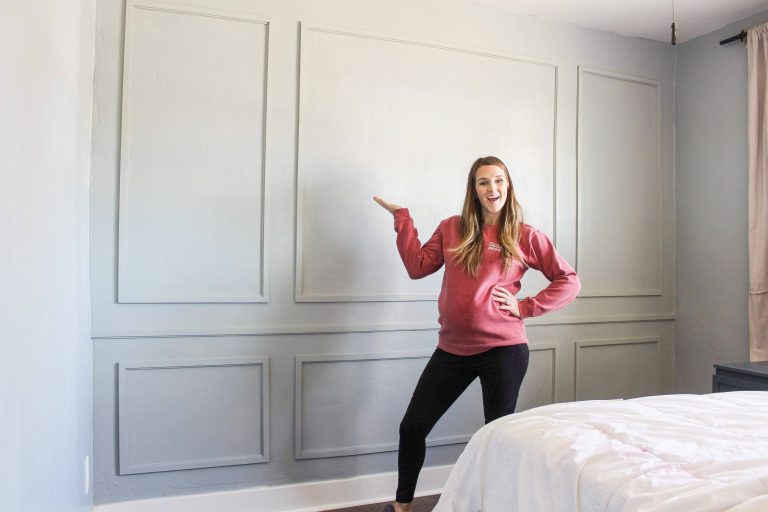
Here’s me and my 6 month pregnant self with the finished wall! Whaddya think? Would you do it?
Thanks for following along, be sure to pin the image below for later!