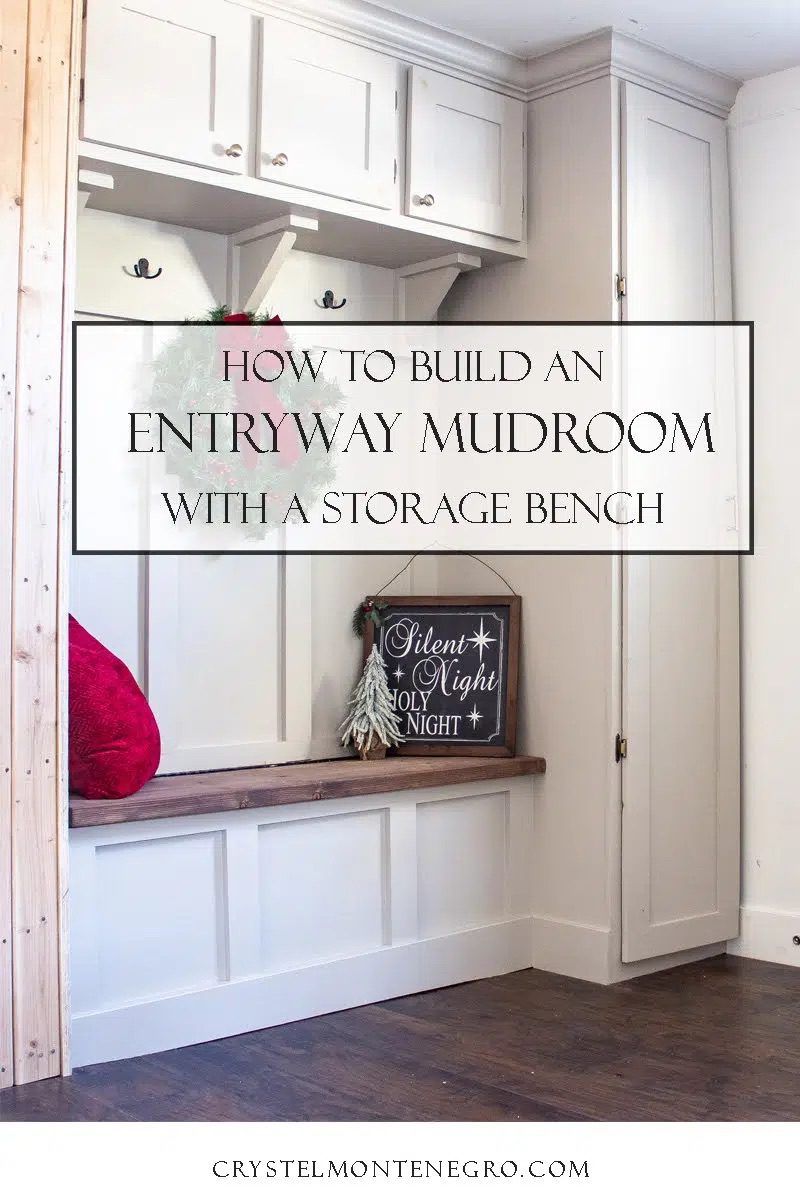
How To DIY A Storage Bench Mudroom


Updated May 9, 2026
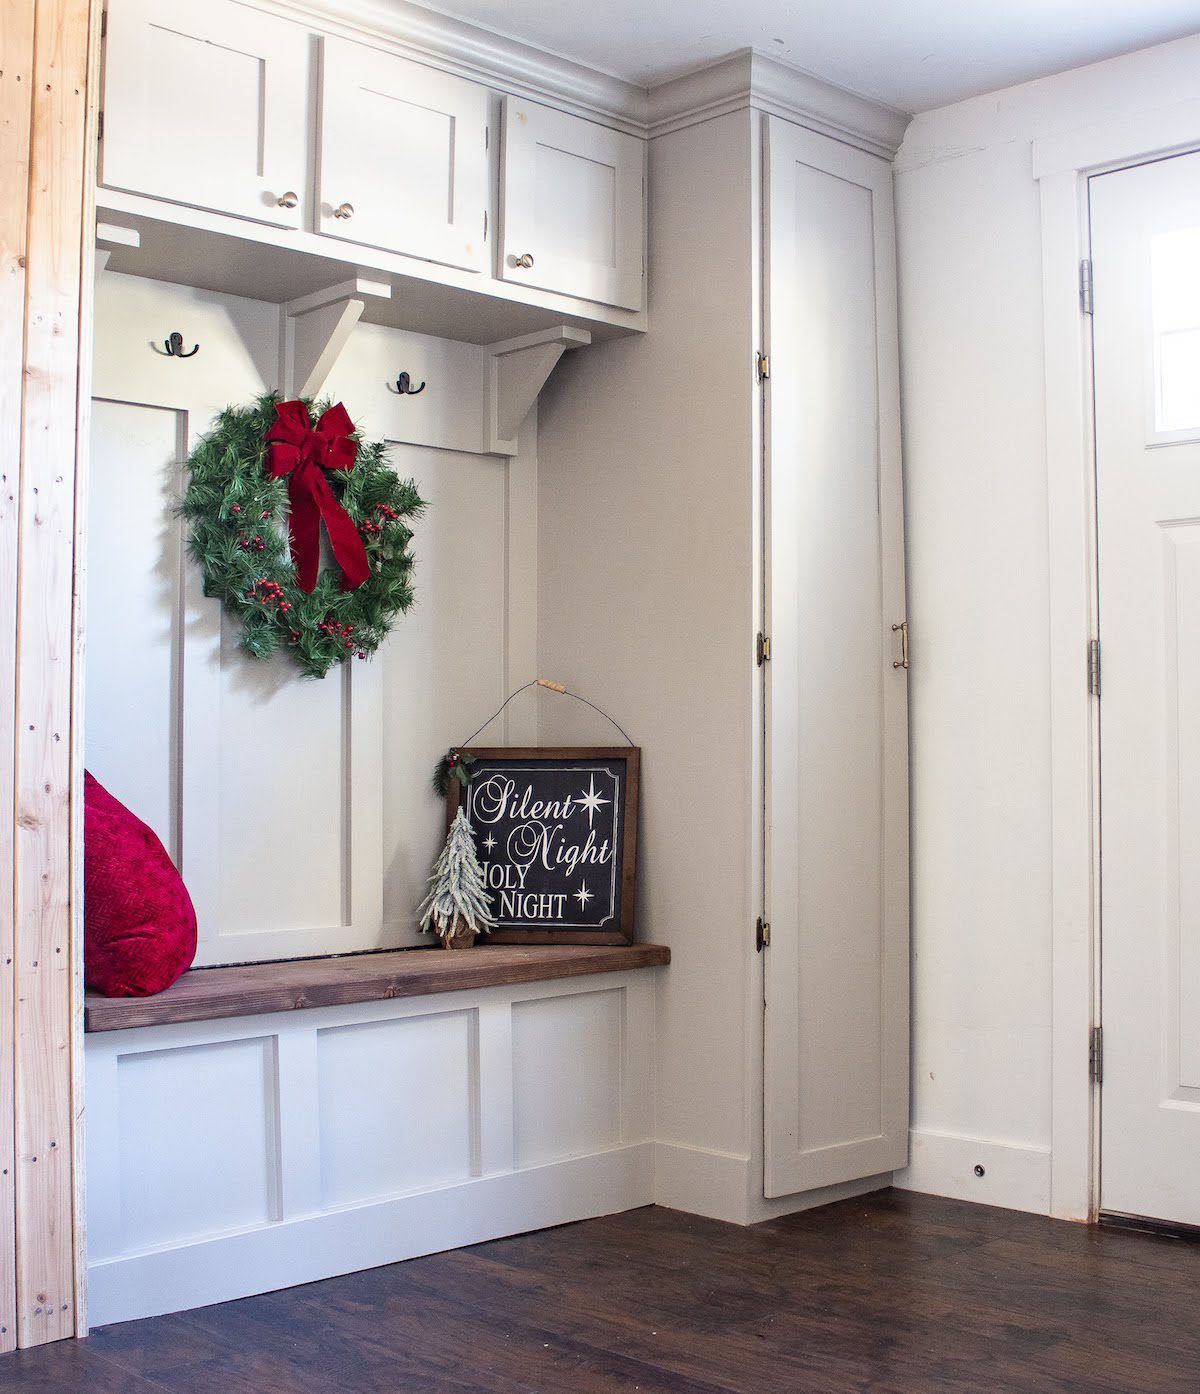
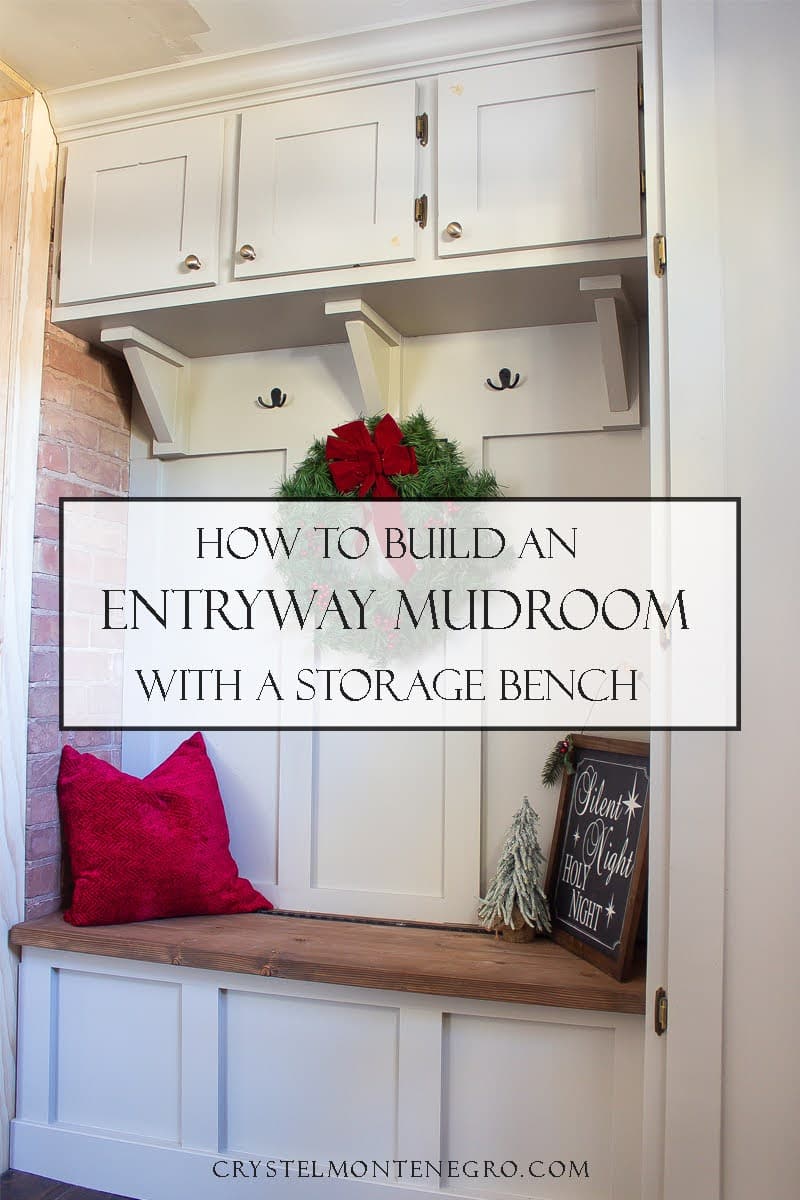
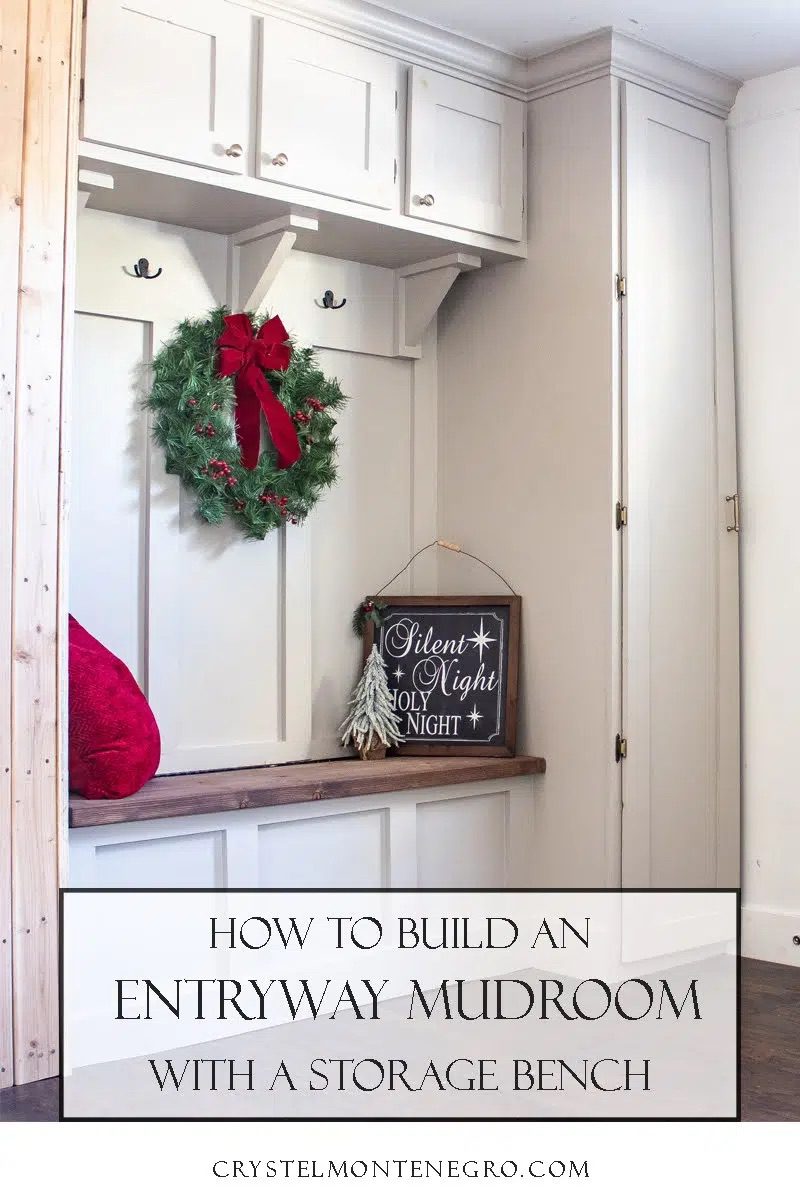
When I decided to finish the mudroom on the other side of my entryway, I determined that instead of building more open shelving and cubbies like I did on the other side I needed to add as much closed storage as possible since our 95 year old home was so lacking. I really wanted a storage bench that would allow me to store some blankets in it since we didn’t have a linen closet downstairs. Let me show you how I did it!
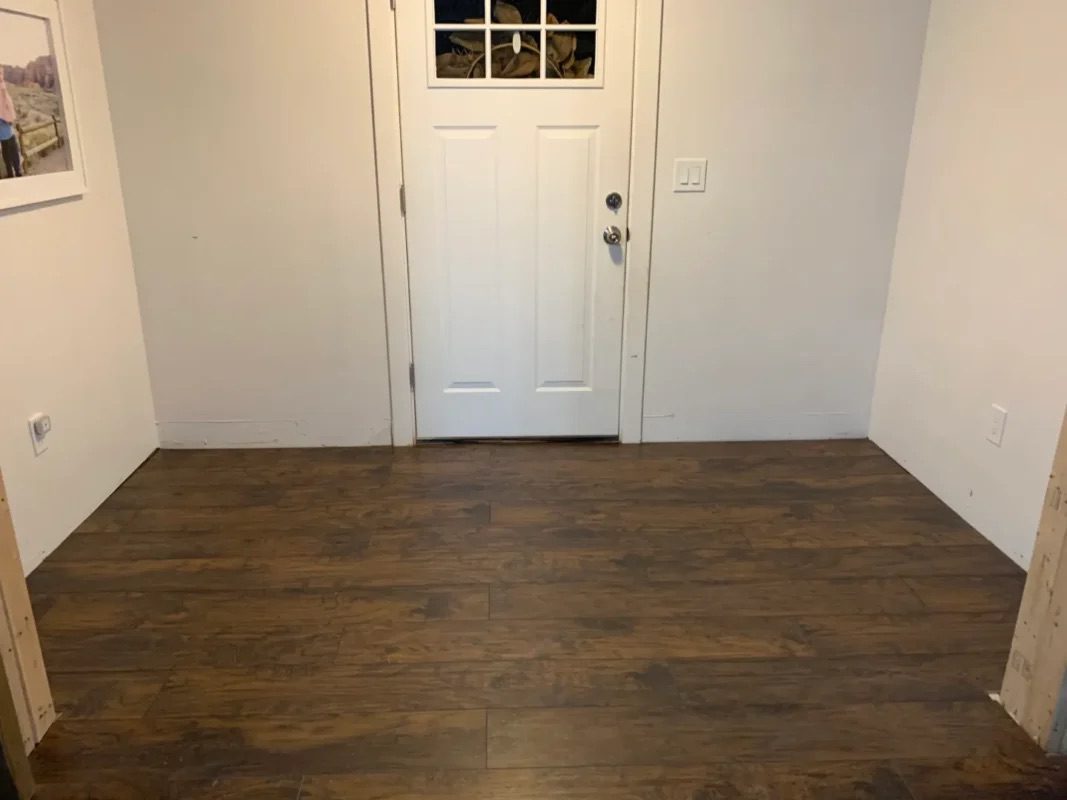
This entryway was an add-on to the original home just months before we moved in. It had black tile that was damaged while we were taking out the two front doors it covered, so I decided to continue the flooring we put in the main living area into the entryway over the tile. I built one side of the mudroom here, now time to finish the other side!
Watch Me Build This DIY Mudroom Storage Bench in One Weekend
Materiels
- 3/4″ MDF
- 1×2 Furring strips for face frame
- 2x4x8 boards for base
- crown molding
- 2x12x8 (or longer depending on your bench size)
- Paintable Caulk
- Wood Glue
- 1 1/2” screws
- 1 1/2” Brad nails
- Paint
- Paint Supplies (Brush, roller, tape, etc)
- Coat Hooks
Tools
- Table Saw or Circular Saw
- Miter Saw
- Saw Guide (if using circular saw)
- Brad Nailer
- Pocket Hole Jig
- Hand Drill
- Level
- Speed Square
- Drywall Square
- Pencil
Building the Base
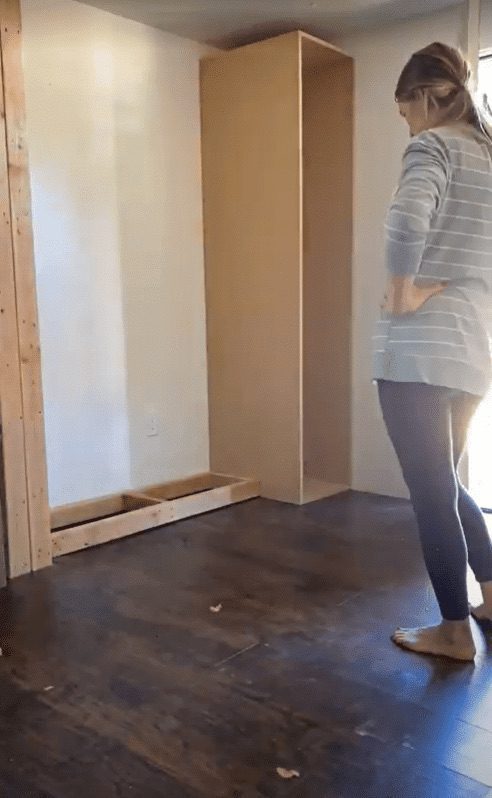
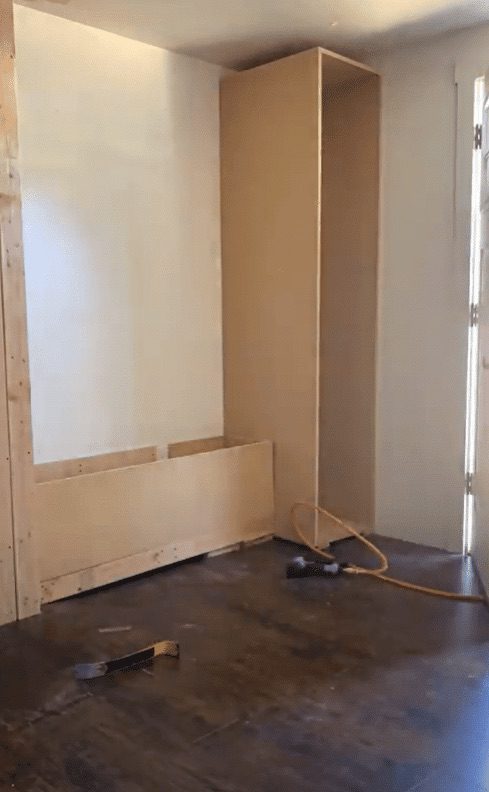
I started by building a simple base out of 2 x 4’s, and I also built a simple box out of MDF for my cabinet. Originally I built a base for my cabinet as well, but I accidentally built my cabinet too tall and it wouldn’t fit with the base. So I settled with just putting it on the ground. I wanted to build the base so that I could easily fasten it to the studs in the wall as well as raise it off the ground in order to add baseboard.
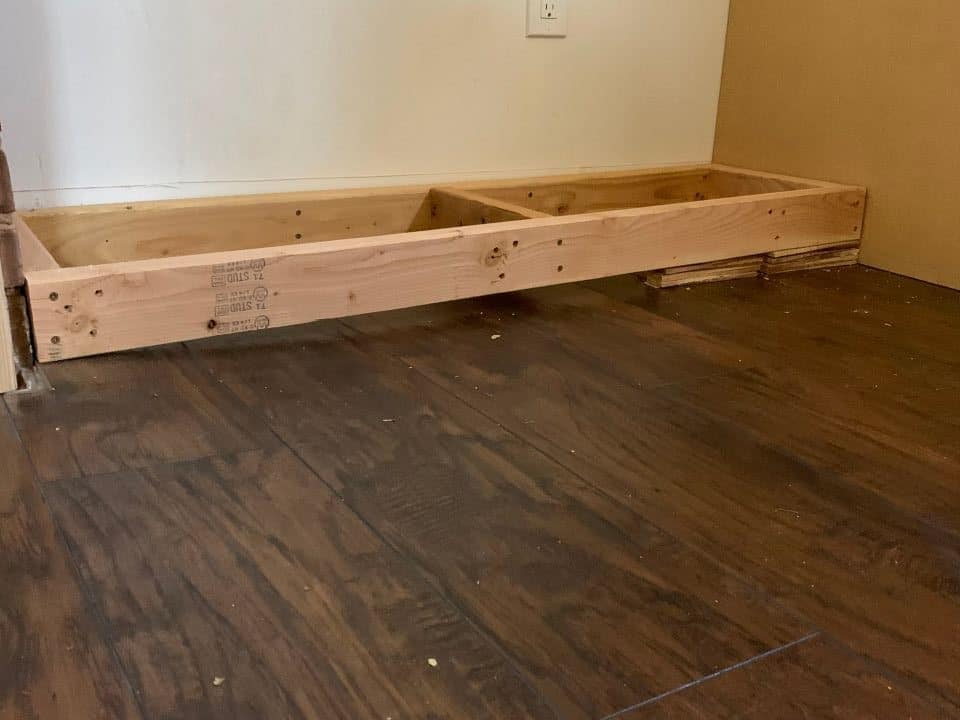
Whoever built the entryway did not level it out. There is a very obvious slope in the floor from where the exterior used to be, so I had to shim up my base big time on one side to make it level.
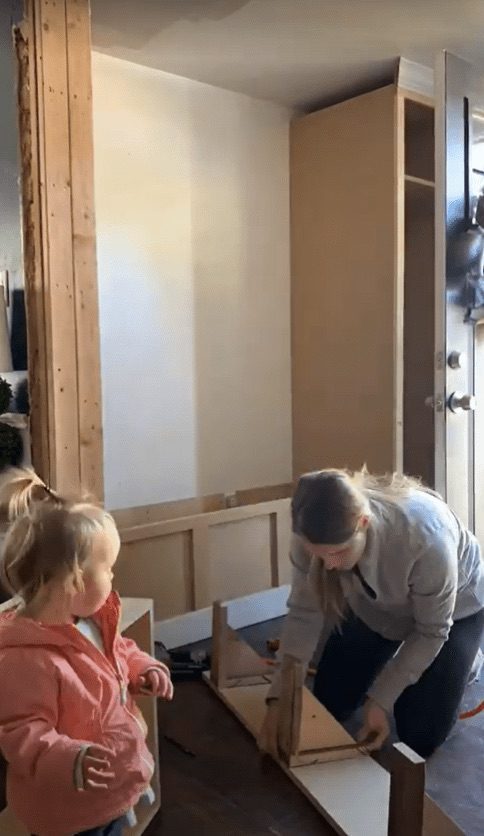
Once I had my base in I built the box for my bench out of MDF. I could have put full piece on the back wall but I had an outlet that I didn’t want to cover up and I also wanted to conserve wood, so I just screwed in some strips of MDF instead. I could have built my box for the bench first and then set it on top of my base, but it worked out better for me to attach them with 1 1/4″ brad nails as I went.
Adding the Trim
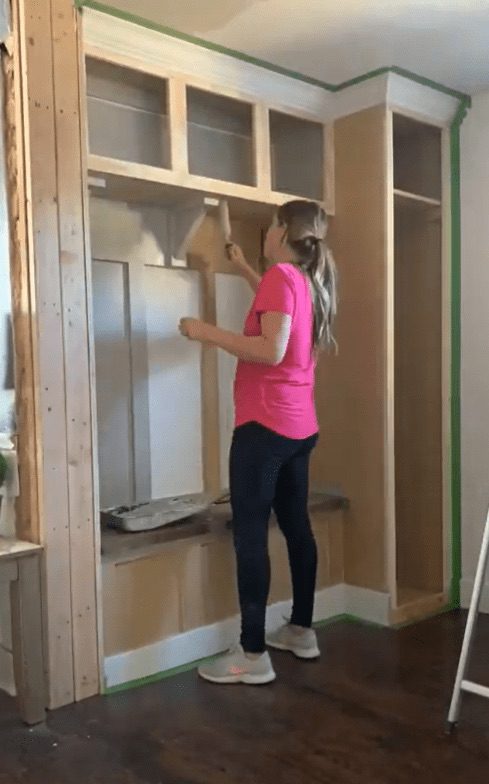
After I had my bench in, I trimmed it out with strips of MDF, which is always my favorite part because that’s when things look exciting! For the front of my tall cabinet I used wood rather than MDF because I was going to be attaching a door to it and needed it to be strong. I also made sure the upper face frame of my cabinet was extra tall so that I would have enough room to attach both crown molding and a door to it and still have a decent amount of space in between. You want to be sure you have plenty of room for the door to lay flat when it’s closed.
I added a shelf with cleats underneath to support it because I forgot to do that before I installed it, then added the crown molding and face frame.
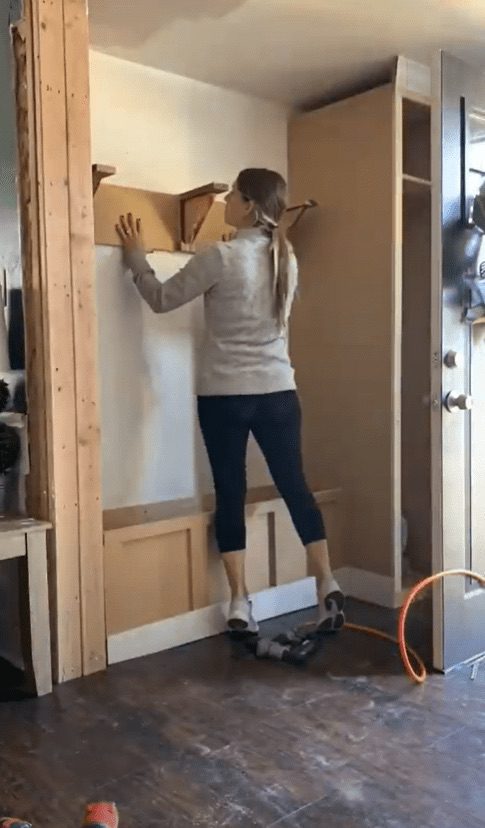
Building the Upper Cabinets
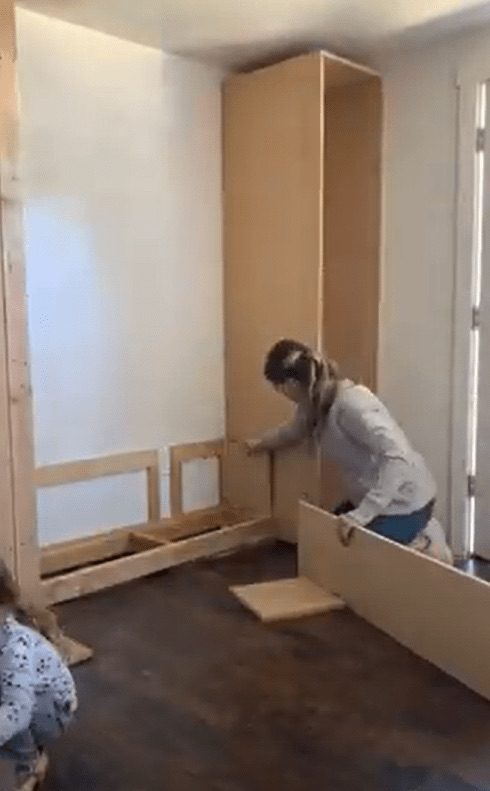
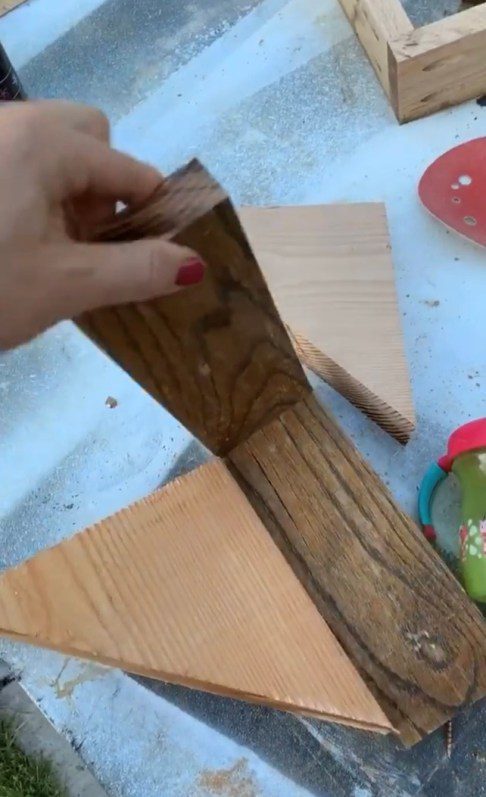
Next up was to install the shelving. I removed some of the crown molding because I decided to do closed shelving rather than open shelving at this point. For my corbels I used a triangle piece of 2×10 and some scrap pieces of oak screwed together, and this time around I attached them to my backing before I attached it to the wall. This made it so I could screw them in from behind and hide the screws, rather than screwing them in from the front.
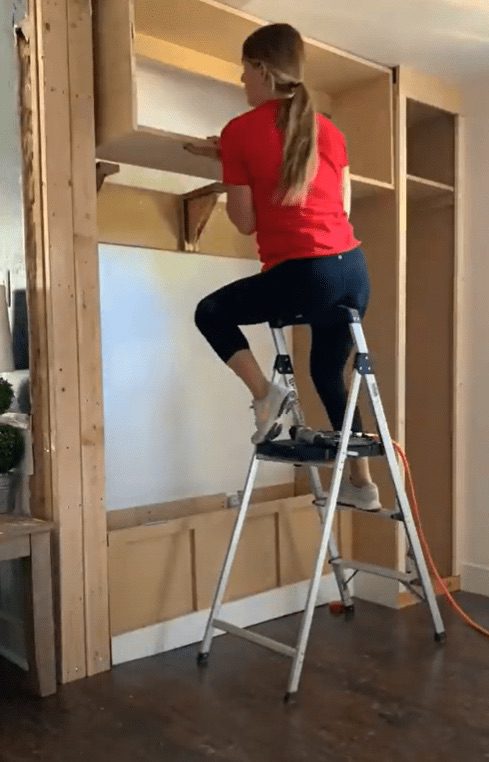
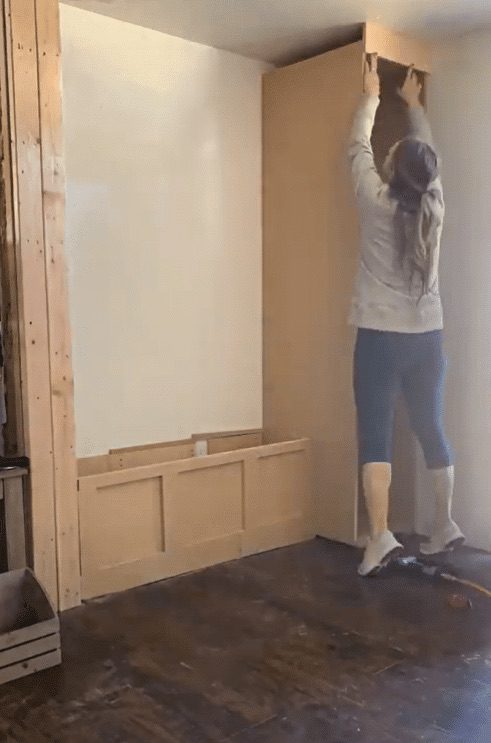
For the upper cabinets I built a box out of some scrap plywood and put a backer on it. I then used that to attach it to the studs in the wall. I shoved it in there and it fit perfectly snug!
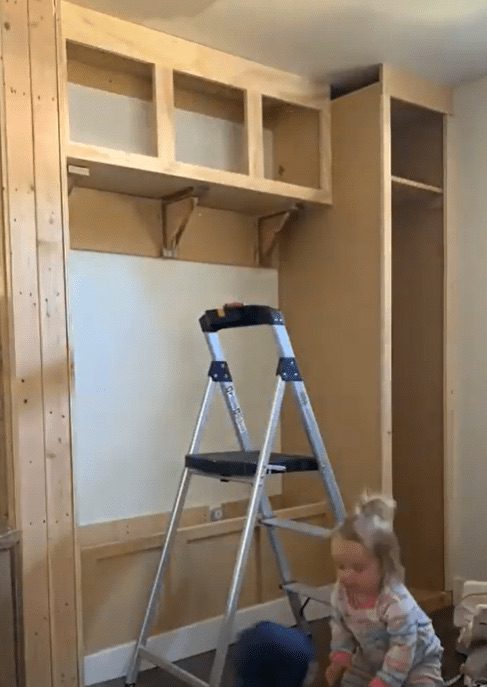
Again I added the face frame made out of wood, attaching with 1 1/4″ brad nails. You could build it all and screw it together first and slap it up there, but I decided to screw it in as I went. This made it a little tricky for adding the middle supports, but I drilled pocket holes with my kreg jig and screwed them in from behind so the screws were concealed.
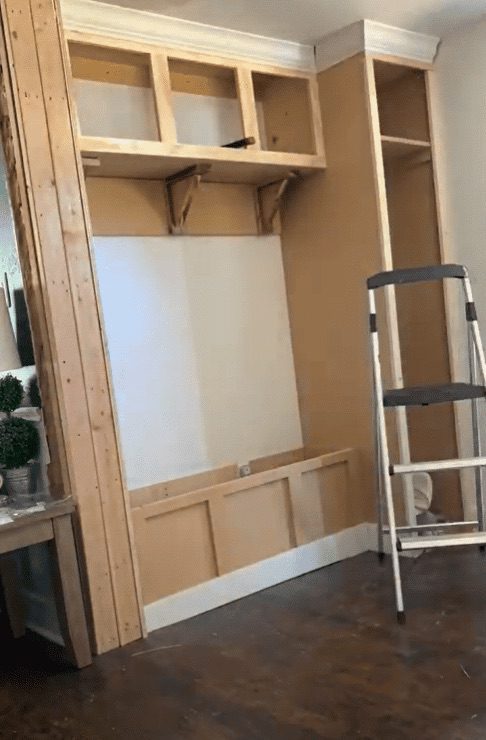
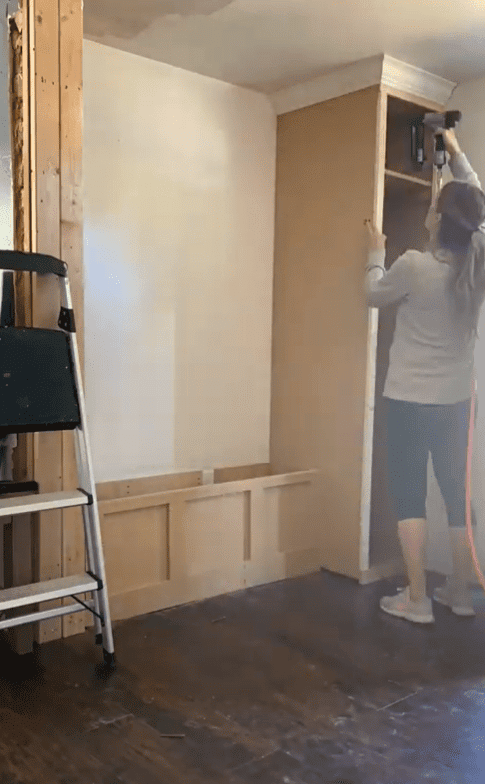
From there I added my crown molding. I had never done an inside corner for crown molding before, but I watched this YouTube Video and it helped me a lot!
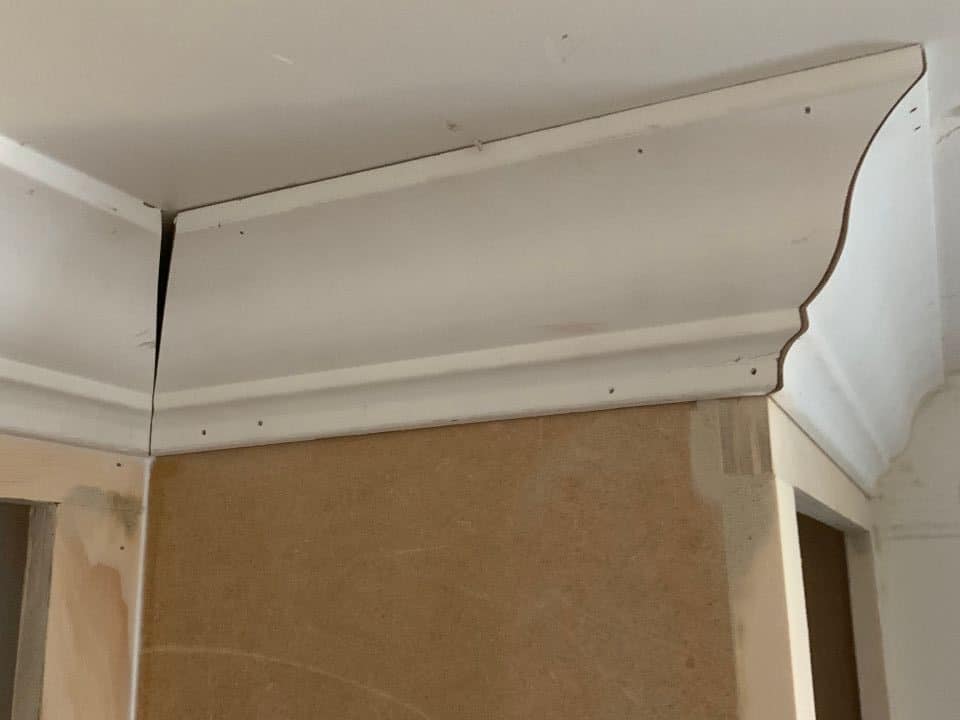
I left a pretty good gap in there, but after I caulked and painted it you would never know it was there! The next time I attempted this it looked much better. 🙂
Building the Bench Top
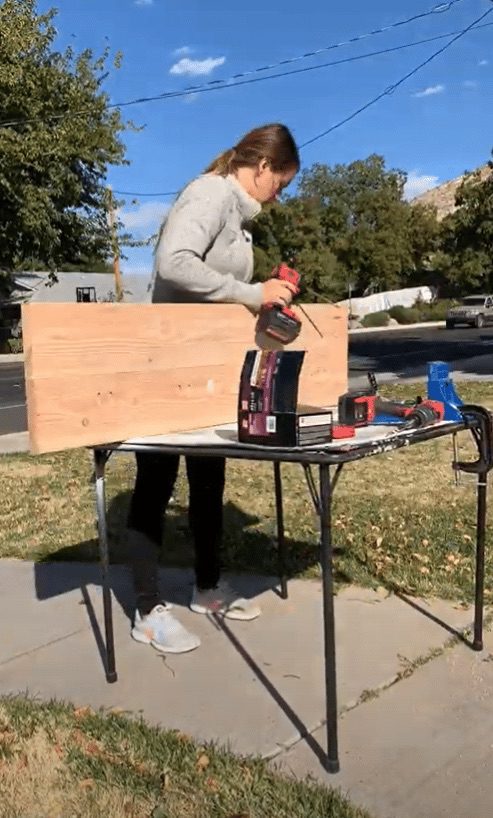
Next it was time to build the bench top! I started by running one long side of two 2×10’s through my table saw to square off the edge. Then I drilled several sets of pocket holes in one of them and screwed the two pieces together. Since I shaved off the end it made it have a nice tight fit with no gaps. I also shaved down a 2×3 to use as the fixed piece that would hold the other side of the hinge.
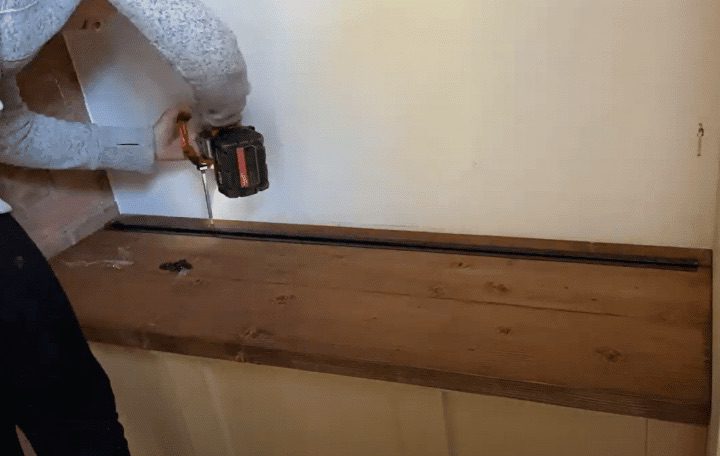
After staining with Minwax Special Walnut I screwed on this continuous hinge and this lid support to allow me to open up the bench top. The lid support allows me to lift it up so it will stay, and also keeps it from slamming down on fingers.
Finishing it Up!
And finally, time to caulk, wood filler and paint! I caulked all the corner seams and wood filled all the flat seams. Once the wood filler dried I sanded it down and painted it Anew Gray by Sherwin Williams.
I built the doors using this method I found on YouTube, but didn’t get any pictures of the process. It’s best to use a hardwood like poplar for the doors, or you might end up frustrated like I was because soft wood will warp and won’t cut straight.
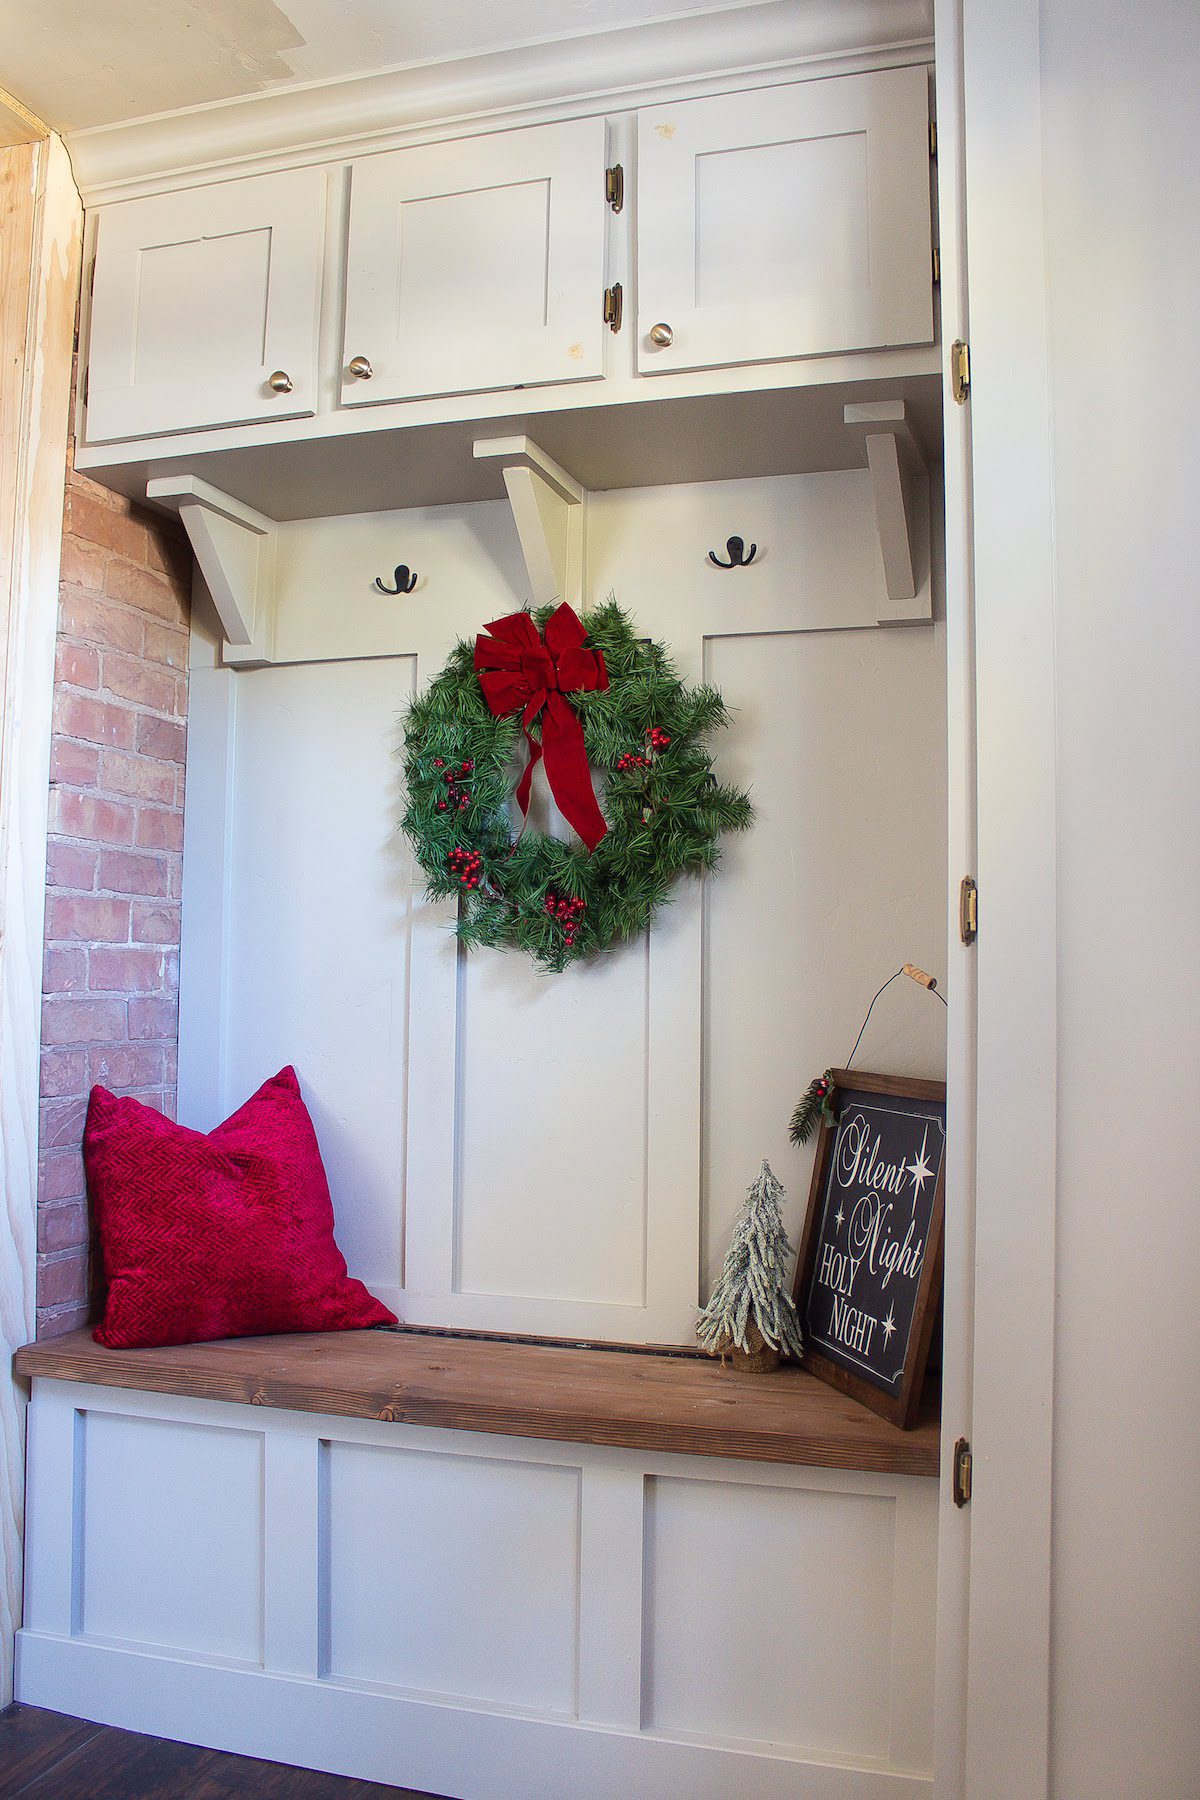
See that exposed brick right there? Since the entryway was an add-on, that is the brick that used to be the exterior! Isn’t it beautiful?
Please be sure to save this for reference by pinning the image below!
Thank you for following along and leave any questions in the comment section below!
XOXO,
Crystel


This makes for such a cute entryway! I love it so much! I am trying to plan our next home project & might have to try this. We are having our kitchen cabinets painted this week & I am already getting excited for the next haha. Thanks so much for sharing!!!