

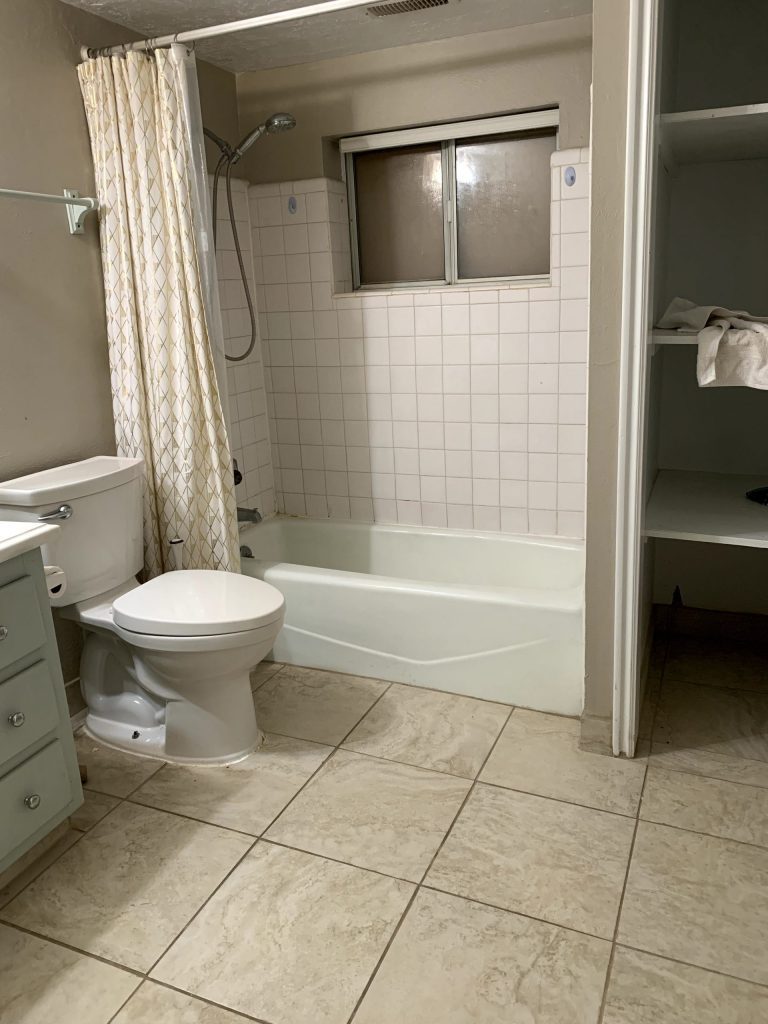
I finally learned how to tile a shower! And eradicate mold in the process. I’ll admit, this one was a first one for me. But with a whole lot of research and a little expertise from my contractor father-in-law I found that gutting and completely re-doing this shower was a lot less intimidating than I had initially imagined! This is what it looked like before. When remodeling old houses, you’re always in for a surprise and this shower was no exception.
I started popping off the original tile showers only to discover lots and lots of mold. The tiles came off very easily because the greenboard behind it was very wet. As it turns out, greenboard is not meant for wet locations. Damp locations, yes, like a humid bathroom. But greenboard is NOT waterproof. Instead, something waterproof like cement board should be used in a shower where it will be directly getting hit with water.
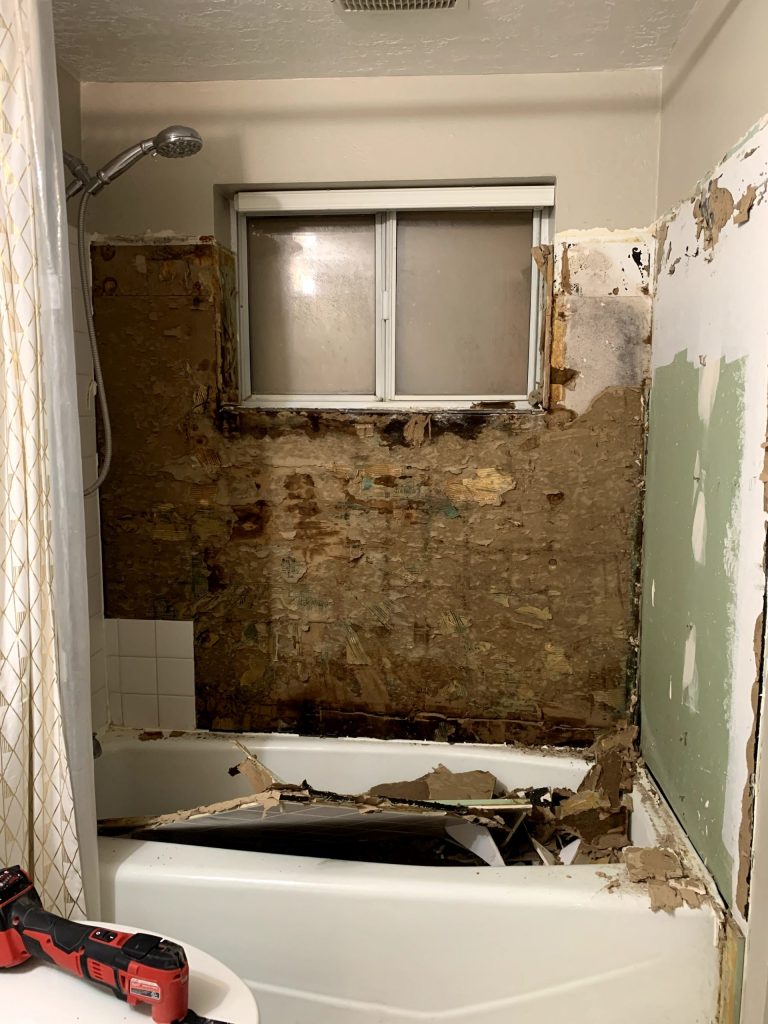
When you encounter mold, it’s a good idea to get it tested, either professionally or with an at-home kit that can be used to determine if the mold is toxic. There are thousands of different kinds of mold, many of them black in color, and only a small percentage are the toxic kind. That being said, better safe than sorry. Toxic mold can be extremely dangerous to your health. In my case, we determined it was not toxic. If you find that it is, it’s best to leave the eradication to the professionals for proper disposal.
To eradicate it, I doused it heavily in this Mold Armor mold remover, and then went over it several times with a mixture of warm water and white vinegar. Before I covered it up, I gave it a few days to dry out thoroughly so we wouldn’t be dealing with the same issue down the road.
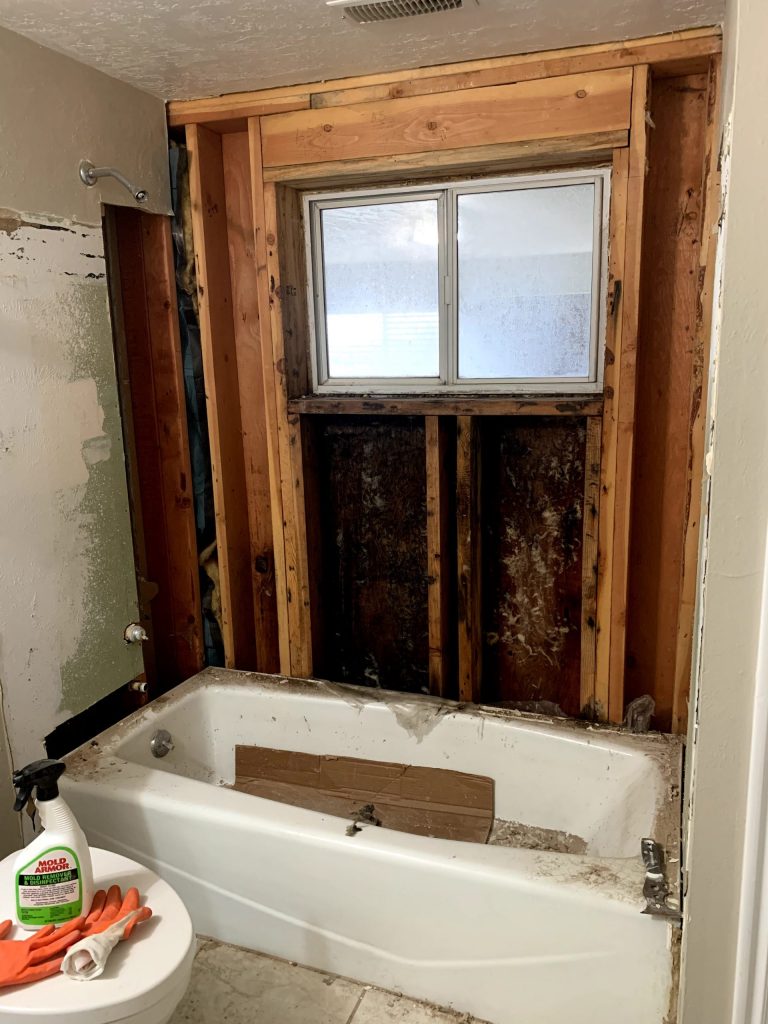
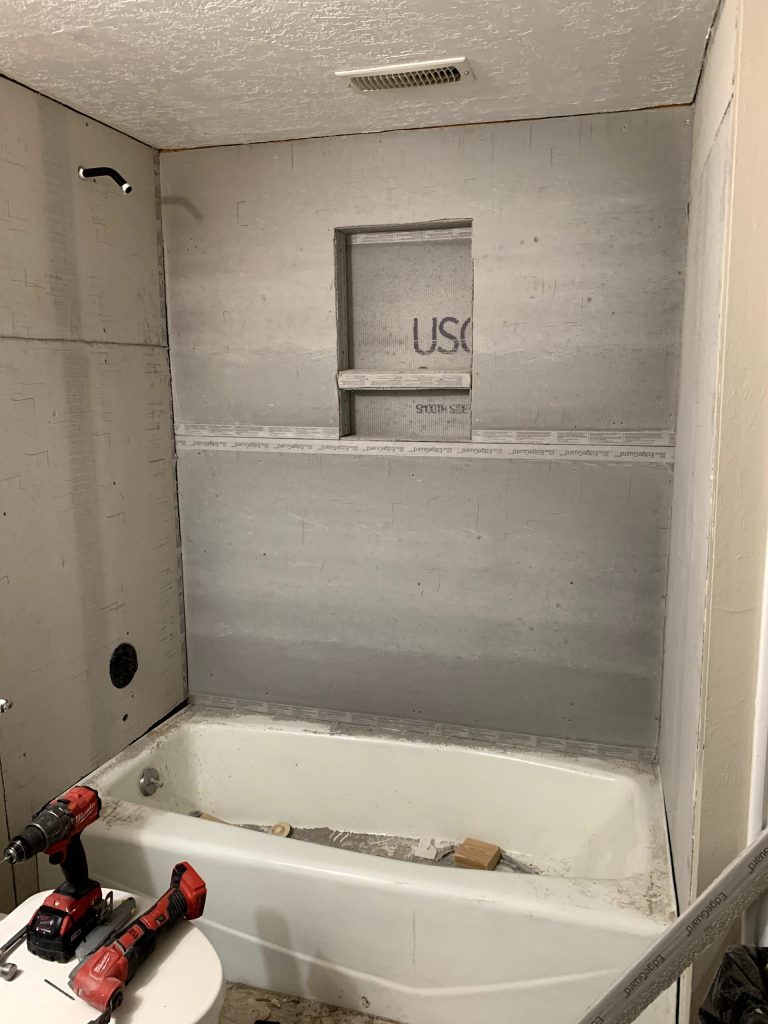
Once the wall was completely dry, I began building my shower niche. Oh, what’s that? You wanna know why there is a rather large unfrosted window in the shower that looks into the living room? Poor design choices is one reason, but it does make a tiny bit more sense when you consider that the living room is an addition, and the window used to lead to the outside. I guess they wanted a shower with a view? Or maybe a backyard with a view?
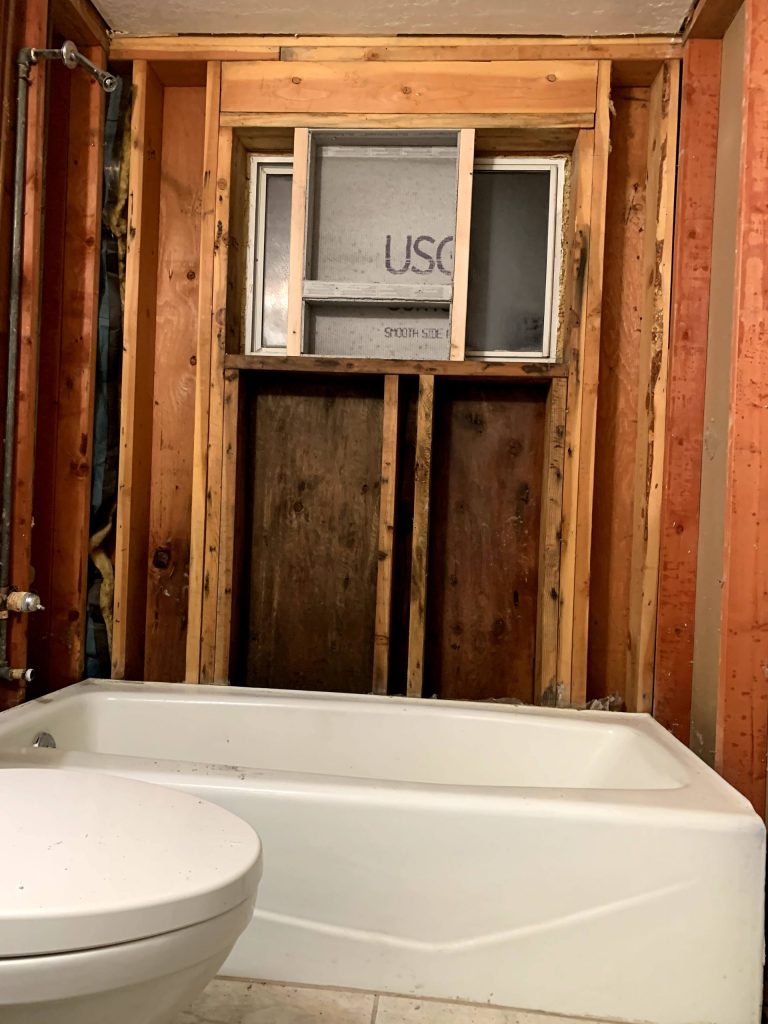
Now, back to the shower niche. Get your head out of the gutter! On the bright side, the window did make it easy to build it how I wanted it.When I built it I made sure to angle the shelf divider ever so slightly to make sure any water would be able to drain properly.
Once the niche was in, I was able to cover the rest of it up with cement board, and while I was at it I plumbed for our brand spankin’ new (sponsored) Karci Pfister Faucet. More on that in part II. I screwed the cement board into the studs every 7-8 inches or so.
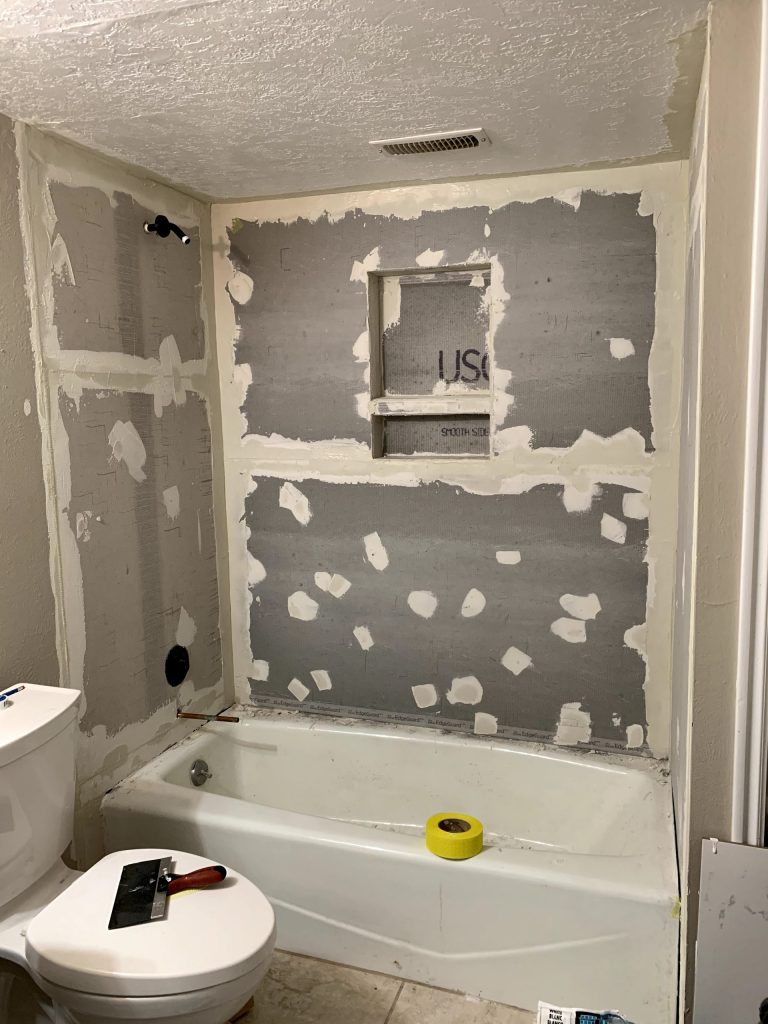
Once the cement board was in, I used some yellow mesh tape on all the seams, then used some of my thin set over top of it. When choosing your thin set, make sure you get the right stuff for your type of tile. In my case my tiles were ceramic. I also went over all the screw holes for an added measure of waterproof-ness. (?)
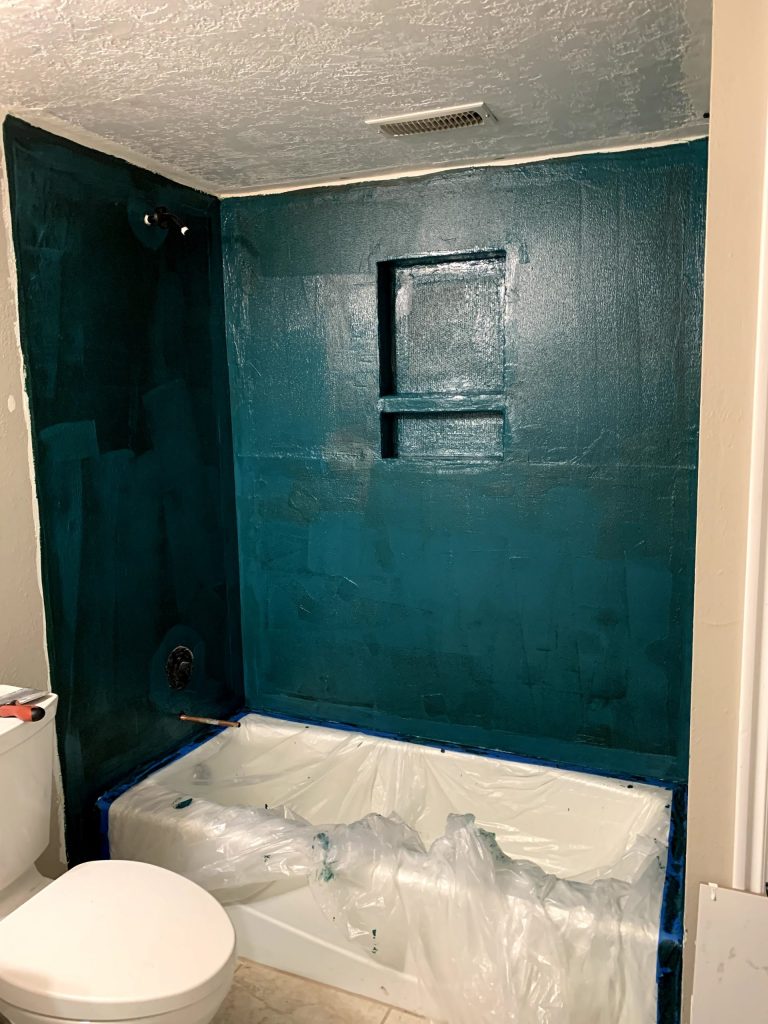
Once all the seams were closed up, I painted the entire shower with two coats of this waterproofing membrane paint. Was it necessary to paint the entire thing and not just the seams? Perhaps not, but bless my little OCD heart, I couldn’t help myself. It just didn’t FEEL right leaving the non-permeable sections of cement board un-green. Give a gal a break, will ya? Plus, now I KNOW for sure I didn’t miss anything. This sucker is WATER. TIGHT.
For all intents and purposes, this shower is technically ready to be used to our heart’s content. It’s waterproof, and nothing is getting past this super thick barrier. But the problem is, it’s ugly. And I’m gonna fix that real quick! Stay tuned for Part II, the actual tiling of the shower!
So sorry to leave you hangin’ like this, but it had to be done. Head on over and check out the finished product!
And while you’re at it, check out how I painted a shower for a quick fix when tiling was not an option!
XOXO,
Crystel
Leave a Reply
