


Board and Batten Bathroom Ideas for Small Spaces


Updated July 13, 2026
If you’re looking for board and batten bathroom ideas that make a small space feel taller, brighter, and more intentional without a full remodel, this clean wraparound DIY is the place to start. I added board and batten to every wall of our basement bathroom over a single weekend, painted the whole thing white, and the difference was almost embarrassing. It looked like a totally different room.
Below is the exact step-by-step I used, including the right height for a small bathroom, the spacing that works best, and how to wrap the trim around a toilet, vanity, and shower wall without the seams looking awkward. If you can use a level and a brad nailer, you can do this. (And if you’re working through a bigger update, this project pairs naturally with my painted bathroom floor tile tutorial.)
Part of my Small Bathroom Remodel series. This shower niche tutorial is one of 7 weekend projects that transformed our basement bathroom. See the full small bathroom remodel breakdown →
Board and Batten Bathroom Wall: At a Glance
- Choose your height and mark a level line around the room
- Attach a 1×4 top rail into studs
- Space and nail 1×2 vertical battens around the bathroom
- Add a 1×2 top cap for a finished edge
- Fill, sand, caulk, then prime and paint
- Install hooks on the top cap for storage
Quick Answer: How High Should Board and Batten Be in a Small Bathroom?
Board and batten in a small bathroom should sit 48 to 54 inches high, about two-thirds of the way up the wall. That’s taller than standard chair-rail height (32 to 36 inches), so the room feels taller and you get space for hooks. In a powder room, go up to 60 inches.
Watch the Full Small Bathroom Remodel
Table of Contents
- Board and Batten Bathroom Wall: At a Glance
- Watch the Full Small Bathroom Remodel
- Why Board and Batten Works in a Small Bathroom
- The Bathroom Before Board and Batten
- Board and Batten Bathroom Wall Supplies
- How High Should Board and Batten Be in a Bathroom?
- Step 1: Choose the Height and Mark the Room
- Step 2: Install the Top Rail
- Step 3: Measure and Install the Vertical Battens
- Step 4: Wrap the Board and Batten Around the Bathroom Walls
- Step 5: Add the Top Cap
- Step 6: Fill, Sand, and Caulk
- Step 7: Prime and Paint
- Step 8: Add Hooks for Storage
- Extra Tips for Installing Board and Batten in a Bathroom
- How Much Does a Board and Batten Bathroom Cost (and How Long Does It Take)?
- Board and Batten in a Powder Room or Half Bathroom
- Finished Board and Batten Bathroom Wall in This Small Space
- Can You Use Board and Batten in a Bathroom With a Shower?
- More Small Bathroom Remodel Projects to Try
- 📌 Pin This Project for Later
- FAQ About Board and Batten in Bathrooms
Why Board and Batten Works in a Small Bathroom
Most wall treatments that work in big rooms feel heavy in small bathrooms. Wallpaper closes the space in. Wainscoting at chair-rail height cuts the room in half visually. Even shiplap, which I love elsewhere in the house, can feel a little too rustic against modern fixtures.
Board and batten splits the difference. The slim 1×2 vertical battens add structure without bulk. The wraparound layout, where the trim runs across every wall instead of stopping at one accent wall, makes a small bathroom feel cohesive and intentional, like the room was designed all at once instead of pieced together. And because the battens themselves are paint-grade pine, the whole project comes in around $150 in materials for a typical small bathroom.
This same trim works in any small space: a powder room, a half bath, a guest bathroom, or a basement bathroom like ours. If you’re working through a bigger update, this project pairs naturally with my DIY gold bathroom mirror and painted bathroom floor tile tutorials. Those three together completely changed the feel of our space.
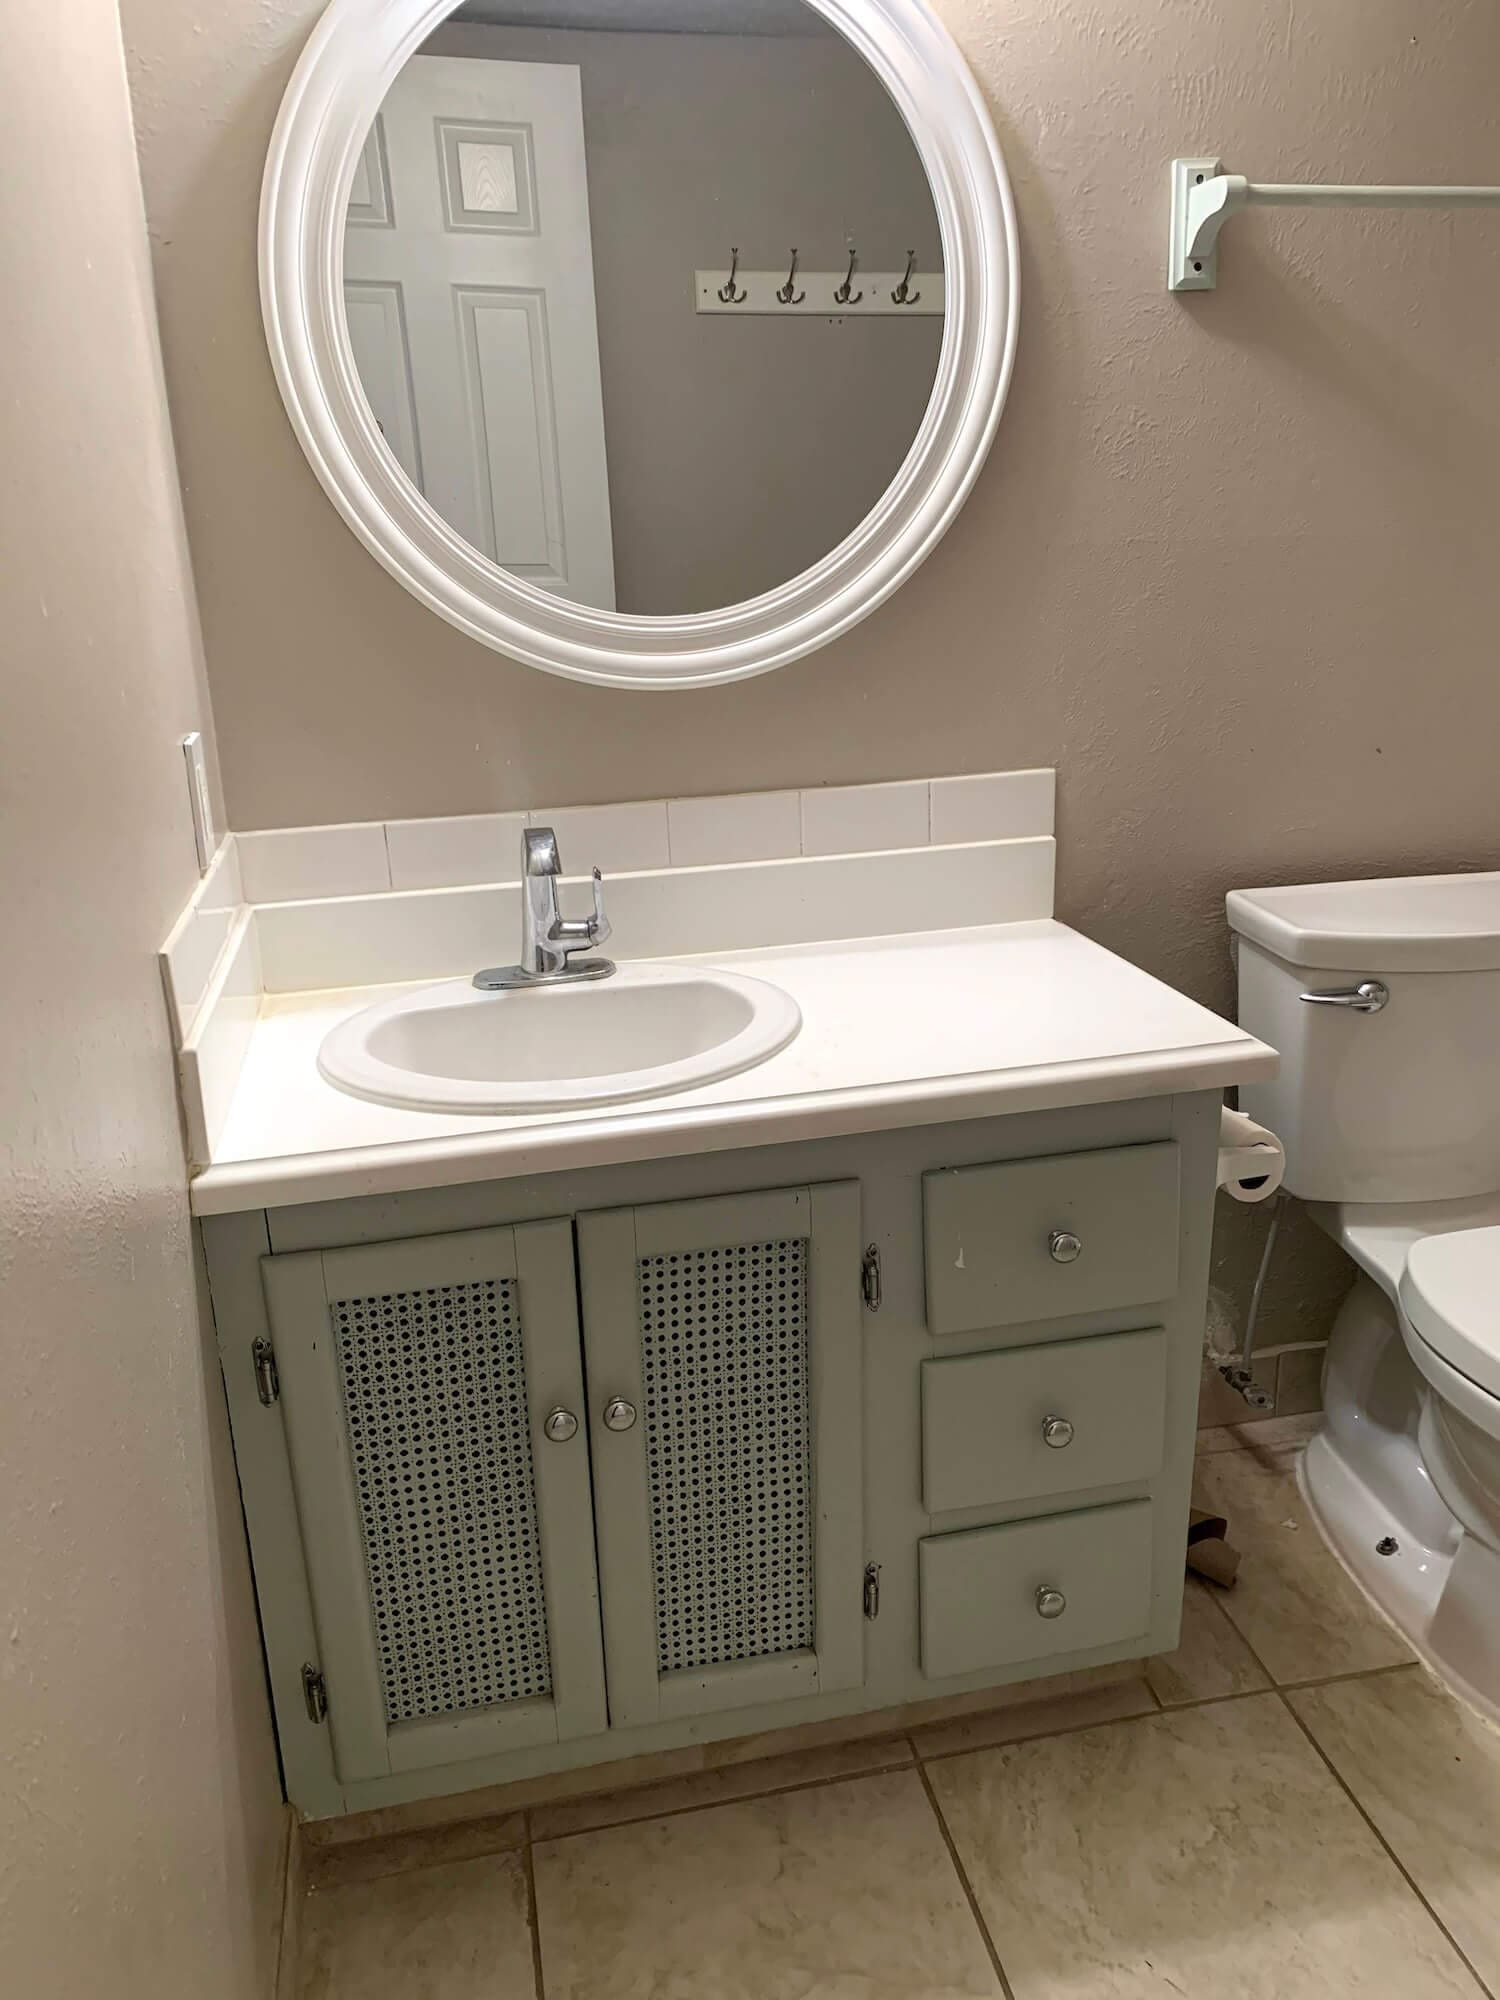
The Bathroom Before Board and Batten
Before installing board and batten, this bathroom felt plain and mismatched. The vanity finish was tired, the walls had no structure, and nothing felt unified. Here’s what the space looked like before we got started:

Board and Batten Bathroom Wall Supplies
One of the best parts of this project is how little you actually need. With a few basic tools and inexpensive boards, you can transform a bathroom wall on a budget.
Tools for a DIY Board and Batten Wall
Materials for a Board and Batten Bathroom Wall
- 1×2 boards for battens and the top cap
- 1×4 boards for the top horizontal piece
- Wood filler
- Caulk
- Primer
- Paint (I recommend this one)
- Hooks (optional, for function and style)
How High Should Board and Batten Be in a Bathroom?
The right board and batten height for a small bathroom is somewhere between 40 and 54 inches, or a little above halfway up the wall. That keeps the room feeling tall and open instead of chopped in half. In this bathroom, I picked a height that lined up with the vanity and mirror. Aligning the rail with existing elements helps the board and batten feel like it was always meant to be there.
Lower Height: Around 40 to 44 Inches
Feels more like classic wainscoting and works in traditional spaces. This height pairs well with deeper paint colors above the trim line and is a good choice if you have a tall mirror or vanity backsplash you don’t want to crowd.
Mid-Height: Around 48 to 52 Inches
The sweet spot for most small bathrooms and powder rooms. Adds visual impact without crowding your mirror and wall art. This is the height I went with in this bathroom — high enough to add hooks for towels but low enough to leave room for the gold mirror and shelving above.
Taller Height: Around 54 to 60 Inches
Feels modern and dramatic, especially in rooms with higher ceilings or in a powder room you want to feel custom. At this height the trim becomes a real architectural feature rather than a quiet detail. Pairs beautifully with bold paint colors above the line.
If you’re not sure, use painter’s tape to mark a few different heights on the wall and live with them for a day. Stand back, look at how the line intersects your vanity, mirror, and window, and pick the height that feels the most balanced for your space.
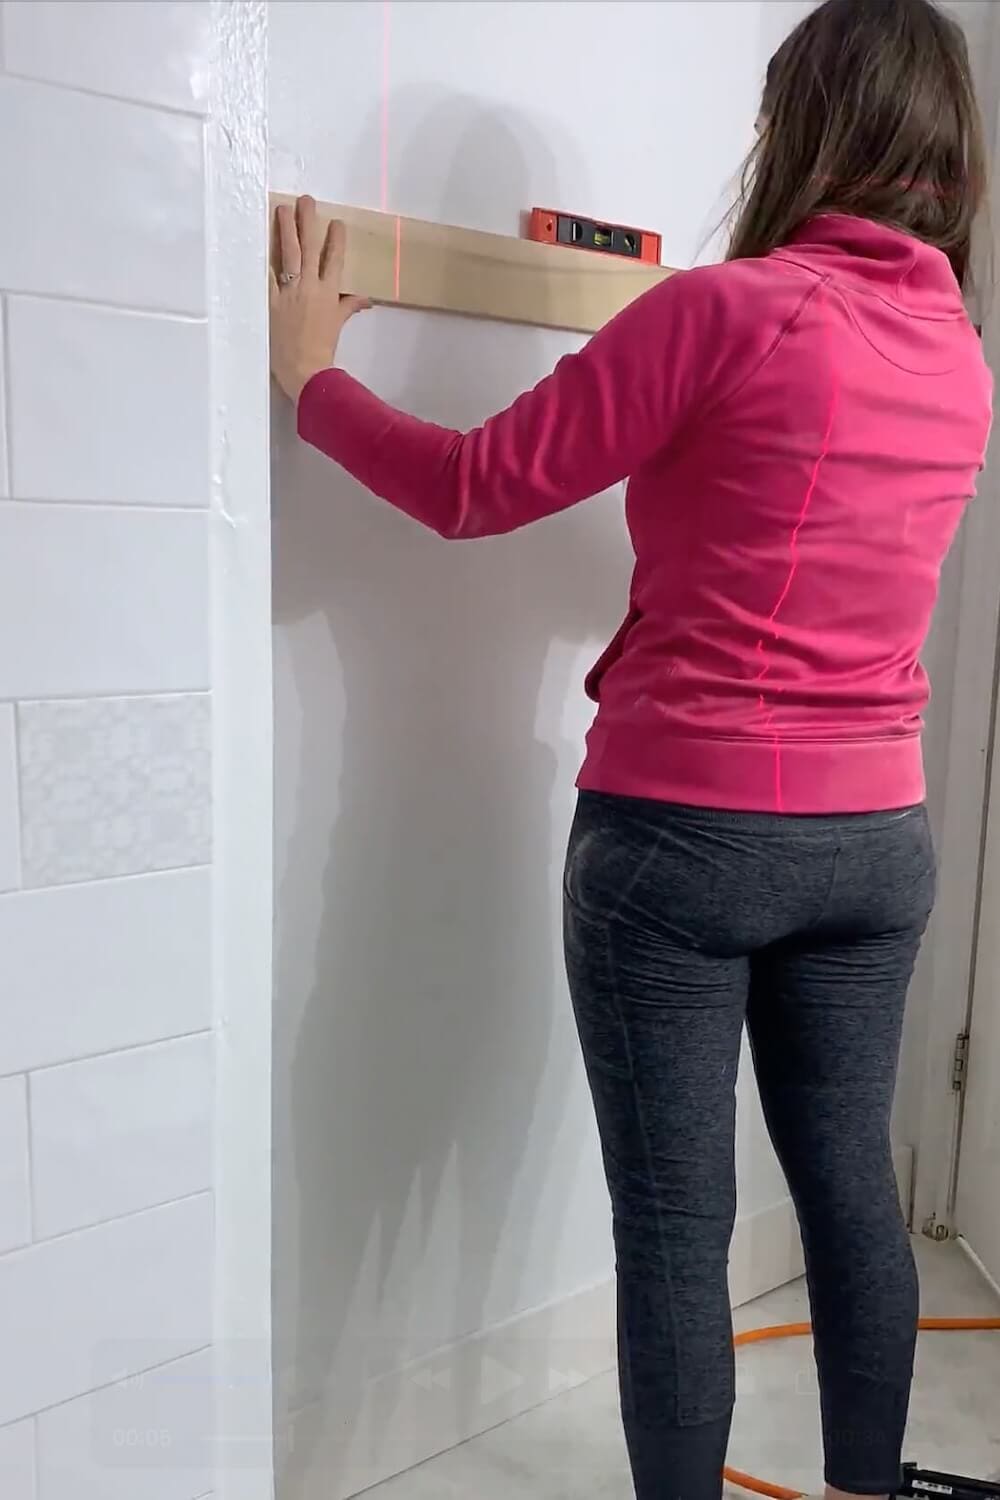
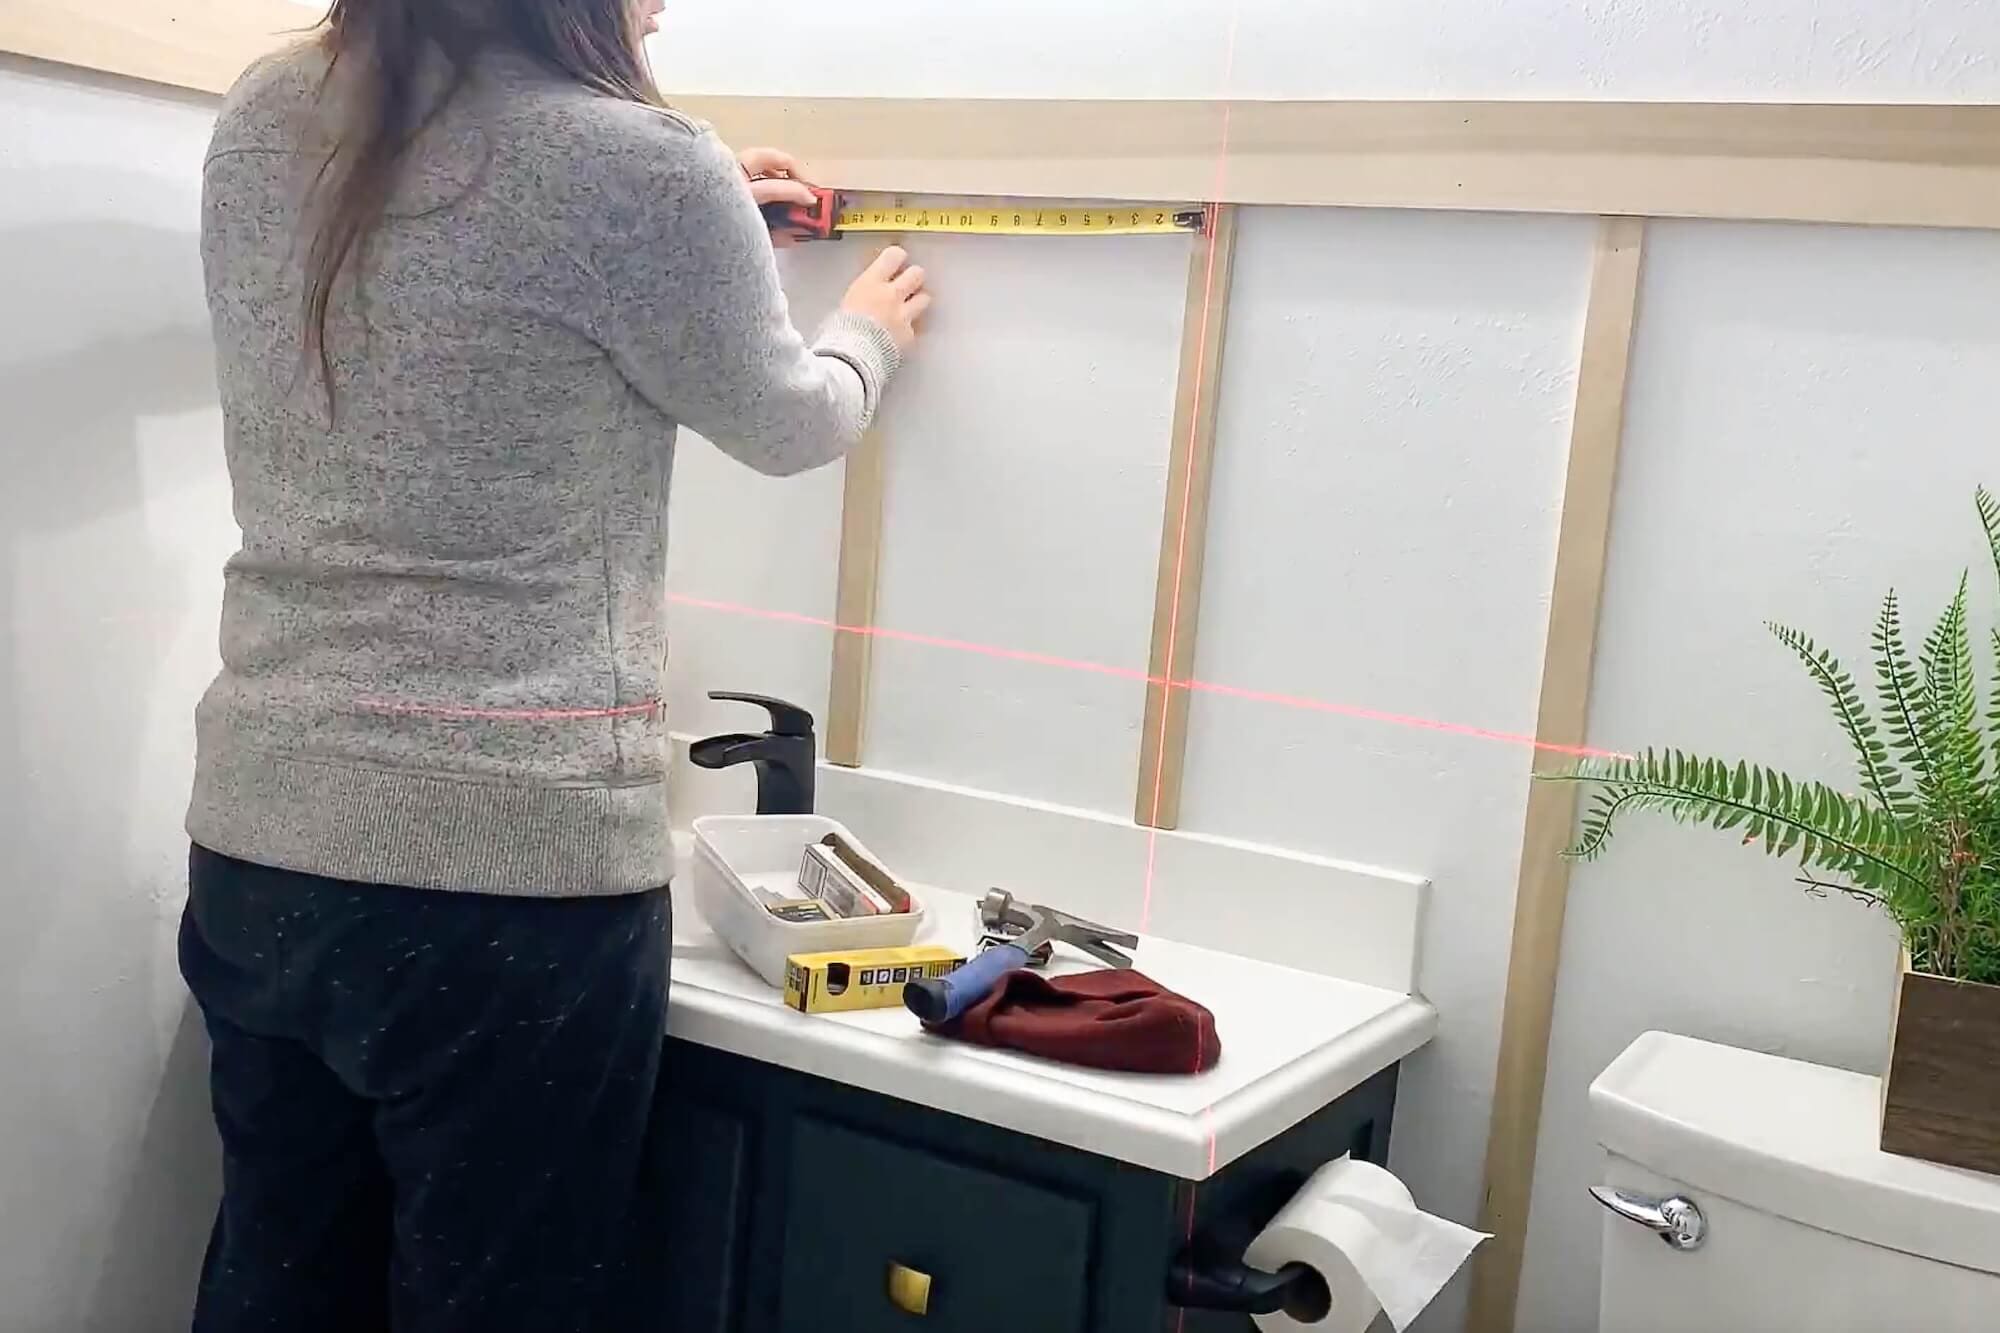
Step 1: Choose the Height and Mark the Room
Pick a height that lines up with your vanity and mirror. In this bathroom, I went slightly above halfway up the wall. Use a laser level to draw a continuous line around the room. This is what keeps the whole project even. Use a stud finder first so you know you’re attaching the boards into wall studs.
Planning the height is the same patient work as detailed projects like prepping a shower for tile. Slow and steady keeps everything consistent.
Step 2: Install the Top Rail
Cut your 1×4 to length and attach it into studs along the level line. A straight top rail makes everything else go smoother. If your vanity is already updated, like in my how to paint a bathroom vanity tutorial, this trim height usually complements most vanity styles.
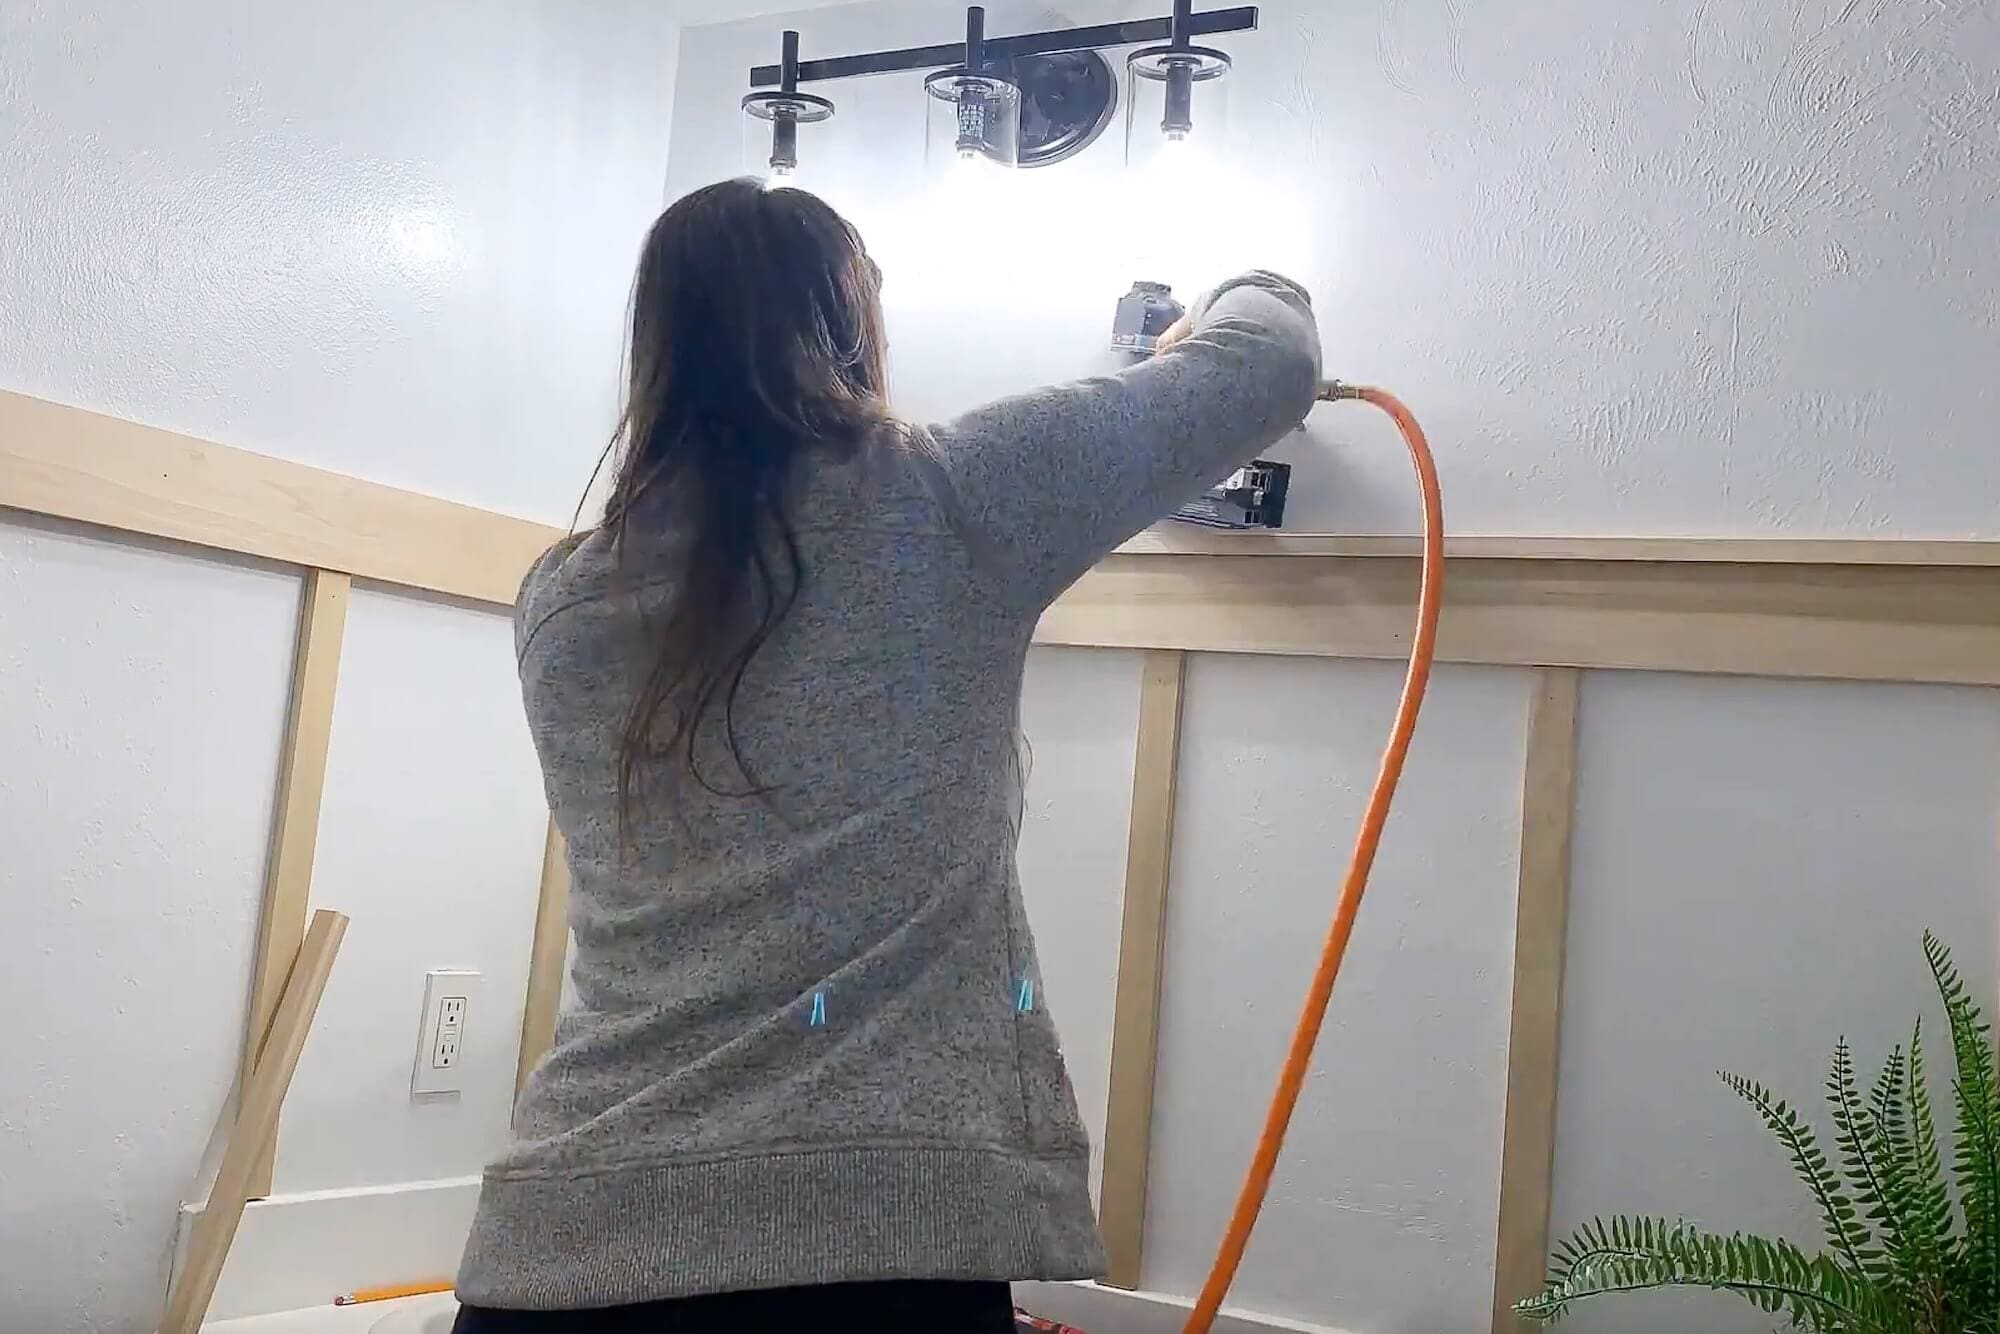
Step 3: Measure and Install the Vertical Battens
Cut your 1×2 battens to height. Spacing them 12 to 20 inches apart works well, but small bathrooms usually look better with closer spacing. I went with 14 inches in this room. Nail each batten into place with a brad nailer, keeping them straight with a torpedo level as you go.

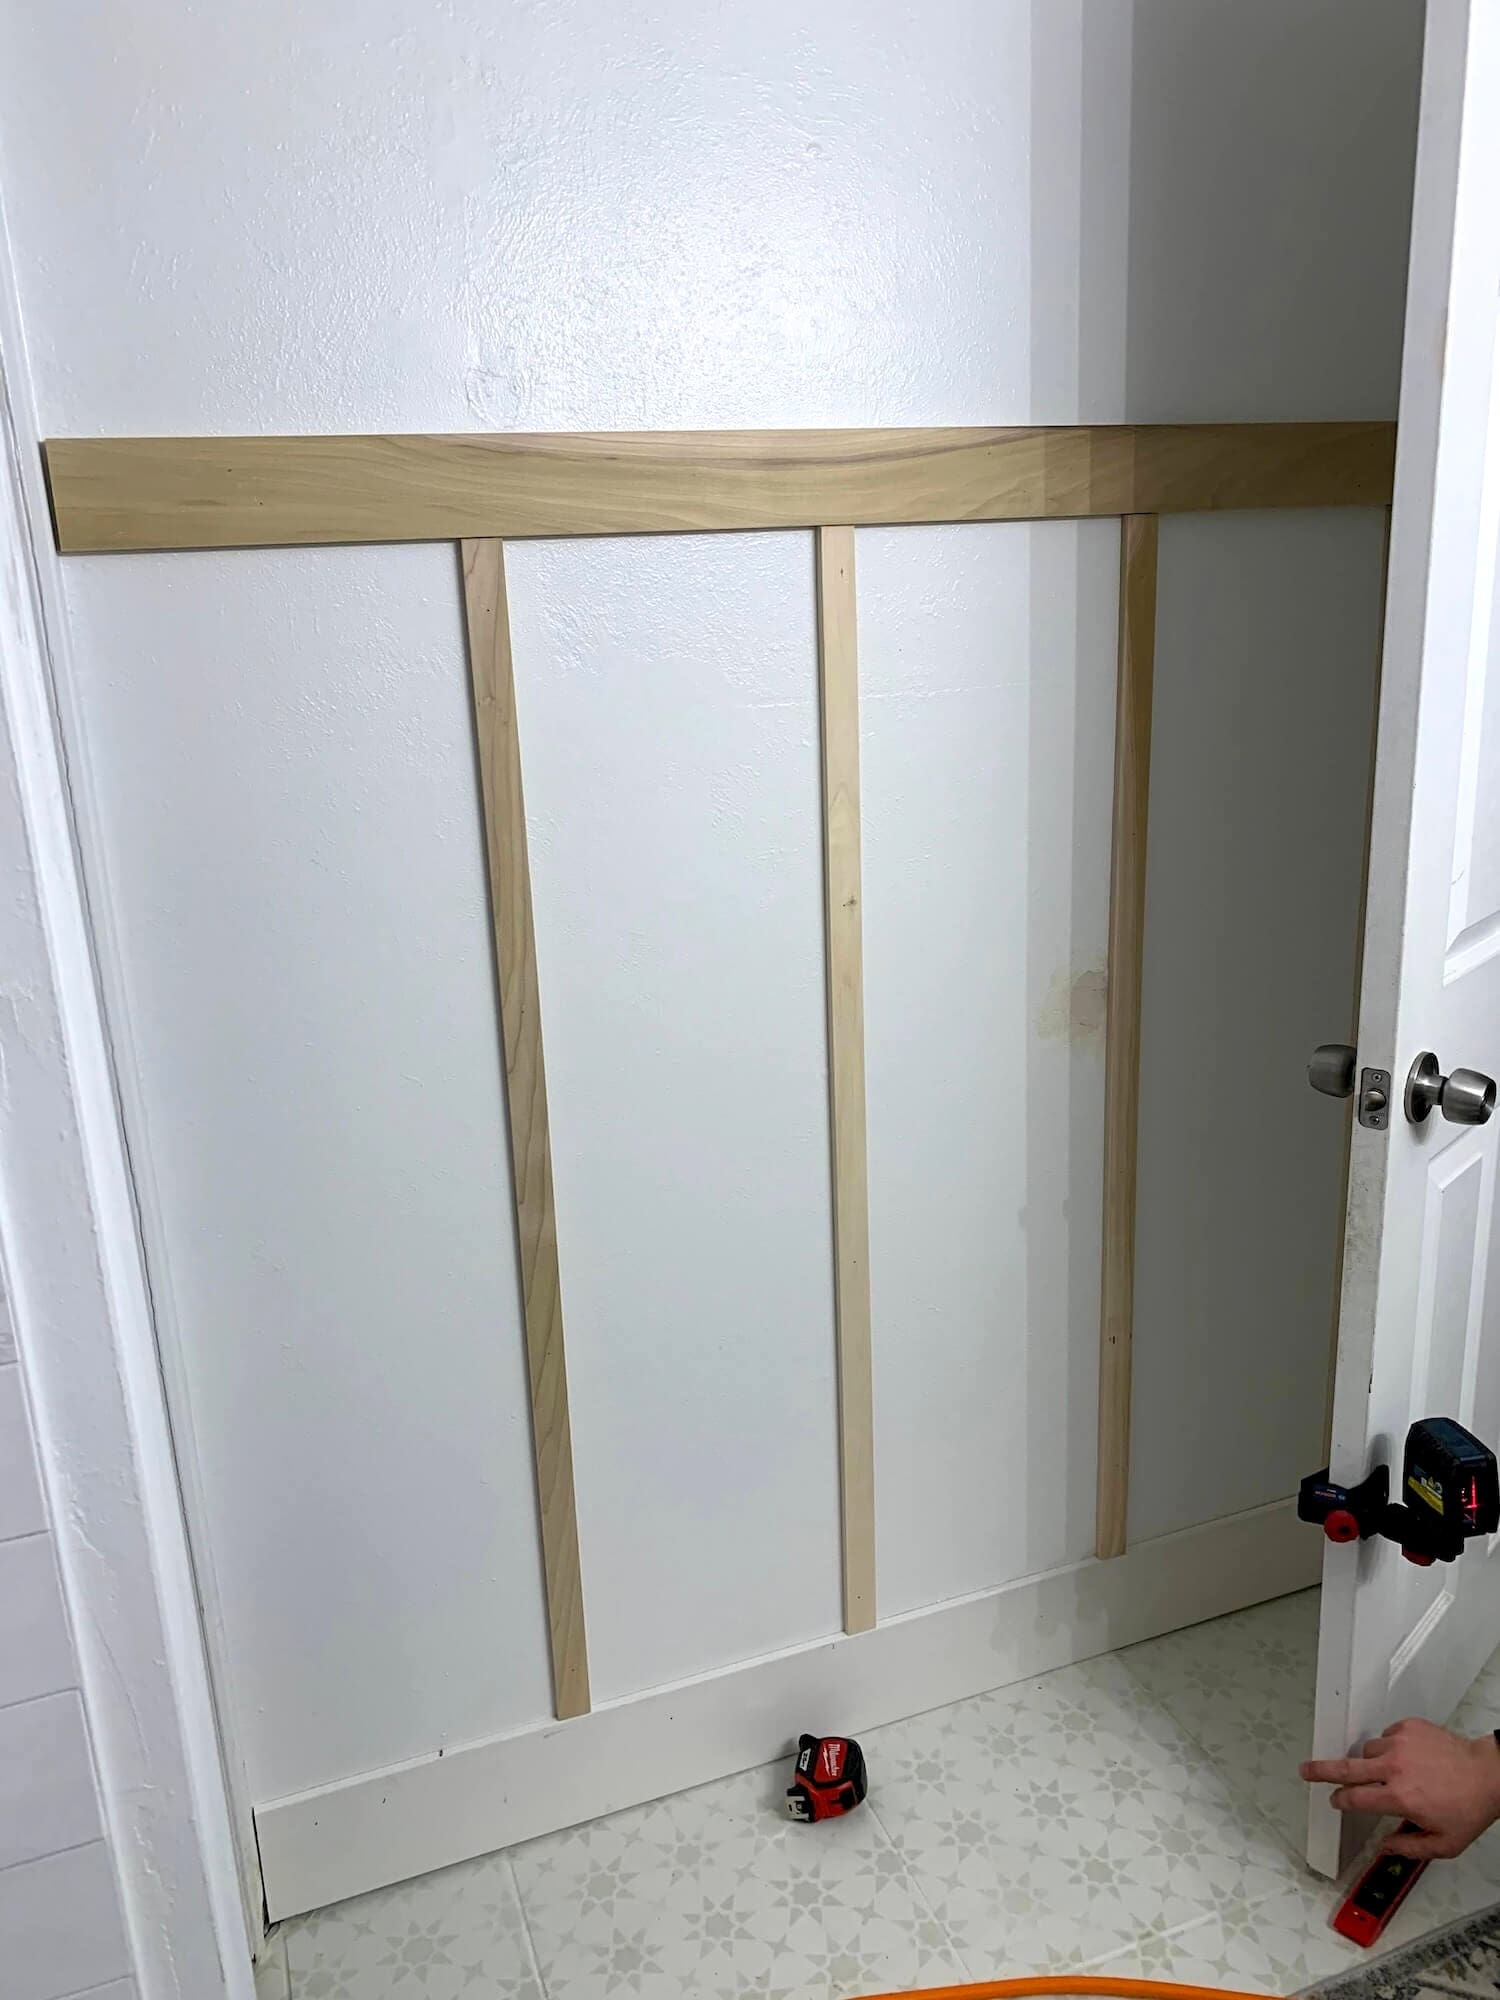
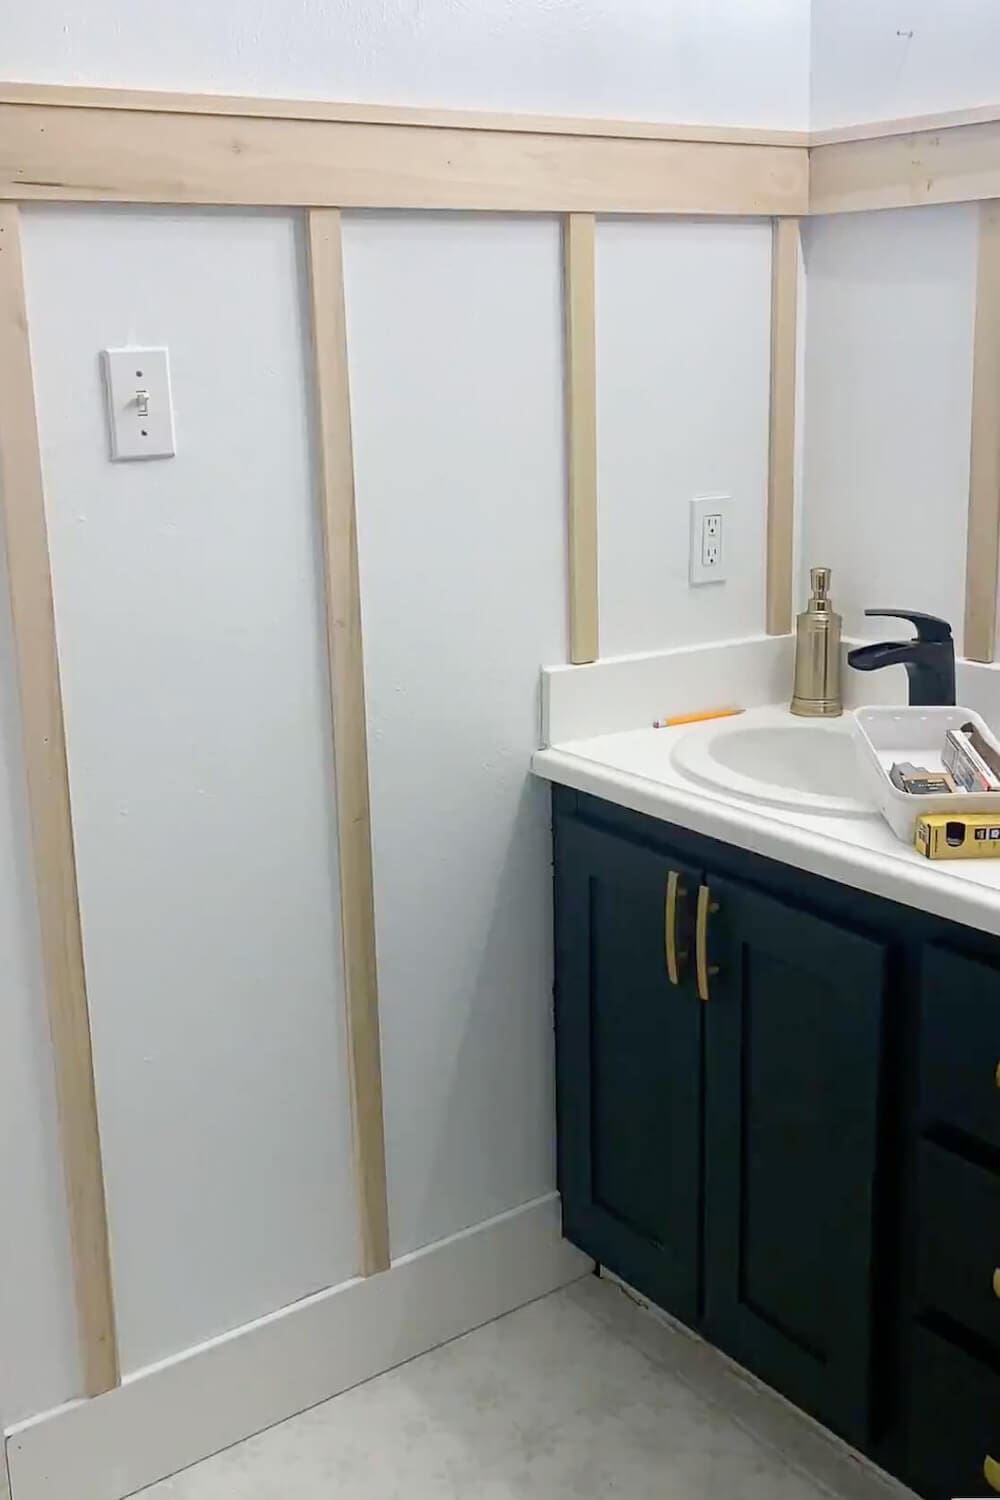
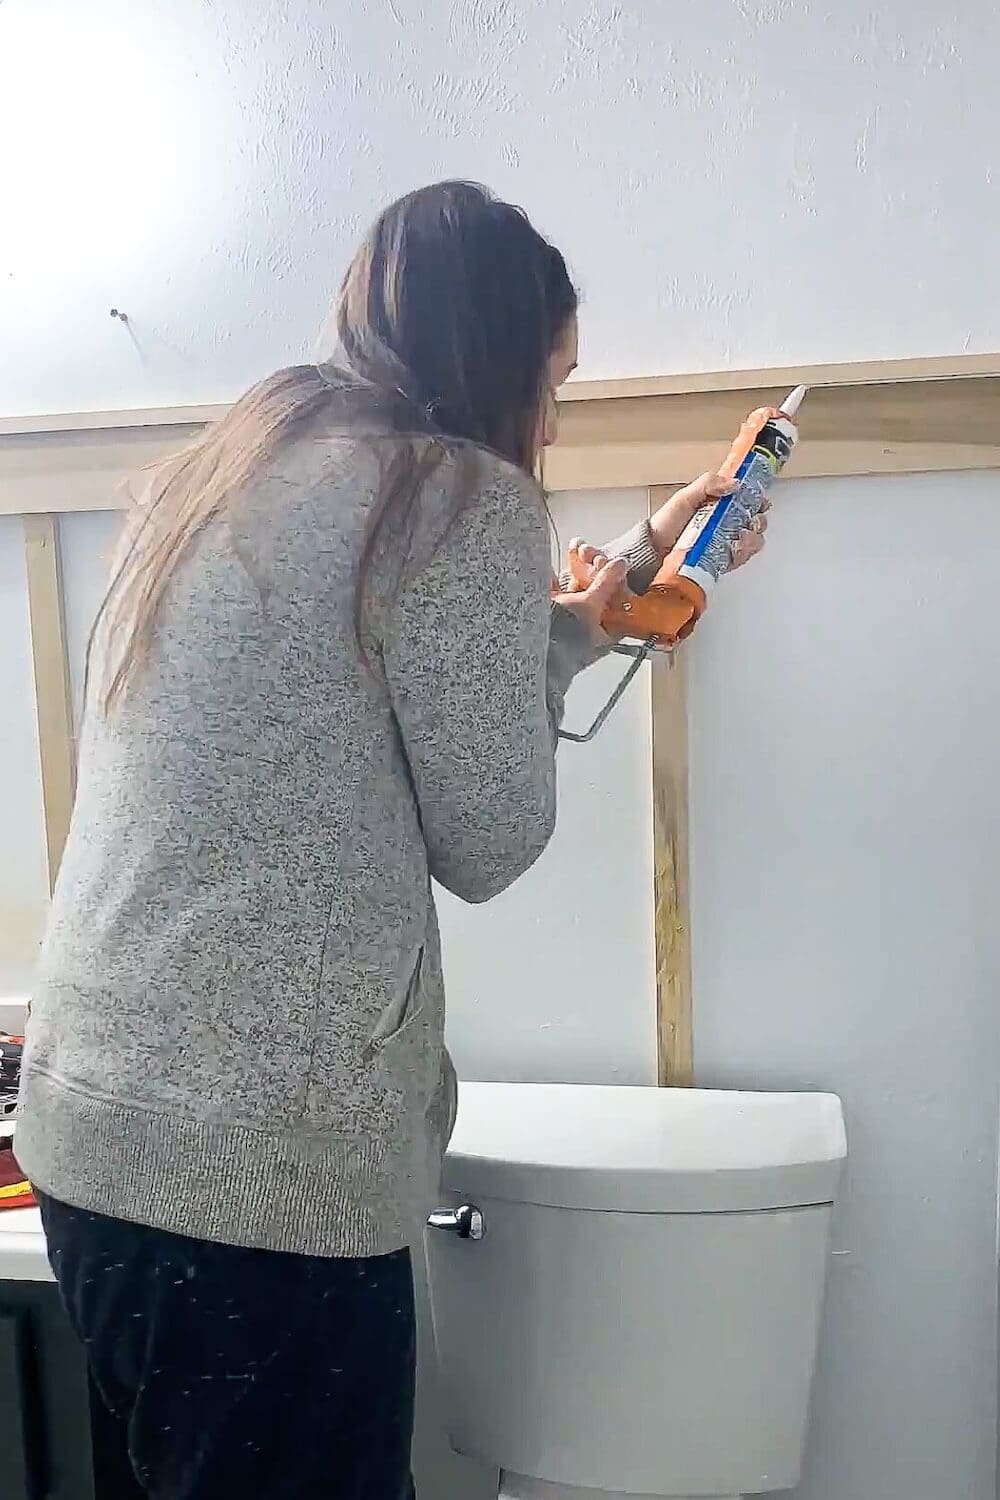
Step 4: Wrap the Board and Batten Around the Bathroom Walls
Instead of stopping at one wall, continue the battens around the entire room. A wraparound small bathroom board and batten wall looks more custom when the trim continues behind the toilet, beside the shower, and across the vanity wall. The transitions in the corners are easier than they look. Just butt the boards into each other and caulk the seam.
This is one of the easiest board and batten bathroom ideas to make a small space feel intentional, especially in a powder room or half bath where every inch of detail counts.
Step 5: Add the Top Cap
Lay a 1×2 board flat on top of the rail to finish the edge. This creates a clean line and gives you a solid place to mount hooks. It’s a simple detail that makes the whole wall look more custom.
Step 6: Fill, Sand, and Caulk
This is the step that separates a DIY-looking wall from a custom-looking wall. Take your time with all three.
Fill Nail Holes
Press wood filler into every nail hole. Wipe off the excess immediately with a damp rag so you have less to sand.
Sand Smooth
Once the filler is fully dry (read the can — most products need 30 to 60 minutes), sand each spot smooth with 220-grit sandpaper. Wipe down with a tack cloth or damp rag.
Caulk Every Seam
Run caulk along every seam where the boards meet the wall and where boards meet each other. Smooth with a damp baby wipe, then a dry one. Even though it takes a few extra minutes, this is what makes the final paint look clean and seamless.
Step 7: Prime and Paint
This is where the wall transforms from “trim glued to a wall” to “this is a built-in feature.”
Prime All the Boards and the Wall Inside the Treatment
Use a small foam roller for the flat trim faces and a brush for the edges. Don’t forget to prime the wall sections between the battens — those areas need to match the trim once painted. Let the primer fully dry per the can.
Paint with a Satin or Semi-Gloss Trim Paint
Once the primer dries, paint everything. I chose white to keep this small bathroom bright, but you can go darker if you want more contrast. A satin or semi-gloss trim paint holds up best in a bathroom because it wipes clean and tolerates humidity better than flat wall paint. Plan on two coats.
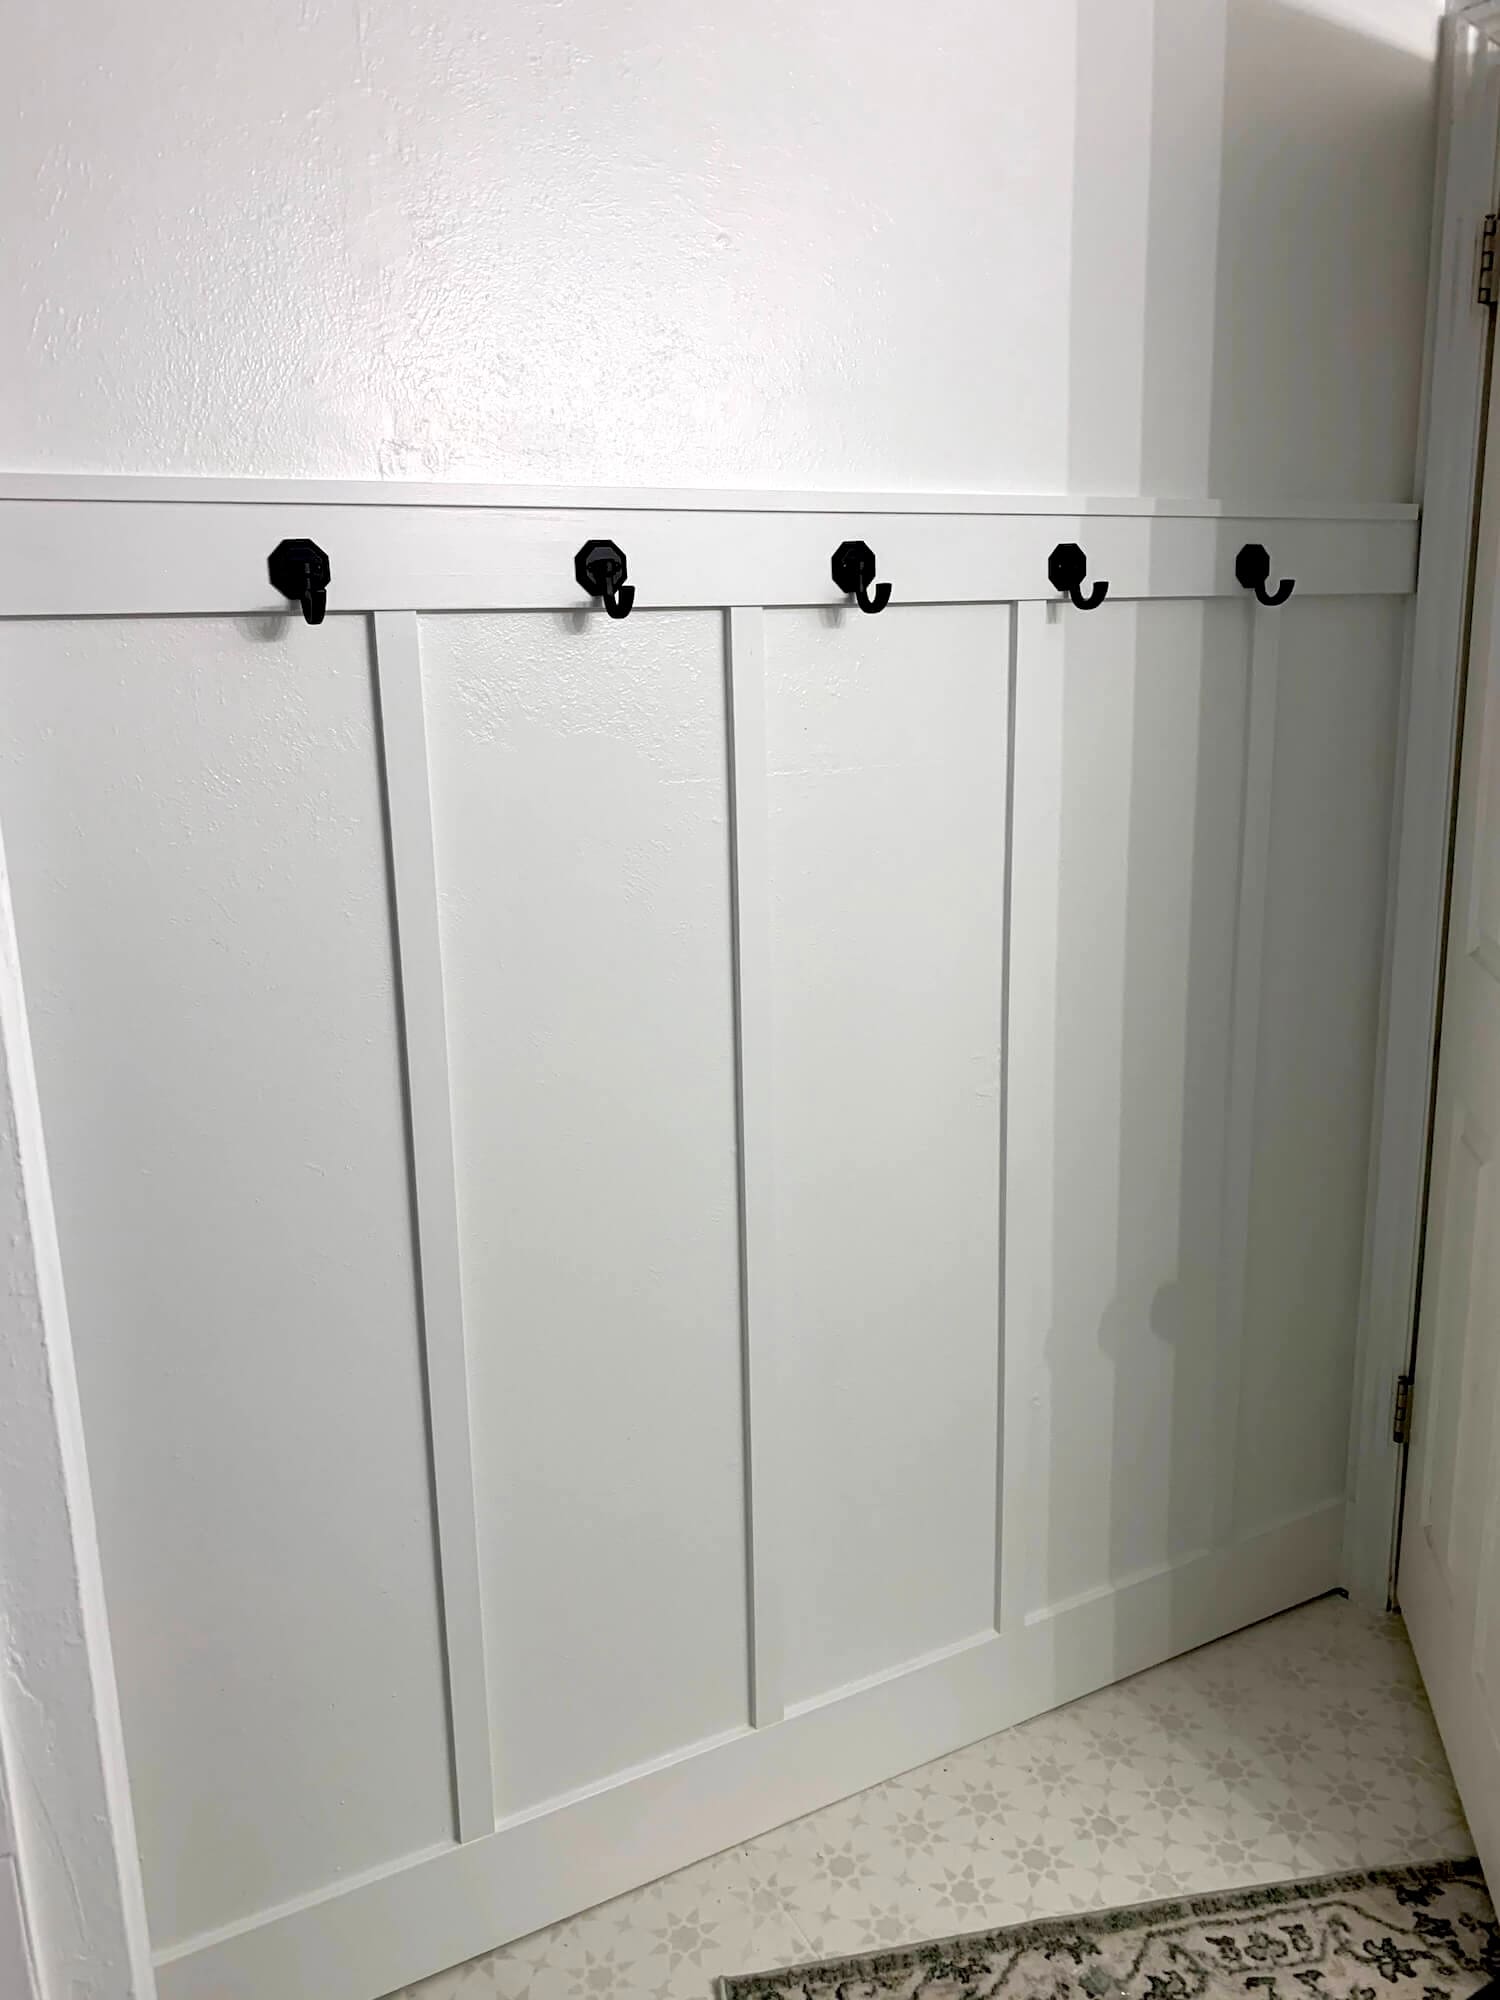
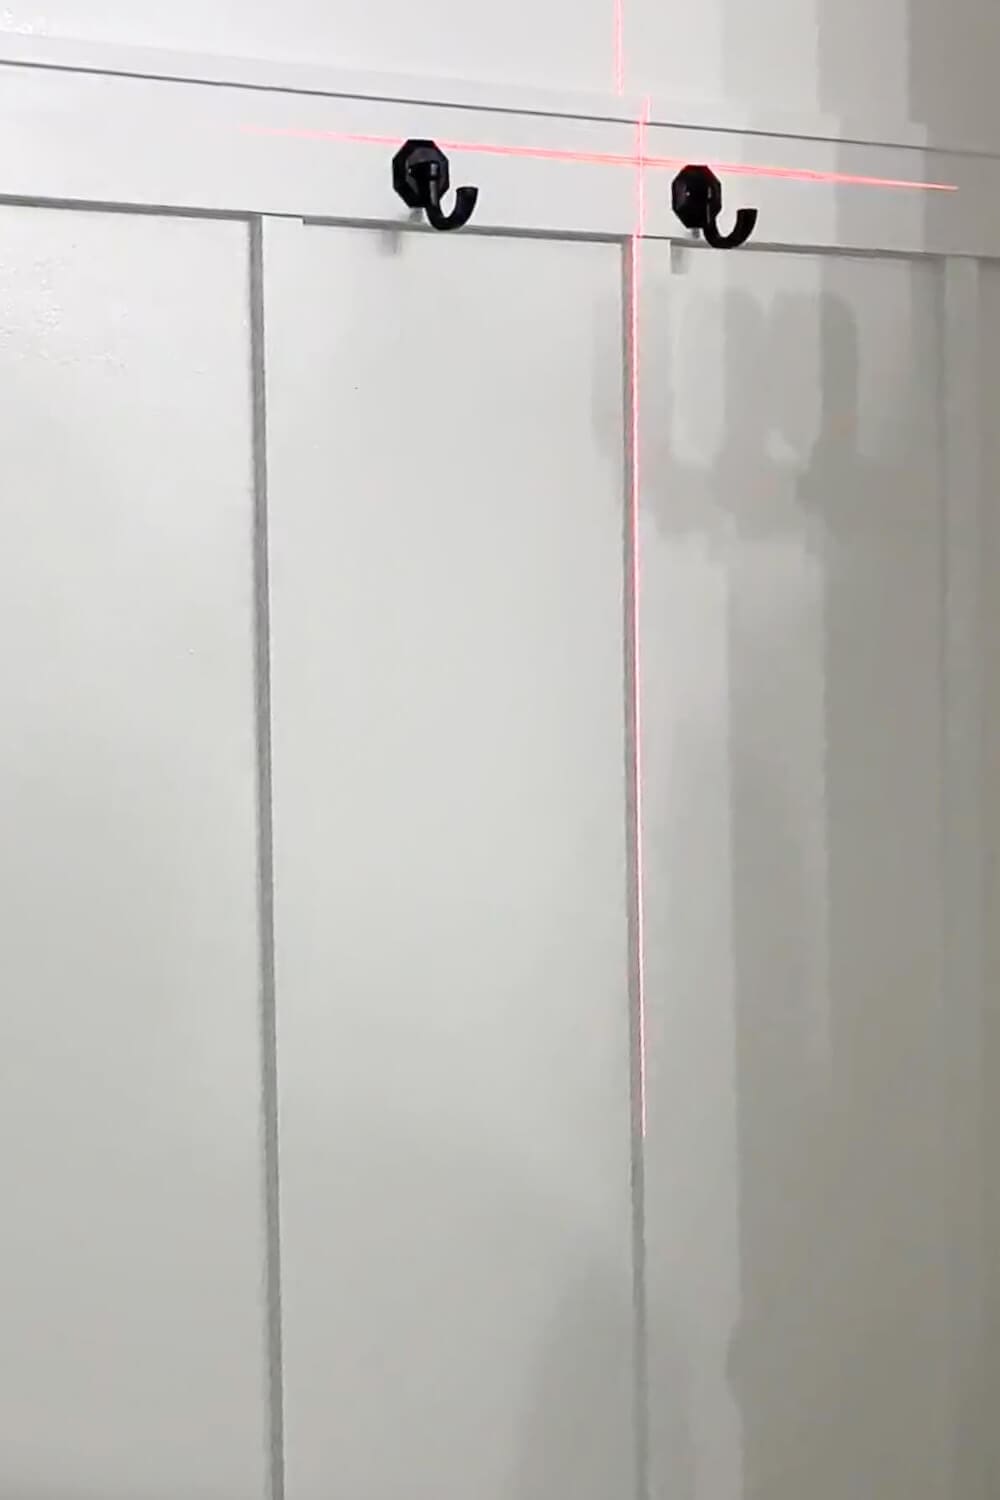
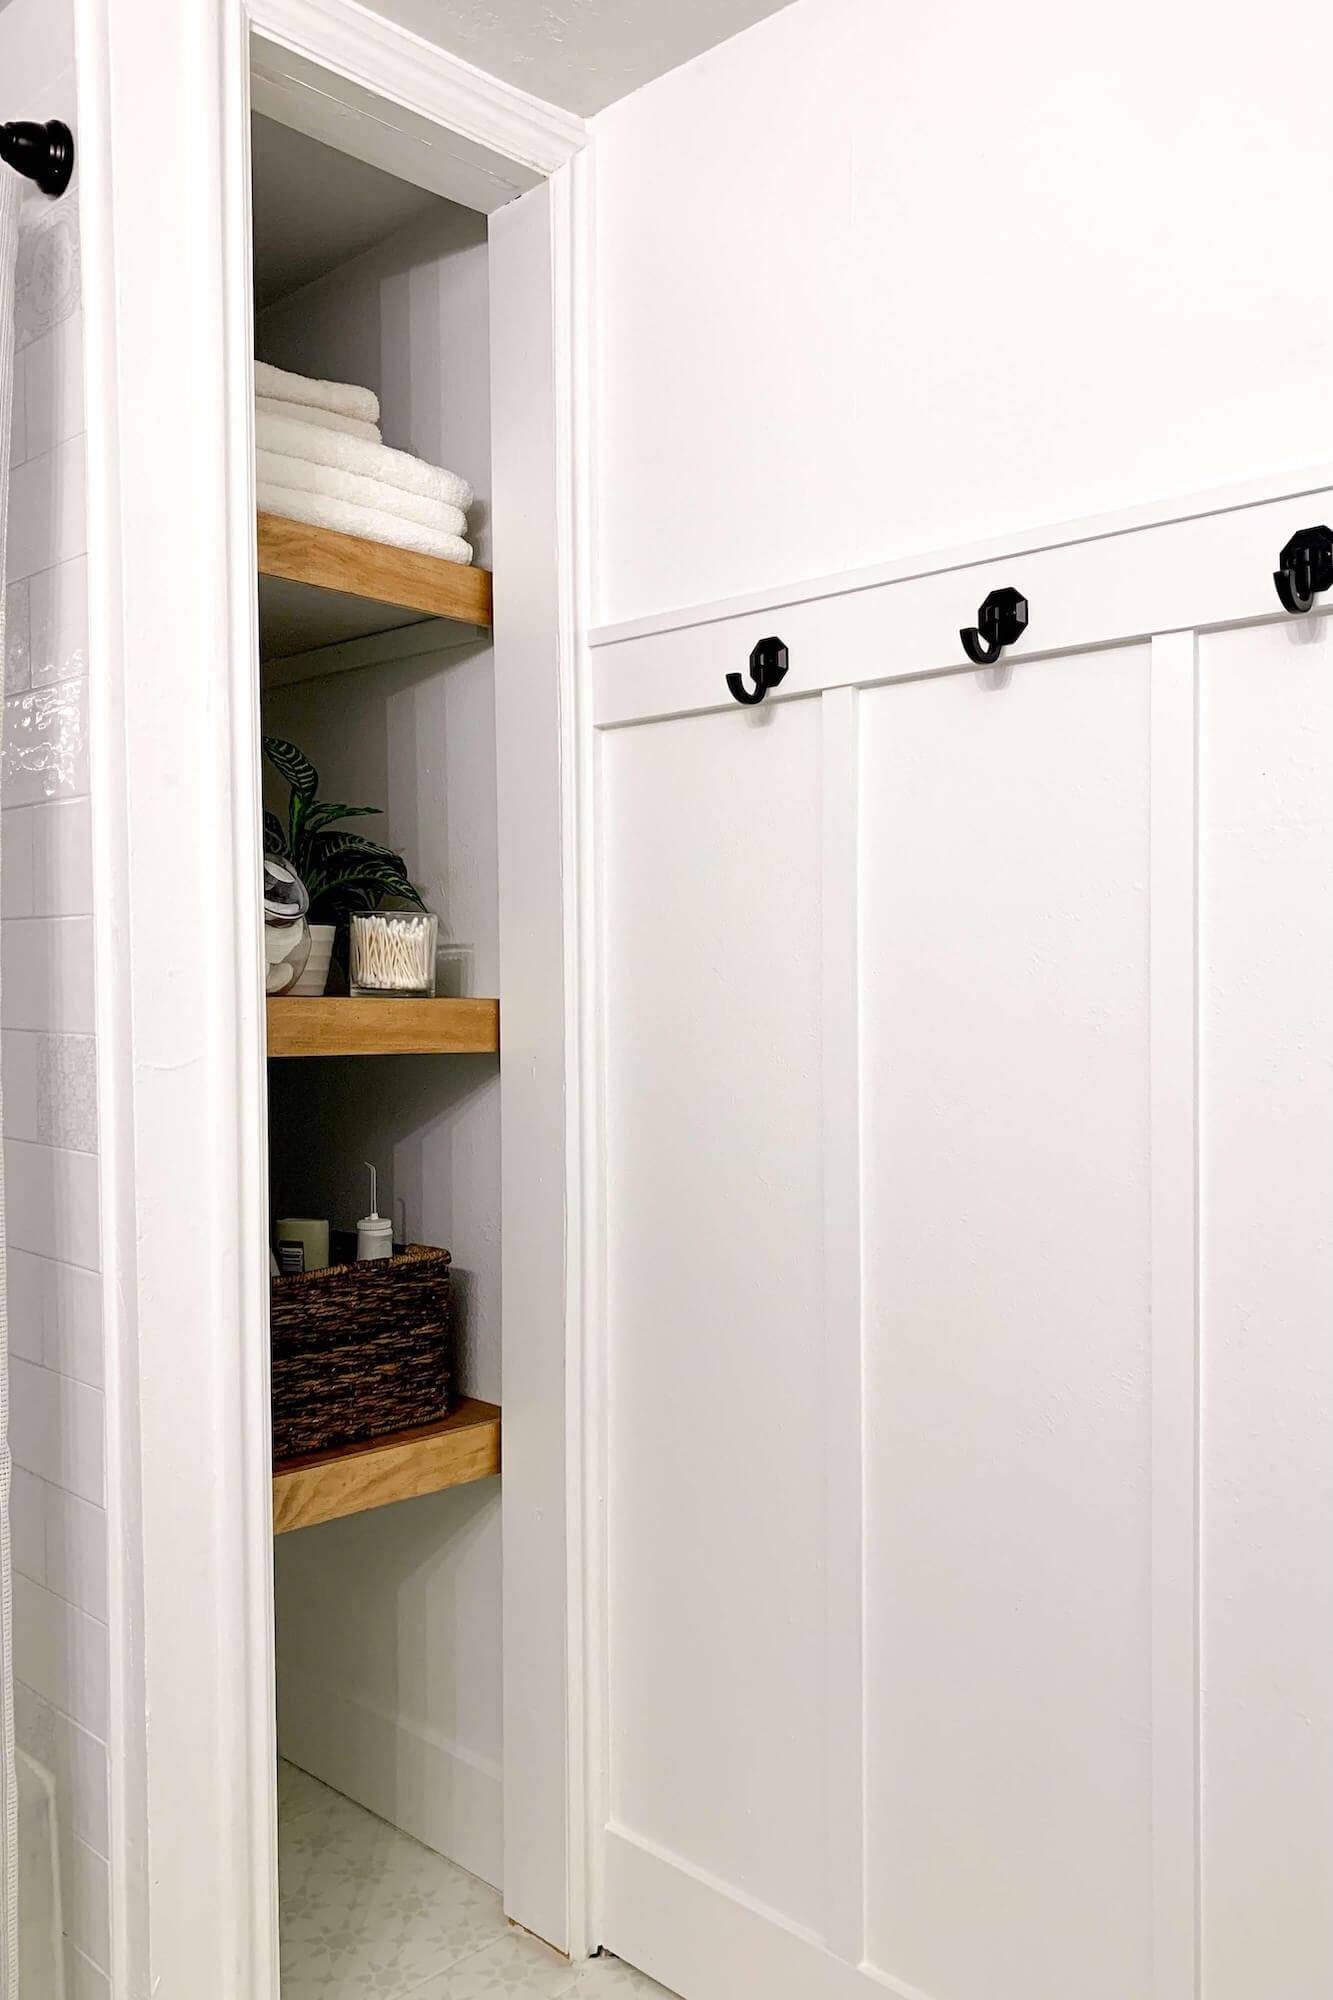
Step 8: Add Hooks for Storage
Install your hooks along the top cap. The laser level keeps them aligned. Hooks are one of the most practical board and batten bathroom ideas because they add storage without taking up floor space. Perfect for towels, robes, or even a small basket of washcloths in a powder room.
Extra Tips for Installing Board and Batten in a Bathroom
- Pre-paint your boards before installing to speed up the final coat.
- Label every board length before cutting multiples so you don’t mix them up.
- Dry-fit your battens on the floor first to dial in spacing before nailing anything to the wall.
- Use a scrap piece of 1×2 as a spacer block to keep gaps consistent as you work around the room.
- Number the back of each board with its location (A1, A2, B1, B2) if you’re cutting everything ahead of time.
- Caulk every seam, even the tiny ones. It’s the single biggest difference between “DIY” and “looks custom.”
How Much Does a Board and Batten Bathroom Cost (and How Long Does It Take)?
One of the first questions I get on this post: how much did the whole board and batten bathroom wall actually cost, and how long did it take? Here’s the honest breakdown.
Materials: Around $150 for a typical small bathroom. That covers a stack of paint-grade 1×2 and 1×4 pine boards (the biggest line item, around $80 to $100 depending on bathroom size and lumber prices), wood filler, paintable caulk, primer, trim paint, and a small box of hooks. If you already own paint, primer, and caulk from other projects, you can come in closer to $80 to $100.
Tools: A miter saw and brad nailer make this project drastically faster, but you can absolutely DIY it with a hand saw and finish nails plus a hammer if you don’t want to buy power tools for one project. Most home improvement stores rent miter saws and brad nailers by the day for around $30 to $40.
Time: A focused weekend if you’re working on a single small bathroom. Saturday is for cutting boards, installing the top rail and battens, and adding the top cap. Sunday is for filling nail holes, sanding, caulking, priming, and painting. If you pre-paint your boards before installing, you can sometimes finish on Saturday alone.
| Phase | Active hours | Notes |
|---|---|---|
| Measure, mark, cut | 1 to 2 | Slowest part is being precise |
| Install top rail and battens | 2 to 3 | A brad nailer makes this fast |
| Top cap and hooks | 1 | Quick finish step |
| Fill, sand, caulk | 2 | Wait for filler to dry between |
| Prime and paint | 3 to 4 | Two coats with dry time |
Board and Batten in a Powder Room or Half Bathroom
If you’re working with a board and batten powder room or a half bathroom instead of a full bath, the same wraparound approach works, but you can usually take the trim higher because the room is smaller and there’s no shower or tub to design around. In a powder room, I recommend going taller, closer to 54 to 60 inches. Here’s why:
- It feels more dramatic in a small footprint. A powder room is often the smallest room in the house, so a higher trim treatment leans into the cozy-feature-wall feeling instead of fighting it.
- You don’t have to worry about splash zones. Without a shower or tub, the trim can run higher without getting hit by water.
- It pairs beautifully with deep paint colors. Powder rooms are the easiest place in the house to go bold with paint. Pair tall board and batten with a deep navy, hunter green, or charcoal above the trim line for a moody, custom-feeling powder room.
For a half bathroom that does have a shower, treat it the same way as a full bathroom: stop the trim outside the splash zone, use moisture-resistant trim paint, and run the bathroom fan for 20 minutes after every shower to keep humidity from messing with the paint over time.
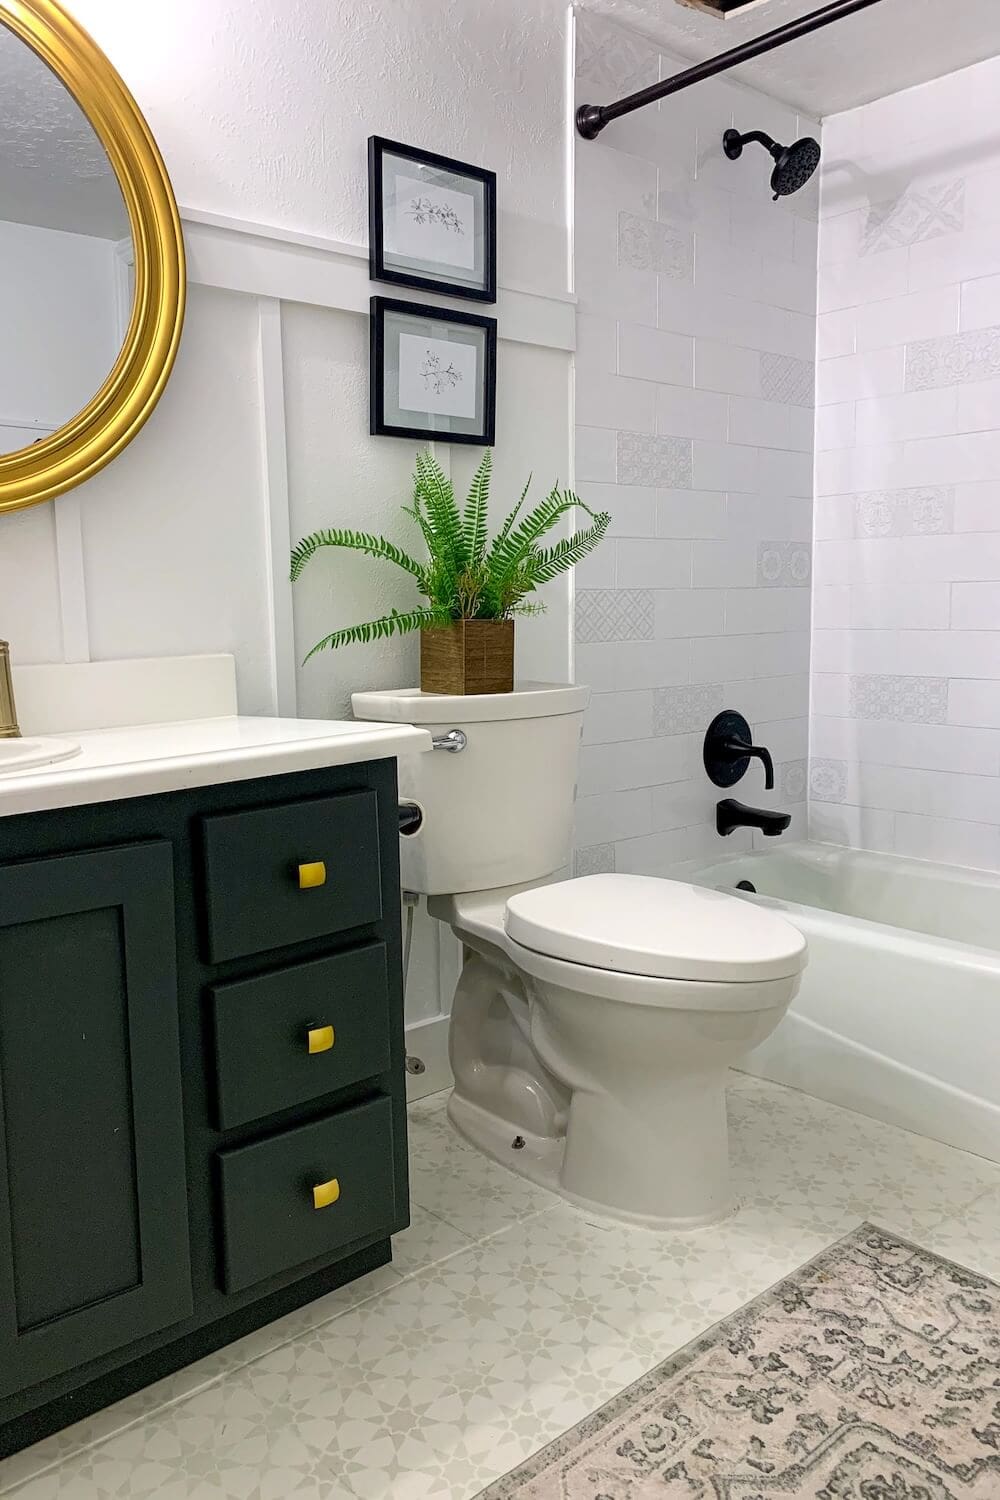
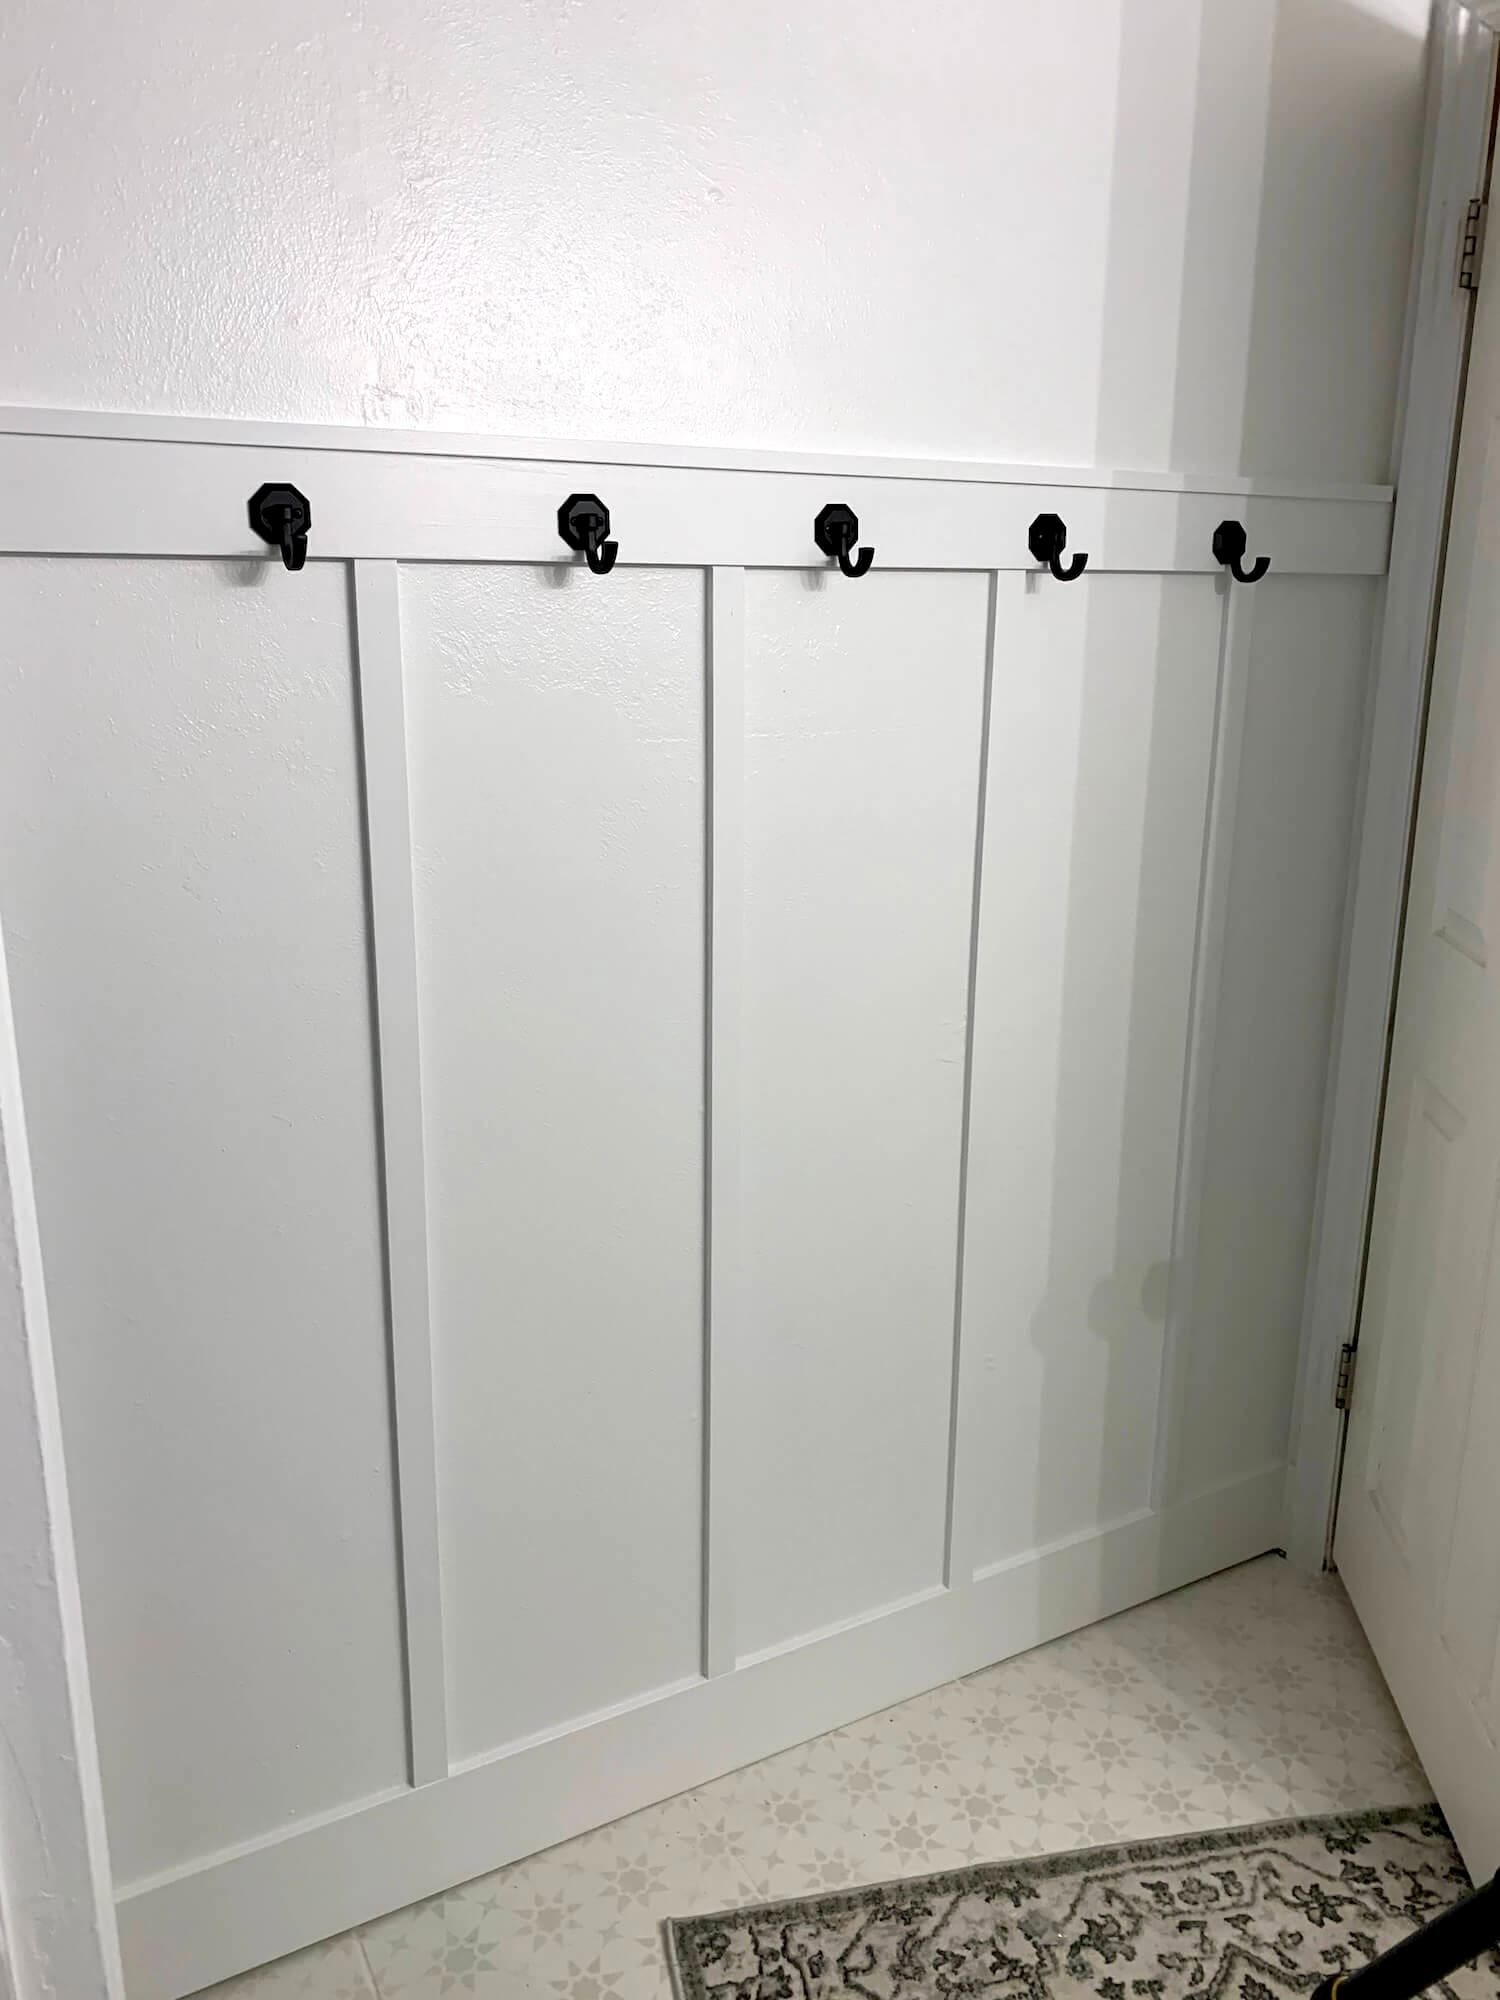
Finished Board and Batten Bathroom Wall in This Small Space
This small bathroom board and batten wall completely changed the feel of the room. The walls look taller, the layout feels more intentional, and the hooks make the space more functional. Towels finally have a real home instead of getting draped over the shower door. This project fits right in with the rest of the updates from my small bathroom remodel.
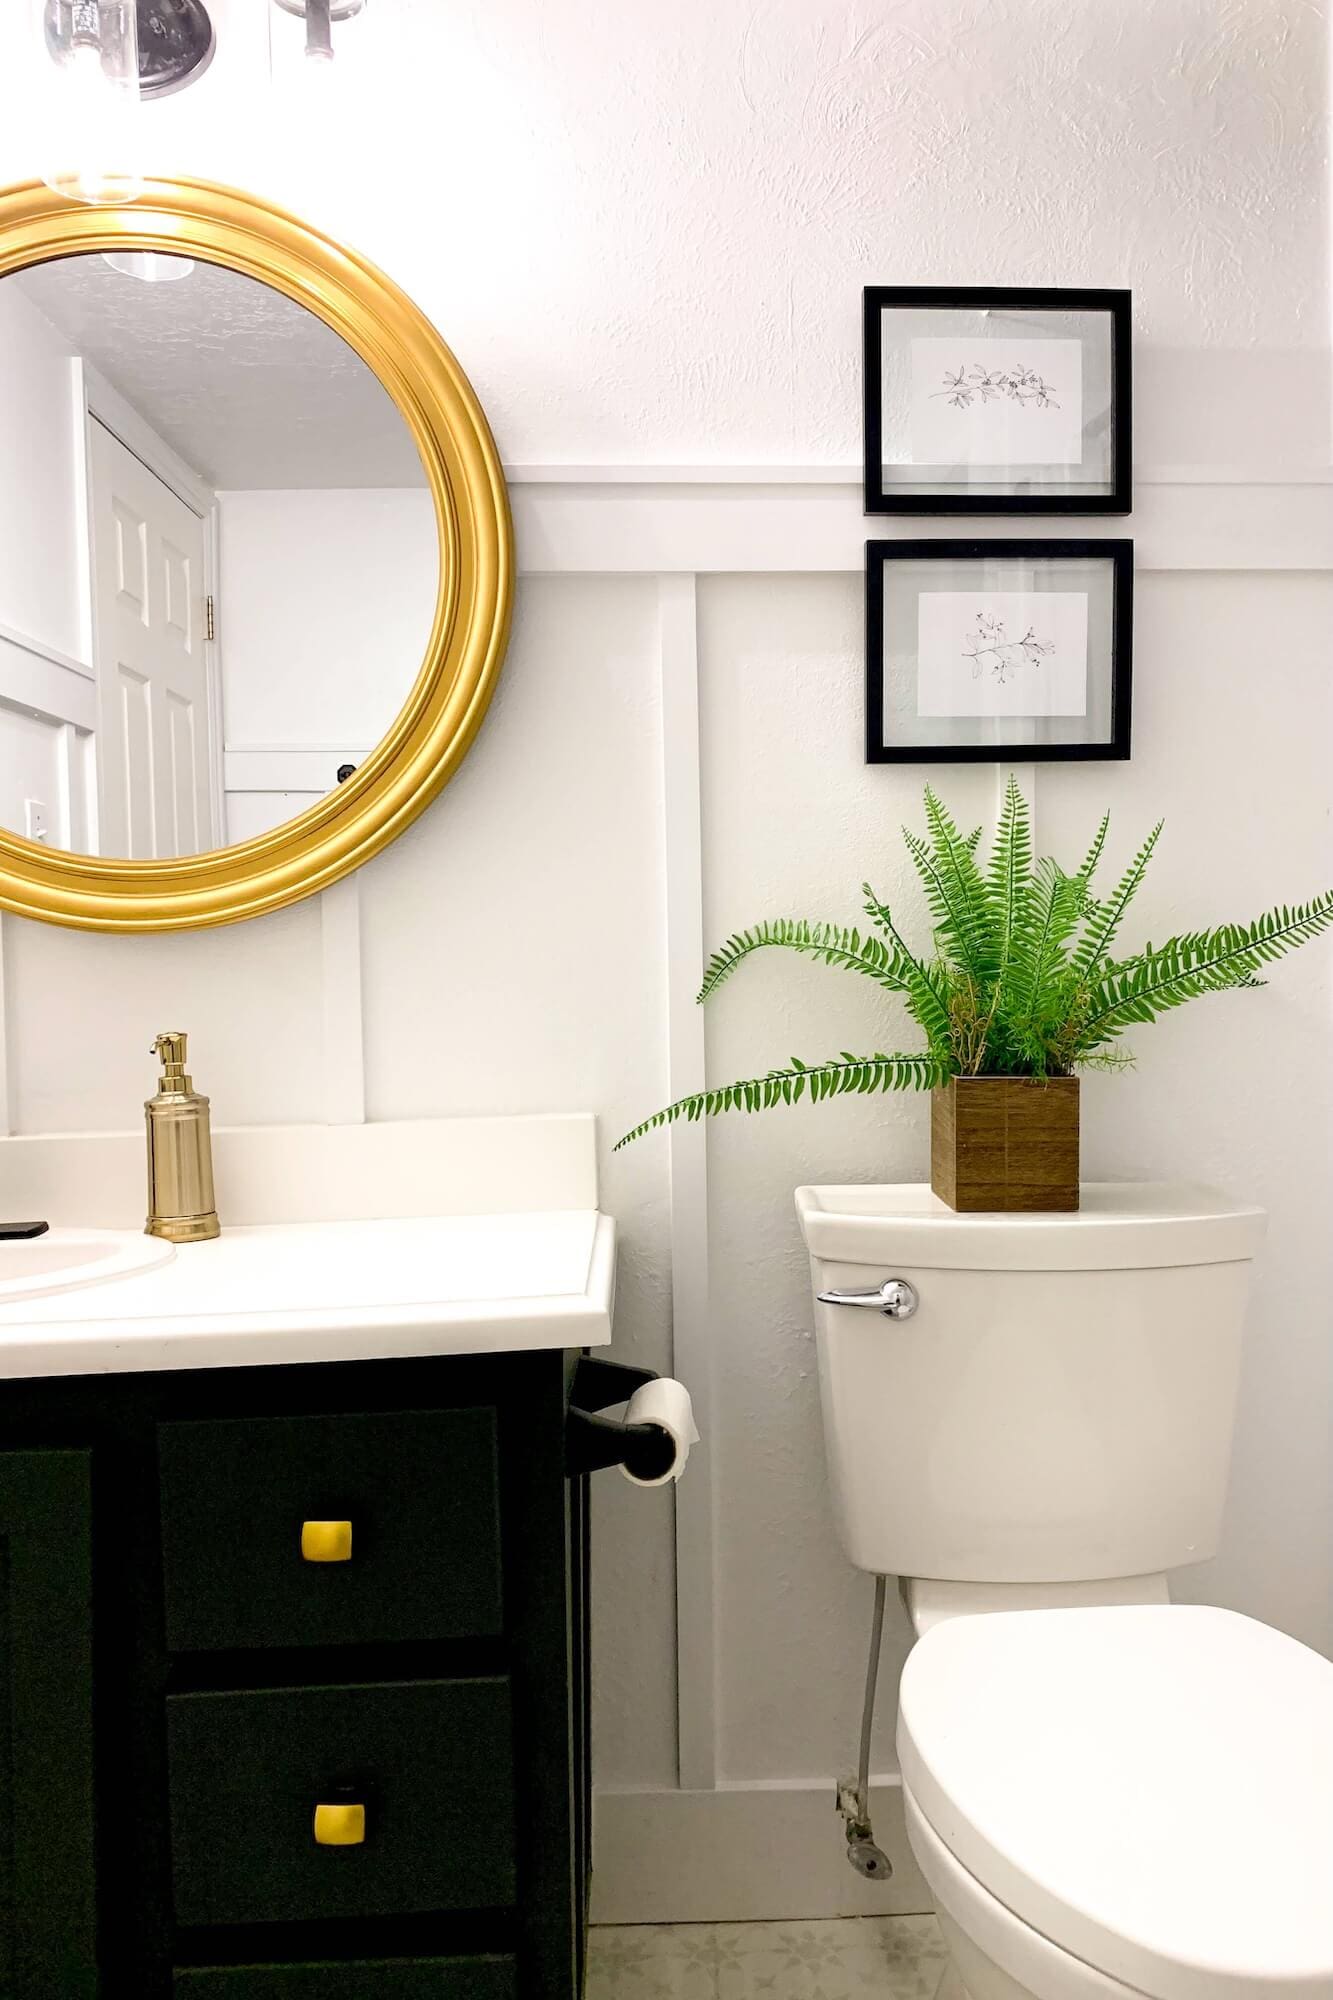
Black and Gold Bathroom Styling Tips
The board and batten itself is white, but the styling pulls in two intentional accent colors: black on the hooks and faucet, gold on the round mirror frame. That black and gold combo is a current bathroom favorite for a reason — it reads as modern without feeling cold, and the warm gold balances the high-contrast black so the room doesn’t tip into industrial. If you want to copy this small black and gold bathroom palette: matte black hooks, matte black faucet, brushed gold round mirror, white walls and trim, and a single warm wood element (like a small shelf or tray) to keep the whole thing from feeling too monochrome.
Can You Use Board and Batten in a Bathroom With a Shower?
Yes. Board and batten works in a bathroom with a shower as long as you treat it like any other moisture-prone space. The key is using the right materials, sealing every seam, and keeping the trim outside of direct splash zones.
In this bathroom, the board and batten stops outside the shower area and wraps around the vanity, toilet wall, and towel storage. Inside the shower, I used tile instead of wood so daily water and steam aren’t hitting the trim directly. Here are the rules I followed:
Choose the Right Material
Primed pine, PVC, or other trim boards hold up better than unfinished MDF in bathrooms. If you do use MDF, keep it well out of splash zones and make sure it’s fully primed and painted on every side, including the cut ends.
Seal Every Seam
Use caulk where boards meet the wall and where boards meet each other. This keeps moisture from sneaking behind the trim and makes your paint job look seamless.
Use a Moisture-Resistant Paint
A high-quality trim paint in a satin or semi-gloss finish is easier to wipe down and holds up better to humidity than flat wall paint.
Keep Wood Out of Direct Water
Use tile, solid surface, or another waterproof material inside the shower or directly above the tub. Let the board and batten bathroom wall start just outside those areas.
Make Sure Your Fan Works
Good ventilation is your friend. Run the fan during showers and for 20 minutes afterward to help control condensation on every painted surface in the room.
With those basics in place, board and batten can absolutely live in the same room as your shower and still look fresh and crisp years down the road.
More Small Bathroom Remodel Projects to Try
This DIY board and batten bathroom wall is one of 7 weekend projects in my small bathroom remodel. If you’re updating a small bathroom and want the rest of the cluster:
- How to get rid of mold in a shower (the right way)
- DIY shower niche tutorial
- How to tile a shower (subway tile beginner guide)
- Painting bathroom floor tiles (stencil method)
- How to paint a bathroom vanity
- DIY gold bathroom mirror with Rub ‘n Buff
- Small bathroom remodel hub (all 7 projects in one place)
And if you love board and batten in general, here are my other board and batten and wall trim projects from around the house:
📌 Pin This Project for Later
Pin now and come back when you’re ready to add a DIY board and batten wall to your bathroom!
Share Your Project With Me!
If you try this board and batten bathroom project, tag me on Instagram. I’d love to see what you create!
FAQ About Board and Batten in Bathrooms
For most small bathrooms, the sweet spot is between 48 and 54 inches, about two-thirds of the way up the wall. Going taller than chair-rail height makes the room feel taller, gives you space for hooks, and lines up cleanly with the top of a vanity backsplash or the bottom edge of a mirror.
Batten spacing is flexible, but a typical range is 12 to 20 inches apart. Closer spacing (12 to 14 inches) looks better in small bathrooms and powder rooms because it makes the trim feel intentional instead of empty. Wider spacing (16 to 20 inches) works better in larger rooms with more wall to fill.
Yes. Board and batten works in a bathroom with a shower as long as you stop the trim outside the splash zone, seal every seam with caulk, and use a satin or semi-gloss trim paint that handles humidity. Make sure your bathroom fan runs during and after showers to keep moisture from sitting on painted surfaces.
Yes, and powder rooms are actually one of the best rooms for board and batten. With no shower or tub to design around, you can take the trim higher (54 to 60 inches) and pair it with a bold paint color above the trim line for a moody, custom-feeling powder room.
White keeps a small bathroom bright and reflective, which is usually the right call for tight spaces. Deep colors like navy, hunter green, or charcoal can look stunning in a powder room with tall ceilings. Whatever color you pick, use a satin or semi-gloss trim paint for the moisture resistance and easier cleanup.
Absolutely. The top rail and top cap create a perfect mounting surface for hooks because they’re solid wood instead of drywall. Use a level to space the hooks evenly along the top cap, and screw them directly into the rail behind. Matte black, brass, and chrome all work well with white painted trim.
Usually no. You can run battens down to the existing baseboard in most bathrooms. If your baseboard is very thin or has a curved profile, you may want to swap it for a straight-edged board to make the seams cleaner. Either way, caulk where the battens meet the baseboard for a built-in look.
Around $150 in materials for a typical small bathroom. That covers paint-grade 1×2 and 1×4 boards, wood filler, paintable caulk, primer, trim paint, and a few hooks. If you already have paint and caulk from other projects, you can come in closer to $80 to $100.
A focused weekend for most small bathrooms. Saturday for cutting, installing the top rail, battens, and top cap. Sunday for filling nail holes, sanding, caulking, priming, and painting. Pre-painting your boards before installing can compress the whole project into Saturday alone if you start early.
Vertical lines. Board and batten with vertical battens running floor to mid-wall, painted the same color as the upper wall, makes a small bathroom feel taller. Pair that with a large mirror, lighter paint colors, and a tall pendant light, and even a tiny bathroom or powder room reads as more spacious.
Doing the whole bathroom? This board and batten tutorial is one of 7 projects in my DIY small bathroom remodel. The hub has the full breakdown of every project, the cost-saving framework, and links to all the other tutorials.