How to Install Vertical Shiplap Walls in a Bathroom


Updated May 9, 2026
Looking to add charm and character to your space? Vertical shiplap walls are the way to go! I recently tackled this DIY in my bathroom and saved time (and money) by using shiplap wall panels instead of individual boards. Ready to transform your space? Here’s my step-by-step process!
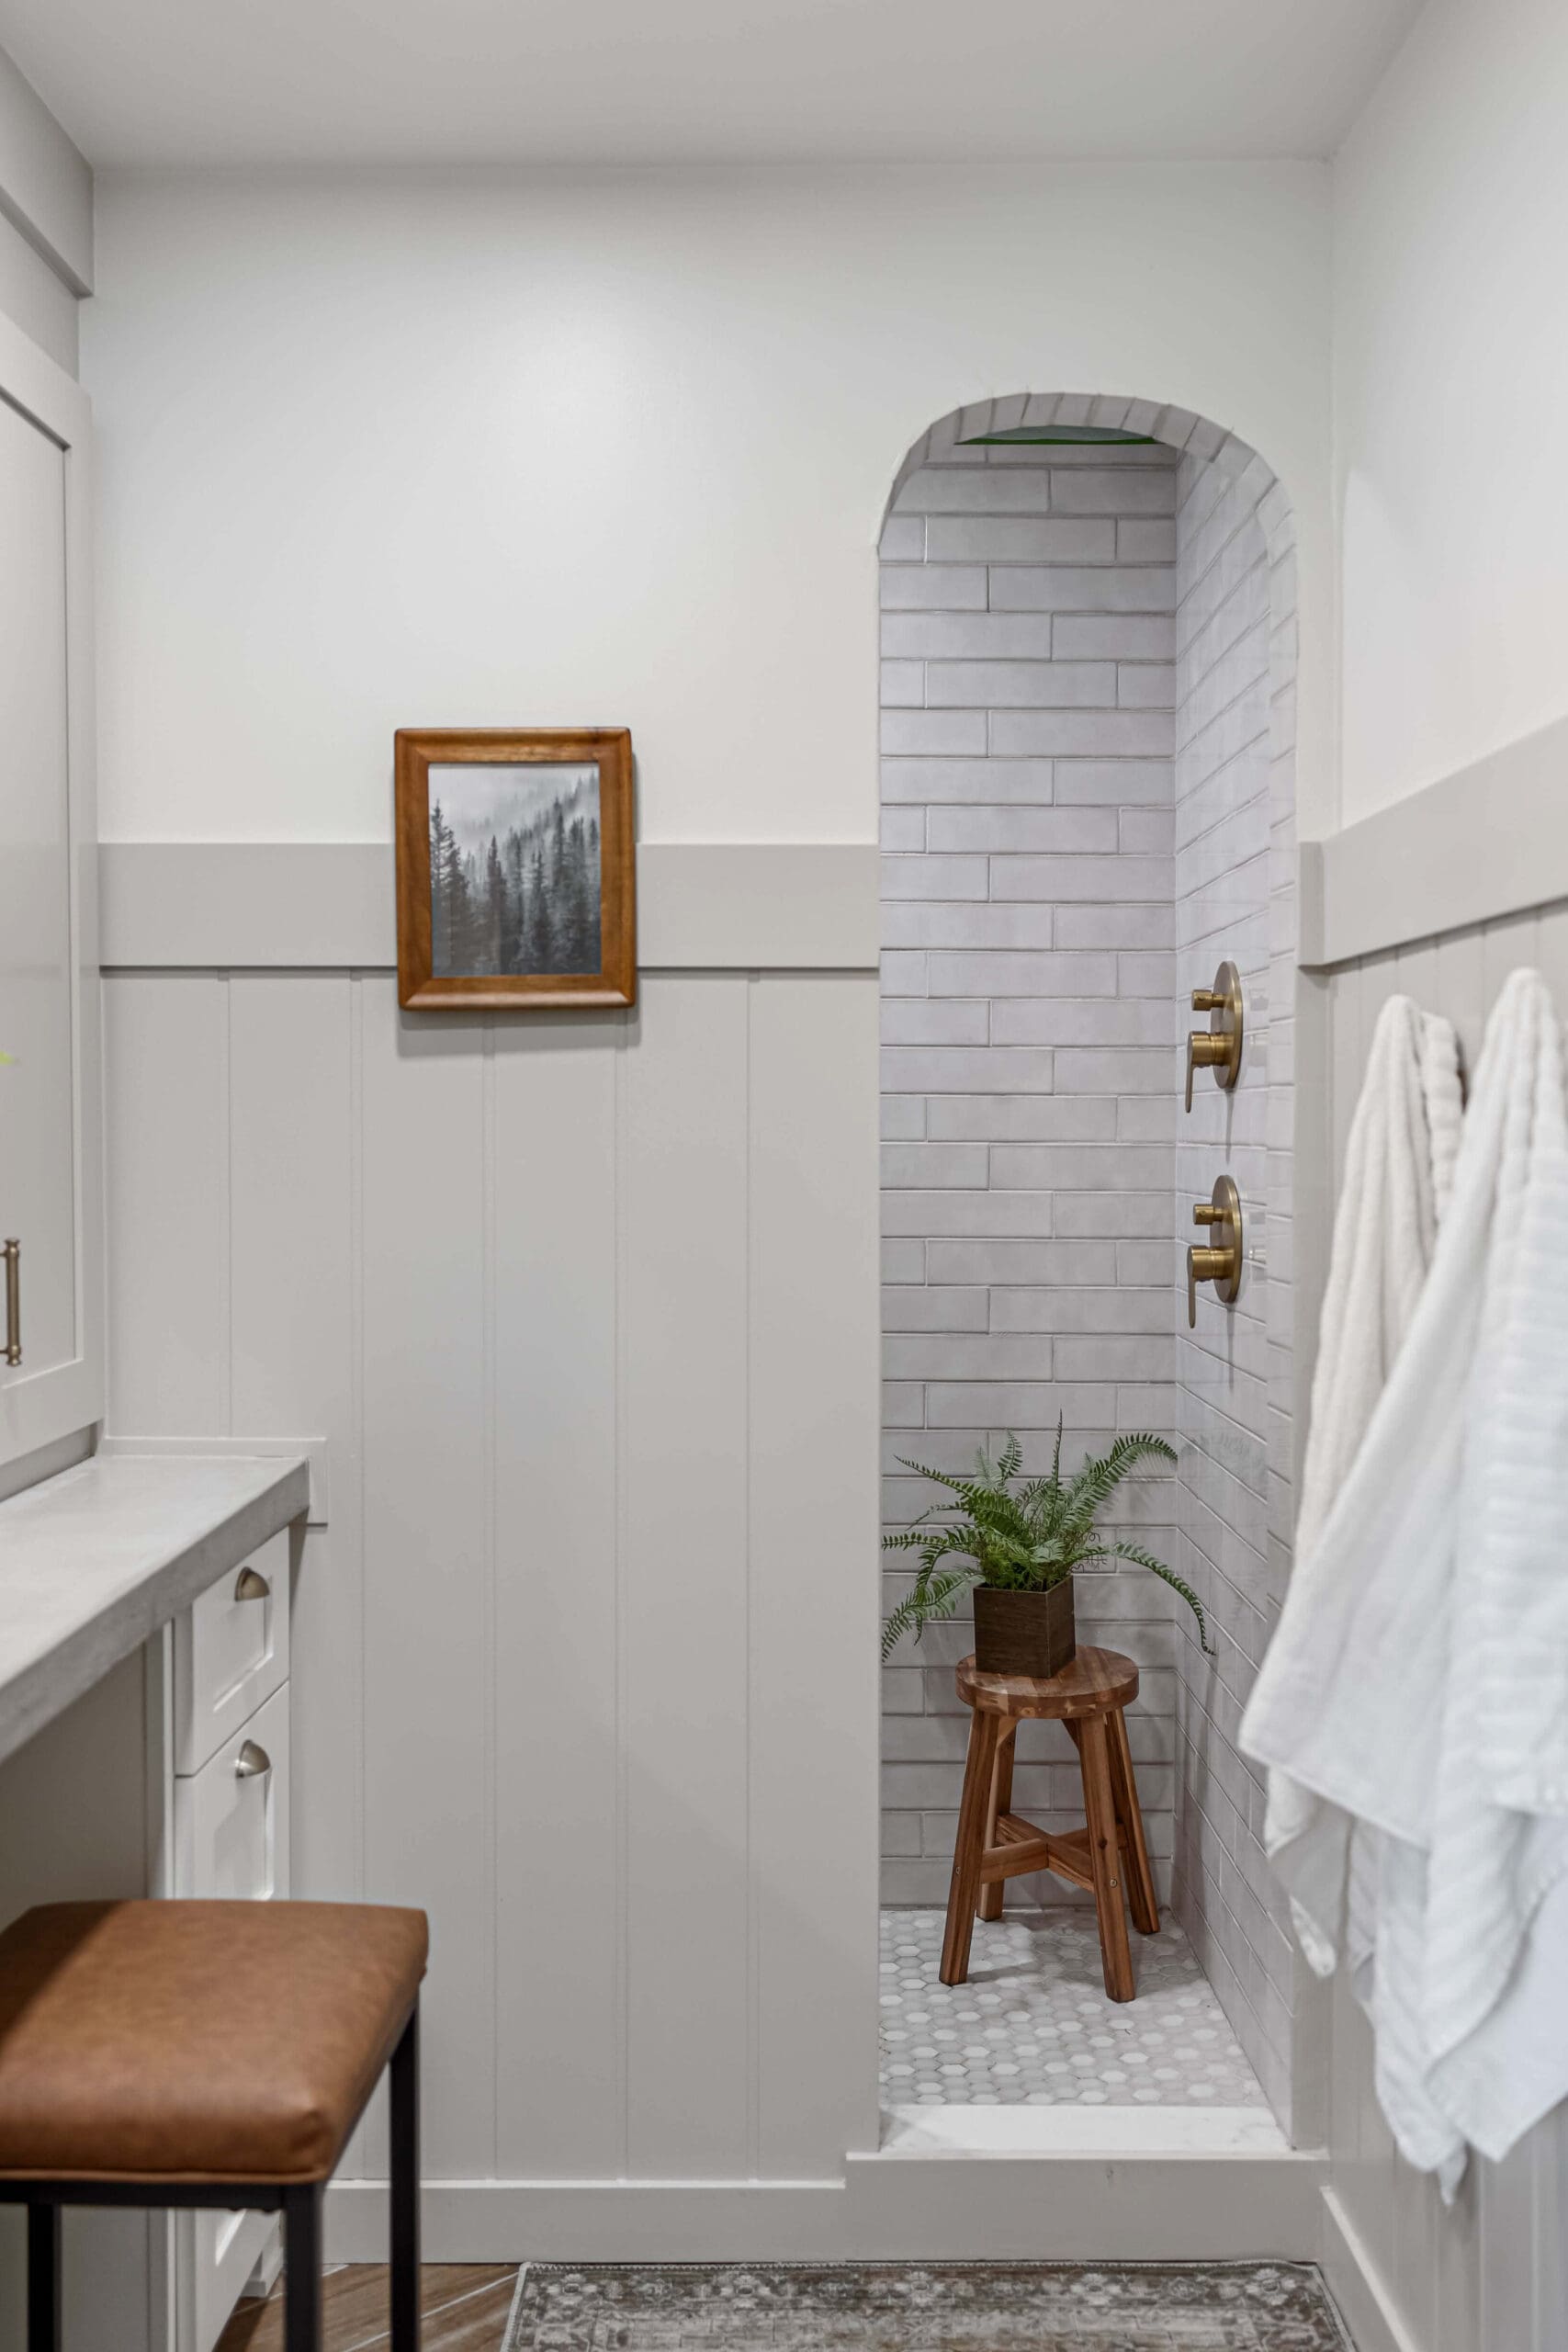
Table of Contents
- Tools for Installing Shiplap Panels
- Materials to Create a Vertical Shiplap Wall
- How to Cut Vertical Shiplap Panels with Clean Edges
- How to Install Vertical Shiplap Panels in a Bathroom
- Baseboard and Trim Tips for Vertical Shiplap Walls
- How to Prep Vertical Shiplap for Paint
- How to Paint Vertical Shiplap Walls for a Smooth Finish
- Bathroom Before and After: Finished Vertical Shiplap Wall Reveal
- 📌 Save this Project for Later
- DIY Mudroom Bench and Storage FAQ
Tools for Installing Shiplap Panels
- Tape measure
- Circular saw
- Multi-tool
- Brad nailer
- Drill
- Stud finder
- Table saw
- Caulk gun
- Handheld sander
- Paintbrush
- Foam roller
Materials to Create a Vertical Shiplap Wall
- Shiplap panels
- Baseboard
- PVC trim
- Bondo
- Caulk
- Paint (I used this color with this paint)
How to Cut Vertical Shiplap Panels with Clean Edges
If you’ve been following me for a while, you might remember the shiplap backsplash I did in my kitchen. For that project, I used individual boards, but for my vertical shiplap walls, I opted for 4×8 shiplap panels. They cover more space at once, making installation much faster.
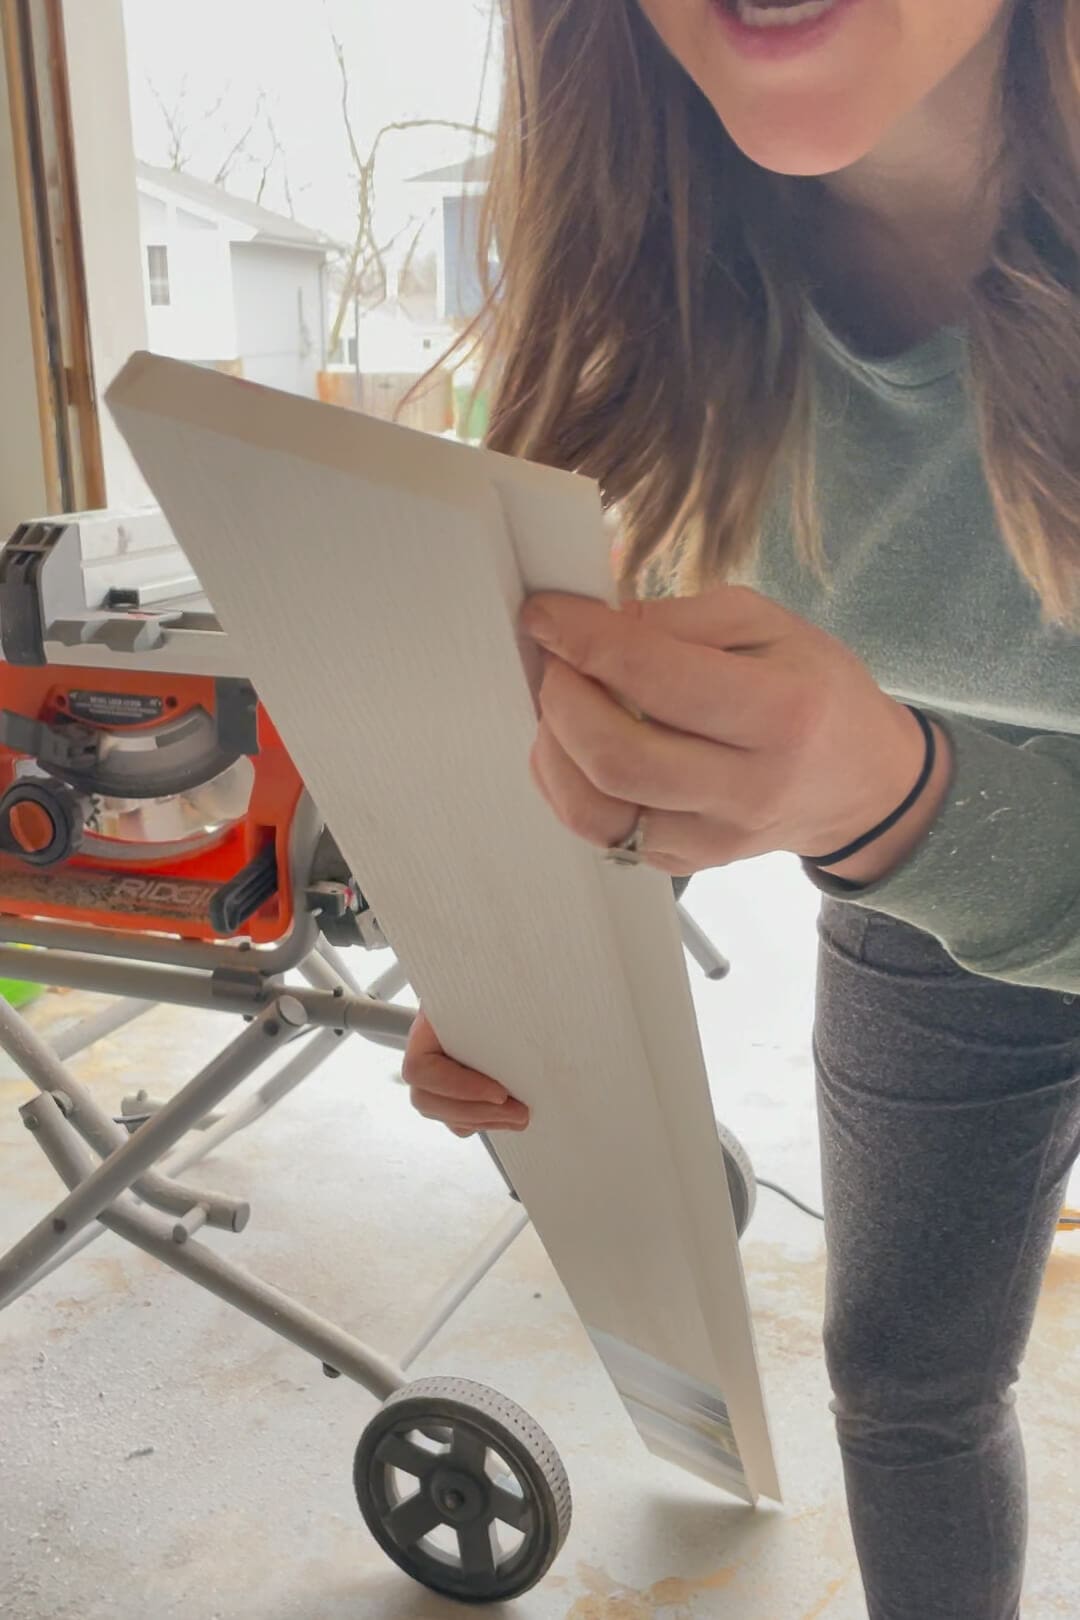
Since the panels were taller than I needed, I had to trim them down. Wrestling a big, floppy sheet of wood through a table saw alone? Not happening. Instead, I used a circular saw with a straight edge as a guide for clean cuts. For outlet and light switch cutouts, my multi-tool was a lifesaver.


How to Install Vertical Shiplap Panels in a Bathroom
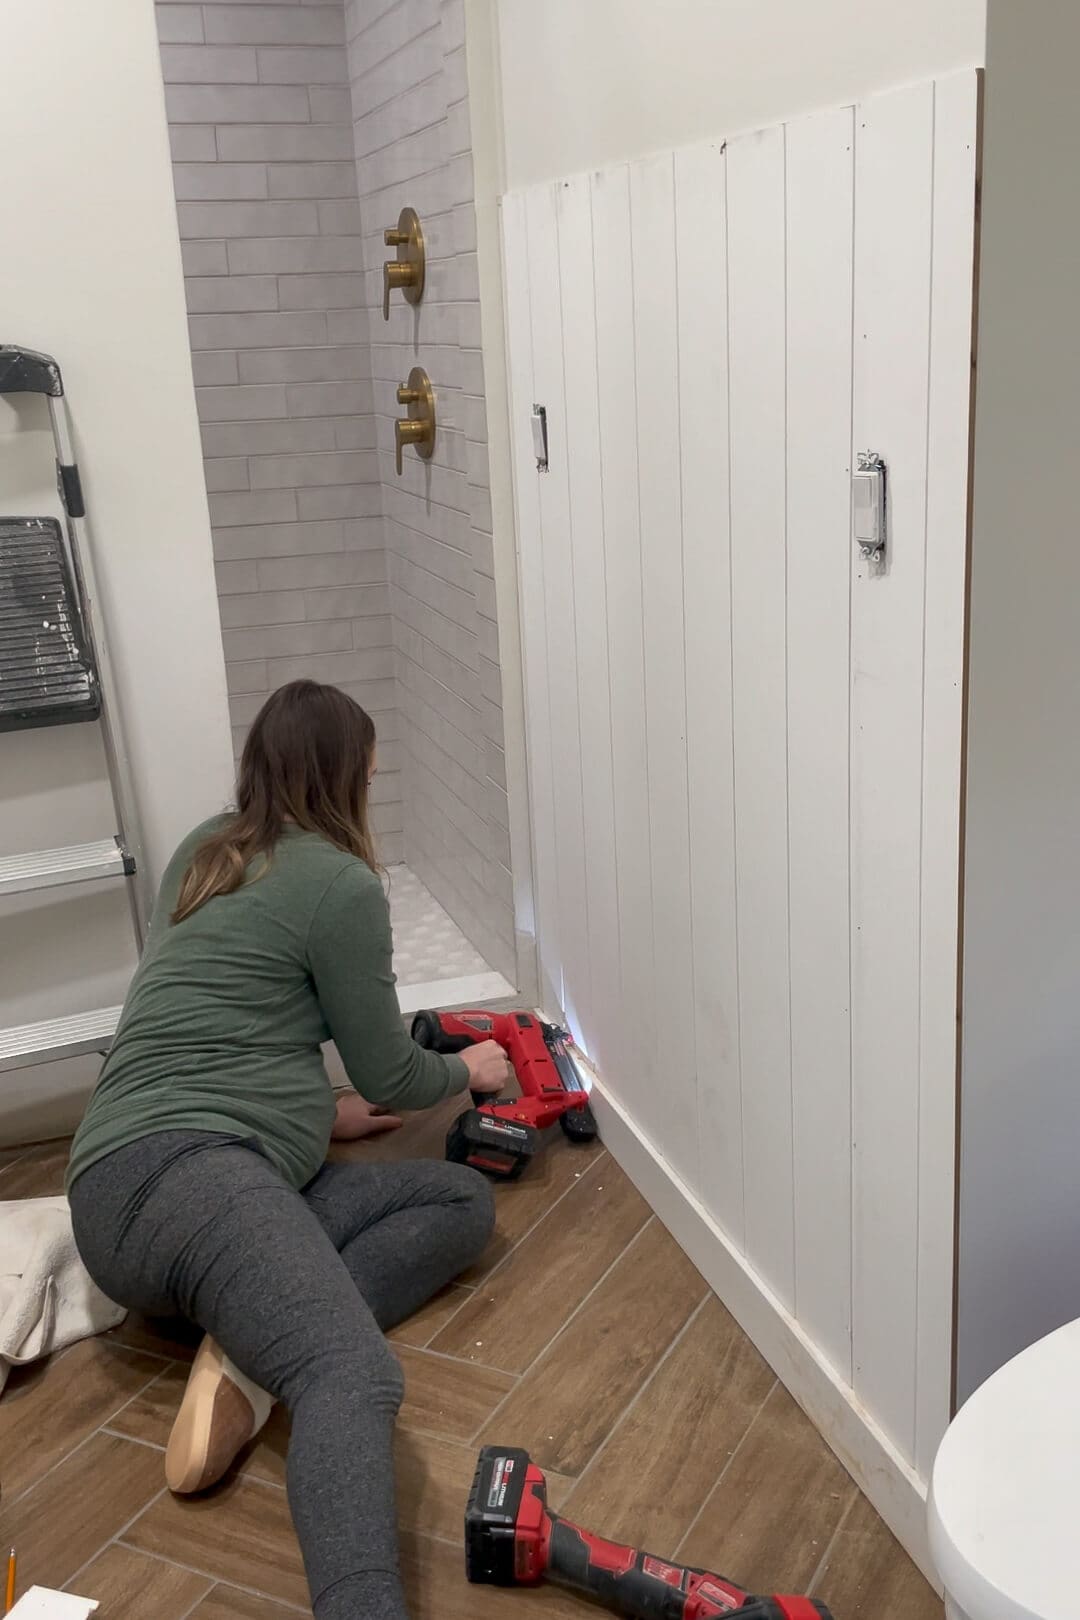
Once everything was cut to size, it was time to install! Using a stud finder, I marked my studs – an essential step since you don’t want these panels secured to just drywall. Then, with my brad nailer, I attached the panels securely to the wall.

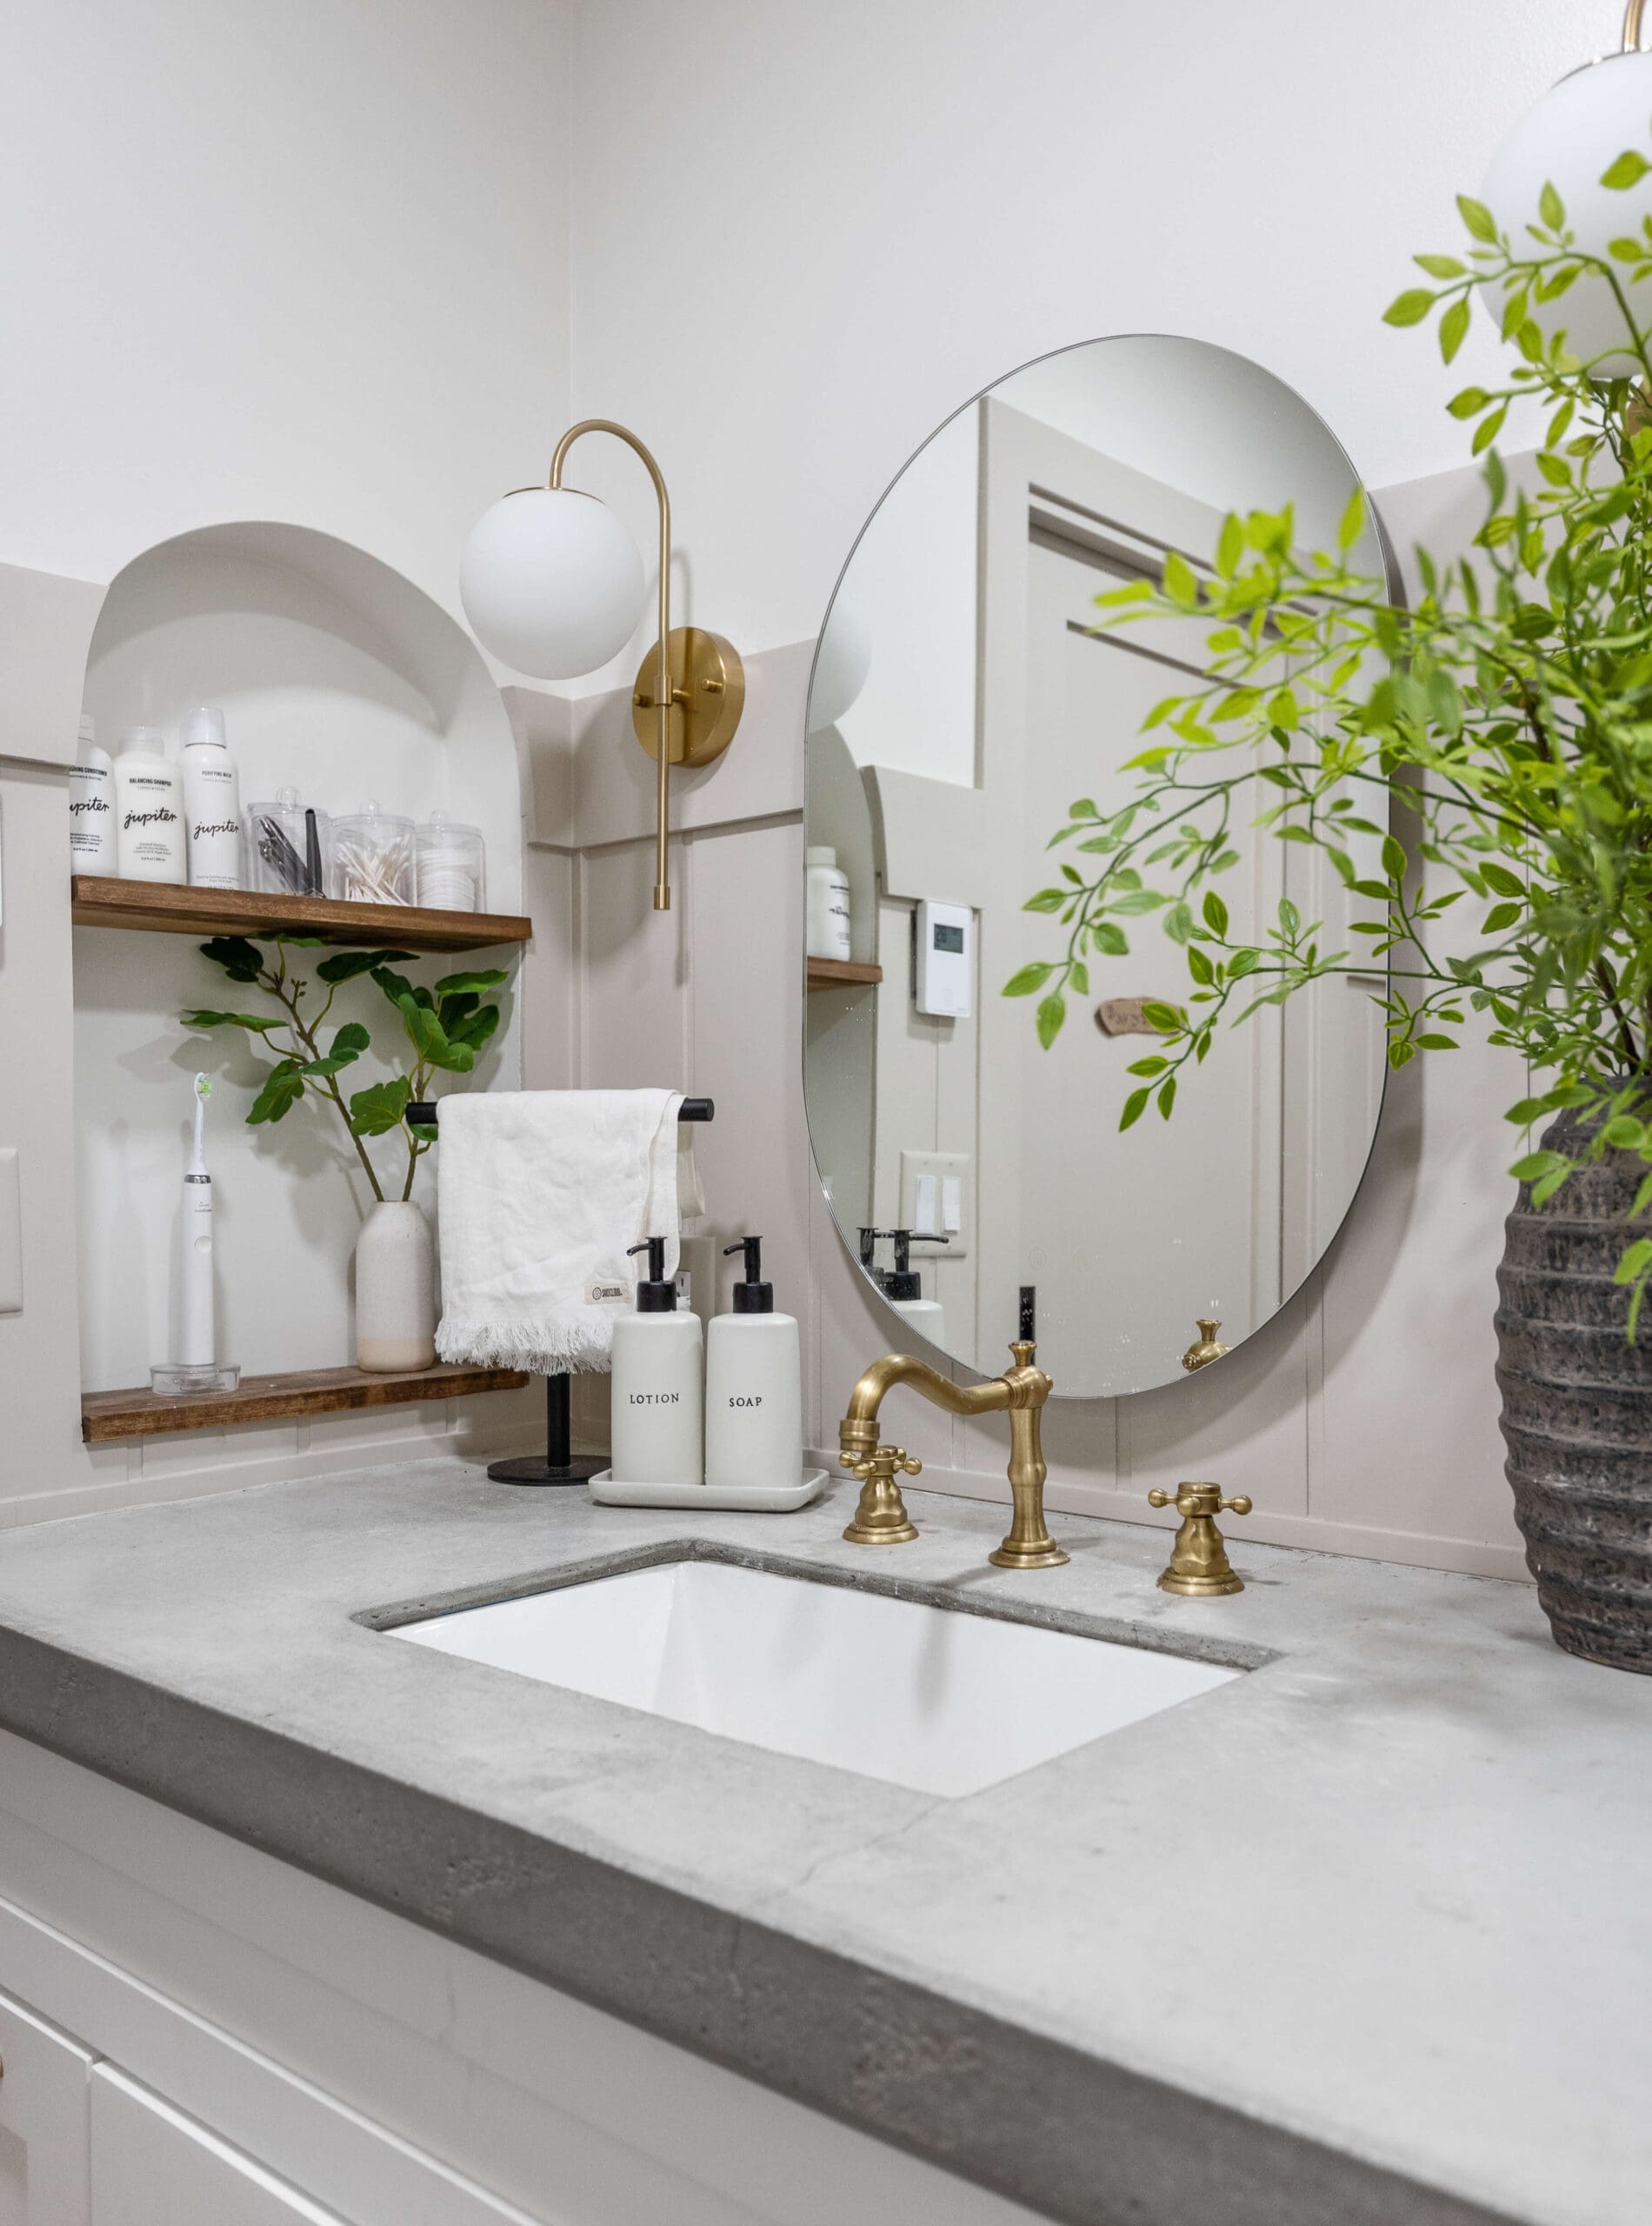
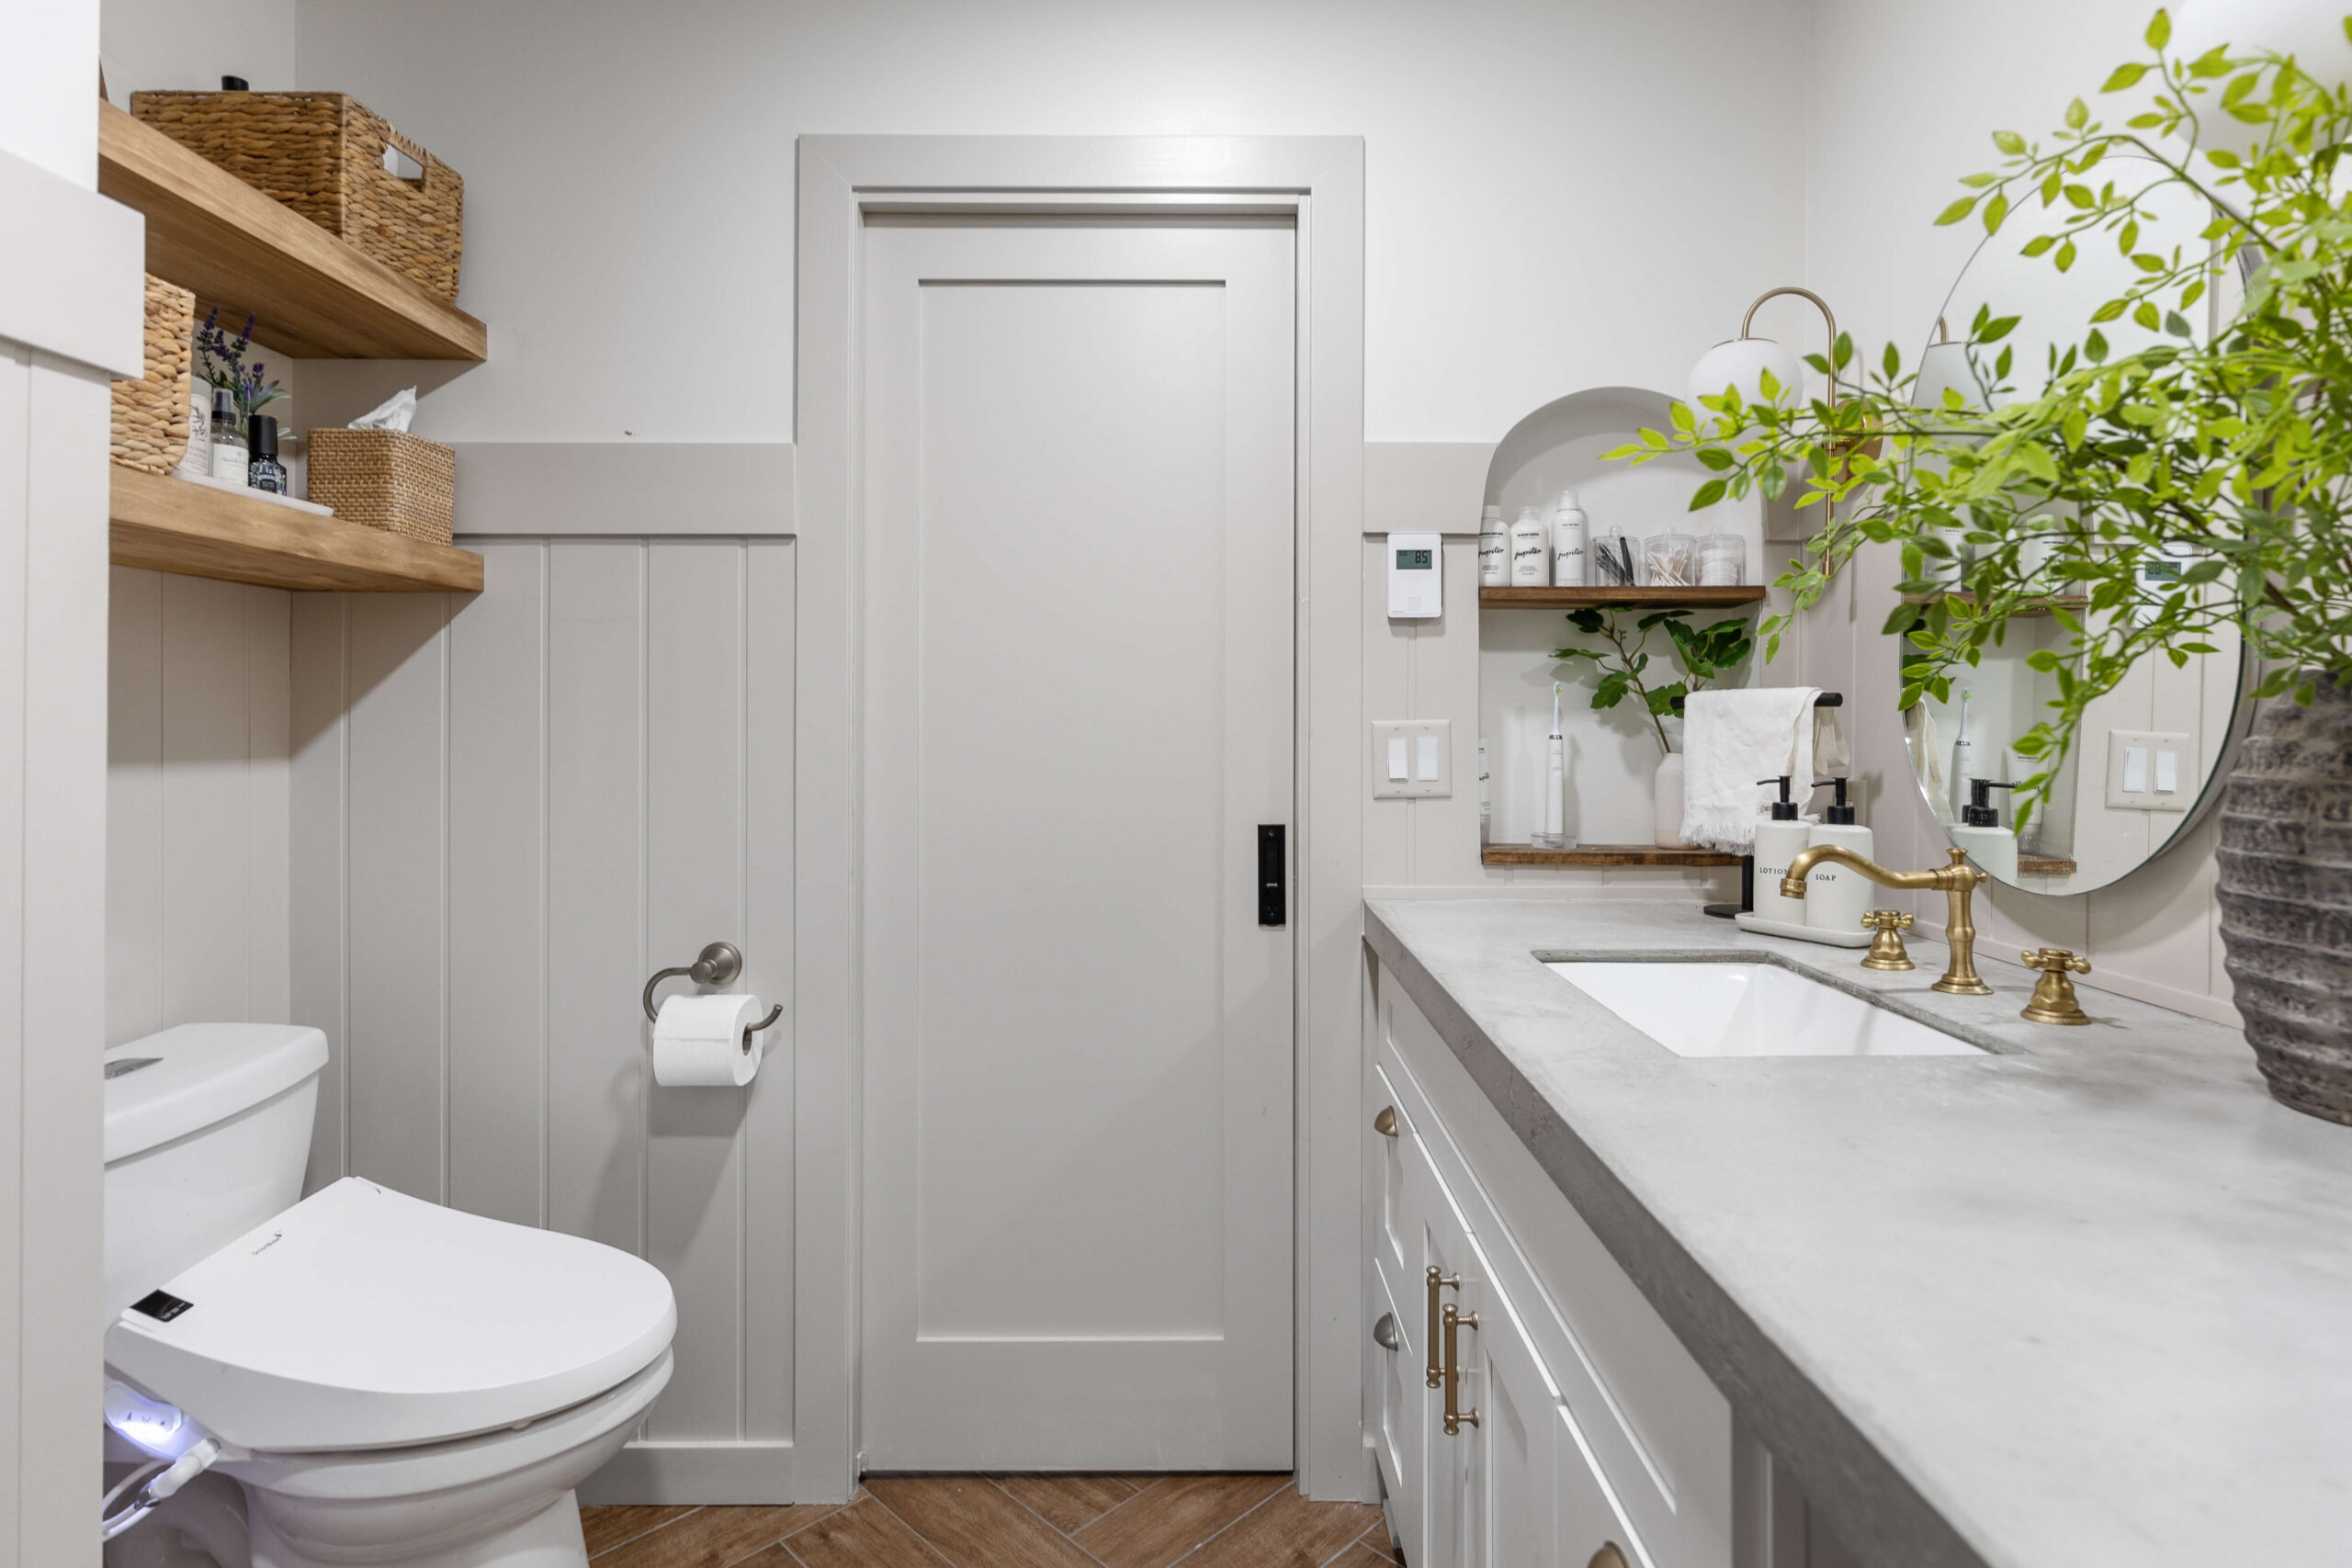
I continued the vertical shiplap walls throughout the entire bathroom, including behind the toilet and as a backsplash behind the sink.


Baseboard and Trim Tips for Vertical Shiplap Walls
After installing my first panel of vertical shiplap walls, I decided I wanted my baseboard to sit below the shiplap rather than in front. So, I used my multi-tool to trim the bottom of the panels where needed.
For the rest of the room, I installed the baseboard first, then placed the shiplap panels on top – much easier that way!

For the top cap, I wanted the trim to cover the shiplap edge rather than sit on top. Using PVC trim, I cut a small channel with my table saw so the trim could fit over the shiplap while sitting flush against the wall. Once cut, I secured it with my brad nailer.
Want to see what it looks like when trim sits directly on top? Check out my coat rack wall or the beadboard in our half-bath for that approach!

How to Prep Vertical Shiplap for Paint
Once my vertical shiplap walls were installed, I filled every seam and nail hole with Bondo. It’s super durable and makes seams disappear – but fair warning, sanding Bondo is a workout! I used my handheld sander hooked up to the shop vac to control dust, and for tight spots, my multi-tool came in handy again.


After caulking all the edges where the trim meets the shiplap, it was time for paint!
How to Paint Vertical Shiplap Walls for a Smooth Finish
I know some people swear by a paint sprayer, but when it comes to vertical shiplap walls, I prefer a paintbrush to get into the grooves, followed by a foam roller to smooth everything out. Just be sure to use high-quality paint like Sherwin Williams Urethane Trim Enamel for a durable finish.


Bathroom Before and After: Finished Vertical Shiplap Wall Reveal
Can we talk about how good these vertical shiplap walls turned out? I’m so glad I went with Sherwin Williams Accessible Beige – one of my go-to neutral paint colors. It’s warm, inviting, and just the right tone.
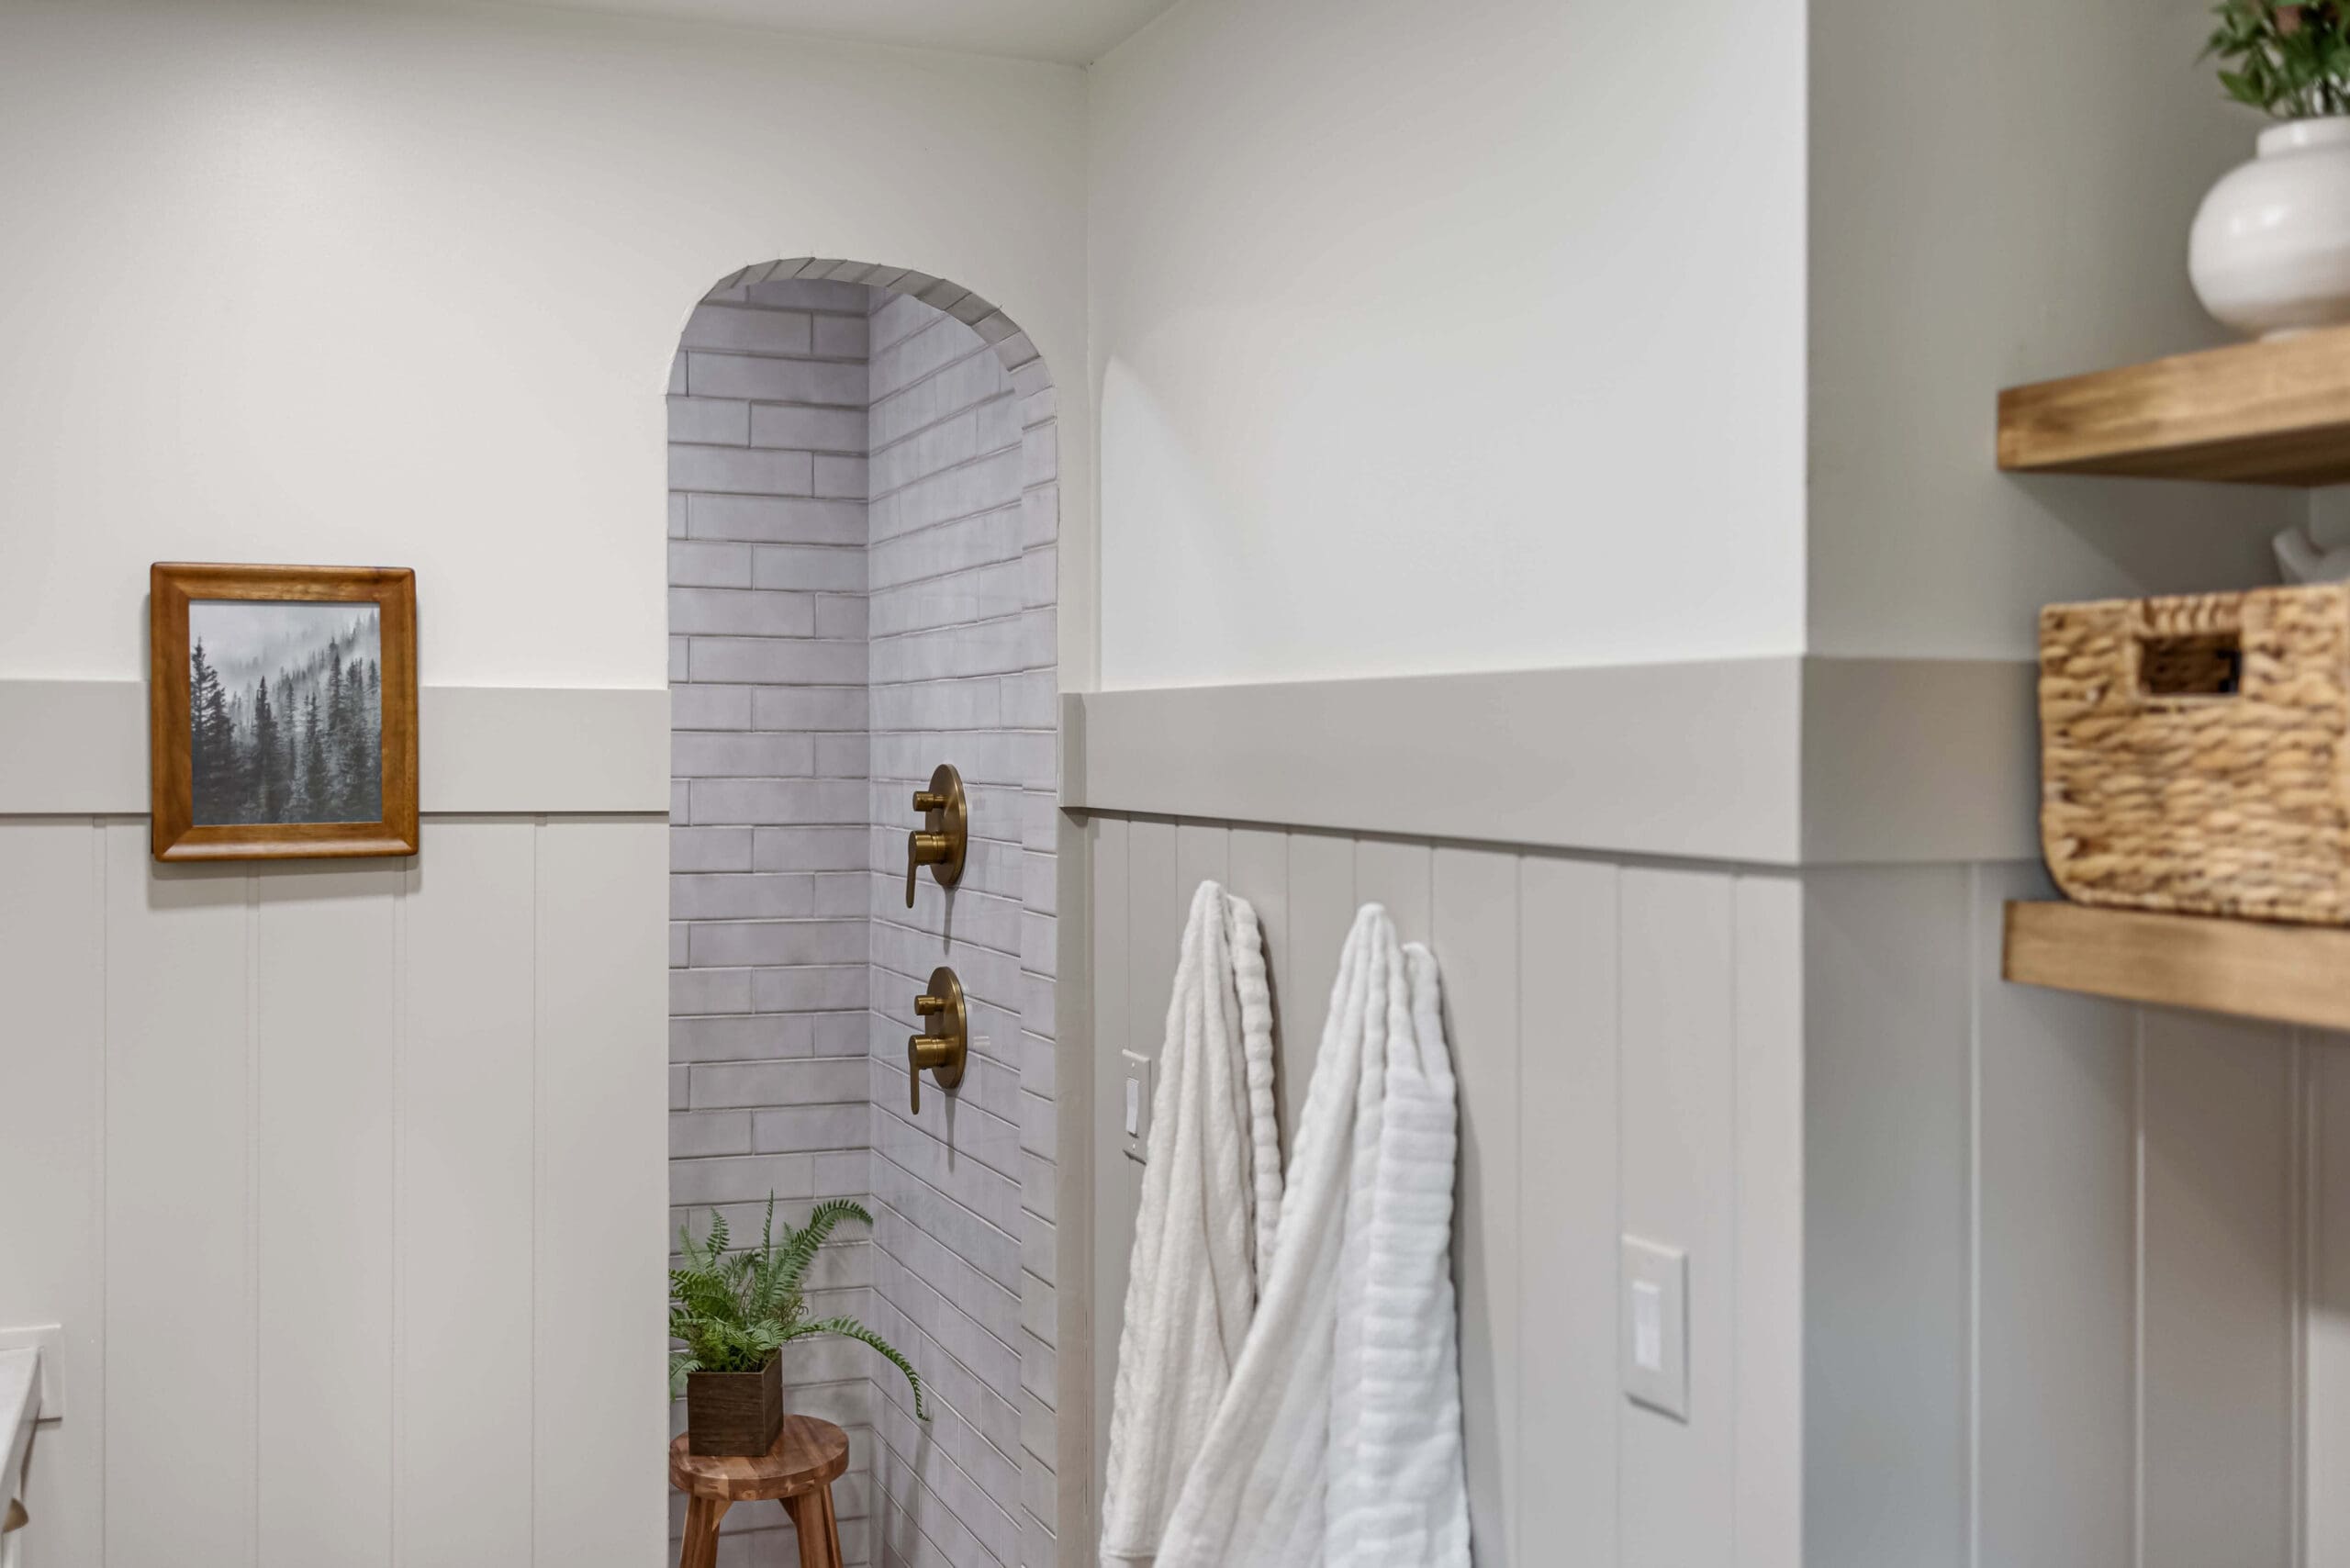
The vertical shiplap walls even made the perfect backsplash behind my mirrors. Where it meets my DIY concrete countertops, I added a small piece of PVC trim and sealed everything with silicone for a clean, finished look.
This bathroom remodel was a labor of love. From the heated herringbone floors to the custom sit-down vanity (made from a kitchen cabinet!) and the subway tile walk-in shower, every detail came together beautifully. It took time and effort, but I wouldn’t change a thing. Now, I get to enjoy this space every single day!
Thinking about adding vertical shiplap walls to your home? Let me know in the comments – I’d love to hear your plans!
📌 Save this Project for Later
DIY Mudroom Bench and Storage FAQ
Vertical shiplap walls create the illusion of higher ceilings and a more contemporary look. They also help prevent dust buildup on ledges, which can be an issue with horizontal shiplap.
Yes! You can install vertical shiplap walls by cutting them to fit above your existing baseboards. However, for a more seamless look, you can remove the baseboards first or install them after the shiplap panels.
You can do either, but for vertical shiplap walls, painting after installation allows you to fill nail holes and caulk seams for a seamless look. Use a paintbrush for grooves and a foam roller for smooth coverage.
