


DIY Counter Cabinet for Extra Bathroom Storage


Updated July 13, 2026
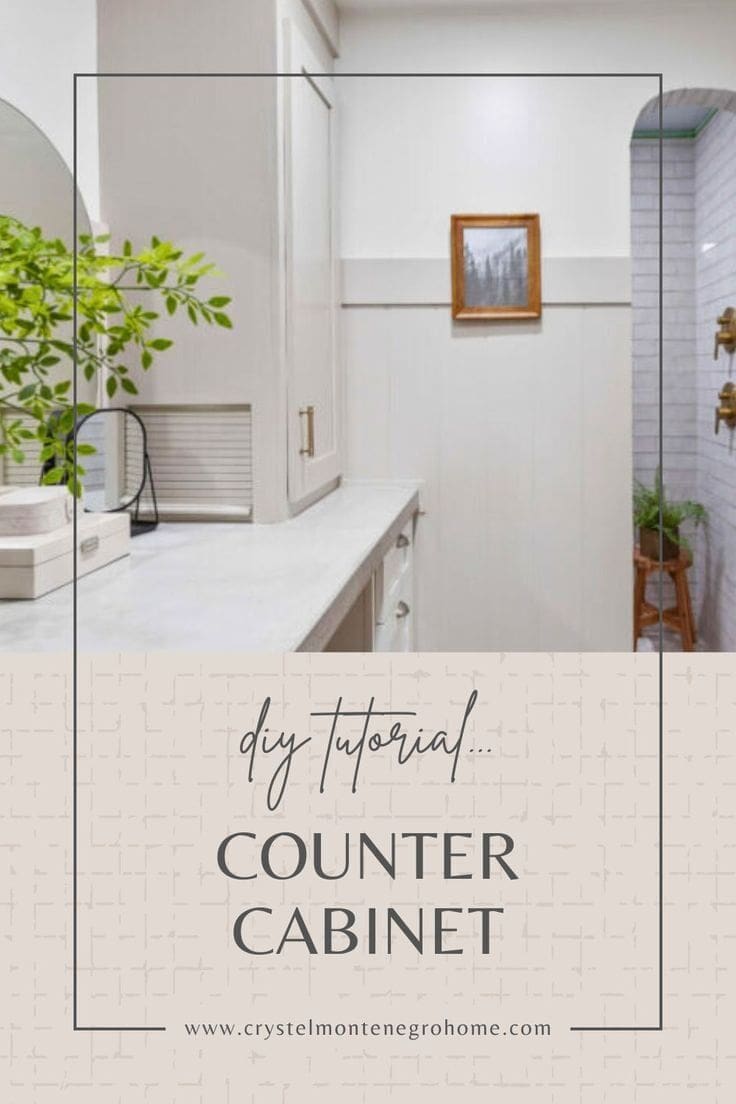
One thing about a bathroom – you can never have too much storage! When designing my sit-down vanity, I wanted to maximize every inch. So, I built a counter cabinet right on top, creating extra storage and a dedicated hair tool garage for my curling irons and blow dryer. Best part? This project is simple and totally doable. Keep reading for the details!
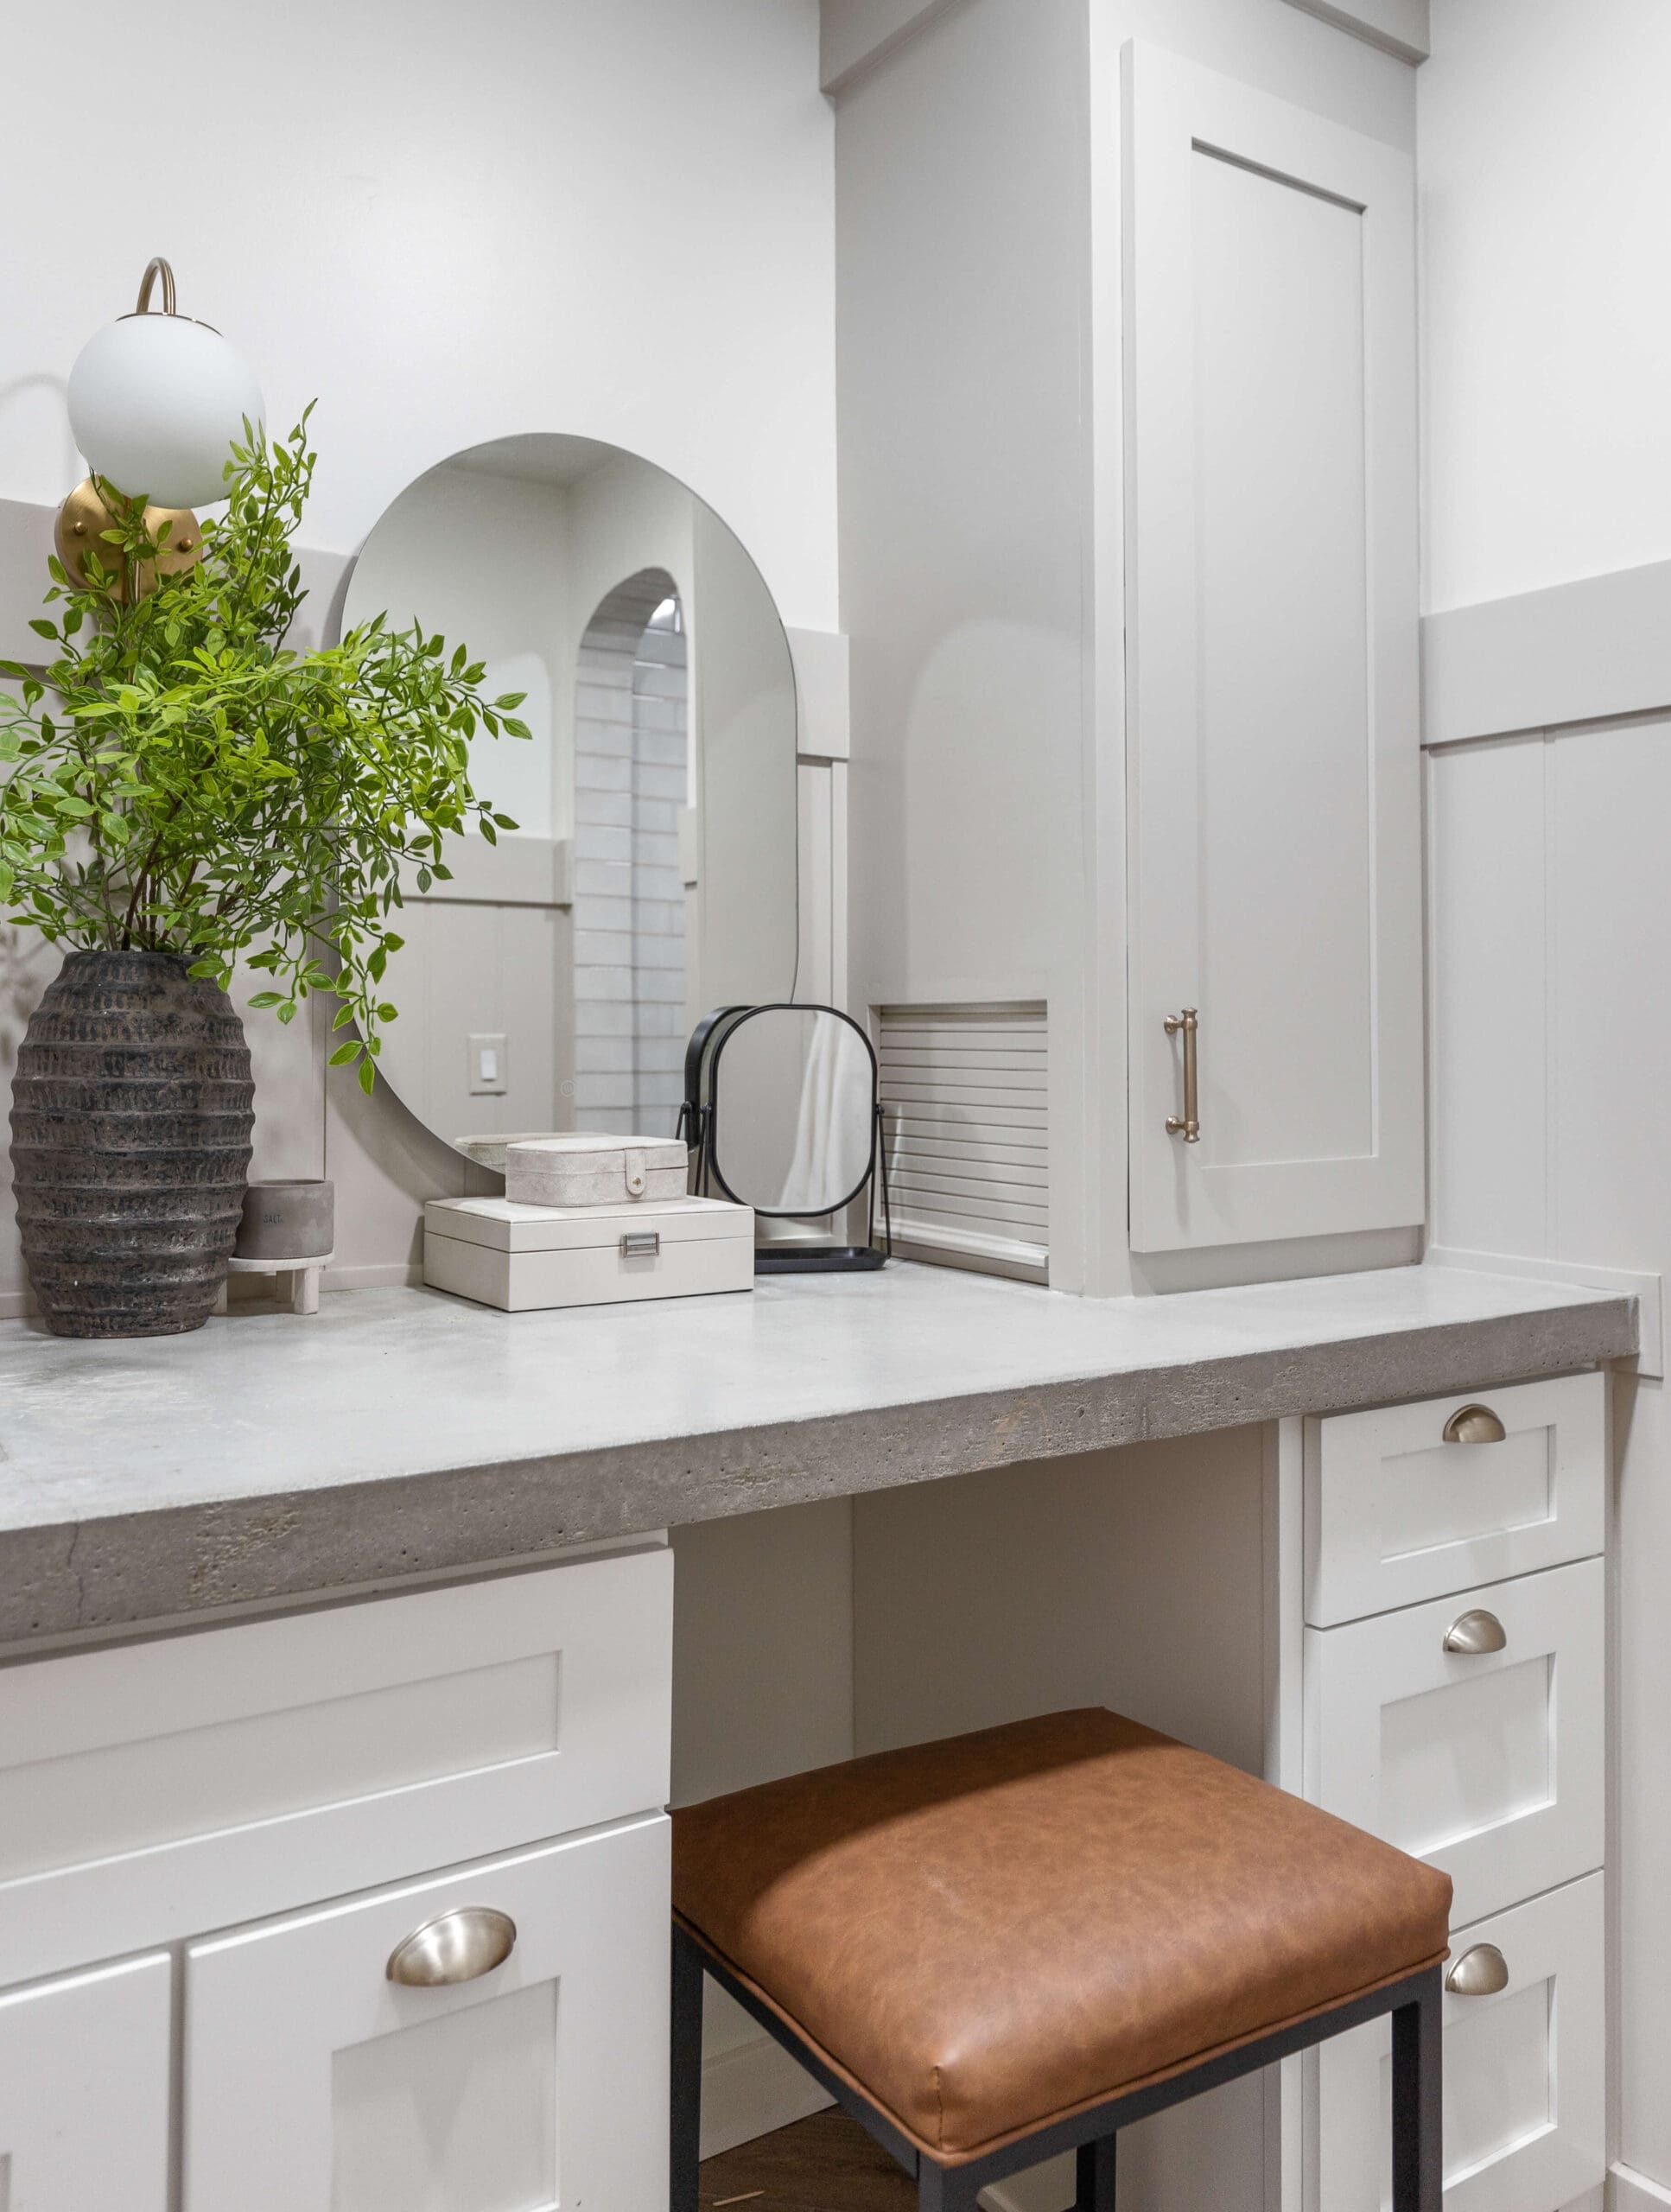
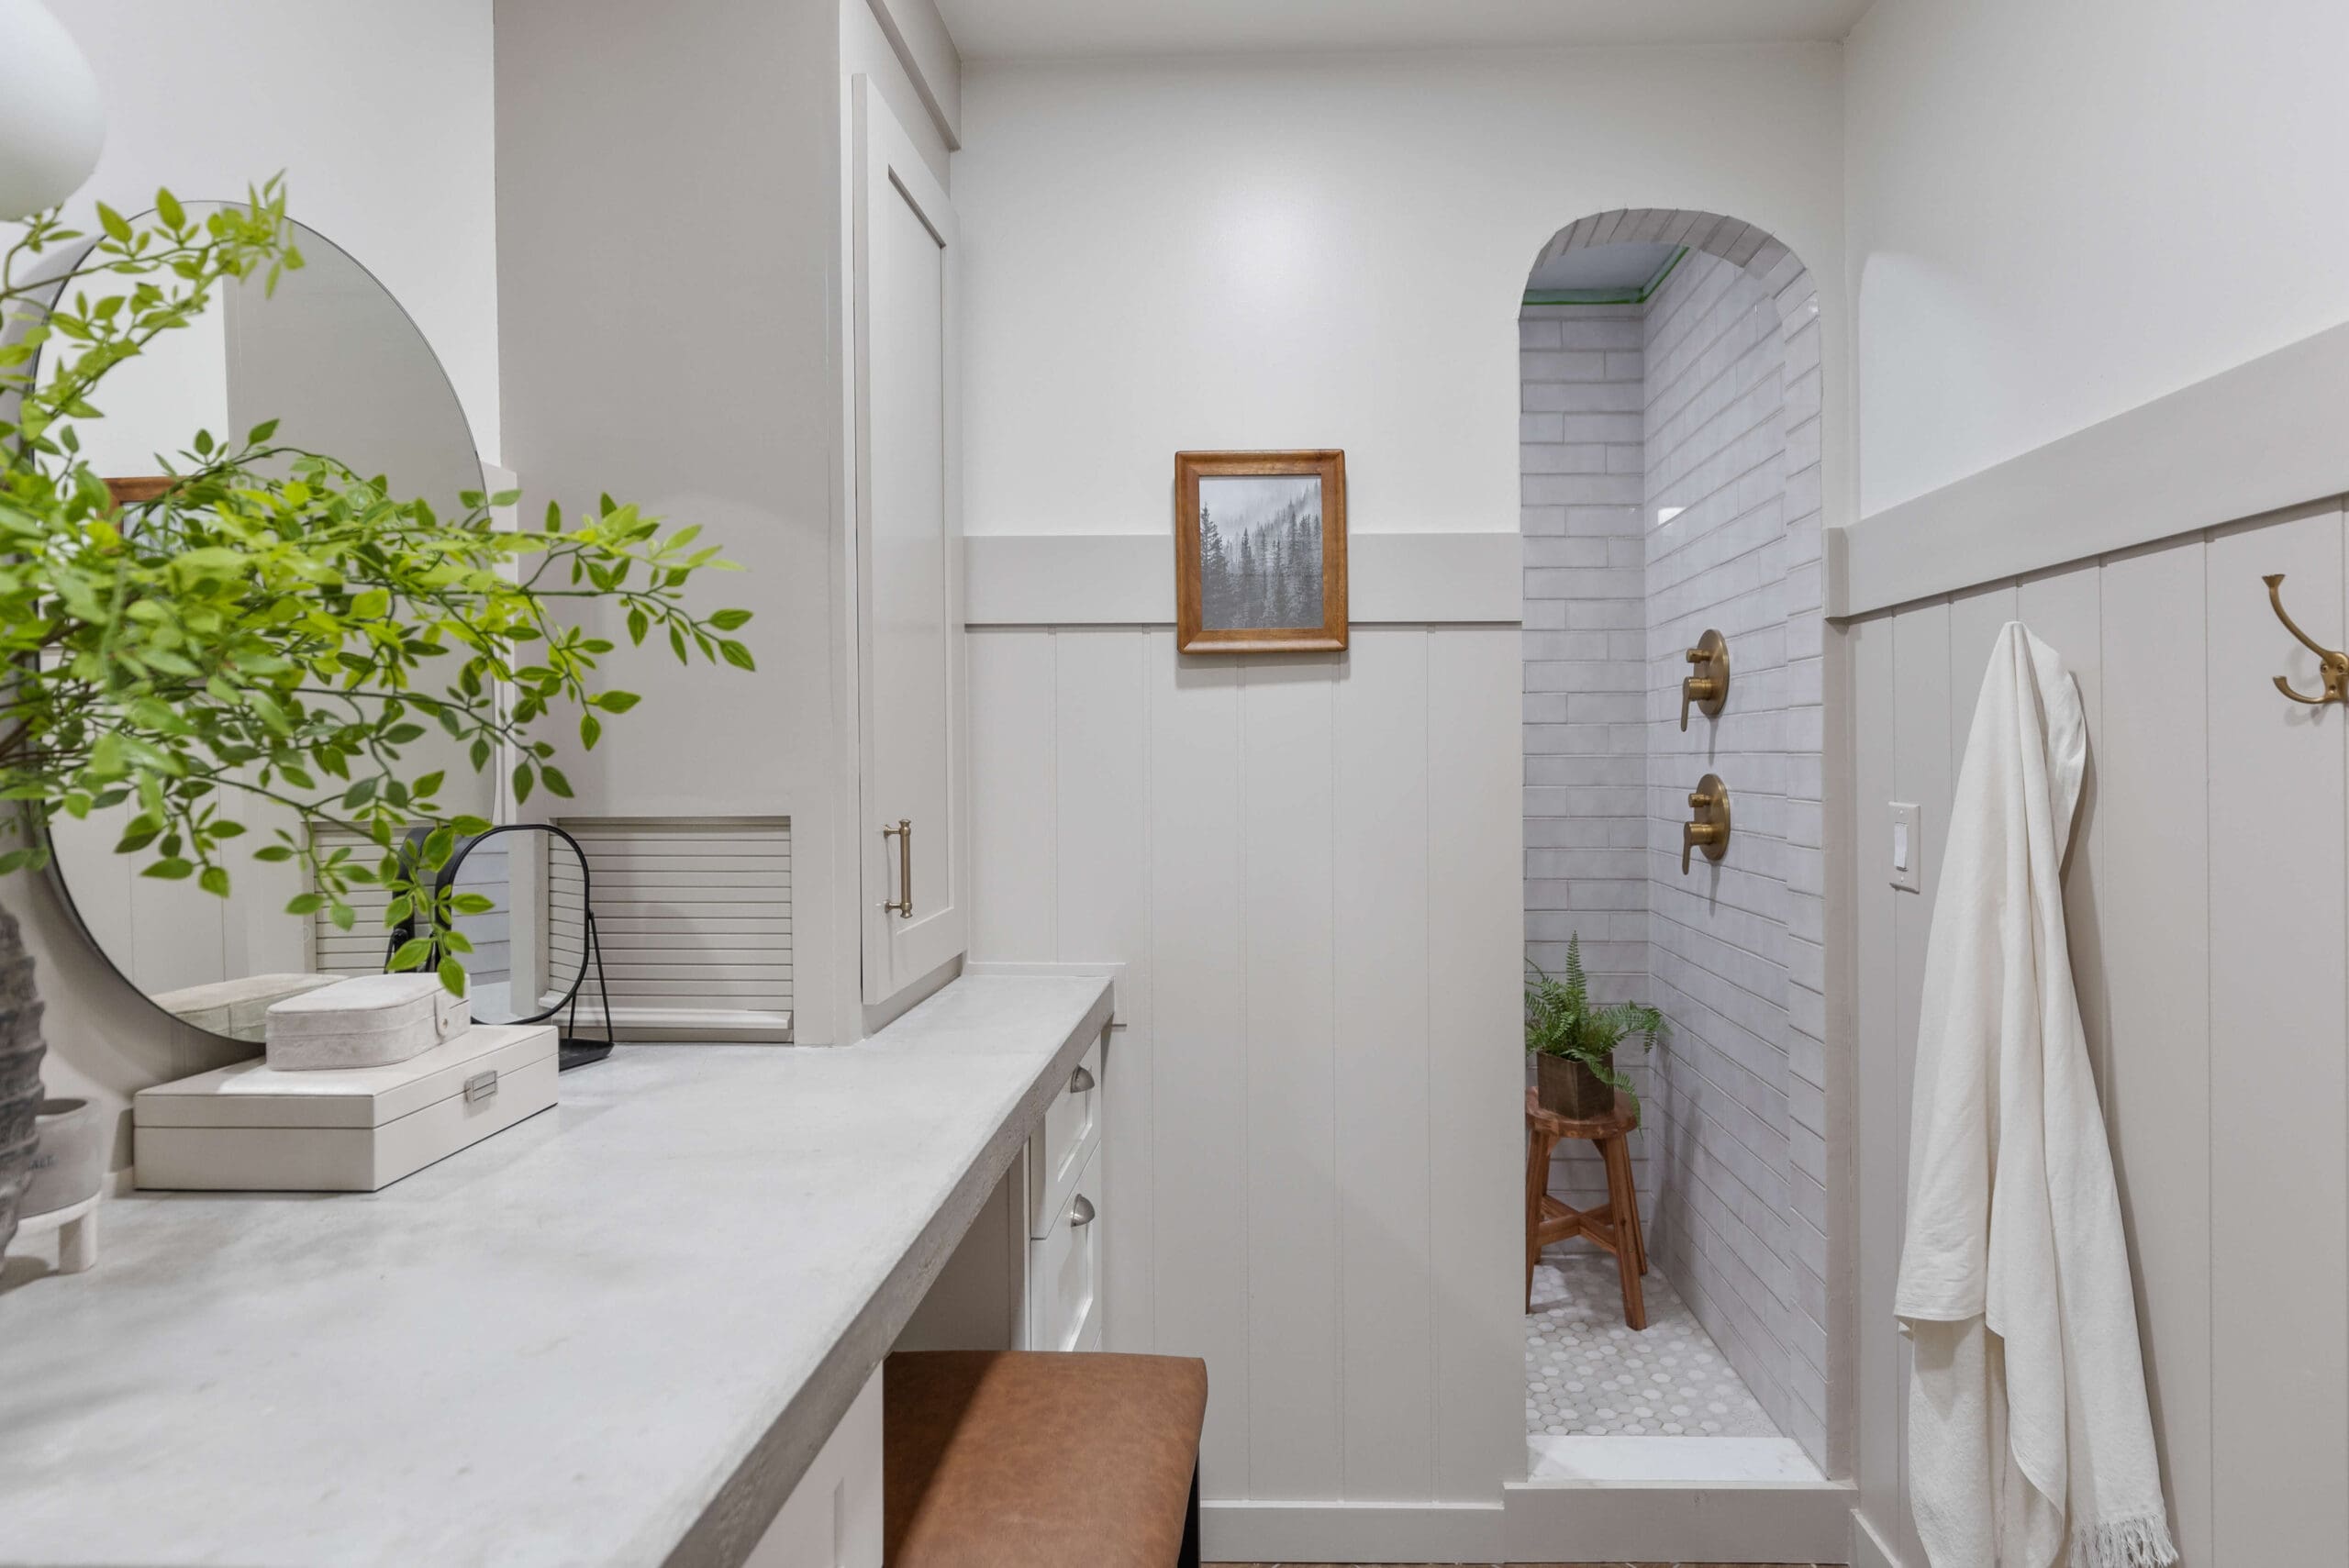
Table of Contents
- Tools for a DIY Bathroom Counter Cabinet
- Materials Needed for Custom Bathroom Cabinetry
- Step 1: How to Build the Frame for a Bathroom Counter Cabinet
- Step 2: How to Secure a Bathroom Counter Cabinet to the Wall
- Step 3: How to Build a Hidden Hair Tool Garage for Bathroom Storage
- Step 4: Trim and Face Frame for a Built-In Cabinet Look
- Step 5: Installing a Tambour Door for Easy Access
- Step 6: How to Use Edge Banding to Hide Plywood Edges
- Step 7: Painting Your DIY Bathroom Cabinet for a Seamless Finish
- The Reveal: Finished Bathroom Counter Cabinet with Hidden Storage
- 📌 Save This DIY Bathroom Cabinet Idea
- DIY Bathroom Cabinet FAQ: Building, Painting, and Storage Tips
Tools for a DIY Bathroom Counter Cabinet
Materials Needed for Custom Bathroom Cabinetry
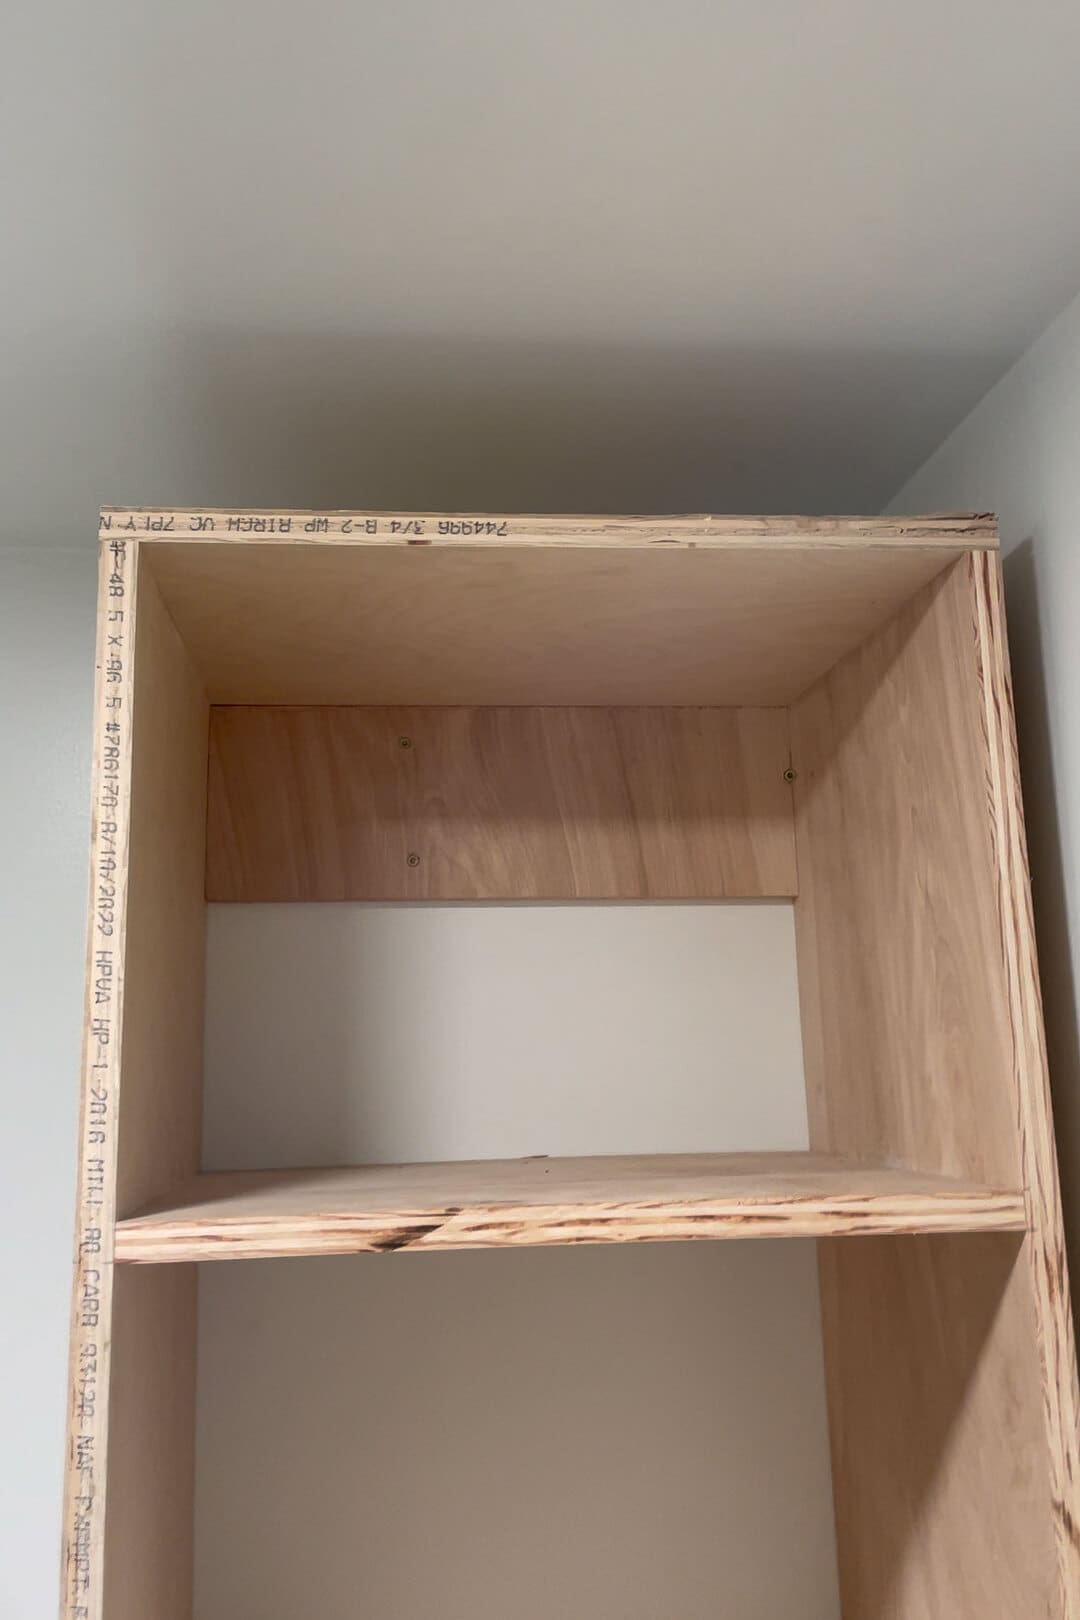
Step 1: How to Build the Frame for a Bathroom Counter Cabinet
I started by constructing the basic frame of the counter cabinet. To keep it simple, I opted for fixed shelves. rather than adjustable. Against the wall, I used screws and a drill; for the outward-facing side, I used a brad nailer – this left only tiny holes to fill later. Every joint got a dose of wood glue for extra strength.

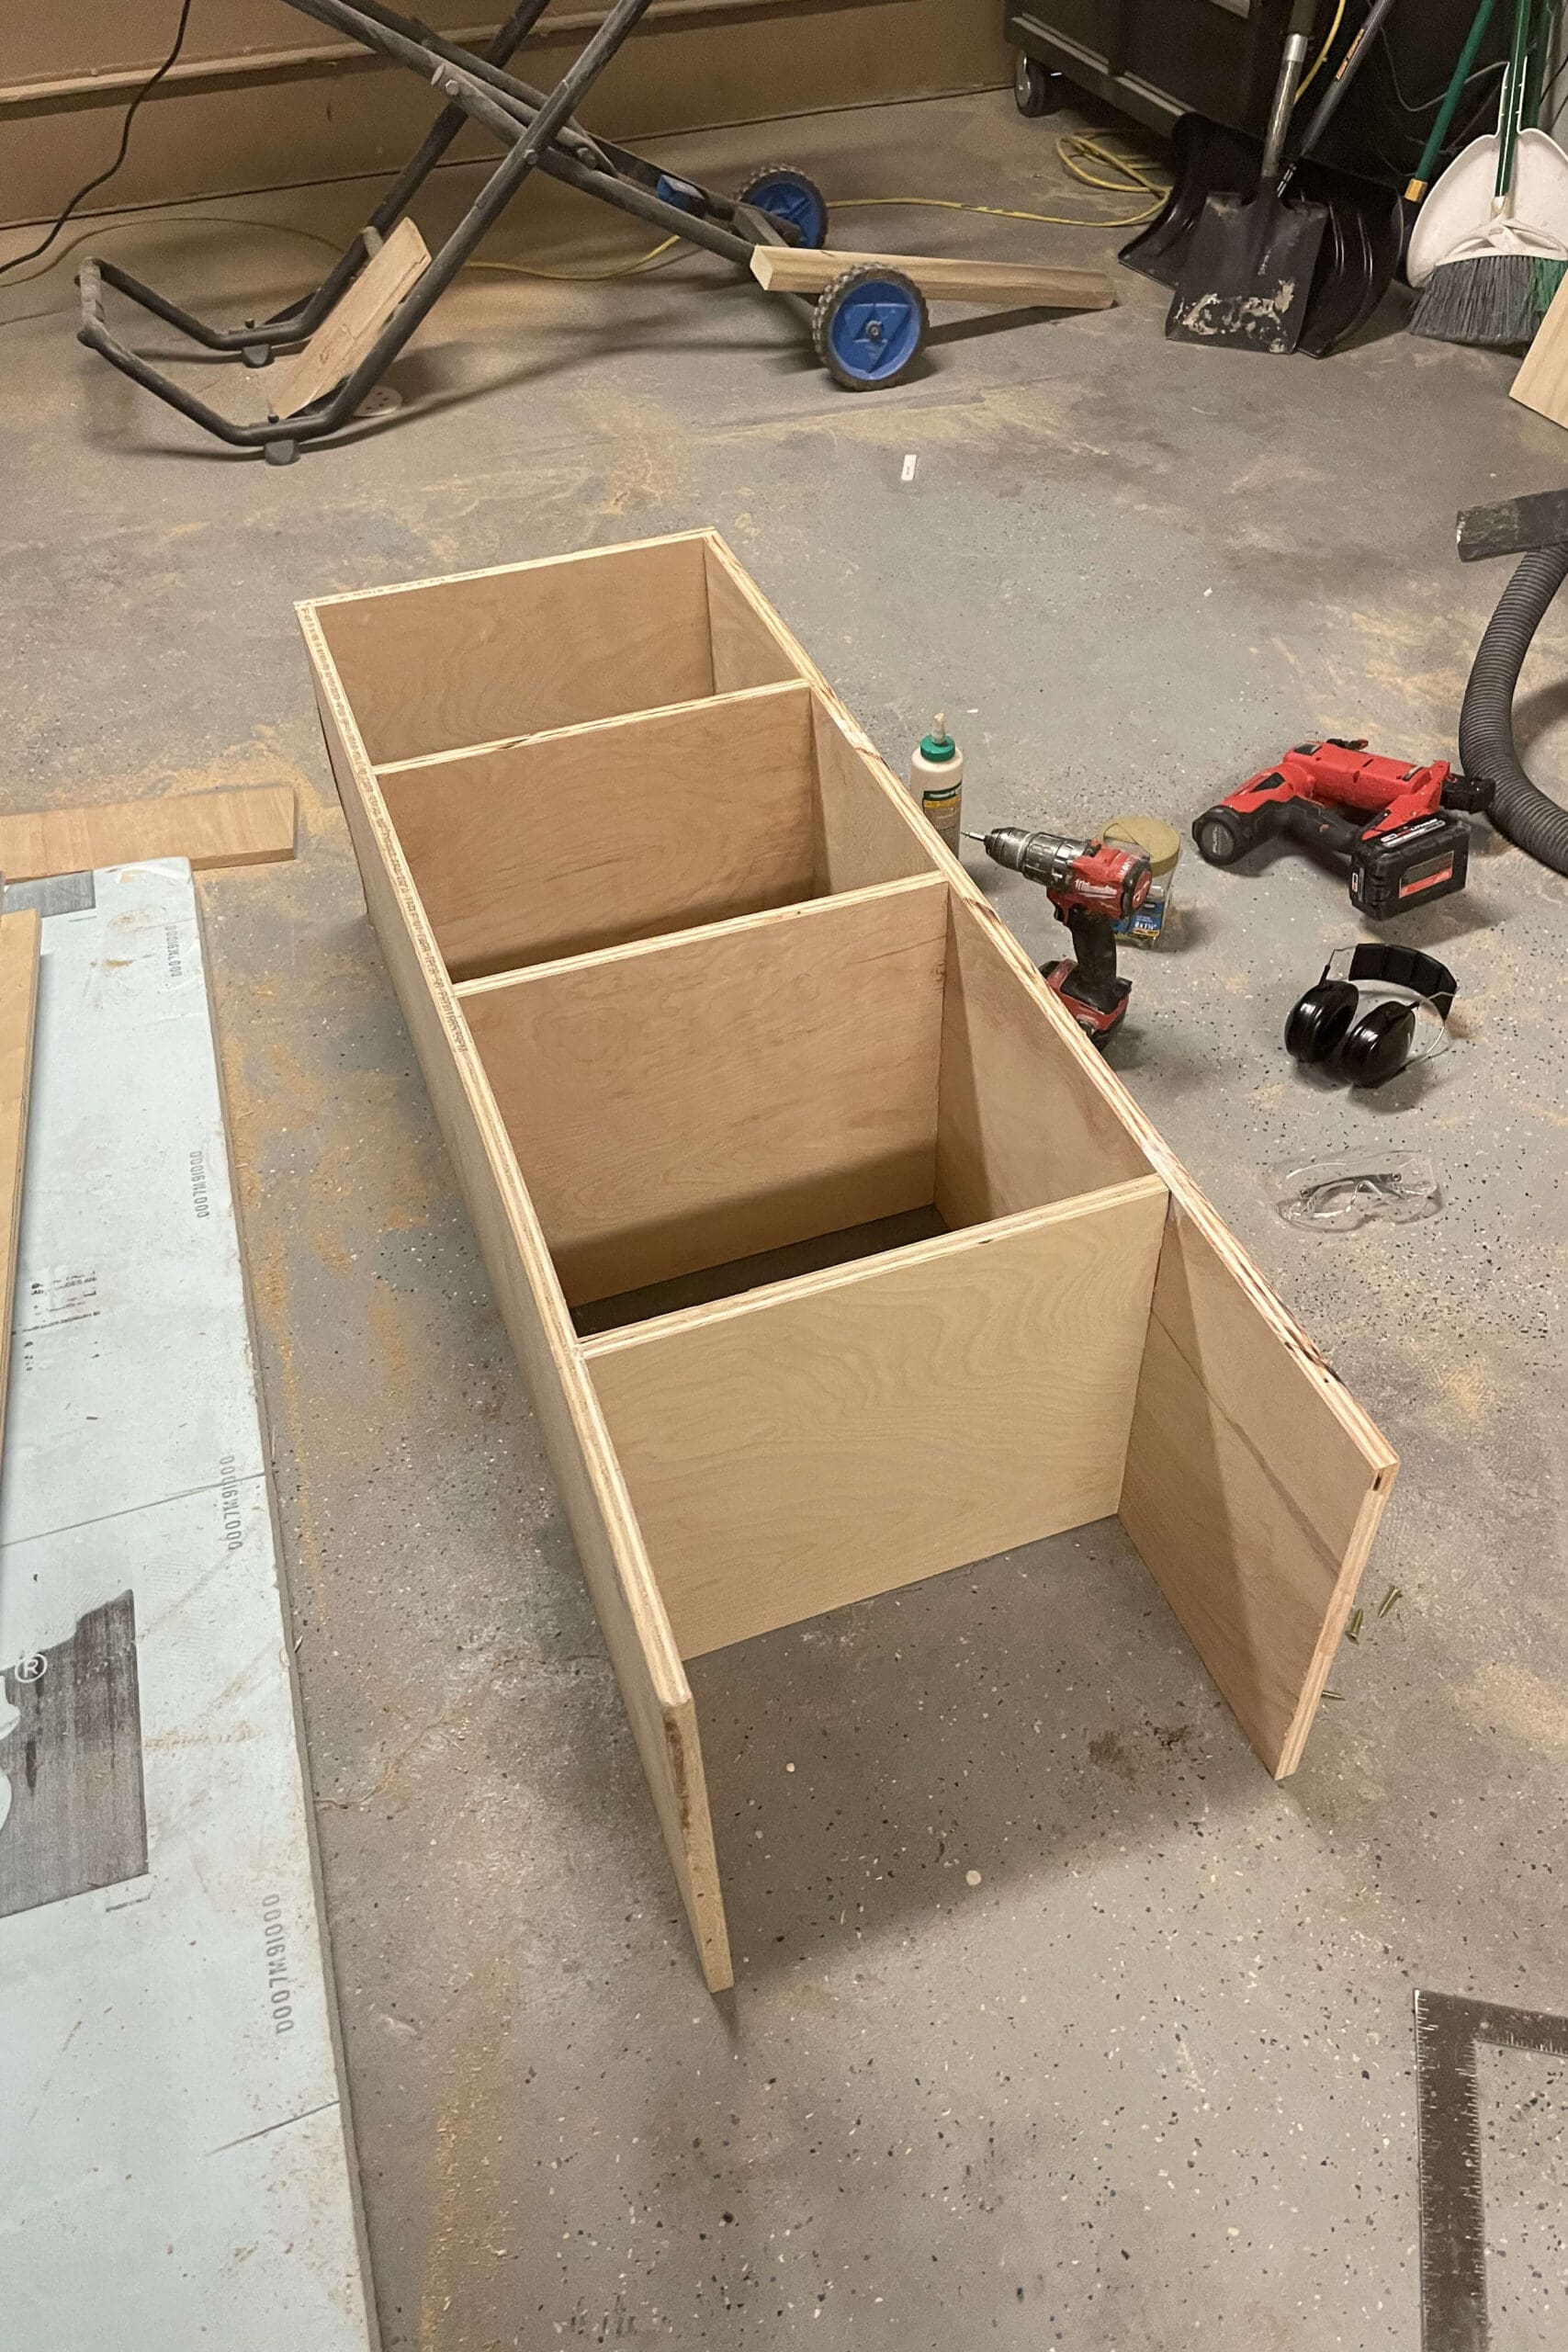
Next, I attached a small board to the back of the counter cabinet with screws – this acts as an anchor point to secure it to the wall.

Step 2: How to Secure a Bathroom Counter Cabinet to the Wall
To secure the counter cabinet in place:
- Locate the wall studs with a stud finder.
- Use screws to attach the cabinet to the studs in both the back and side walls.
Once secured, this counter cabinet isn’t going anywhere!

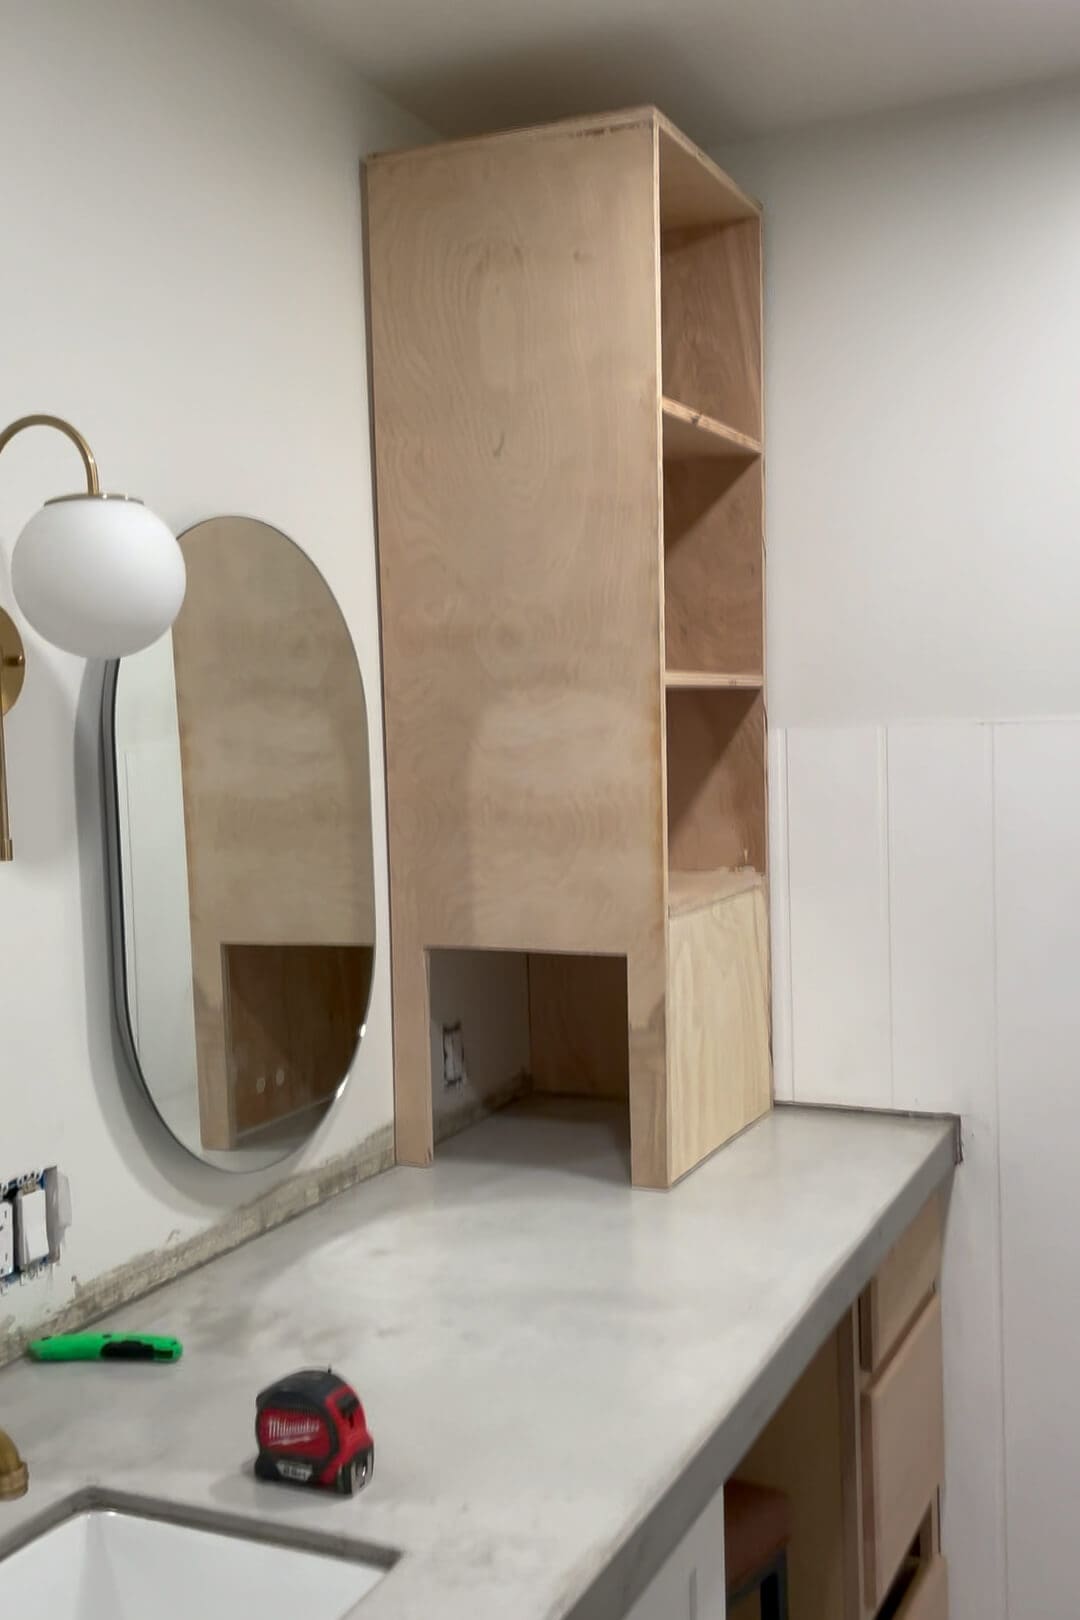
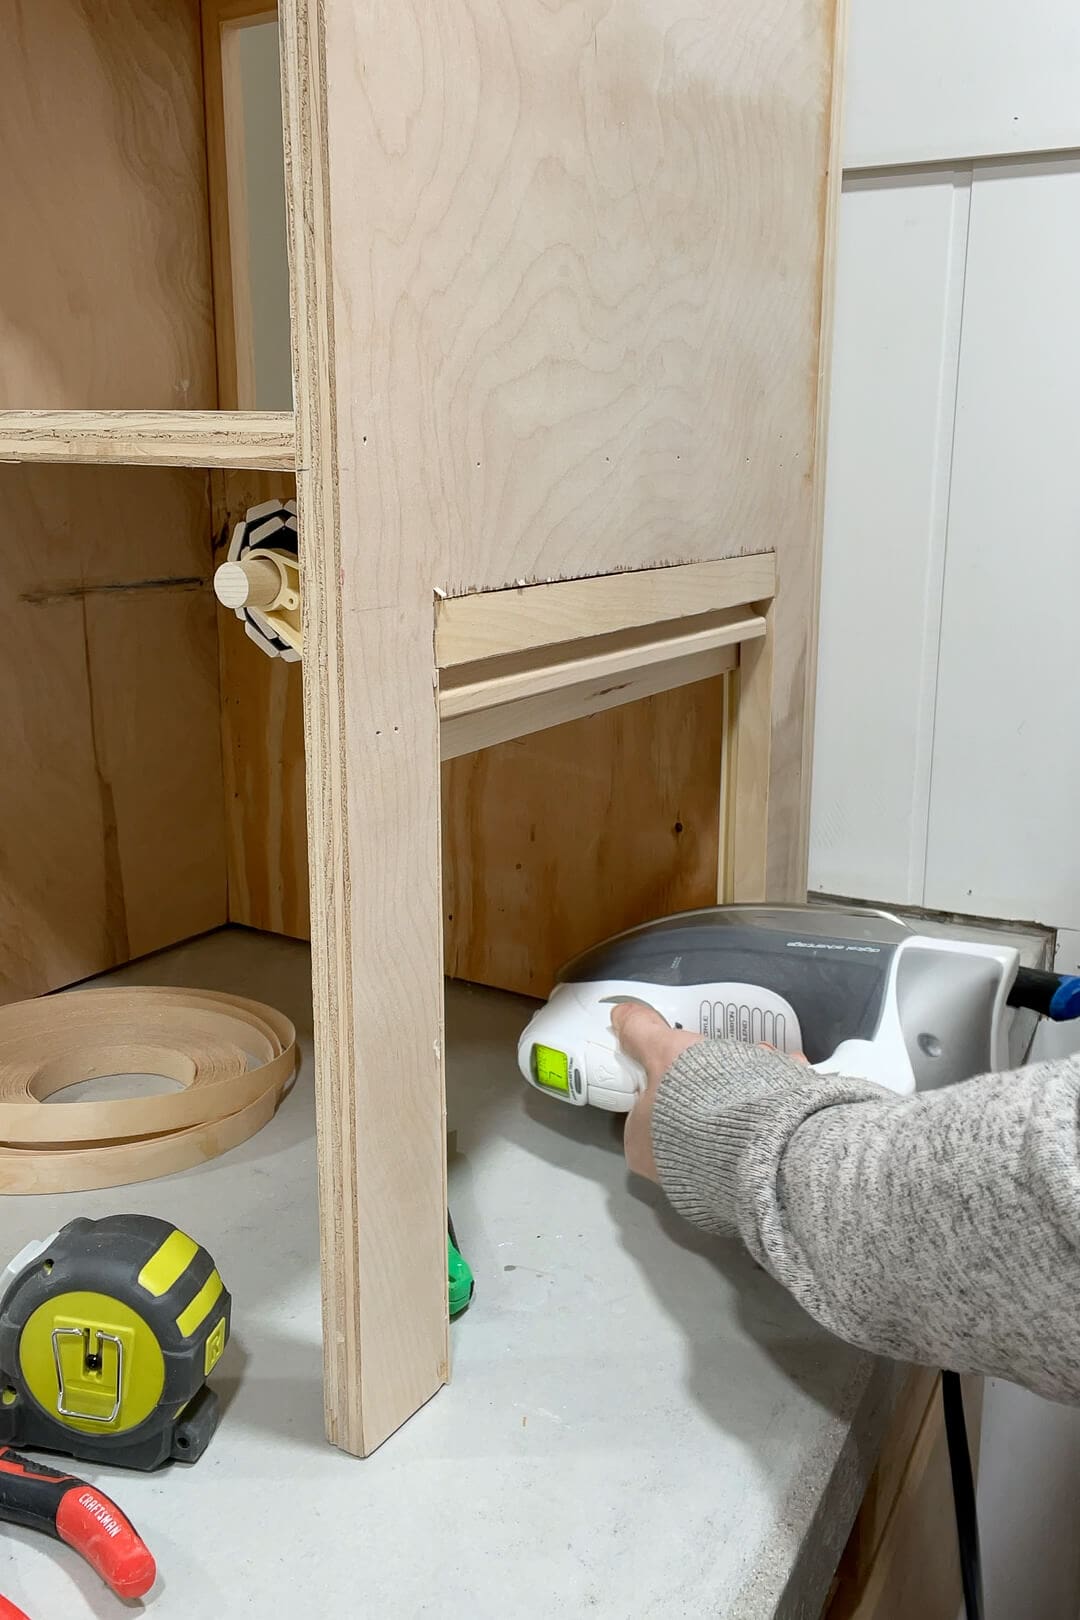
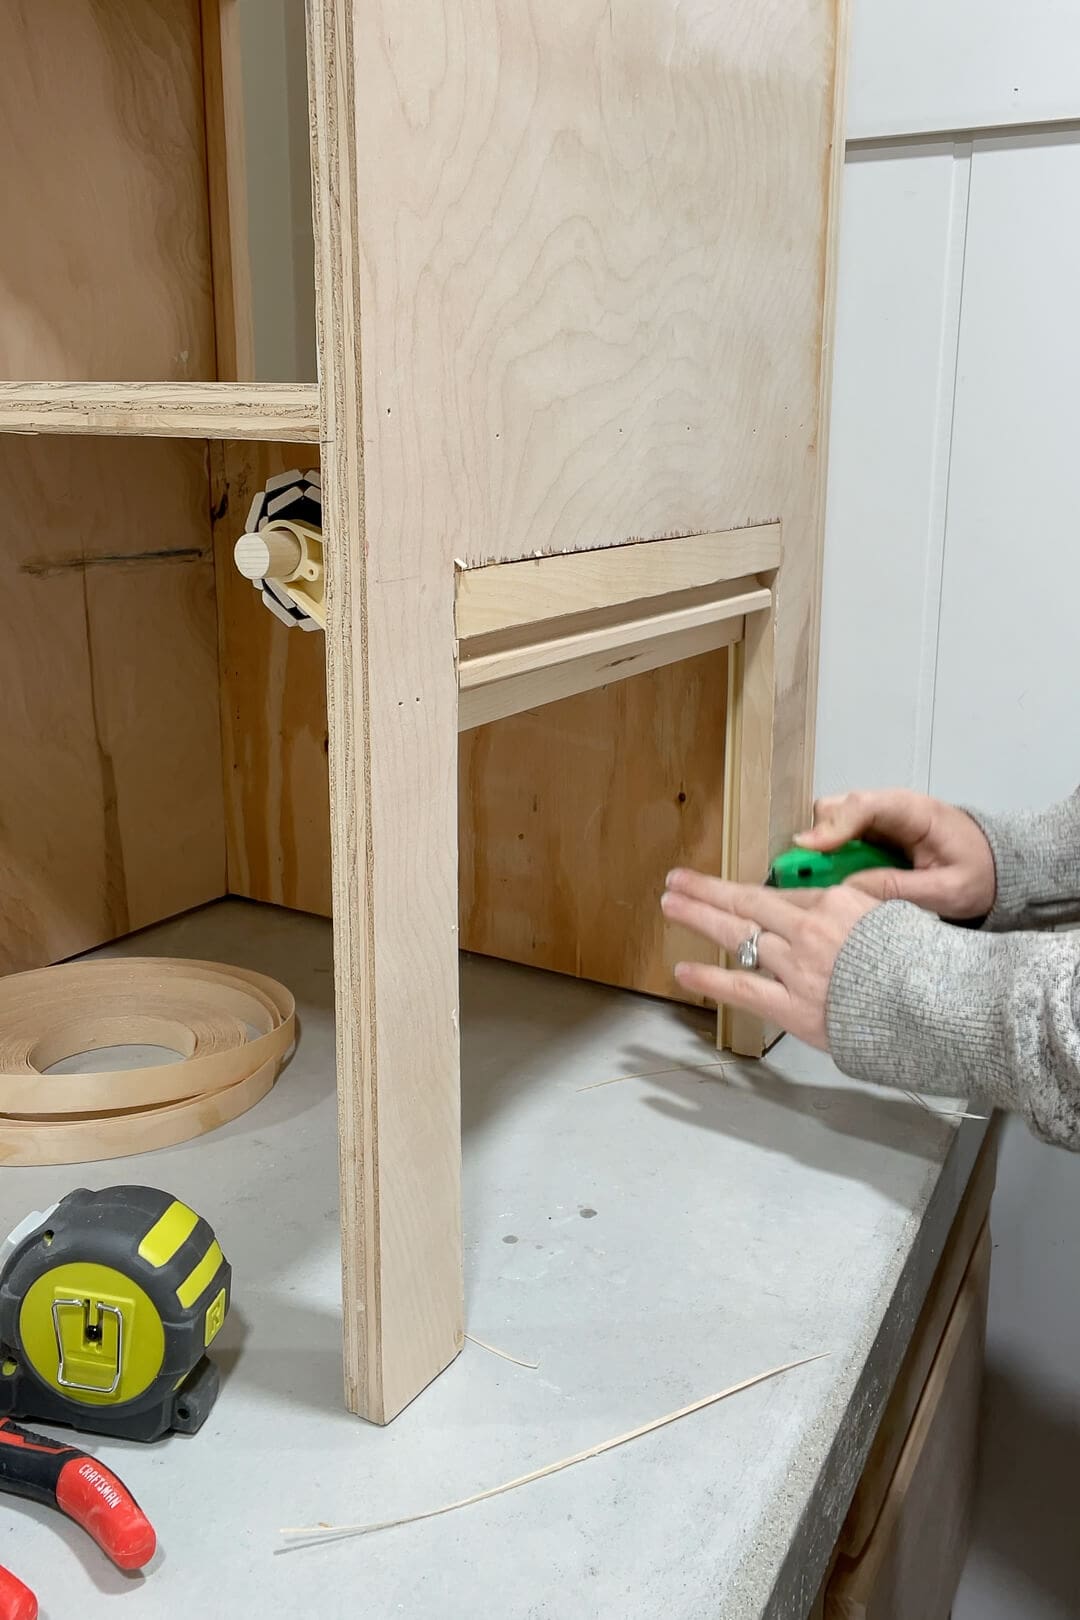
Step 3: How to Build a Hidden Hair Tool Garage for Bathroom Storage
A key feature of my counter cabinet is the built-in hair tool garage. I cut an opening in the side of the cabinet and enclosed the lower shelf area at the front. This design lets me add an access door on the side, making it easy to plug in my hair tools with an outlet inside the cabinet.
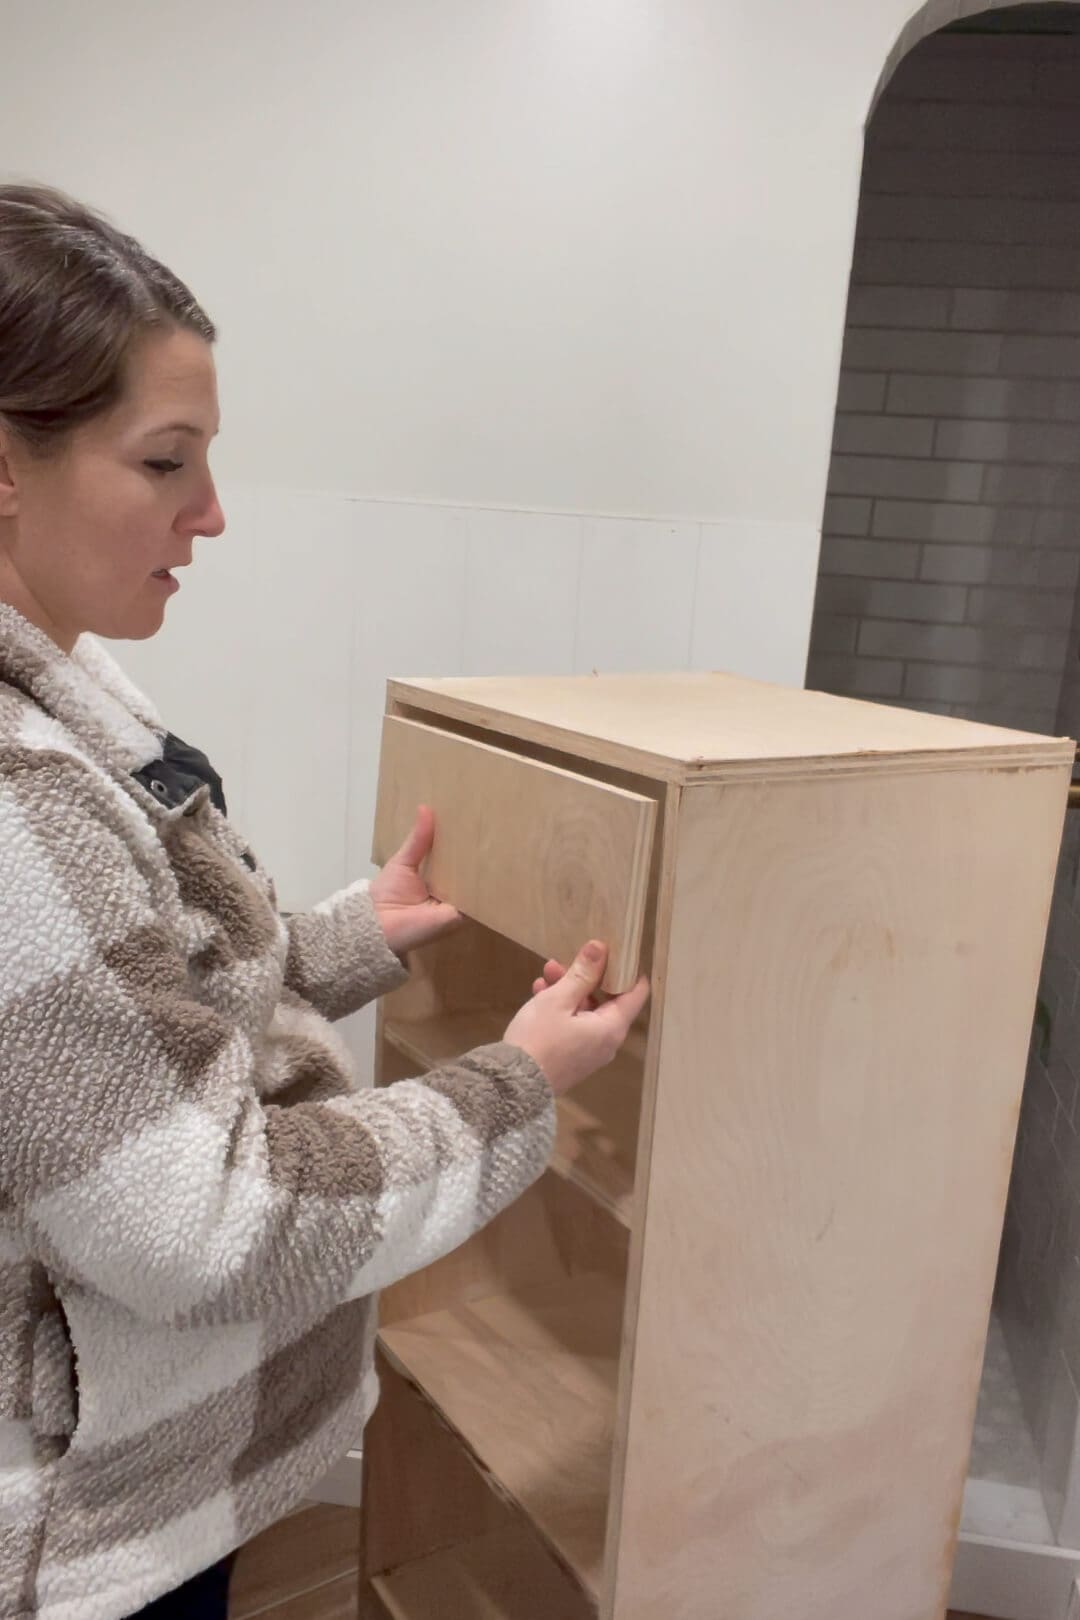
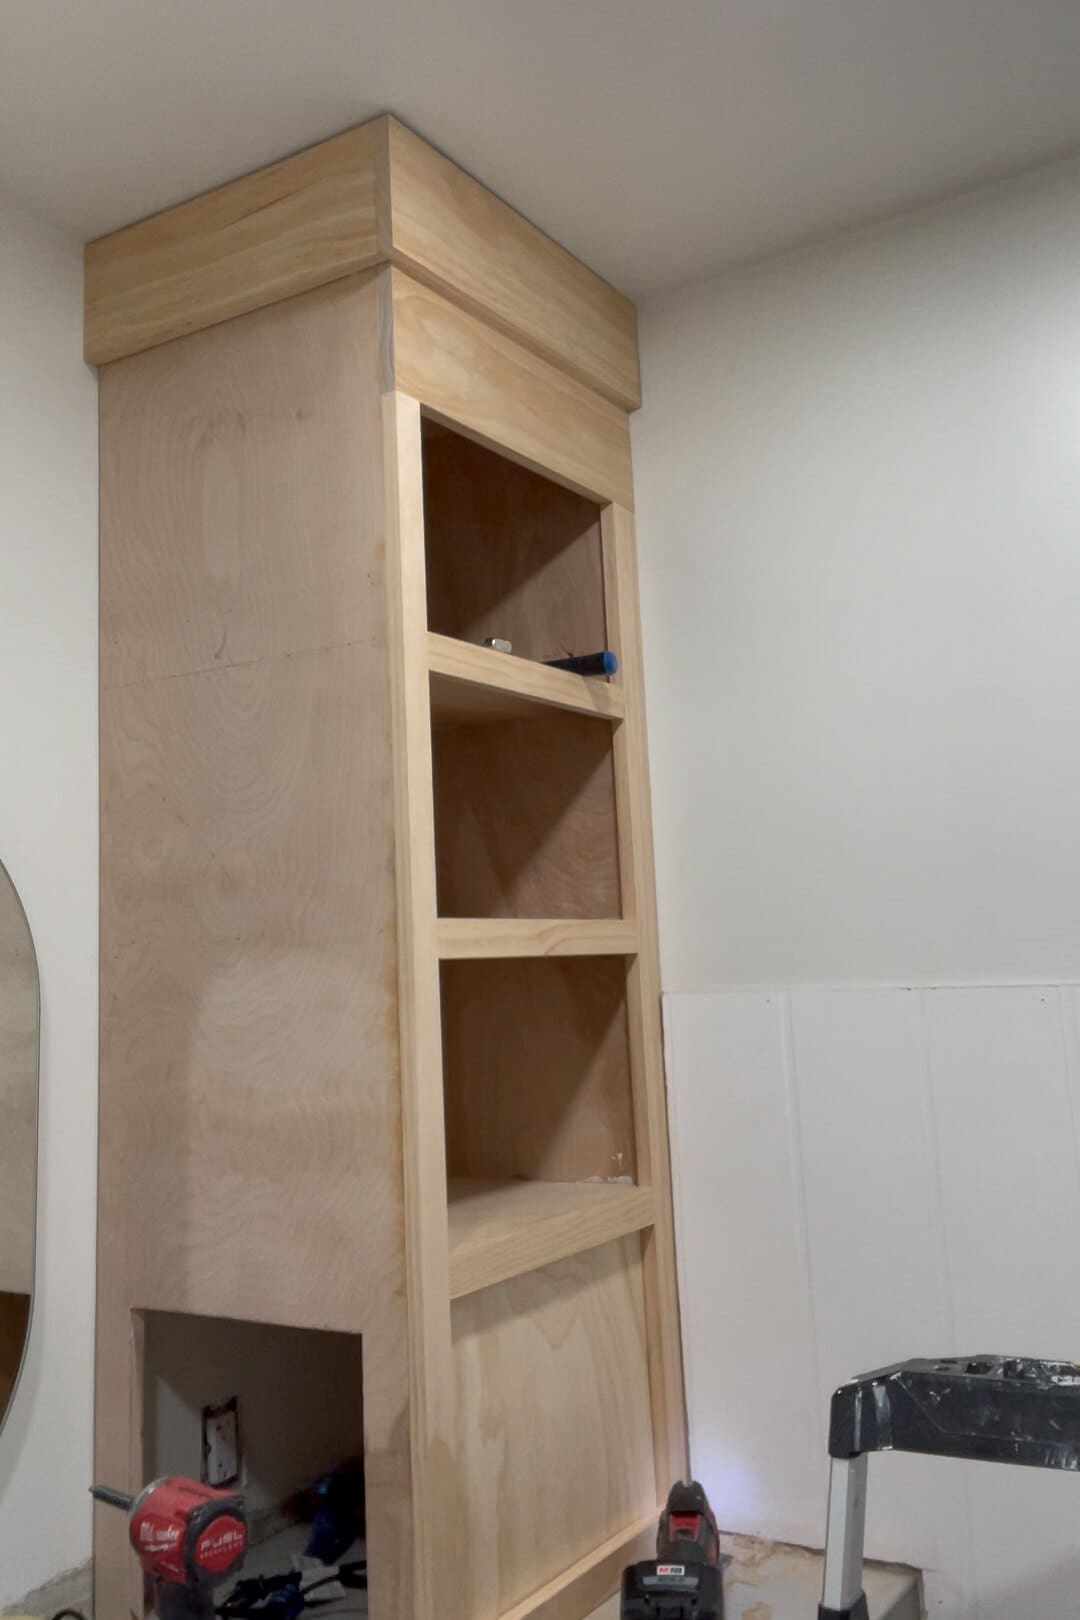
Step 4: Trim and Face Frame for a Built-In Cabinet Look
With the access door cut and the cabinet secured, it was time for trim! I added a face frame and crown molding using my brad nailer.

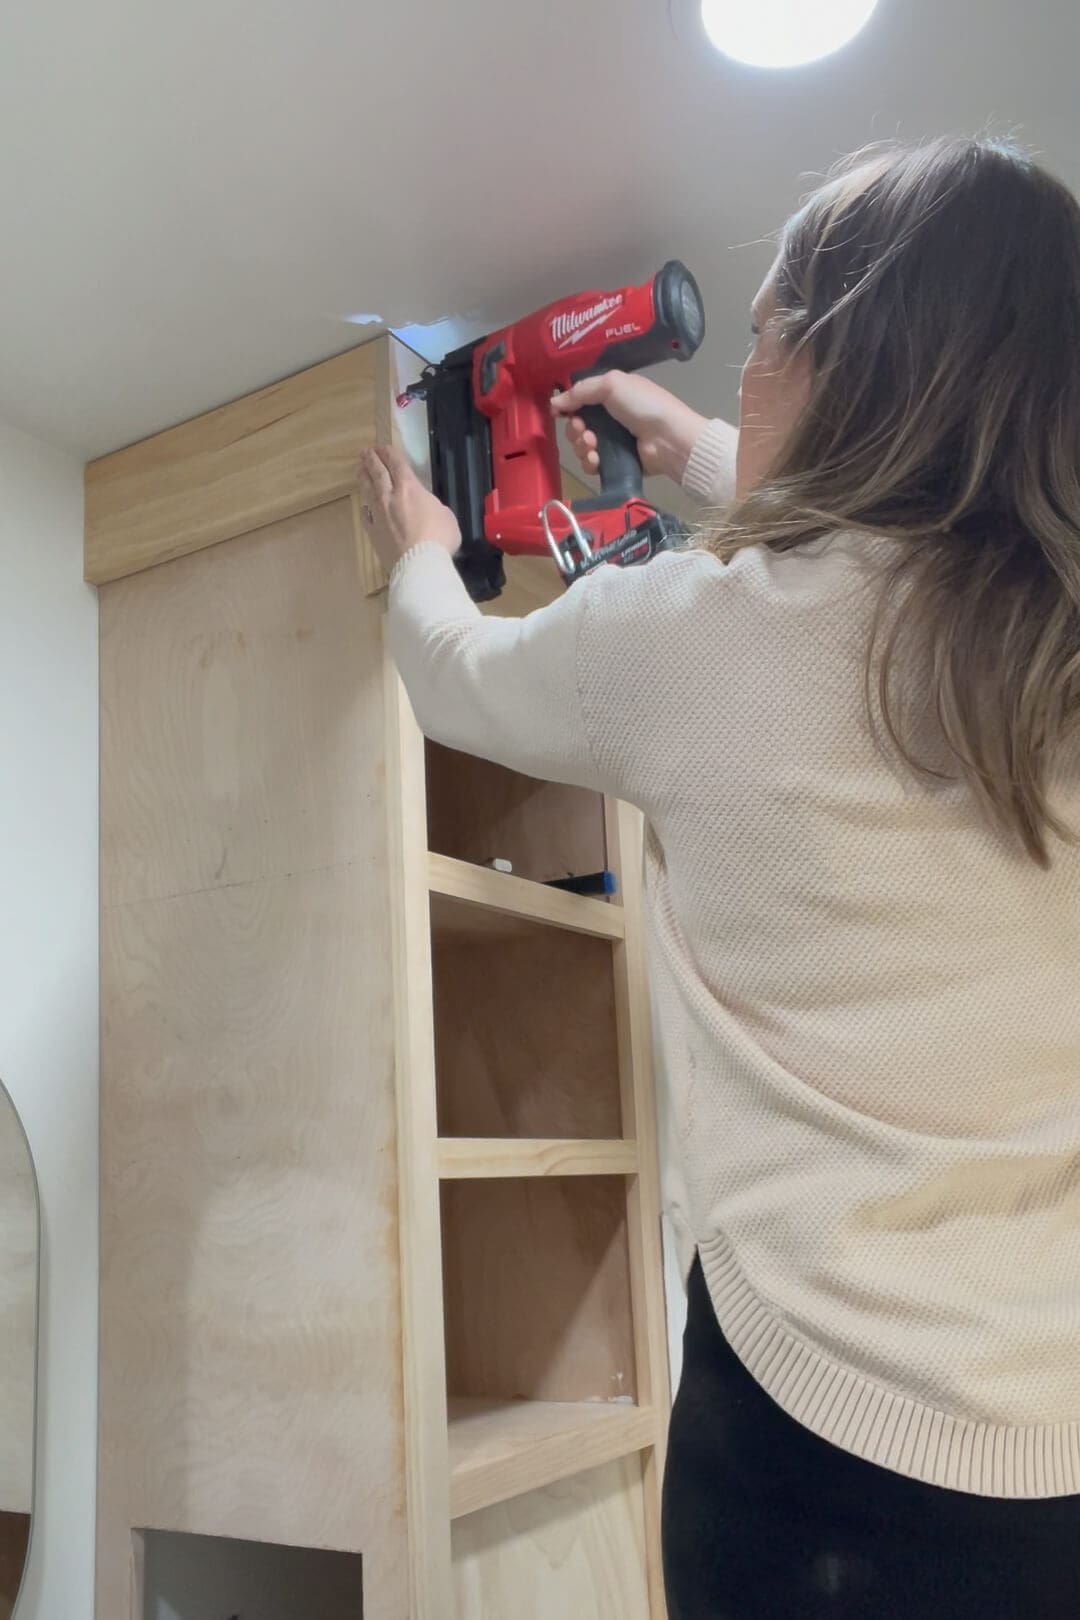
This step made a huge difference – the face frame hid any gaps and covered unfinished plywood edges, while the crown molding filled the space at the top. Instant polished, built-in look!
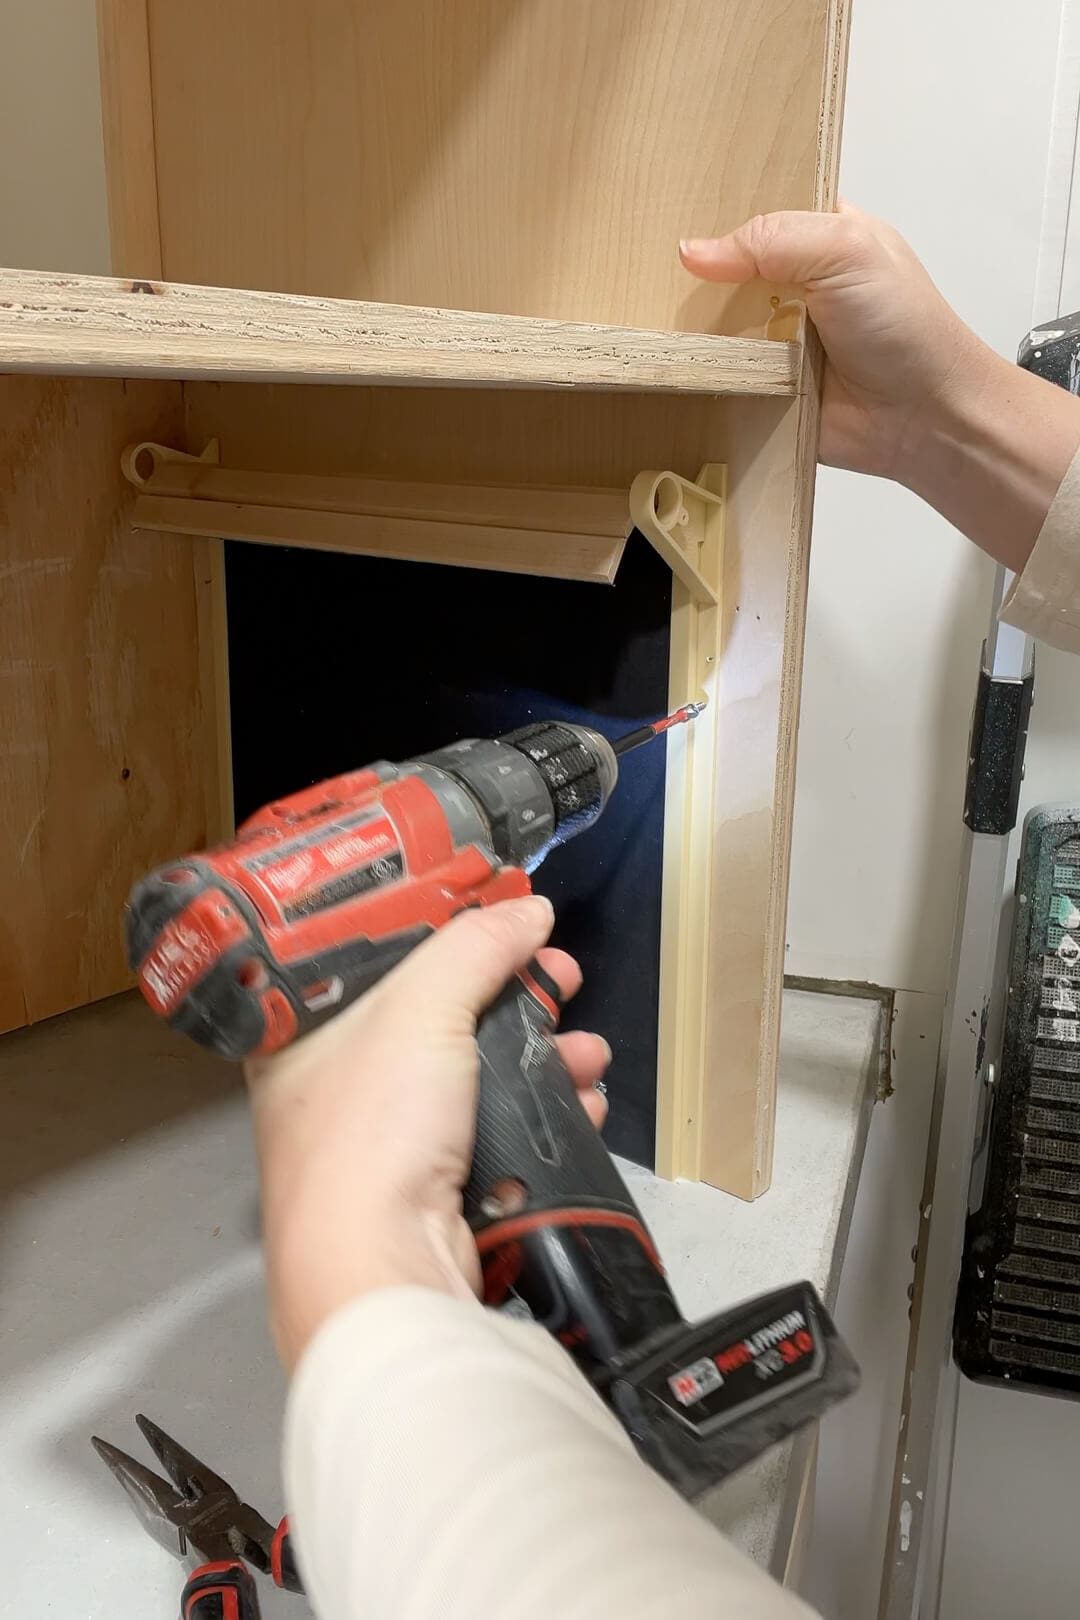
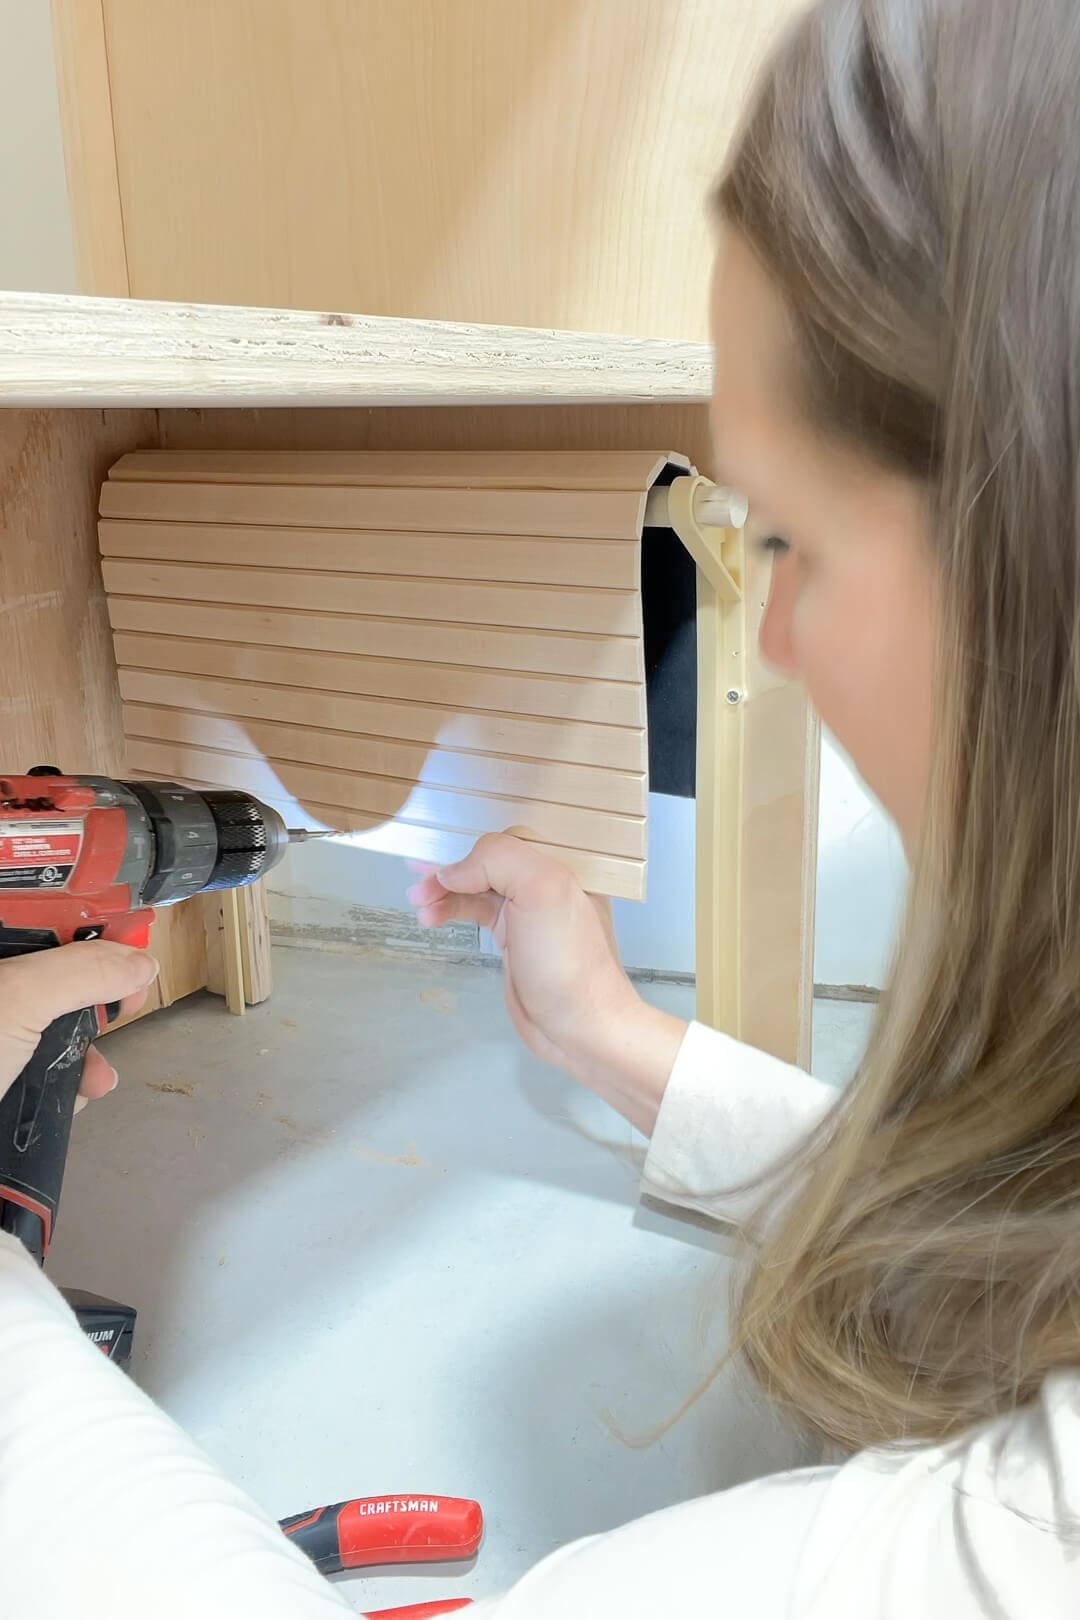
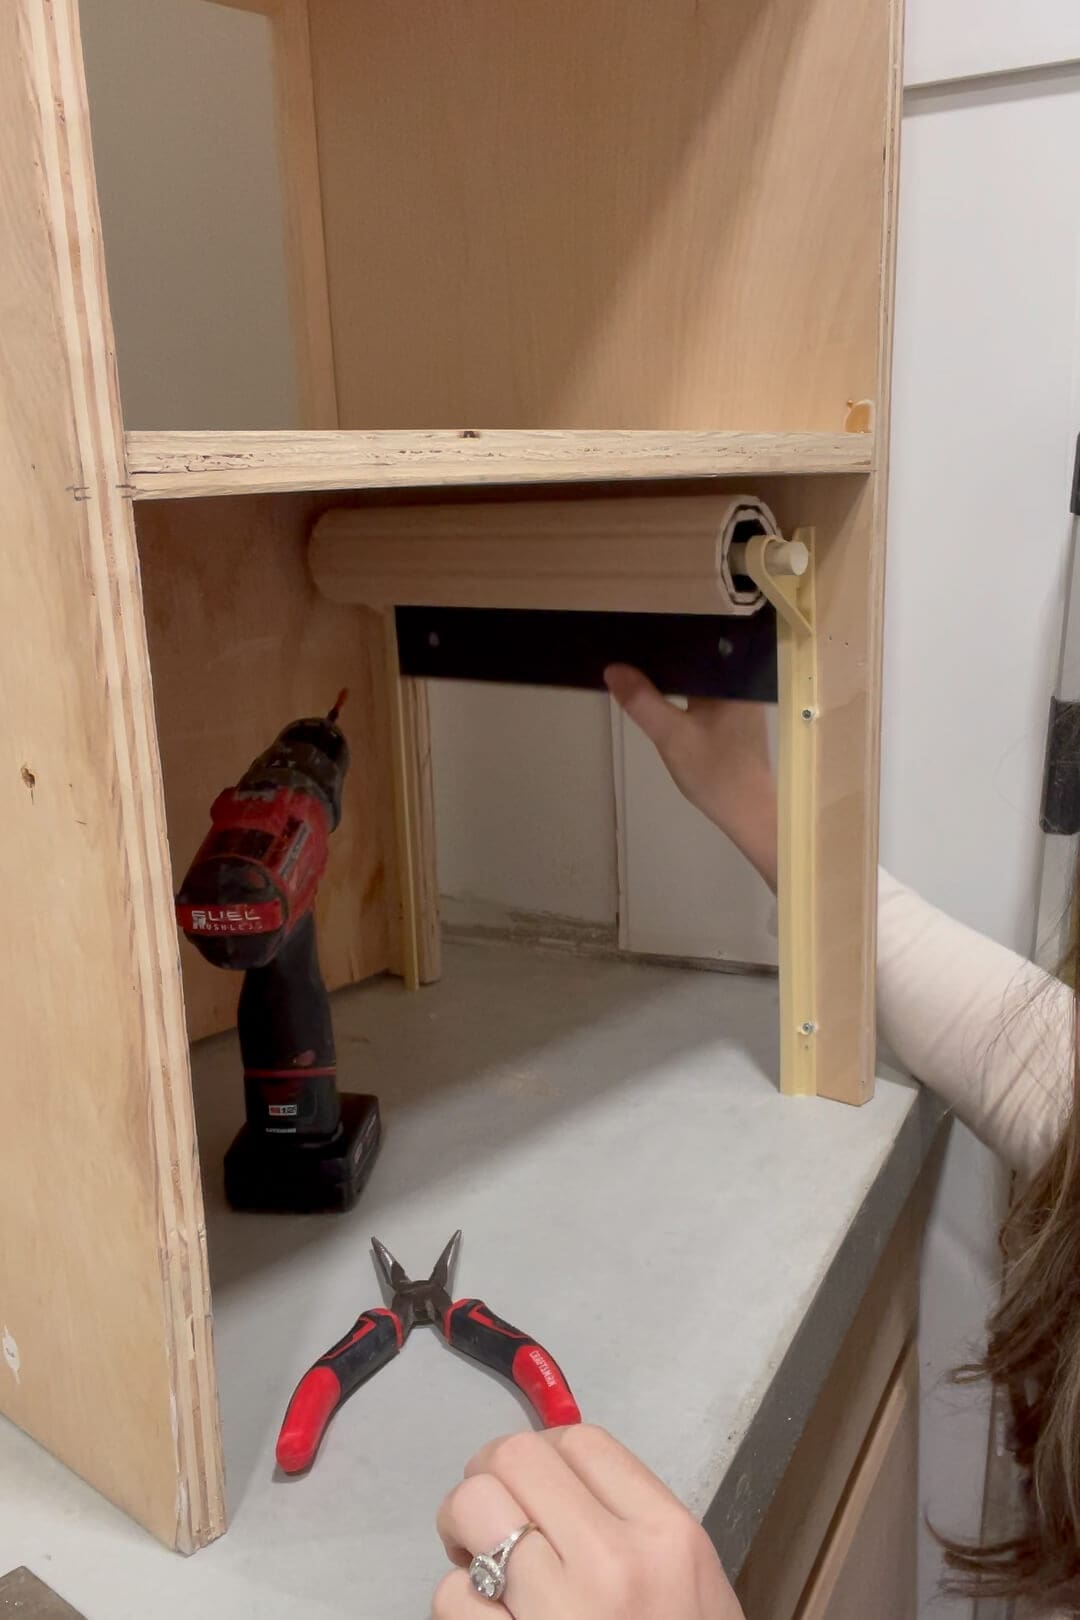
Step 5: Installing a Tambour Door for Easy Access
For my hair tool garage access door, I ordered a tambour (roll-up) door. To install it, I had to temporarily detach the counter cabinet from the wall and work from the back.
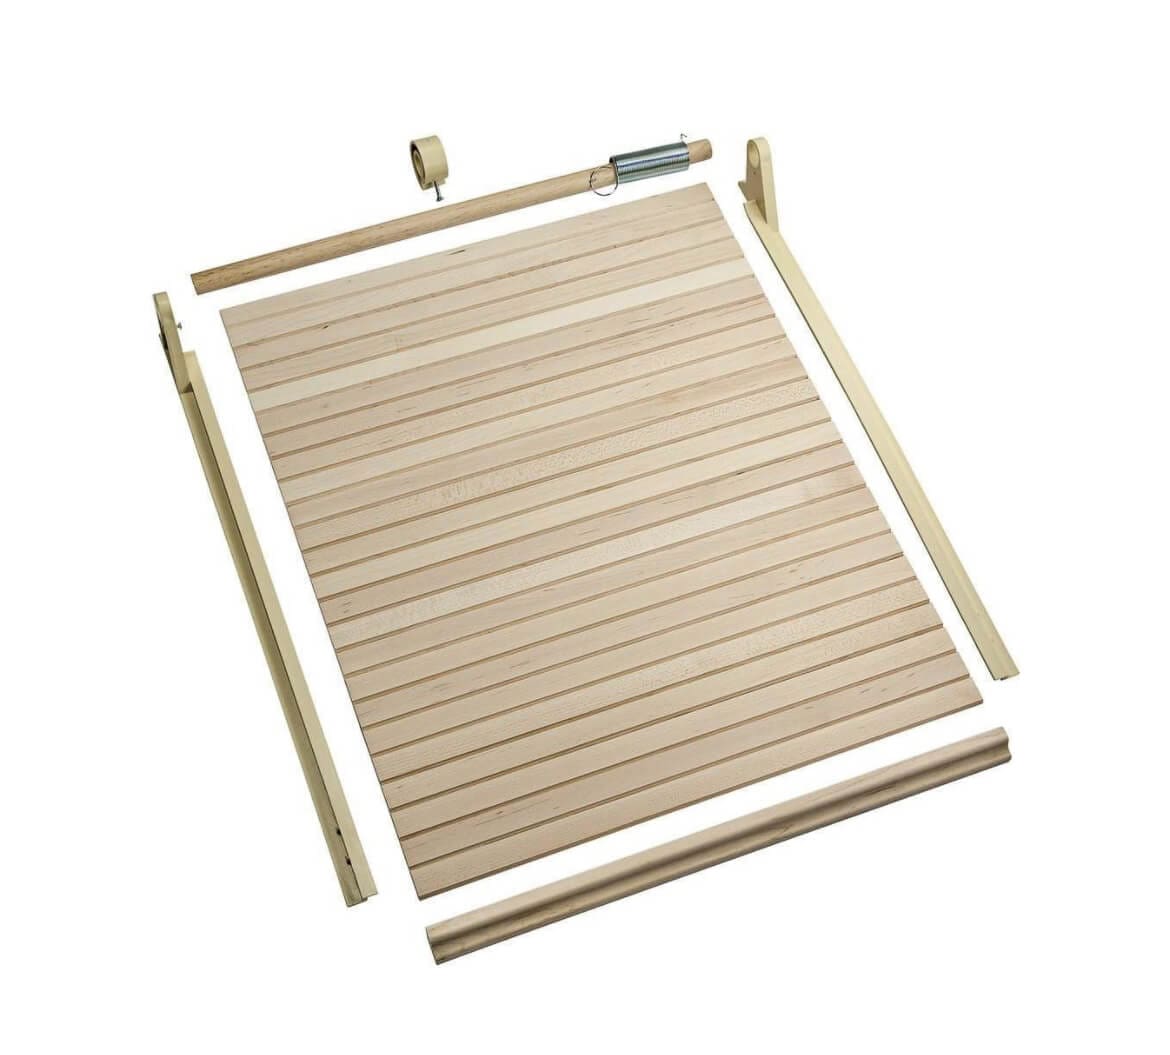
Steps for installation:
- Secure the track with a brad nailer.
- Use the included small screws to permanently attach it.
- Install the rod across the top.
- Attach the slatted roll-up door to the rod.
And just like that, I had a functional roll-up door in the side of my counter cabinet for my hair tool garage. So cool, right?!
Step 6: How to Use Edge Banding to Hide Plywood Edges
Since plywood edges can look rough (even when painted), I used iron-on edge banding to clean up the cutout opening for the hair tool garage.. This stuff is amazing—just apply it with a regular clothes iron, then trim the excess with a utility knife or an edge banding tool.
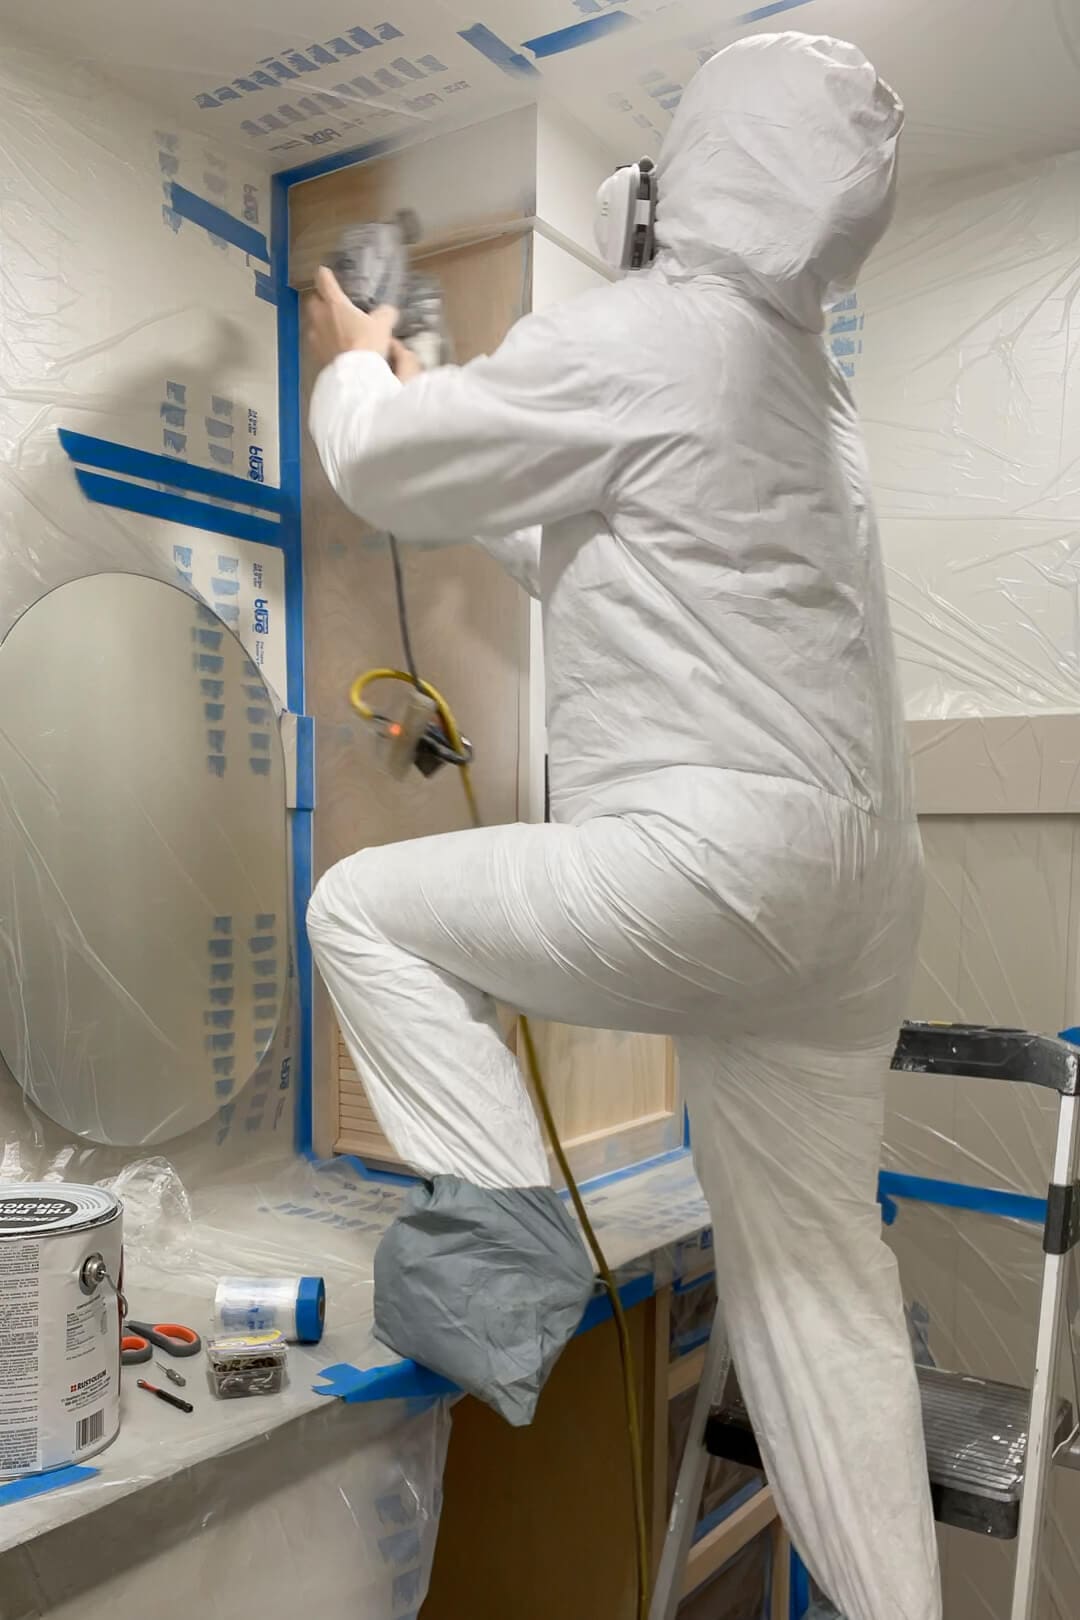
Step 7: Painting Your DIY Bathroom Cabinet for a Seamless Finish
Last step? Paint! I went with Accessible Beige—the same color as the shiplap wall, kitchen cabinets, and even my girls’ bunk bed. It’s the perfect neutral—not too gray, not too tan. If you want a pro-level finish, check out my Ultimate Step-by-Step Guide to Painting Cabinets & Furniture.
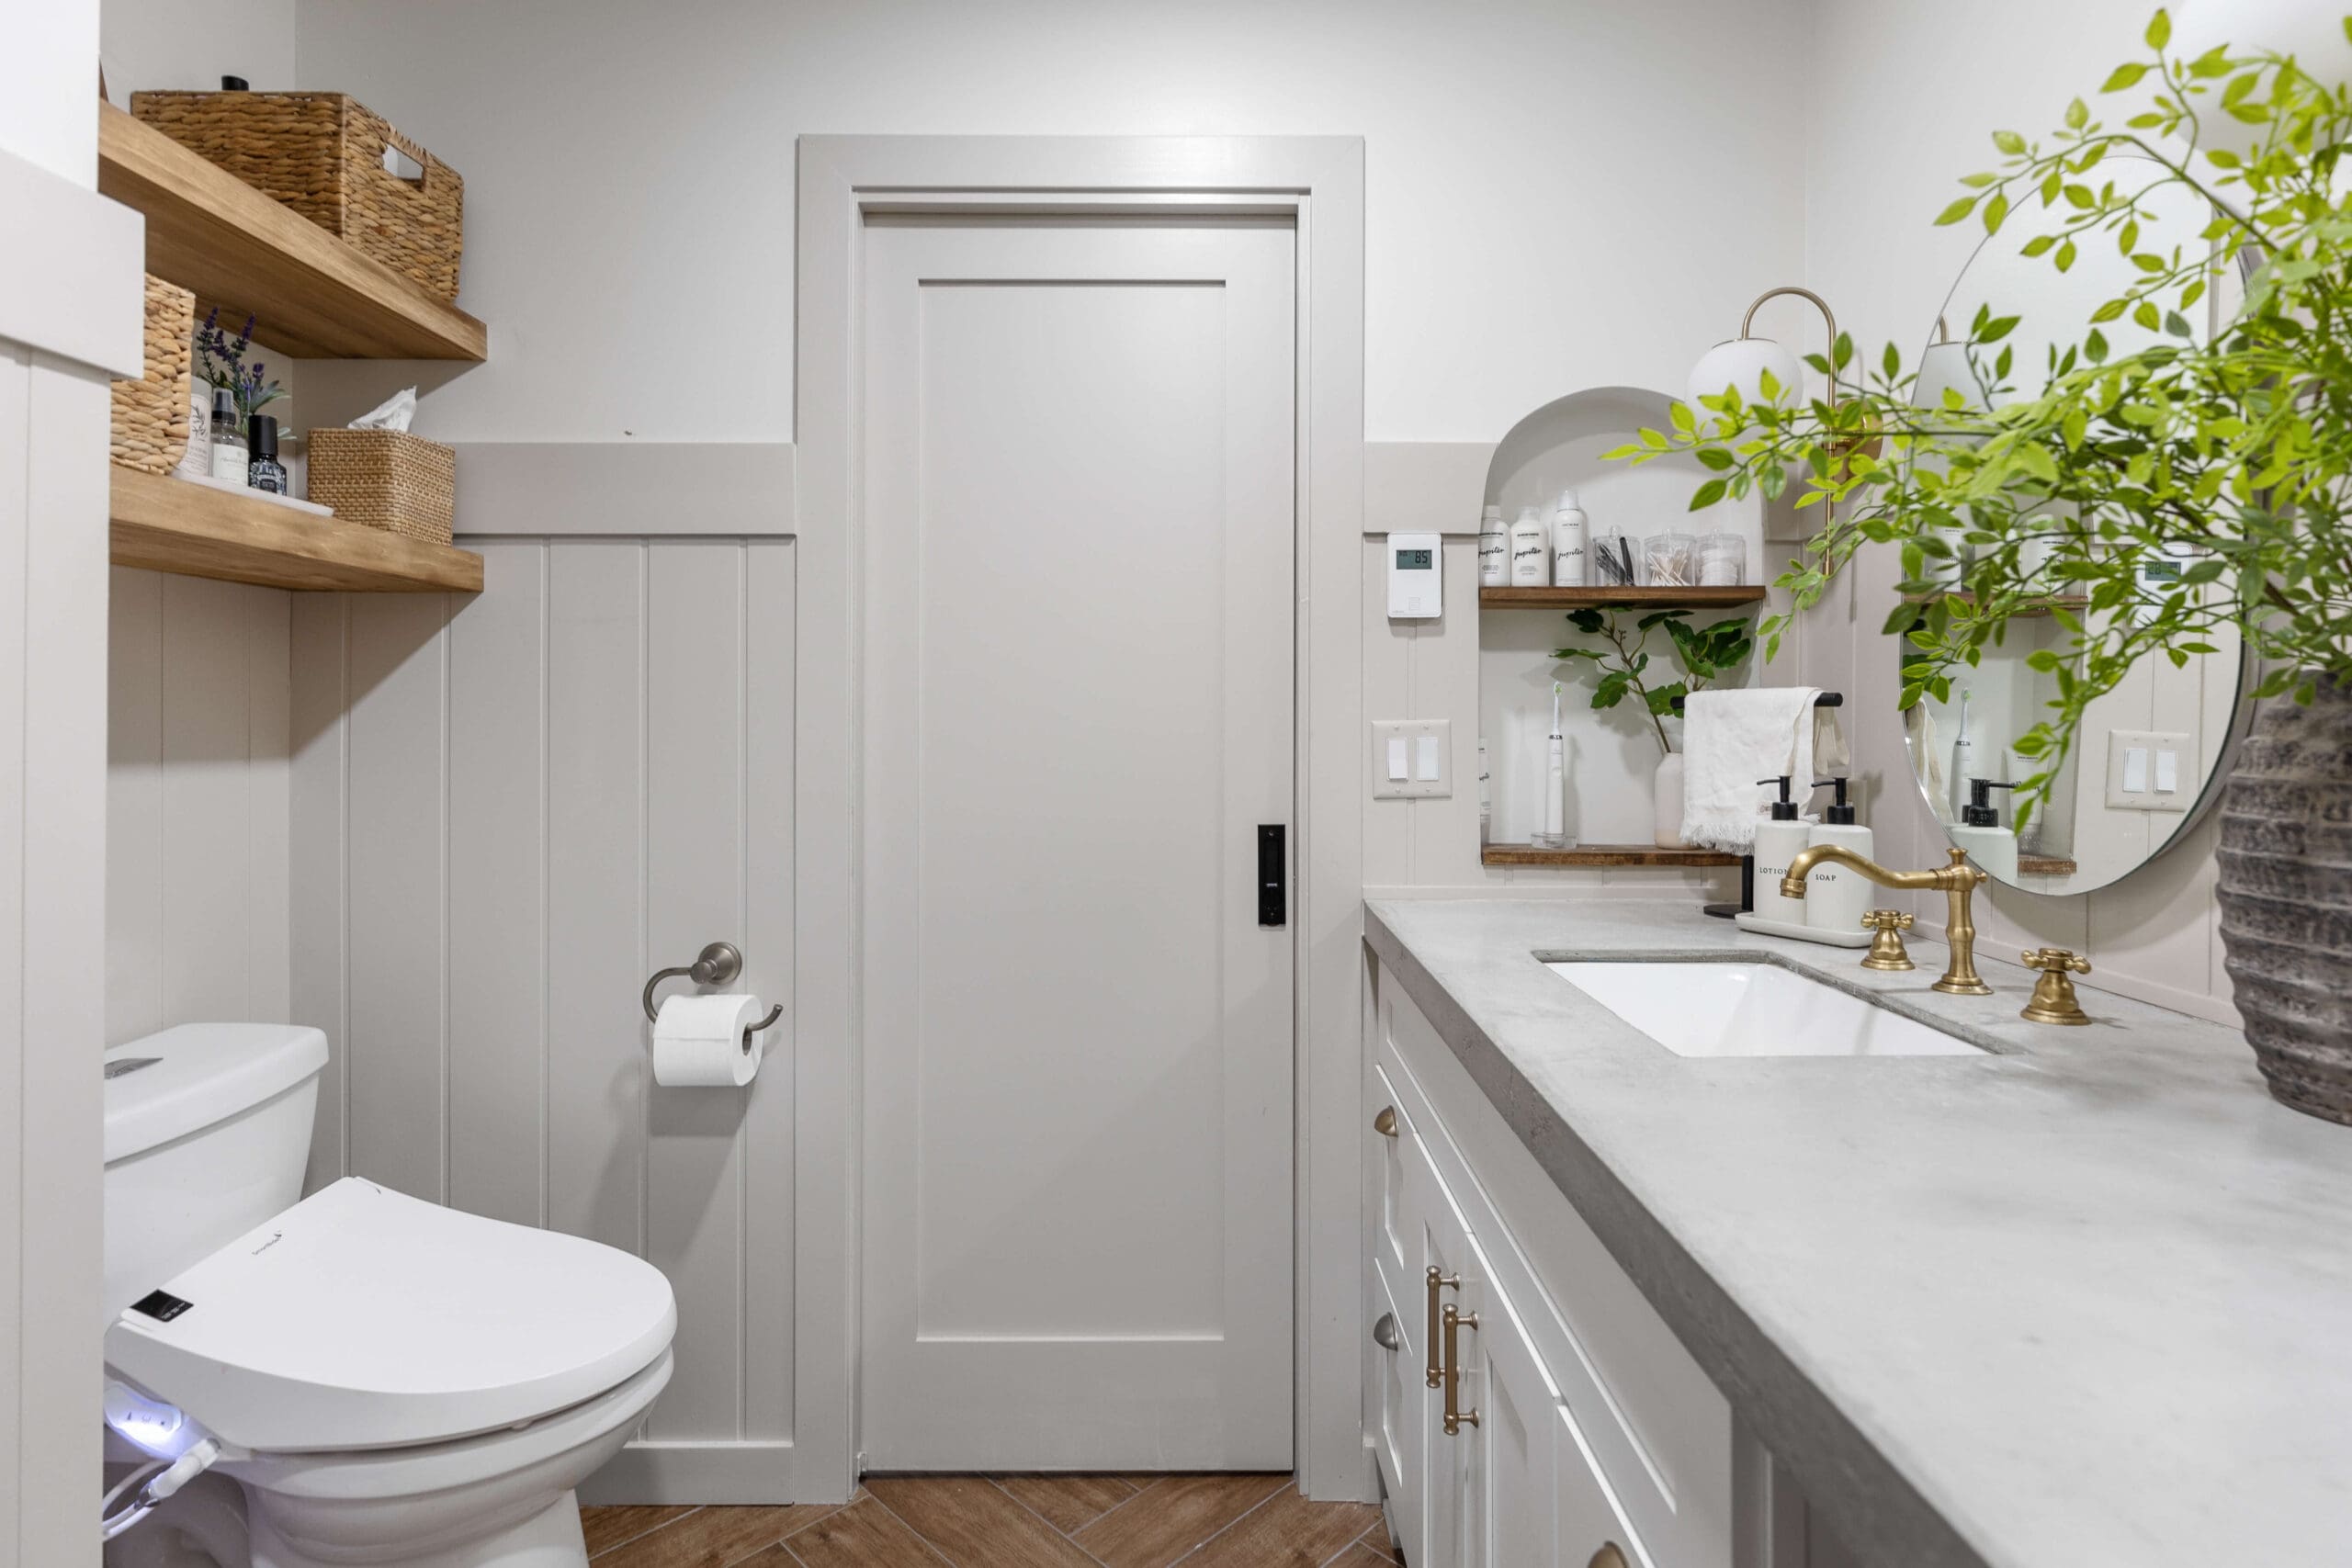
The Reveal: Finished Bathroom Counter Cabinet with Hidden Storage
And that’s it! The counter cabinet is done, and I love how much storage it adds. The hair tool garage? A total game-changer. Being able to sit at my vanity, roll up the door, and access my hair tools (with an outlet inside!) just makes sense. Plus, my bathroom stays neat and tidy – always a win!
Thinking about building your own counter cabinet? Let me know in the comments, or tag me in your DIY projects – I’d love to see what you create!
📌 Save This DIY Bathroom Cabinet Idea
DIY Bathroom Cabinet FAQ: Building, Painting, and Storage Tips
To build a counter cabinet, start by constructing a simple wooden frame with fixed shelves, securing it to the wall studs. Add trim for a finished look, and consider incorporating features like a built-in hair tool garage for extra functionality.
To install a tambour door, first, secure the track with a brad nailer, then attach the rod and slatted door. You may need to temporarily detach the cabinet from the wall to install it properly.
Iron-on edge banding is an easy way to clean up plywood edges. Simply apply heat with a clothes iron, then trim off excess with a utility knife for a seamless finish.
Use a durable, moisture-resistant paint like satin or semi-gloss. Accessible Beige is a great neutral that complements most interiors. For a professional finish, use a high-quality primer and sealer.
