

Updated November 21, 2025
If you’re ready to learn exactly how to tile a shower wall, you’re in the right place. This is the step where your bathroom finally starts to look pretty, not just like a construction zone.
In this tutorial, I’ll walk you through my full process for tiling a shower wall step by step: planning your layout, deciding where to start tiling a shower wall, setting a ledger board, finishing the outside edges, tiling around and inside a shower niche, grouting, and sealing everything with silicone so it lasts.
This project is Part 2 of my small bathroom remodel. If your walls still need demo, rebuilding, or waterproofing, start with the prep first in my shower mold and waterproofing post. Once you’ve got cement board and a shower waterproofing membrane installed and cured, you’re ready for tile.
Time: Weekend project (plus cure time)
Difficulty: Intermediate DIY (great “first” project if you’re comfortable with basic tools)
If you want to see how the rest of this tiny bathroom came together, I also have tutorials for the DIY board and batten bathroom wall, painted bathroom vanity, gold bathroom mirror, and painted bathroom floor tiles. All of those finishes work together with this classic subway tile shower idea.
How to Tile a Shower Wall: At a Glance
Here’s the big-picture flow before we dive into photos and details:
- Plan your shower tile layout on the floor so cuts and decorative tiles land where you want them.
- Mark a level line and install a ledger board one full tile above the highest point of the tub.
- Install metal tile edge trim on open vertical corners for a clean finish.
- Spread thinset on the wall, back-butter tiles, and start tiling the shower wall from the ledger board up.
- Tile around and inside the shower niche, keeping grout lines aligned.
- Use spacers and a laser (or long level) to keep rows straight as you go.
- Grout the shower walls once the thinset cures.
- Finish with 100% silicone in corners and at the tub for a flexible, watertight seal.
Table of Contents
- How to Tile a Shower Wall: At a Glance
- Before You Tile: Where This Bathroom Started
- Tools for Tiling a Shower Wall
- Materials for This Shower Tile Project
- Step 1: Plan Your Shower Tile Layout on the Floor
- Step 2: Where to Start Tiling a Shower Wall (and Why Not at the Tub)
- Step 3: Finish the Outside Edge First for Clean Lines
- Step 4: Mix and Apply Thinset (Grooves + Back-Butter)
- Step 5: Tile Around and Inside the Shower Niche
- Step 6: Keep Rows Straight with Spacers and a Laser
- Step 7: How to Grout a Shower Wall
- Step 8: Where to Use Silicone Instead of Grout
- Troubleshooting & Pro Tips
- The Finished Shower Reveal
- More Shower Tile Projects
- Pinterest: Save This Shower Tile Project for Later
- FAQ: How to Tile a Shower Wall
Before You Tile: Where This Bathroom Started
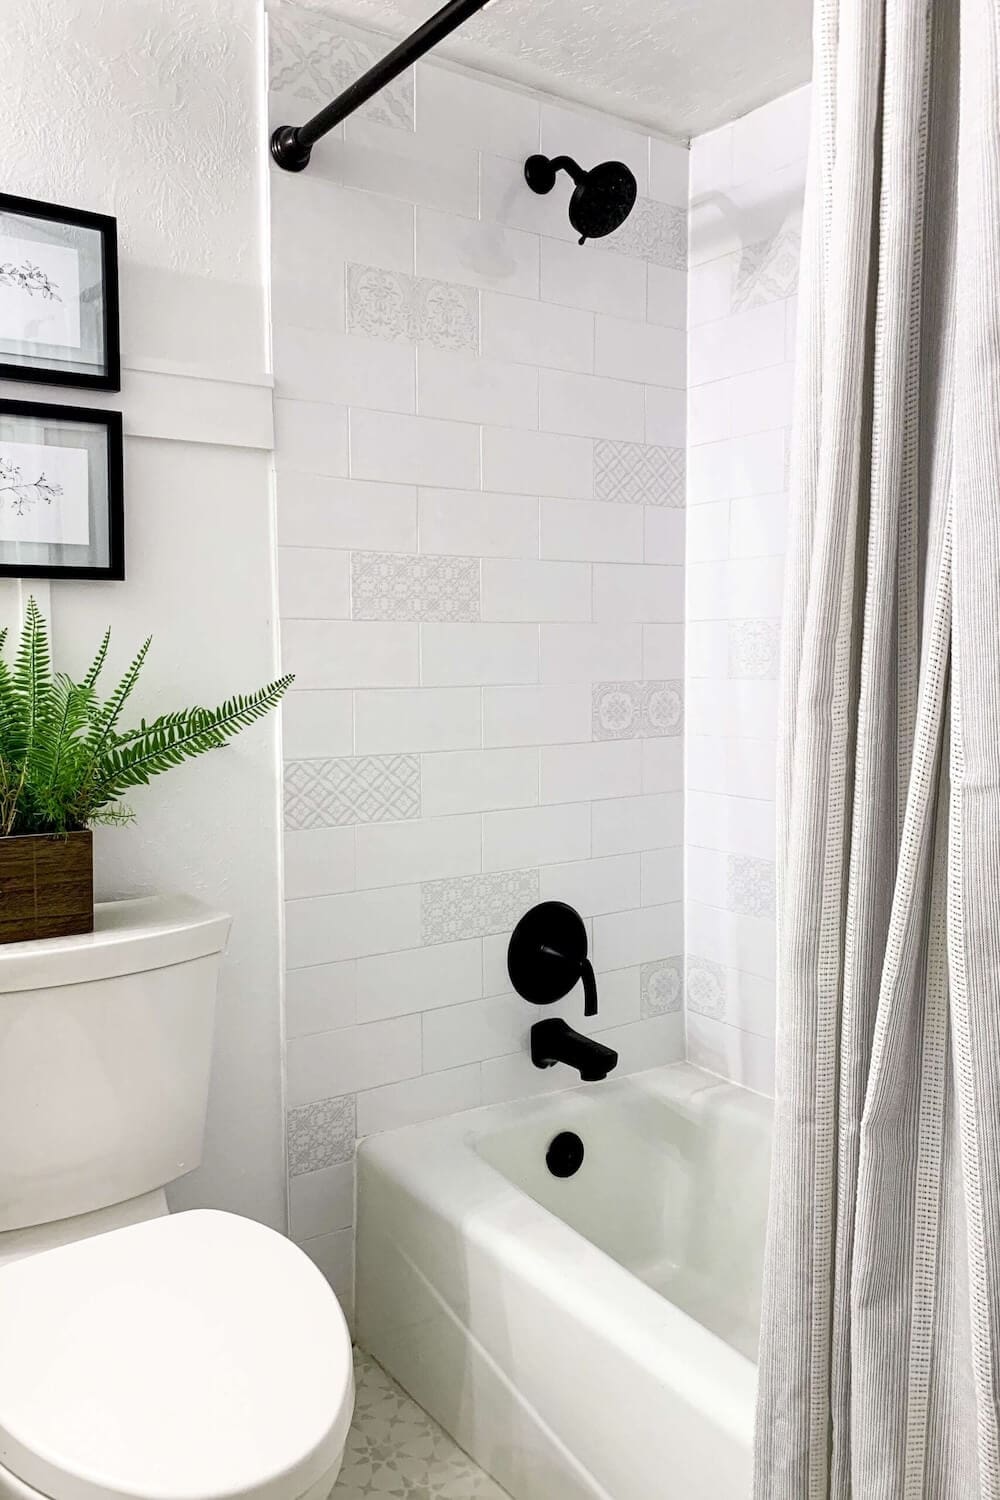
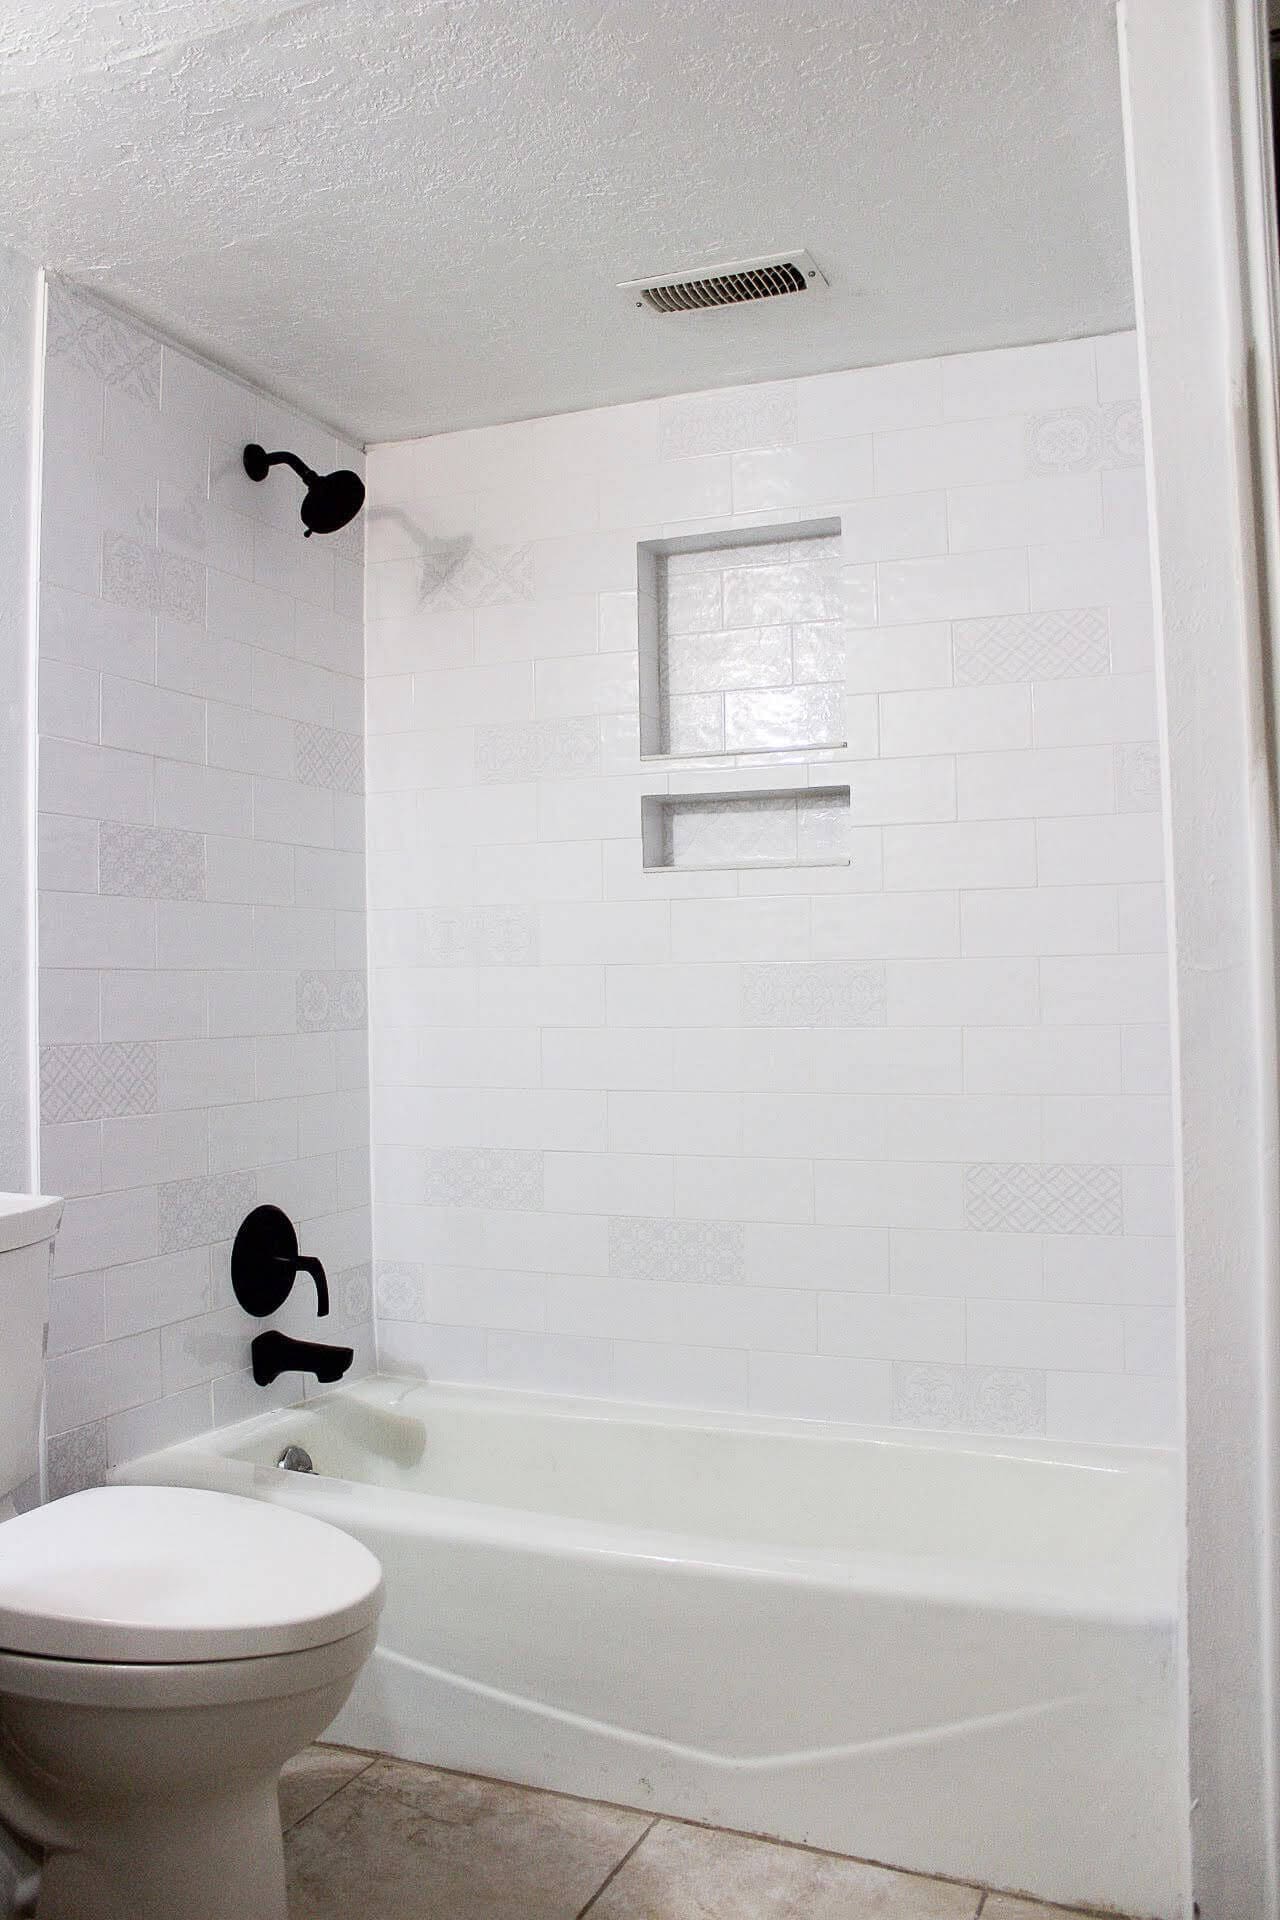
Before we get to the pretty white subway tile shower wall, here’s what the bathroom looked like at the beginning.
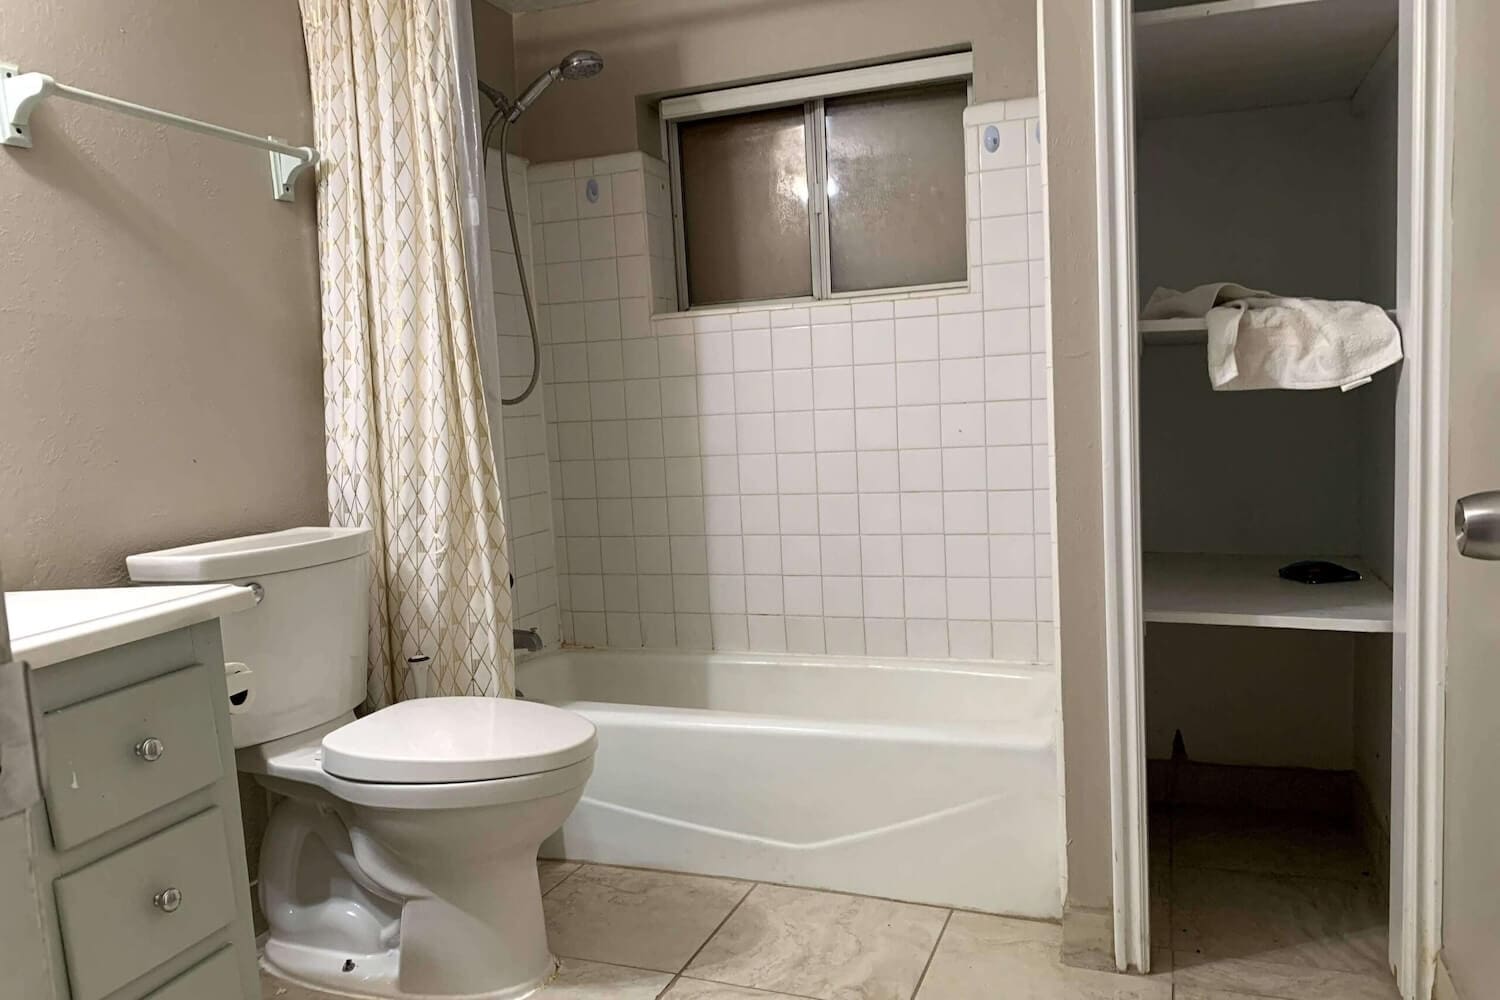
This small bathroom started out dark, dated, and a little sad. The original tile was stained, the grout was cracking, and moisture had worked its way behind the walls. I demoed the surround, removed mold, rebuilt with ½” cement board, and rolled on a full waterproofing membrane so the new tile would have a solid, long-lasting base.
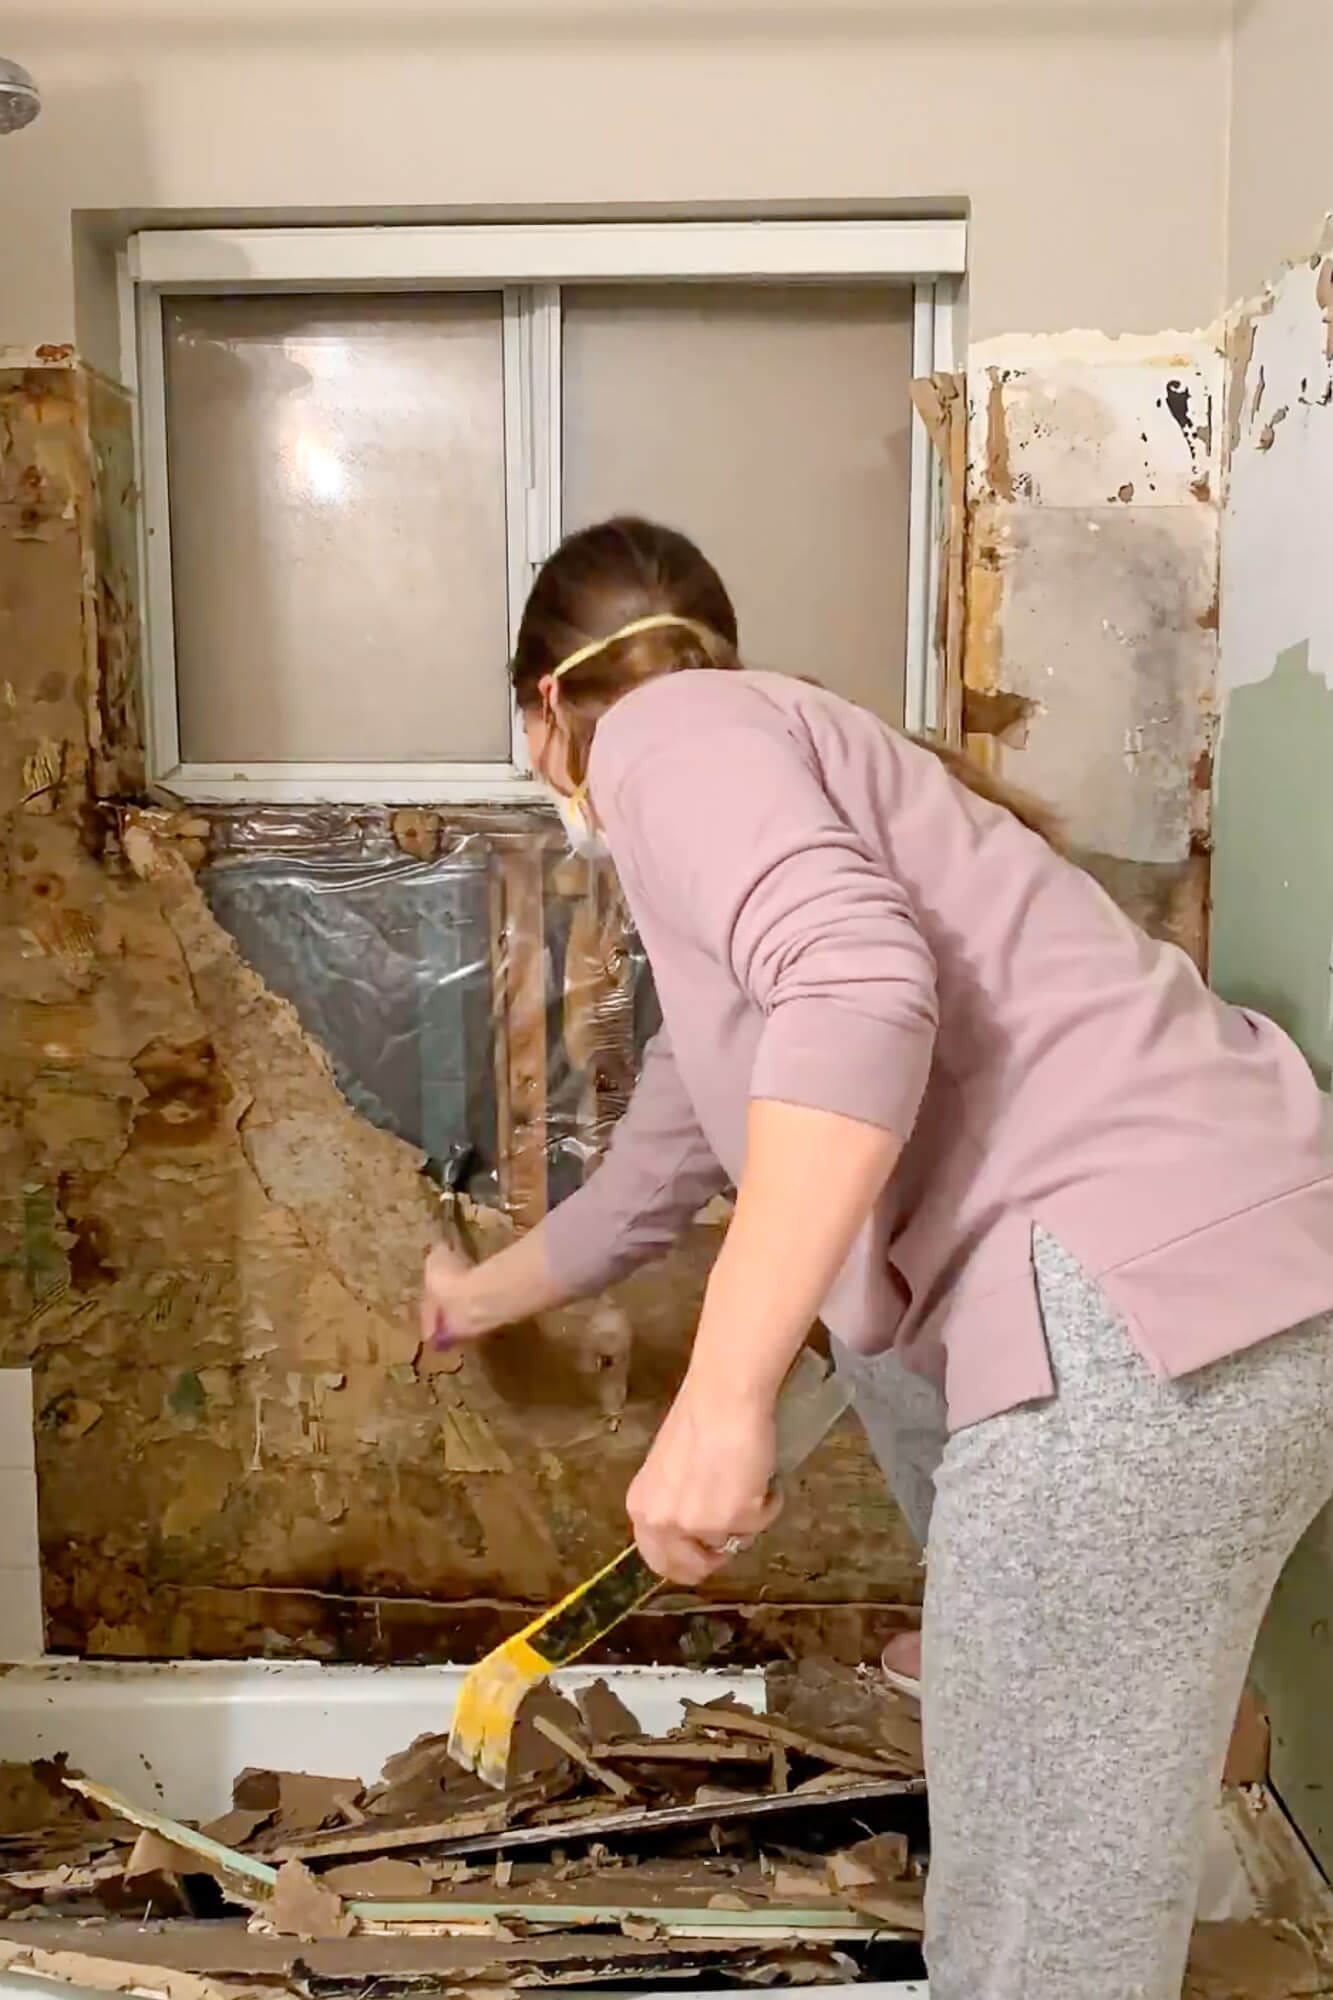
Once the surround was waterproof and the shower niche was framed and pitched, it was finally time for the fun part: tiling the shower walls.

Tools for Tiling a Shower Wall
Here are the tools I actually used while tiling this shower wall-perfect if this is your first DIY tile shower:
- Laser level or long bubble level
- Notched trowel
- Tile spacers
- Grout float
- Sponge
- Tile saw
- Caulk gun
- Drill
- Hole saw
Most of these tools work for other tile projects too, like a bathroom floor or kitchen backsplash, so they’re worth owning if you love DIY.
Materials for This Shower Tile Project
Your exact materials will depend on your tile and grout choices, but here’s what I used and why.
- Thinset mortar (appropriate for your tile and substrate)
- For the best thinset for shower walls, choose a polymer-modified thinset that’s rated for wet areas and compatible with your waterproofing system.
- Ready-mixed white grout
- Color-matched 100% silicone caulk
- Metal tile edge trim for the open vertical edges
- Plain white subway tile
- Decorative patterned subway tile
- Shower faucet and trim kit (I used the Pfister Karci matte black set)
If you’re still collecting subway tile shower ideas, simple white tile is super forgiving for beginners and plays well with almost any vanity, mirror, and wall color.
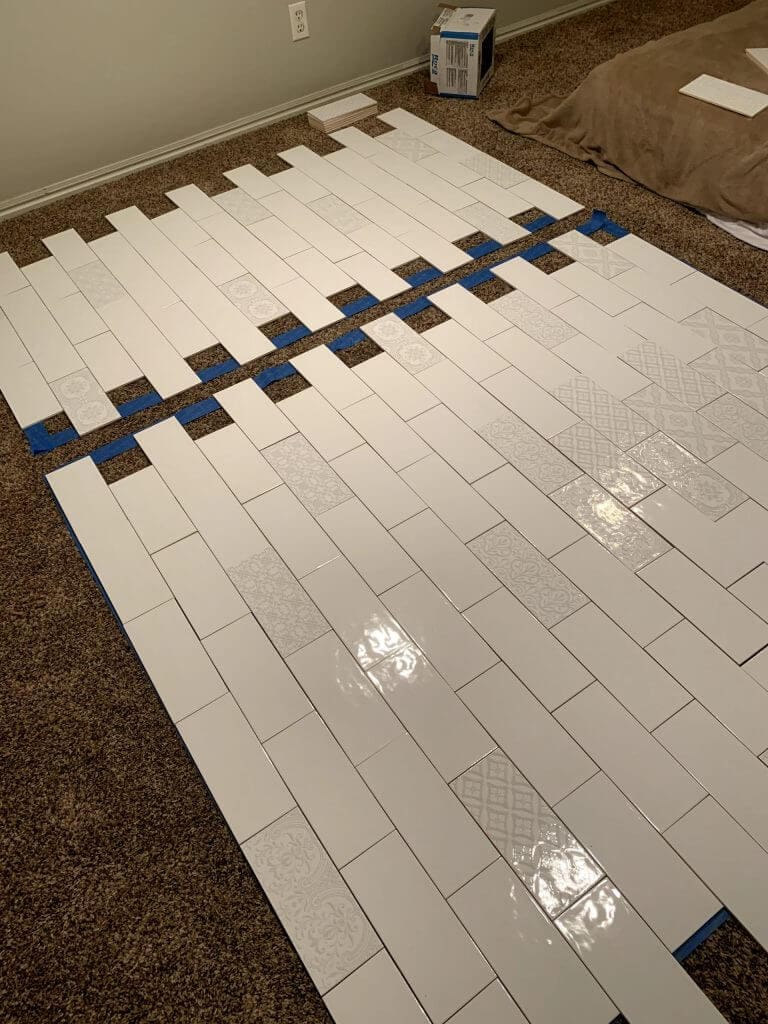
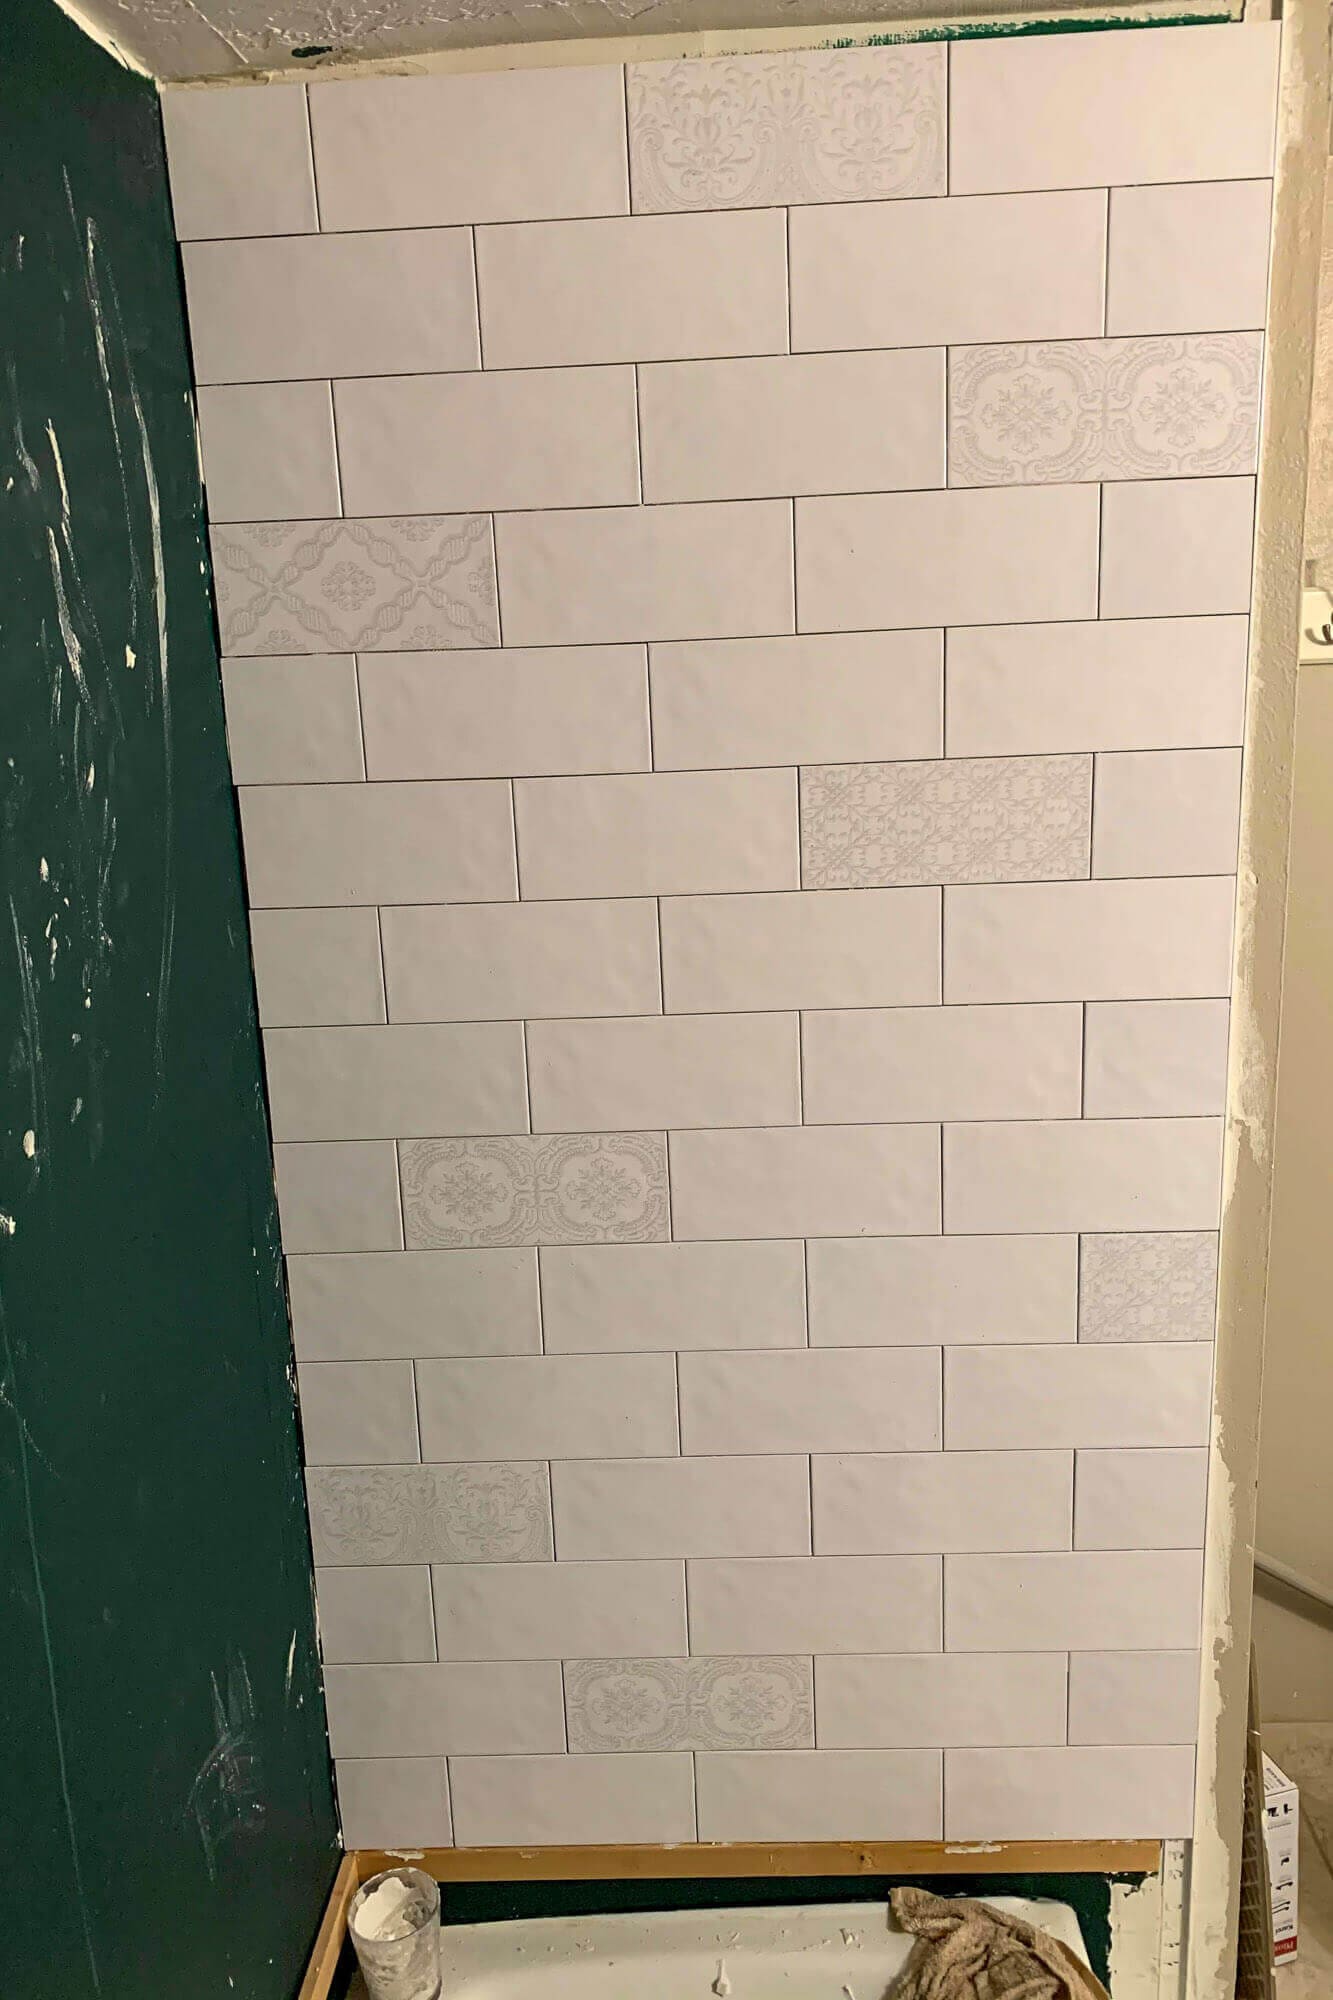
Step 1: Plan Your Shower Tile Layout on the Floor
Laying everything out on the floor gives you real-life shower tile layout ideas before anything is permanent. It sounds extra, but it makes the actual install faster and avoids awkward slivers in the corners.
Here’s what I did:
- Taped out the exact width of the shower on the floor, including the niche location.
- Laid out plain white subway tiles in straight rows inside that taped area.
- Started “auditioning” the decorative tiles, swapping them in until the pattern felt balanced.
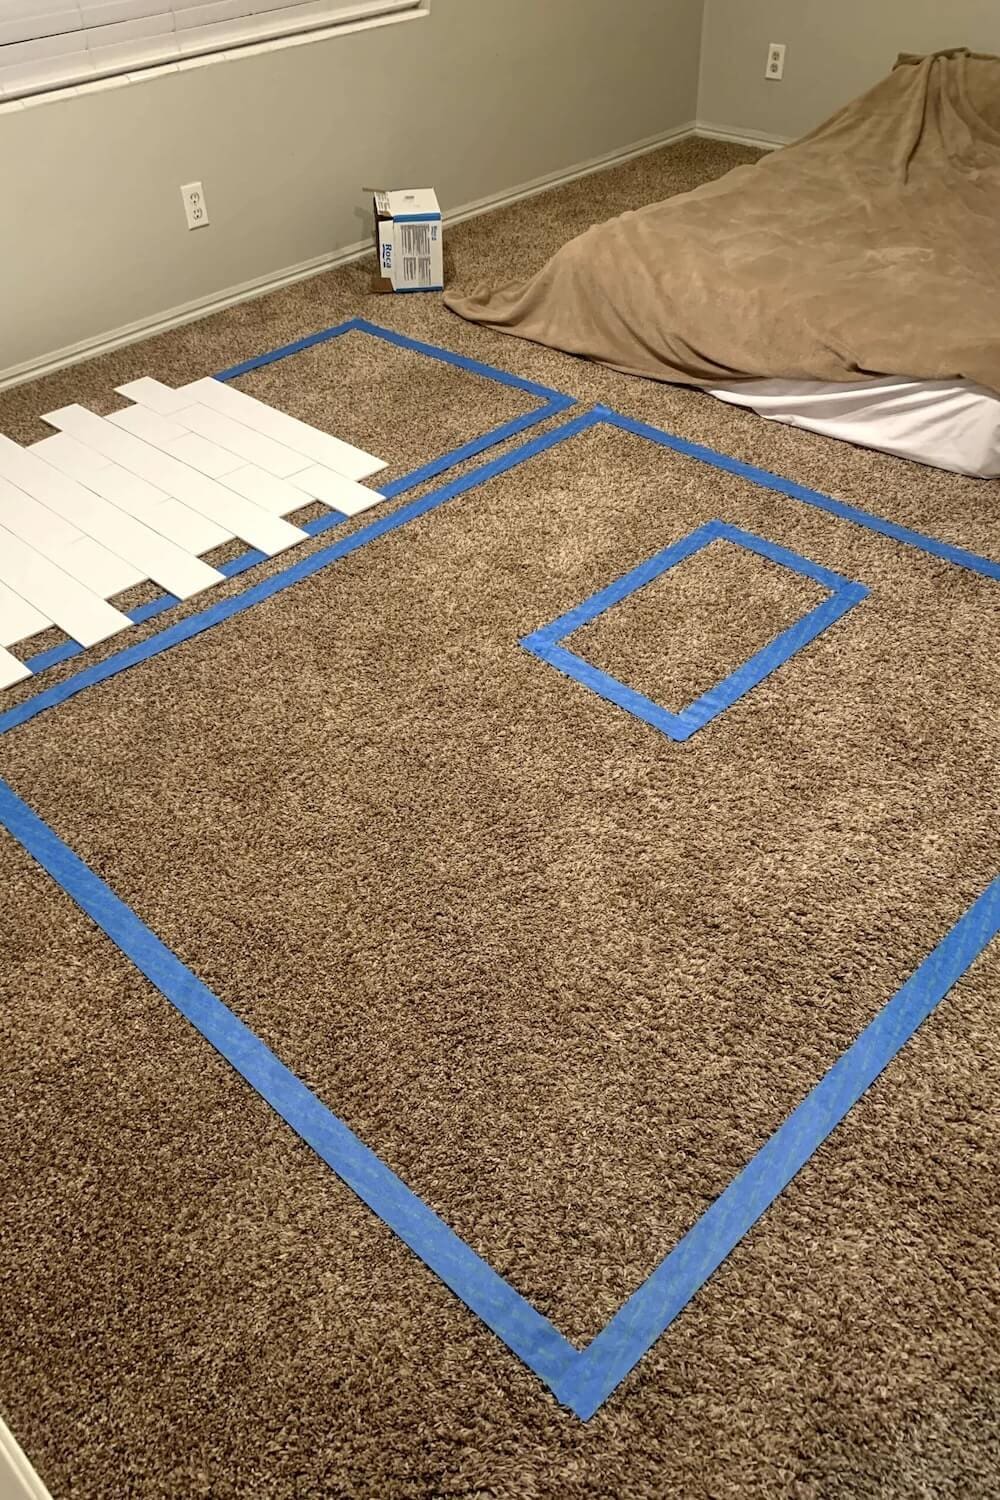
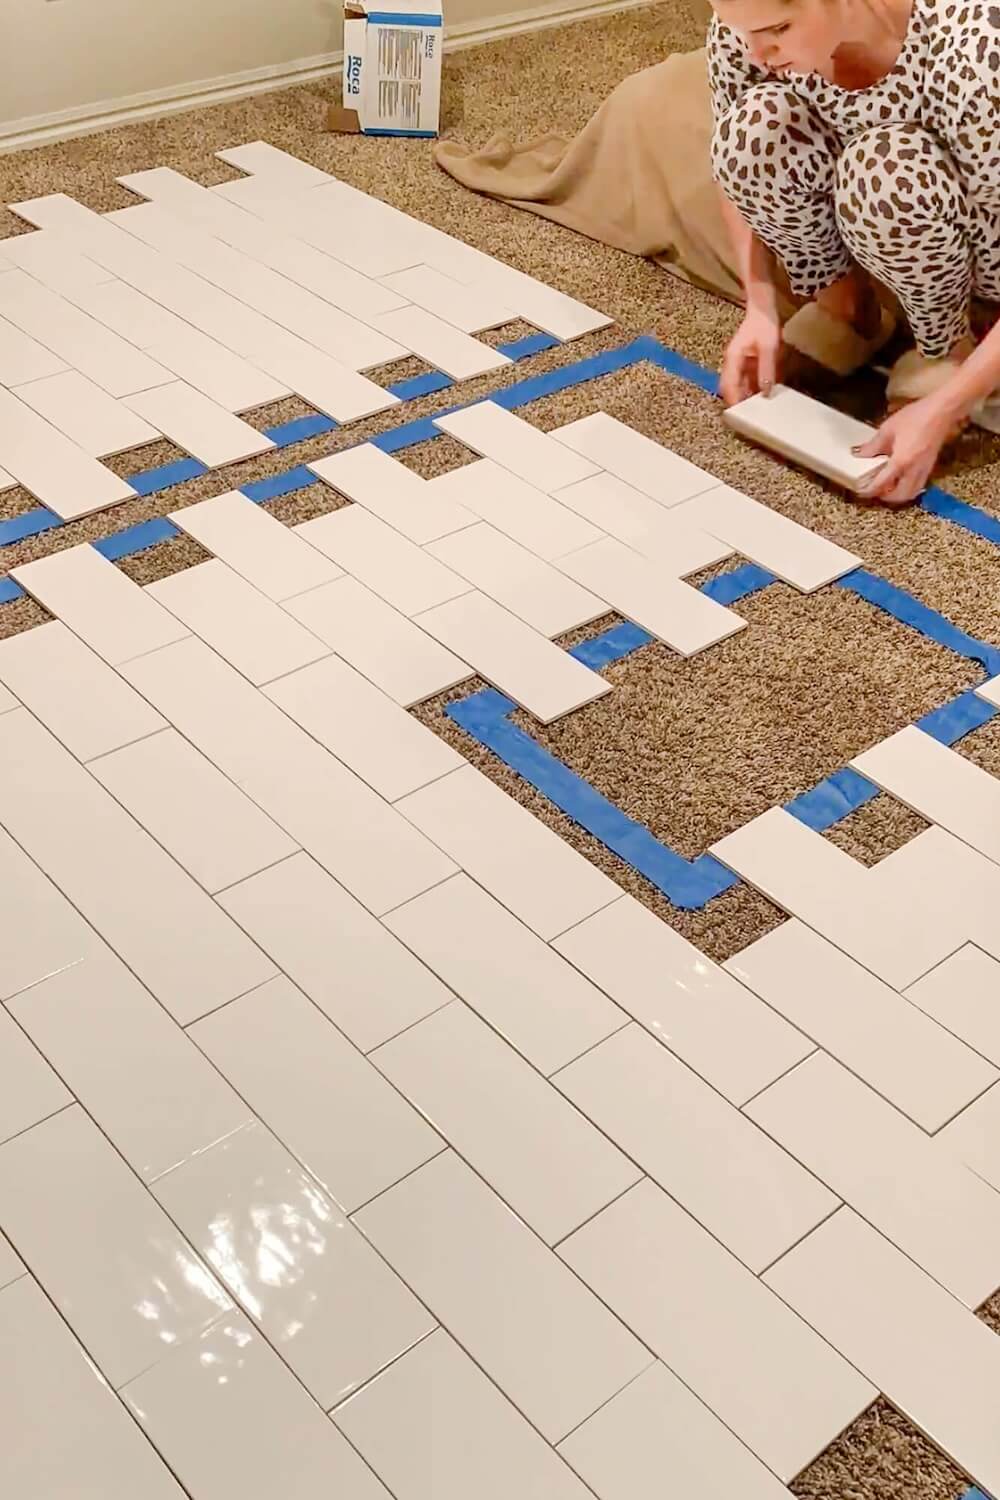
This little exercise gives you practical shower tile layout ideas and lets you see the pattern from above. Once I loved the layout, I snapped a quick photo on my phone. That became my “tile map” so I wasn’t making design decisions while standing on the tub with thinset on the wall.
If you’re wondering how to tile a shower for beginners, this layout step is your best friend. Spend time here and everything else feels calmer.
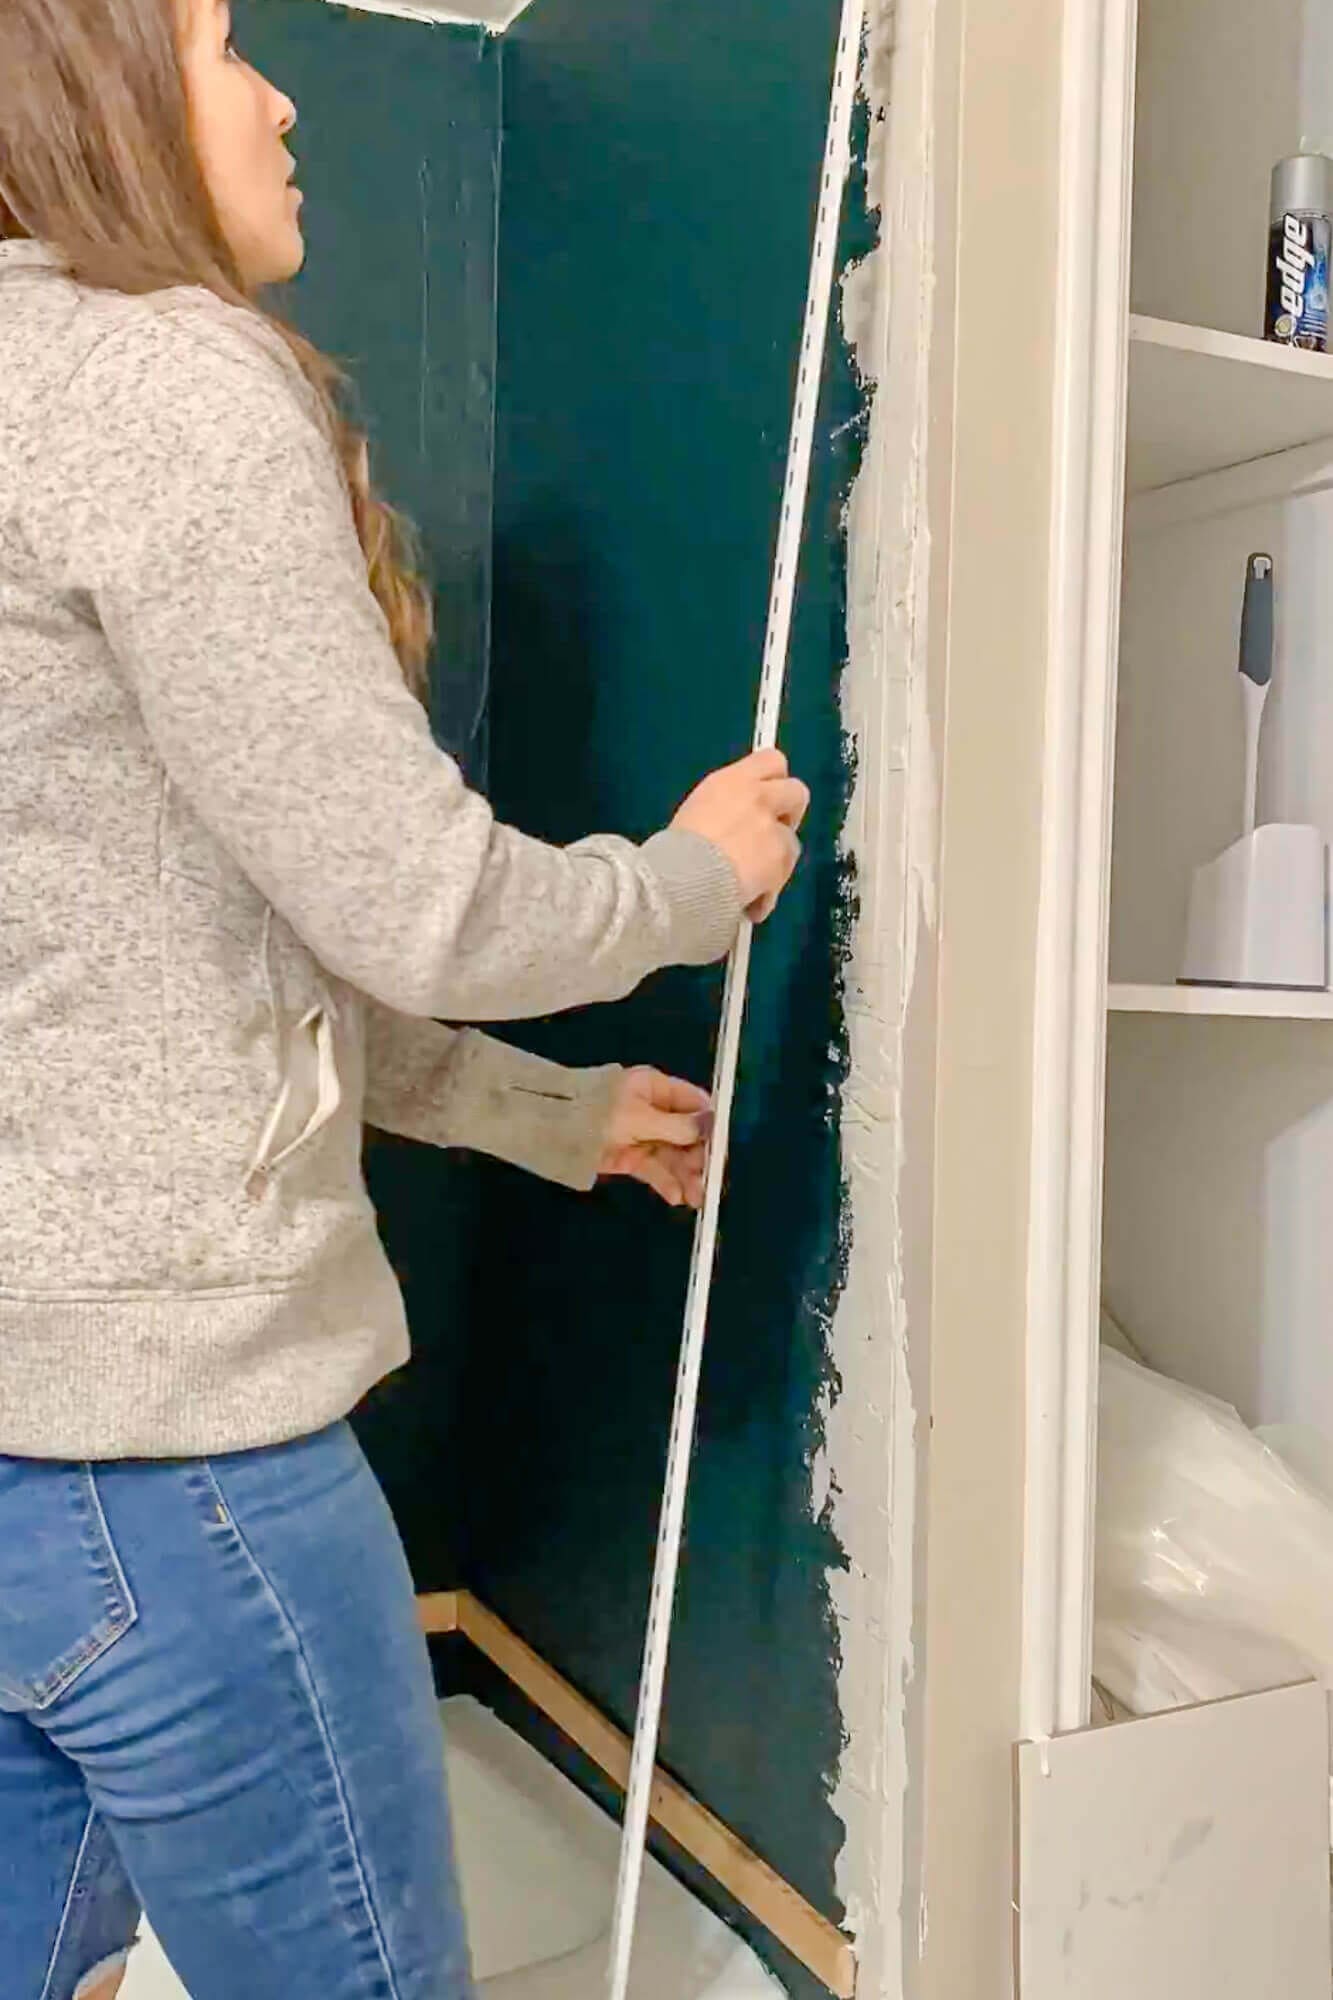
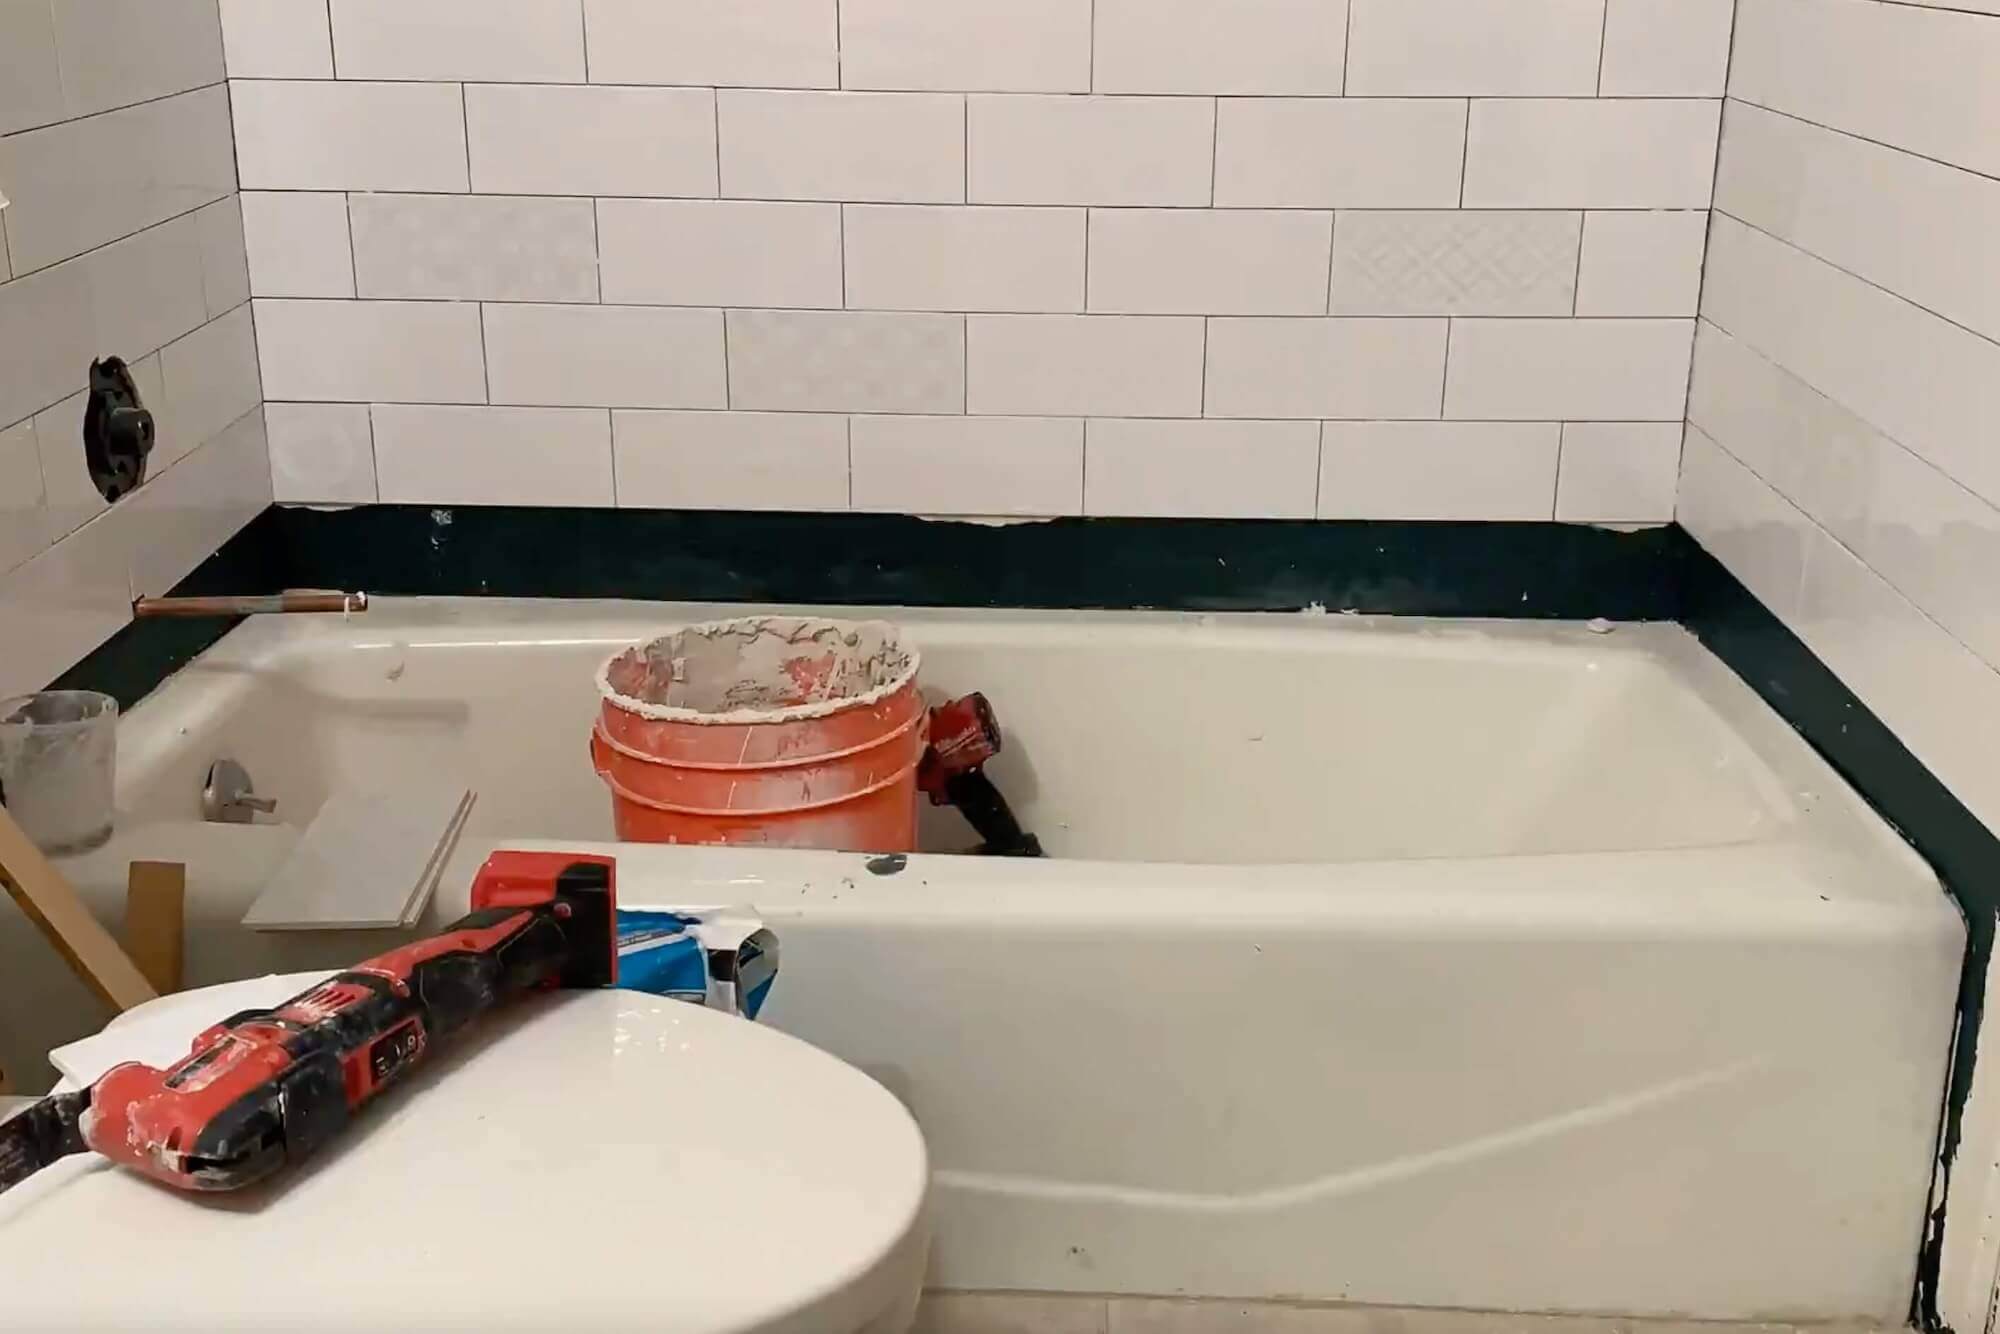
Step 2: Where to Start Tiling a Shower Wall (and Why Not at the Tub)
It’s tempting to start tiling right on the tub ledge, but tubs are almost never perfectly level. If you follow a slightly sloped tub edge, your grout lines will drift as you go up the wall.
Here’s where to start tiling a shower wall instead:
- Find the highest point of the tub edge.
- Use a laser or long level to draw a perfectly level line one full tile above that high point.
- Screw a straight ledger board (a scrap 1×3 or 1×4) into the wall along that line.
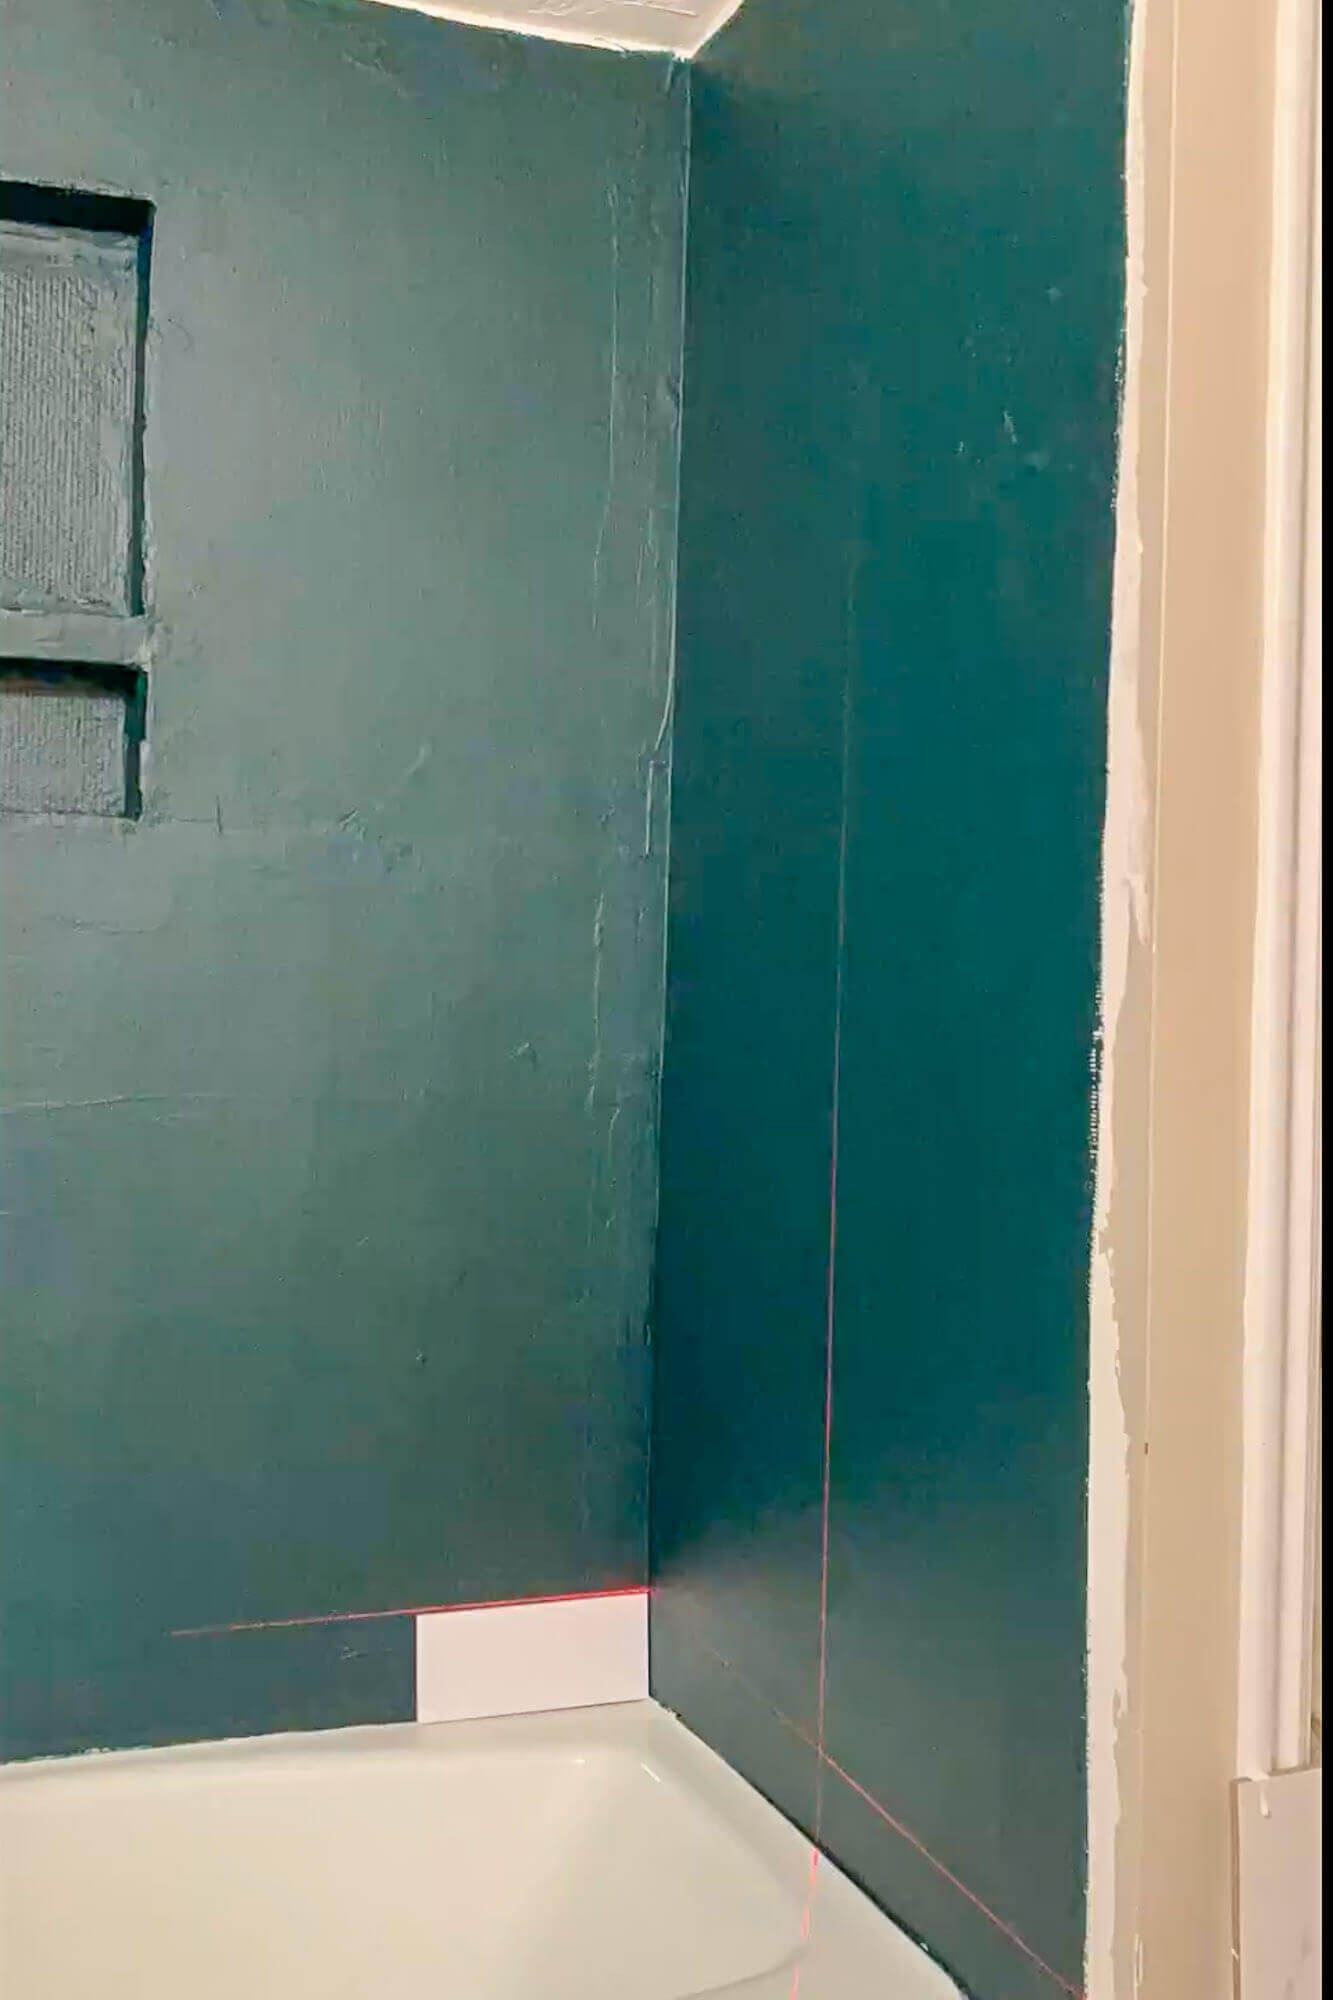
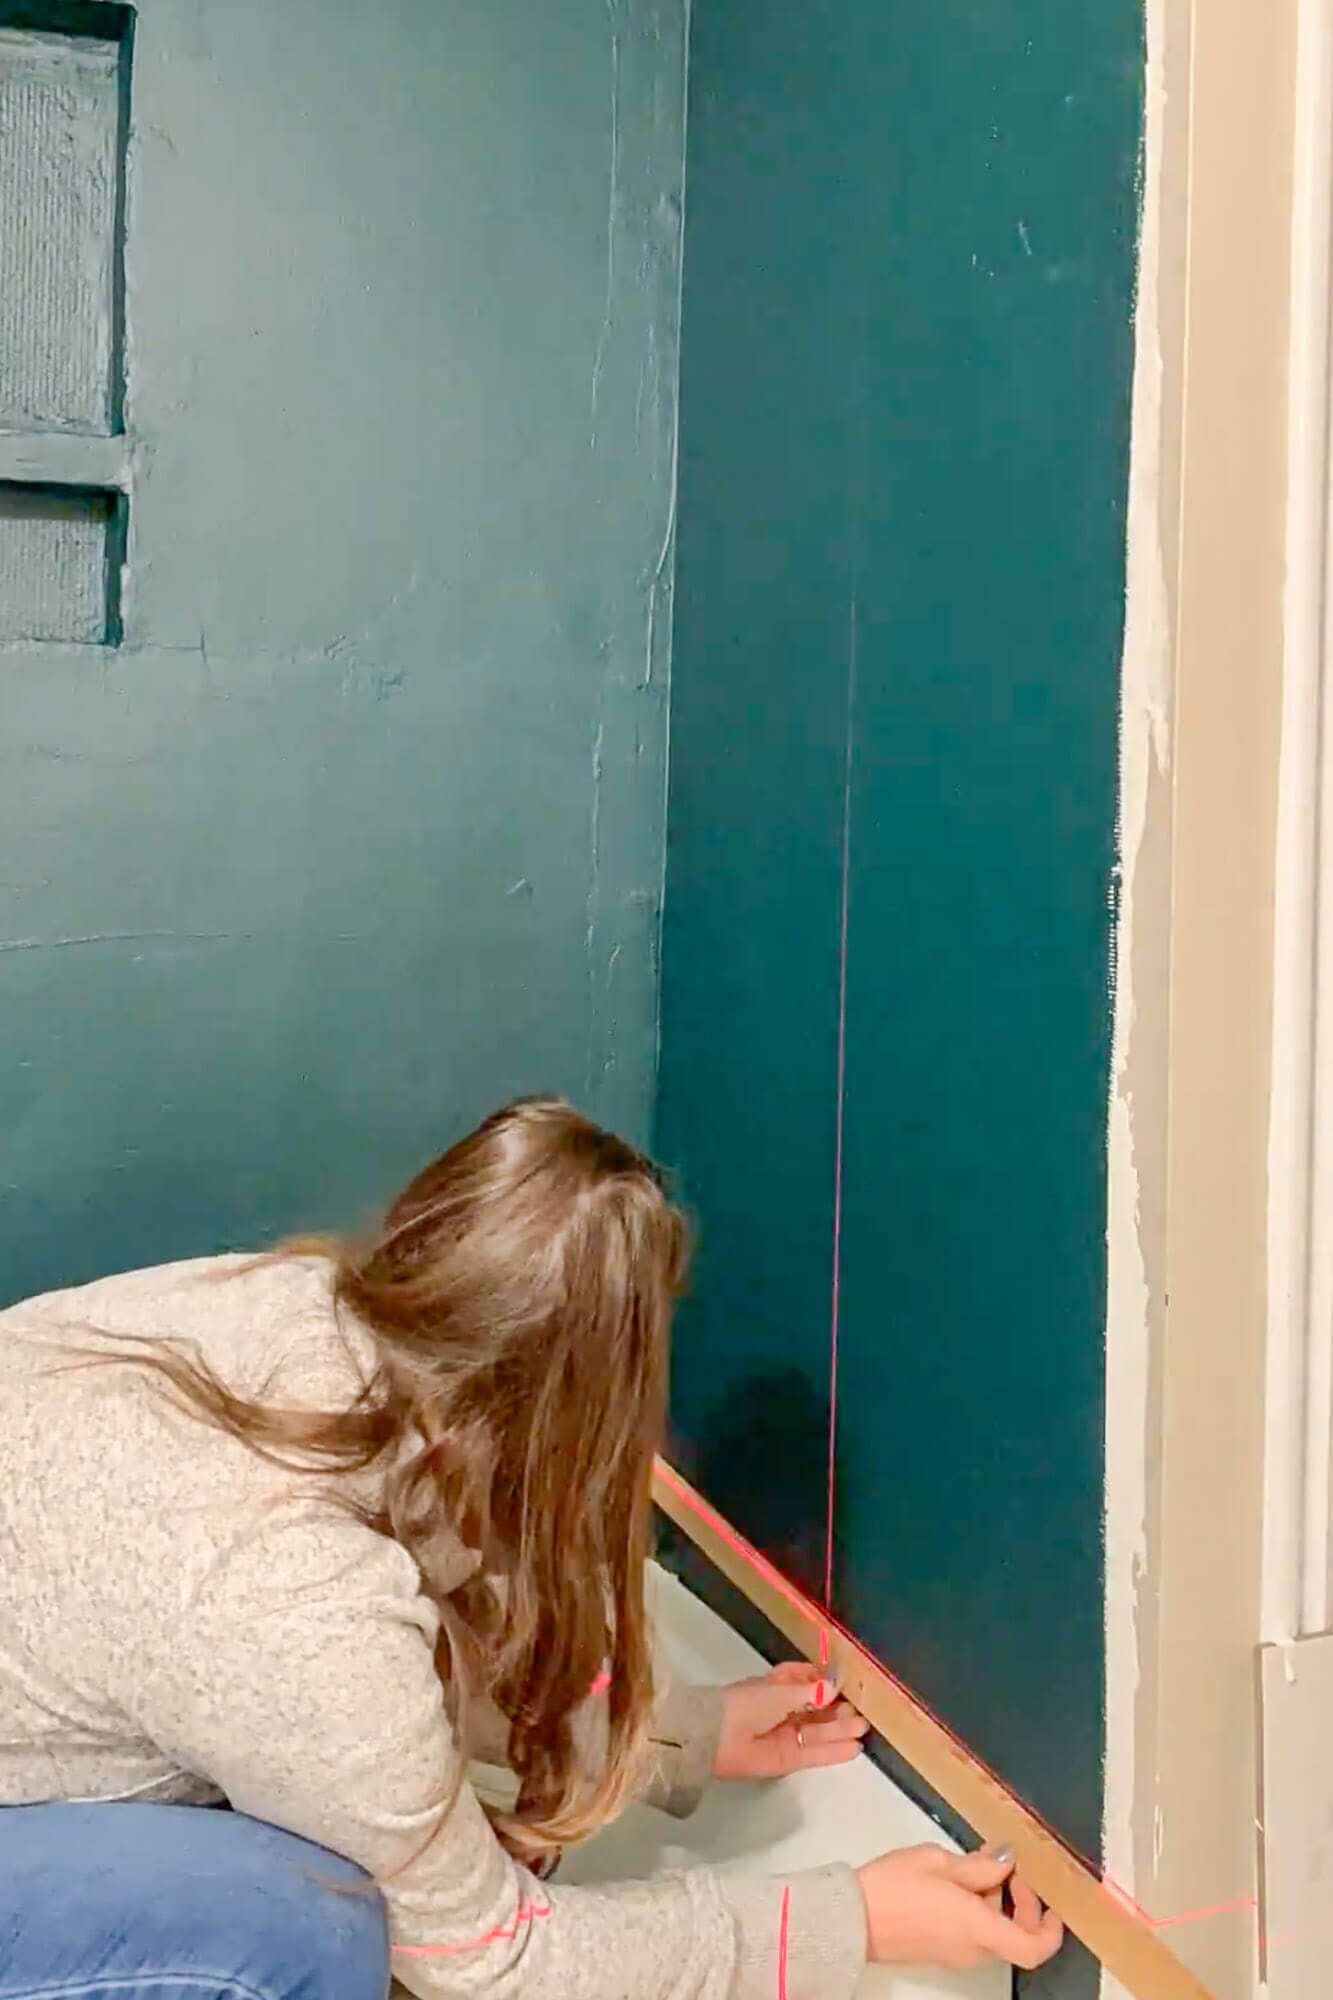
The ledger board acts like a temporary shelf to support your first full row of tiles. Once the upper rows are set and secure, you’ll remove the ledger and cut the bottom row of tiles to follow the tub’s slope. Your grout lines stay beautifully level, even if the tub isn’t.
This simple ledger trick is one of the biggest upgrades from “I tried tiling once” to “this looks professionally done.”
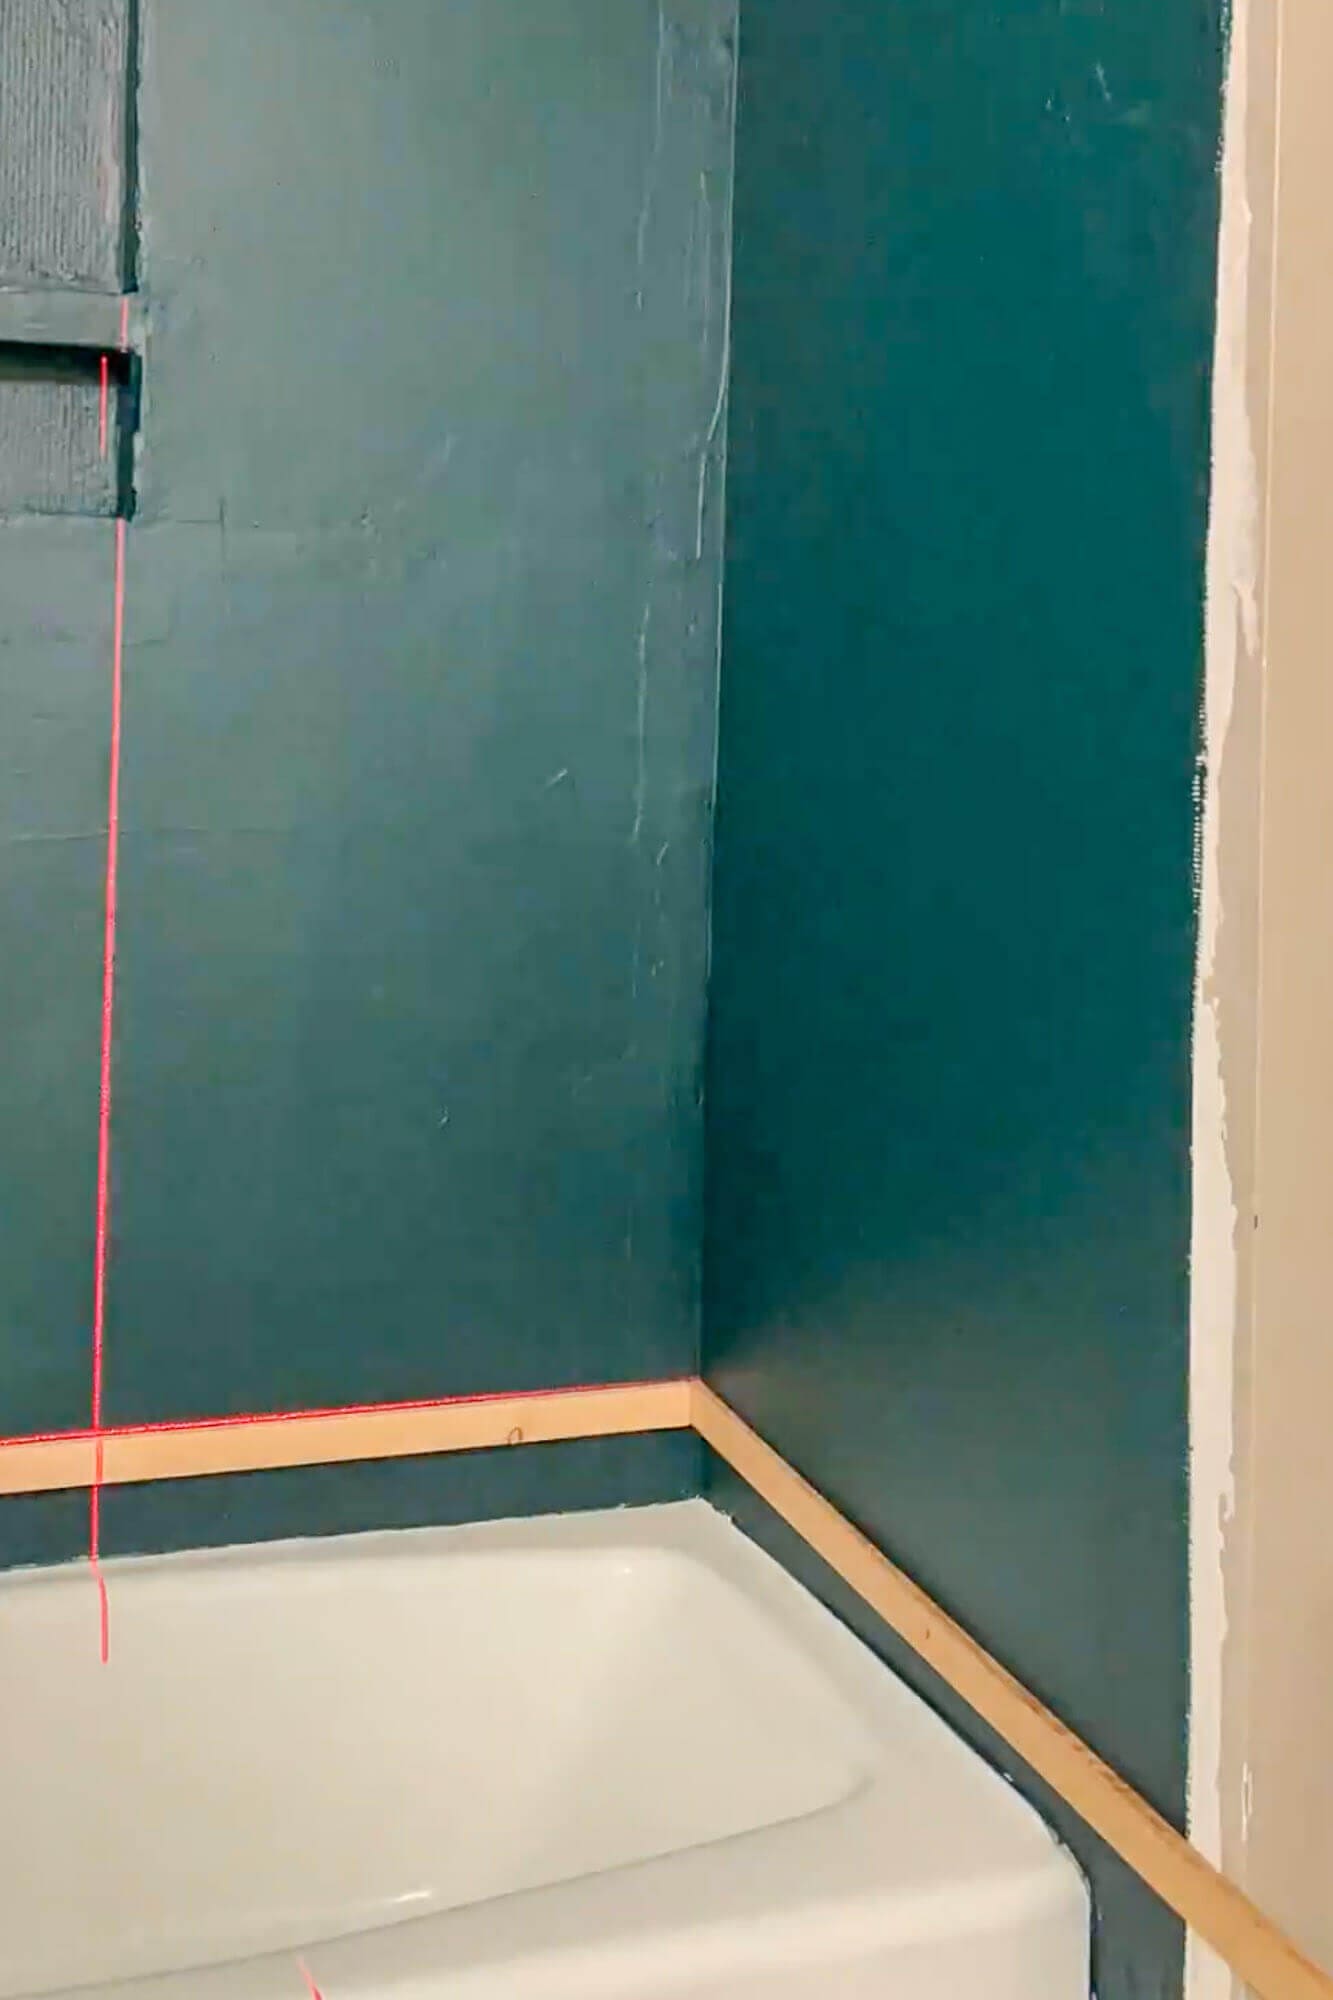
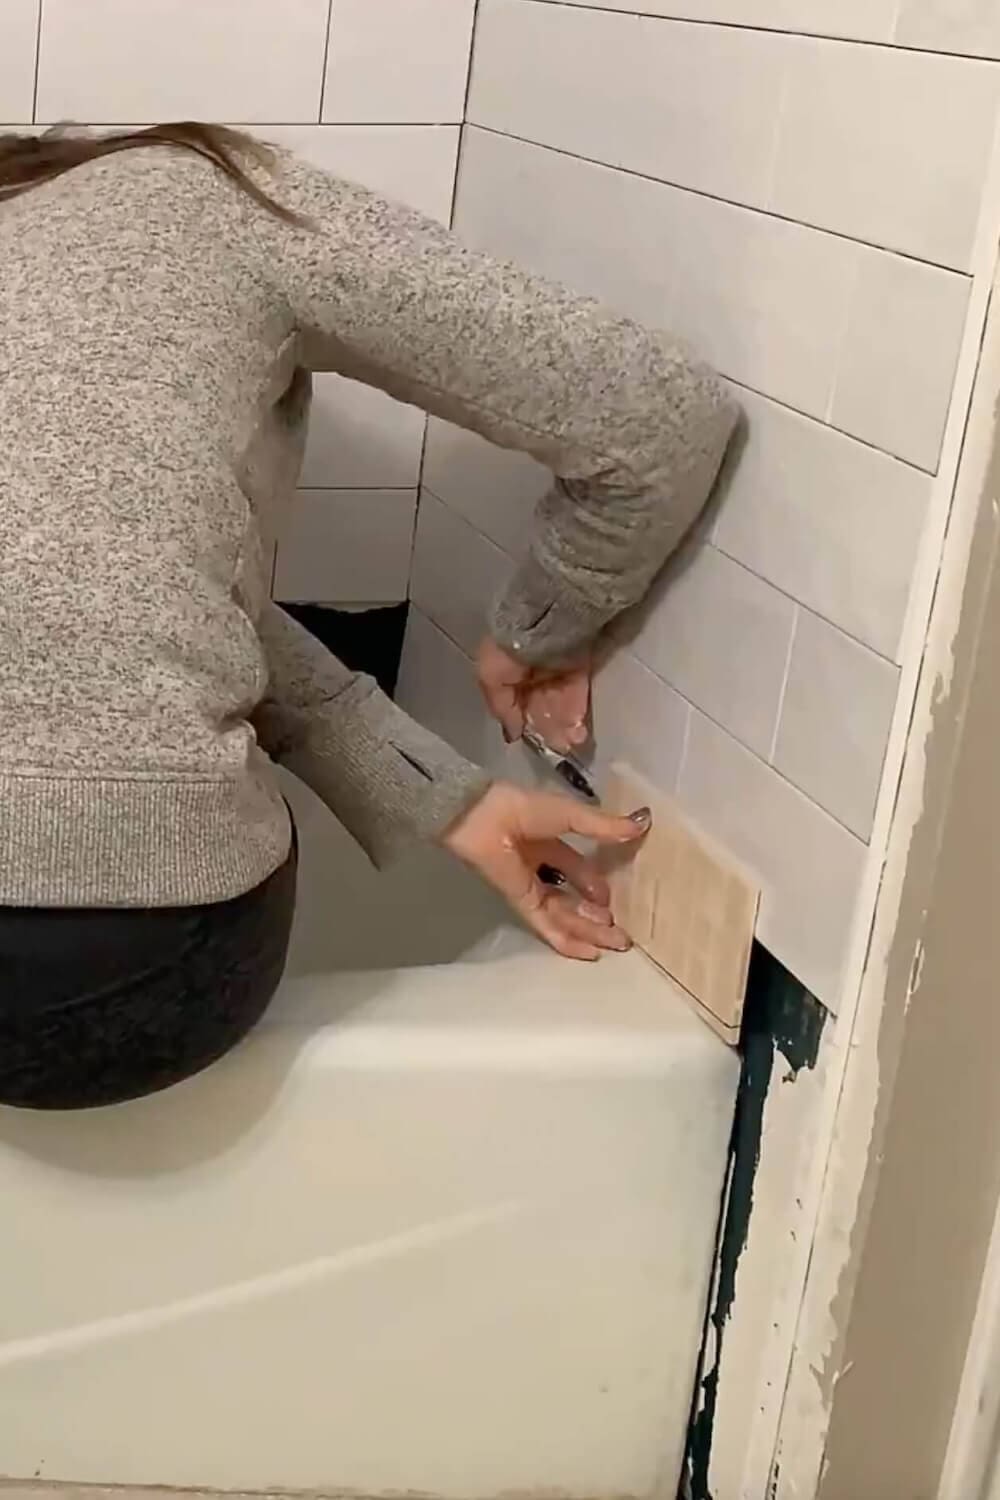
Step 3: Finish the Outside Edge First for Clean Lines
Before tiling the main field of the wall, I installed metal tile edge trim on the two open vertical corners of the shower.
Why do this first?
- It gives the shower a clean, finished edge.
- It keeps the vertical lines arrow-straight from top to bottom.
Once the trim was set in thinset, I started tiling from that outside edge and worked inward:
- Tiled one side wall, then the other.
- Saved the back wall for last so I could line up the corners and keep everything symmetrical.
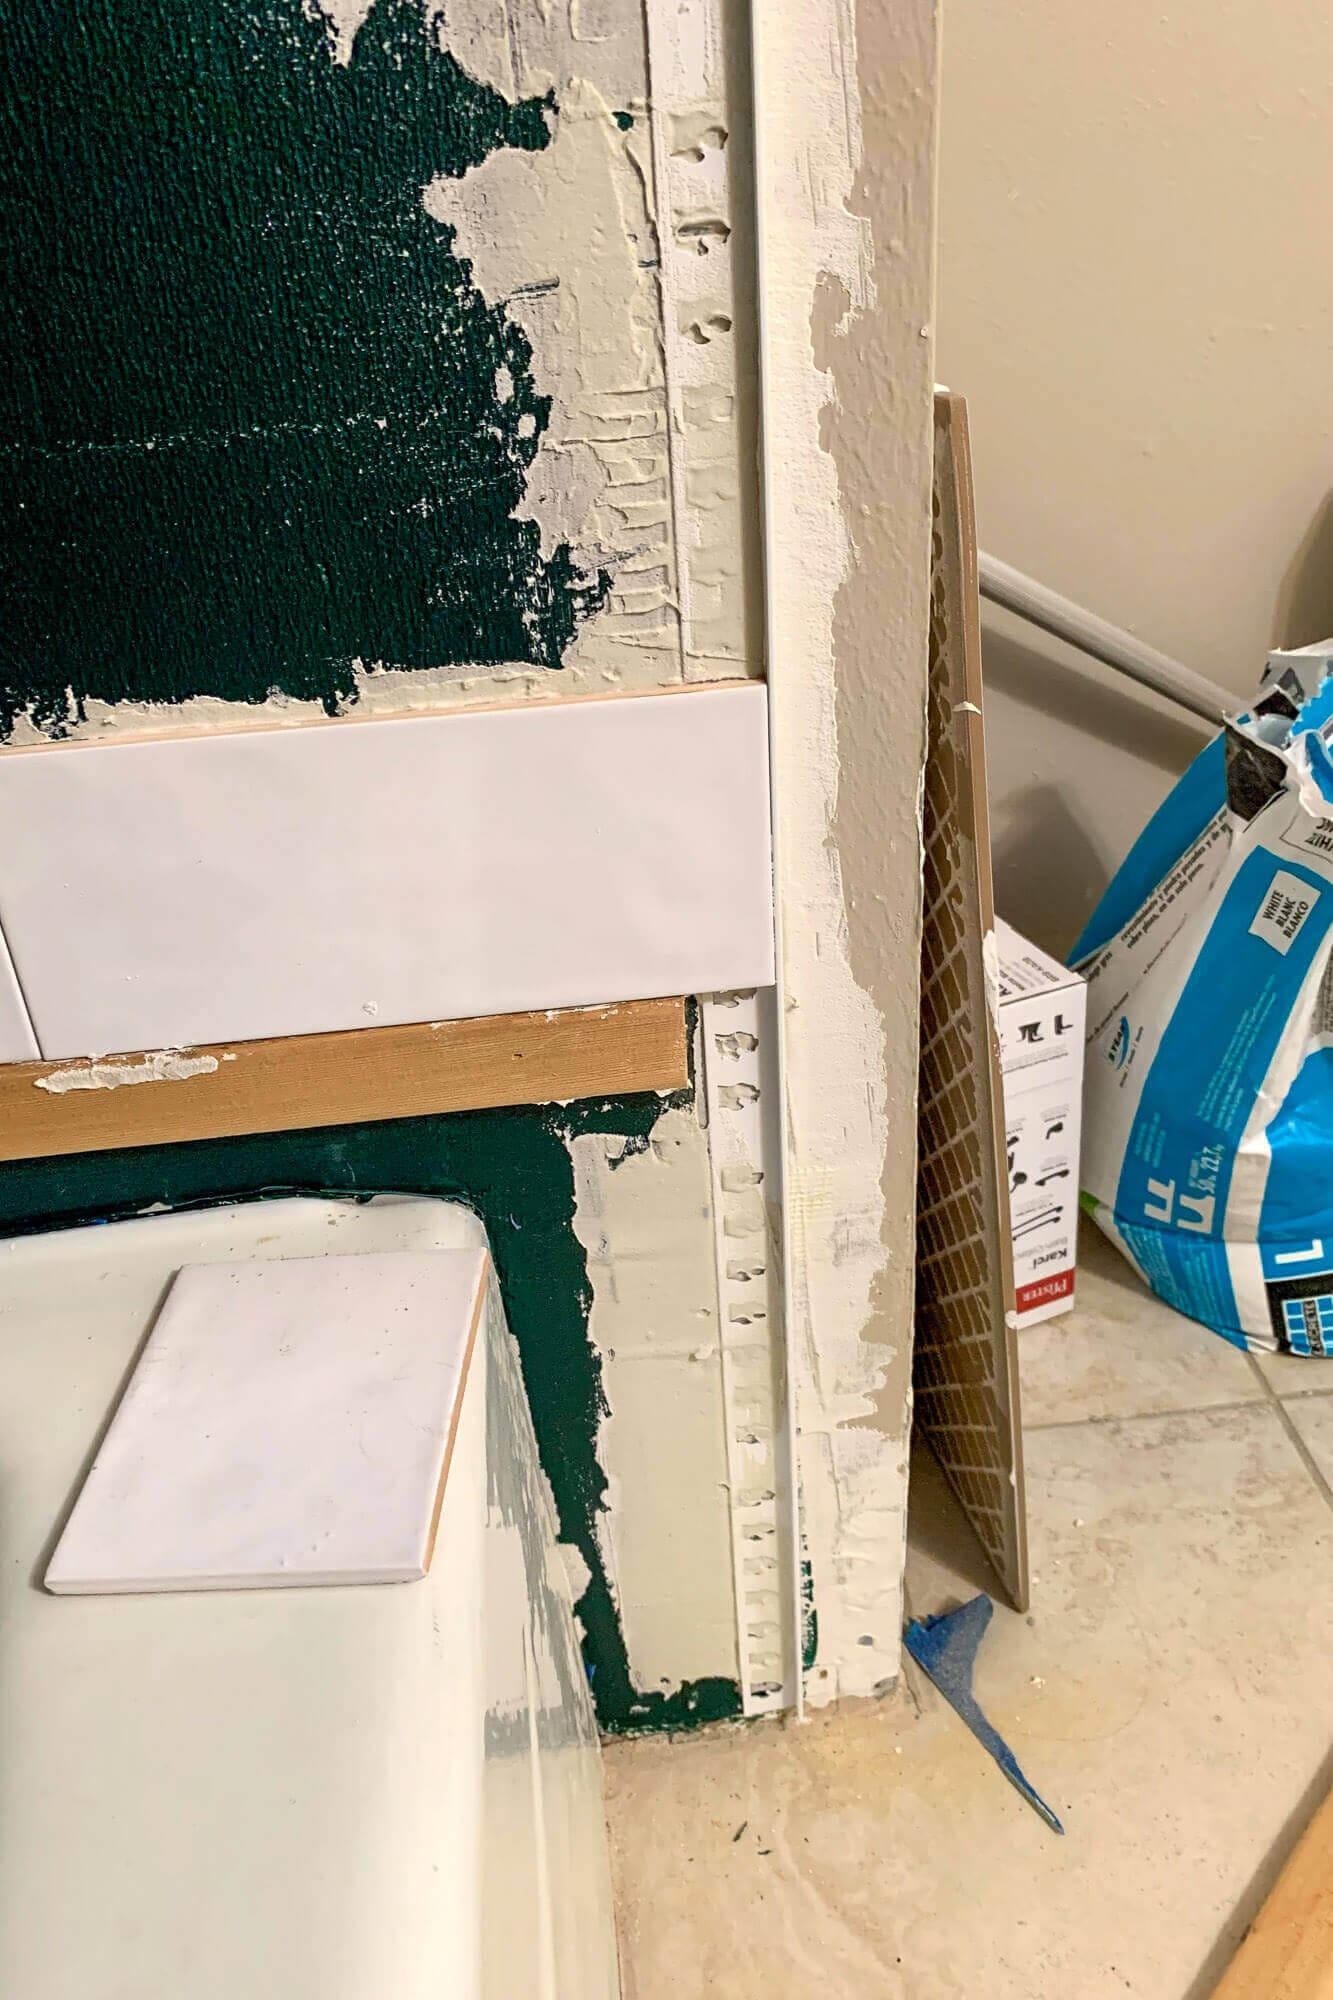
If your tile doesn’t come with bullnose pieces, metal edge trim is one of the easiest and most budget-friendly ways to finish a DIY shower tile project. It comes in tons of finishes and looks sleek next to modern black or brass fixtures.
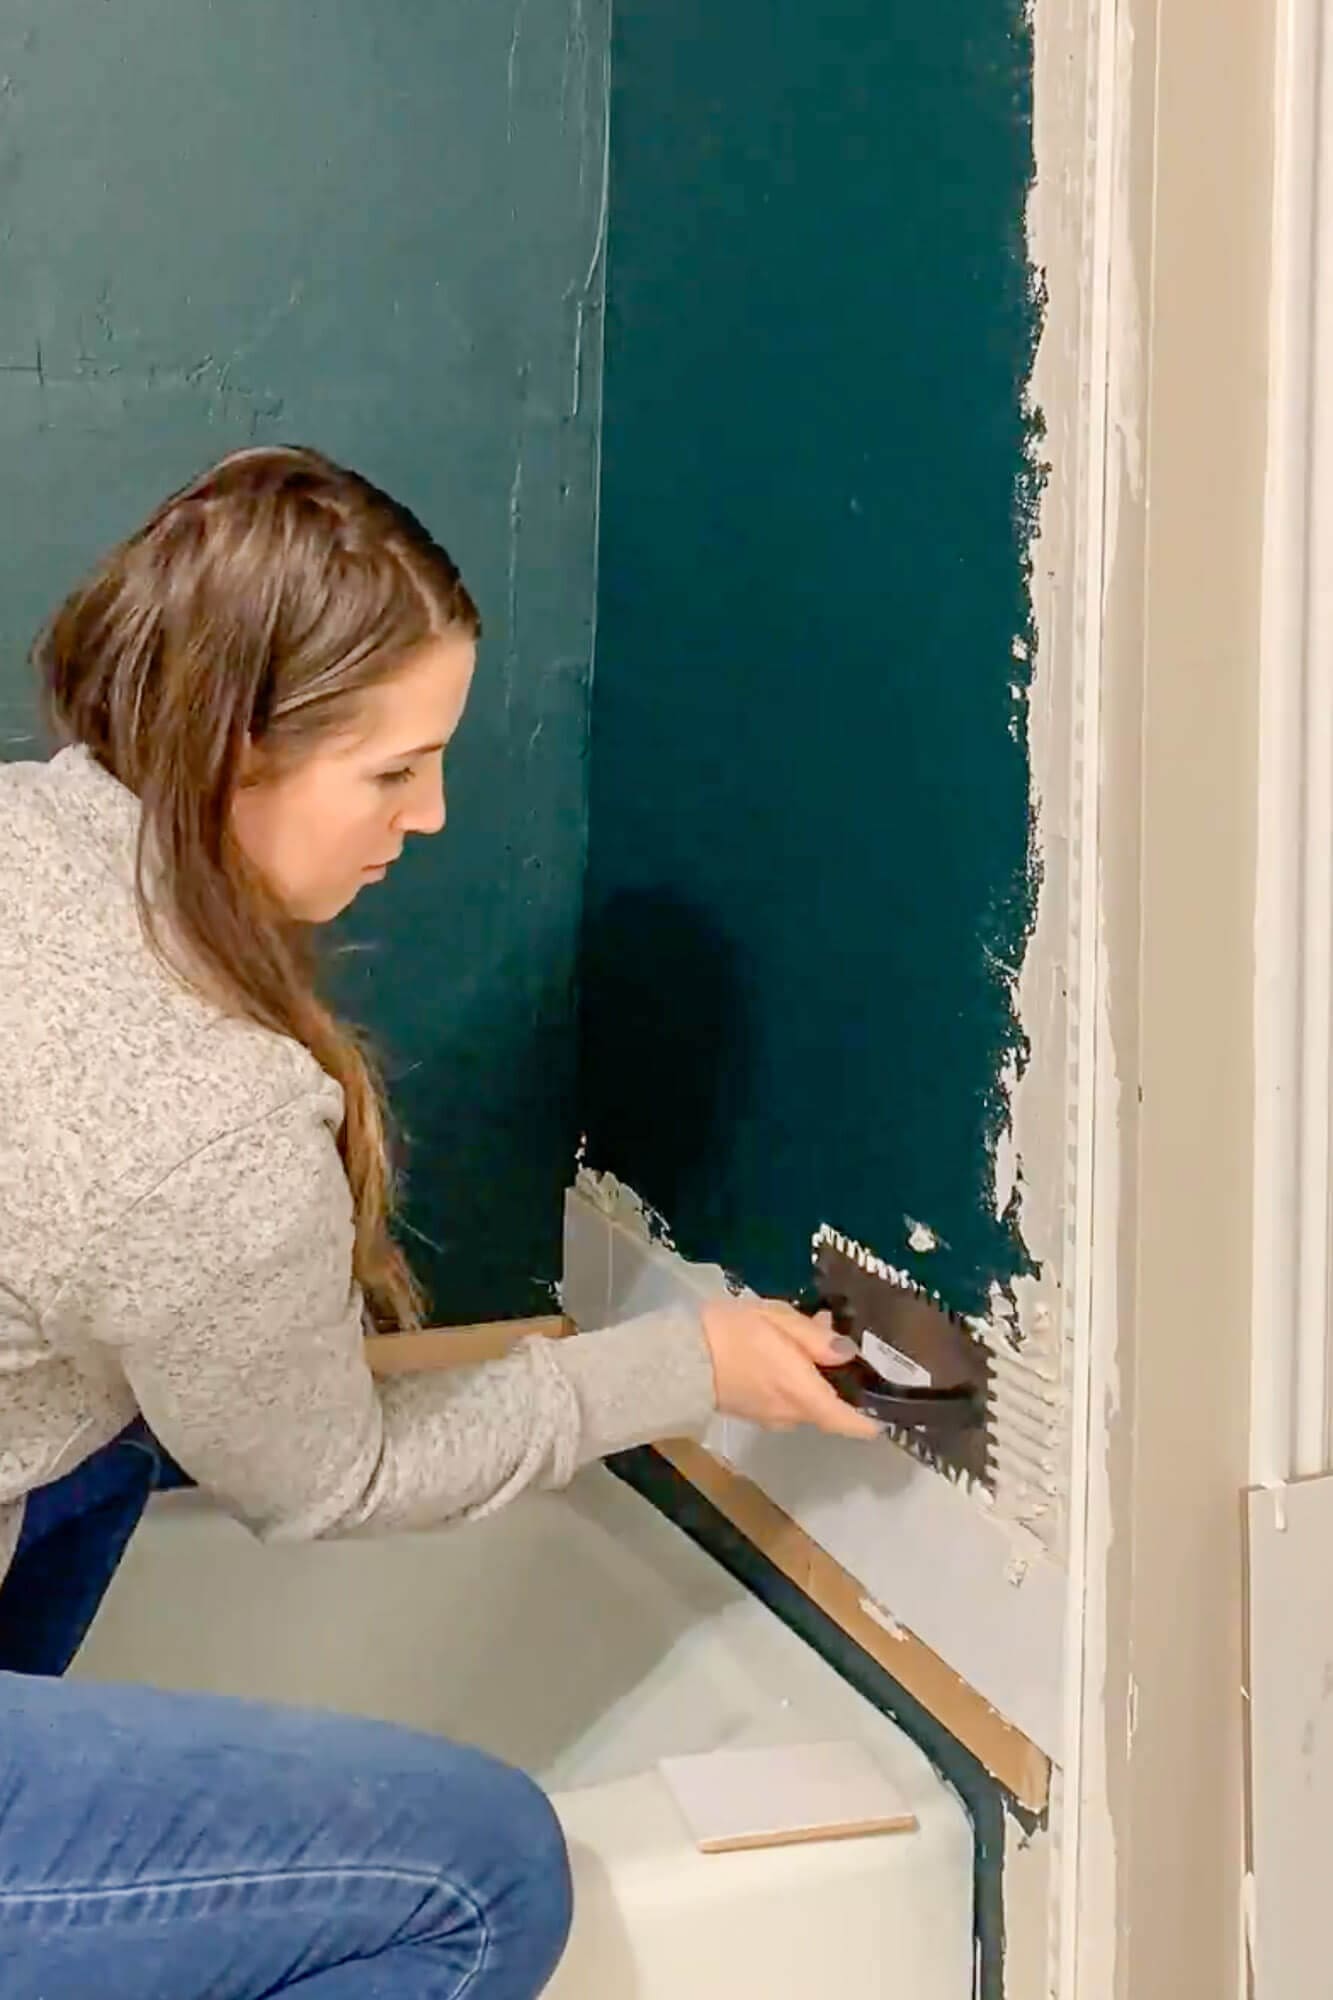
Step 4: Mix and Apply Thinset (Grooves + Back-Butter)
The way you apply thinset has a huge impact on how well your tiles stay put over time.
Here’s the method I like for step-by-step shower tiling:
- Spread thinset on the wall with a notched trowel, holding it at a consistent angle so the grooves are even.
- Use the flat side of the trowel to butter the back of each tile with a thin coat of mortar.
- Press the tile into the grooves on the wall and give it a tiny wiggle to collapse the ridges and eliminate air pockets.

This “grooves + back-butter” combo helps prevent hollow spots behind the tile and reduces the risk of tiles cracking or popping off later. Work in small sections so the thinset doesn’t skin over before you get the tiles set.
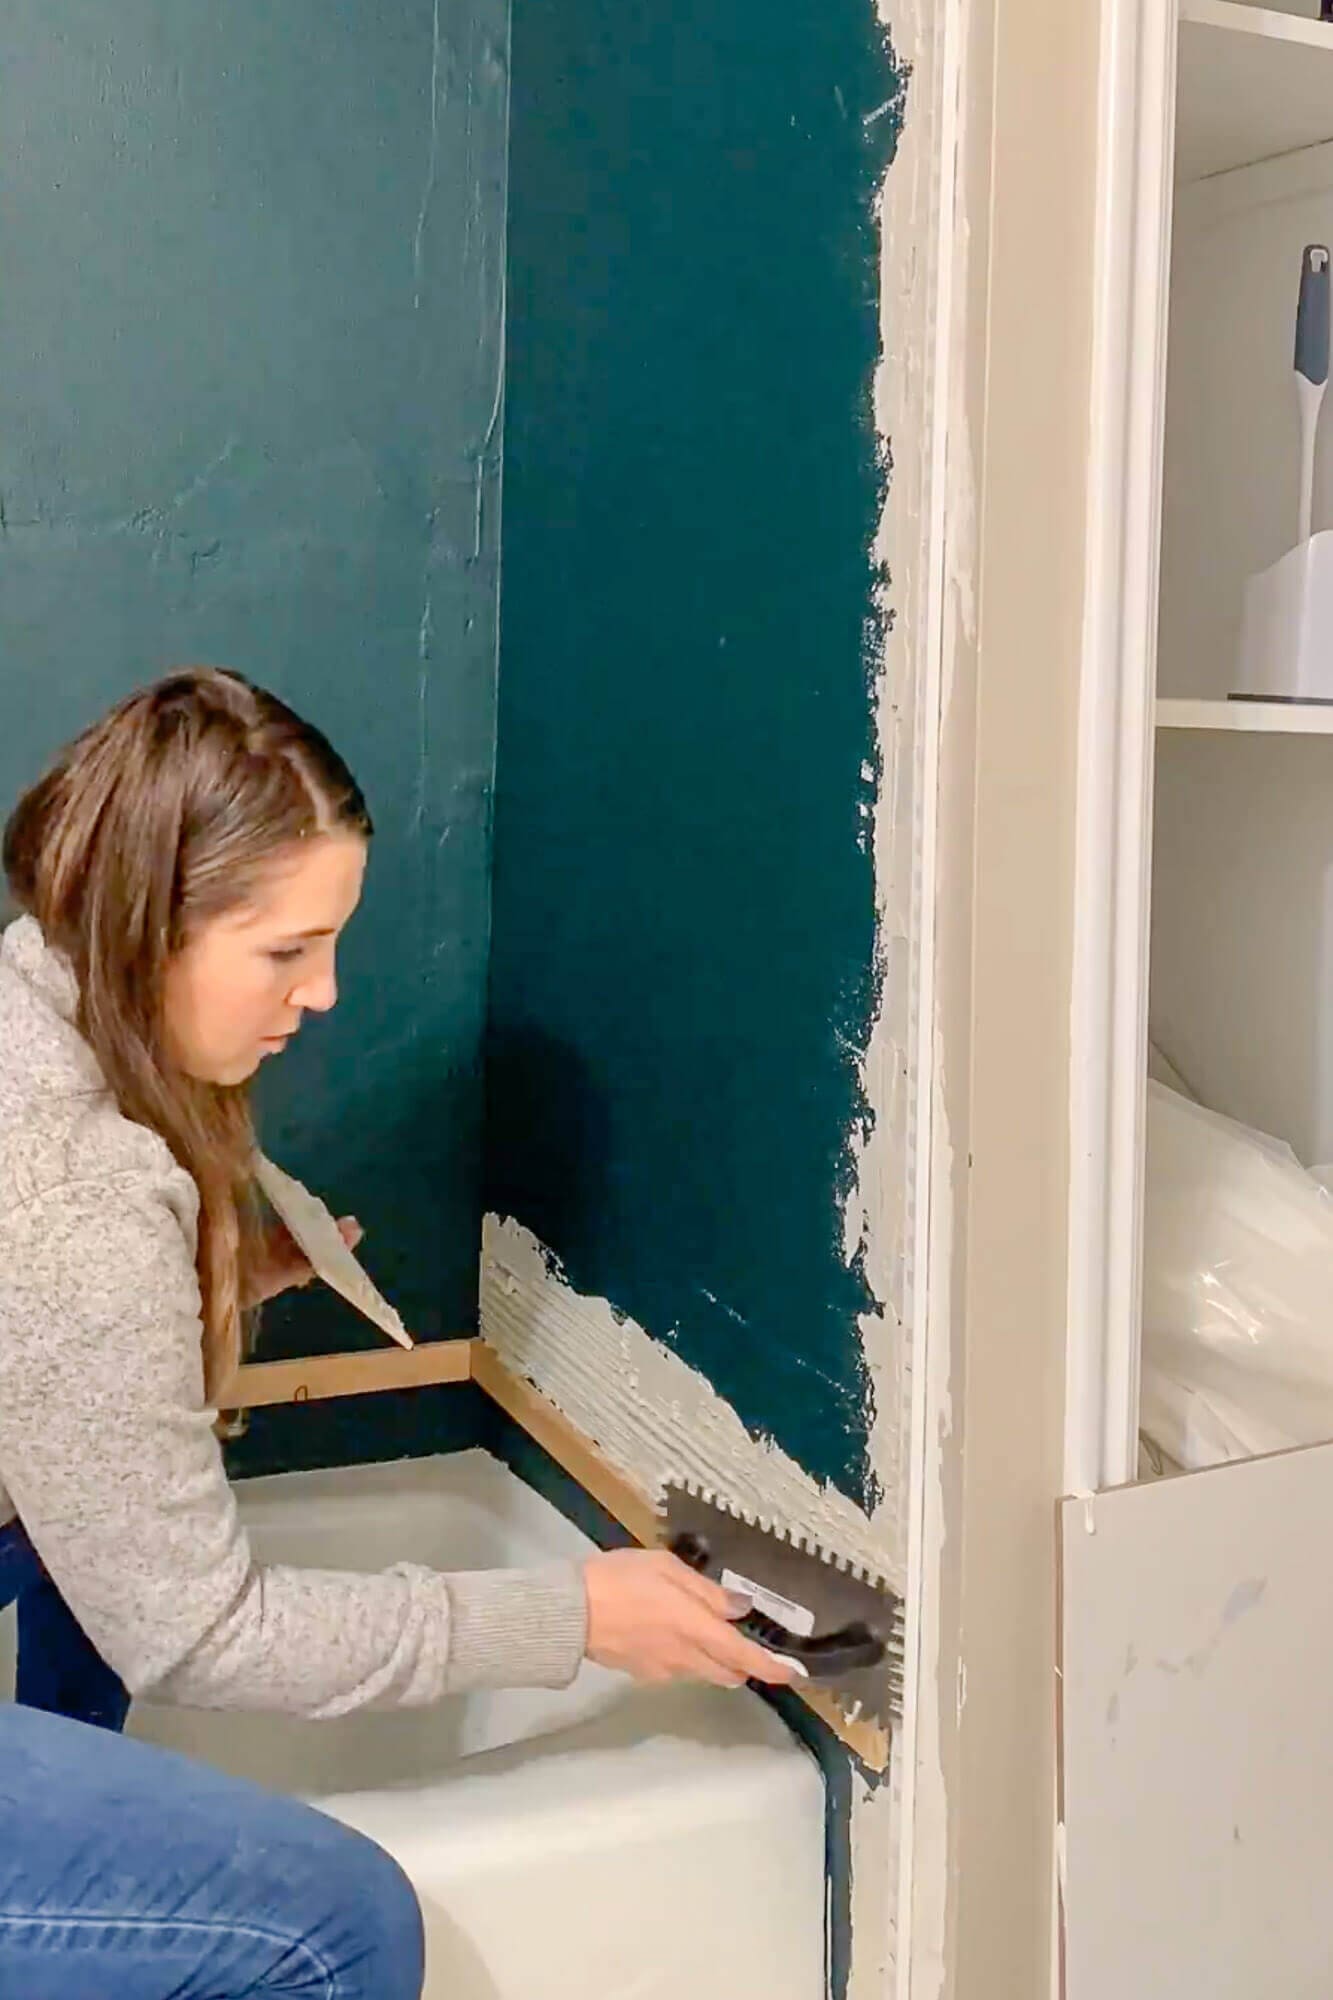
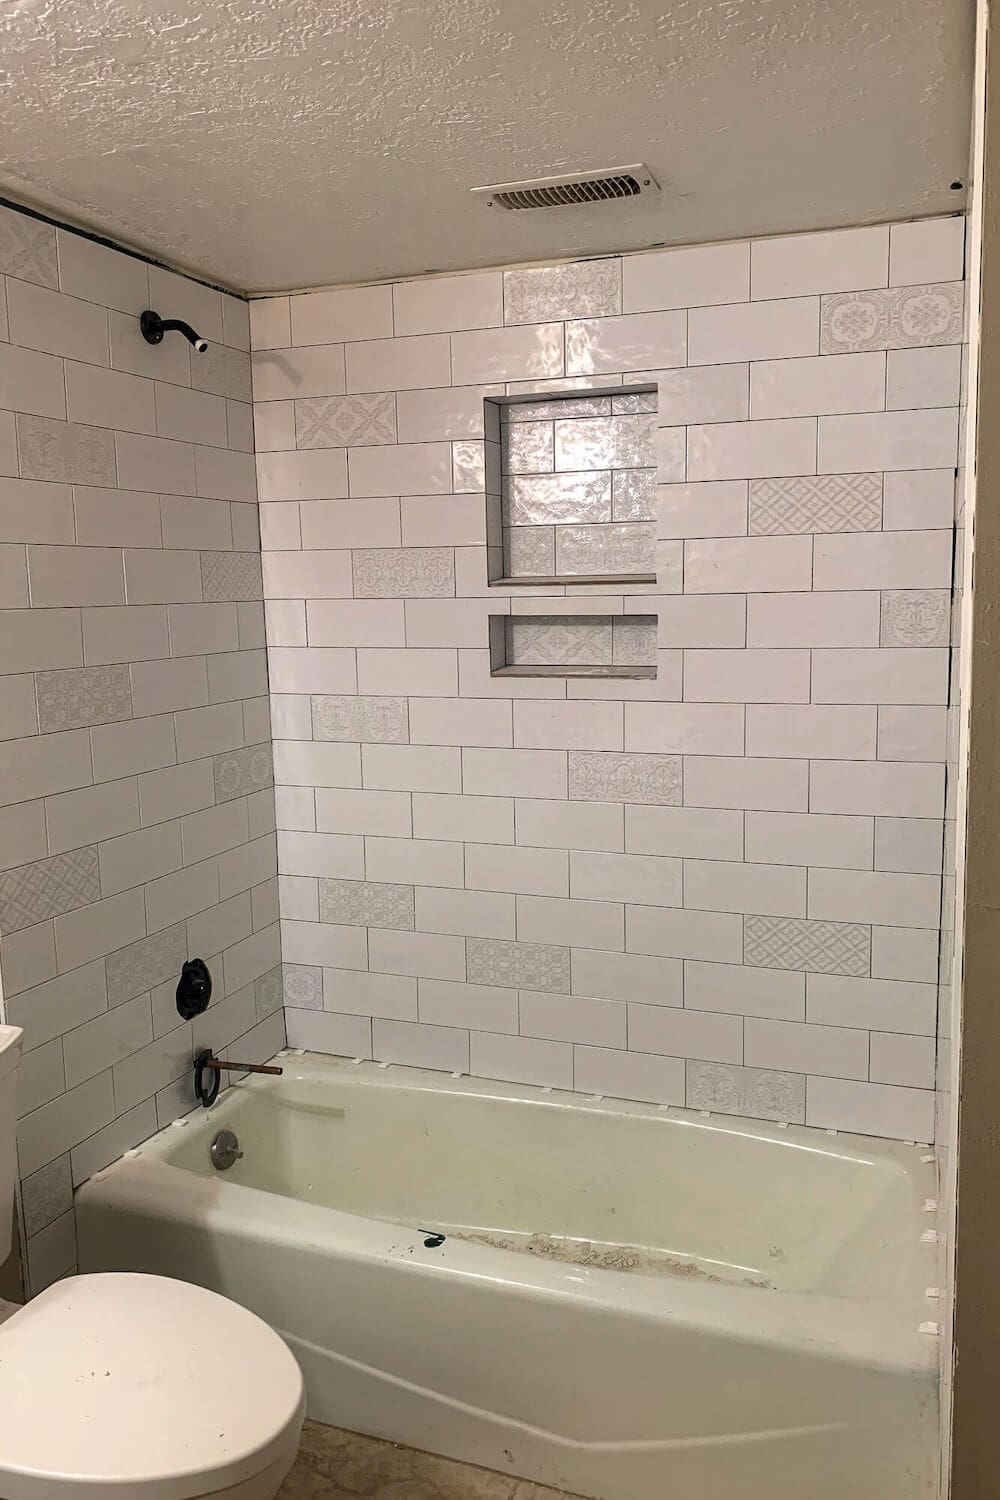
Step 5: Tile Around and Inside the Shower Niche
Niches are a little more detailed, but they’re totally doable with a plan. If you haven’t built yours yet, I walk through the full framing, pitching, and waterproofing process in How to Build a Shower Niche.
Here’s how I approached it:
- Dry-fit all of the niche tiles first so the grout lines would line up with the rest of the wall.
- Put all the decorative tiles on the back of the niche so they’d be a focal point.
- Supported the niche ceiling tile with small scraps of wood while the thinset cured so it wouldn’t sag.
- Wrapped the edge tiles into the niche opening for that clean “picture frame” look you see in designer bathrooms.
Because the niche is at eye level, take your time here. Any crooked lines or uneven spacing will be noticeable once everything is grouted.
Step 6: Keep Rows Straight with Spacers and a Laser
The secret to a professional-looking DIY shower tile job is consistency: consistent grout lines, straight rows, and even gaps at the corners.
While I tiled:
- I used firm tile spacers so the joints stayed the same width everywhere.
- Kept the laser line projected as I worked up the wall (or you can use a long level).
- Wiped away any thinset that squeezed into the joints before it dried.
Once the upper rows were secure, I:
- Removed the ledger board.
- Touched up waterproofing over the screw holes.
- Cut and installed the bottom row of tiles so they followed the tub’s slope while still hitting the grout lines cleanly.
This is also a good time to step back every few rows and make sure your decorative tiles are spaced the way you planned from your floor “tile map.”
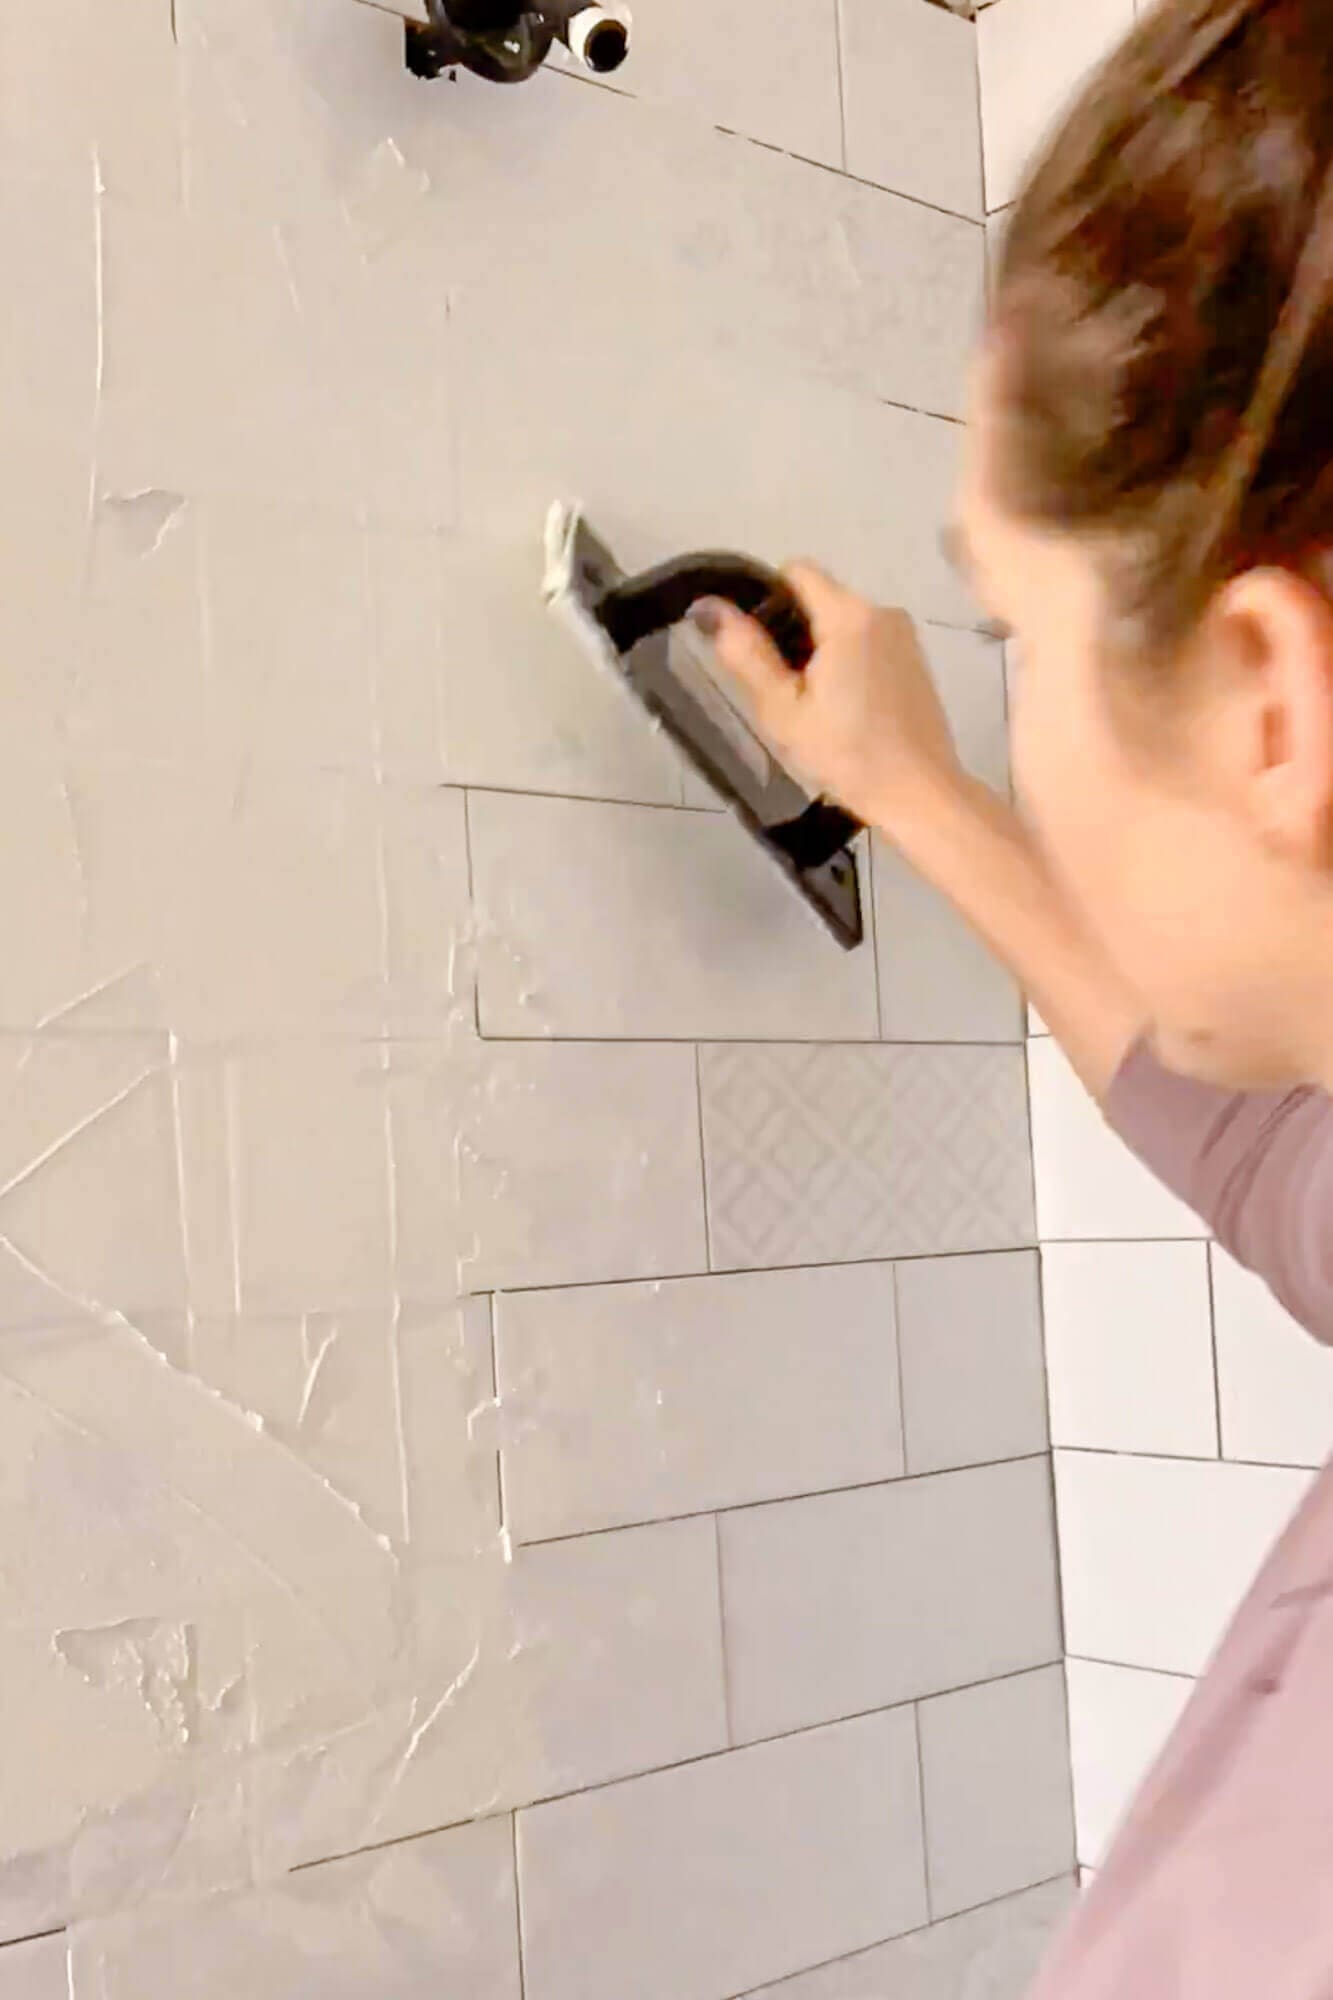
Step 7: How to Grout a Shower Wall
Once the thinset cured, it was time to grout. If you’re wondering how to grout a shower wall, this is the basic process I followed.
Before grouting, I:
- Wiped all the tiles clean.
- Checked every joint for dried mortar and scraped it out where needed.
Then I grouted:
- Pressed grout into the joints using a rubber float, working at a diagonal to pack the joints fully.
- Let it sit for the amount of time recommended on the label.
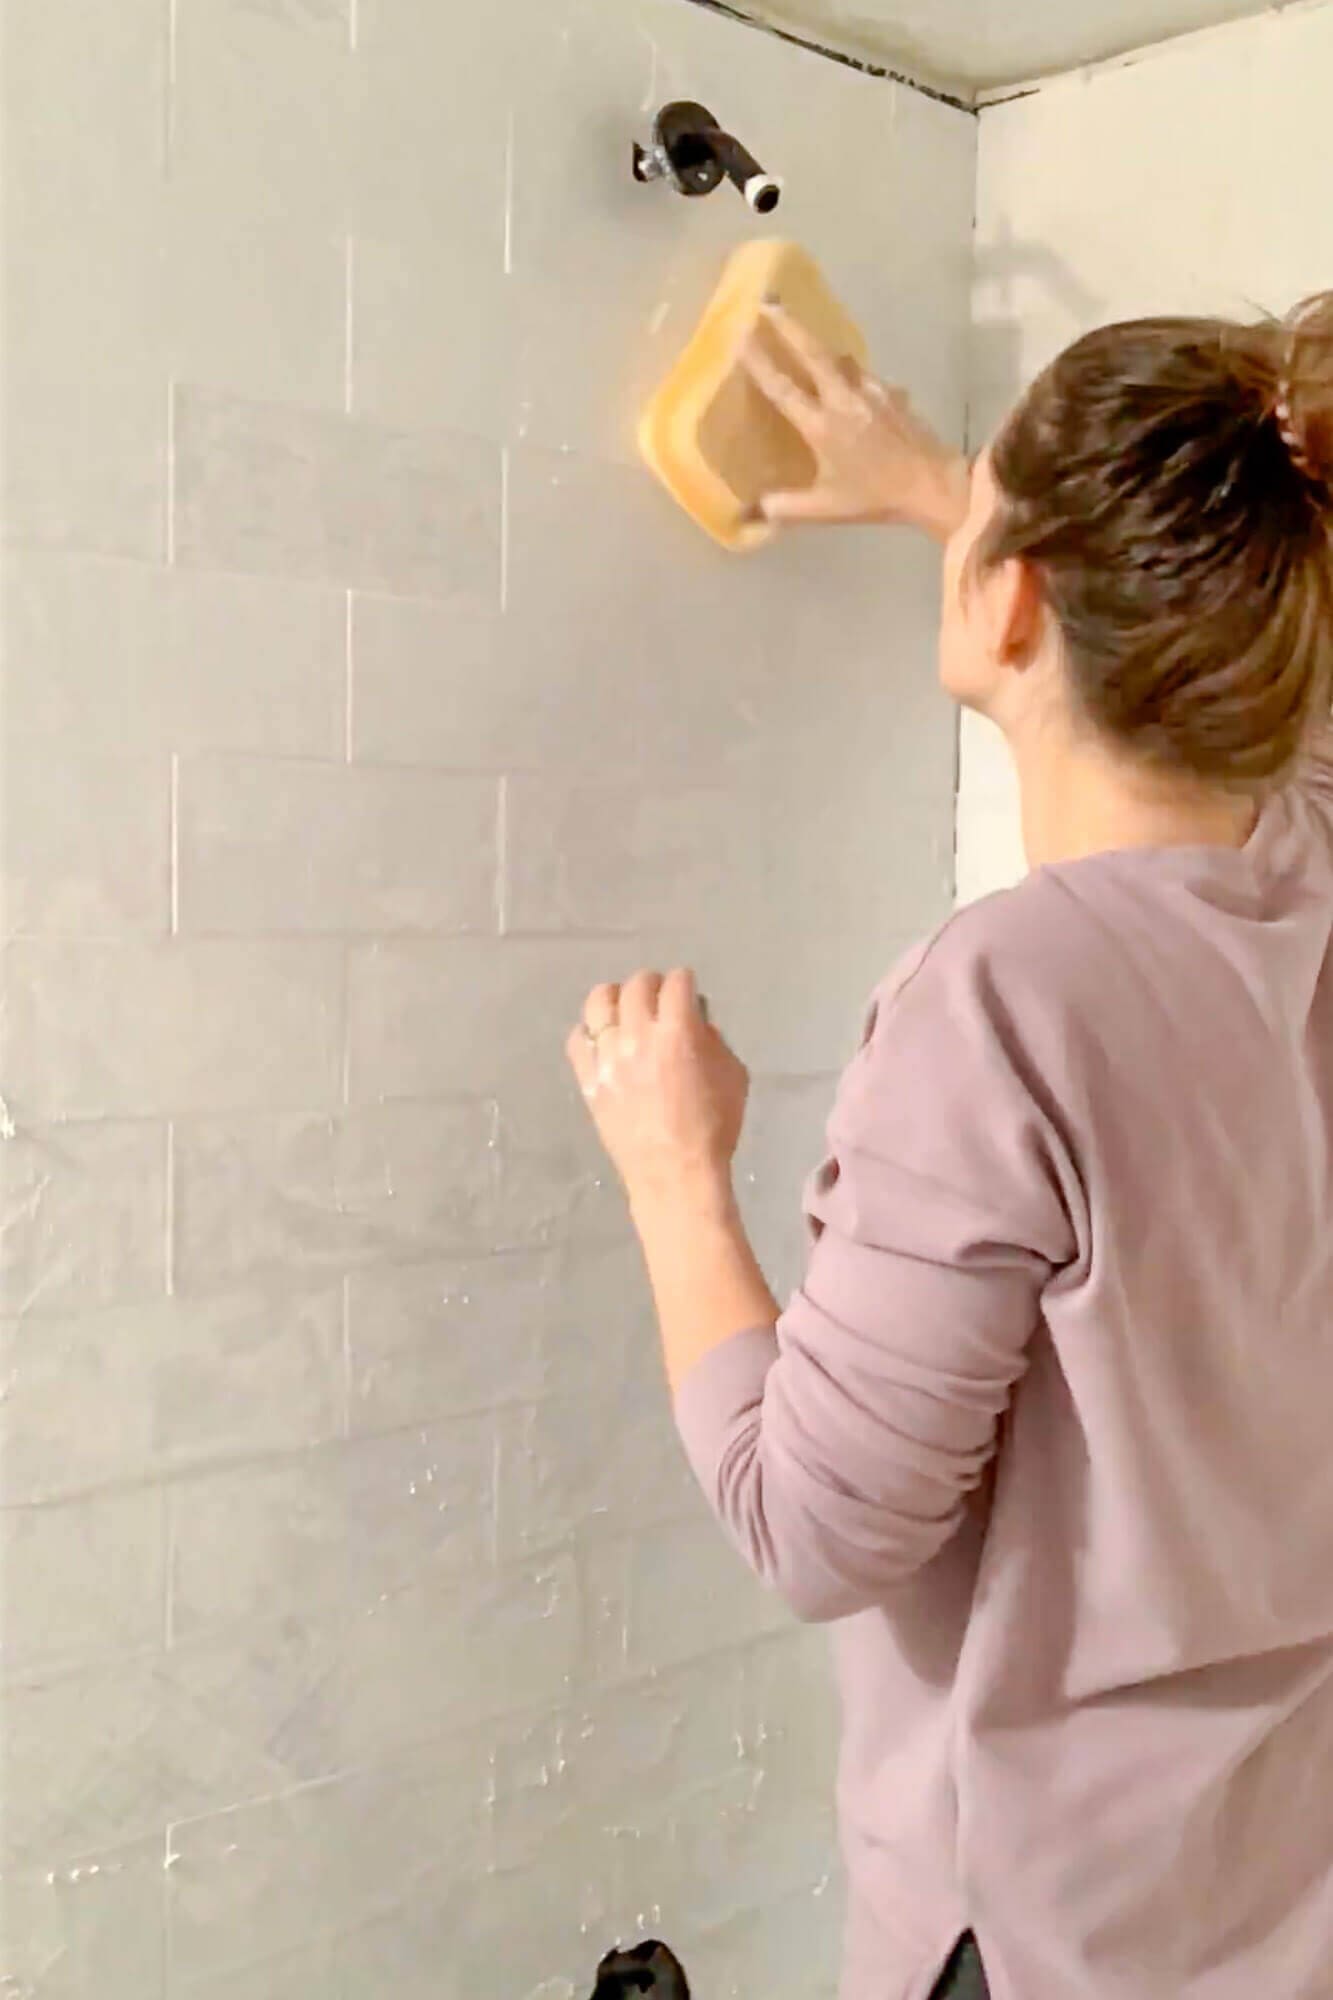
- Lightly wiped the tile surface with a damp sponge, rinsing it often so I removed haze without pulling grout out of the joints.
After everything dried, I used a grout-haze remover and a microfiber cloth to polish the tiles back to a clean shine.
For best grout for shower walls, look for a grout that’s rated for wet areas and follow the manufacturer’s instructions for sealing (if required).
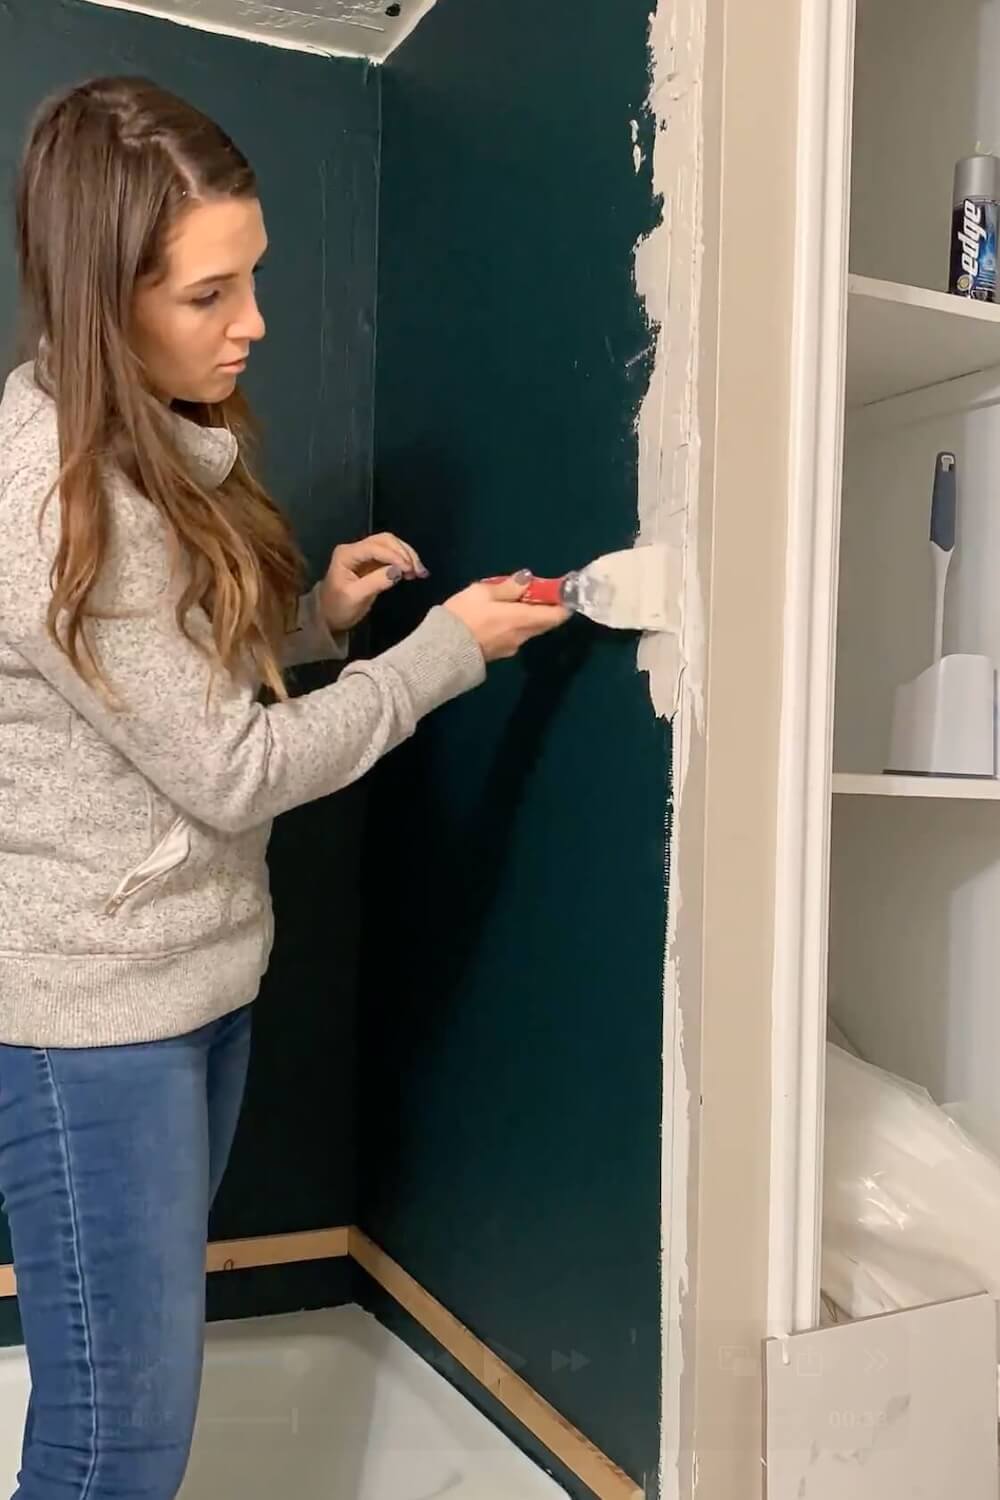
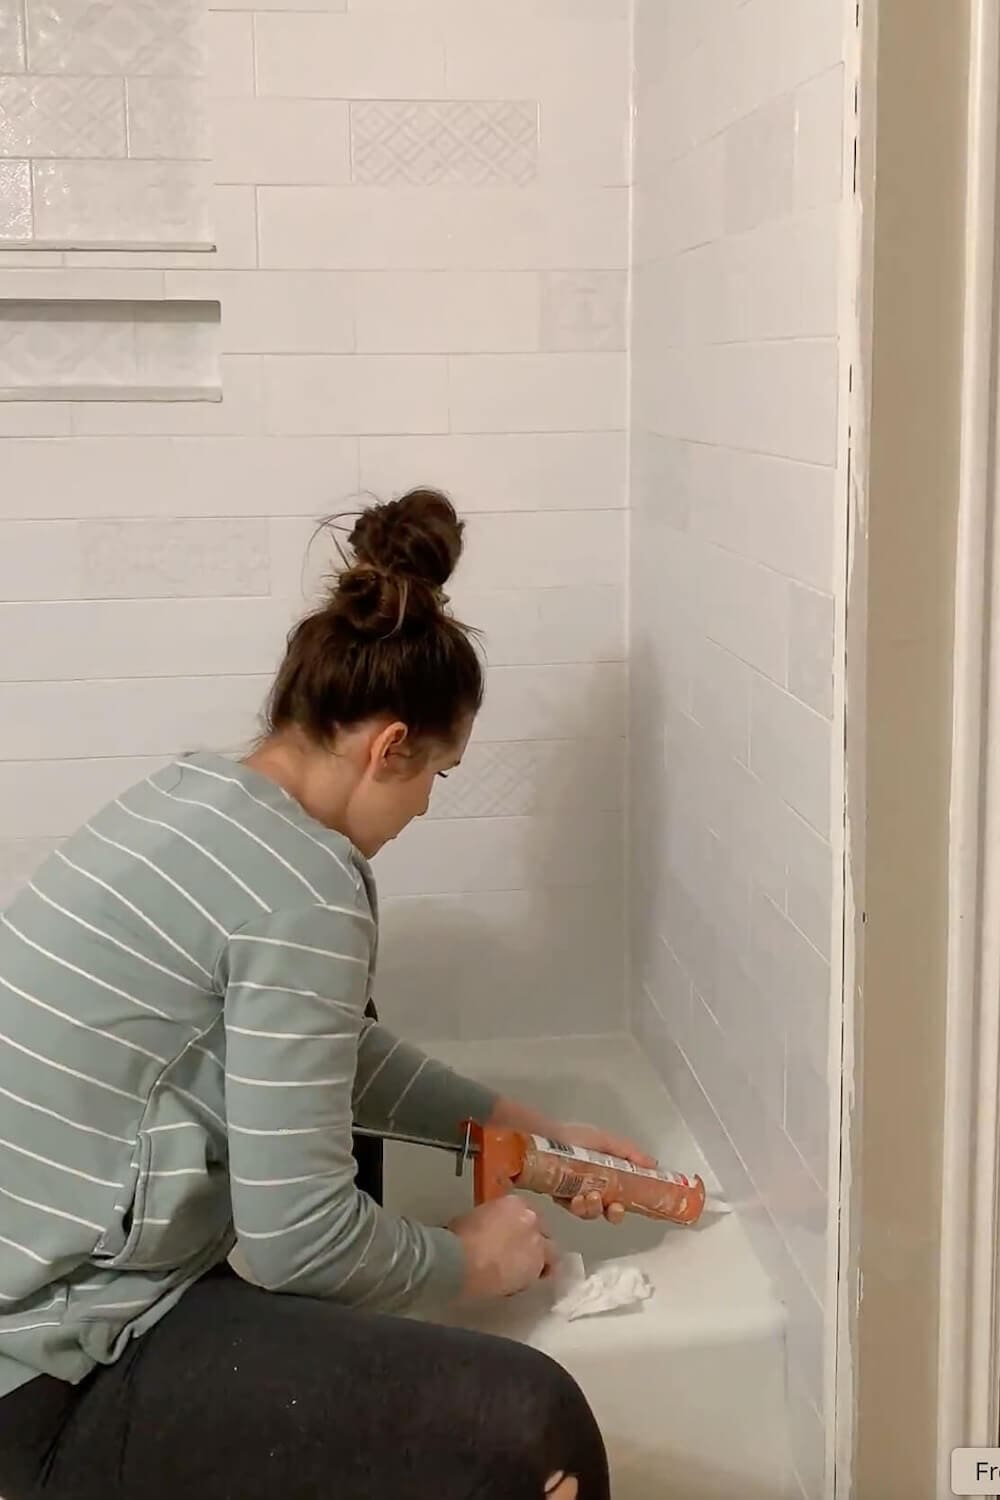
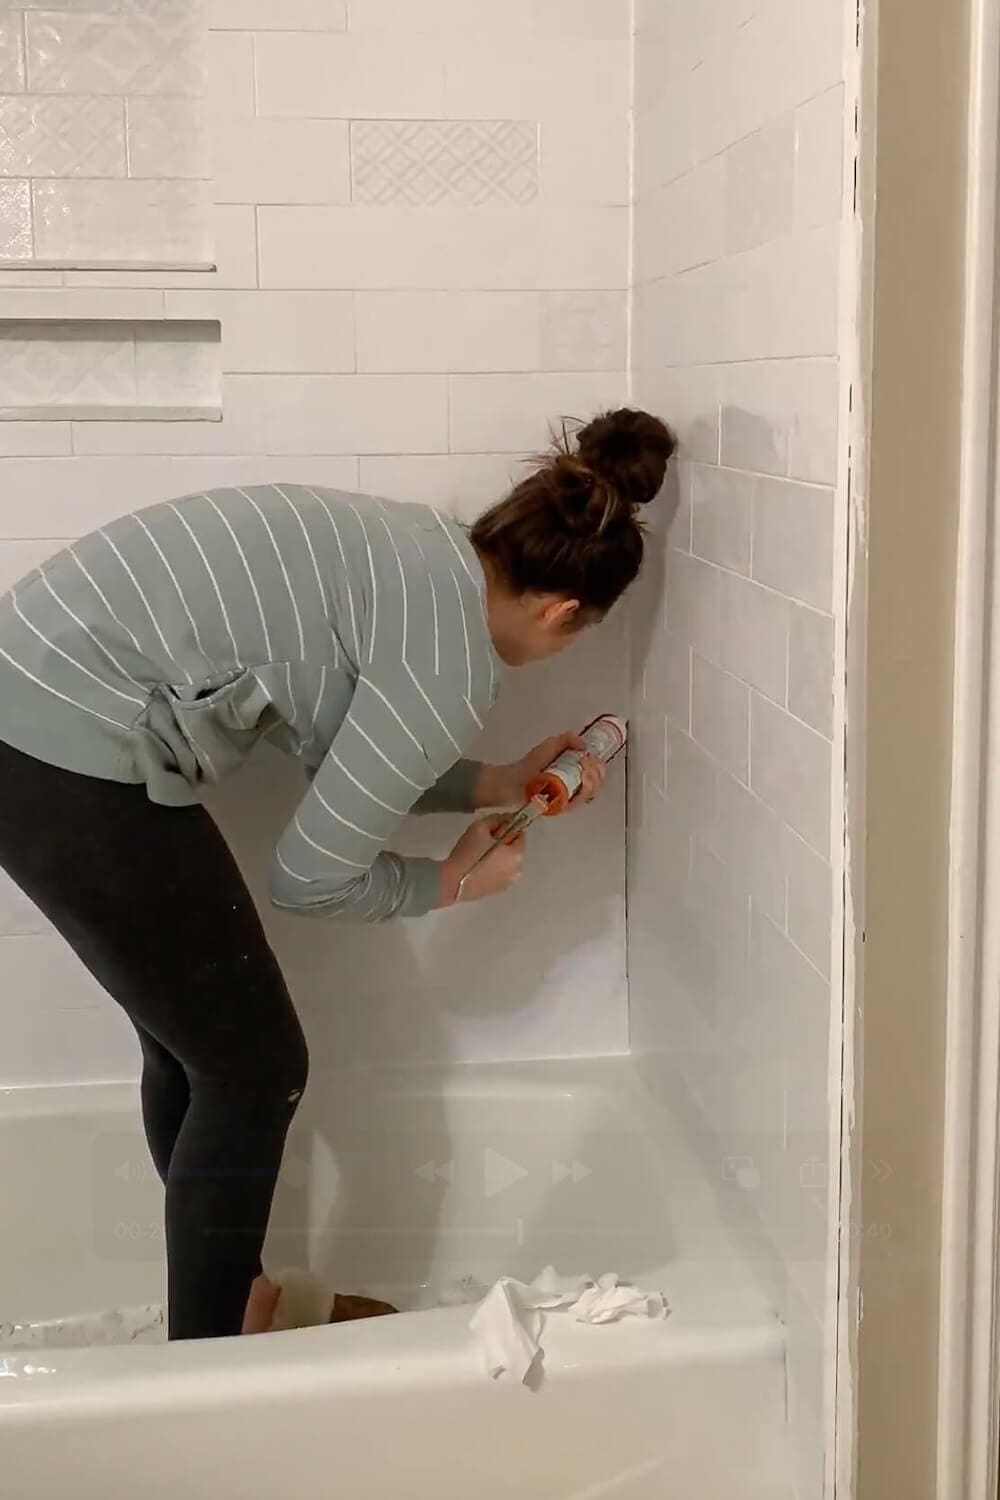
Step 8: Where to Use Silicone Instead of Grout
One of the most important details for a long-lasting DIY tile shower is knowing where to use silicone instead of grout. Anywhere the surfaces can move even a little, silicone will flex; grout will crack.
Use color-matched 100% silicone in these spots:
- Vertical inside corners of the shower
- Inside corners of the niche
- Where the tile meets the tub deck
Run a smooth, continuous bead, then tool it with a wet finger or a caulk tool for a clean finish. It’s a small step that makes a big difference in keeping water out of joints and extending the life of your tiled shower wall.
Troubleshooting & Pro Tips
A few extra tips that helped this DIY shower tile project go more smoothly:
- If a tile doesn’t sit right, adjust it immediately-thinset waits for no one.
- Step back every few rows to make sure your decorative tiles still look balanced.
- Don’t rush cure times. Follow the thinset and grout labels so everything has time to fully set before you use the shower.
- Keep a damp rag handy to wipe tools, buckets, and tile edges as you go. Cleanup is much easier if you don’t let mortar or grout dry on the surface.
- If you’re nervous about tiling your first shower wall, start on the least visible wall so you can get your rhythm before tackling the focal wall.
The Finished Shower Reveal
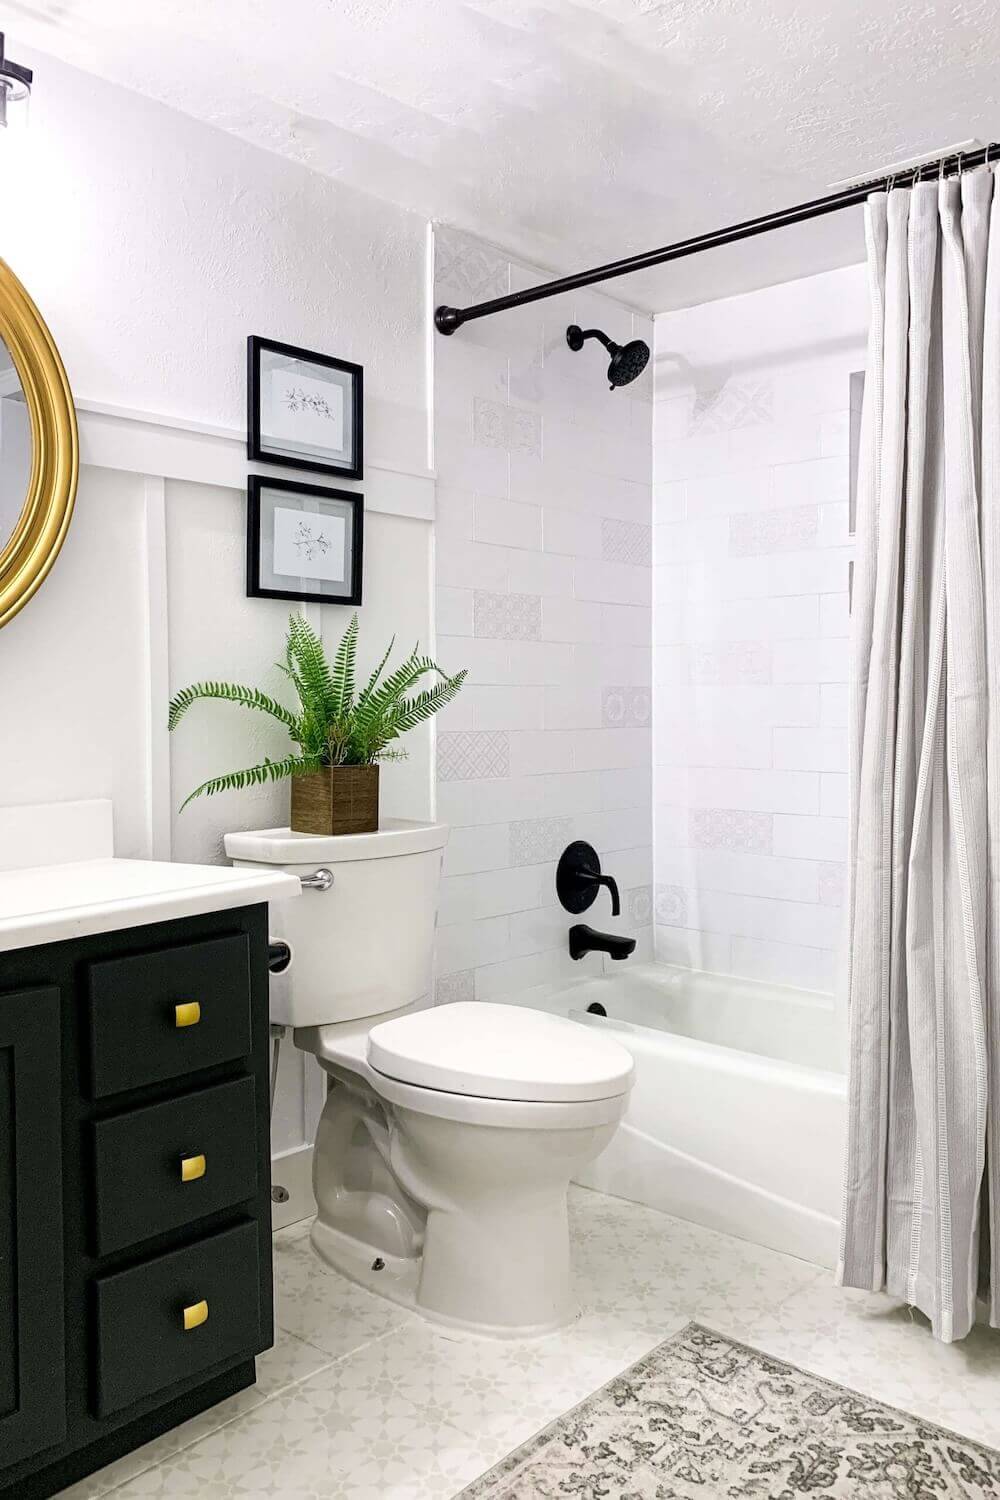
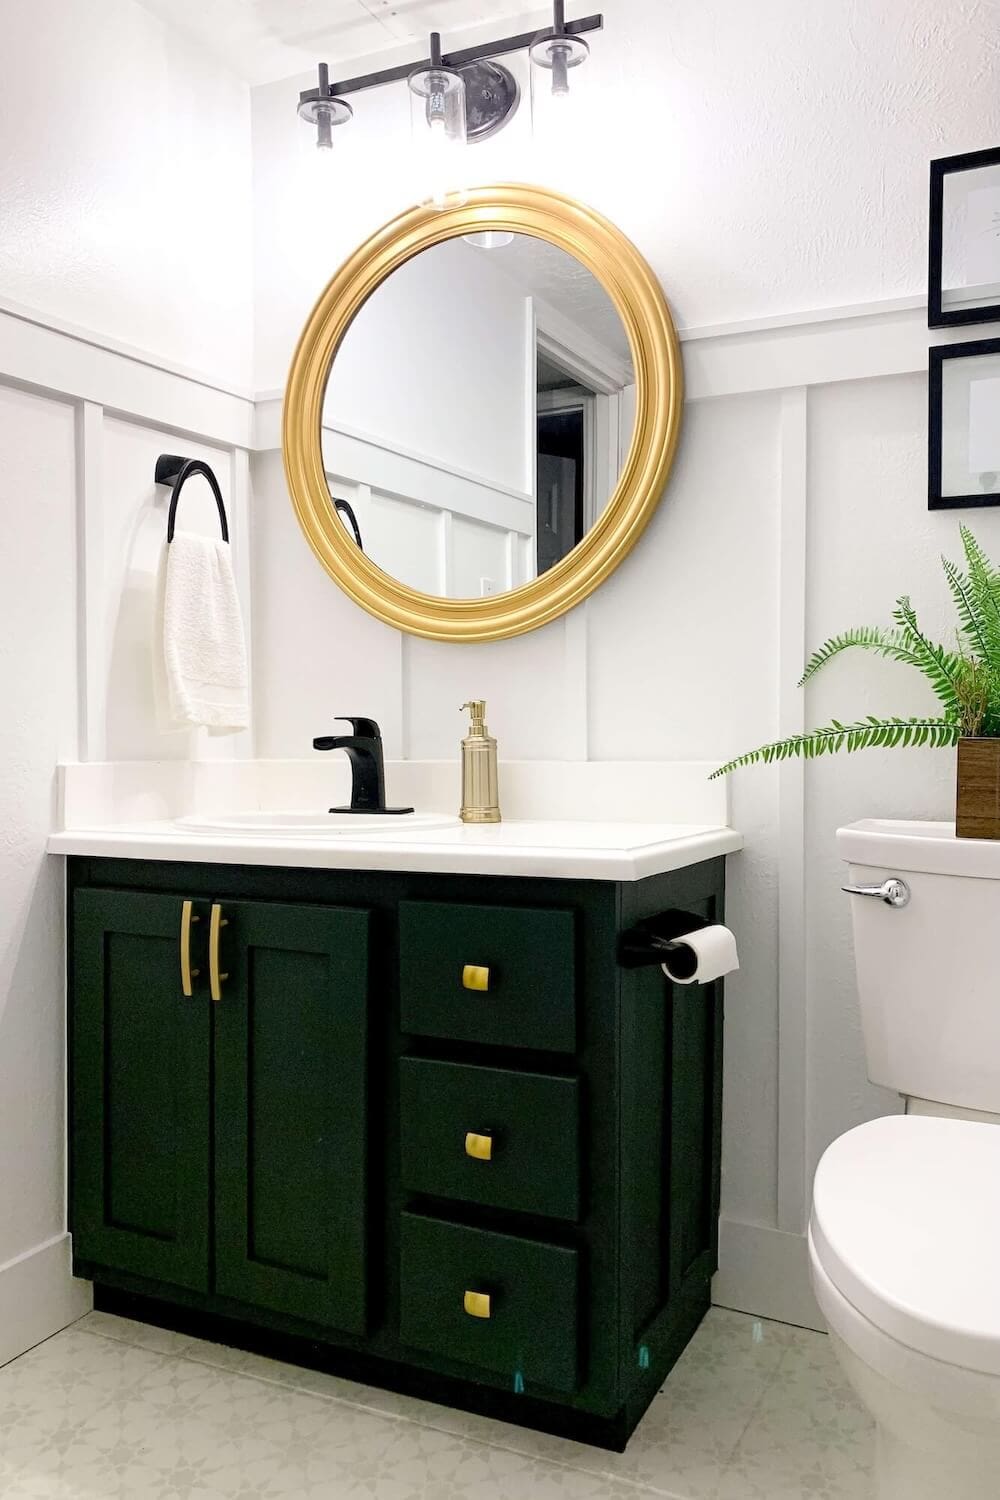
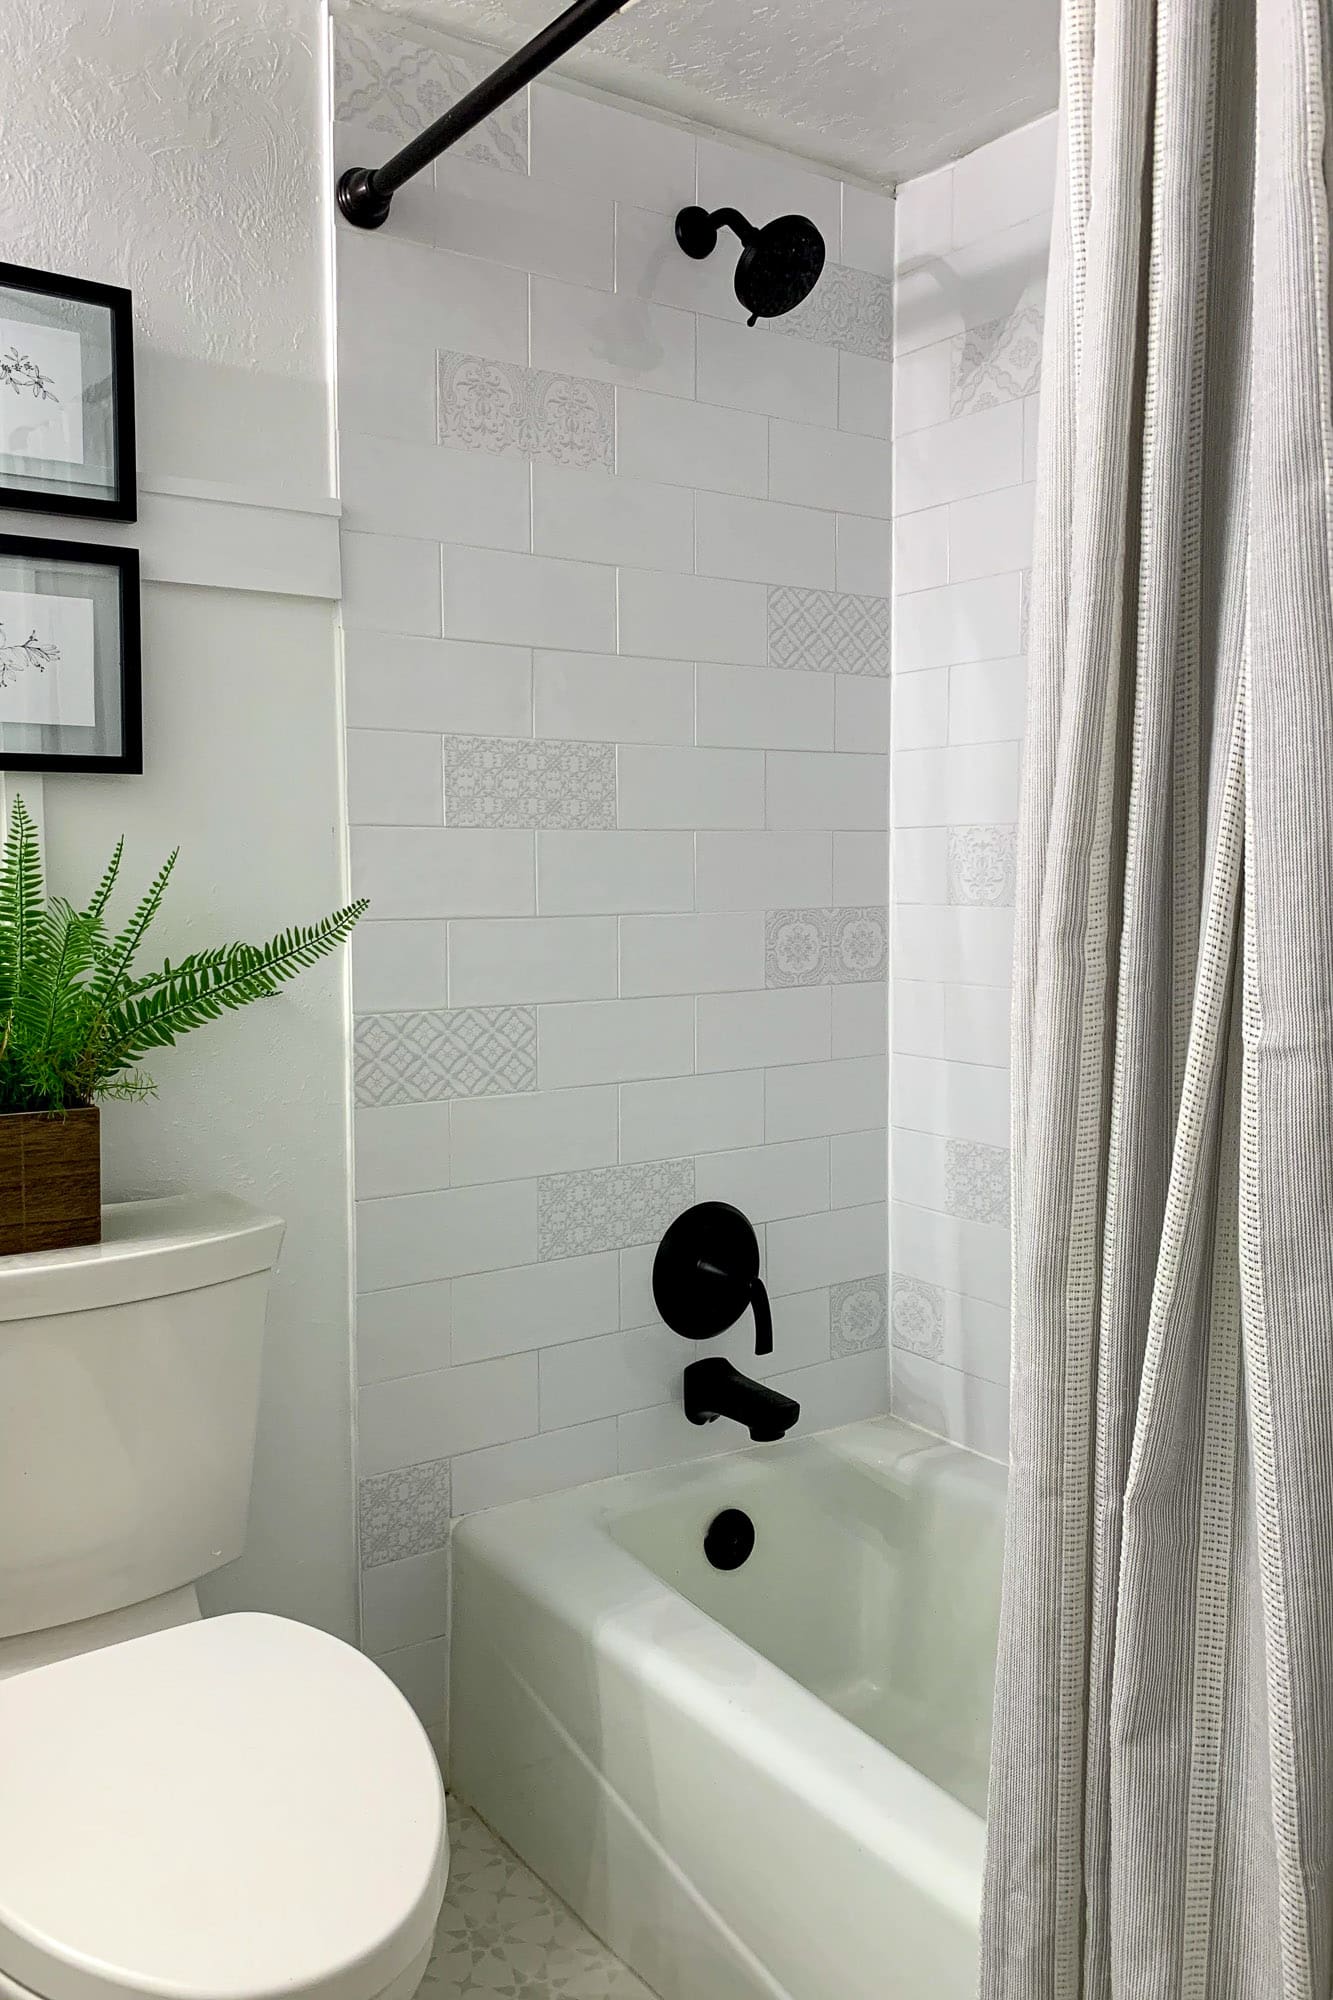
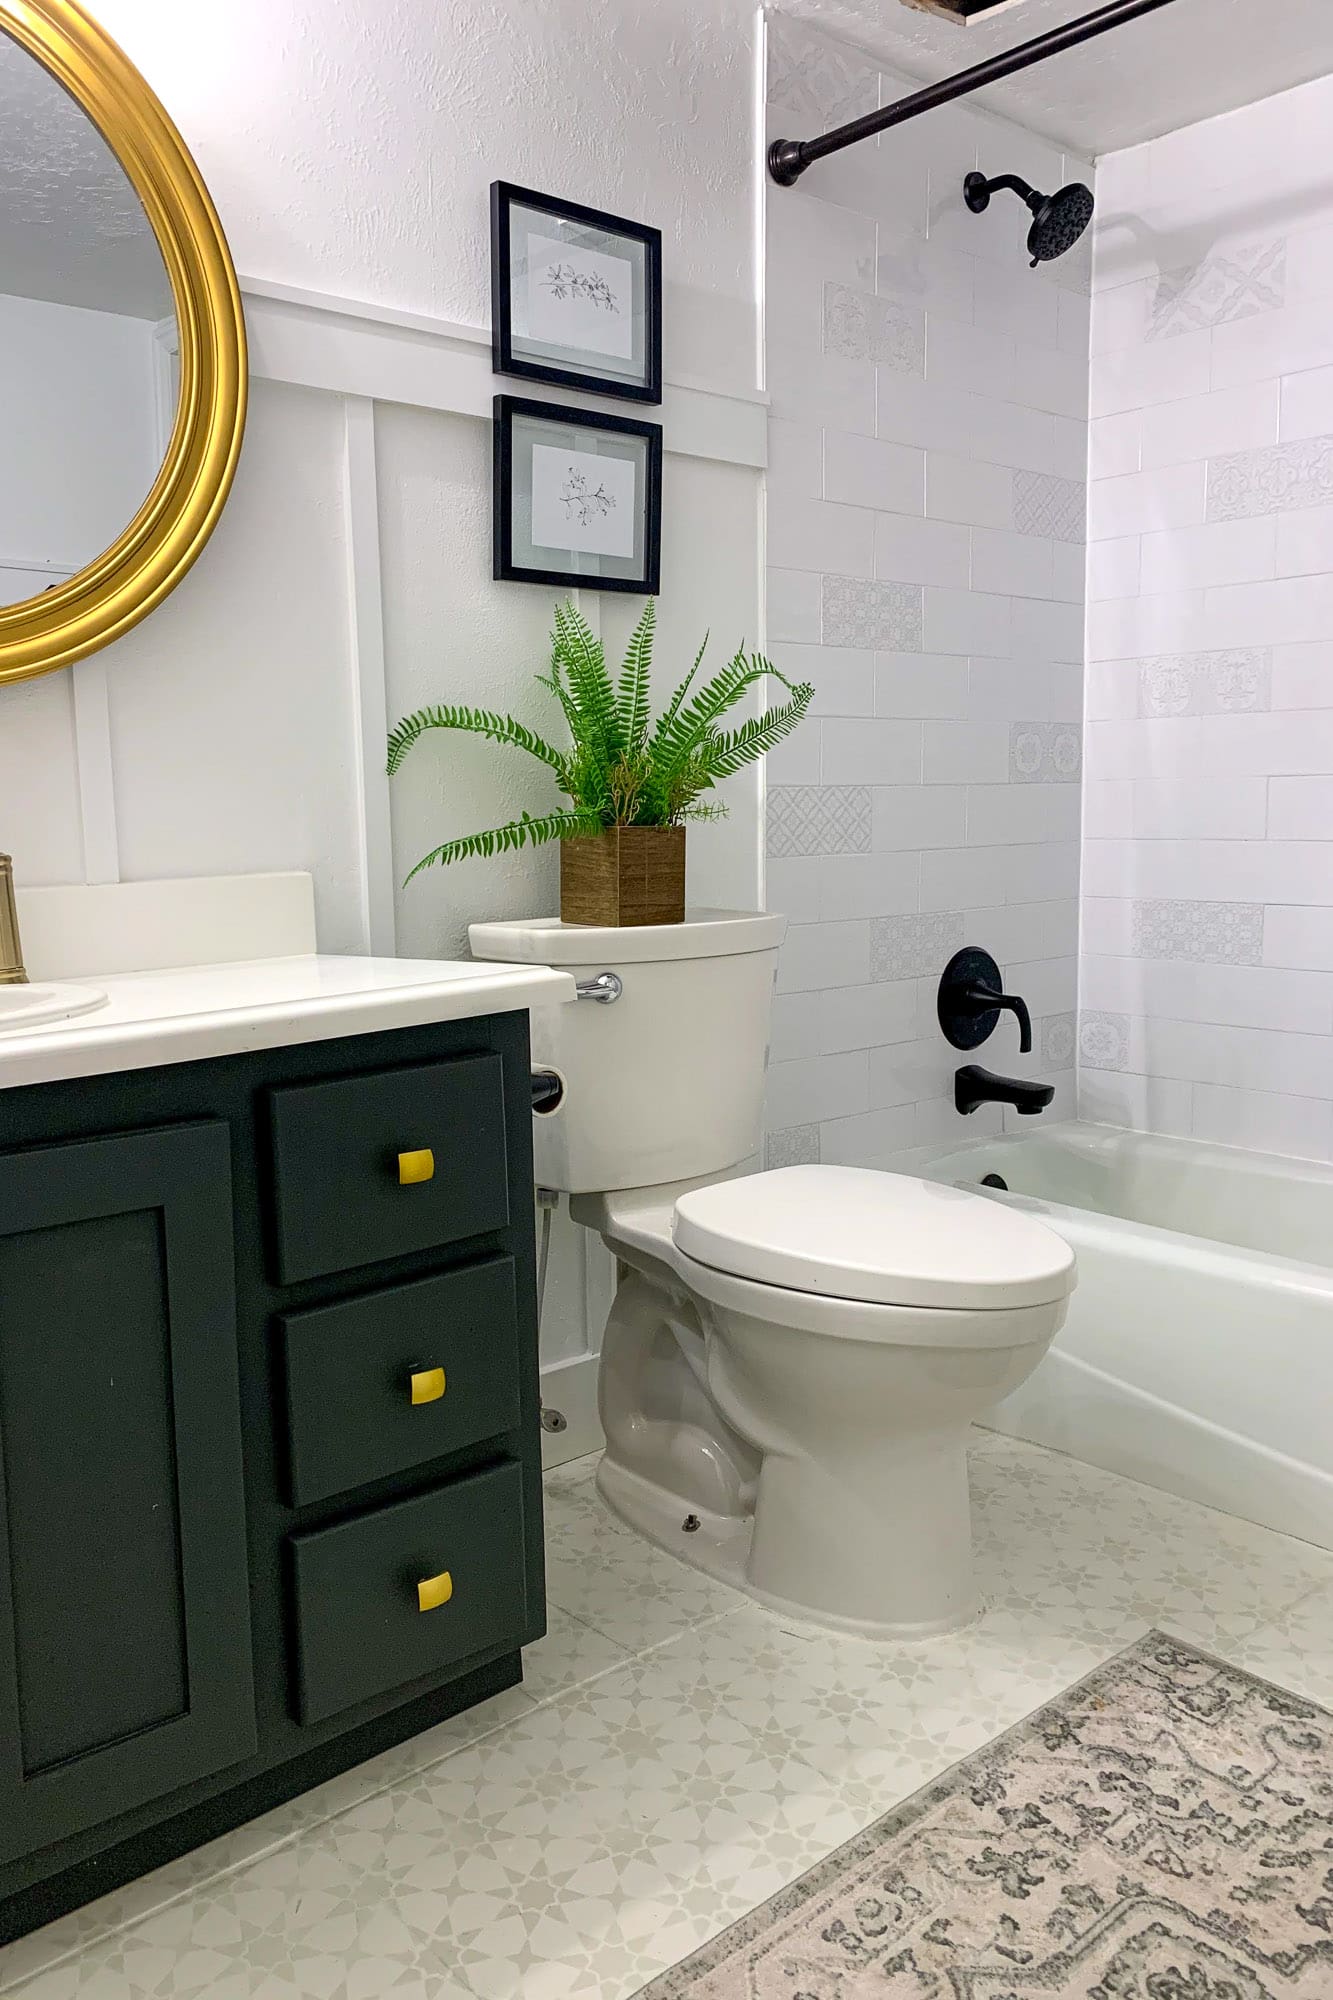
After all the tiling, grouting, and caulking were done, I installed my matte black faucet and showerhead and finished the rest of the bathroom with a DIY board and batten wall, a freshly painted vanity, a gold bathroom mirror, and painted floor tiles.
The finished white subway tile shower wall feels modern, bright, and timeless-and doing the tiling myself cut the cost significantly compared to hiring it out.
More Shower Tile Projects
If you’re planning more than one bathroom or just want more inspiration, you might also like:
Pinterest: Save This Shower Tile Project for Later
If you’re still in the dreaming and planning phase, save this tutorial so you can come back when you’re ready to tackle your own shower wall.
FAQ: How to Tile a Shower Wall
Start one full tile above the highest point of your tub using a ledger board and a level line. That keeps your rows straight from the beginning and lets you cut the bottom row last to follow the tub while still keeping your grout lines level.
Use color-matched 100% silicone in corners, inside the niche, and where tile meets the tub. Those areas move slightly over time, and silicone flexes with that movement while grout can crack and let water in.
Yes. Tile and grout are not waterproof. You should install cement board and a continuous waterproofing membrane before you start tiling. I walk through that entire process in my mold and prep post: How to Remove Mold From a Shower + Prep the Walls for Tile.
Most grouts need 24-48 hours to cure before regular use, and some recommend up to 72 hours. Always follow the instructions on your thinset and grout so everything has time to fully cure and resist moisture.
Yes, with patience and prep. Start with a simple rectangular tile like subway tile, take time to plan your layout on the floor, use a ledger board and spacers, and don’t rush cure times. If your walls are already properly waterproofed, tiling is very doable as a DIY project.
Most thinsets and grouts recommend at least 24-48 hours before normal use, and some call for up to 72 hours. Always follow the instructions on your specific products.

