




Published October 25, 2026
If you’ve ever stood in a giant room wondering what on earth to do with all that space, these large bedroom ideas are for you. While we were visiting family in Utah, I stayed with my sister, and of course, we ended up deciding to tackle her bedroom. Because what’s a family visit without a power tool or two?
Her room is HUGE. Like, “you could lose a toddler in here” huge. And while that sounds like a dream, a room that big can actually be really hard to use well. So we came up with a plan to make every inch of it work.
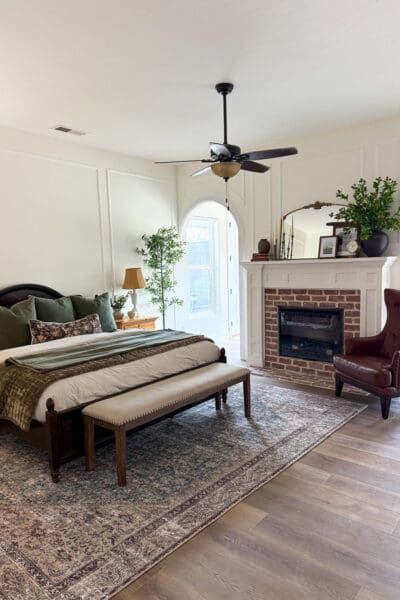
Today I’m walking you through every idea we used, from building a wall right down the middle to the final styling touches. I’ve shared the big projects in their own step-by-step posts, so I’ll give you the highlights here and link to the full tutorials along the way.
The Before: One Really Big Room
Here’s what we started with. The front half was the bedroom, and the back half by the windows had become the home for everything that didn’t have another spot. A desk, weights, a walking pad, a bookshelf, and more. You know the corner. We all have one.
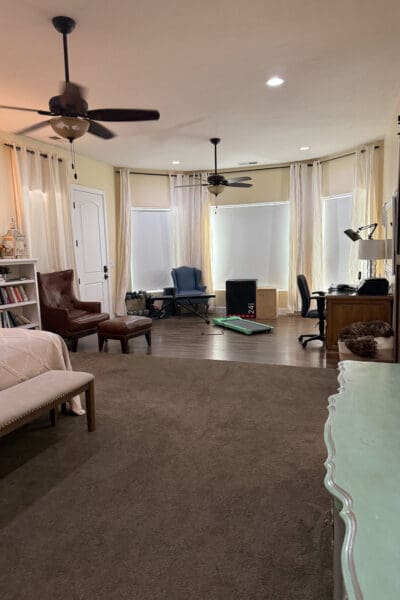
The flooring didn’t match either, with carpet in half the room and laminate in the other half. So before we did anything else, we pulled it all up and installed new flooring throughout. It’s the same flooring we used in our house. It’s durable and beautiful, and I love it. Check it out here!
Large Bedroom Idea #1: Divide the Space With a Wall
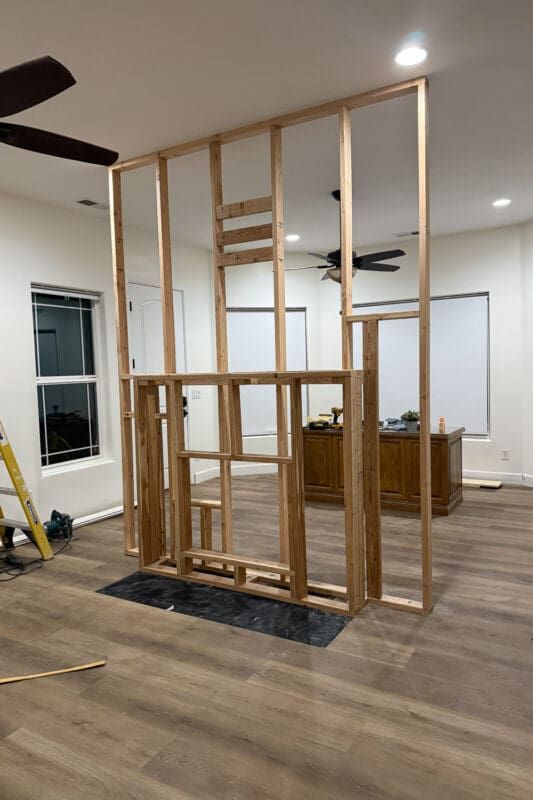
This is the idea that started it all. We built a wall across the middle of the room to split it into two spaces, but we didn’t add any doors. It’s still one room. It just finally has a designated front and a back.
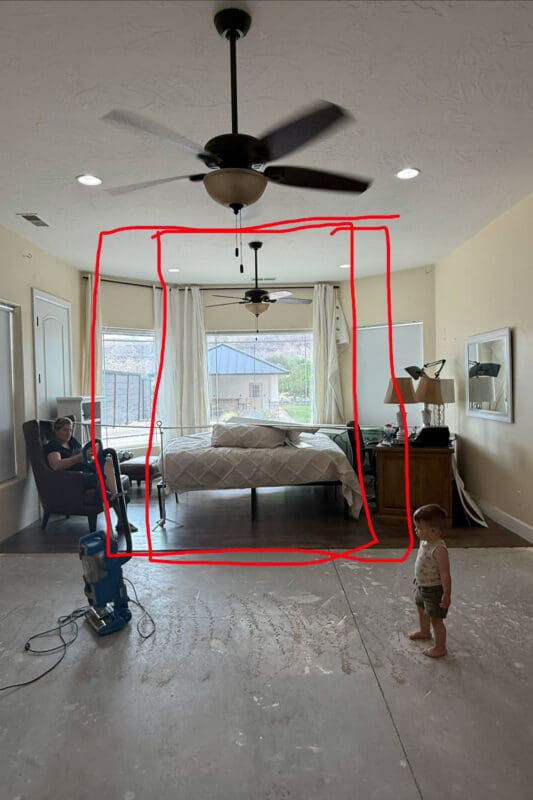
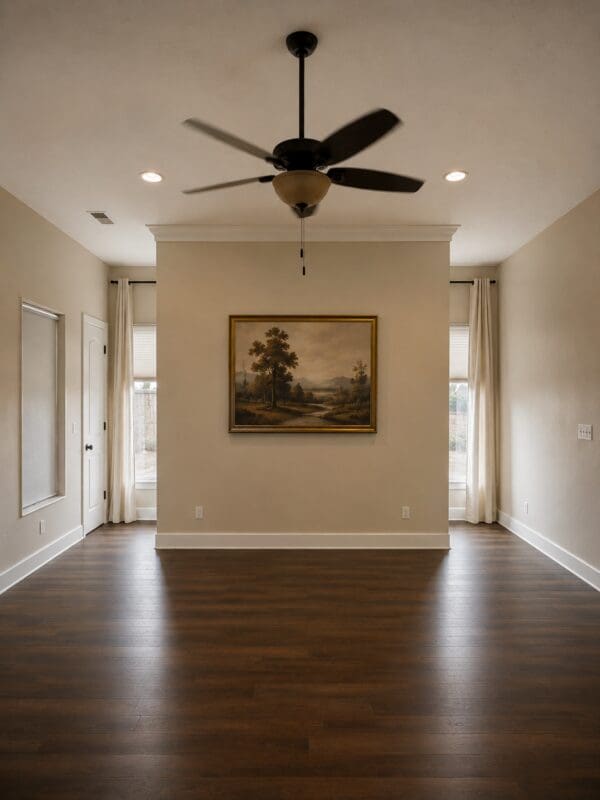
The front half became the bedroom and the back half became an office. And the back half is big enough to hold a bed too, so my sister can rearrange however she wants down the road.
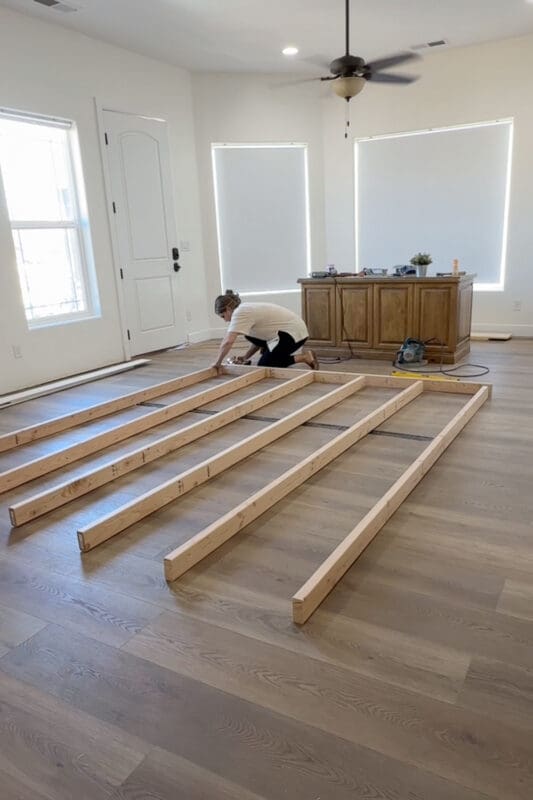
To build it, I cut the new floating floor where the wall would sit, added blocking in the attic so the top of the wall had something solid to attach to, and framed the whole thing flat on the floor before tilting it up into place. Then, because I can never leave well enough alone, I framed in a spot for an electric fireplace.
Get every step in my full tutorial: DIY Room Divider Wall: How I Split One Big Bedroom Into Two Spaces.
Large Bedroom Idea #2: Add Arched Doorways
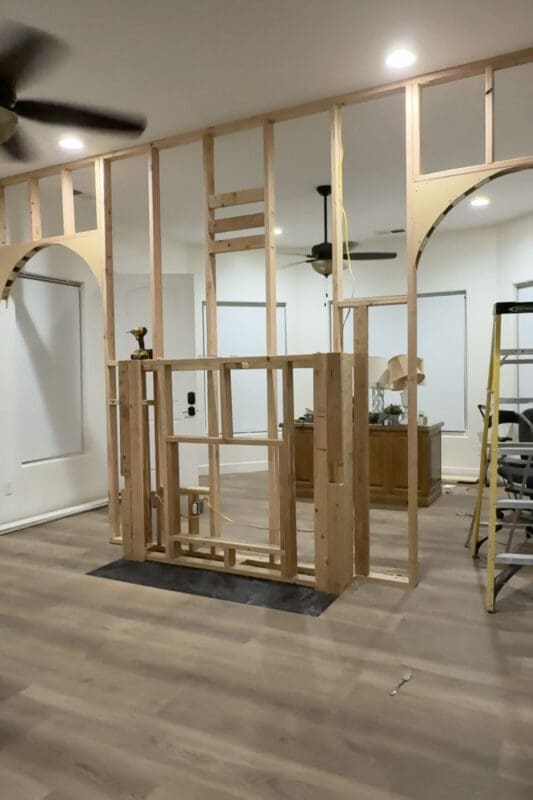
Once the wall was framed, I couldn’t stop staring at the two open walkways on each side. They felt a little plain for such a special room. So naturally, I added more work to my own to do list.
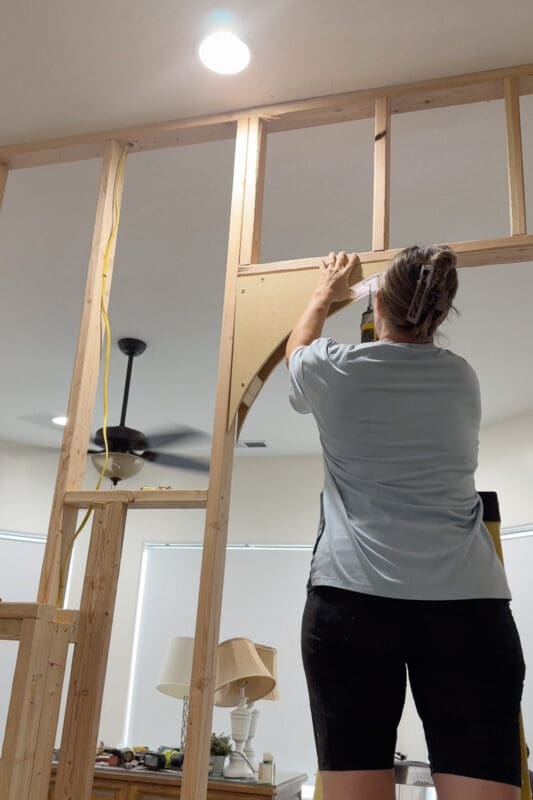
The ceilings in this room are tall, so first I built a small 2×4 frame above each opening to bring the top down to a better height for an arch. Then I cut the curves out of 1/2 inch MDF, sandwiched 2×4 blocking between matching pieces for depth, and screwed them into each corner of the openings.
Those arches make each half of the room feel a little more tucked away while keeping everything open and connected. Here’s the full how to: DIY Arched Doorway: How to Arch any Wall Opening.
Large Bedroom Idea #3: Build a Fireplace as a Focal Point
What started as a simple divider wall to break up a large bedroom quickly escalated with ideas like… how awesome would a fireplace be? In a big room, a focal point gives your eye a place to land and makes the whole space feel more intentional.
After running the electrical, I installed an electric fireplace insert and built a brick hearth, brick surround, and a white mantel around it. Now the divider wall isn’t just a wall. It’s the heart of the bedroom.
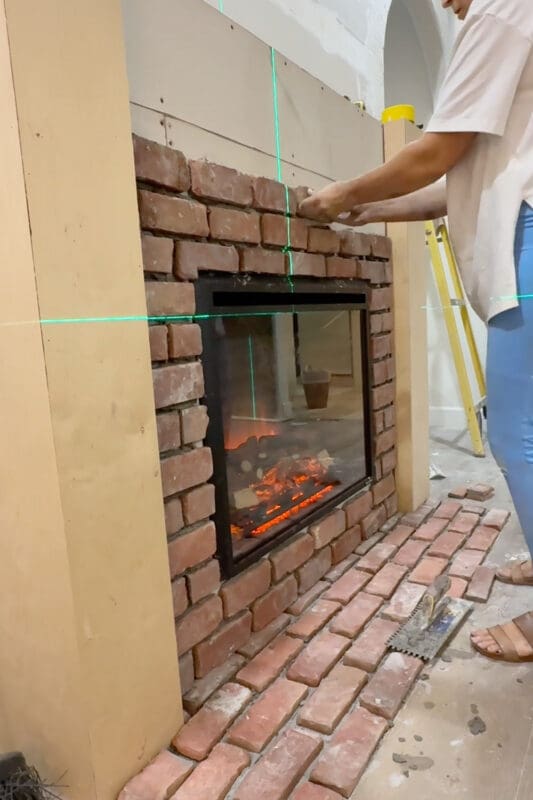
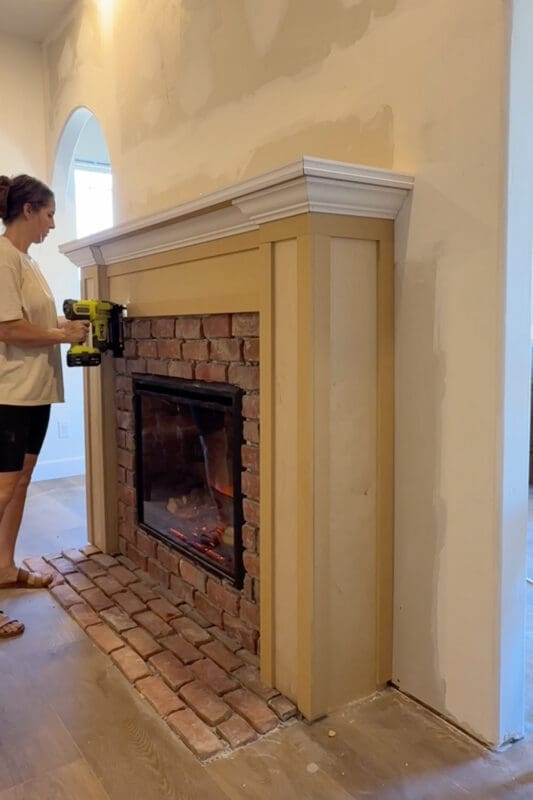
See how I built it from scratch: DIY Electric Fireplace: How to Build One From Scratch
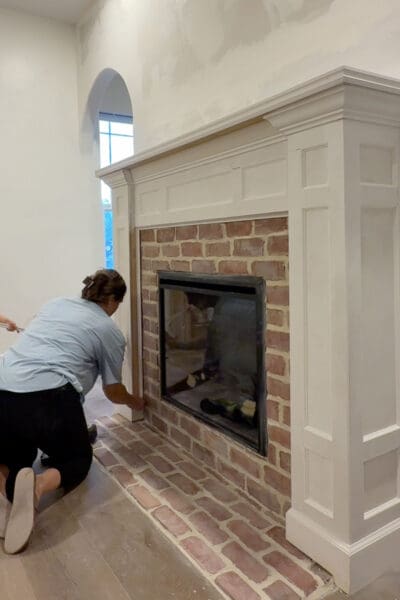
Large Bedroom Idea #4: Add Picture Frame Molding for Character
This is one of those ideas that is great for a large bedroom or for small rooms too. Blank walls can make a large room feel a little empty. Picture frame molding fixes that fast. It adds texture and architectural detail without taking up a single inch of floor space.
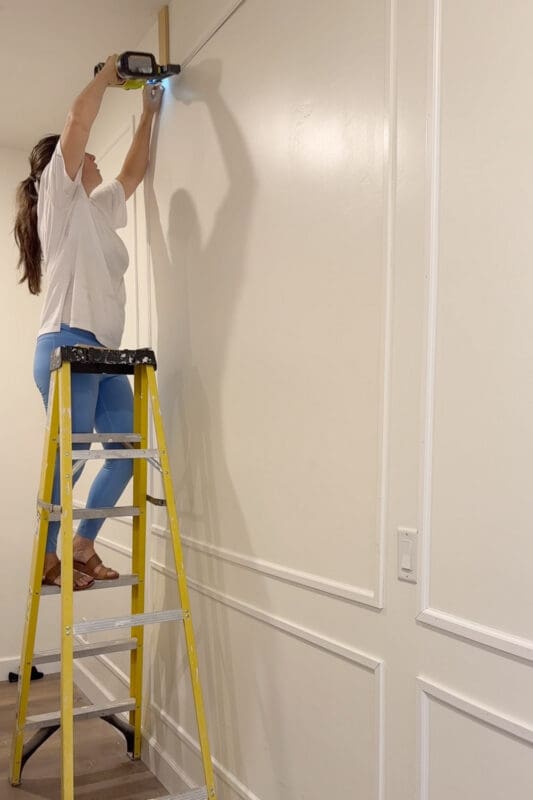
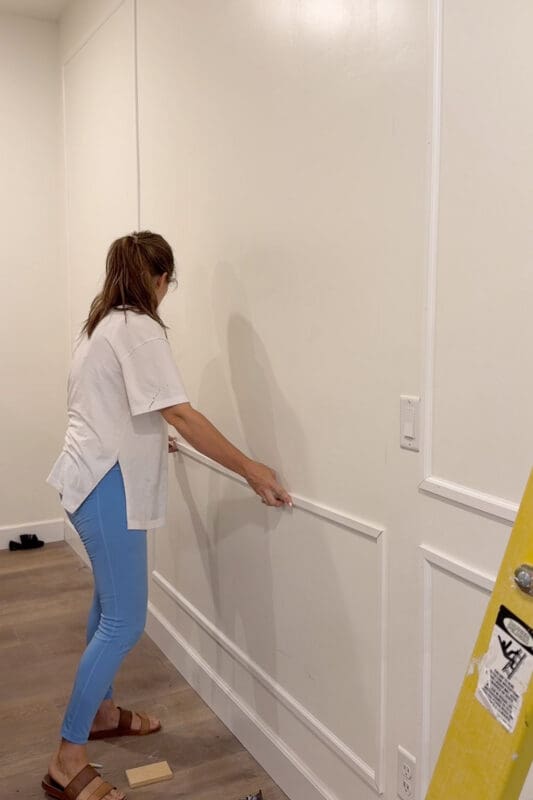
I started above the fireplace using PVC trim pieces and attached them with a brad nailer. My favorite trick? I cut scrap wood into spacers so every box sits the exact same distance from the ceiling and from the box next to it. No measuring over and over, no wonky gaps. Just hold the spacer, set the trim, and nail.
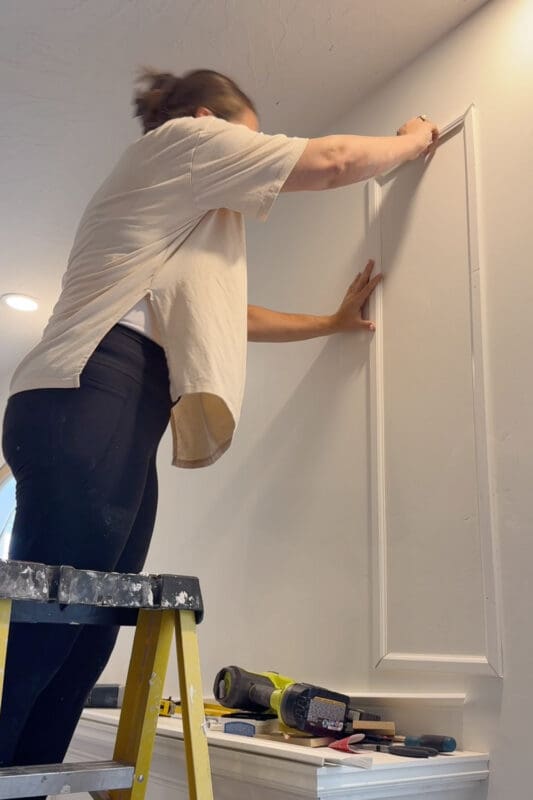
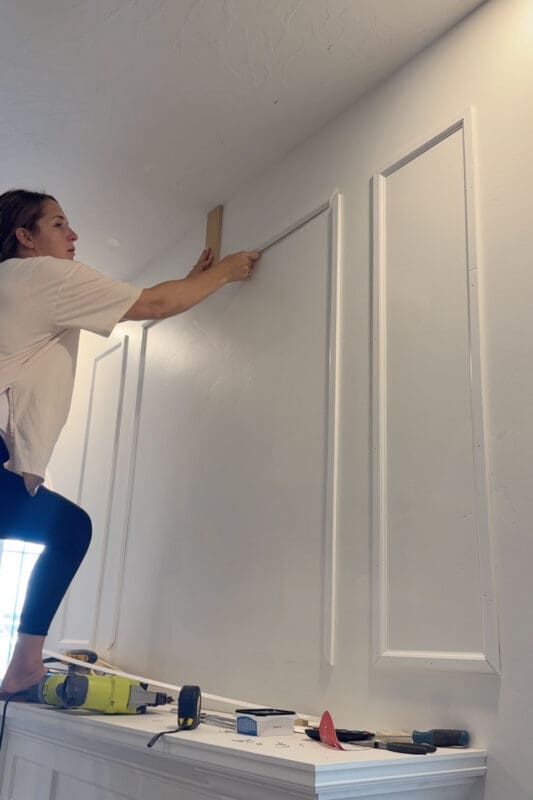
I used this same method in our guest bathroom, and I walk through every step there, including how to get those crisp corners and the finishing steps like caulk, spackle, and paint: DIY Guest Bath Upgrade with Picture Frame Molding.
Curving the Molding Over the Arches
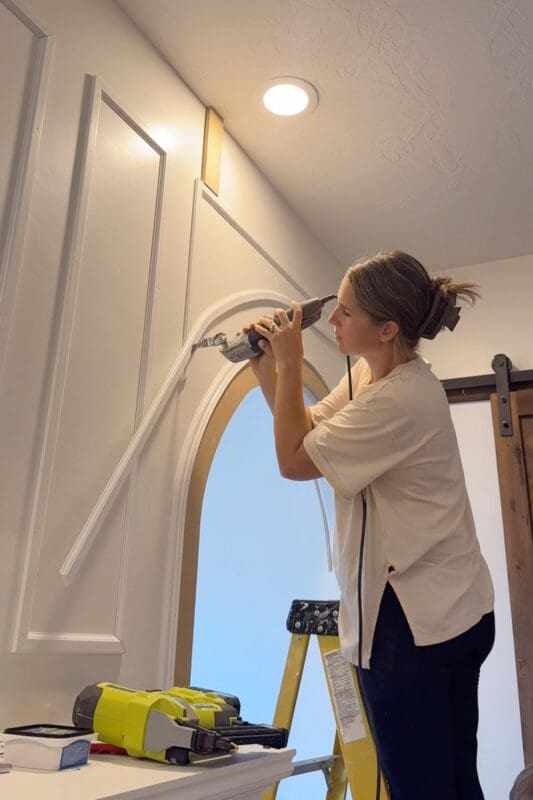
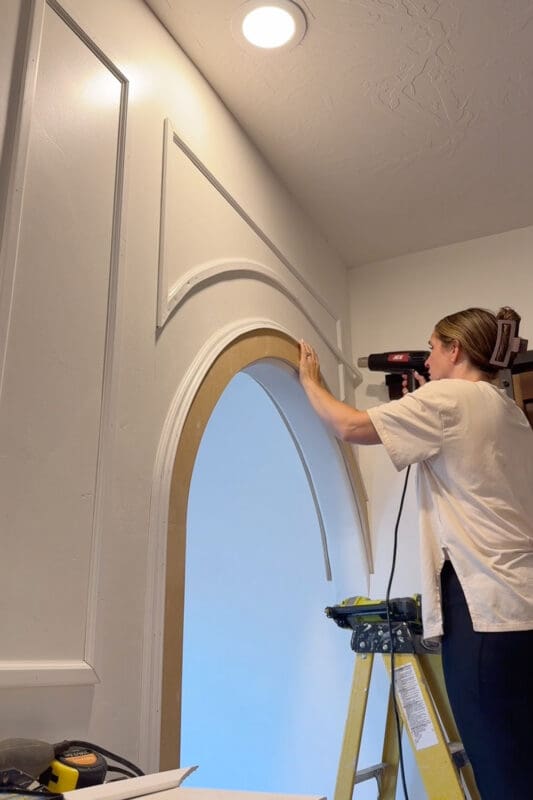
The arches added one fun twist. Straight boxes don’t follow a curve, so I bent the molding to match. PVC trim gets flexible when it’s warm, so I used a heat gun to soften it and pressed it into shape over each arch.
Those scrap wood spacers came in handy here too, keeping the curve an even distance from the arch casing the whole way around.
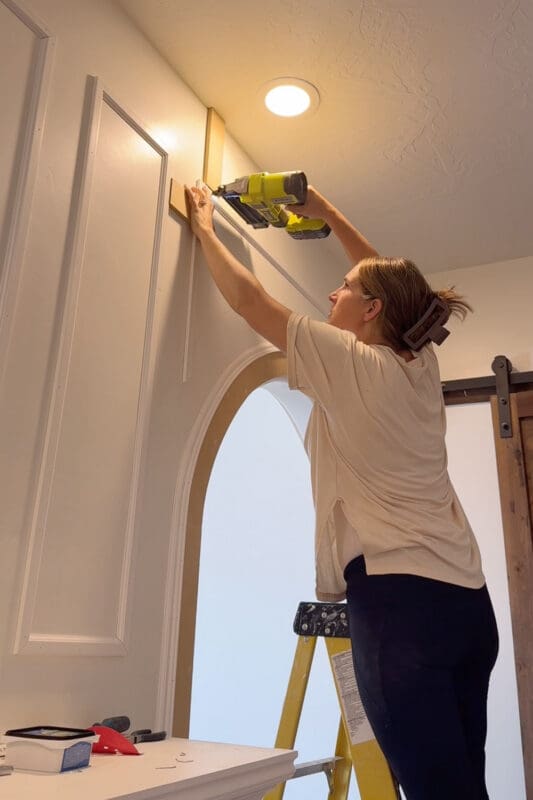
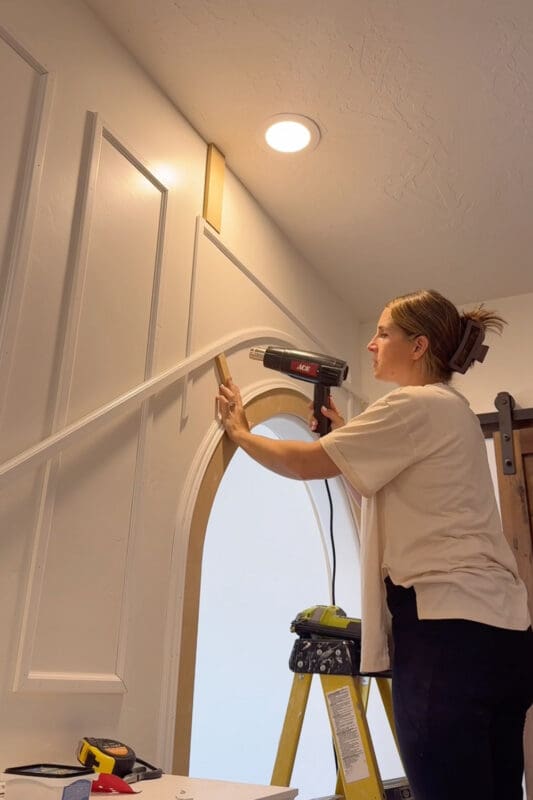
Once the curve was set, I trimmed the end with an oscillating multi-tool so it met the vertical rail of the box cleanly.
It’s one of those details that makes a room look custom. Want to try it yourself? Here’s my full tutorial: DIY Curved Molding Around an Arch.
Large Bedroom Idea #5: Style It to Feel Cozy
My favorite of all the large bedroom ideas, because who doesn’t love making a space pretty. The biggest challenge with a large bedroom is making it feel warm instead of cavernous. Here’s how we styled the bedroom side to do just that.
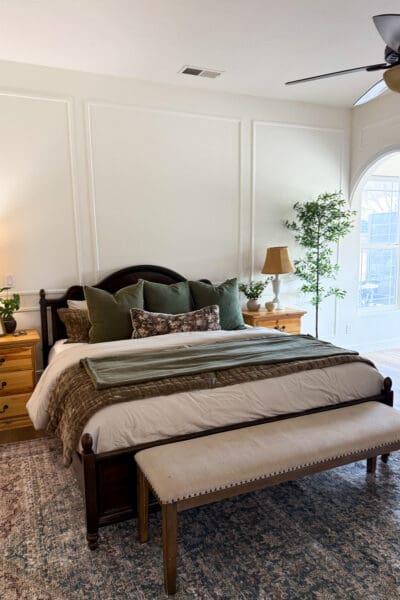
Go big with the rug. A large rug anchors the bed and pulls the furniture together so nothing looks like it’s floating in the middle of the room.
Fill the foot of the bed. An upholstered bench with nailhead trim fills that awkward gap between the bed and the rest of the room. Plus, it’s the perfect spot to sit and put on your shoes.
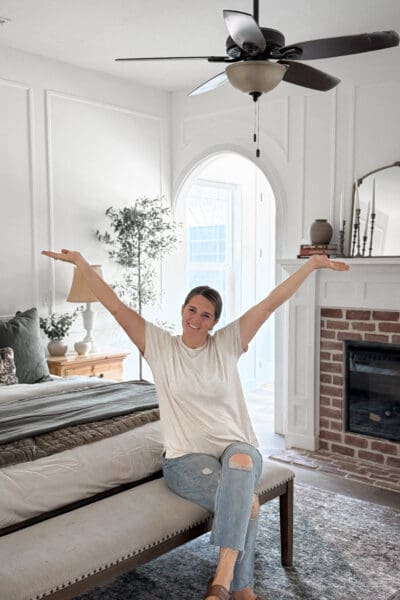
Add height. Tall ceilings need something to draw the eye up. A faux tree in the corner fills that vertical space beautifully.
Layer the bedding. Green pillows, a floral lumbar pillow, a velvet quilt layered over a neutral comforter, and a soft green throw blanket add texture and color against the gorgeous dark wood bed.
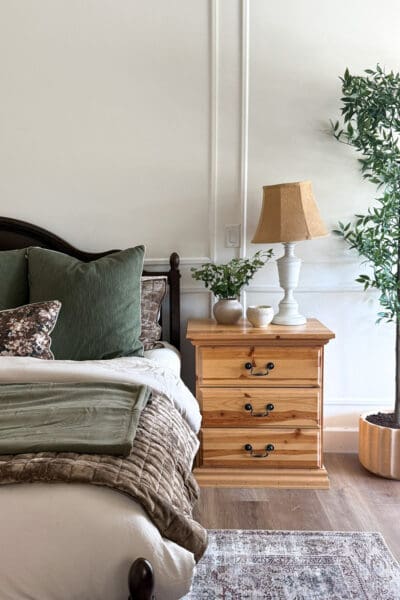
Keep the nightstands simple. A pretty lamp with a tan bell shade, a small vase of greenery, and a little dish for collecting odds and ends, or a pretty candle are all you need.
Create a seating nook. Extra floor space is a gift, so use it! A leather wingback chair next to the fireplace makes a cozy reading spot.
Style the mantel. I layered a gold arched mirror, brass candlesticks, stacked books, framed photos, a clock, and a big vase of greenery for a collected, lived-in look.
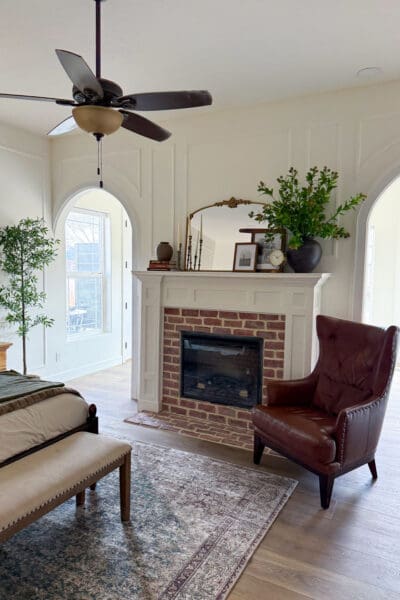
The color palette ties it all together: soft greens, warm wood, red brick, and a little bit of brass. It feels classic, cozy, and just a touch vintage.
What’s Next for the Office Side
I know you’re curious about the other side of the wall! I had to head home before this half was finished, but I couldn’t leave you hanging. So here’s a sneak peek of where things stand.
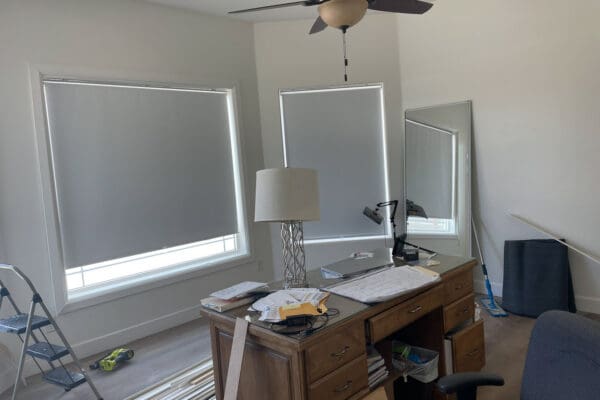
Right now, the front half is the bedroom and the back half is the office. But here’s the fun part: the back half is big enough to hold a bed. That means my sister could put her bed on the divider wall between the two arches and move the office up front.
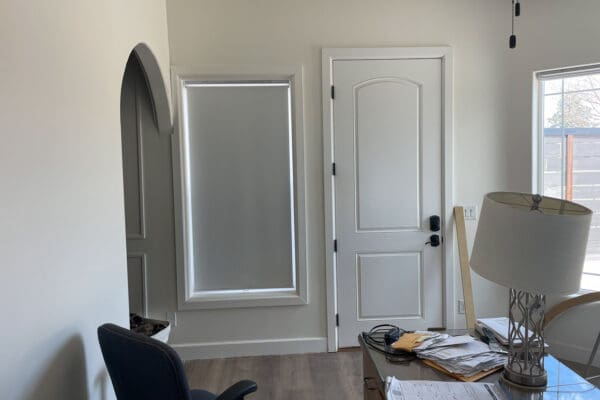
That flexibility is one of my favorite large bedroom ideas of all. Dividing the room gave her two layout options instead of one, so this space can be a bedroom office combo that changes as her needs change.
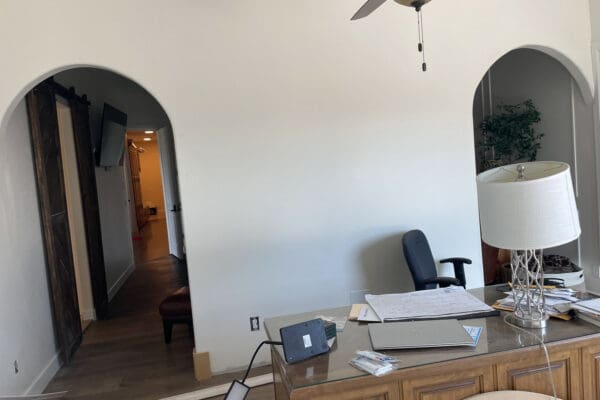
I’m not sure yet whether I’ll finish this side on a future trip or give some design direction and let them take it from here. Either way, I’ll share an update when it’s done!
Shop This Large Bedroom
- Large Area Rug
- Dark wood bed
- Upholstered bench
- Green pillows
- Floral lumbar pillow
- Velvet quilt
- Neutral comforter
- Green throw blanket
- Gold arched mirror
- Candlesticks
- Leather wingback chair
- Electric fireplace insert
To shop the rest of the decorative accent pieces, such as clocks, vases, frames, and more, find them all here.
Read All the Posts In My Large Bedroom Ideas Series
- DIY Room Divider Wall: How I Split One Big Bedroom Into Two Spaces
- DIY Arched Doorway: How to Arch any Wall Opening
- DIY Electric Fireplace: How to Build One From Scratch
- Large Bedroom Ideas We Used in My Sister’s Room (you are here!)
📌 Pin These Large Bedroom Ideas for Later
Got a big room that feels more awkward than awesome? Save these large bedroom ideas to your favorite Pinterest board so you have them handy when you’re ready to make your space work harder. And while you’re there, come follow along for more DIY projects!
Large Bedroom Ideas FAQ
Use a large rug to anchor the bed, layer your bedding with texture, and add a seating nook. Tall plants fill vertical space, and a focal point like a fireplace gives the room a place for your eye to land.
Build a wall across the room with open walkways on each side and no doors. The room stays connected, but each half gets its own purpose. Arching the walkways adds extra charm.
Add a reading chair by a fireplace, a bench at the foot of the bed, or a desk for a home office. Dividing the room lets you use one half as a bedroom and the other as an office.
Yes! Warm PVC trim with a heat gun until it’s flexible, then bend it to follow the curve of the arch and nail it in place.
Cut a few scraps of wood to the gap you want and use them as spacers. Hold one against the ceiling or the neighboring box, set your trim against it, and nail. Every gap comes out the same.