




Published October 21, 2026
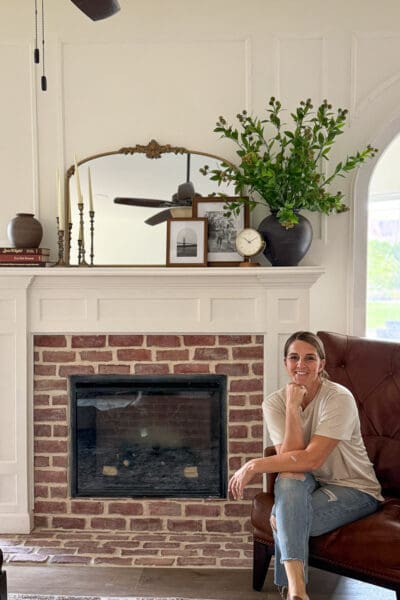
Building a DIY electric fireplace from scratch might sound like a big leap, but if you can frame a box and stack some bricks, you can absolutely do this! This cozy fireplace is the heart of my sister’s bedroom makeover in Utah, and I am so excited to finally show you how it came together.
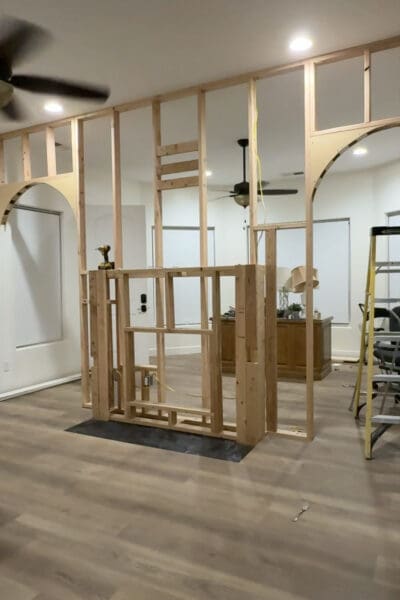
If you’re just joining us, this is part three of the series. First, I built a wall to divide her big bedroom into a sleeping area and an office. Then I framed in arched doorways on each side of it. Now it’s time for my favorite part: adding a fireplace right in the middle of that brand new wall.
I’ve done quite a few fireplaces over the years. I’ve built them from scratch, like in our dining room in Omaha, and I’ve made over a dated brick fireplace, like in our home in St. Louis. I love the feel of a cozy fireplace in a room, and I would put a fireplace in just about everywhere if the space and budget allowed for it. If you want to see all my fireplace projects, go here!
Table of Contents
- Watch the DIY Electric Fireplace Come Together
- Supplies and Tools for a DIY Electric Fireplace
- Step 1: Run the Electrical
- Step 2: Close It Up With Drywall
- Step 3: Install the Electric Fireplace Insert
- Step 4: Wrap the Columns in Plywood
- Step 5: Lay the Brick Hearth and Surround
- Step 6: Build the Mantel
- Step 7: Add Box Molding Trim
- Step 8: Fill the Mortar Joints
- Step 9: Fill, Caulk, Prime, and Paint
- Step 10: Add an Access Door Behind the Fireplace
- Step 11: Finish the Brick Edges With Trim
- The Finished DIY Electric Fireplace
- DIY Electric Fireplace FAQ
- 📌 Pin This DIY Electric Fireplace for Later!
Watch the DIY Electric Fireplace Come Together
Here’s how this DIY electric fireplace came together, from running wire in the attic to the finished brick surround and white mantel.
Supplies and Tools for a DIY Electric Fireplace
Supplies
- Electric fireplace insert
- Electrical wire, outlet boxes, and outlets
- Fire-rated drywall
- Plywood (for the columns, mantel shelf, and mantel front)
- Brick
- Mortar
- Crown molding
- Baseboard
- MDF (cut into 3-inch strips for box molding)
- Panel molding
- Wood filler
- Caulk
- Primer
- Paint (I used SW Alabaster)
- Drywall access door
Tools
- Cordless brad nailer
- Laser level
- Table saw
- Miter saw
- Jigsaw
- Notched trowel
- Grout bag
- Small paint roller
- Paintbrush
- Drill
Quick note on the tools: since I was visiting my sister for this project, I used her tools. They got the job done, but I’ll be honest, I’m a little spoiled by my own! So the tools I’ve linked throughout this post are the ones I personally use and love at home, because those are the ones I’d actually recommend to you.
Step 1: Run the Electrical
The first thing I did when I picked this project back up was run electrical. A DIY electric fireplace needs power, and I figured if I was already crawling around in the attic, I might as well make it count!
I added three outlets to this wall. One is inside the recessed area where the fireplace insert sits. The other two are on the back side of the wall, one on each side. That way, if my sister ever wants to put her bed on that wall, she’ll have an outlet on each side of the bed. I like to design with options in mind.
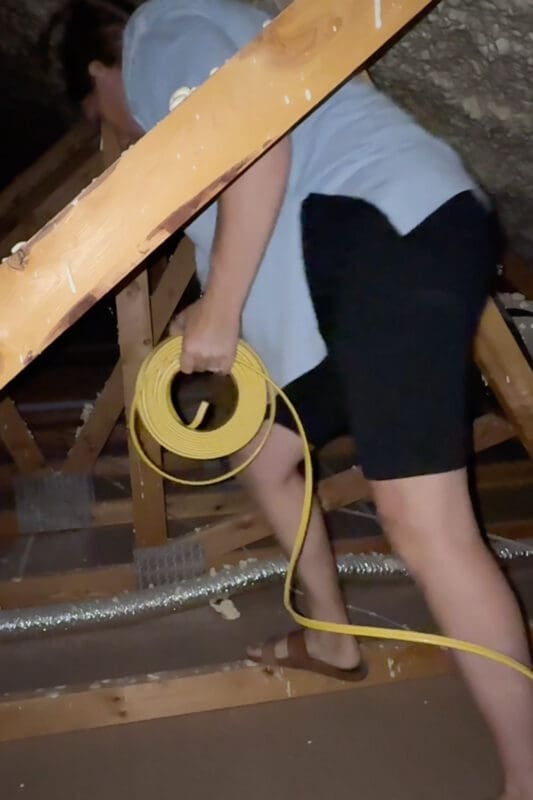
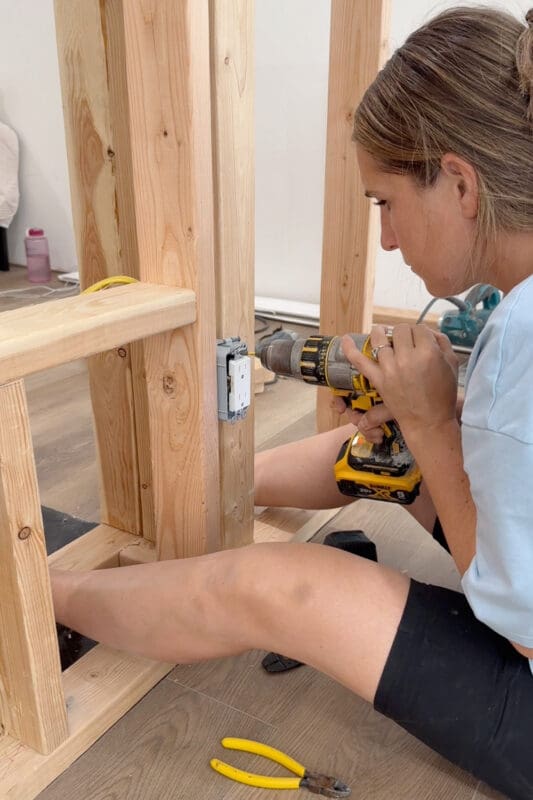
I ran all the wire and wired in the outlets myself. Then an electrician came out to connect my wiring to the electrical panel and install a new breaker. I’m all for DIY, but I also have no problem with calling in a pro!
Step 2: Close It Up With Drywall
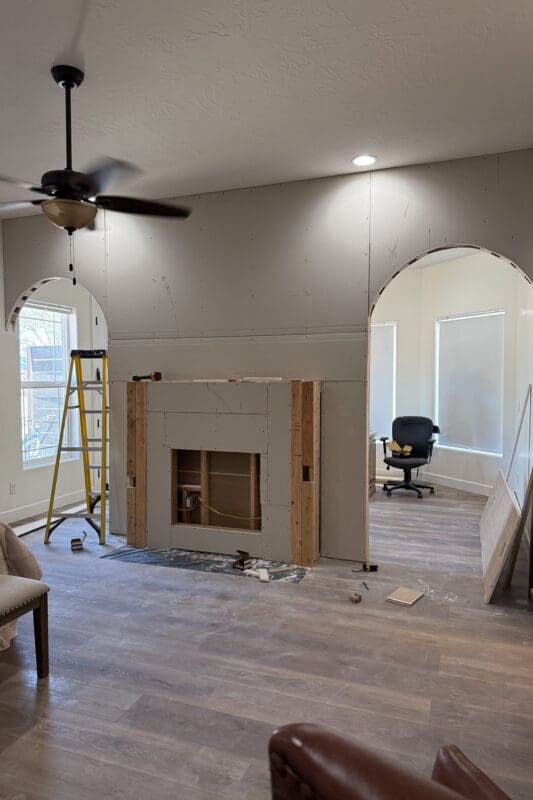
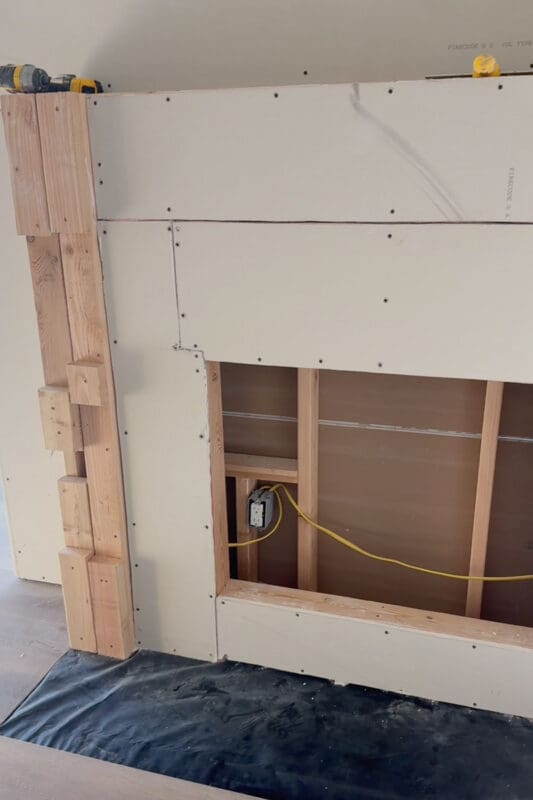
Once the electrical was done, we closed everything up with drywall. For the wall, we used standard 1/2 inch drywall, but around the fireplace, we used fire-rated Firecode X drywall.
We left an opening in the front of the fireplace framing for the insert, with the outlet tucked inside, ready to go.
Step 3: Install the Electric Fireplace Insert
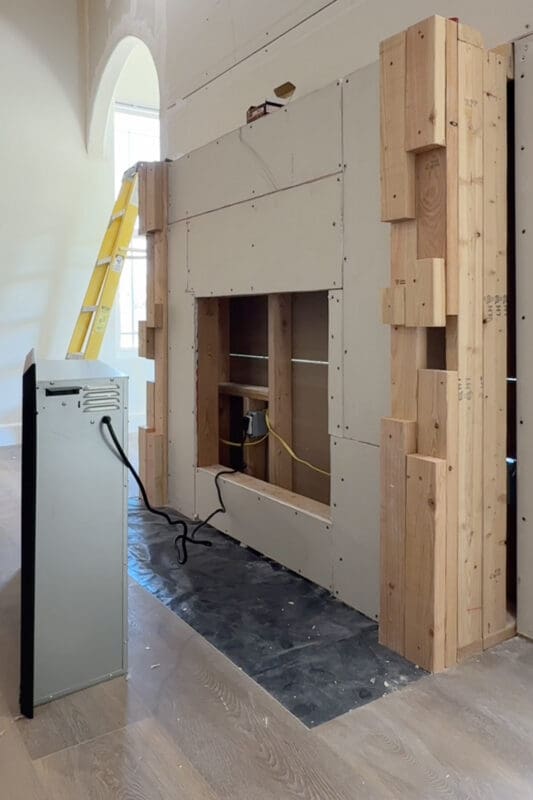
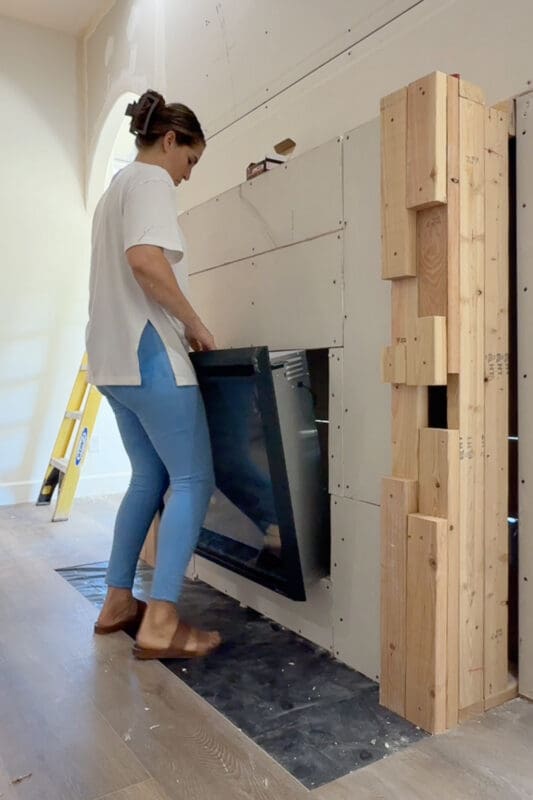
This is the moment it starts to feel real! I plugged the insert into the outlet inside the recess before sliding it into place. Then I lifted it up and slid it right into the opening. The insert I used is from PuraFlame. Here’s a link to the exact one that I used.
Step 4: Wrap the Columns in Plywood
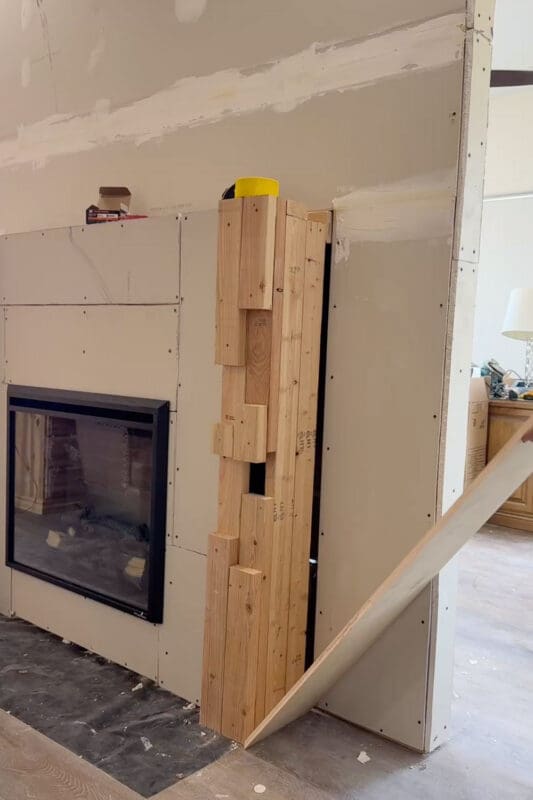
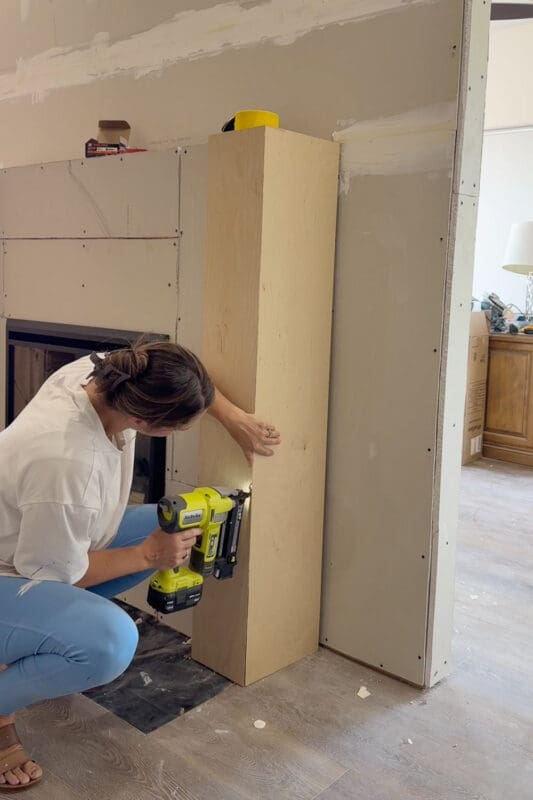
With the insert in, I moved on to the two side columns. I built them out with blocks of 2x4s, which looks a little chaotic, I know. But it’s all getting covered. I just need something that I can nail plywood to.
Then I wrapped each column in plywood and attached it with a brad nailer. Where the plywood pieces meet at the corners, I cut the edges at a bevel so they fit together with no raw edges showing. Just like that, the chaos turns into what looks like one solid beam!
Step 5: Lay the Brick Hearth and Surround
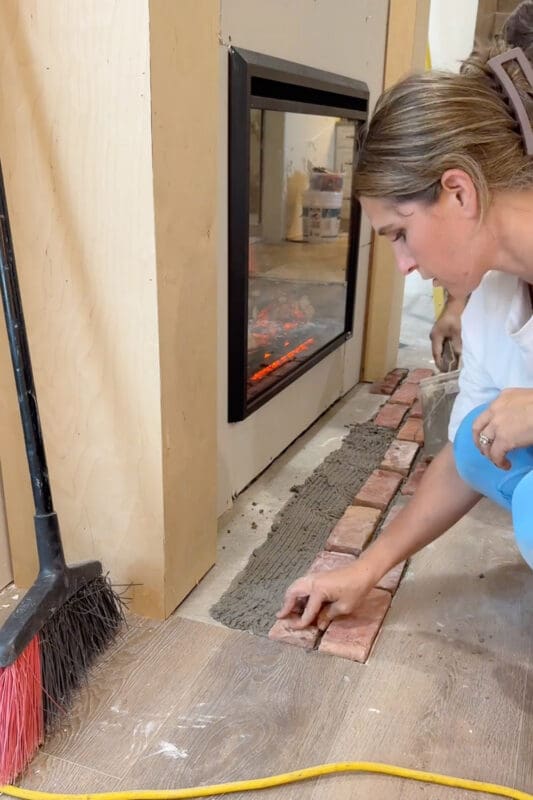
Now for the fun part: brick! I started with the hearth. I spread mortar on the floor with a notched trowel and pressed each brick paver into place, working my way along the front of the fireplace.
Once the hearth was down, I bricked in the area around the insert. For this portion, I back-buttered the bricks (applied mortar to the back of each brick), then set them in place. I used a laser level to keep my rows straight because even a slightly crooked brick will haunt you forever.
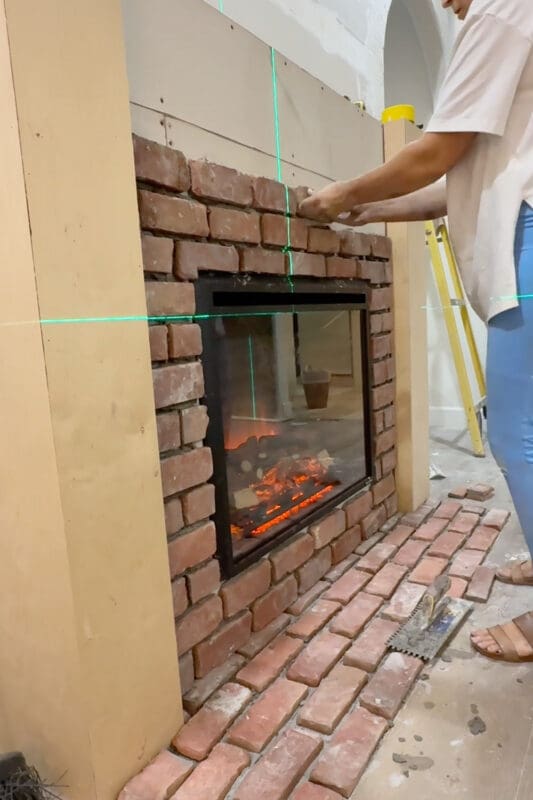
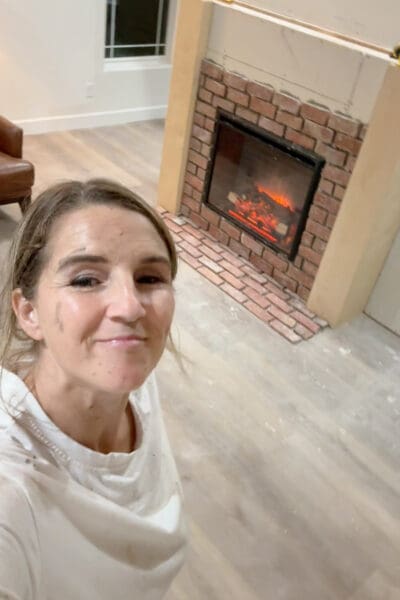
By the end of the day, I was wearing about as much mortar as the wall was. Totally worth it. This DIY electric fireplace is starting to look so good!
Step 6: Build the Mantel
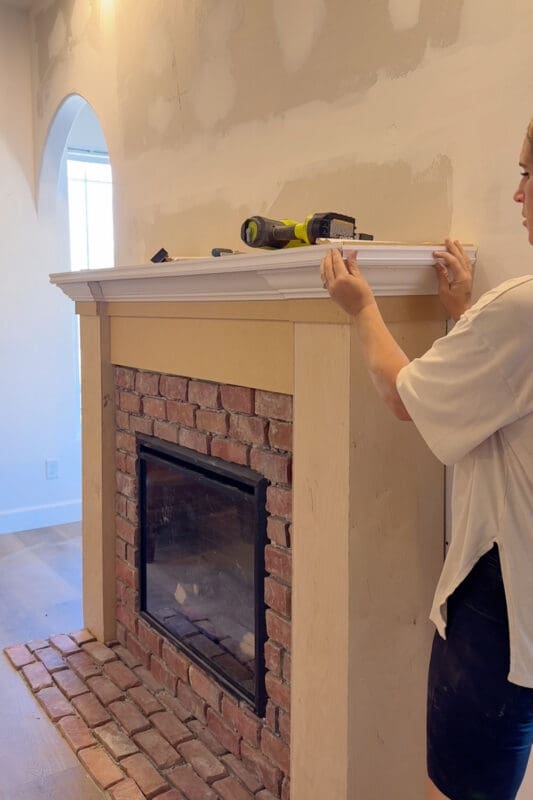
For the mantel shelf, I double-stacked two pieces of 3/4 inch plywood on top of the surround.
Next, I added a piece of plywood to the front of the mantel, above the brick. I set it slightly back from the two side columns so the columns would stand out and give the fireplace some depth.
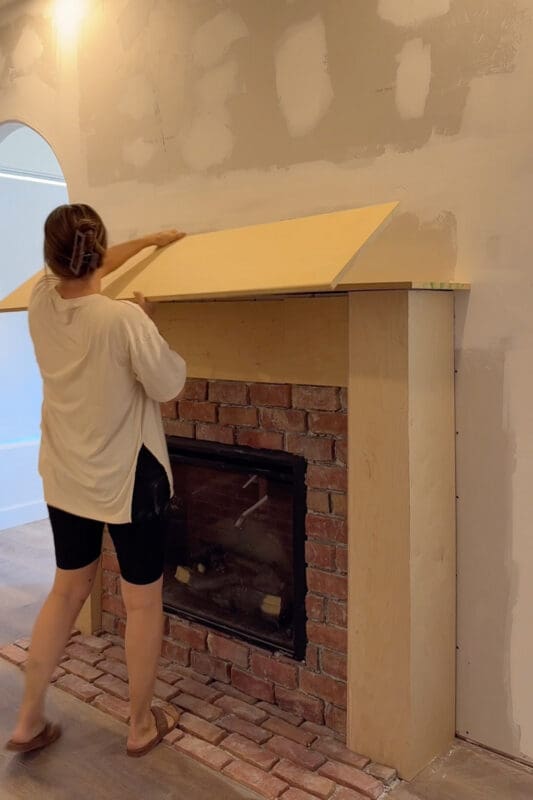
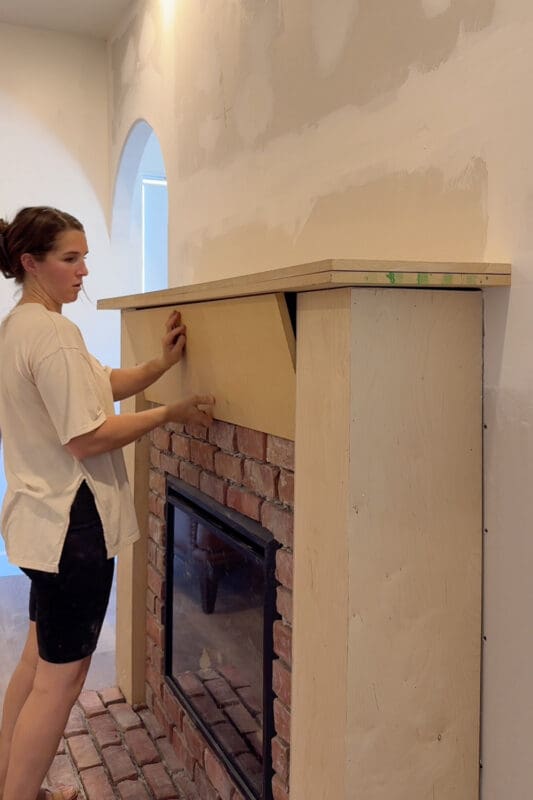
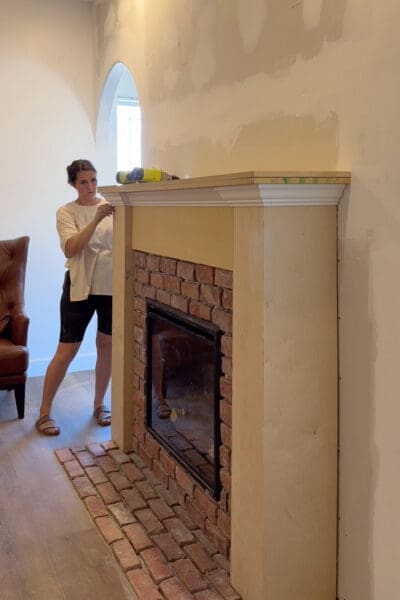
Then I added crown molding underneath the mantel shelf. This is where it really started looking like a DIY electric fireplace with character and not just a wood box!
My Favorite Trim Trick
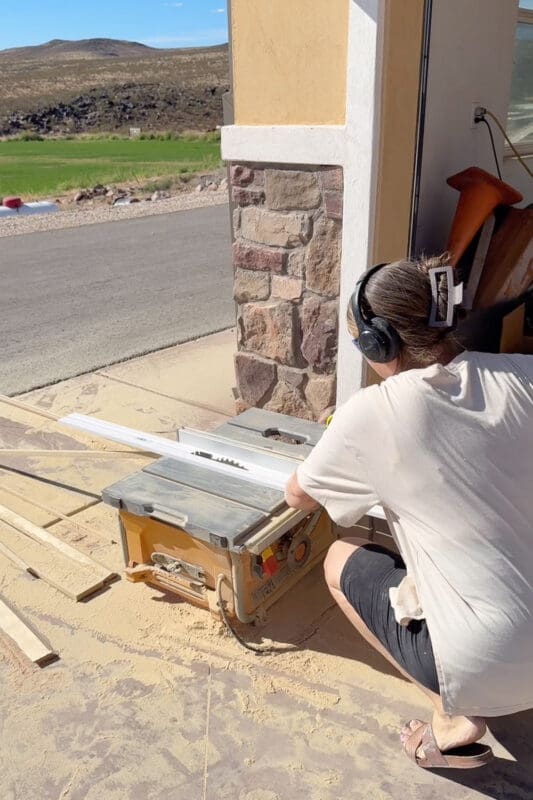
Here’s a little problem I ran into. With two pieces of 3/4 inch plywood stacked together, finding trim the same thickness as the mantel shelf was tricky. So I went to the baseboard aisle instead!
I found a baseboard with a detail I loved and cut it down on my table saw to fit. Then I wrapped it along the edge of the shelf for a clean, fully finished look. This is a great trick to keep in mind when working on custom pieces like this!
Step 7: Add Box Molding Trim
To give this DIY electric fireplace that old world, it’s been here forever, built-in look, I added box molding with strips of MDF. It’s similar in style to the box molding I added in my own house, and I just love how much character it adds.
I nailed the MDF strips to the top, front, and sides of each column, plus the front of the mantel.
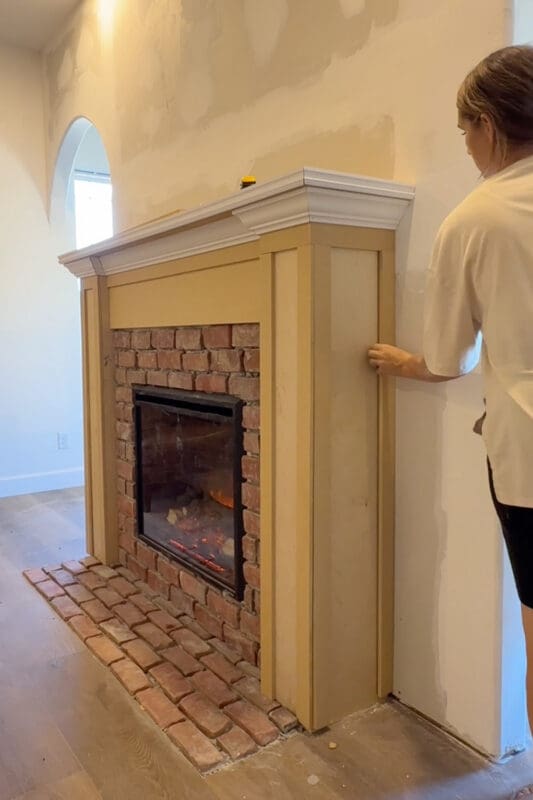
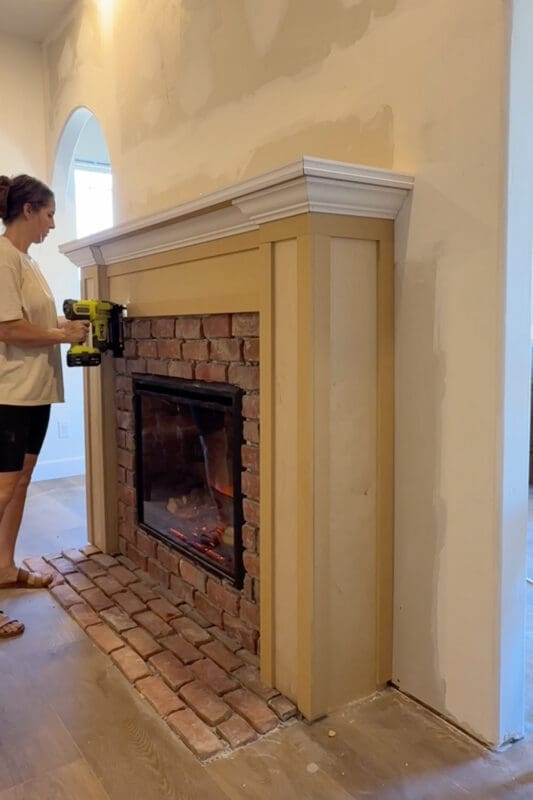
A laser level came in handy again here. It helped me line up the trim pieces so everything matched from the front of the columns to the sides.
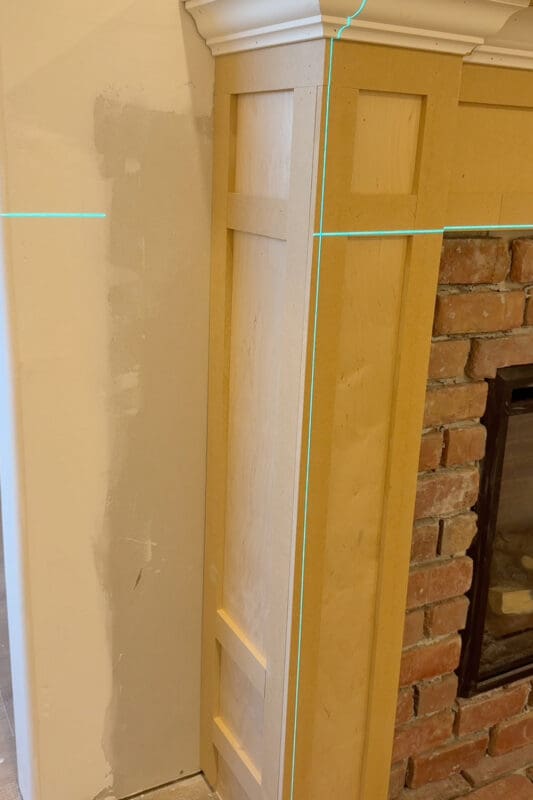
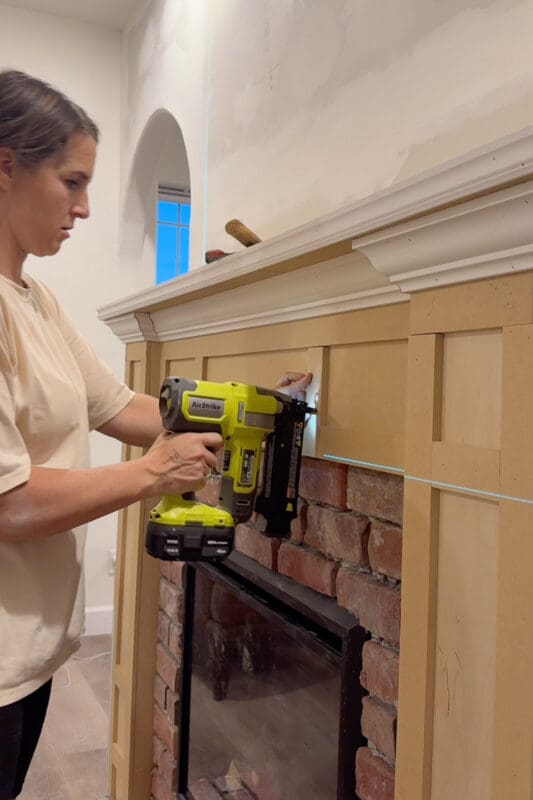
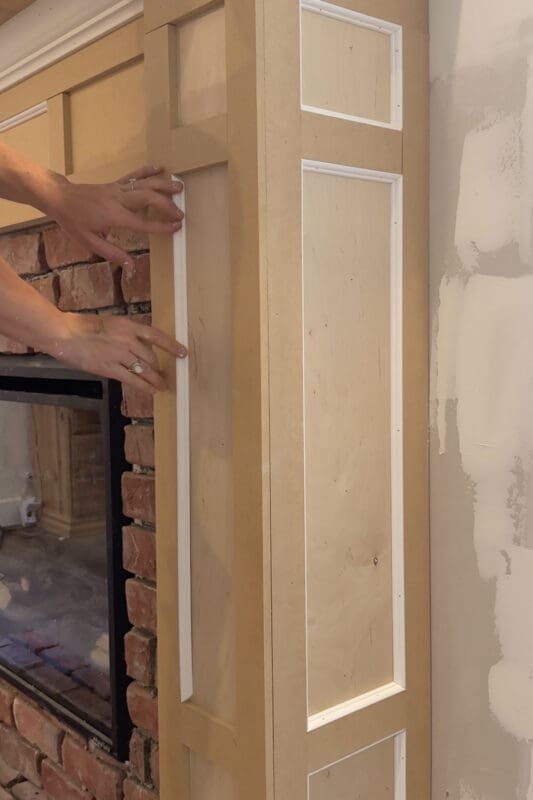
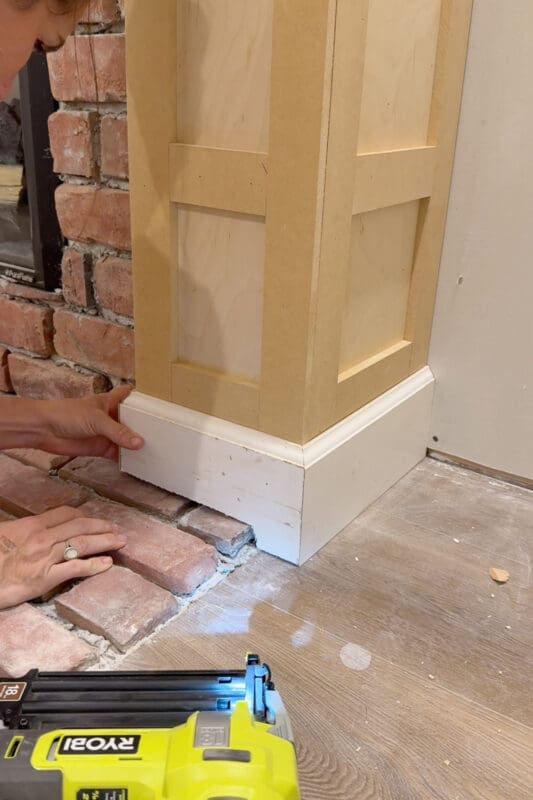
For an extra layer of detail, I added thin panel molding along the inside edges of each box. And I wrapped baseboard around the bottom of each column. Brick is not exactly flat, so I used a jigsaw to trim the bottom of the baseboard to fit over the hearth.
Step 8: Fill the Mortar Joints
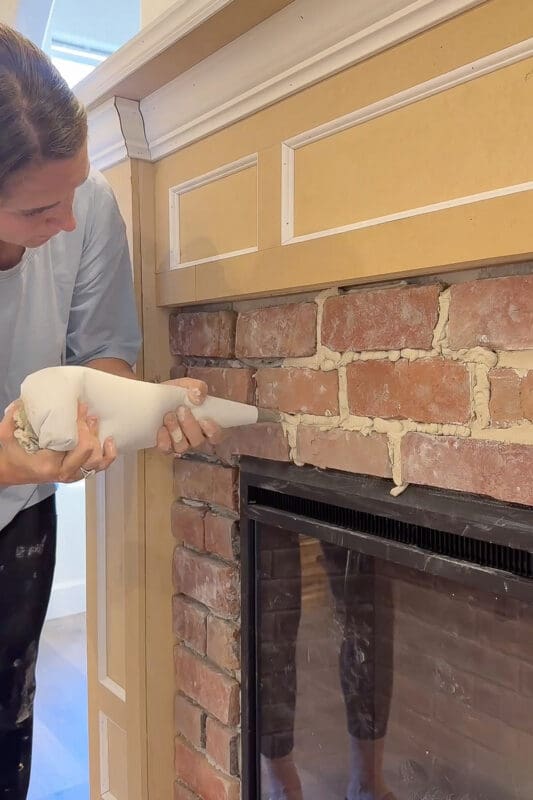
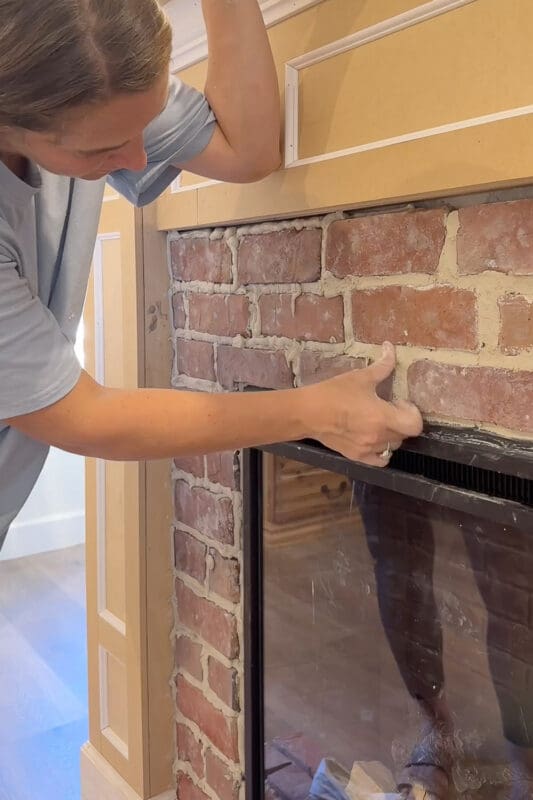
Next, I went back to the brick to fill in the joints. I used a grout bag to pipe mortar into the gaps between the bricks. If you’ve ever frosted a cake, you already have this skill!
Then I used my finger to press the mortar in and smooth it out. This is what gives the brick that soft, old-world look I love. After filling in all the grooves, I went over everything with a damp sponge to clean the brick and give the mortar a final smoothing.
Step 9: Fill, Caulk, Prime, and Paint
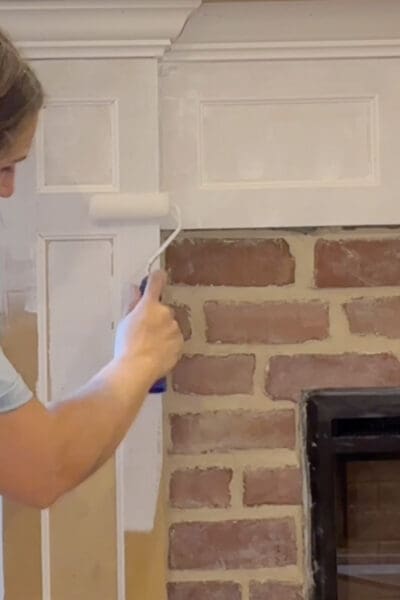
This is the not-so-glamorous part, but it makes all the difference. I filled every nail hole and seam with wood filler and sanded it smooth. Then I caulked all the joints so the trim looks like one solid piece.
Finally, I primed and painted the whole surround. I have a full guide for painting built-ins like this for a professional finish. You can read my step-by-step process and best tips here: The ULTIMATE Guide to Painting Cabinets & Furniture.
Step 10: Add an Access Door Behind the Fireplace
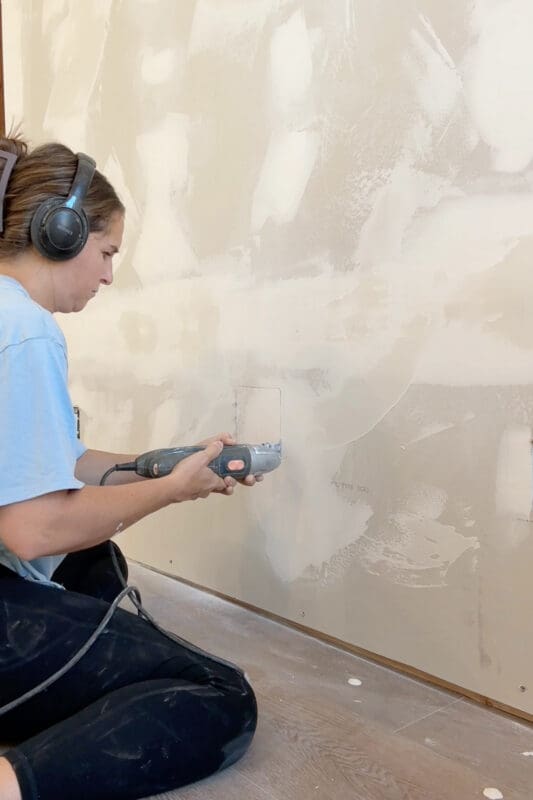
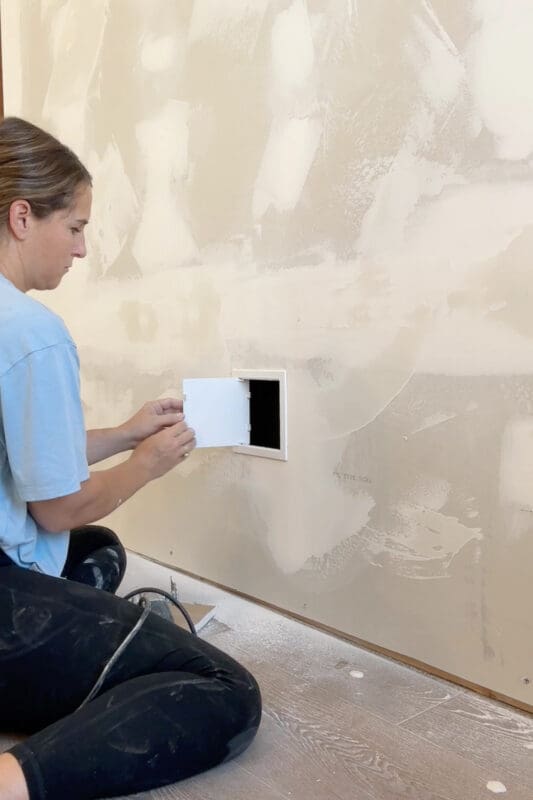
Here’s a little detail I’m really proud of. On the back side of the wall, I cut a small opening in the drywall behind the fireplace.
Then I installed a small access door over it. Now, if anyone ever needs to get to the outlet behind the insert, they can just pop the door open instead of pulling the whole fireplace out. Easy peasy!
Step 11: Finish the Brick Edges With Trim
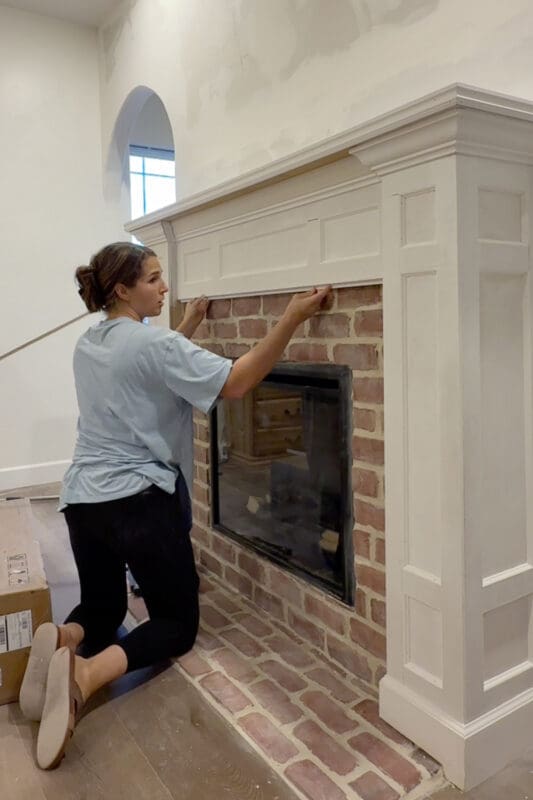
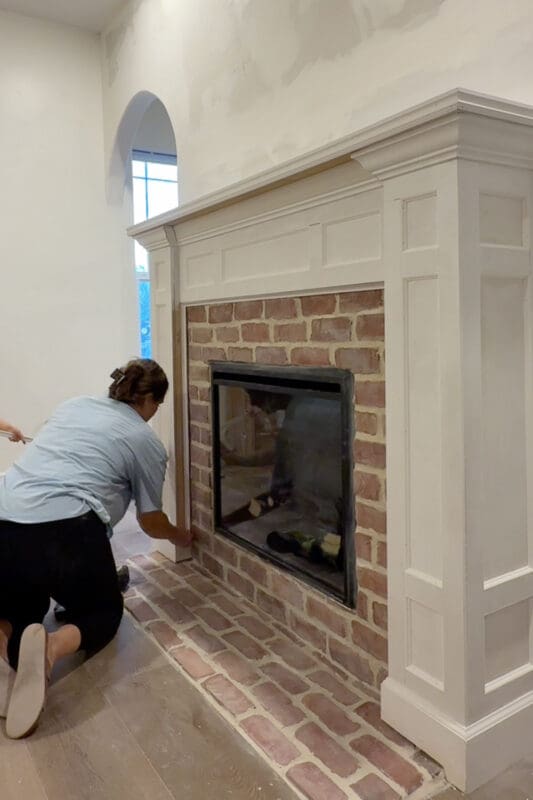
The very last step was adding trim where the brick meets the wood. The edge of the brick and the mortar can look a little unfinished. These narrow trim pieces hide the uneven lines and make the whole thing look polished.
I added one piece along the bottom of the mantel, right above the brick. Then I added trim along the inside edge of each column.
The Finished DIY Electric Fireplace
And here she is! A brand-new DIY electric fireplace in a spot that used to be nothing.
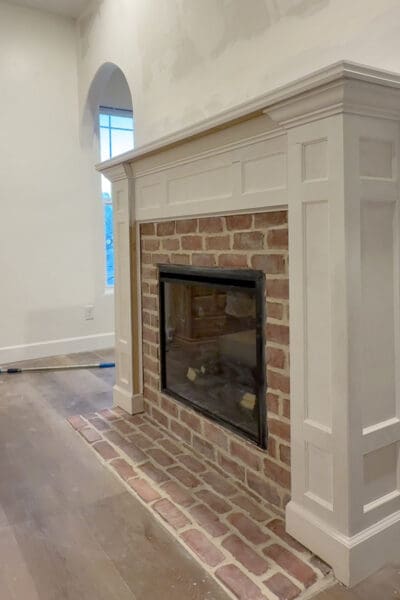
Once the wall was finished and the mantel was styled, this DIY electric fireplace became the coziest spot in the whole room. I mean, look at that warm brick next to the white trim. I could sit here all day!
Stay tuned for the full room reveal, where I’ll walk you through the whole bedroom makeover from start to finish.
DIY Electric Fireplace FAQ
Many electric fireplace inserts simply plug into a standard outlet. I ran the wire and installed the outlets myself, then had an electrician connect everything to the panel and add a new breaker. Always check your local codes and call a licensed electrician for anything involving your electrical panel.
Always follow the clearance and installation instructions in your insert’s manual. I used fire-rated Firecode X drywall around the fireplace for a little extra caution.
I added a small access door on the back side of the wall, right behind the fireplace. That way, you can get to the outlet without pulling the insert out.
If you can’t find trim tall enough for your mantel edge, try baseboard! I cut down a baseboard with a detail I liked on my table saw, and it wrapped the double-stacked plywood shelf perfectly.
Yes! I laid brick for both the hearth and the surround, then piped mortar into the joints with a grout bag. Just be sure to check your insert’s manual for any clearance requirements first.
📌 Pin This DIY Electric Fireplace for Later!
Save this post to your favorite Pinterest board so you have it handy when you’re ready to build a cozy fireplace of your own!