


DIY Fireplace Built-Ins With Shelves: How I Built Ours, Part One


Updated September 18, 2026
Our DIY fireplace built-ins started with a big, dated-looking brick fireplace, two very empty walls on either side of it, and a bunch of paint samples.
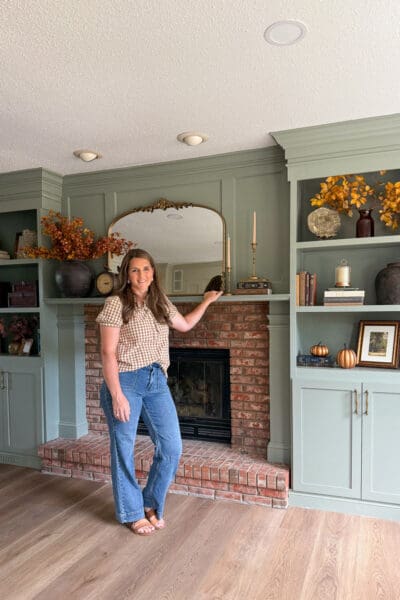
This project ended up being big enough that I split it into two posts. Part one is the build, which is everything from cutting plywood on my garage floor to setting the boxes in place and getting the mantel up. Part two covers all the finishing touches. The trim, the paint, the doors, and the big reveal.
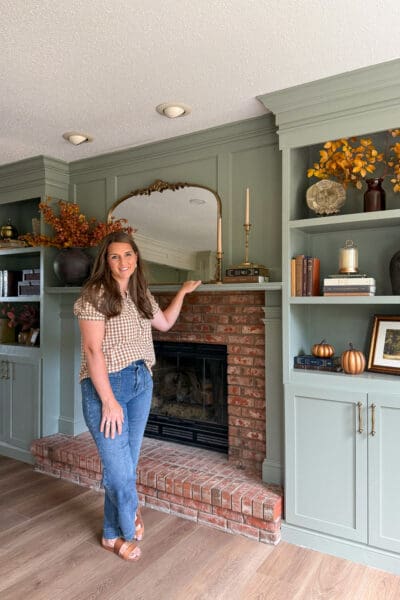
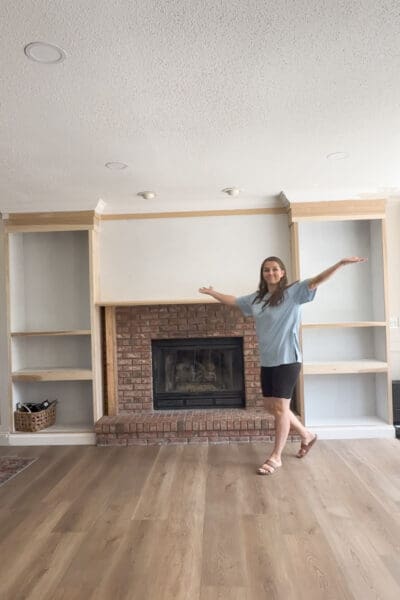
Fair warning before you scroll: this post ends with the whole thing looking like a bunch of ugly plywood, and not like that gorgeous after shot. We will get there, though, promise!
Table of Contents
- Our Dated Brick Fireplace Before
- Planning the DIY Fireplace Built-Ins With AI
- What I Used for My DIY Fireplace Built-Ins
- Cutting and Priming the Plywood
- Marking Where the Shelves Would Go
- Assembling the Cabinet Boxes
- Adding the Back Panels to the Cabinets
- Setting the DIY Fireplace Built-Ins in Place
- Attaching 2x4s to the Brick
- Adding the Panel Above the Mantel
- Why I Hired Out the Crown Molding
- Then It Sat Like That All Summer
- Finishing the DIY Fireplace Built-Ins in Part Two
- FAQs: DIY Fireplace Built-Ins
- 📌 Pin These DIY Fireplace Built Ins for Later
Our Dated Brick Fireplace Before
Here is what we were working with. A floor-to-ceiling brick fireplace with a chunky wood mantel, a raised brick hearth, and nothing on either side but blank walls. If you have been following along, you know this wall has been on my list since pretty much the day we moved in. The brick itself is fine. I’m actually ok with the brick. There’s just a lot of it. The biggest problem was everything around it. Just a whole lot of blank walls and wasted space. I removed the mantel, then had a blank slate ready to be transformed.
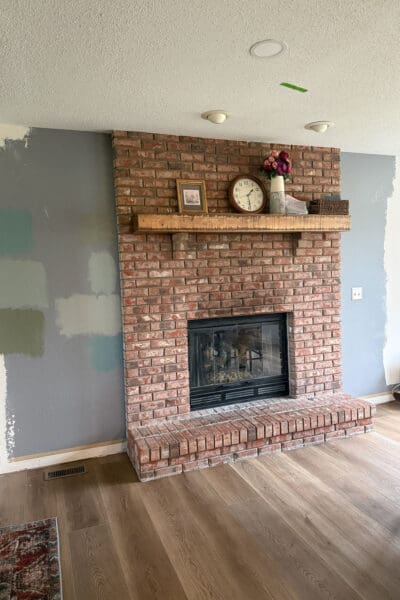
The good news is that all of that empty space on either side of the brick was exactly the room I needed. DIY built-ins will give us extra storage while being a gorgeous, decorative feature for our dining room.
Planning the DIY Fireplace Built-Ins With AI
Before I bought a single board, I made myself an inspiration image of my dream DIY built-ins using AI.
I do this for almost every project now, because it is so much easier to commit to a plan when you can actually see it. If you want to try it yourself, I walk through exactly how I make these images here: Using ChatGPT for Interior Design Help.
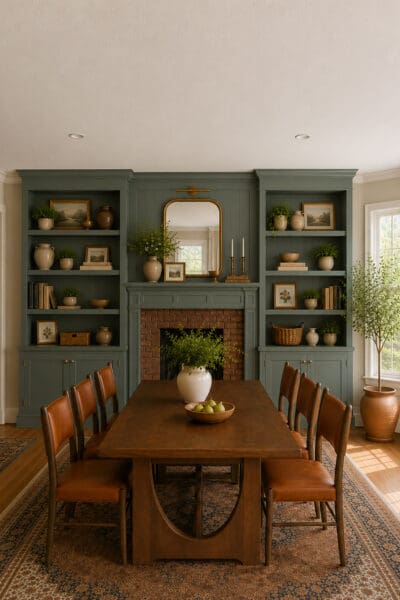
That image is not quite accurate to the scale of our dining room, but it’s a pretty starting point, nothing more. These inspo images help me visualize the plan: cabinets on the bottom, open shelves on top, keep some of the brick exposed, and let everything around the brick disappear into one cozy color.
What I Used for My DIY Fireplace Built-Ins
Here are the supplies that went into part one of tackling these built-ins.
Materials
- 3/4 inch plywood for the cabinet boxes, shelves, and mantel
- Hardboard for the backs of the boxes
- 2x4s for the blocking on the brick
- Zinsser BIN shellac primer
- Wood glue
- Brad nails
- Wood screws
- Masonry fasteners for attaching to brick
Tools
- Circular saw or table saw
- Brad nailer
- Drill and impact driver
- Tape measure
- Straightedge and pencil
- Level
- Hammer and
- Paint roller, roller sleeves for a smooth finish, and paint tray
- Step ladder
Cutting and Priming the Plywood
I cut all of my pieces for the built-ins using a circular saw with this special jig to keep my cuts straight, then I primed them all before assembly.
Priming flat panels while they are lying on the garage floor is so much faster and easier than doing it after you’ve assembled them into cabinet boxes and installed them. You are rolling one flat surface at a time instead of contorting yourself around an assembled cabinet, and you get much better coverage in a fraction of the time.
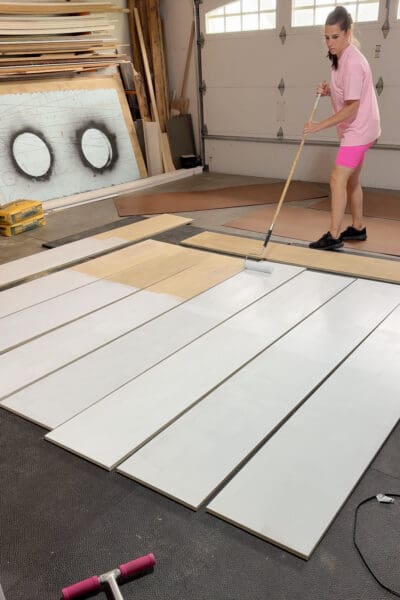
I used Zinsser BIN, which is a shellac-based primer. It sticks to everything, it blocks stains and knots, and it dries fast. It also has a bit of a smell, and it’s not water-based, so cleanup takes some extra effort, but it’s worth it.
Marking Where the Shelves Would Go
Once everything was primed and dry, I laid the panels out and marked where each shelf would land.
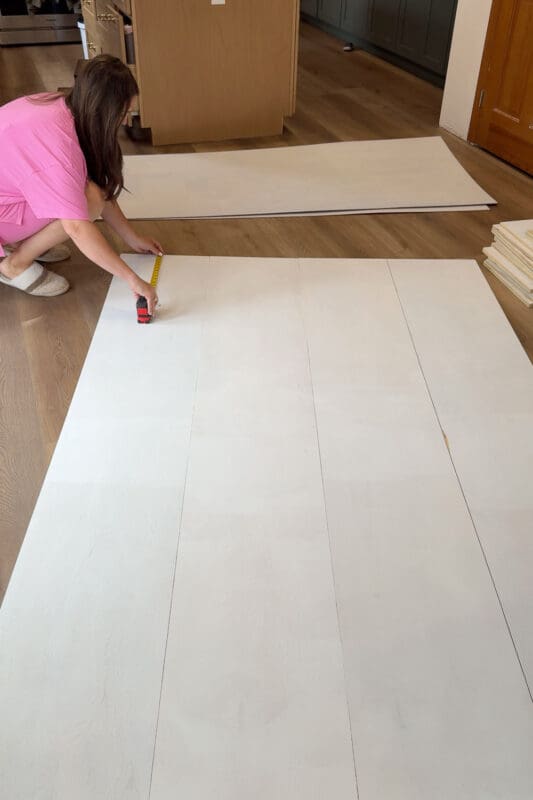
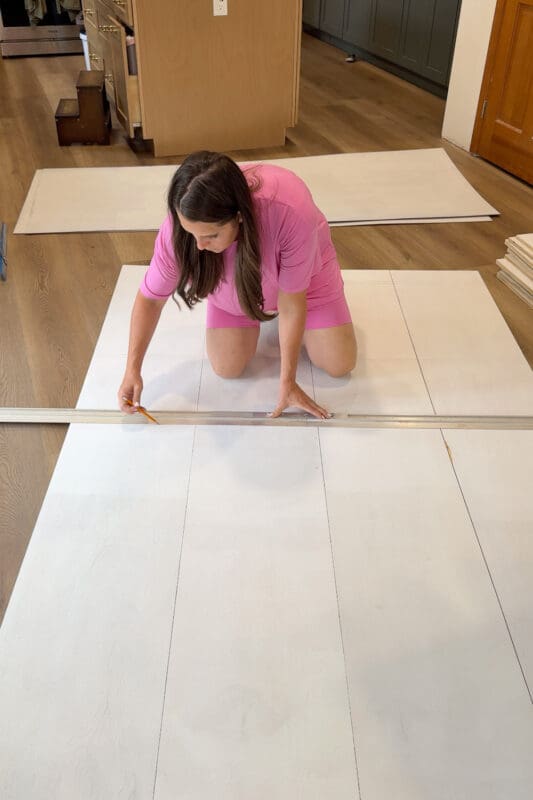
Assembling the Cabinet Boxes
Every joint gets wood glue first, then I use my brad nailer to hold everything together.
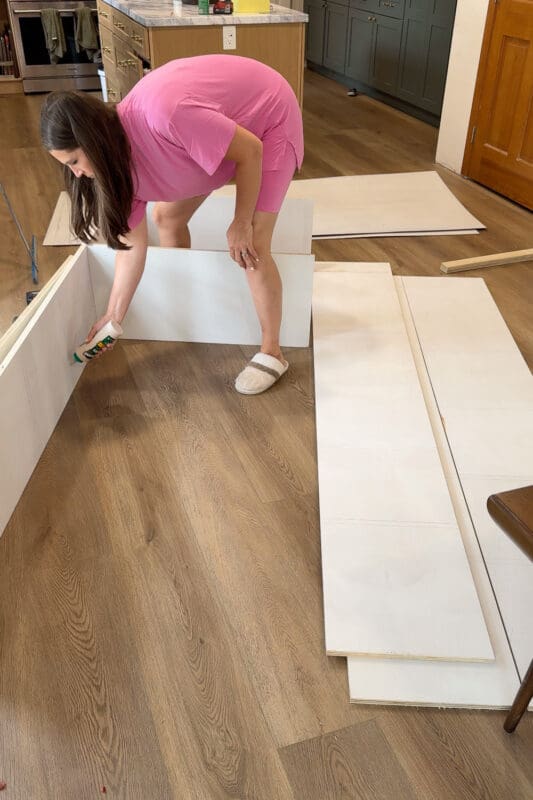
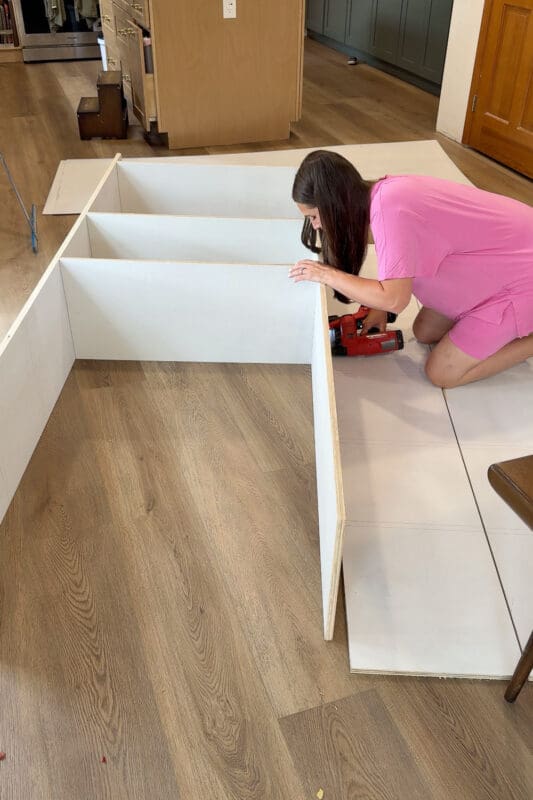
Across the back, at the top of each box, I added a small piece of plywood as a brace. This piece goes by a couple of names: a stretcher or a mounting rail, and it sits flush just inside the top edge. It does two jobs at once. It keeps the box from flexing, and it gives me something solid to screw through when I mount the whole thing to the wall studs later.
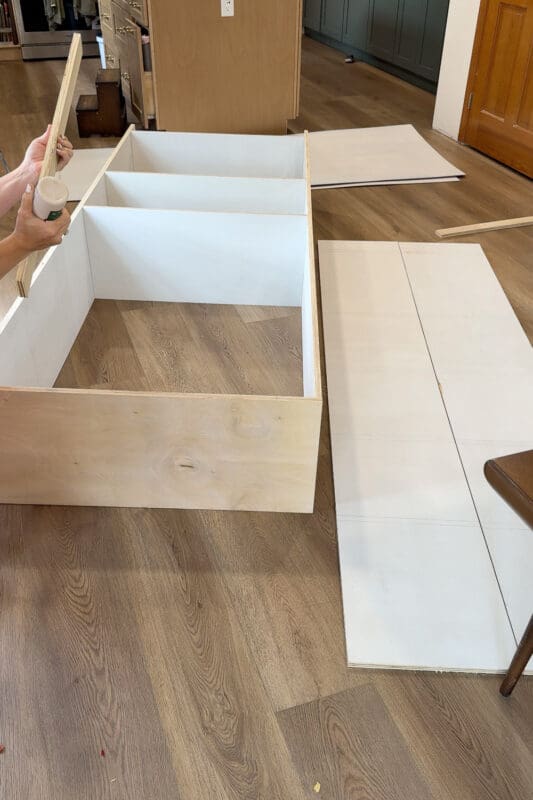
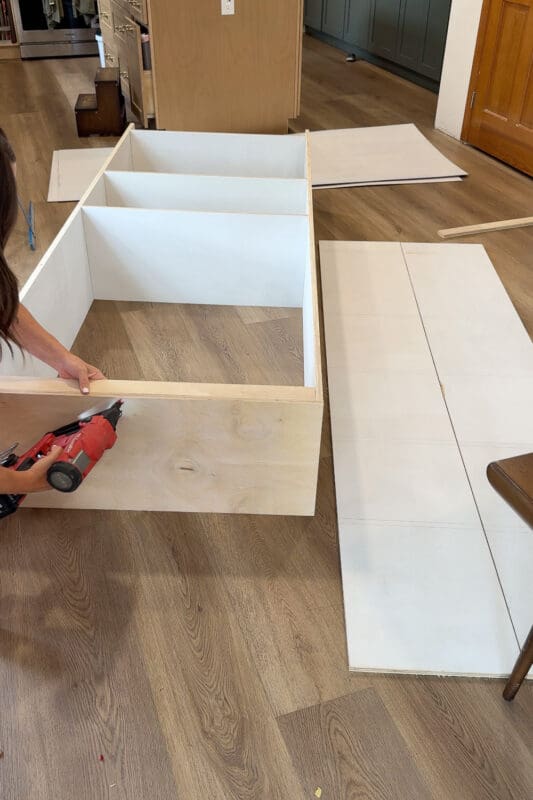
Here is my favorite trick for building cabinets like this, and it’s the reason I was able to assemble these built-ins without a second set of hands. The brad nailer you see me using to assemble everything is easy to use one-handed. So I could hold a panel in place with one hand, tack it with the other, and have the whole box put together how I want it.
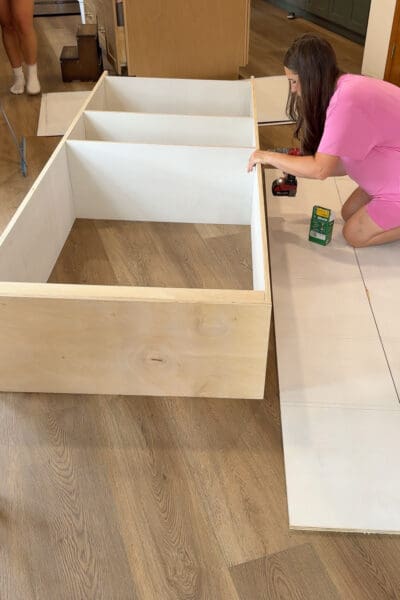
The brads are not going to hold this together long-term, though. Once the entire box was assembled and square, I went back and used my drill to add screws at all of the joints to actually make it sturdy. Between the wood glue and the screws, these DIY built-ins will be solid.
Adding the Back Panels to the Cabinets
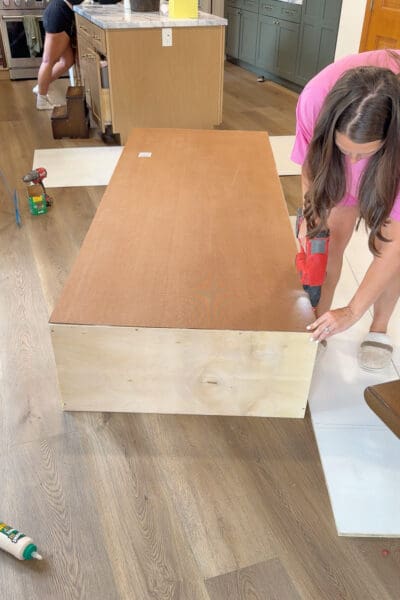
With the box fully assembled, it was time to attach a backing.
A back panel to your built-ins does more than just close up the back of the cabinet. It helps keep the whole cabinet box from flexing, which matters a lot once you stand something this tall upright. A piece of hardboard is perfect for this. It’s thin and inexpensive. It comes in a 4×8 sheet and is easy to cut down with a table saw or circular saw.
Setting the DIY Fireplace Built-Ins in Place
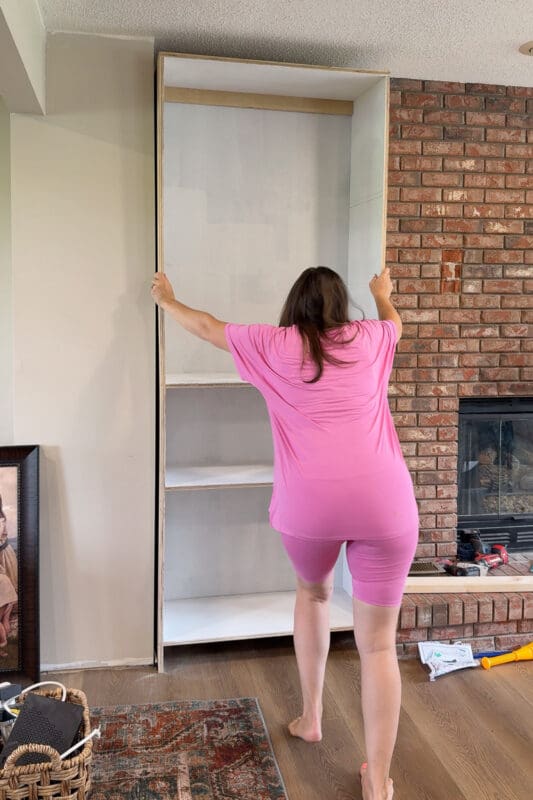
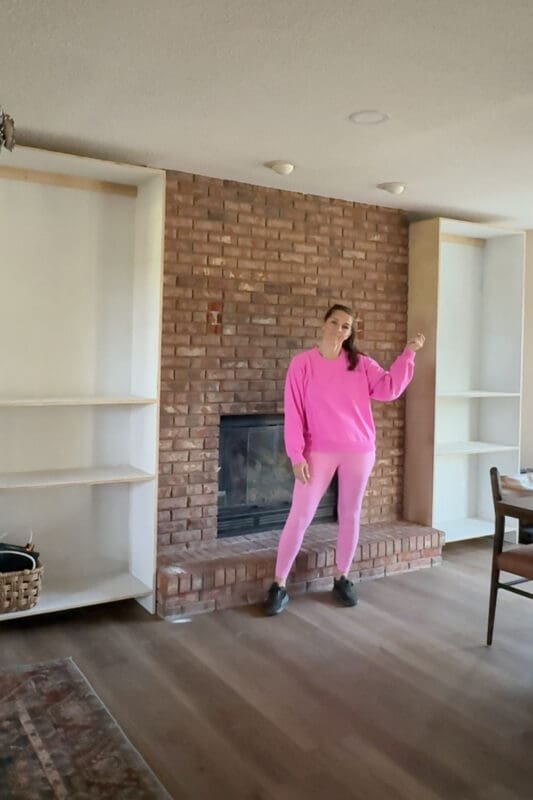
Then came the moment of truth. I slid that first cabinet into place, and it fit – YAY! Then I built a second identical one for the other side. Once they were both standing where they belonged, I screwed through the stretcher at the top of each one straight into the wall studs.
Attaching 2x4s to the Brick
Now, we’re going to deal with covering up some of this brick. This is the step that scares people off, and I understand why. Drilling into brick feels permanent in a way that drilling into drywall does not. I get it, but it’s going to be just fine.
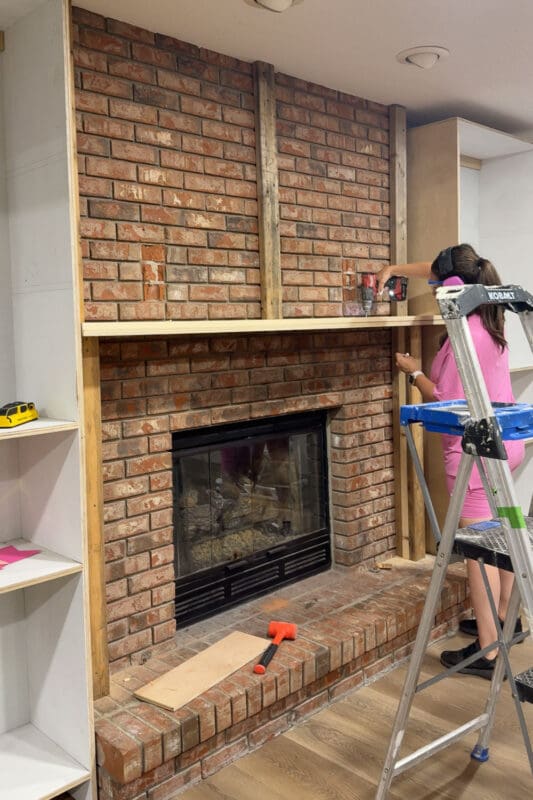
I started with one 2×4 running from the hearth to the ceiling on each side of the fireplace, tight up against the cabinet boxes. You can’t use regular wood screws for this part. I’m using self-tapping masonry screws.
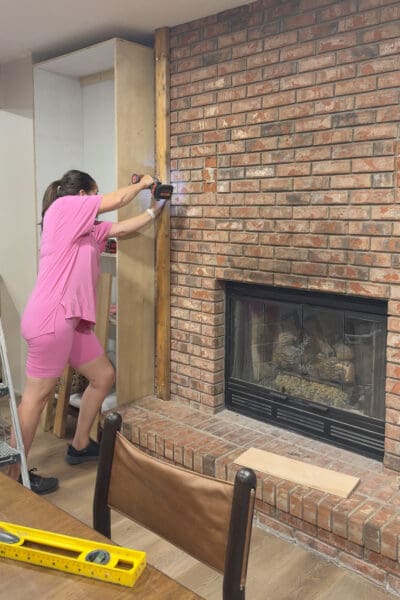
After the longer 2×4 is in, I’m adding three more pieces that are cut to the height I want the new mantel to sit. Since the 2x4s are each attaching to the 2×4 behind it, you can switch back to regular wood screws for this part.
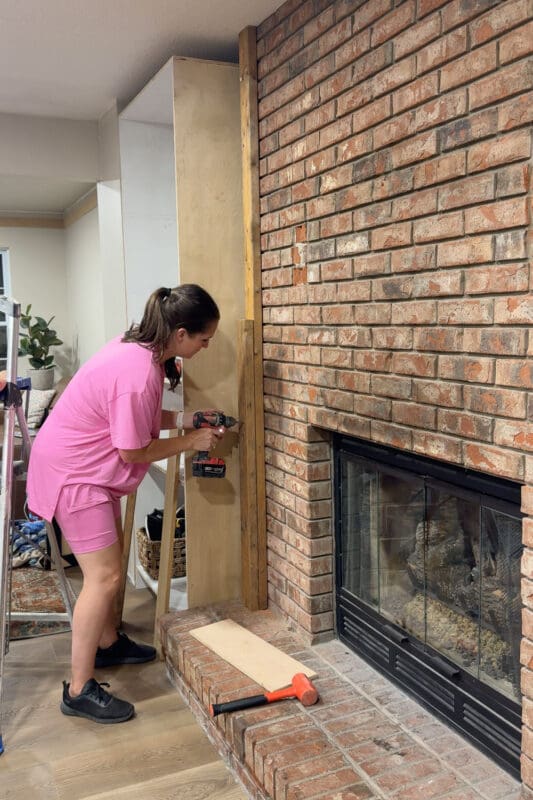
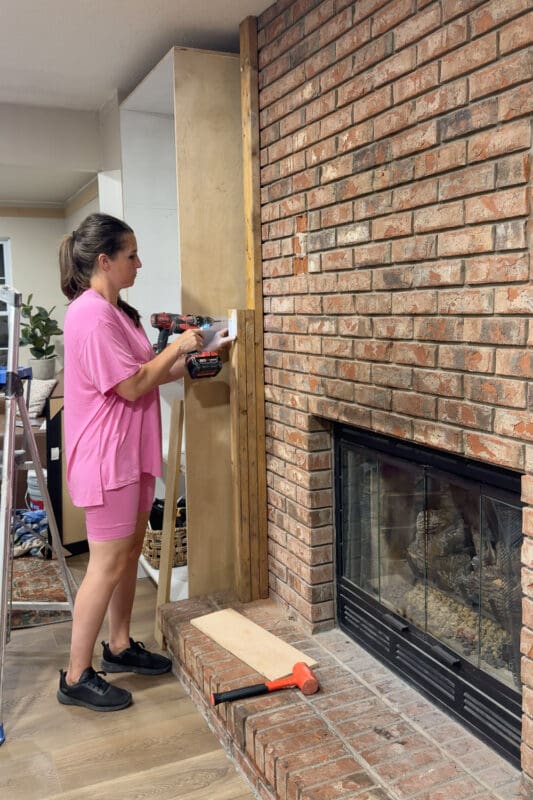
All of this blocking is doing one job: giving me solid wood to attach my mantel, paneling, and eventually trim to.
I added one more 2×4 running up the center of the brick. This one is cut off to sit just above the mantel after it’s in.
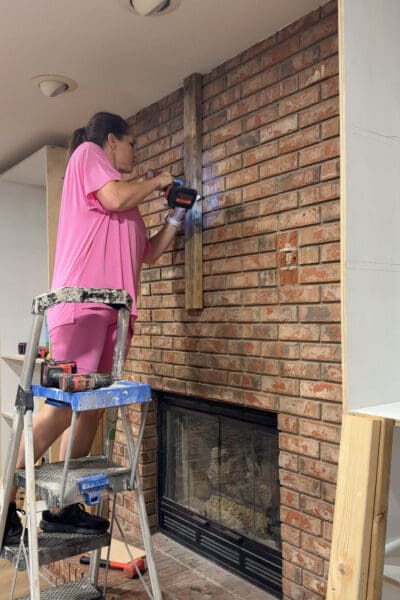
For the mantel, I started with a simple piece of plywood, the same stuff I used for the built-ins on either side. I cut it down so the depth sits flush with those two boxes, and then screwed it into the stacked 2x4s on each side of the firebox.
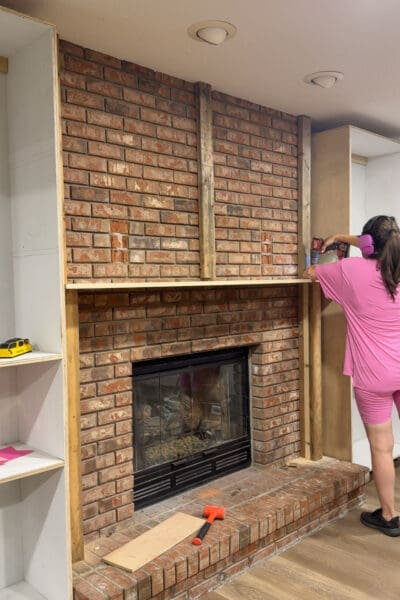
One piece of plywood would be too flimsy on a span this wide, and I did not want any sagging over time. So I doubled it up with a second piece. That doubling is the whole reason the finished mantel looks substantial instead of like a shelf somebody stuck on the wall, and it costs you exactly one extra piece of plywood.
The raw plywood edge you can see in these photos gets covered with trim in part two, which is why the finished version looks so crisp.
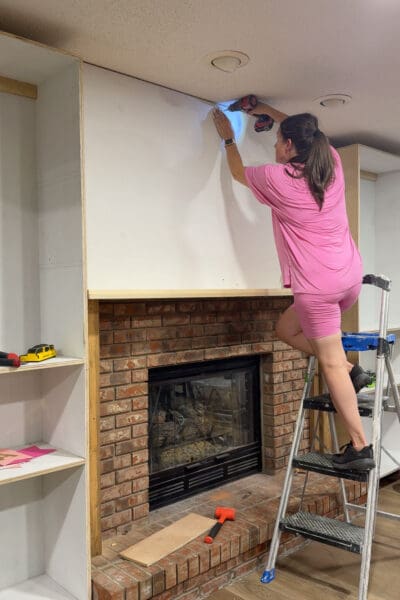
Adding the Panel Above the Mantel
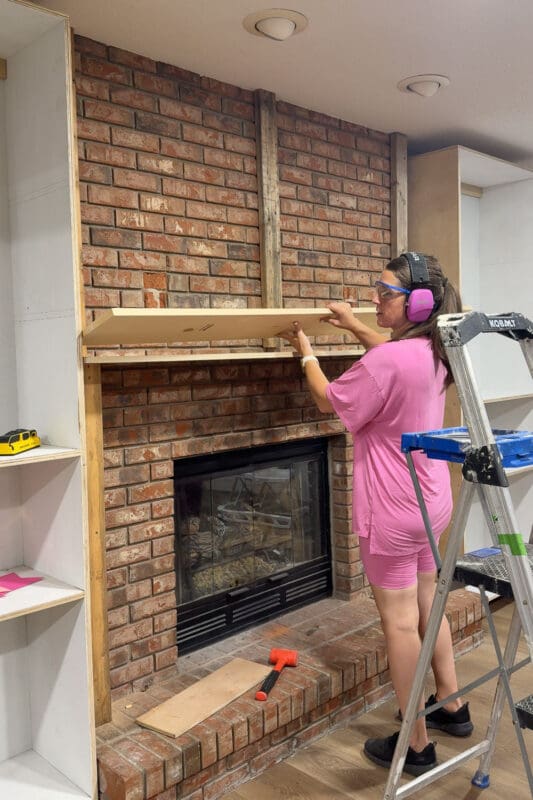
Last piece for the building portion of these DIY fireplace built-ins: a big primed plywood panel across the chimney above the mantel, covering up a whole lot of the brick. I screwed it straight into the 2x4s I attached to the brick earlier. I know it does not look like much right now, but hang with me, because this panel is where a lot of the character comes from in part two.
Why I Hired Out the Crown Molding
And then I stopped and called in some help.
I wanted crown molding to run around the entire first floor, not just this wall. My entire first floor. Crown molding is tricky enough, but getting every angle right so it all matched up in every corner of every room was more than I wanted to take on. It would have taken me weeks and weeks to finish.
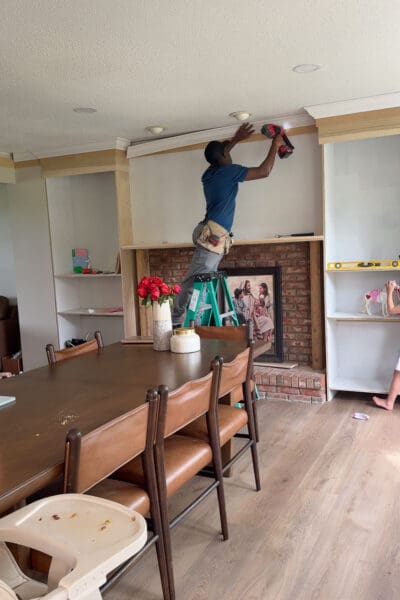
So I found somebody on Facebook Marketplace and hired it out, and it was one of the best decisions I made on this whole project.
I say this as somebody who builds almost everything herself: knowing which parts to hand off is a skill too. Doing it yourself is supposed to save you money and give you something you are proud of. If a step is going to cost you a month of your life and make you hate your own living room, pay somebody.
Then It Sat Like That All Summer
Here is the part nobody puts on Instagram.
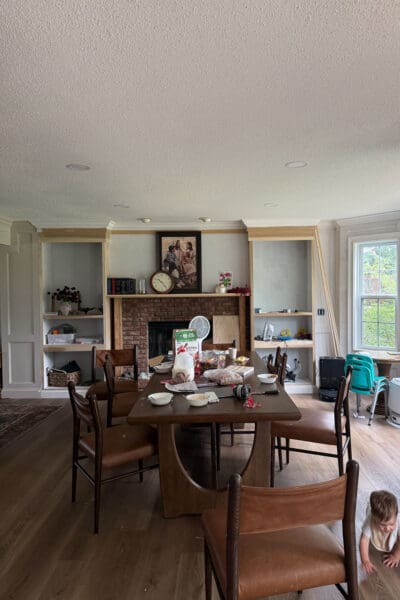
We lived with raw plywood built-ins for about four months. Books and random clutter went on the shelves. Baskets went in the bottom. Breakfast happened three feet away every single morning.
I had a summer full of outside projects (like building a garden from scratch), and these DIY fireplace built-ins just sat, unfinished and unpainted, in the middle of our dining room. And you know what? It was fine. The shelves worked. The mantel held a picture. Nobody who came over said a word about it.
If your project is stalled at the ugly stage right now, that is not a failure. That is just normal life.
Finishing the DIY Fireplace Built-Ins in Part Two
Part two is where this thing actually becomes the big feature I had in my head. We will get into:
- The trim on the mantel and the columns
- The paneling above the mantel
- Wood filler, caulk, and all the unglamorous prep
- The paint color, which is the question I get asked most
- Cabinet doors and hardware
- All the gorgeous decor
Read the full post here – DIY Fireplace Surround and Mantel: Part Two
FAQs: DIY Fireplace Built-Ins
No. Our brick stayed exactly where it was. The cabinet boxes sit on either side of it and the trim and mantel attach to 2x4s that are fastened to the brick face. Keeping the brick saved a huge amount of demo, mess, and money.
Mine do not. The boxes sit directly on the floor and I added baseboard across the front afterward to cover the gap and make everything look built in. It is one less thing to build and one less thing to shim level.
Because rolling primer onto a flat panel on the floor is so much faster and gives you better coverage than trying to reach into the corners of an assembled box. Cut, prime, mark, then assemble.
Yes. I built both boxes on my own. The trick is using a brad nailer to tack your joints together, because it is easy to operate one-handed while your other hand holds the panel in place. Go back and add screws once the box is assembled.
Not at all, plenty of people do their own crown. I hired mine out because I wanted it running through the whole first floor and I did not want to spend my summer fighting inside corners. Deciding to hand off one step does not make it any less your project.
📌 Pin These DIY Fireplace Built Ins for Later
Save this post so you can find it when you are ready to tackle your own DIY fireplace built ins, and come back for part two to see the trim, the paint, and the finished reveal.