


DIY Fireplace Surround and Mantel: Part Two


Published September 14, 2026
Our DIY fireplace surround sat as raw, unpainted, partially primed plywood in our dining room for about four months. Near the end of August, I finally picked the project back up and finished it.
If you missed the build, this post – DIY Fireplace Built-Ins With Shelves: How I Built Ours, Part One covers everything from the planning and building to my priming trick and getting the boxes in place and the mantel up. Start there if you want guidance on building the bones of this DIY fireplace surround. This post is the big finish. It will stop looking like a construction site and start looking like a beautiful, cozy focal point for our dining room.
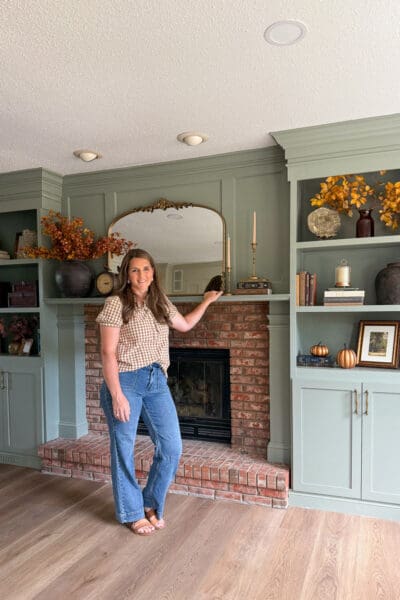
Table of Contents
- Where We Left the DIY Fireplace Surround All Summer
- DIY Fireplace Surround Tools and Materials
- The First Thing I Did Was Take Two Steps Backwards
- Getting the Old Shelf Out
- Putting the Shelf Back Higher
- Adding the Upper Shelves
- Wrapping the Columns
- A Quick Note About Brad Nails
- Adding All the Trim and Molding
- Filling, Sanding, and Caulking
- Painting the DIY Fireplace Surround
- All My Best Paining Tips
- Installing the Cabinet Doors
- How to Install Cabinet Pulls
- The Reveal: Our Gorgeous DIY Fireplace Surround
- Shop the Look – My Fall Shelf Decor
- FAQs: DIY Fireplace Surround
- 📌 Pin This DIY Fireplace Surround for Later
Where We Left the DIY Fireplace Surround All Summer
Here is the fireplace before I touched anything, and another photo showing where we left things off at the end of part one. Cabinet boxes built and in place, mantel up, panel above the mantel, crown molding and baseboard installed.
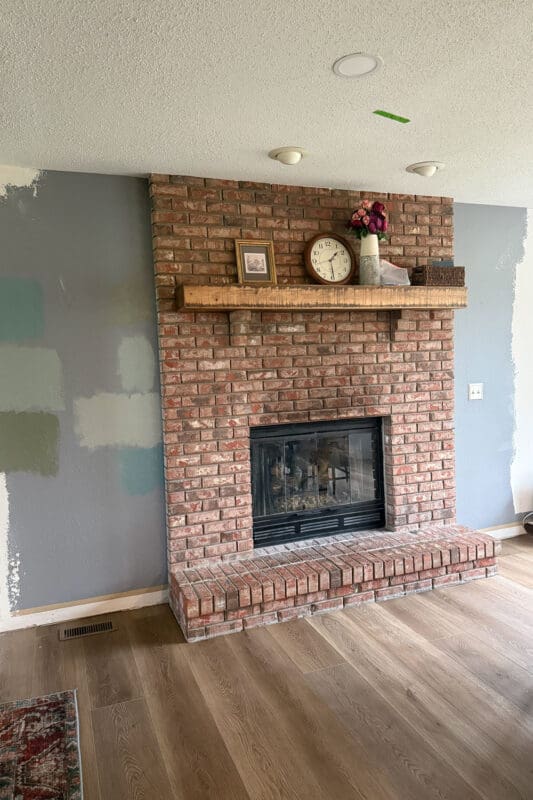
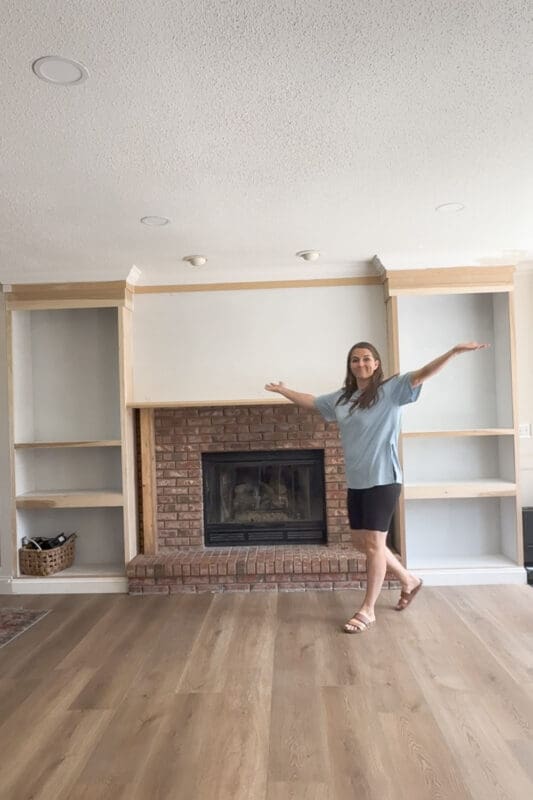
One thing that happened right at the end of part one, and that I never got a photo of. I put the face frames on the cabinet openings before I stopped for the summer. So when you see finished trim around the openings in the photos below, that is where it came from. Sadly, one of the first things I did when jumping back into this project was to take off some of the face framing. Keep reading to find out why.
DIY Fireplace Surround Tools and Materials
Everything that makes up the actual structure here, the plywood cabinet boxes, the 2×4 blocking on the brick, the mantel, and the crown molding, all went up in part one. You will find that full list over there. What follows is just what I used to finish it: the trim, the filling and caulking, the paint, and the doors and hardware.
Materials
- 3/4 inch plywood for wrapping the columns
- 1×4 for shelf cleat and cabinet face frame
- Pocket screws
- Shelf pins
- Trim for the mantel front edge
- Molding for column caps
- Baseboard
- 1×2 for shelf edge
- Brad nails
- Wood filler
- Paintable caulk
- Sandpaper
- Primer
- Paint – I use Sherwin-Williams Emerald Urethane Trim Enamel
- Shaker cabinet doors
- Concealed cabinet hinges
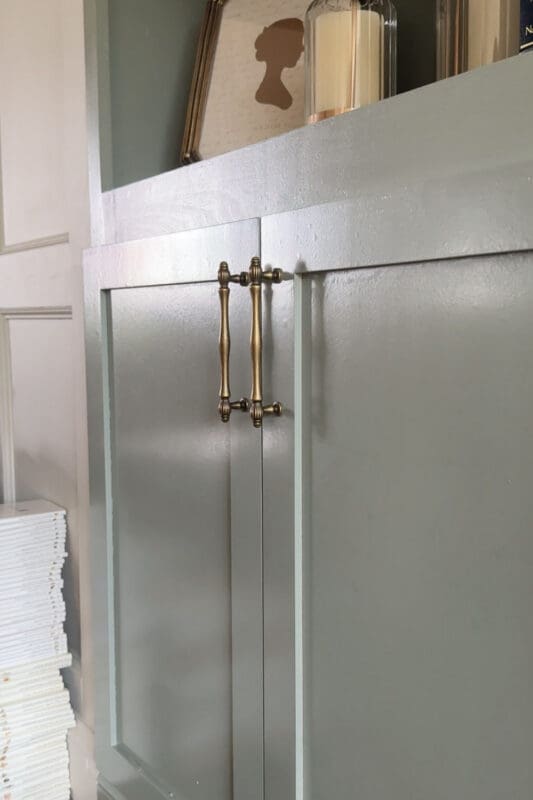
- Aged brass cabinet pulls
- Pre-taped plastic and painter’s tape
Tools
- Oscillating multitool
- Brad nailer
- Nail punch and hammer
- Drill and impact driver
- Pocket hole jig
- Shelf pin jig
- Concealed hinge jig
- Laser level
- Speed square
- Tape measure and pencil
- Miter saw for cutting trim
- Handheld sander
- Caulk gun and putty knife
- Paint sprayer
- Proper Safety Gear
The First Thing I Did Was Take Two Steps Backwards
We lived with our DIY fireplace surround being half done all summer long. Every year when the weather starts to warm up, I find myself buried in outside projects. We ripped out our deck that was falling apart, had a bike path put in, built garden boxes from scratch, added a greenhouse, and more. It was a busy summer!
But after looking at and living with these built-ins for 4 months, I realized that the space I had left for cabinets at the bottom was too short. They really needed to be taller. The first thing I did when I picked this project back up was to take some of it apart.
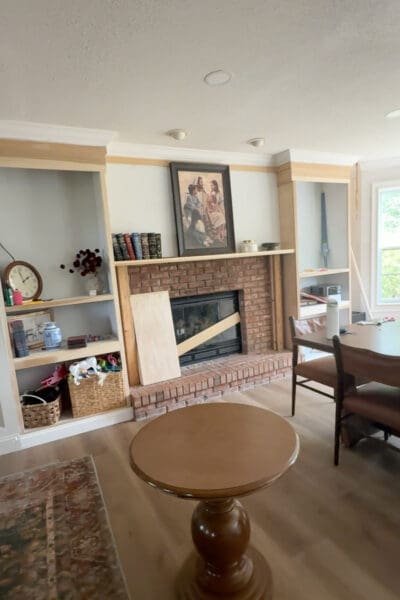
Tip: Wait to build or buy your cabinet doors until the boxes are completely final and you know for sure what those dimensions are going to be. Doors are the expensive part to redo.
Getting the Old Shelf Out
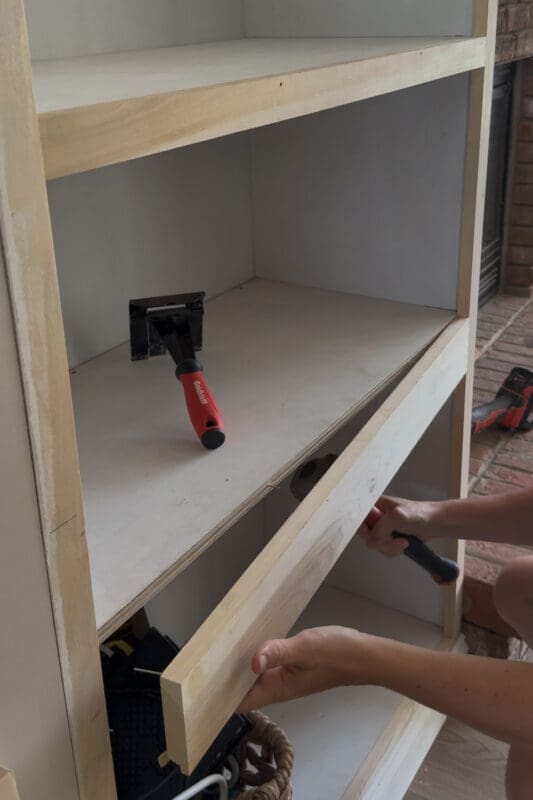
First, I pried the face frame off using my trim puller so I could get at the shelf. When I built the boxes back in part one, I had screwed the shelves in from the outside. Now the boxes are installed against the wall and up against the brick. There was no getting to those screws. So I ran a multitool blade through the joint and cut the screws and brad nails instead. It works.
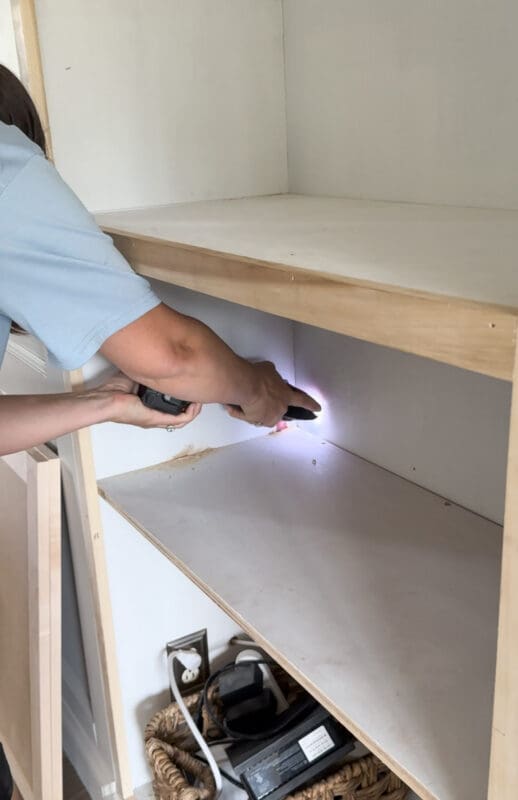
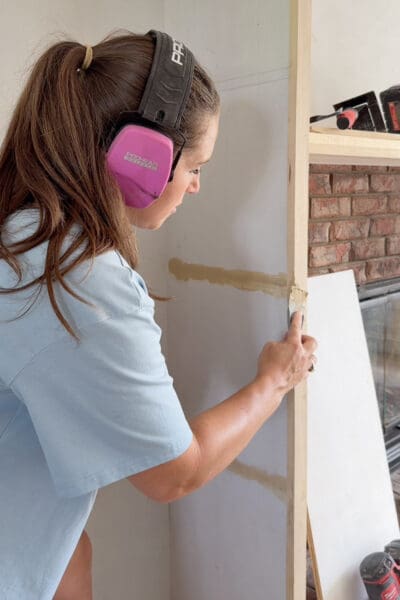
After the shelves were out, there was a bit of damage to fix. I filled in all the holes and scuffs with wood filler. Once that had a chance to dry, I smoothed it down with a good sanding using my orbital sander. Even though it meant a little extra work and time, I’m so glad I moved the cabinet up before continuing any further in the project.
Putting the Shelf Back Higher
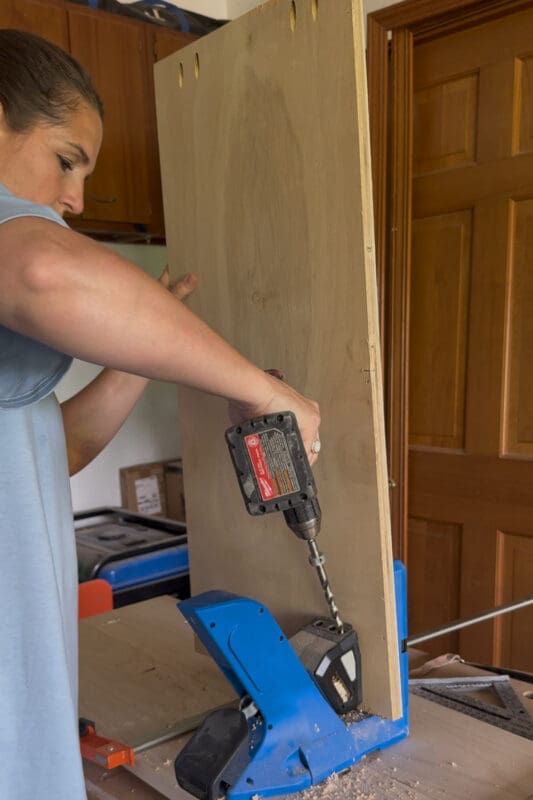
With the boxes already installed, I could not attach the new shelf the way I did the first time. So I used pocket holes instead. Using my pocket hole jig, I drilled the pocket holes along the underside of the shelf. This way, they will be completely hidden.
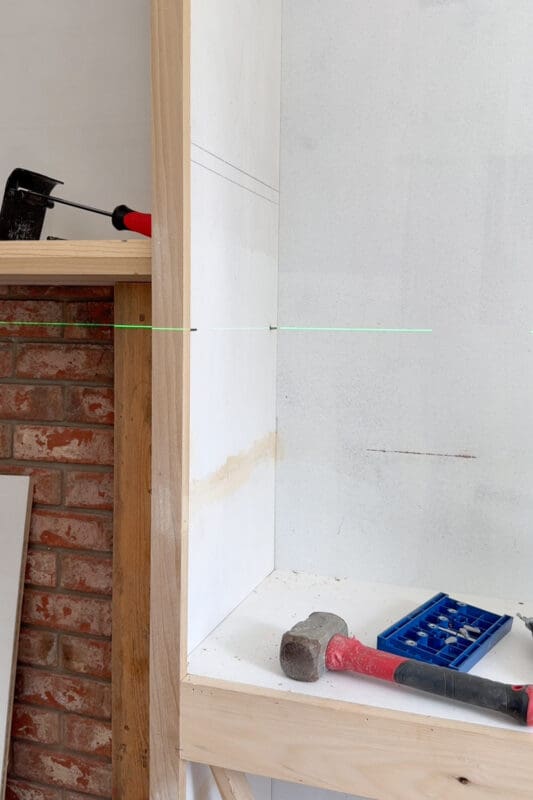
Next, I added a cleat across the back of the cabinet and screwed it into the wall studs. A stud finder is no help here because the cabinet has a back panel on it. Fortunately, I have a trick for this situation. When I attached these boxes to the wall back in part one, I screwed them straight into the studs, and those screw heads are still visible at the top of the shelf. So I lined my laser level up with them and knew exactly where my screws needed to go.
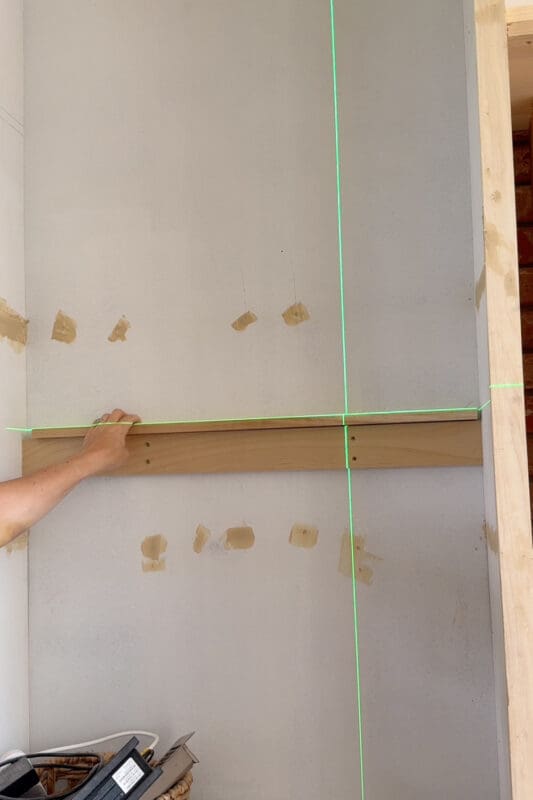
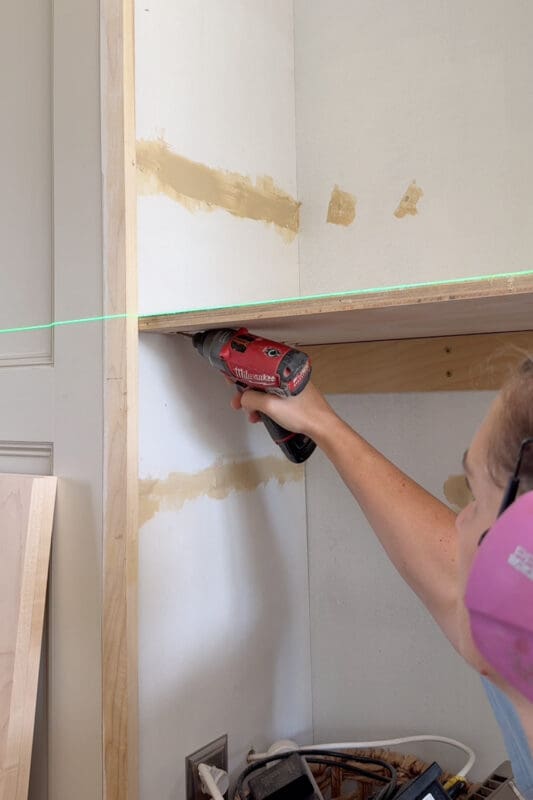
The shelf sets right down onto that cleat in the back. My laser level helps guide me into the correct position for the front. Once the shelf is where I want it, I drive pocket screws up through those holes on the underside and into the cabinet sides.
Then the face frame went back on. I’m using 1x4s for the shelf that creates the top of the cabinet. You want a wider board for the cabinet doors to rest against when closed.
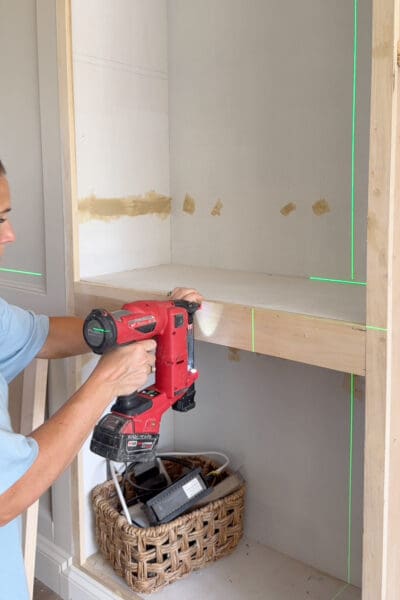
This project would’ve been so much more difficult without my laser level. Two separate cabinets on two sides of a fireplace have to line up with each other. If anything is off, it will be noticeable. A laser line across both of them takes all the guesswork out of it.
Adding the Upper Shelves
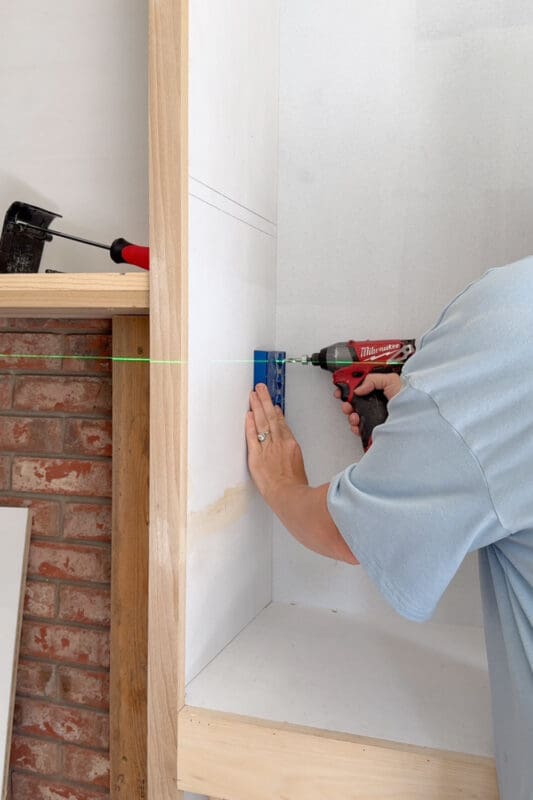
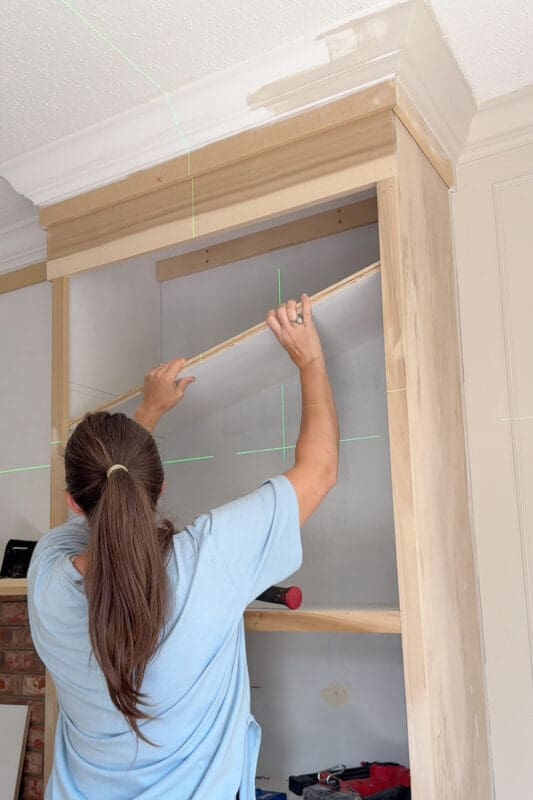
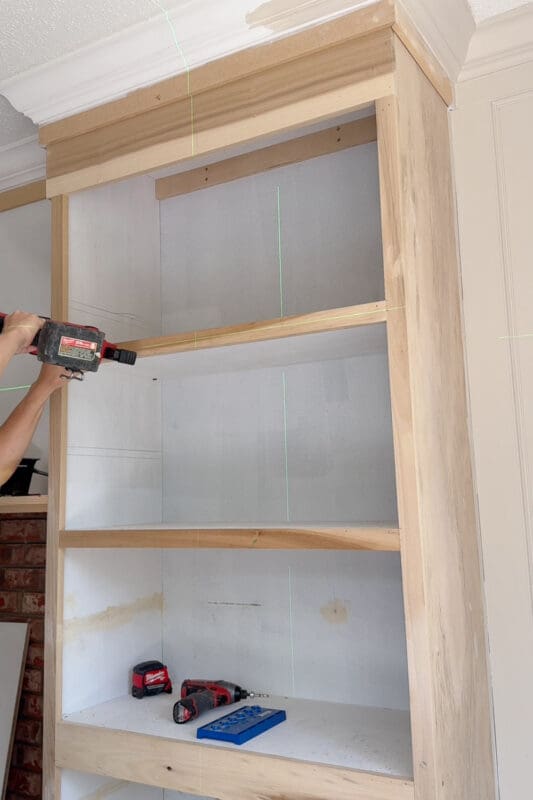
For the open shelving above the cabinets, I went with adjustable shelf pins instead of fixing them in place with pocket holes. A shelf pin jig and that same laser line, and the holes end up level and evenly spaced without any math. Then, you just set the shelves on the pins.
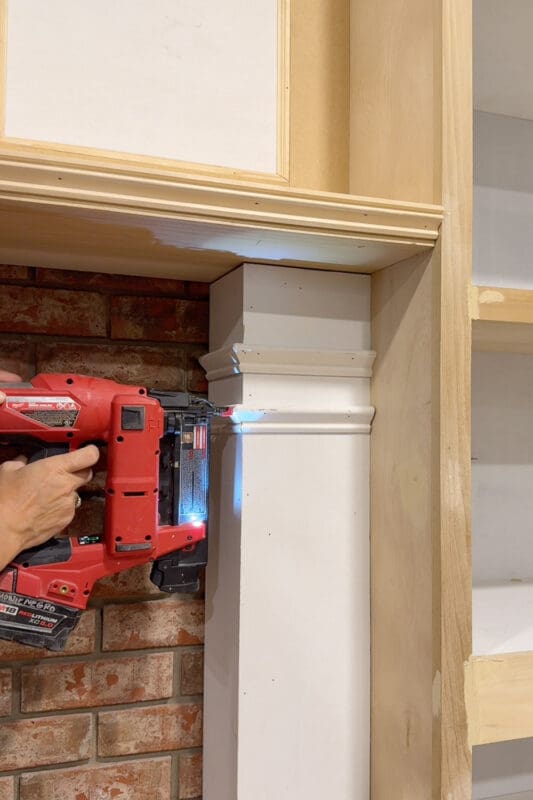
After each shelf was in, I used my braid nailer to attach a strip of 1×2 onto the front edge of it. I’m calling this shelf edge trim, and it does two jobs at once. First, it hides the raw plywood edge, which nobody wants to look at. Secondly, it makes the shelf look thicker and more substantial than a simple piece of plywood. It sits flush with the face frame pieces and makes this whole DIY fireplace surround look like one solid, built-in shelving unit that’s always been here.
Wrapping the Columns
On either side of the firebox, there were still two very plain stacks of vertical 2x4s from part one. Those need a little love to look like gorgeous columns.
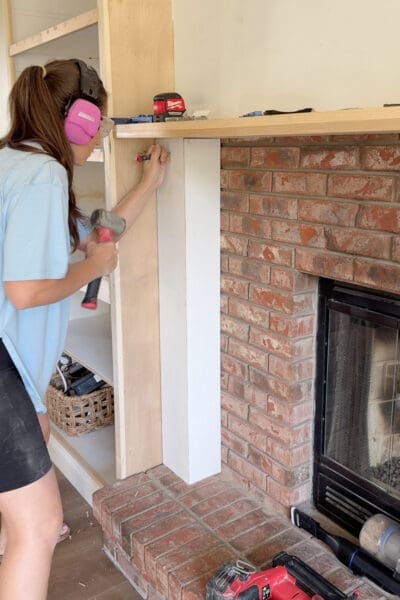
I wrapped them in 1/2 inch plywood, one piece on the side first and then one on the front, using my brad nailer to attach the plywood to the 2x4s.
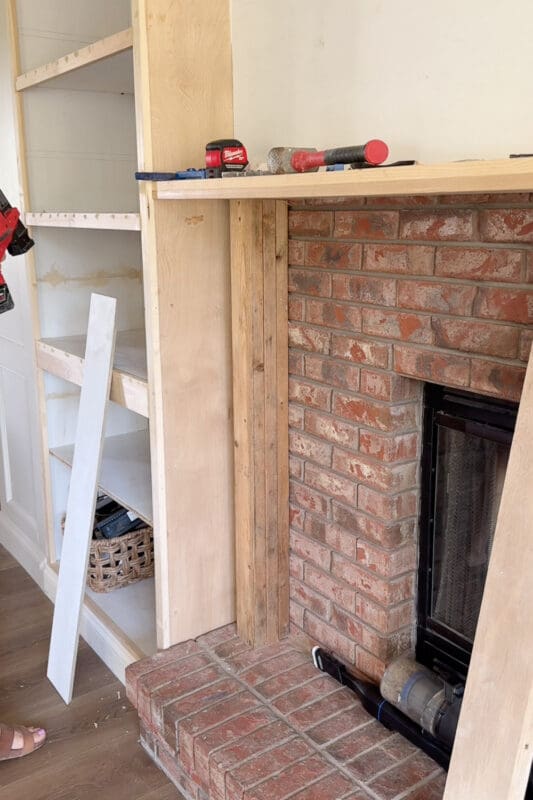
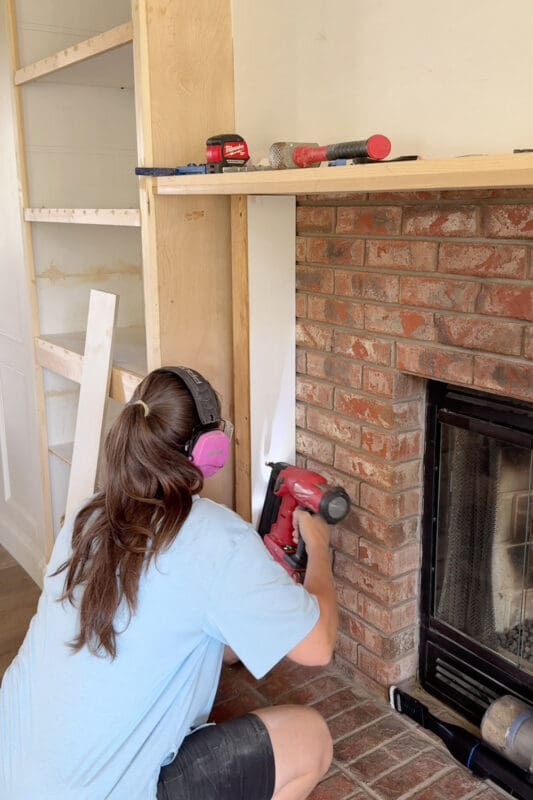
Where the two pieces meet at the corner, I cut a beveled edge on both pieces so they come together in a clean point. It hides the raw plywood edge on both pieces, and you end up with a perfect corner. Once I add wood filler and paint, it will look like one solid piece of wood. I used a similar technique during this project: How to Build a DIY Fireplace Mantel With a Hidden Outlet! That post has great close-up photos and instructions for cutting the bevel on a table saw.
A Quick Note About Brad Nails
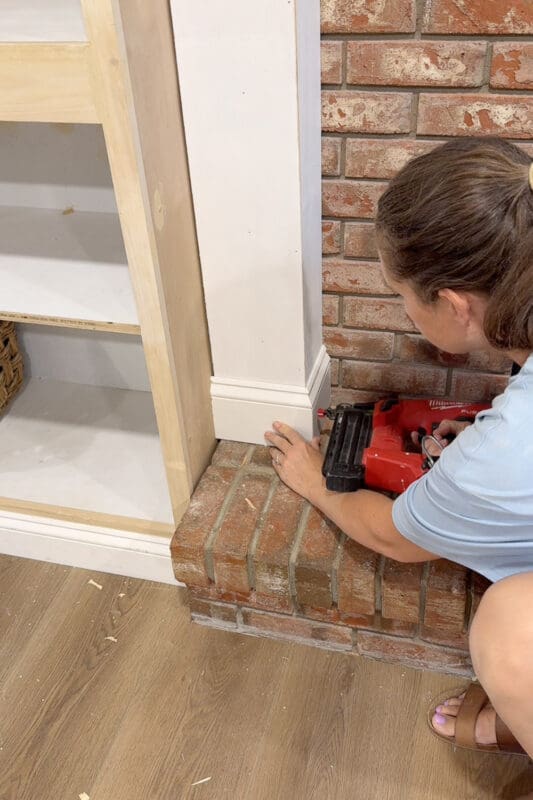
This is small, but it matters on every single nail in this project. If a brad nail does not sink all the way in, take care of it; don’t ignore it. Set a nail punch on the head and tap it with a hammer or mallet until it sits just below the surface. Every one of these holes gets filled later, and filler will not hide a nail head that is sticking up. You will see every one of them once the paint goes on, and you cannot unsee them. You don’t want a deep hole, but the brad nails should be set in just below the surface of the wood.
Adding All the Trim and Molding
This is the stage where it stopped looking like a box and started looking like a real, custom fireplace surround. Molding went on the front edge of the mantel, which is what covers that raw, doubled plywood edge from part one. It gives the mantel its finished, gorgeous profile. Then I started installing the trim onto the panel above the mantel to create the box molding that matches the rest of the first floor.
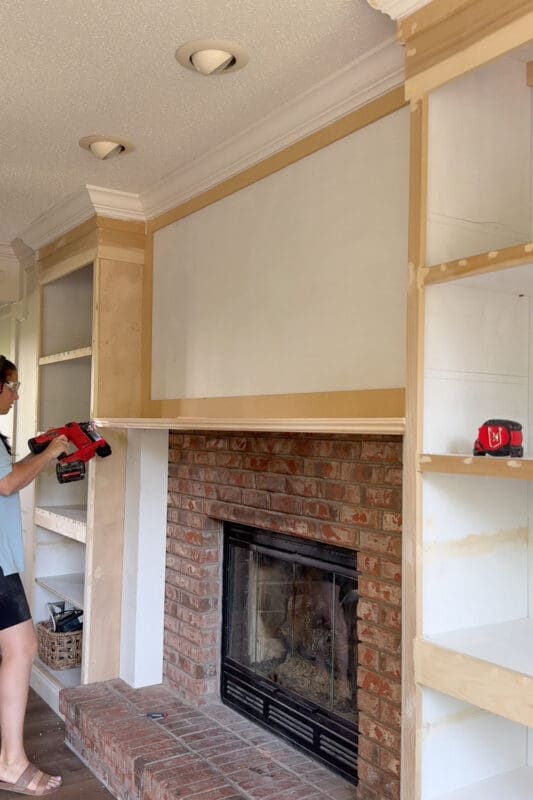
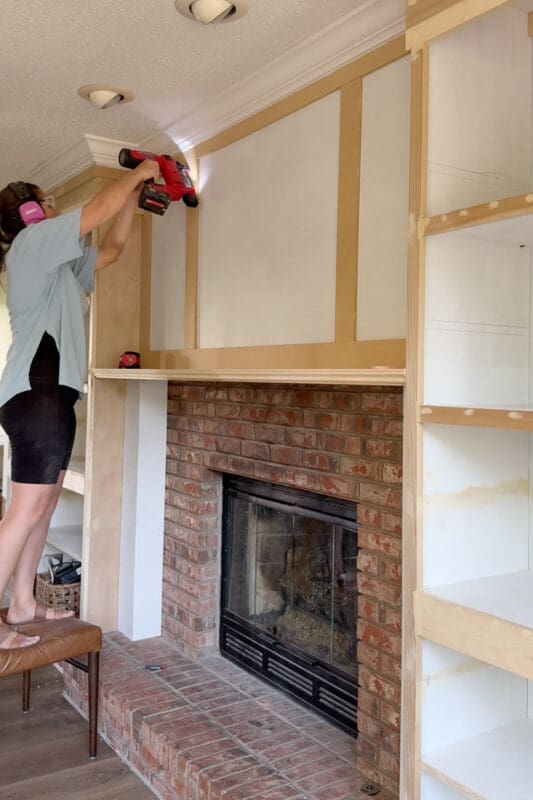
We have box molding and crown running through the entire first floor, so I used the same trim style here on the DIY fireplace surround. It’s the whole reason that this wall feels cohesive with the rest of the house. If you want more details on the box molding, I covered that project here: DIY Box Molding Wall Trim Tutorial (Step-by-Step Guide). If you want to see a finished space with the box molding, check out our downstairs hall: Decorating a Narrow Hallway: Moody Makeover.
For the columns that are supporting the mantle, I added baseboard around the bottom and two sections of trim around the top. It’s those little details that make a big difference. Now they look like fancy, custom columns instead of just boring posts.
Filling, Sanding, and Caulking
This is the tedious part, but it’s also the part that decides how good your final project looks. Every nail hole and seam that you want to disappear gets filled with wood filler and sanded smooth. Every joint gets caulked. Paint will not hide any of it alone; it just highlights it.
Painting the DIY Fireplace Surround
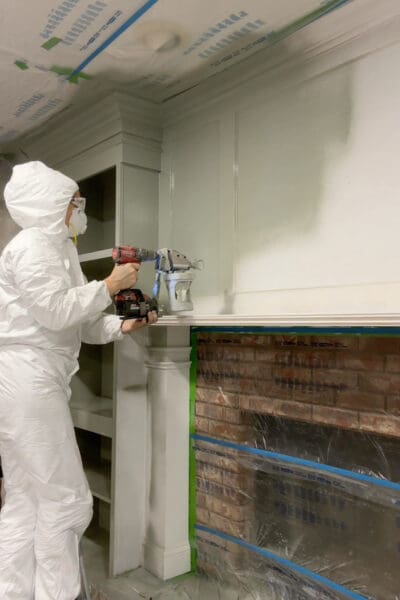
I’m going to be using a paint sprayer for this DIY fireplace surround, which means masking everything that I don’t want paint to get on. Pre-taped plastic went over the brick, over the hearth, and more over the flooring, with extra painter’s tape to hold it all in place. Don’t skip this step. PS… I LOVE my paint sprayer. It attaches to my drill so it’s cordless, and works so well! I also have the plug-in version and have used it for years. Both sprayers are great!
After masking, I used my sprayer to apply a coat of bonding primer to everything that needed it, which was the new trim pieces as well as all the areas that I’d used wood filler on.
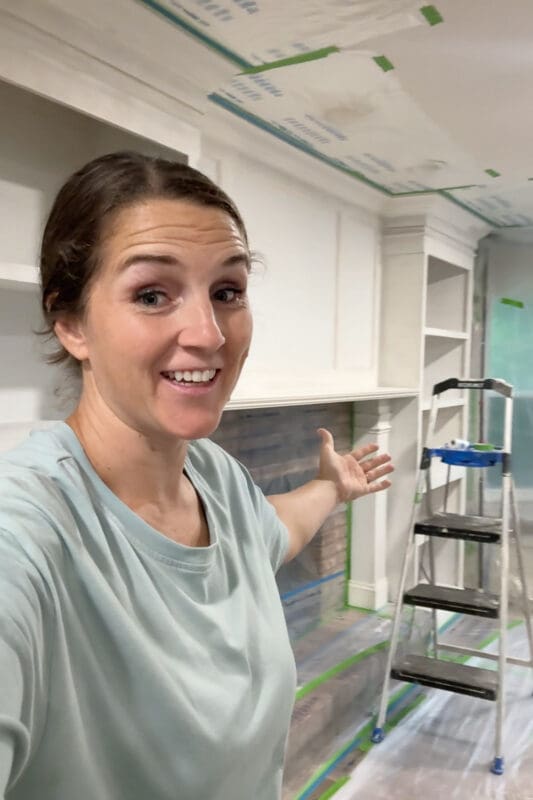
Then it was time to spray the paint. The color I chose is SW Evergreen Fog. My husband Stuart said I could do whatever I wanted, as long as it wasn’t boring. Our last house in Nebraska was a little too white and beige for his taste. After swatching several colors, I landed on this one and love it. Sherwin-Williams Emerald Urethane Trim Enamel is my go-to when it comes to built-ins and cabinets, because it levels out beautifully and it cures hard. I put on all my safety gear and got to work.
All My Best Paining Tips
I have painted so many cabinets and pieces of furniture over the years that I have perfected my process. If you want my step-by-step guide, I have it linked here: The ULTIMATE Guide to Painting Cabinets & Furniture. I go deep on filling, sanding, prepping, priming, and painting- the whole process and the tools that I use.
Installing the Cabinet Doors
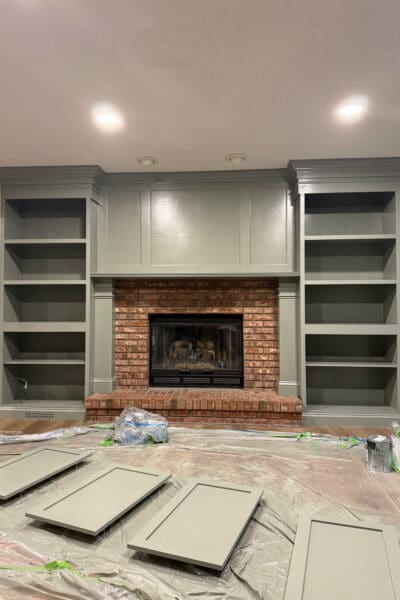
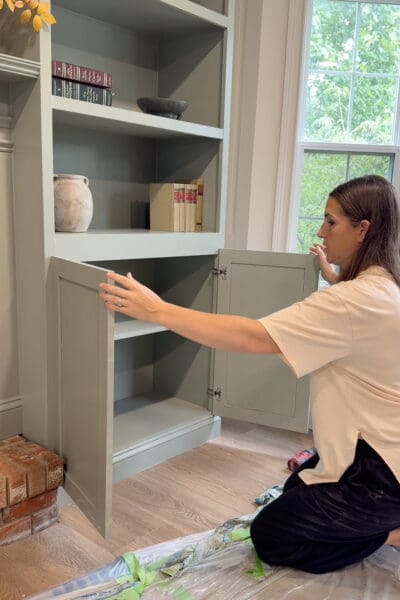
The doors are simple shaker doors that I purchased from Fast Cabinet Doors. I sprayed them the same color as the rest of the DIY fireplace surround, and now it’s time to install the hinges. I used a concealed hinge jig to bore the cup holes.
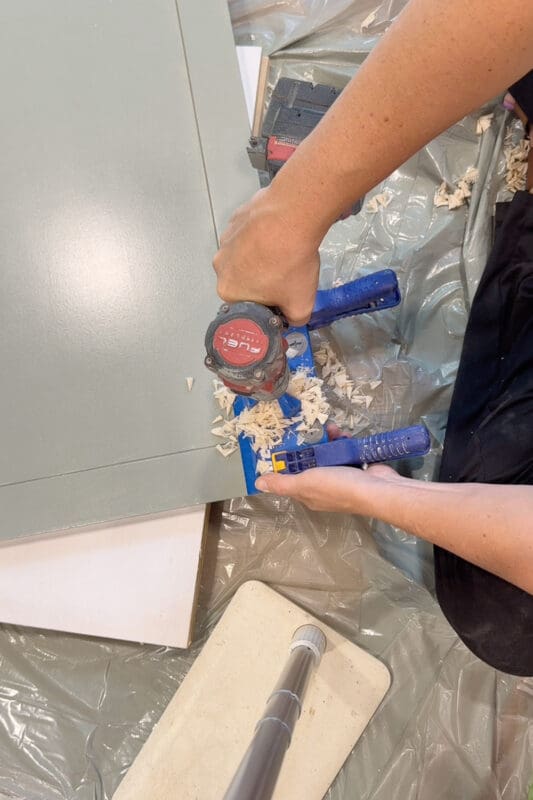
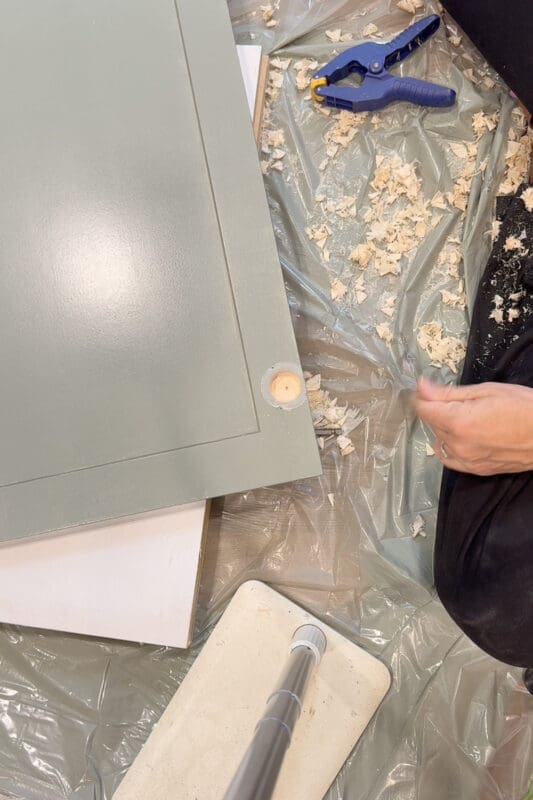
Then I attached the concealed hinges to the door before attaching them to the cabinets.
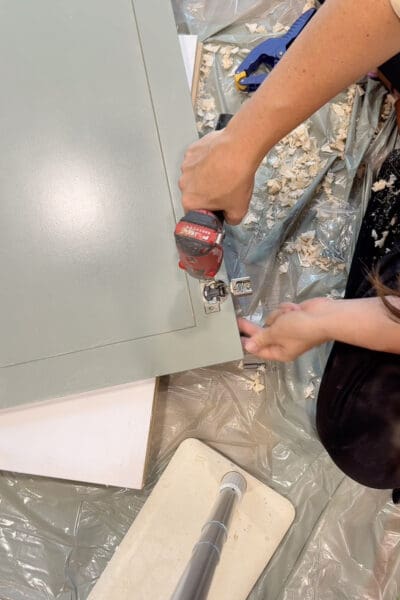
Hinges in and doors hung. Suddenly, this unfinished DIY fireplace surround that sat around looking like a mess for months is just about done.
How to Install Cabinet Pulls
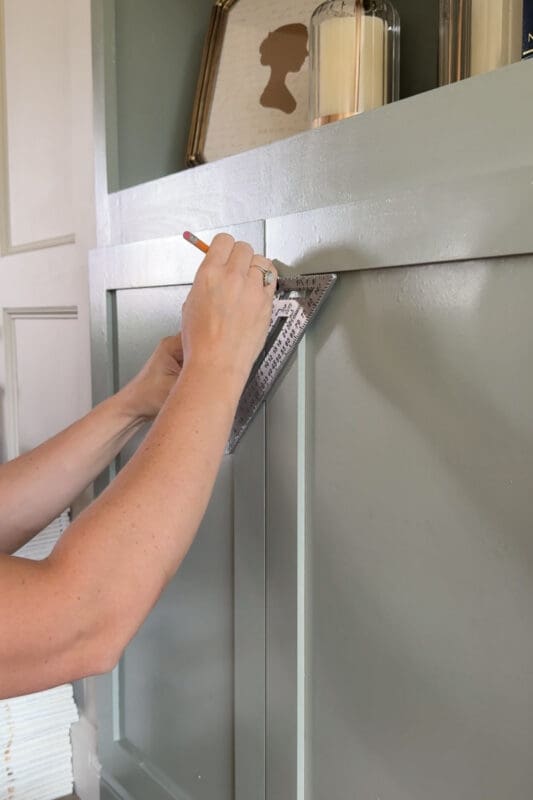
First, I marked the pull placement for the top of my handle with a speed square and a pencil. You can buy a special cabinet hardware jig, and if you are doing a whole kitchen, you probably should. But for just four doors, a square and a pencil did the job just fine. Once that first hole was marked, I made a hole using my drill.
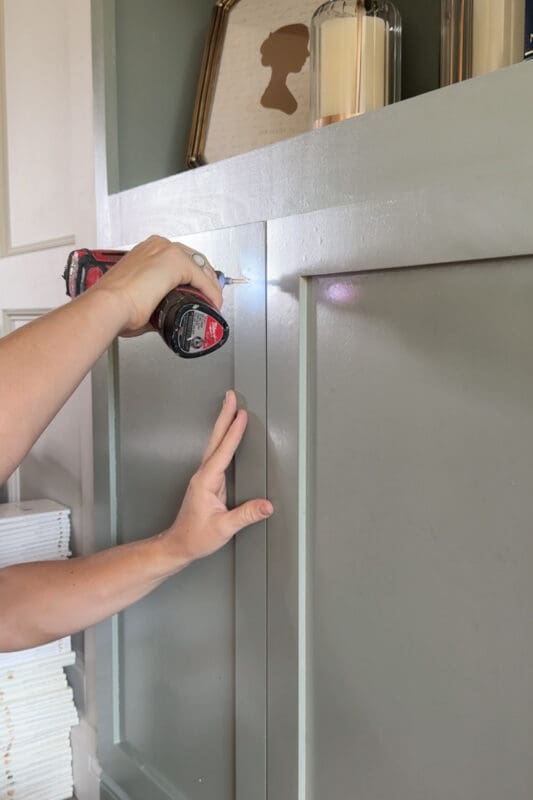
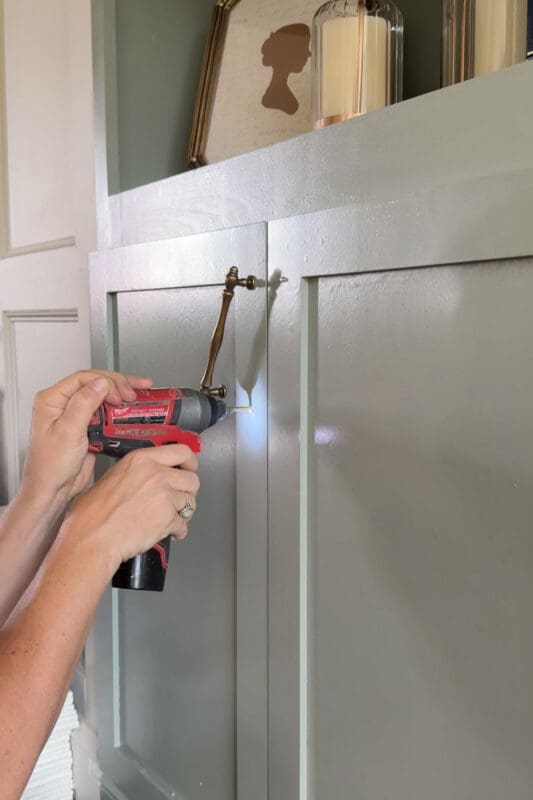
I attached the top part of the pull by screwing it in through the back of the door. Then it’s really easy to mark where the second, lower hole should go. Drill that hole, attach it with a screw, and boom, you have a cabinet pull installed.
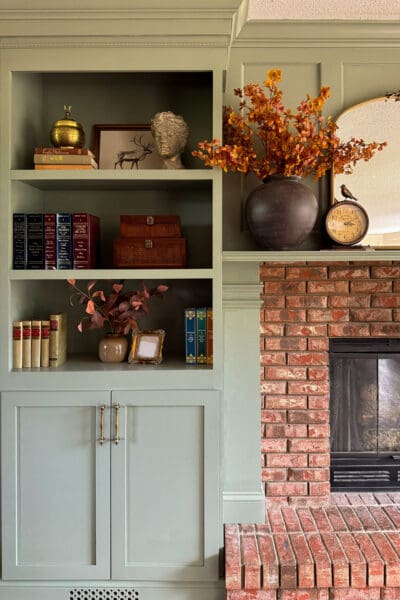
These pulls are aged brass, and the warmth of them against the green is the exact thing I was hoping for when I made that inspiration image back in the spring.
The Reveal: Our Gorgeous DIY Fireplace Surround
The brick that was there when we moved in is still there. I haven’t painted, limewashed, or transformed it in any way. I just covered some of it up and built around it.
That is the whole trick, honestly. I didn’t need to get rid of the brick. I needed to frame it out with something special.
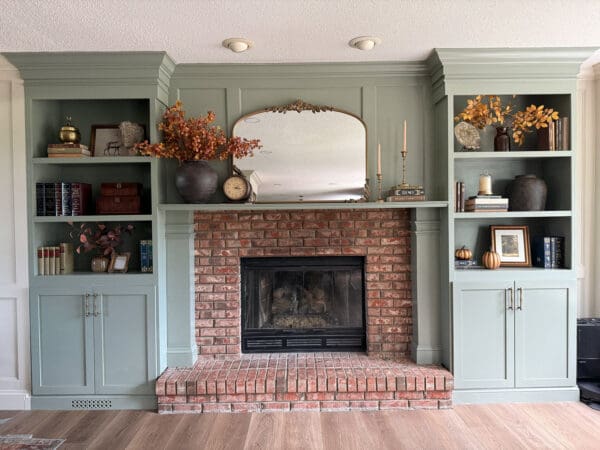
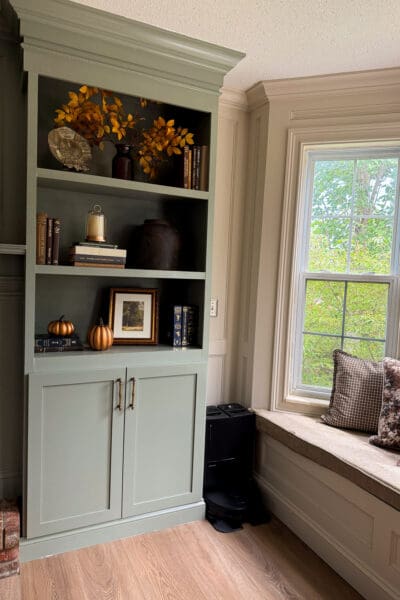
If you look just to the right of these dining room built-ins, you can see our window bench. Two things that the main gathering place in your home can always use are more storage and more seating. This window bench does both. If you want to see how the bench came together, I walk through that whole build here: How to Build a DIY Bay Window Bench With Storage
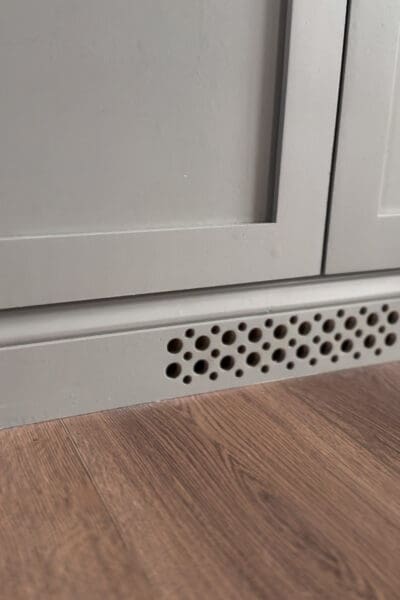
One other reason you might want to check out the window bench post is if you want to install built-ins but have a floor vent. Here is a close-up of the custom vent I made by drilling holes right into the baseboard of the shelf on the left. Once everything was painted, it blends and looks intentional. You get airflow without having to buy a vent cover that never quite matches anything. I used this same trick on our window bench, which had to cover a floor register, and I walk through it step-by-step in that post.
Shop the Look – My Fall Shelf Decor
I finished the shelves of my DIY fireplace surround just as fall was starting to creep in, so they do currently have an autumn theme. I’m excited to be able to seasonally decorate this space throughout the year, but I’ve also chosen to mostly fill them with some timeless decor pieces that will look good no matter the season. If you want to shop the decor on these shelves, I have a link here for you.
FAQs: DIY Fireplace Surround
It is Sherwin-Williams Emerald Urethane Trim Enamel in Evergreen Fog. Emerald Urethane is worth the price for built-ins because it levels out smoothly and cures hard enough to handle the constant use that they will see in such a busy room.
You can absolutely brush and roll them, but spraying gives you the smoothest finish on a surface this big with this much trim on it.
For this project a thin strip of wood to the front edge of each shelf. It hides the edge and makes the shelf look thicker at the same time. It is one of the cheapest upgrades in the whole project. You also can use iron on edge banding. That’s how I covered the edge of the plywood shelves in our Nebraska living room.
You have two good options and I used both on this project. Pocket holes give you a fixed shelf: drill them along the underside so they are hidden once the shelf is in, then drive pocket screws into the cabinet sides. Shelf pins give you an adjustable shelf: use a shelf pin jig to drill evenly spaced holes down each side, drop the pins in, and set the shelf on top. Pocket holes are stronger and permanent, shelf pins let you move things around later.
📌 Pin This DIY Fireplace Surround for Later
Save this post for the trim details, the paint color, and the shelf edge trick, and head back to [LINK: part one] if you want to see how the boxes got built in the first place.