


Home Library Makeover: Finishing Our DIY Built-Ins


Published September 17, 2026
Our home library makeover is finally finished, and I have been waiting a long time to say that.
If you’ve been following along, you know this room has been a project. In DIY Built-In Bookshelves for a Cozy Home Library: Part One, I built every shelf and cabinet in here from plywood, starting with a formal dining room we didn’t need and ending with a home library that consisted of walls of built-in bookshelves that were up, secured, and holding books. This post is everything that happened after that. The trim, the corbels, the paint, the cabinet doors, and finally getting to style the shelves.
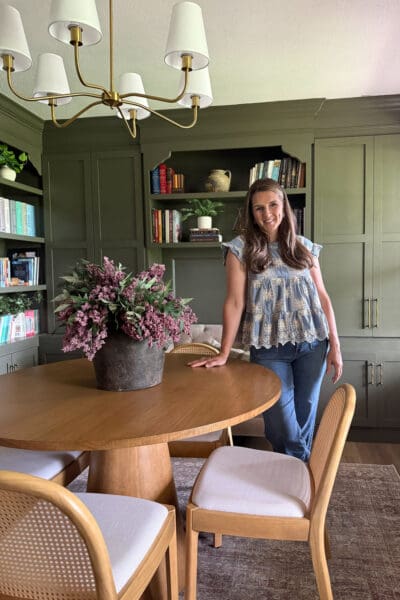
Table of Contents
- Where This Home Library Started
- What Got Done in Part One
- Adding Trim Under the Crown Molding
- The Corbels That Make the Shelves Look Arched
- Adding Caulk and Wood Filler
- Priming and Painting the Home Library Built-Ins
- Swapping Out the Light Fixture
- Installing Cabinet Doors and Hardware
- Styling Our Home Library Shelves
- The Finished Home Library
- 📌 Save This Home Library Makeover for Later
- Frequently Asked Questions About This Home Library Makeover
Where This Home Library Started
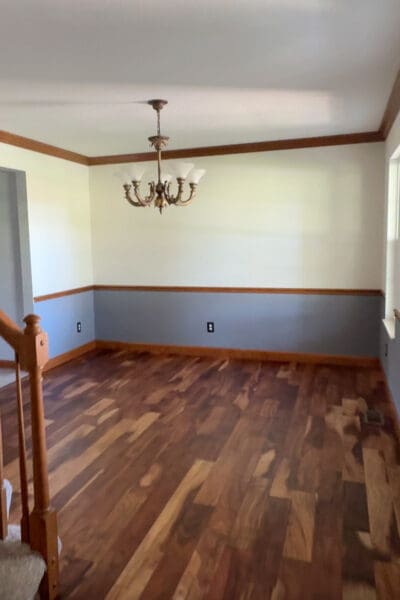
This is the room the day we walked into this house.
A formal dining room with two-tone walls, oak trim, and a brass chandelier. We started remodeling the entire first floor almost immediately, and knew right away we would be moving some things around. It was obvious that this room wasn’t going to work as our dining room. We have a big family, and we love to host. This space just wasn’t big enough.
So we moved the dining room into what used to be the family room, right off the kitchen. That left this room free to become the cozy home library I’d been dreaming of for years.
What Got Done in Part One
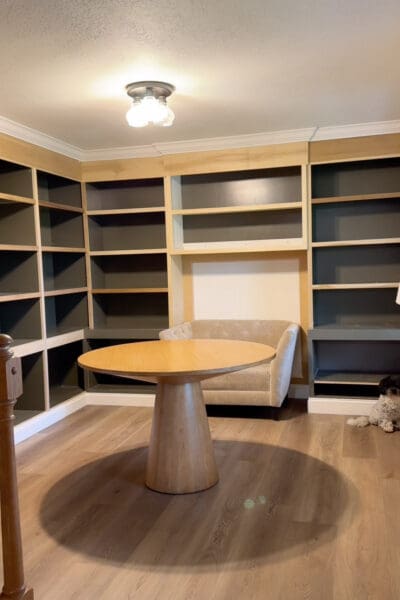
In part one, I closed off the old kitchen opening with drywall, then built and installed every cabinet and bookshelf in the room. I painted the plywood panels before cutting and assembling them, which sounds backward but saved me so much time. Then I added face frames to all the shelf edges and ran new baseboards around the room. I hired out the crown molding, then I stopped.
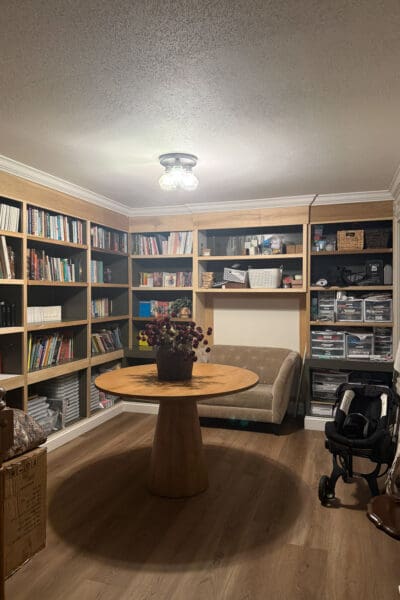
Summer hit; I had a long list of outside projects waiting, like building a garden from scratch, and instead of letting this room sit empty and unfinished, we moved in and started using it.
If you want the full build, including how I made the cabinet boxes, added the sliding shelf for our printer, and secured everything to the studs, it’s all in DIY Built-In Bookshelves for a Cozy Home Library: Part One.
Adding Trim Under the Crown Molding
The first thing I did when I came back to this project (after completely emptying it) was to add one more piece of trim underneath the crown molding.
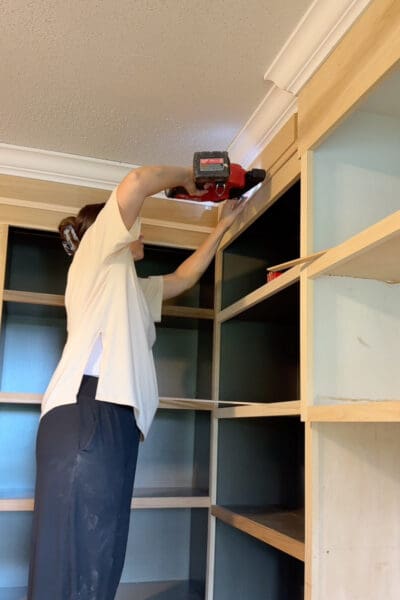
I used a spare 1×4 as a spacer, which is the easiest trick in the world for getting trim placed evenly without measuring every single time. Set the spacer against the crown, rest the trim underneath the spacer board, and nail it in with the brad nailer. Move the spacer down the wall and repeat.
That one strip of trim made such a big difference.
The Corbels That Make the Shelves Look Arched
This is my favorite detail in the whole room.
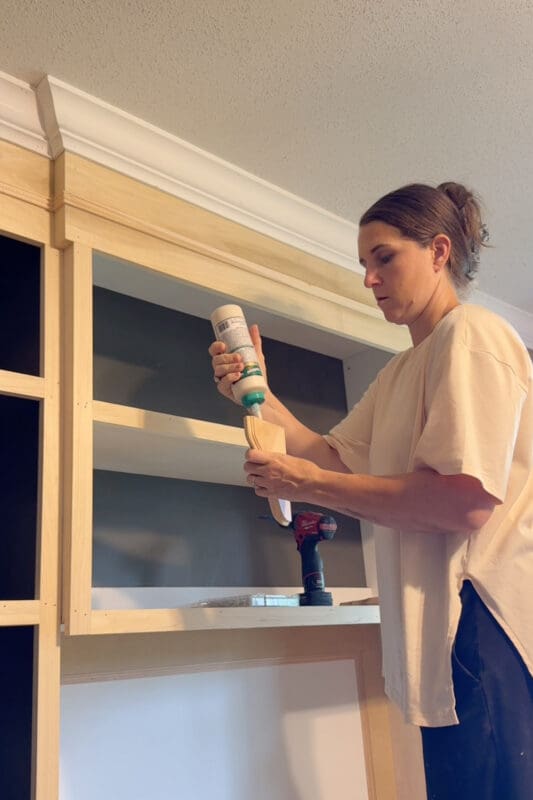
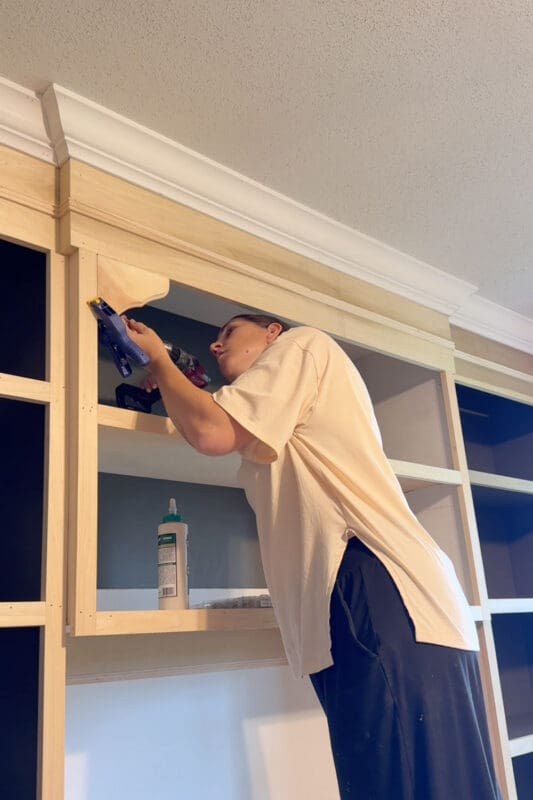
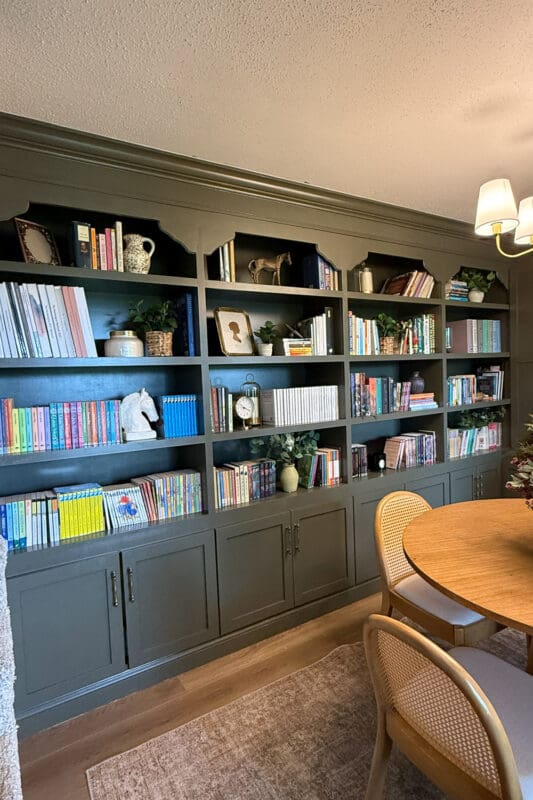
I added small curved corbels to the corners of the bookshelf openings. Two per opening in the top corners. Individually, they’re tiny. Together, they turn a plain square opening into something that reads as a decorative arch, and they completely change the feel of the shelves.
I ran wood glue along the edges, clamped each corbel in place, then drove screws through to hold it permanently. The clamp does the holding so you can use both hands to guide the screw in with the drill.
Adding Caulk and Wood Filler
This is the least fun step and the one that matters most.
I used paintable caulk on every joint and used wood filler on all the brad nail holes, the screw holes, and the seams where the corbels meet the shelves. Raw plywood with visible nail holes never looks built-in. Filled and caulked, it looks like it came with the house.
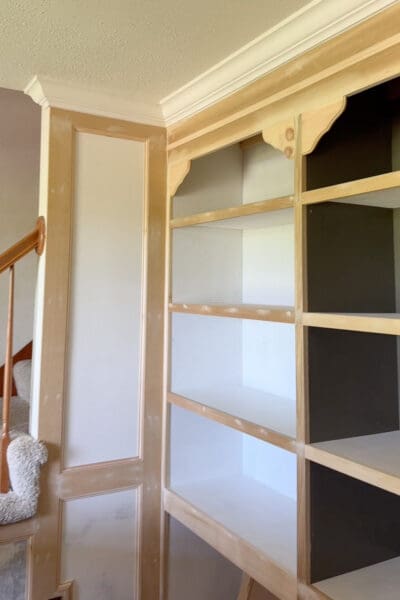
You can also see the box molding on the wall next to the shelves here. That molding runs through the whole first floor, and I covered how I did it in DIY Box Molding Wall Trim Tutorial (Step-by-Step Guide).
Priming and Painting the Home Library Built-Ins
You might remember from part one that I started this project by priming and painting the plywood panels before I cut and assembled anything, and for the first stretch it was amazing. No taping, no drop cloths, no crouching in a corner trying to cut in behind a shelf.
But as the project went on, some panels only ever got primed and never painted. And none of the trim, the face frames, or the corbels existed yet when I was painting out in the yard, so all of that needed primer too.
I used BIN shellac-based primer on everything raw. Once it was dry, I did two coats of paint. I did not want to mask off an entire room to spray, and there wasn’t much left to paint, so I did the whole thing by hand with my favorite paintbrush and a smooth roller.
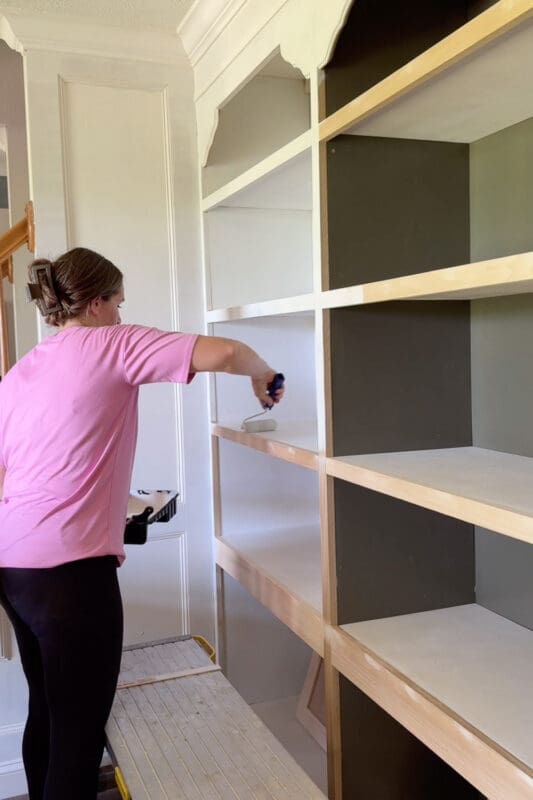
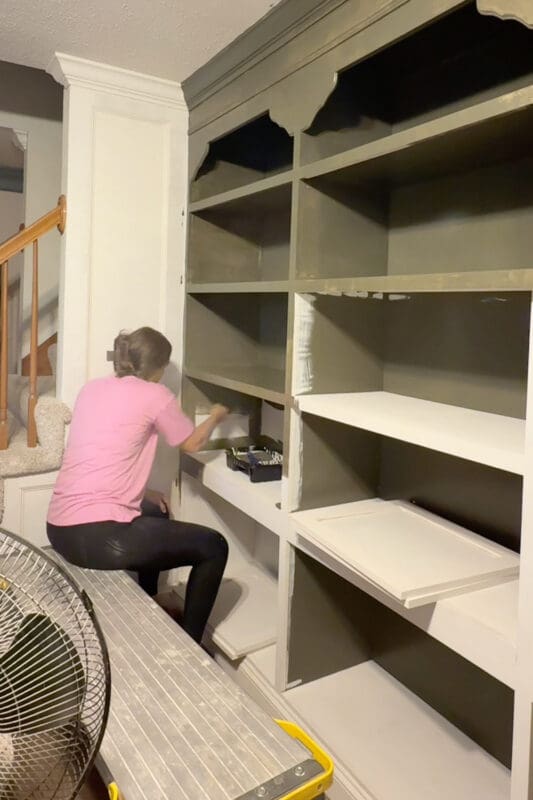
The color is SW Hidden Trail. It reads a little lighter and more olive in this room than you might expect from the swatch, but I love it so much. It’s the perfect warm, moody green that I was going for.
I have painted so many built-ins at this point that I have my method down. If you want my full process for priming, sanding, and painting cabinets and built-ins so they have a professional-looking finish that lasts, I have a whole post on it: The ULTIMATE Guide to Painting Cabinets & Furniture
Swapping Out the Light Fixture
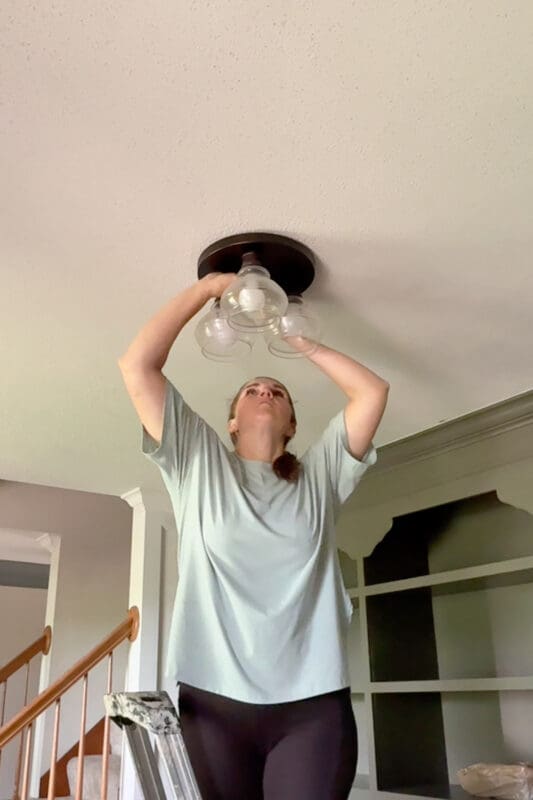
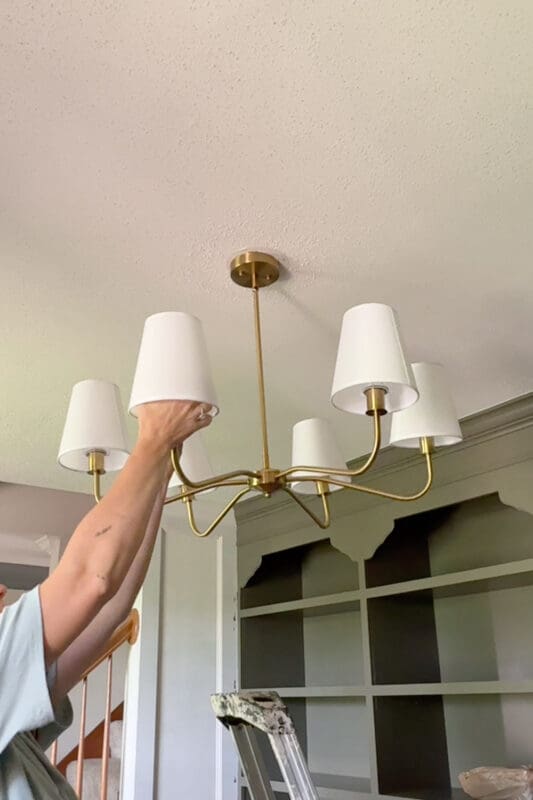
The old flush mount was boring and not doing this room any favors.
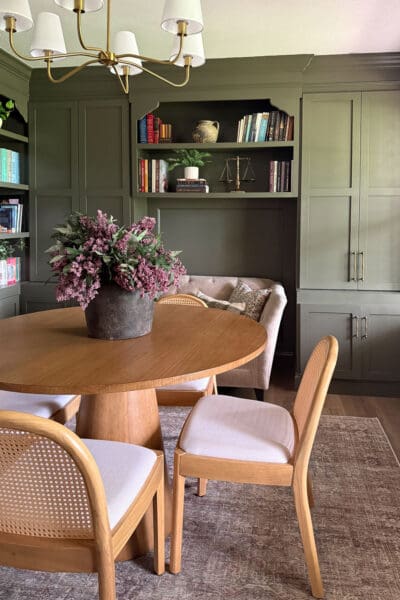
Down it came, and up went a gorgeous brass chandelier with white shades. It’s one of the few things in here that isn’t green, and the warmth of the brass and pop of white against all that dark paint is exactly what the room needed.
Installing Cabinet Doors and Hardware
I built all the cabinet boxes myself, but I did not build the doors.
I ordered them from Fast Cabinet Doors, made to the exact sizes of my openings. If you’ve ever built a cabinet, you know the doors are the fussiest part to get right. Ordering the doors instead of building them saved me a lot of time and frustration.
For hardware, I used these aged brass pulls, the same ones we used on the built-ins in the dining room. Carrying the same hardware through both rooms is a small thing, but it’s what makes a whole-floor remodel feel cohesive and like it was planned instead of pieced together.
Styling Our Home Library Shelves
And then the fun part. Filling it all back up.
Our books, of course, went on the shelves, mixed in with plants, a few brass pieces, framed art, and some things that just make me smile to look at. You can shop all my home library shelf decor here.
The Finished Home Library
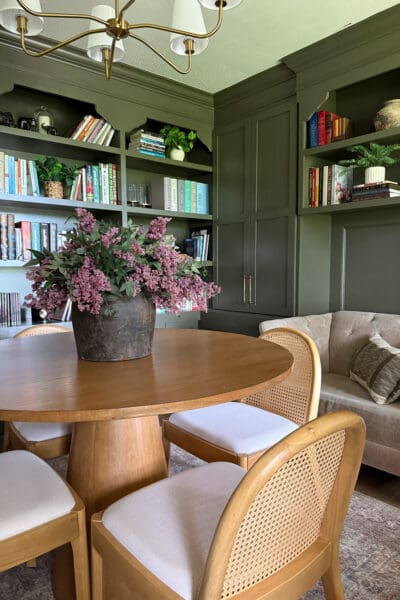
Walls of books. A table in the middle. Cabinets hiding all the homeschool and office supplies. This is exactly the room I pictured when we first walked through this house, and I stood in a formal dining room, imagining something completely different.
Someday I’d still love to close it off with French doors and a pretty transom. That one’s on the maybe someday list. For now, though, it’s a gorgeous room that gets used daily by the whole family. I’m so happy with how this home library turned out.
📌 Save This Home Library Makeover for Later
Pin this post so you have the full finishing process saved for your own built-ins, from adding trim and corbels to priming, painting, and styling the shelves.
This project is perfect if you want:
- Built-in bookshelves that look custom without hiring a contractor
- A moody, cozy home library on a budget
- Simple trim details that make plain shelves look high end
- A multipurpose room that works for school, work, and reading
Frequently Asked Questions About This Home Library Makeover
The built-ins are Sherwin-Williams Hidden Trail, a deep green that reads a little more olive in a room with this much natural light. I used BIN shellac-based primer underneath and two coats of paint on top.
Add small curved corbels to the top two corners of each shelf opening. Glue them, clamp them, and secure them with screws. The two curves together read as an arch without any of the work of actually building one. In our last home, I did do a full arch on our living room shelves. You can find all that info here: DIY Arched Living Room Shelves.
A corbel is a small decorative bracket, usually curved, used as a trim detail. In this project I used them purely for looks, to give the square shelf openings an arched shape.
No. I painted this entire room with a brush and a roller because, one, I didn’t want to mask off the whole space for spraying. And two, since I had already done most of the painting before building, there wasn’t much left to paint. A good primer, a light sanding, and quality cabinet paint will give you a smooth finish without a sprayer.
Yes, and I highly recommend it. I ordered mine from Fast Cabinet Doors, sized to my openings. Building the boxes yourself and ordering the doors gets you a custom result, saving money and time.