Our Backyard Greenhouse: Assembly Tips & Tricks


Updated May 9, 2026
When we started dreaming up our backyard garden, a greenhouse was always at the top of the wish list. Somewhere to start seeds early, keep tender plants going a little longer into fall, and honestly, just a beautiful focal point for the whole space. After a lot of research (and a few discussions about whether we should build one from scratch), we landed on a backyard greenhouse kit that we assembled ourselves, and I’m so glad we did.
I’m going to show you how we prepped the space, built a rock-solid foundation, and put it all together, plus the tips that helped us get this done.
Watch the Full Trampoline Build
Table of Contents
- Watch the Full Trampoline Build
- What You’ll Need for a Backyard Greenhouse
- What We’d Done in the Garden So Far
- Buying vs. Building a Backyard Greenhouse
- Building a Proper Foundation
- Backyard Greenhouse Assembly Tips
- The Finished Greenhouse
- The Garden Coming Together
- 📌 Save This Backyard Greenhouse Post for Later
- Backyard Greenhouse FAQs
What You’ll Need for a Backyard Greenhouse
Before you break ground, here’s a rough list of what we used for this project:
- A greenhouse kit (we used this one)
- Pressure-treated 4×4 posts (for the foundation frame and corner posts)
- Wood screws
- Circular saw
- Concrete (for anchoring the corner posts)
- Post hole digger
- Landscape fabric
- Gravel (enough to fill the base of the greenhouse)
- A level
- Tape measure
- Cordless drill
- Bar clamps (lifesavers during assembly)
- At least one extra set of hands (but ideally two or three)
What We’d Done in the Garden So Far
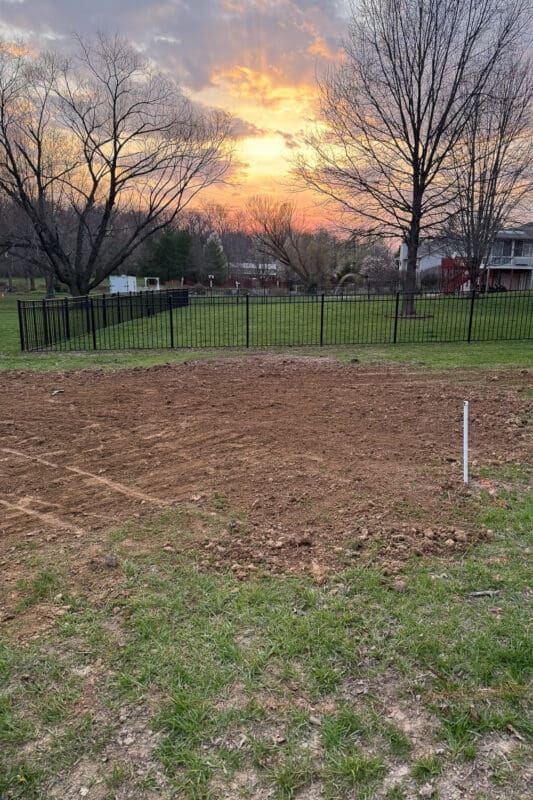
Before the greenhouse arrived, we leveled out the section of the backyard where the garden would live, which took some work since our yard has a bit of a slope (How to Level Ground for Garden Beds (Easy DIY Method)). We also buried irrigation pipes so we could run water to the raised beds and the greenhouse without a tangle of hoses later on.
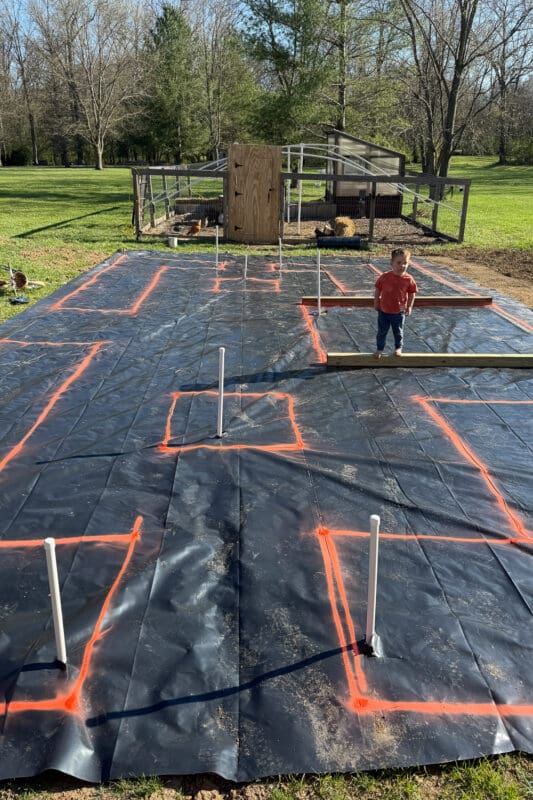
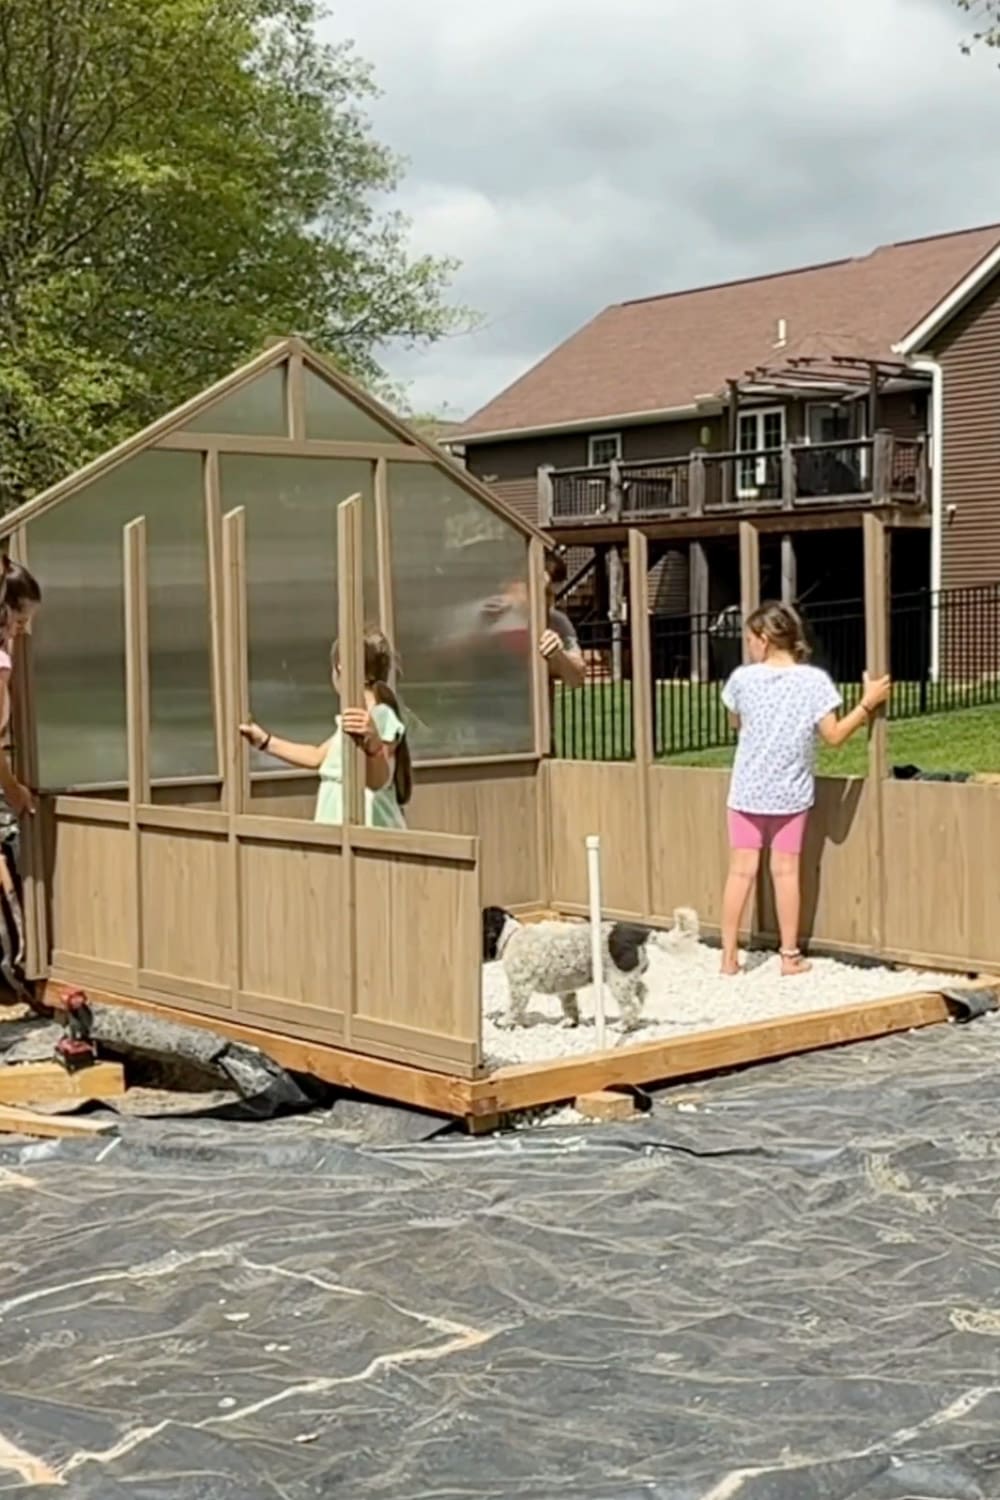
Once the ground was level and the irrigation was in, we laid down heavy black plastic across the whole footprint of the garden to prevent weeds from creeping up through (Weed Control for a Garden That Actually Works). Then came one of my favorite planning steps: we grabbed a can of orange marking paint and sketched right on top of the plastic where each raised bed would go and where the greenhouse would sit. Right where my son is standing in the photo is where I wanted our backyard greenhouse to go.
Buying vs. Building a Backyard Greenhouse
We seriously considered building a greenhouse from scratch… DIY is our usual MO… but once we priced out the lumber, polycarbonate panels, hardware, and everything else we’d need, buying a kit was dramatically cheaper and faster. We found this cedar-framed greenhouse on Amazon, and it checked every box: good-looking wood frame, twin-wall polycarbonate panels, and a roof vent for ventilation.
The trade-off, of course, is that you still have to put it together. Which brings us to the foundation.
Building a Proper Foundation
I can’t stress this enough: don’t skip the foundation. A backyard greenhouse is essentially a big lightweight sail waiting for a windy day, and without a solid anchor, it will move on you. Here’s what we did:
Step 1: Build a frame the same size as the greenhouse. We cut pressure-treated 4x4s to match the exact footprint of our 8×8 greenhouse and joined them at the corners to create a square base frame.
Step 2: Dig corner post holes. At each of the four corners, we dug a hole about 3 feet deep, below our frost line, which is important if you live somewhere that freezes. Shallower holes can heave up in winter and throw the whole greenhouse out of square.
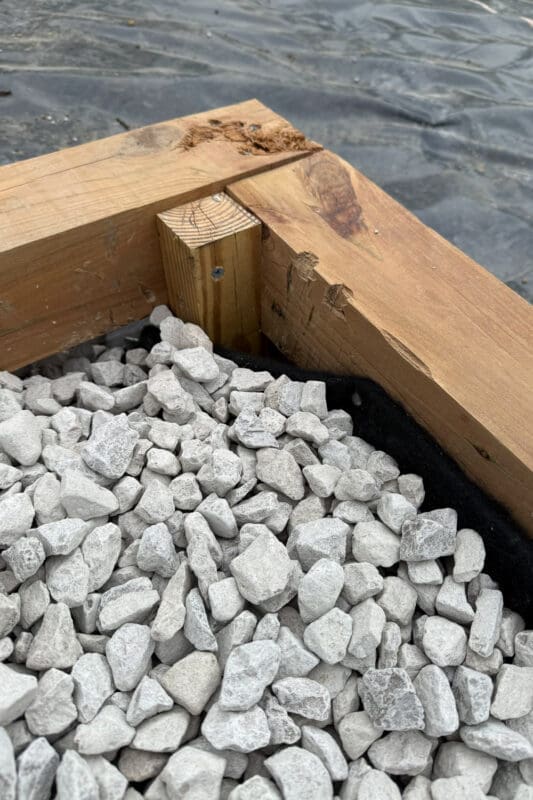
Step 3: Set and notch the corner posts. We dropped a pressure-treated 4×4 into each hole and notched the top of each post, so it joined cleanly with the horizontal foundation frame. This creates a really strong mechanical connection instead of relying on screws alone. Use a level to make sure that your frame is sitting level on those posts. Adjust as needed.
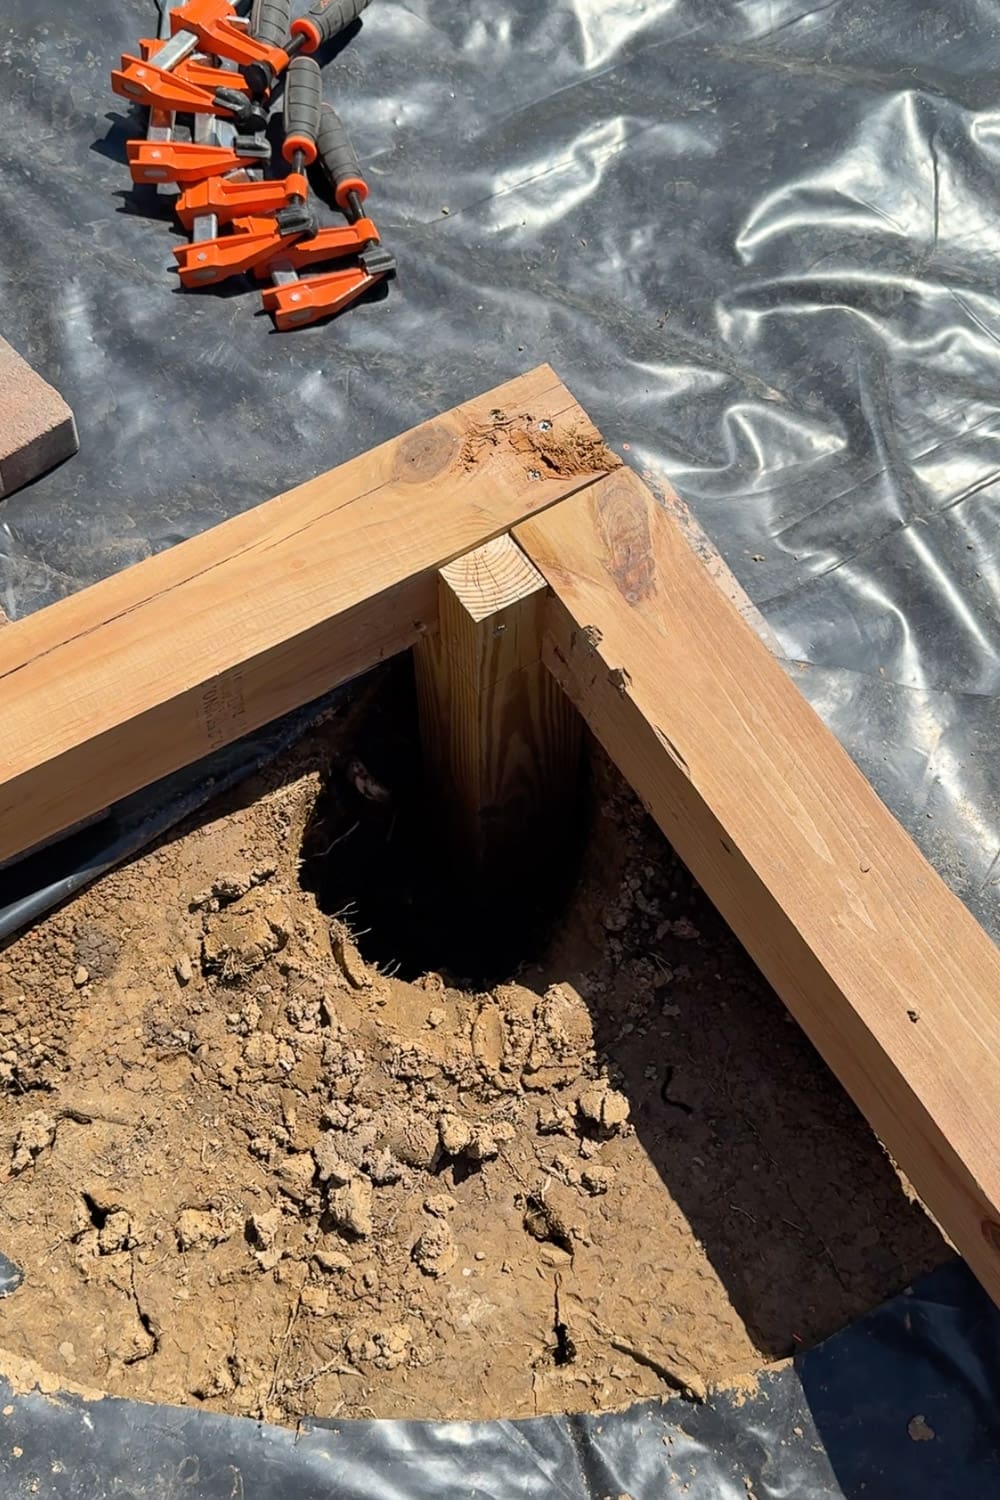
Step 4: Pour concrete. With the posts set and the frame leveled and attached, we poured quick-set concrete into each hole. Once that cured, this greenhouse was not going anywhere.
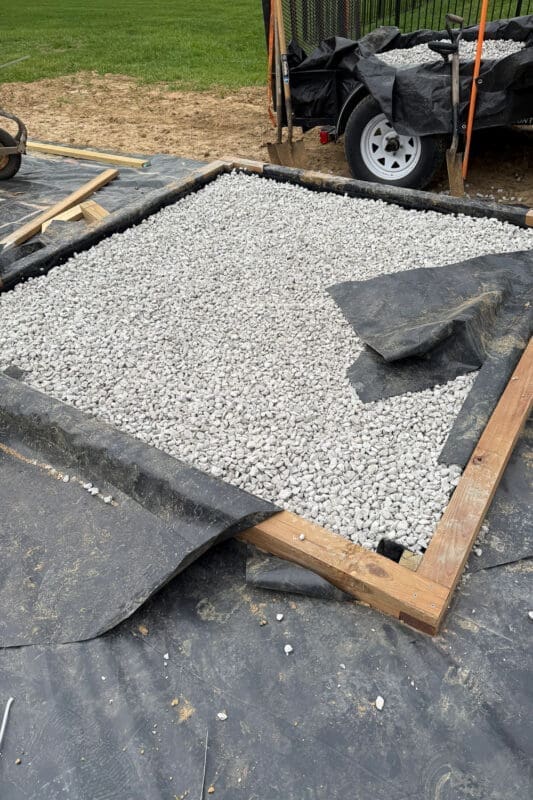
Step 5: Swap the plastic for landscape fabric and add gravel. The heavy black plastic we used for the majority of the garden isn’t great for drainage, so we cut it out of the greenhouse footprint and replaced it with landscape fabric, which still blocks weeds but lets water pass through. Then we filled the entire base with gravel for drainage and a clean, level surface.
Backyard Greenhouse Assembly Tips
You can follow the step-by-step instructions that come with whichever greenhouse kit you buy (they’re all a little different), so I’m not going to walk through every step and every screw. Instead, here are the three tips I’d give anyone tackling a backyard greenhouse assembly for the first time.
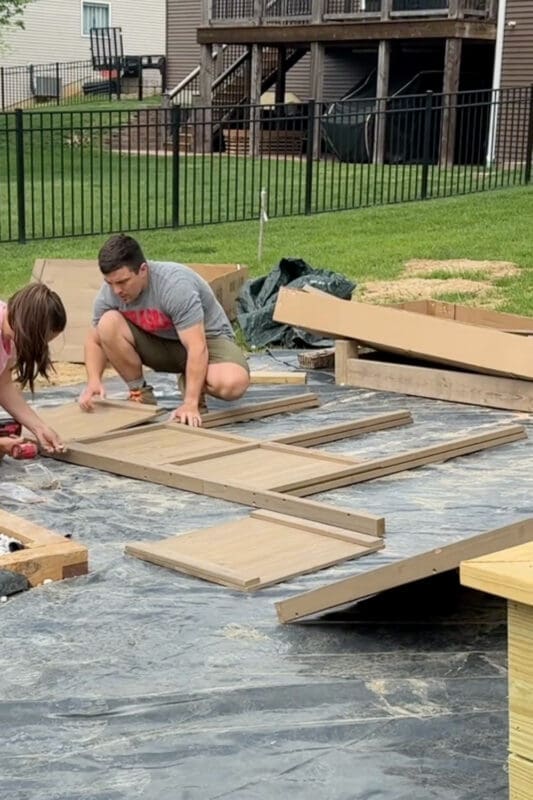
Tip 1: Assemble the walls on the ground
It’s so much easier to build each wall flat on the ground than to try to hold pieces up in the air while you drive screws. Lay out the frame pieces, attach them, and then stand the wall up. One important note: stand the wall up before you slide the polycarbonate window panels into place. If you try to lift an assembled wall with the panels already in, you risk flexing the frame and cracking or popping out the panels.
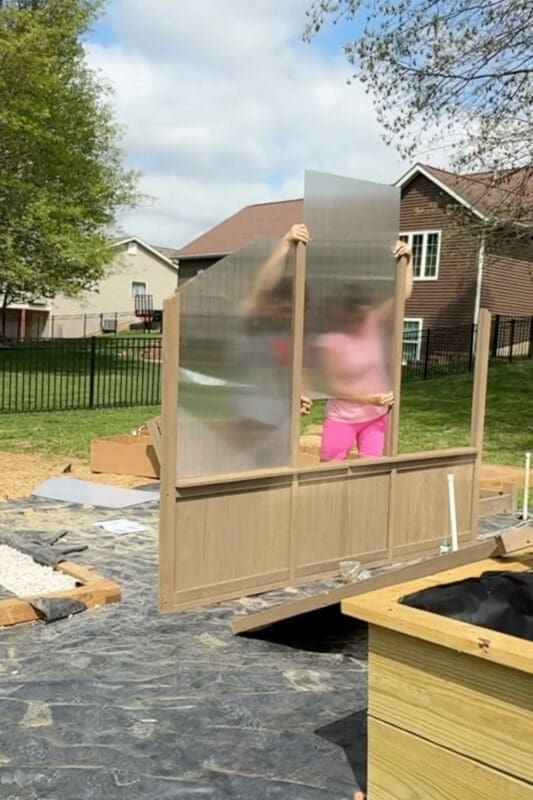
Tip 2: Recruit some extra hands
You’ll need help. Not because the walls are especially heavy, but because you need multiple walls standing up simultaneously to attach them. Our two oldest kids were easily able to hold the side walls upright while my husband and I secured the front and back walls. Solo, this step would have been miserable. With a small crew, it was honestly kind of fun.
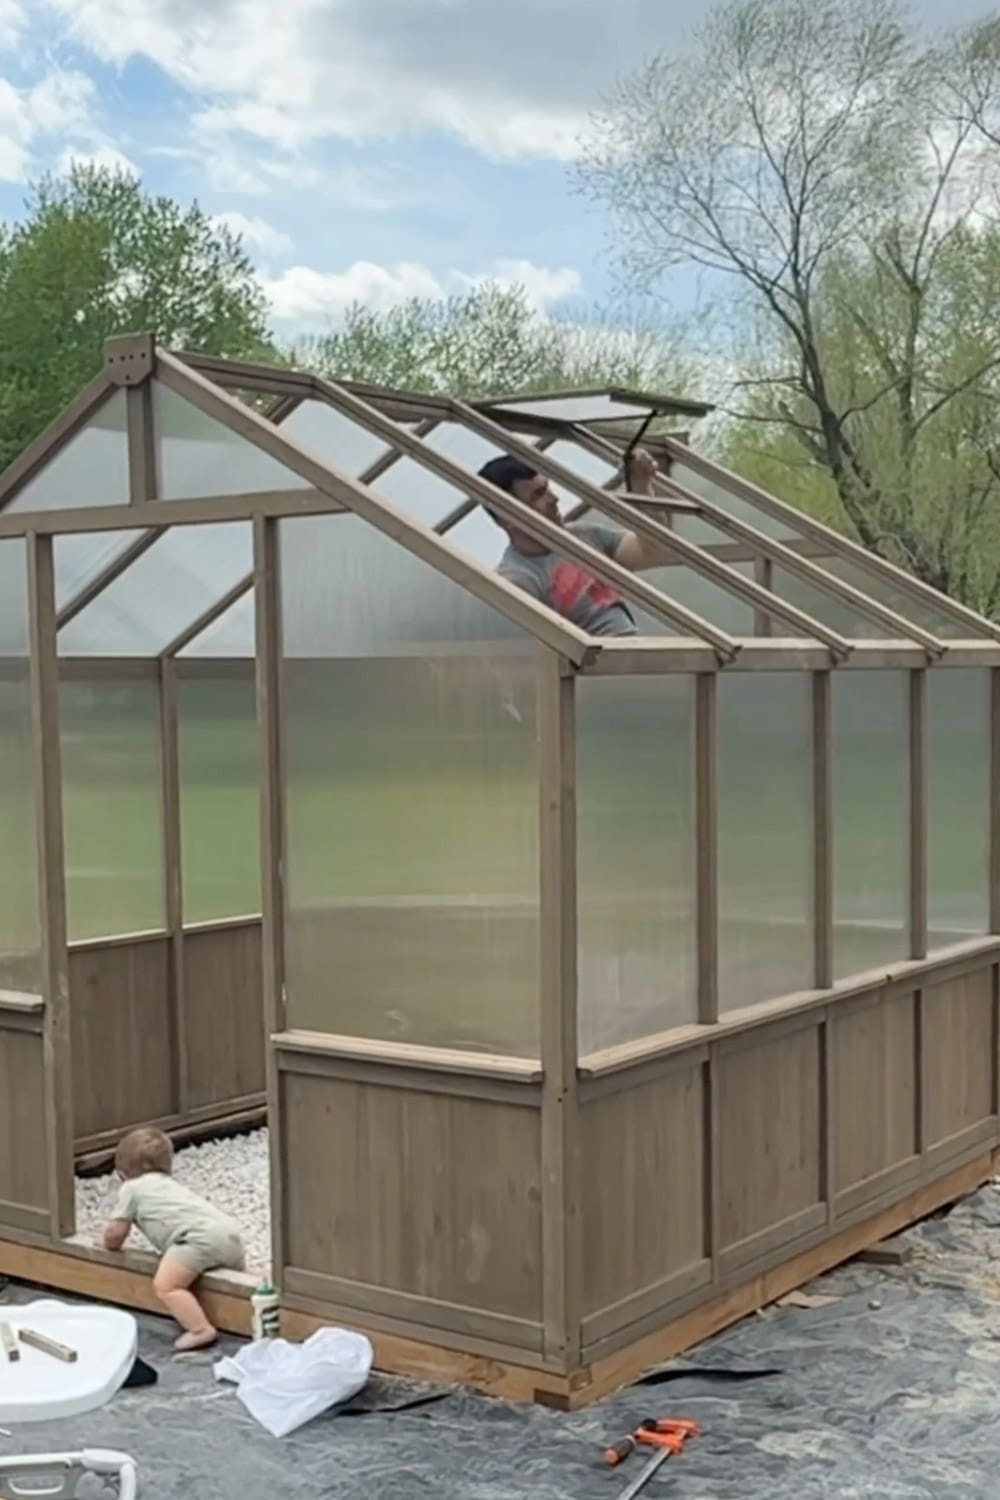
Tip 3: Buy a greenhouse with a roof vent and install it correctly
Ventilation matters more than most people realize. Without it, a greenhouse can easily climb past 100°F on a sunny spring day and cook the very plants you’re trying to protect. When you’re shopping, prioritize a kit (like the one we used) with a built-in roof vent, and take the time during assembly to install it exactly per the instructions.
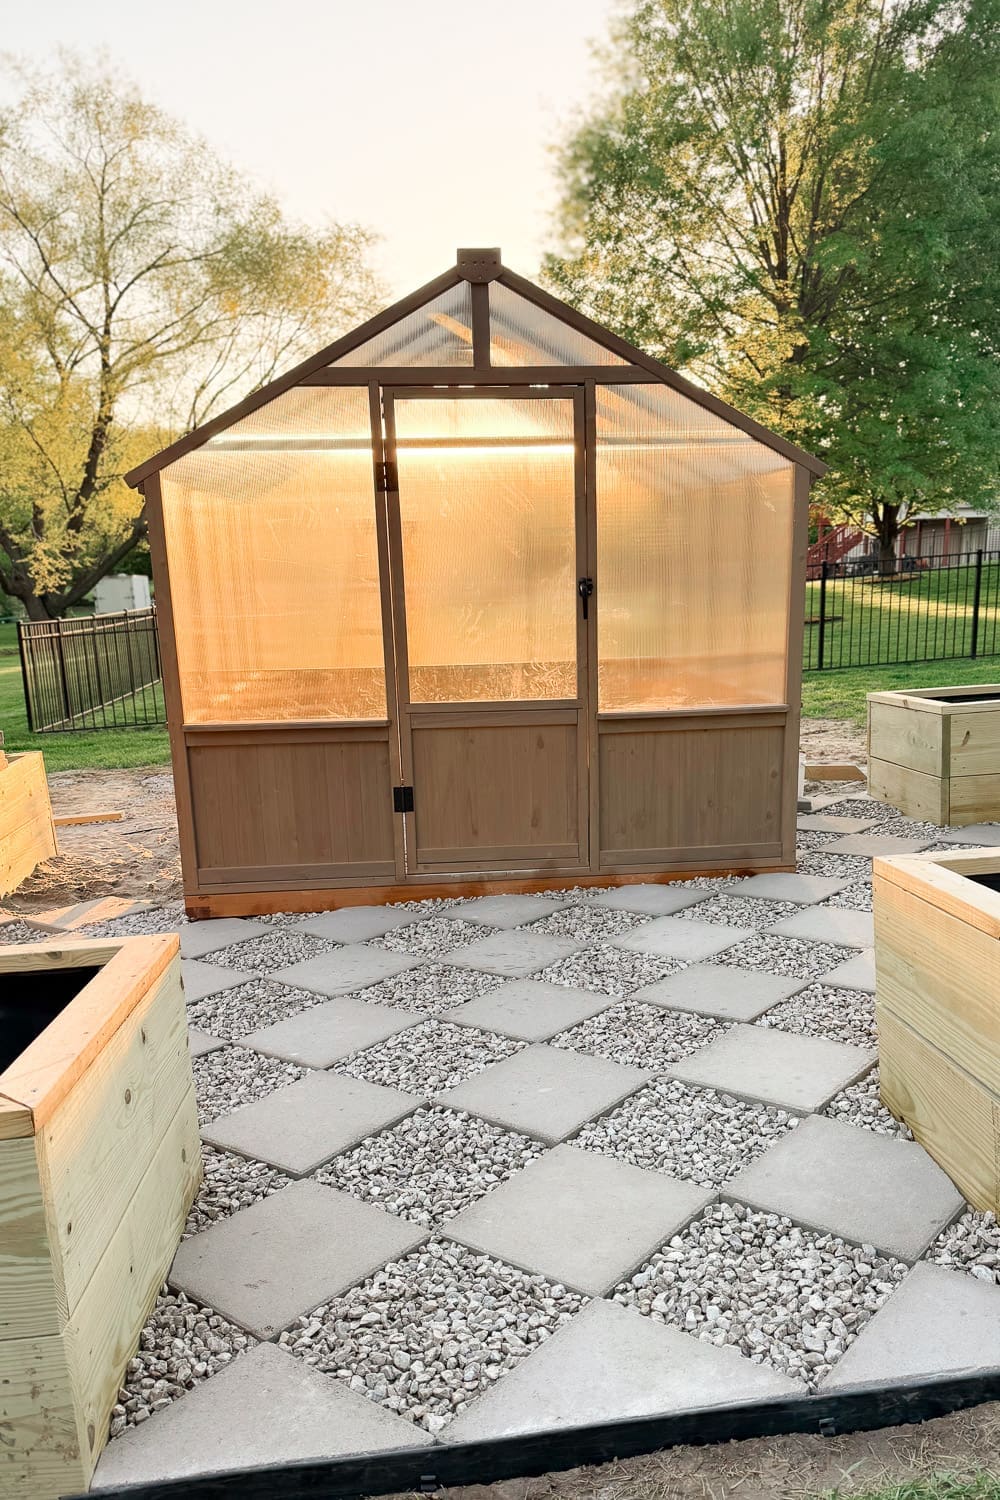
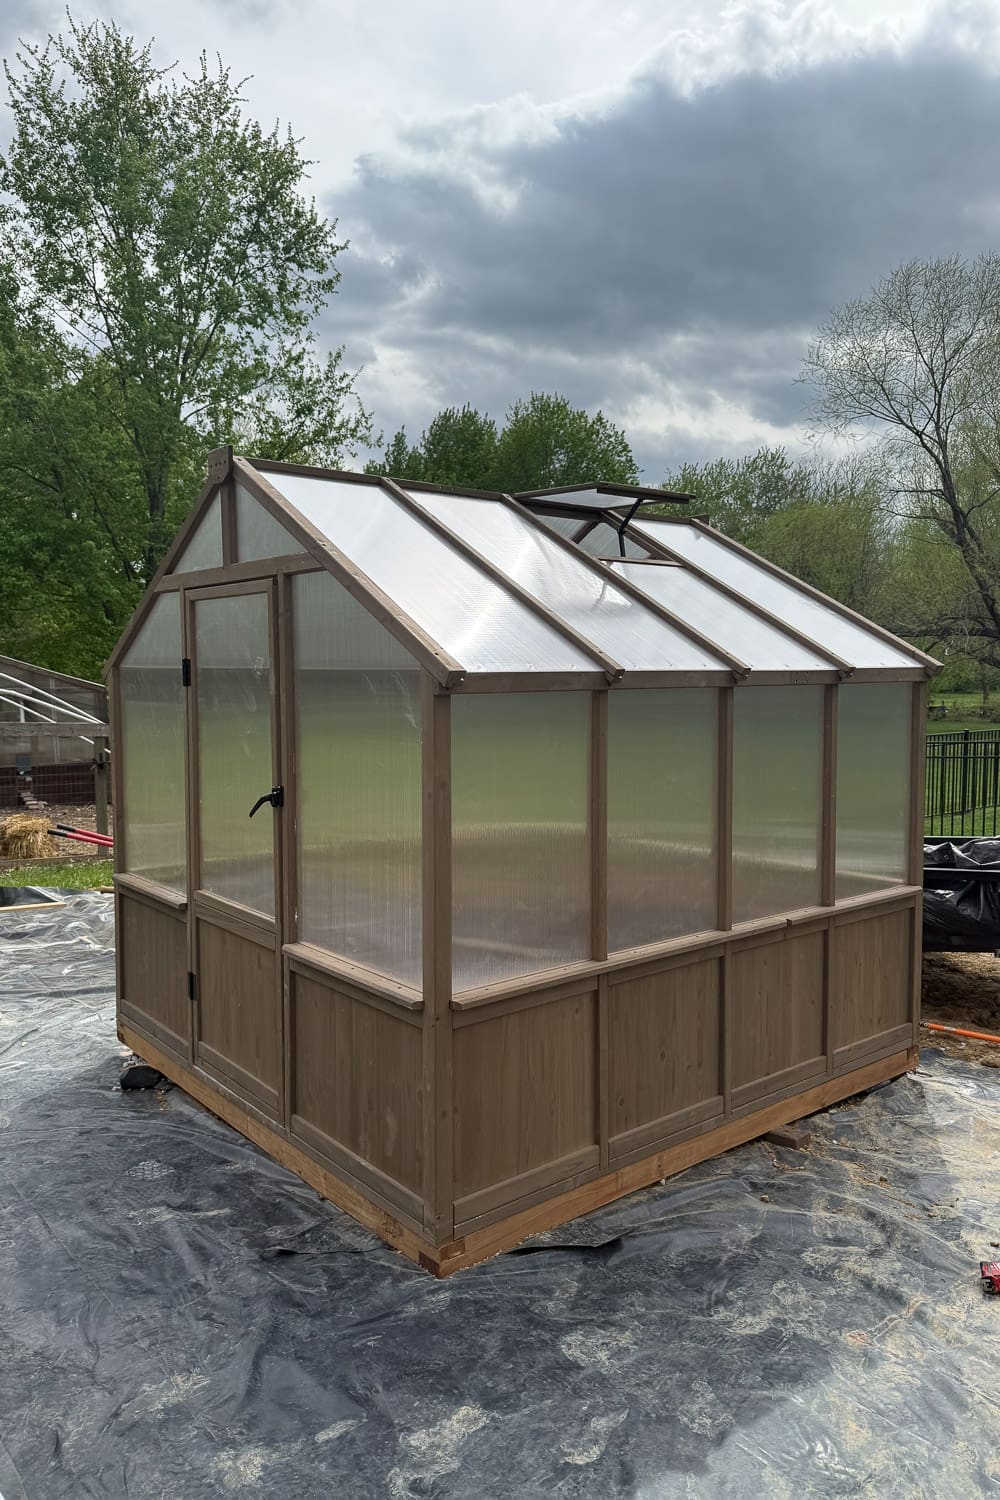
The Finished Greenhouse
Start to finish, the actual greenhouse assembly took us about 4 hours with two adults and occasional kid help. The foundation work took a bit longer than that, but that’s the part you don’t want to rush.

I absolutely love how it turned out. The cedar tone of the wood frame is beautiful. It’s the perfect blend of utility and function, while being a gorgeous focal point for our backyard garden. Standing inside it for the first time made every hour of the backyard greenhouse build worth it.
The Garden Coming Together
Once our backyard greenhouse was up, we went to work on the rest of the garden around it. We laid a diamond paver walkway with concrete pavers set on the diagonal and gravel filling the gaps. I also built raised beds out of pressure-treated lumber to frame the greenhouse on either side. The combination of the warm wood, the glow of the greenhouse at sunset, and that geometric paver pattern underfoot has turned the whole space into a destination. I can’t believe how good my backyard is looking.
Links for other garden DIY projects:
If you’re thinking about adding a backyard greenhouse to your own yard, my honest advice is: buy the kit, take the extra time to build a real foundation, and rope in some helpers for the assembly day. It’s one of the best things we’ve added to our home so far.
📌 Save This Backyard Greenhouse Post for Later
Planning your own backyard greenhouse build? Pin this post to your gardening or DIY board so you can come back to it when you’re ready to break ground.
Backyard Greenhouse FAQs
The actual greenhouse kit assembly took us about 4 hours with two adults and occasional help from our kids. That said, plan for a full weekend if you’re also building the foundation from scratch… the foundation work (digging holes, setting posts, pouring concrete, and letting it cure) took us longer than the greenhouse itself.
Yes! Sadly, this is the step I see people skip most often. A greenhouse is essentially a large, lightweight structure that catches a lot of wind. Without a proper foundation anchoring it to the ground, you risk it shifting, racking out of square, or, in a worst-case scenario, getting damaged in a storm. A pressure-treated frame with concrete-set corner posts is absolutely worth the extra time and expense.
Absolutely. On a sunny spring day, a closed greenhouse can easily climb past 100°F and stress or kill the plants you’re trying to protect. A roof vent (ideally with an automatic opener that reacts to temperature) is one of the most important features you can have.
Ours is 8×8 feet, which feels roomy for two people to work in and has plenty of space for seed starting, overwintering plants, and a small potting bench. If you’re mainly starting seeds for a home garden, 6×8 or 8×8 is a great starting point. If you want to grow inside year-round or have multiple gardeners using it, size up to 8×10 or 8×12.
