DIY Irrigation System for a Raised Bed Garden


Updated June 12, 2026
A DIY irrigation system for your raised beds is one of those projects that pays you back every single day of the growing season, year after year. And friend, I am here to tell you it’s so much easier than I thought it would be.
We finally built the garden watering system of my dreams. The kind where you just set it and forget it. No hose-dragging. No standing in the heat holding a sprayer. No forgetting to turn the water off and waking up at midnight in a panic.
And the best part? It’s not as complicated (or expensive) as I thought it would be. If you’ve got raised beds and a willingness to dig a trench, you can absolutely do this.

Table of Contents
- Why We Built a DIY Garden Watering System
- What You’ll Need for a DIY Irrigation System
- Step 1: Plan Your Garden Layout
- Step 2: Run Water From the House
- Step 3: Dig the Trench
- Step 4: Lay the Main PVC Line
- Step 5: Install Tee Fittings and Spigot Risers
- Step 6: Glue Everything Together
- Step 7: Test Your DIY Irrigation System Before You Bury
- Step 8: Lay Landscape Fabric
- Step 9: Build Your Beds
- Step 10: Add the Brass Spigot Valves
- Step 10: Connect Soaker Hoses and Plant
- Was It Worth It?
- 📌 Pin This DIY Irrigation System for Later
- DIY Irrigation System FAQ
Why We Built a DIY Garden Watering System
Before I show you how, let me explain why I wanted this DIY irrigation system.
In our previous home, the garden was right next to the house. For those boxes, we ran a house right off the outside spigot and connected drip lines. It worked just fine (full post if you want the details – How to Install a DIY Drip Irrigation System for Raised Garden Beds). Our new home has a humongous backyard, and the garden is at least 50 ft from the house. Way too far to just hook up to the spigot with a hose.
Since we were building this garden from scratch, we wanted to do it right the first time. That meant an underground watering system (no hoses to trip over or accidentally mow), with every single bed getting its own water source so I could water each one separately.
That’s the whole goal of this DIY raised bed irrigation system. Less hassle, healthier plants, more time for everything else.
What You’ll Need for a DIY Irrigation System
Here’s the basic supply list. Your exact quantities will depend on how far your beds are from the house and how many boxes you have.
- 1/2-inch PVC pipe (enough to run from your water source to your garden, plus risers for each bed)
- PVC tee fittings (one per bed, plus extras for any branching)
- PVC elbows
- PVC primer and cement (we used this one)
- Brass spigot/hose bib valves (one per bed)
- Threaded PVC adapters (to connect the brass valve to the PVC riser)
- A trenching shovel and a powered edger (highly recommend the edger if you have a long run)
- Utility flags or marking paint to plan your layout
- Landscape fabric (we used heavy-duty black plastic)
- A ratcheting PVC pipe cutter
- Work gloves
Step 1: Plan Your Garden Layout
Before you dig anything, walk your yard with a can of marking paint and some flags. Map out where each raised bed will go, and where the main pipe needs to run from your water source to reach all of them.
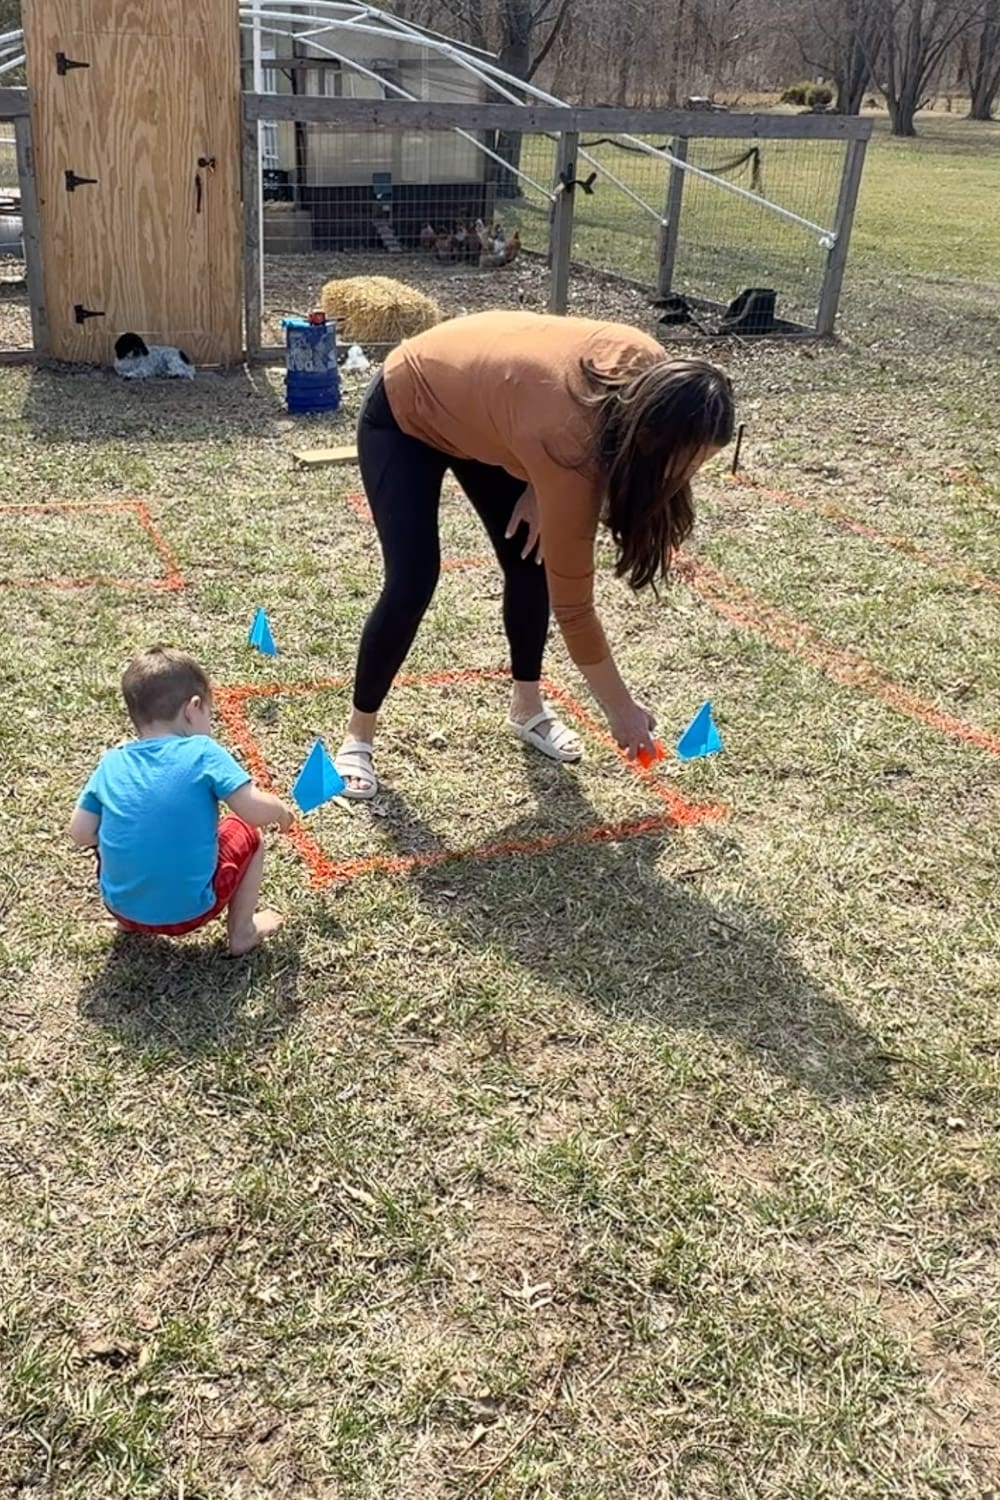
We used blue flags to mark each box corner and orange spray paint to draw the actual outline of each bed. This may seem extra, but once you start digging, you don’t want to be guessing. You want to make sure that the DIY irrigation system you’re laying will reach where you need it to.
This is also the time to call 811 (or your local equivalent) to have your underground utilities marked. Free, easy, and keeps you from hitting a gas line with your shovel.
Step 2: Run Water From the House
We tapped into our existing water line at the house and ran a pipe out to where the garden would be. If you’re not comfortable working with your home’s plumbing, this is the part to call in some help. We had my father-in-law (a general contractor, lucky us) jump in for this piece.
Once the line was run from the house, the rest of the project was a totally manageable DIY.
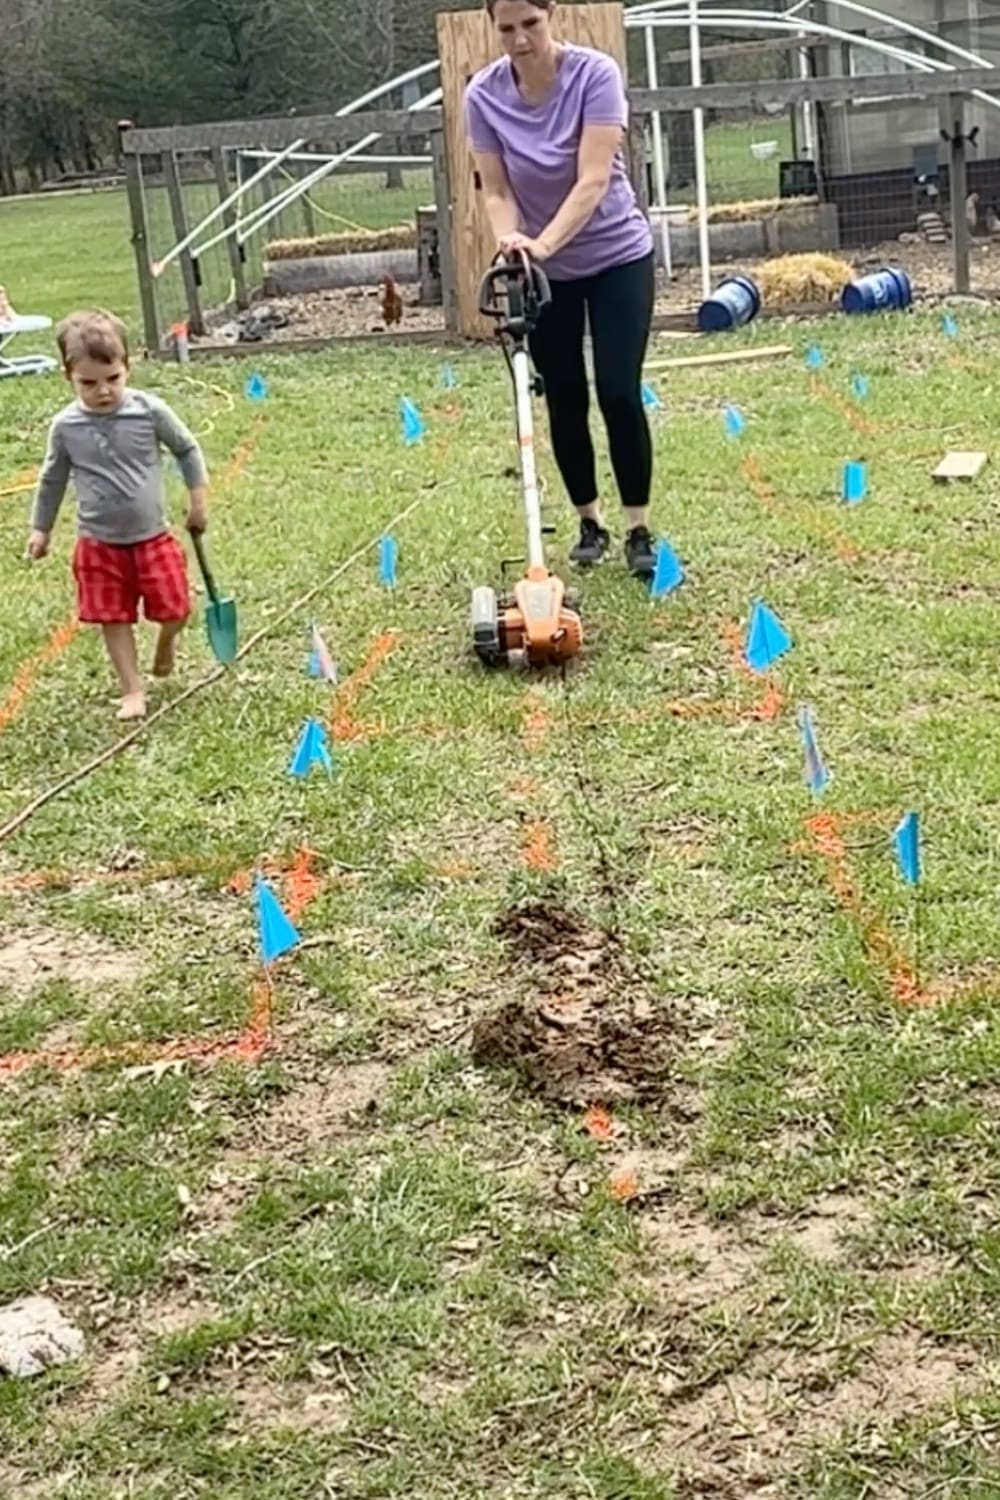
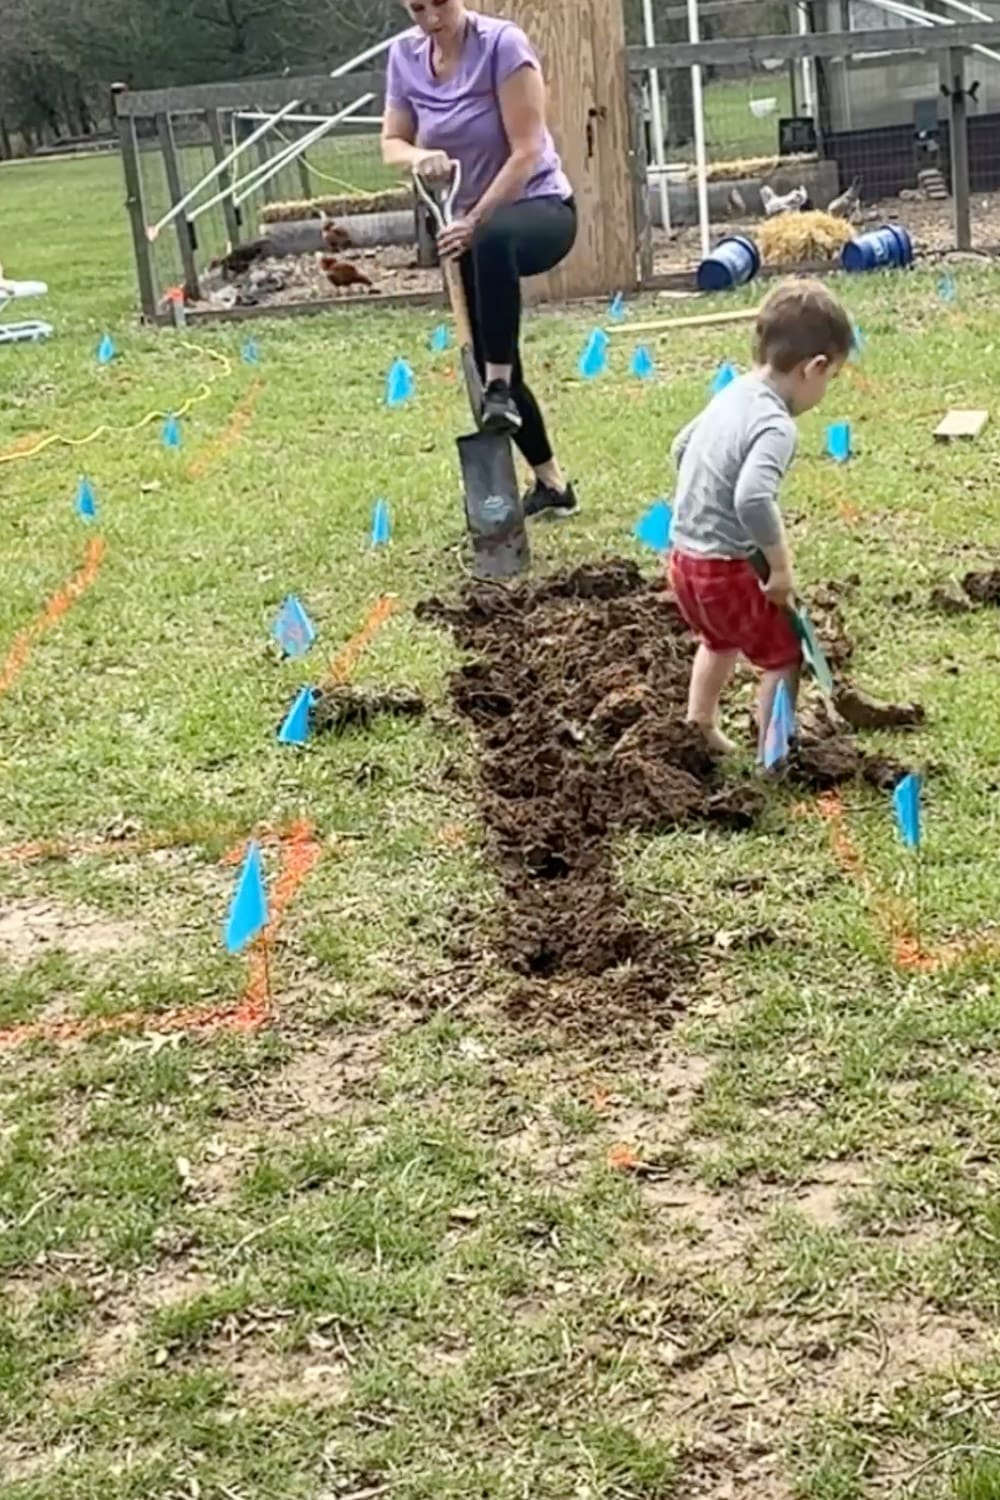
Step 3: Dig the Trench
Be prepared, this next step is a full-body workout!
I started by using an edger to cut the initial line, which makes the actual digging way easier. Then I went back through with a trenching shovel and dug the trench down deep enough to fully bury the PVC pipe, at least 6 inches, deeper if you live somewhere that freezes hard.
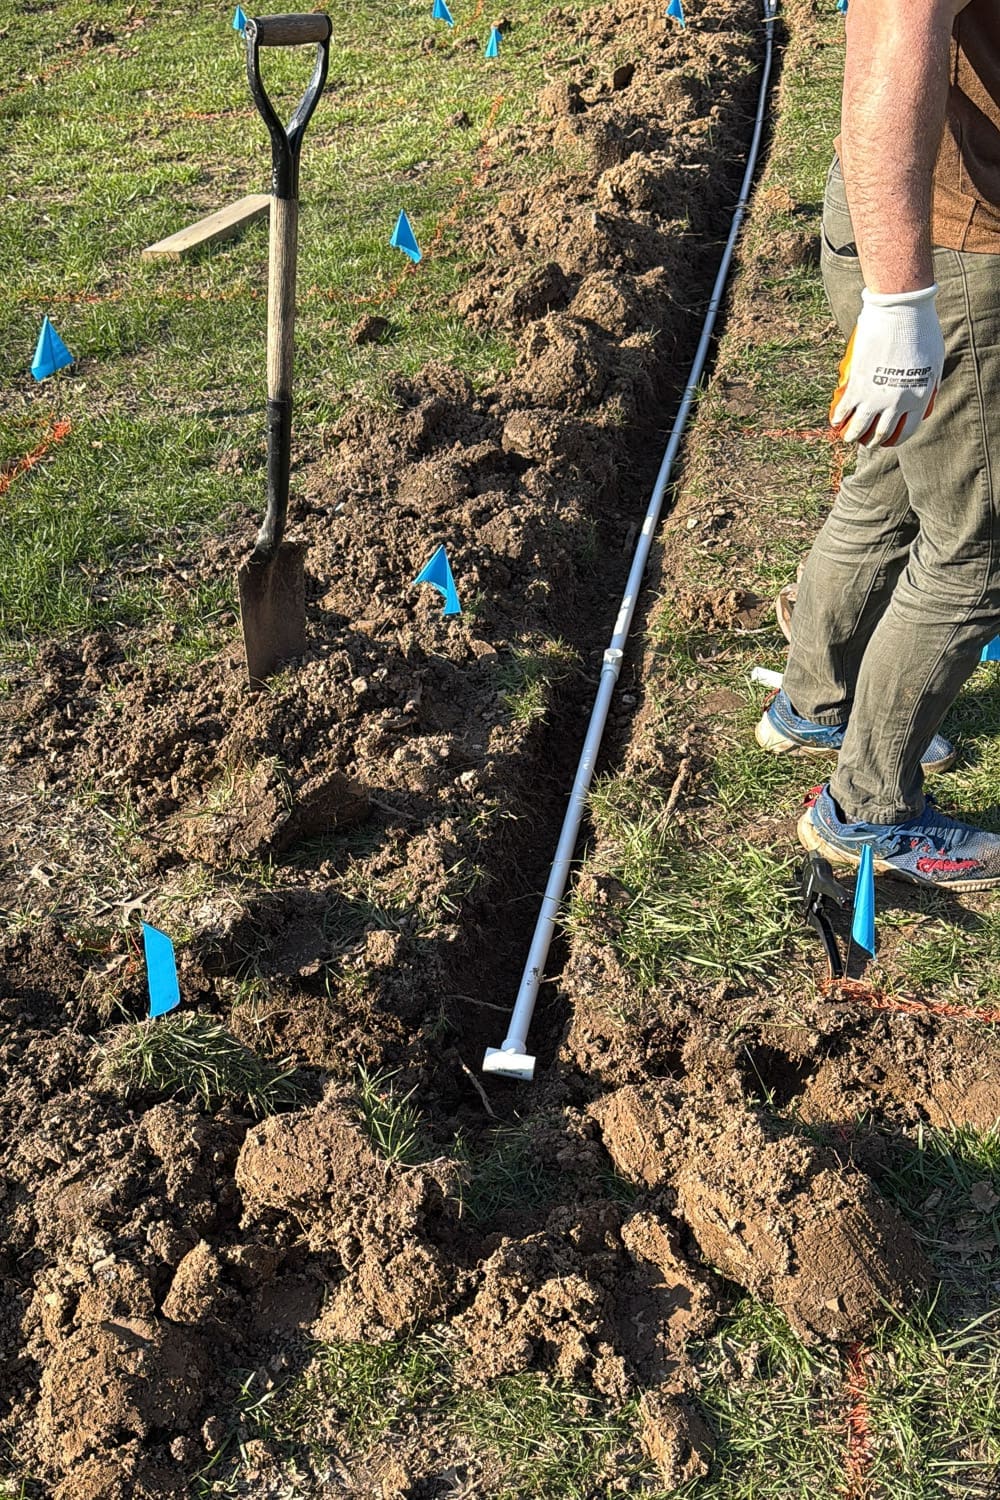
Step 4: Lay the Main PVC Line
With the trench dug, it’s time to start laying pipe. We used 1/2-inch PVC for the entire system, which is plenty for the water pressure we needed.
Run your main line along the length of the trench, cutting and adding T-shaped connections as needed. Don’t worry about gluing yet. This part matters because you want every tee fitting to line up exactly with your future raised beds. Measure twice, glue once.
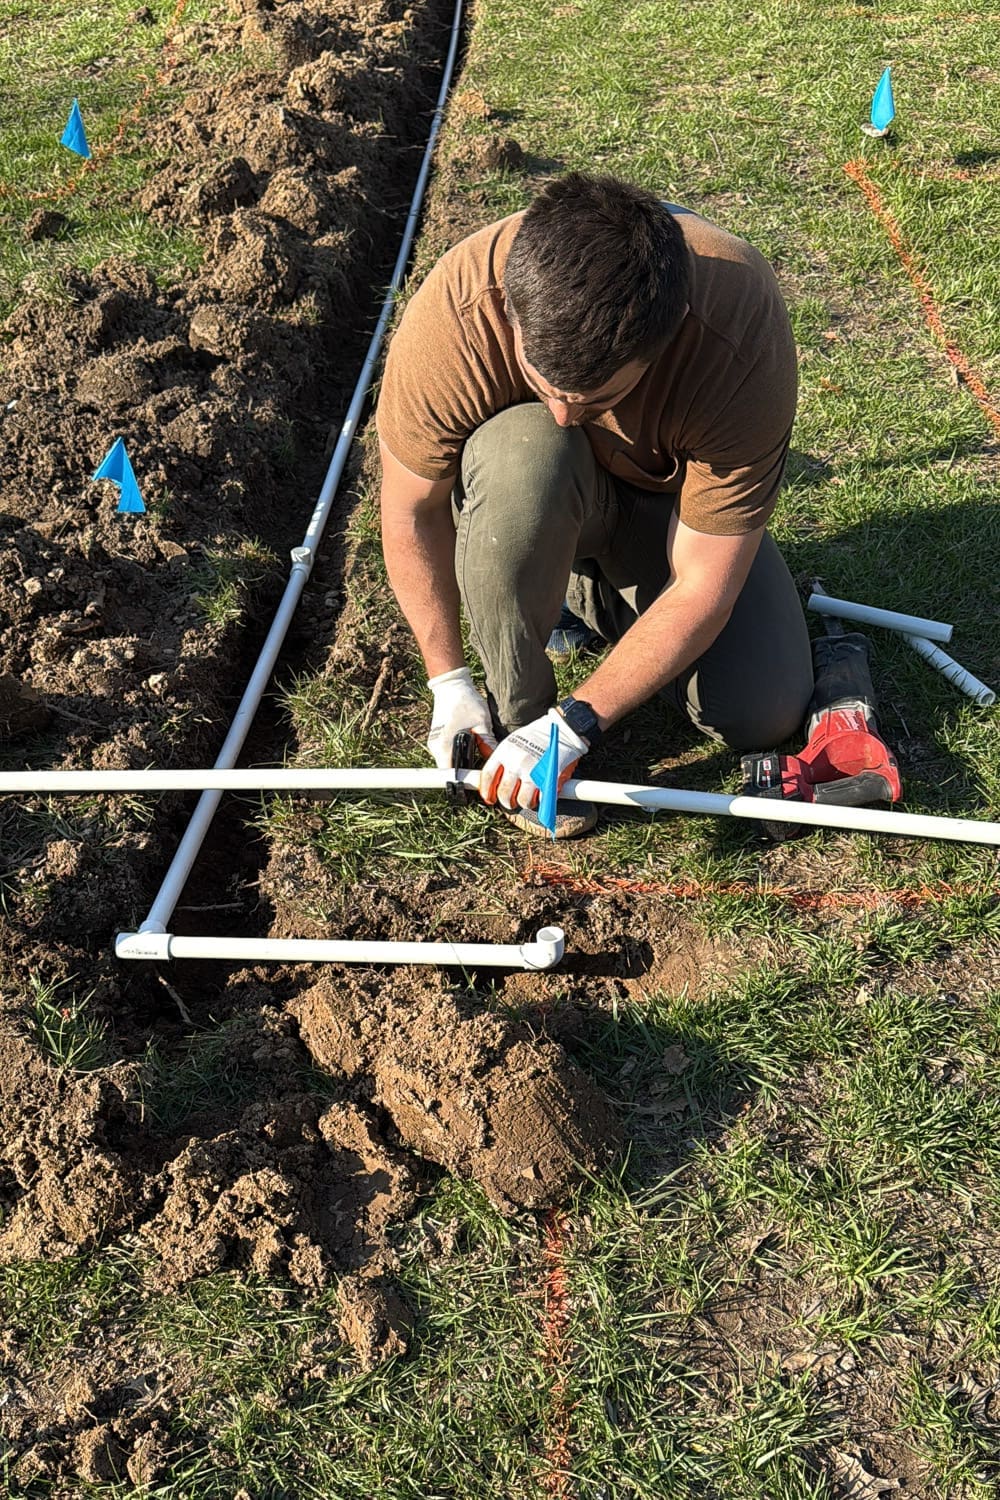
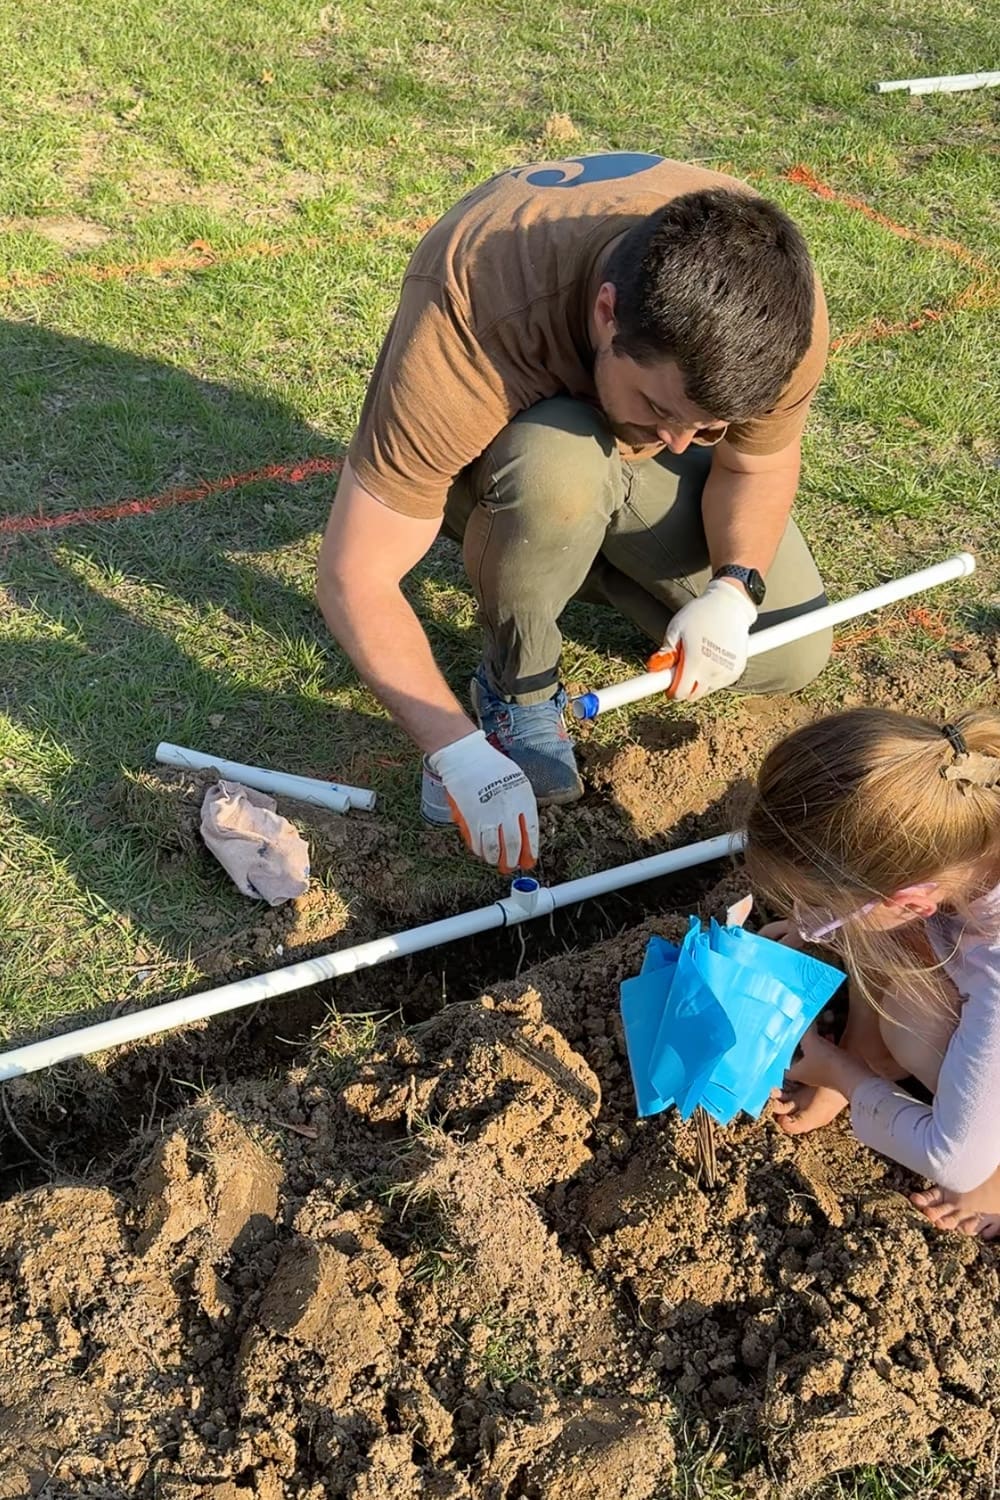
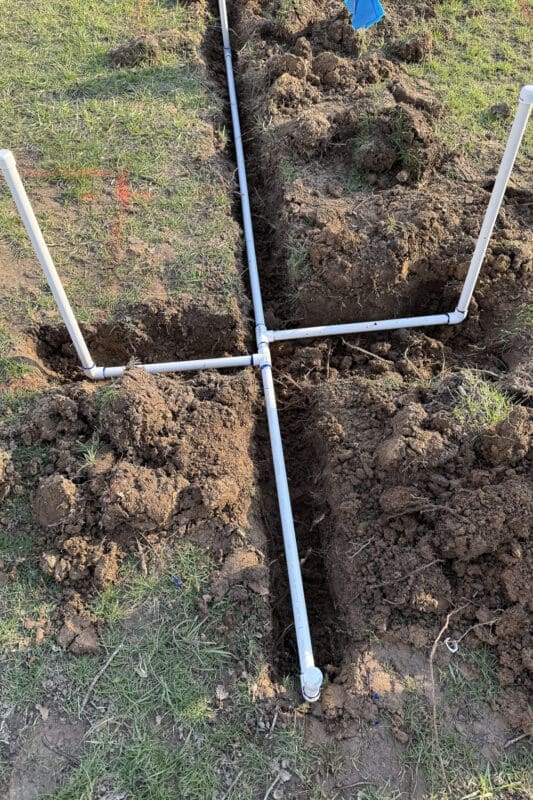
Step 5: Install Tee Fittings and Spigot Risers
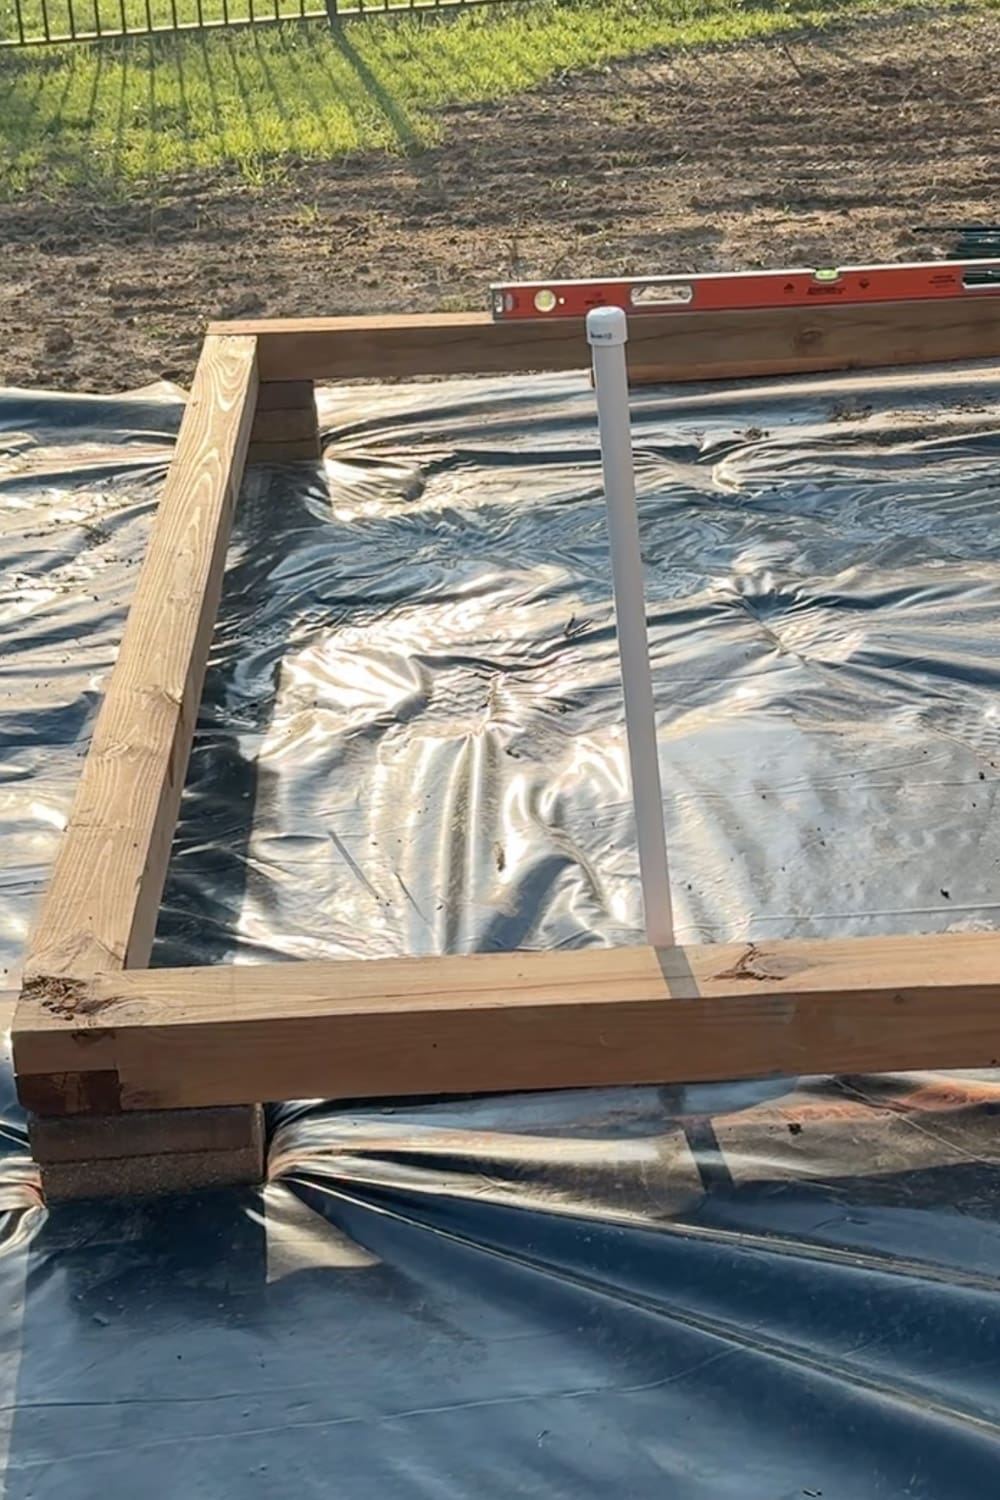
This is the heart of the system. At each raised bed location, we installed a PVC tee fitting in the main line, ran a section of PVC over to the bed, and then added an elbow piece and a vertical riser up to where the spigot would eventually sit.
The risers will come up out of the ground, just inside the edge of each raised bed, and will have a brass spigot valve at a comfortable height for connecting a hose.
A quick tip for this DIY irrigation project: Use a ratcheting PVC cutter to get clean, square cuts. Way easier than a saw.
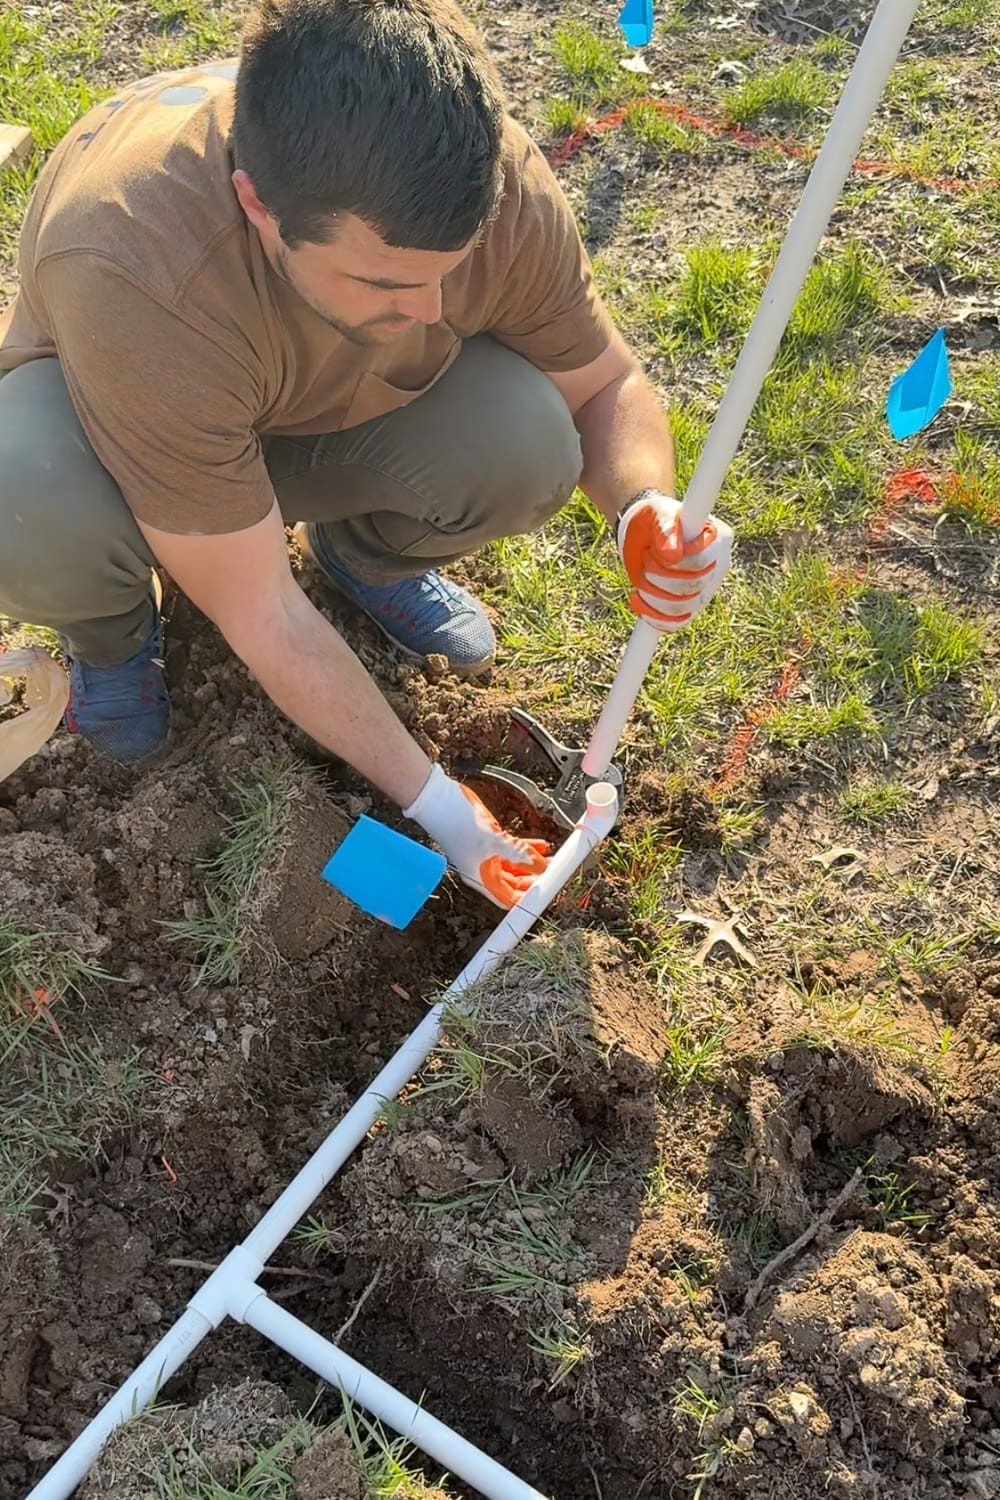
Before you glue a single joint, dry fit the entire system first. Lay out every piece of pipe, every tee fitting, and every riser exactly where it’s going to live. This is your chance to catch any measurement that’s off, any tee that’s facing the wrong direction, or any riser that needs to be a little taller or shorter. Once you’re sure everything lines up the way it should, then go back through and glue it all together.

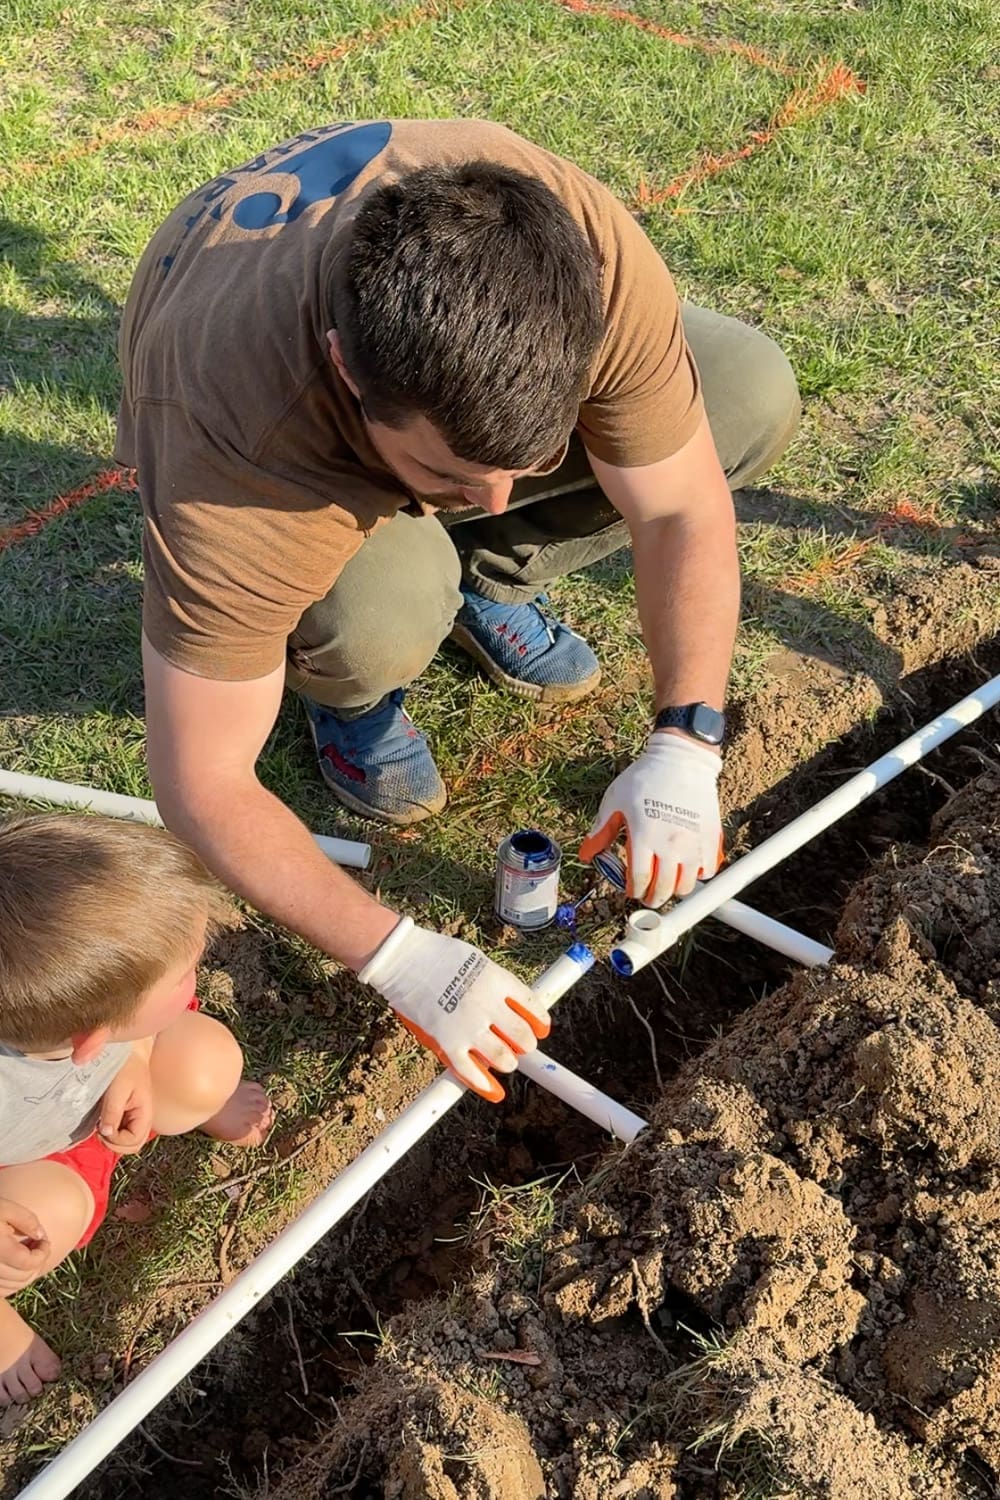
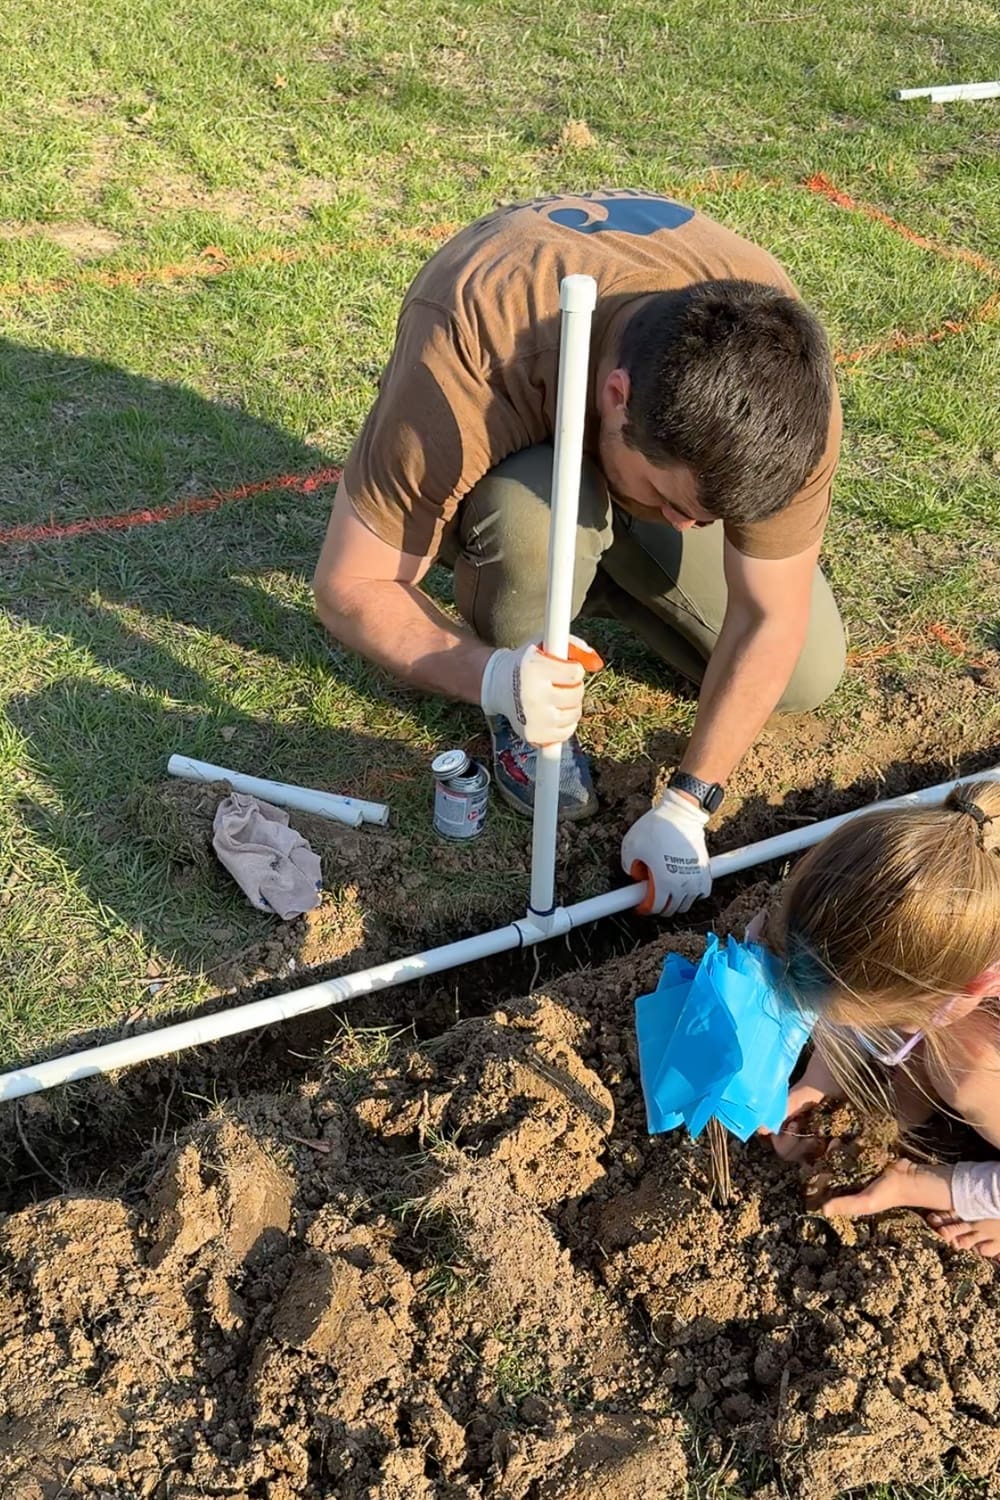
Step 6: Glue Everything Together
Once you’ve dry-fitted the whole system and you’re happy with where all the pipes are going, go back through and permanently glue every joint.
When it comes to gluing PVC, you’ve got two options. The traditional method is a two-part system: purple primer first to clean and soften the pipe, then PVC cement to bond the joint. It works great, but you’re juggling two cans. We used this one-step option instead, a primer-and-cement-in-one that does both jobs at once.
This is tedious but important. A leaky joint underground is a nightmare to fix later, so take your time and do it right the first time.
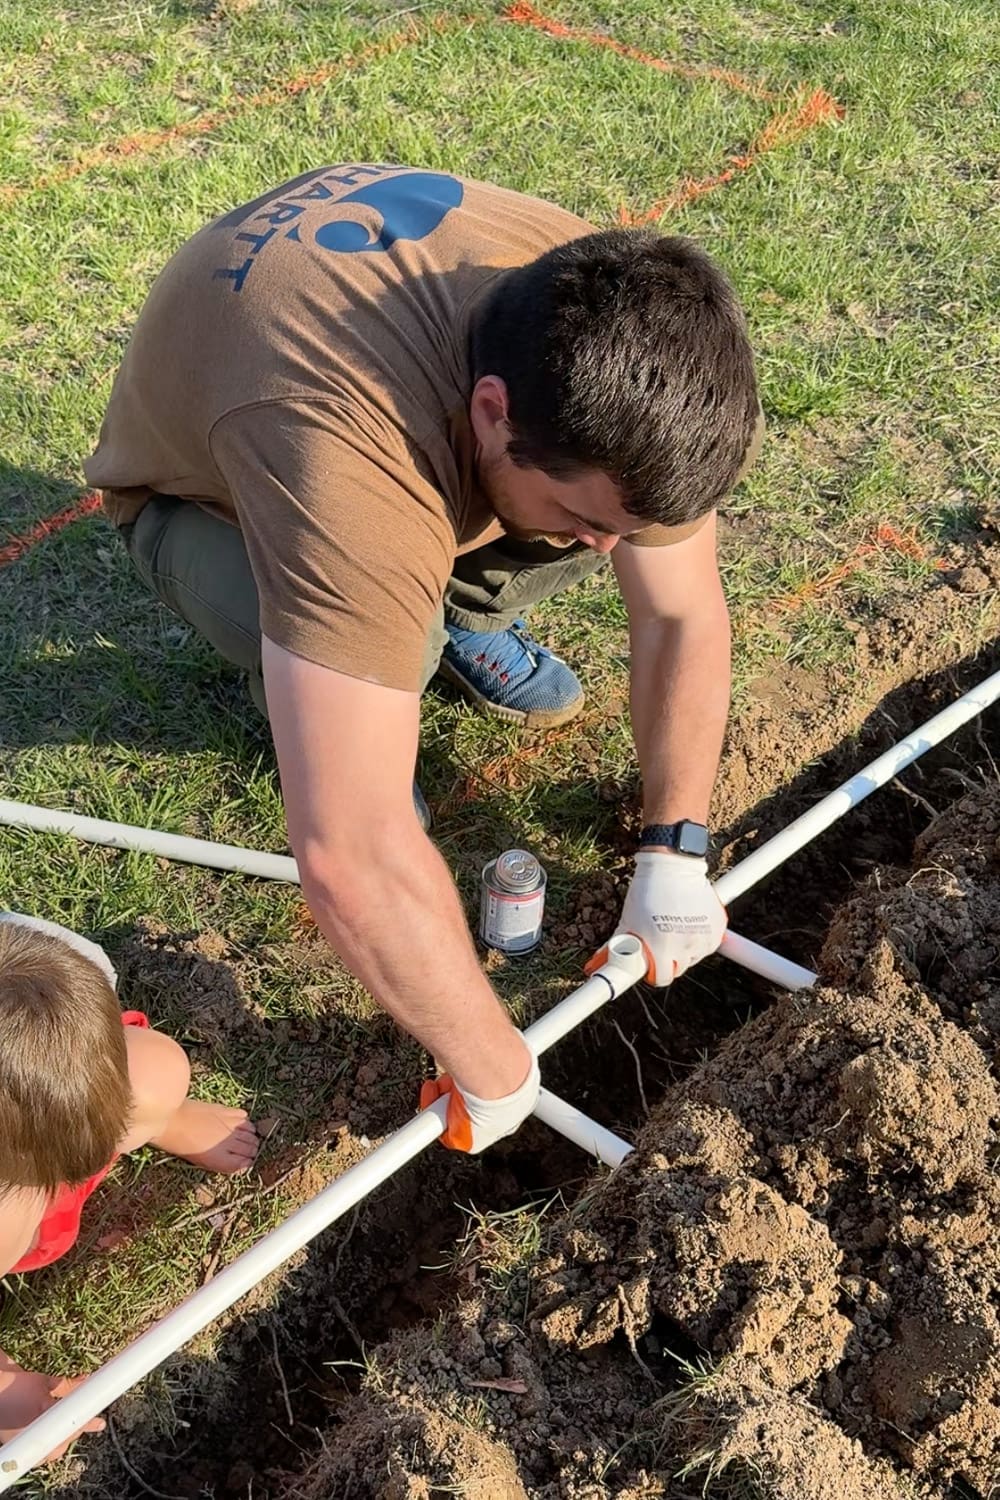
Glue every connection along the main line, as well as the base of each riser. Add end caps to the top of each riser, too, but don’t glue those. They’re temporary placeholders that will get swapped out for brass spigots later.
Step 7: Test Your DIY Irrigation System Before You Bury
Before you fill in the trench, turn on the water, and check every single joint for leaks. Every. Single. One. This is your last chance to catch a problem easily. Once everything’s buried, finding a leak means digging it all back up. So take a minute, run the water, and look carefully.
If everything’s dry, you’re ready to backfill the trench.
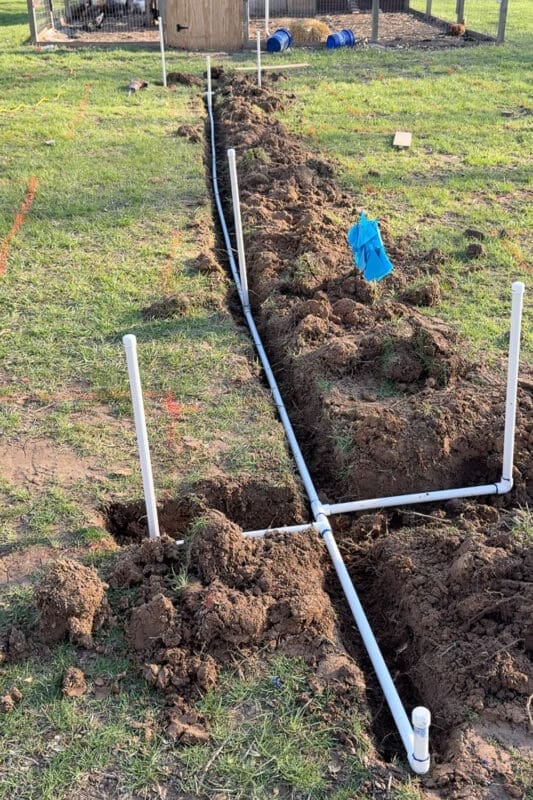
Step 8: Lay Landscape Fabric
We laid heavy-duty black plastic over the entire garden area, with the capped risers poking up through holes we cut in the plastic. This keeps weeds from growing around the boxes and gives you a clean surface to build on.
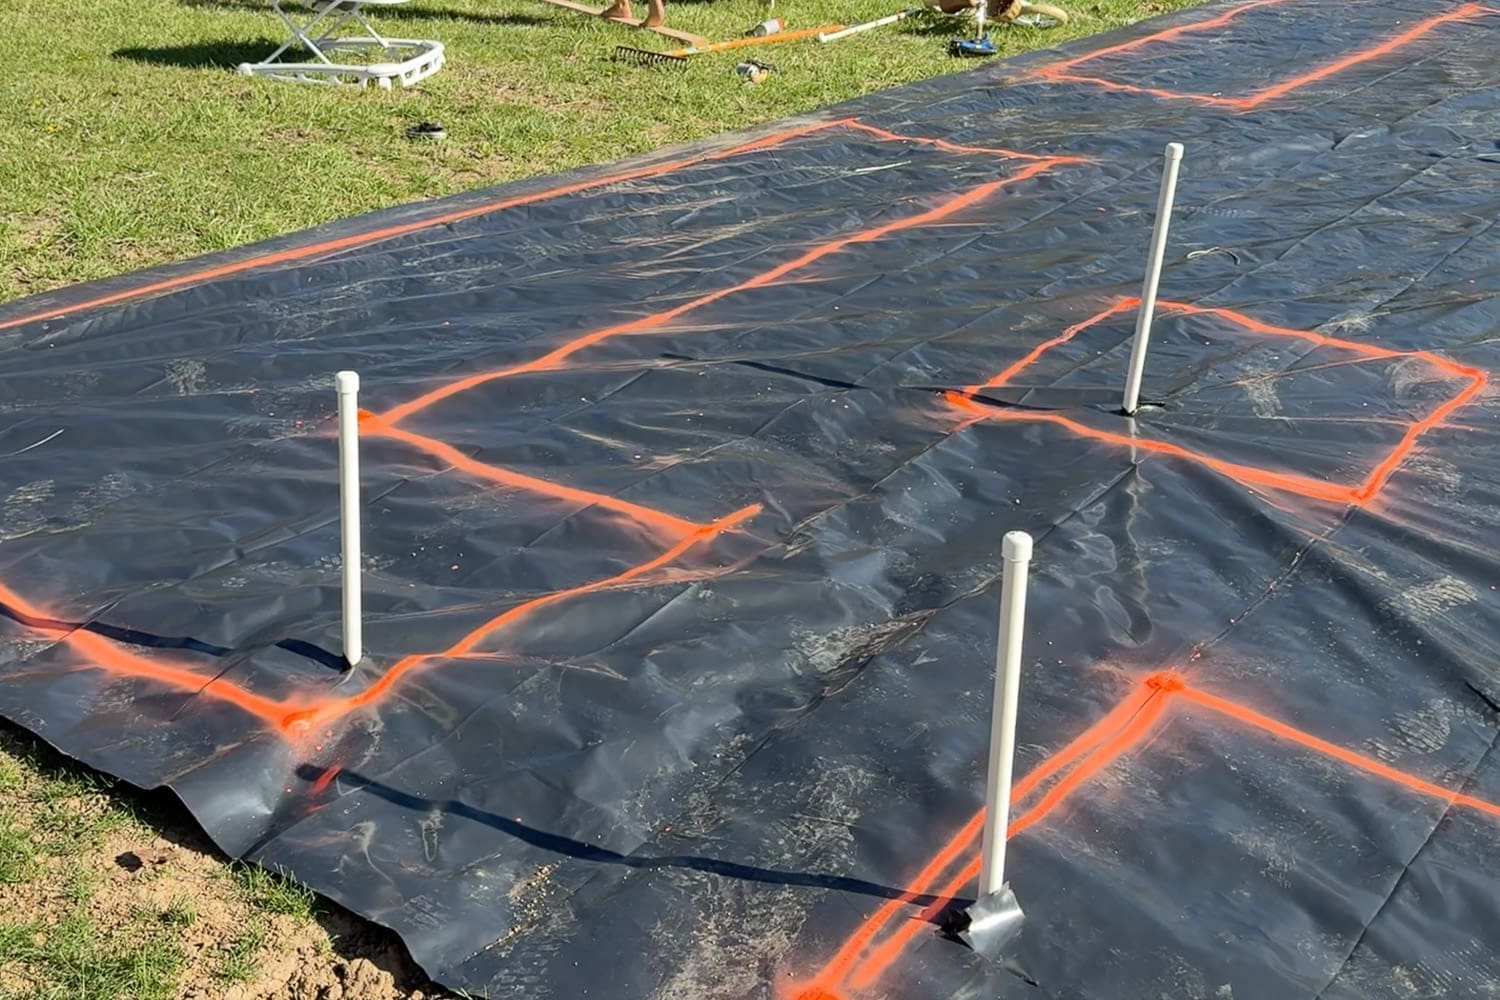
The photo above really shows how we were able to bring water to every single box off of just one main line.
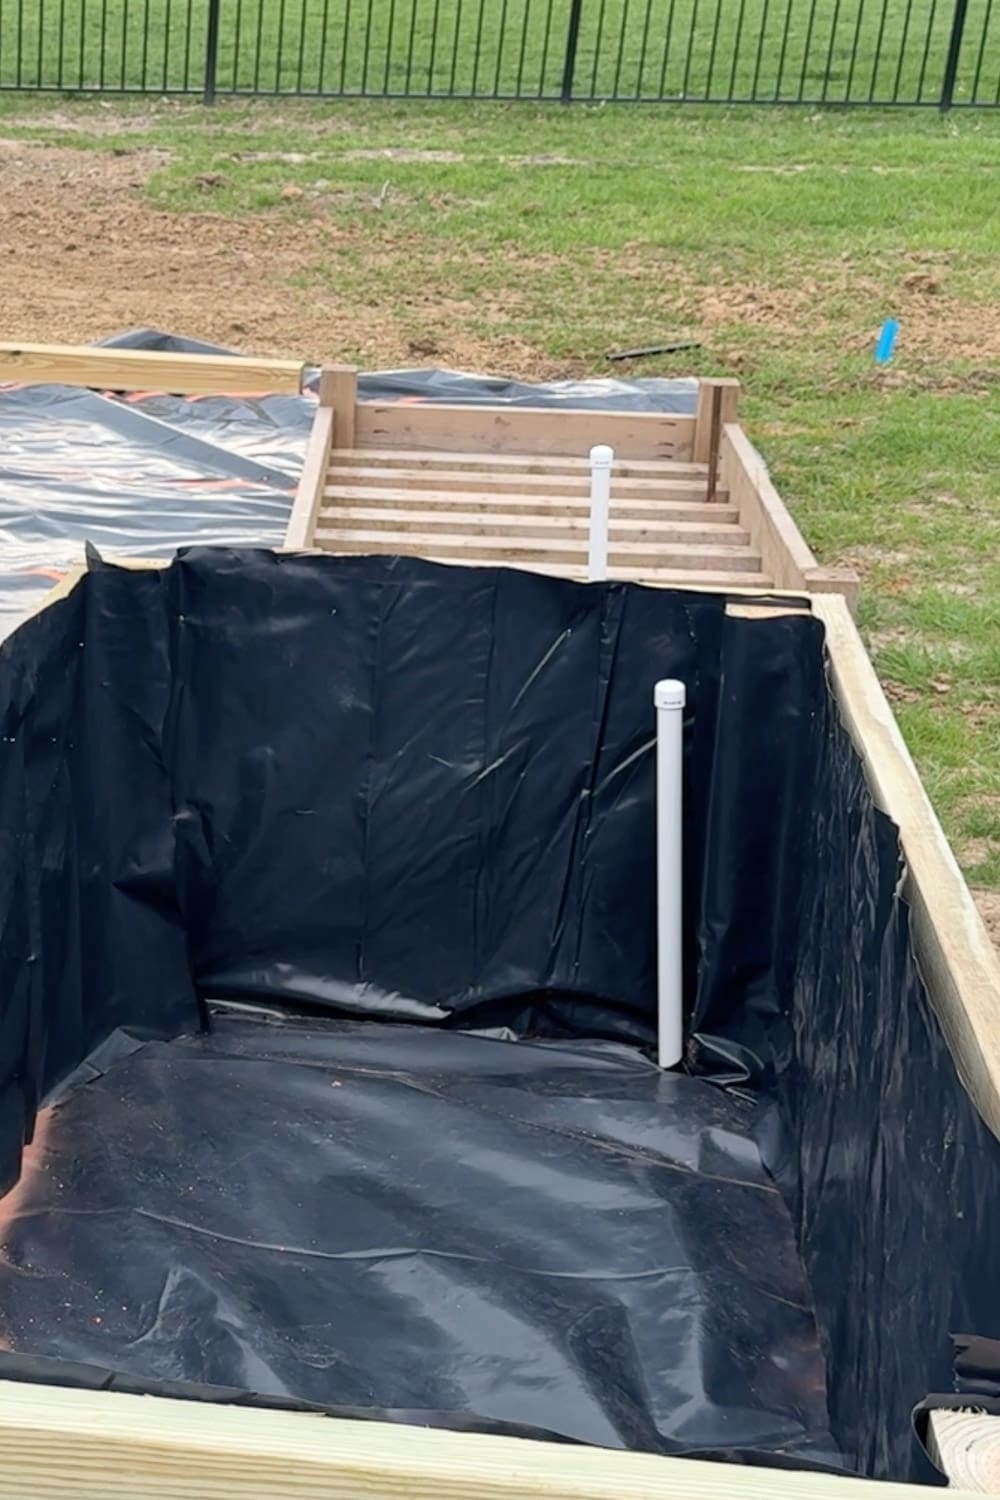
Step 9: Build Your Beds
Then we built each raised bed around its corresponding riser. The capped pipe sits just inside the edge of each box, exactly where the spigot will eventually go. We even ran a line over into the greenhouse so it could be watered the same way.
This is a key thing most tutorials skip: position your risers first, then build the garden boxes and greenhouse around them. Doing it the other way around is way harder. We left the end caps on throughout the entire bed-building process to keep dirt and debris out of the pipes.
Want links to the full tutorials for building my raised garden beds and greenhouse?
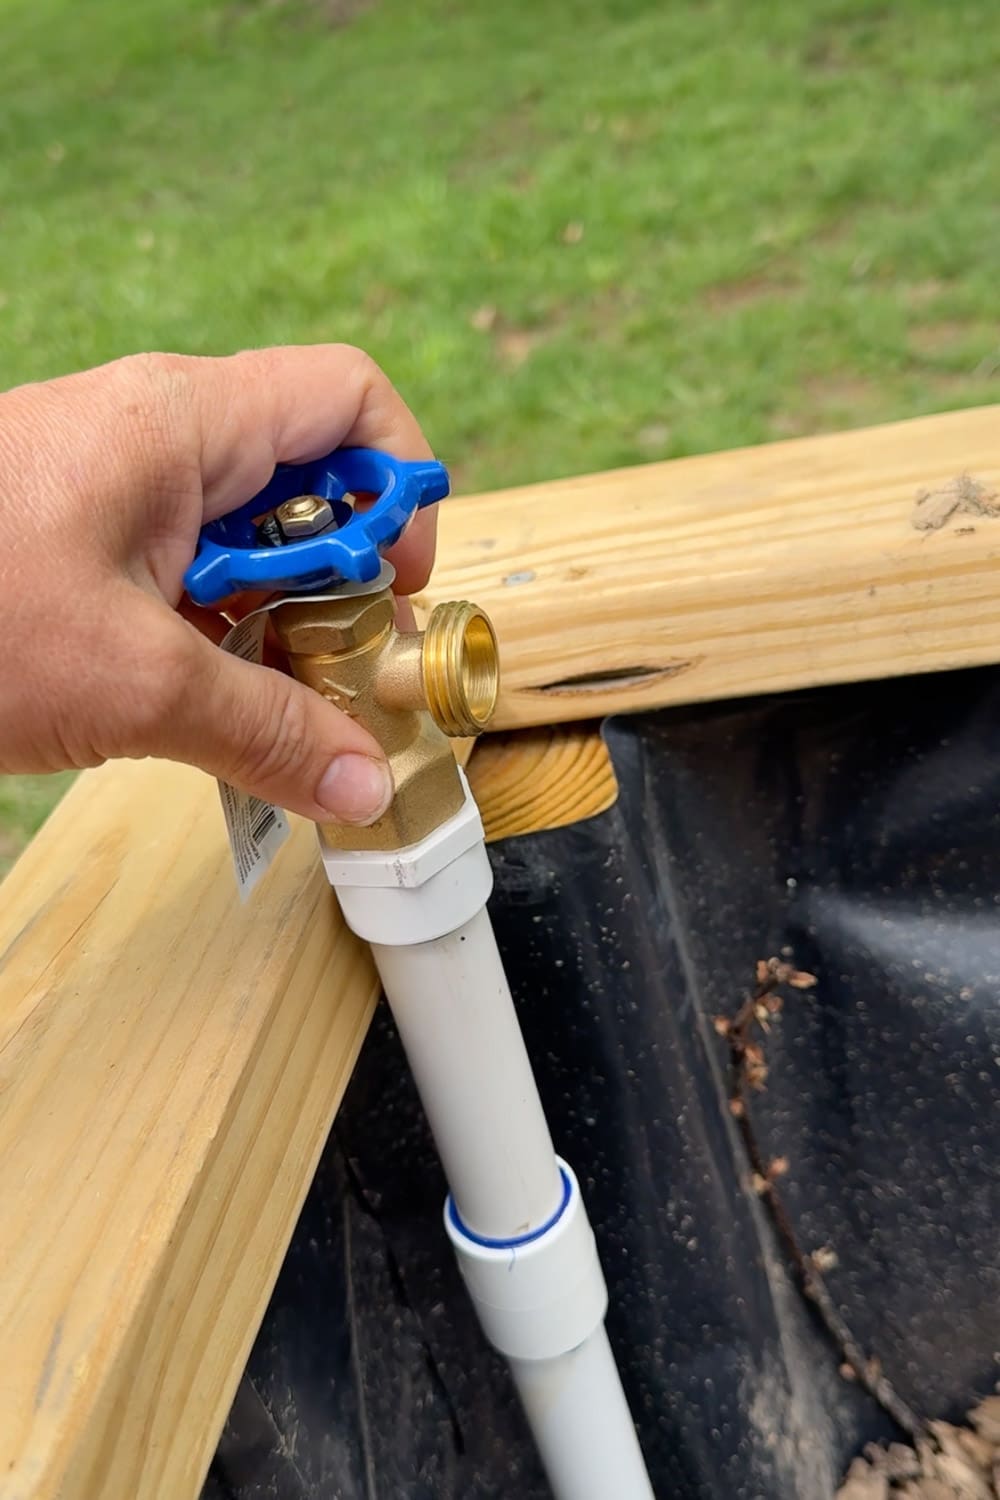
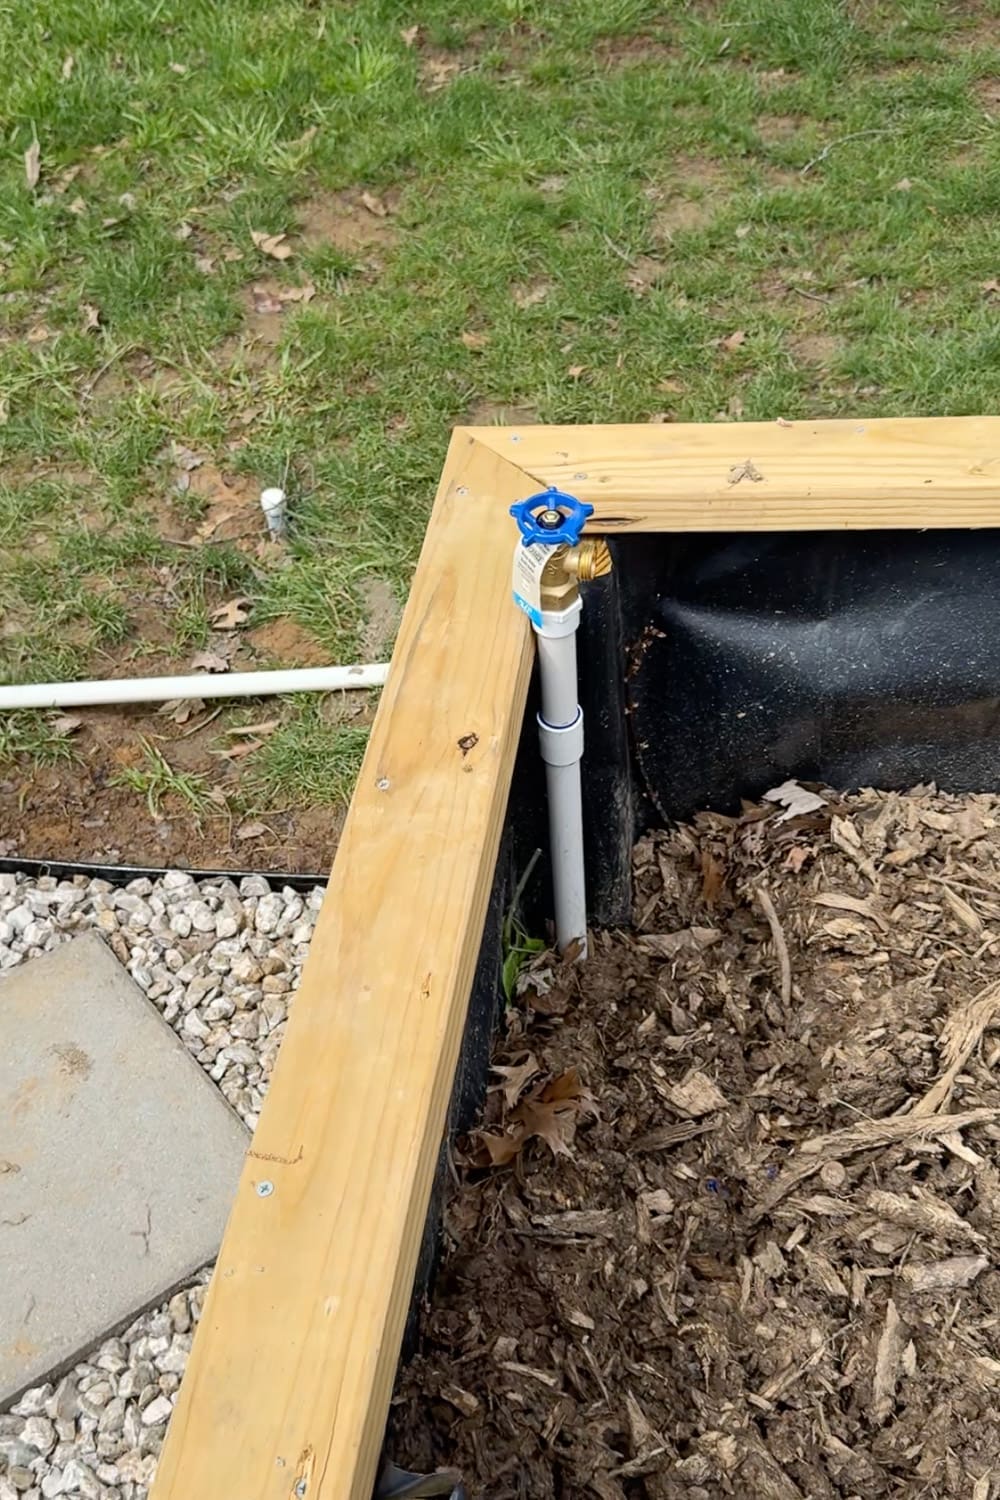
Step 10: Add the Brass Spigot Valves
Once the beds were fully built, it was time for the satisfying part: swapping out those temporary end caps for the real brass spigot valves.
Confession: We made our risers a little too short. Whoops. The fix was simple. We glued on a coupling and added a bit more PVC length. Once we had the proper height of riser, we attached a threaded adapter and screwed on a brass spigot valve. That valve is what lets us turn the water on and off for each bed individually.
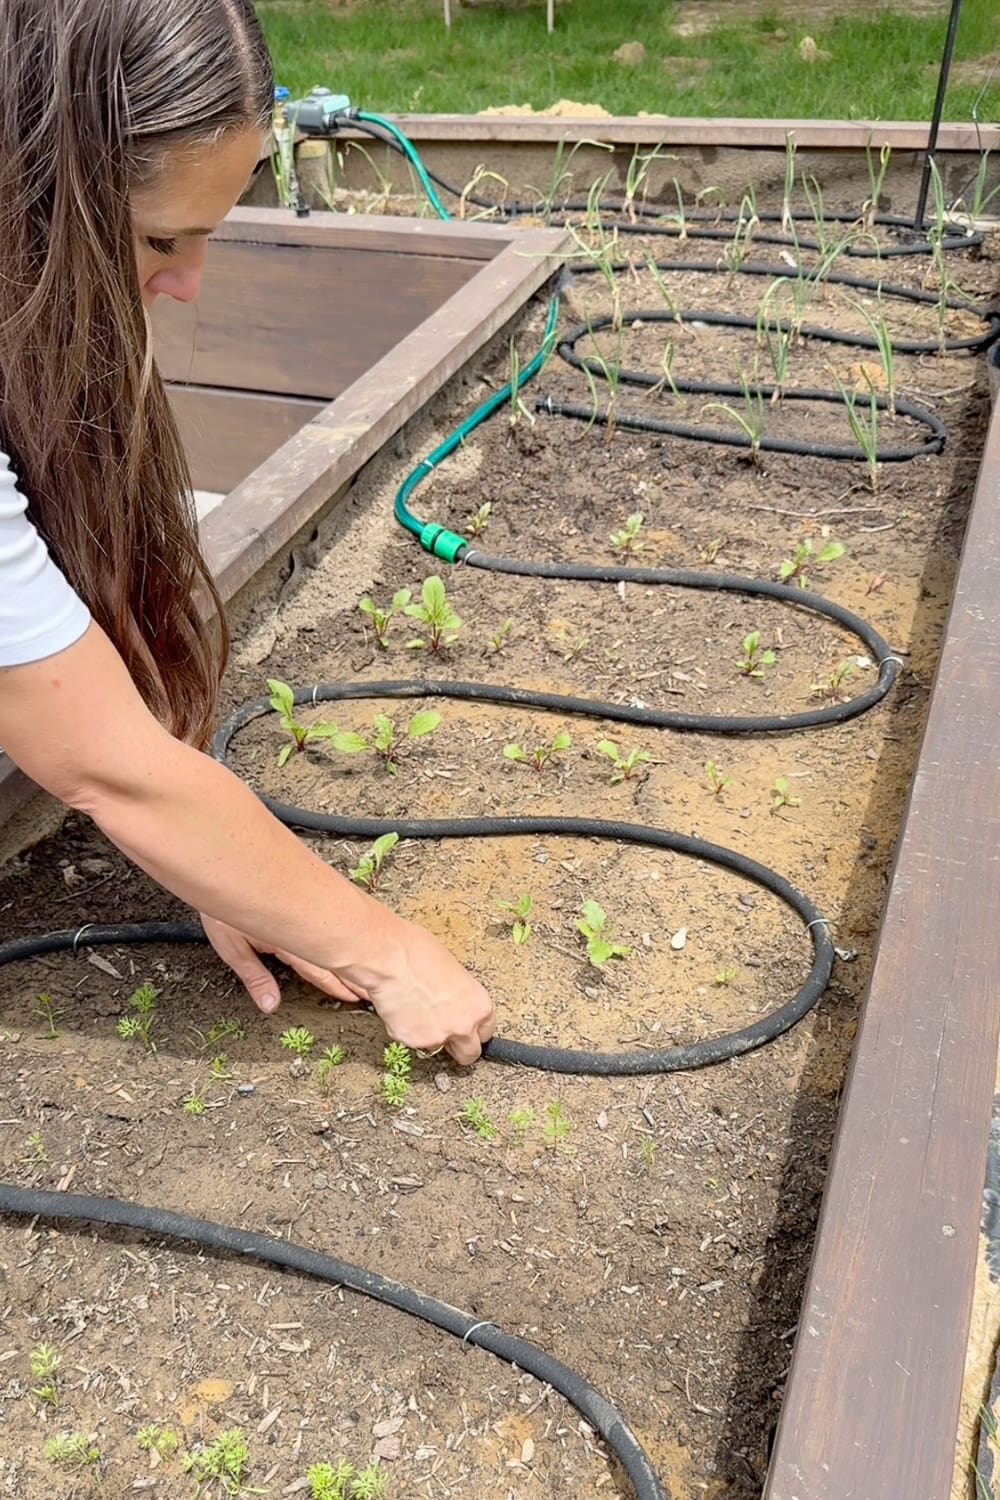
Step 10: Connect Soaker Hoses and Plant
The final piece to our DIY Irrigation System: each spigot will get a soaker hose connected to it, snaked through the bed wherever I want the water to go.
I love this setup because each bed is independent. If my asparagus needs more water than the herbs next to it, I can run that one spigot longer. If a bed is empty between plantings, I just leave its spigot off. Total control, zero hose-dragging. Want all the details? Check out Soaker Hoses for Raised Beds: Easy Watering Setup.

Was It Worth It?
A thousand percent yes. If you’re considering a DIY garden watering system for your raised beds, here’s my honest take: it’s a weekend of real work, but the payoff is years of easier gardening.
The morning watering routine is a breeze. I can walk down the row, turn on each spigot, come back later, and turn them off. That’s it. Once I upgrade the setup with these timers, I won’t have to do a thing. My plants are happier because they’re getting consistent water at the roots, and I’m happier because I’m not standing in the yard with a hose in my pajamas.
📌 Pin This DIY Irrigation System for Later
Loved this DIY irrigation system tutorial? Save this post to your gardening or DIY board on Pinterest so you can find it when you’re ready to build your own. And if you give this project a try, I’d love to see how yours turns out!
DIY Irrigation System FAQ
At a minimum, bury your pipe 6 inches deep. If you live somewhere with hard freezes, go deeper, below your local frost line, so the pipes don’t crack in winter. You can also drain the system before winter as an extra precaution.
For a simple raised bed setup like this with brass spigot valves and soaker hoses, you typically don’t need one. Soaker hoses are designed to handle standard household water pressure. If you’re adding drip emitters or a more complex drip irrigation system later, then yes, a pressure regulator becomes important.
Yes! You can add a hose timer at the house spigot where the system originates, which will turn the whole system on and off automatically. Just keep in mind that all your beds will get watered for the same amount of time. Use individual timers at each spigot if you want full control.
You can, but it’s a lot more work. Trenching around established beds means working carefully not to damage anything, and you’ll likely have to remove and replace some of your existing setup. If you’re starting from scratch, like we did, definitely do the watering system first.
