


DIY Paver Walkway: Diamond Pattern with Gravel


Updated July 13, 2026
If you’ve been looking for a way to tie your garden together with a beautiful, functional path, this DIY paver walkway is it. We built ours right in the middle of our raised garden beds, using square concrete pavers laid in a diamond checkerboard pattern with gravel in between. It’s eye-catching, budget-friendly, and honestly one of the most satisfying projects we’ve tackled in our backyard.
In this post, I’m walking you through exactly how we did it. Everything from prepping the base to locking the gravel in place at the end, so you’ll have all the info you need to build your own DIY paver walkway.
Watch How to Build a DIY Paver Walkway with Diamond Pattern and Gravel
Table of Contents
- Watch How to Build a DIY Paver Walkway with Diamond Pattern and Gravel
- Why We Chose a Diamond Pattern with Gravel
- What You’ll Need for a DIY Paver Walkway
- Step 1: Prep the Area for Your DIY Paver Walkway
- Step 2: Add and Level the Sand Base
- Step 3: Set Up Your String Lines
- Step 4: Screed and Smooth the Sand
- Step 5: Start Laying the Pavers
- Step 6: Cut Pavers to Fit the Edges
- Step 7: Install Landscape Edging
- Step 8: Fill in the DIY Paver Walkway Gaps with Gravel
- Step 9: Lock the Gravel in Place with Mulch Glue
- The Finished DIY Paver Walkway
- Tips to Make Your DIY Paver Walkway Last
- Ready for the Next Project? Build a Garden Arbor
- 📌 Save This DIY Paver Walkway for Later
- Frequently Asked Questions: DIY Paver Walkway
Why We Chose a Diamond Pattern with Gravel
Before we get into the how of building a DIY paver walkway, let me tell you why we love this design so much. The diamond checkerboard pattern has this timeless, custom look that feels so much more intentional than a standard paver path. The gravel between the pavers softens the whole thing, adds great texture, and helps with drainage so water doesn’t pool on the walkway.
It also happens to be way more affordable than laying wall-to-wall pavers, since you’re only using about half the stone. Win-win.
What You’ll Need for a DIY Paver Walkway
Here’s a quick list of the materials and tools we used for this project:
Materials:
- Square concrete pavers (we used 16″ x 16″)
- Paver base sand
- Gravel (we used 3/4″ crushed stone in a light gray/white color)
- Black plastic (for blocking weeds)
- Landscape edging
- Mulch glue (to lock the gravel in place)
Tools:
- Utility cart
- Transfer shovel
- Stiff rake
- Tape measure
- String line and marker stakes
- Scrap 2×6 and 2 – 1/2-inch PVC pipes (for screeding sand)
- Carpenter’s square
- Rubber mallet
- Angle grinder with diamond blade (for cutting pavers)
- Hammer
- Pump sprayer
- Safety glasses, hearing protection, and work gloves
Step 1: Prep the Area for Your DIY Paver Walkway
We started by clearing out the area where we wanted to place our garden. We leveled the ground, placed our irrigation pipes, and then laid down this heavy-duty, black plastic across the entire area. The plastic keeps weeds from growing up through your base and gives you a clean slate for placing the sand in the next step.
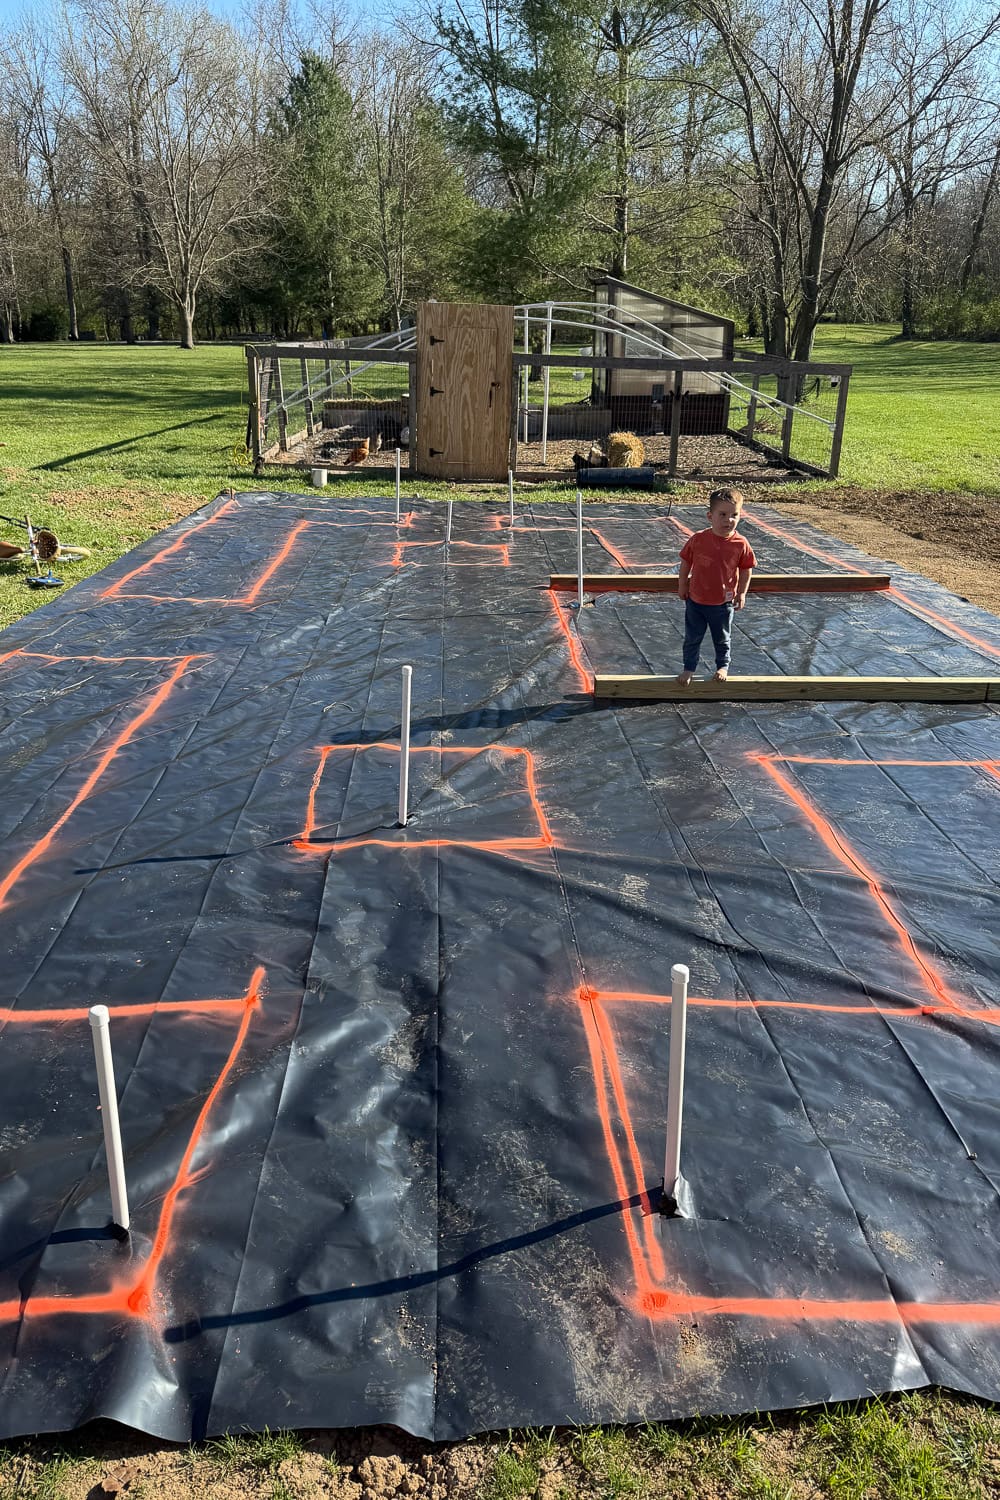
Once the base for the garden was set, we constructed several raised garden beds and built a greenhouse. With all of that in place, it was finally time to install the DIY paver walkway throughout the footprint of the garden.
Here are links to all the garden projects that got us to this point, if you want to learn more:
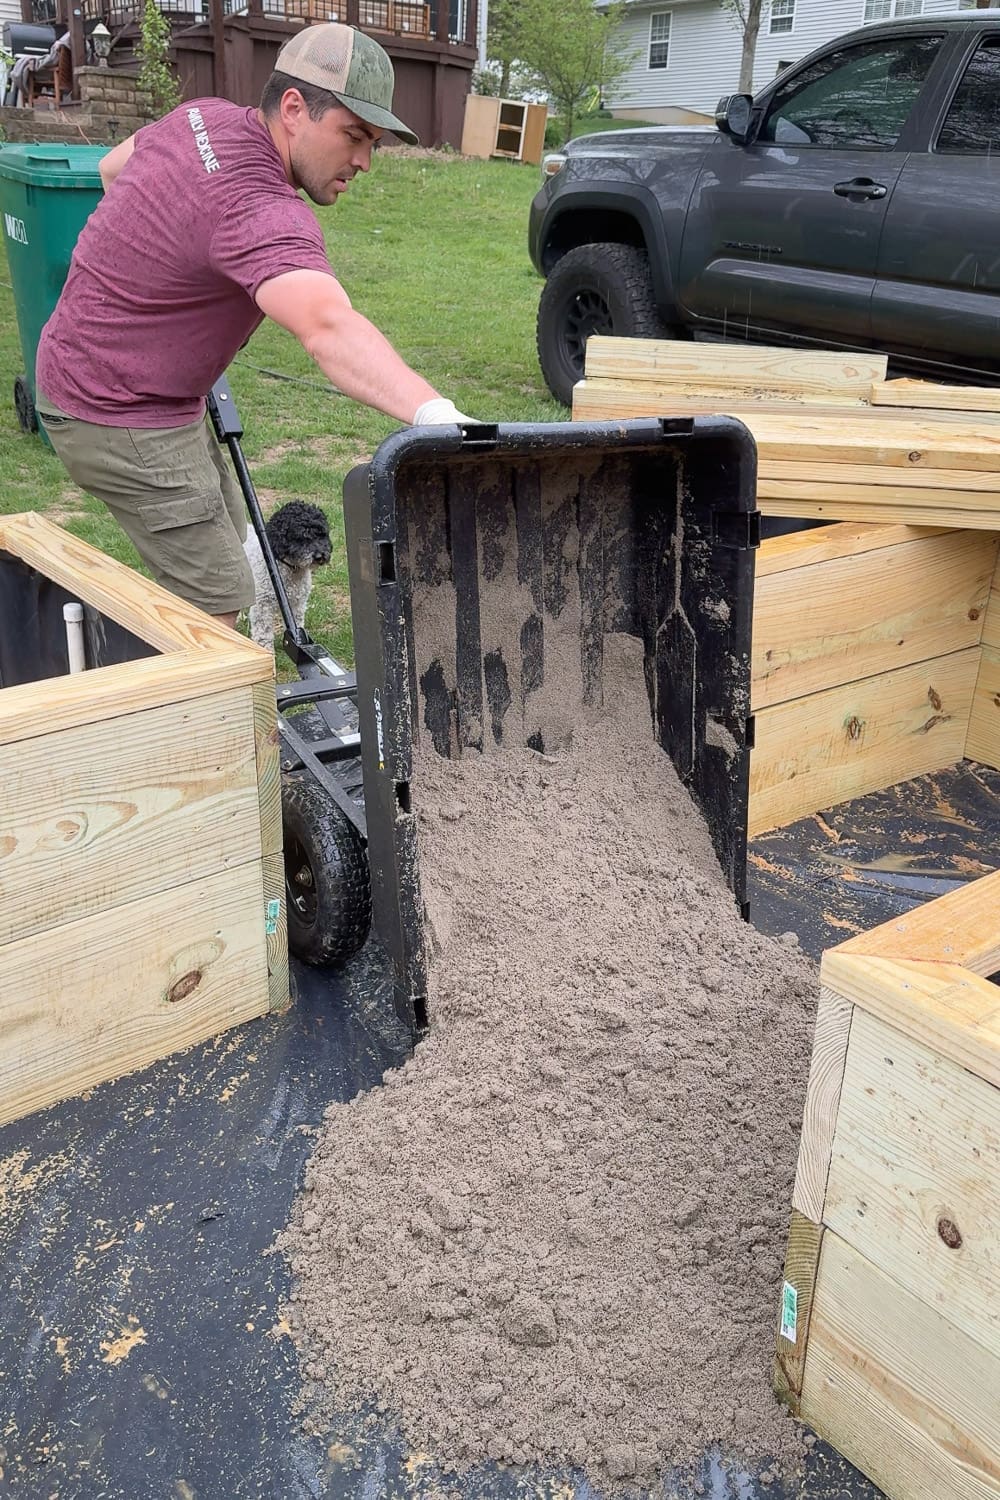
Step 2: Add and Level the Sand Base
Next up, the sand base. We dumped paver base sand across the plastic using this awesome dump-style utility cart, which made moving a lot of sand a whole lot easier.
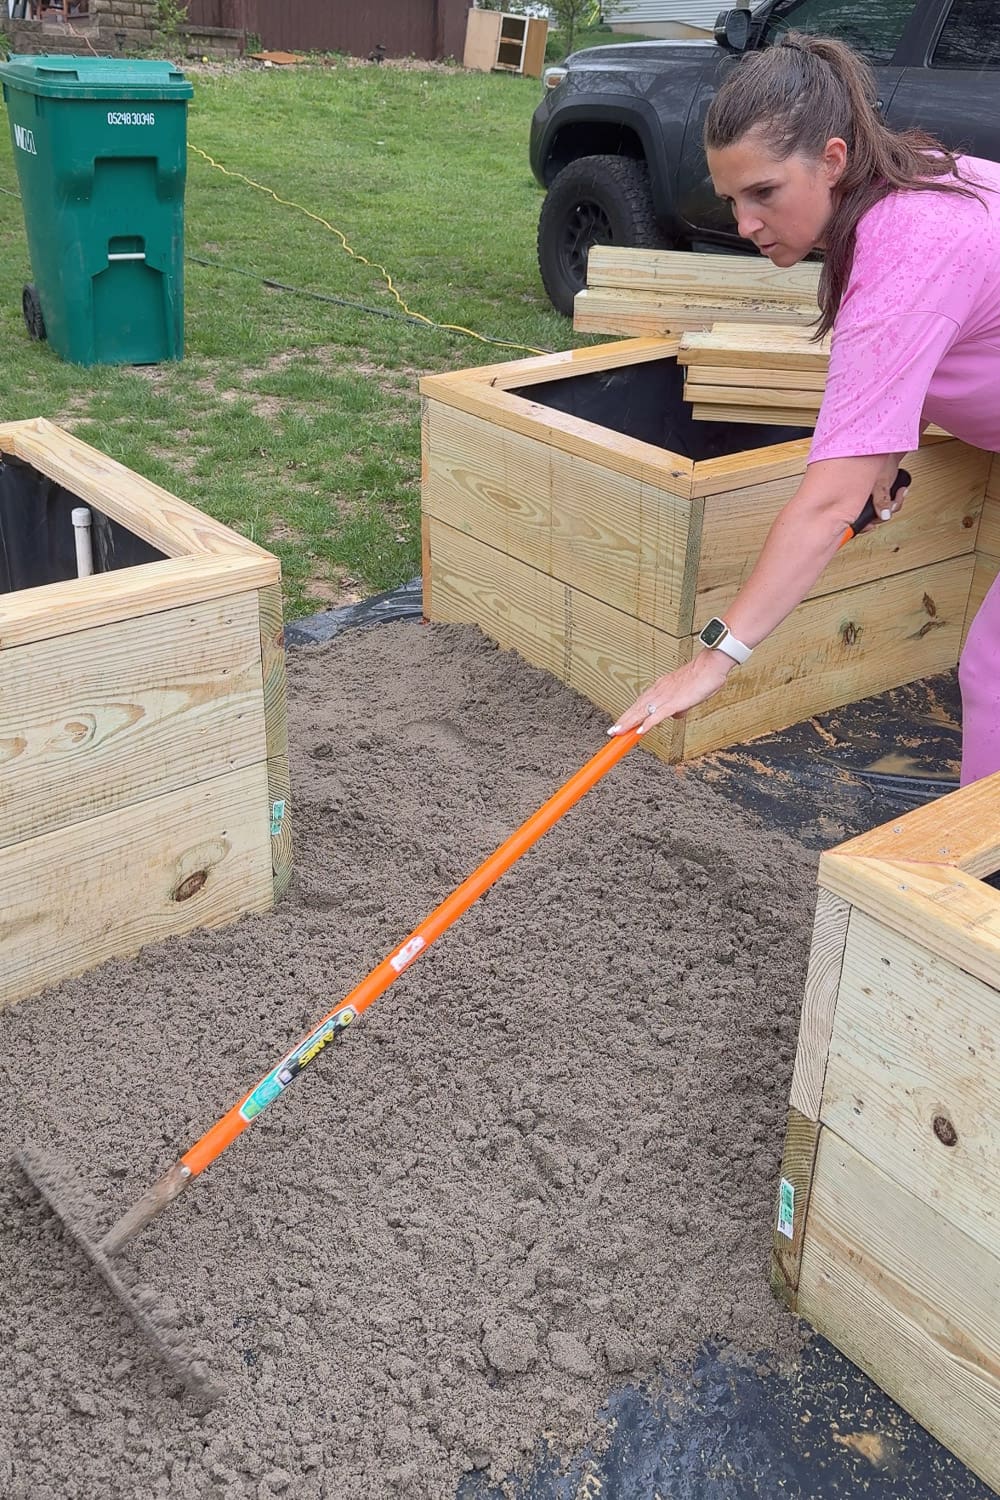
Once it was dumped, we raked it out to spread it evenly across the entire area. You want about a 1-2 inch layer of sand as your base.
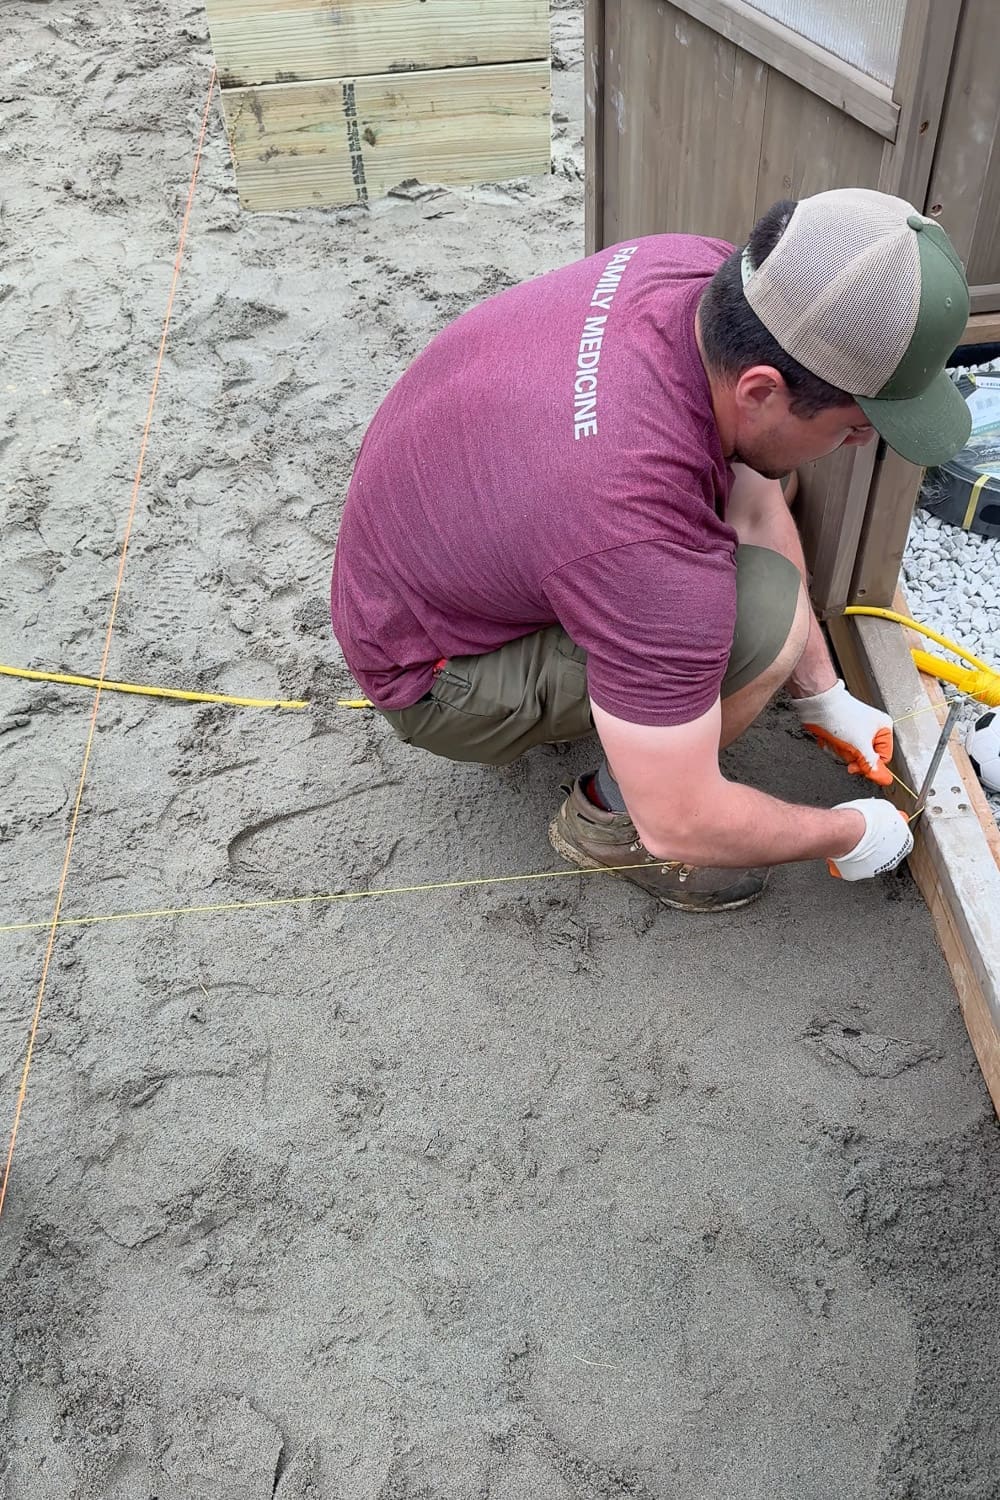
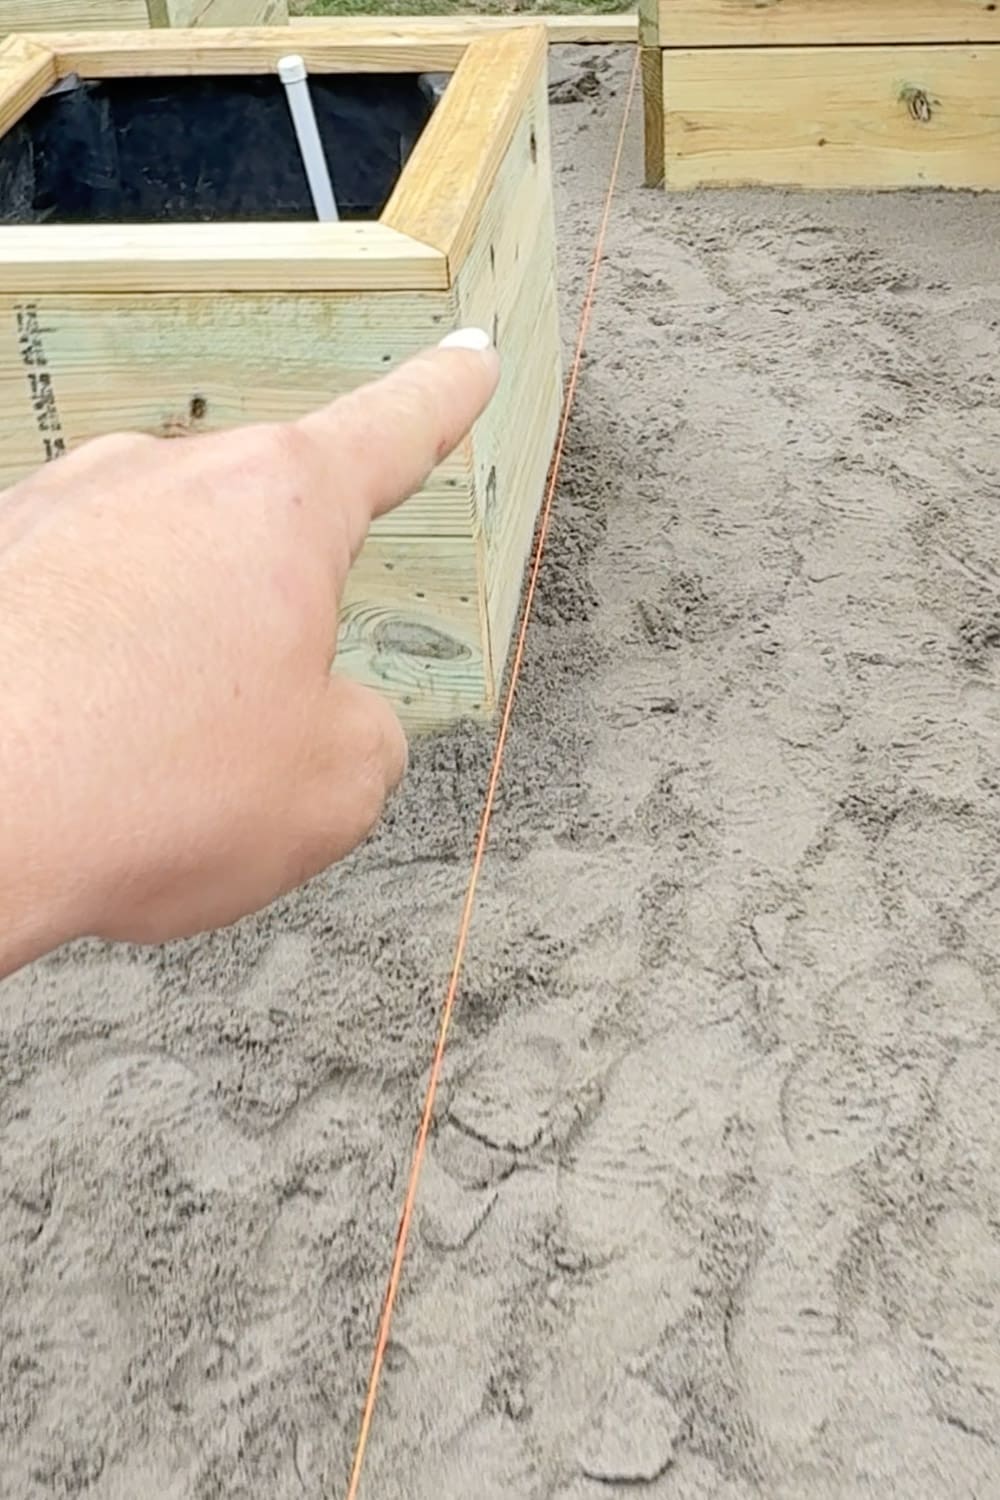
Step 3: Set Up Your String Lines
Before placing a single paver, we wanted to make sure the pattern would line up perfectly with the greenhouse and the main entrance. So we ran two string lines, one from the center of the greenhouse to the main entrance, and another running perpendicular to it. The two strings intersect at a perfect 90° angle, and that intersection is the sweet spot where your very first paver goes. Getting this step right is the key to keeping your whole diamond pattern square from start to finish.
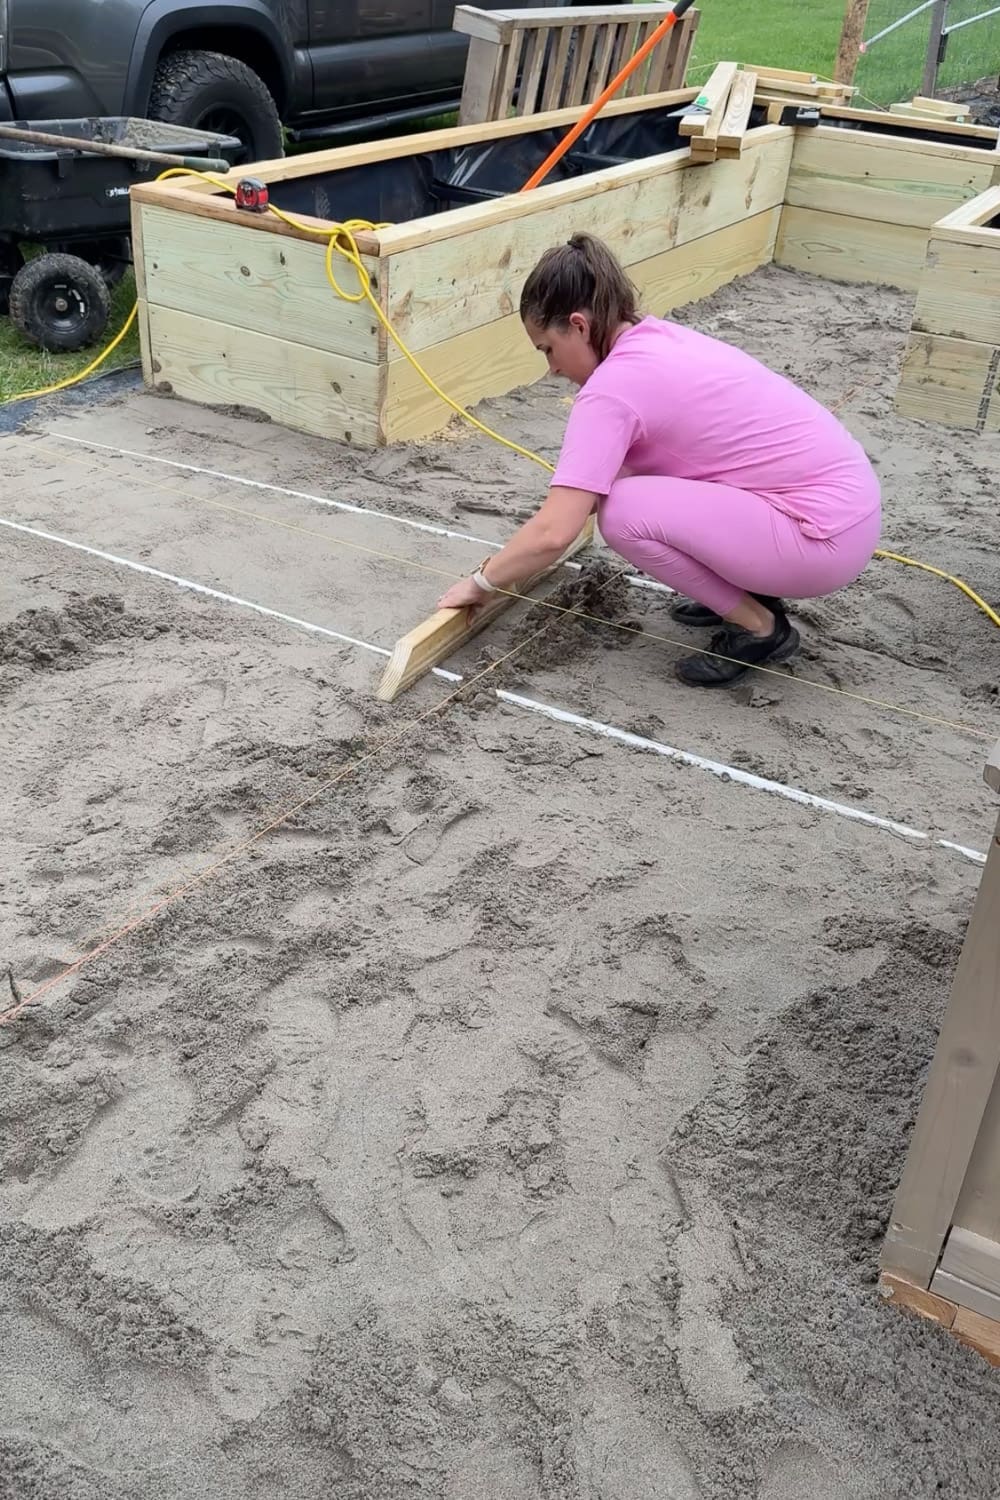
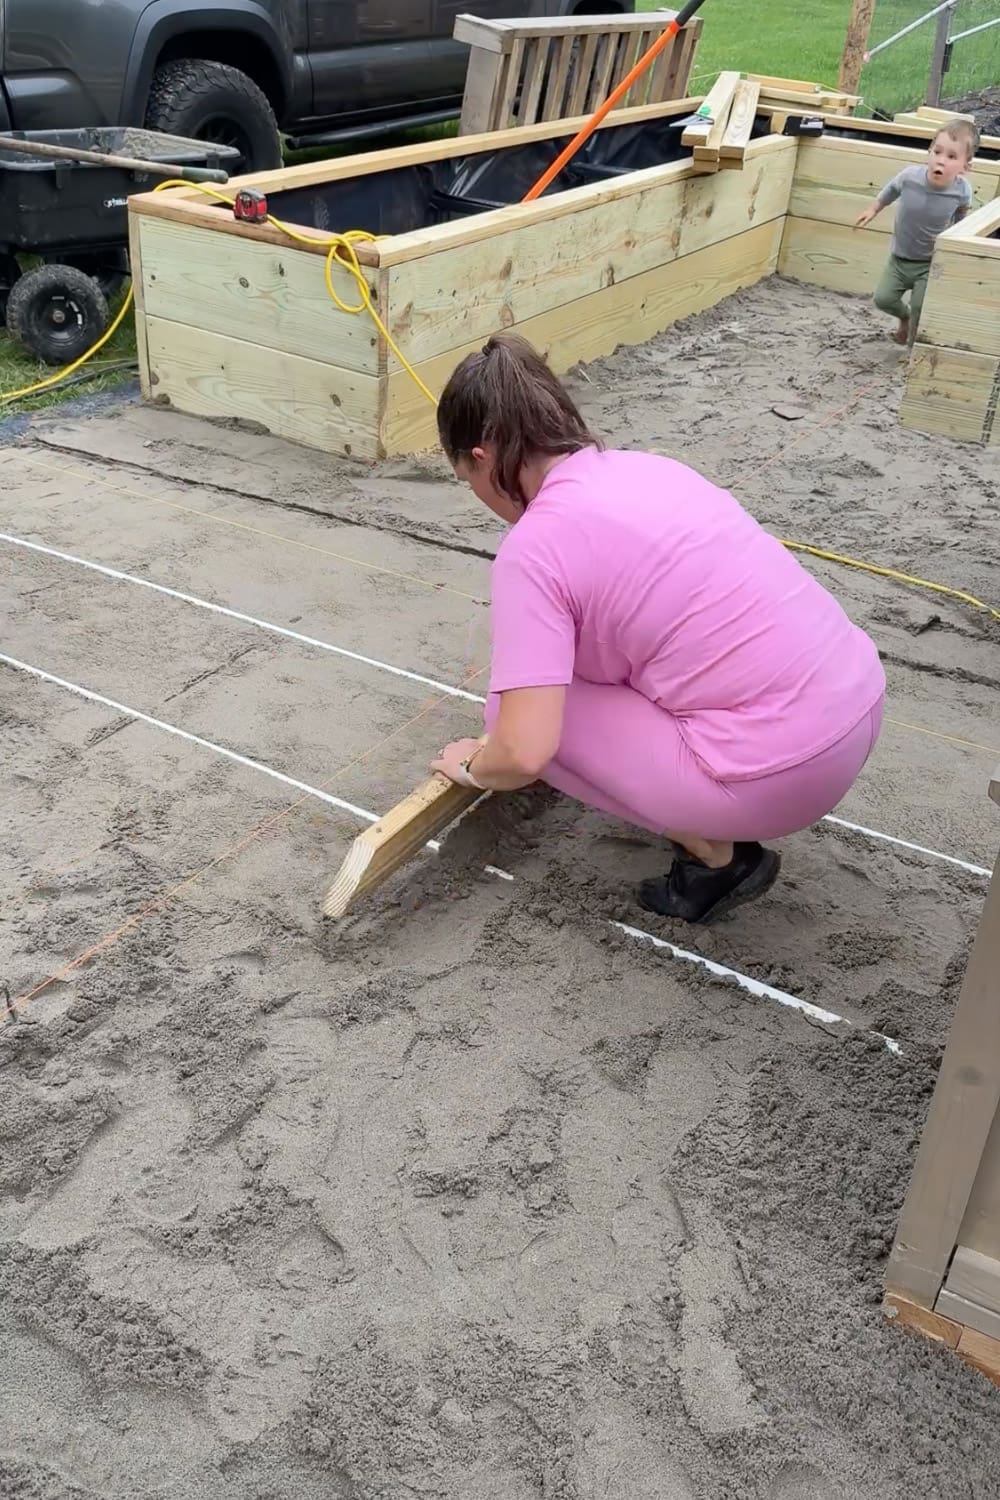
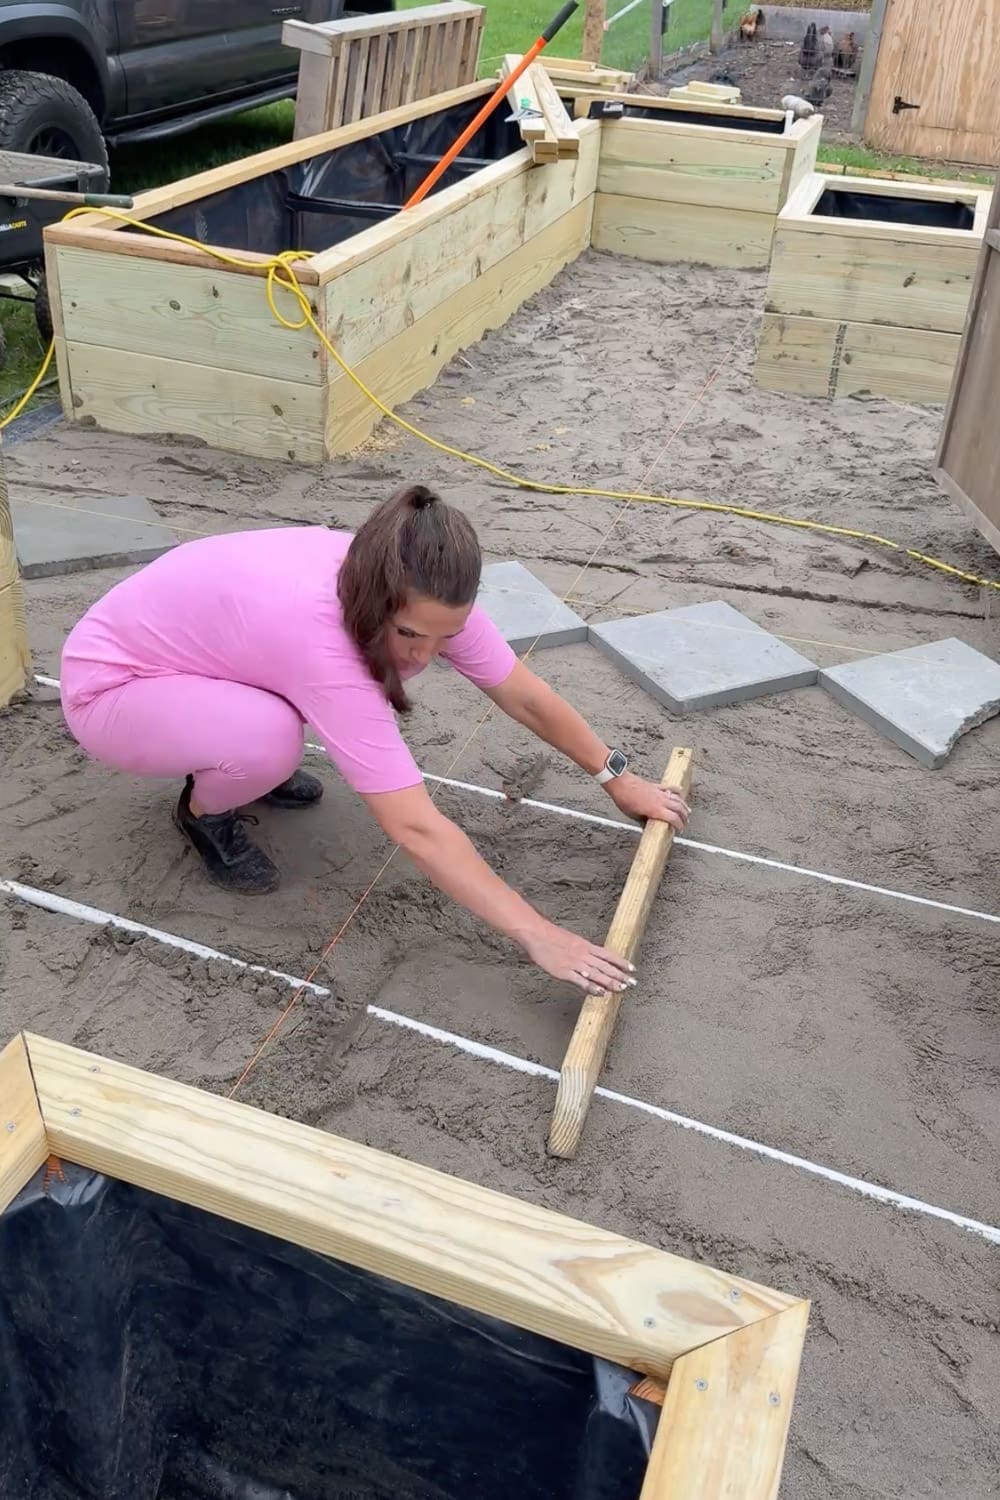
Step 4: Screed and Smooth the Sand
With the string lines in place, it’s time for screeding the sand base. Here’s how it works: I laid down two 1/2-inch PVC pipes as rails, then pulled a scrap piece of wood across them to drag the sand perfectly flat and level. Once that section was smooth, I moved one of the pipes over and repeated the process, working my way around the whole walkway.
This screeding step is what gives your pavers a perfectly smooth surface to sit on, so don’t rush it. If you spot any low areas or dips, just add a little more sand and screed again until everything is smooth.
And don’t stress about the small indents left behind when you lift the PVC pipes out. They smooth right out by hand before you lay your pavers.
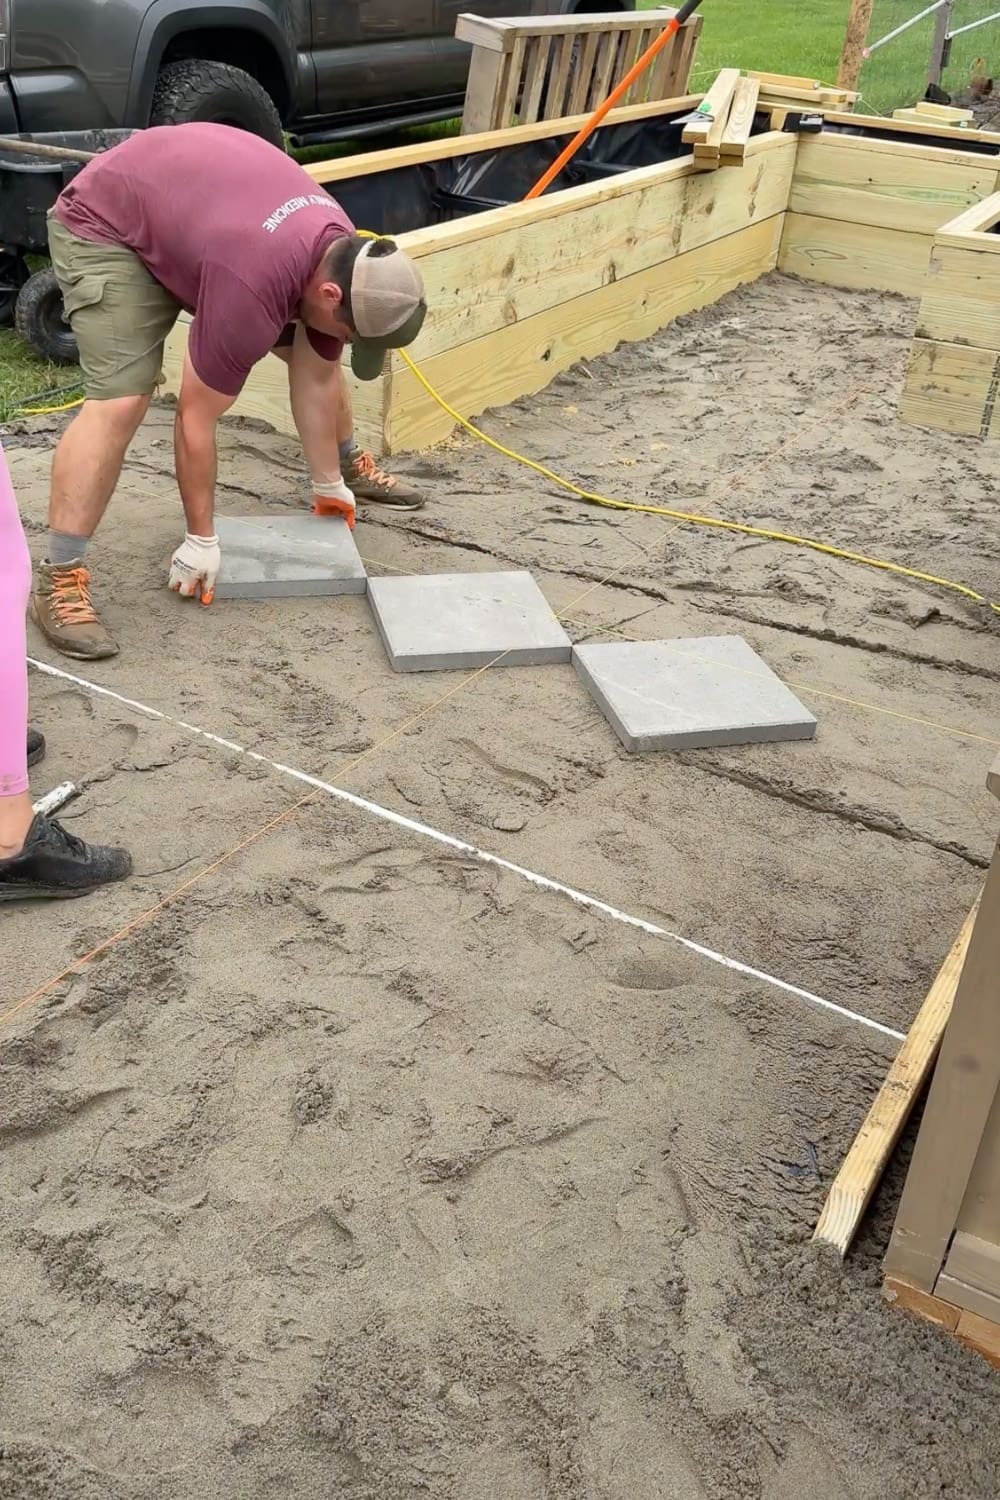
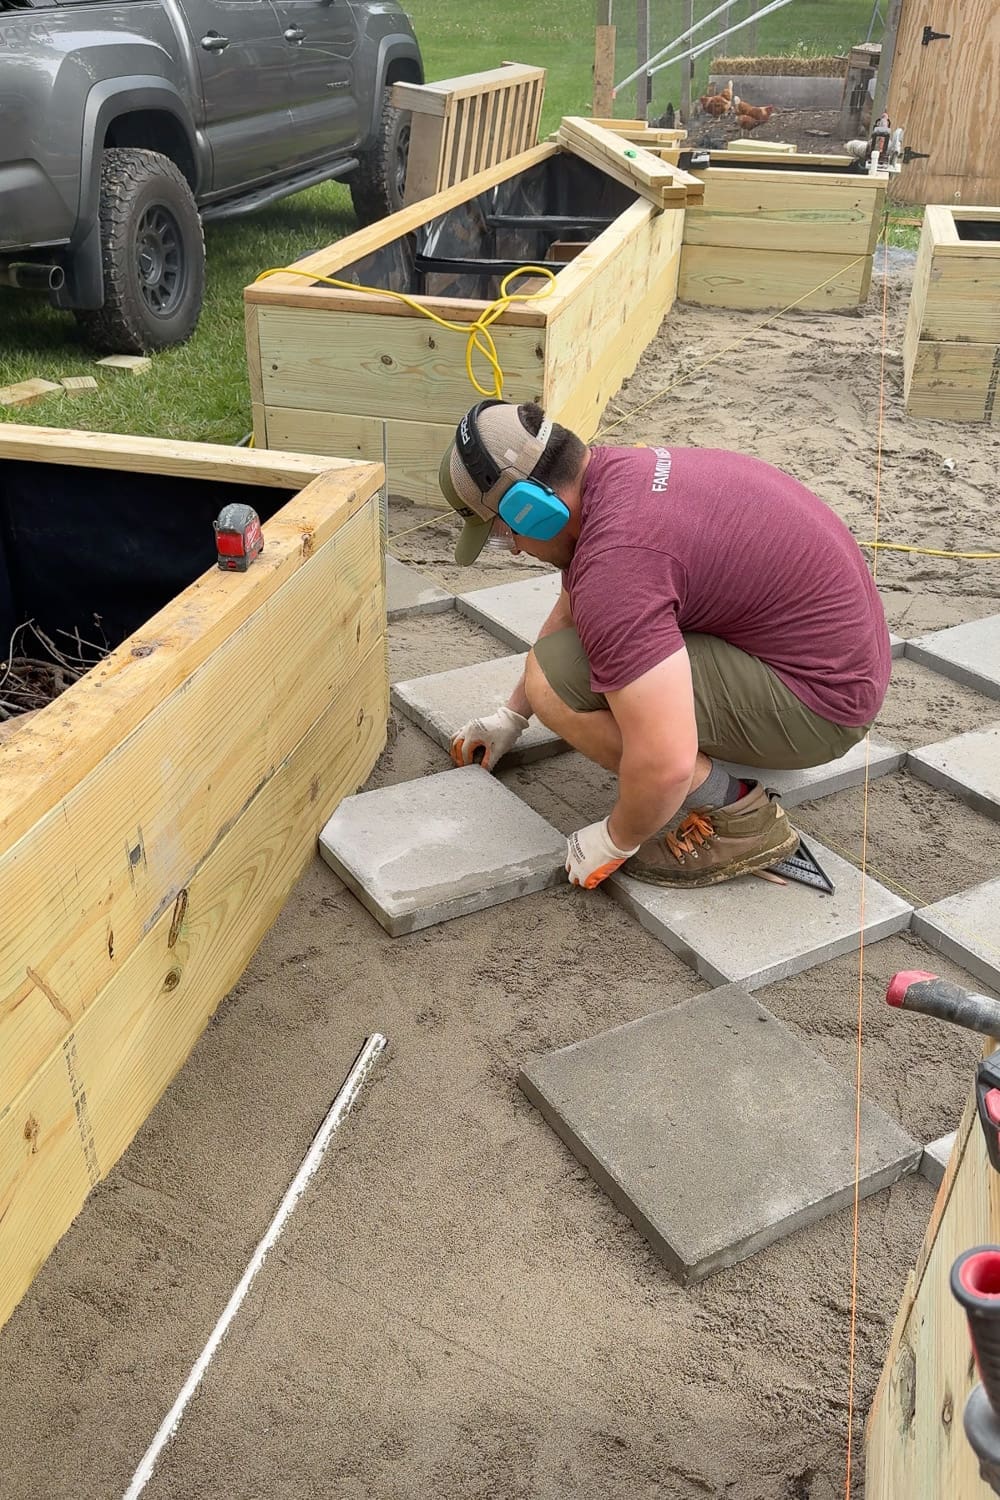
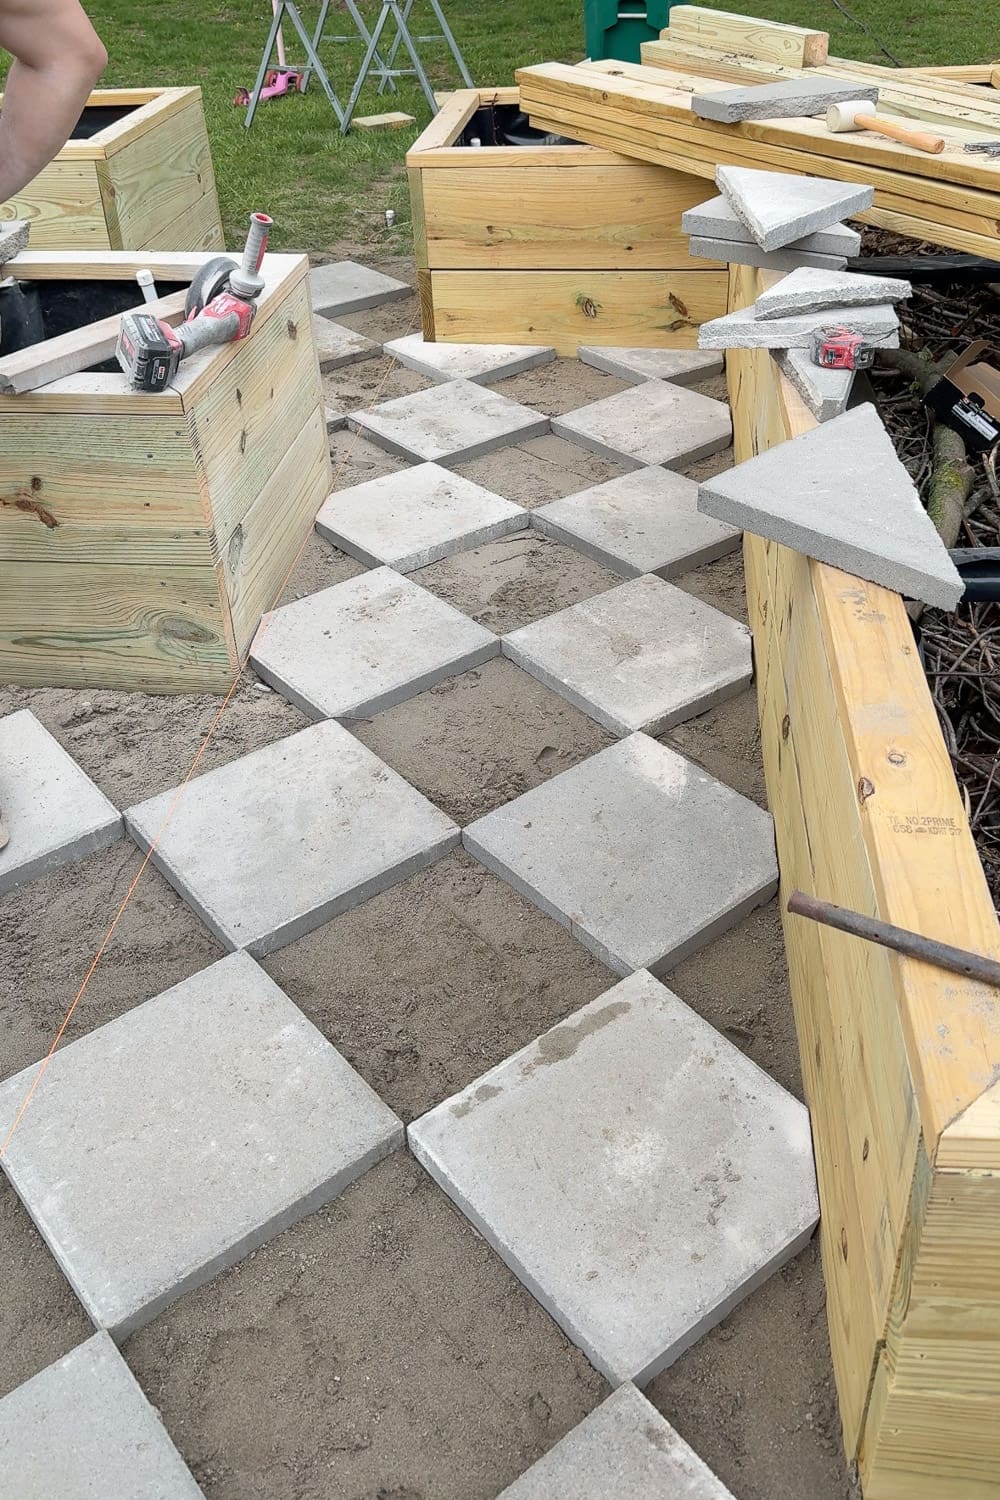
Step 5: Start Laying the Pavers
Now for the fun part, laying the pavers! We started right in the center of our garden entrance, placing each square paver on the sand, orienting them like a diamond. This first row follows that string we set from the greenhouse to the main entrance, keeping them in line and centered.
A few tips that helped us:
- Use a carpenter’s square and tape measure to make sure each paver is perfectly in line
- Tap the pavers down gently with a rubber mallet so they settle into the sand
- Step back every few pavers to check that the pattern is looking straight
Once that first row was down, the rest was pretty much rinse and repeat. I worked my way across the garden, screeding the sand while my husband, Stuart, followed right behind me, laying the pavers and keeping everything aligned with that first row. Having one person screeding and another placing pavers made the whole process go so much faster.

Step 6: Cut Pavers to Fit the Edges
Here’s where things get a little trickier. Because our walkway tucks right up against the raised garden beds, we had to cut some pavers on an angle to fit the edges cleanly.
How to cut pavers:
- Mark your cut line on the paver
- Use an angle grinder with a diamond blade to score and cut along the line
- After scoring the cut line with the angle grinder, use a hammer to break off the portion of the paver you need removed
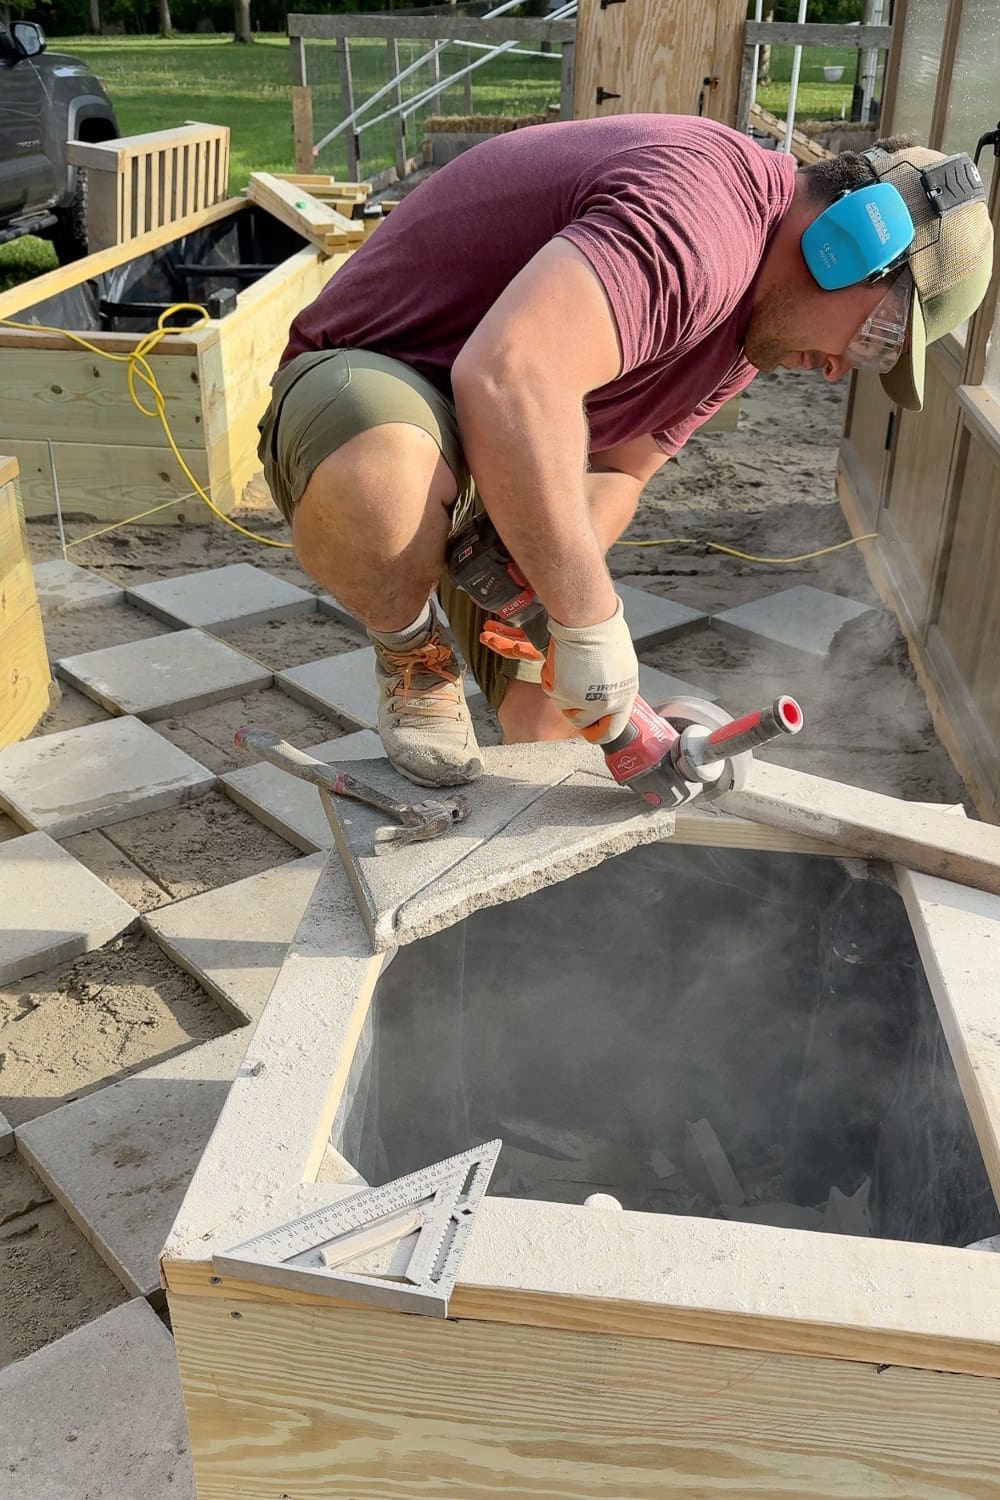
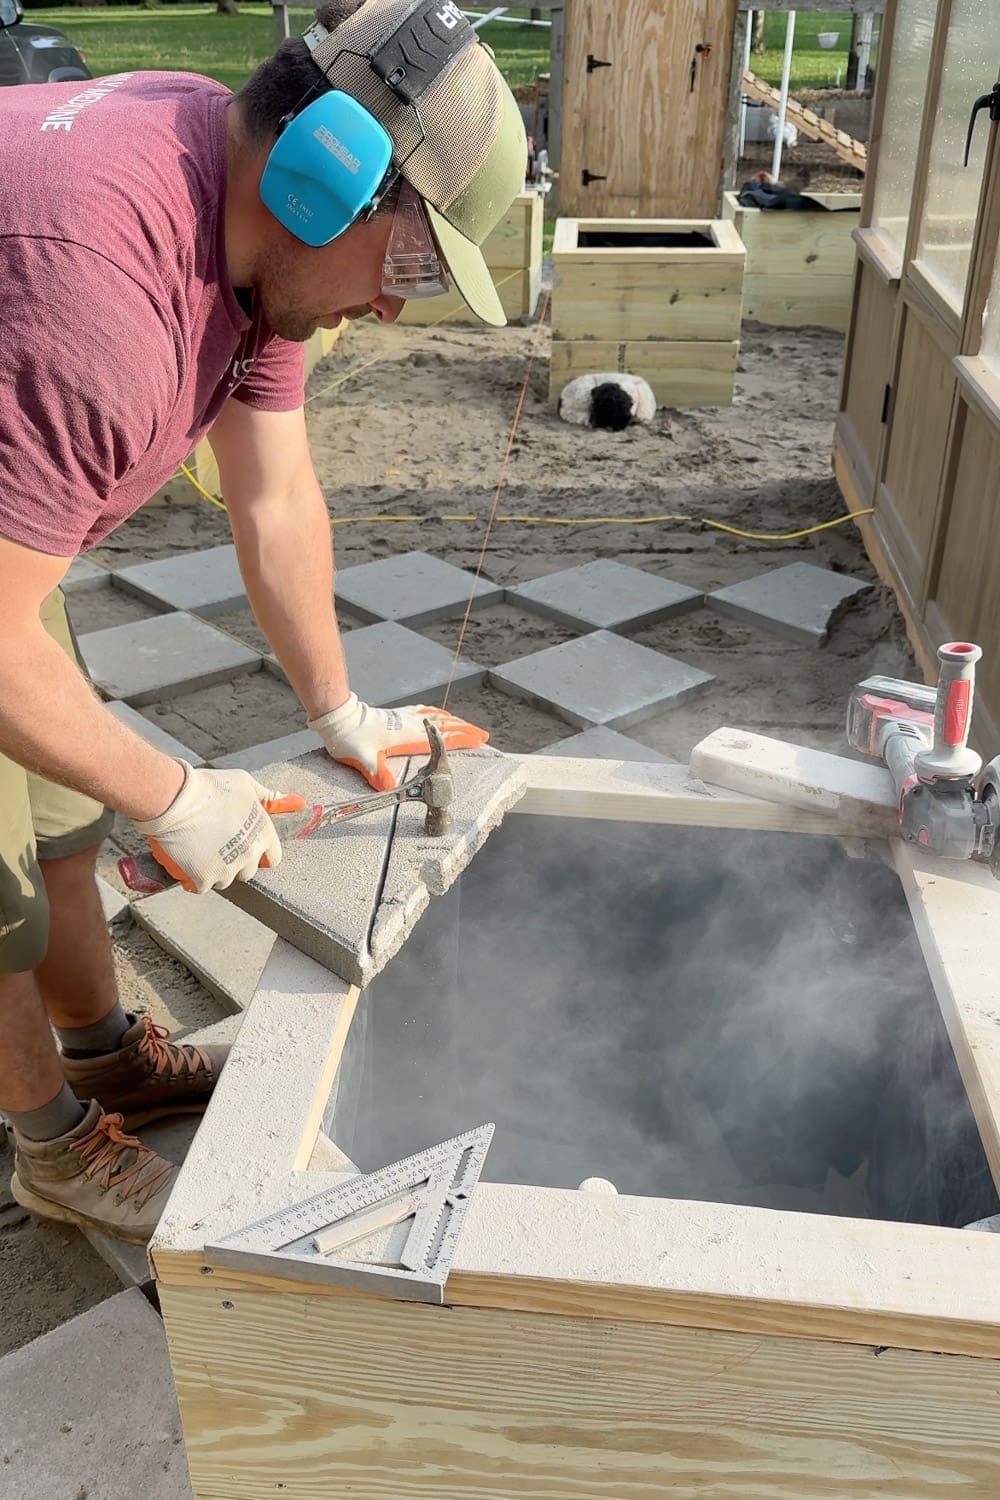
Some cuts are easy, some are tricky, like this corner one, but you can do it! And it’s so satisfying to set those perfectly cut pavers in place and see your DIY paver walkway come to life.

Safety first! Always wear safety glasses, hearing protection, and work gloves when cutting pavers!
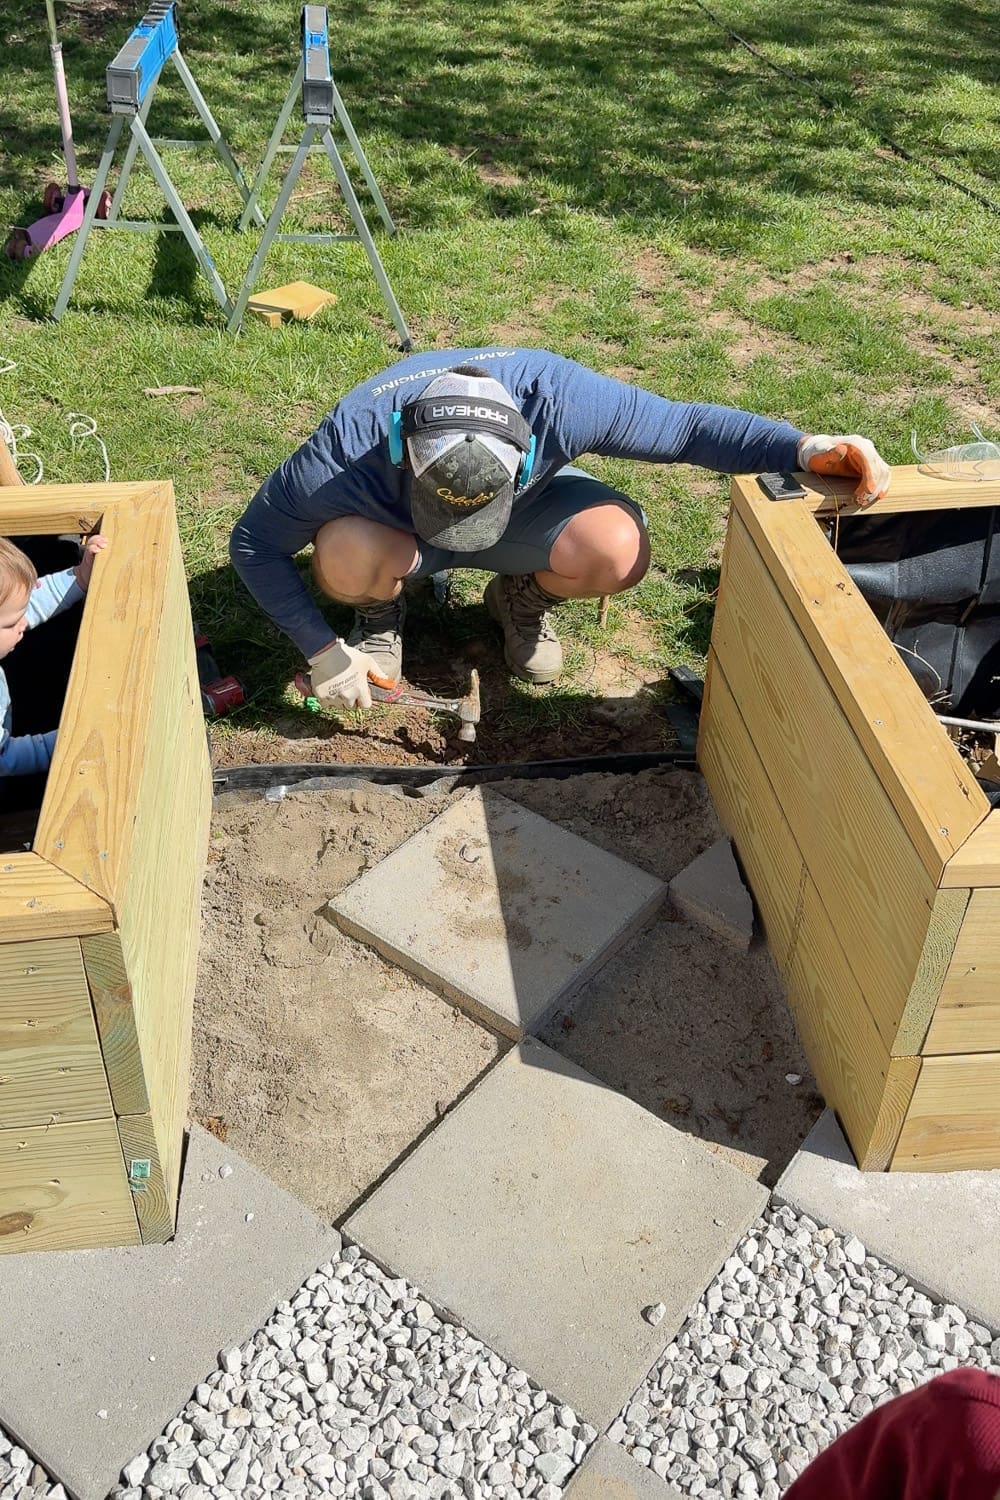
Step 7: Install Landscape Edging
Once all the pavers were in place, we installed landscape edging on the open edges of the walkway. This is another step I’d strongly recommend not skipping.
The edging does two important things:
- Keeps your gravel from migrating out into the grass
- Keeps the whole walkway locked in place so nothing shifts over time
We hammered the edging down into the soil along the edge of the walkway for a clean, finished border.
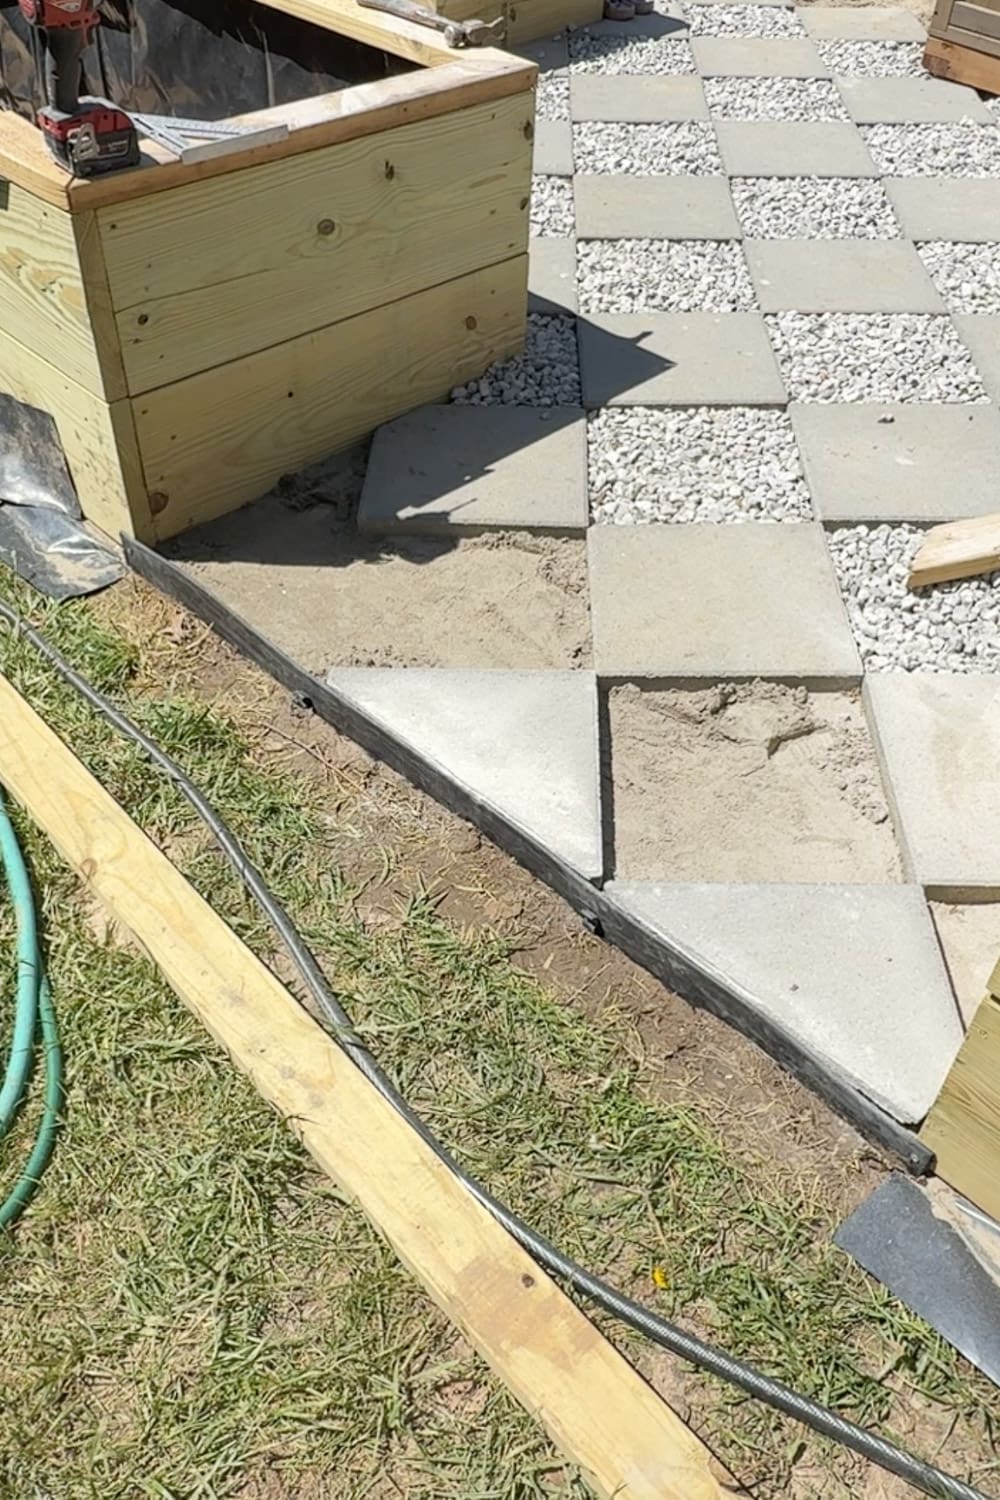
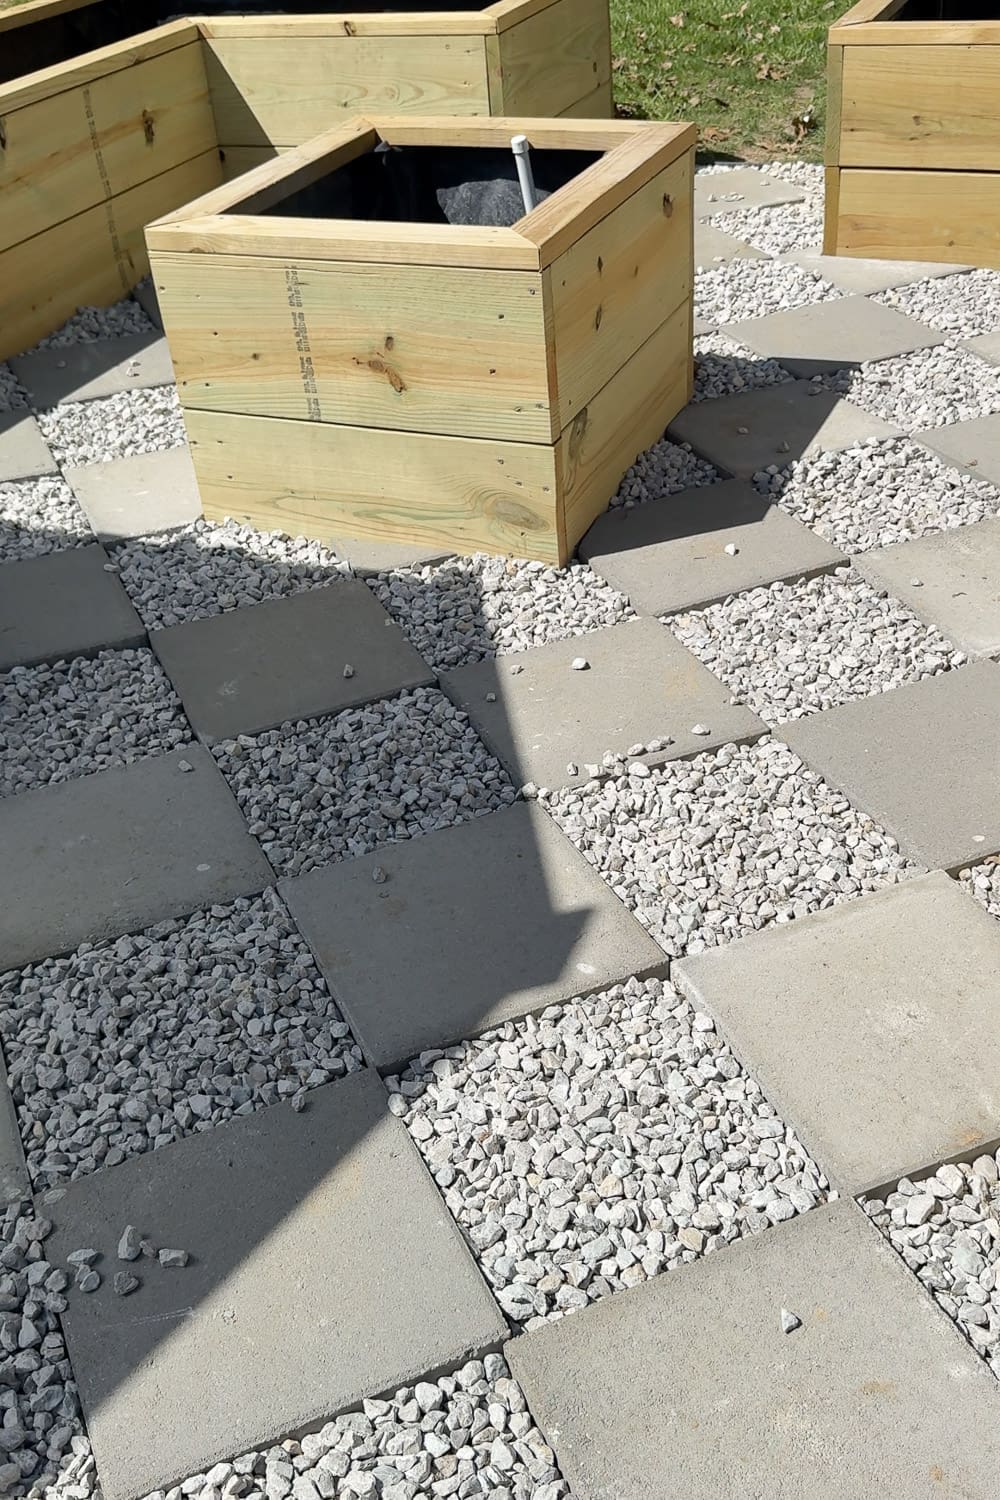
Step 8: Fill in the DIY Paver Walkway Gaps with Gravel
Now the walkway really starts to come to life. We shoveled gravel into all the empty spaces between the pavers. Pouring gravel with a bucket also worked well, especially for the harder-to-reach spots.
After filling, use your hands or a small broom to spread the gravel evenly and brush off any pieces that ended up on top of the pavers. The contrast between the pavers and the gravel is stunning at this stage.
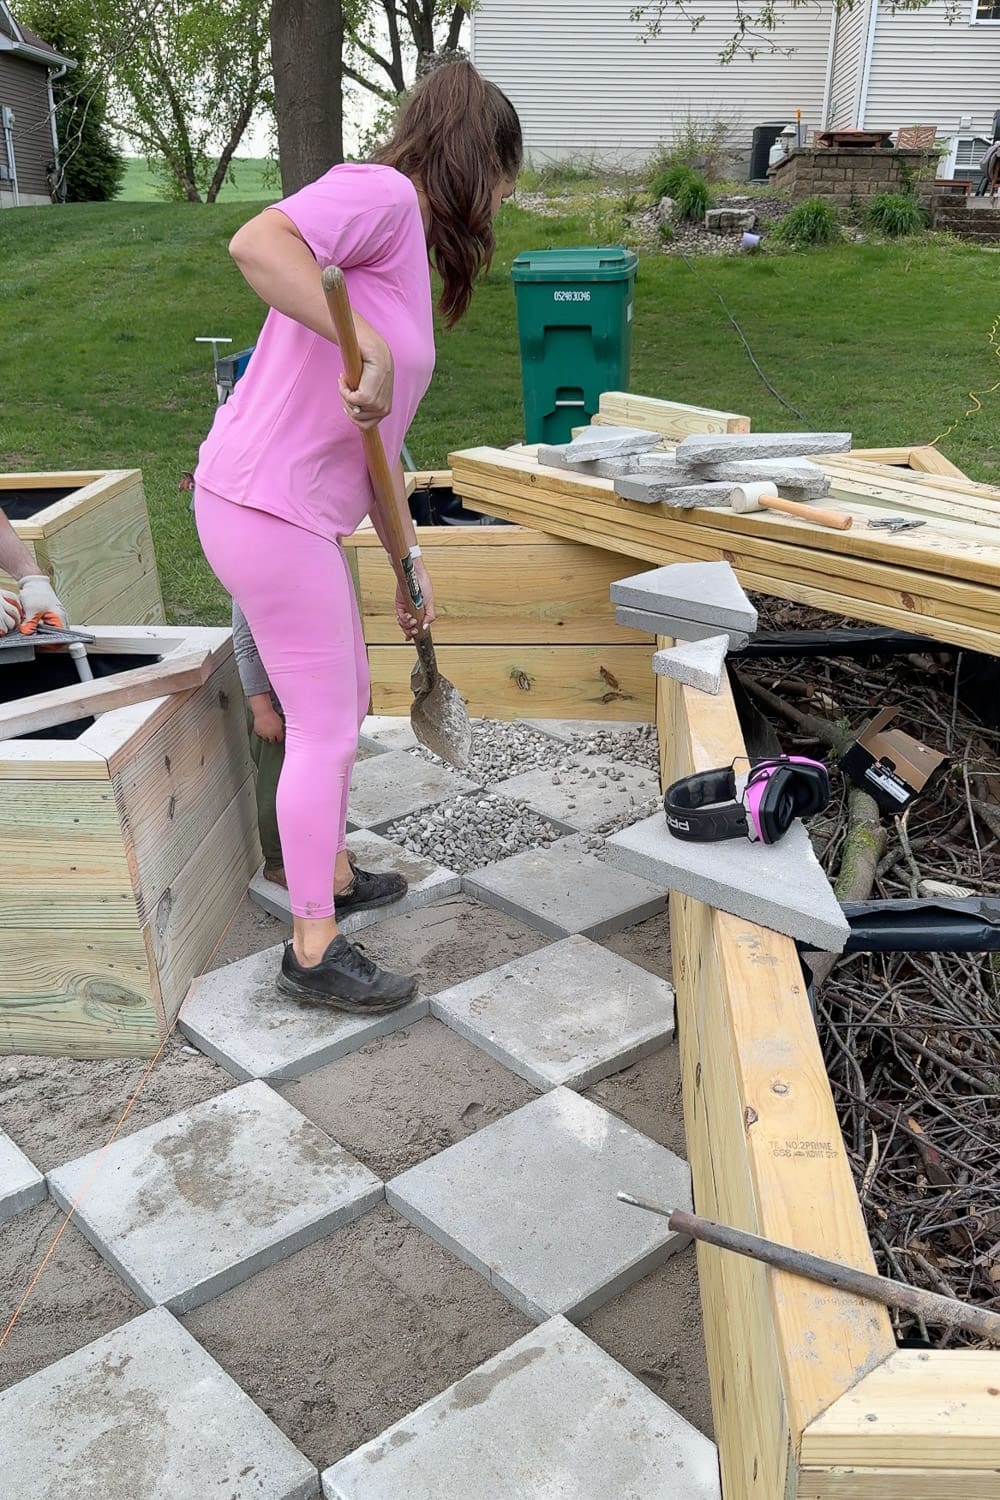
This is the moment the whole project really came together for me. The DIY paver walkway looked absolutely gorgeous, but we noticed one issue right away. The gravel would not stay put. Every step kicked it out of the gaps and onto the pavers. The fix? Coming up in the final step.
Step 9: Lock the Gravel in Place with Mulch Glue
This isn’t necessary, but it’s a total game-changer. We used this mulch glue to lock the gravel in place between the pavers.
Why bother? Because without it, gravel gets kicked around when you walk on it. Over time, it migrates out of the gaps, gets stuck in shoe treads, and ends up in your garden beds or your grass. Mulch glue sprays on clear and dries to hold the gravel together, while still letting water drain through. This stuff is magic!
How to apply mulch glue:
- Fill a pump sprayer with the mulch glue
- Spray evenly across all the gravel areas
- Let it cure according to the product’s instructions (usually 24 hours)
Make sure you spray on a dry day with no rain in the forecast for at least 24 hours.

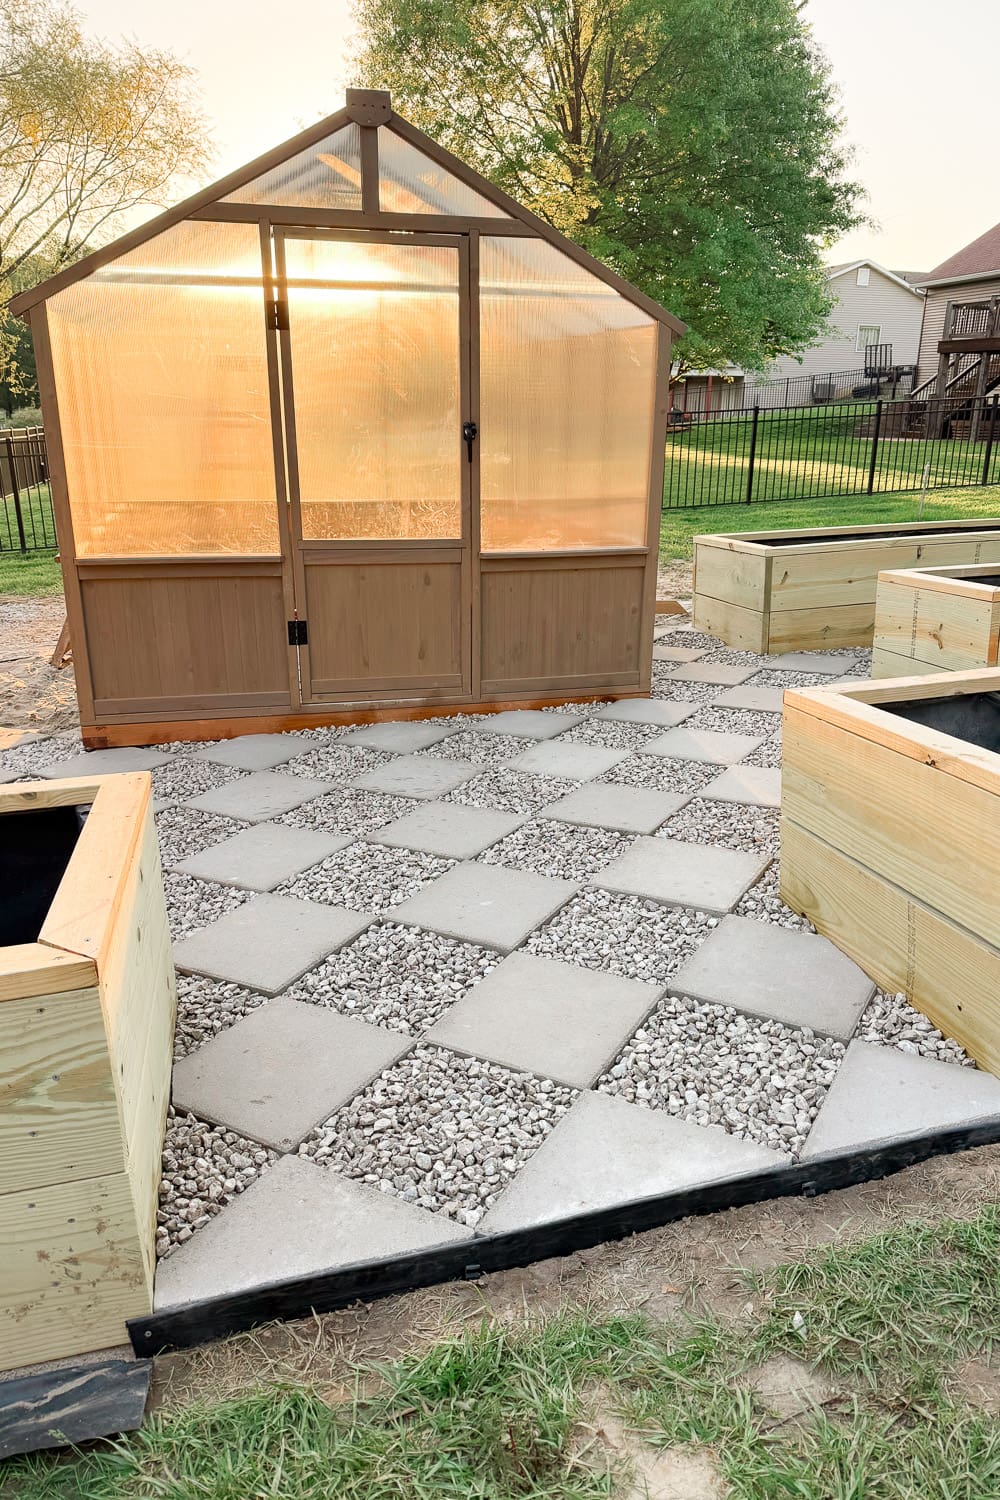
The Finished DIY Paver Walkway
And that’s it! You’ve got a gorgeous, durable DIY paver walkway with a diamond checkerboard pattern and gravel between the pavers. Ours ties the whole garden area together and honestly looks way more expensive than it actually was.
The combination of the warm wood garden boxes, gorgeous greenhouse, the gray pavers, and the light gravel against the sunset? Total heart eyes.
Tips to Make Your DIY Paver Walkway Last
A few final tips to keep your walkway looking great for years:
- Sweep regularly to keep debris from settling in the gaps
- Reapply mulch glue every year or two as needed (check your product’s instructions)
- Pull any weeds that sneak through right away
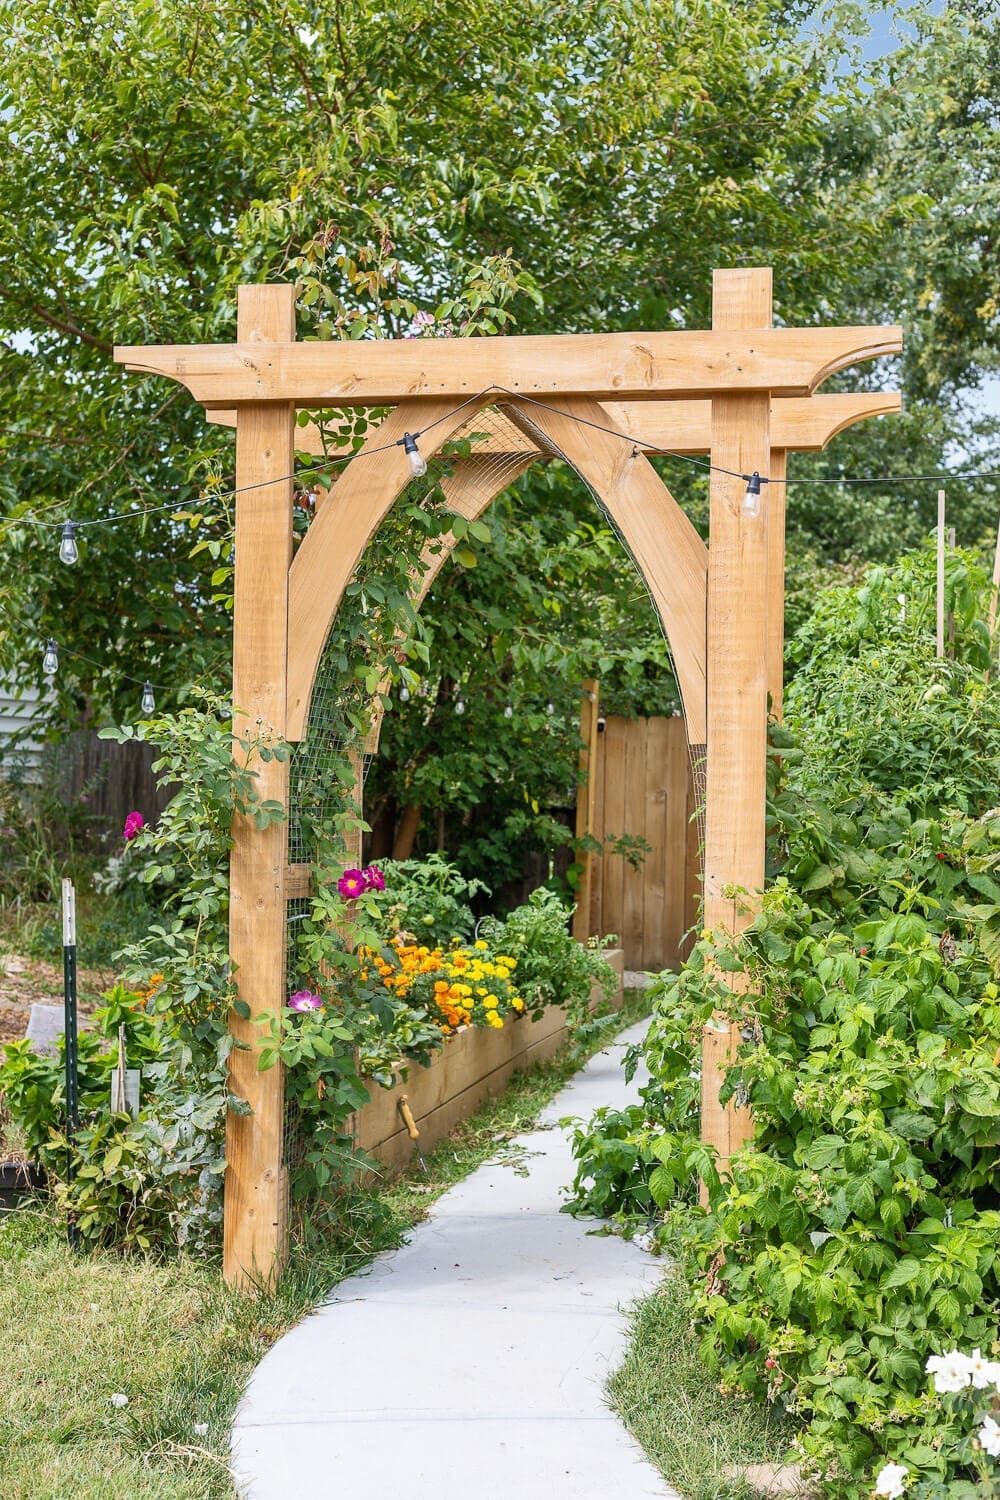
Ready for the Next Project? Build a Garden Arbor
Now that my DIY paver walkway is done, the next step in my garden is a gorgeous arbor at the entrance. In our last home, we had a much smaller garden (just two long raised boxes), but the arbor I built for the entrance was such a showstopper. It took the whole space from “backyard project” to “magazine-worthy.” Head over to my post, DIY Garden Arbor – How to Build a Beautiful Backyard Arbor, for the full tutorial.
📌 Save This DIY Paver Walkway for Later
Loving this project? Save it to your garden or backyard DIY board on Pinterest so you can come back to it when you’re ready to build your own!
Frequently Asked Questions: DIY Paver Walkway
Ours took us a full weekend, about two days of focused work for a walkway this size. Plan for extra time if you’re working alone or if your area needs more prep.
We used 3/4″ crushed stone, but anything from 3/8″ to 3/4″ works well. Smaller gravel packs tighter; larger gravel has a chunkier look.
Technically, no, but I’d highly recommend using mulch glue if you want to avoid constantly raking gravel back into the gaps. It’s cheap insurance for a polished, low-maintenance walkway.
The landscape plastic underneath handles most of it. For extra protection, you can apply a pre-emergent herbicide once or twice a year in the gravel gaps.