


Concrete Path in the Backyard for Biking and Walking


Updated September 18, 2026
We did not buy this house for the house. We bought it for the one acre it was sitting on. I still remember walking the yard during that first showing and thinking I felt like I was in a park. Big mature trees, wide open grass, room to run. It was amazing, and we had some big plans for the space, including a winding concrete path.
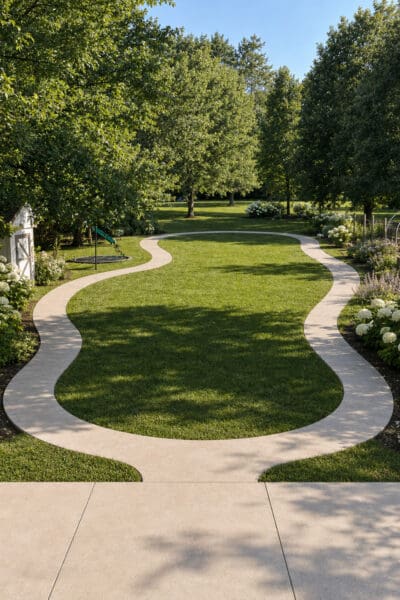
Little disclaimer for the above picture. That’s not my finished yard, but an AI rendering of what I was going for with the bike path. More on that later.
We’ve spent the entire summer out in the backyard knocking projects off the list. We built raised garden beds from scratch, added a greenhouse, hauled home a playset off Facebook Marketplace, and buried the trampoline so it’s ground level. Every project has been another piece of turning that big empty yard into an outdoor space that our kids will spend hours playing in, and we’ll all enjoy as a family.
The next piece was a concrete path. A big winding loop through the backyard, three feet wide, and perfect for biking or walking.
Table of Contents
Why We Wanted a Concrete Path in the Backyard
The honest answer is bikes.
We live on a rural road, and I don’t have a great spot for my kids to ride their bikes. A concrete path in the backyard solves that problem and gives them a safe place to ride around all day long if they want to. It’s a loop, so there is no end to ride off of. There is no road at the bottom of it. They can go around and around until they wear themselves out, and I can see the whole thing from my patio or kitchen window.
The ability to use it as a walking path is a bonus, but I’m not going to pretend that I’m not excited about it. Having a hard surface to walk on when everything else is mud or snow will be worth the cost and effort on its own.
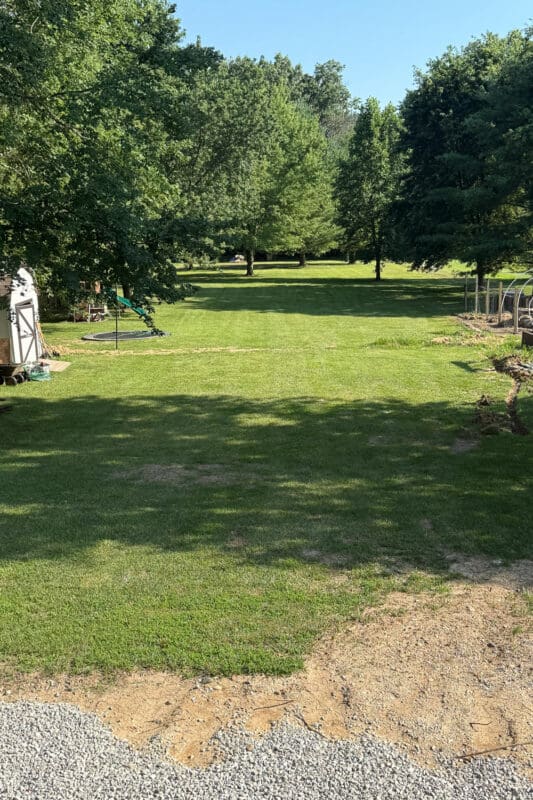
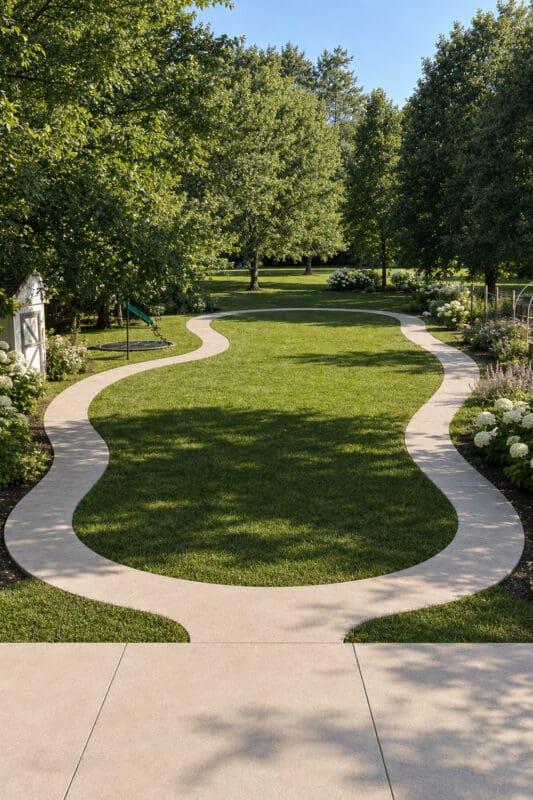
The photo on the left is a nice before shot of the open area in the middle of the yard. On the right is an AI mockup showing a new patio and the concrete bike path I was dreaming of. I love using AI to create inspiration photos for my outside and inside projects. If you’re wondering how to do it, check out my post Using ChatGPT for Interior Design Help.
Asphalt or Concrete Path? Which Is Better?
Our first instinct for our backyard bike path was to go with asphalt. Everything I found online said asphalt was the cheaper option for a long run like this, and cheaper is usually where I start. We had a company come out to quote it, and I had already mentally spent the savings.
Then we found out how much prep work asphalt needed underneath. Once all of that base work got added into the quote, the price gap between asphalt and concrete got small. Not identical, but close enough that it stopped being the obvious call.
So we started weighing the pros and cons. With asphalt, we could afford to do a little bit wider of a path at 4 ft, but it would need to be maintained and require upkeep. Concrete is prettier, and this path runs through the middle of a yard we look at from the kitchen window every single day. And concrete would match the patio we had just poured off the back of the house. We weighed the options and opted for a concrete path.
If the numbers had come back further apart, I might have made a different call. For us it was close enough that maintenance and looks won out this time.
We Hired This Concrete Path Out
I share a lot of DIY projects around here, but this is not one of them.
This project was too big for us. We are talking about a path that loops the entire backyard, which means excavation, a gravel base, forms that hold a curve, a concrete pour, and finishing work that has to happen fast before it sets. That is not a Saturday project. This was a job for a full crew with big machinery like a skid steer.
We hired a concrete company recommended to us by the guy who quoted our asphalt, and I have zero regrets. There is a version of this where my husband and I try to do it ourselves, and we would still be out there come Thanksgiving. It would’ve taken forever to DIY.
If you are trying to decide whether to DIY your own path, my rule of thumb is this: a short straight walkway is a very doable weekend project, but a long winding path, like we added to our backyard, is not.
Installing the Backyard Concrete Path
Watching the crew work was genuinely the most interesting week of the whole summer. Here is how it went.
Marking and Excavating the Curves
The whole path was laid out and marked first, then the grass and dirt were dug out along the route we had planned for our concrete path. This is where the dirt piles start showing up in every photo, and your yard begins to look like an archaeological excavation site. It gets worse before it gets better. Just know that going in.
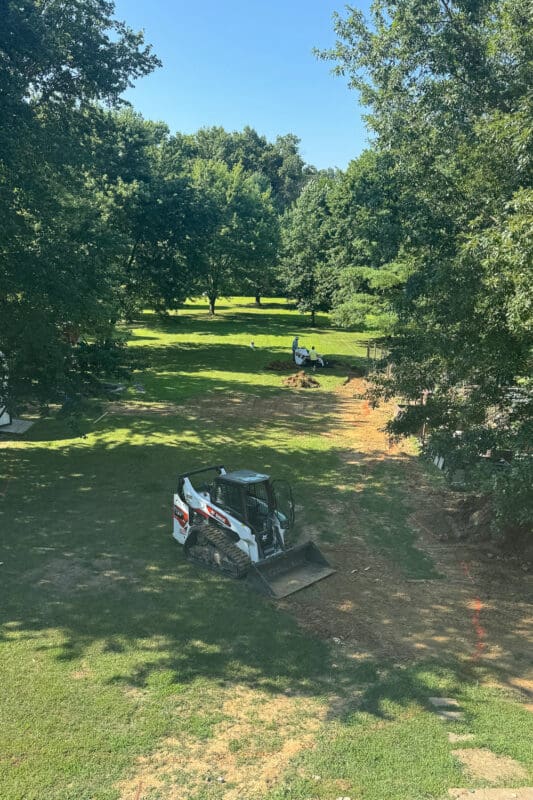
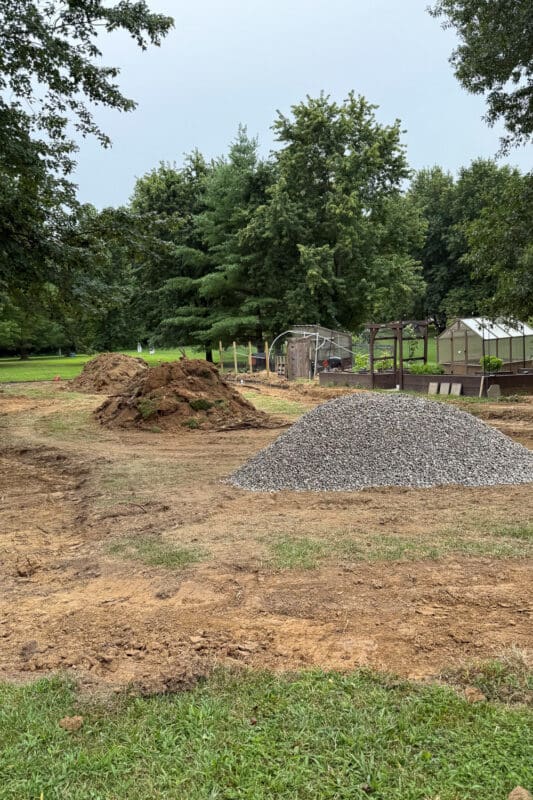
Something else you should know before digging into a project like this is that you will end up with a genuinely enormous pile of dirt sitting in the middle of your yard, and it is not going to politely disappear. Some people spread it out somewhere else on their property or use it to fill in low spots. We did not have anywhere we wanted it, so we paid our concrete guys extra to haul it away.
Ask about this when you are getting quotes. It may or may not be included, and finding out after the fact that you own a mountain of dirt is not a fun surprise.
Setting the Concrete Forms
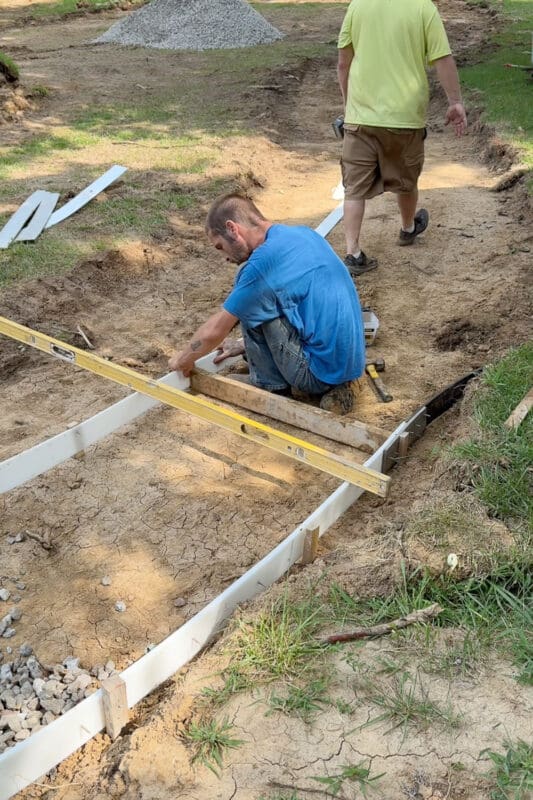
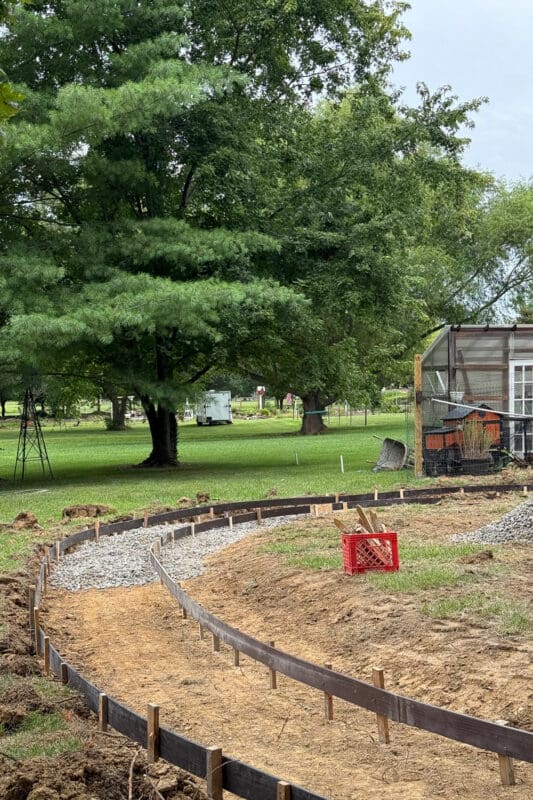
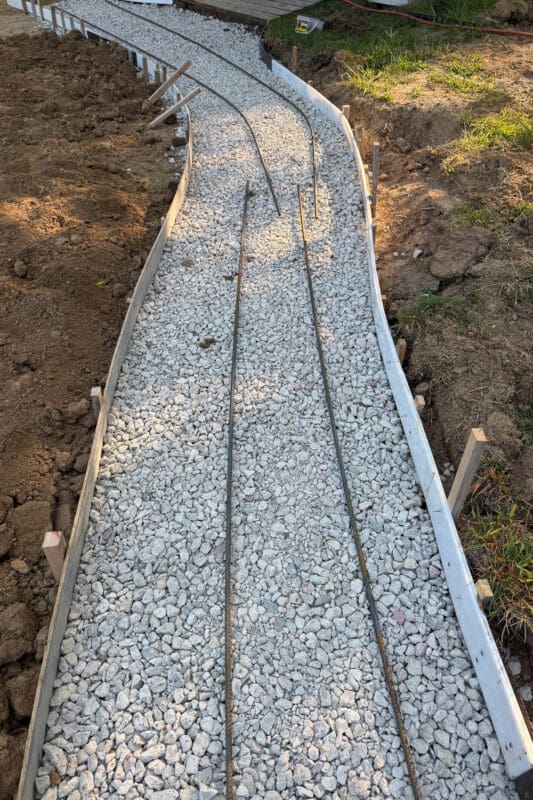
The forms are what hold the shape of the concrete while it sets, and on a curved path they are doing a lot of work. The crew used flexible forming material for the curves so the path could actually bend the way we wanted, staked in place all the way down both sides.
Every bit of it got checked with a level. That is what keeps water from pooling on your brand-new concrete path the first time it rains.
Gravel Base and Rebar
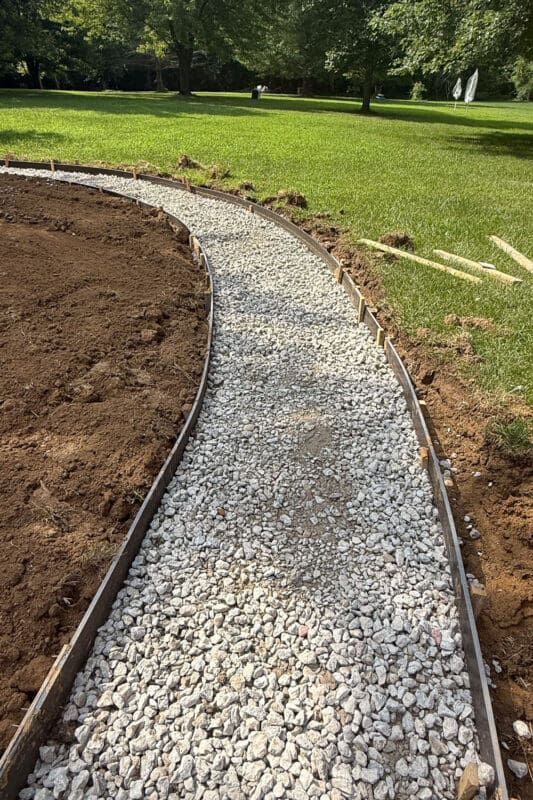
A gravel base goes down inside the forms and is leveled out and compressed with a giant tamper. This is the layer that handles drainage and keeps the slab from shifting when the ground freezes and thaws, which matters a lot when you live in the Midwest. Then rebar is run down the length of the path for reinforcement.
Pouring and Finishing the Concrete
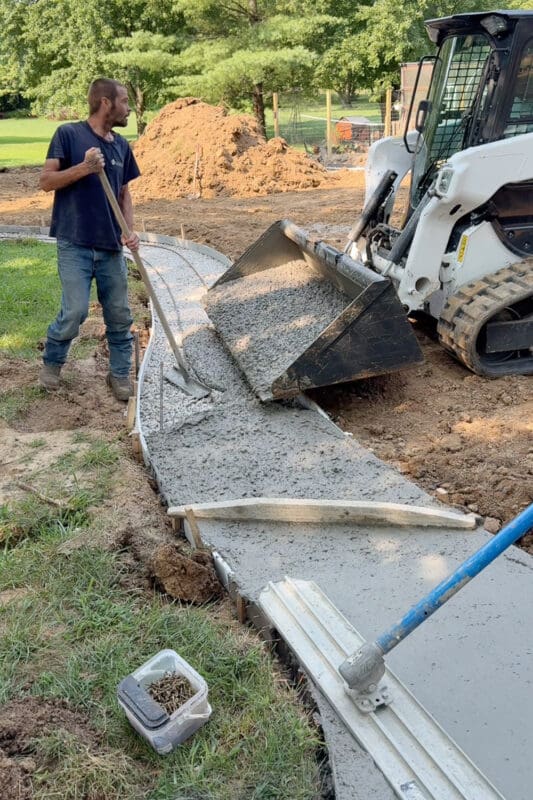
This is where having a whole crew makes the job go so much smoother. They used the bucket of the skid steer ot dump the concrete into the forms, someone else was spreading that concrete around, while someone else is following along and floating it out nice and smooth across the top. Teamwork!
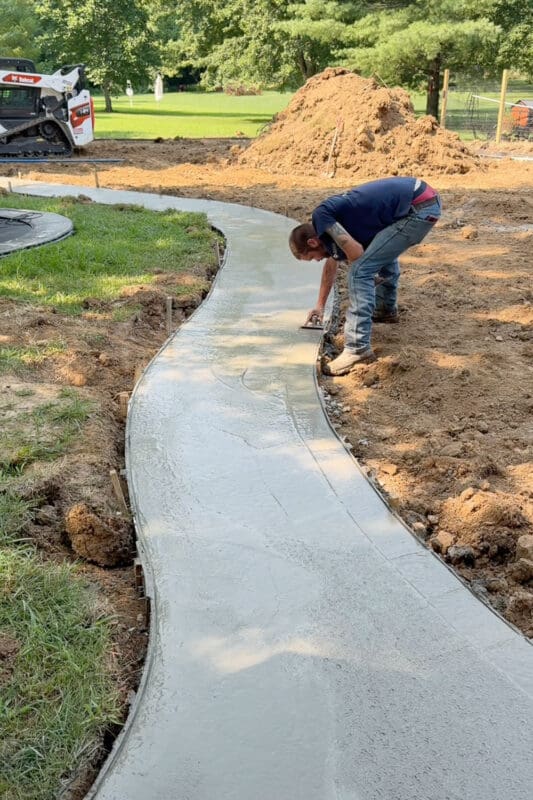
Then they ran an edger along the edges to get a nice rounded corner, and smoothed out the marks from that tool with a trowel. Concrete finishing is an art in itself.
Cutting the Relief Cuts
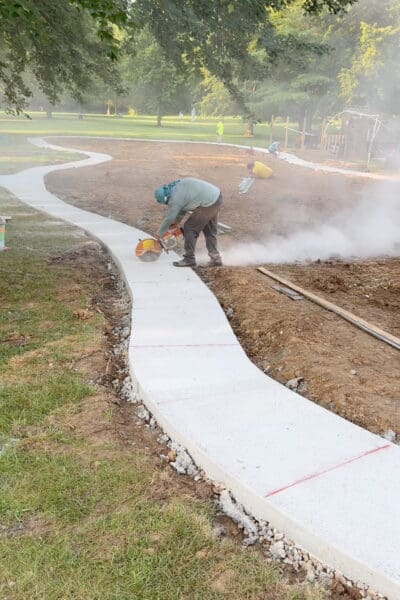
Those lines you see across every sidewalk are not decorative. They are relief cuts, also called control joints, and they give the concrete a designated place to crack so it does not crack somewhere ugly and random.
The crew marked the spacing in red first, then came through with a special saw. It was loud and extremely dusty, but oh so necessary.
The Finished Backyard Concrete Walking Path
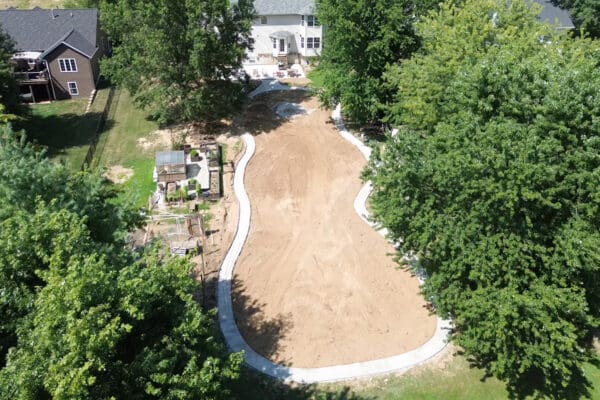
You really cannot appreciate the shape of it from the ground. From above you can see the whole loop, how it pulls off the patio, wraps the yard, and comes back around.
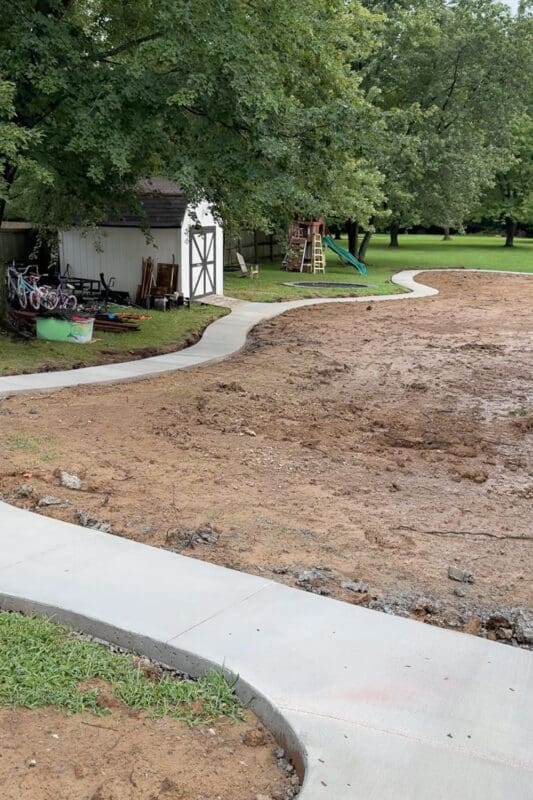
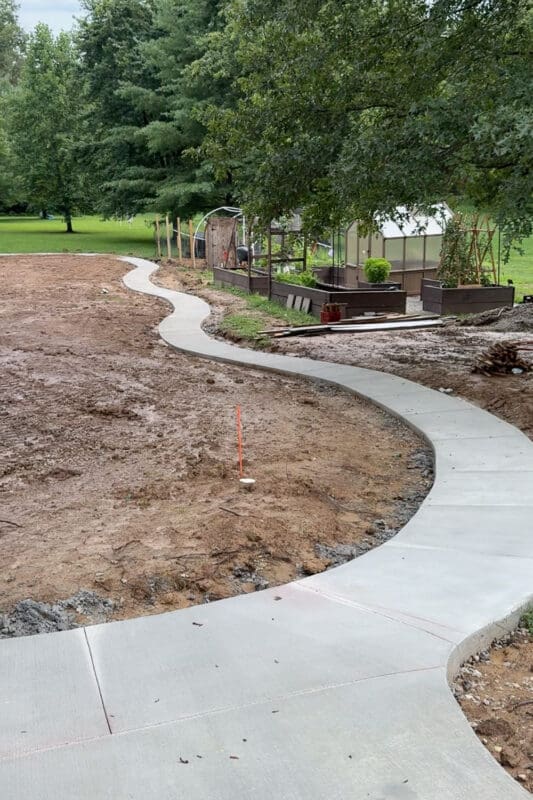
The path runs right past the greenhouse and garden beds, which I’m so excited for. Now I can get to the garden without walking through wet grass, and hauling a wheelbarrow of compost is dramatically easier than it used to be.
The inside of that loop is currently a large dirt oval. I’m going to throw some grass seed out there and hope for the best.
Once that fills in, I’ll come back with some real finished photos of the kids using our concrete bike path.
📌 Save This Concrete Path Idea for Later
Planning your own backyard bike path or walking path? Pin this so you can find it when you are ready to start getting quotes.
Frequently Asked Questions: Backyard Bike Path
Ours is three feet wide, and it’s plenty for kids riding single file. I would’ve preferred four feet, but that would’ve cost more. If you have older kids who will want to ride side by side or pass each other, four feet would be better. I’m more than happy with our three-foot path.
It depends on how far apart your quotes come in. Asphalt is usually cheaper up front, but once we added in the base prep, the difference got small for us. Asphalt also needs regular maintenance and upkeep.
Ours has rebar running down the length of it. For a path that only sees foot traffic and bikes, the reinforcement is less about weight and more about keeping the slab together through freeze-and-thaw cycles.
Those are relief cuts, or control joints. Concrete is going to crack eventually. The cuts give it a straight, tidy place to do that instead of letting it crack wherever it feels like it.
Ours came in at $11,000, but prices vary widely based on so many factors. A path half the length of ours in a different part of the country could come in at a completely different number. Use ours as a reference point, but get two or three real quotes for your own yard.