


Build a DIY Chicken Coop for Backyard Chickens


Updated September 18, 2026
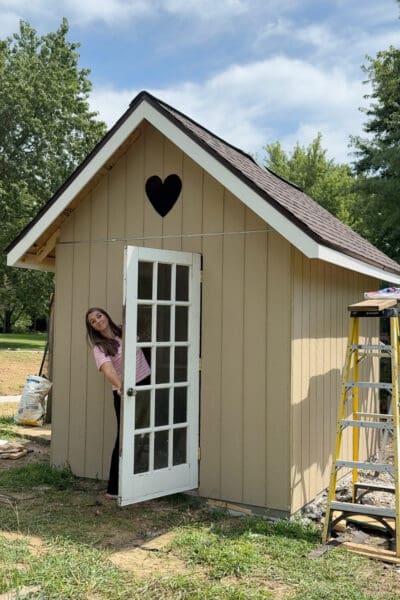
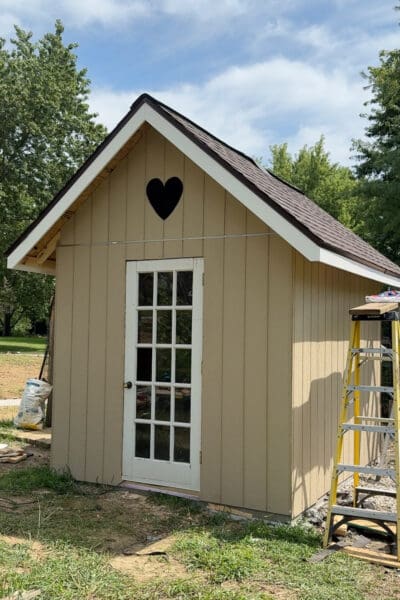
I told Stuart I wanted a heart cut into the front of our new DIY chicken coop, and he gave me The Look. You know the one. The look that says this is going to add three hours to my Saturday. But he not only built us a gorgeous DIY chicken coop that I’ve nicknamed the chicken mansion, but he also cut the heart out right on the front, just like I’d pictured.
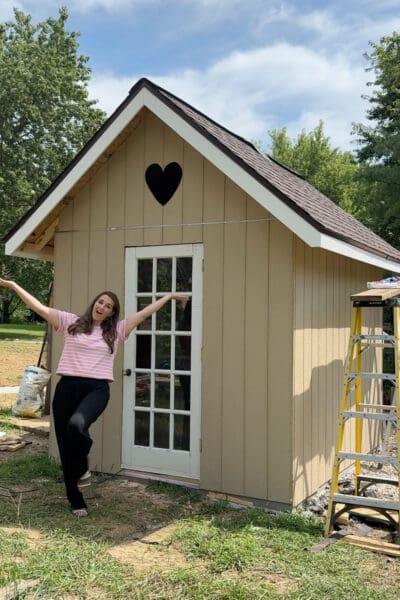
Before this, our chickens were living in a dilapidated greenhouse that the previous owners left behind. It was falling apart, ugly, and we needed a real coop. I’m walking you through every step of how we built this DIY chicken coop, with all my best tips included, so you’ll know what you’re in for if you want to build a chicken coop of your own.
Table of Contents
- What We Used to Build Our DIY Chicken Coop
- Starting With the Foundation
- Framing the Walls of the Chicken Coop
- Building and Setting the Roof Trusses
- Siding a DIY Chicken Coop
- Adding a Door, the Trim, and the Roof
- Inside: How We Customized Our DIY Chicken Coop
- The First Night in the DIY Chicken Coop
- Finished DIY Chicken Coop (For Now)
- 📌 Pin This DIY Chicken Coop for Later
- FAQ: Build a DIY Chicken Coop
What We Used to Build Our DIY Chicken Coop
Before we get into it, here’s a rundown of what went into this build. I’m not giving you quantities because it’ll depend on what size coop you build. But this should give you a solid idea for planning your own chicken coop DIY project.
Tools
Materials
- Sill plate gasket
- 2×4 framing lumber
- Powder actuated fasteners
- OSB sheathing, for the roof deck and the interior walls
- Siding panels
- Trim boards for the fascia and gables
- Roofing underlayment
- Architectural shingles and roofing nails
- A glass-paned door and a knob
- Welded wire mesh for the gate and interior panels
- Gate hinges and a latch
- Roll-away nesting boxes
- Tree branches for the roosting bars, courtesy of our own backyard
Starting With the Foundation
We already had a crew coming out to pour the concrete for our bike path. So while they were here, with the truck already there and the concrete already mixing, we had them pour the slab for the coop too. One trip. One setup fee. Two projects. Bundling a small pour onto a bigger job is one of the easiest ways to save real money, and it took approximately zero extra effort on our part.

A concrete floor is also a genuine upgrade for a DIY chicken coop. Nothing burrows up through it. You can easily hose it out for cleaning, and it doesn’t rot. Ten out of ten, would pour again.
Framing the Walls of the Chicken Coop
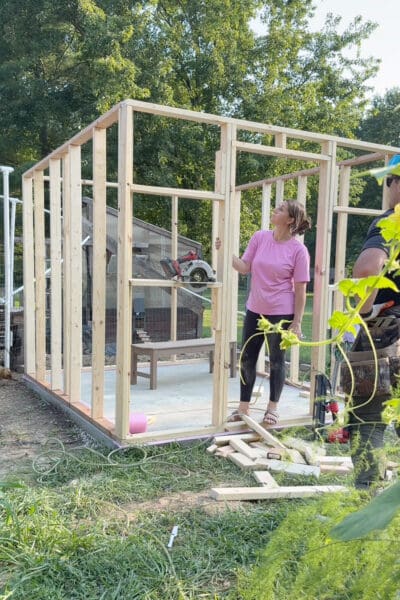
Once the slab cured, Stuart laid out the lumber and built the wall frames flat on the ground using a framing nailer and 2x4s.
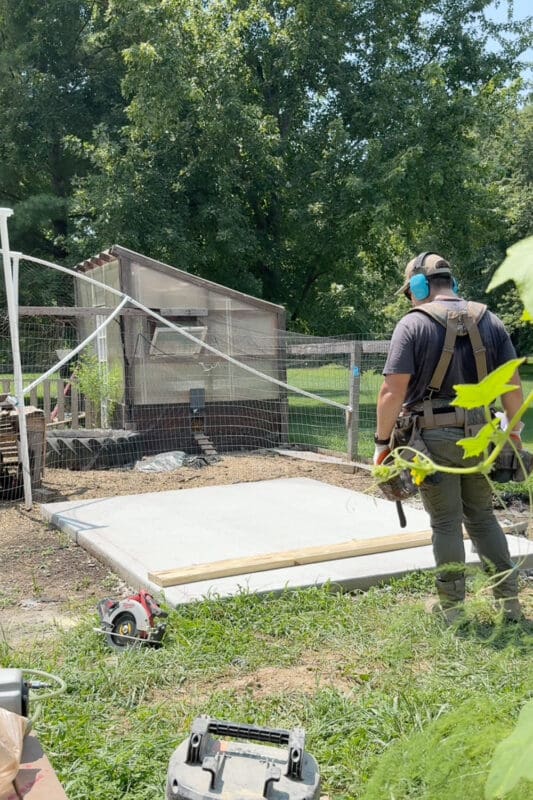
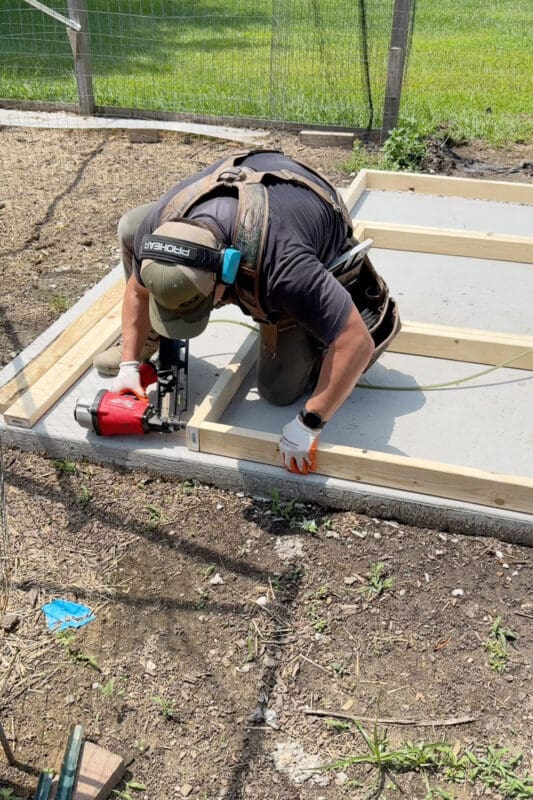
You’ll want to build the walls flat, then stand them up. Framing a wall while it’s lying flat on the slab is the easiest and fastest way to get a nice square wall for your DIY chicken coop. Just know that tipping a finished wall upright is much easier with a second set of hands, and you’ll want a brace ready to hold it while you set the next one.
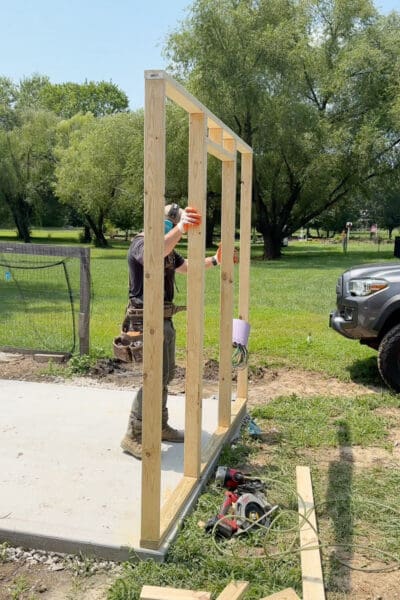
Now, how do you attach a wooden wall to a solid slab of concrete?
Stuart used a HammerShot power actuated tool, which is essentially a nail driver powered by a .22 blank. He set the fastener in the board, put the tool over it, then tapped the back of the HammerShot with a hammer, which drove the nail straight into the concrete. It’s loud, but effective. Be sure to wear proper eye protection and ear protection.
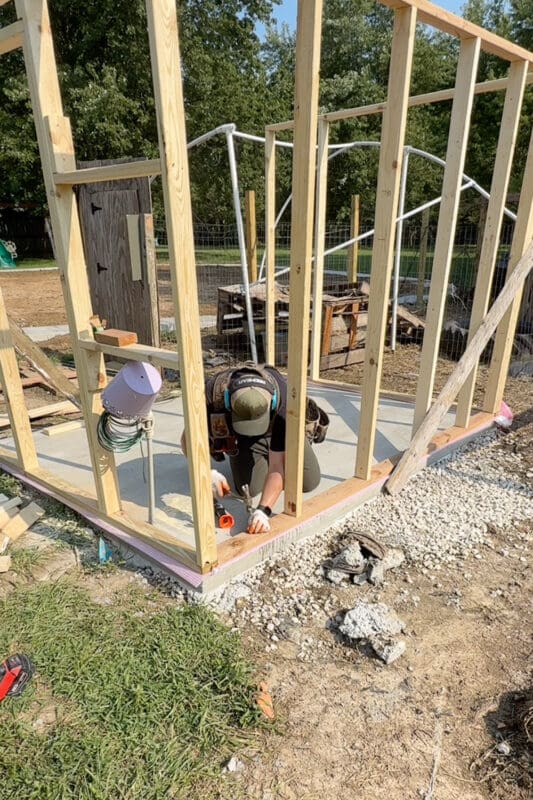
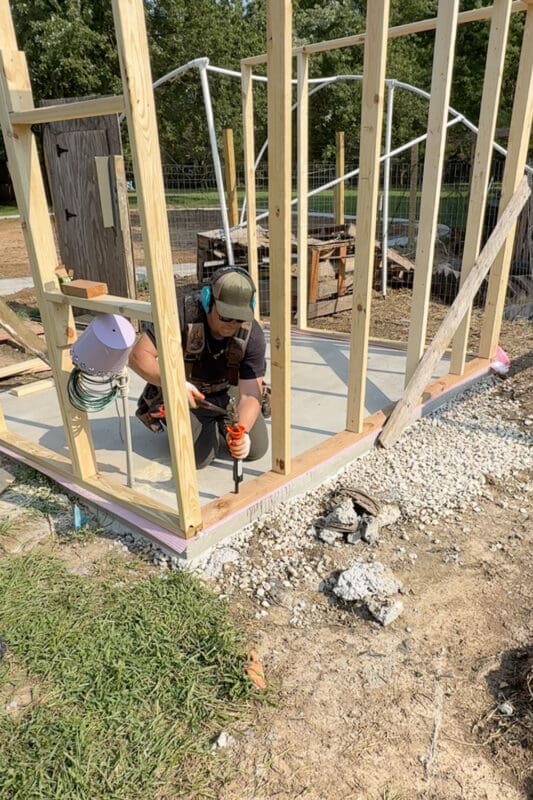
Note: Between the wall and the slab, put a sill plate gasket down first. It’s that pink strip you can see running along the bottom of the wall. It goes between the wood and the concrete, keeping moisture from wicking up from the slab into your framing. It’s cheap. It takes five minutes. Skip it, and you’ll be replacing rotted boards in a few years.
Building and Setting the Roof Trusses
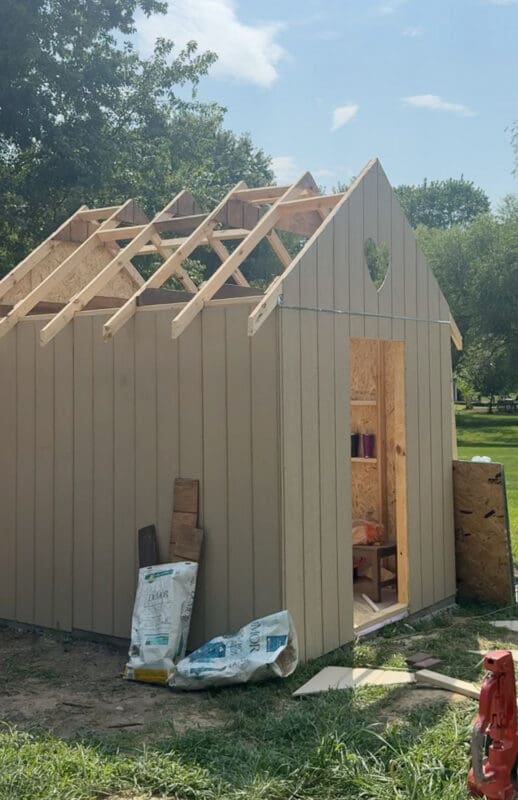
The peak is what makes this thing read as a cottage instead of a boring box, so we went with a steep pitch.
Stuart built the trusses on the ground, and we lifted them up one at a time. Assembling them flat on the ground means every truss is identical, and identical trusses mean a straight roof line.
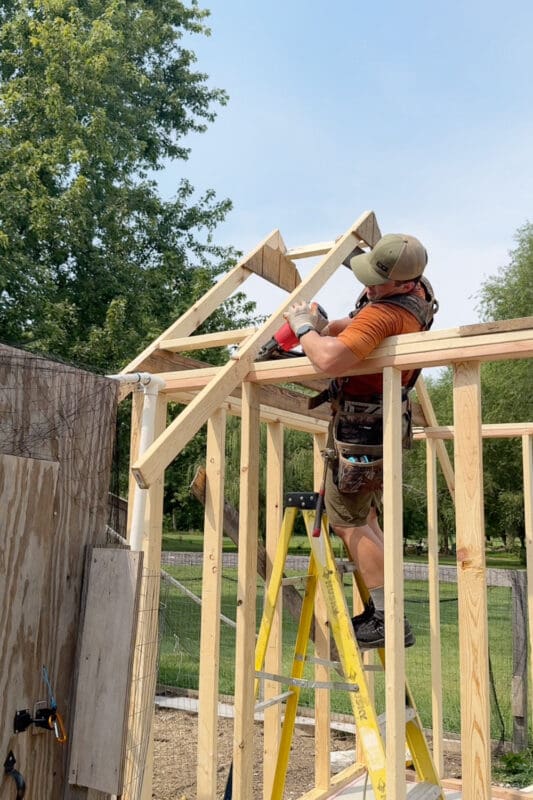
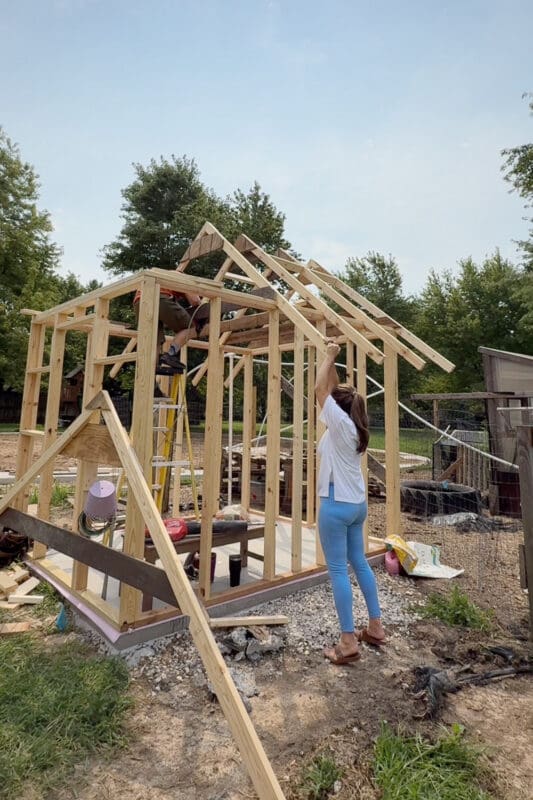
Still a way to go, but this DIY chicken coop is starting to take shape.
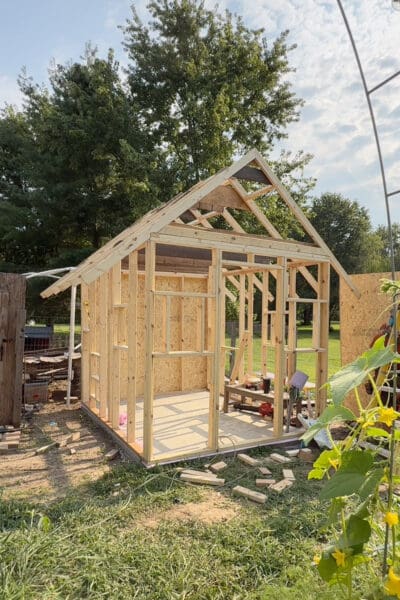
Siding a DIY Chicken Coop
Siding day is when a project stops looking like lumber and starts looking like a building. We used siding panels. They are easy to cut to length, fast to install, and are attached straight to the framing using a framing nailer.
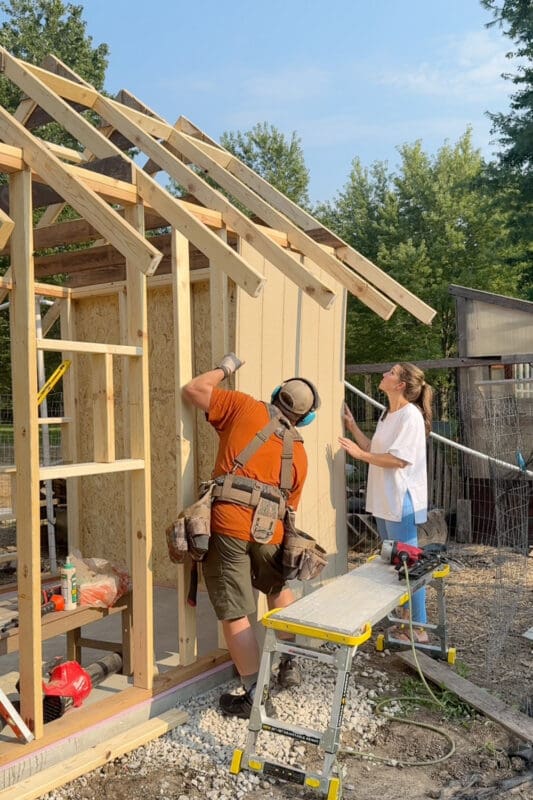
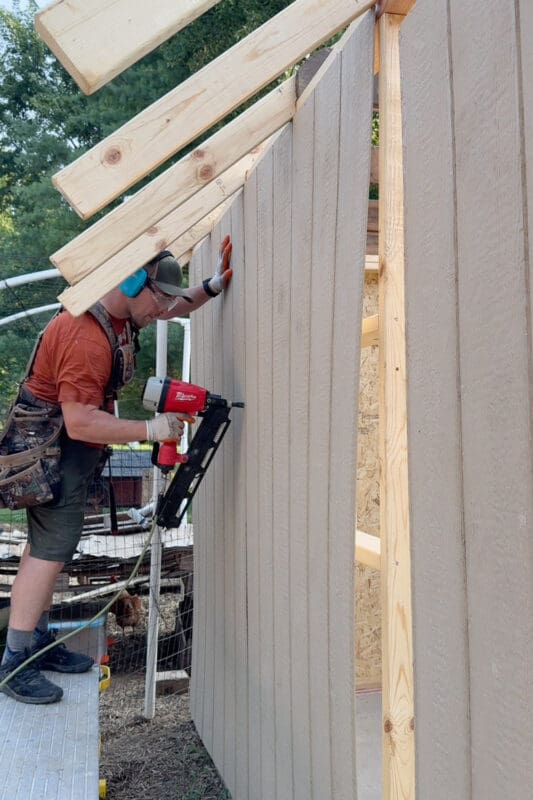
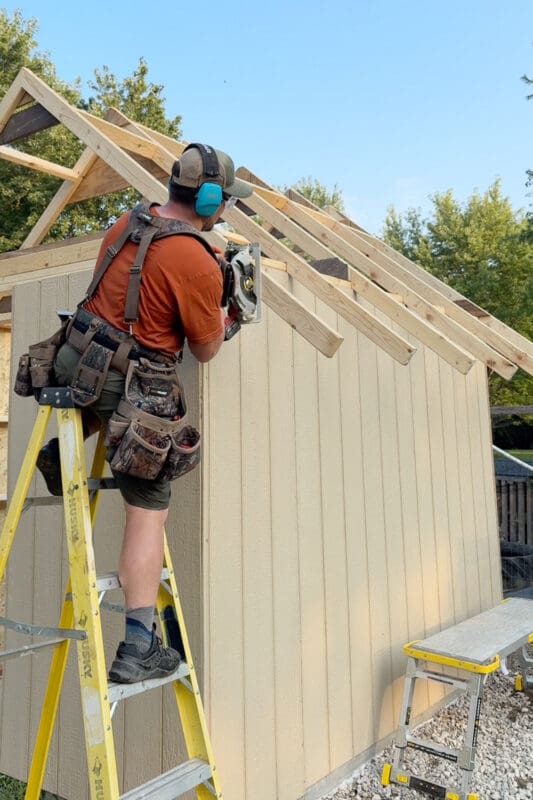
The trusses stick out past the walls, and you can use a circular saw to cut them off at pretty much whatever length you want your overhang to be.
Shed and coop eaves usually land somewhere in the six to sixteen inch range. Deeper eaves throw rain further away from your siding and give more shade, which is genuinely nice for chickens in summer. Shallower eaves look tidier and use less material. The only real rules are that both sides need to match and whatever you choose has to work with your fascia plans.
Just make sure to cut them off so the edge is straight up and down. The angle will vary based on the pitch of your roof, but a torpedo level comes in handy for drawing a straight, perfectly plumb cut line.
Adding a Door, the Trim, and the Roof
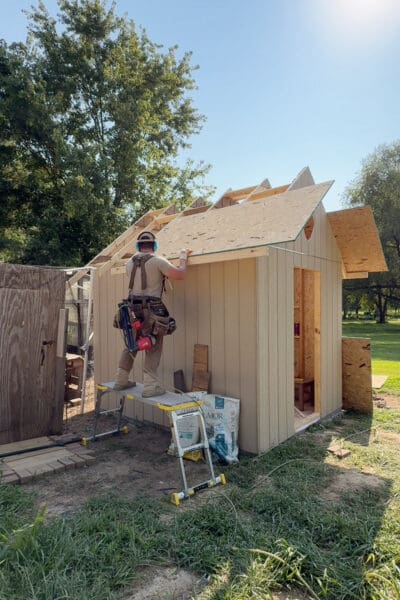
Once the siding was on, Stuart ran a 2×4 across all the cut ends of the trusses. This is called a sub-fascia, and it is the unsung hero of a good-looking roof. It ties all the rafter tails together and gives you one perfectly straight line to nail your fascia trim to.
Then the door went in, and oh, this door. It’s a glass-paned door, and it’s my favorite thing about the whole build after the heart. It lets a ridiculous amount of light into the storage side, and it makes the coop feel like a greenhouse or cute cottage instead of a shed.
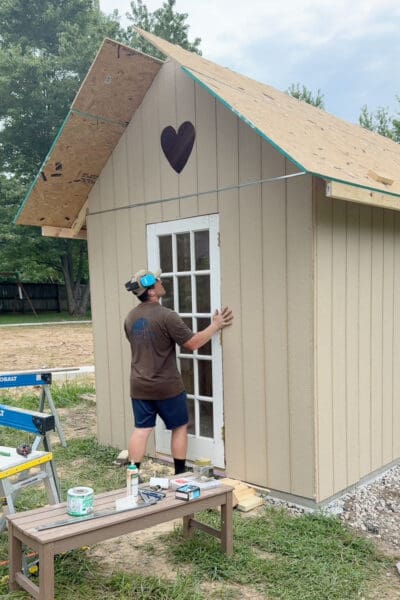
Next came the white fascia board, and friends, this is the cheapest transformation in the entire project. A few boards of white trim around the gable and eaves are what take a building from “utility structure” to “on purpose design.” If you build a chicken coop and only splurge on one thing, splurge on a little trim.
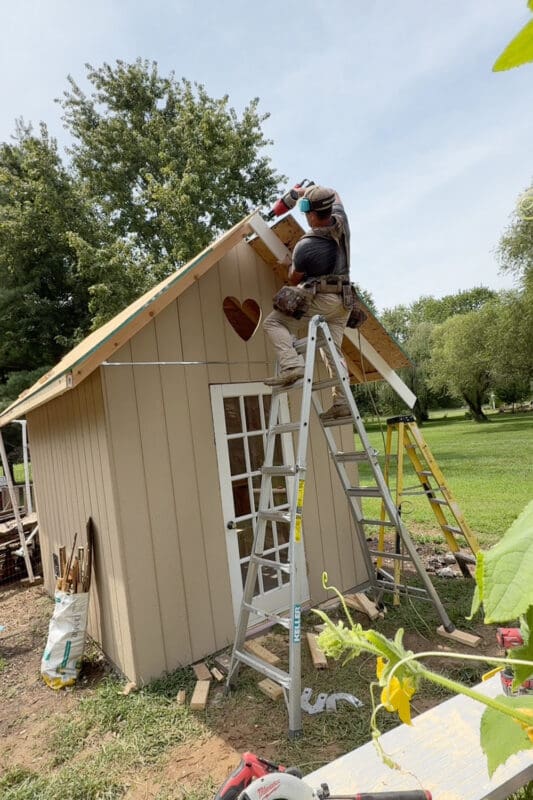
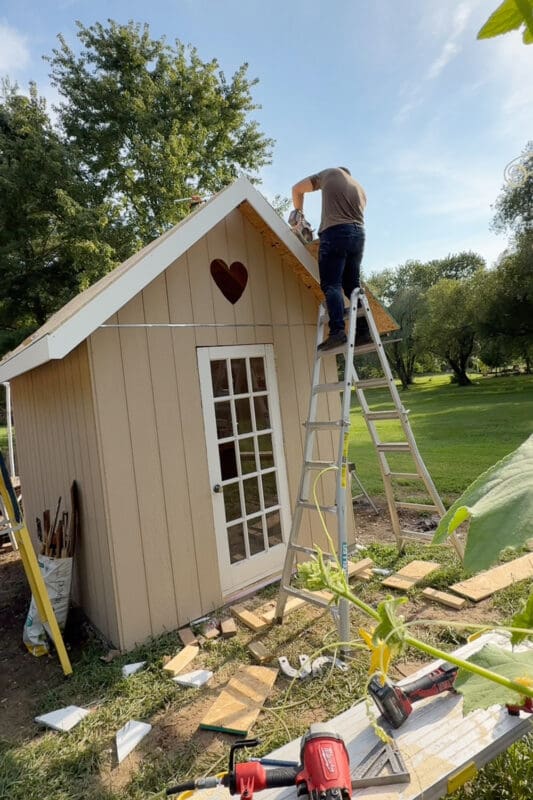
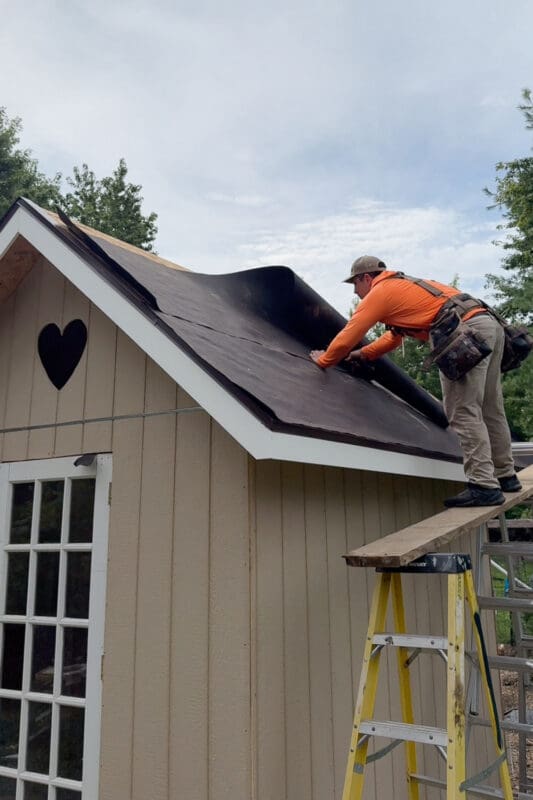
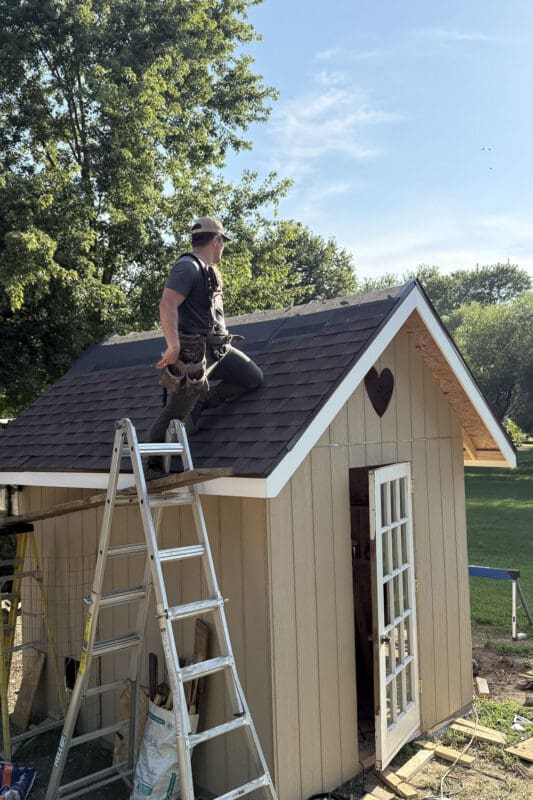
For the roof, after the sheathing was installed, Stuart rolled out the underlayment and then installed the roofing shingles.
Please don’t skip the underlayment on a small building. I know it might feel like overkill for a chicken coop. It’s not overkill. It’s the layer that saves you when a shingle lifts in a storm, and it costs almost nothing compared to redoing a roof deck.
Inside: How We Customized Our DIY Chicken Coop
Here’s the part I’m most excited to show you, because this is the design choice that’s going to make my life so much easier.
We built a wall straight down the middle of the coop.
The back half is the chickens’ half. Roosts, nesting boxes, and a little door out to the run. The front half is mine. Storage, feed, tools, and egg collecting. Which means, other than cleaning, I never have to walk into the chicken side. Not to grab feed, not to get eggs, not for anything.
If you have ever tried to collect eggs while six hens attempt to escape past your ankles, you understand why this matters. Also, having a dry, protected area for storage is going to be amazing!
The Pop Door Out to the Run
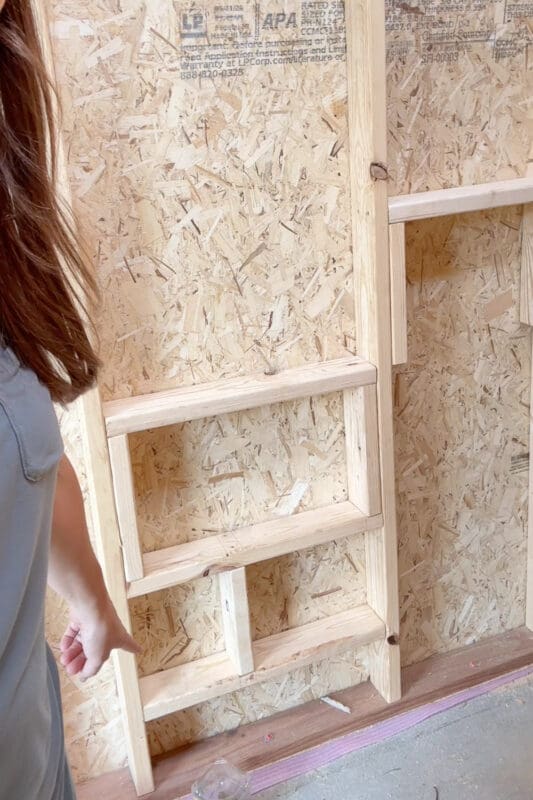
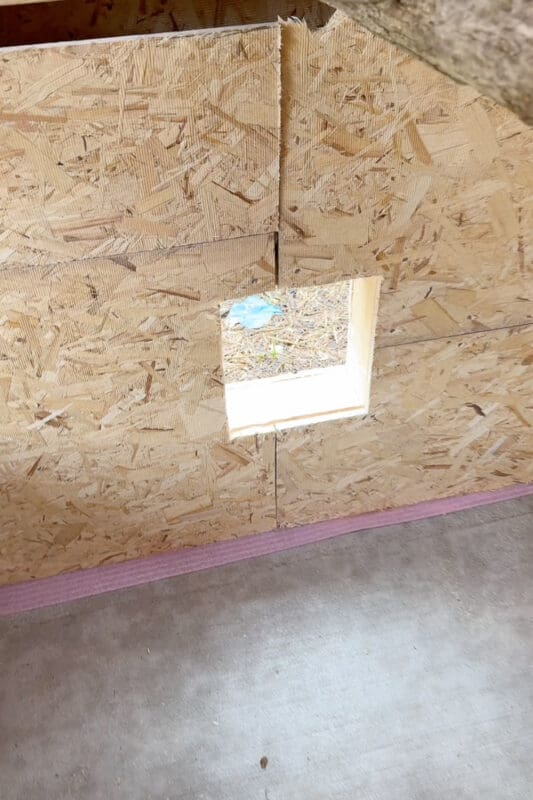
When doing your wall framing, you have to plan ahead. Stuart framed an opening low in that dividing area for a little chicken-sized door, then he sheeted over the framing and cut the hole all the way through.
In chicken-keeping circles, this is called a pop door. You keep it small on purpose. Big enough for a hen to hop through, small enough to cut down on drafts and give predators less to work with. We will add an automatic door to it down the road, which would mean nobody has to trudge out at dusk to close it. We had one in the chicken coop at our last house in Omaha and loved it.
Roosting Bars Made From Our Own Trees
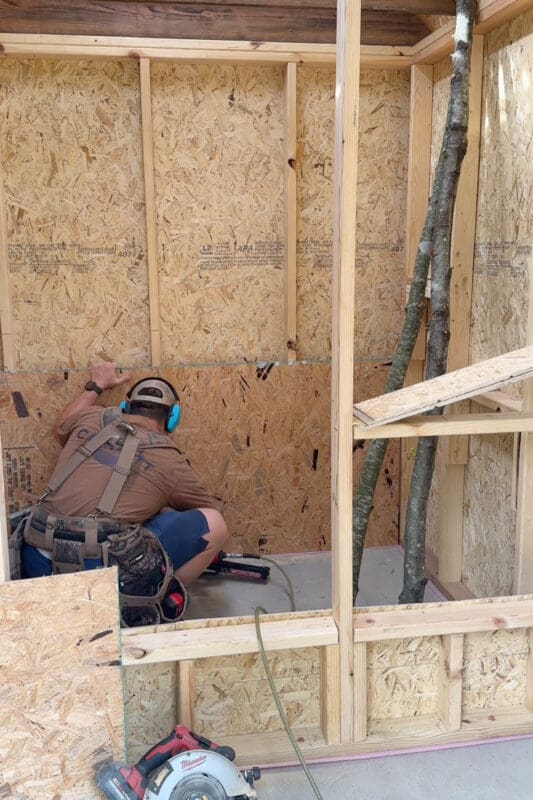
Stuart added OSB sheeting all along the lower half of the coop on the back half where the chickens will be roosting. Then he added the roosting bars. We used tree branches off our own property for the roosting bars, and I love them more than I expected to.
They cost nothing. They look beautiful. And honestly, a round branch is easier on a chicken’s feet than a square piece of lumber, since they can wrap their toes around it the way they would on an actual tree. Free and better. My favorite combination.
Plenty of people swear by a plain 2×4 laid flat instead, and that’s a perfectly good option too. More on that down in the FAQ section if you’re trying to decide.
The Gate in the Middle
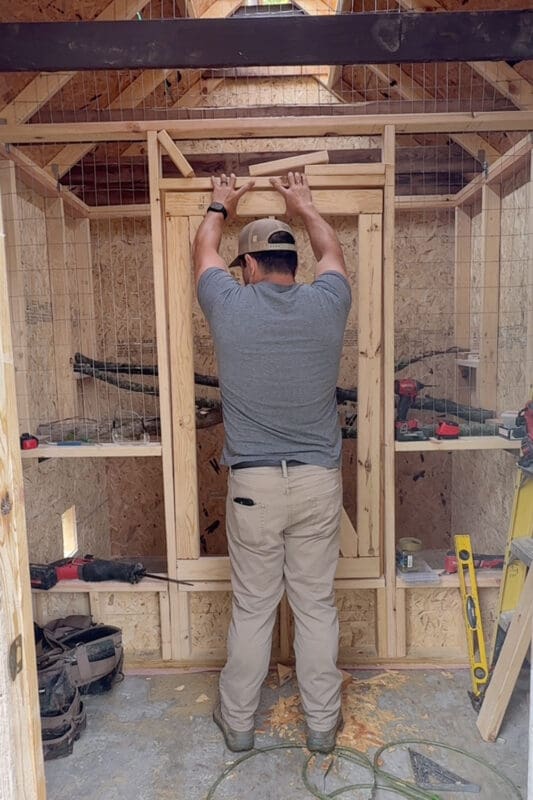
Stuart framed up a wire gate with a diagonal brace and hung it in the dividing wall, so we can still get into the chicken side when we need to. The brace matters on a gate, by the way. It’s what keeps it from sagging into a parallelogram after a season of swinging. The openings in the wall framing are all covered by welded wire fencing to keep the chickens in and predators out. We left an opening on each side of the gate for our nesting boxes.
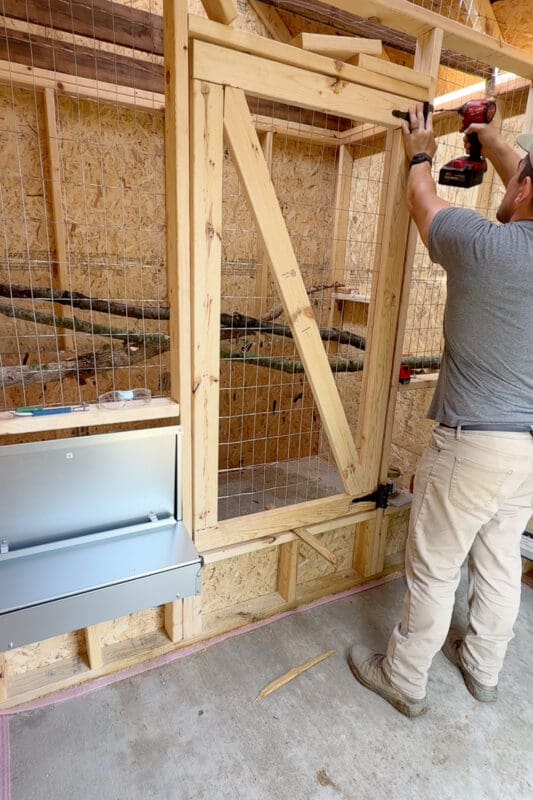
Roll-Away Nesting Boxes (The Real MVP)
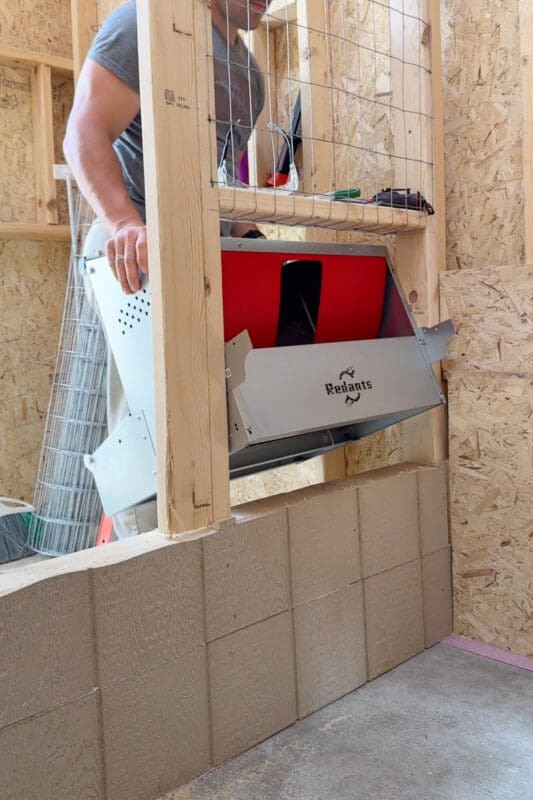
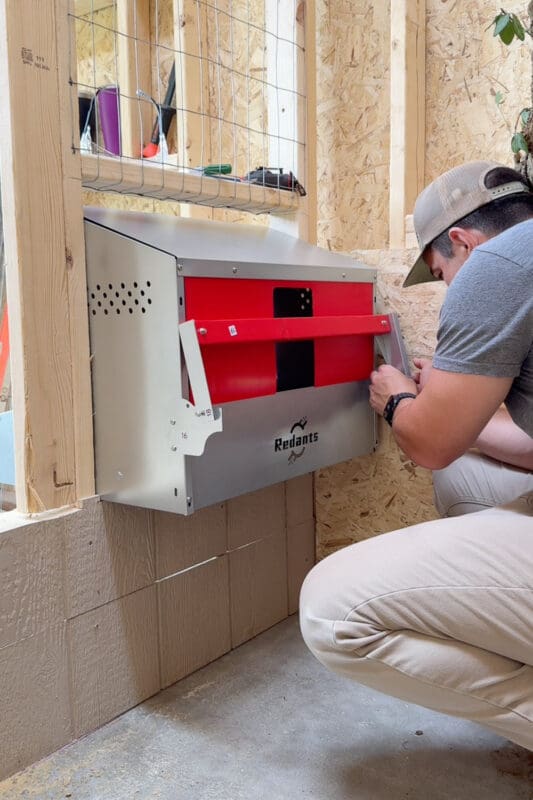
These nesting boxes are built right into the dividing wall, and they are magic. We put one on each side of the gate, and I think every DIY chicken coop needs a set.
The hens go in from their side and lay their eggs. The floor of the box is angled, so the egg gently rolls forward and out of reach into a covered tray on my side. I open the tray from the storage half, and there the eggs are.
No reaching under a broody hen. No stepping in anything. And because the eggs roll away immediately, they stay clean and they don’t get pecked or accidentally broken or eaten. If you’ve ever lost eggs to a hen who developed a taste for them, you know that this alone is worth the money.
The First Night in the DIY Chicken Coop
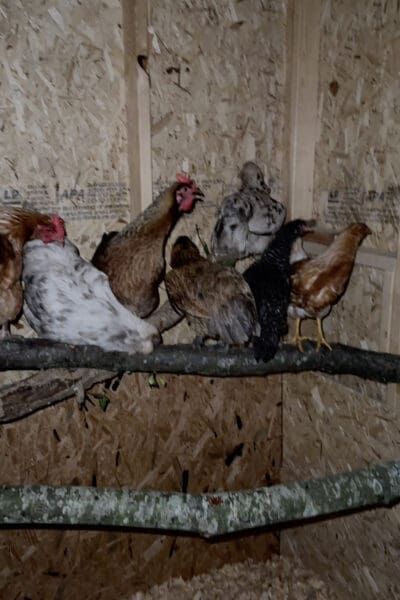
We moved the girls in, and then we did what any normal people would do. We waited until dark and snuck out with a flashlight to see if they’d figured it out.
They had. Every single one of them lined up on the branches like they’d lived there their whole lives.
Finished DIY Chicken Coop (For Now)
I’m calling this one “finished for now,” because there’s still a list.
We’re going to paint it. We want to add some windows. The run still needs to be finished out. And there are a handful of little details we’re saving for a second round.
But it’s standing, it’s dry, it’s got a shingled roof and a heart in the gable, and the chickens are in it and happy. That’s a finished chicken coop as far as I’m concerned.
I’ll be back with a part two once we’ve painted and finished the run. Until then, I’ll be out here admiring the heart cutout like a total weirdo.
📌 Pin This DIY Chicken Coop for Later
Building a coop is one of those projects that sits on the list for a while before it happens. Pin this so it’s waiting for you when you’re ready, and come find me over on Pinterest for more of our backyard projects.
FAQ: Build a DIY Chicken Coop
No, plenty of coops are built on gravel, dirt, or a wood floor on skids. But concrete is easy to clean, nothing can dig up through it, and it won’t rot. If you can bundle the pour onto another concrete project, it’s very worth considering.
It’s the small chicken-sized opening that lets hens go in and out to the run. They’re kept small on purpose to limit drafts and reduce predator access, and many people add an automatic opener so it closes at dusk on its own.
For us, absolutely. The angled floor lets the egg roll into a separate collection tray, so eggs stay clean and don’t get pecked, eaten, or broken. It also means you can collect eggs without going into the chicken area at all.
The most common options are 2x4s laid flat, wooden closet rods or dowels, and natural tree branches. Chickens don’t grip a roost the way wild birds do, so they need something wide or rounded enough to rest their feet on flat and cover their toes at night. We used tree branches off our own property, which cost nothing and let the hens wrap their toes around them naturally. Whatever you use, make sure it’s sturdy, dry, splinter-free, and wide enough to hold your whole flock side by side.