




Published October 9, 2026
If you’ve ever looked at a plain, boxy opening and thought, “You know what this needs? A curve,” then this DIY arched doorway tutorial is for you. Today I’m showing you how I arched the walkways on each side of the room divider wall I built in my sister’s bedroom.
If you missed the first post, you can catch up on DIY Room Divider Wall: How I Split One Big Bedroom Into Two Spaces. That’s where you’ll find all the before photos of this giant bedroom. And when I say giant, I mean it was big enough that splitting it in two made total sense.
The goal of the wall was to create two usable halves, with plenty of room for a bed on either side. Here’s where we left off: the wall framed, the fireplace frame in the middle, and an open walkway on each side.
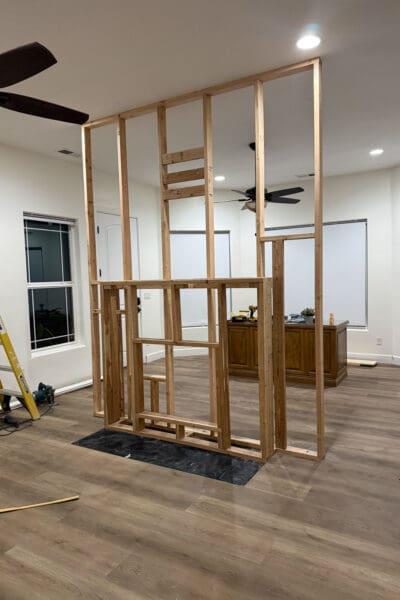
Table of Contents
And Then I Had an Idea
Originally, the plan was just the wall. Build it, drywall it, call it a day. But once it was framed, I couldn’t stop staring at those two openings. I wanted each side to feel a little more closed off and a lot more special.
So naturally, I did what I always do. I added more work to my own to-do list. DIY arched doorways- here we go!

The good news is this isn’t my first arch rodeo. I’ve done arched openings a few times now, so I’ve gotten pretty comfortable with the process. And honestly, it’s way easier than it looks.
Want to check out some more of my DIY arch projects?
DIY Arched Doorway Supplies
Here’s what I used to build the arches for both openings.
Materials
- 2x4s (for the framing above the opening and the blocking)
- 1/2 inch MDF
- Wood screws
Tools
Step 1: Frame Above the Opening
The first step was building a small 2×4 frame to fill in the space above each walkway. The ceilings in this room are tall, so the openings went all the way up. Way too tall for a nicely proportioned arch.
I built each frame on the floor first, then lifted it into place and screwed it into the top of the wall framing.
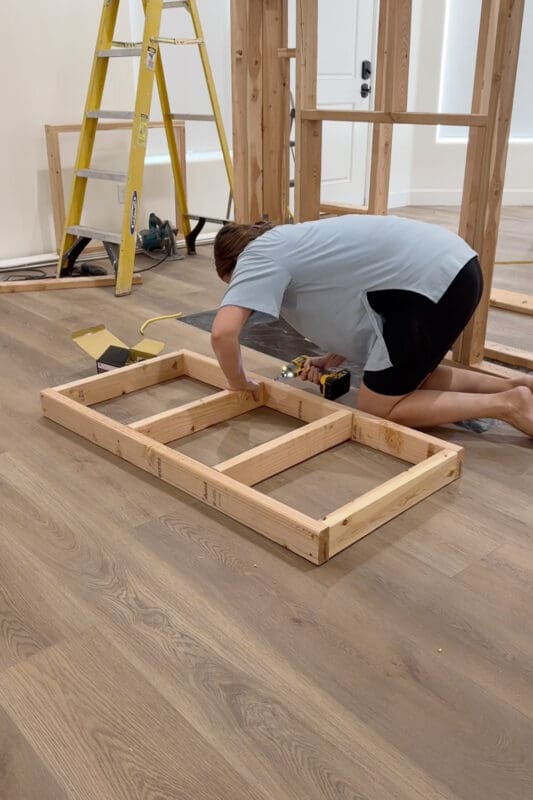
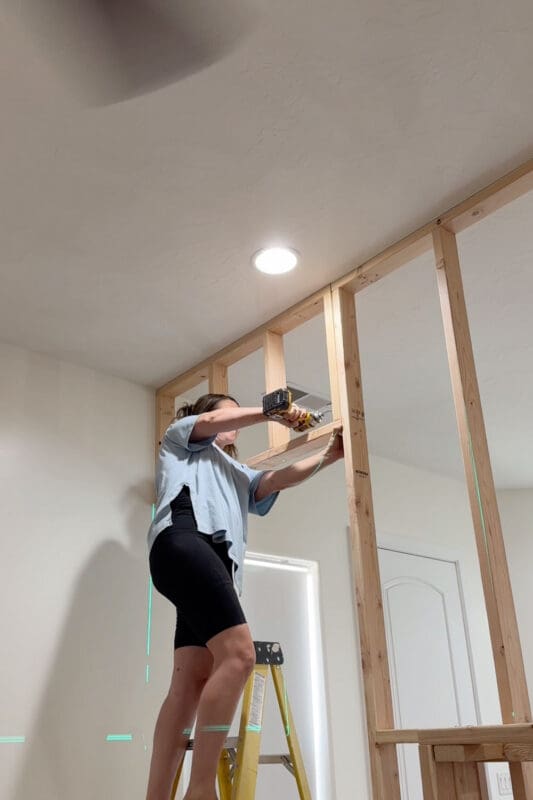
Here’s the key thing to know: the bottom of this frame is the top of your arch. So take your time getting the height where you want it.
If your ceilings are lower, you might be able to skip this step entirely and build your arch right under the existing top of the opening.
Step 2: Draw and Cut the Arch Pieces
Next, I drew the arch curve onto a sheet of 1/2-inch MDF.
I freehand drew the curve for these DIY arched doorways. Since I’ve done this a few times, I was comfortable with just going for it. If freehanding makes you nervous, no shame! Here are a couple of easy ways to get a smooth curve:
- Use a string. Tie a pencil to a piece of string, hold the other end in place, and swing it like a giant compass.
- Trace something round. A bowl, a bucket, a lid. Whatever gives you the curve you like.
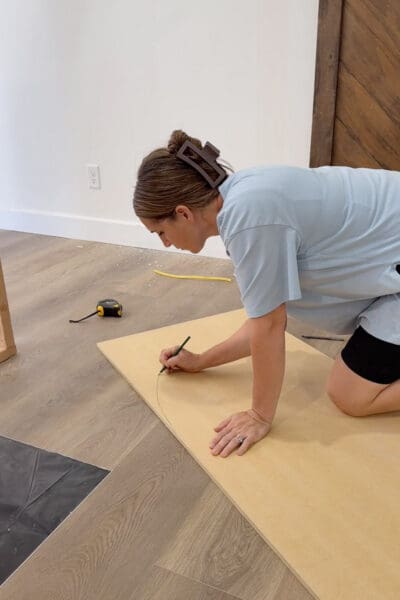
Once the curve was drawn, I cut it out with a jigsaw and sanded the edges smooth with an orbital sander so they were nice and clean. I used that first piece as a template to make the rest of my arch pieces match. You’ll need 4 of these pieces for each arched doorway.
Step 3: Sandwich the Blocking
This is where your flat cutouts turn into a real arch. I cut short blocks from 2x4s and lined them up along one MDF piece, following the curve and the straight edges. Then I set the matching MDF piece on top and screwed everything together, sandwiching the blocking in between. The blocking gives the arch its depth and makes each piece nice and sturdy.
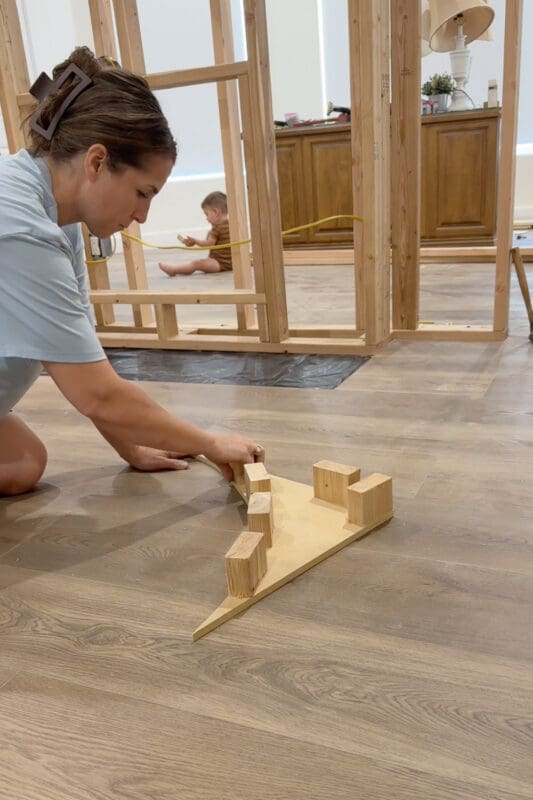
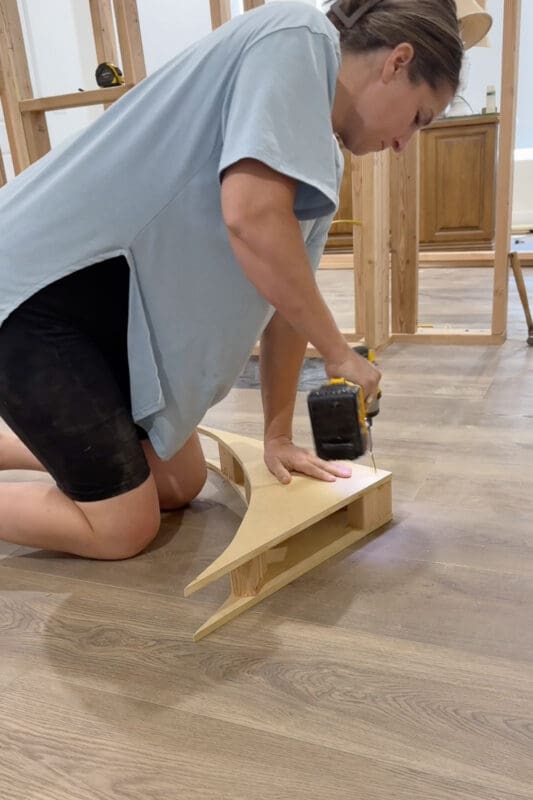
Here’s a closer look at a finished piece, from the front and from the side. These finished arch pieces need to be the same thickness as your wall.
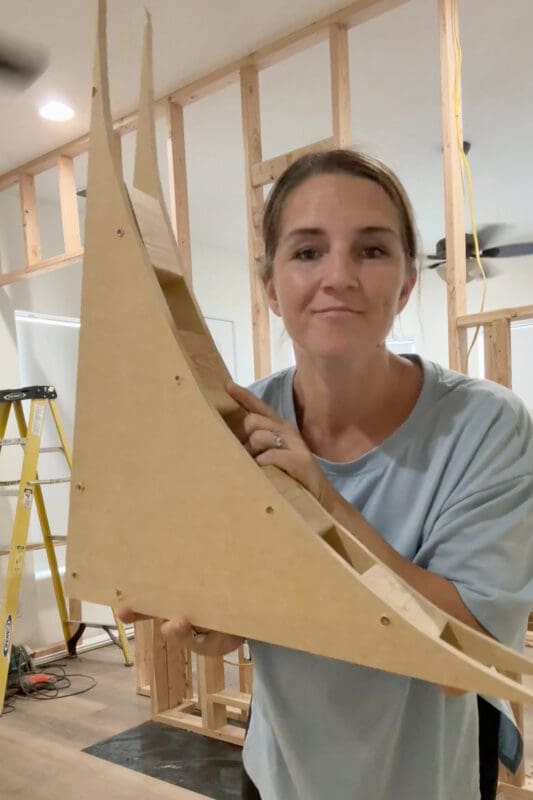
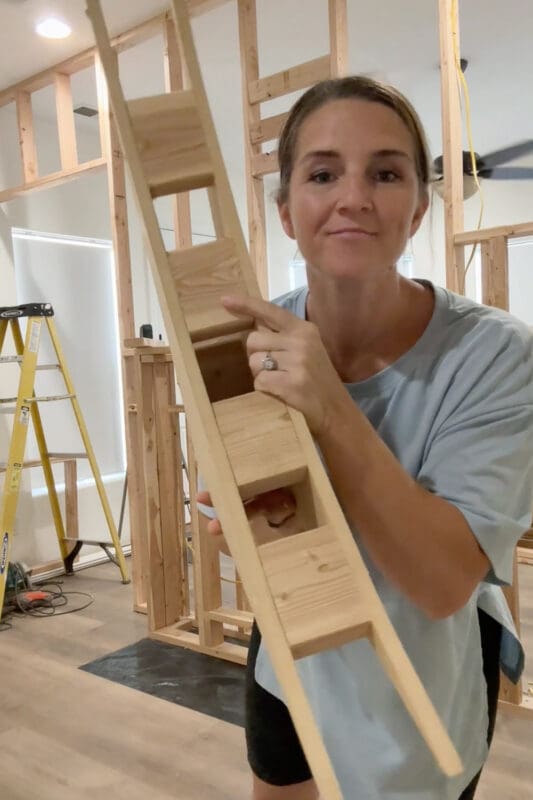
Repeat until you have two arch pieces for each opening. I’m turning two openings into DIY arched doorways, so I need to make 4 of these.
Step 4: Install the Arches
Time for the fun part! I held each arch piece up into the corner of the opening, tucked right under the new 2×4 frame, and screwed through the blocking and into the framing.
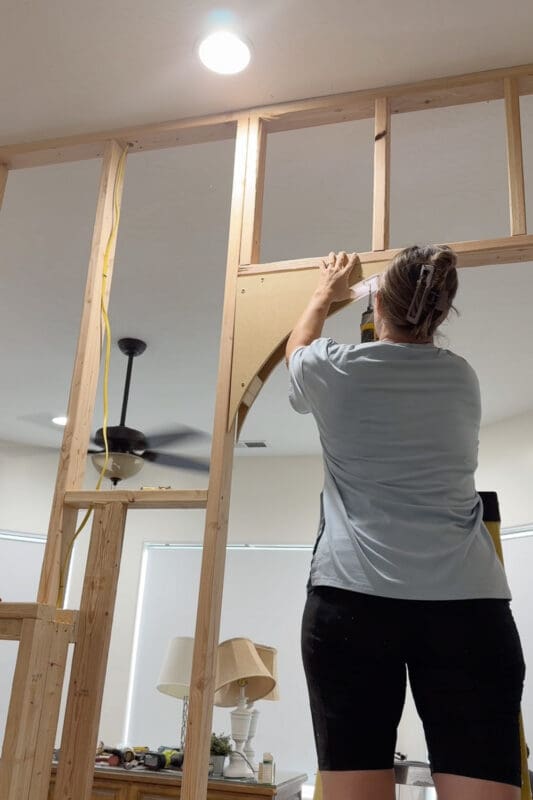
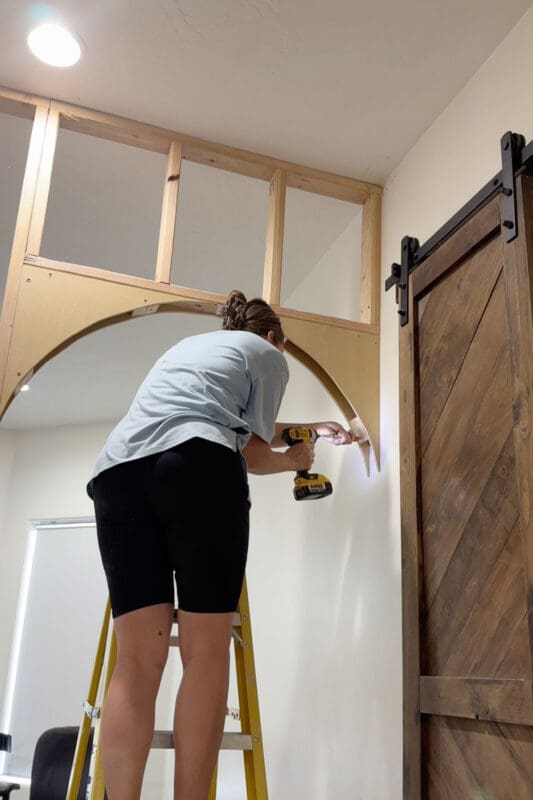
On each opening, one arch piece attaches to the new divider wall and the other attaches to the existing bedroom wall. Lucky for me, there was a wall stud right where I needed it, so I screwed straight into it.
Tip: If there isn’t a stud where your arch needs to attach, the best approach is to open up the drywall and add blocking behind it. That way, your arch has something solid to anchor into.
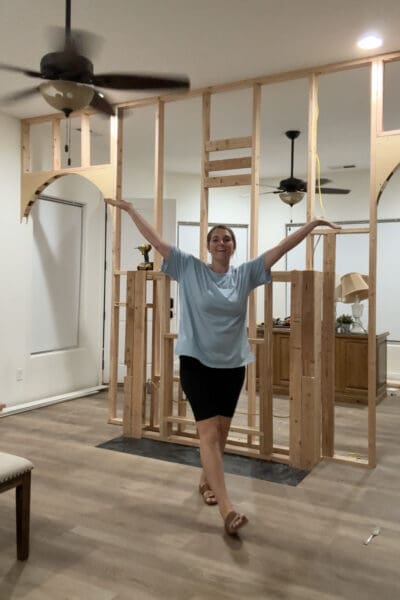
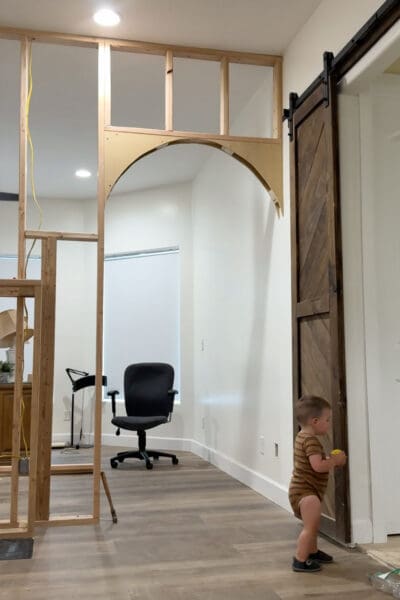
And just like that, both openings had arches!
I may or may not have done a little happy dance. (I did. There’s photographic evidence.)
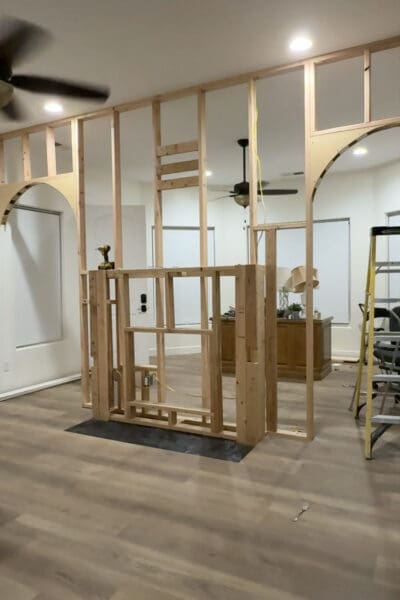
What We’re Going For
I know it’s hard to picture the finished room when it still looks like a lumber yard. So here’s the AI-generated inspiration image I made of what we’re going for. (To be clear, this is not the finished room! Just some inspo). If you want to learn how to make your own AI artistic renderings for your DIY projects, check out my post: Using ChatGPT for Interior Design Help.
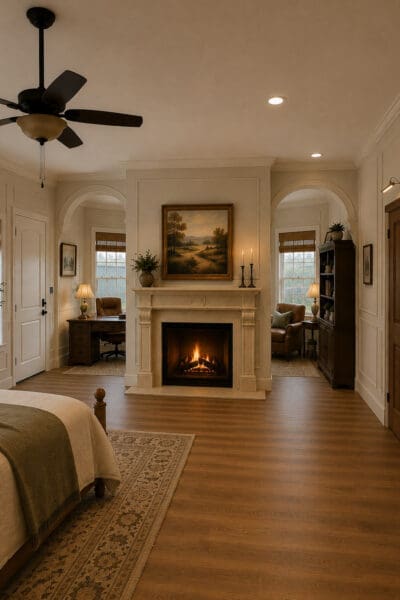
What’s Next
The arches are framed, so next up is drywall and installing the fireplace. After that, we will have all the finishing details, like trim and paint. So excited to walk you through this whole DIY bedroom refresh, and I can’t wait to share the finished pics.
And if you want to follow along with the rest of this bedroom makeover, here’s the whole series:
- Building a divider wall – DIY Room Divider Wall: How I Split One Big Bedroom Into Two Spaces
- DIY arched doorway (you are here!)
- Fireplace installation
- The big reveal
DIY Arched Doorway FAQ
I used 1/2 inch MDF for the arch pieces, with 2×4 blocking sandwiched between two curved pieces. MDF cuts cleanly with a jigsaw and sands smooth, so it’s easy to get a nice curve.
You can freehand it, tie a pencil to a string and swing it like a compass, or trace something round, like a bowl or bucket. Just get one piece you’re happy with, then it’s easy to trace the rest.
Only if your opening is taller than you want your arch to be. The bottom of that frame becomes the top of your arch. With lower ceilings, you may be able to skip it.
📌 Pin This DIY Arched Doorway Tutorial for Later
Planning to add some curves to your own home? Save this pin to your DIY board so you’ll have the steps handy when you’re ready to build!