




Published October 29, 2026
This DIY treasure chest started as a pile of old cardboard boxes and a few sheets of craft foam, and it ended up being the star of our church trunk or treat. We went full pirate this year, costumes and all, so the van needed a treasure chest worthy of the whole crew.
It looks like a real wooden chest with aged gold hardware, but it’s really just cardboard, craft foam, hot glue, and a little paint. The kids got in on the action too, which made it even more fun.
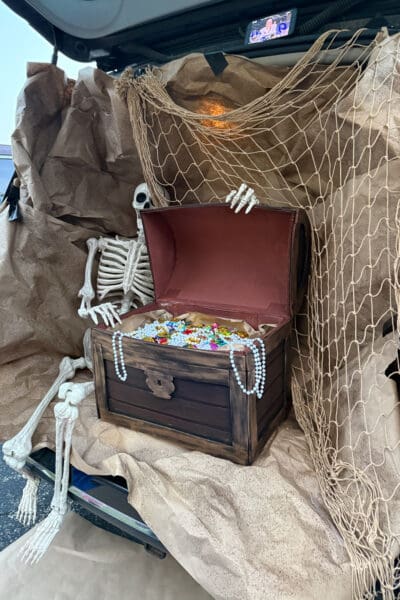
And yes, that’s a phone propped up on the liftgate. We had the BYU game playing the whole time so we could keep one eye on the score between handing out treats. Priorities, people.
DIY Treasure Chest: At a Glance
Here’s the whole process before we get into the step by step photos:
- Hot glue three equal cardboard rectangles into the bottom, front, and back
- Glue on the two side pieces from the inside
- Trace a mixing bowl to make two rounded lid sides
- Wrap the rounded sides in cardboard to form the curved lid
- Attach the lid with packing tape inside and out
- Cover everything in brown craft foam planks
- Frame the edges with black craft foam trim and a lock detail
- Spray the whole chest with red primer
- Paint the trim black and the planks brown
- Rub Antique Gold Rub ‘n Buff onto the trim
- Fill it with treasure
Quick Answer: How Do You Make a DIY Treasure Chest?
Build a box from cardboard, then make a curved lid by tracing a mixing bowl for the rounded sides and wrapping them in a cardboard sheet. Tape the lid on as a hinge, cover the chest in brown craft foam planks, and frame the edges with black foam strips. Prime it, paint the planks brown and the trim black, then rub Antique Gold Rub ‘n Buff over the trim so it looks like aged metal.
Supplies for a DIY Treasure Chest
Most of this you probably already have in the garage or craft closet. I used old shipping and moving boxes for the cardboard, so the base of the chest was free.
For the Chest
- Cardboard (old boxes work great)
- Brown craft foam sheets
- Black craft foam sheets
- Hot glue gun and glue sticks
- Clear packing tape
- Utility knife
- Cordless electric cutter (optional, but it makes cutting cardboard so much easier)
- Scissors
- Long metal ruler or framing square
- Pencil
- A large mixing bowl for tracing
For Painting
- Rust-Oleum 2X Ultra Cover red primer
- Black acrylic craft paint
- Brown acrylic craft paint
- Craft paint brush
- Foam paint brush
- Rub ‘n Buff in Antique Gold
- Drop cloth
Step 1: Build the Bottom, Front, and Back
Start with three rectangles of cardboard that are all the same size. These become the bottom, front, and back of your DIY treasure chest.
Lay them flat in a row and tape the seams with clear packing tape. The tape is just there to hold everything together temporarily while you work.
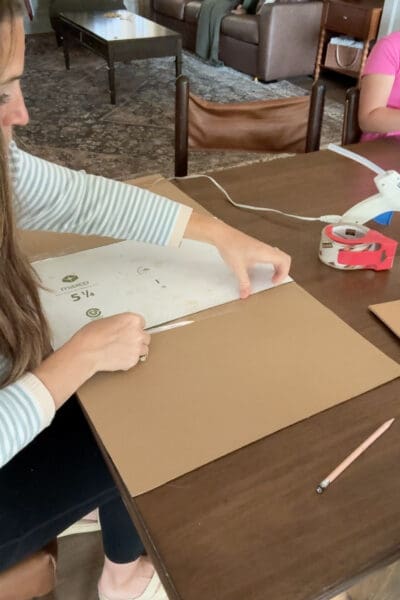
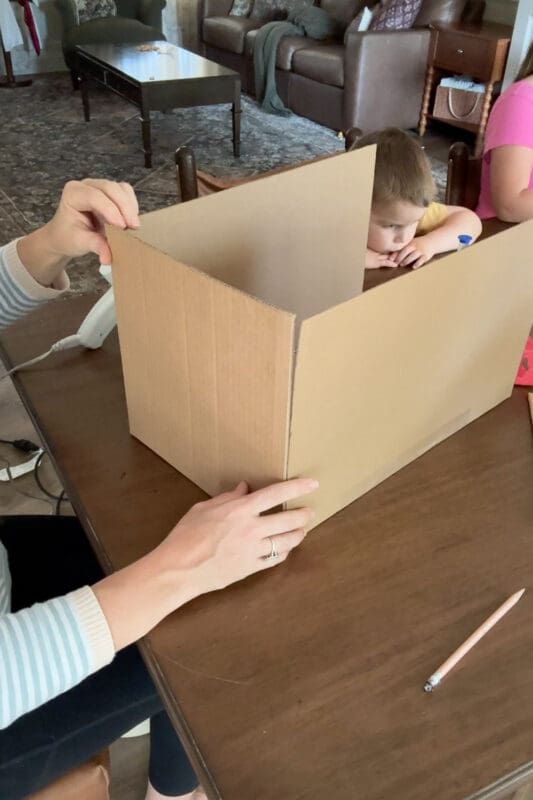
Next, fold the front and back pieces up and use your hot glue gun to run a line of hot glue along each inside seam. This is what actually holds the box together, so don’t be shy with the glue.
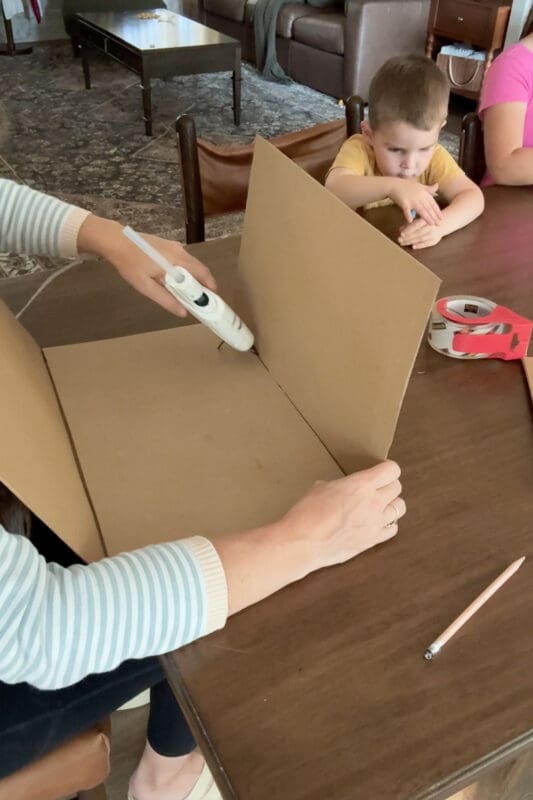
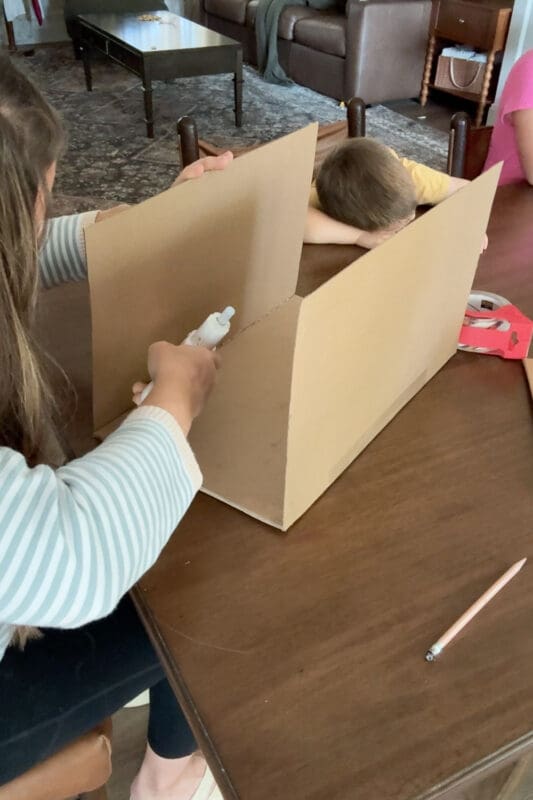
As you can see, my helpers were riveted by this part of the process.
Step 2: Add the Side Pieces
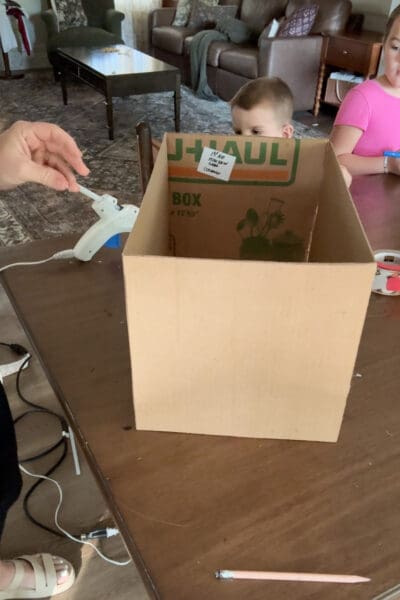
Cut two more pieces of cardboard for the sides of the DIY treasure chest. Hold each one in place against the front and back, then hot glue the seams from the inside.
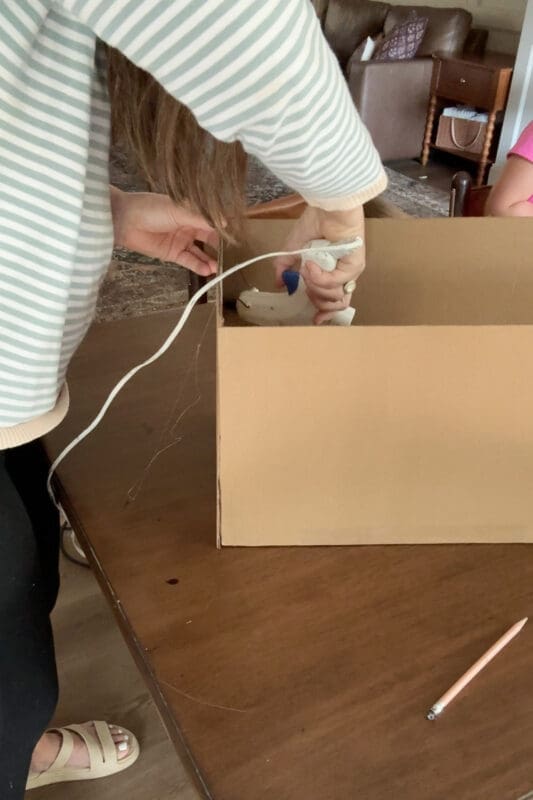
Now you’ve got an open cardboard box! Don’t worry about any printing or labels on the inside. Mine still says exactly which moving box it used to be, and nobody will ever know once it’s full of treasure.
Step 3: Make the Rounded Lid Sides
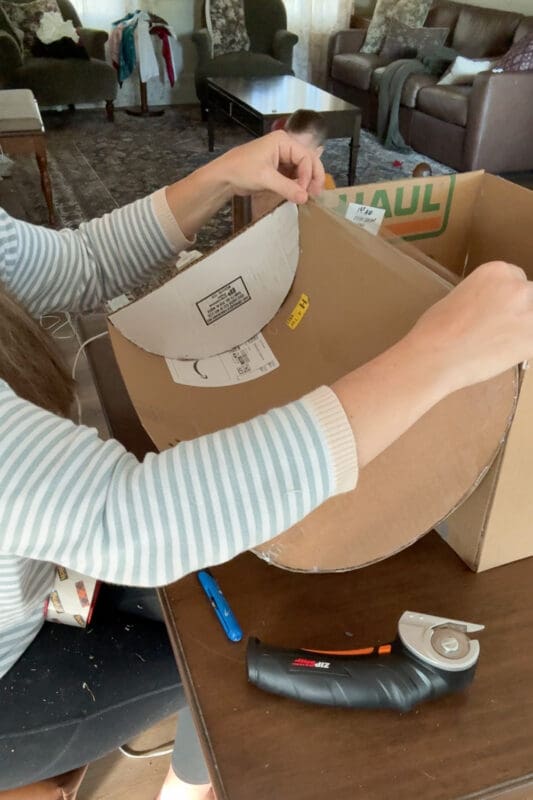
The curved lid is what makes it look like a real pirate treasure chest, and the secret tool is sitting in your kitchen cabinet. I grabbed a large stainless steel mixing bowl, flipped it upside down on a piece of cardboard, and traced around it. I cut along the traced line with my X-ACTO knife, then repeated the process on the second side.
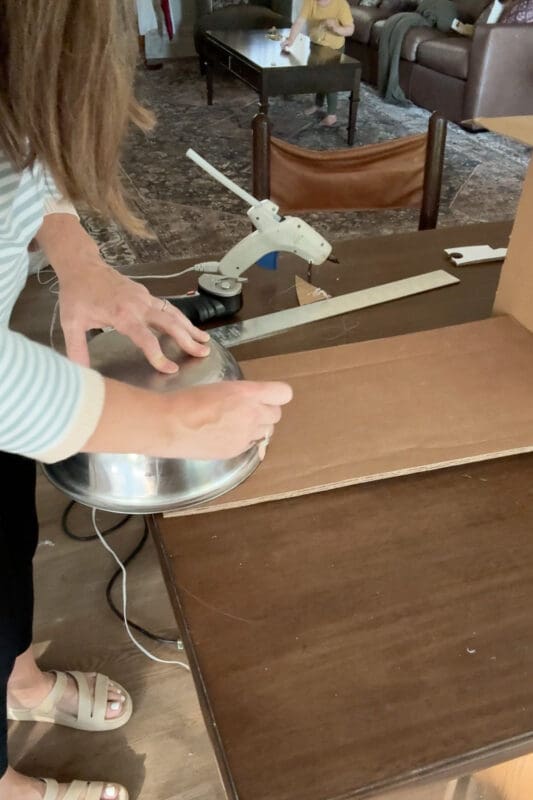
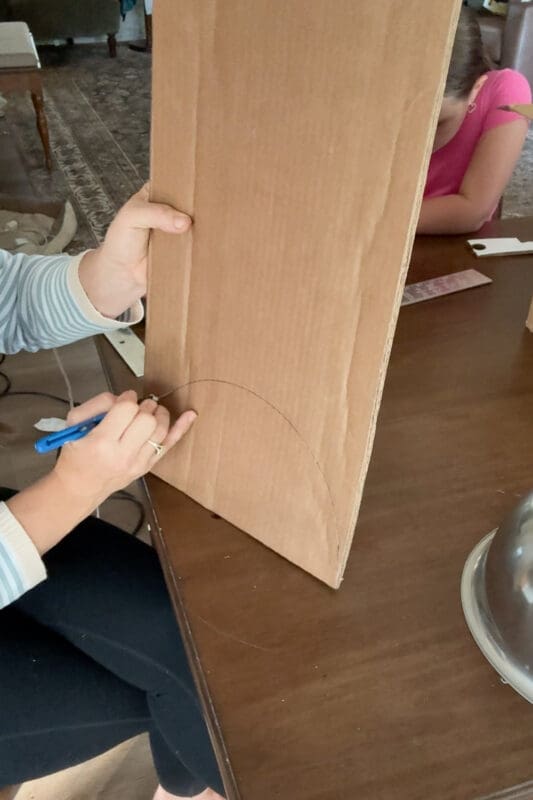
The key here is size. Each rounded piece needs to be the same width as the side pieces of your box, so the lid of your DIY treasure chest ends up the same size as the base.
Step 4: Wrap the Lid in Cardboard
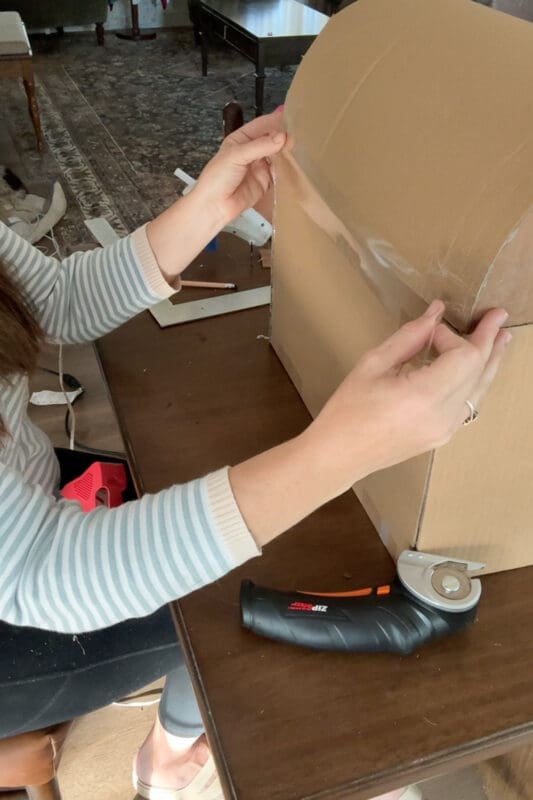
Cut a flat sheet of cardboard that’s the same width as the base of your DIY treasure chest. Hot glue the curved edge of one rounded piece along the end of the sheet.
Then slowly bend the cardboard over the curve, gluing as you go. Take your time so the curve stays smooth.
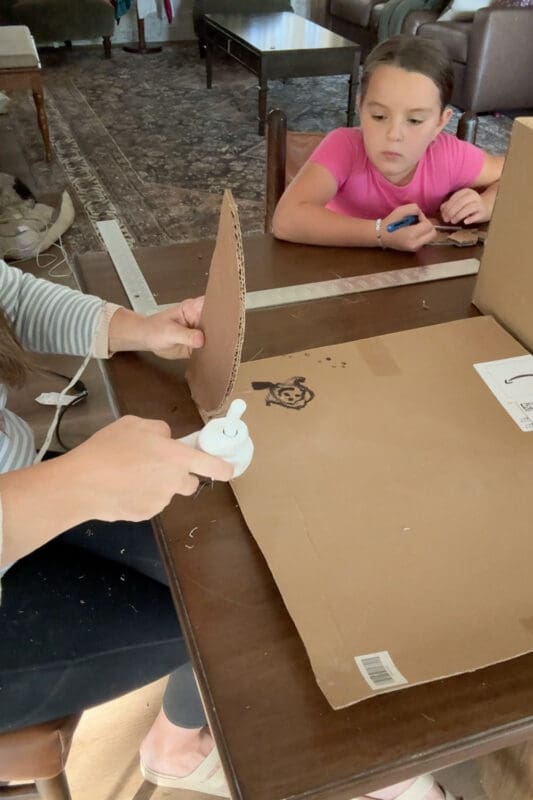
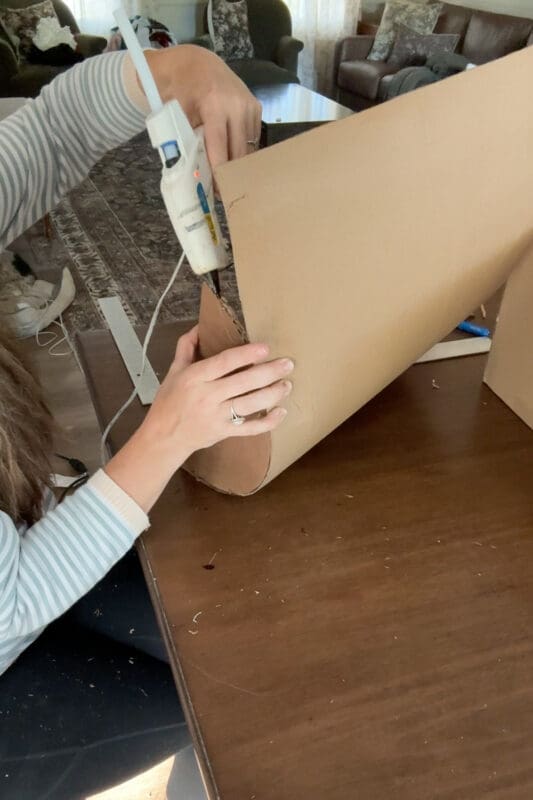
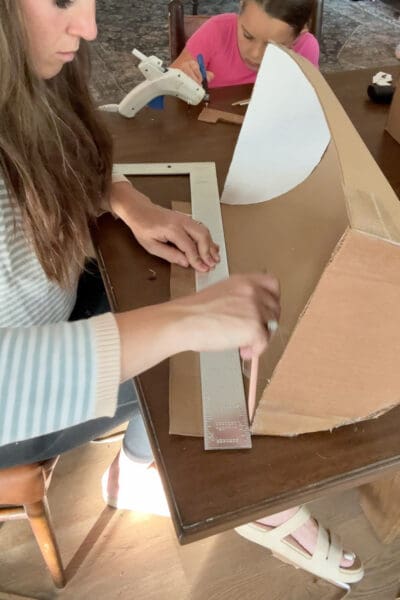
Once both rounded sides are glued in, you’ll probably have some extra length hanging off the end. Mark it with a ruler and trim it off with a utility knife or cordless electric cutter. I recommend the electric cutter; it’s much faster and easier on your hands.
Step 5: Attach the Lid With Packing Tape
To turn the lid into a working hinge, I used packing tape along the back seam where the lid meets the box on the outside, and I also opened the lid and taped the same seam on the inside to reinforce it. Taping both sides keeps the hinge strong.
Step 6: Cut and Glue Brown Craft Foam Planks
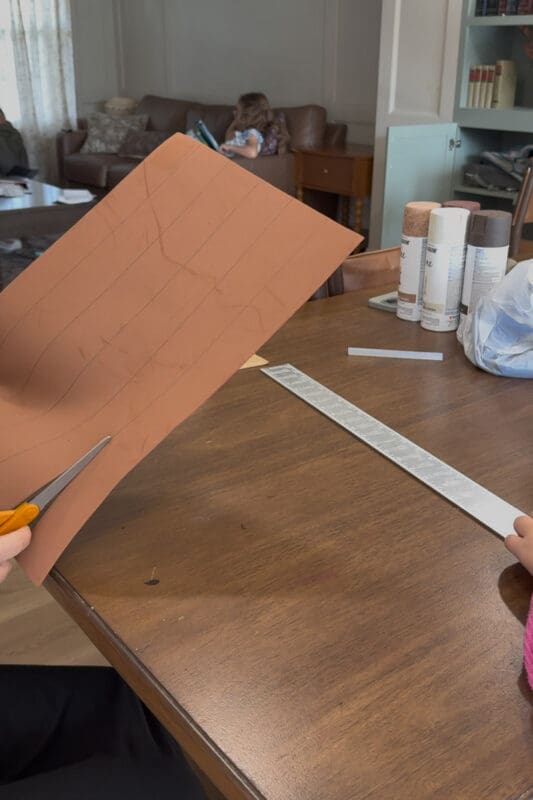
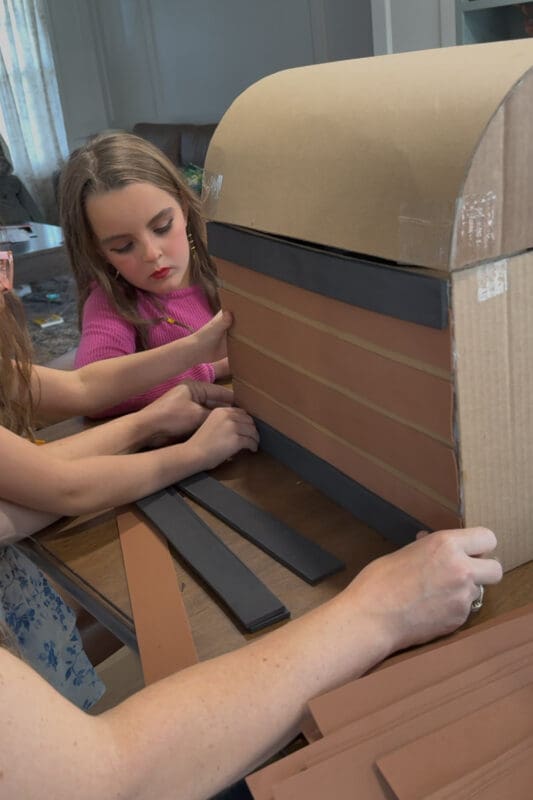
This is where your cardboard box starts turning into a wooden pirate chest. Use a metal square or a ruler to mark long strips on sheets of brown craft foam. These become the wood planks. Cut along your pencil lines with scissors.
Grab your hot glue gun and run a line of hot glue down the back of each foam strip and press it onto the DIY treasure chest. Leave a small gap between each plank so it reads like individual boards. The planks go all the way around the whole chest, lid and sides included.
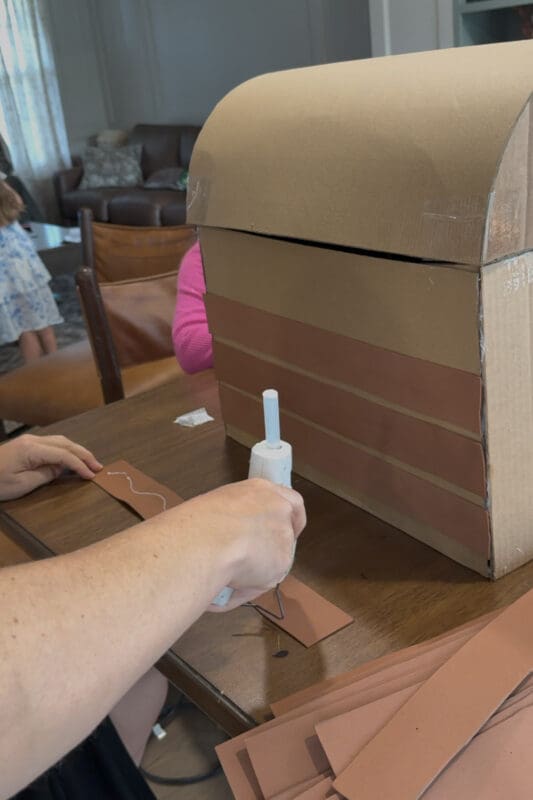
Tip: If you want the lid to open easily, leave a little gap in the foam along the back where the lid meets the box. You can see the gap I left in the first photo of Step 9.
Step 7: Add Black Foam Trim
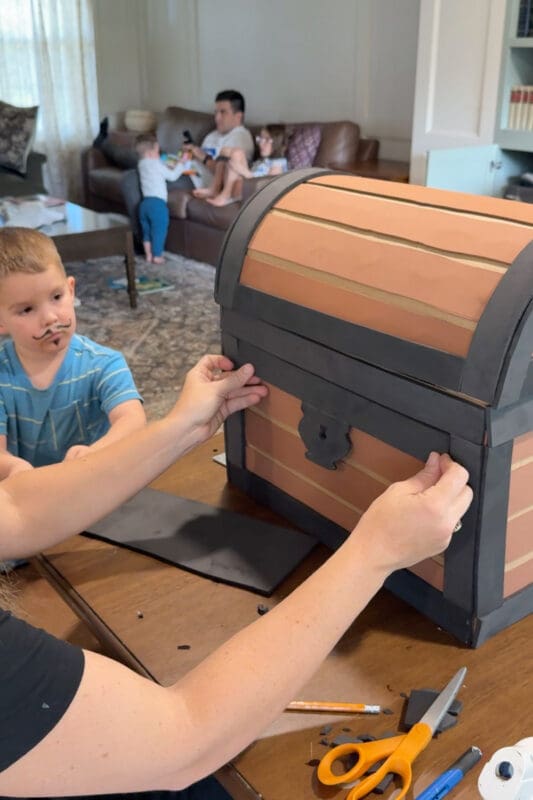
To make the trim that looks like the metal bands on a real treasure chest, cut black craft foam into strips that are slightly thinner than your planks. Glue them along all the edges of the chest.
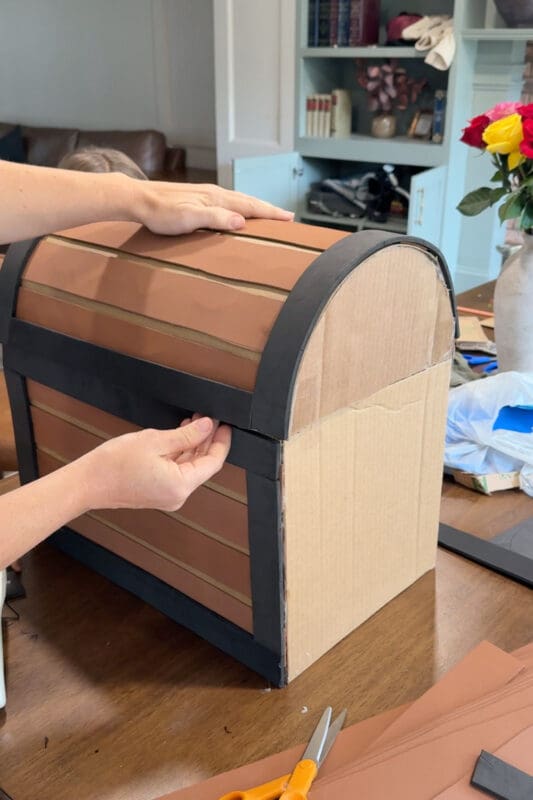
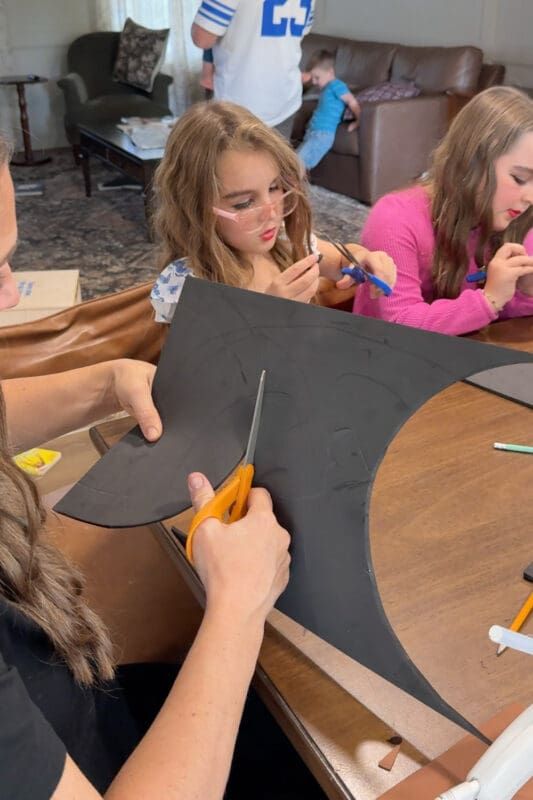
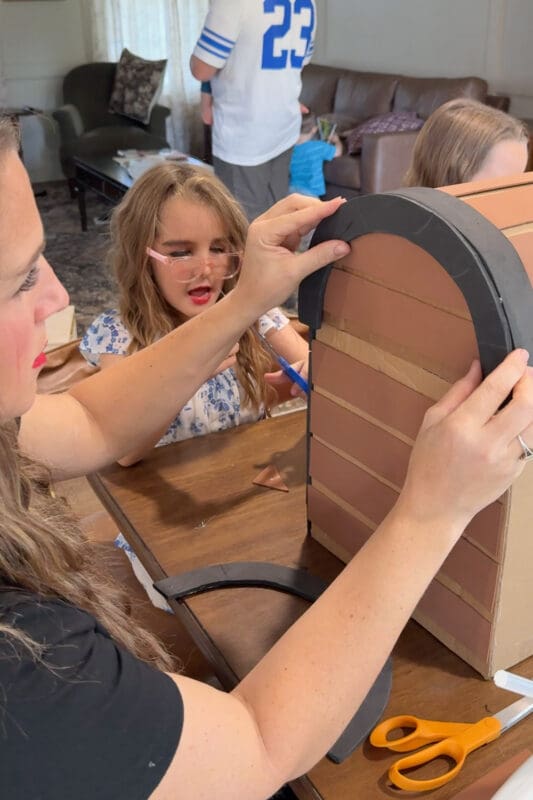
For the rounded sides of the lid, I used that same trusty mixing bowl to trace a curve onto black craft foam, then cut it into an arch.
Then I glued the arch around the rounded edge of each side, so it frames the curve of the DIY treasure chest lid.
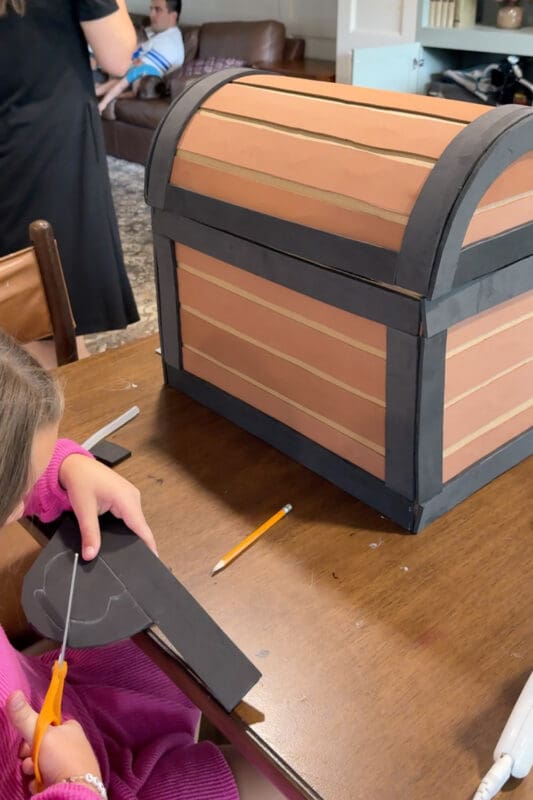
Step 8: Make the Lock Detail
No treasure chest is complete without a lock! Draw a lock plate shape on black craft foam and cut it out. My helper took this job very seriously.
Glue the lock to the center front of the chest, just below the lid.
Step 9: Spray Paint With Red Primer
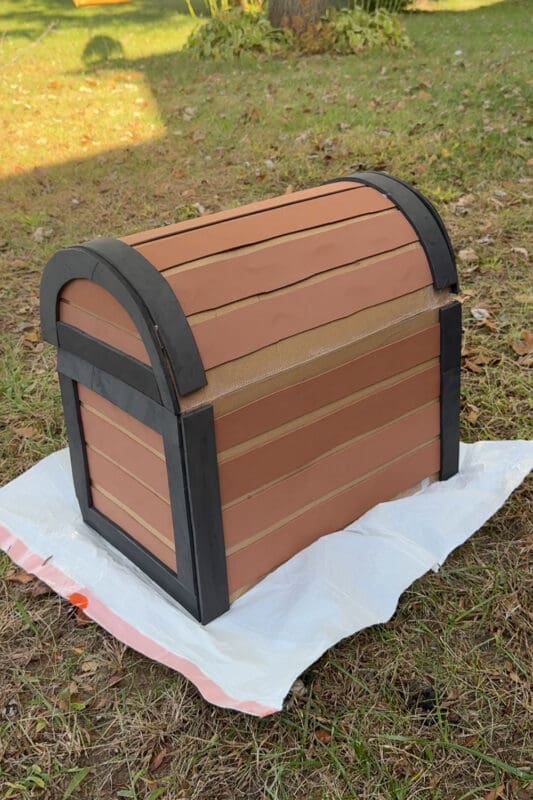
Once all the foam is on, take the chest outside and set it on a drop cloth (or a trash bag in my case). Here’s the back of mine before painting, where you can see the strip of cardboard I left uncovered along the hinge.
Spray the whole thing with primer. I used Rust-Oleum 2X Ultra Cover Flat Red, which dries to a ruddy, redwood brown. This one coat pulls the cardboard and two colors of foam together into one solid base. Any brownish color should do for this part.
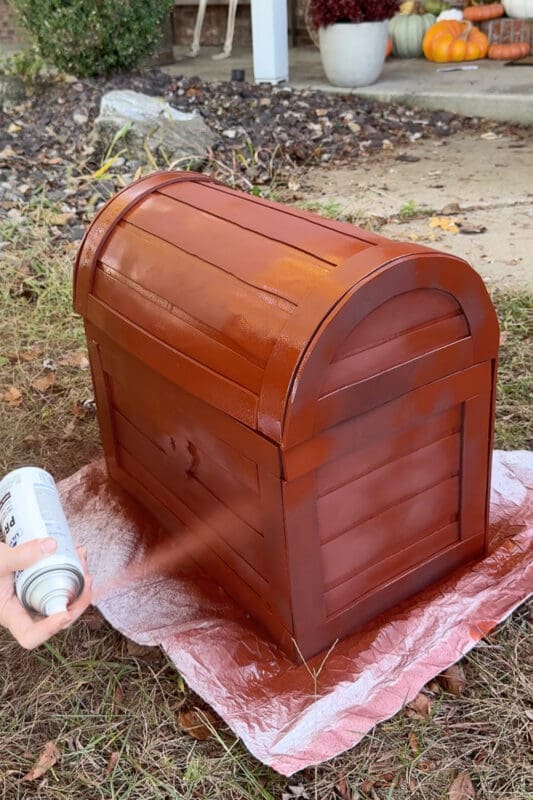
If you want the inside of your chest to look nice, and not like moving boxes, go ahead and spray the inside as well.
Step 10: Paint the Trim Black
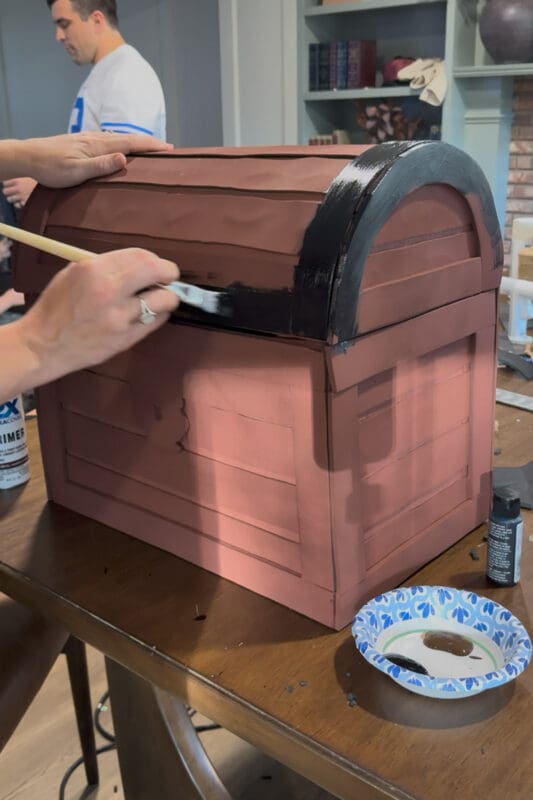
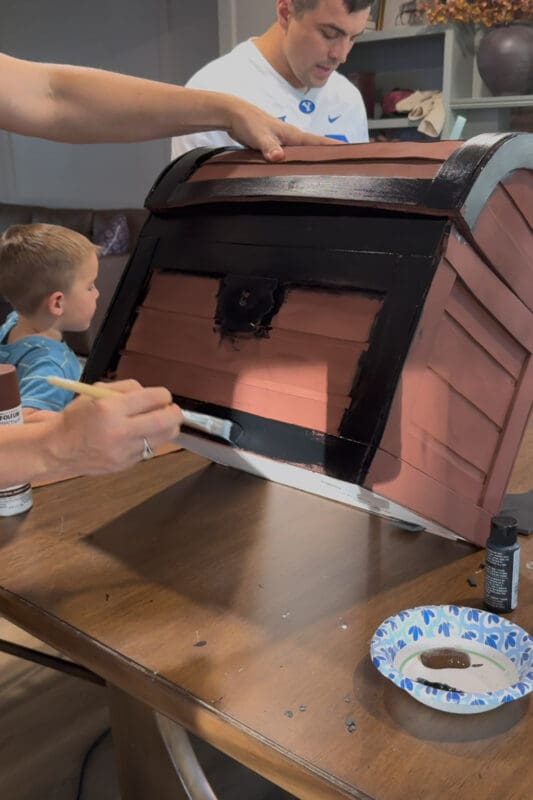
After the primer dries, bring the DIY treasure chest back inside and paint all the raised trim edges and the lock with black acrylic craft paint. You don’t have to be careful. It’s ok if some black gets on the wood plank part.
Step 11: Paint the Planks Brown
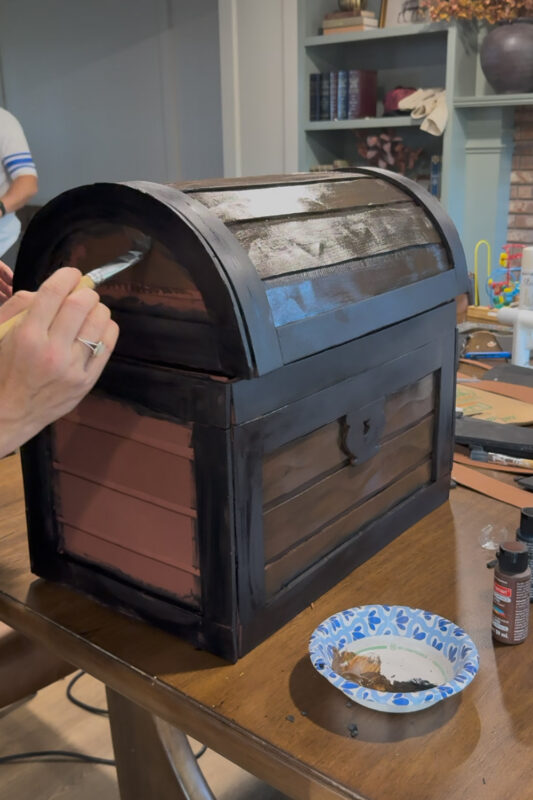
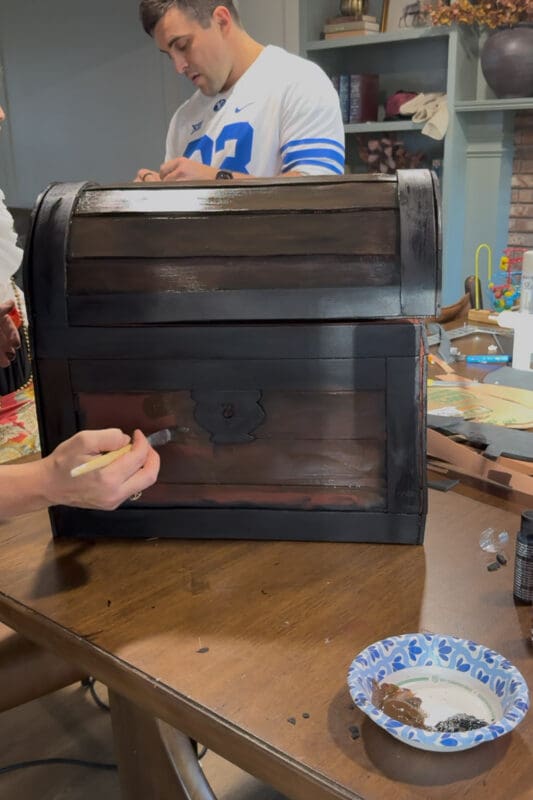
Next, brush brown acrylic craft paint over the wood plank sections. Don’t stress about perfect coverage. The streaky brushstrokes and bits of red primer peeking through are what make it look like real wood grain.
Step 12: Add Rub ‘n Buff to the Trim
This is where the magic happens. I rubbed Rub ‘n Buff in Antique Gold over all the black trim with a foam craft brush. The black underneath gives the gold so much depth, and suddenly that foam trim looks like old metal hardware.
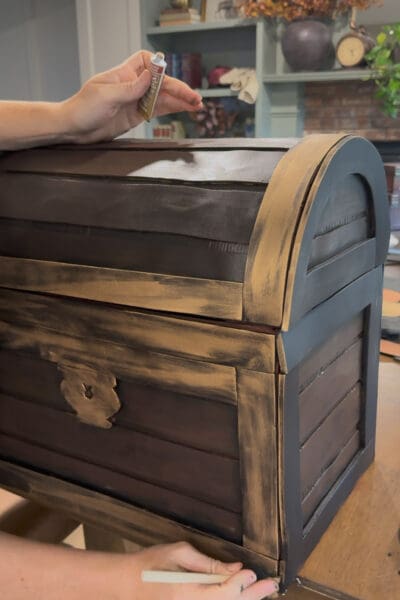
If you’ve been around here for a while, you know I have a serious love for Rub ‘n Buff. I used the same Antique Gold on my gold bathroom mirror and my DIY flocked ornaments. Every time, the black underneath is what makes the gold look like real metal instead of gold paint.
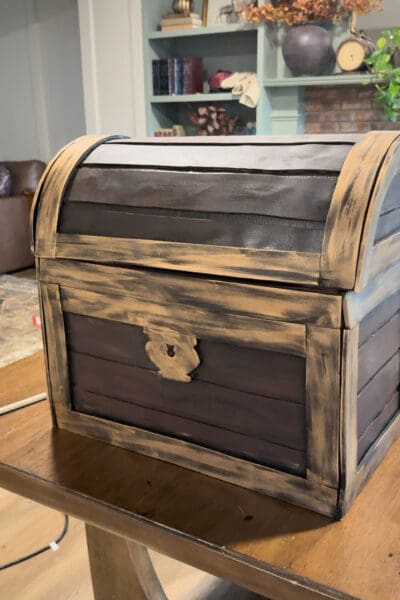
Step 13: Fill Your Treasure Chest
Now for the fun part! I put an empty cardboard box in to fill space, tucked crumpled kraft paper into the chest, and piled plastic gold coins and colorful gems on top. A few strands of pearl necklaces draped over the front edge made it look like the treasure was spilling out.
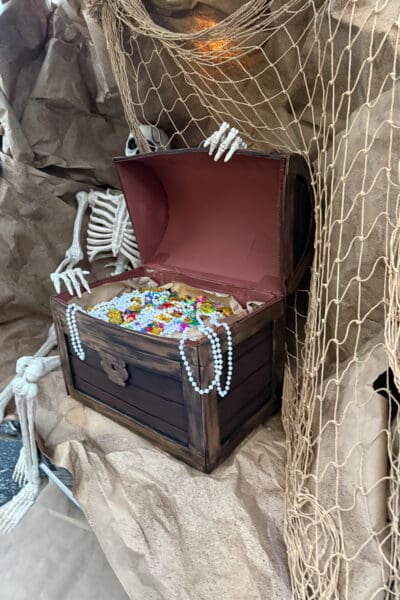
How I Decorated the Trunk for Our Pirate Trunk or Treat
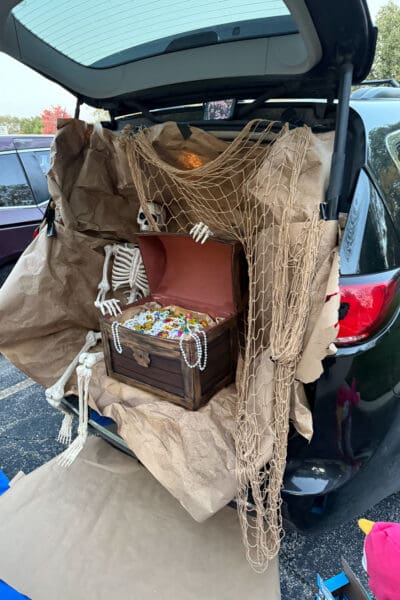
The treasure chest was the star, but the rest of the van setup was simple and budget friendly:
- Brown kraft paper lined the whole cargo area and spilled down over the bumper onto the ground. Crumpling it gives it a rugged, rocky look.
- Black tape held the paper up along the inside of the van.
- A fishing net draped down one side for that shipwreck vibe.
- A posable skeleton sprawled next to the chest with one bony hand reaching over the lid, like he’s still guarding his treasure.
- Gems and gold coins to fill up the DIY treasure chest
What I’d Add Next Time
I had big plans to glue faux vines around the edge and seashells onto the fishing net, but I ran short on time. If you have a little extra time, they’d be a fun finishing touch.
The Treasure Chest Saved the Day
We totally underestimated how many kids would show up and ran out of fruit snacks way earlier than planned. So we did what any good pirate would do and started handing out the jewels from the treasure chest. Honestly? The kids loved them more than the candy.
If you’re planning your own trunk or treat, a chest full of plastic gems is a great built-in backup treat.
📌 Pin This DIY Treasure Chest for Later
Save this to your Halloween or trunk or treat board so you’ve got it ready when it’s time to plan next year’s setup.
FAQ: Making a DIY Treasure Chest
You need cardboard, brown and black craft foam, a hot glue gun, packing tape, and a utility knife or scissors. For the finish, you need red spray primer, black and brown acrylic craft paint, and Antique Gold Rub ‘n Buff.
Trace a large mixing bowl onto cardboard to cut two rounded side pieces that match the width of your box’s sides. Glue a flat sheet of cardboard, cut to the width of the chest, around the curves, then trim off any extra length.
Cover it in strips of brown craft foam with small gaps between them, so each strip reads as a plank. After priming, brush on brown acrylic paint and let the streaky brushstrokes act as wood grain.
Glue black craft foam strips along the edges, paint them black after priming, then rub Antique Gold Rub ‘n Buff over the top. The black underneath makes the gold look like aged metal hardware.
Plastic gold coins, colorful plastic gems, and pearl bead necklaces fill it out nicely. Bonus: they double as giveaways if you run out of candy.