How to Paint a Front Door in 3 Easy Steps


Updated June 29, 2025
Refresh your home’s entrance by following my easy guide on how to paint a front door. This is a simple project that you can do for next to nothing if you have a little extra paint and a few basic supplies on hand. I will show you exactly how to paint a front door, for a quick project that will instantly update one of the most visible parts of your home.

Learning how to paint a front door is a beginner level, DIY project that needs very few supplies. This project was pretty much free for me as I used paint and primer that was left over from other projects around my house.
Tools and Materials
Why I’m Painting My Front Door
Before diving into how to paint a front door, let’s discuss why I’m doing it. We plan to upgrade our home’s exterior in the future, but that’s a ways off. Painting the front door is a quick, budget-friendly way to improve our entryway now.
Here’s what we started with: a wood door that looked old and scratched, with a dated, sad interior.
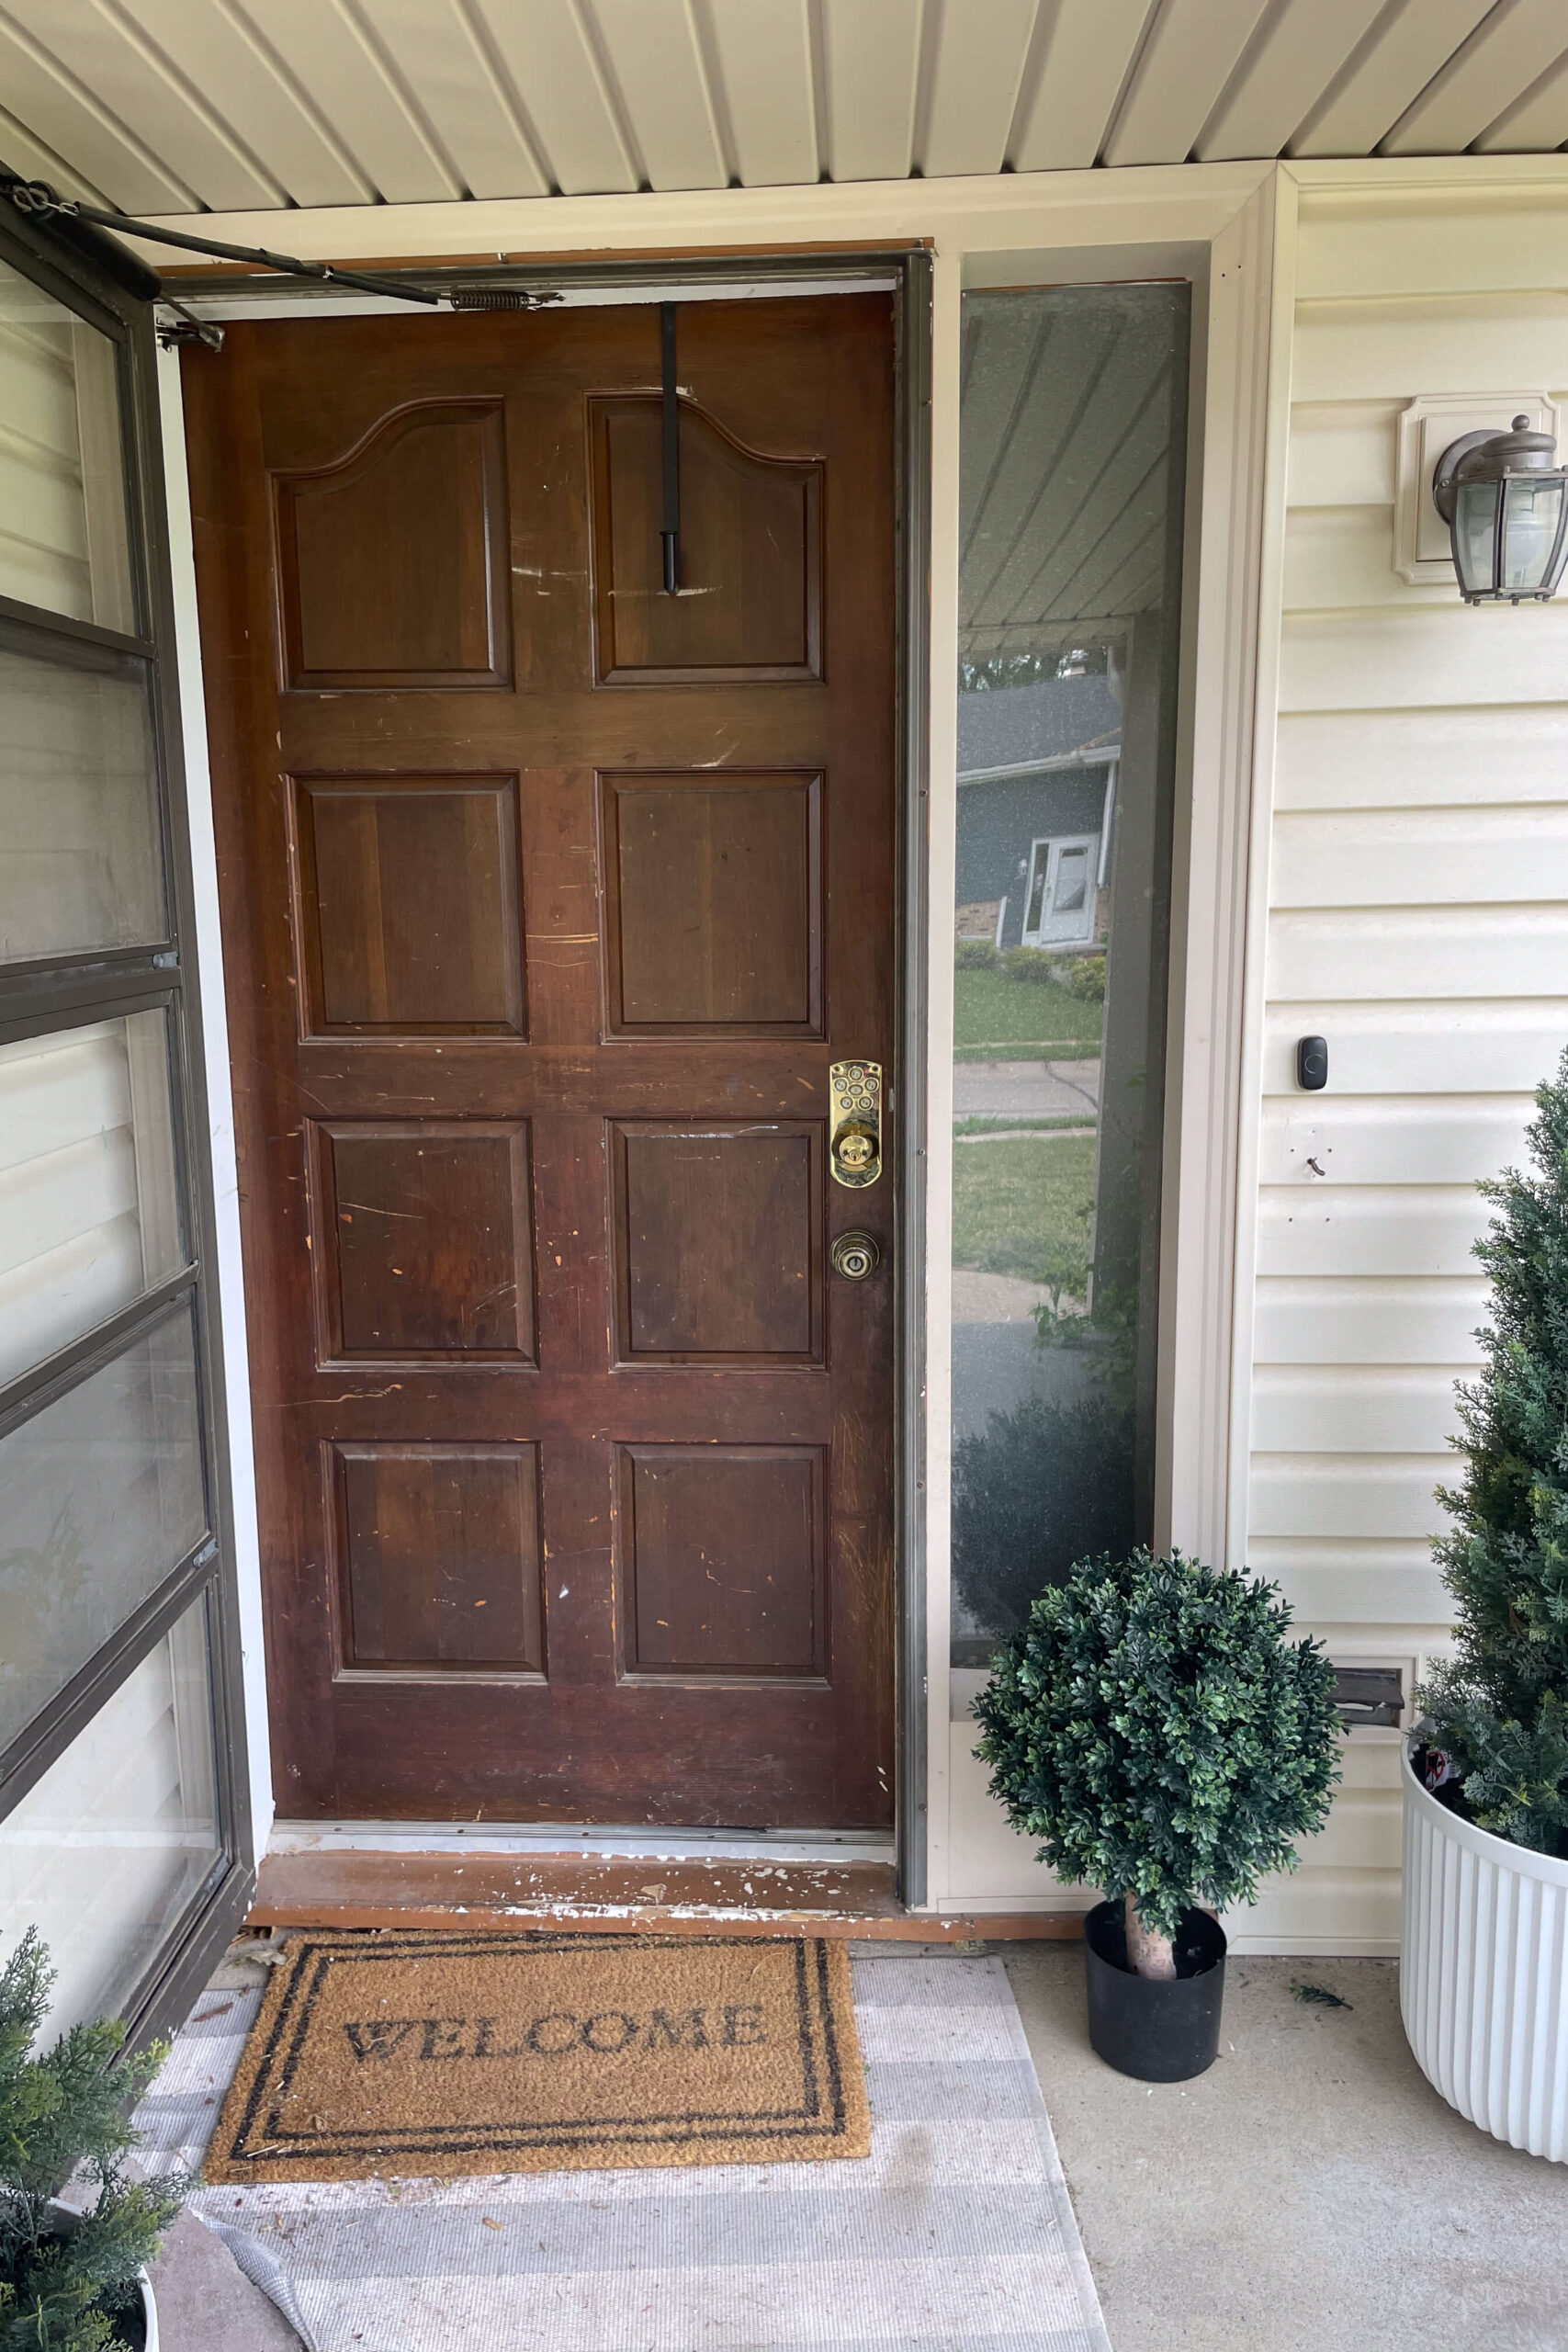
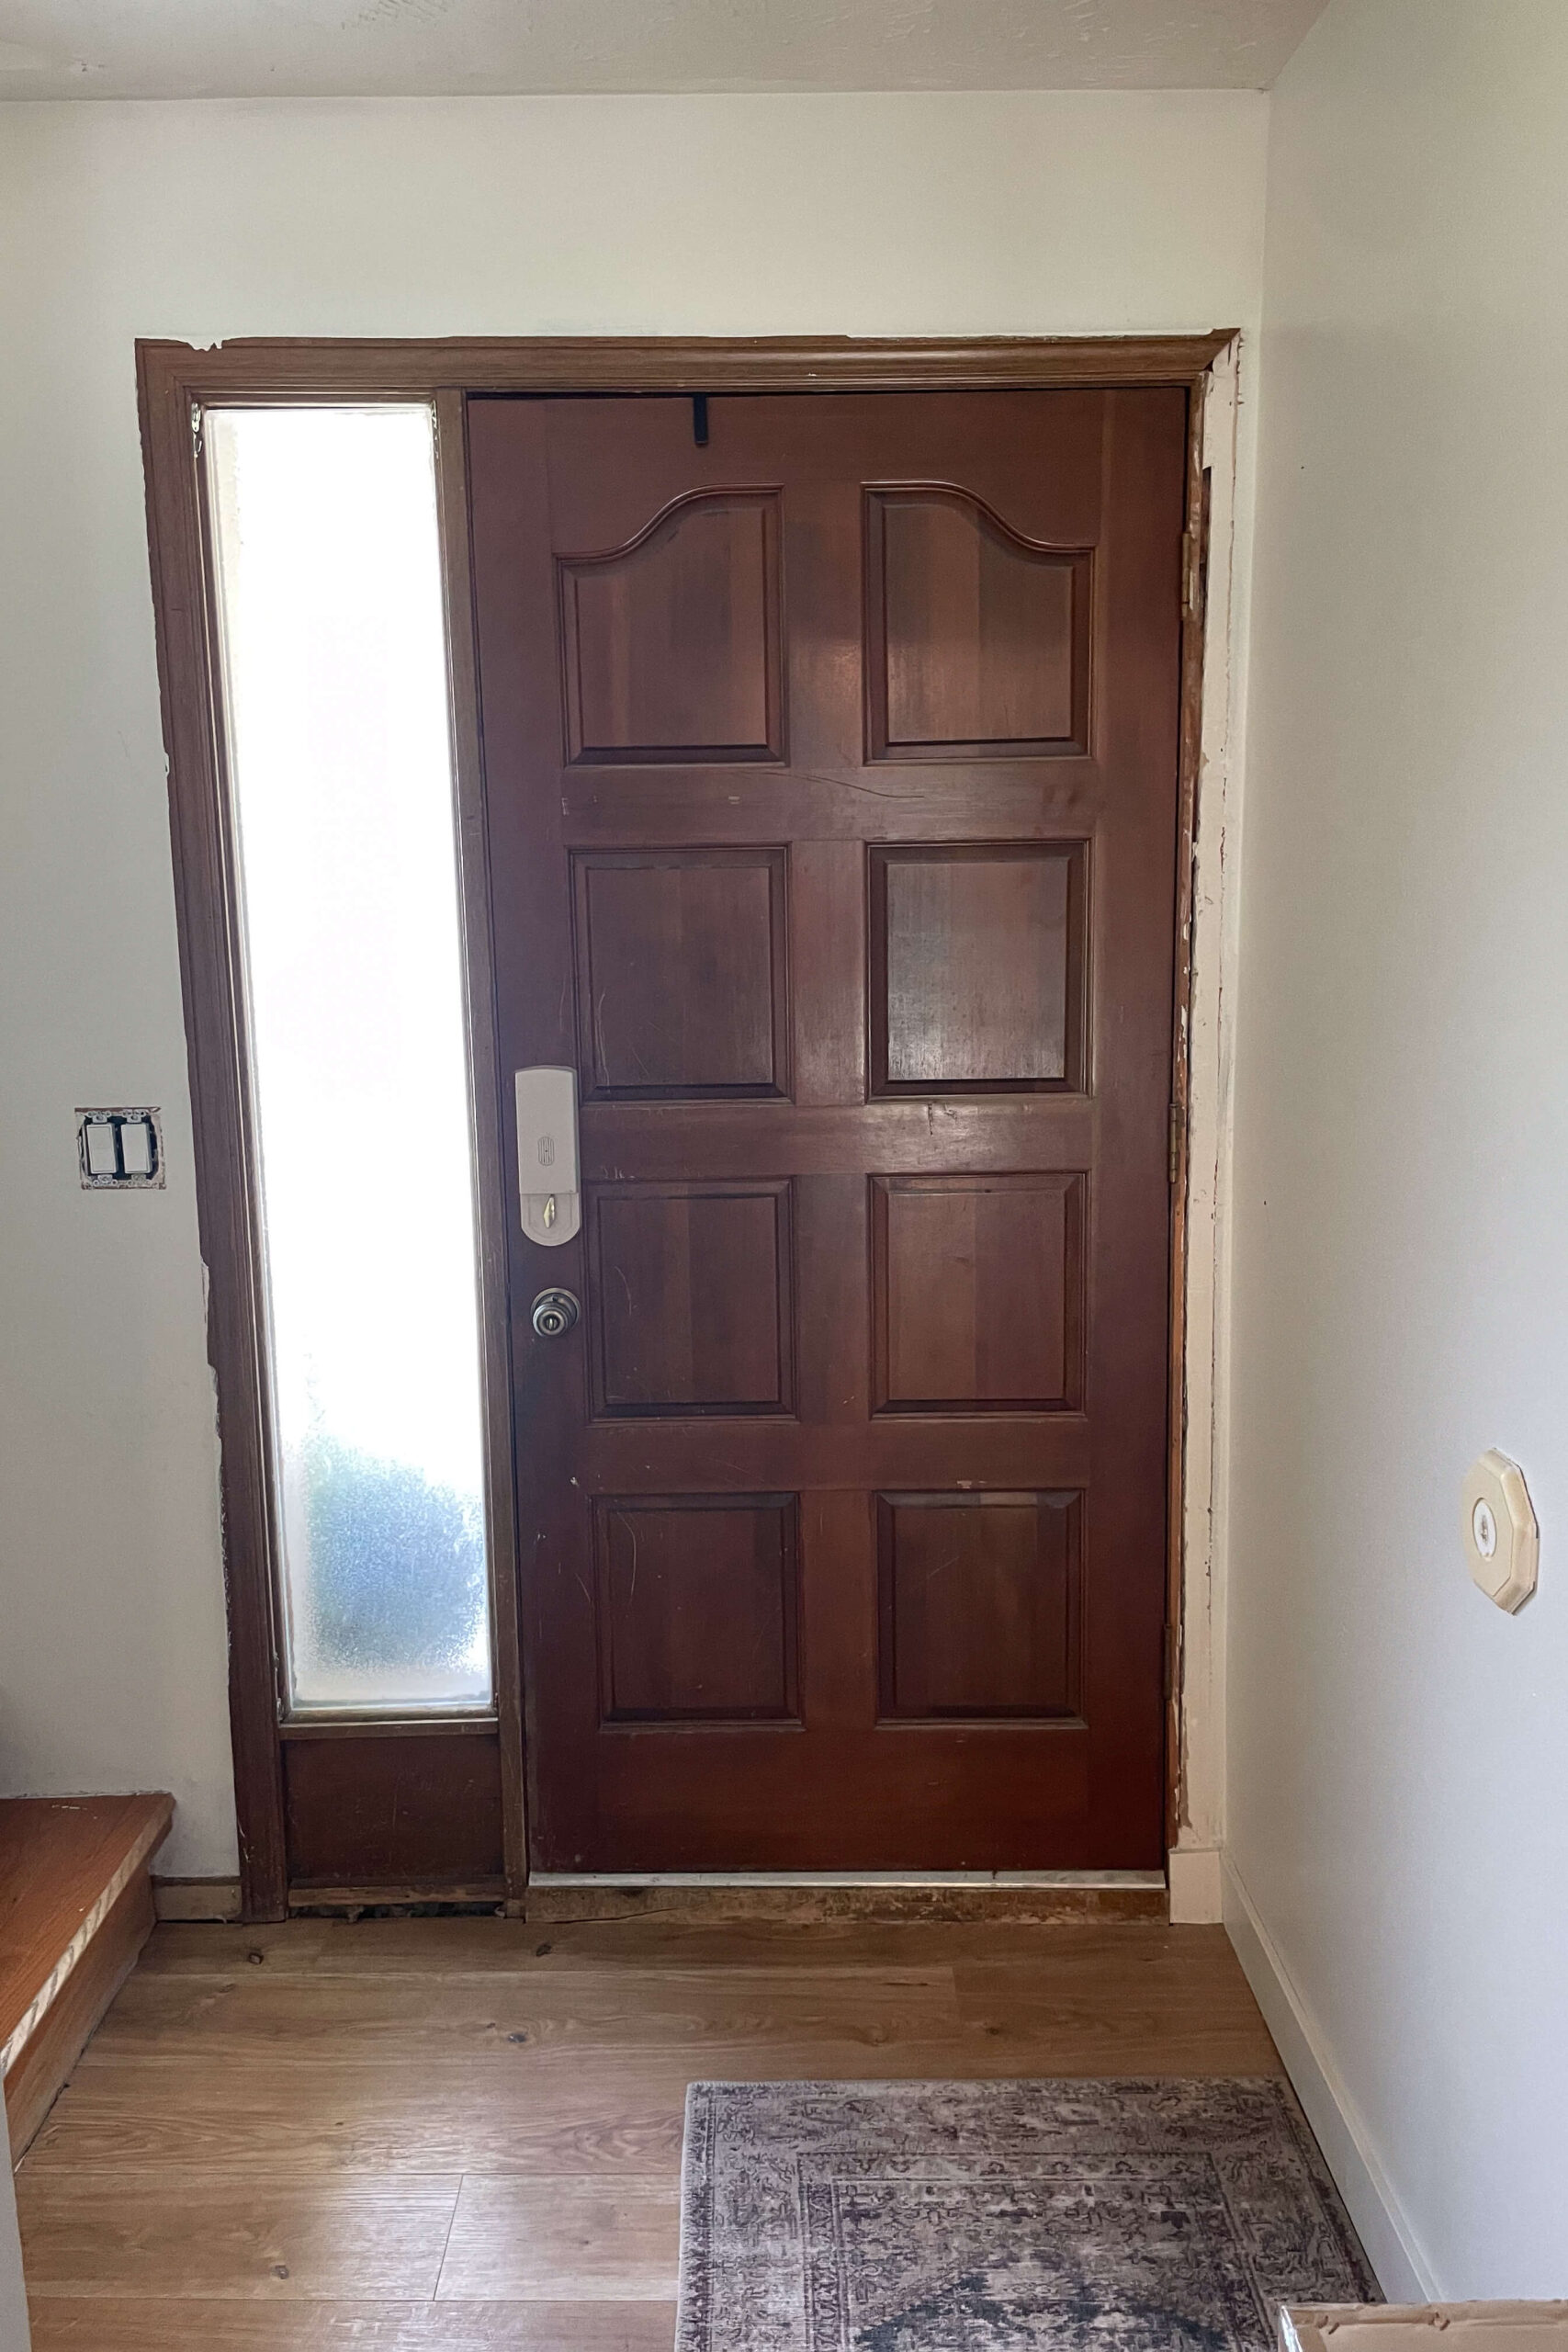
The interior didn’t look much better. Definitely less weathered of course, but still old and dated.
How to Paint a Front Door
Before beginning, remove any hardware like handles, deadbolts, or screen doors. Start this project in the morning to finish and reinstall the hardware by bedtime.
Step One: Sand the Door
Proper prep is crucial in how to paint a front door. Begin by sanding. Sanding cleans up scratches and creates a surface better suited for primer and paint. I used 100-grit sandpaper with a handheld sander for one pass.

After sanding, wipe off the dust to ensure a clean painting surface. Clean any areas you plan to paint, as paint doesn’t stick well to dirt.

Step Two: Prime the Door
Next in how to paint a front door is priming. Lay down a drop cloth to protect your floor and porch from drips, and use painter’s tape to mask areas you don’t want to paint.
Using a foam roller and primer, prime the inside and outside of the door. Focus on the panel details first, then move to the larger areas.


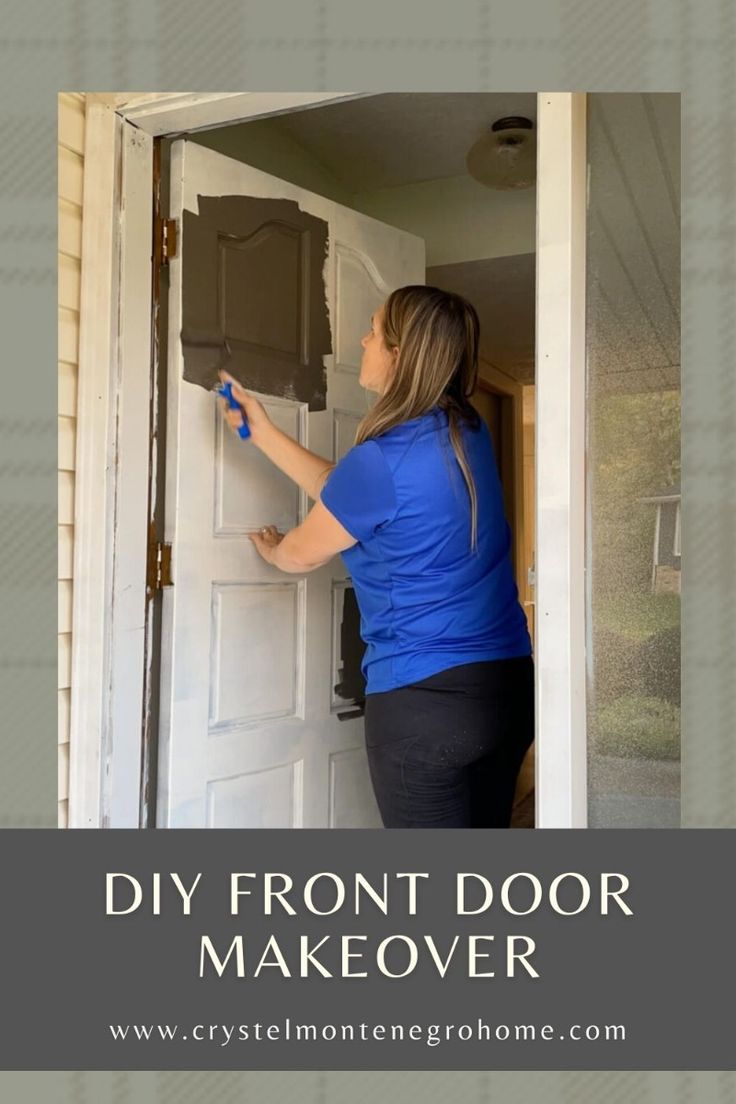
Step Three: Paint the Door
Finally, the best part: painting the door! After the primer dries, use a small, angled brush for the details and grooves, then a foam roller for the larger areas. Painting the door and trim in the same color can make a small entryway feel bigger.


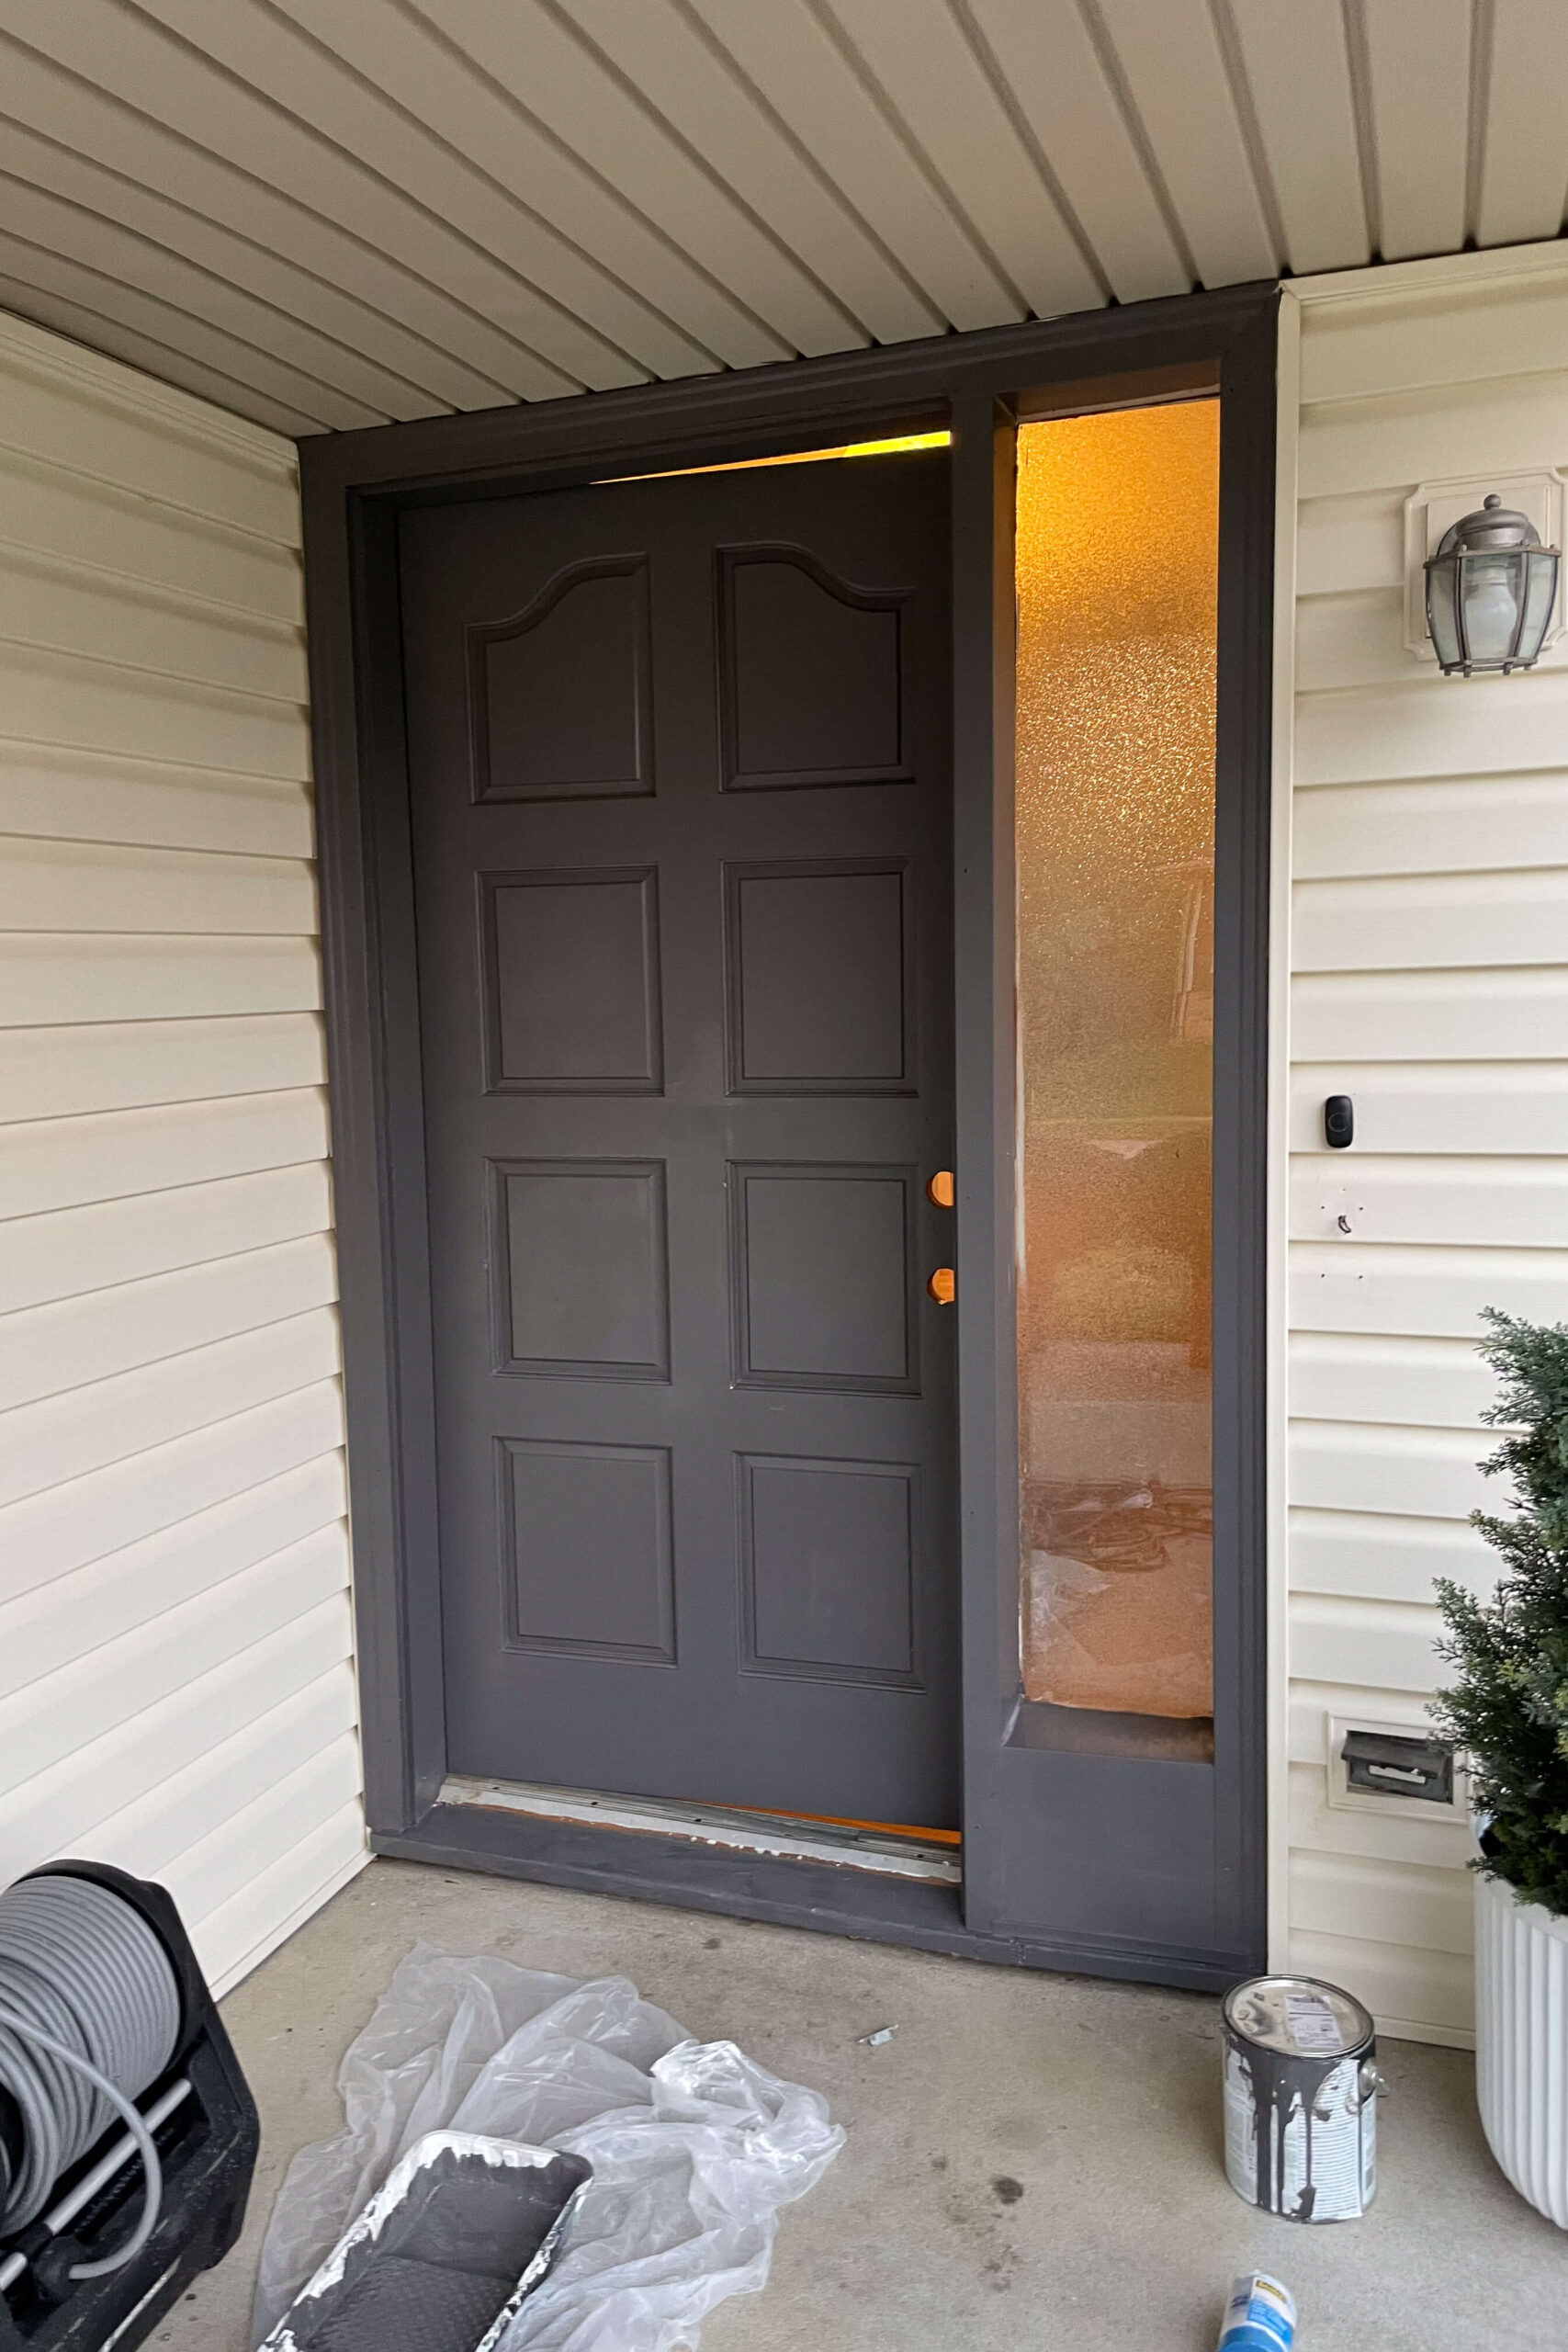
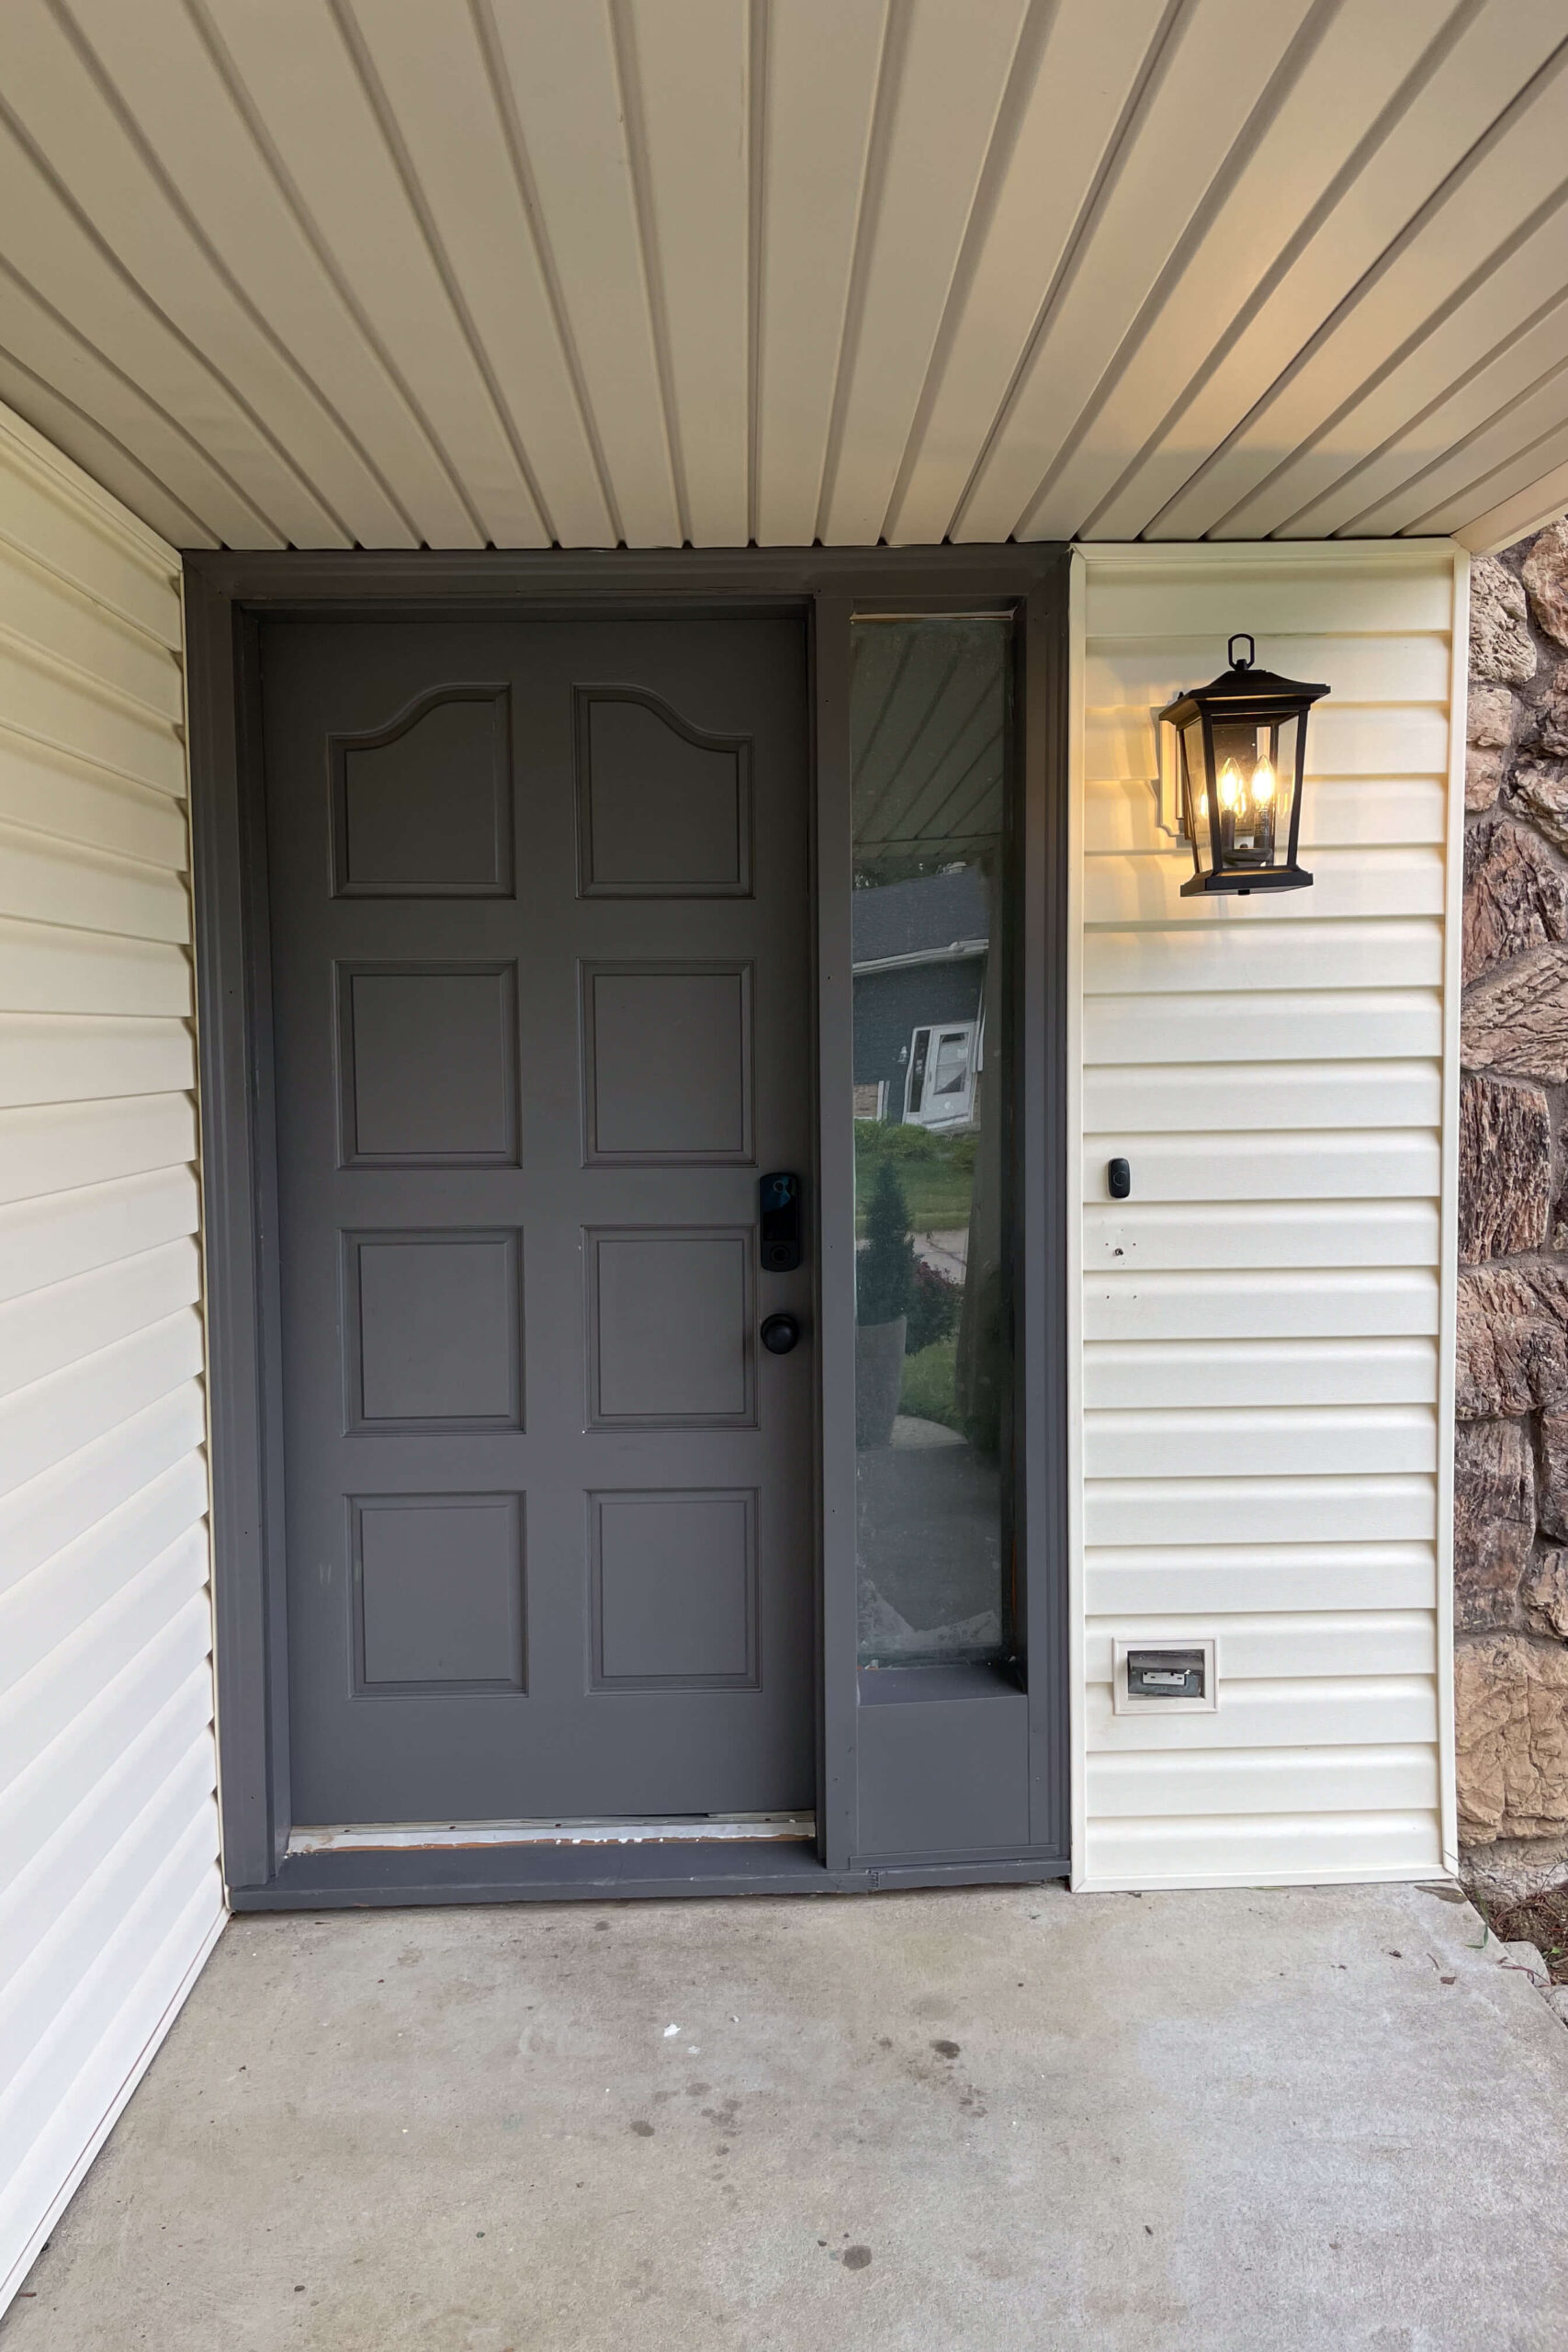
I used a custom dark gray color that complements my decor better than the old wood. It looks different outside than inside but blends perfectly with my home’s style. I’ve used this color on my home office built-ins, my kitchen island, my pantry shelves, and a few other places too

All done painting! It seriously looks like a brand new door, but for way cheaper. The dark gray matches my decor so much better than the wood did, and having everything painted the same color makes it look big and open.
Additional Upgrades
Once the paint is dry, reinstall the hardware. Installation is straightforward with a drill or screwdriver.

I upgraded to a keyless entry deadbolt, which includes a numbered code, key fobs, and fingerprint access. There’s even a hidden key slot for traditional use, which is great for having on your key chain, or lending to someone, like a house sitter, for temporary access.


Our keyless entry deadbolt is currently unavailable, but I’m linking it here anyways in case it comes back in stock. This one is close style-wise and has all the same features like a thumbprint, key fobs, etc.
Once I painted the door it looked so good, I had to upgrade the porch light too. This porch light matches my house and freshly painted door way better. The old light was too small and didn’t fit the space well.
I have a short video on my Instagram walking you through the basic process of how to change a light fixture here.
And done! The door looks brand new and fresh. Knowing how to paint a front door is a valuable skill to update your home affordably. Instead of spending $1000 or more on a new door, we achieved a completely updated look with just some paint and a day’s work.
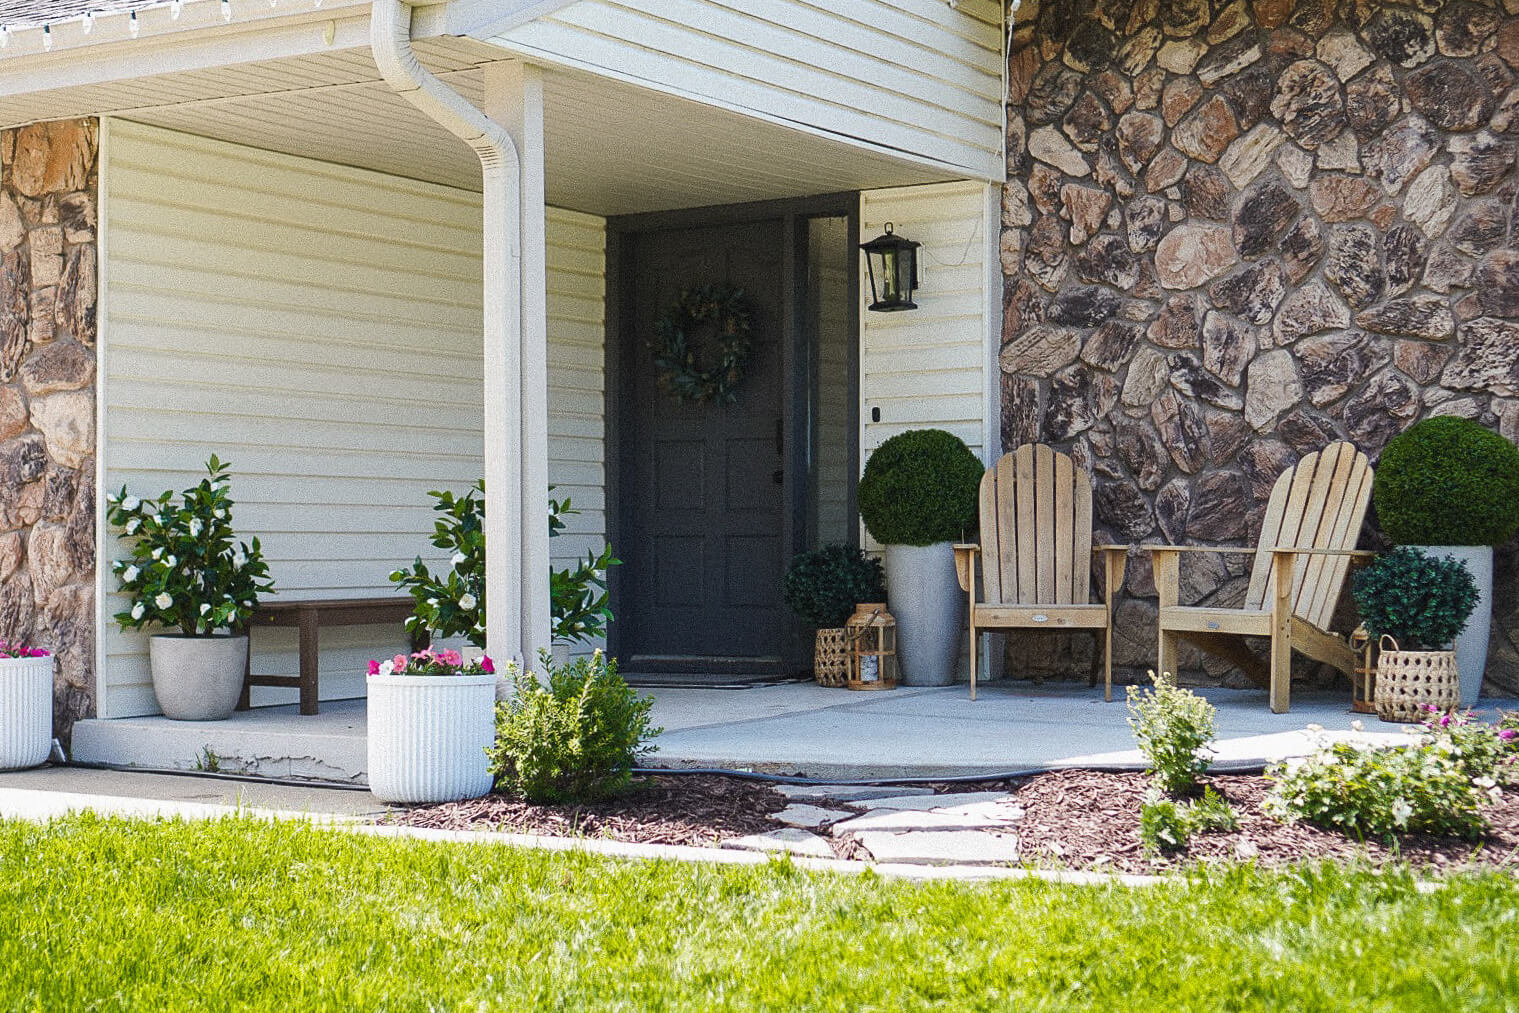
To finish off my front door refresh, I added layered doormats and these gorgeous, concrete planters with artificial cedar topiaries that look so real.

Since painting the front door last year, I’ve taken on quite a few projects. We’ve already extended the porch so we have room for seating, added landscaping and a DIY concrete curb, we’ve laid sod, and even more projects that aren’t captured in this photo here. We aren’t done upgrading the exterior of our home yet, so be sure to follow along on Instagram or my blog.
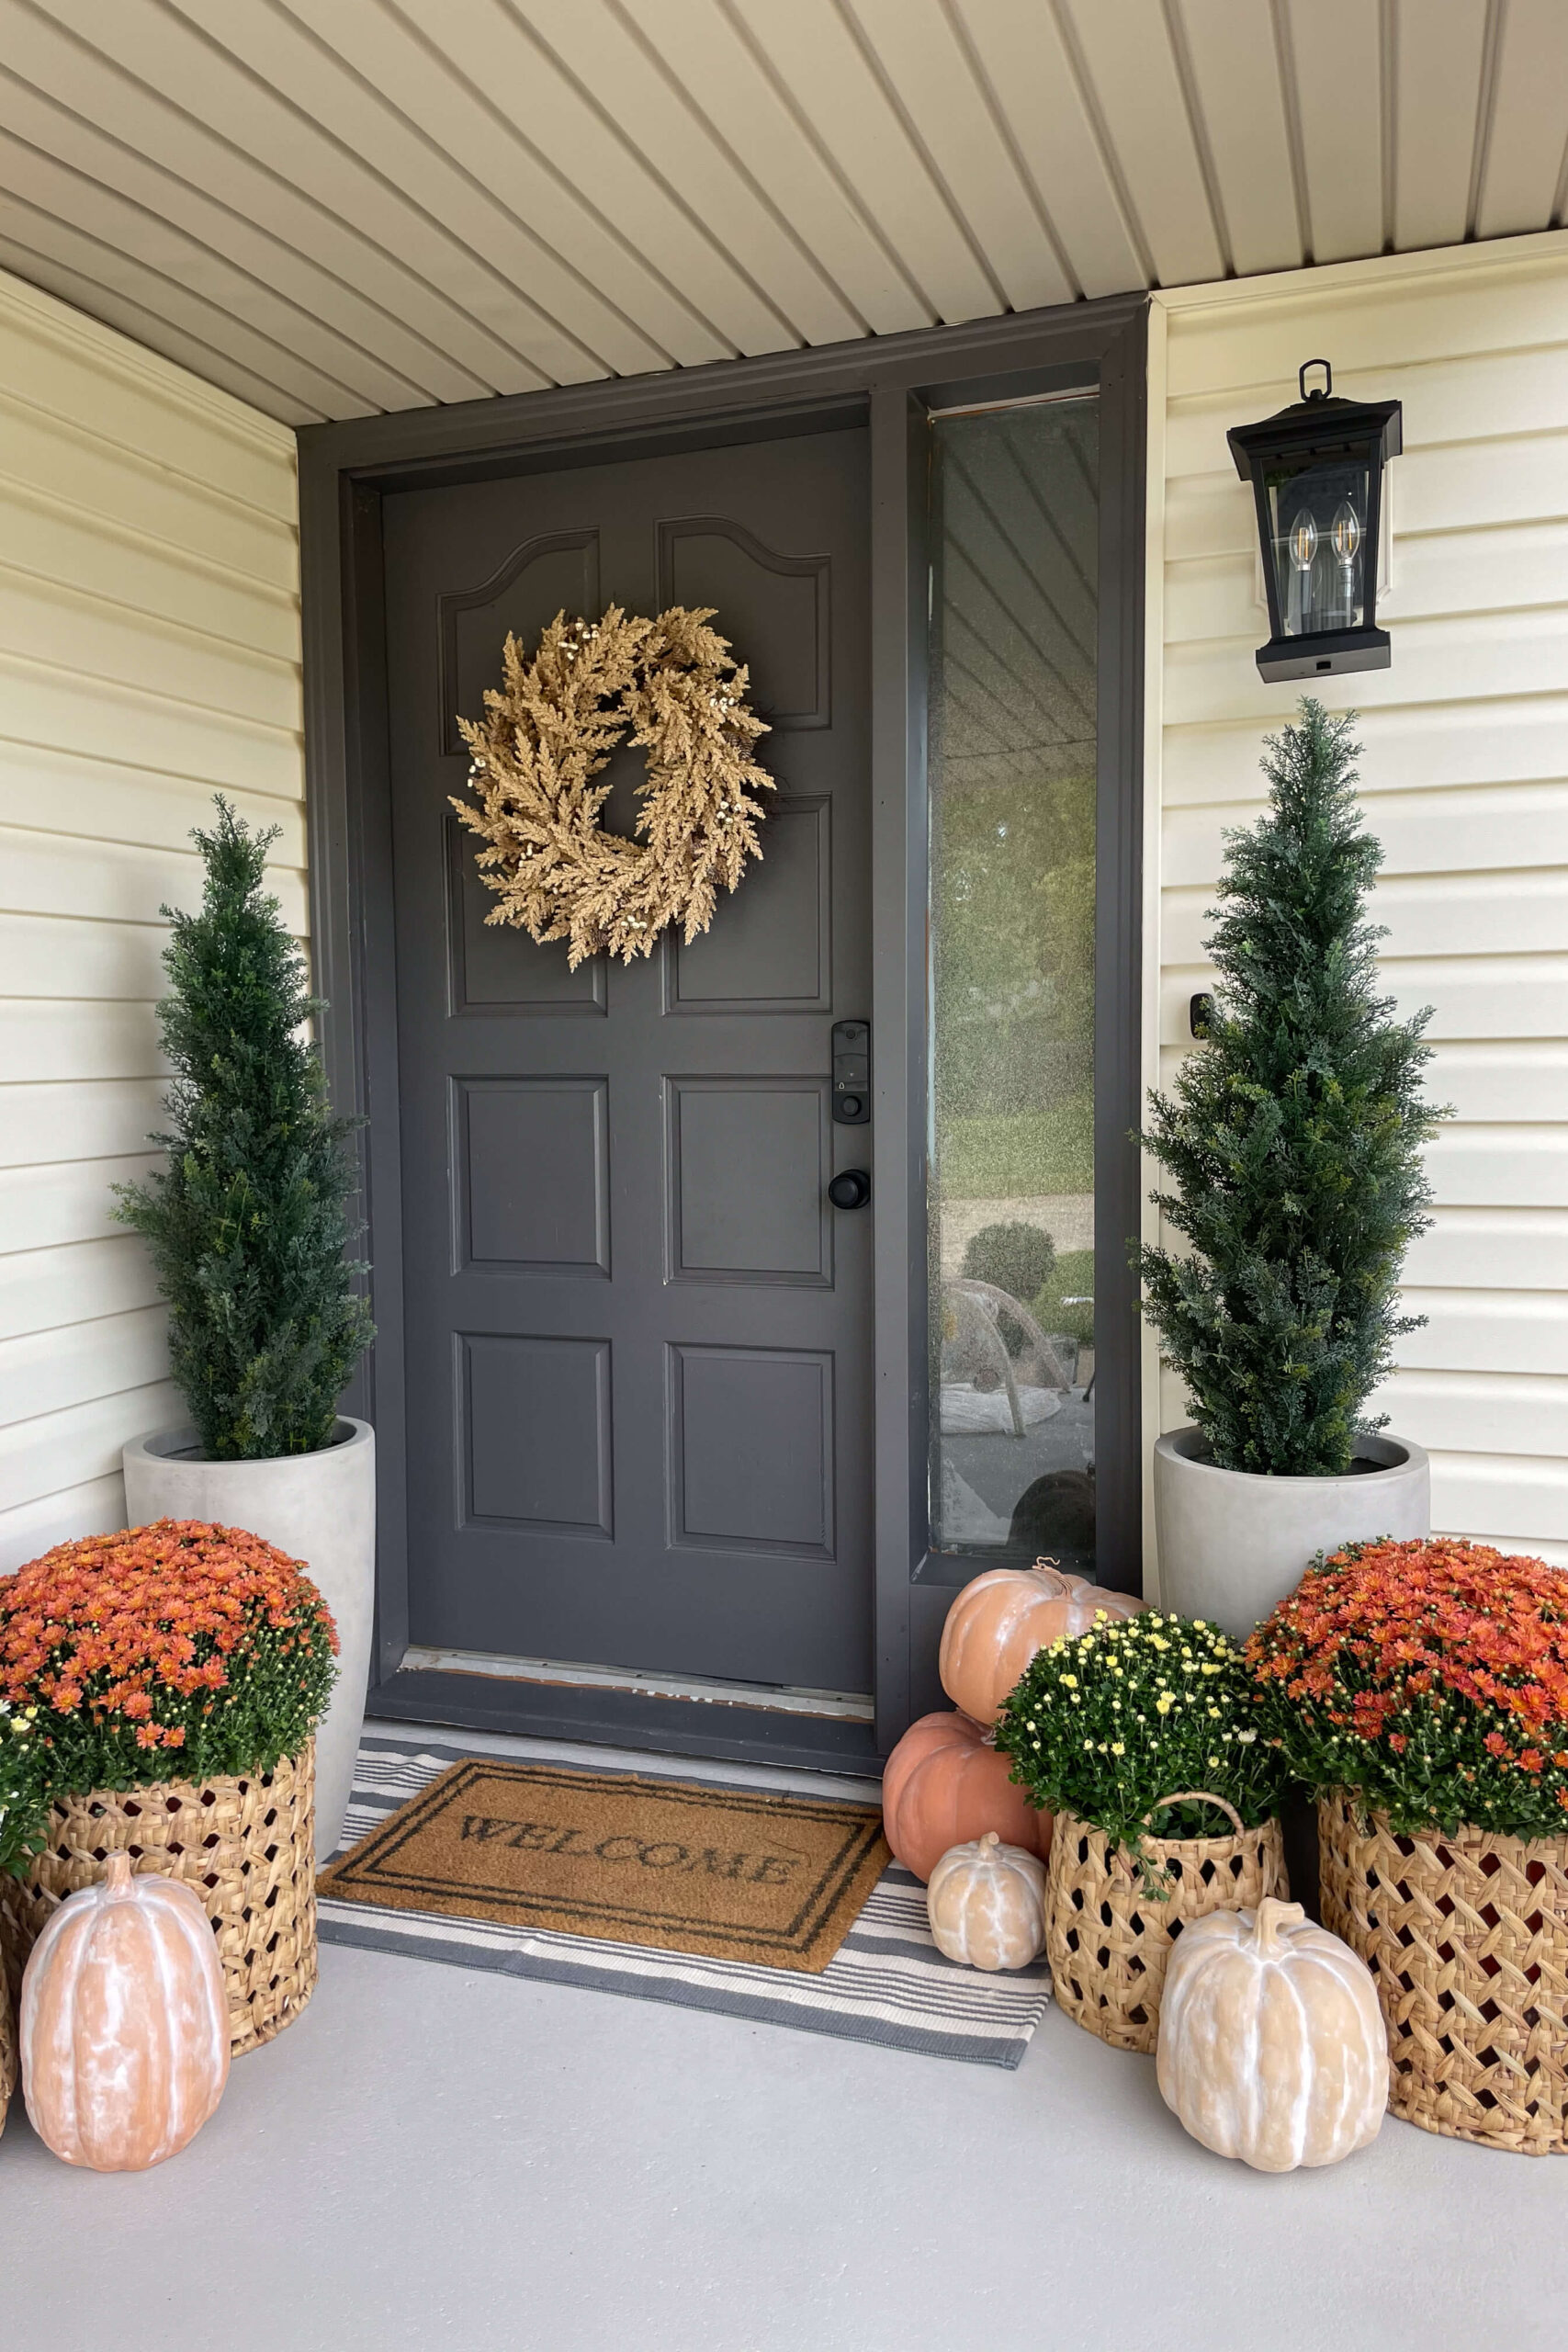
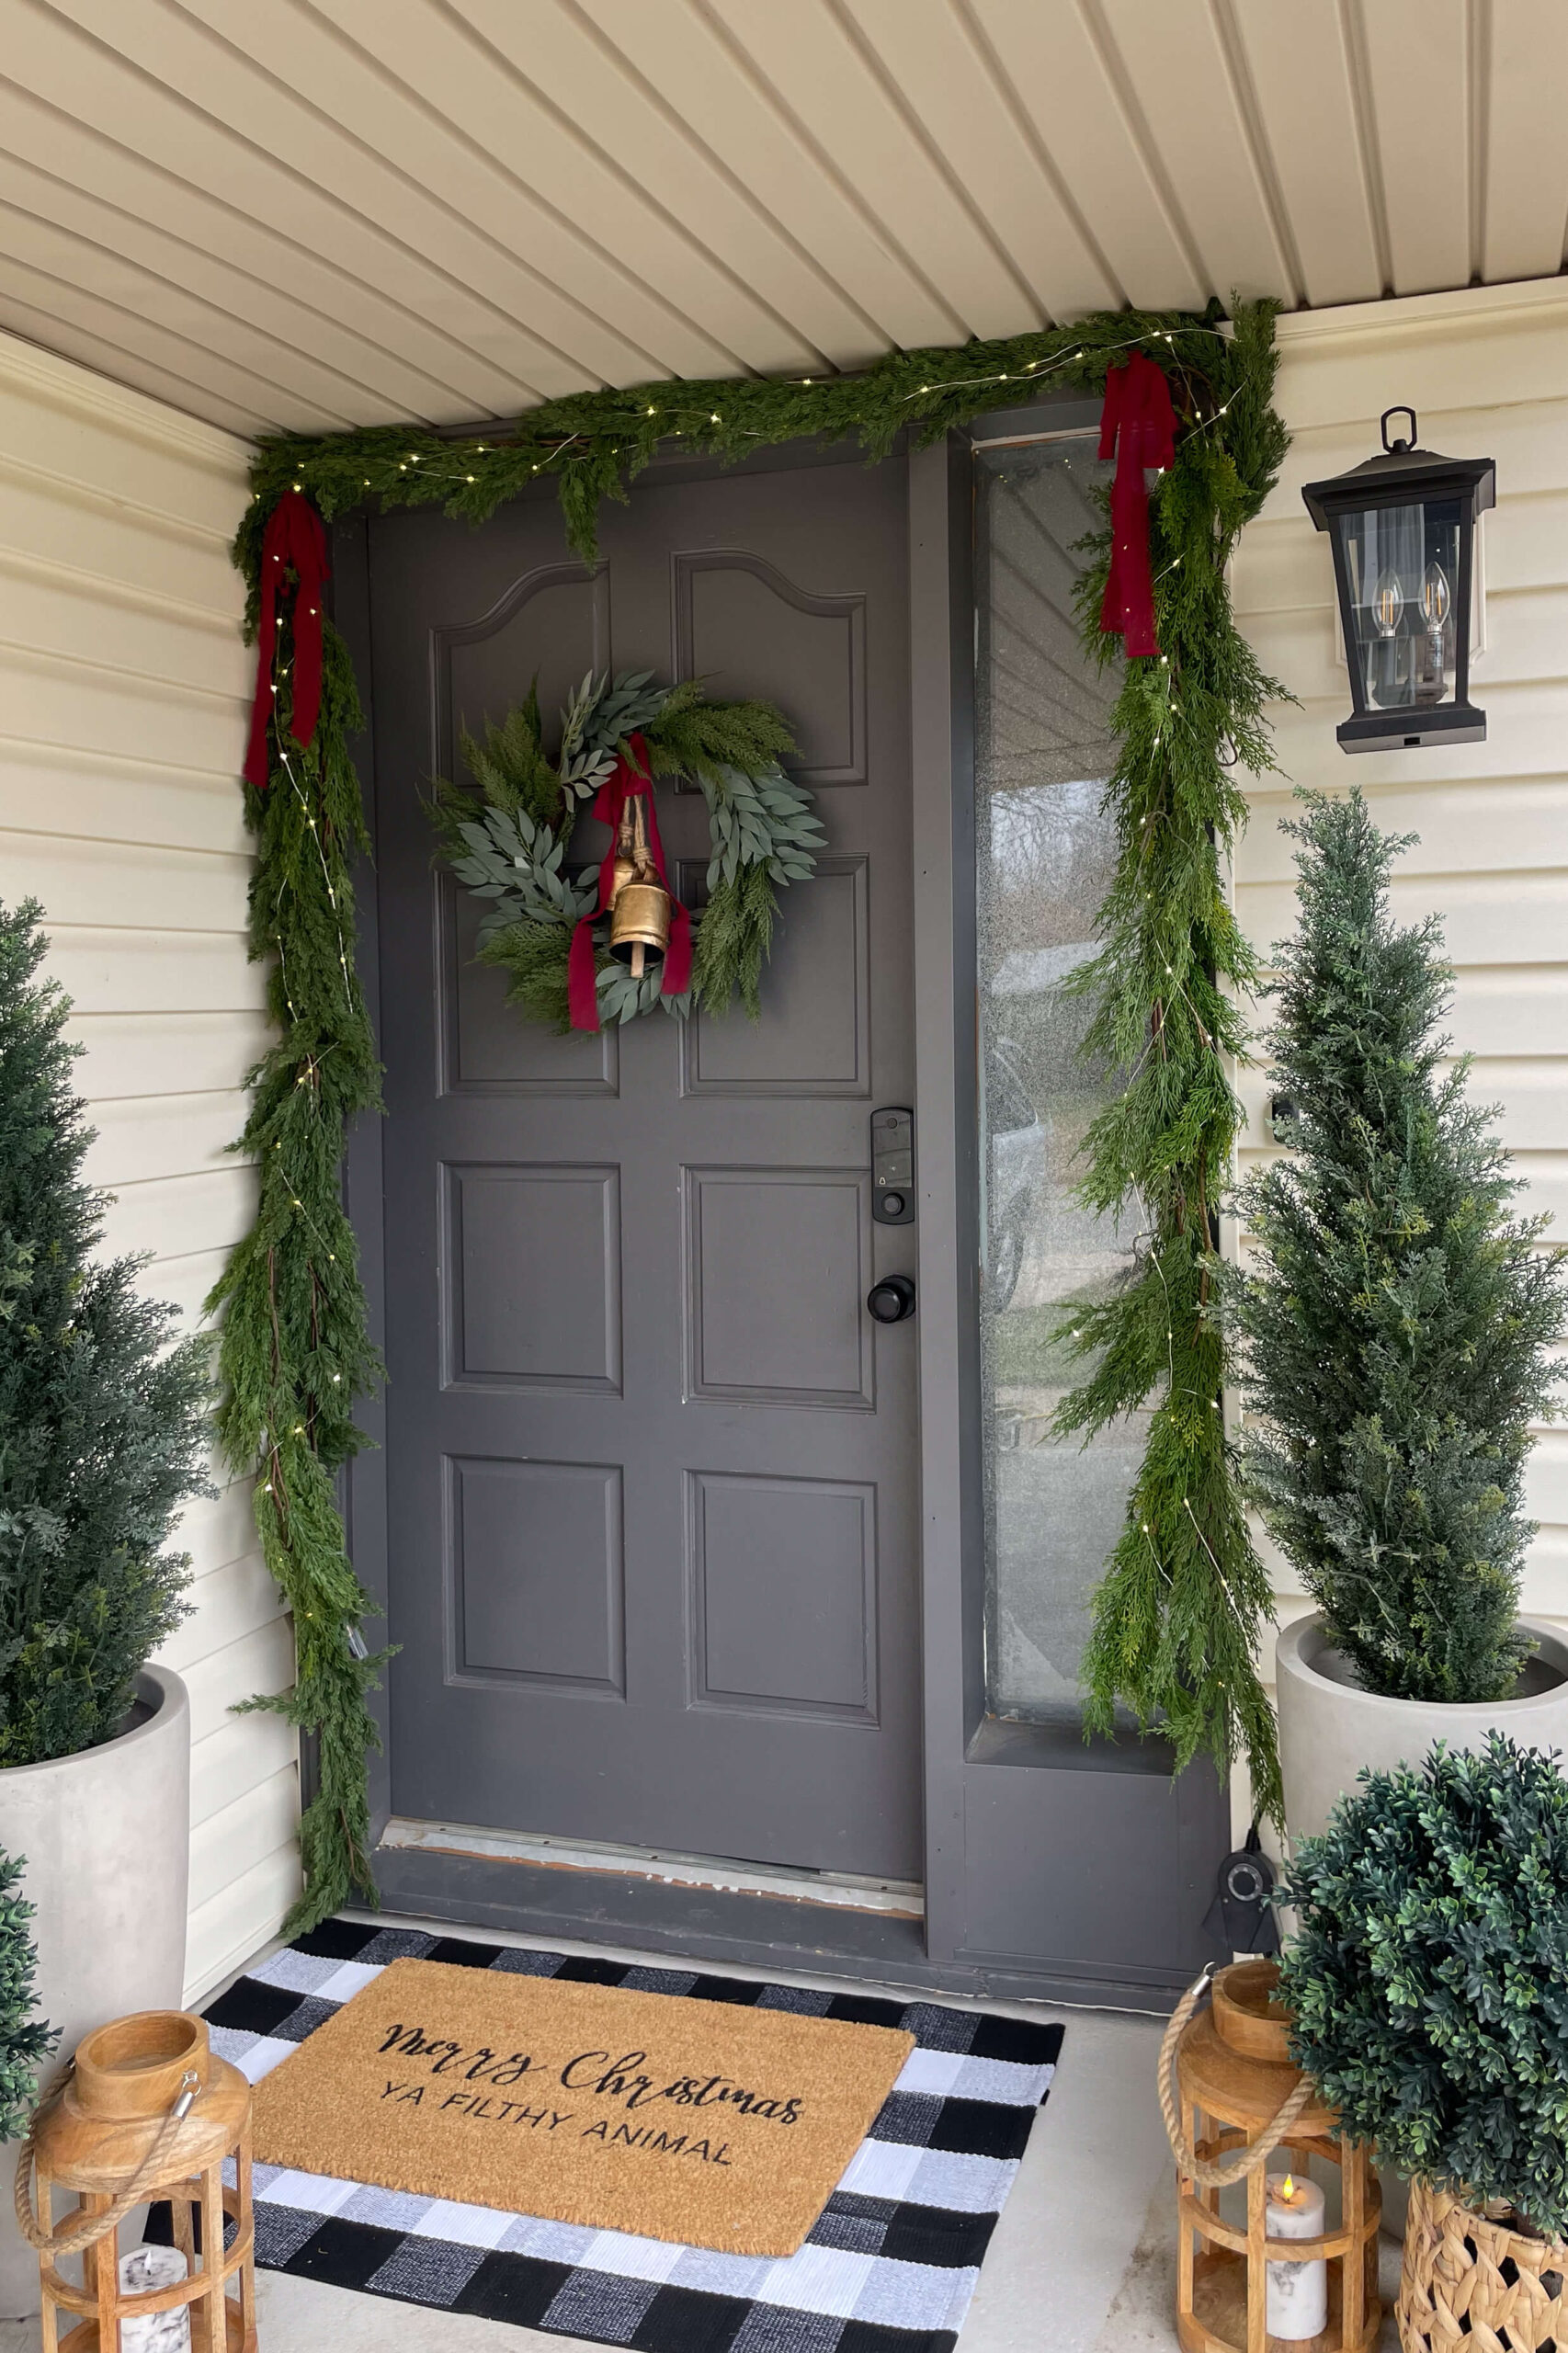
I love decorating my porch seasonally and this door looks great no matter what time of the year I am decorating for. If you want links and details for all of the Christmas decor go here. Or for the fall decor and gorgeous “terra cotta” pumpkins go here.
I hope you found this post helpful and feel confident that you know how to paint a front door of your own.