

Updated August 8, 2025
When it comes to DIY kitchen renovations, choosing the right countertops can feel like one of the hardest decisions. There are so many options – concrete, butcher block, laminate, tile – and each comes with its own pros and cons. We chose epoxy kitchen countertops, and now that we’ve lived with them for three years, I’m sharing a full update. In this post, I’ll walk you through how our epoxy countertops have held up, what I’d do differently next time, and whether or not I’d choose epoxy again in our next kitchen remodel.
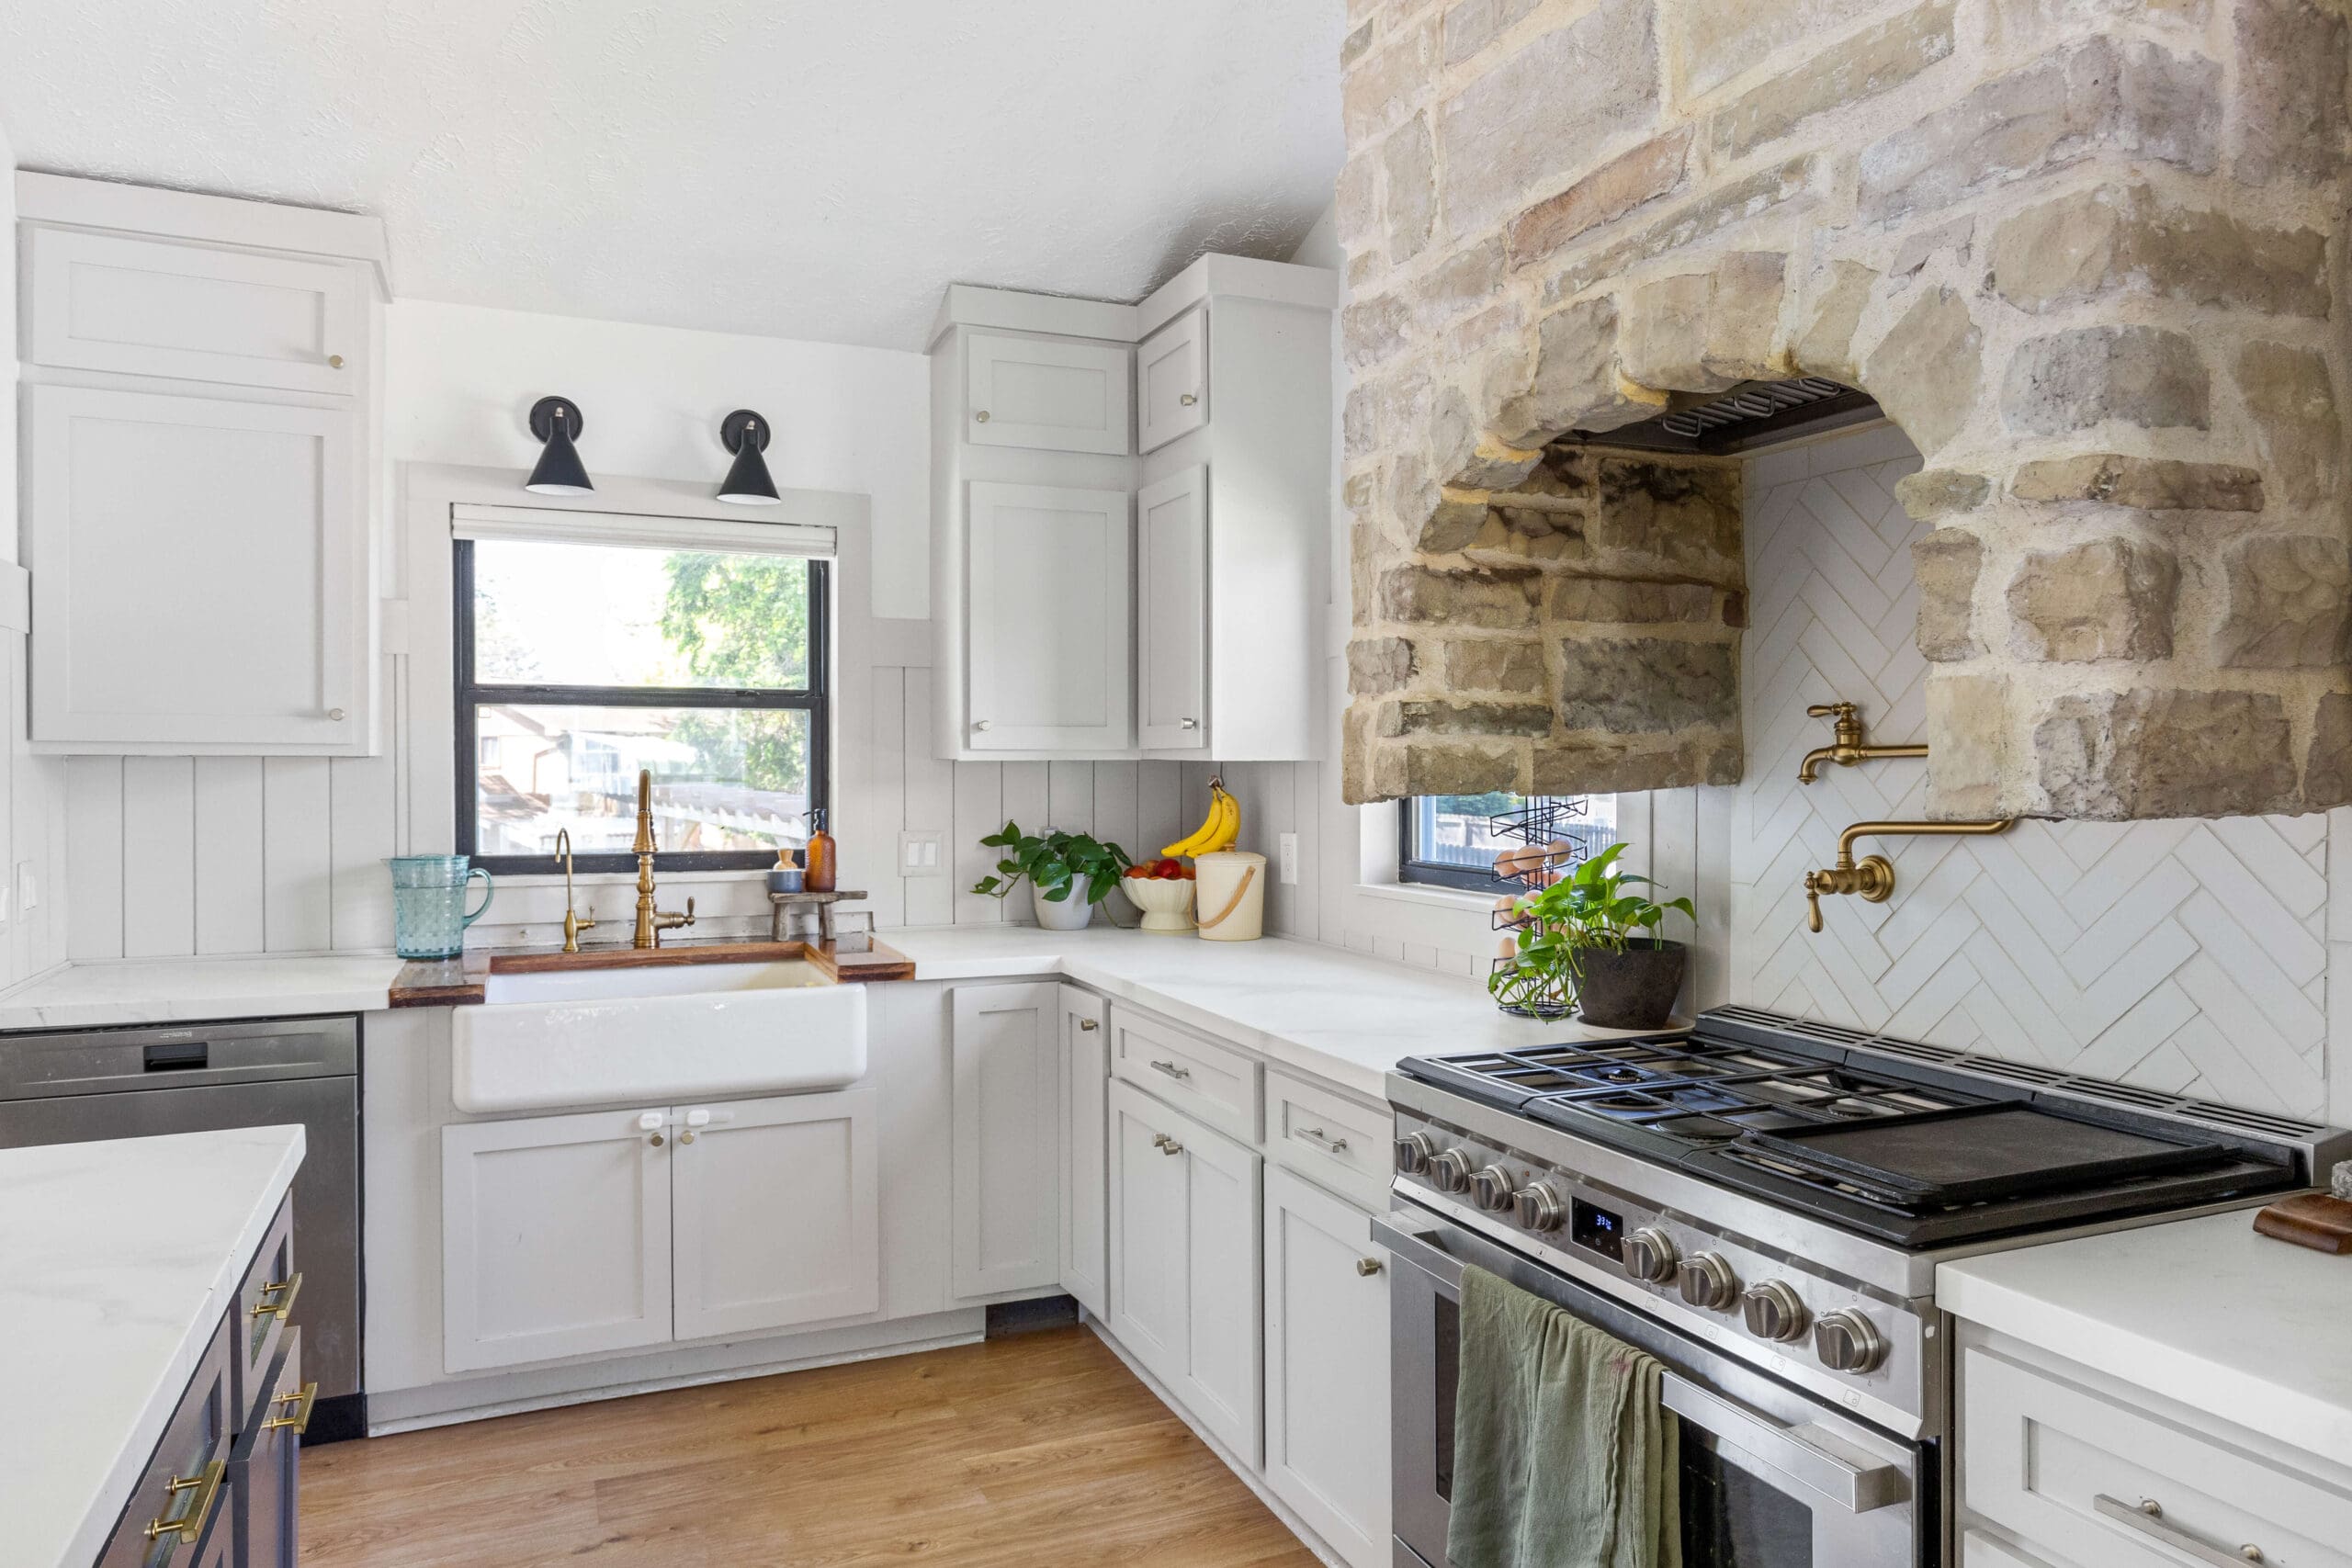
Table of Contents
- DIY Kitchen Remodel With Epoxy Kitchen Countertops
- How Our Epoxy Kitchen Countertops Have Held Up
- Common Sink Issues with Epoxy Countertops
- How I Repaired the Epoxy Damage
- Reapplying the Epoxy Countertops – Our Process
- Do Epoxy Kitchen Countertops Stain Easily?
- Why We Didn’t Reapply Epoxy to the Island
- Would I Recommend Epoxy Countertops Again?
- More Epoxy Countertop Resources
- Related DIY Kitchen Projects
- 📌 Save This Epoxy Countertop Update for Later
- FAQs About Epoxy Countertops
DIY Kitchen Remodel With Epoxy Kitchen Countertops
When we moved into our home back in April 2022, we knew a kitchen renovation was at the top of our to-do list. What used to be a very yellow dining area (and I mean very yellow) got a complete overhaul – and became our kitchen!

You can hardly believe that this is the same house! We tackled a ton of DIY projects in this space: from installing stock cabinetry, a custom stone range hood, our shiplap backsplash, and more. You can read about the full remodel right here.

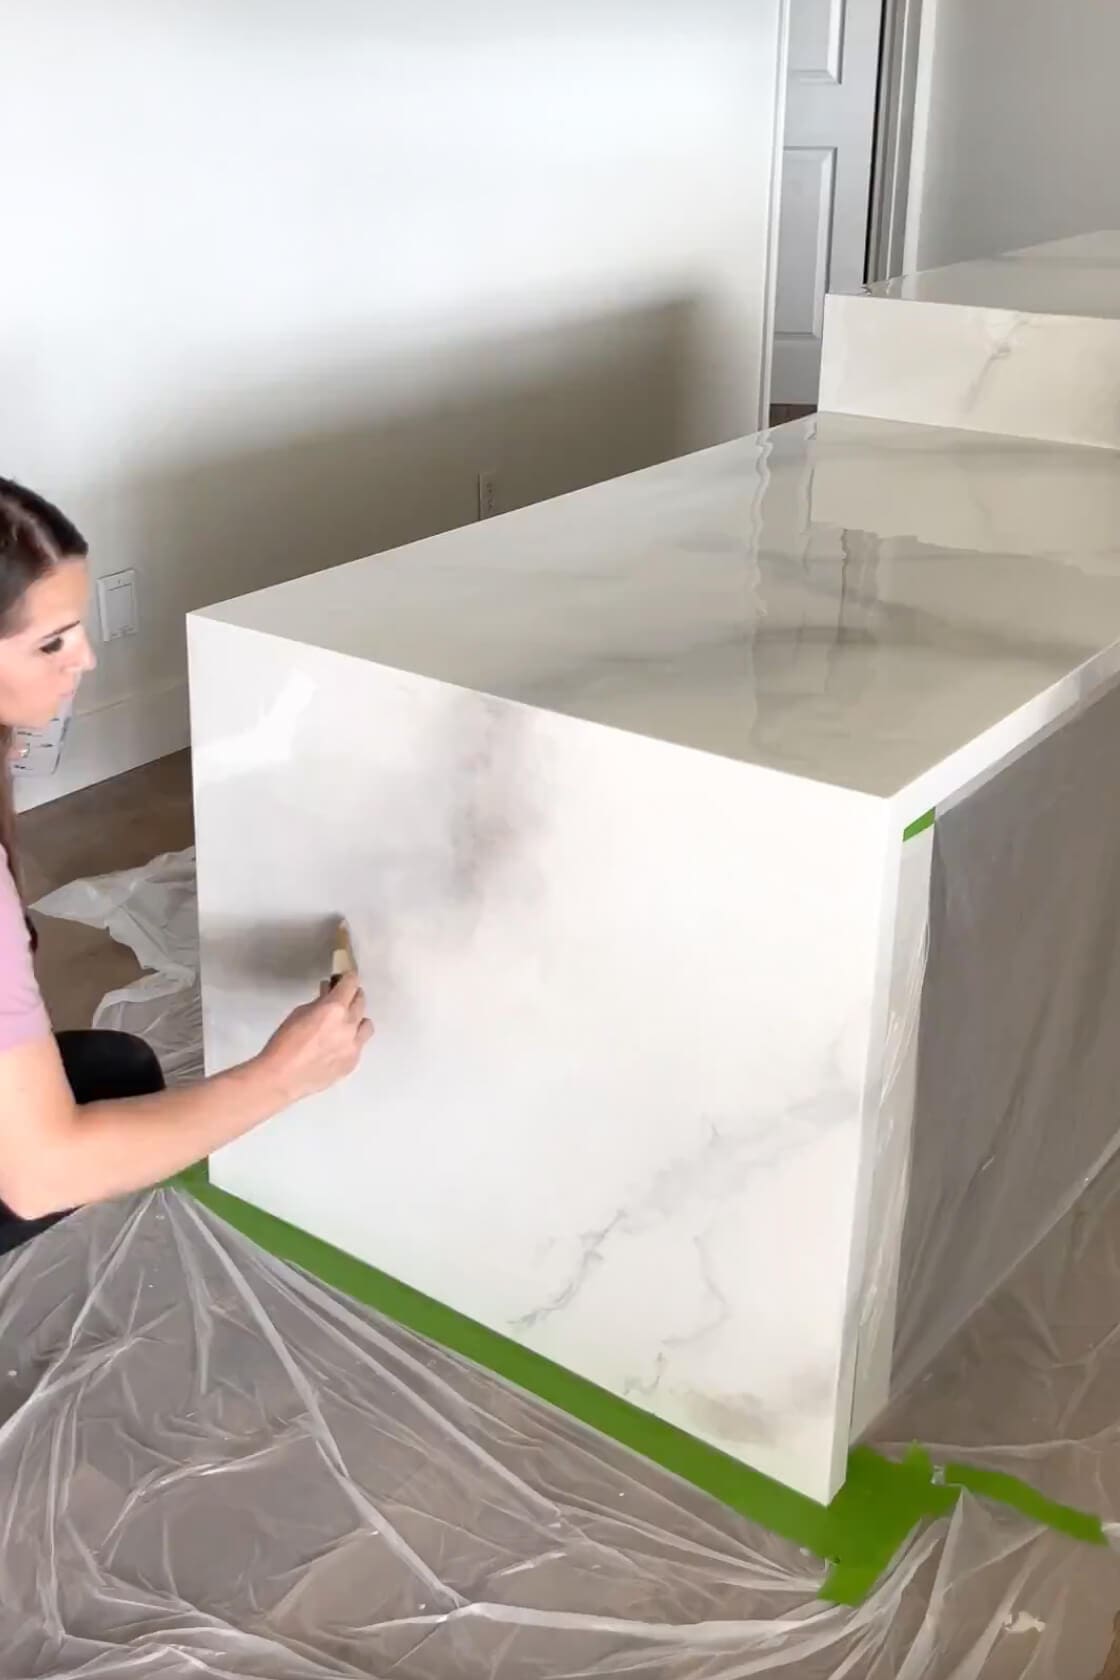
But the one project I get asked about constantly is our DIY epoxy kitchen countertops. These babies look just like marble, and we were able to do our full kitchen for less than $500! Now that we’ve lived with them for three years, it’s time for a brutally honest review and update.
How Our Epoxy Kitchen Countertops Have Held Up
Short version? These countertops have been awesome. We entertain a lot, we have five kids, and this kitchen gets used (and abused) every single day. These epoxy kitchen countertops have taken the heat – literally and figuratively – and still look beautiful.
They’ve survived craft projects, dropped dishes, lots of spills, and the endless chaos that comes with a full house. But of course, there’s always a catch…
Common Sink Issues with Epoxy Countertops
The only trouble spot? The area around our kitchen sink. We originally used MDF as the base for all our epoxy kitchen countertops, and even though we sealed everything with epoxy, used a protective topcoat, and sealed around the sink with silicone – it wasn’t enough.
Within six months, the MDF near the sink started swelling and deteriorating. At the 18-month mark, it looked pretty awful (you can see the not-so-subtle breakdown in the photos for the full effect).


How I Repaired the Epoxy Damage
About a year ago, we cut out the damaged MDF around the sink and replaced that section of the kitchen countertop with solid wood coated in epoxy. That area has held up so much better.
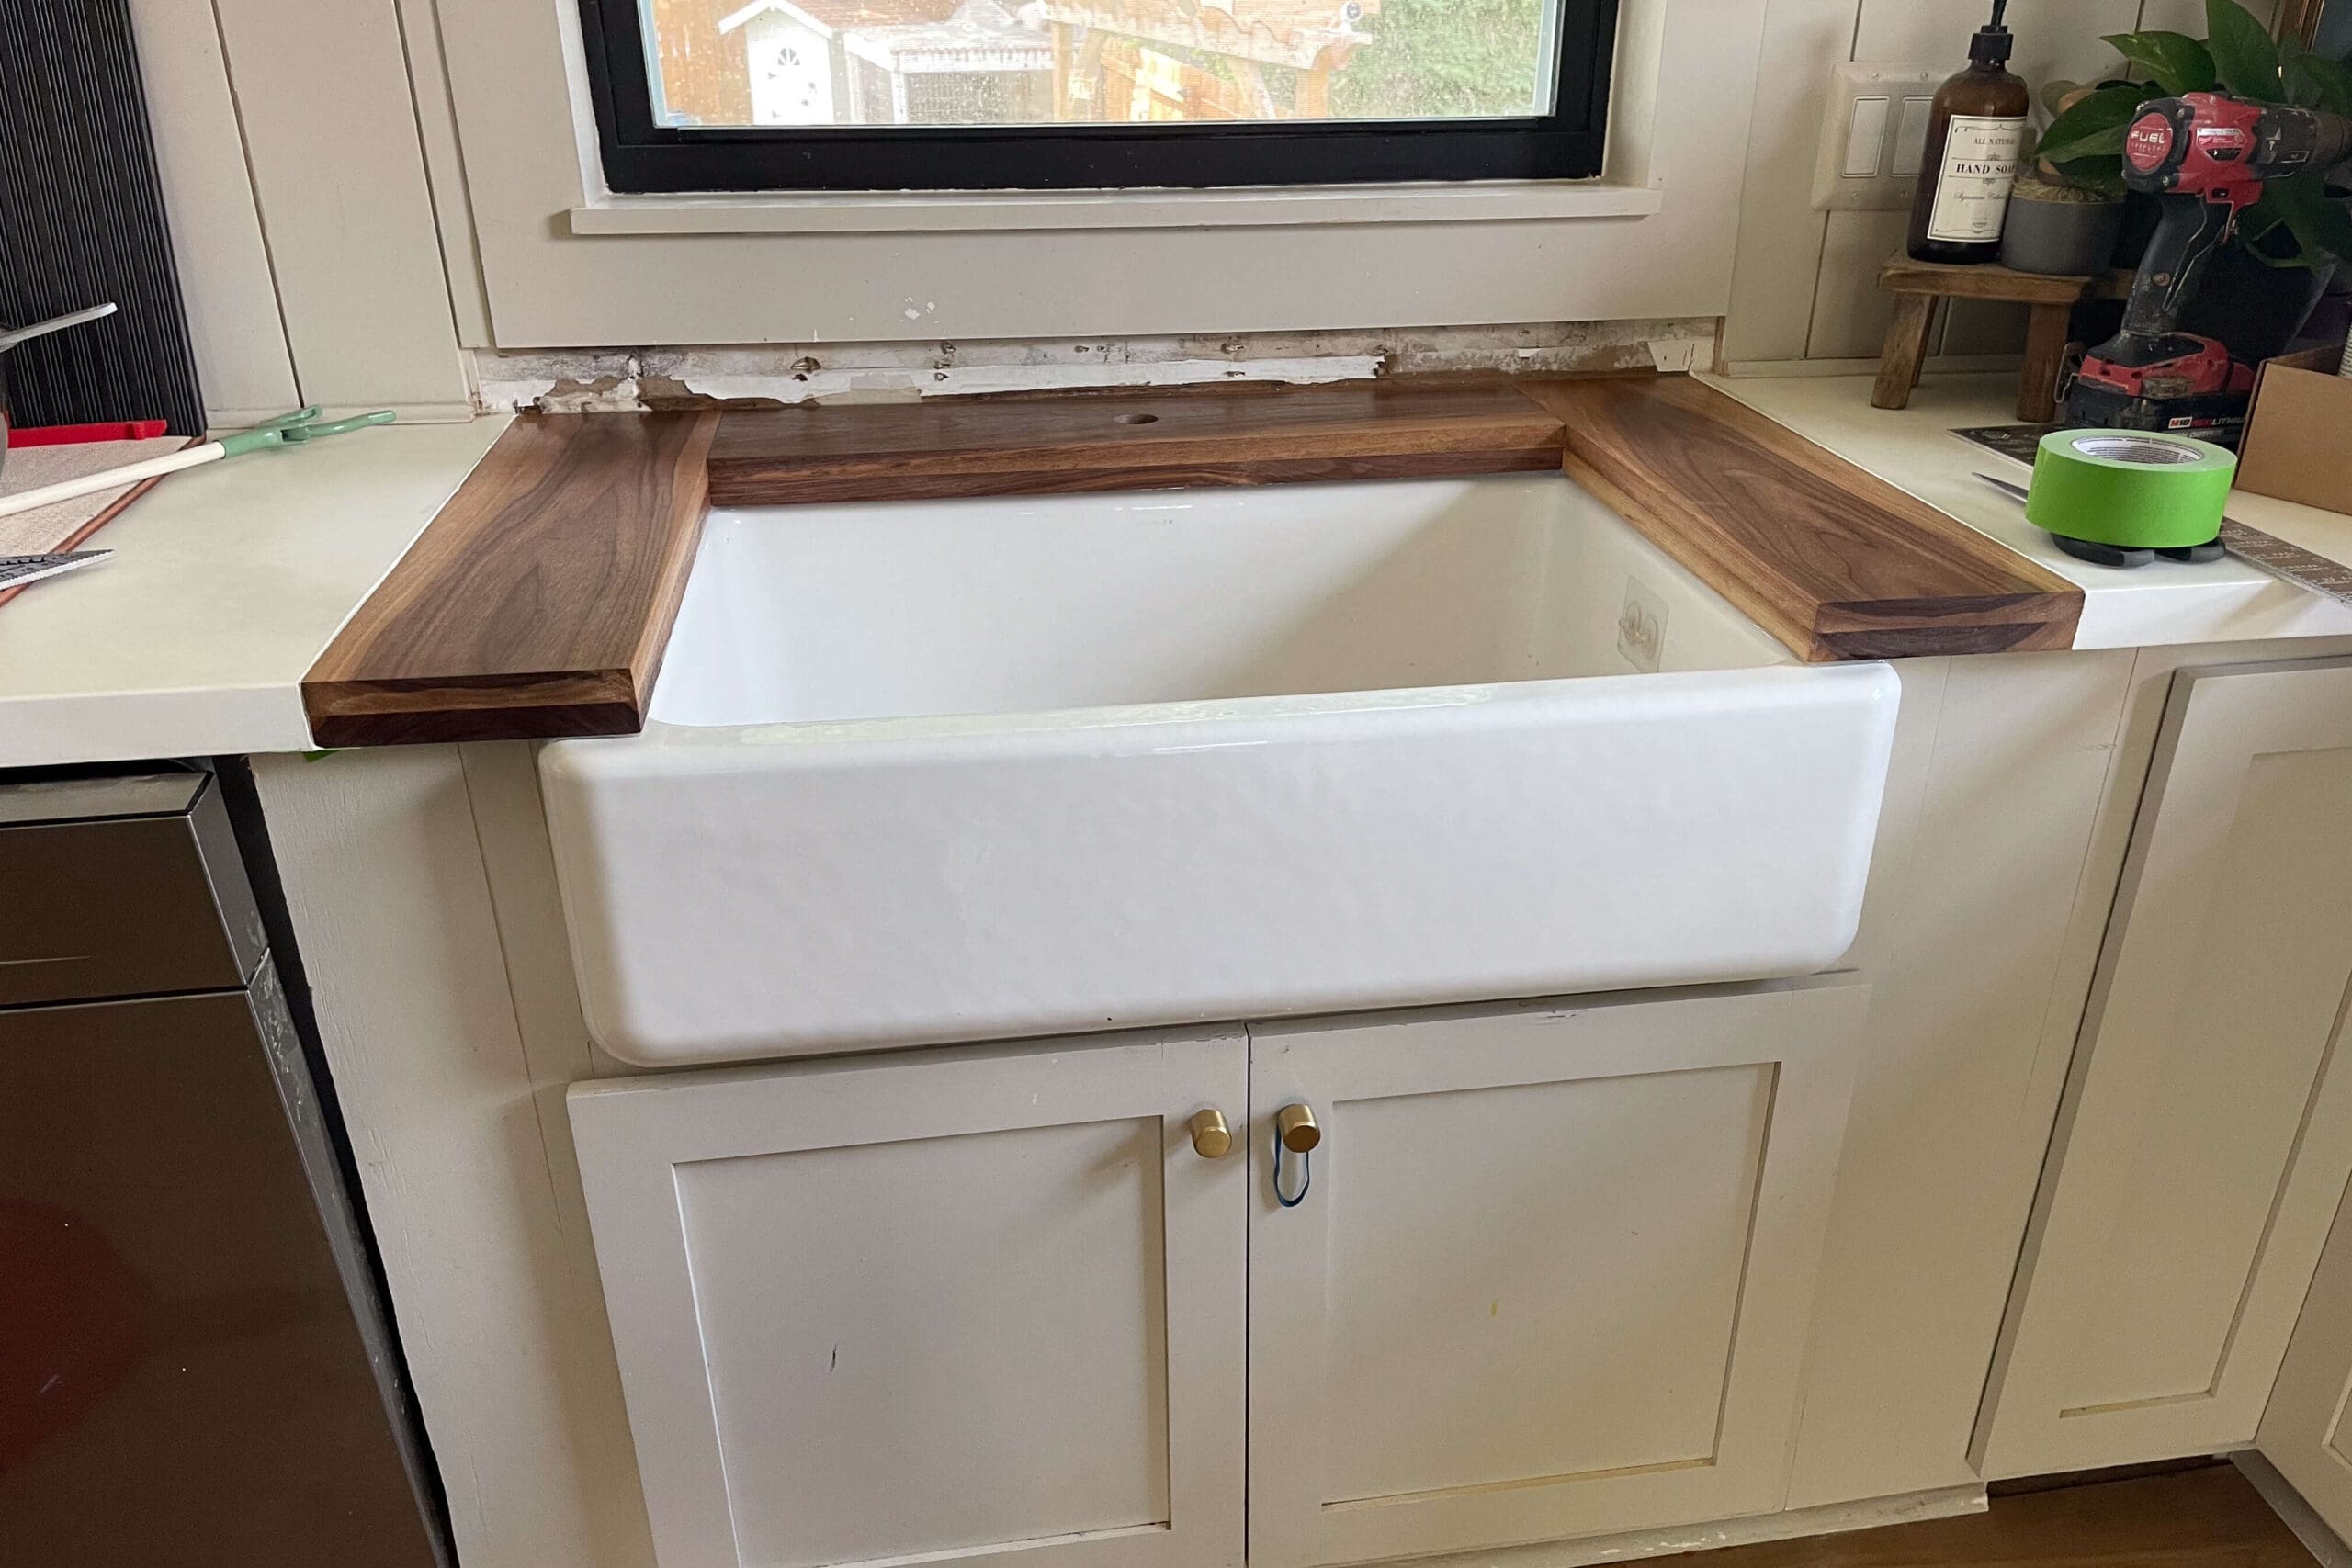
But here’s where we went a little wrong – we only applied the epoxy to the new wood portion instead of pouring it across the whole countertop. Because of that, we ended up with a visible seam where the old and new sections meet. And a year later that seam doesn’t look great.
Lesson learned!

Reapplying the Epoxy Countertops – Our Process
This summer, we decided to reapply epoxy across the entire run of kitchen countertops (excluding the island, which still looks flawless). Here’s a quick breakdown of how we did it:
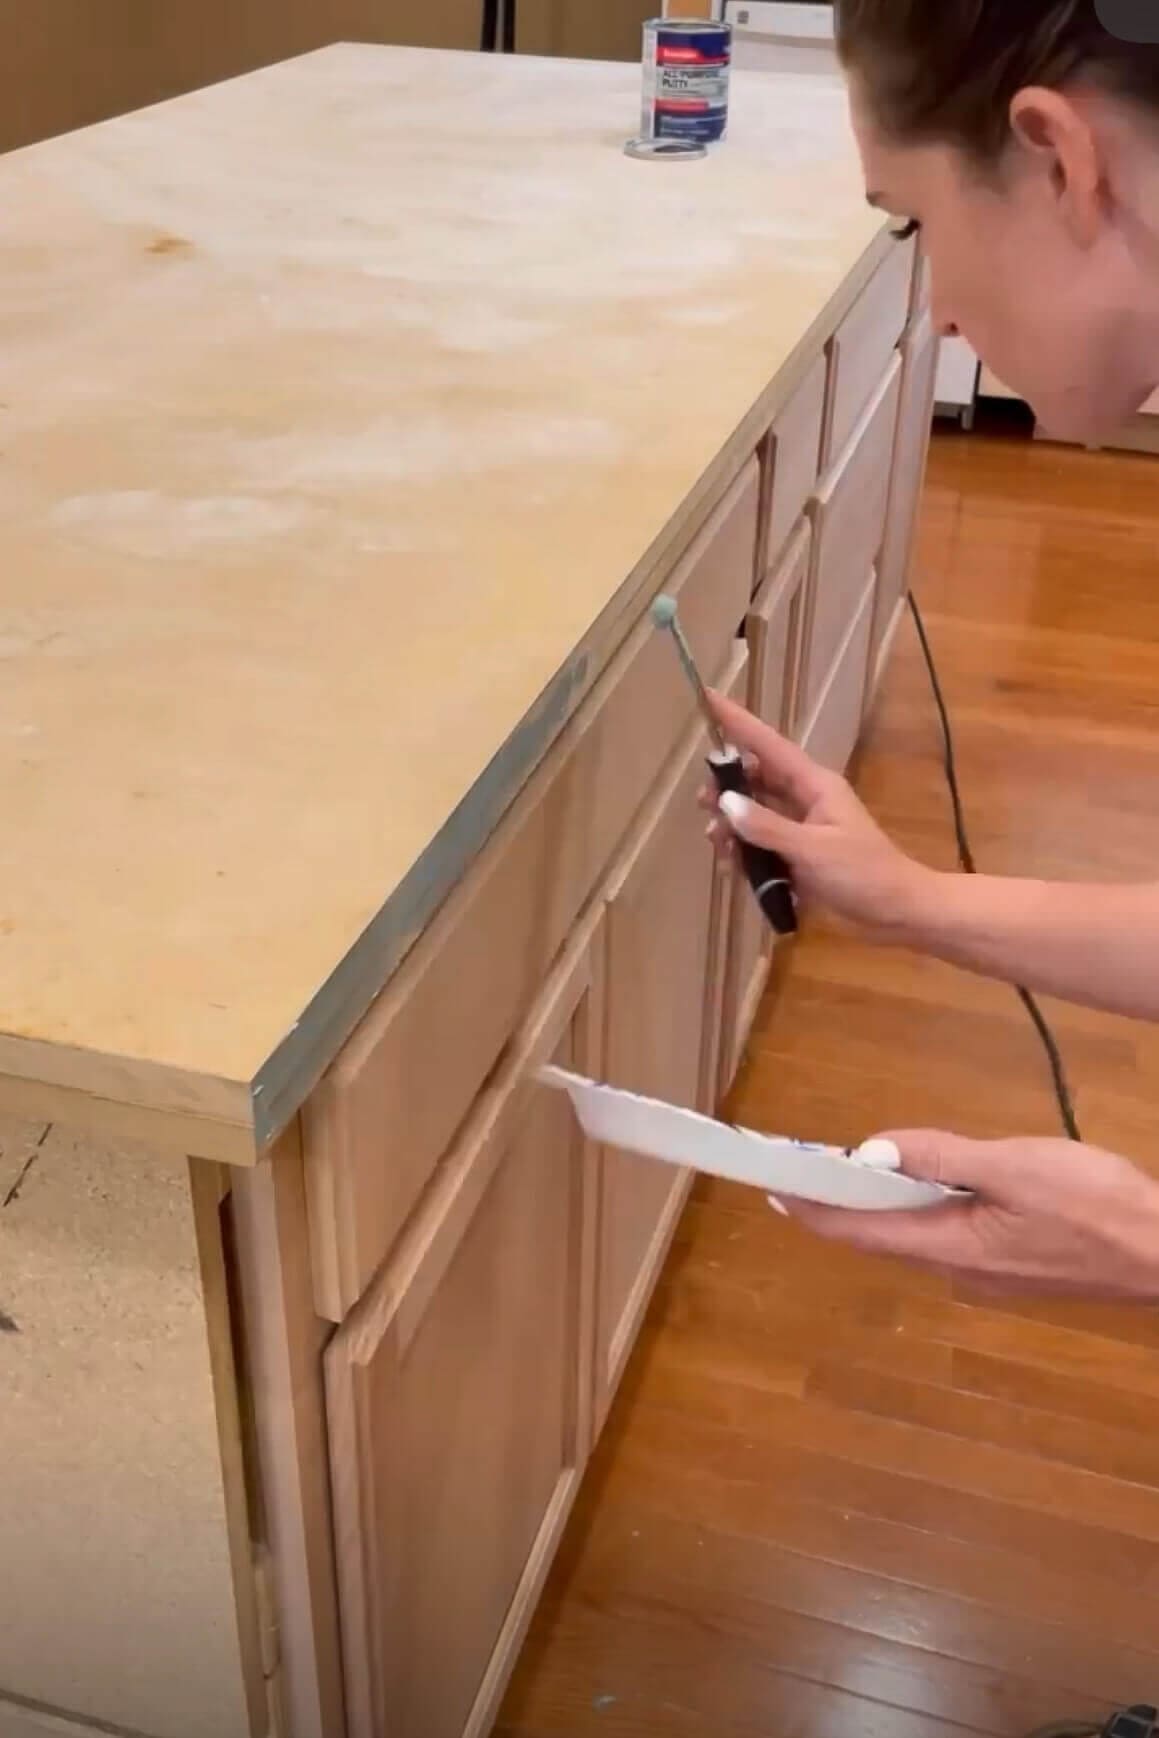
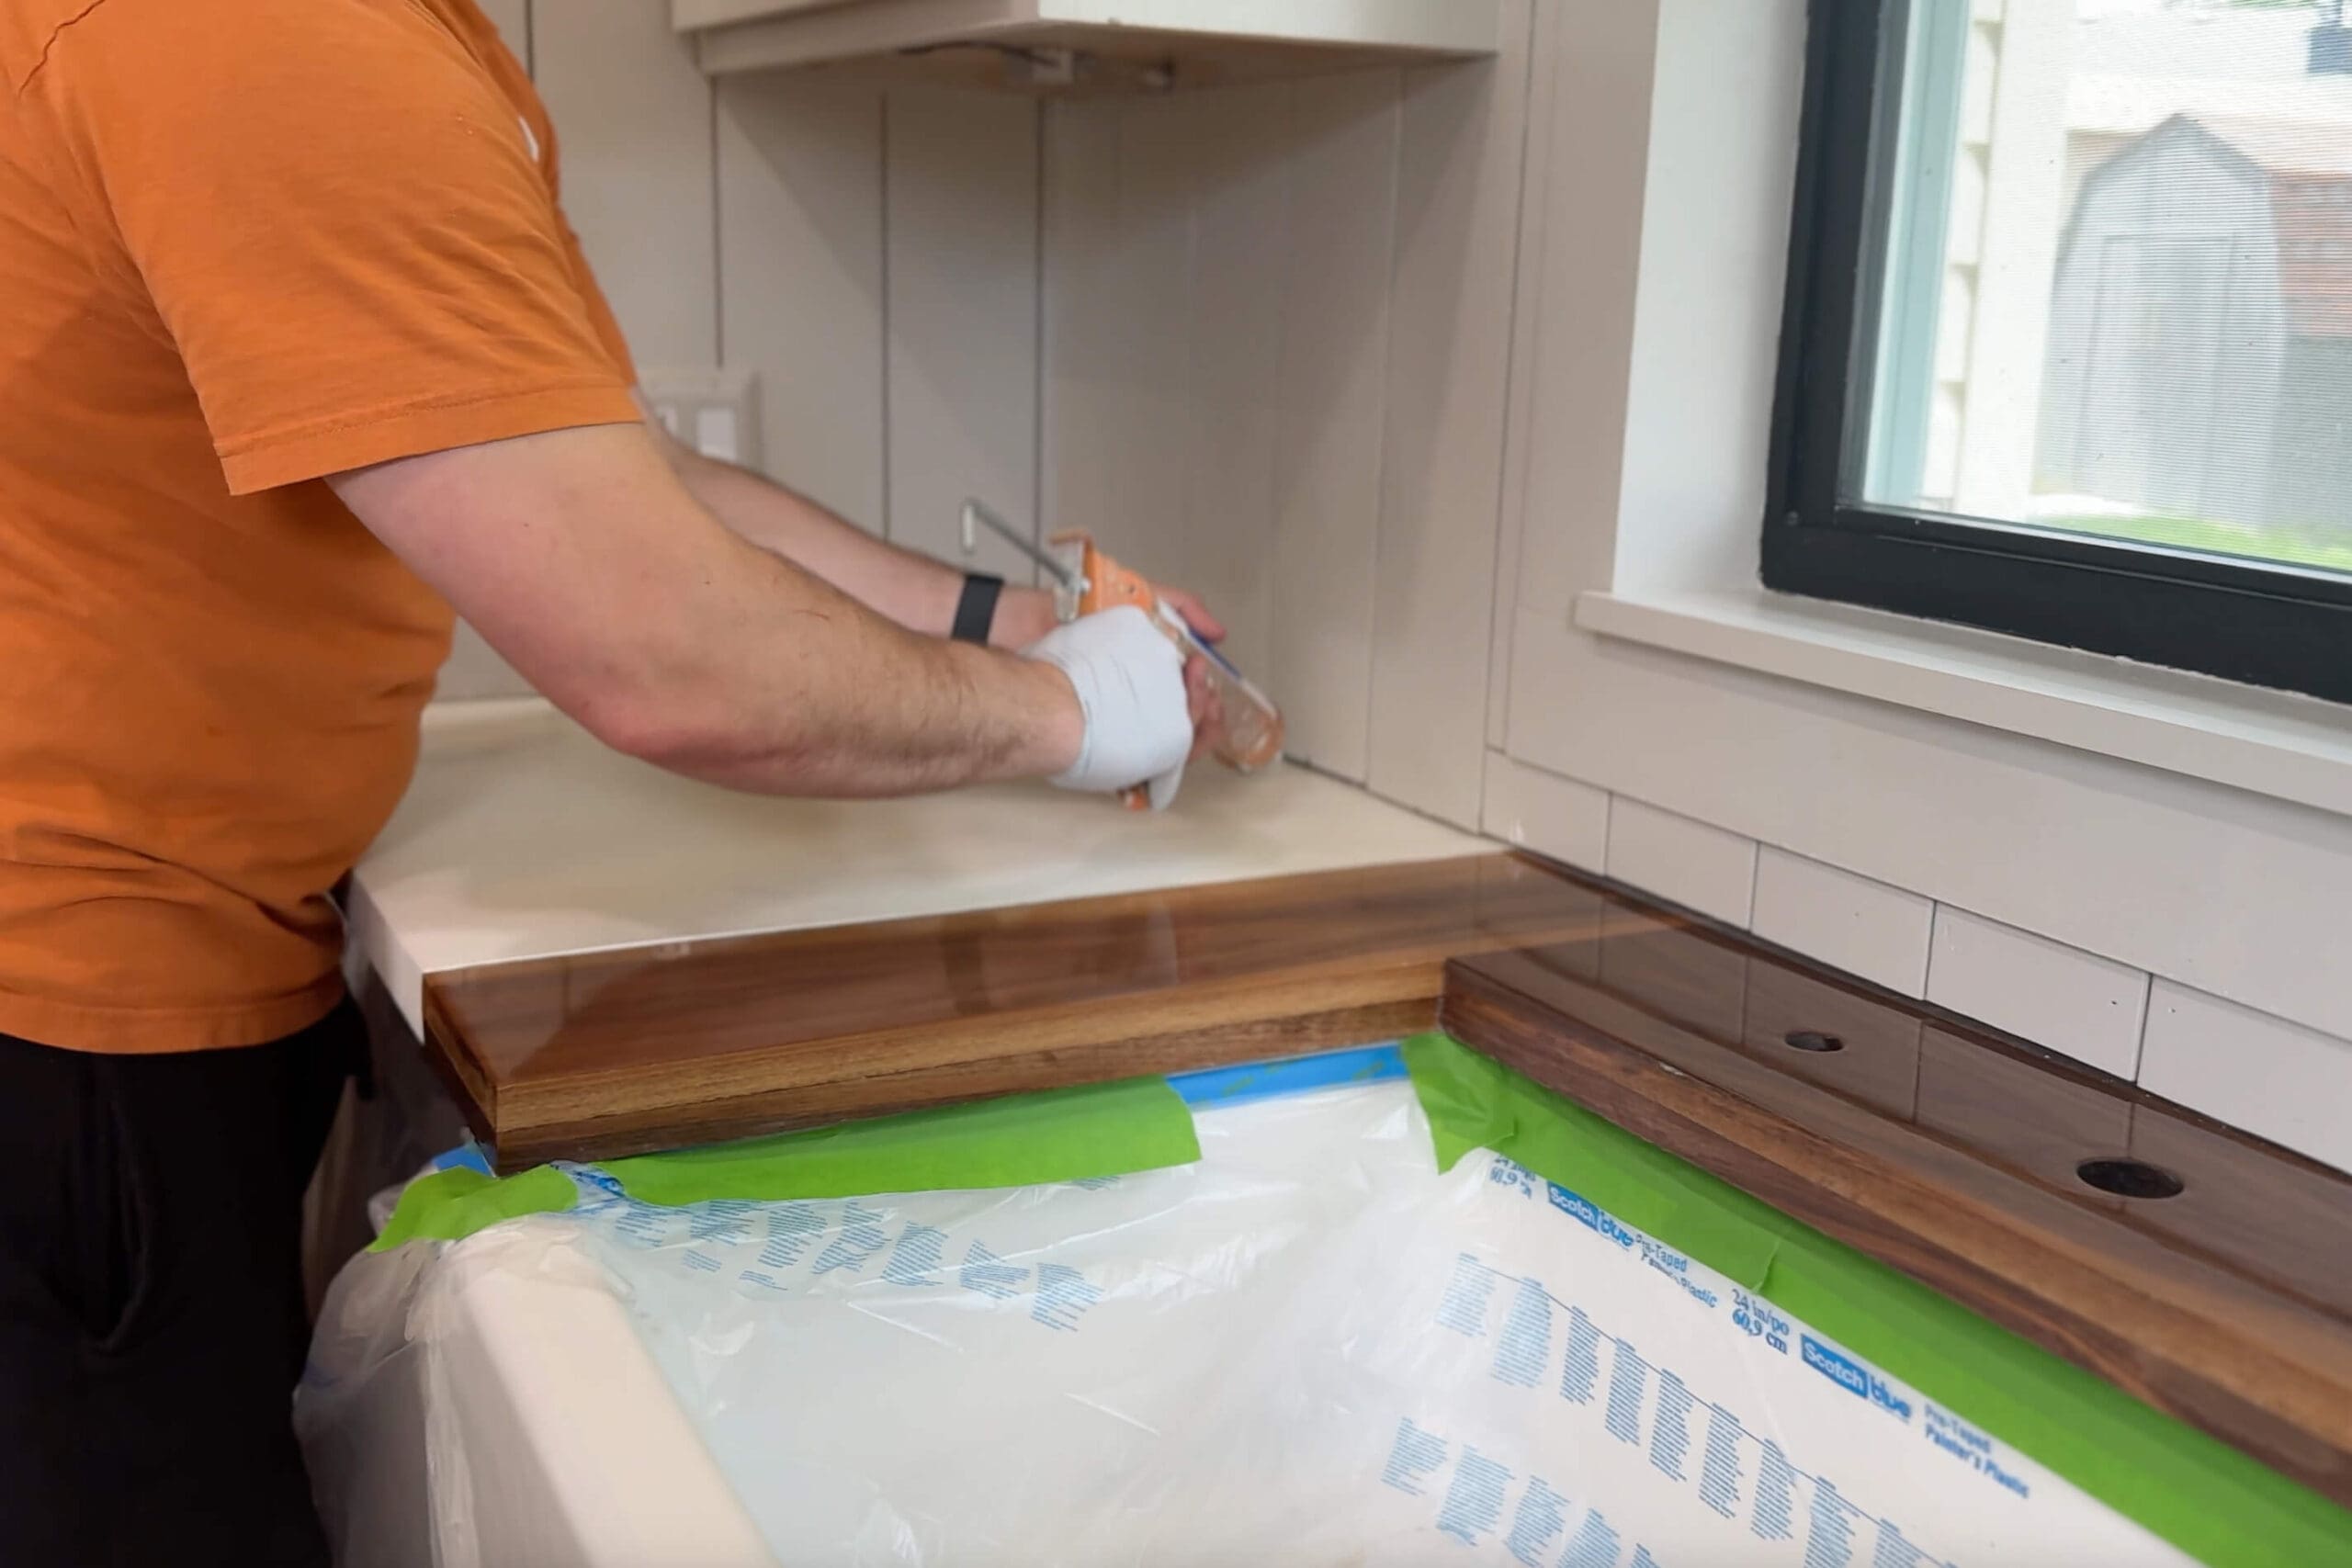
- Removed the shoe molding from under the shiplap backsplash
- Caulked and sealed the back edge of the wall
- Masked and draped everything with pre-taped plastic to protect from drips
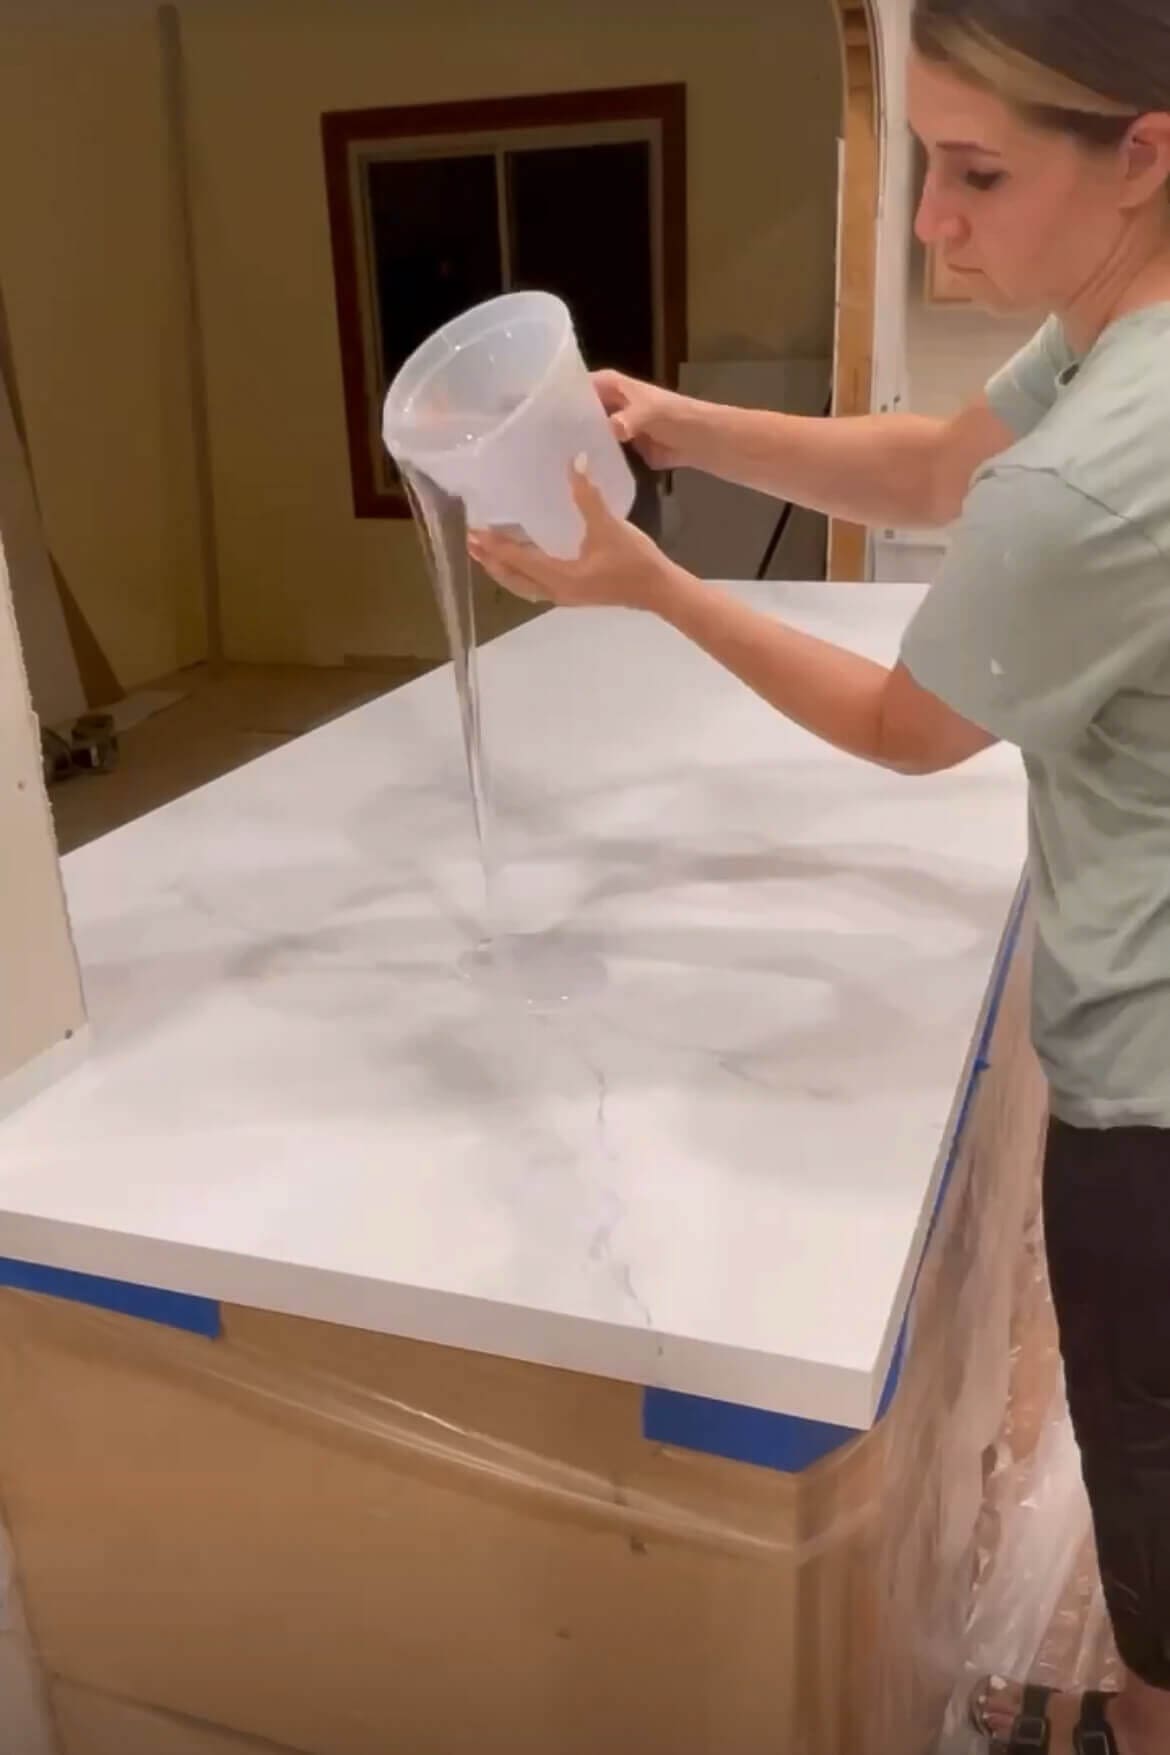
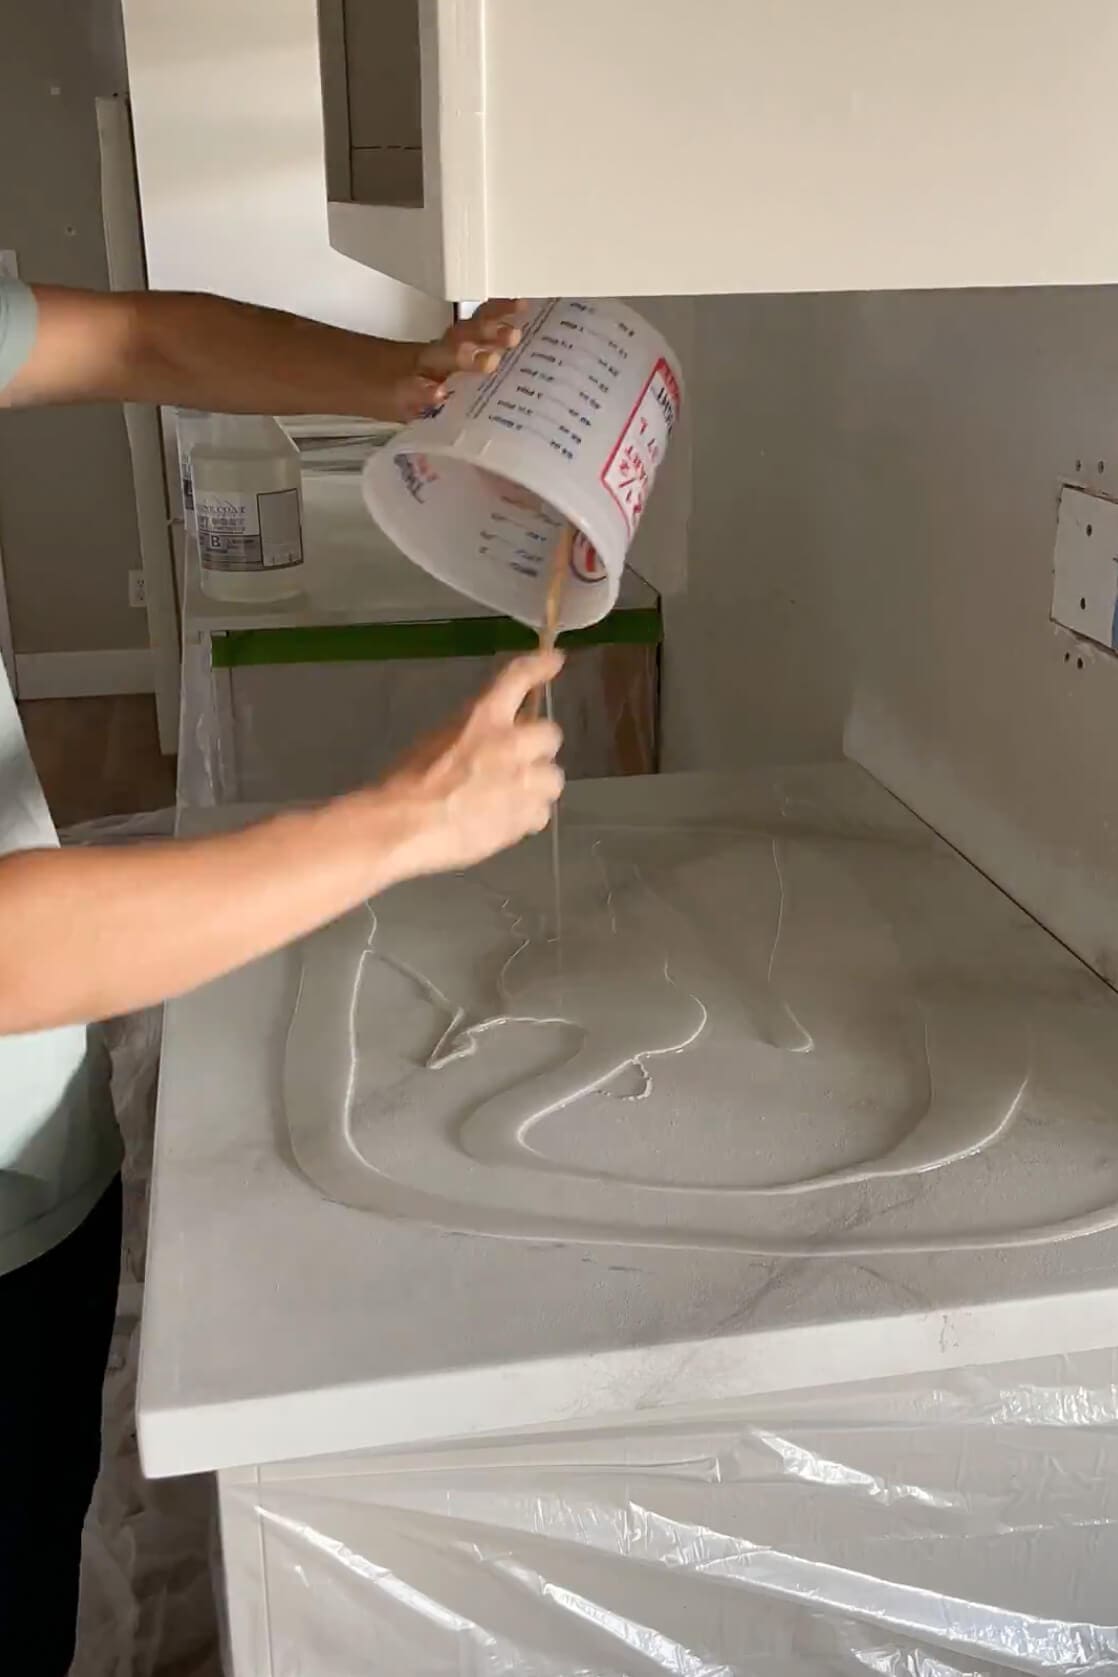
- Poured the epoxy and spread it using a notched trowel
- Smoothed the surface with a paintbrush
- Used a heat gun to eliminate bubbles
- Finished it all off with a durable matte topcoat

Do Epoxy Kitchen Countertops Stain Easily?
One question I get all the time is: “Do you have to worry about stains on your epoxy kitchen countertops?” And honestly – nope! The real secret is the topcoat. That stuff is magic. I even filmed a video of me wiping off beet juice (aka the ultimate stainer) like it was no big deal. So trust me – don’t skip the topcoat. It makes all the difference.
Why We Didn’t Reapply Epoxy to the Island
Why didn’t we touch the island during this redo? After three years of daily use, the epoxy on that section was still in perfect condition: no cracking, no yellowing, no dulling. The epoxy counters on the island still looked solid.
The only reason we had to redo the perimeter counters was because of the sink situation. Otherwise? Still going strong!

Would I Recommend Epoxy Countertops Again?
Yes. A big, loud, enthusiastic YES. We’re about to begin another DIY kitchen remodel in our new house in St. Louis, and guess what? Epoxy kitchen countertops are definitely in the running as we are choosing fixtures and materials.
That said, I’d for sure make two changes next time:
- I’ll use plywood as the base instead of MDF – much more durable.
- I’ll rethink the area around the sink. Maybe a quality hardwood again, maybe concrete like we used in our bathroom, maybe something else. TBD.
More Epoxy Countertop Resources
This isn’t my first epoxy rodeo. I’ve done epoxy countertops in multiple kitchens and bathrooms. I’ve even tackled an epoxy backsplash and a waterfall island.
If you’re curious about how to apply epoxy yourself, check out this step-by-step tutorial where I go into the entire process—from prep to topcoat.
And if you’re serious about doing this right, I created an in depth e-book that includes:
- Every product I used (including my go-to epoxy brand)
- My favorite topcoat for sheen and durability
- All the tools and tips I wish I had known when I started
Find my e-book DIY Epoxy Faux Marble Countertops here.
Related DIY Kitchen Projects
Want to see more of our budget kitchen makeover? Here are a few posts you might like:
- How I Painted My Kitchen Cabinets Like a Pro
- Affordable Kitchen Remodel Using Stock Cabinets and Epoxy Countertops
📌 Save This Epoxy Countertop Update for Later
FAQs About Epoxy Countertops
Epoxy can scratch if you’re not careful, especially with knives or abrasive cleaners. We always use cutting boards and mild cleaning solutions.
es! Small damaged areas can be repaired by sanding, cleaning, and reapplying a new layer of epoxy. Just be sure to blend carefully.
Epoxy is water-resistant when cured properly, but edges near the sink need extra sealing to prevent water intrusion over time.
With proper prep and care, epoxy kitchen countertops can last 3-5 years or more. Ours are still going strong after three years with only minor repairs.
