

Updated November 21, 2025
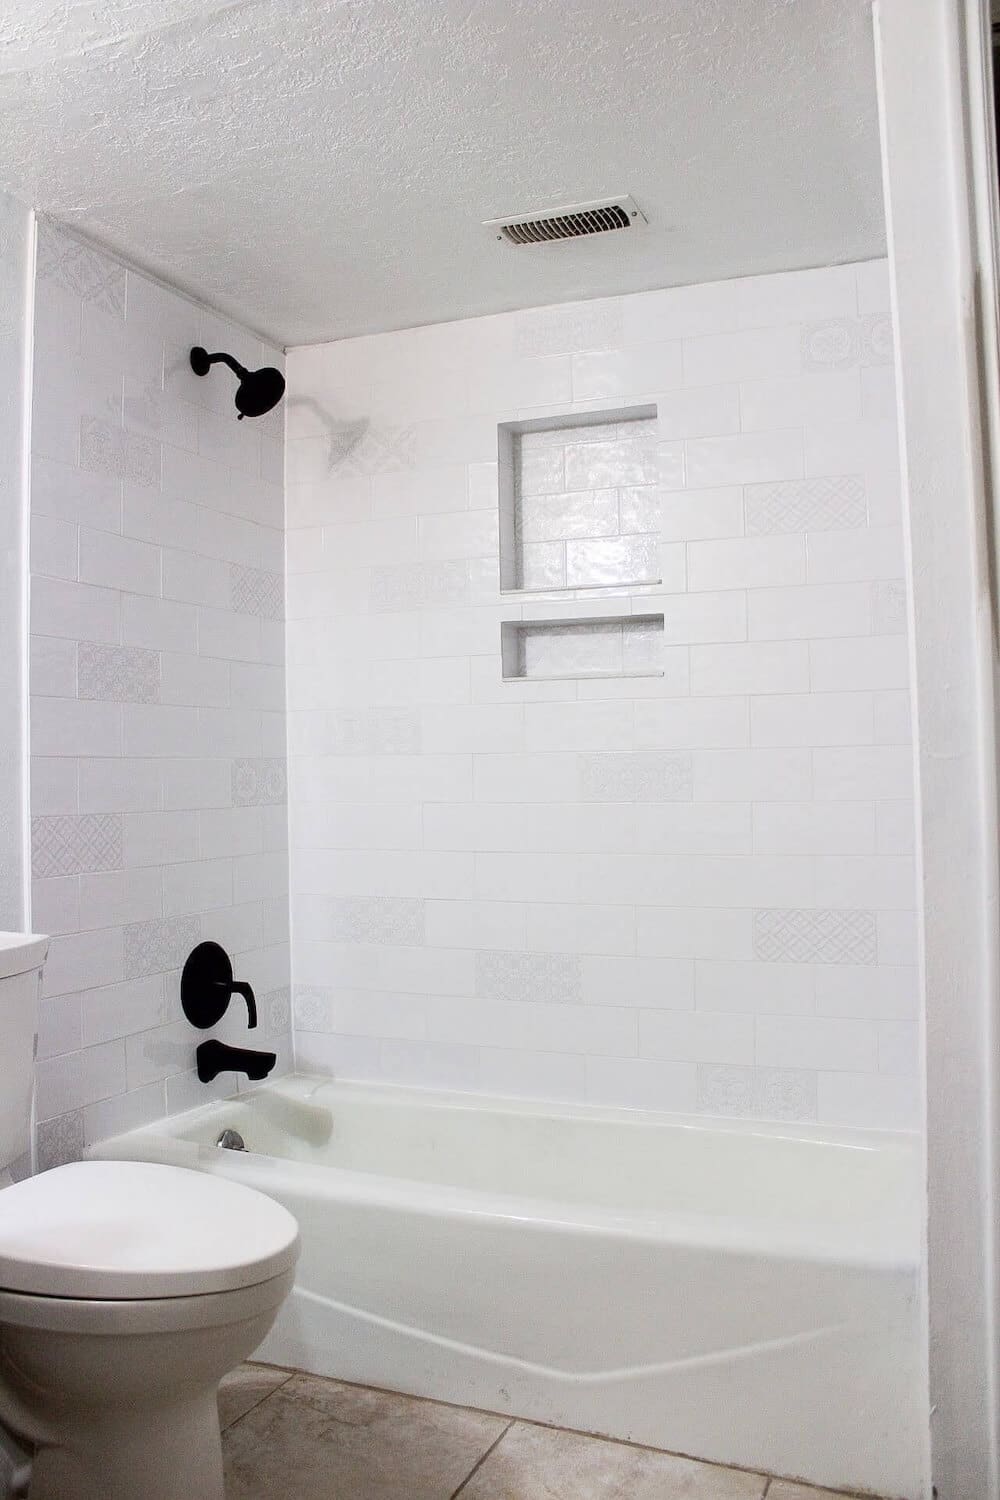
A shower niche is one of the most functional upgrades you can add to a bathroom, and this tutorial will show you exactly how to build a shower niche – from framing and attaching cement board to waterproofing the entire box so it’s ready for tile. It keeps bottles off the tub edge, makes the shower feel high-end and custom, and adds smart storage without taking up any extra space.
Time: Weekend project (framing + waterproofing)
Difficulty: Intermediate DIY (comfortable with basic framing + tools)
This is the same method I used during our basement bathroom remodel to build a custom, recessed shower niche, and it works whether your walls are wide open or you’re working around an unusual feature.
If you’re jumping into this project as part of a bigger remodel, these posts will help:
- How to Remove Mold From a Shower + Prep the Walls for Tile
- How to Tile a Shower Wall (Even If You’ve Never Done It Before)
- DIY Small Bathroom Remodel on a Budget
Shower Niche Build: At a Glance
- Decide niche height, width, and location between studs
- Frame a niche box and add cement board to the back
- Pitch the bottom slightly so water drains forward
- Secure the niche box between studs
- Wrap cement board around the niche opening
- Tape, thinset, and smooth all seams
- Waterproof the niche and surrounding wall
- Prep the box for tile and continue with your shower tiling
Table of Contents
- Shower Niche Build: At a Glance
- Before: A Shower With a Strange Window (And Zero Storage)
- What You’ll Learn in This Shower Niche Build
- Tools You’ll Need to Build a Shower Niche
- Materials You’ll Need
- Step 1: Choose the Shower Niche Height and Size
- Step 2: Build the Shower Niche Frame (With Cement Board Attached)
- Step 3: Install the Niche Box Into the Wall
- Step 4: Cut and Install Cement Board Around the Niche Opening
- Step 5: Tape and Thinset the Seams
- Step 6: Waterproof the Shower Niche
- Step 7: Prep the Niche for Tile
- How the Niche Fits Into Our Full Bathroom Remodel
- Common Mistakes When Building a Shower Niche
- Can You Add a Shower Niche to an Existing Tiled Shower?
- More Tile Shower Projects
- 📌 Pinterest: Save This Shower Niche Tutorial for Later
- FAQ: How to Build a Shower Niche
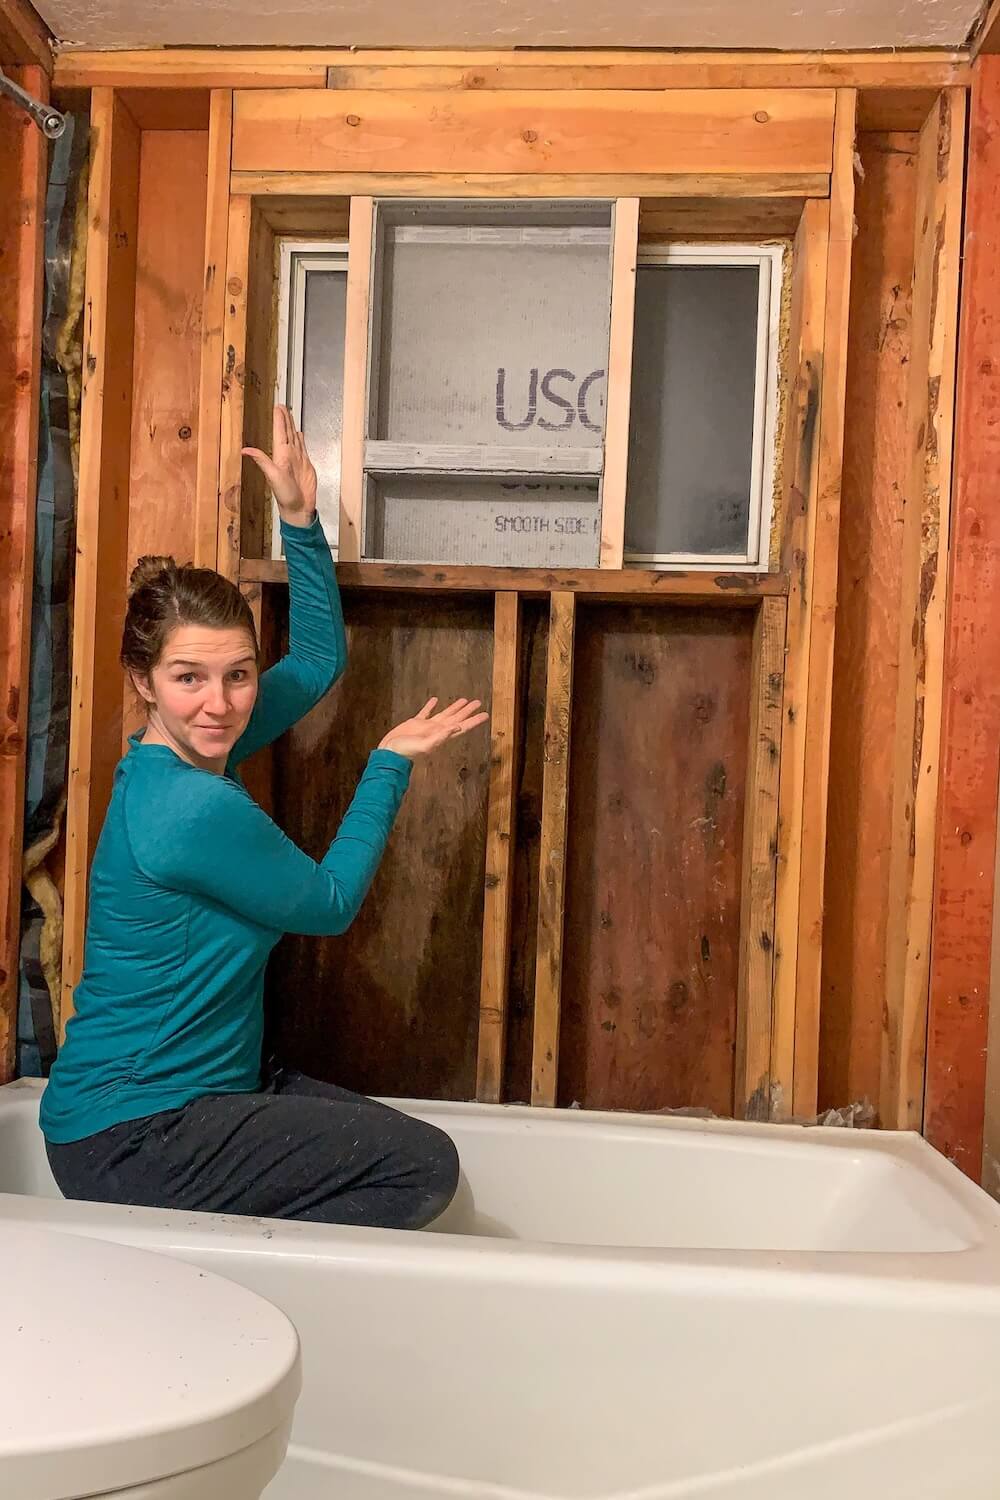
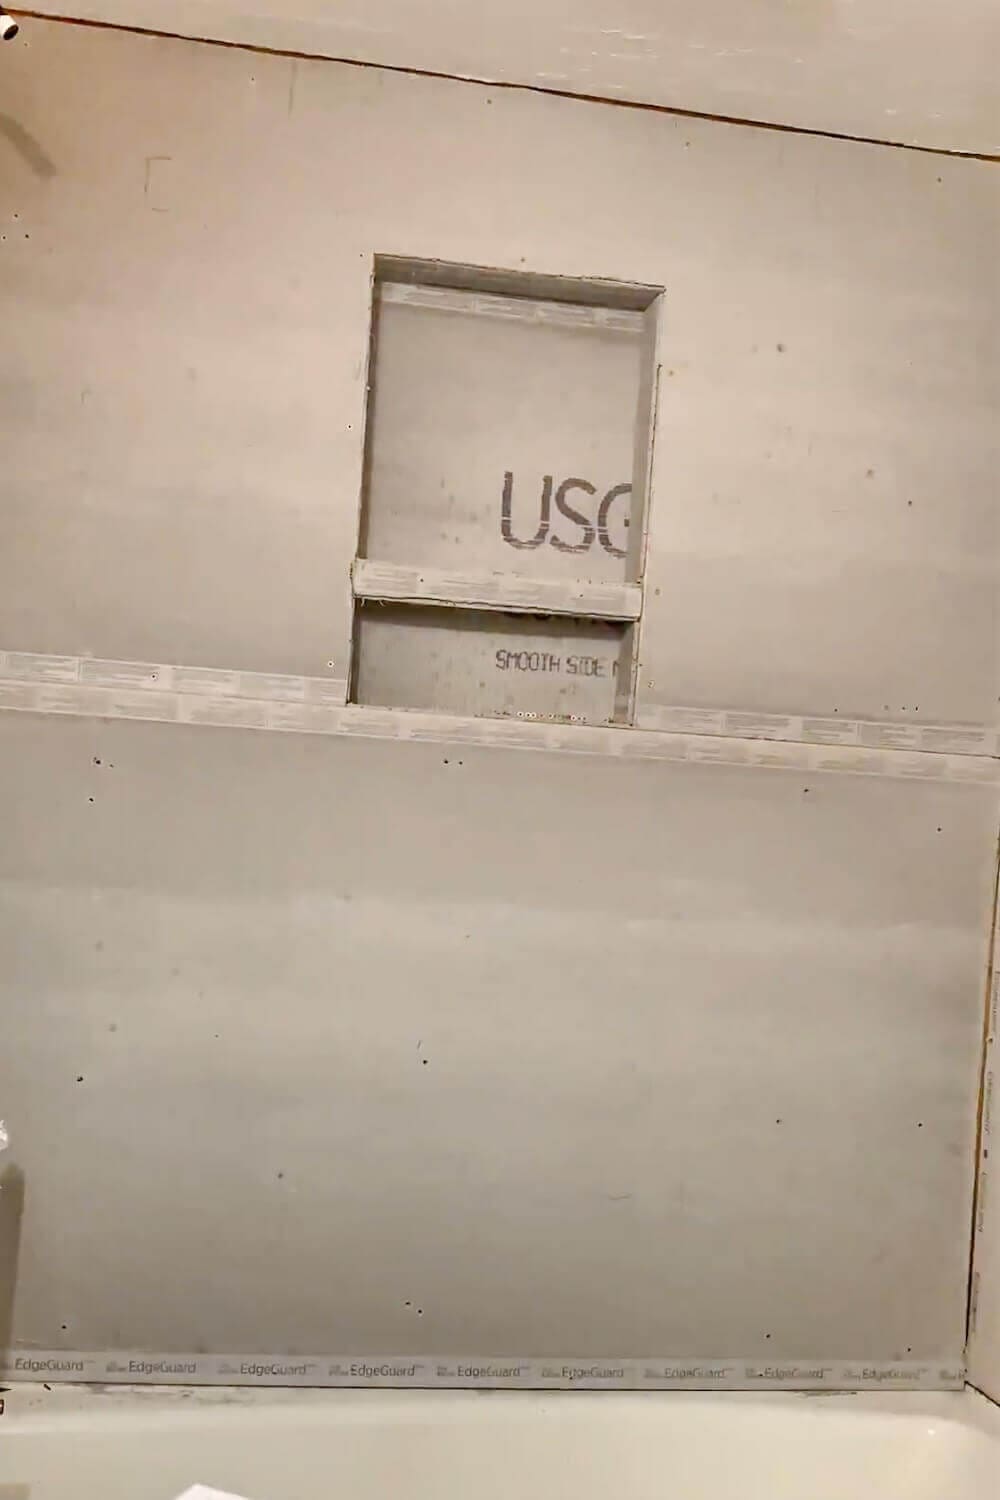
Before: A Shower With a Strange Window (And Zero Storage)
This basement shower had one big challenge: a dead, outdated window right inside the shower wall. It didn’t open or function, but it did make the whole space feel dark, awkward, and dated.
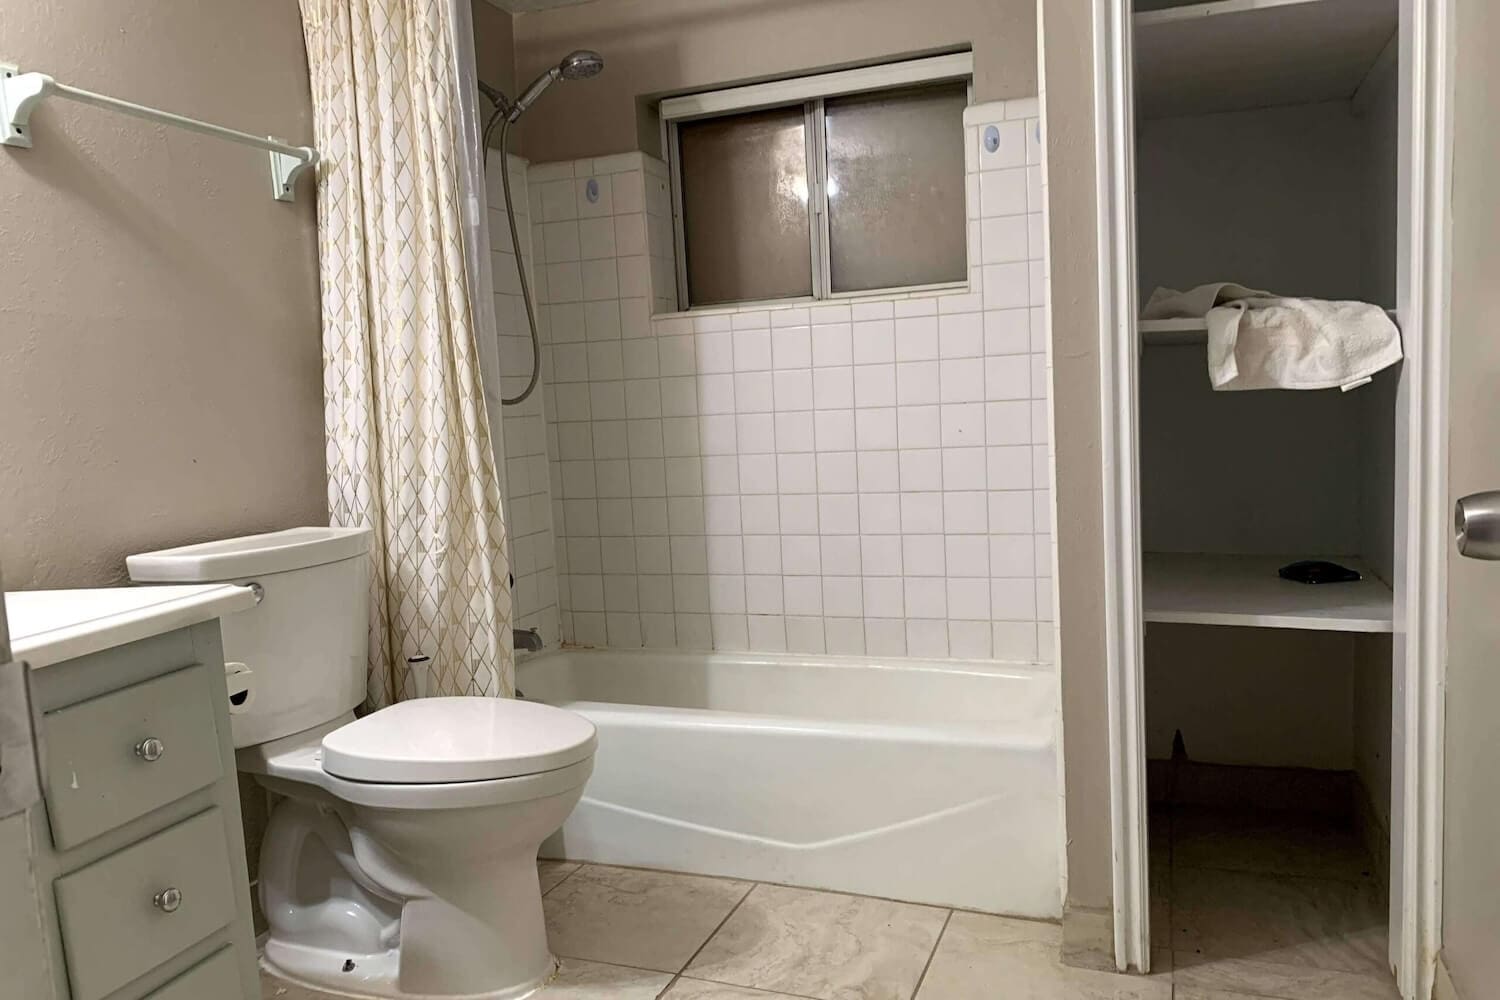
There was also no storage for bottles – everything sat on the tub ledge. A niche was the most efficient storage upgrade, and turning the window area into a niche would solve two problems at once.
What You’ll Learn in This Shower Niche Build
By the end of this tutorial, you’ll know exactly how to build a DIY shower niche that’s framed, waterproofed, and ready for tile.
- Choose the right size and height when you build a shower niche
- Frame a niche between studs
- Add a slight pitch so water drains
- Install cement board inside the niche
- Seam, patch, and waterproof the box
- Prep it perfectly for tile
Tools You’ll Need to Build a Shower Niche
- Drill/driver
- Hole saw (if adding plumbing penetrations nearby)
- Tape measure
- Level or Laser level
- Utility knife
- Multi-tool or angle grinder with diamond wheel
- Carpenter square
- Putty knife and Taping knife
- Caulk gun
- Pencil
- Tile saw (needed later, not for framing)
Materials You’ll Need
- 2×4 lumber for framing
- ½” Cement board
- Cement board screws
- Alkali-resistant Mesh tape
- Thinset mortar
- Liquid Waterproofing membrane
- Plastic shims (for niche pitch)
- Silicone caulk
- Subway tiles (I used both plain and patterned)
Step 1: Choose the Shower Niche Height and Size
The best shower niche height depends on who uses the shower. A good starting point is around chest height for adults-roughly 42–48 inches from the floor for most people. Measure your tallest bottles and add an inch or two so they fit comfortably without angling.
For shower niche depth, standard 2×4 wall framing gives you about 3½” inside, which works for most bottles. If your wall allows 2×6 framing, you can go 4–5″ deep for even more storage.
For width, choose a size that will align neatly with your tile layout. Planning ahead prevents awkward slivers of tile once you begin tiling the walls.
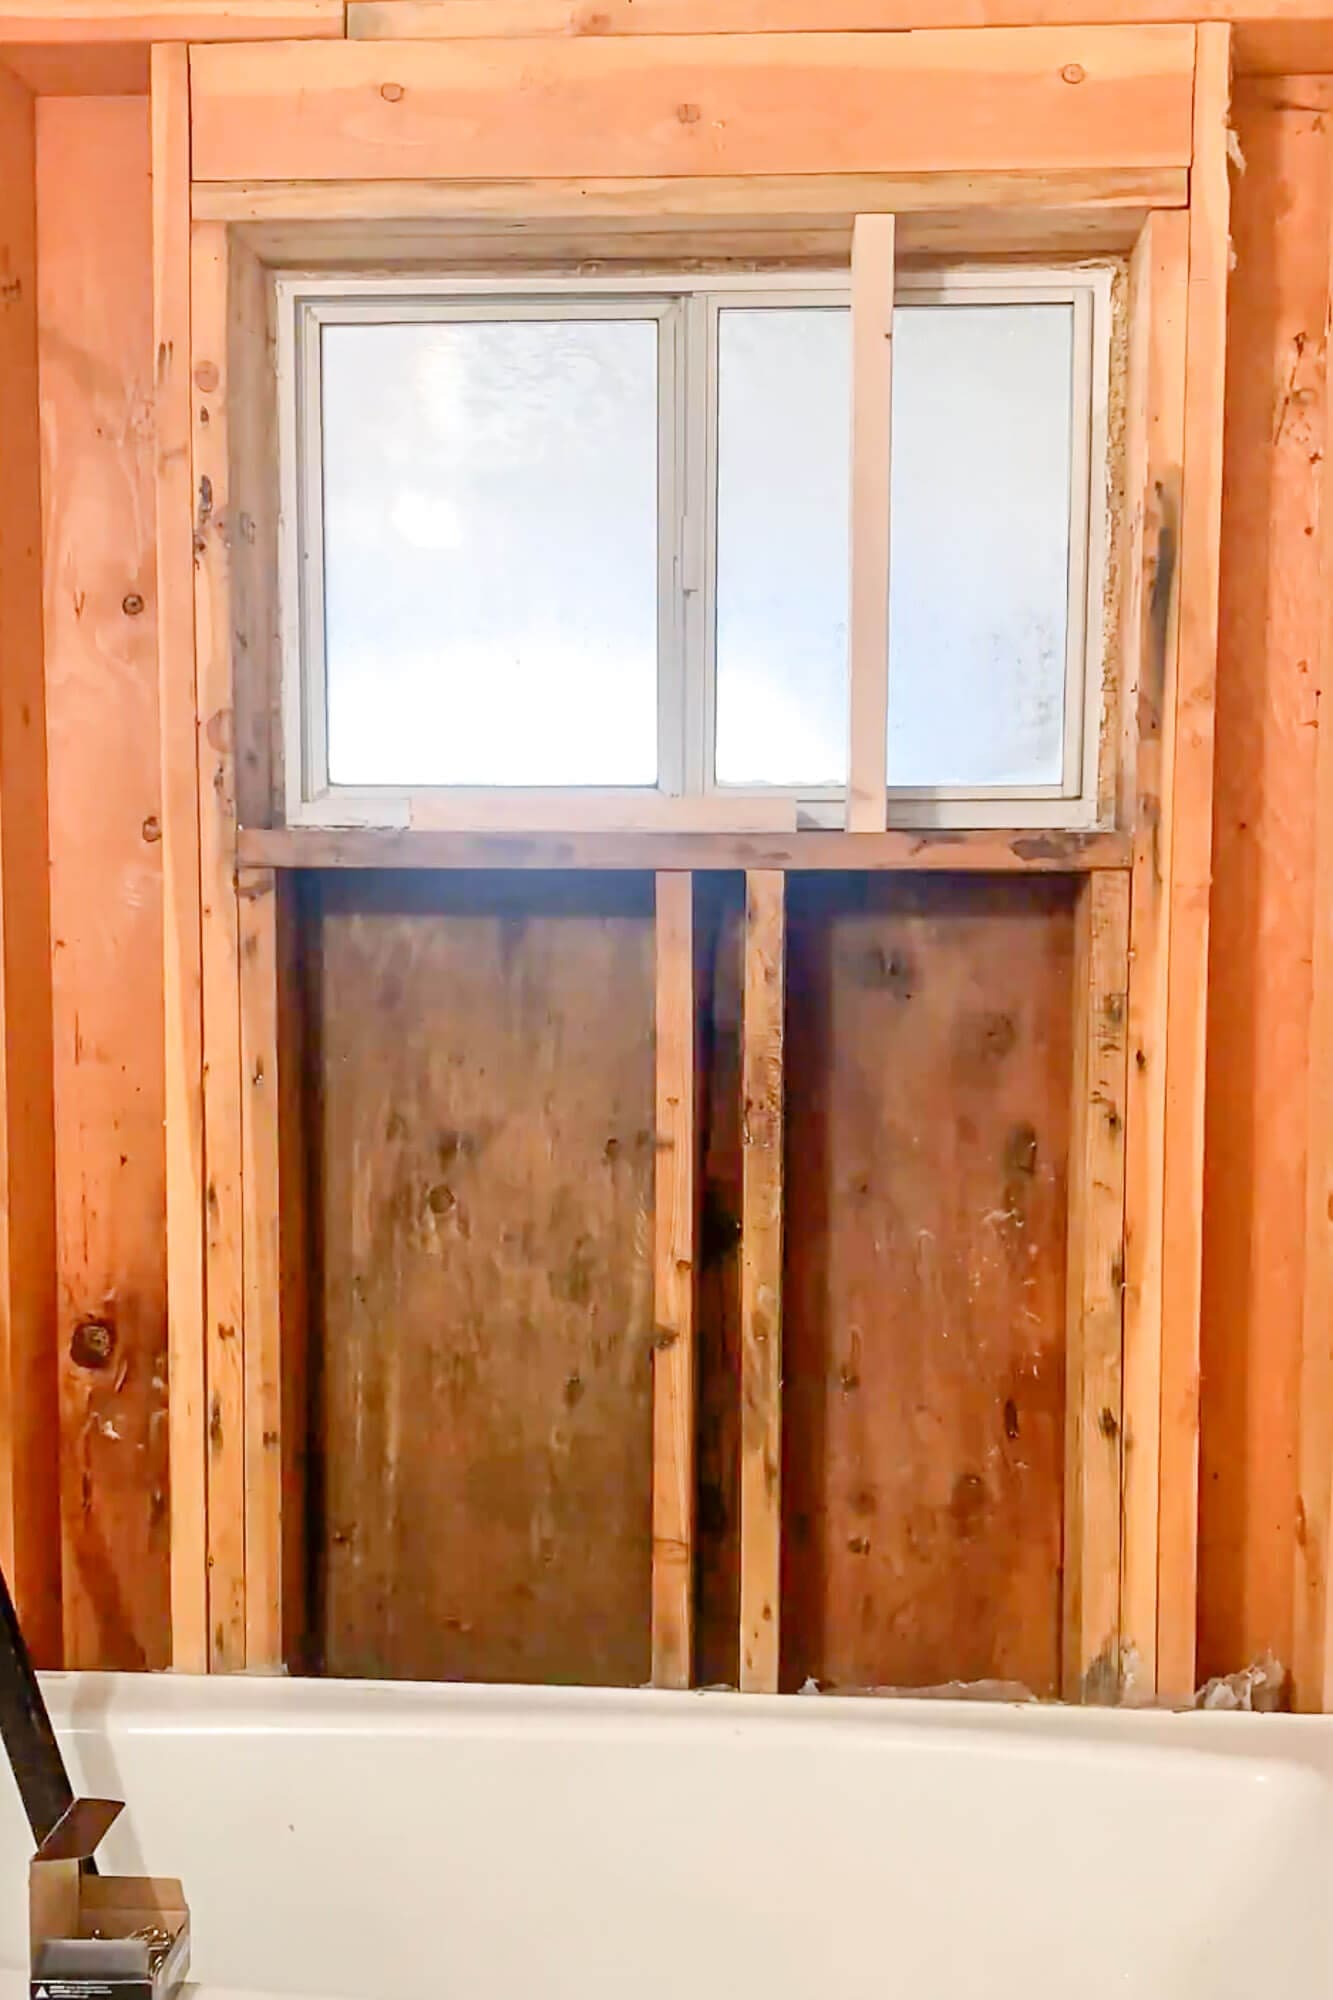
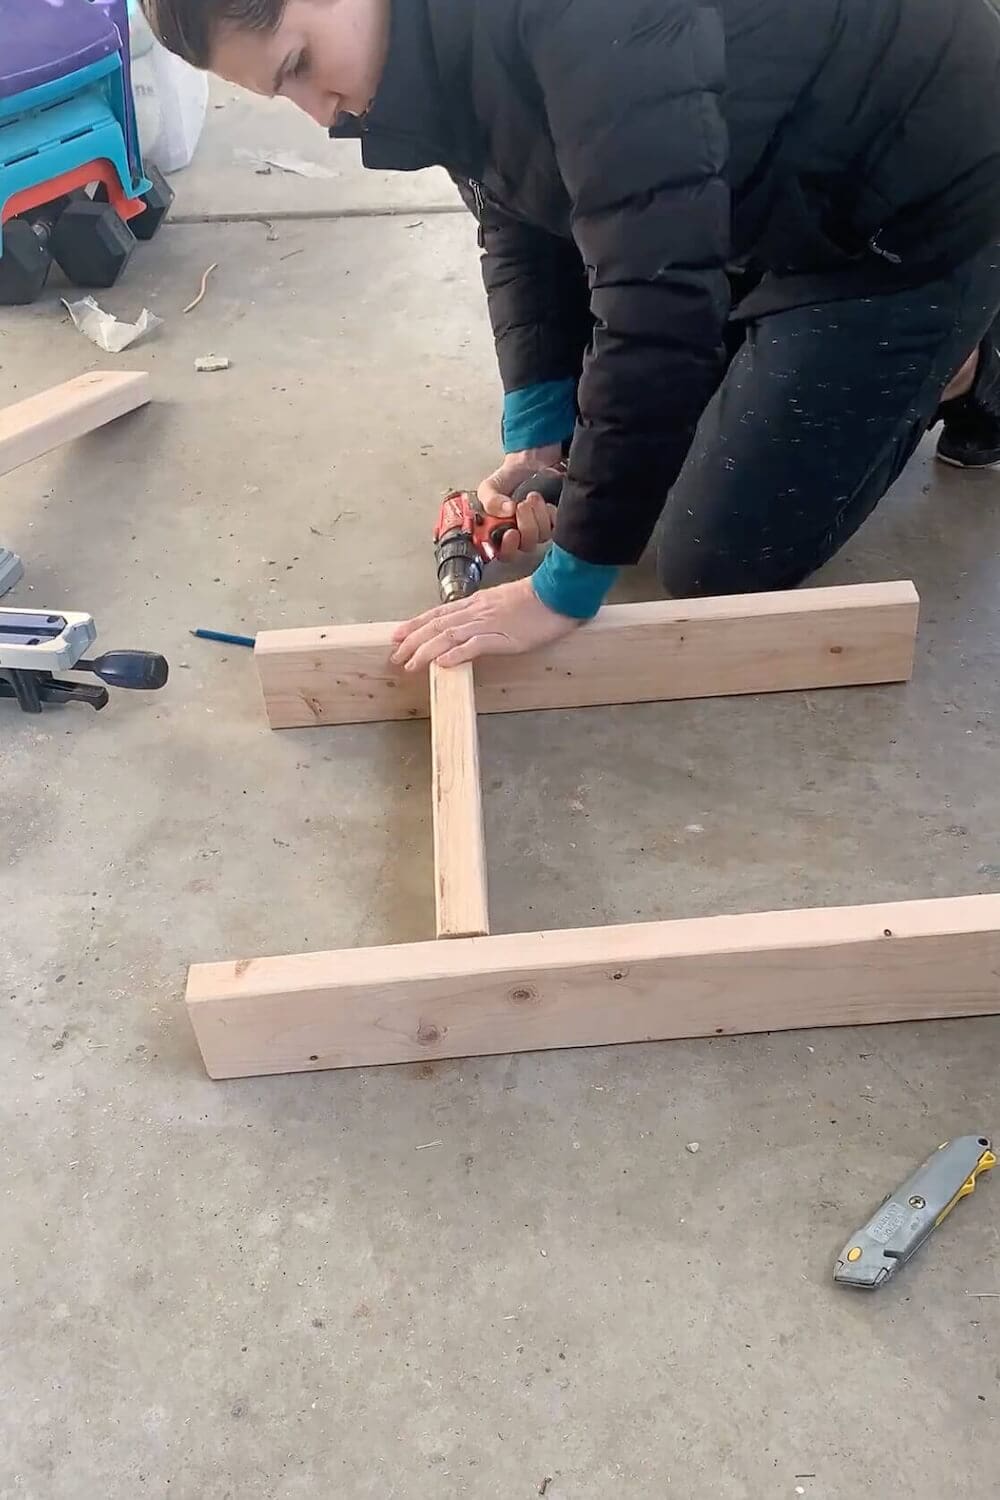
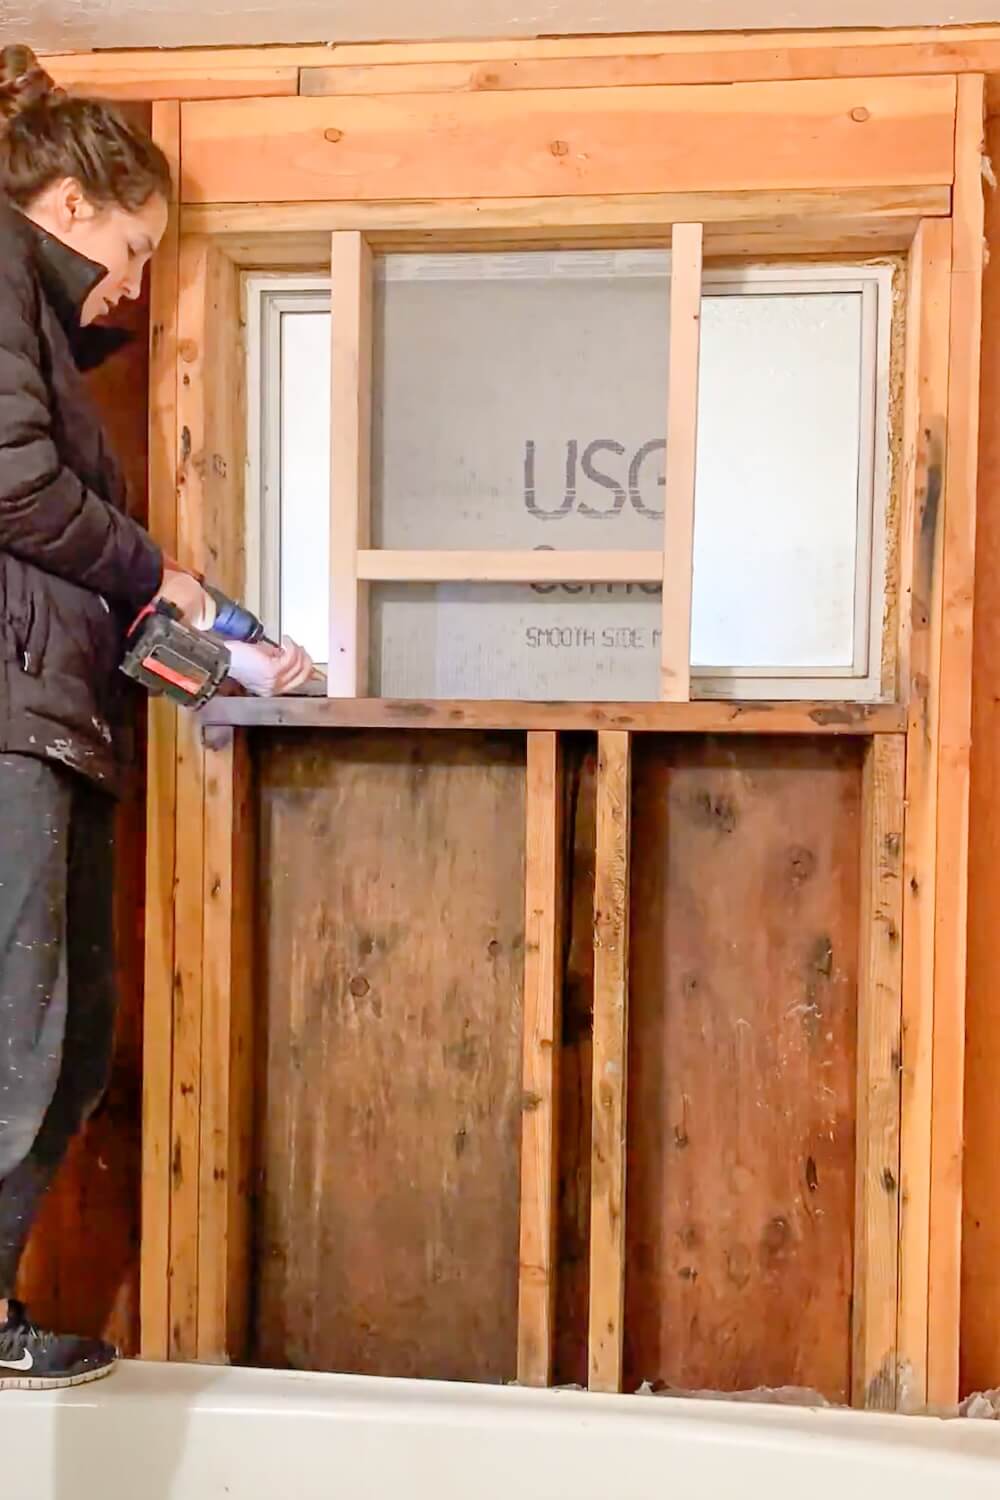
Step 2: Build the Shower Niche Frame (With Cement Board Attached)
When you’re learning how to frame a shower niche, assembling the full box on the floor before it goes into the wall makes everything square and easier to handle.
Build the Frame
- Cut 2×4 pieces for the top, bottom, and sides.
- Assemble the rectangle using screws.
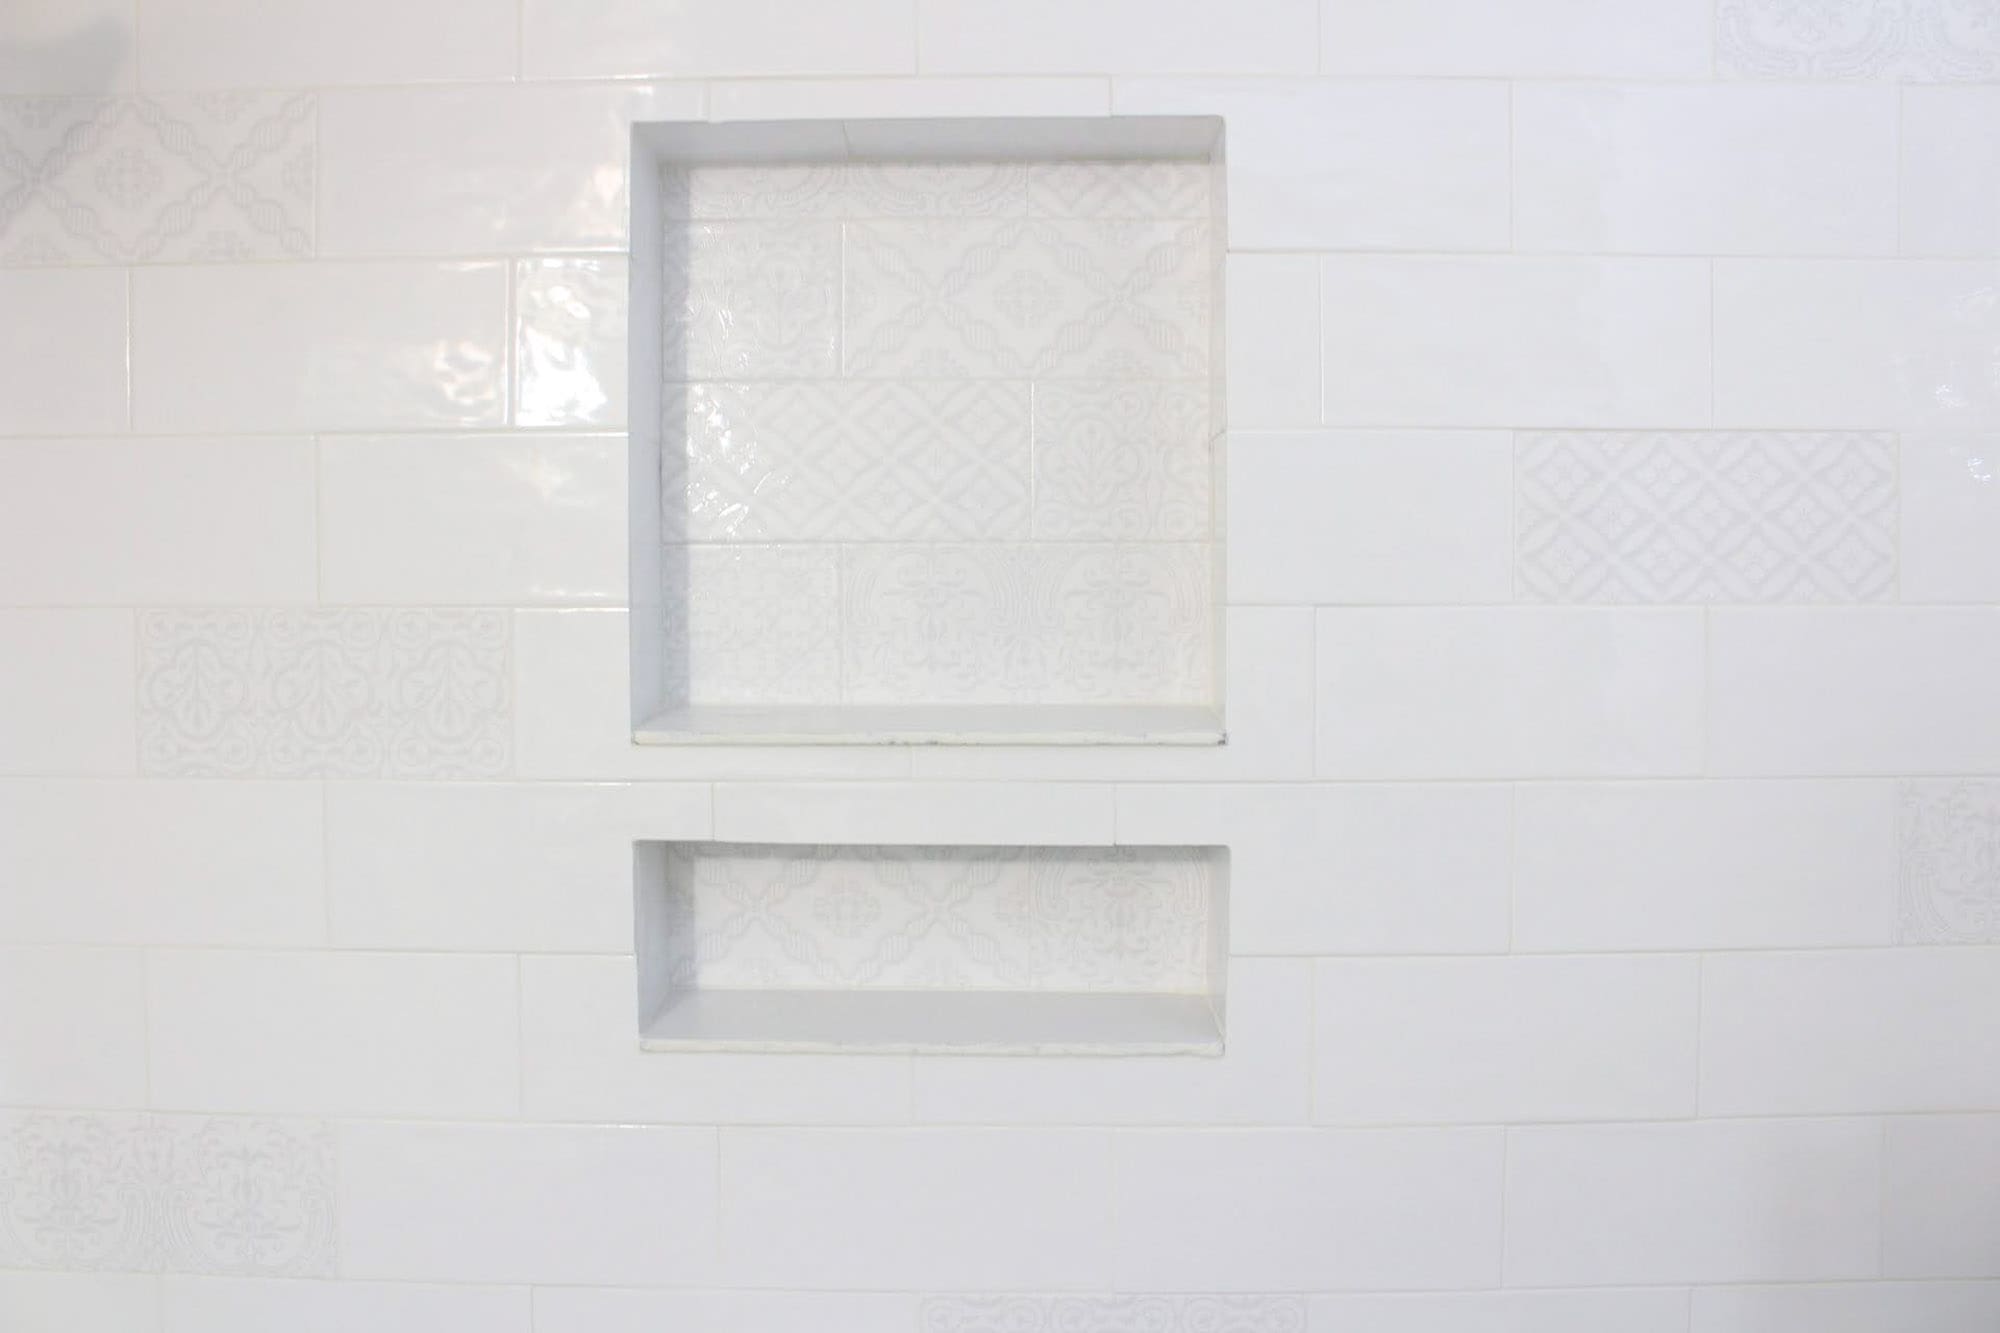
- Add a center board if you’re creating a double niche.
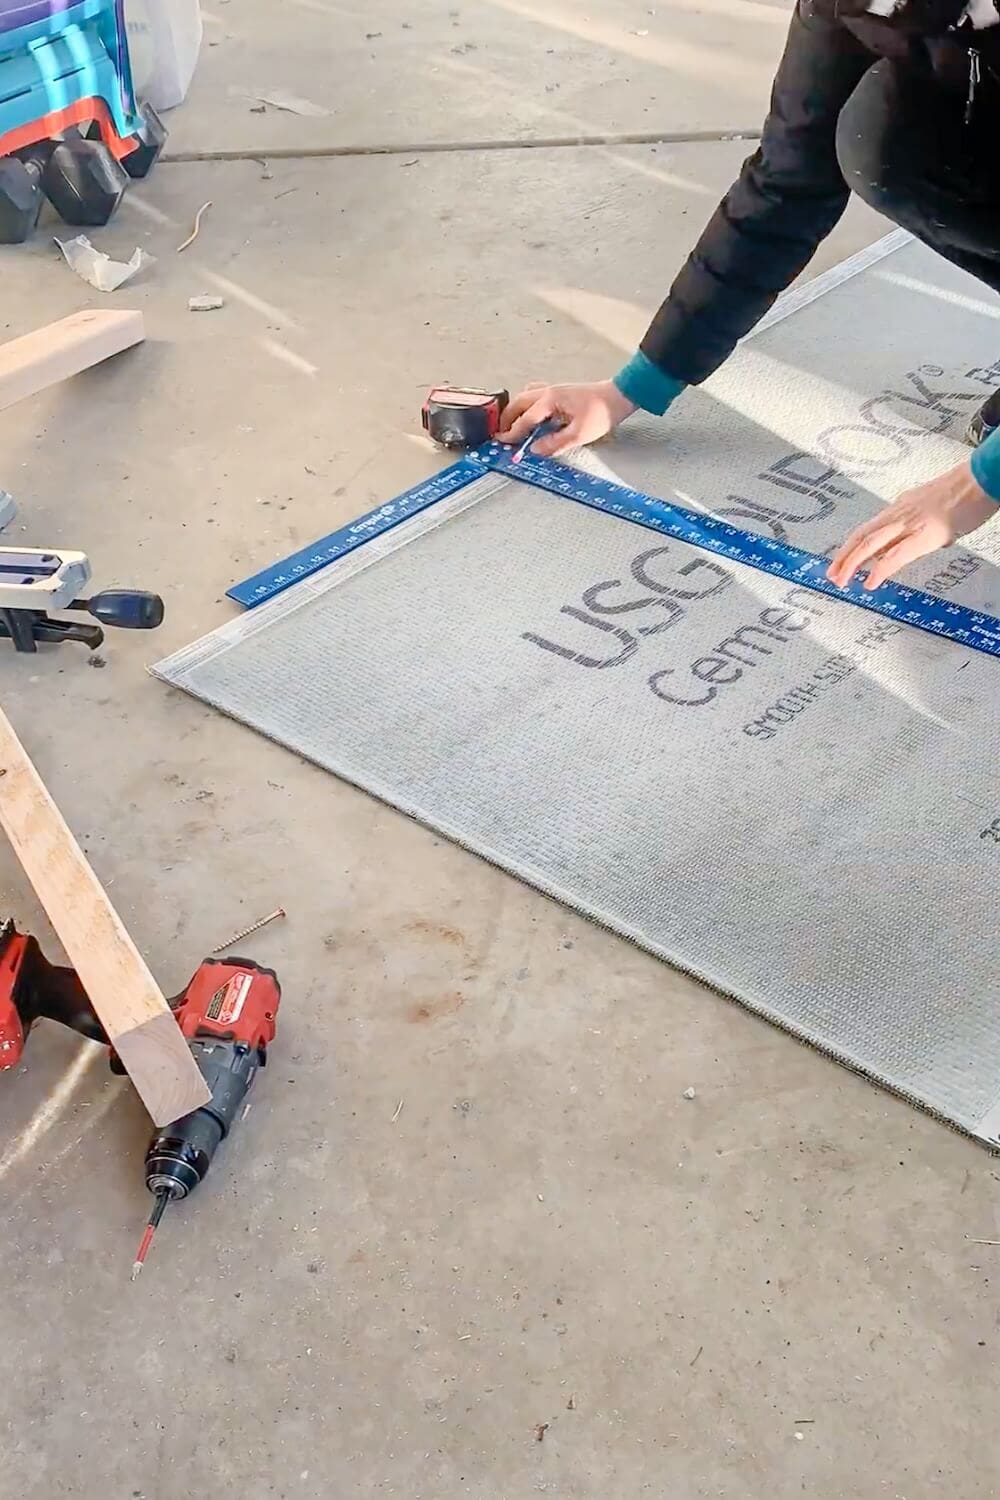
Attach Cement Board to the Frame
- Cut cement board panels to the exact size of the niche back.
- Lay the board over the rear of the frame.
- Screw it into place with cement board screws.
This creates a solid, ready-to-install niche box.
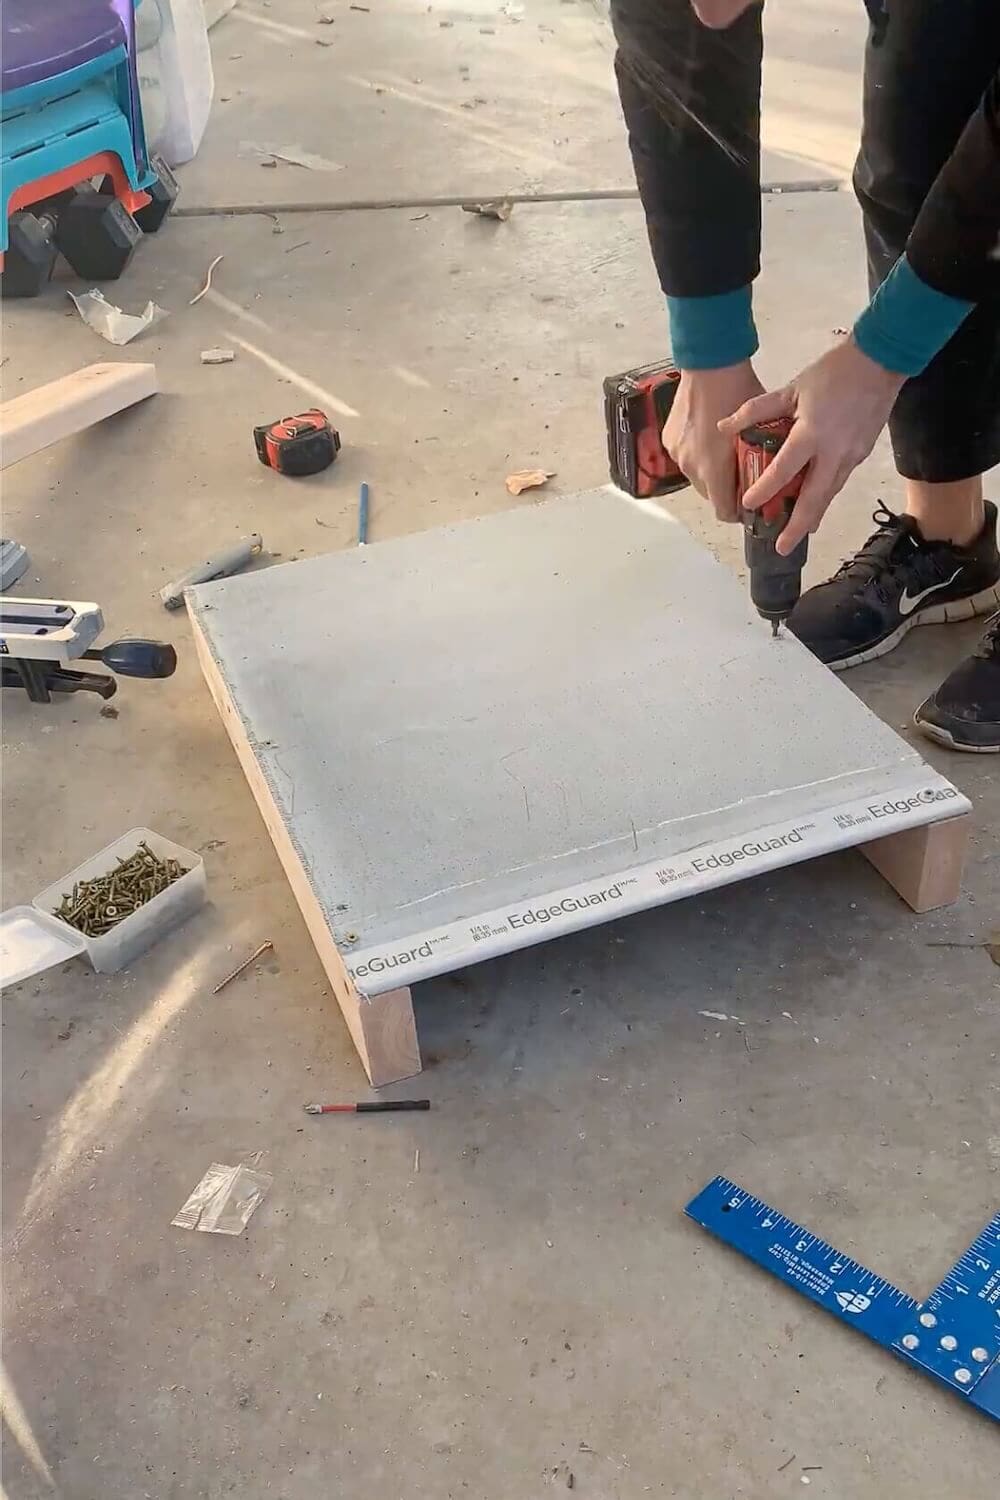
Add a Slight Pitch
The bottom piece needs a very small tilt – about 1–2 degrees – so water drains outward. Add a thin shim under the front edge while securing the bottom board.
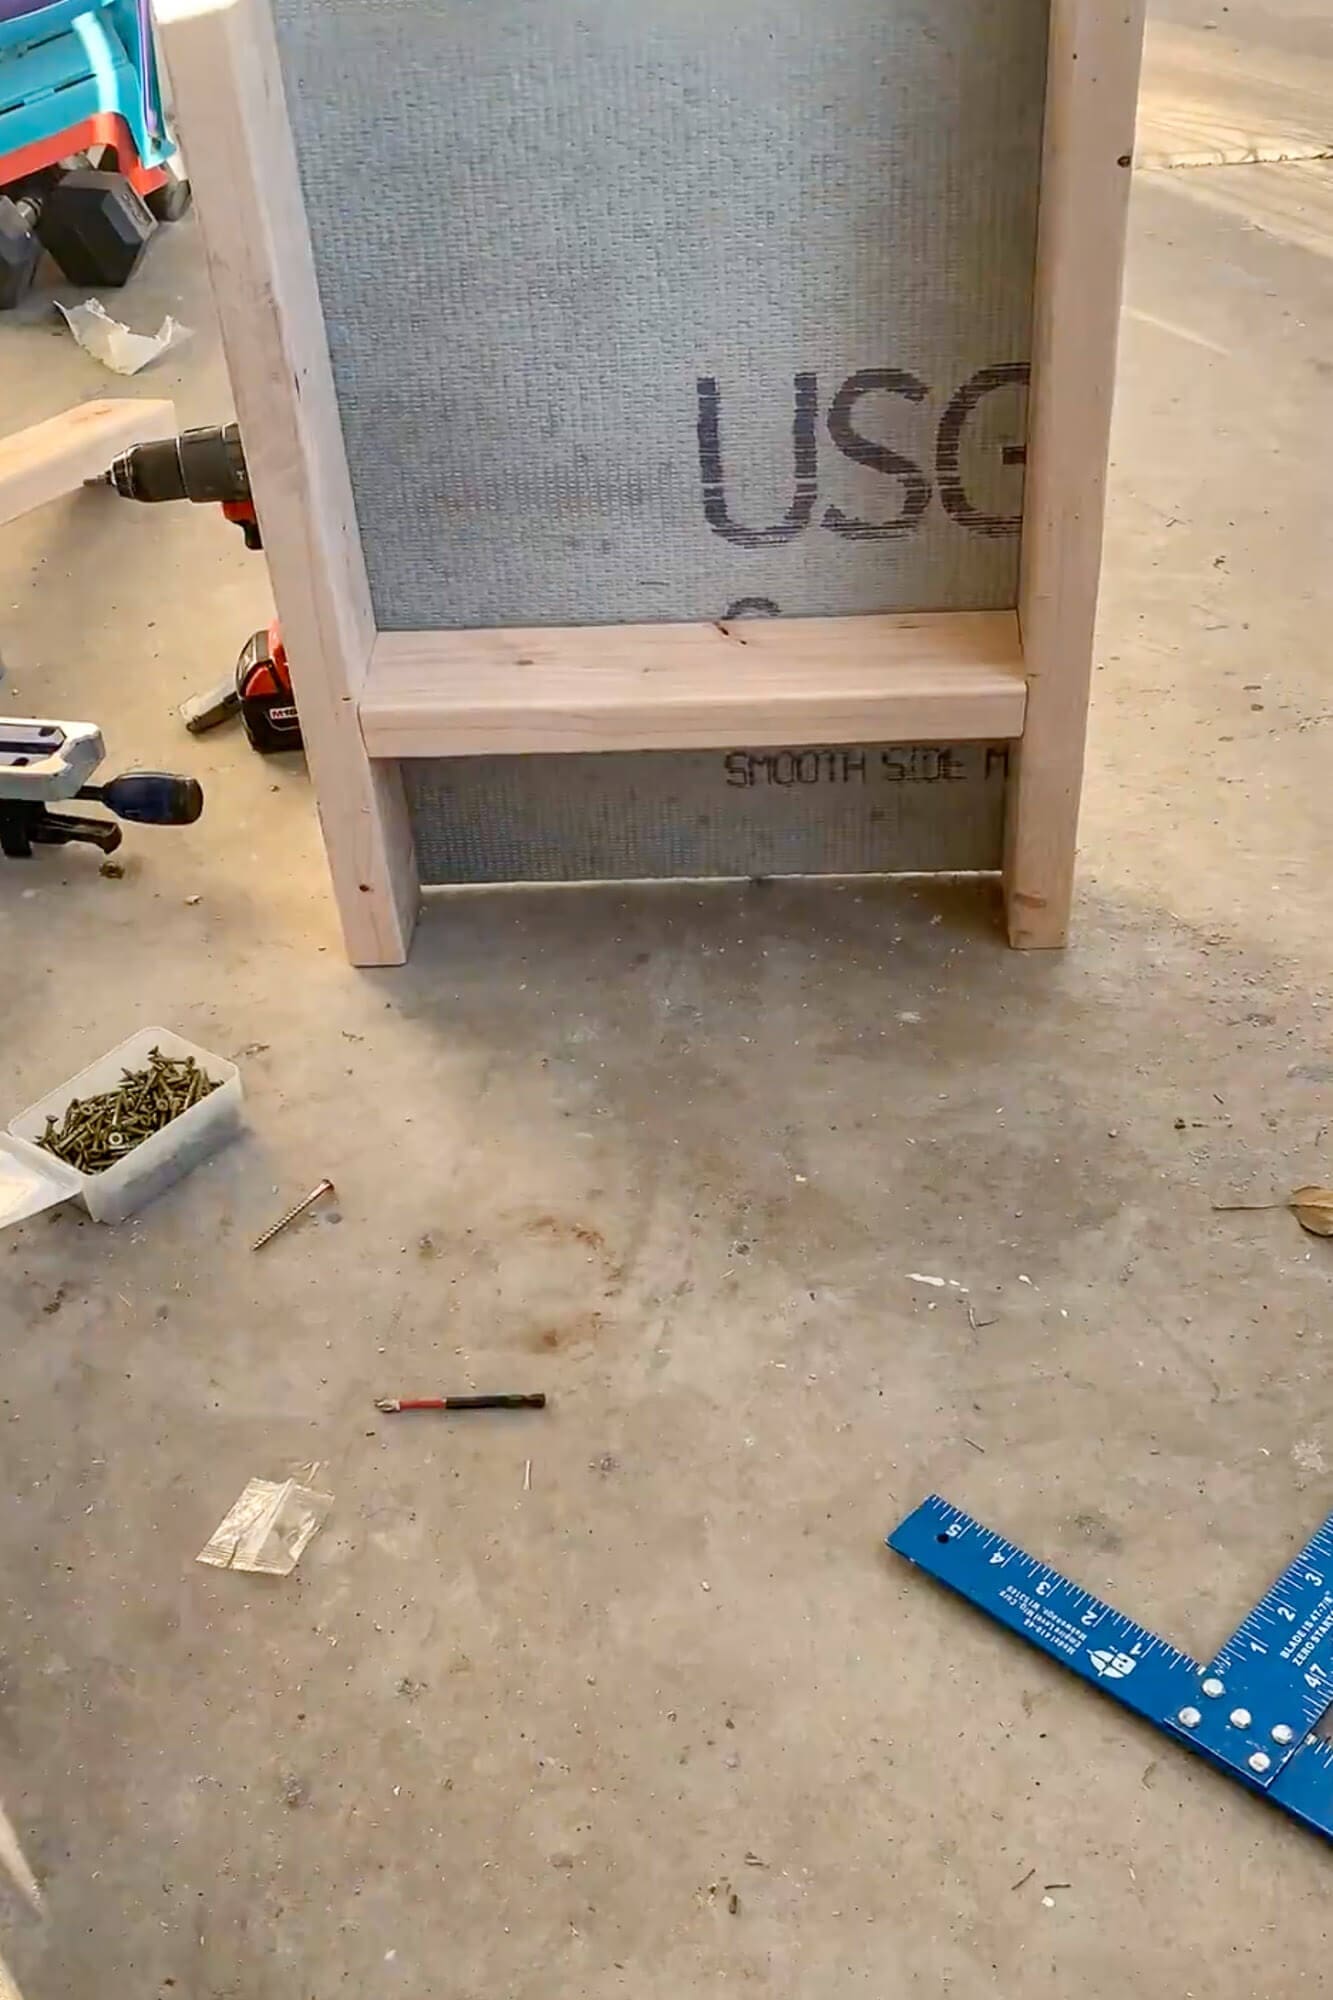
Test Fit the Niche Box
Hold the assembled box between the studs to ensure it fits and sits at the correct height.
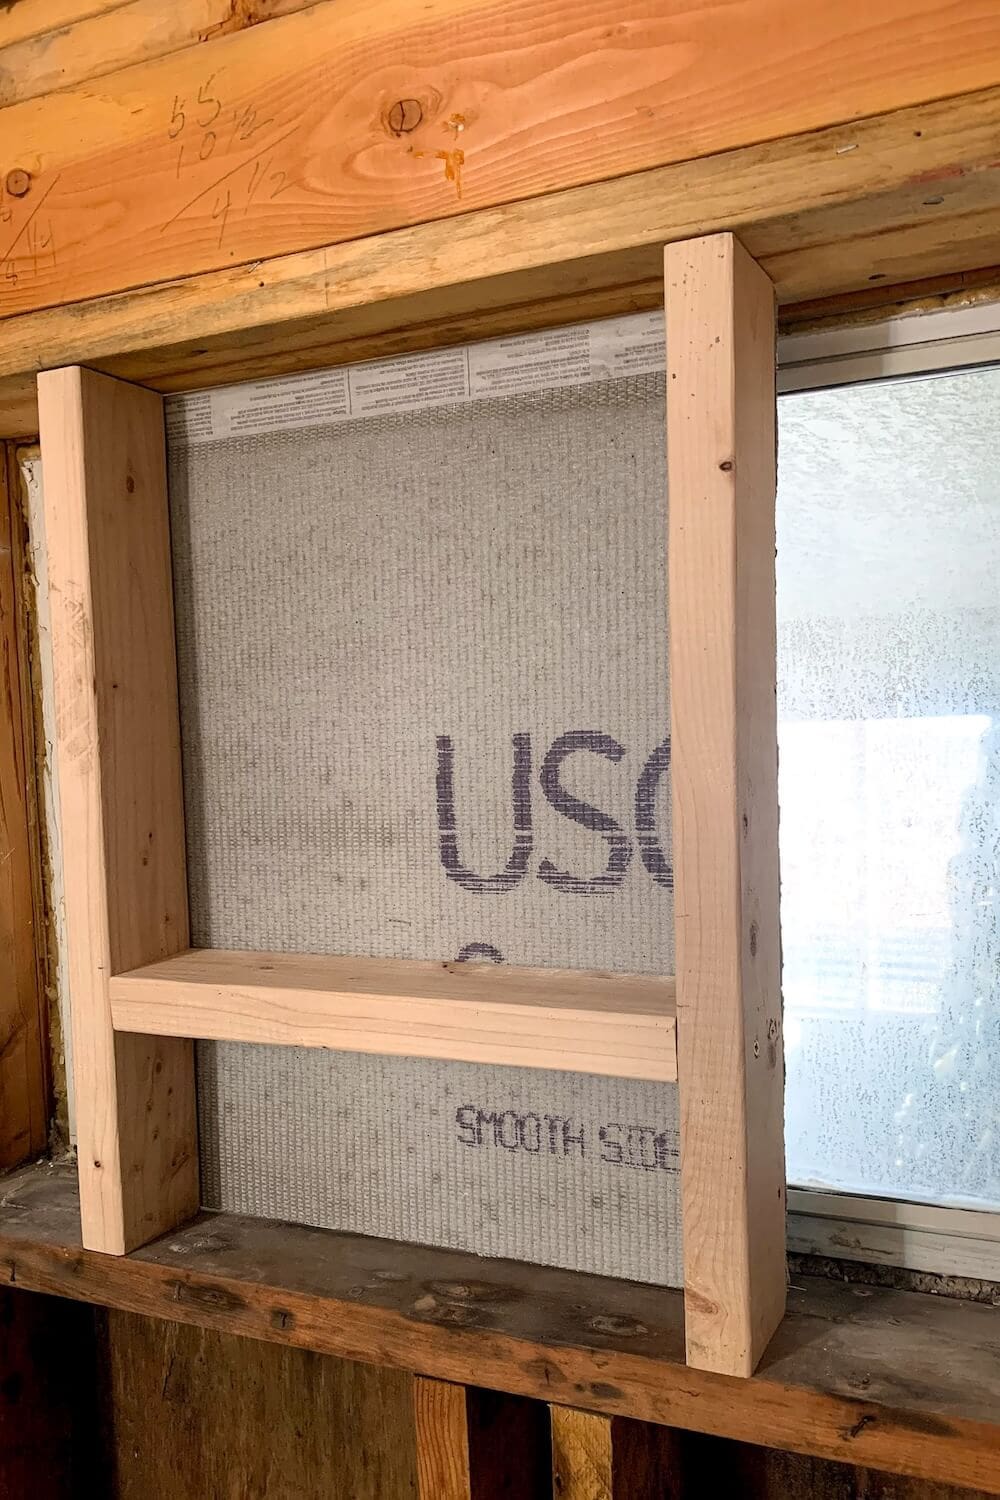
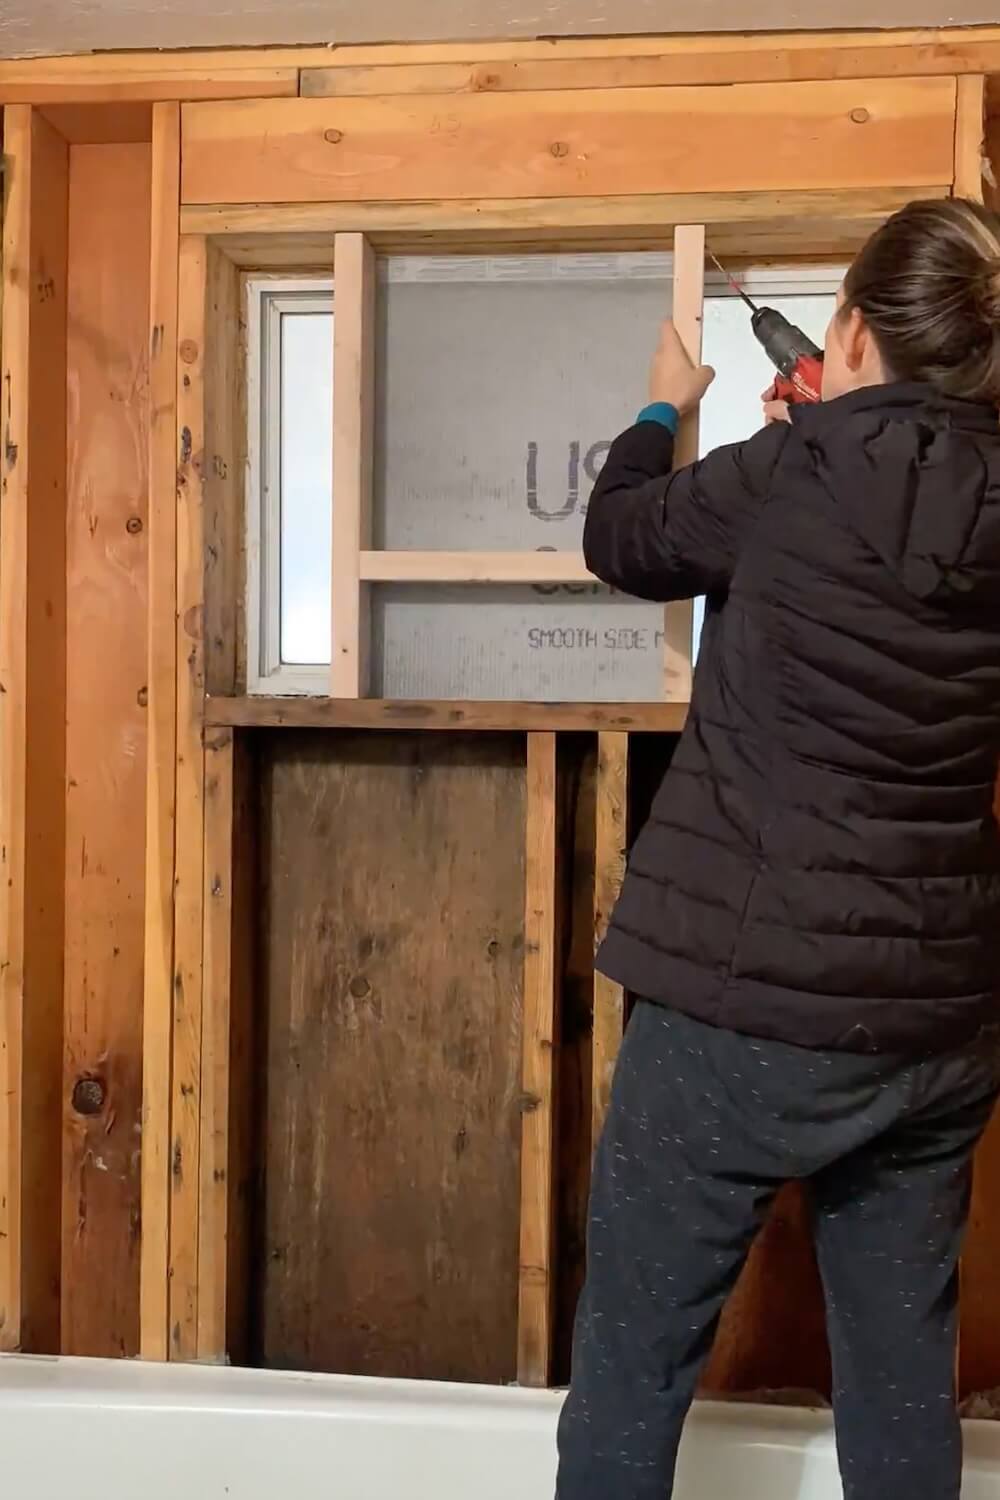
Step 3: Install the Niche Box Into the Wall
Once the niche is built, it’s ready to secure inside the wall cavity.
- Slide the niche between the studs.
- Use screws through the side studs to secure the frame.
- Add blocking if the studs don’t fully support the sides.
- Double-check that the pitch still angles forward.
If you need wall prep guidance – like attaching cement board around the rest of the shower – go to:
How to Remove Mold From a Shower + Prep the Walls for Tile
Step 4: Cut and Install Cement Board Around the Niche Opening
With the niche box in place, the surrounding shower walls can be covered.
- Measure and cut cement board to fit around the niche opening.
- Attach cement board to the studs with cement board screws.
- Keep edges clean and tight around the niche.
- Check that seams land where they can be taped properly.
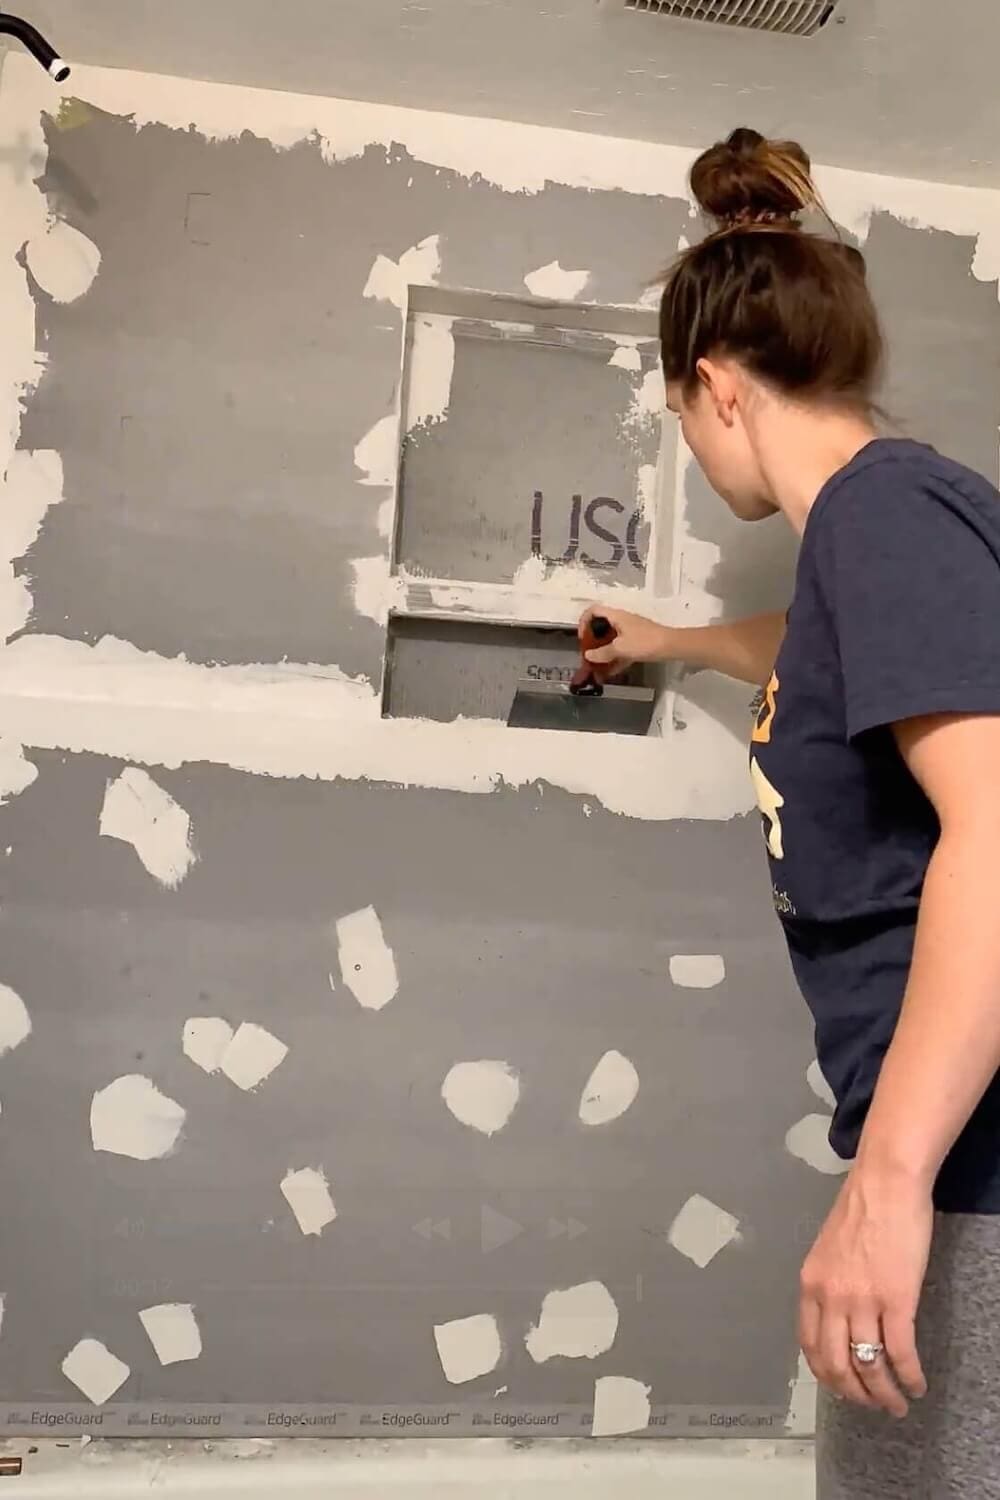
Step 5: Tape and Thinset the Seams
This step reinforces the niche structure and prepares it for waterproofing.
- Apply alkali-resistant mesh tape along all niche seams.
- Cover the tape with a layer of thinset mortar.
- Apply thinset over every screw head.
- Smooth edges to keep the niche corners crisp.
Let everything dry completely. This is a crucial step when you build a shower niche because it strengthens the box before waterproofing.
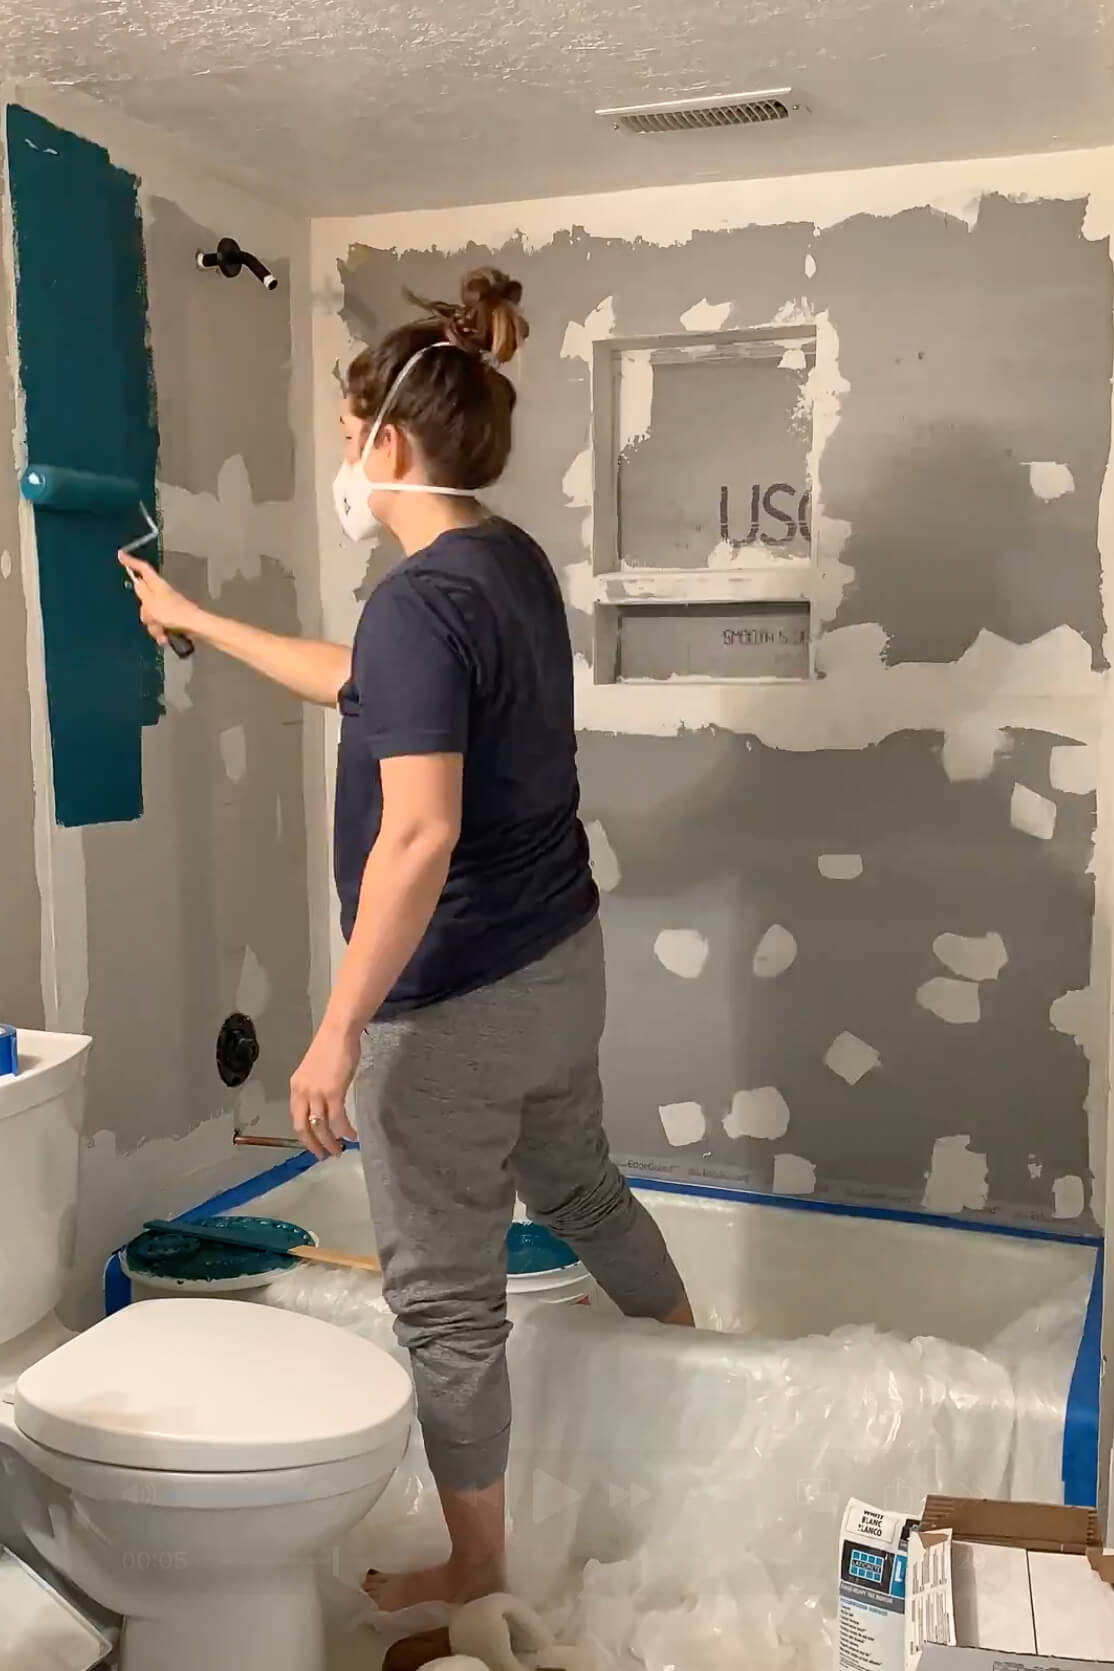
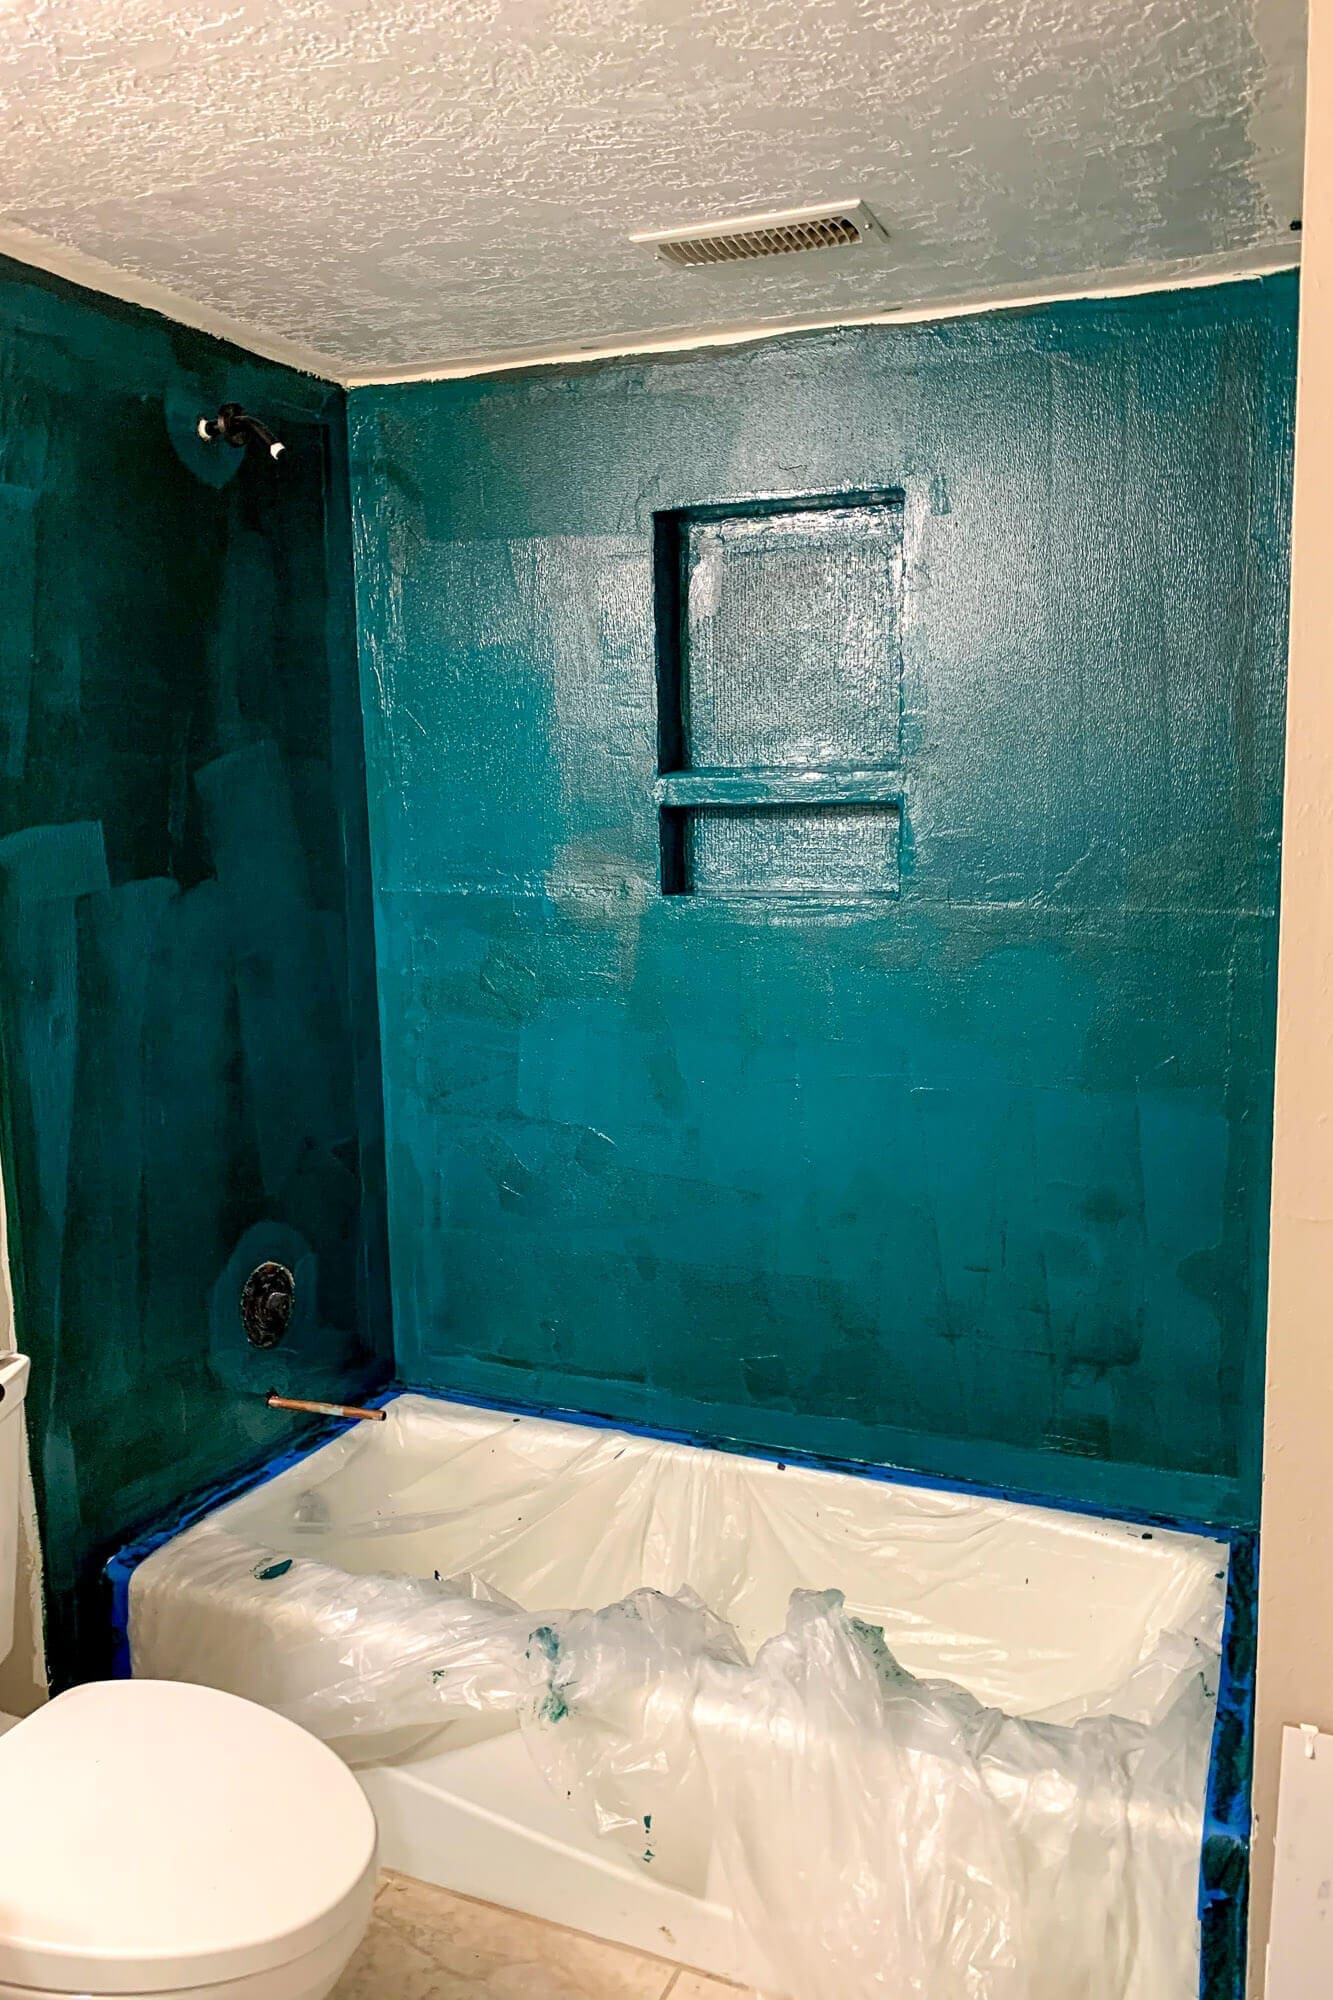
Step 6: Waterproof the Shower Niche
This is the most important step for preventing leaks, and it’s a non-negotiable part of how to waterproof a shower niche.
- Apply a full coat of liquid waterproofing membrane inside the niche.
- Make sure corners and seams are covered thoroughly.
- Allow it to dry completely, then apply a second full coat.
- Coat the surrounding wall area as well so the niche ties into the rest of the shower waterproofing.
For a more detailed waterproofing guide, you can reference the waterproofing steps in the mold/prep post: How to Remove Mold From a Shower + Prep the Walls for Tile.
Step 7: Prep the Niche for Tile
Before you begin tiling, do a quick checklist to make sure all of your waterproofing work is really ready to go. This last bit of prep is what keeps your finished shower niche looking clean and professional.
Before you start setting tile:
- Ensure the waterproofing is fully cured.
- Check the pitch on the bottom one more time.
- Wipe away any dust or debris.
- Confirm all corners feel solid and smooth.
At this stage, your niche is ready for tiling. For the tiling technique-including layout, back-buttering, and clean grout lines-continue to How to Tile a Shower Wall (Even If You’ve Never Done It Before).
How the Niche Fits Into Our Full Bathroom Remodel
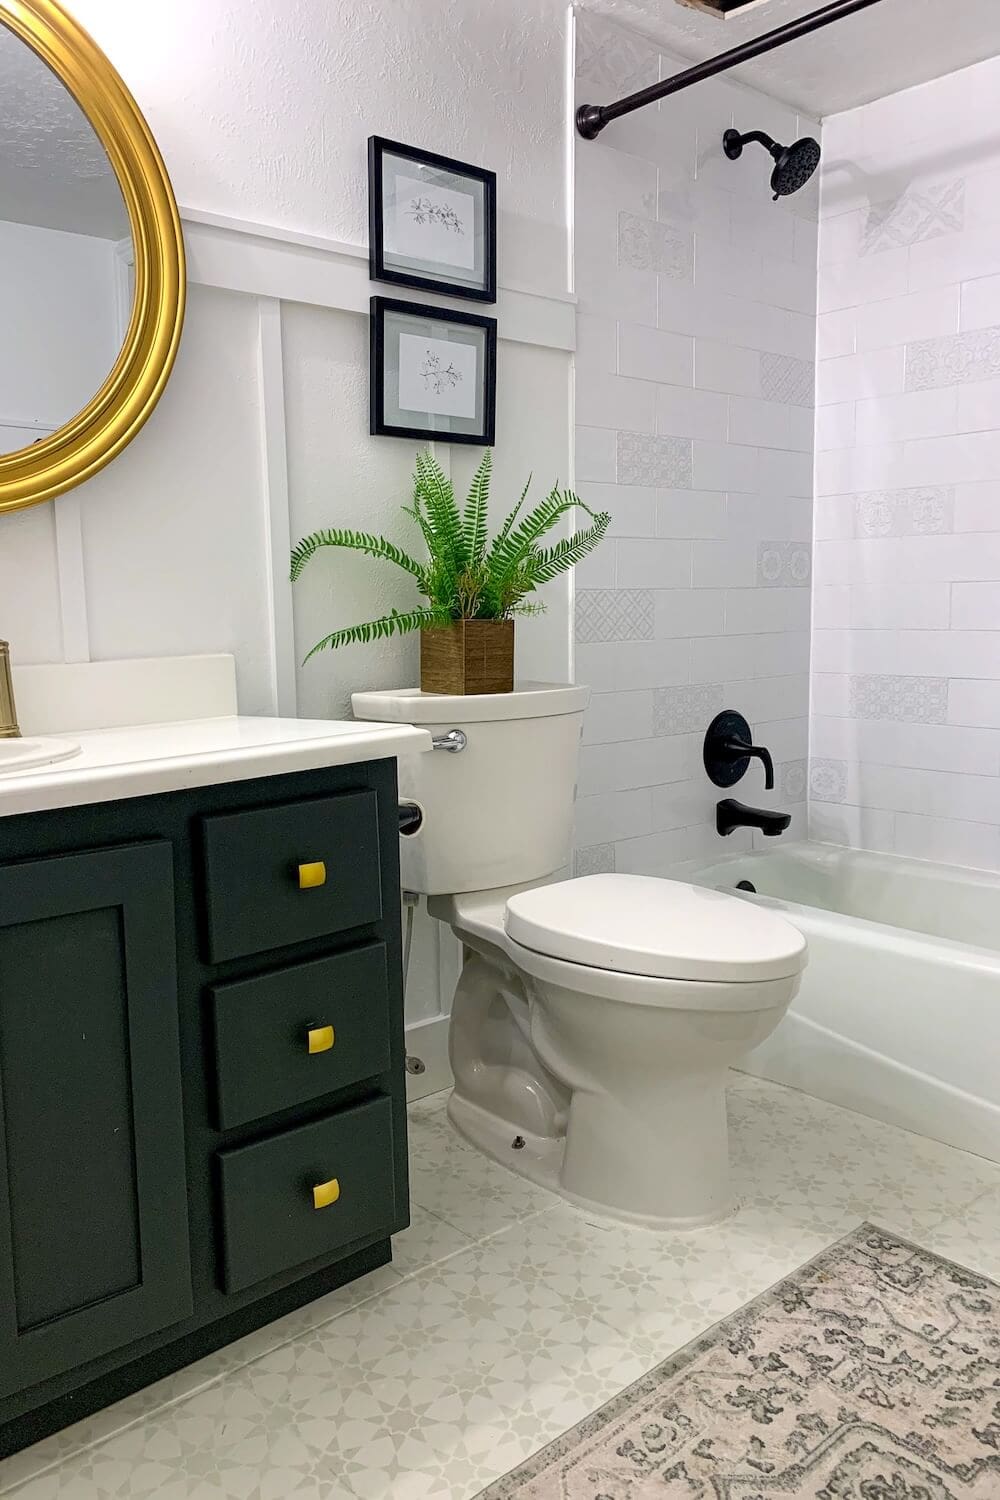
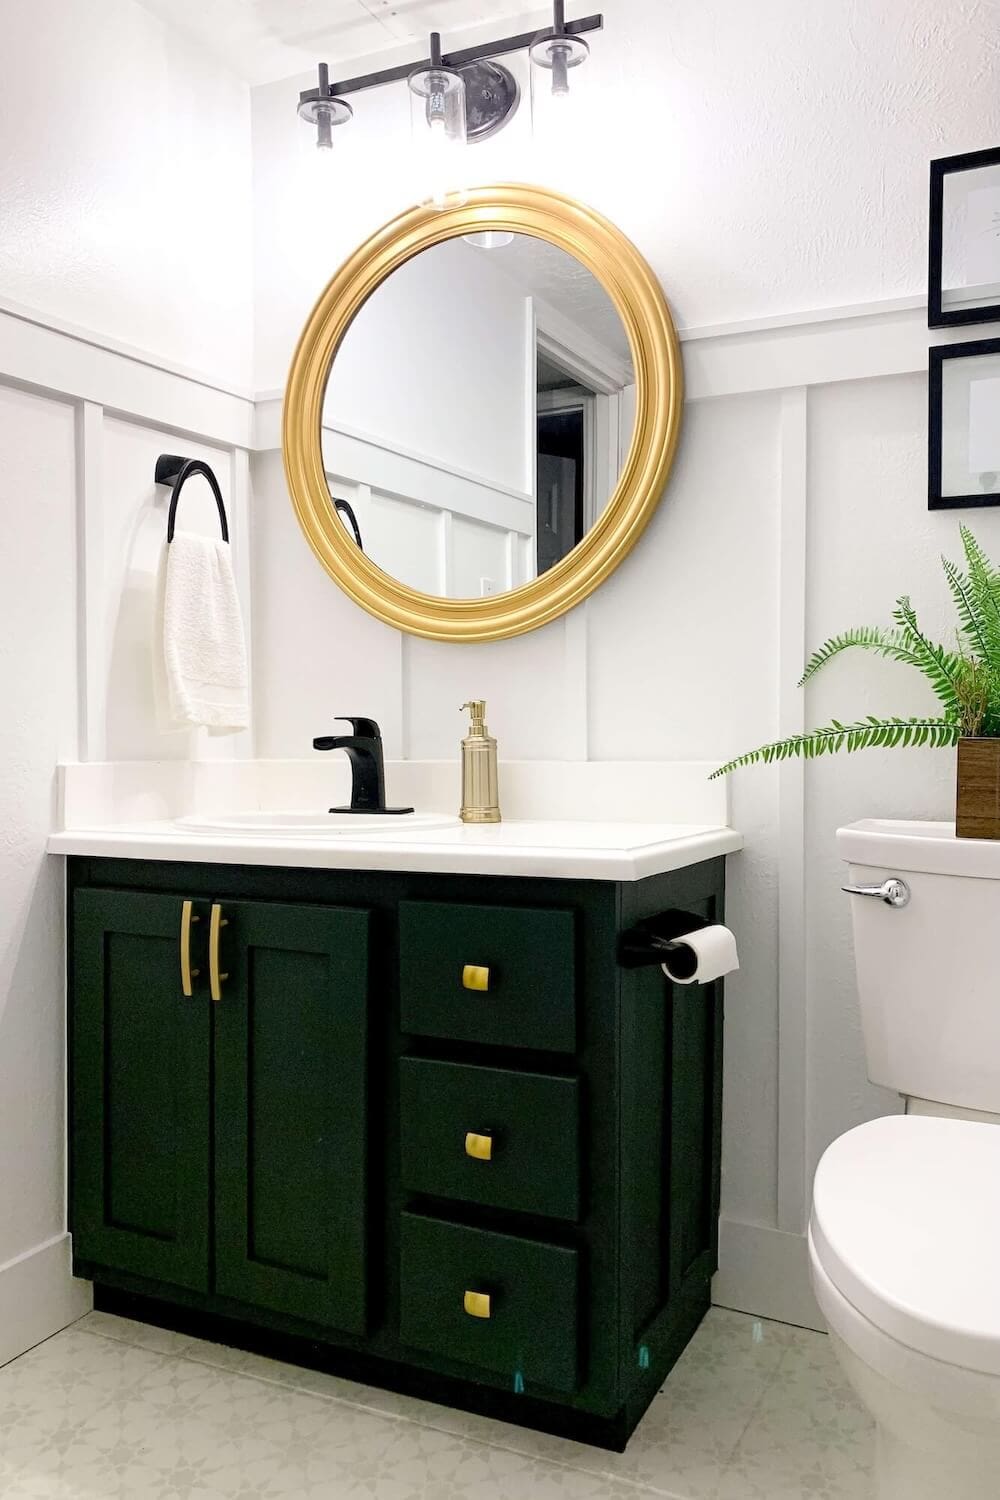
This built in shower niche was just one part of our full basement bathroom makeover, but learning how to build a shower niche made the whole space work better for our family. The rest of the room came together through several affordable DIY projects, including painted and stenciled floor tiles, a freshly painted vanity with new doors, a gold mirror upgrade, and a DIY board and batten wall.
You can see the entire transformation and all the coordinating projects in the full reveal here:
Small Bathroom Remodel
Common Mistakes When Building a Shower Niche
- Skipping the bottom pitch so water pools instead of draining
- Not fully waterproofing inside the niche and seam areas
- Forgetting to plan niche size around your tile pattern
- Building on an exterior wall in a cold climate without proper insulation + waterproofing
- Rushing thinset or waterproofing dry times
Can You Add a Shower Niche to an Existing Tiled Shower?
This tutorial shows how to build a shower niche when the walls are open and you’re already in the middle of a remodel. Adding a niche to an existing tiled shower is a more advanced project because it involves cutting tile, backer board, and sometimes adjusting plumbing or insulation.
In many cases, it’s safer to:
- Install a surface-mounted corner shelf if you’re not ready to open up the wall, or
- Have a contractor or experienced tile pro handle the demo and waterproofing if you want a recessed niche in a finished shower.
If you’re currently planning a remodel with the studs open, that’s the best time to build a niche-before any new cement board or tile goes up.
More Tile Shower Projects
If you’re planning a bigger remodel or want more shower niche ideas and tile inspiration, here are two of my other shower builds. Both posts break down the process with progress photos and practical steps that are helpful for any DIYer.
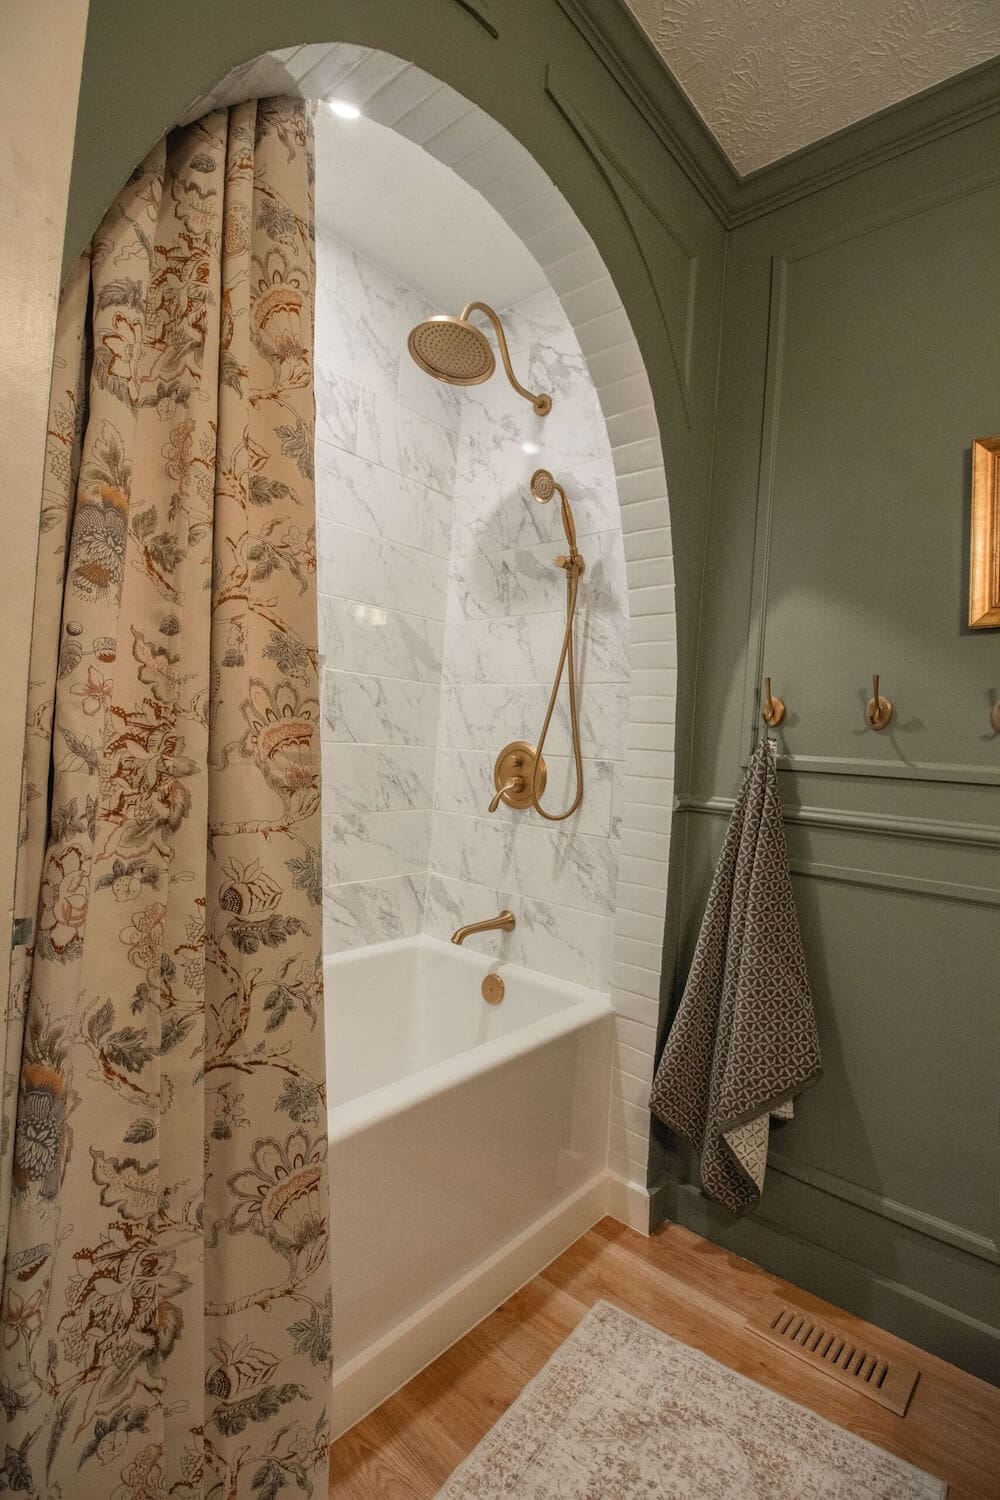
How to Build an Arched Bathtub Alcove
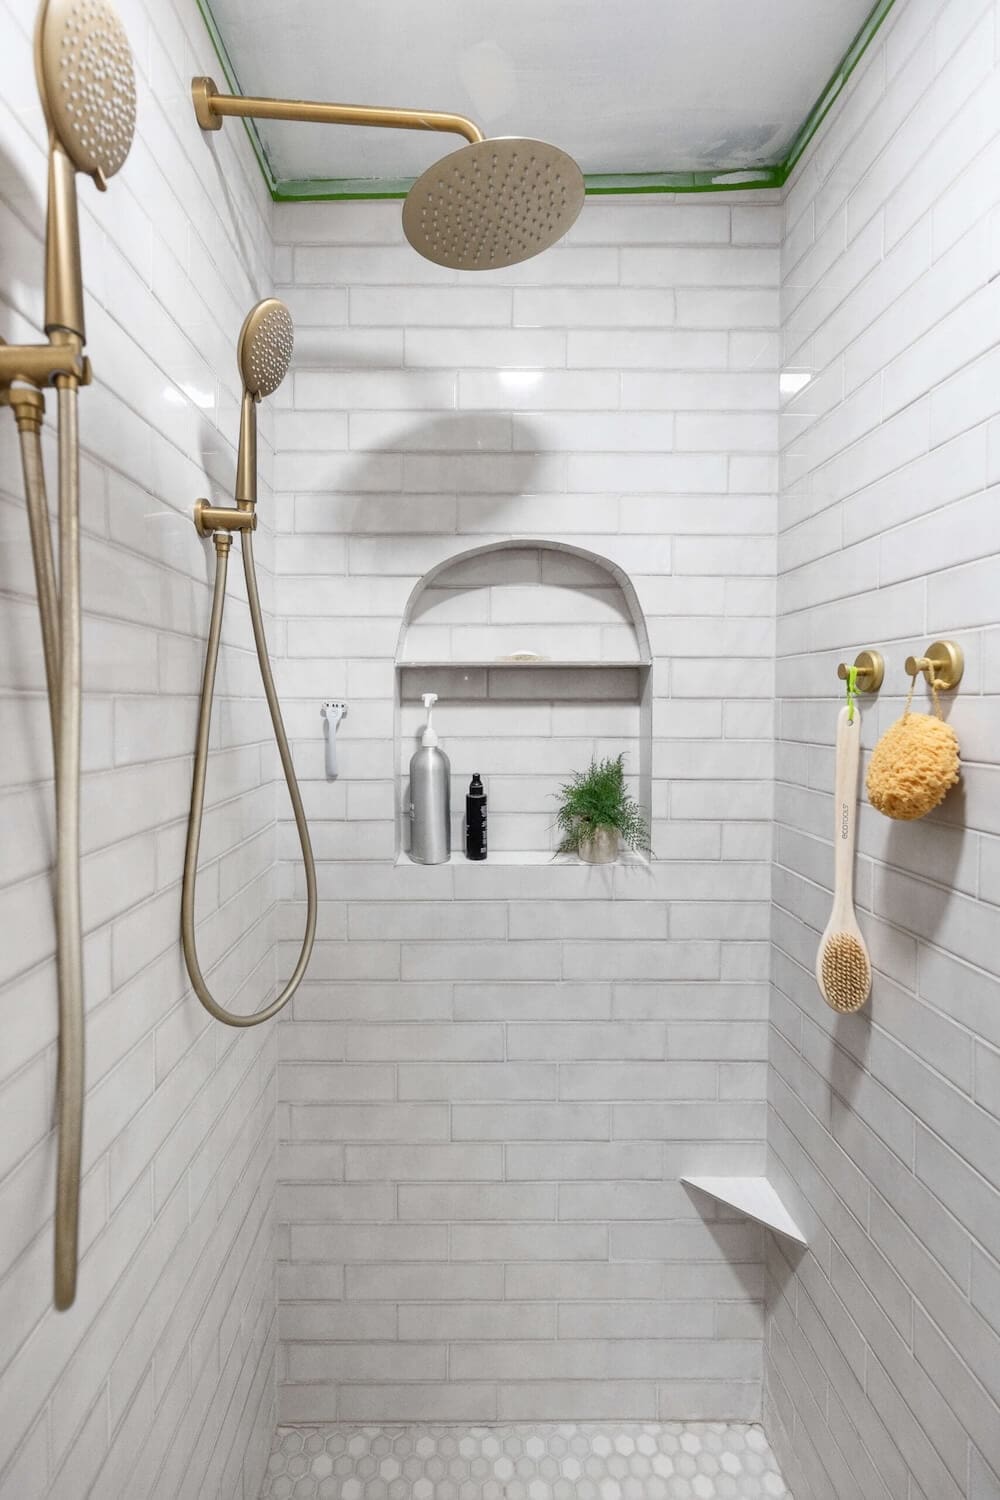
How We Built Our Gorgeous Subway Tile Shower
📌 Pinterest: Save This Shower Niche Tutorial for Later
If you’re planning a future bathroom remodel, save this tutorial so you can reference these framing and waterproofing steps when you need them.
FAQ: How to Build a Shower Niche
Standard stud depth is about 3.5 inches, which works well for most bottles. If your wall allows, 4–5 inches offers more storage.
Yes, about 1–2 degrees. This helps water drain forward instead of pooling.
It’s possible but not ideal in cold climates. Interior walls are safer unless you have a contractor guide the insulation and waterproofing.
Yes. Every surface inside the niche needs a continuous waterproofing layer.
If possible. Planning ahead makes the niche look cleaner and helps avoid skinny tile cuts.
