

Updated November 21, 2025
If you’re gathering board and batten bathroom ideas to upgrade a small space, this clean, wrap-around DIY board and batten bathroom wall is one of the easiest ways to make a bathroom feel taller, brighter, and more intentional without doing a full remodel.
Time: Weekend project
Difficulty: Beginner-friendly
Board and Batten Bathroom Wall: At a Glance
- Choose your height and mark a level line around the room
- Attach a 1×4 top rail into studs
- Space and nail 1×2 vertical battens around the bathroom
- Add a 1×2 top cap for a finished edge
- Fill, sand, caulk, then prime and paint
- Install hooks on the top cap for storage
Table of Contents
- Board and Batten Bathroom Wall: At a Glance
- Board and Batten Bathroom Ideas That Work in a Small Space
- Before We Started
- Supplies You’ll Need
- What Height Should Board and Batten Be in a Bathroom?
- Step 1: Choose the Height and Mark the Room
- Step 2: Install the Top Rail
- Step 3: Measure and Install the Vertical Battens
- Step 4: Wrap the Board and Batten Trim Around the Whole Bathroom
- Step 5: Add the Top Cap
- Step 6: Fill, Sand, and Caulk
- Step 7: Prime and Paint
- Step 8: Add Hooks for Storage
- Extra Tips to Make This Easier
- Finished Board and Batten Bathroom Wall in This Small Space
- Can You Use Board and Batten in a Bathroom With a Shower?
- Optional Board and Batten Bathroom Ideas to Try
- 📌 Pin This Project for Later
- Share Your Project With Me!
- FAQ About Board and Batten Bathroom Ideas
Board and Batten Bathroom Ideas That Work in a Small Space
These DIY board and batten bathroom ideas are especially good for small bathrooms because they add structure without overwhelming a compact room. Slim 1×2 battens keep the look light, and continuing the trim around all four walls makes the bathroom feel more cohesive. If you’re working through updates like in Small Bathroom Remodel Reveal, this project ties everything together with a clean, modern finish.
Before We Started
Before installing board and batten, this bathroom felt plain and mismatched. The vanity finish was tired, the walls lacked structure, and nothing felt unified. Here’s what the space looked like before we got started:

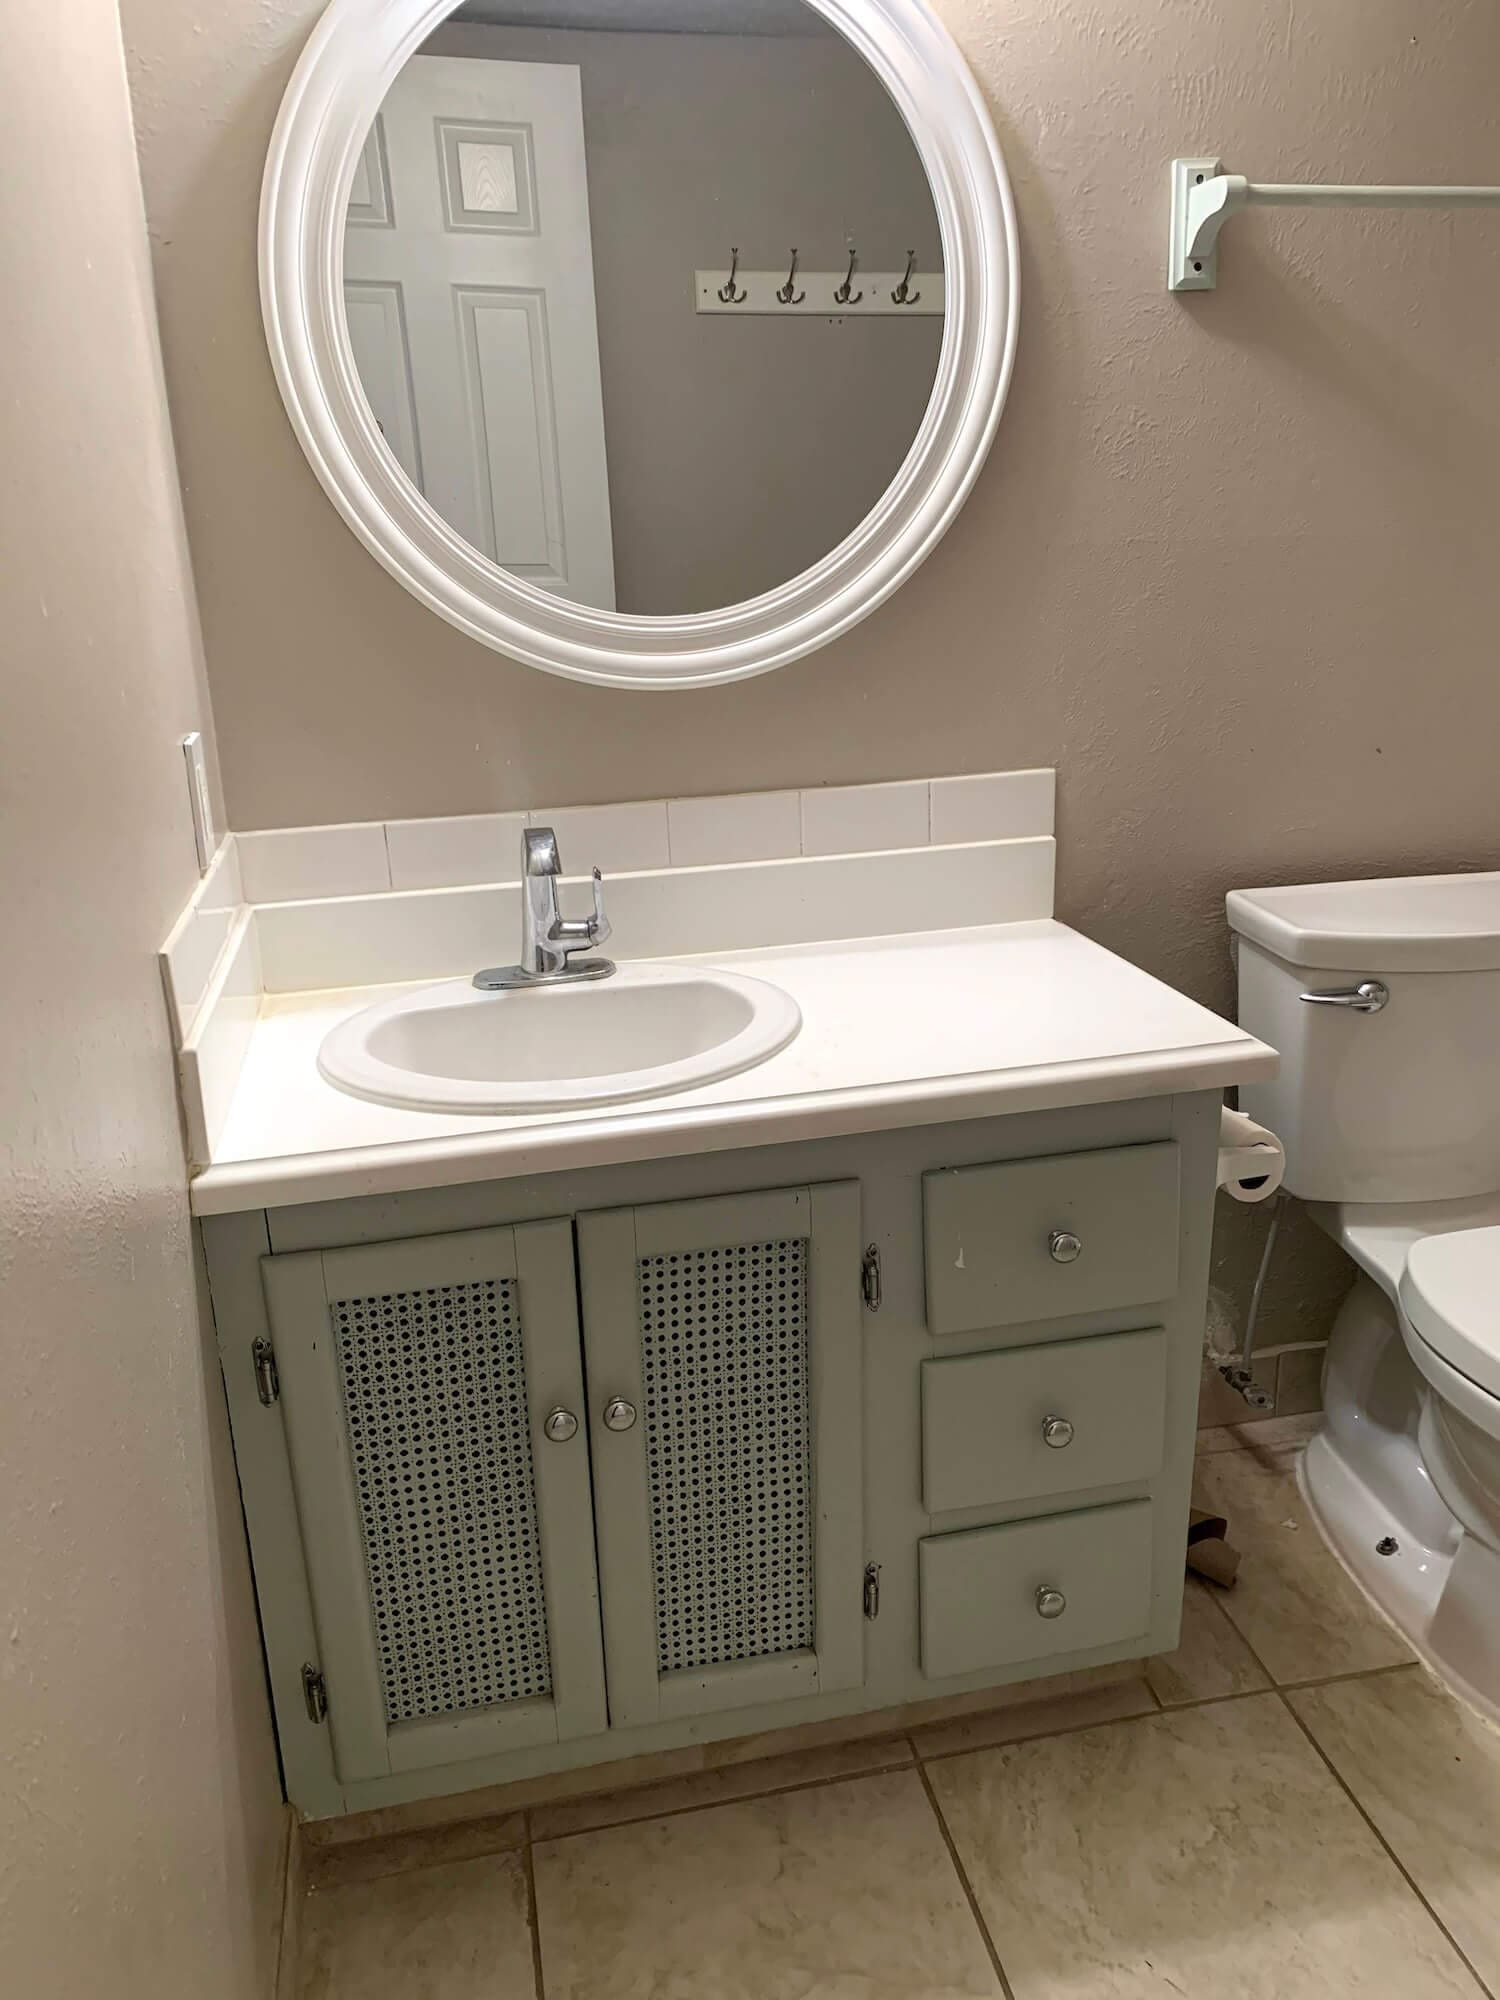
These board and batten bathroom ideas pair well with projects like my DIY Gold Bathroom Mirror and Painted Bathroom Floor Tiles.
Supplies You’ll Need
One of the best parts of this project is how little you actually need. With just a few basic tools and inexpensive boards, you can completely transform a bathroom wall on a budget.
Tools for a DIY Board and Batten Wall
Materials for a Board and Batten Bathroom Wall
- 1×2 boards for battens and the top cap
- 1×4 boards for the top horizontal piece
- Wood filler
- Caulk
- Primer
- Paint (I recommend this one)
- Hooks (optional, for function and style)
[hubbub_save_this]
What Height Should Board and Batten Be in a Bathroom?
A good rule of thumb for board and batten in a small bathroom is somewhere between 40–54 inches high, or a little above halfway up the wall. That keeps the room feeling tall and open instead of chopped in half.
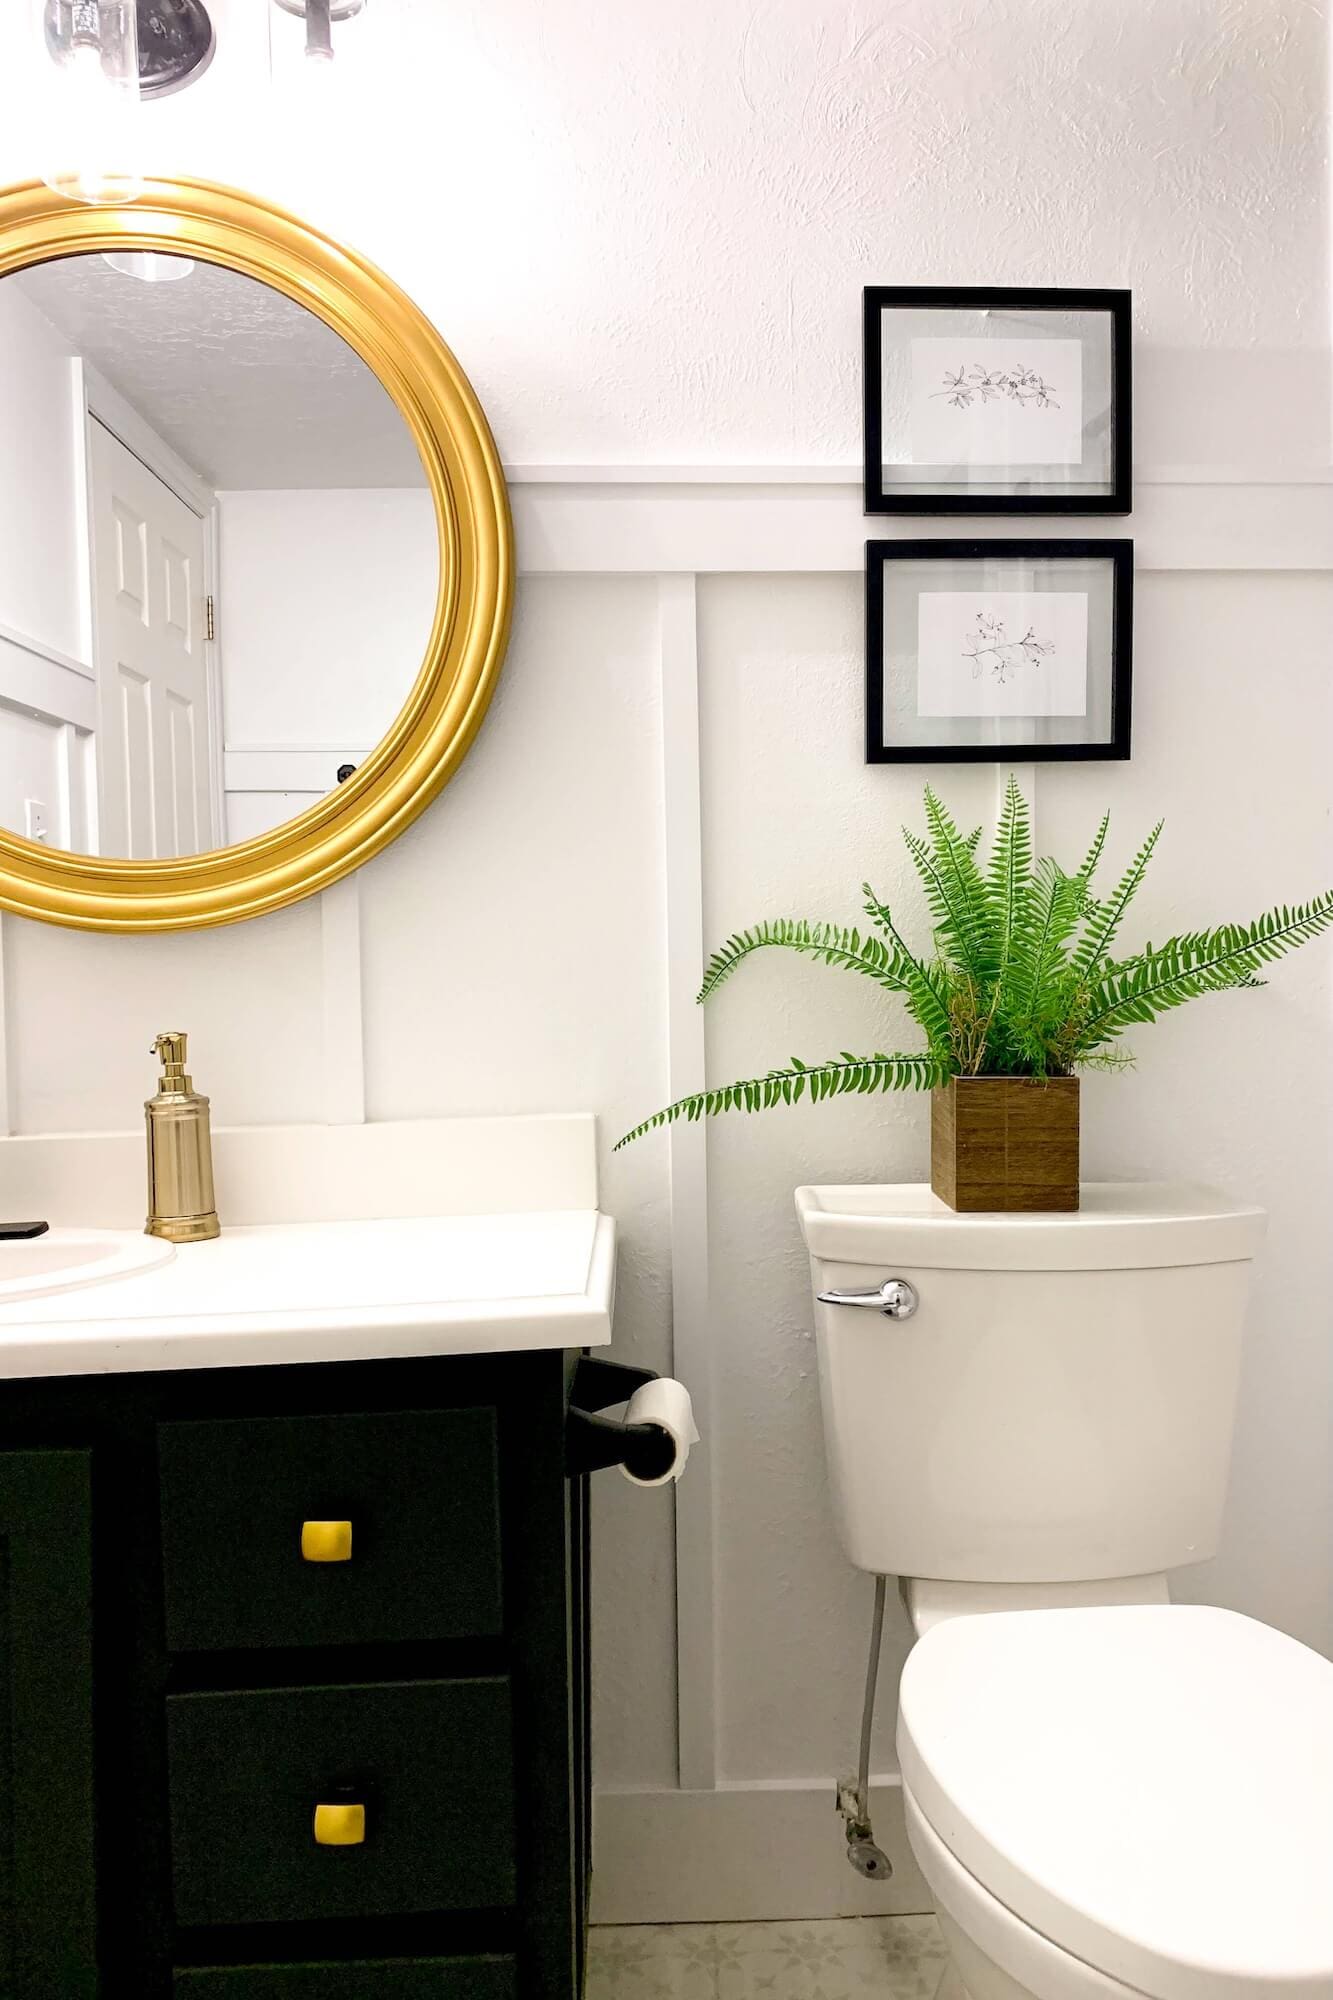
In this bathroom, I chose a height that lined up nicely with the vanity and mirror. Lining the rail up with existing elements—like the bottom third of a mirror, the top of the vanity backsplash, or just below a window sill—helps the board and batten feel like it was always meant to be there.
- Lower height (around 40–44 inches): Feels more like classic wainscoting and works well in traditional spaces.
- Mid-height (around 48–52 inches): Great for most small bathrooms and powder rooms; adds impact without crowding your mirror and wall art.
- Taller height (around 54–60 inches): Feels more modern and dramatic, especially in rooms with higher ceilings.
If you’re unsure, use painter’s tape to mark a few different heights on the wall and live with them for a day. Stand back, look at how the line intersects your vanity, mirror, and window, and choose the height that feels the most balanced for your space.
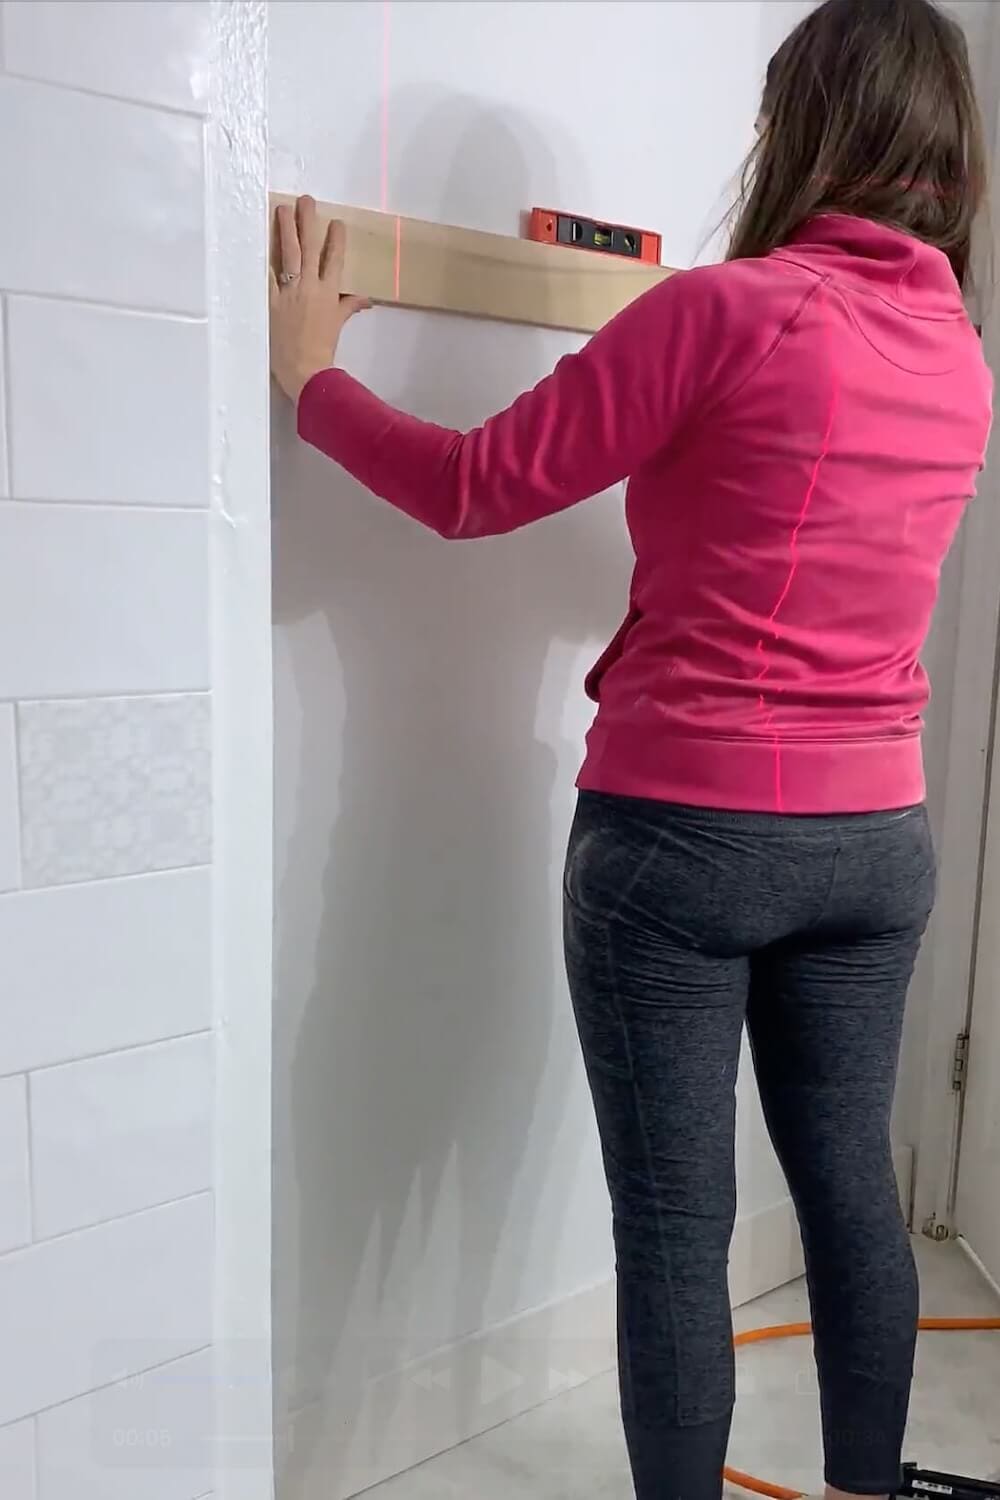
Step 1: Choose the Height and Mark the Room
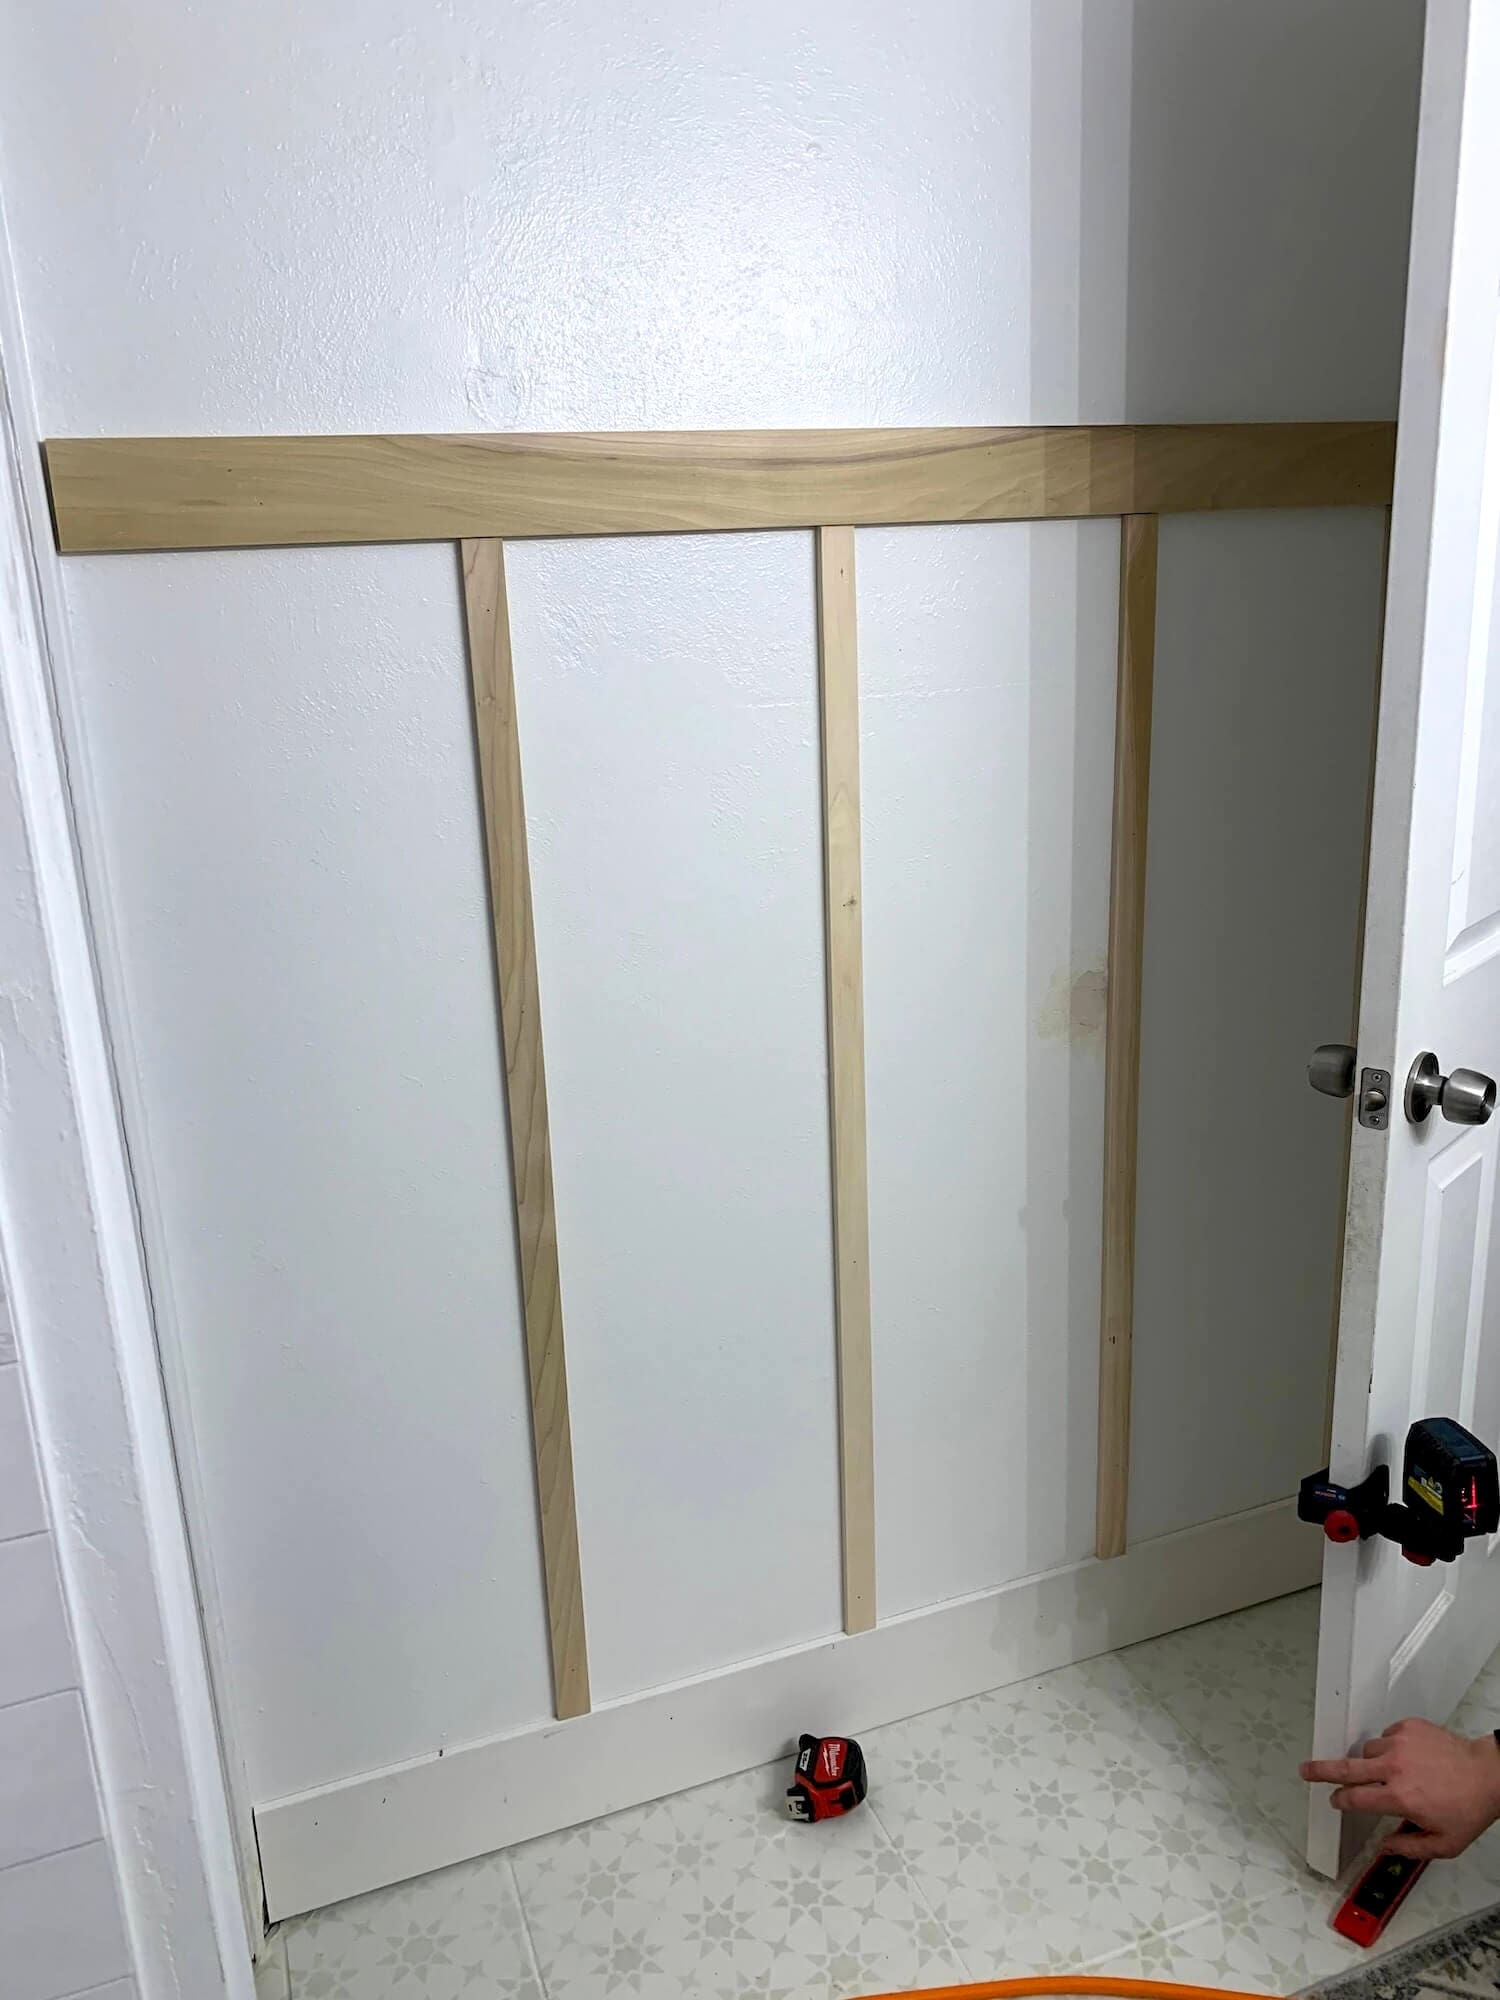
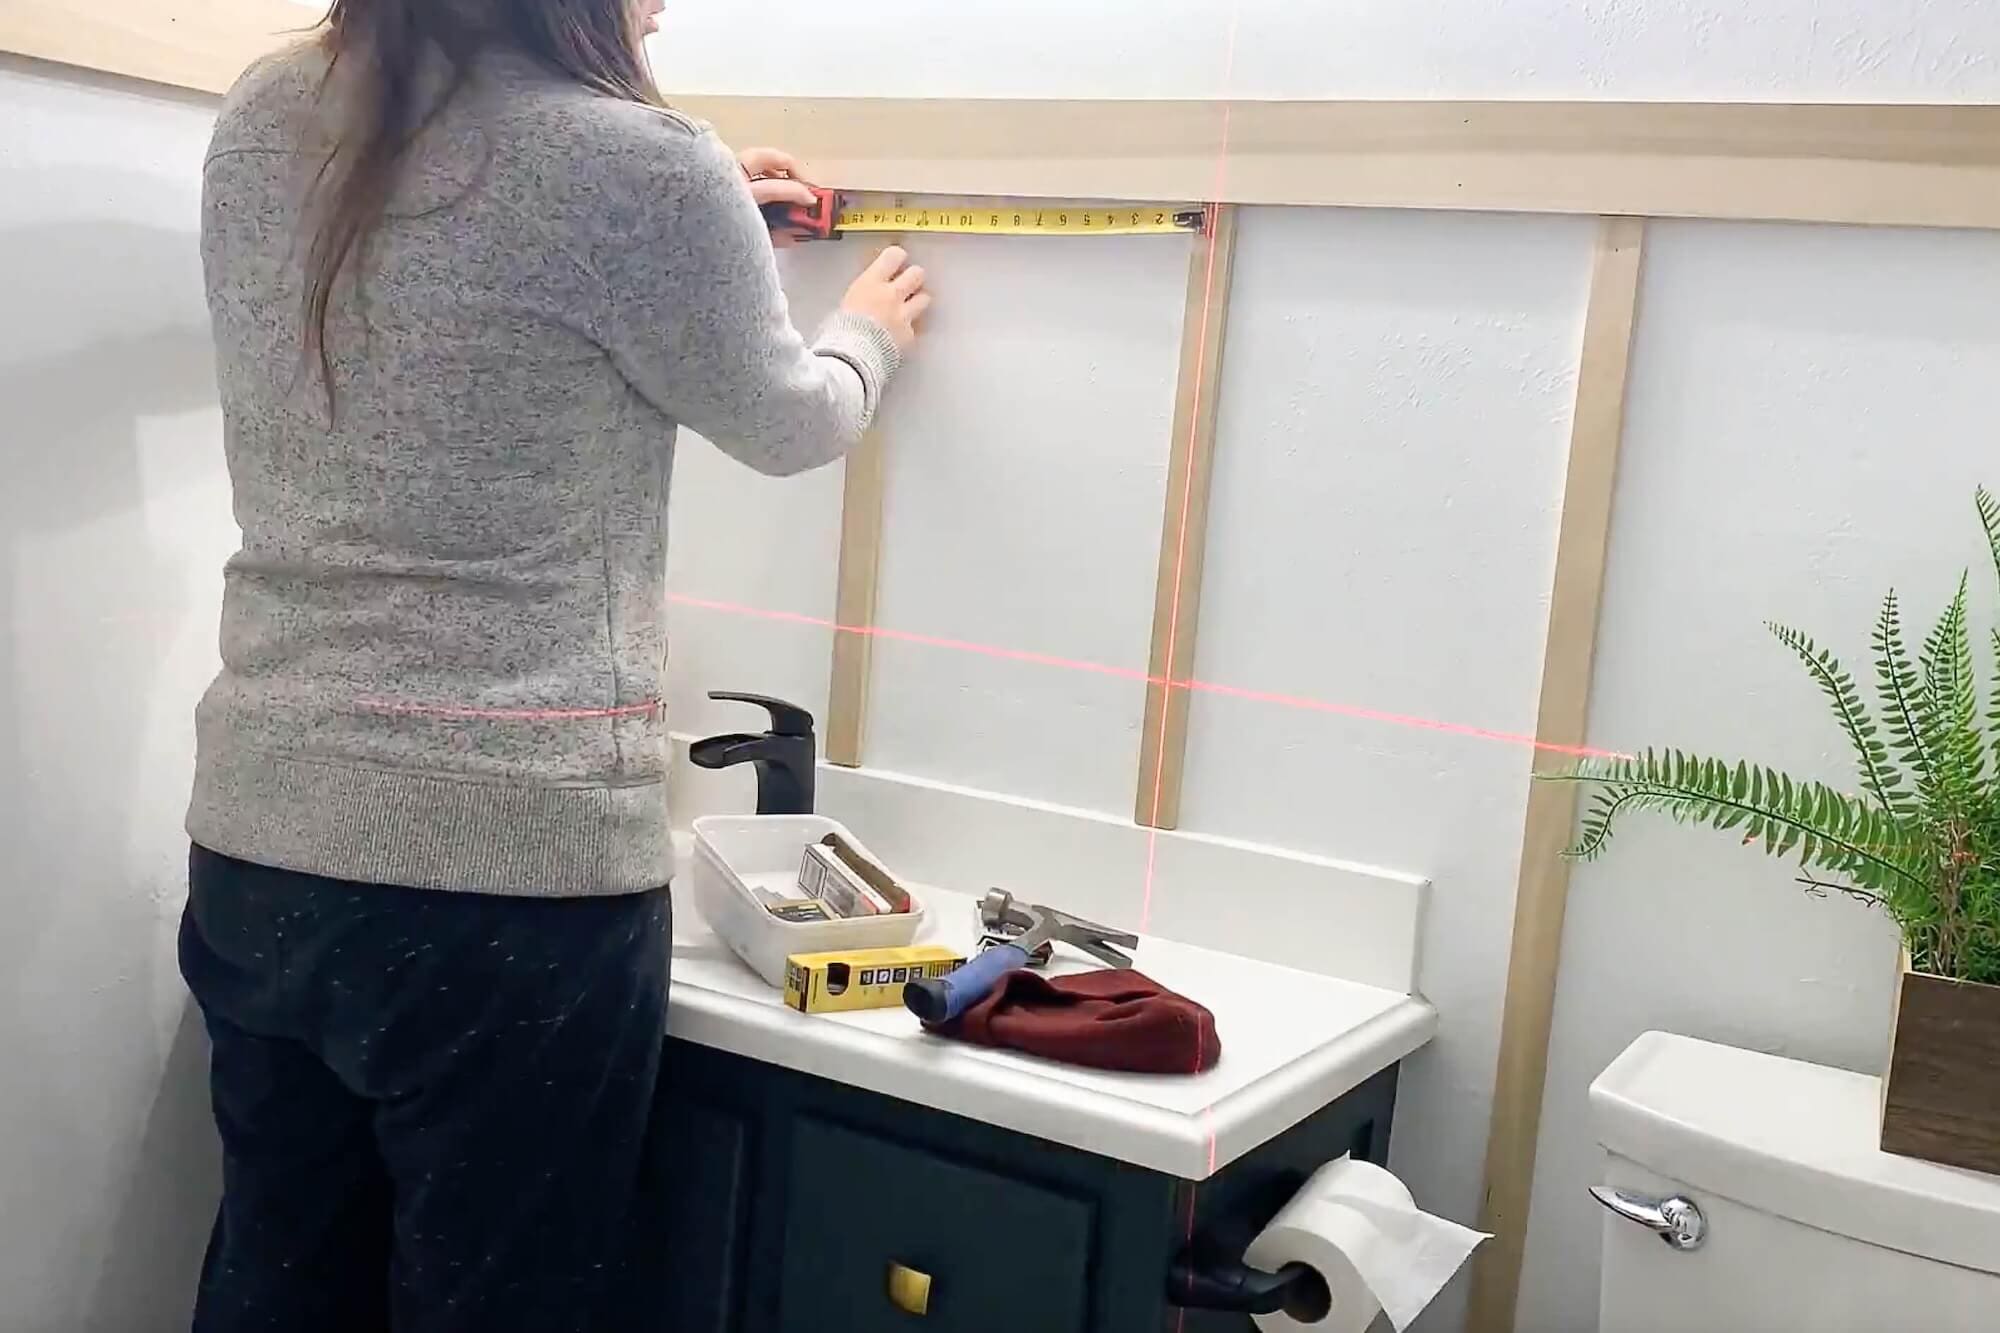
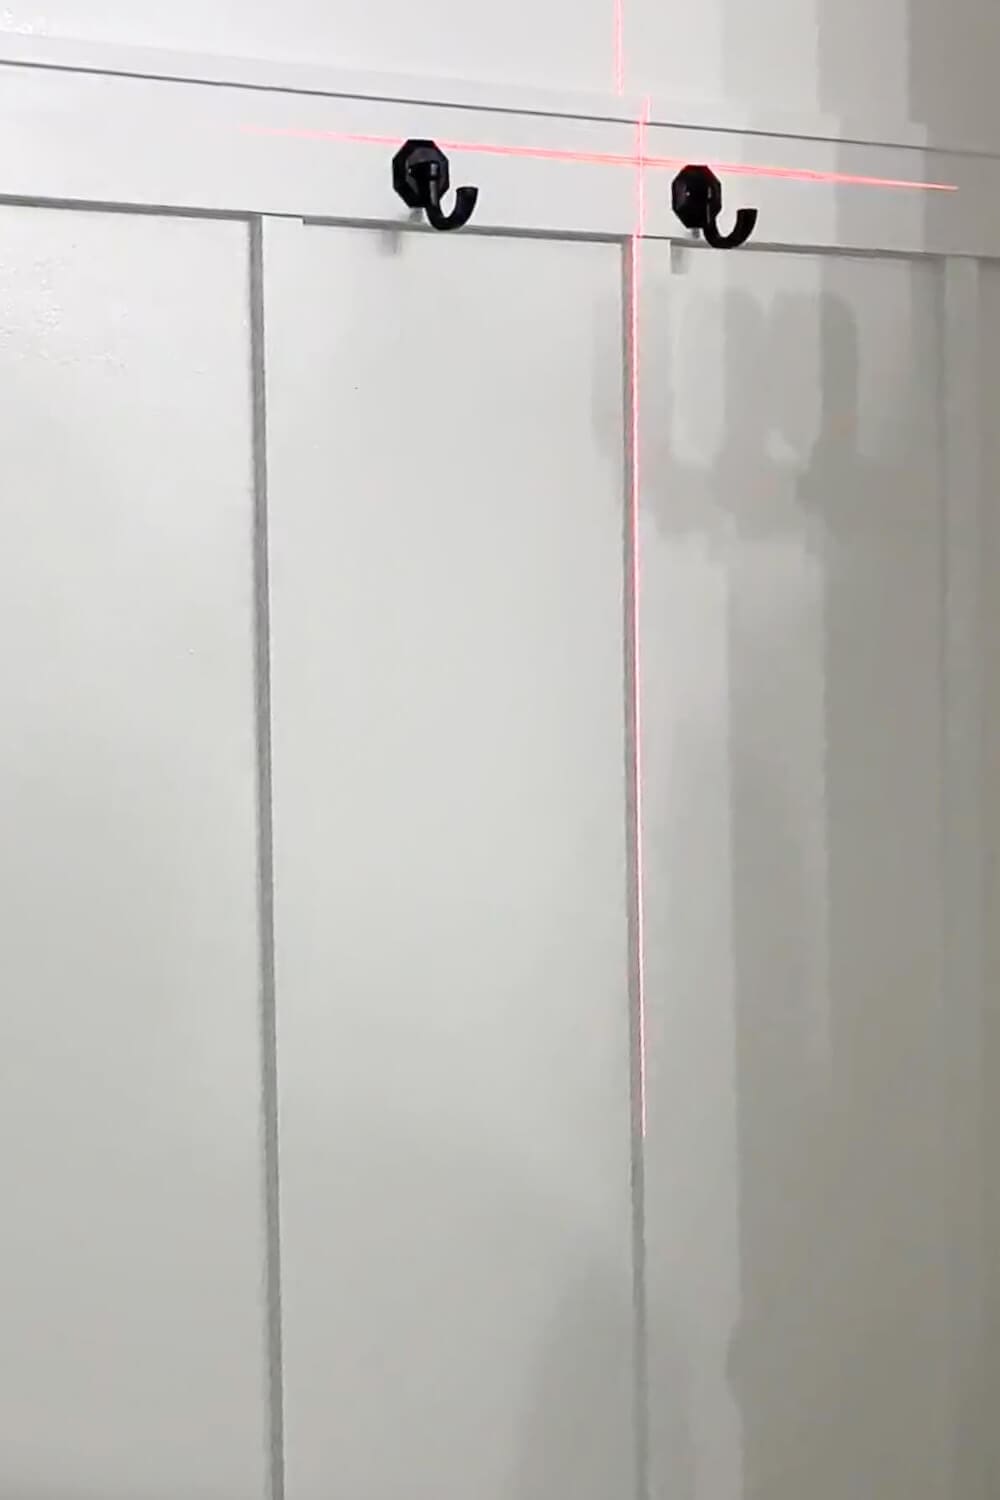
Choose a height that lines up with your vanity and mirror. In this bathroom, I went slightly above halfway up the wall. Use a laser level to draw a line around the room. This keeps the whole project even. Use a stud finder first to be sure that you are attaching the boards into the wall studs.
Planning the height feels similar to lining things up in detailed projects like How to Prepare a Shower for Tile – slow and steady keeps everything consistent.
Step 2: Install the Top Rail
Cut your 1×4 to length and attach it into studs along the level line. A straight top rail makes everything else go smoother. If your vanity area is already updated, like in How to Paint a Bathroom Vanity Instead of Replacing It, this trim height usually complements most vanity styles.
Step 3: Measure and Install the Vertical Battens
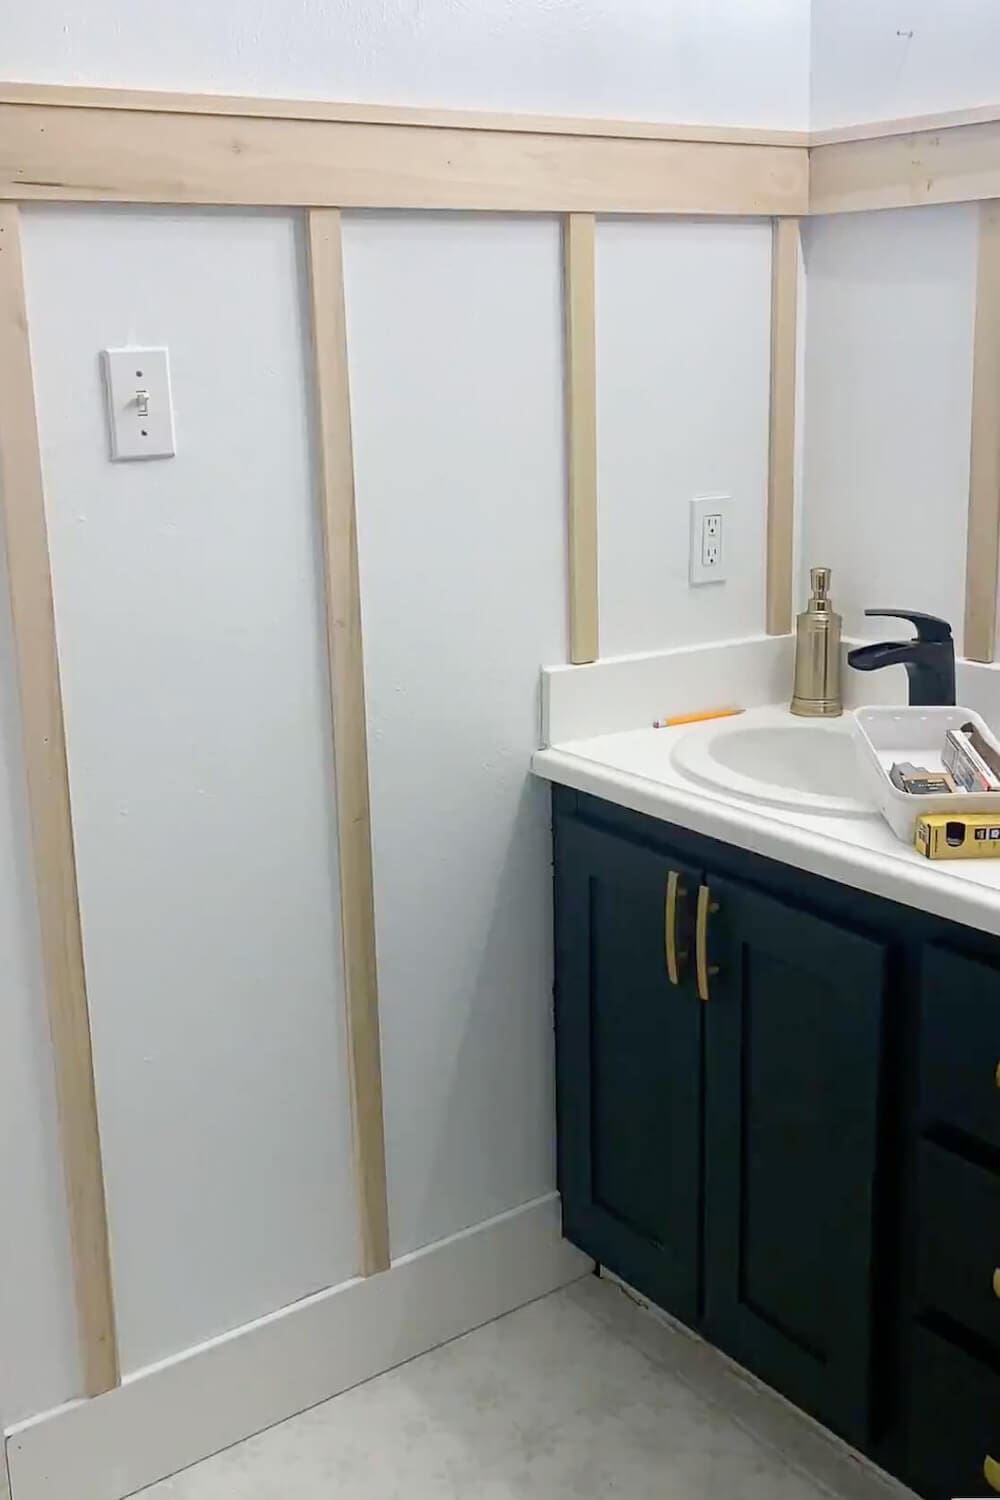
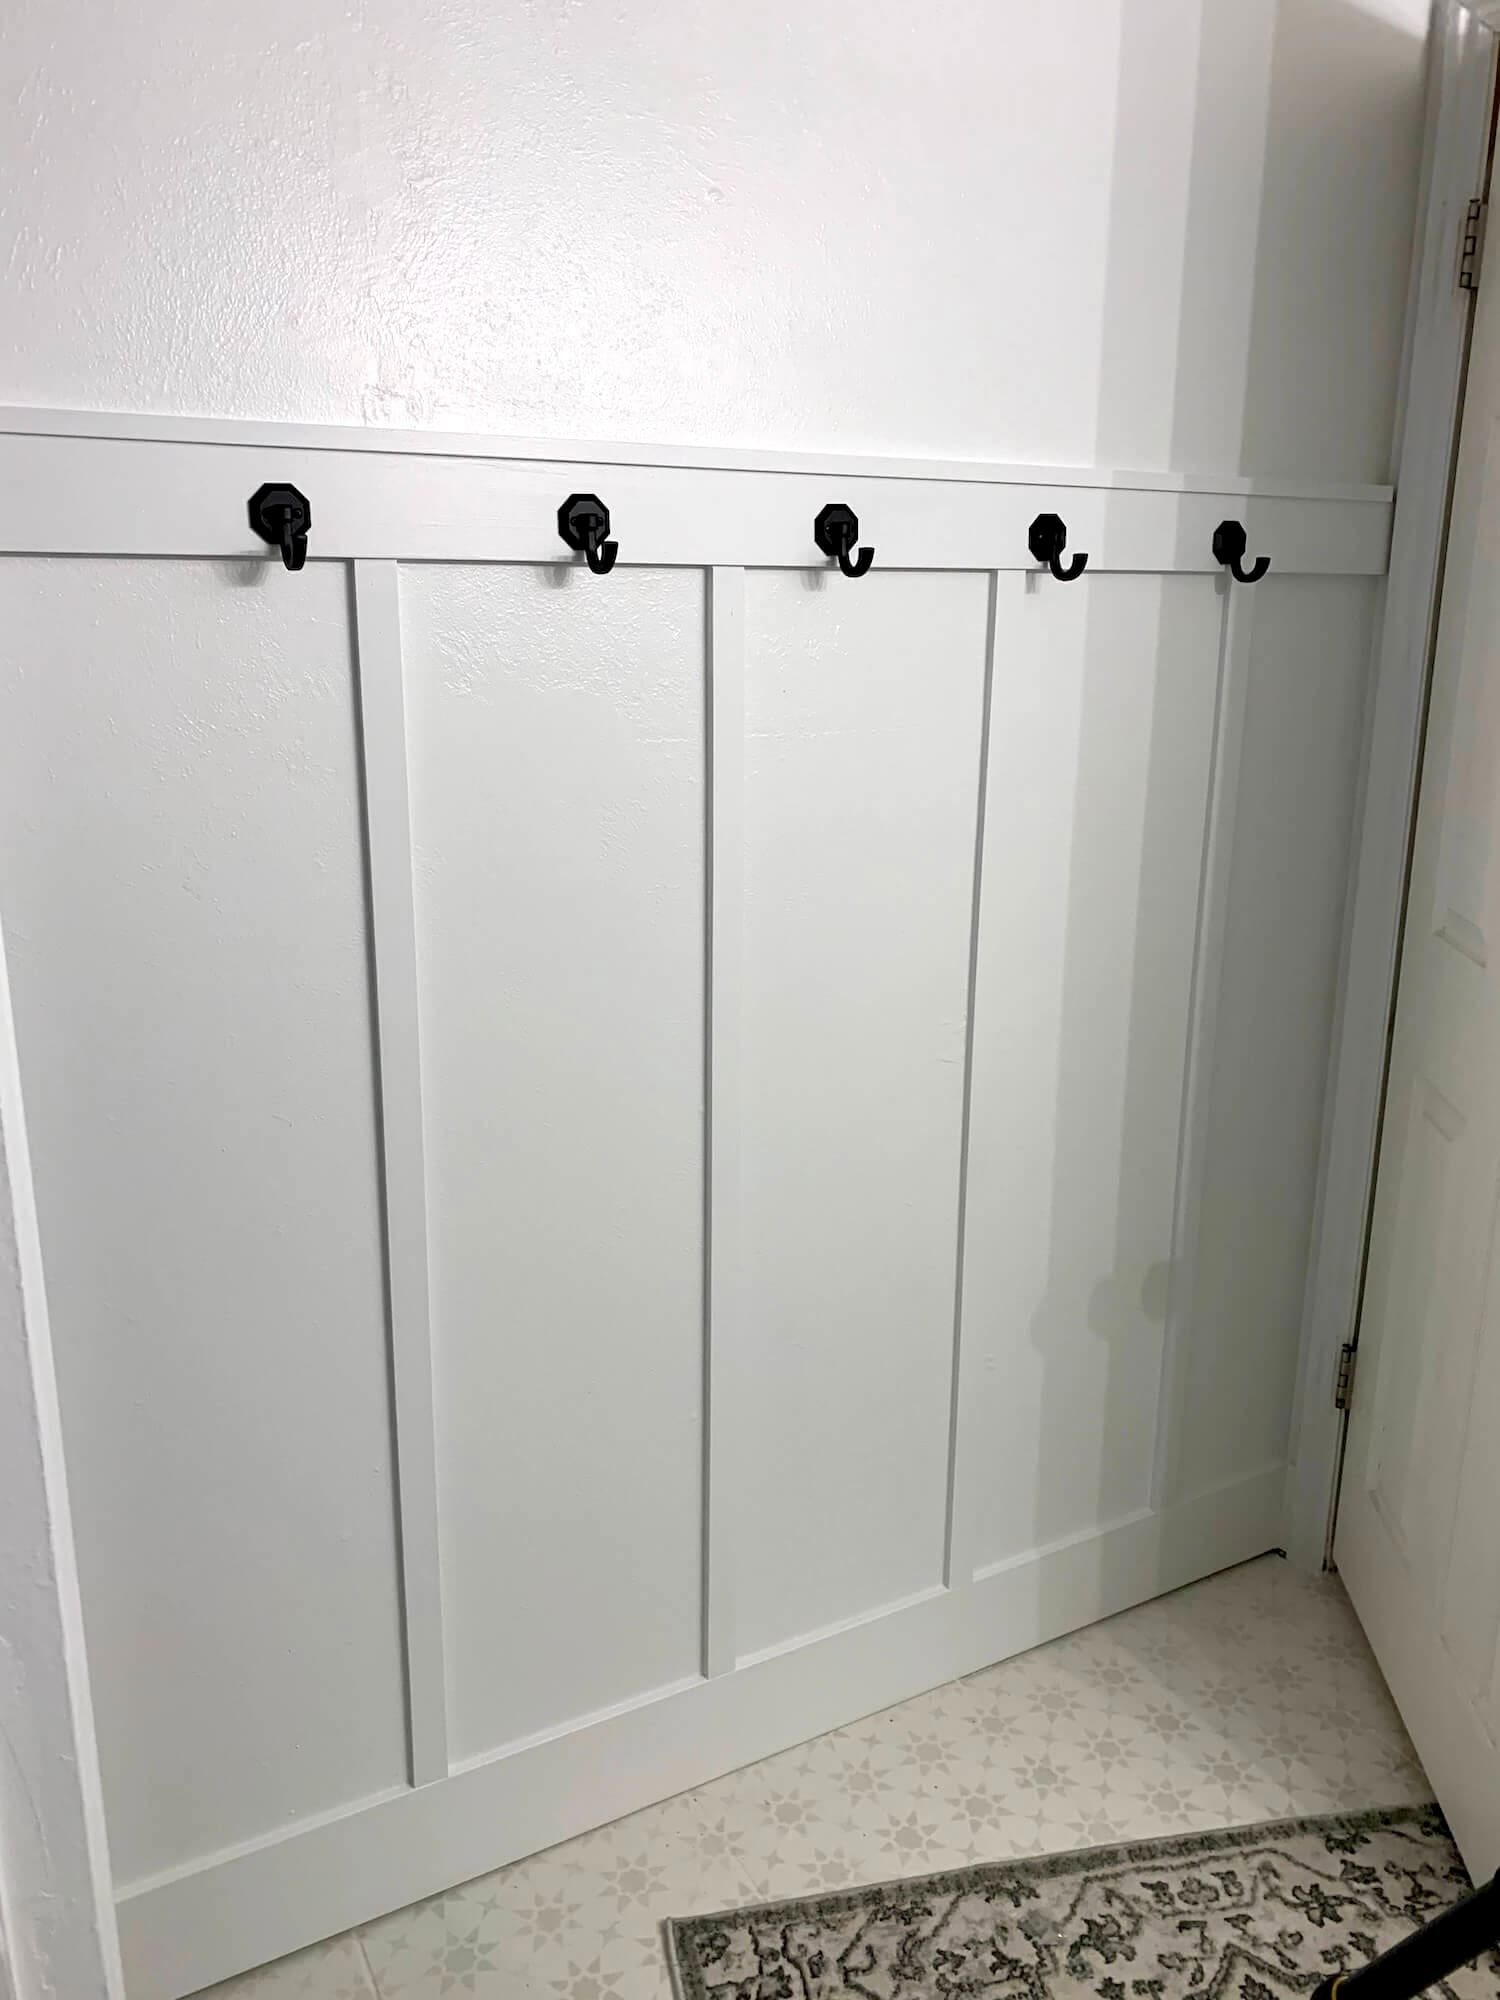
Cut your 1×2 battens to height. Spacing them 12–20 inches apart works well, but small bathrooms usually look better with closer spacing. Nail each batten into place, keeping them straight.

Step 4: Wrap the Board and Batten Trim Around the Whole Bathroom
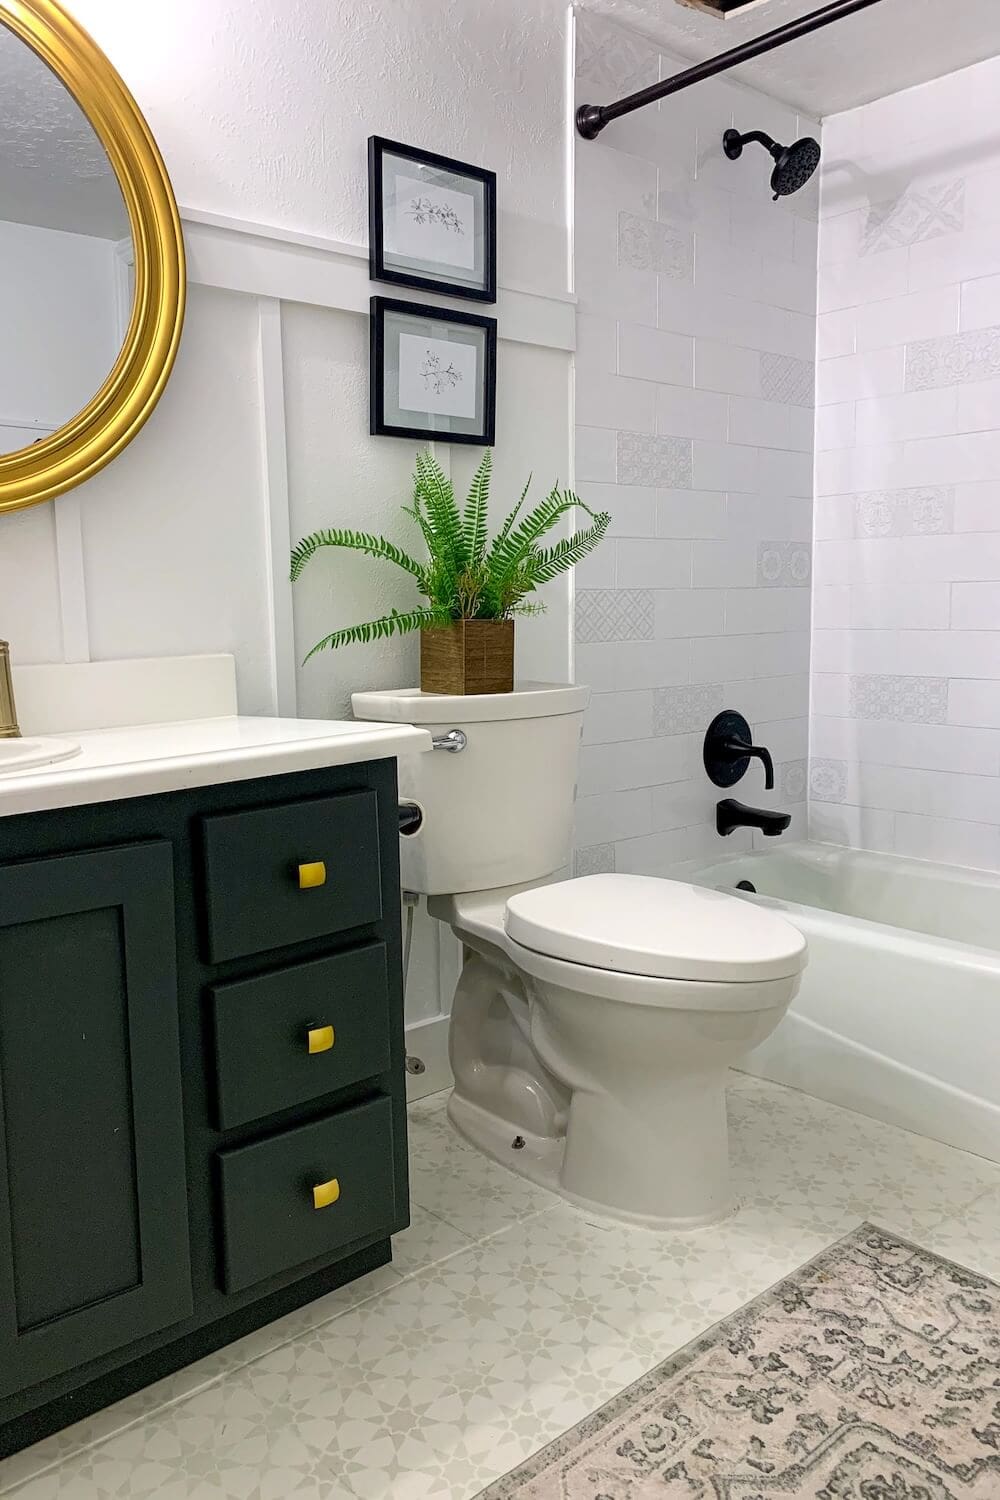
Instead of stopping at one wall, continue the battens around the entire room. This small bathroom board and batten wall design looks more custom when the trim wraps behind the toilet, beside the shower, and across the vanity wall.
This is one of the easiest board and batten bathroom ideas to make a small space feel more intentional.
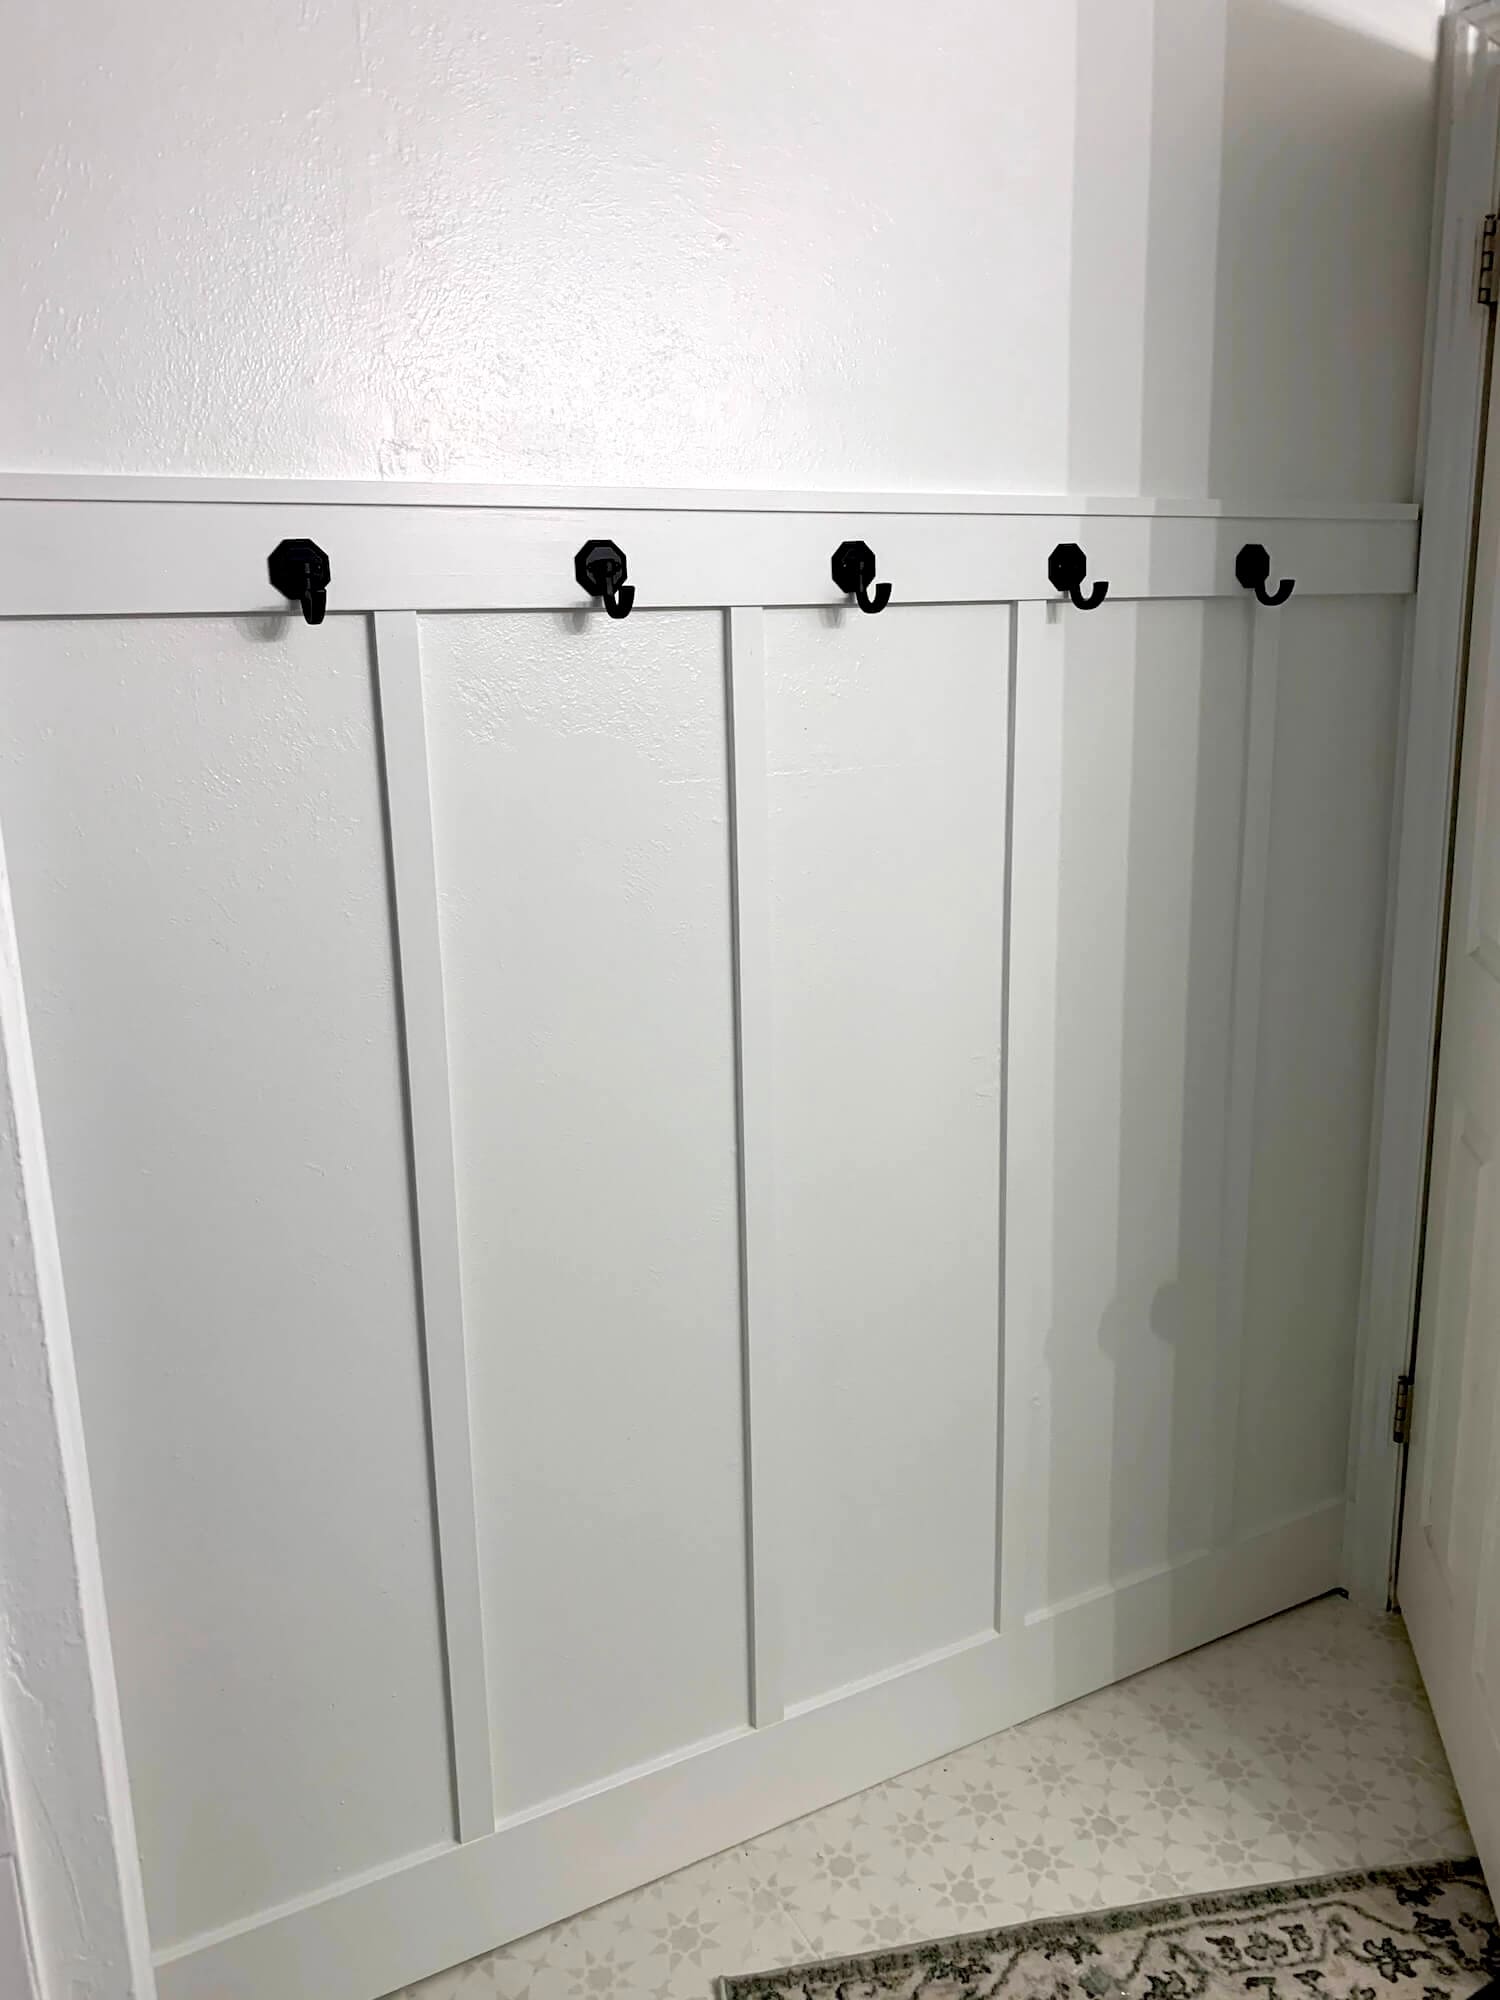
Step 5: Add the Top Cap
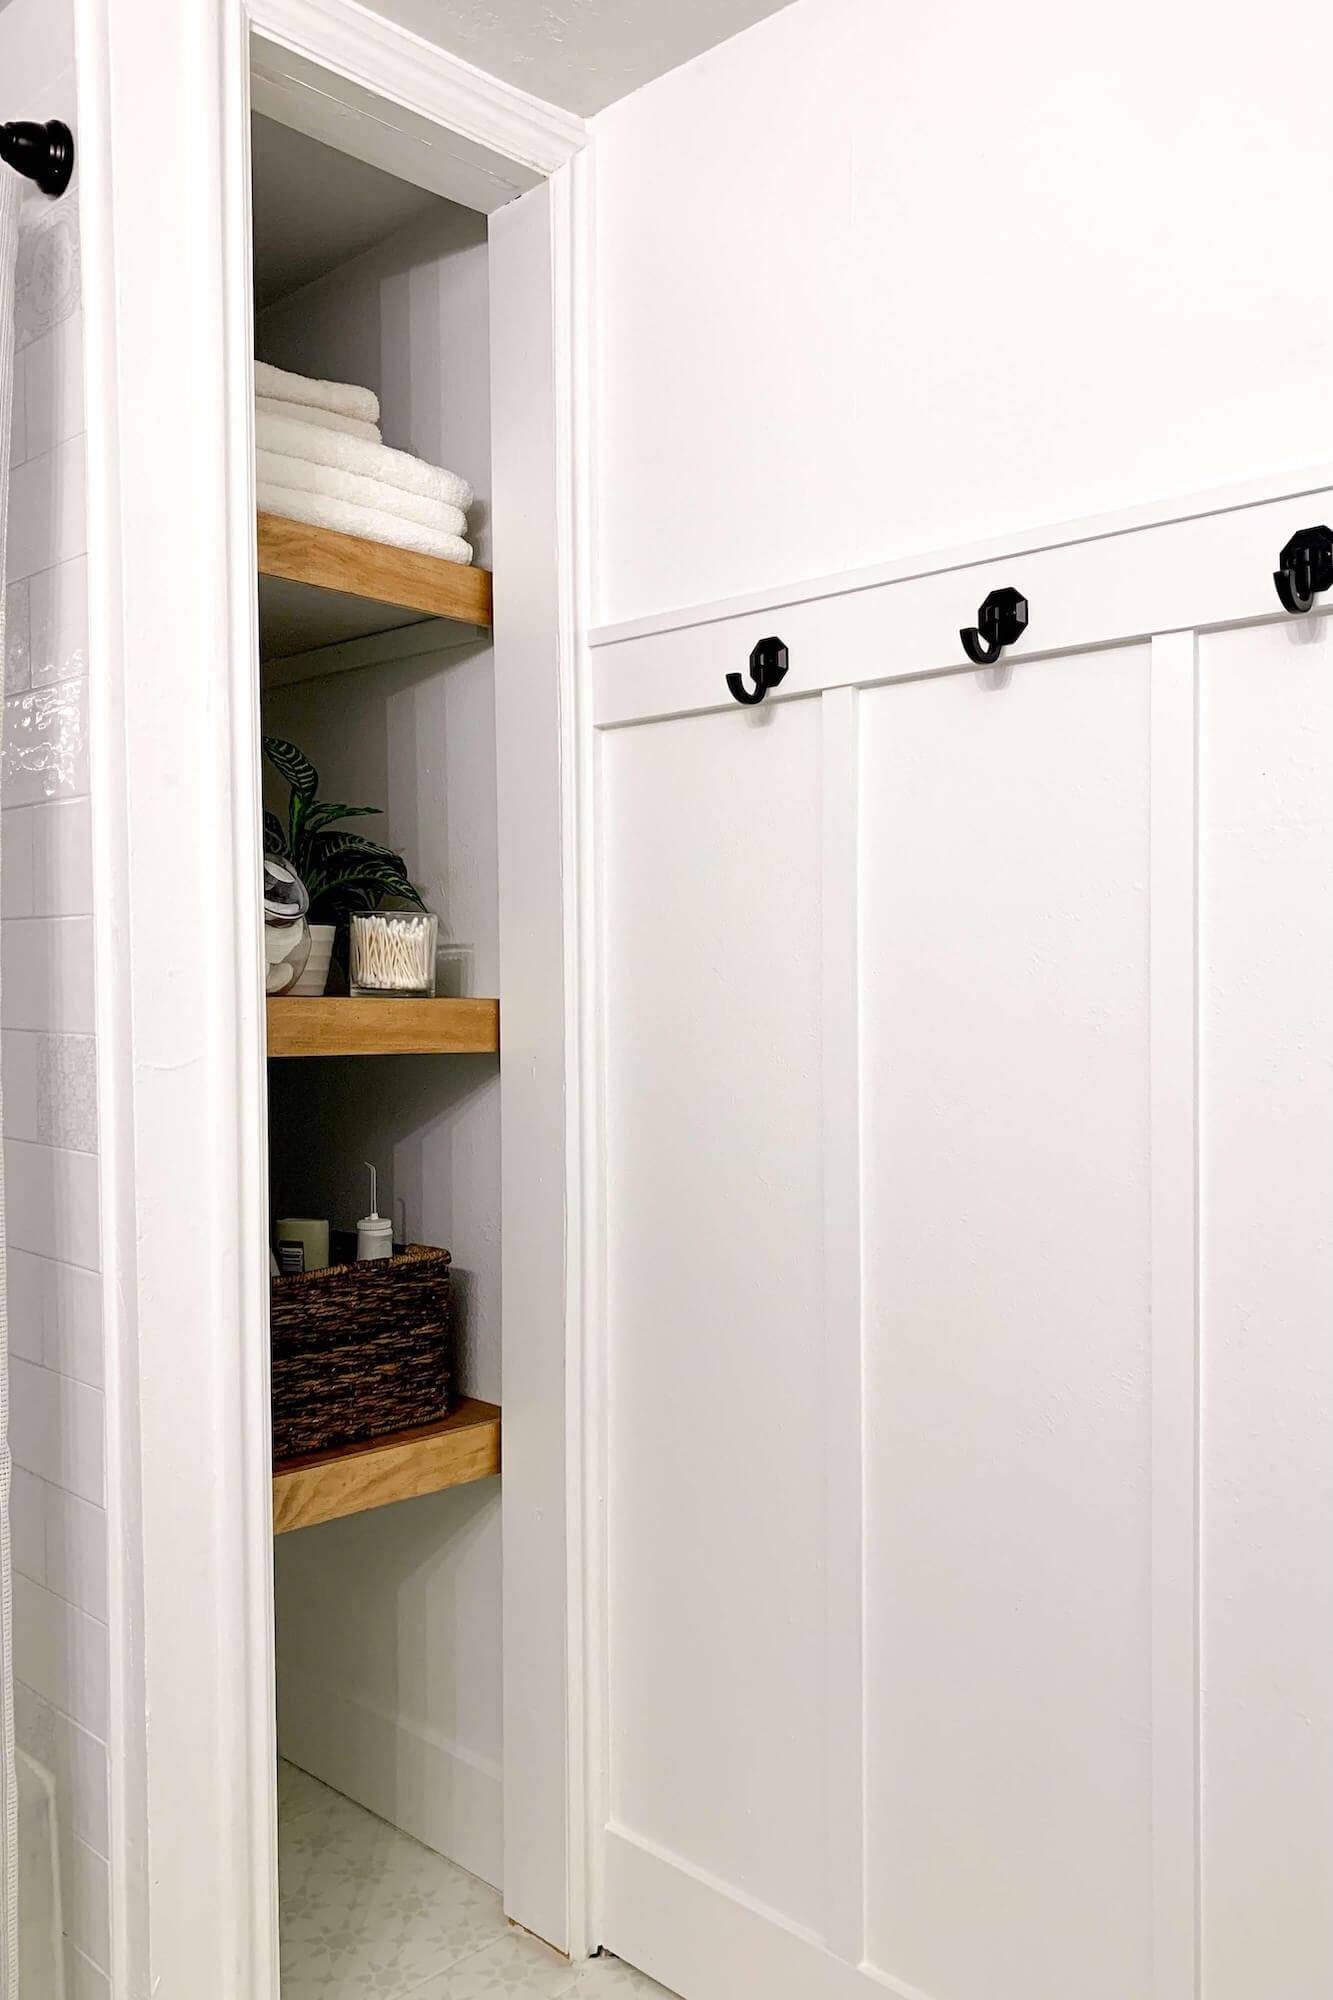
Lay a 1×2 board flat on top of the rail to finish the edge. This creates a clean line and gives you a solid place to mount hooks. It’s a simple detail that makes the whole wall look more custom.
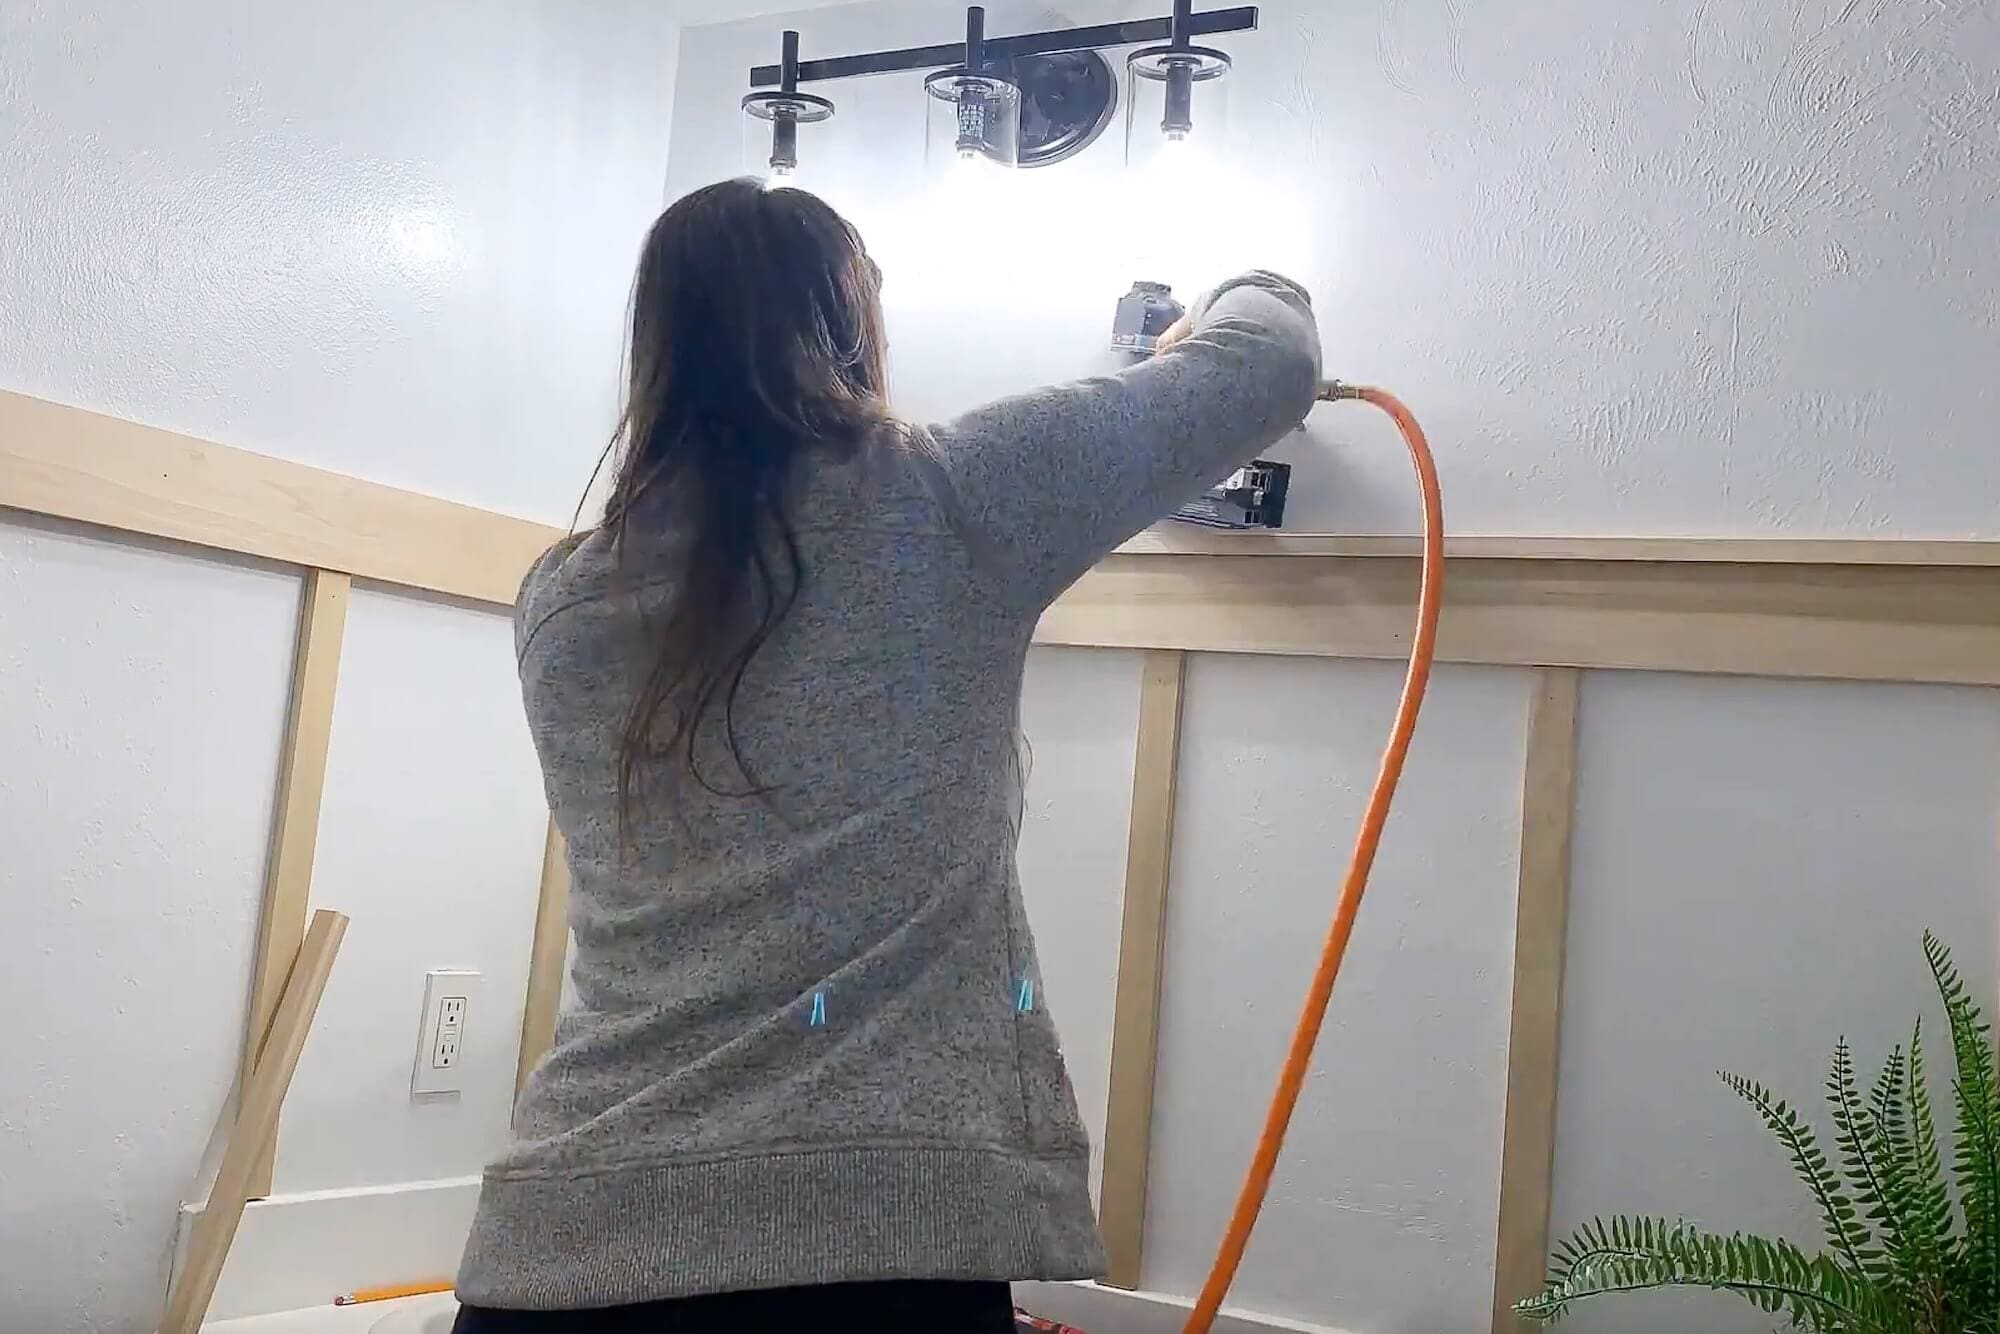
Step 6: Fill, Sand, and Caulk
Fill nail holes with wood filler. After it dries, sand it smooth. Caulk along every seam where the boards meet the wall. Even though it takes a few extra minutes, this is what makes the final paint look clean and seamless.
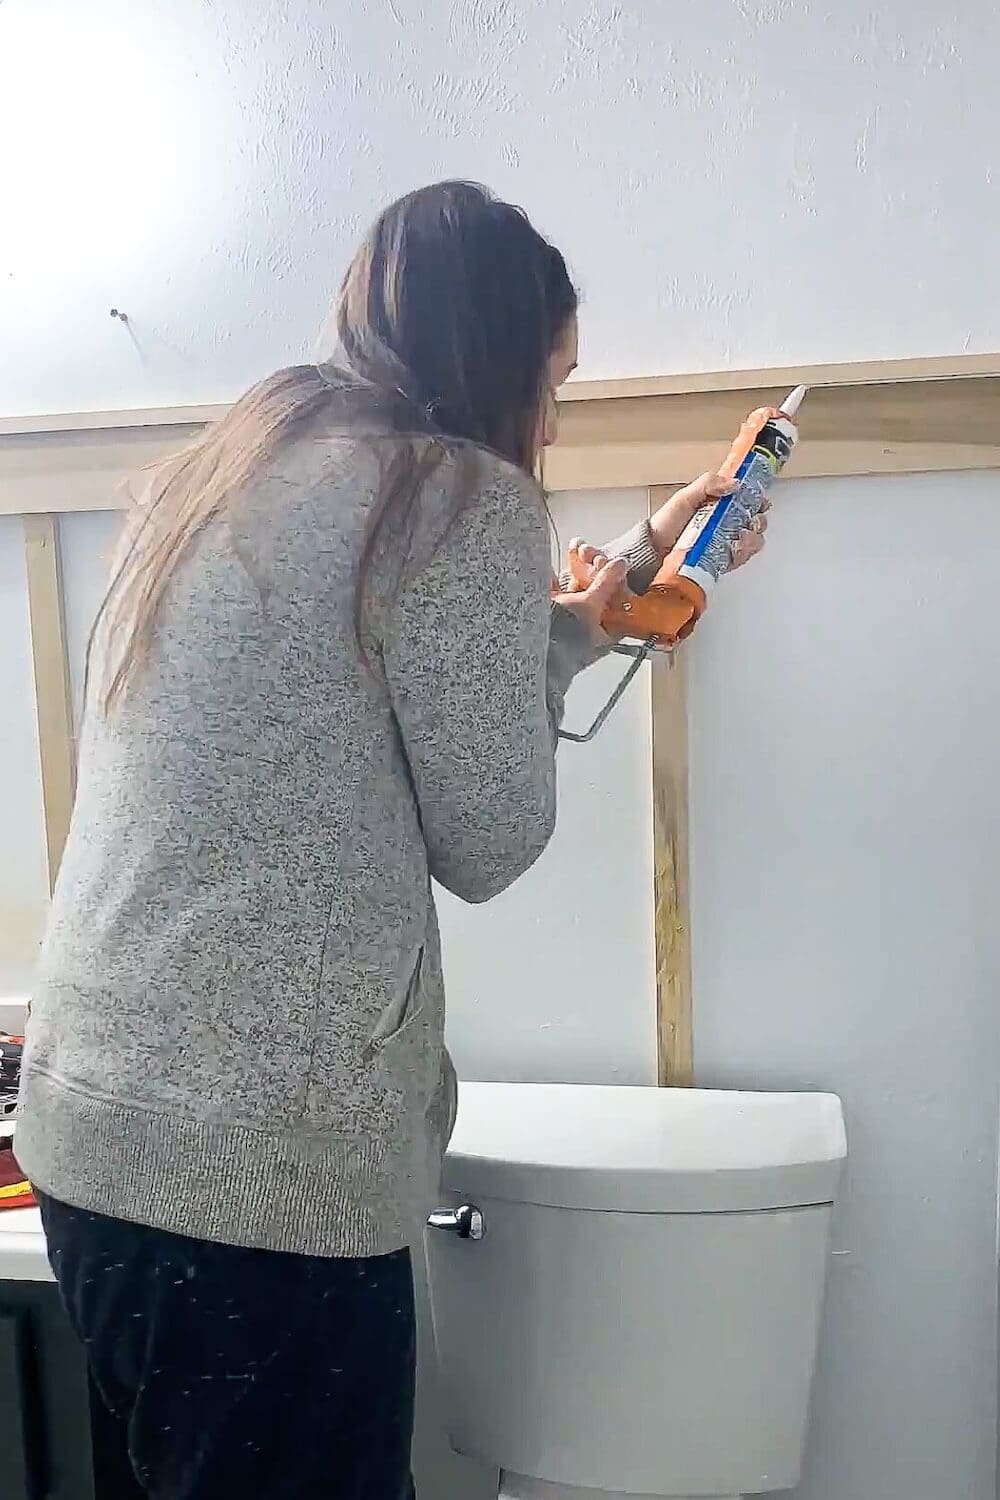
Step 7: Prime and Paint
Prime all the boards and wall areas inside the treatment. Once the primer dries, paint everything. I chose white to keep this small bathroom bright, but you can go darker if you want more contrast.
Step 8: Add Hooks for Storage
Install your hooks along the top cap. The laser level keeps them aligned. Hooks are one of the most practical board and batten bathroom ideas because they add storage without taking up floor space.
Extra Tips to Make This Easier
- Pre-paint your boards to speed up the final coat
- Label every board length before cutting multiples
- Dry-fit your battens on the floor first to dial in spacing before nailing anything to the wall.
- Use a scrap piece of 1×2 as a spacer block to keep gaps consistent as you work around the room.
- Number the back of each board with its location (A1, A2, etc.) if you’re cutting everything ahead of time.
Finished Board and Batten Bathroom Wall in This Small Space
This small bathroom board and batten wall completely changed the feel of the room. The walls look taller, the layout feels more intentional, and the hooks make the space more functional. This project fits right in with the rest of the updates from my Small Bathroom Remodel Reveal.
Can You Use Board and Batten in a Bathroom With a Shower?
Yes-board and batten works in a bathroom with a shower as long as you treat it like any other moisture-prone space. The key is using the right materials, sealing every seam, and keeping the trim outside of direct splash zones.
In this bathroom, the board and batten stops outside the shower area and wraps around the vanity, toilet wall, and towel storage. Inside the shower, I used tile instead of wood so that daily water and steam aren’t hitting the trim directly.
Tips for Using Board and Batten in a Bathroom With a Shower
- Choose the right material. Primed pine, PVC, or other trim boards hold up better than unfinished MDF in bathrooms. If you do use MDF, keep it well out of splash zones and make sure it’s fully primed and painted.
- Seal every seam. Use caulk where boards meet the wall and where boards meet each other. This keeps moisture from sneaking behind the trim and makes your paint job look seamless.
- Use a moisture-resistant paint. A high-quality trim paint in a satin or semi-gloss finish is easier to wipe down and holds up better to humidity than flat wall paint.
- Keep wood out of direct water. Use tile, solid surface, or another waterproof material inside the shower or directly above the tub. Let the board and batten bathroom wall start just outside those areas.
- Make sure your fan works. Good ventilation is your friend. Run the fan during showers and for a bit afterward to help control condensation on all of your painted surfaces.
With those basics in place, board and batten can absolutely live in the same room as your shower and still look fresh and crisp years down the road.
Optional Board and Batten Bathroom Ideas to Try
This DIY board and batten bathroom wall ties in beautifully with other board and batten projects I’ve done throughout this house. You can check out all of those posts if you’re looking for more inspiration.
📌 Pin This Project for Later
Pin now and come back anytime you’re ready to add a DIY board and batten wall to your bathroom!
Share Your Project With Me!
If you try this project, tag me on Instagram-I’d love to see what you create!
FAQ About Board and Batten Bathroom Ideas
Using slim vertical battens and wrapping the treatment around the entire room makes a small bathroom feel taller and more structured.
Batten spacing is flexible, but a typical range is 12–20 inches apart. The exact spacing depends on your wall size and the look you want.
Yes-board and batten works beautifully in tight spaces and doesn’t take up floor space.
Absolutely. The top rail creates a perfect mounting point for functional hooks.
White keeps the room bright, while deeper colors create contrast and interest.
Usually no, you can run battens down to the existing baseboard in most cases; if the base is super thin or curved, you may need to swap it.
