Updated November 21, 2025
If you’ve been eyeing those trendy gold bathroom mirrors but don’t love the price tags, this DIY is the perfect solution. With just a few supplies and a little time, you can turn a plain mirror into a high-end-looking gold bathroom mirror that fits right into your budget.
Time: About 1–2 hours of active work
Difficulty: Beginner-friendly
This project is simple enough for beginners and works whether you’ve got a basic builder mirror or a secondhand Marketplace find. I’ll show you exactly how to paint a bathroom mirror frame gold using Rub ’n Buff and a clever black base coat for extra depth. The result is a DIY gold bathroom mirror that looks designer, not DIY.
If you’re working on a full bathroom mirror makeover or looking for cheap bathroom mirror ideas and ways to update a bathroom mirror on a budget, this project is an easy win.
Gold Bathroom Mirror DIY: At a Glance
Here’s the basic process before we get into the step-by-step photos:
- Tape off and protect the mirror glass.
- Spray paint the frame black to create depth.
- Apply Antique Gold Rub ’n Buff over the black base.
- Carefully remove the tape and clean any overspray.
- Hang and style your new gold bathroom mirror.
Table of Contents
- Gold Bathroom Mirror DIY: At a Glance
- Tools and Materials for a DIY Gold Bathroom Mirror
- What Kind of Mirror Does This Work On?
- Before: Plain Bathroom Mirror Before the Gold Makeover
- Step 1: Tape Off the Mirror (Prep Is Everything)
- Step 2: Spray Paint the Frame Black (For Depth)
- Step 3: Apply Rub ’n Buff (The Gold Moment)
- Step 4: Remove Tape Carefully (Crisp Lines)
- Step 5: Style Your New Gold Bathroom Mirror
- The Finished Bathroom
- 📌 Save This Gold Bathroom Mirror DIY
- FAQ – Painting a Gold Bathroom Mirror
- More Projects Using the Power of Paint
Tools and Materials for a DIY Gold Bathroom Mirror
You don’t need much for this project. A few basic tools and the right products will give you a rub n buff mirror frame that looks like it came straight from a designer showroom.
- Round or rectangular bathroom mirror (check Martketplace)
- Painter’s tape
- Utility knife
- Razor blade
- Black spray paint
- Rub ’n Buff
- Rag or towel for applying Rub ’n Buff
Rub ’n Buff is my favorite for a rub n buff gold bathroom mirror because it gives a rich, metallic finish that really looks like metal-not just “gold paint.”
What Kind of Mirror Does This Work On?
This DIY works best on framed bathroom mirrors made of wood, MDF, or plastic. If your mirror frame is super glossy or slick, give it a quick scuff sand and make sure it’s clean before you start. Rub ’n Buff sticks really well over a dry, matte surface and the black spray paint base.
For frameless builder mirrors glued to the wall, this exact project won’t work, but you can add a simple frame first and then follow these same steps to paint it gold.
Before: Plain Bathroom Mirror Before the Gold Makeover
This basement bathroom was looking pretty dated. My goal was a budget-friendly, DIY refresh and to reuse anything I could instead of starting from scratch. The existing mirror was a simple white round frame-totally fine, but not exactly inspiring.
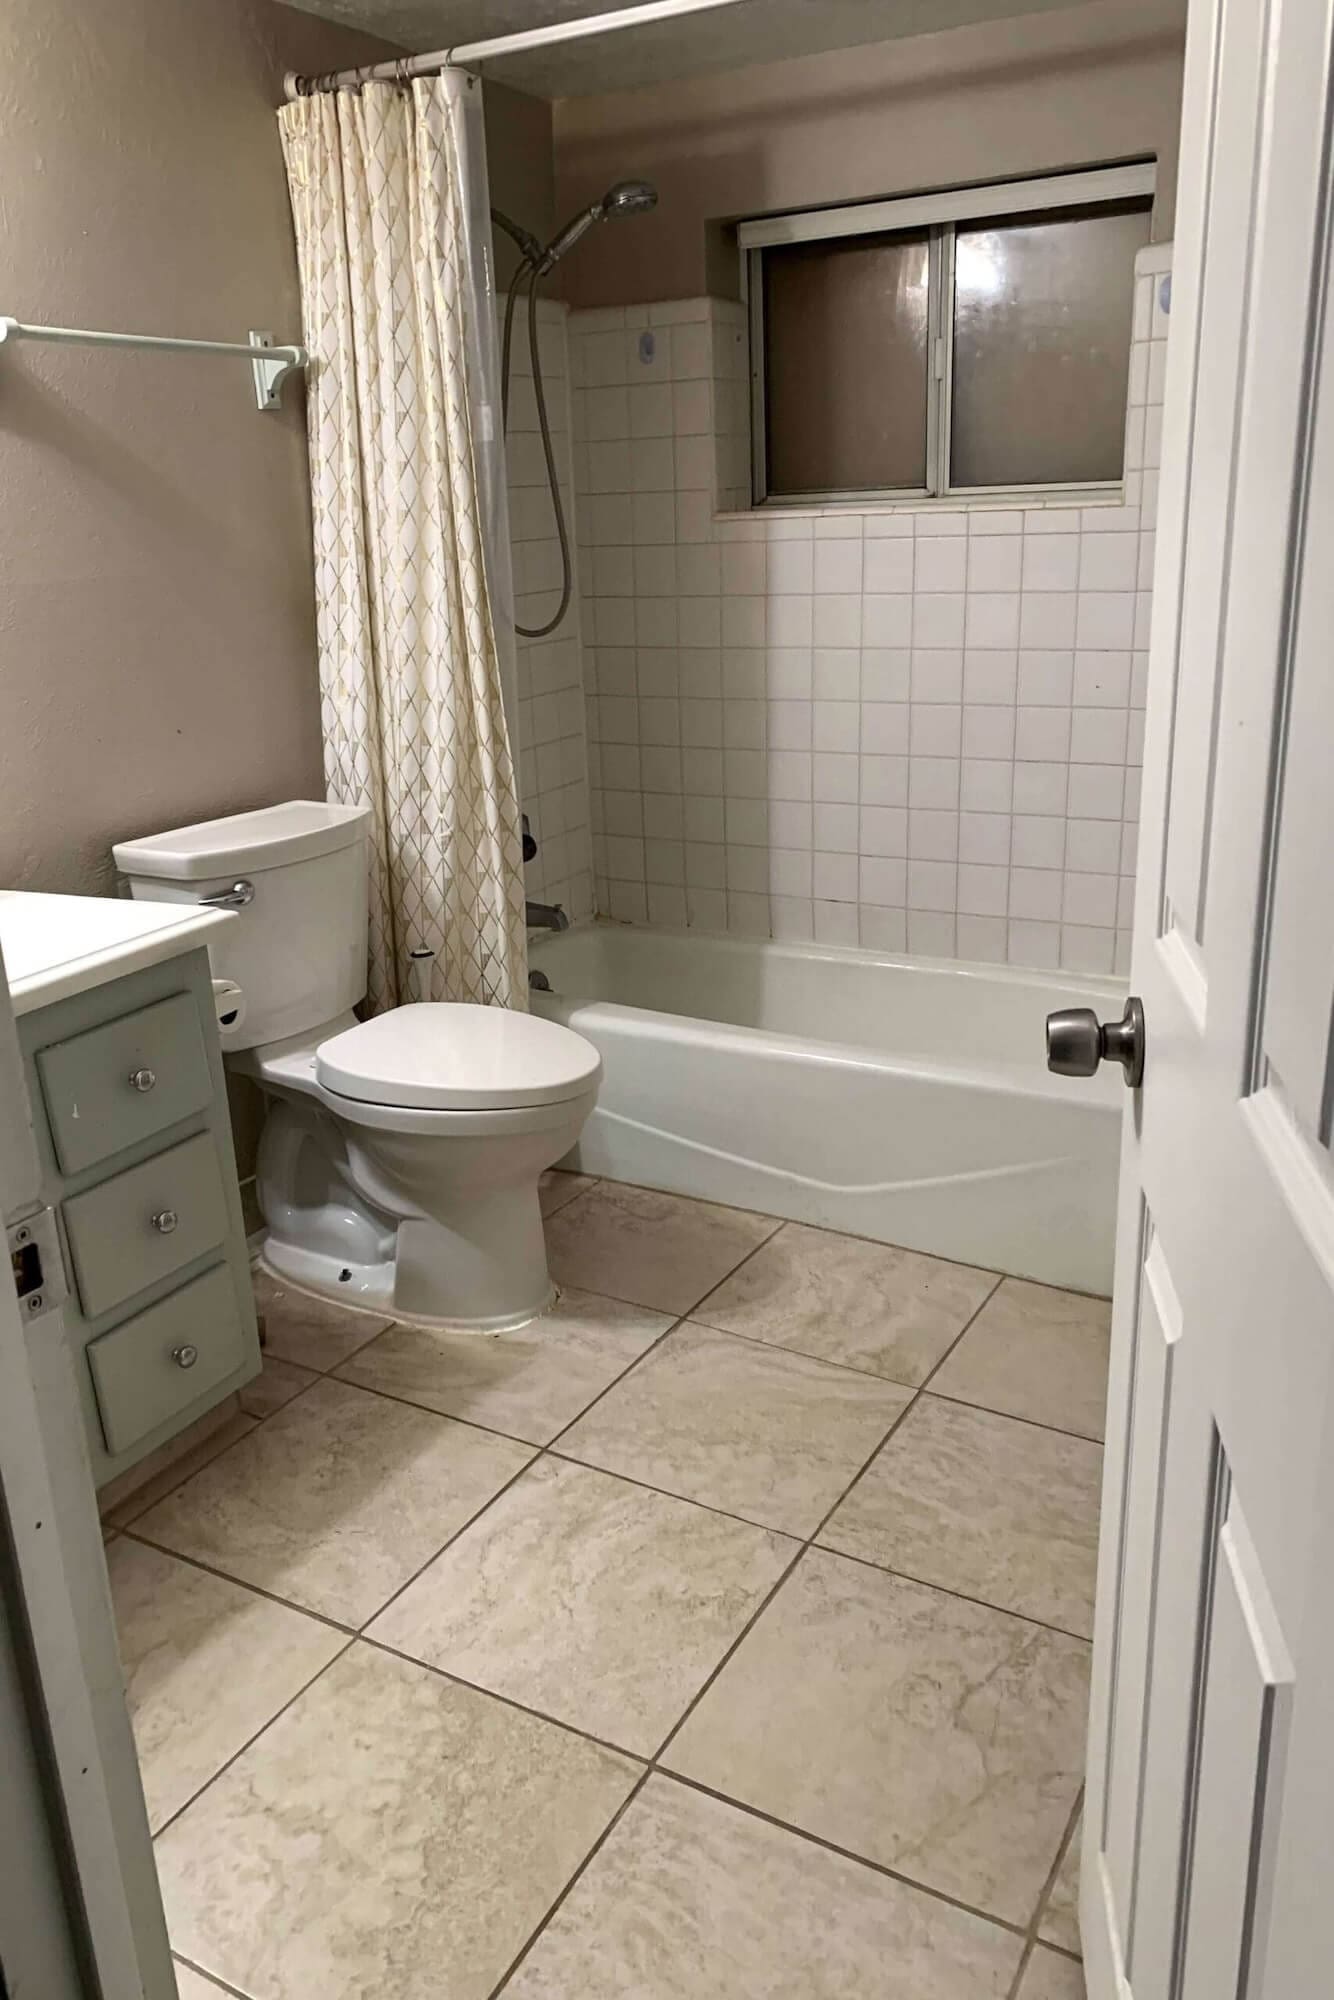
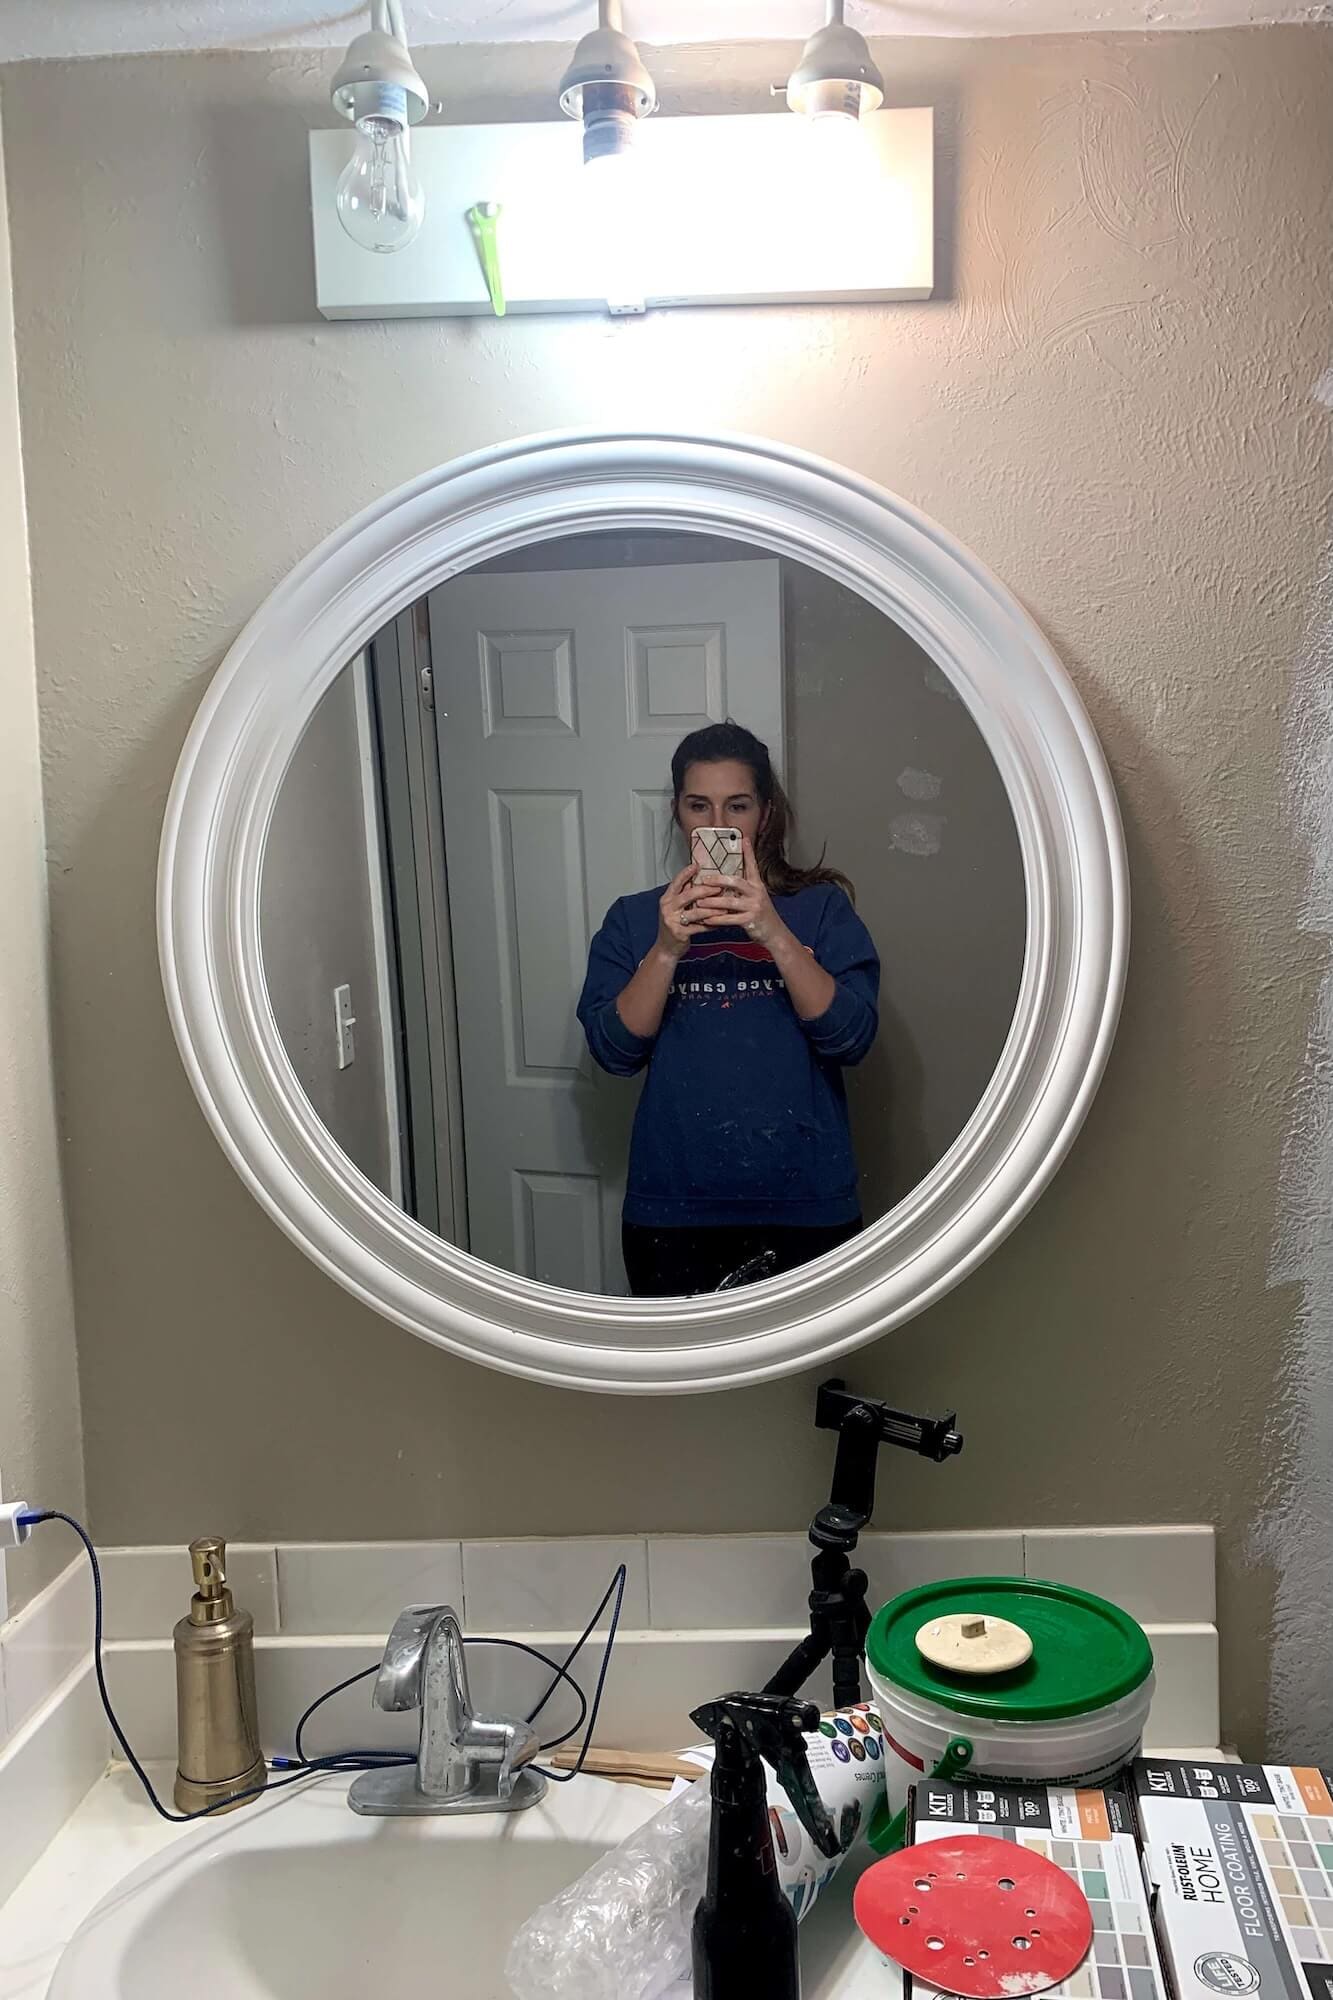
Rather than buying a new gold round bathroom mirror, I decided to turn the old white one into the star of the room. With just a bit of paint and Rub ’n Buff, the mirror went from basic to “wow” and helped give this whole space a DIY glow-up.
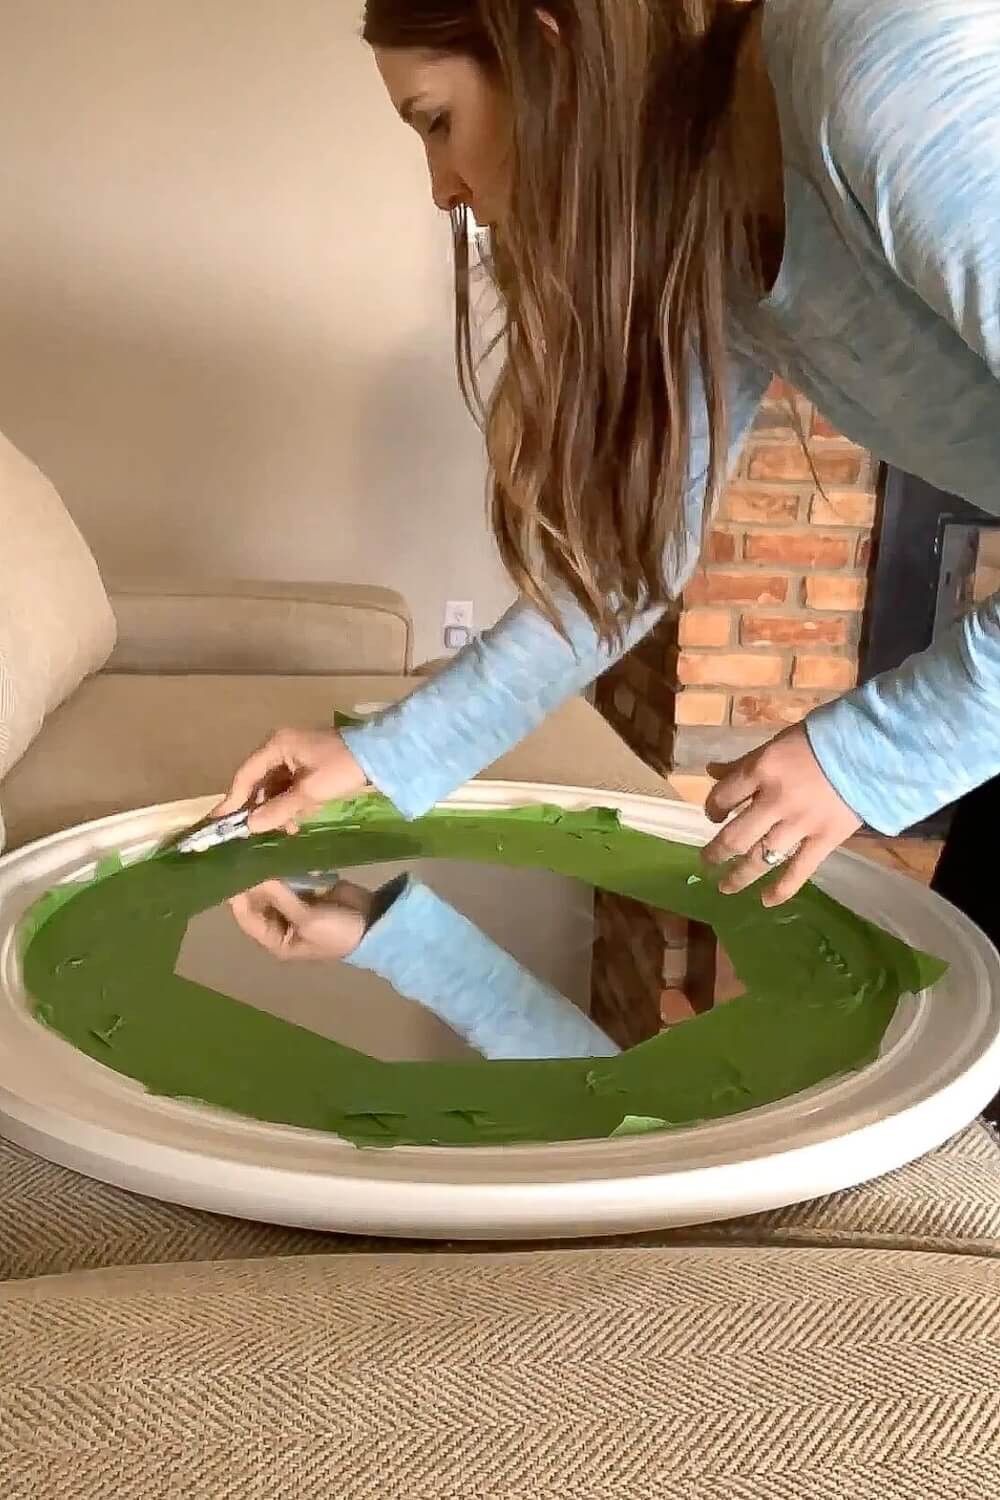
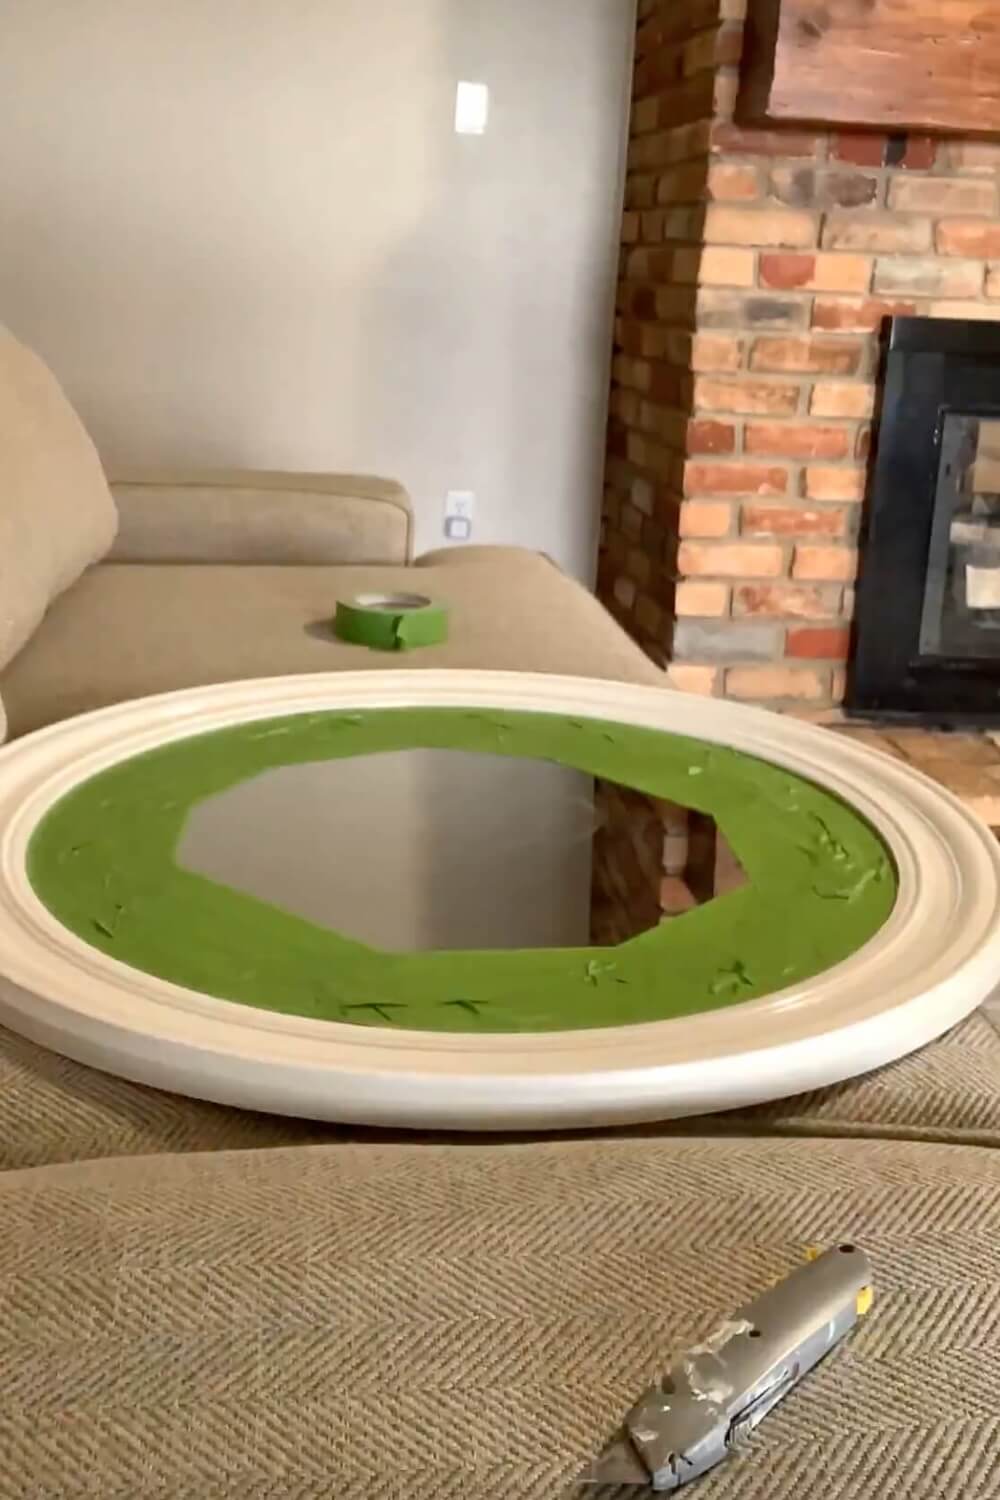
Step 1: Tape Off the Mirror (Prep Is Everything)
Before we can transform this bathroom mirror to gold, we have to do the all-important prep work.
- Cover the mirror glass with painter’s tape, overlapping the pieces slightly.
- Press the tape down firmly right along the edge of the frame to keep paint from seeping underneath.
- Use a utility knife to carefully trim any tape that overlaps onto the frame.
Taking your time here saves you a ton of cleanup later and gives you those crisp lines that make a bathroom mirror makeover look professional.
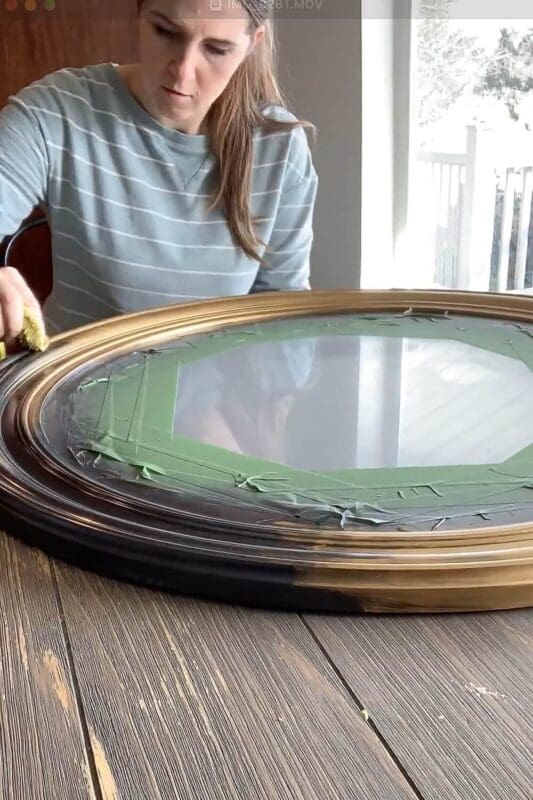
Step 2: Spray Paint the Frame Black (For Depth)
I know what you might be thinking: “Wait Crystel! Why are we painting the frame black if we want a gold bathroom mirror?”
Painting the mirror frame with black spray paint first:
- Adds depth under the gold
- Helps the Rub ’n Buff look more like real metal
- Keeps the finish from looking flat or chalky
Give the frame an even coat of black spray paint, let it dry completely, and make sure you don’t see any white peeking through. A white base won’t give the same rich metallic effect, so don’t skip this step.

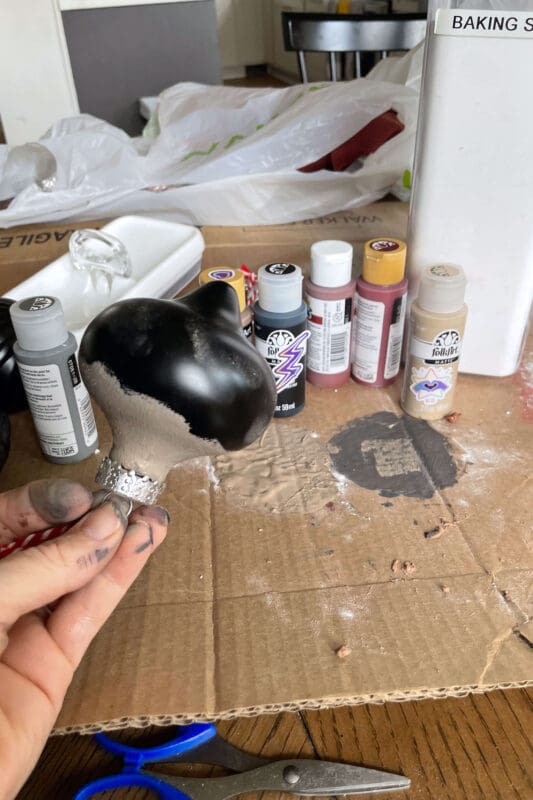
Step 3: Apply Rub ’n Buff (The Gold Moment)
This is where the magic happens-and where your basic mirror starts looking like a designer DIY gold bathroom mirror.
- Squeeze a tiny amount of Antique Gold Rub ’n Buff onto a rag or small towel.
- Working in small sections, rub it onto the frame in light, even strokes.
- Build up the coverage gradually instead of globbing it on. A little goes a long way.
- Keep going until the entire frame has a smooth, even gold finish with no black showing through, unless you’re intentionally leaving a bit for an aged look.
This technique is what makes a rub n buff mirror frame look high-end. The combination of the black base and metallic wax gives your mirror so much more dimension than gold spray paint alone.
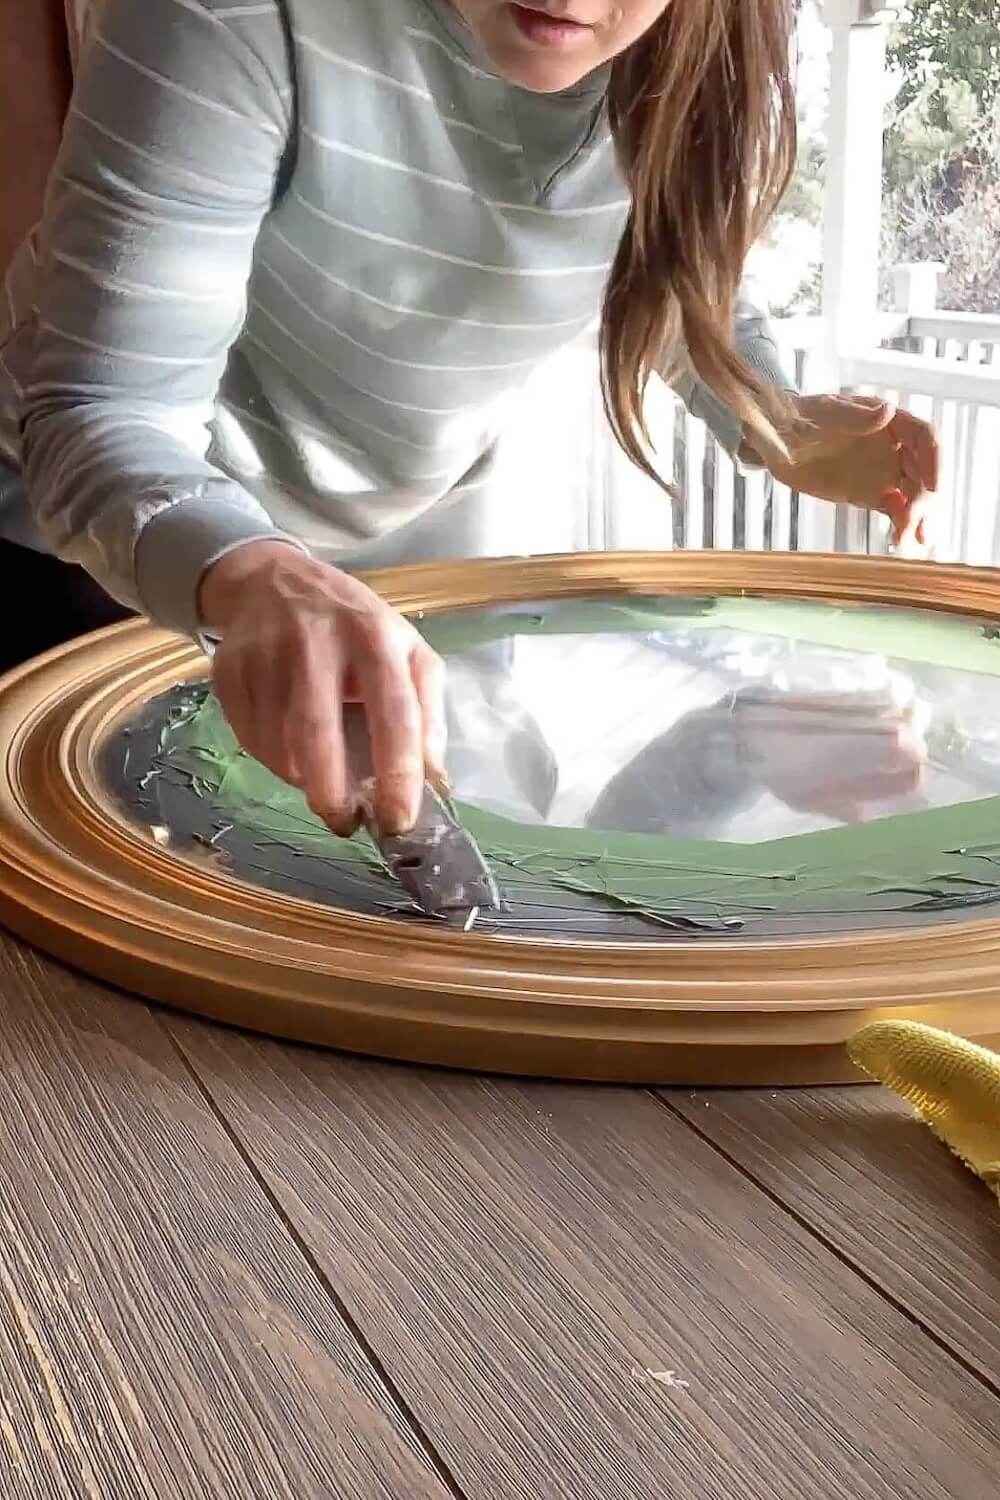
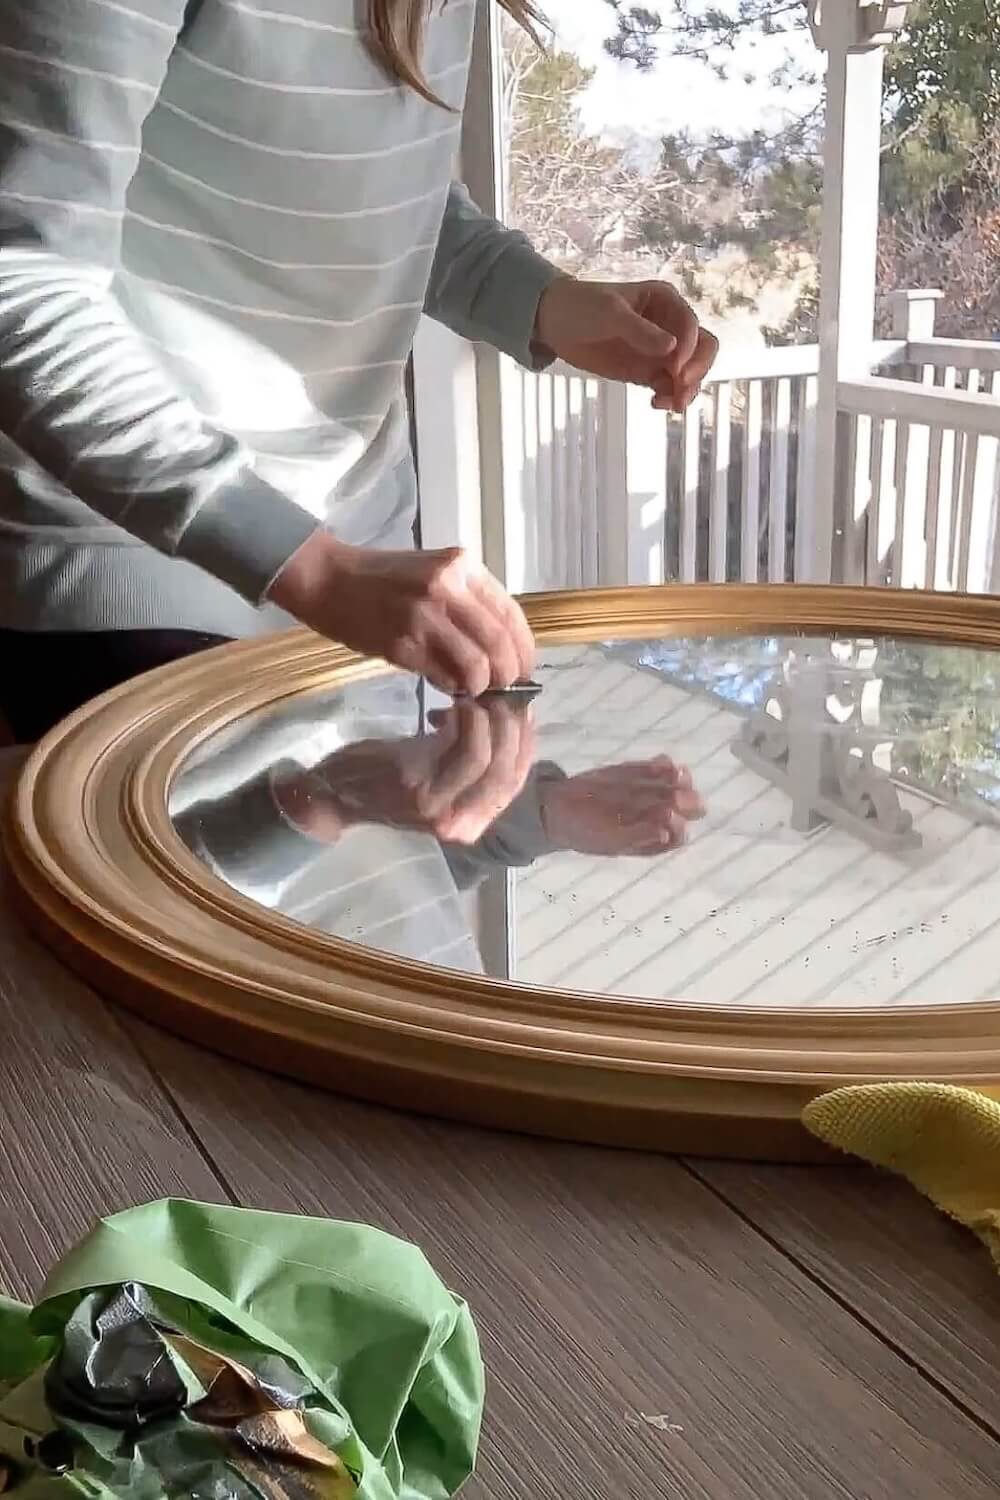
Step 4: Remove Tape Carefully (Crisp Lines)
Once the frame is fully dry to the touch, it’s time to reveal that clean edge between the frame and the mirror.
- Use your utility knife to gently score along the edge where the tape meets the painted frame.
- Peel the tape away slowly, pulling it back on itself rather than straight out.
- If you notice any overspray or Rub ’n Buff on the glass, scrape it off gently with a razor blade.
Scoring the tape first keeps the paint from lifting and gives you that crisp, professional edge that makes the whole bathroom mirror frame look expensive.
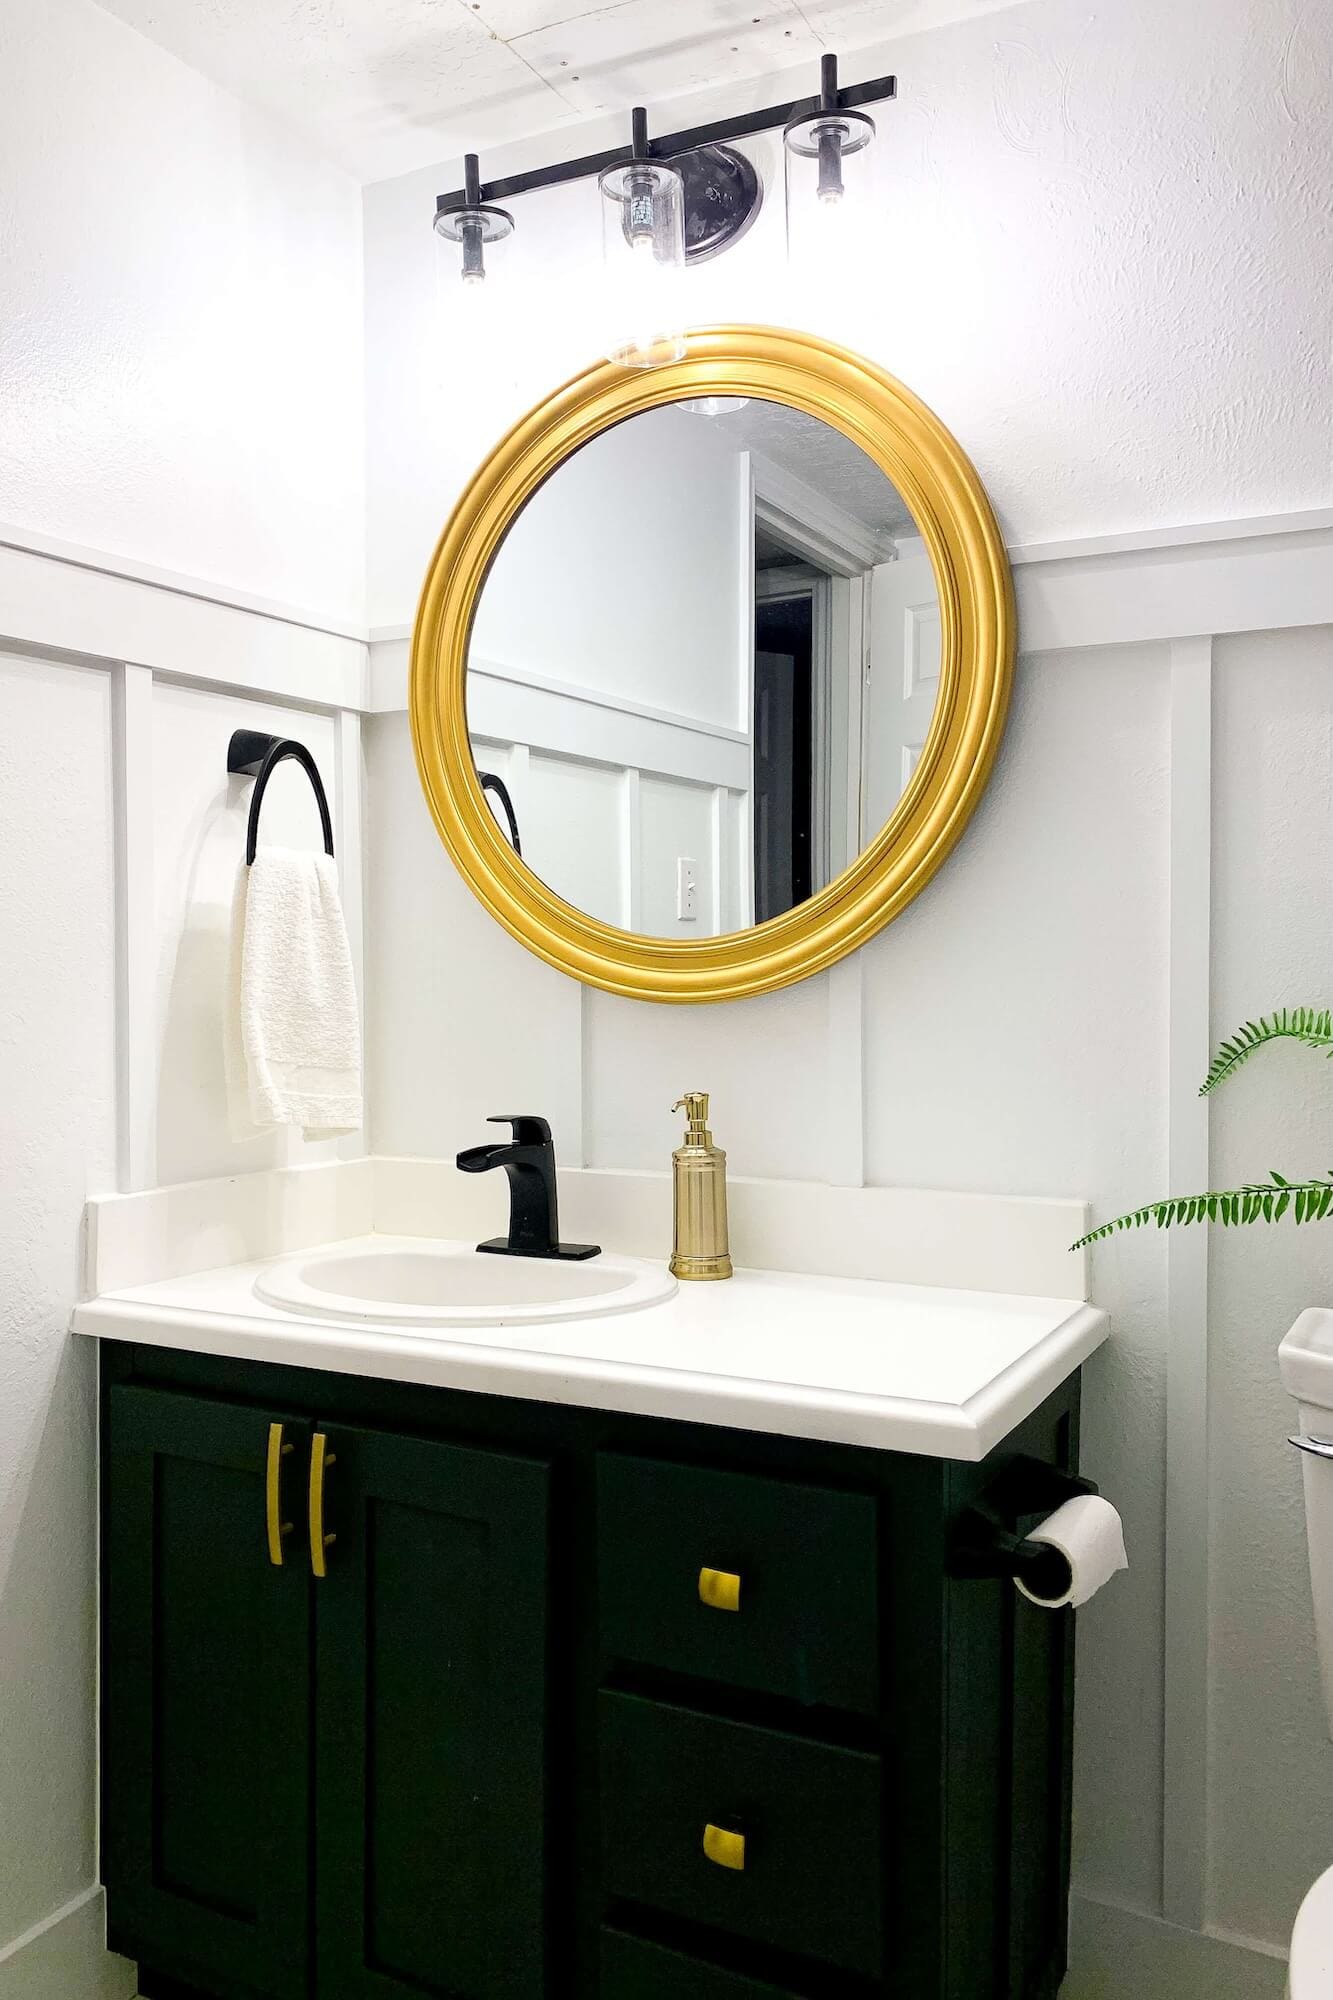
Step 5: Style Your New Gold Bathroom Mirror
That’s it-your DIY mirror makeover is done!
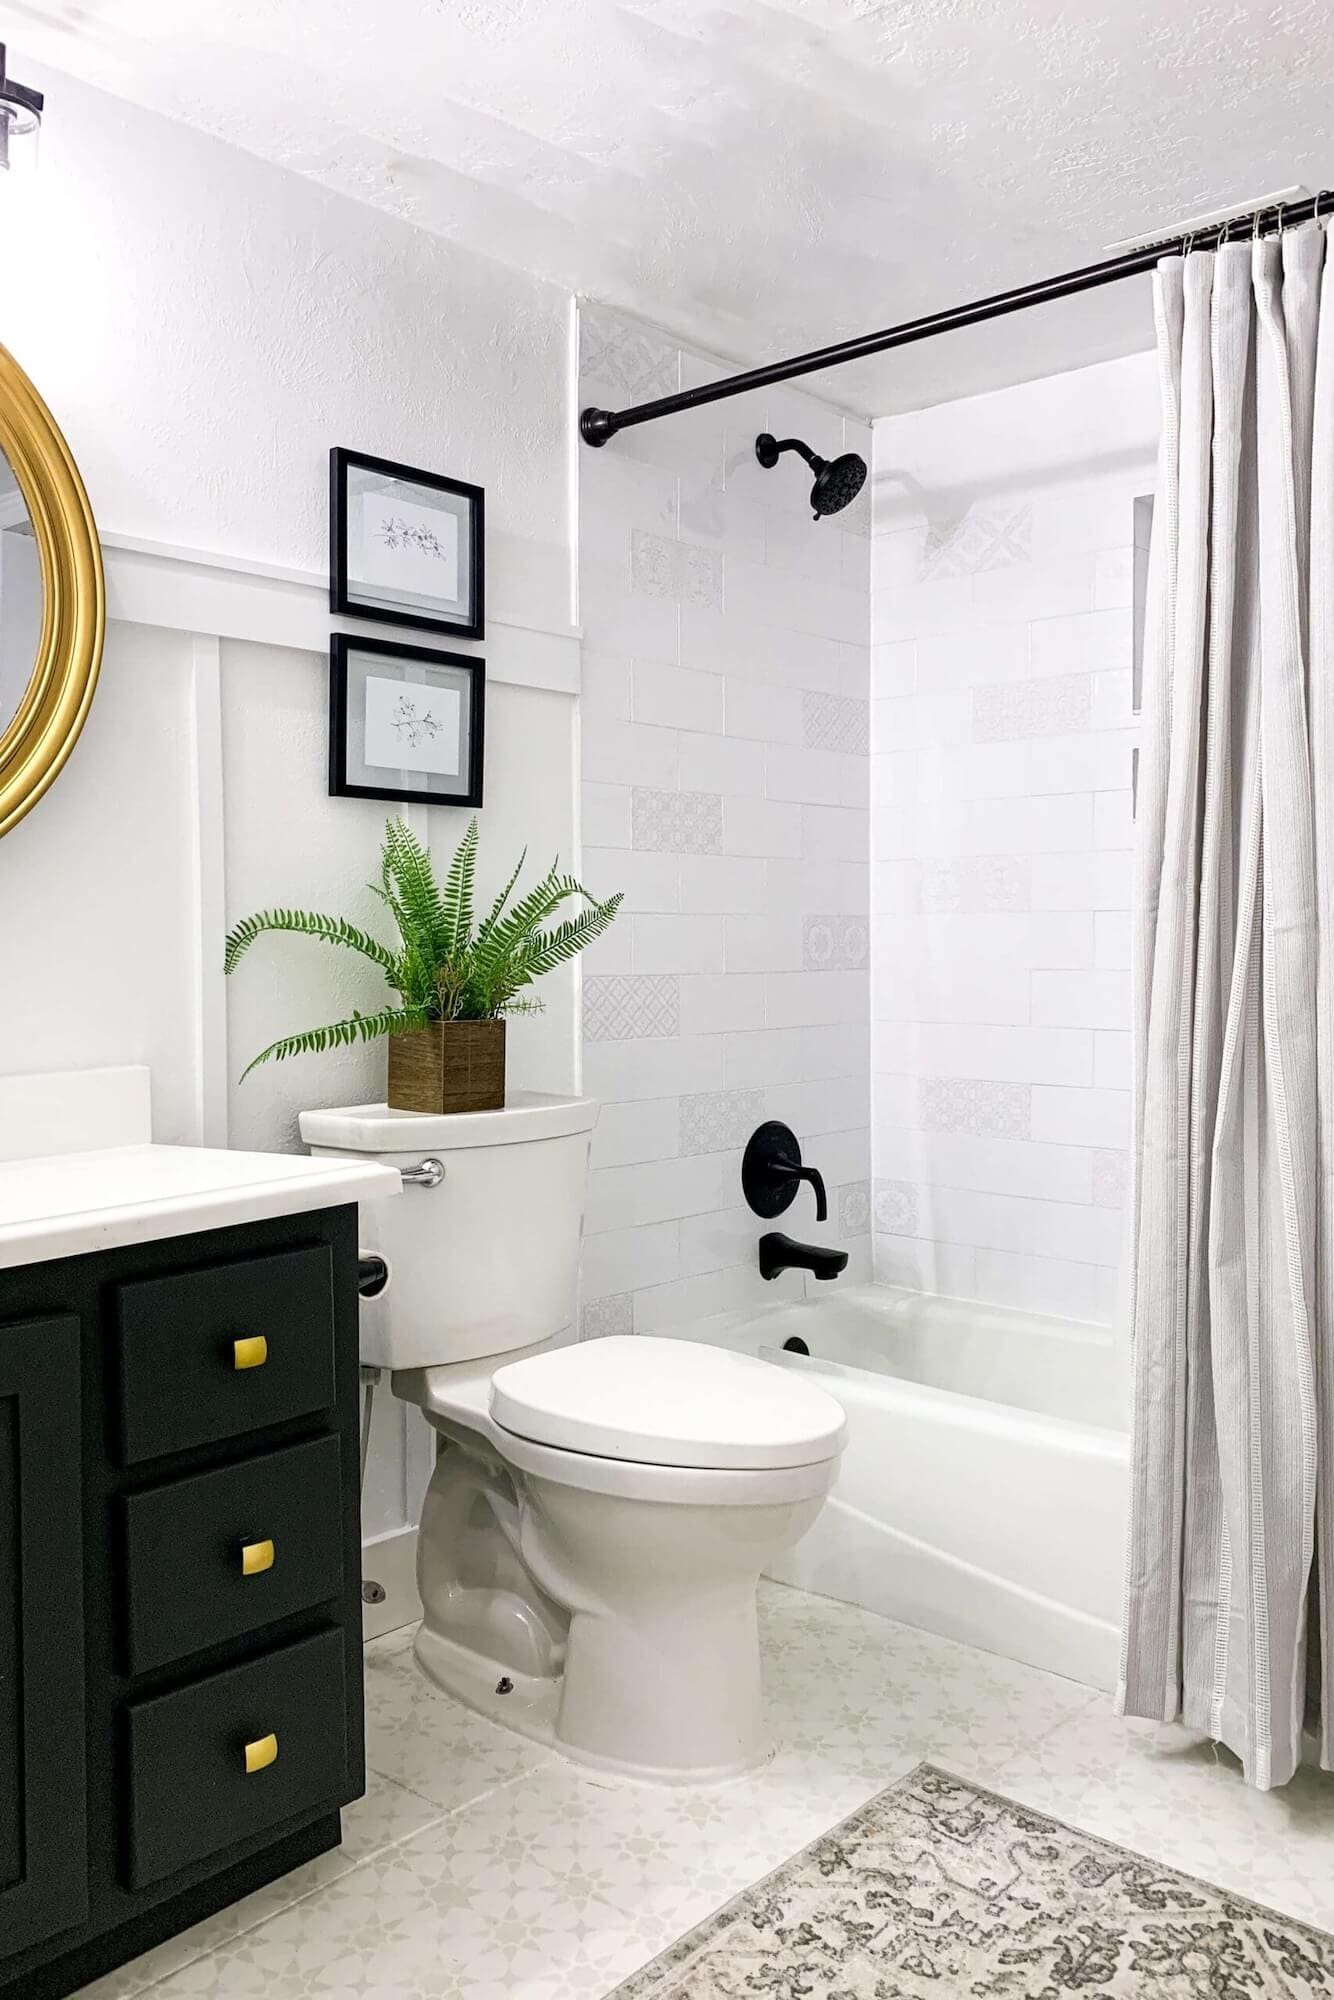
Once I hung mine back in place, the gold frame tied in perfectly with the rest of the bathroom. It matches the gold vanity hardware, warms up the white tile, and pops against the black faucet and light fixture.
Whether you’re pairing it with a newly painted vanity, fresh tile, or just some new towels, this mirror instantly becomes a focal point and proves you don’t have to spend a lot to get a designer-style bathroom.

The Finished Bathroom
This basement bathroom has been a total DIY, budget-friendly transformation. Along with updating the mirror, here’s what I’ve been up to:
- DIY Small Bathroom Remodel on a Budget
- How to Tile a Shower Wall
- How to Build a Shower Niche
- Painting Bathroom Floor Tiles on a Budget
- Board and Batten Bathroom Ideas for Small Spaces
The gold bathroom mirror was the finishing touch that pulled everything together. It’s one of my favorite examples of how a single project can completely change the feel of a room—especially when you’re looking for cheap bathroom mirror ideas or ways to update a bathroom mirror on a budget.
📌 Save This Gold Bathroom Mirror DIY
Pin now and come back when you’re ready to give your bathroom mirror a budget-friendly glow-up!
FAQ – Painting a Gold Bathroom Mirror
To paint a bathroom mirror frame gold, first tape off the glass, spray paint the frame black for depth, then apply Rub ’n Buff with a rag for a rich gold finish.
Rub ’n Buff is a great choice for a gold bathroom mirror because it’s easy to apply, long-lasting, and gives a metallic, high-end finish.
If overspray gets on the glass, use a razor blade or utility knife to gently scrape it away without damaging the new gold frame or your mirror.
Rub ‘n Buff over a black base looks richer and hides brush marks. Spray paint can look flat and is harder to control in tight spaces.
Usually no. If it’s a high-touch area, a light clear wax after 24–48 hours can protect the finish without dulling the sheen.
Yes. As long as your bathroom mirror frame is properly prepped and the products are fully dry and cured, a painted gold frame holds up well in a typical bathroom. Keep harsh cleaners off the frame and wipe it down with a soft, damp cloth when needed so the finish stays looking fresh.
More Projects Using the Power of Paint
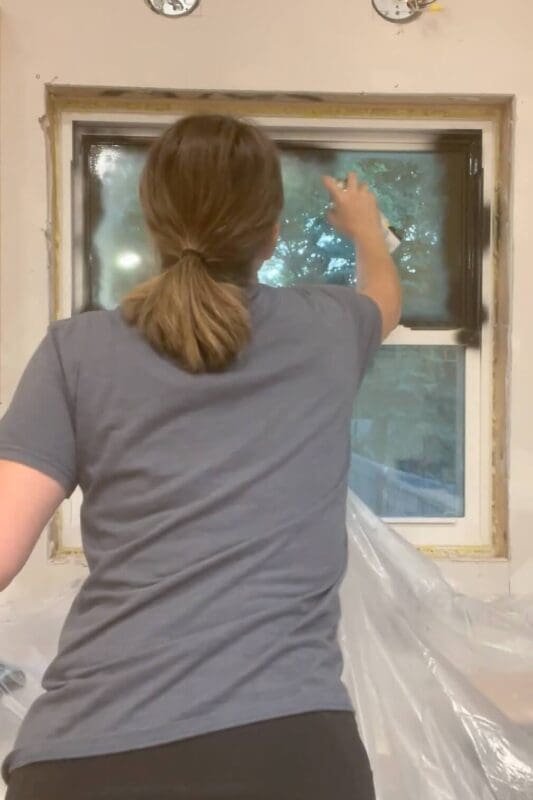
If you love paint transformations as much as I do, be sure to check out my tutorial on painting Christmas ornaments for a budget-friendly holiday DIY, and my post on painting window frames black to see how a little paint can completely modernize your home.