

Updated November 22, 2025
Remodeling a bathroom can get pricey really quickly, especially when you’re working with a tight footprint and an even tighter budget. This post is the full story of how I did a small bathroom remodel on a budget in our basement-one project at a time, over several weekends.
Instead of gutting everything and hiring out the whole job, I kept what was still solid (the tub, vanity box, and basic layout) and focused on smart DIY upgrades: removing mold, rebuilding the shower correctly, painting and stenciling the floor, updating the vanity and mirror, adding board and batten, and reworking the linen closet. The result is a bright, modern little bathroom that feels custom without a custom price tag.
[hubbub_save_this]
Table of Contents
- Basement Bathroom Remodel: At a Glance
- Before: Small Basement Bathroom, Big Potential
- Step 1: Demo, Mold Removal & Shower Prep
- Step 2: Build a Recessed Shower Niche
- Step 3: Tile the Shower Walls
- Step 4: Paint & Stencil the Bathroom Floor
- Step 5: Paint the Vanity & Update Hardware
- Step 6: DIY Gold Bathroom Mirror
- Step 7: Board and Batten Bathroom Wall
- Optional: DIY Toilet Replacement
- Small Bathroom Remodel Ideas From This Space
- Budget Notes: How Much Does a Small Bathroom Remodel Cost?
- What I’d Do Differently Next Time
- 📌 Save This Small Bathroom Remodel for Later
- FAQ About Small Bathroom Remodels
Basement Bathroom Remodel: At a Glance
Here’s the big-picture flow of this DIY small bathroom remodel so you can see how all the pieces fit together:
- Demo & Prep the Shower: Remove damaged tile and mold, clean and dry the framing, rebuild with cement board, and waterproof everything.
- Build a Shower Niche: Frame, pitch, and waterproof a recessed niche for storage.
- Tile the Shower Walls: Install a white subway tile surround with a patterned niche and black fixtures.
- Paint & Stencil the Floor: Turn beige floor tile into a patterned, painted floor instead of replacing it.
- Paint the Vanity & Update Hardware: Keep the cabinet box, build new doors, and give it a bold, dark green finish with fresh hardware.
- Upgrade the Mirror to Gold: Transform a plain mirror into a warm gold focal point using a black base and Rub ’n Buff.
- Add Board and Batten: Wrap the room with a simple board and batten wall treatment and add hooks for storage.
- Optional: Replace the Toilet (in another bath, but same process): Swap in a new, more comfortable-height toilet with a simple DIY install.
Below I’ll walk through each step, with ideas + links you can follow if you want to dig into the detailed posts.
Before: Small Basement Bathroom, Big Potential
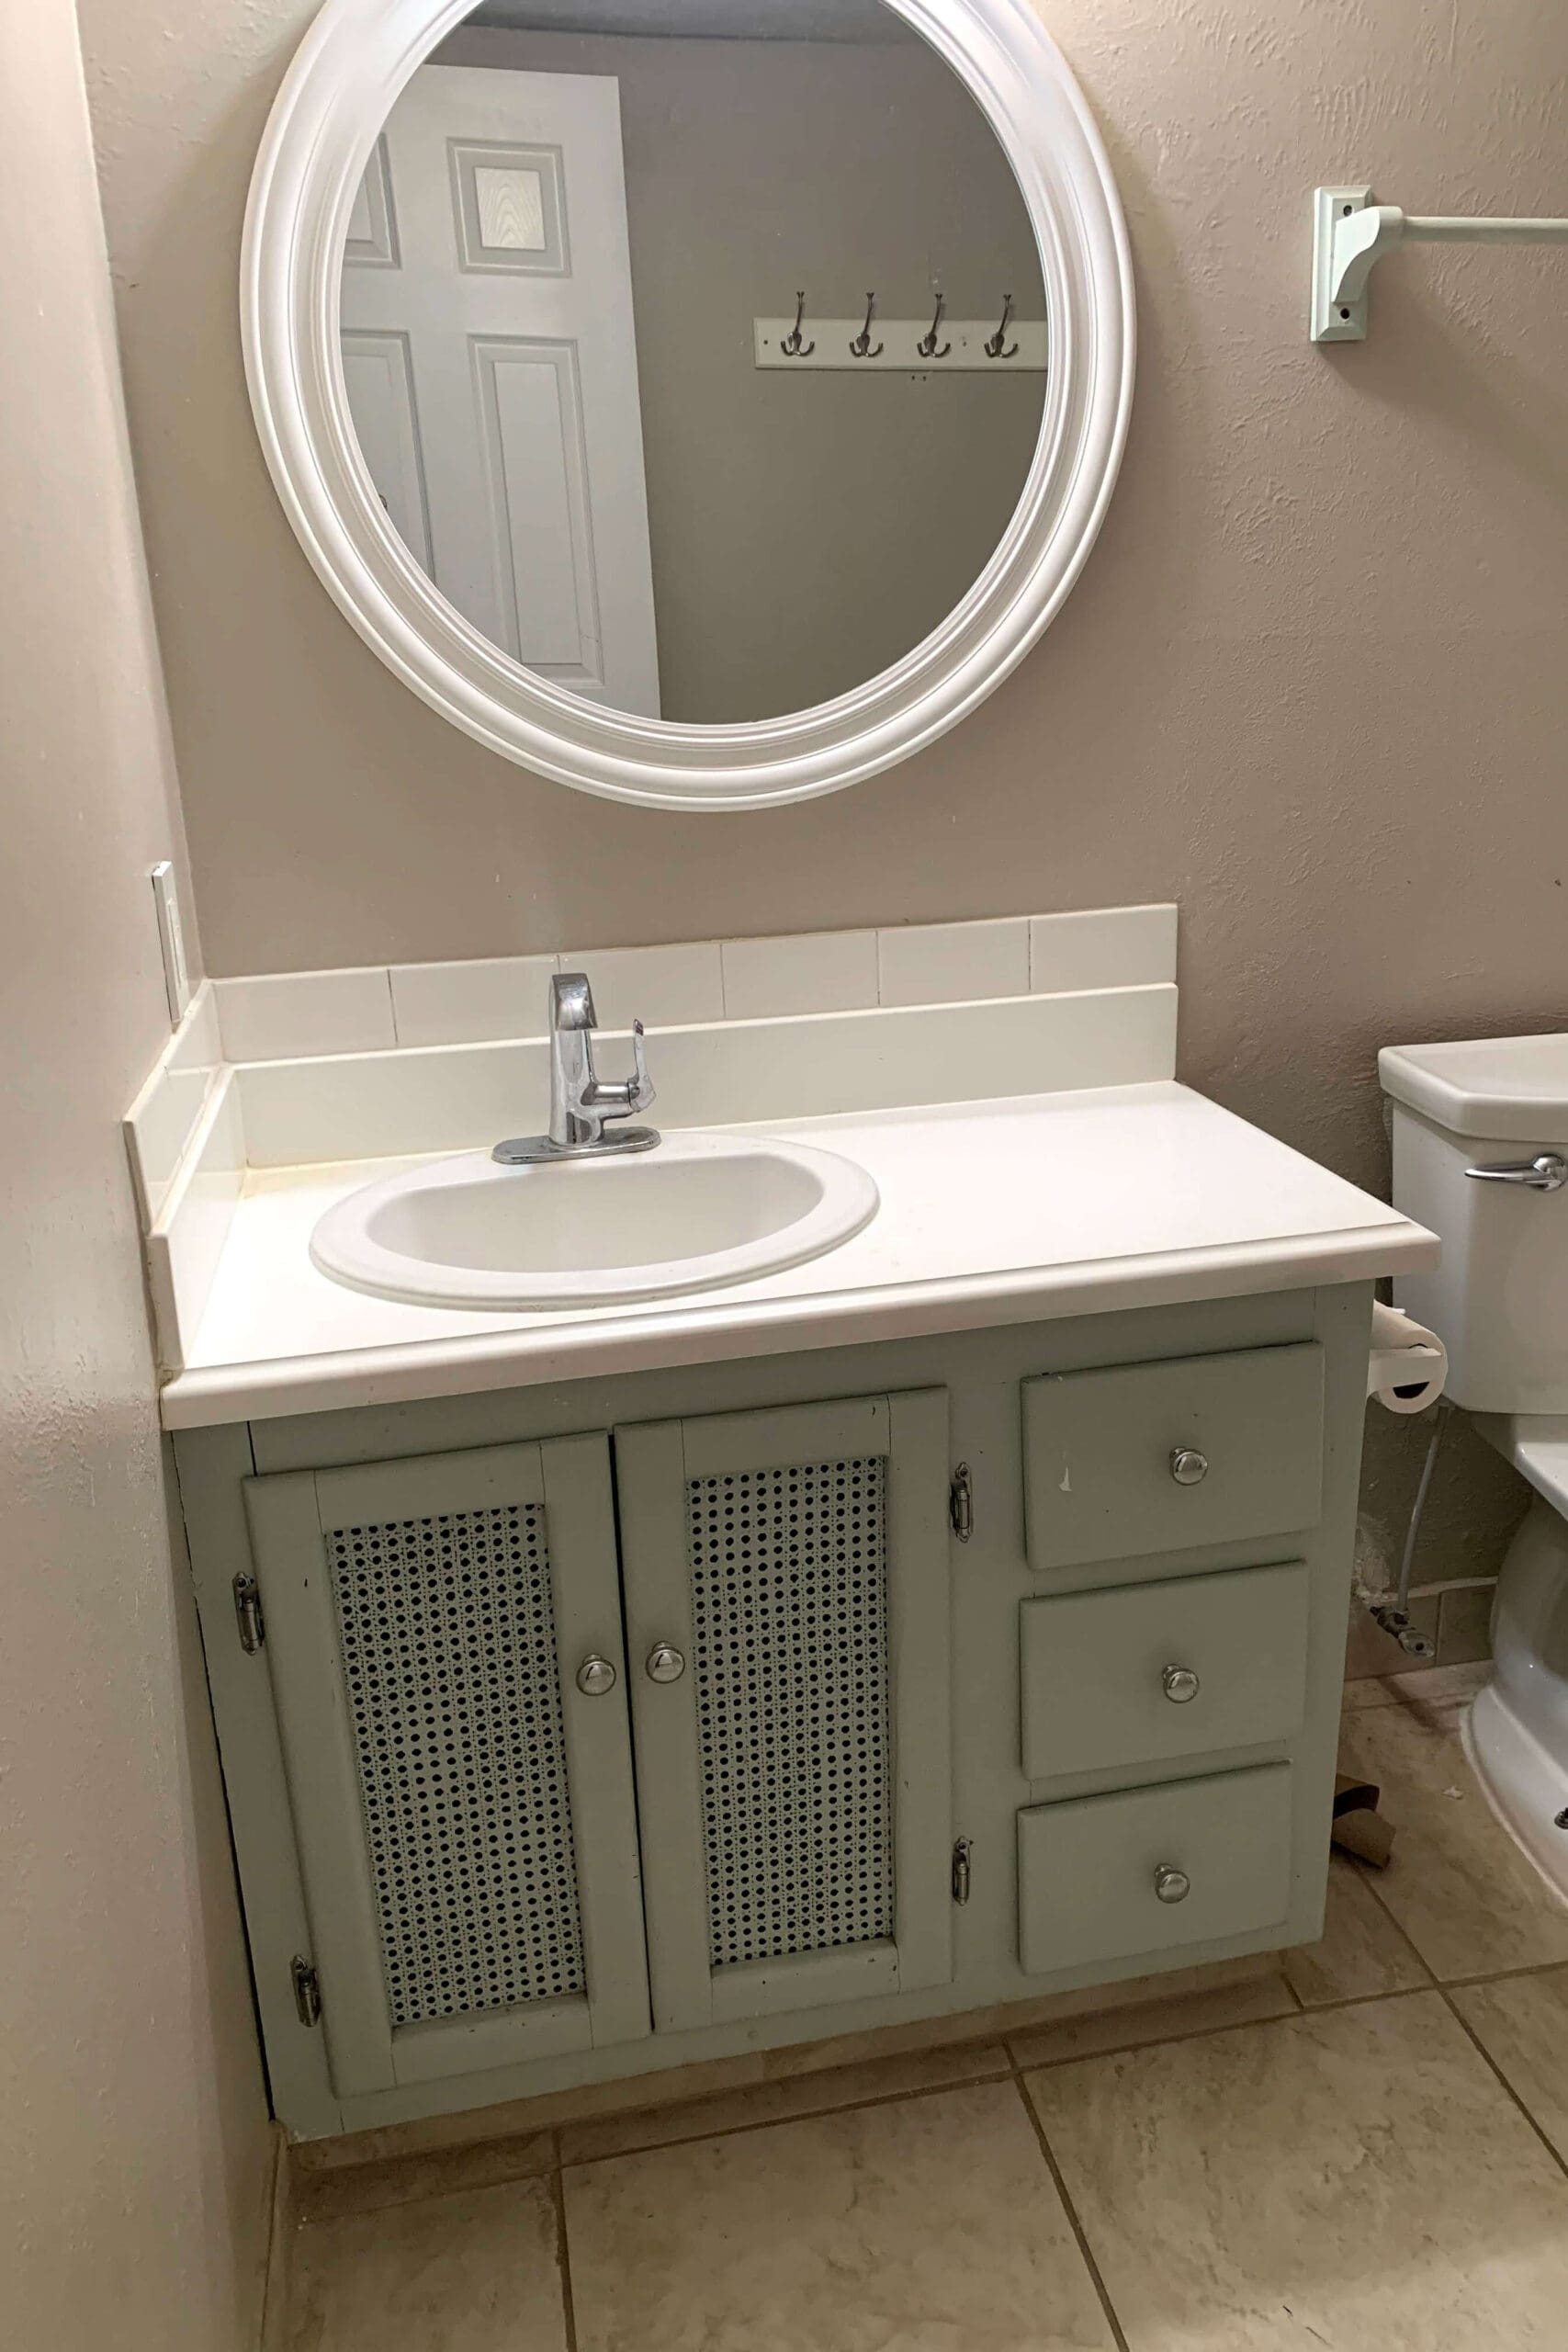
Before any of the pretty updates, this bathroom felt dark and dated. Beige walls, basic tile, a shower surround with a strange window, and a tired vanity all made the room feel dingy rather than cozy.
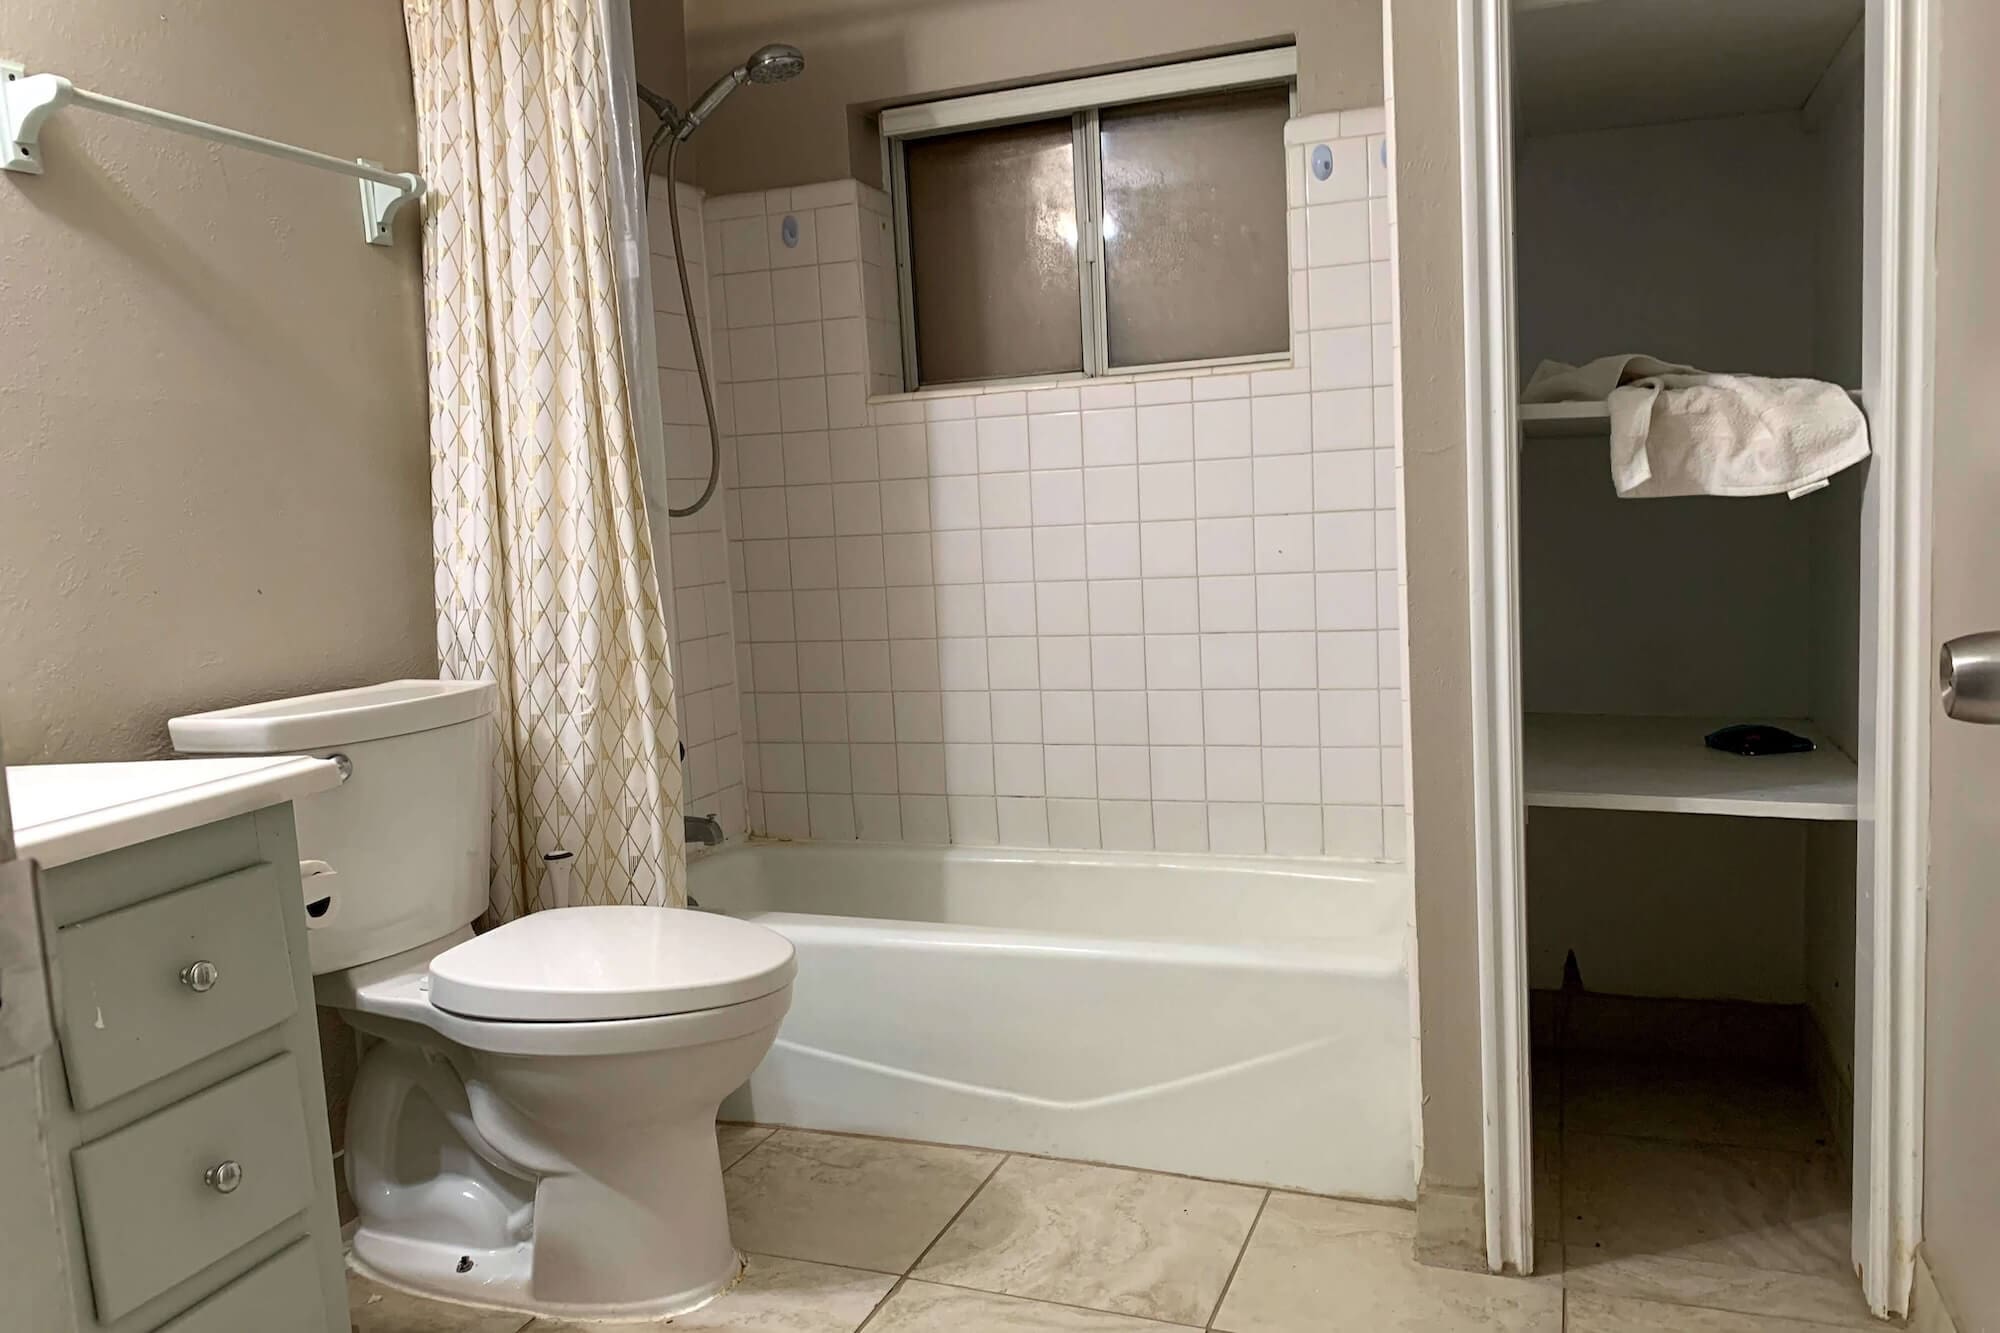
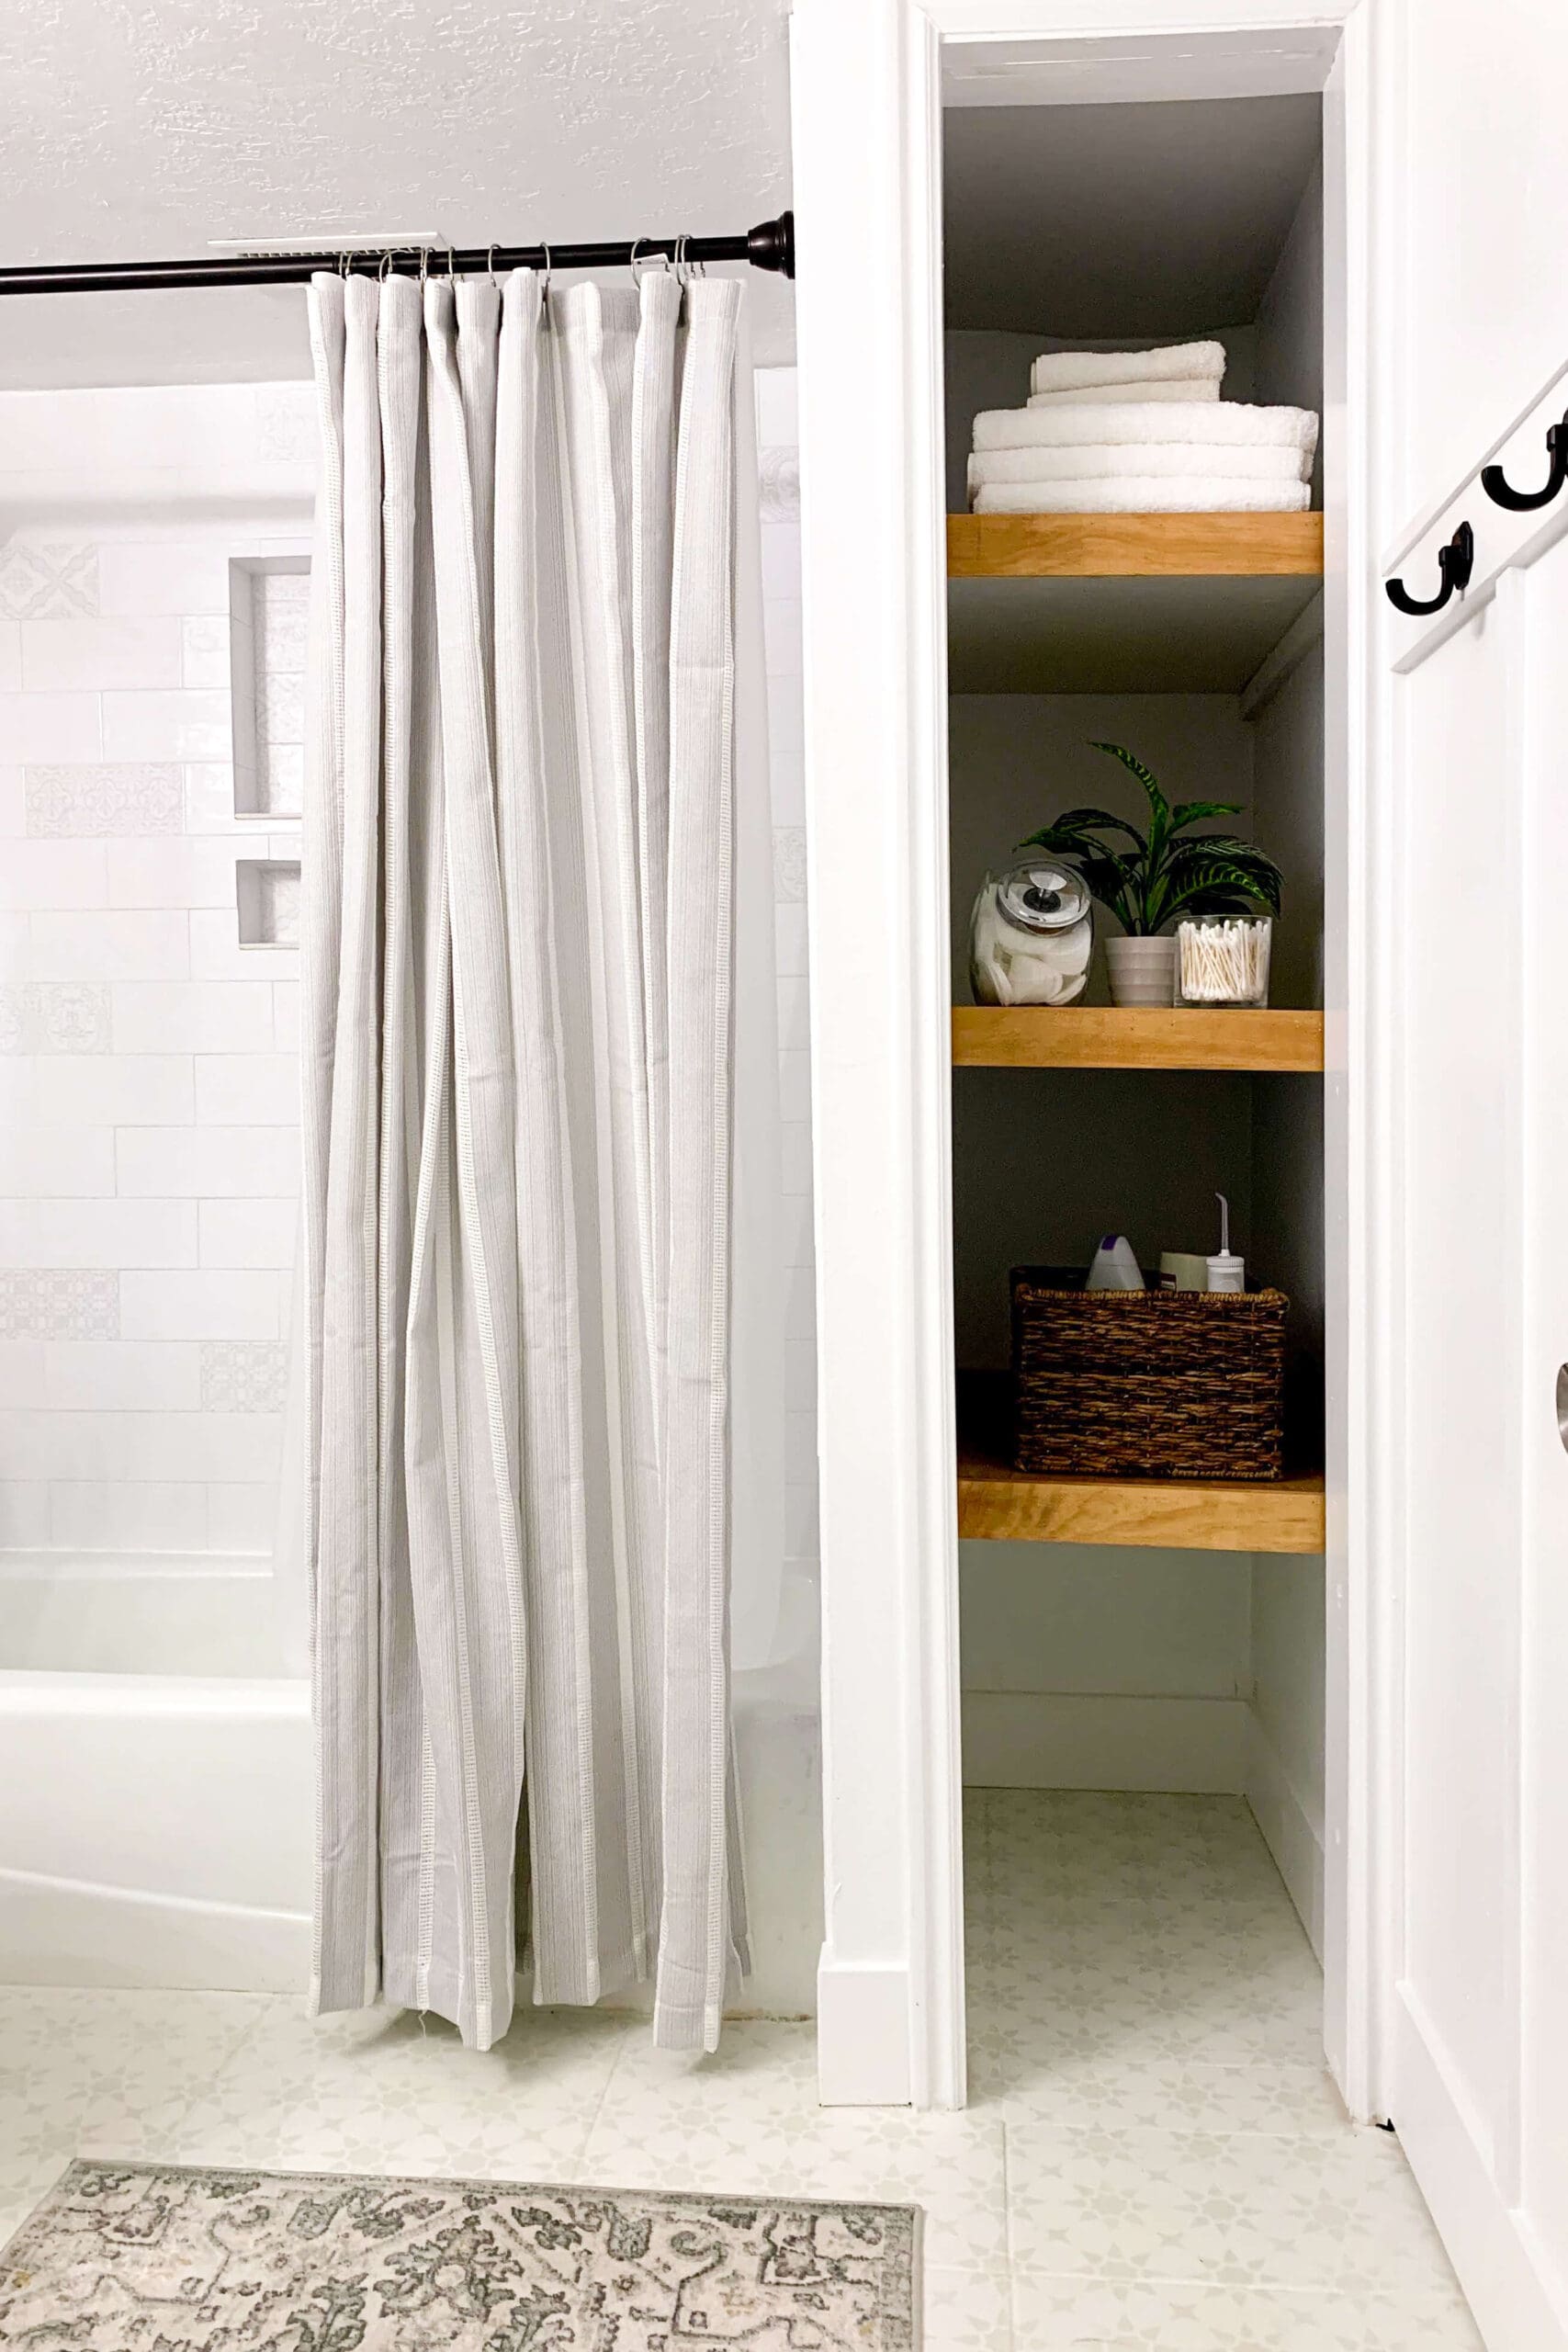
The vanity had a worn finish and doors that had clearly lived a hard life, and the floor tiles were a flat beige that did nothing for the space. The linen closet shelves were just thin white boards that looked like they belonged in a garage more than a bathroom.
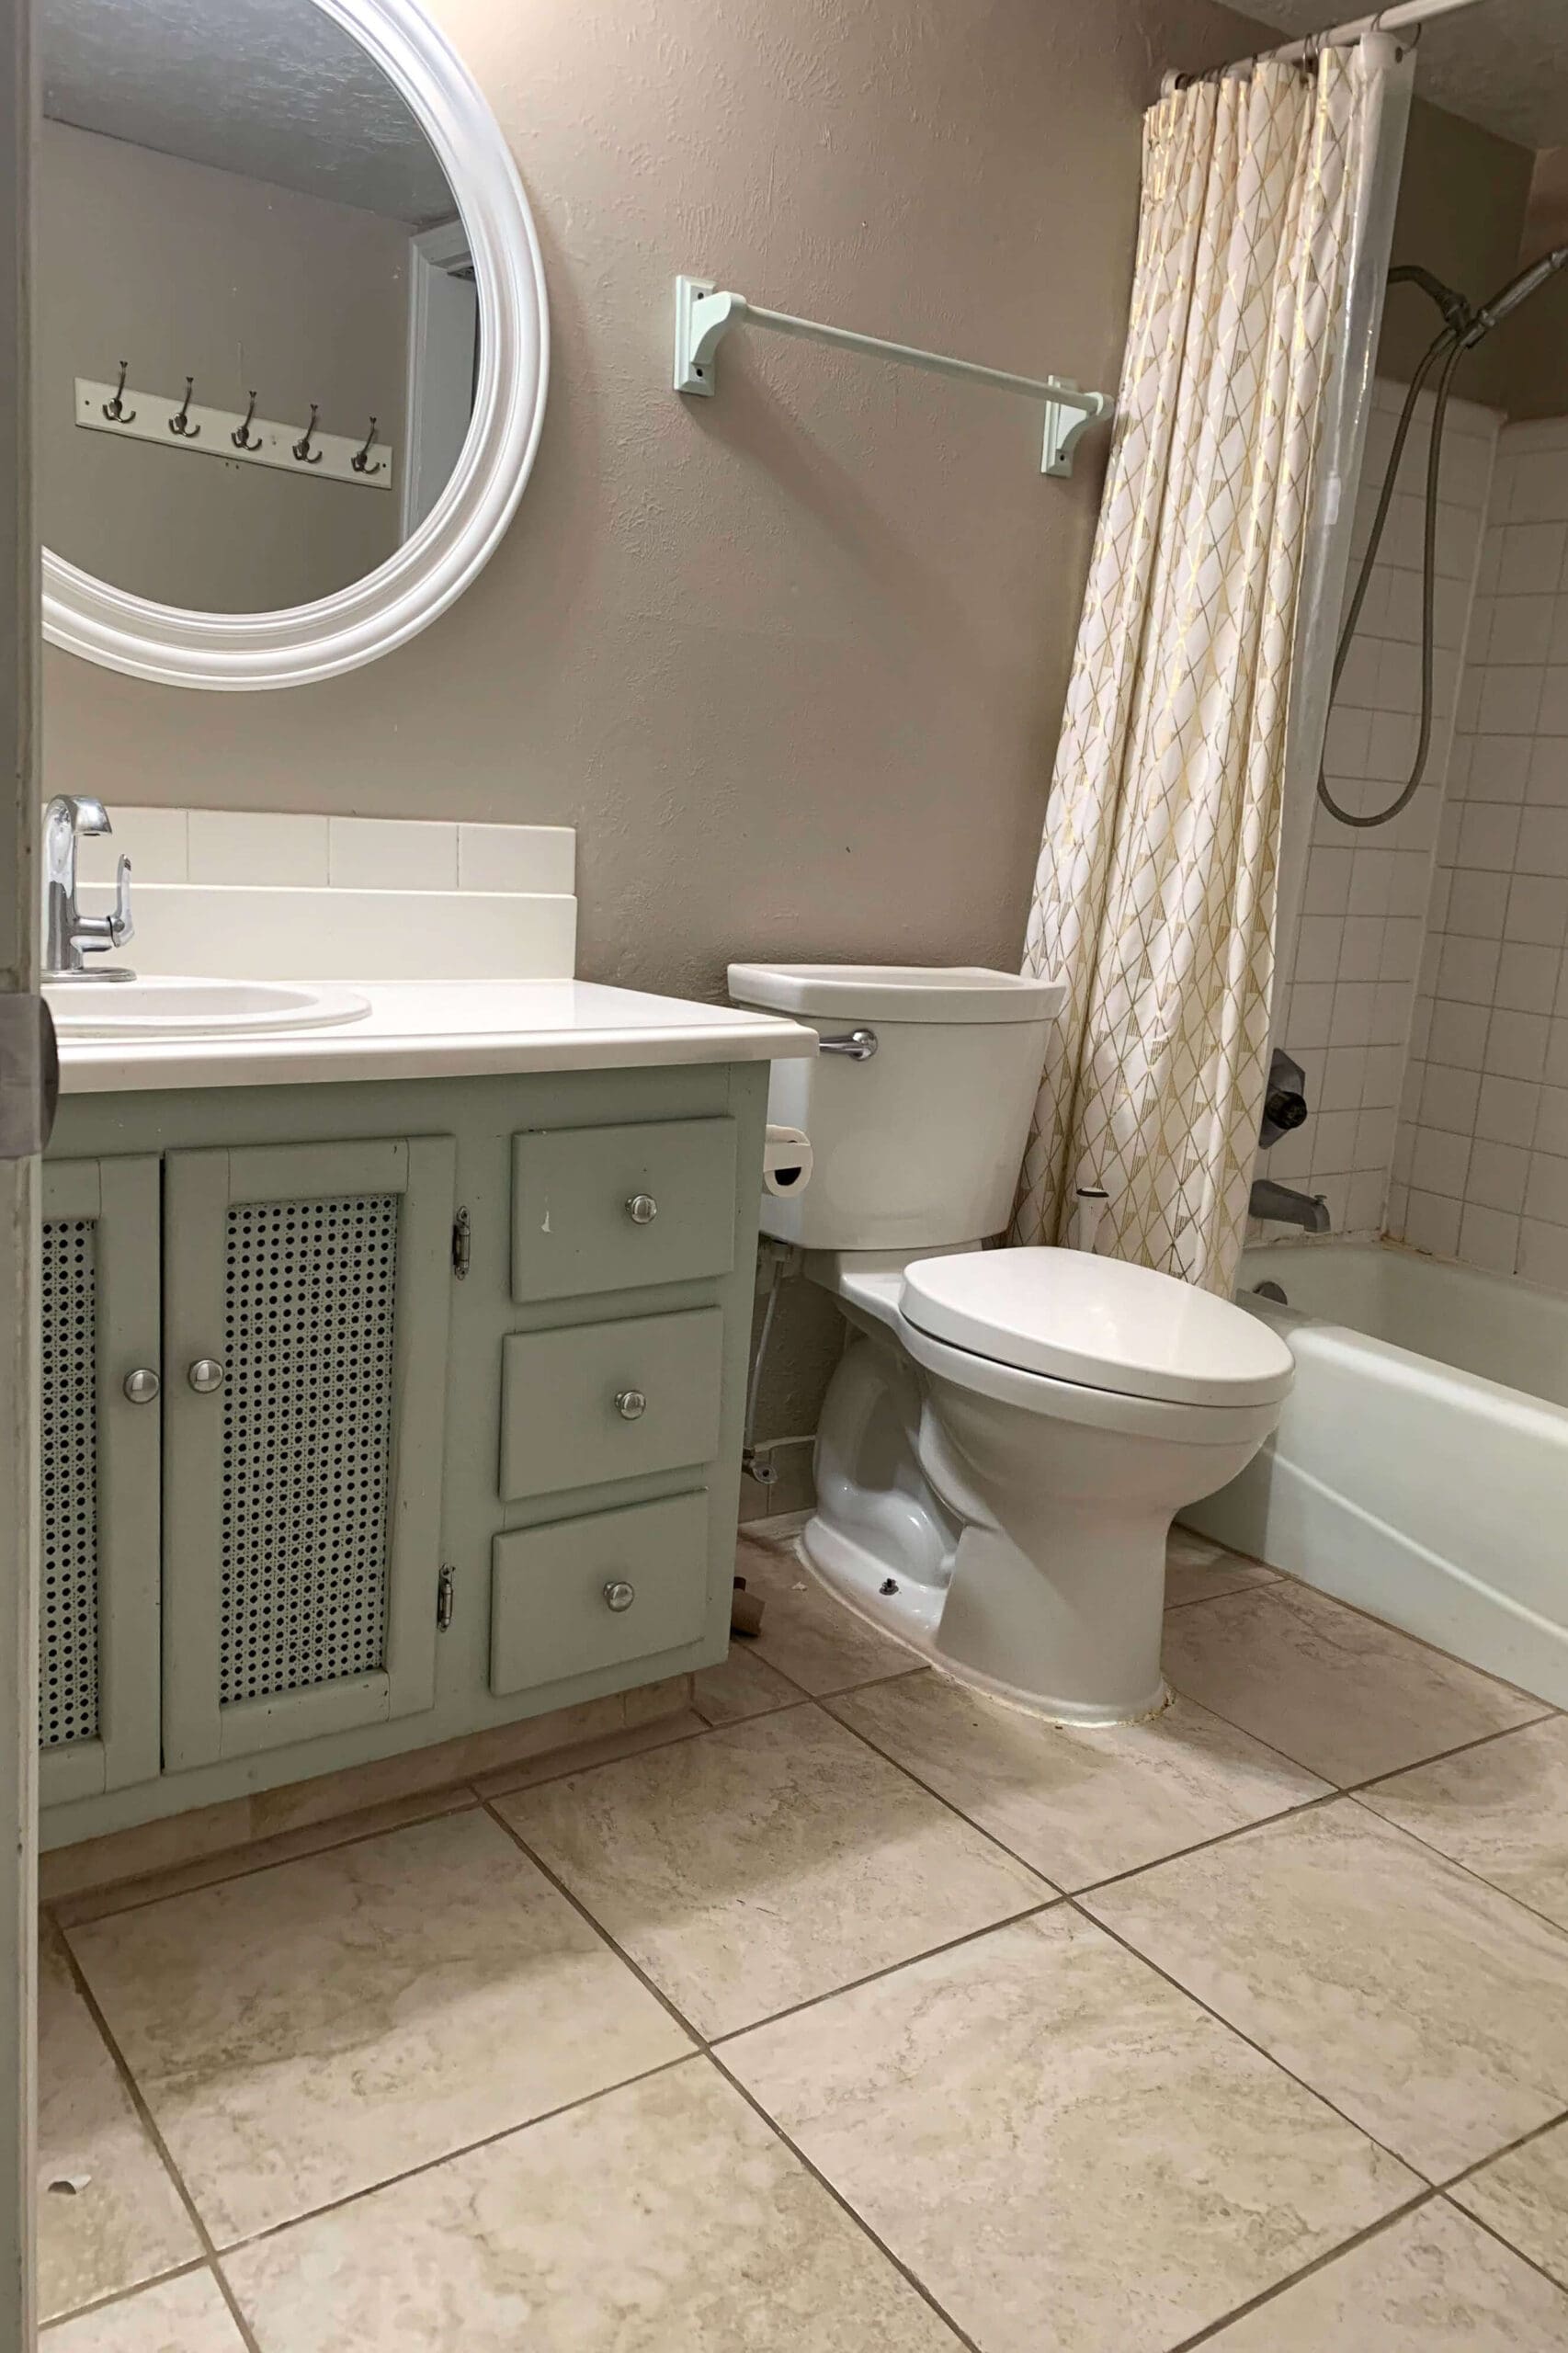
It was a true basement bathroom remodel project-usable, but not somewhere you’d be excited to get ready every morning.
Step 1: Demo, Mold Removal & Shower Prep
For the full step-by-step demo, mold removal, and waterproofing process I used in this shower, see How to Get Rid of Mold in a Shower + Prep the Walls for Tile.
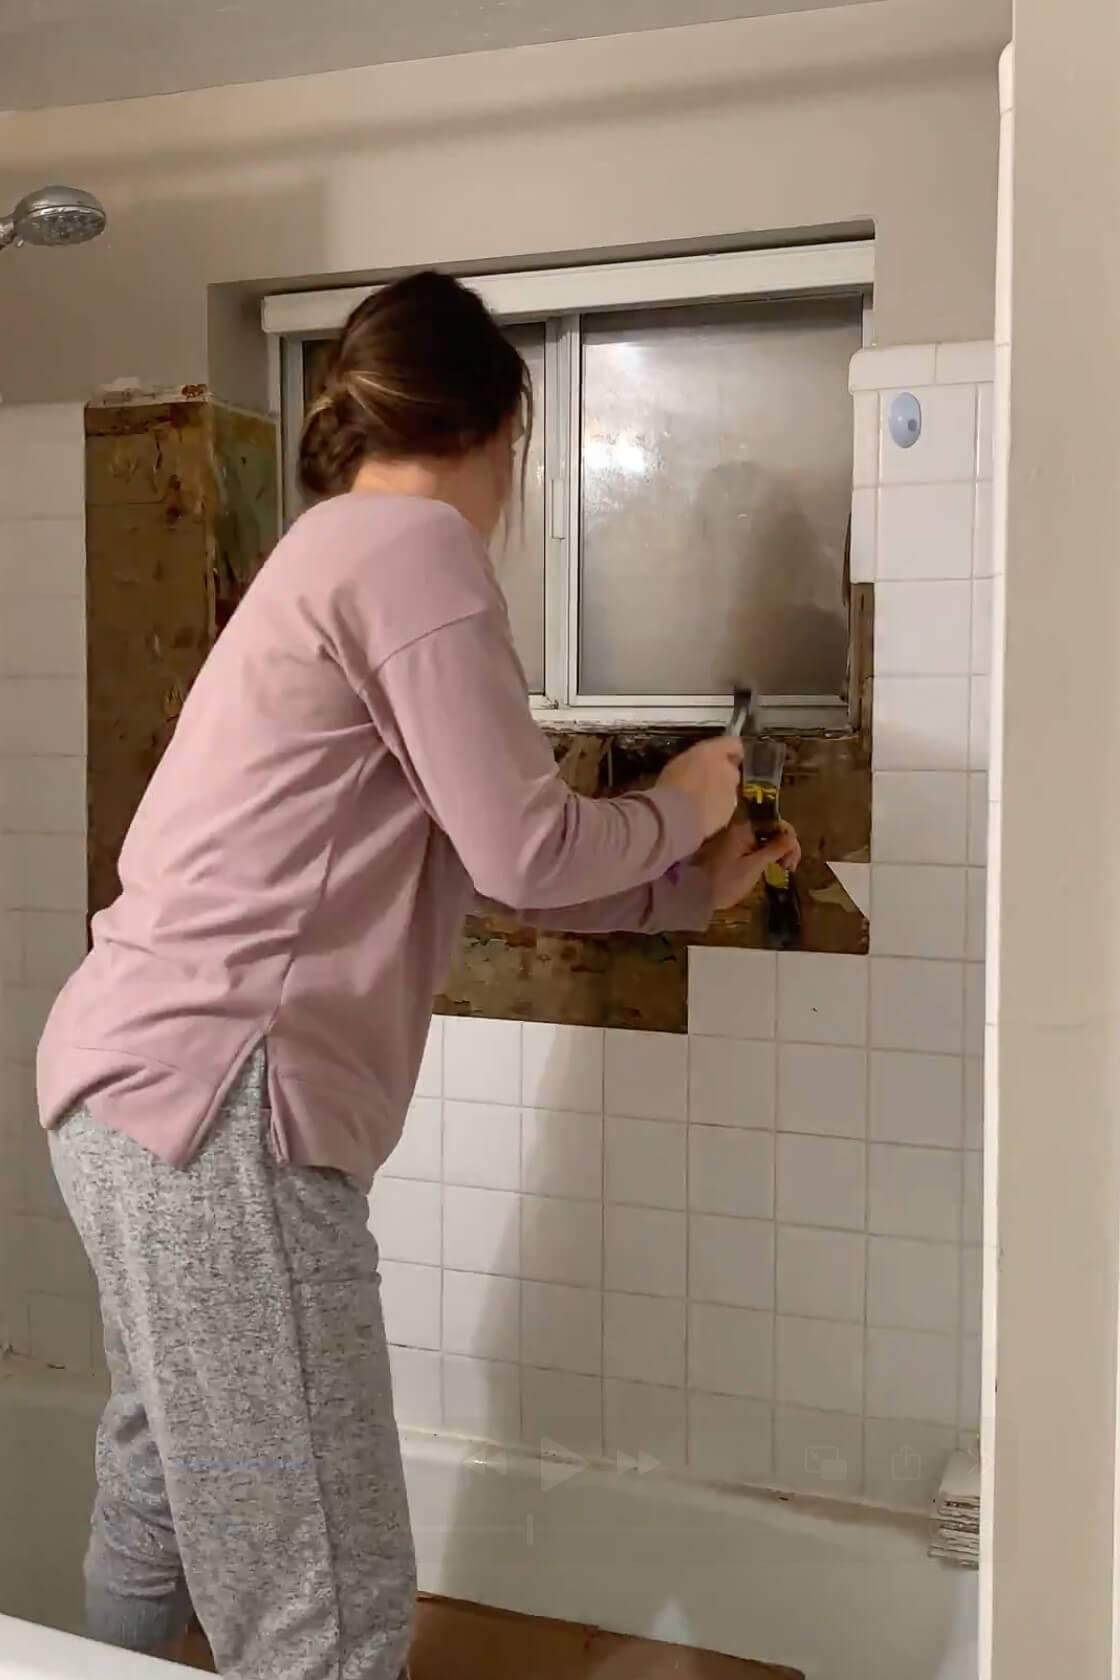
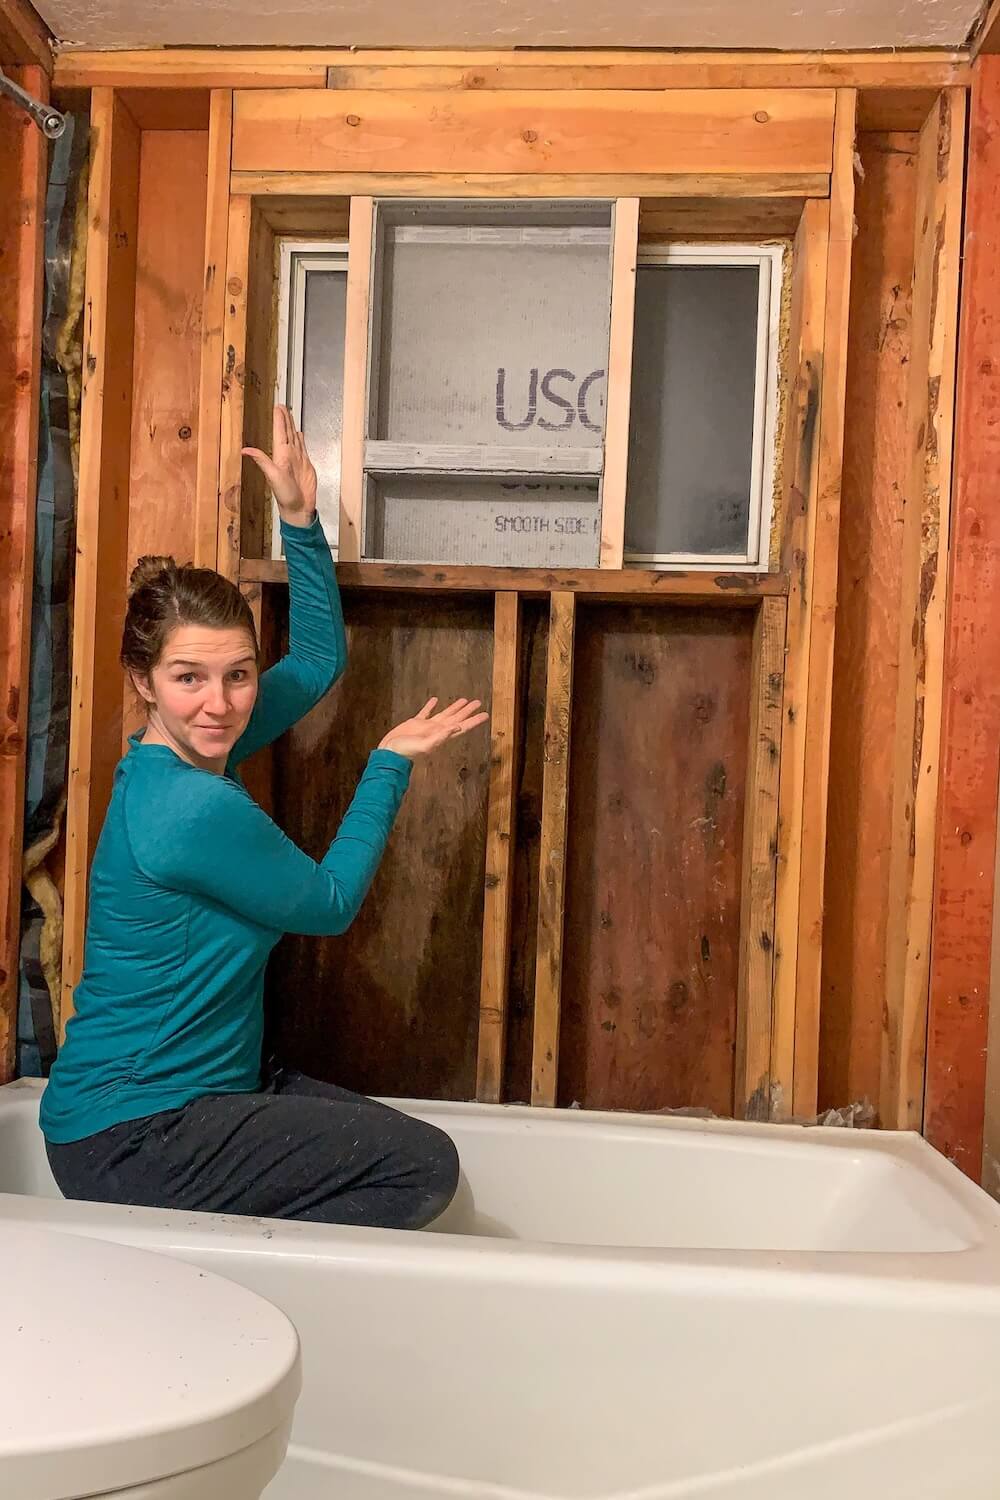
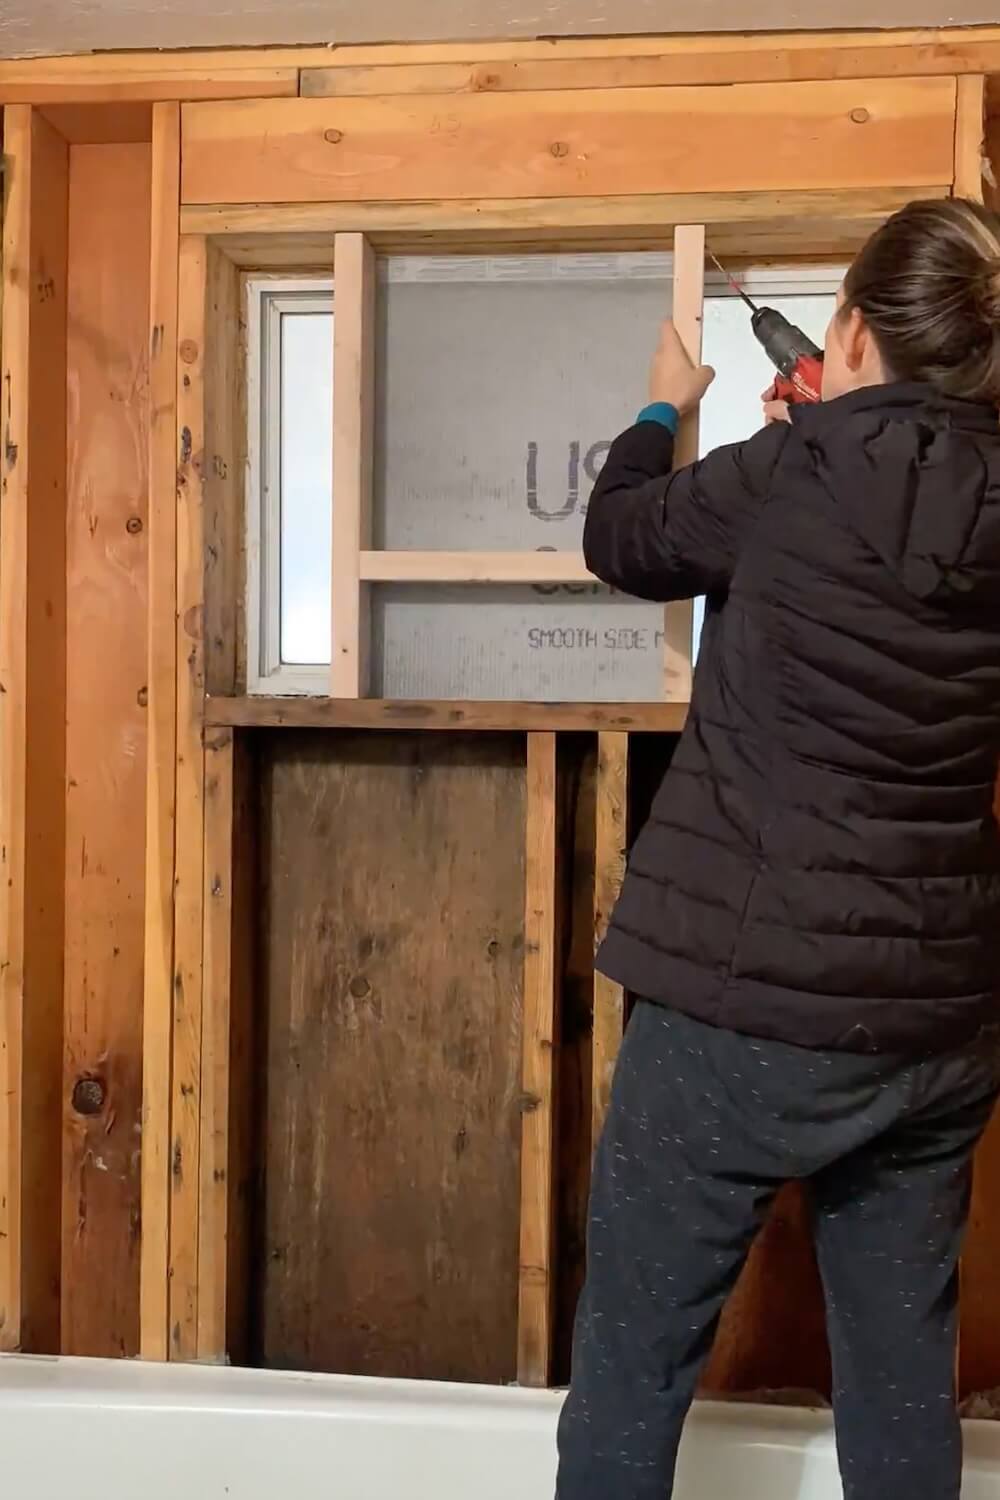
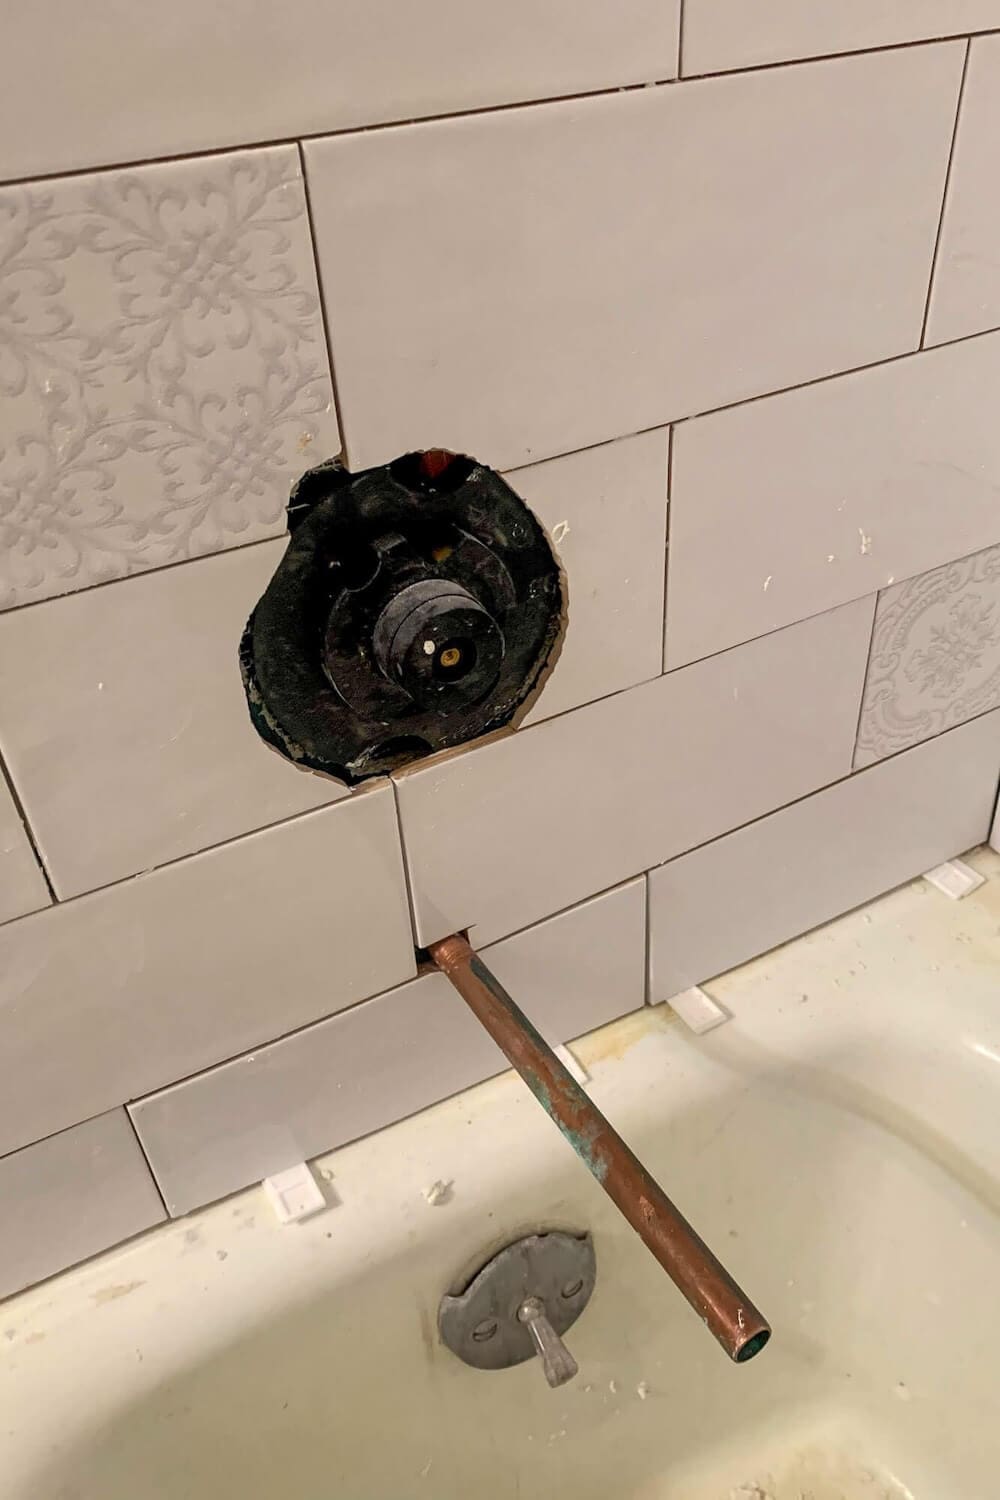
The first big job was getting rid of the failing shower surround and dealing with the mold behind the tile. This was not a “spray it with bleach and move on” situation-it was a full demo and rebuild.
- Removed the old tile and wet greenboard (the tile was practically falling off, which is a big clue there was moisture behind it).
- Bagged all debris in contractor bags to minimize dust and mold spores traveling through the house.

- Cleaned the open wall framing with mold cleaner, then followed up with warm water and white vinegar.
- Let the studs dry completely before rebuilding-this took at least a full day with good ventilation and fans running.
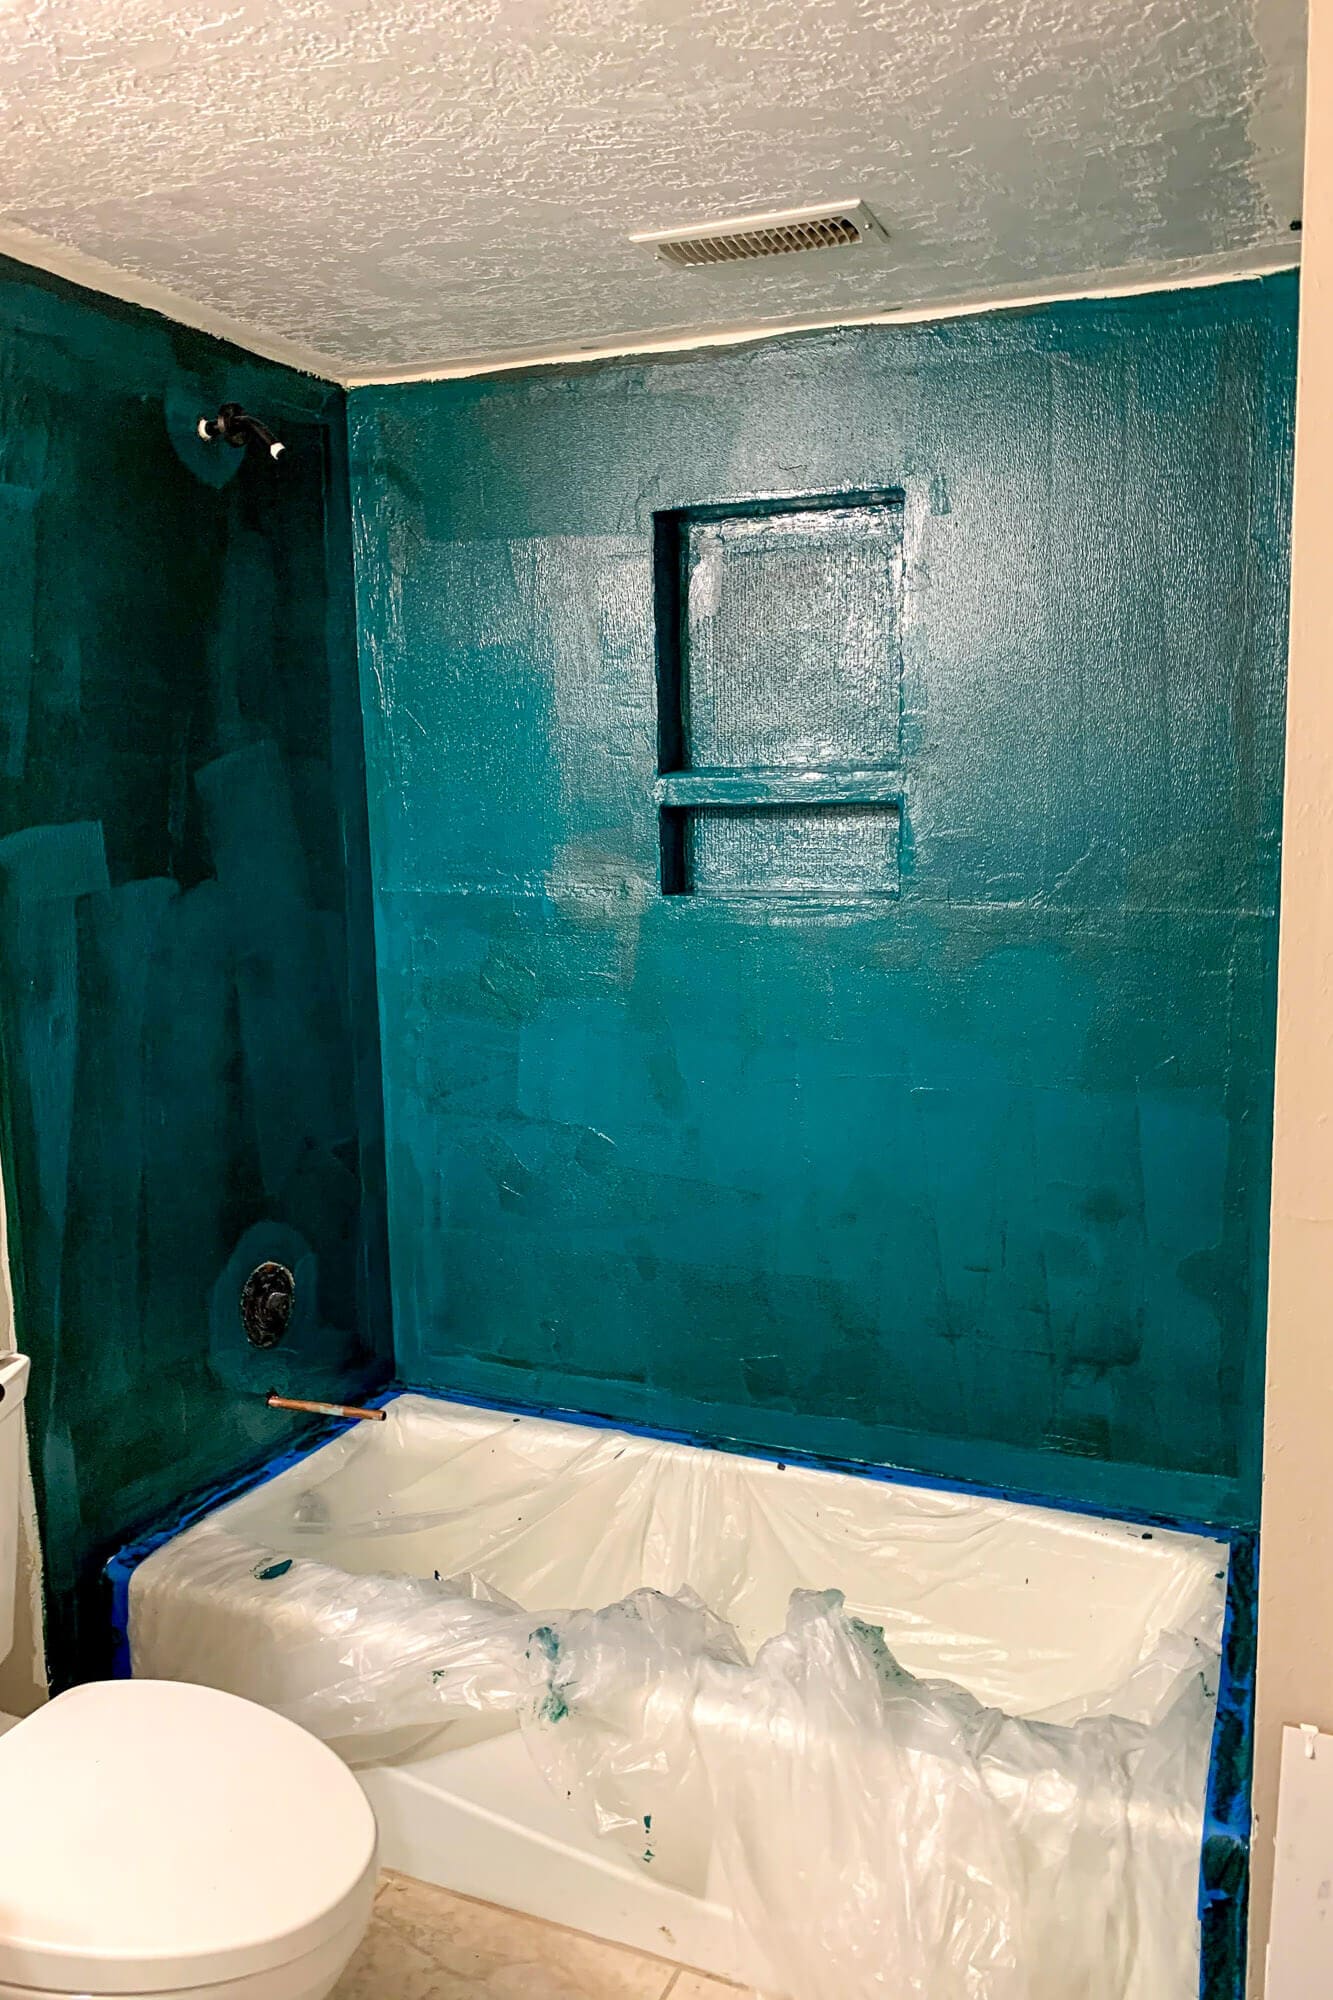
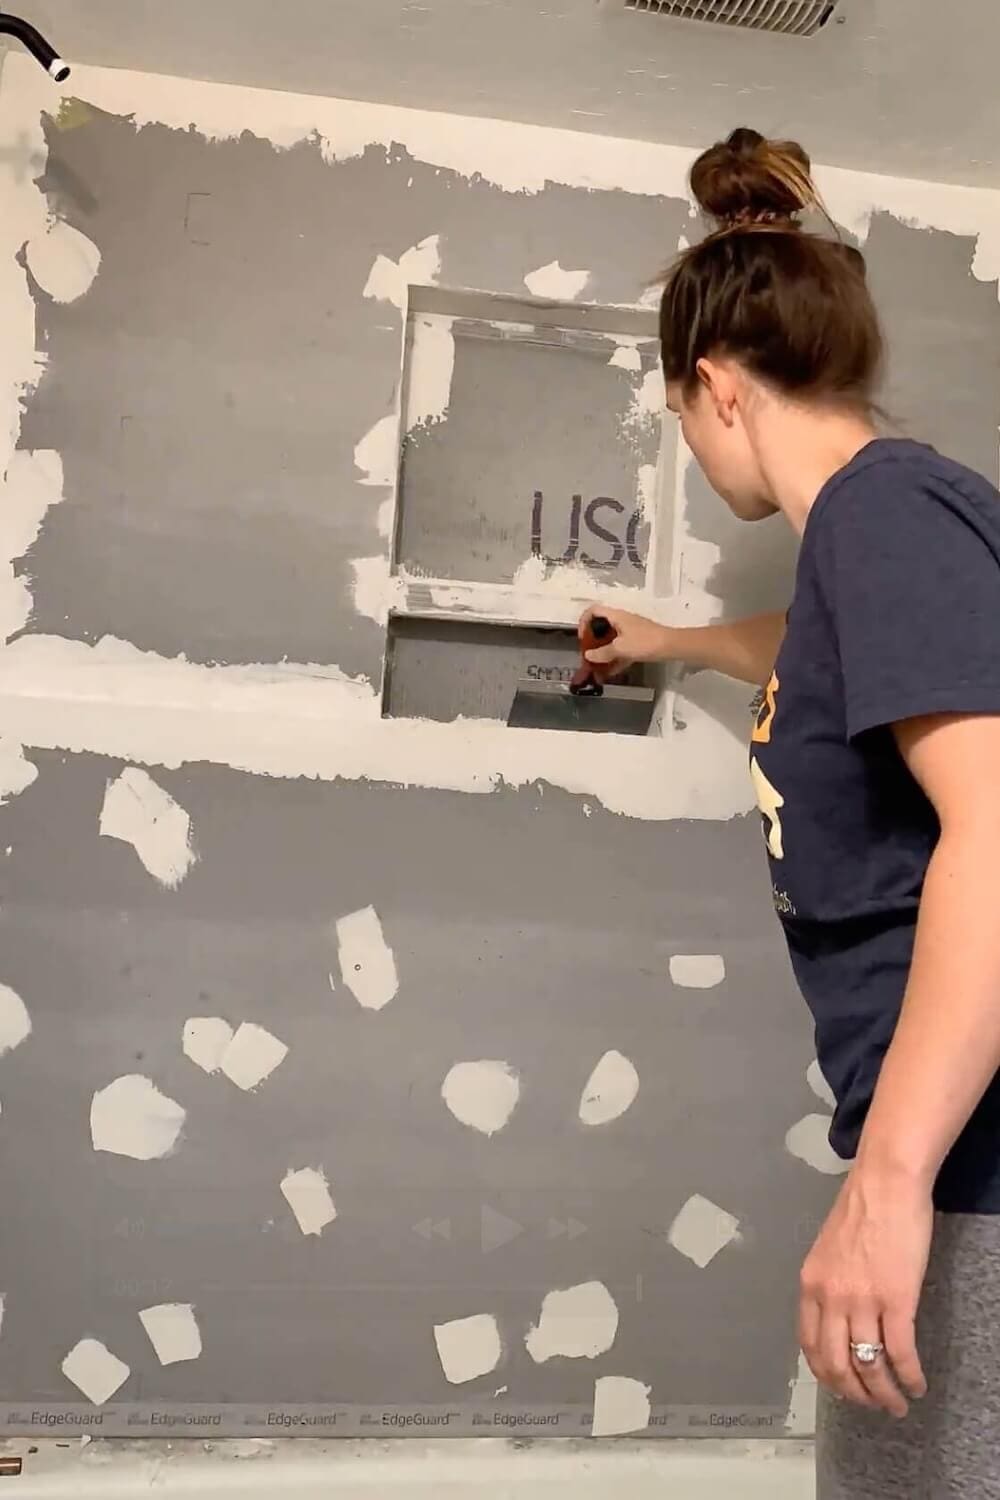
Once everything was dry, I installed ½” cement board instead of greenboard, added blocking where seams didn’t land on studs, taped seams with alkali-resistant mesh, and skimmed them with thinset. Then I rolled on two full coats of liquid waterproofing membrane over every inch of the surround.
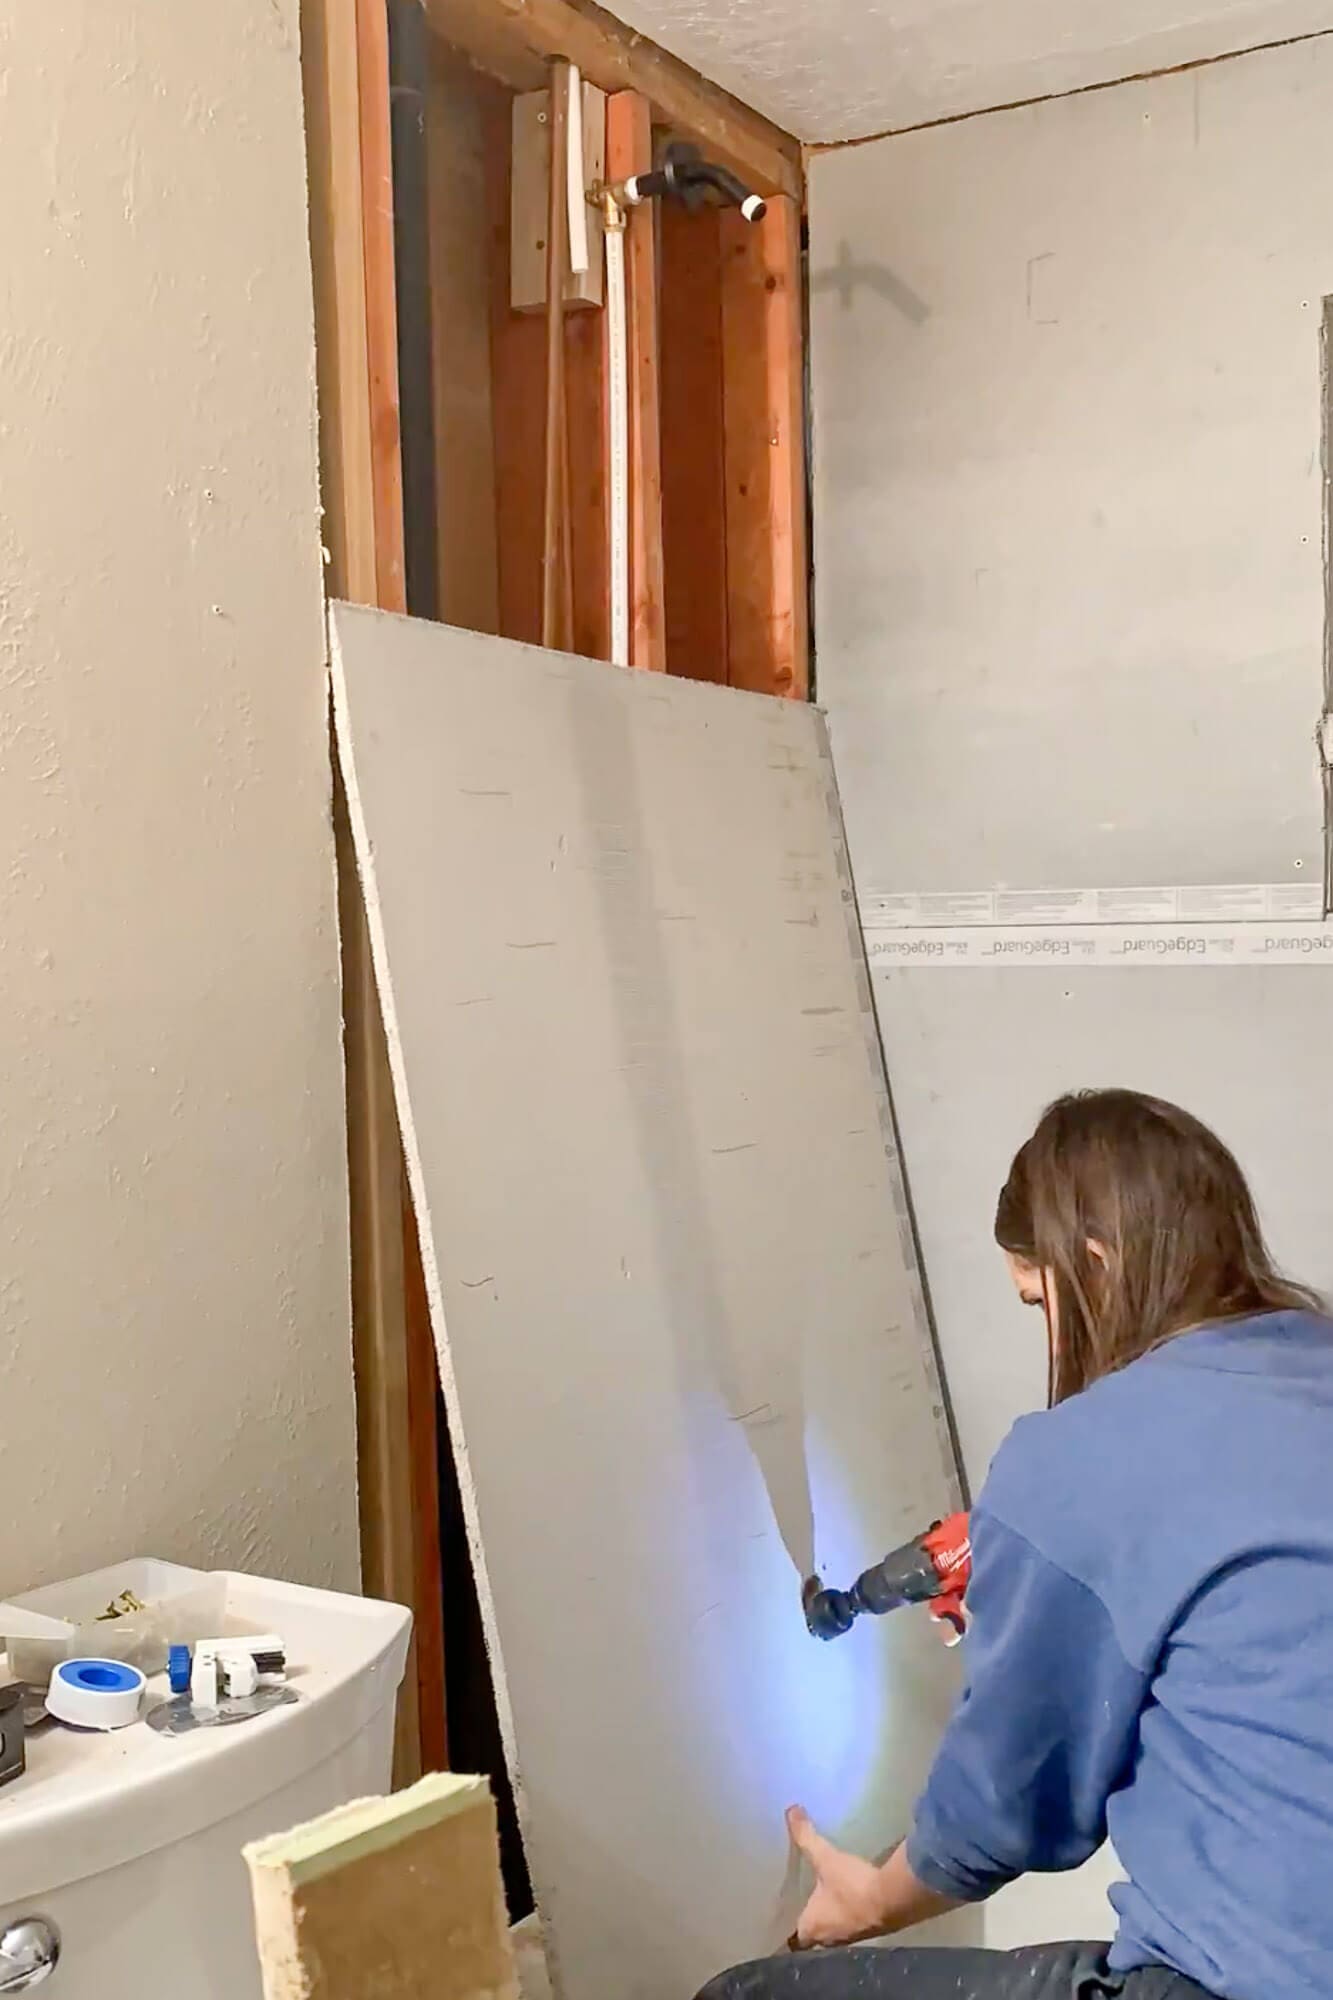
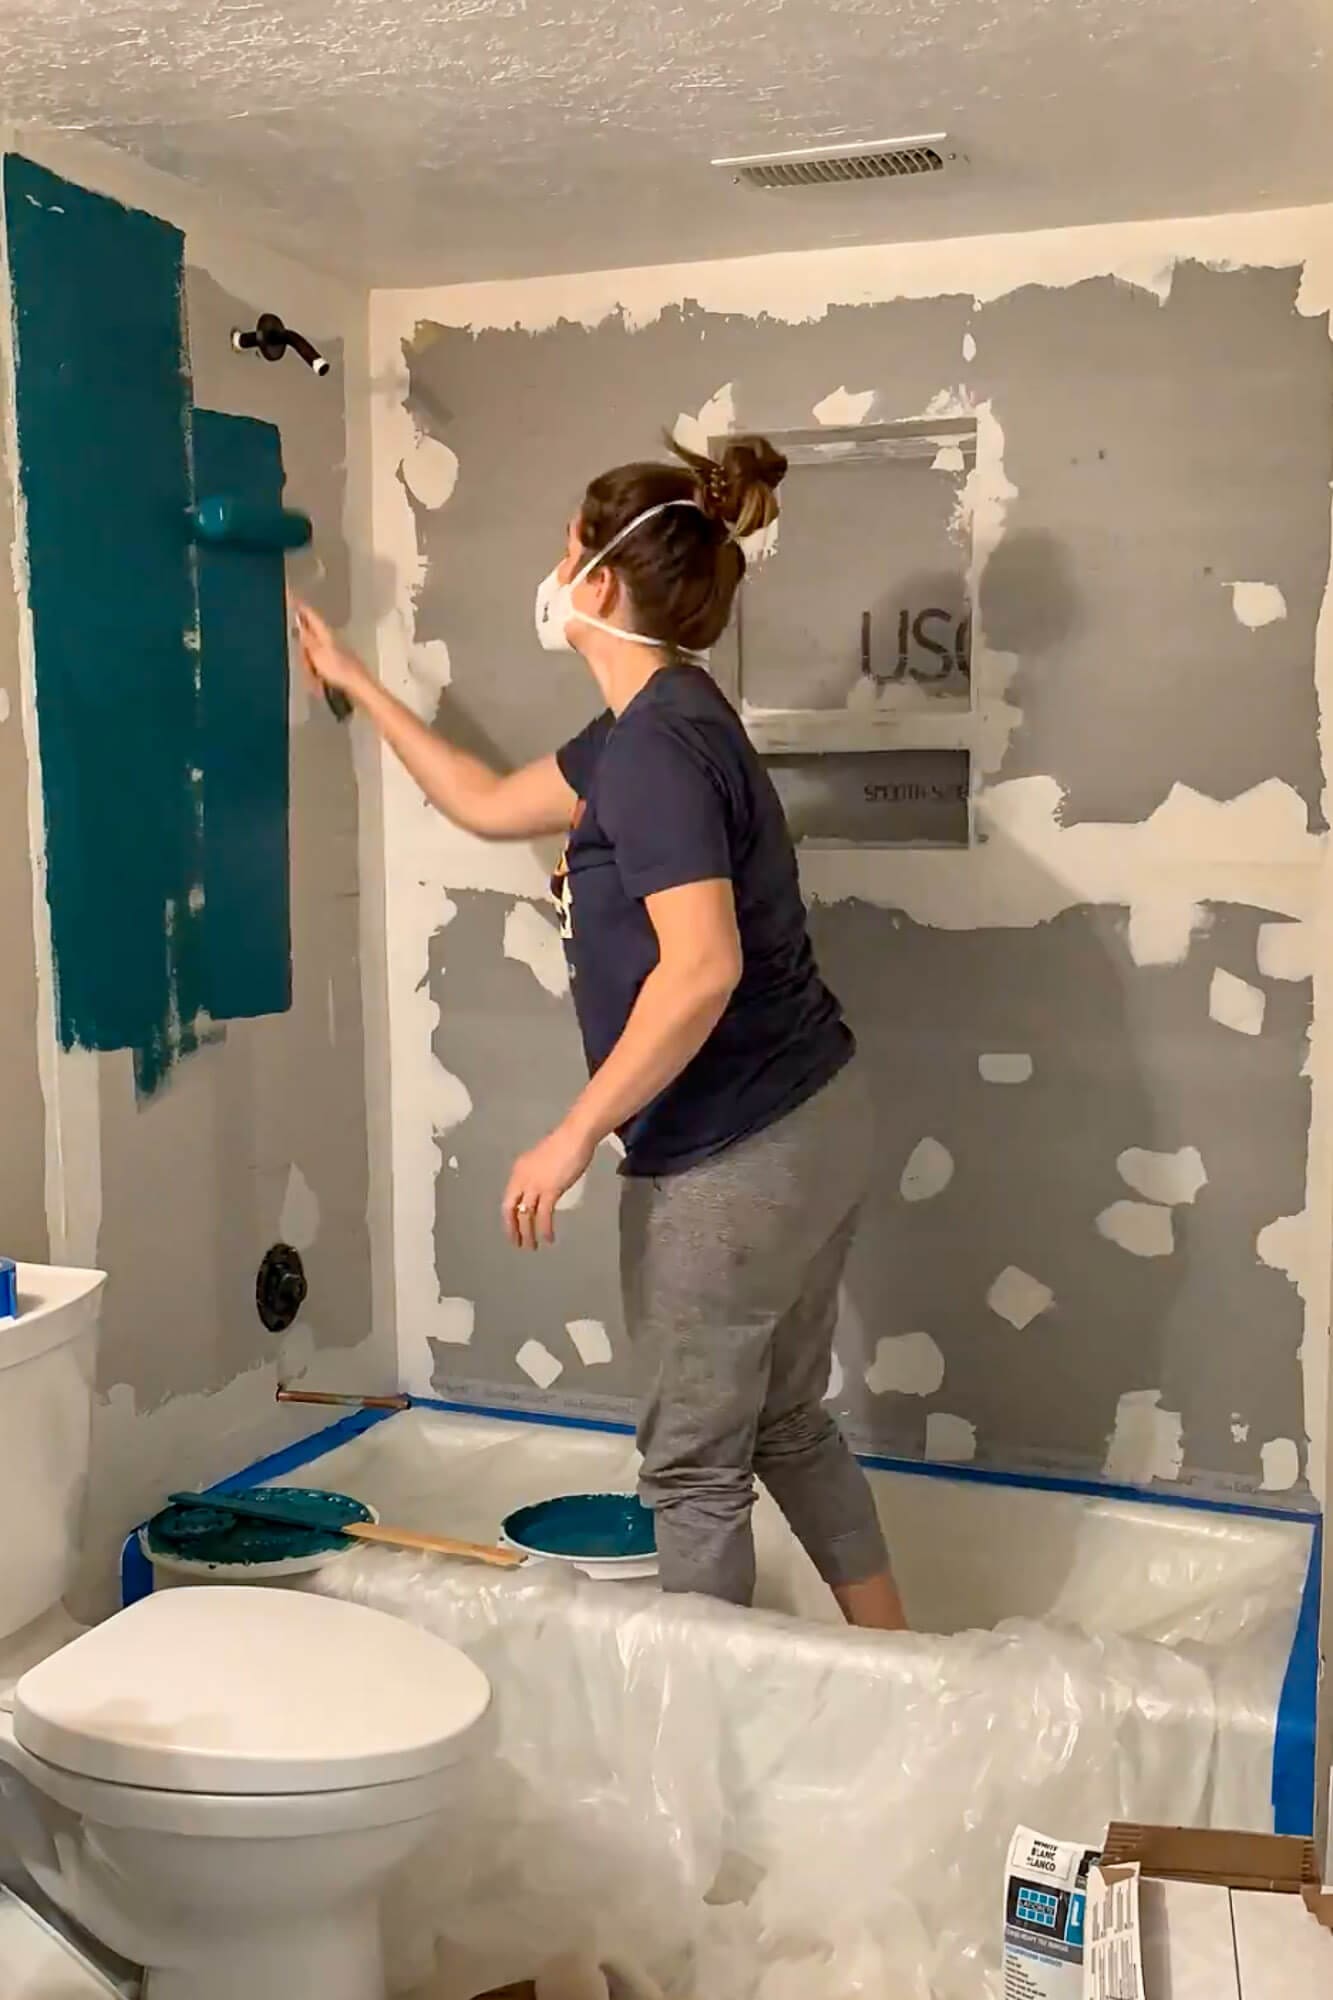
That gave me a solid, waterproof base for tile and set this small bathroom remodel on a budget up to last.
Safety note: I followed local code for waterproofing and used GFCI protection at the vanity.
Step 2: Build a Recessed Shower Niche
If you want to add the same built-in storage, you can follow my detailed niche build in How to Build a Shower Niche (Step-by-Step DIY Tutorial).
With the shower framing exposed, I took the opportunity to add a recessed shower niche-one of the most functional upgrades in any small bathroom.
Key steps:
- Chose a niche height around chest level (roughly 42-48″ from the floor) and sized it based on our tallest bottles and tile layout.
- Framed a box between studs using 2×4s, then attached cement board to the back before installing it.
- Added a slight pitch (1-2°) to the bottom by shimming the front edge so water would drain out instead of pooling.
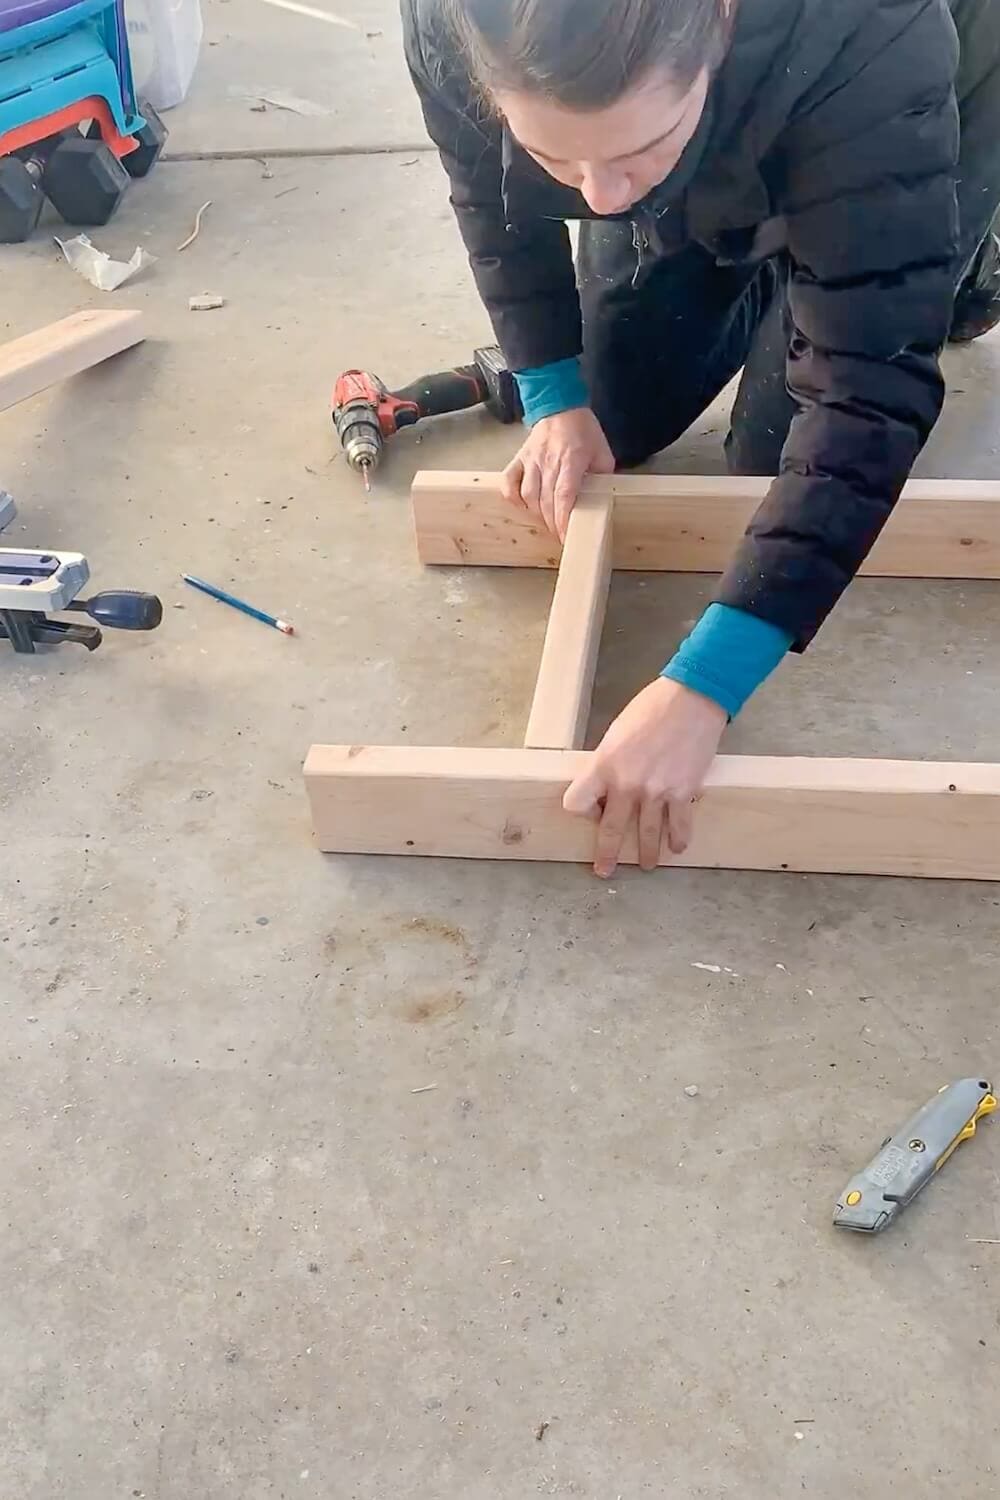
- Secured the box between the studs, then wrapped cement board around the opening.
- Taped and thinset all seams and screw holes, then waterproofed the niche and surrounding wall with two coats of membrane.
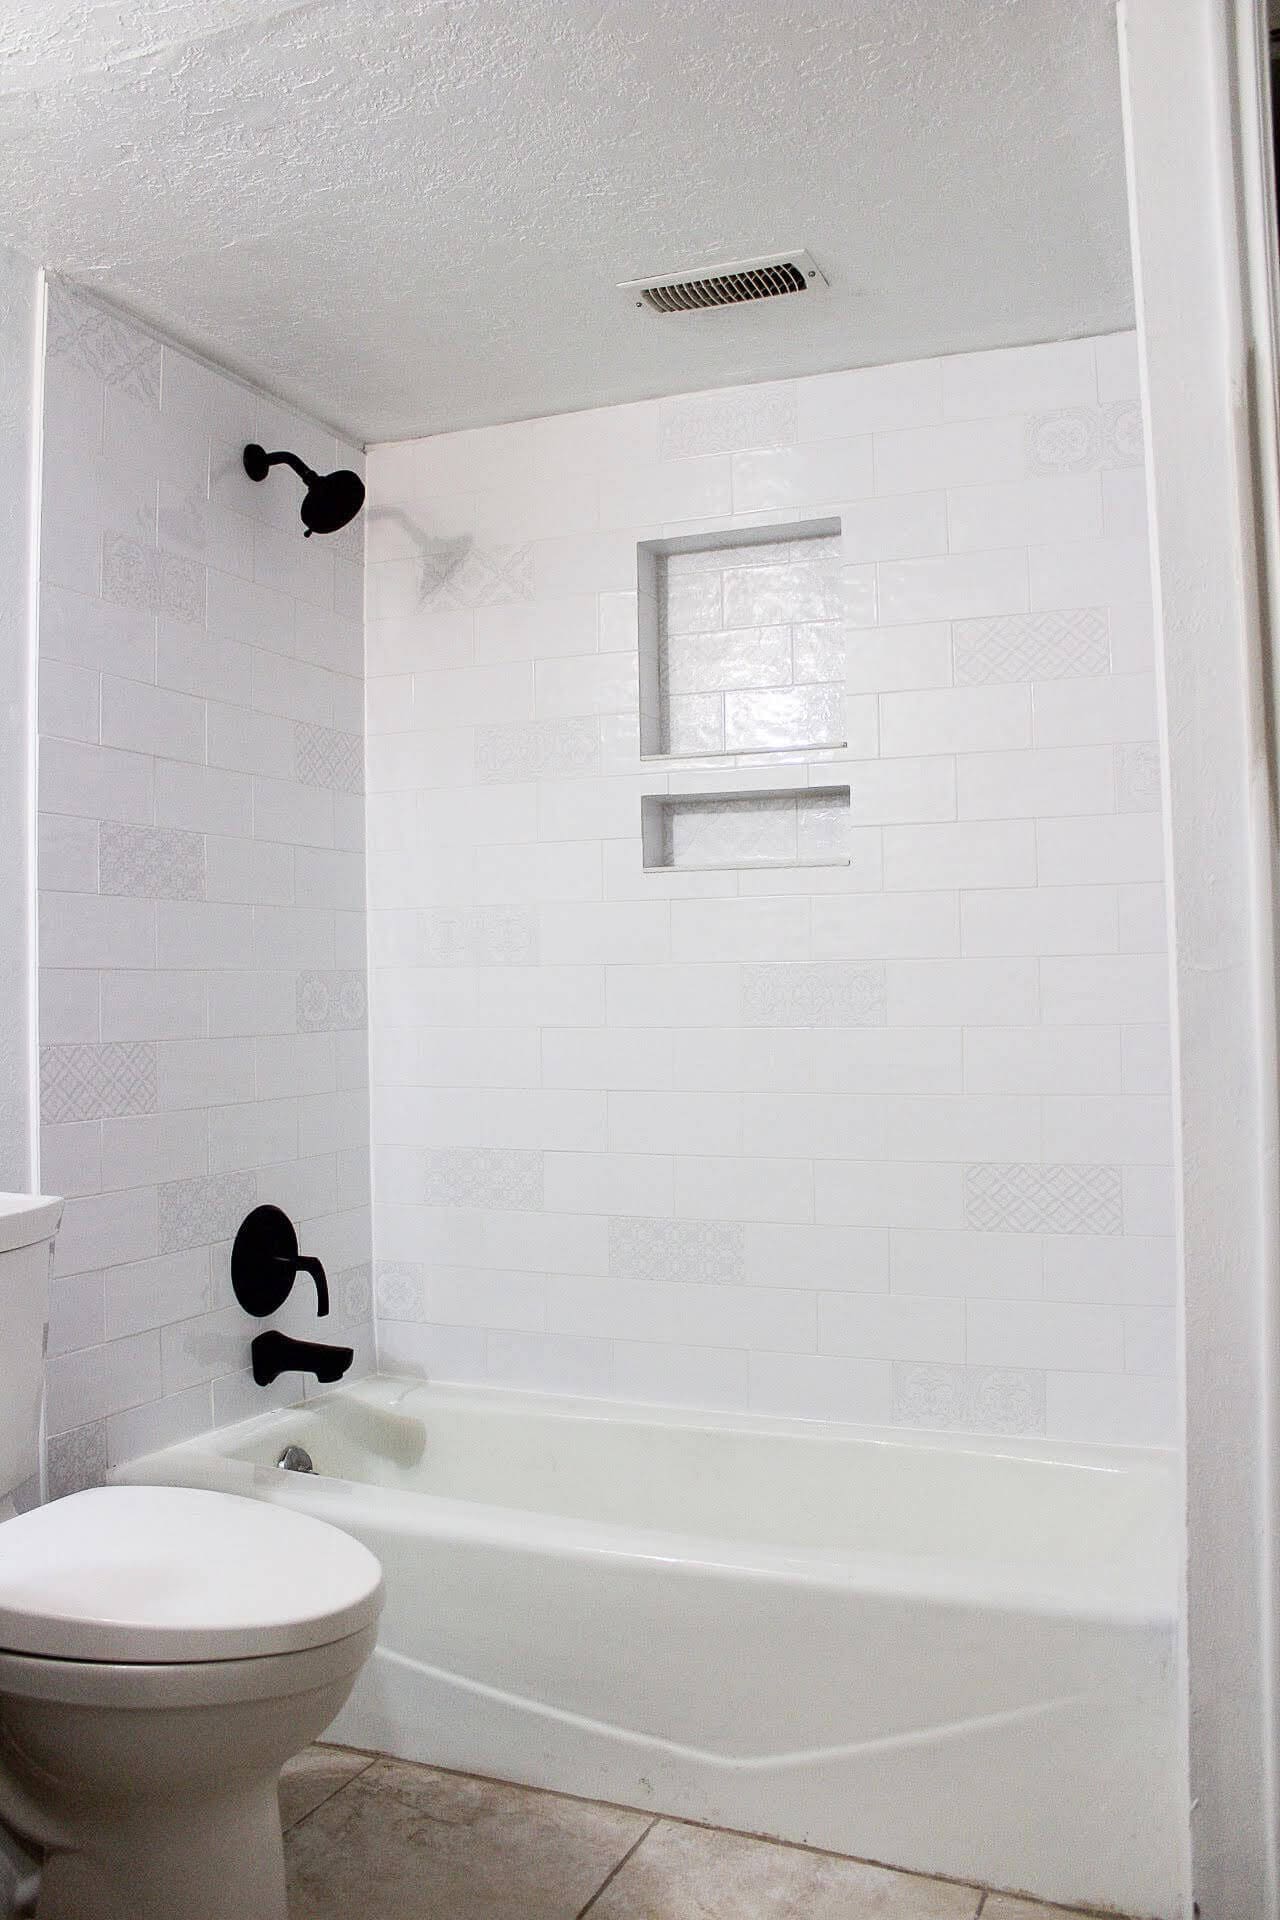
This niche keeps bottles off the tub edge and instantly makes the shower feel more custom.
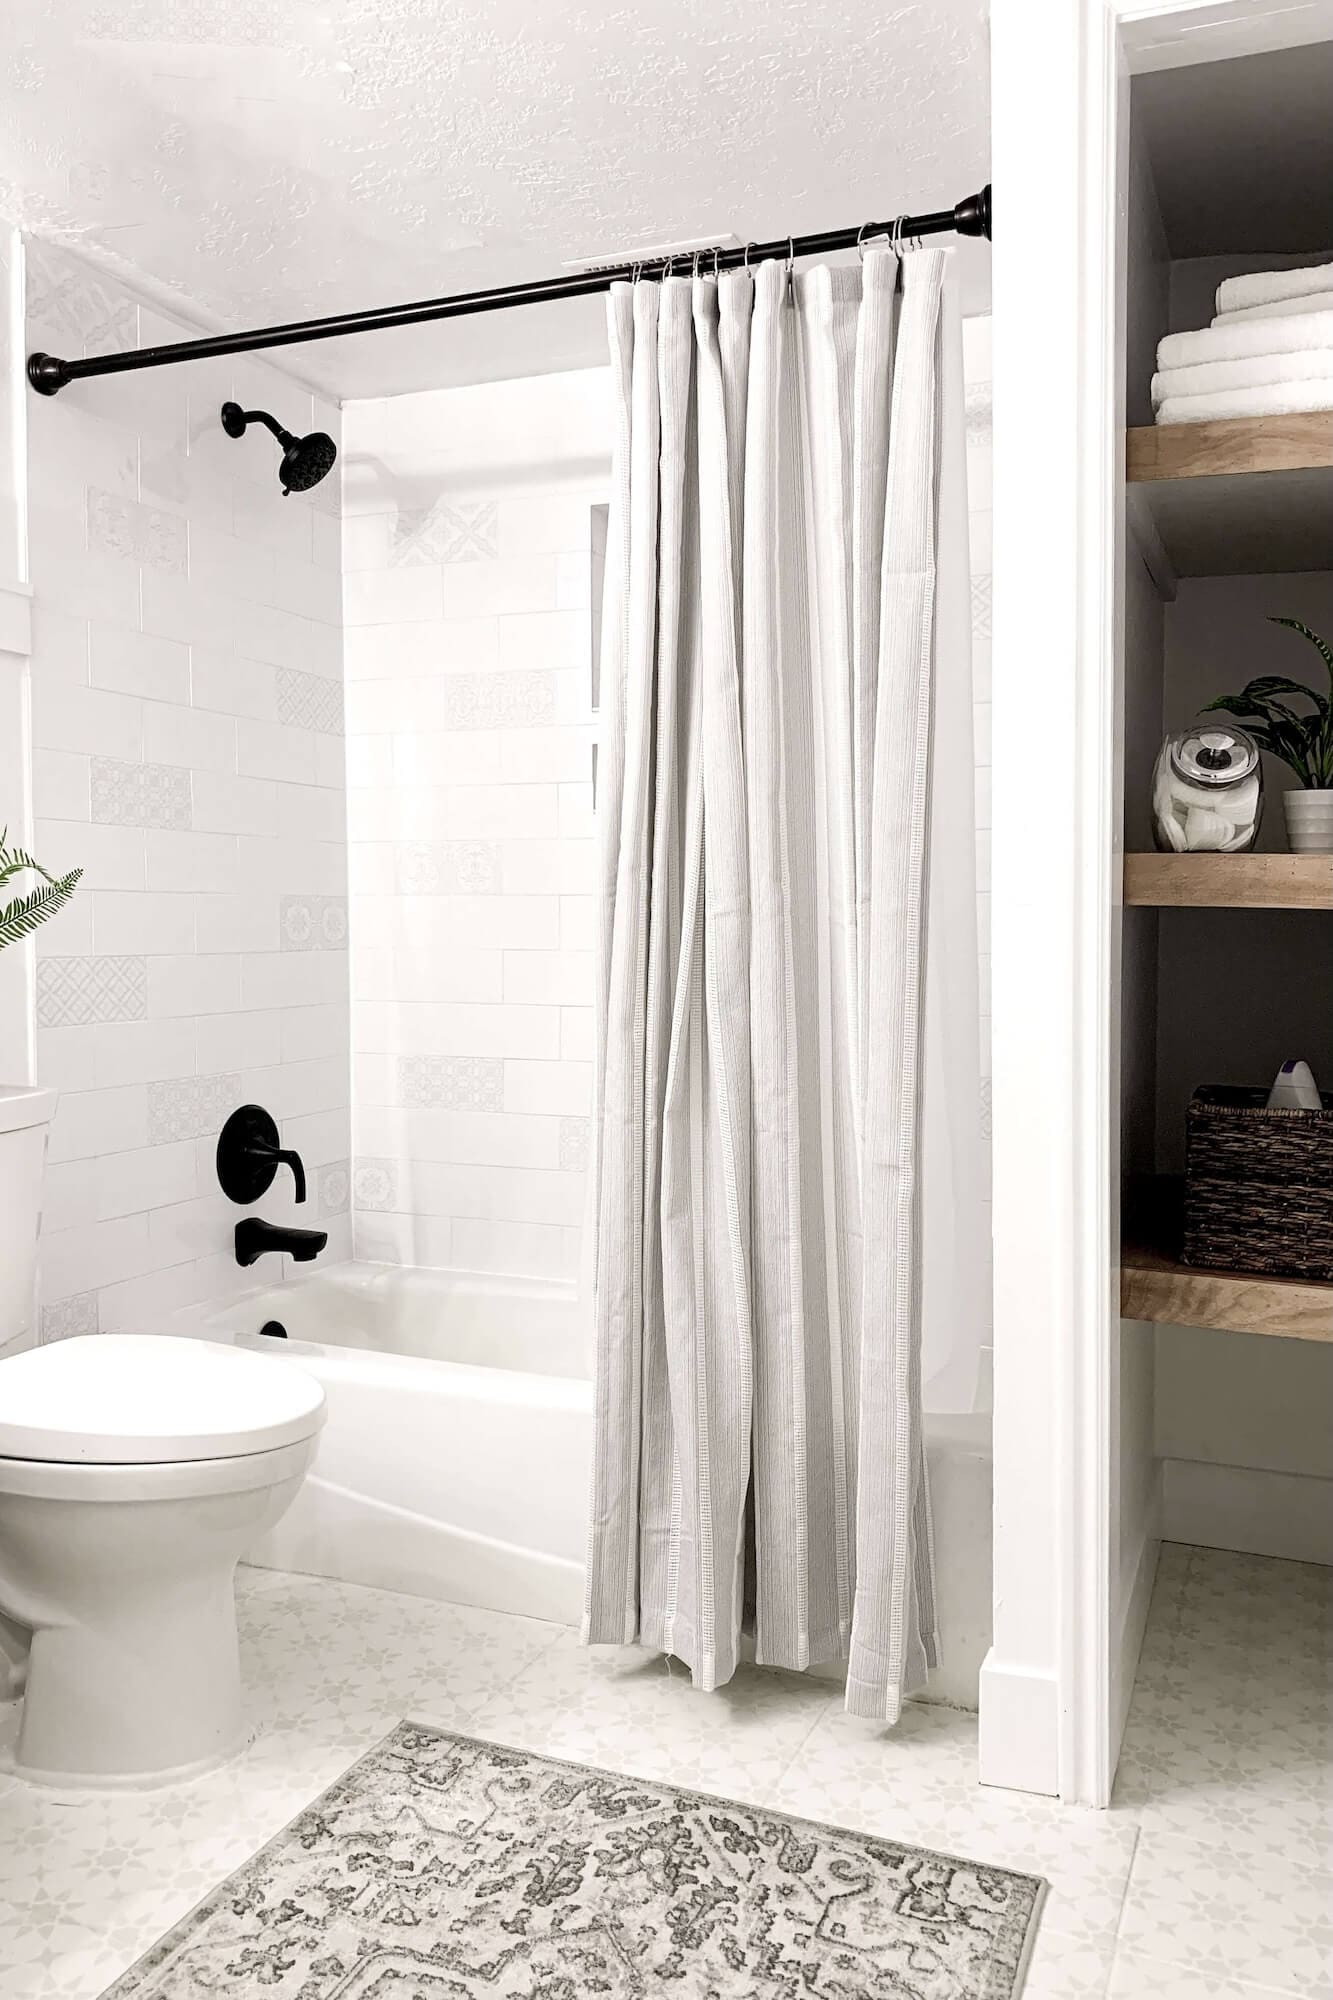
Step 3: Tile the Shower Walls
You can see every tiling step for this surround in my shower tutorial here: How to Tile a Shower Wall (Even If You’ve Never Done It Before).
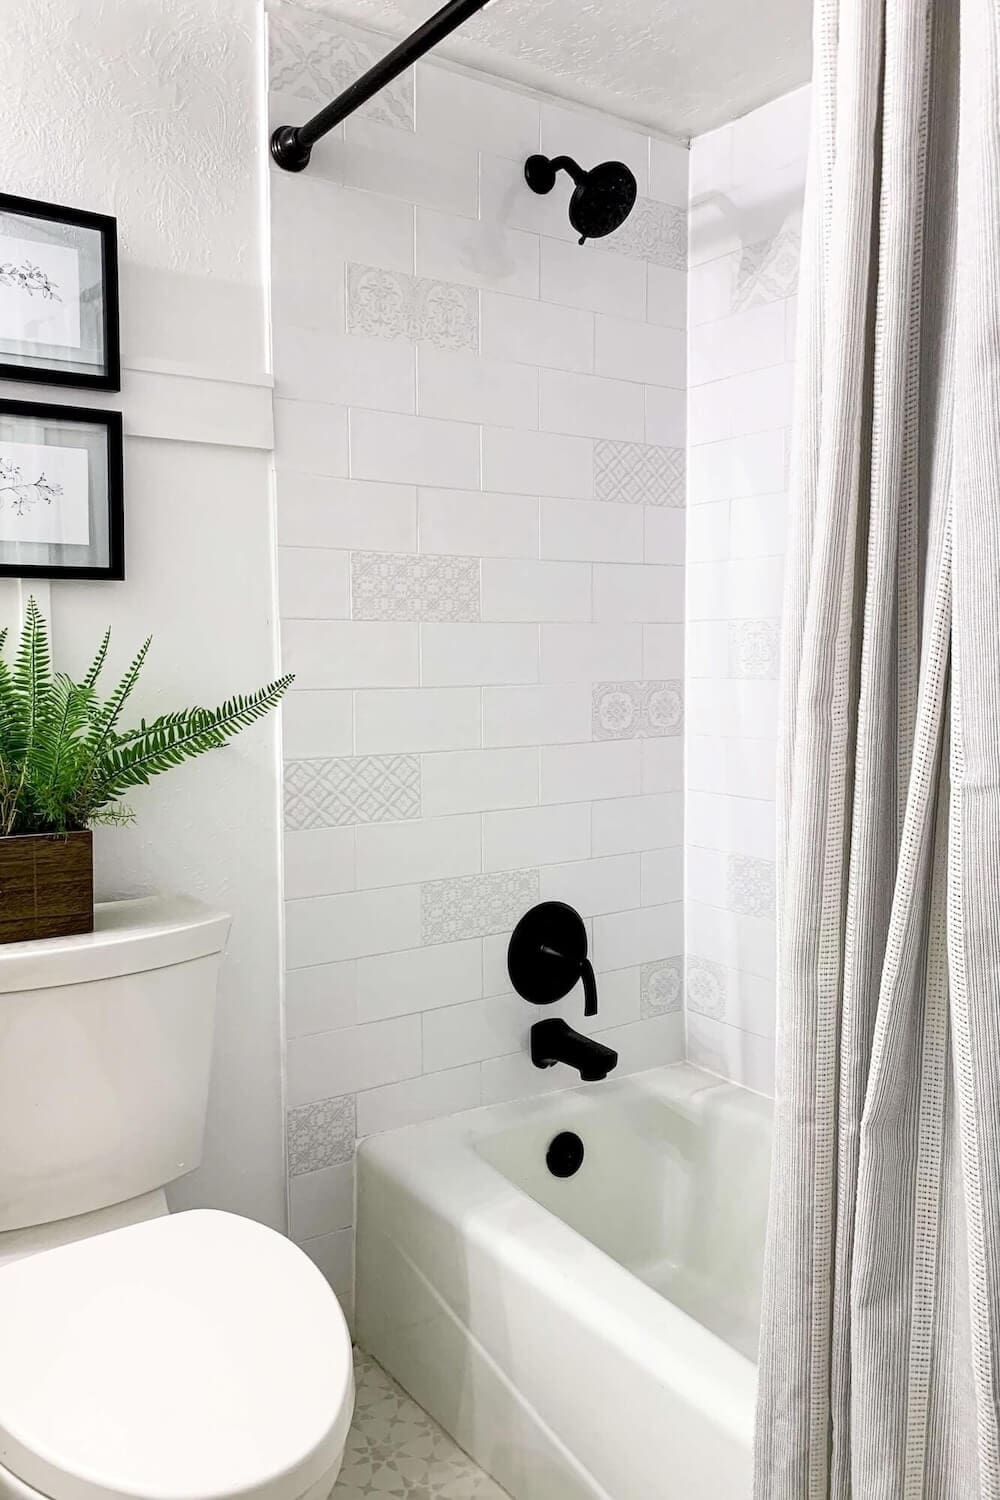
Once the waterproofing cured, it was time for the fun part-tiling the shower.
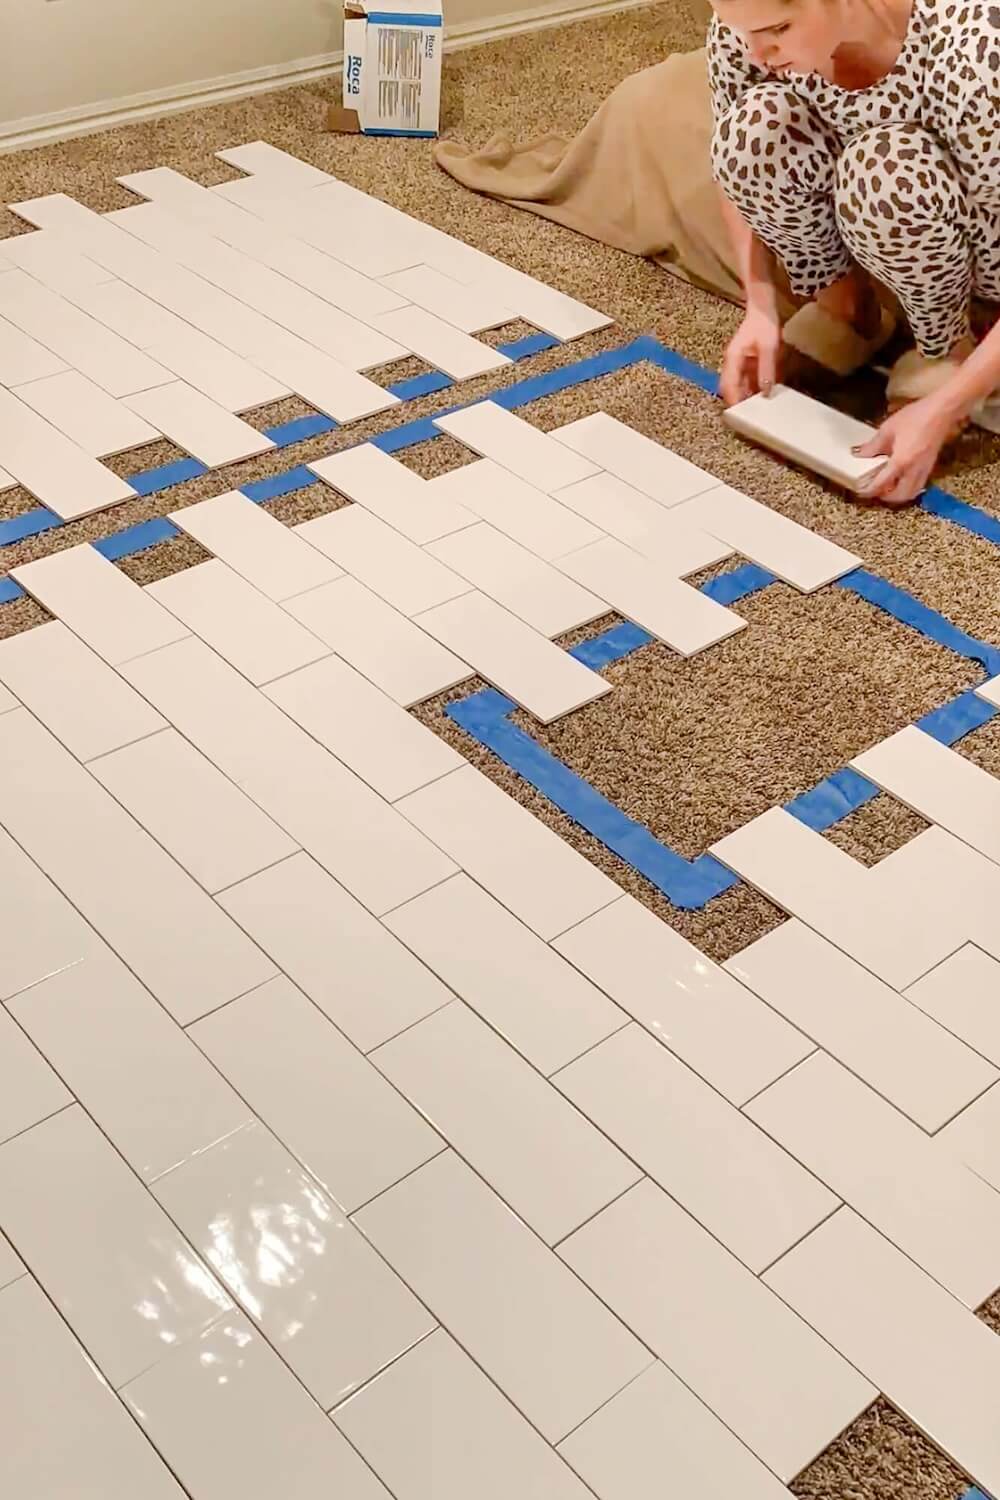
- Planned the tile layout on the floor first, taping out the shower width and “auditioning” where the patterned tiles would go so there were no awkward slivers at the corners.
- Found the highest point on the tub and used a laser level to mark a line one full tile above it. I installed a ledger board along that line so the first row of tiles would be perfectly level even if the tub wasn’t.
- Installed metal edge trim on the two open vertical corners for a clean, finished edge.
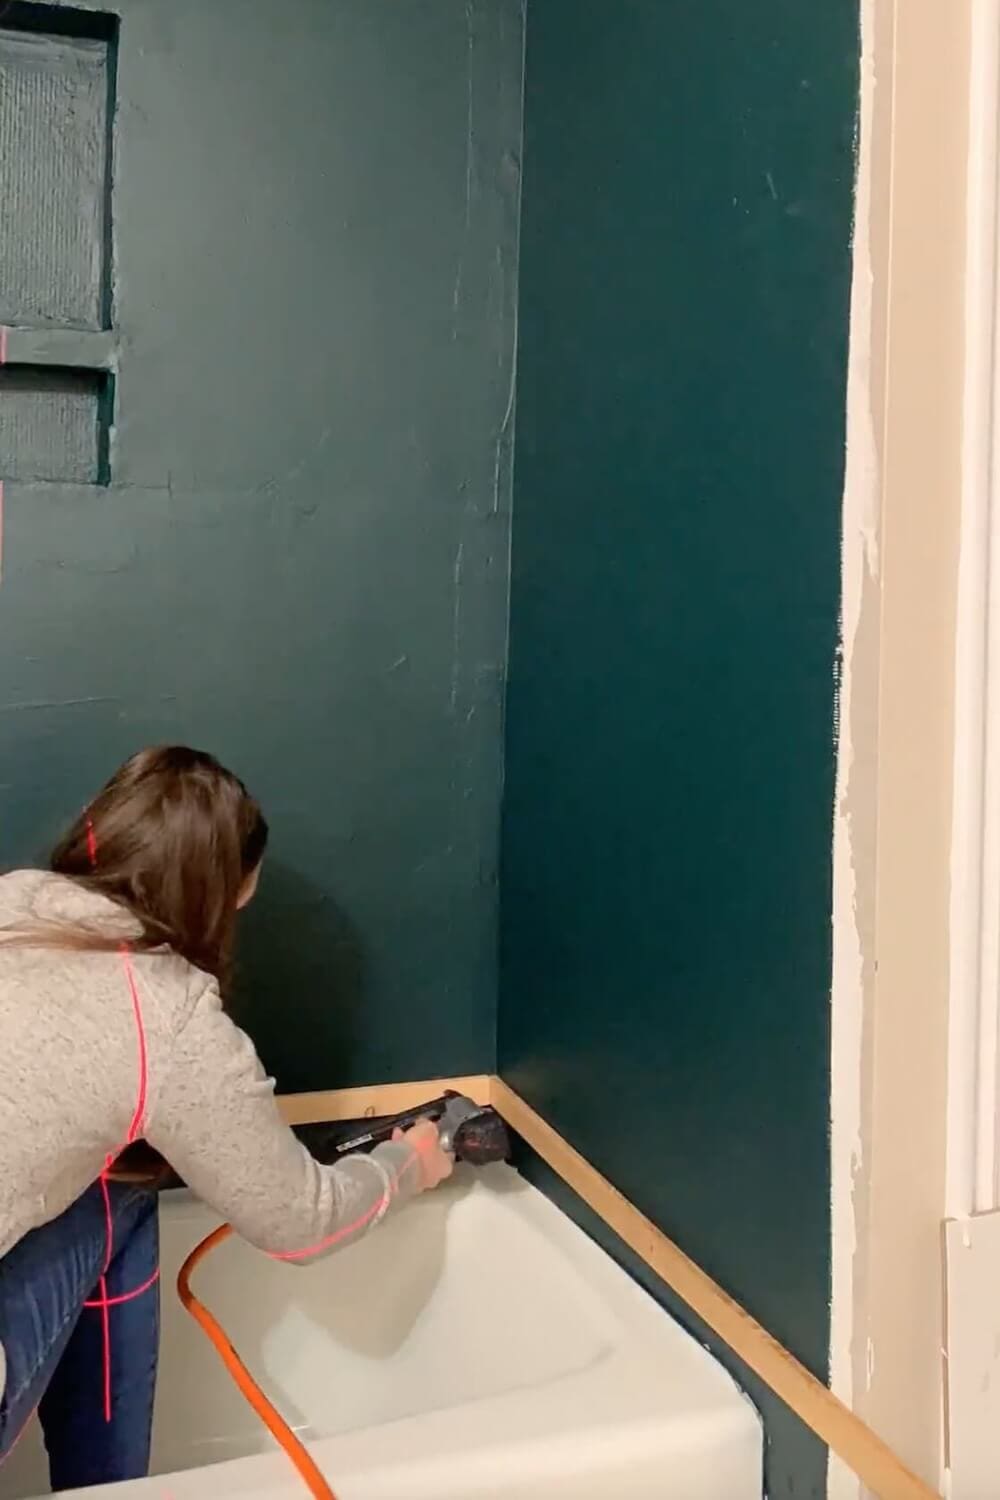
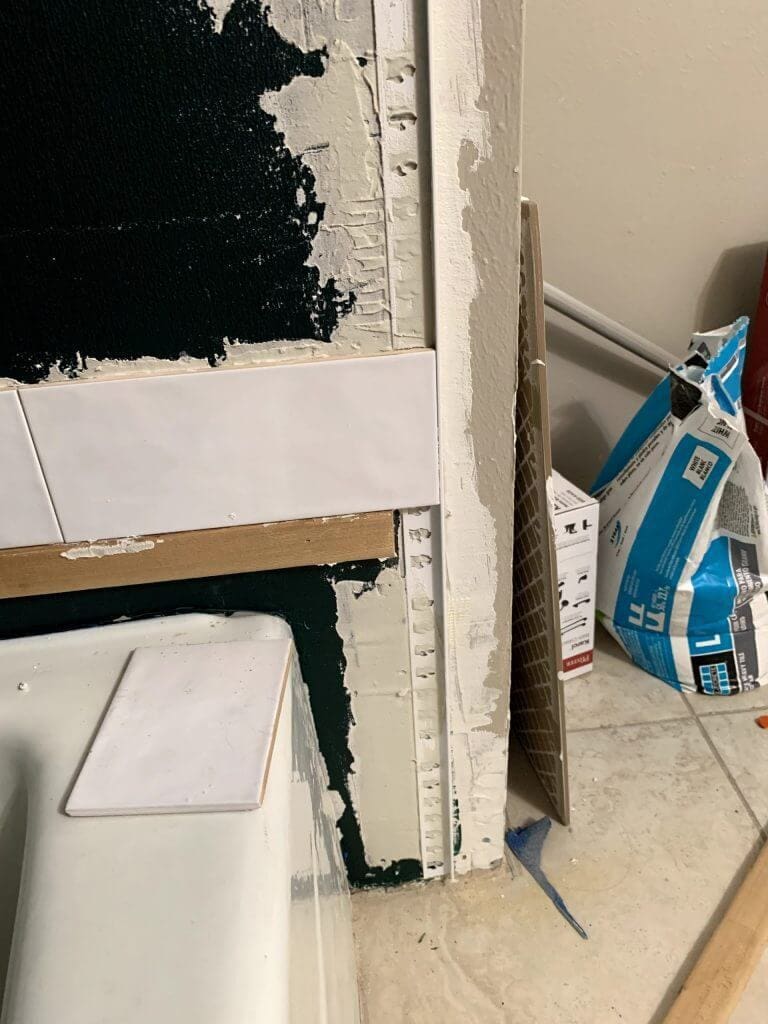
- Spread thinset on the wall with a notched trowel, back-buttered each tile, and pressed it into place with a small wiggle to collapse the ridges.
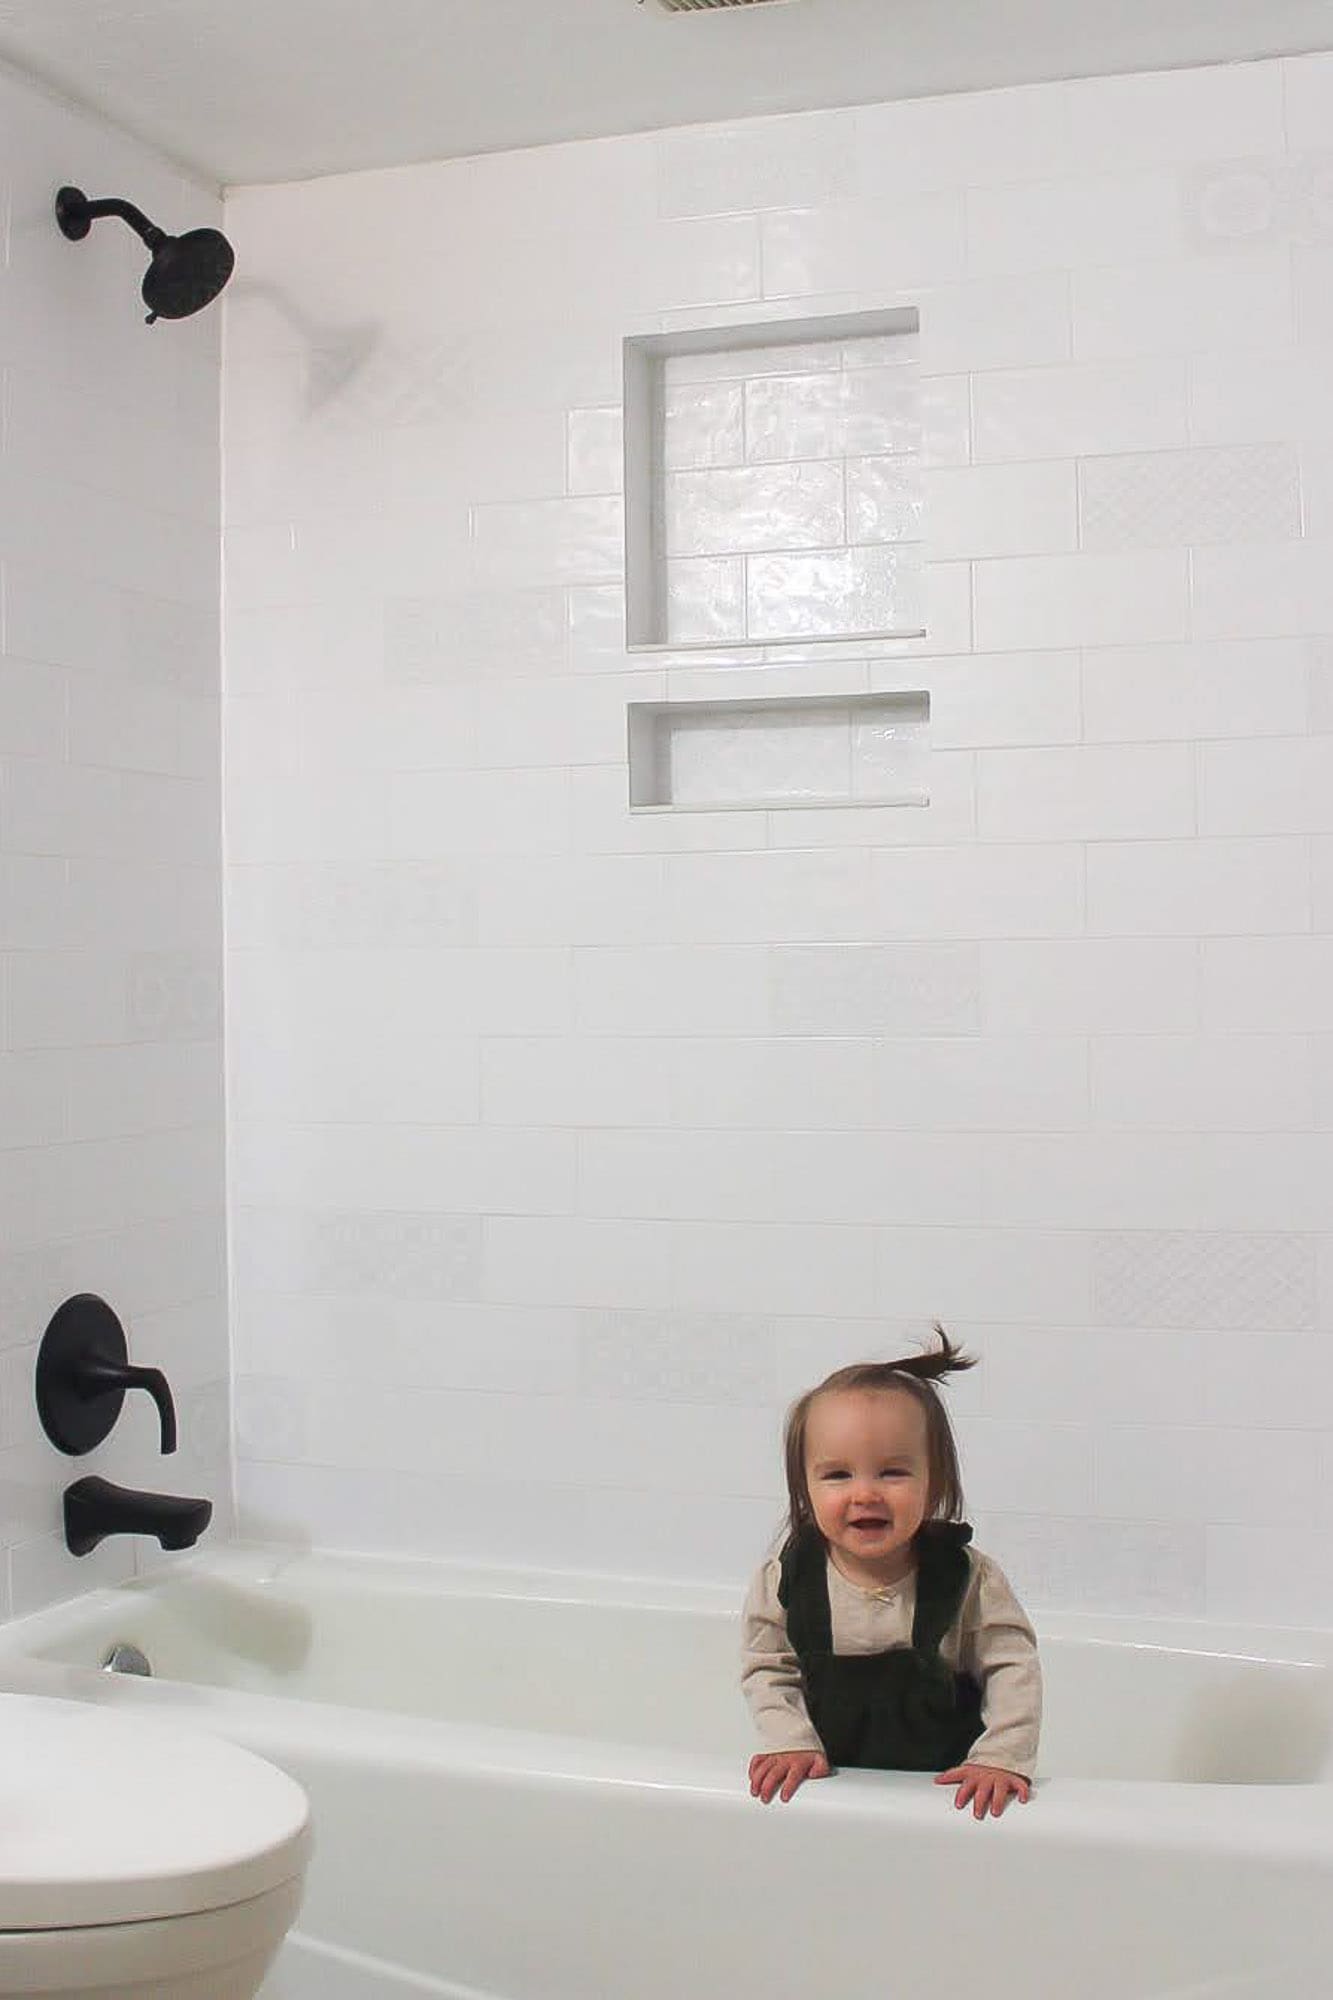
- Tiled around and inside the niche, aligning grout lines and wrapping the edge tiles into the opening for that “picture frame” look.
- Used spacers and a laser (or long level) as I worked up the wall so grout lines stayed straight.
- Grouted once the thinset cured, then finished with color-matched silicone in all inside corners and where tile meets the tub.
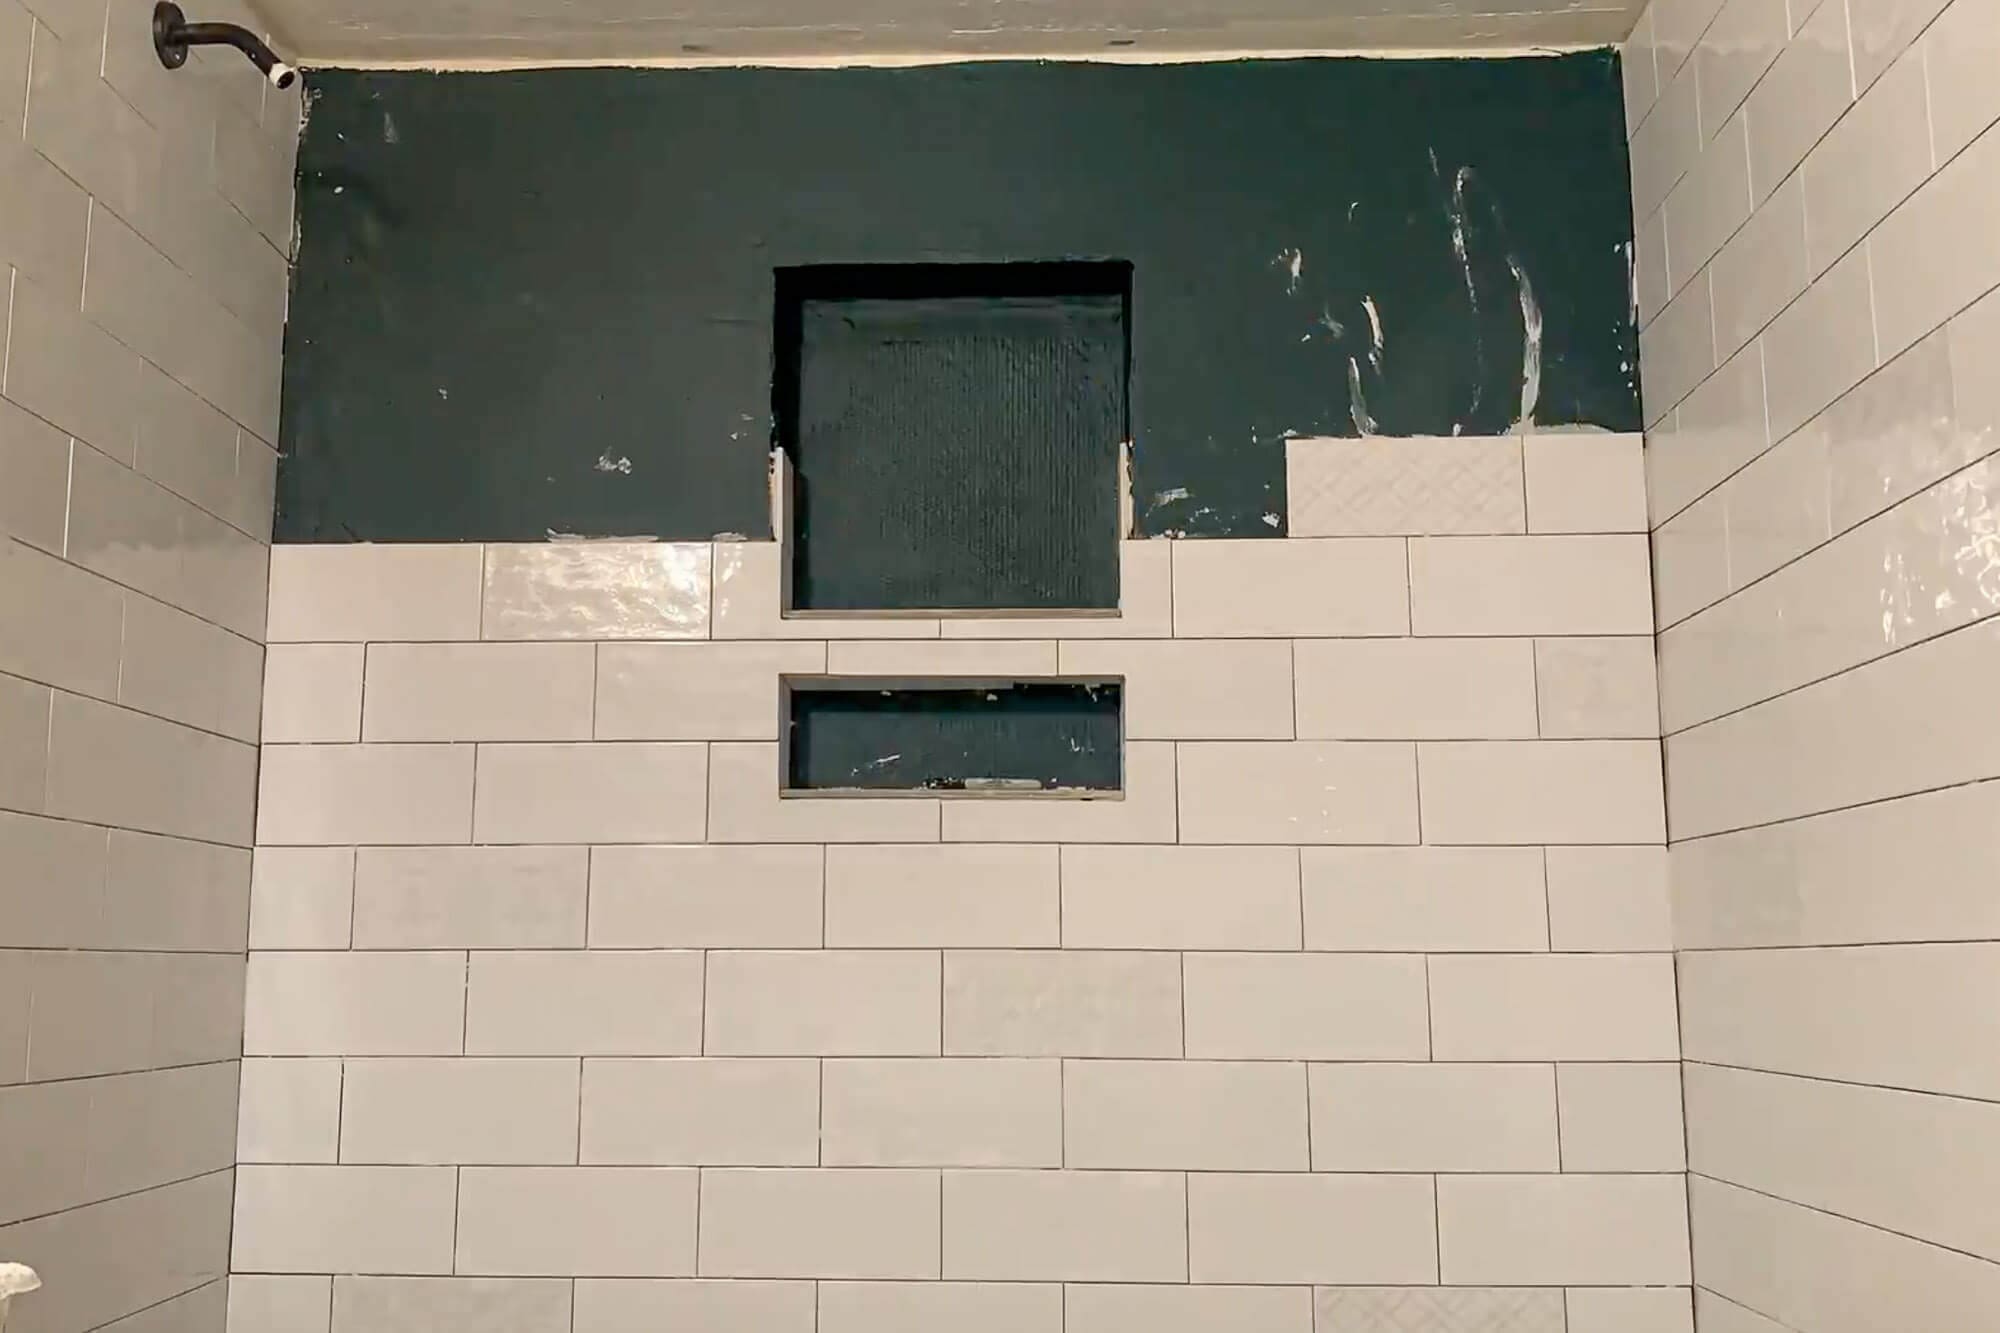
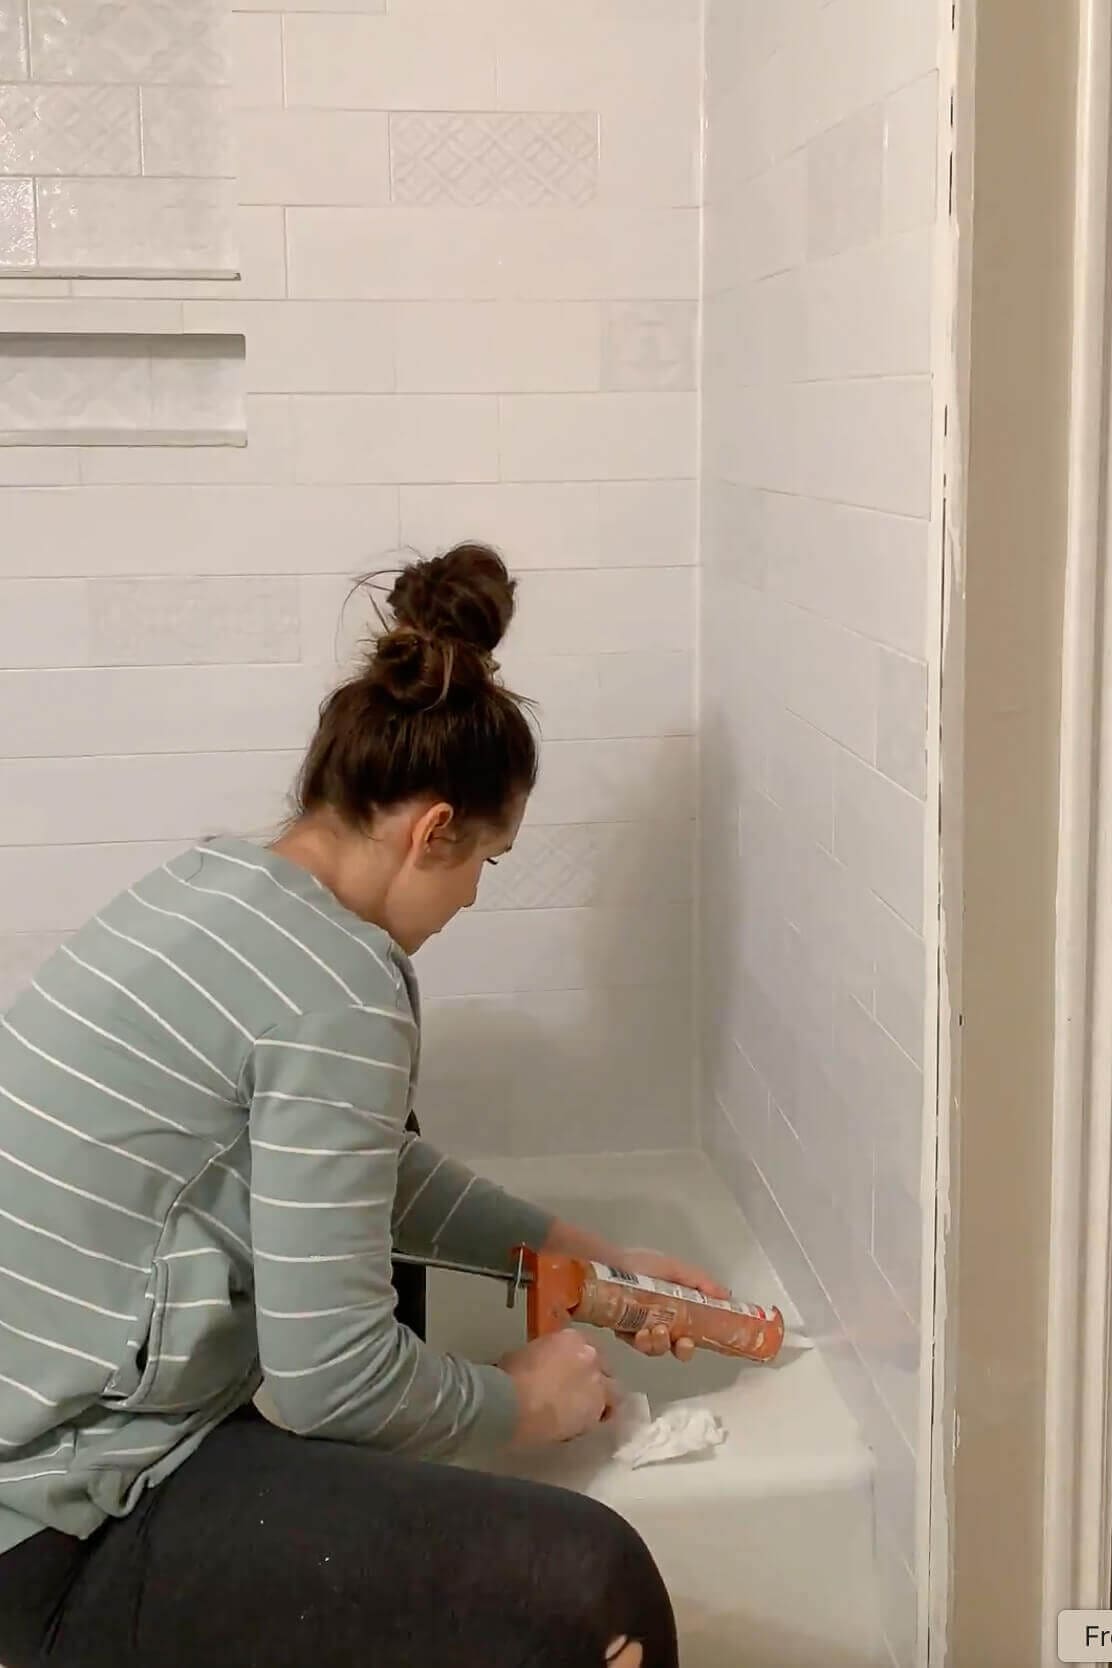
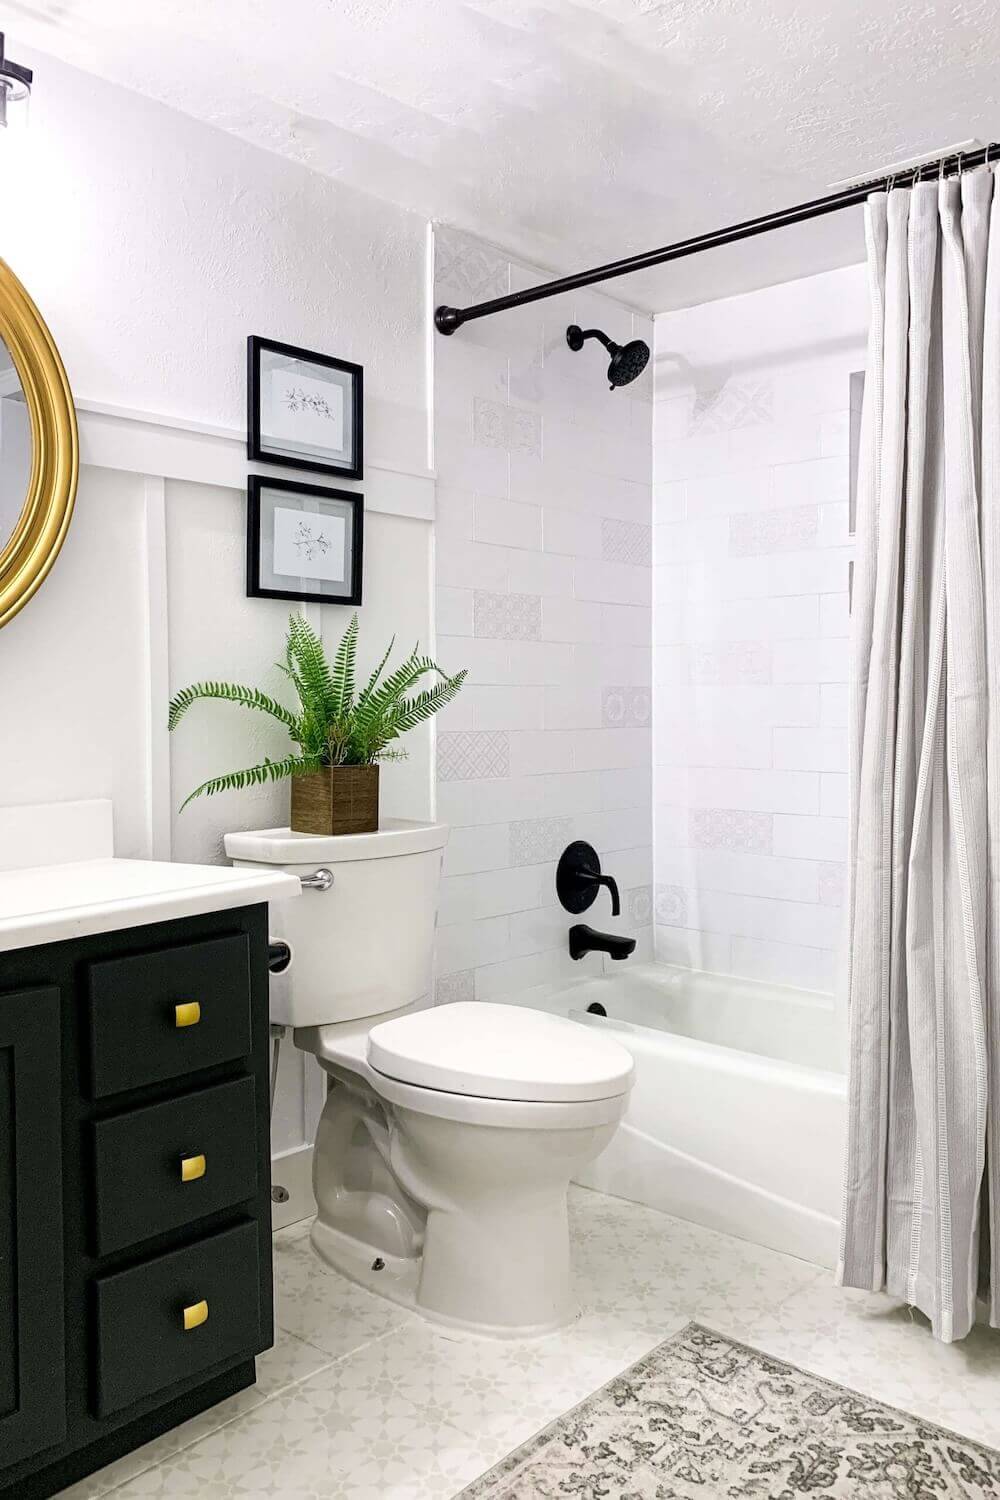
The finished shower is bright and classic, with just enough pattern in the niche to feel special. It really anchors this modern small bathroom remodel.
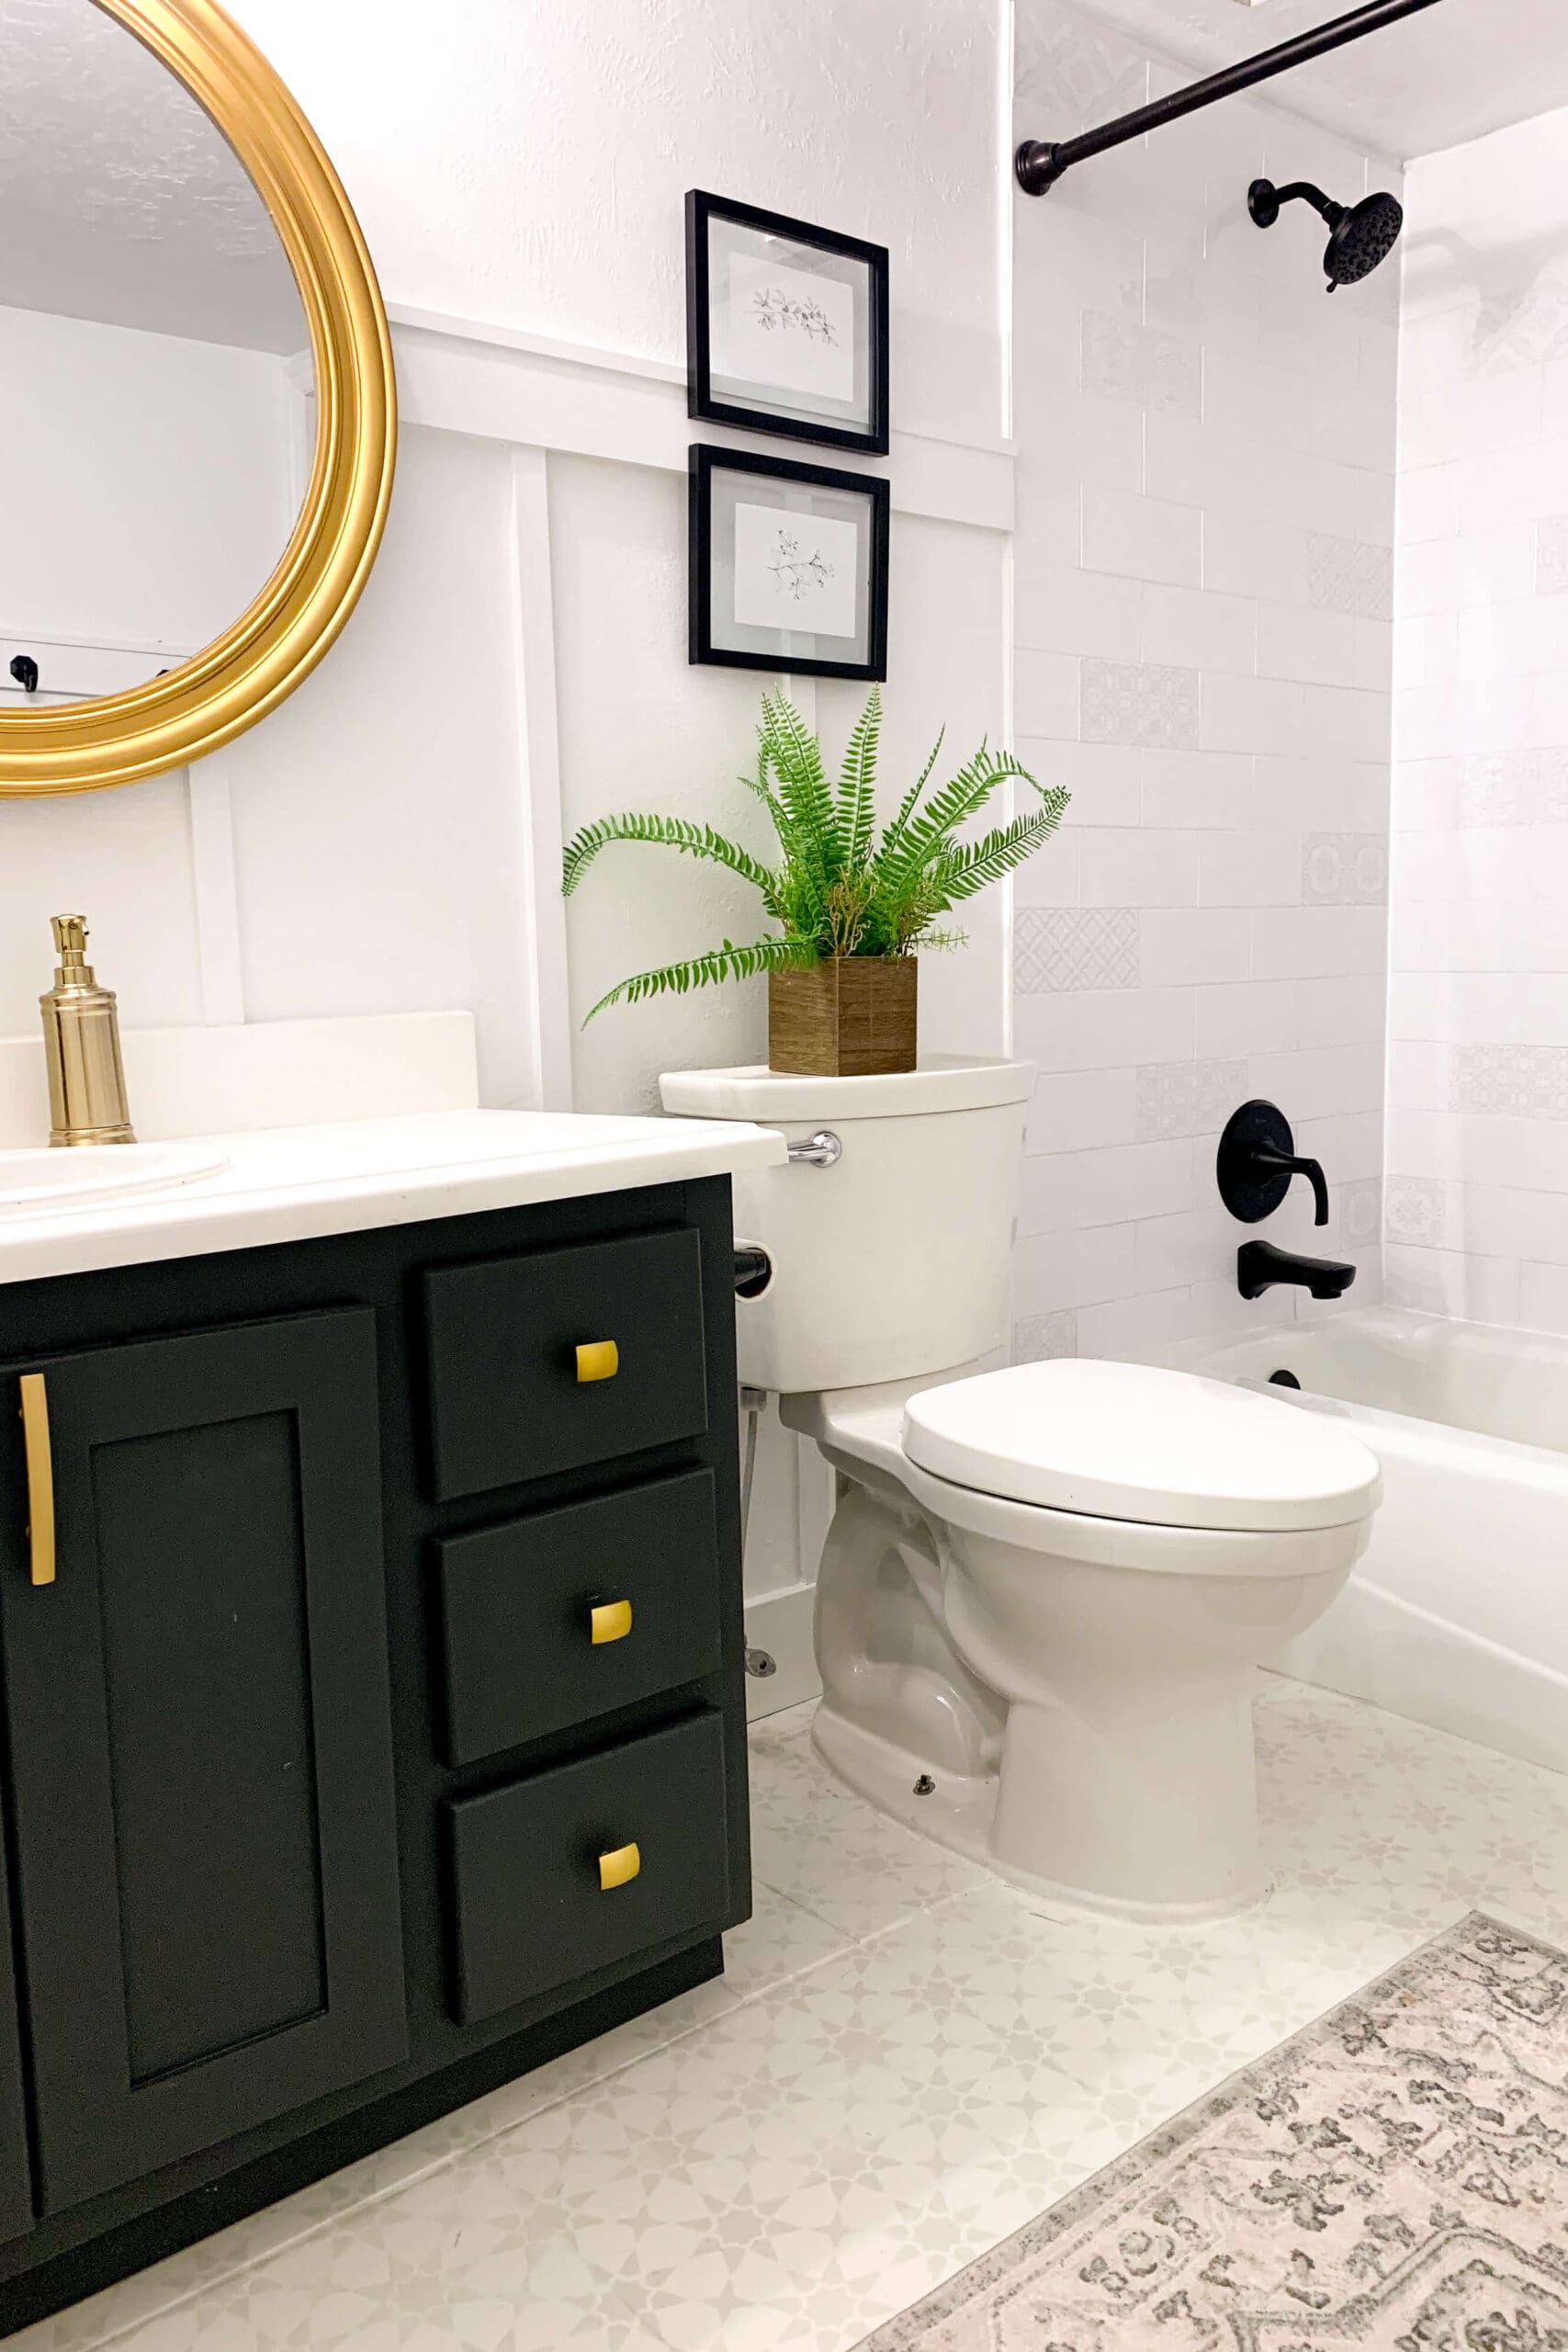
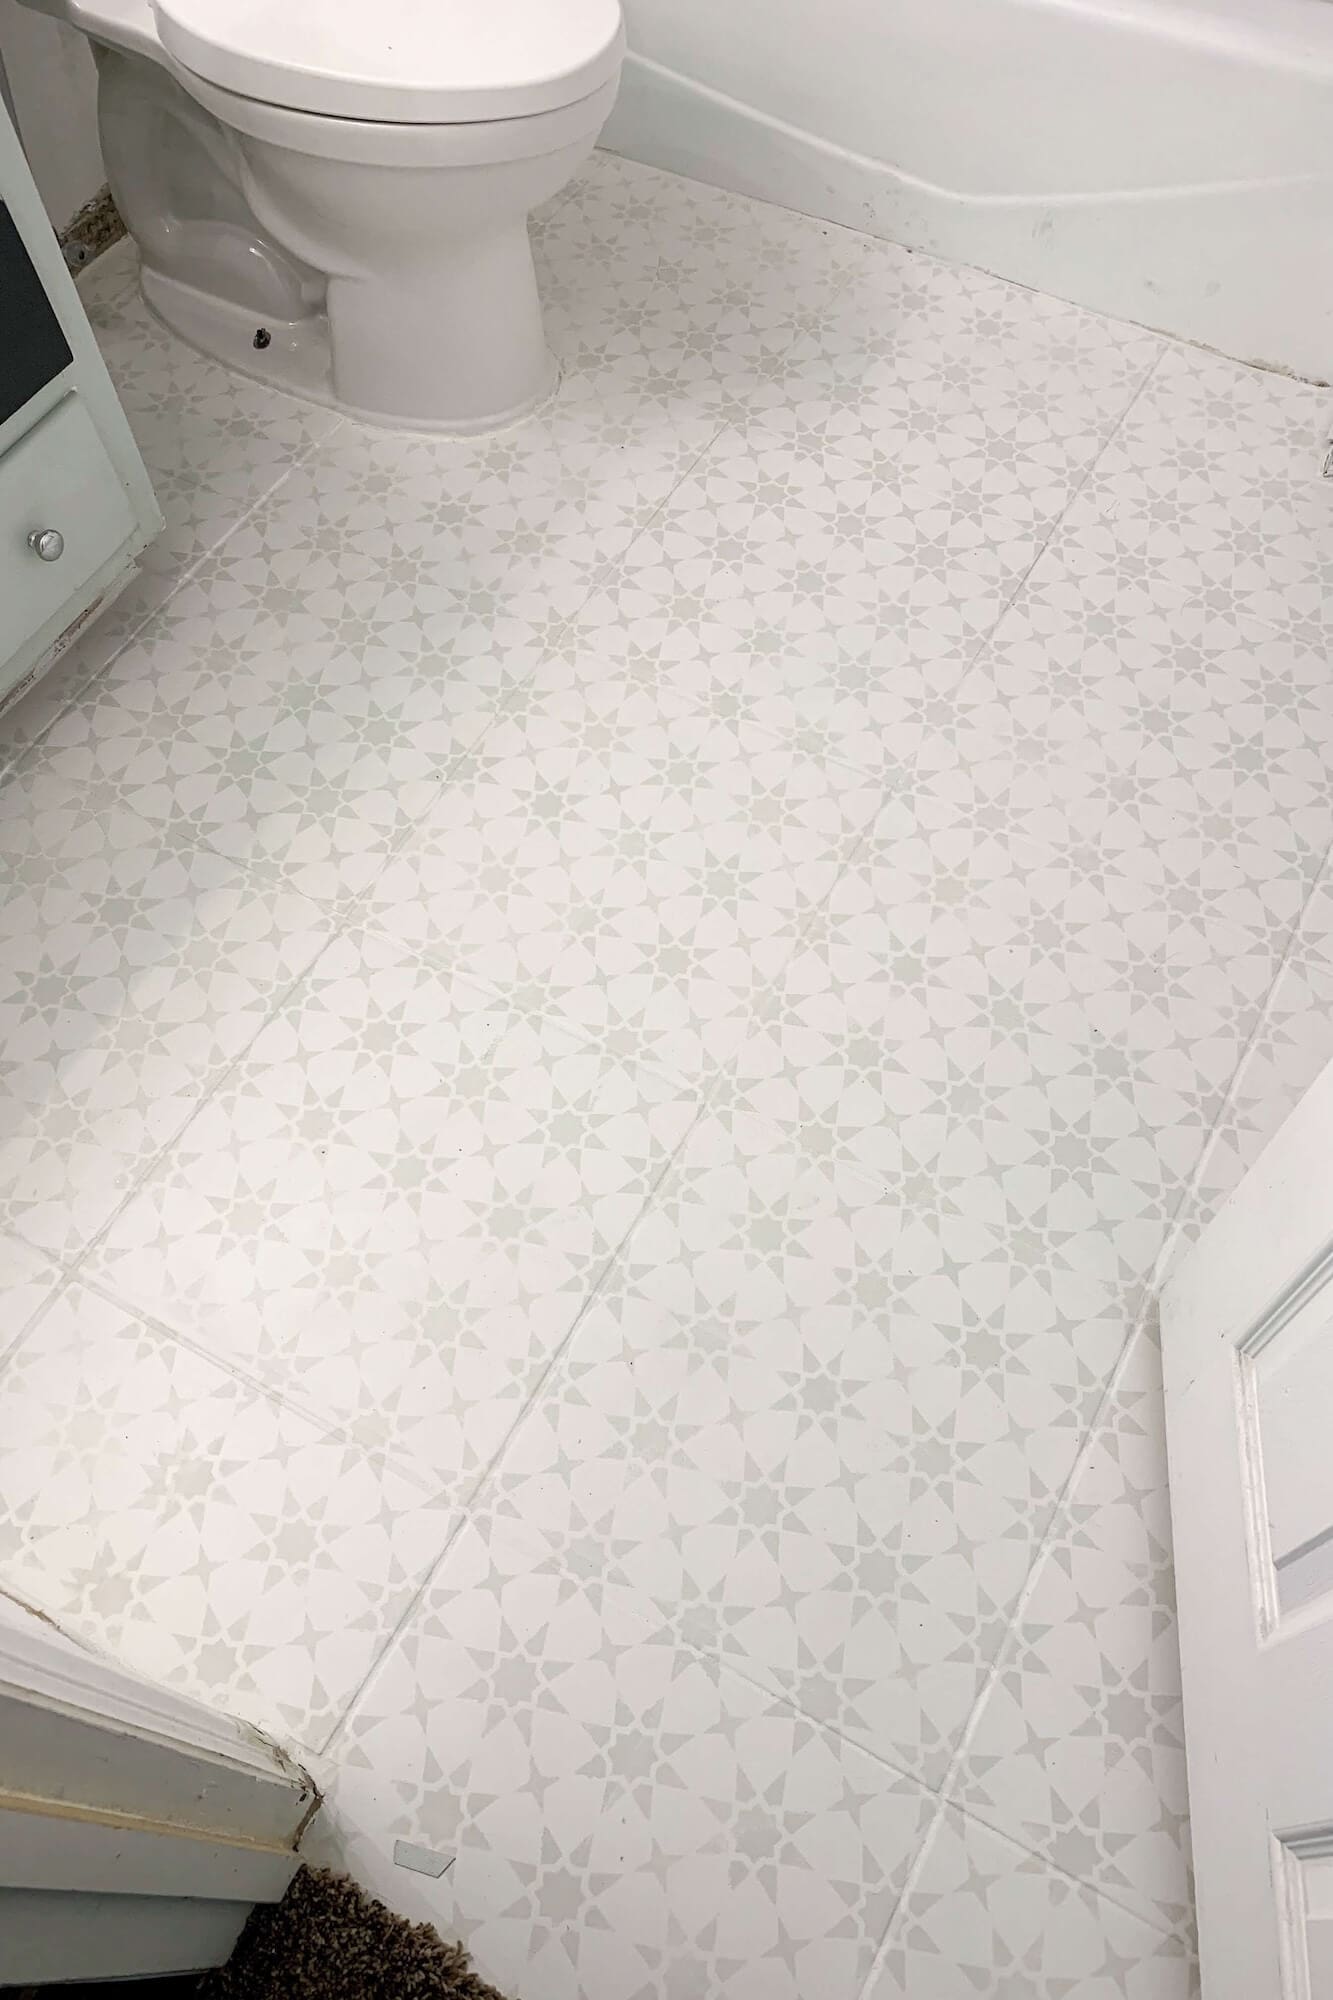
Step 4: Paint & Stencil the Bathroom Floor
For product details and exact steps for this painted pattern, head to Painting Bathroom Floor Tiles on a Budget.
Replacing the floor tile would have blown the budget, so I opted for a painted and stenciled tile floor instead.
The process looked like this:
- Removed the tile “baseboard” row to get a clean edge.
- Vacuumed thoroughly, then scrubbed with a heavy-duty degreaser to remove dirt, oils, and soap residue (this step is non-negotiable for adhesion).
- Rolled on a high-adhesion bonding primer rated for tile.
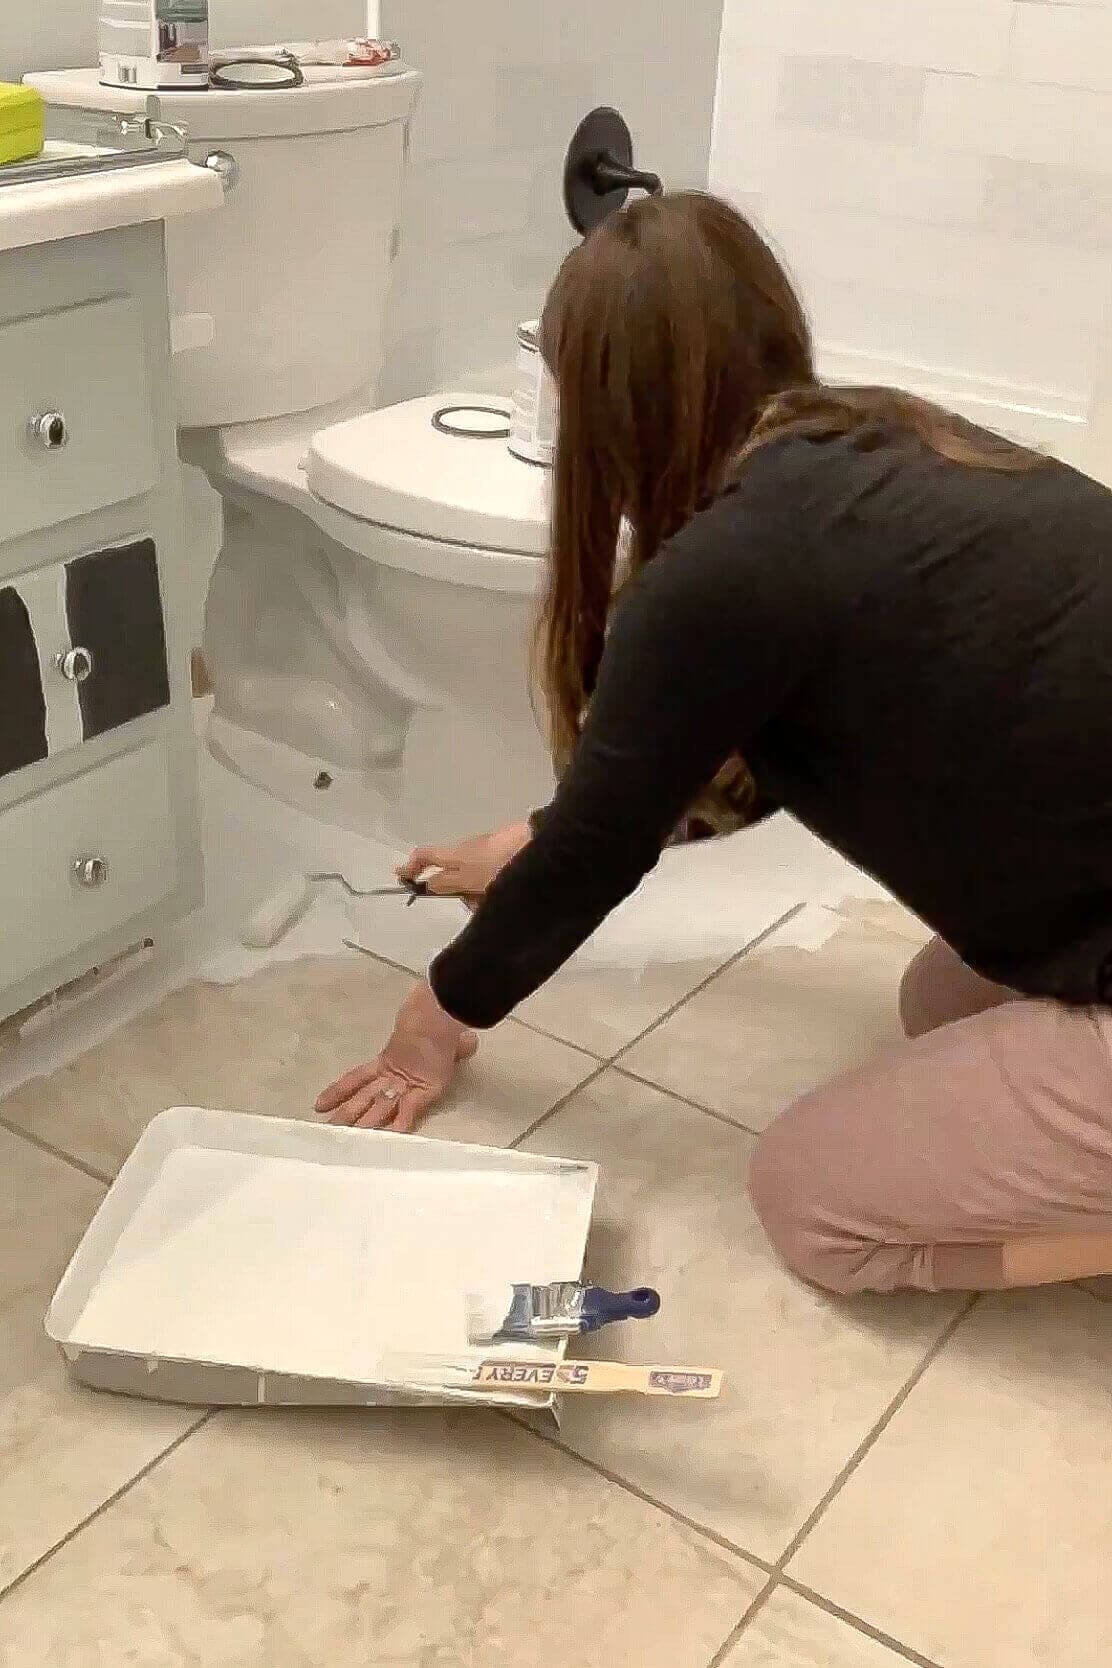
- Painted a solid warm-white base coat using an angled brush around edges and a foam roller for the main field.
- After the base coat cured, used a star stencil and a small round brush in a stippling motion to add a soft gray pattern tile by tile.
- Trimmed a second stencil for tight spots around the toilet, tub, and walls.
- In this low-traffic basement bath, I skipped a topcoat, but a water-based polycrylic is a good idea in high-traffic spaces.
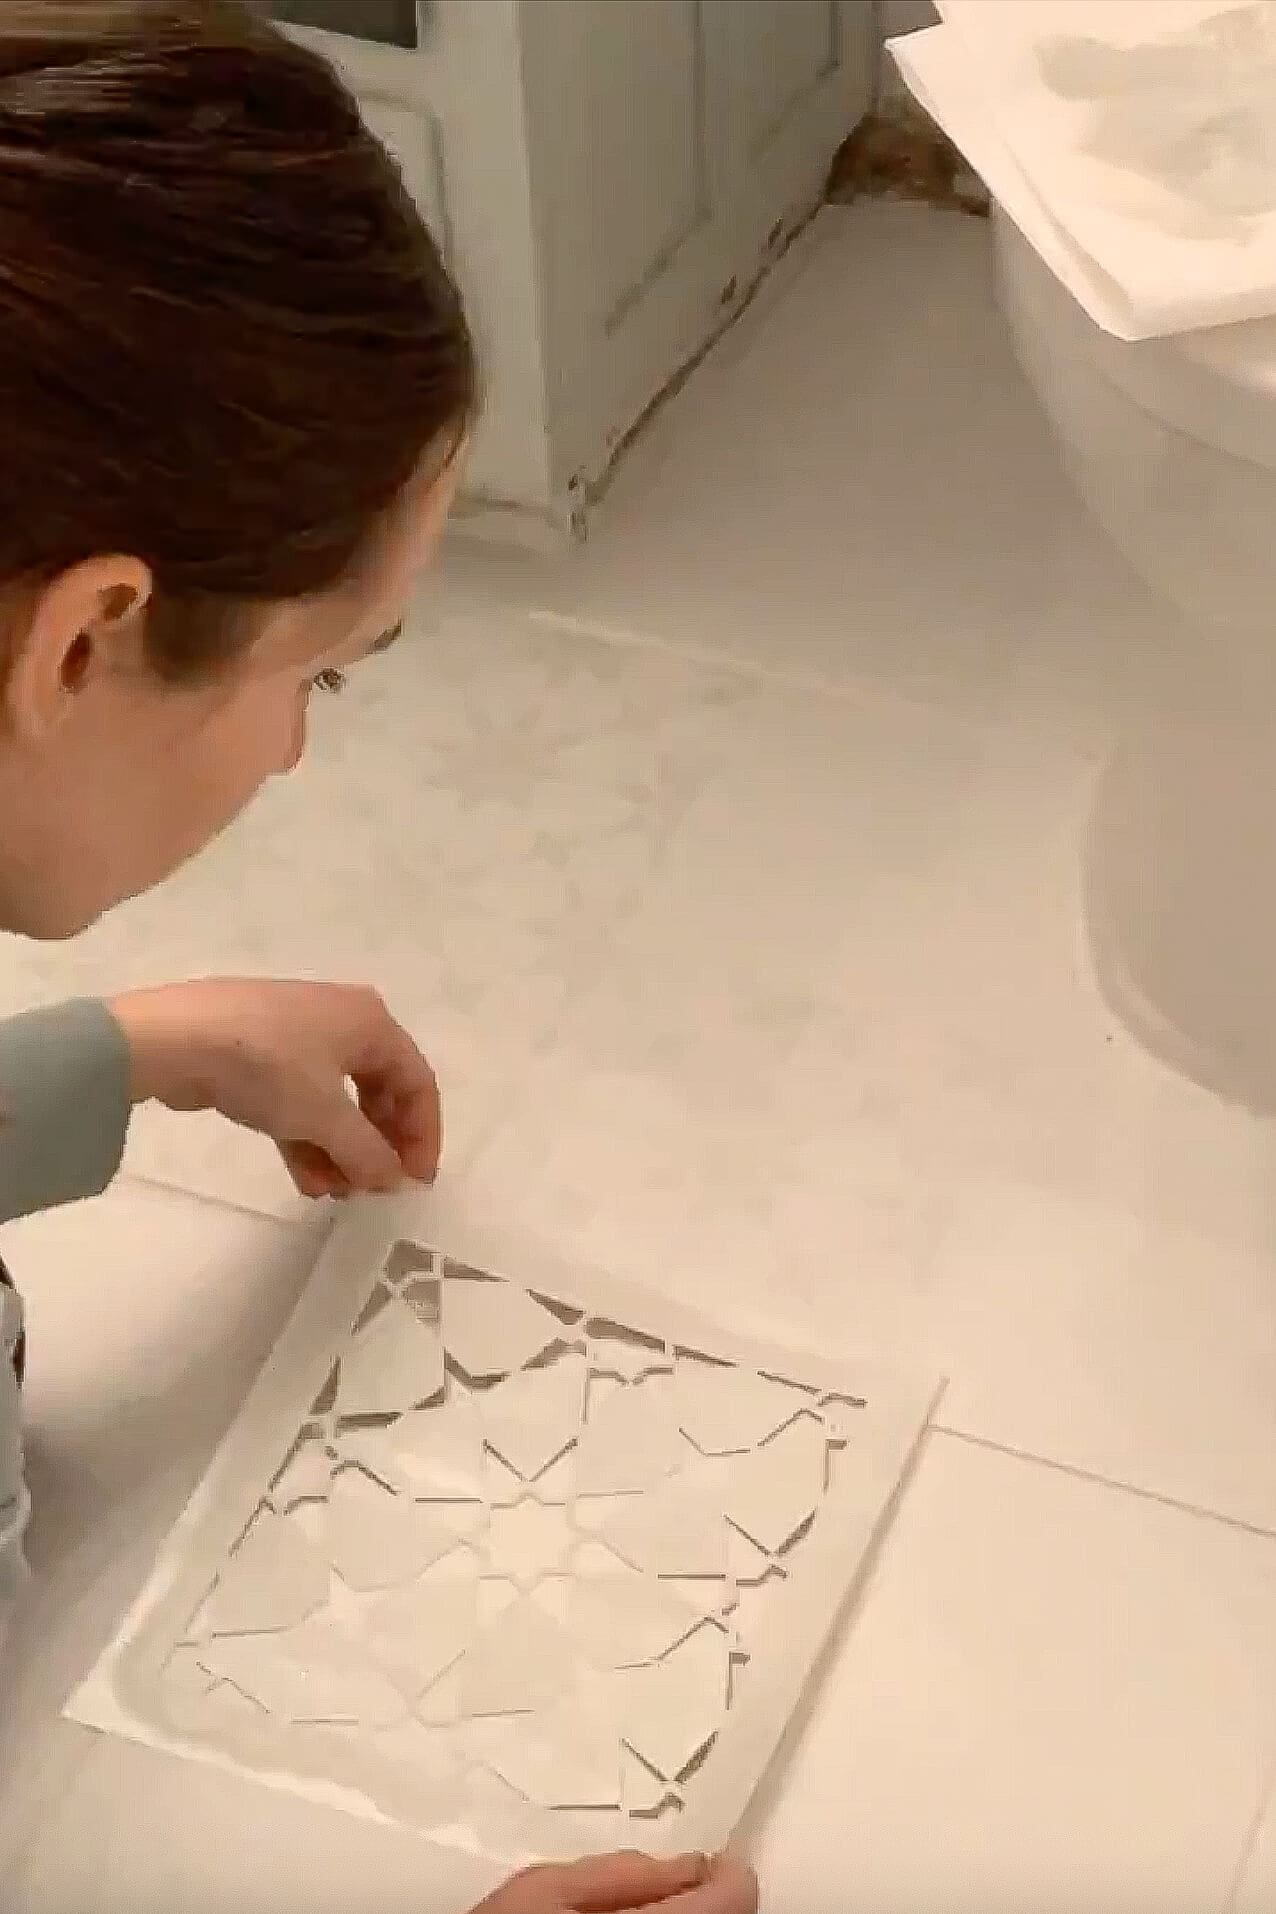
The end result looks like patterned cement tile and completely changed the feel of the room—all without touching a tile saw.
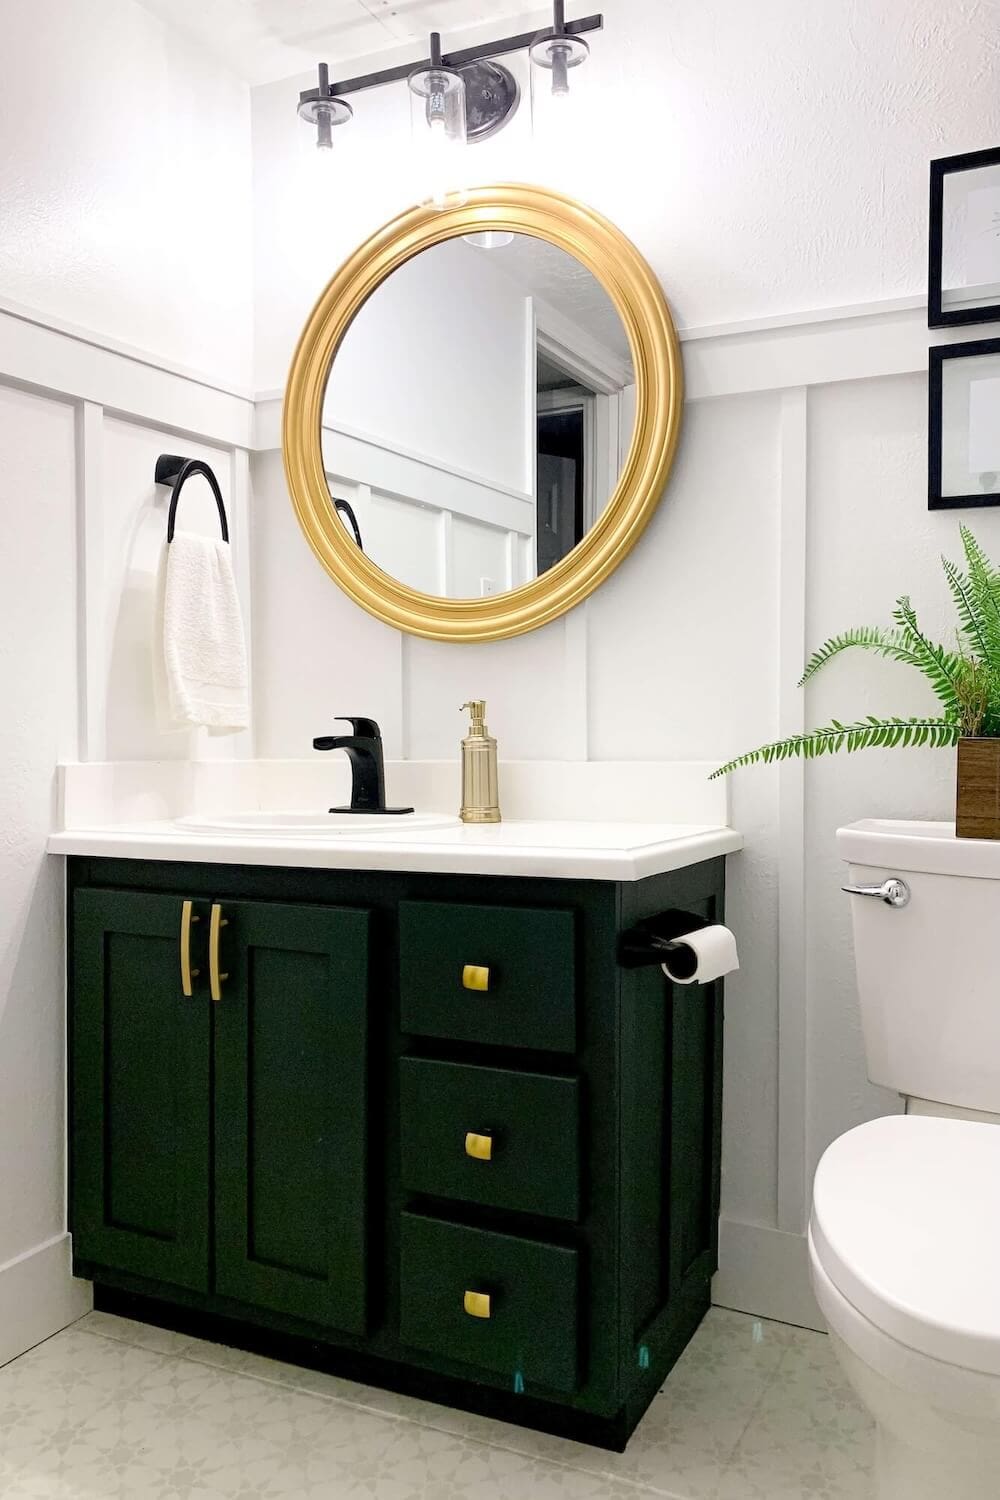
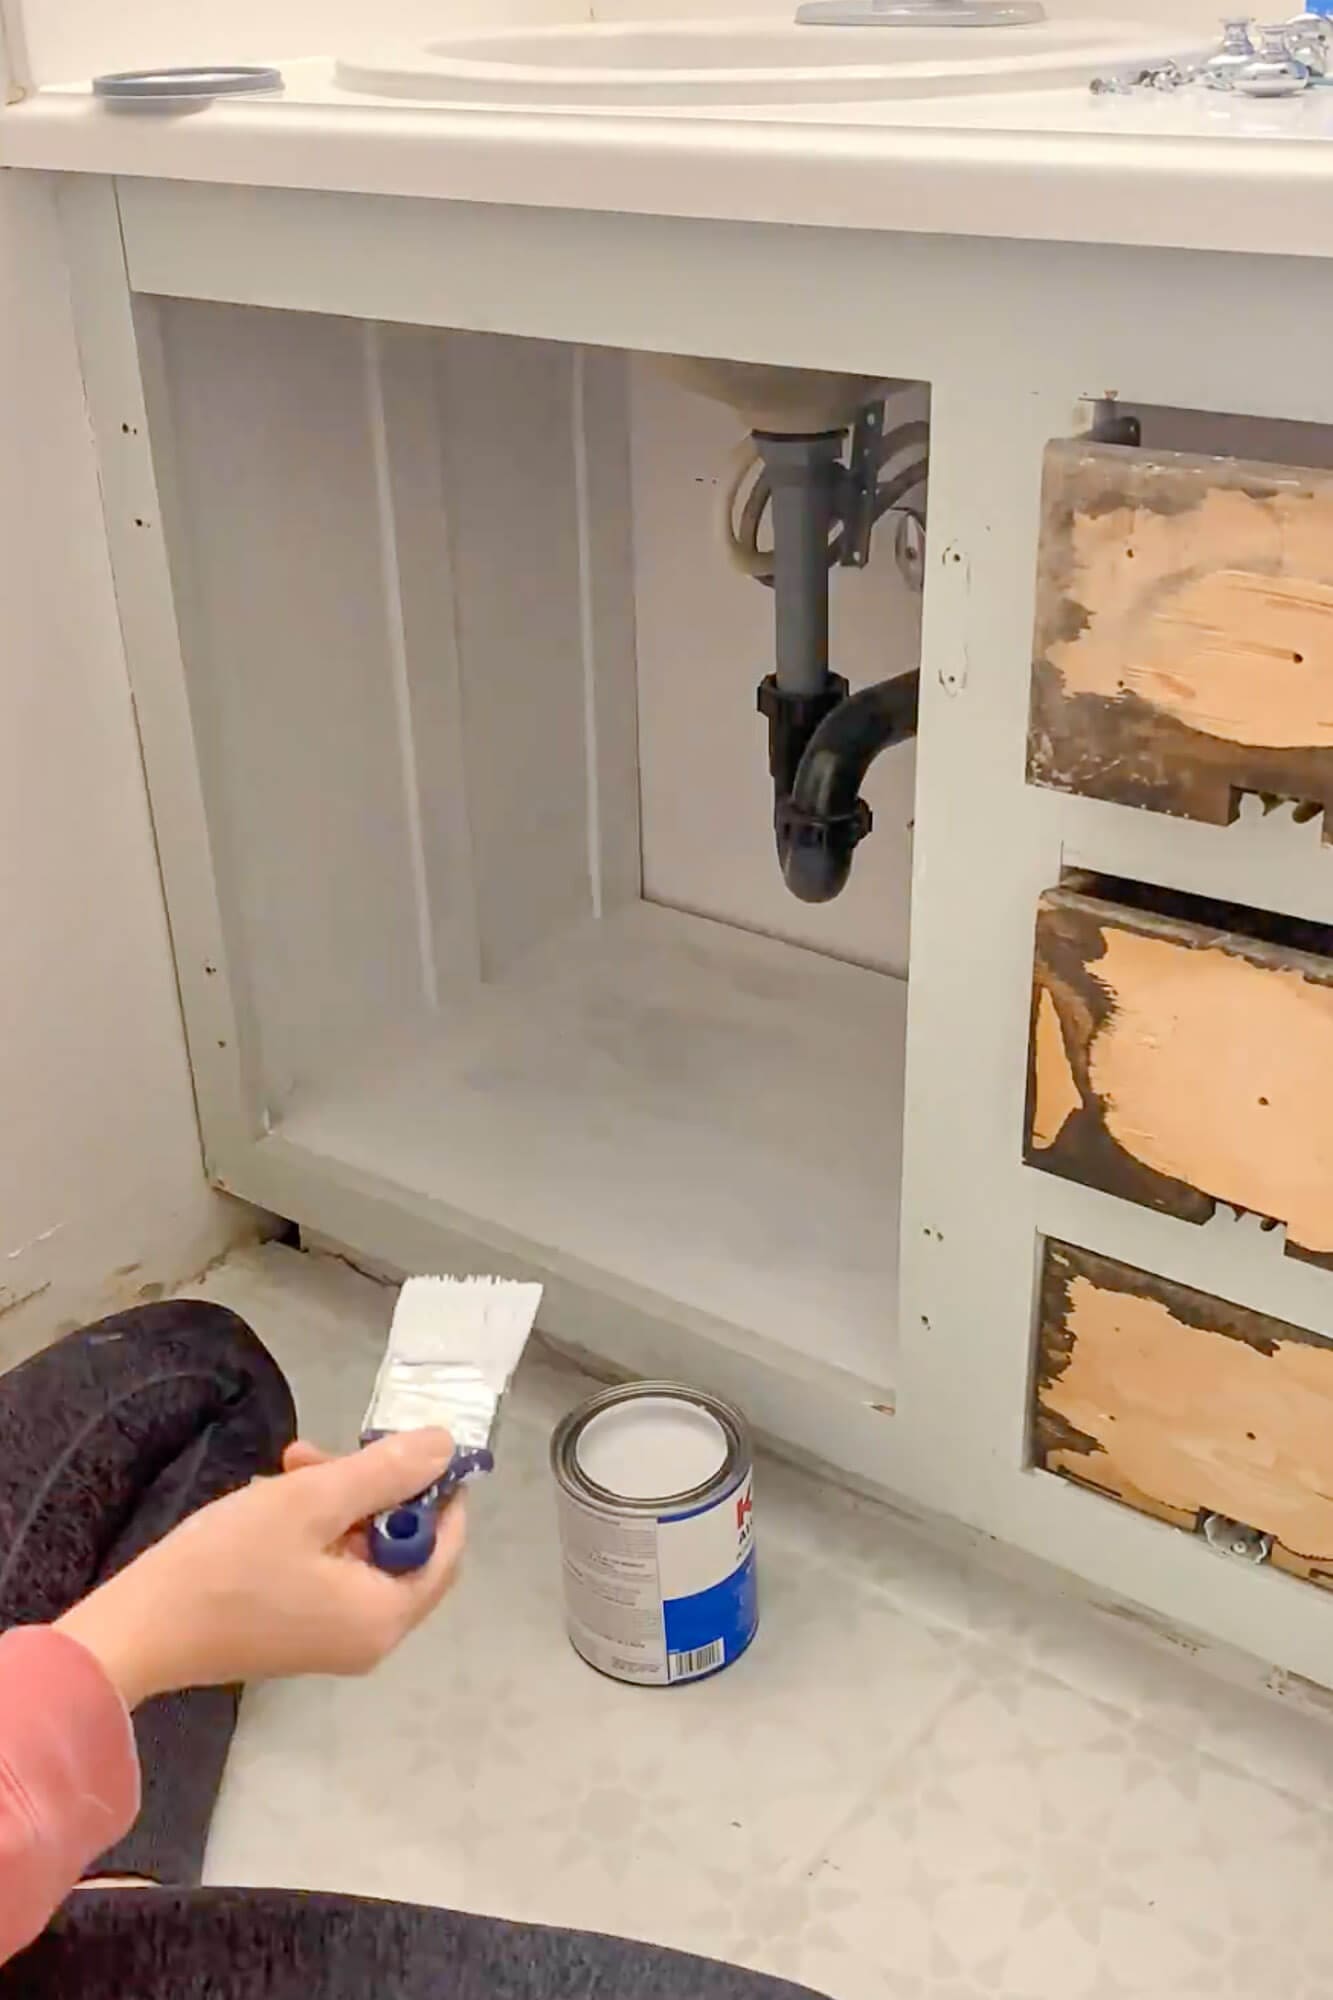
Step 5: Paint the Vanity & Update Hardware
If you’d like to give your own cabinet the same treatment, I break down every step in How to Paint a Bathroom Vanity Instead of Replacing It.
The vanity was structurally fine but visually tired. Instead of replacing it, I did a bathroom vanity makeover on a budget.
- Removed the doors and drawer fronts and cleaned everything with a degreasing cleaner.
- Lightly sanded the cabinet box, doors, and drawers to scuff the surface.
- Applied a bonding primer, sanded again for smoothness, and then painted multiple thin coats of deep green cabinet enamel (Sherwin-Williams Emerald Urethane Trim Enamel).
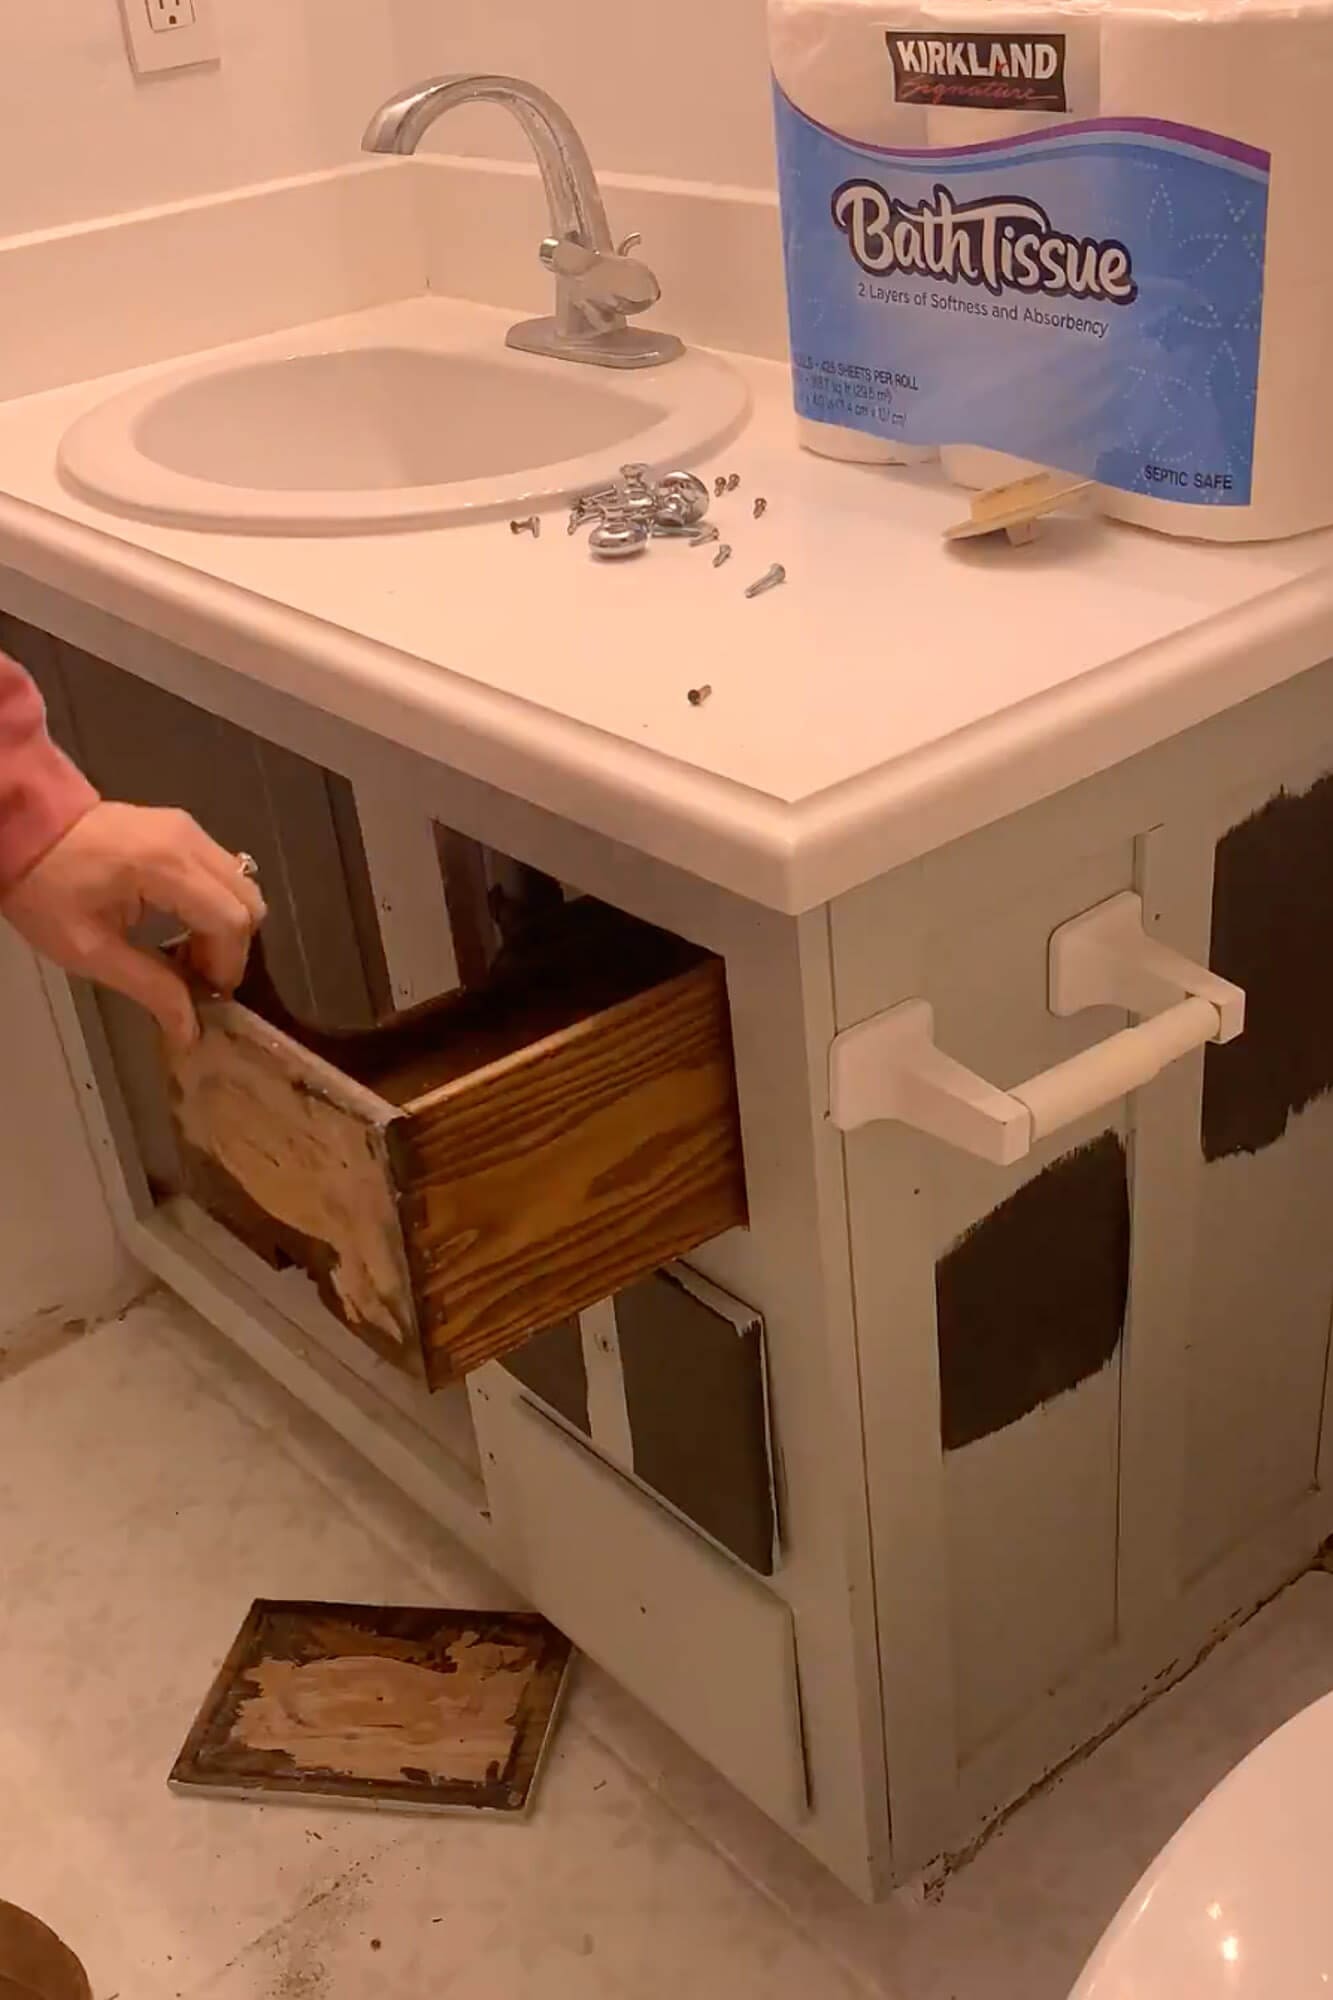
- Built new shaker-style doors and drawer fronts, then installed soft-close hinges.
- Added simple, modern gold pulls and knobs using a painter’s-tape drilling template so everything lined up perfectly.

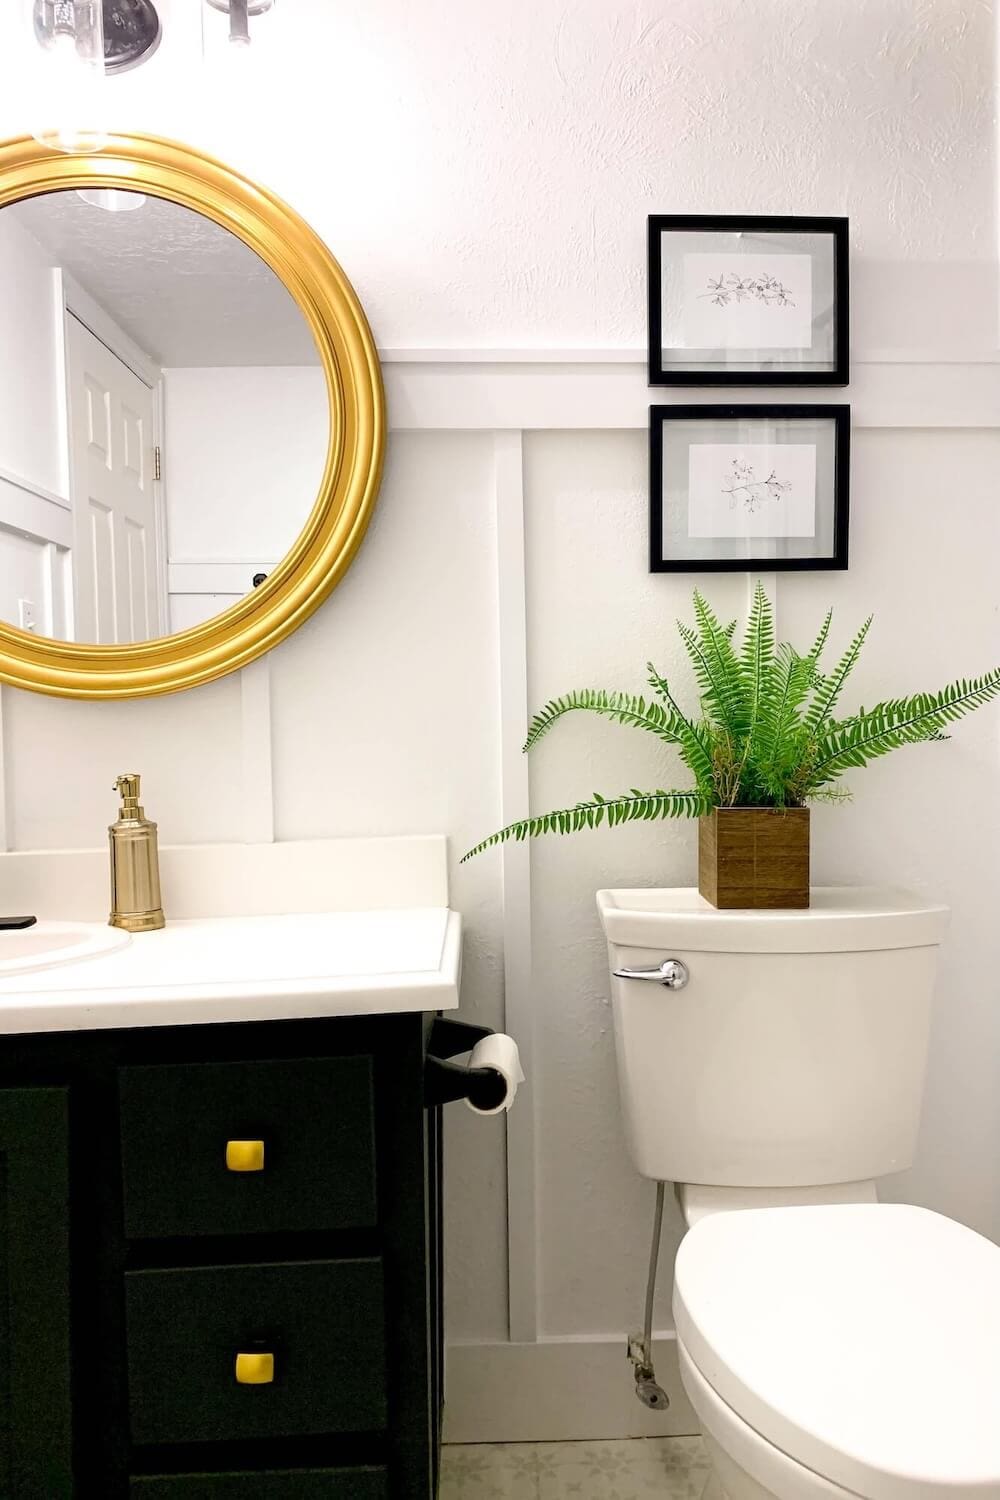
Paired with the new floor and shower, the painted vanity makes the whole bathroom feel intentional and pulled-together rather than builder-basic.
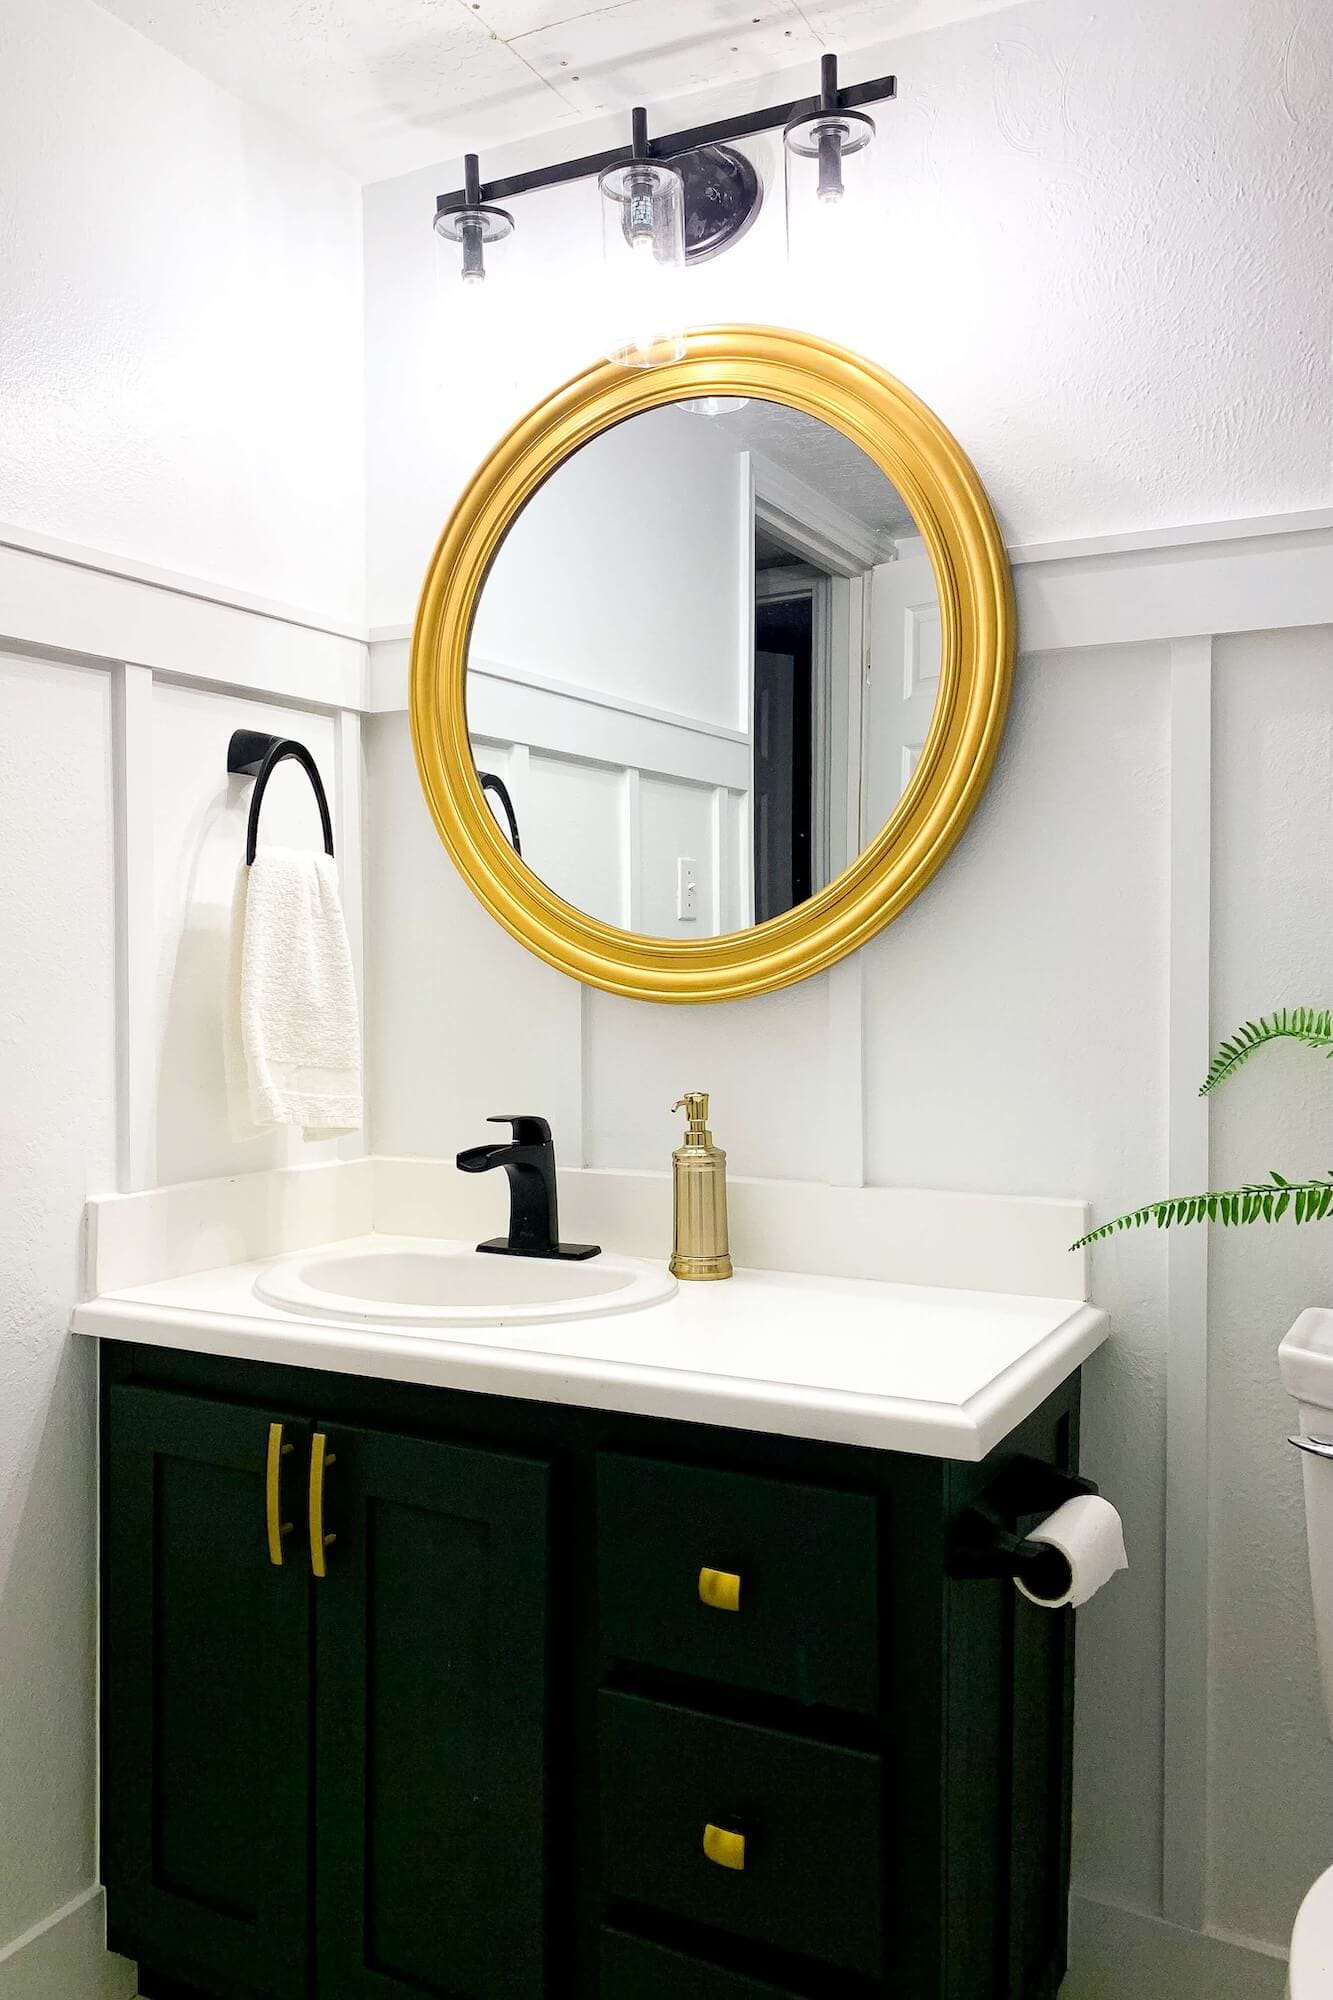
Step 6: DIY Gold Bathroom Mirror
You can see exactly how I transformed this mirror with a black base and Rub ’n Buff in Easy Gold Bathroom Mirror Painting Tutorial.
Above the vanity, I wanted a warm focal point to balance the dark cabinet and black fixtures. Instead of buying a new mirror, I transformed the existing white frame into a DIY gold mirror using spray paint and Rub ’n Buff.
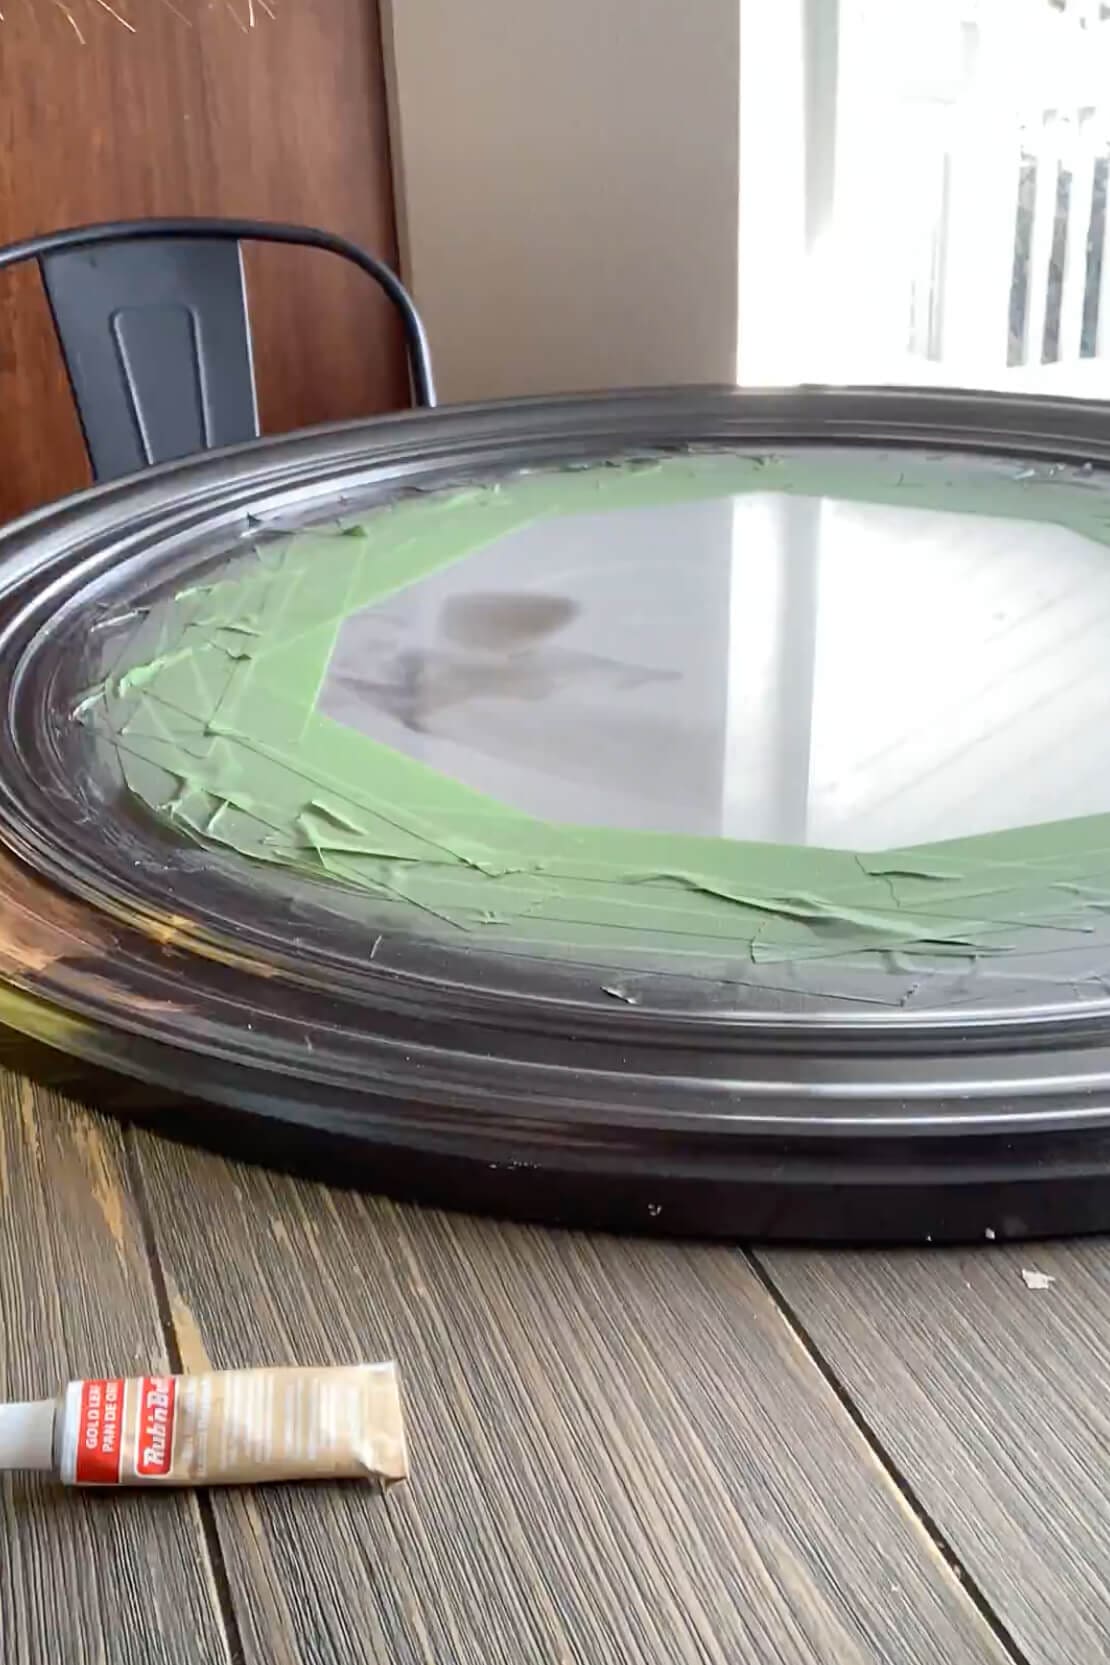
The basic steps:
- Taped off the glass with painter’s tape.
- Sprayed the frame black as a base coat to add depth under the gold.
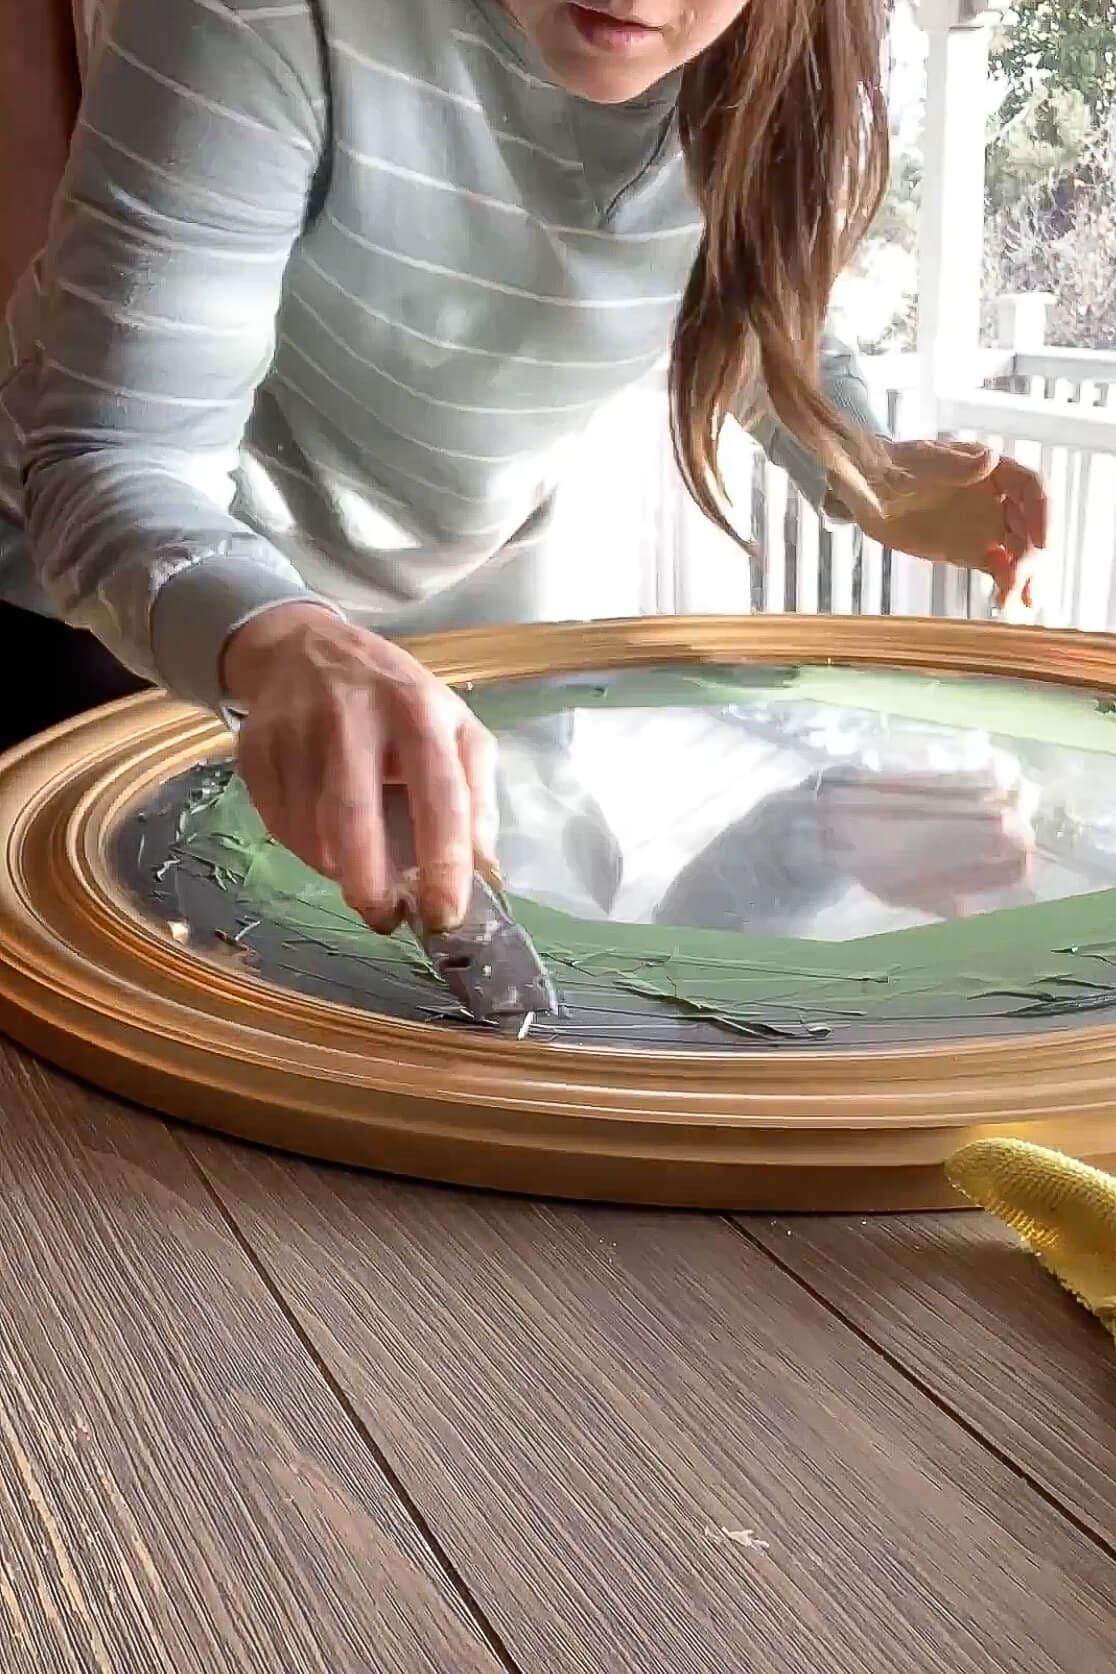
- Rubbed on Antique Gold Rub ’n Buff in thin layers with a soft rag, building up coverage gradually.
- Carefully scored and removed the tape, then scraped any overspray from the glass with a razor.
The finished frame ties in perfectly with the vanity hardware and warms up all the white tile and paint.
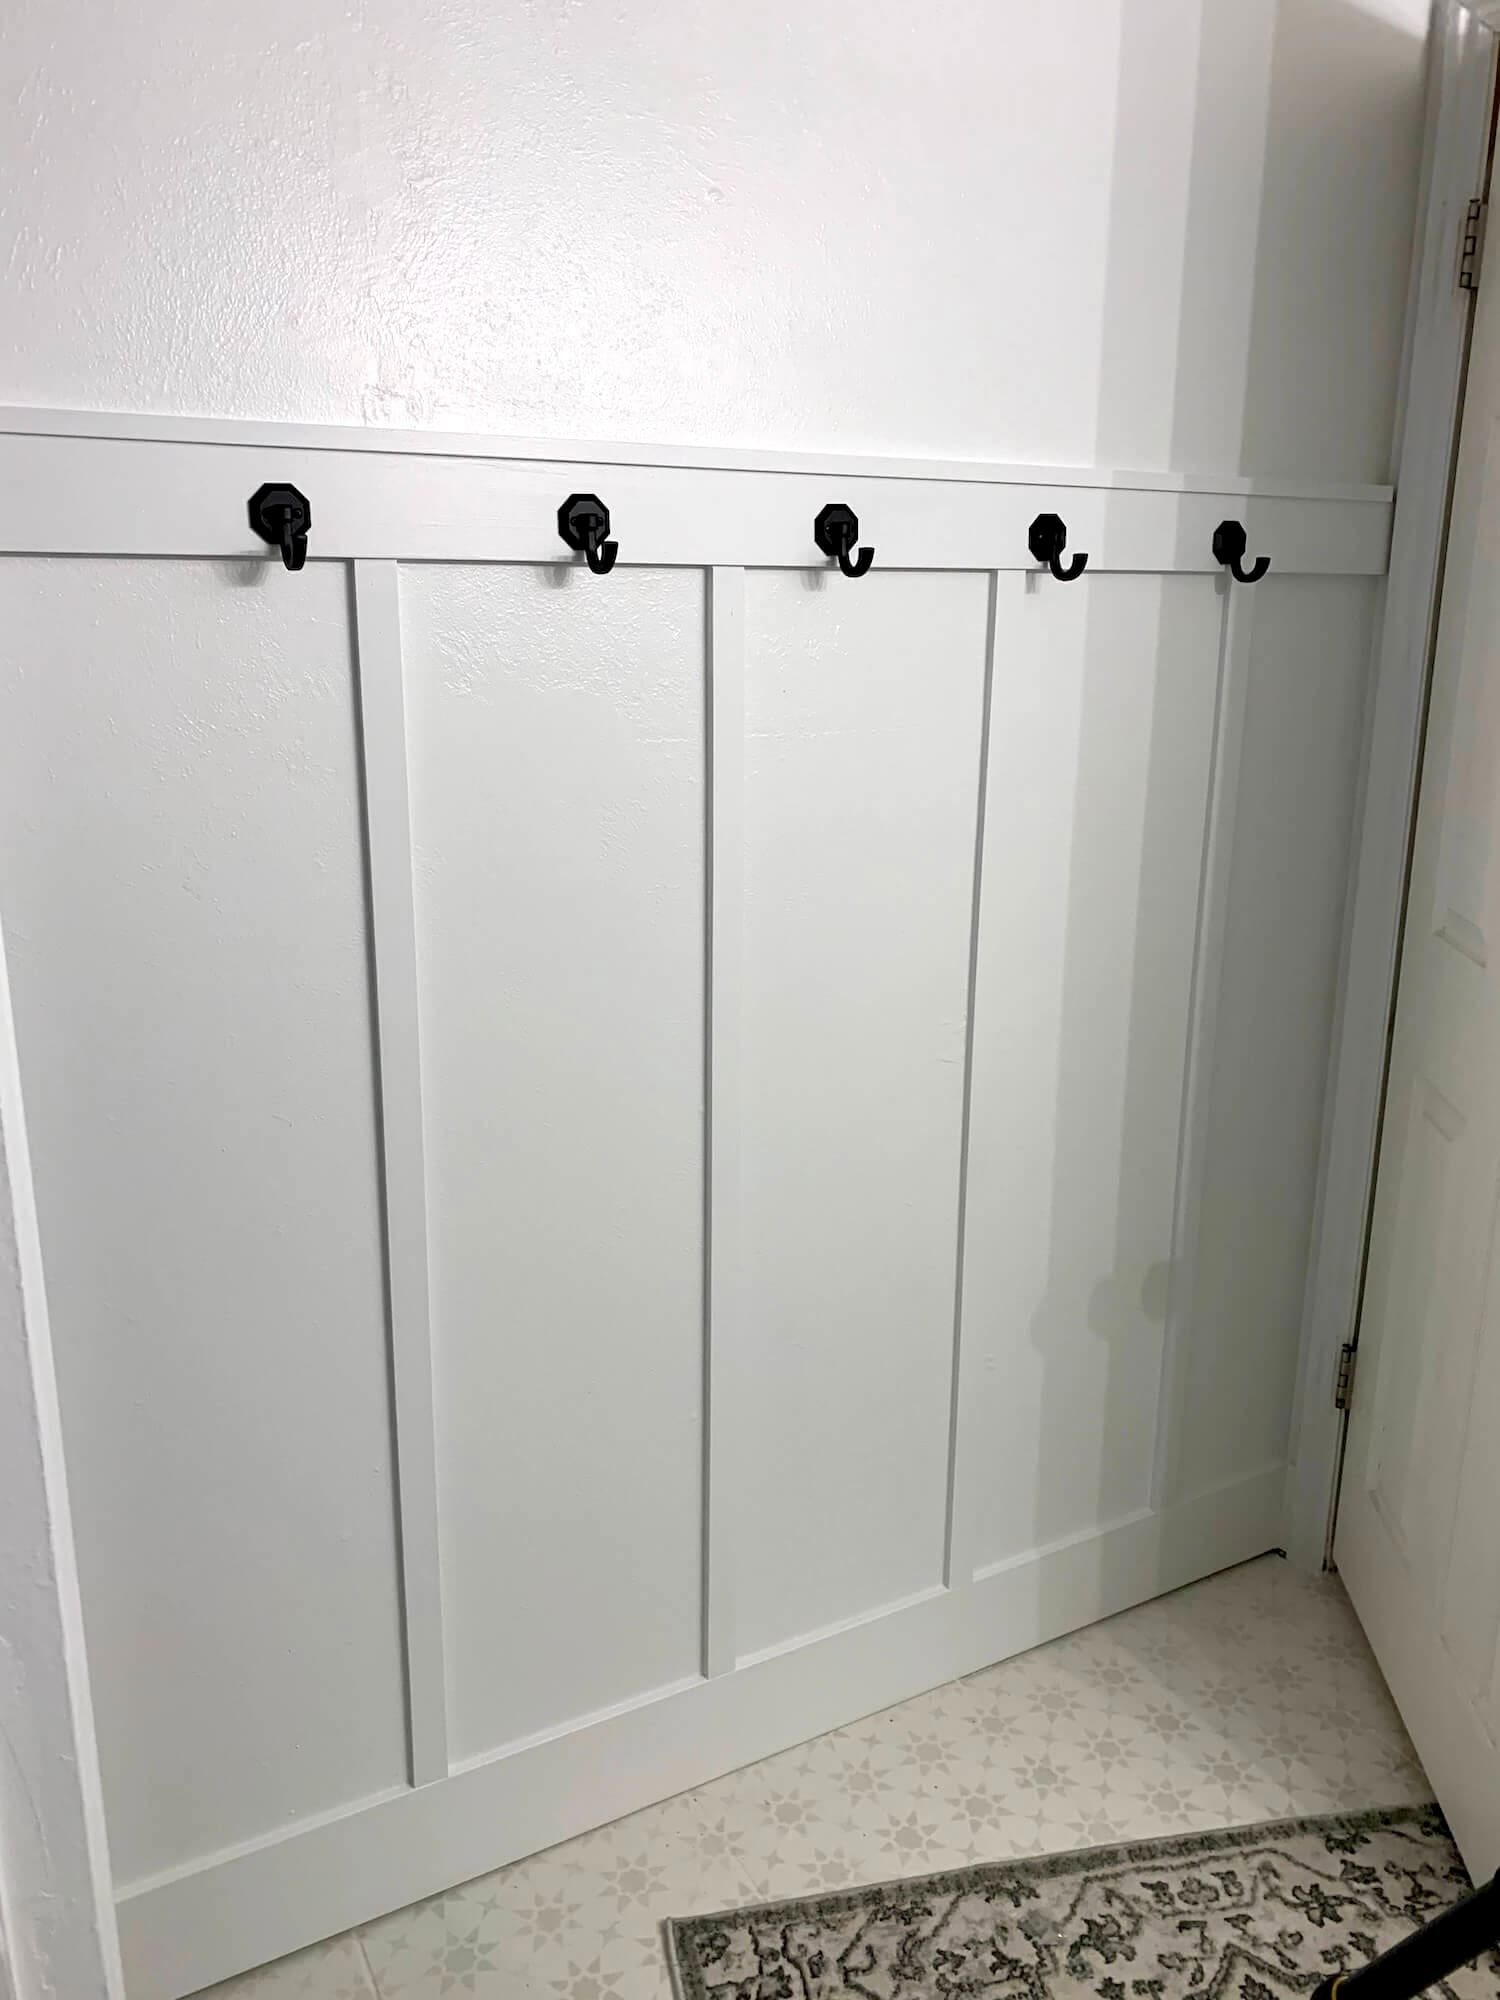
Step 7: Board and Batten Bathroom Wall
For measurements, spacing, and all the install details, check out DIY Board and Batten Wall in a Bathroom: Beginner Guide.
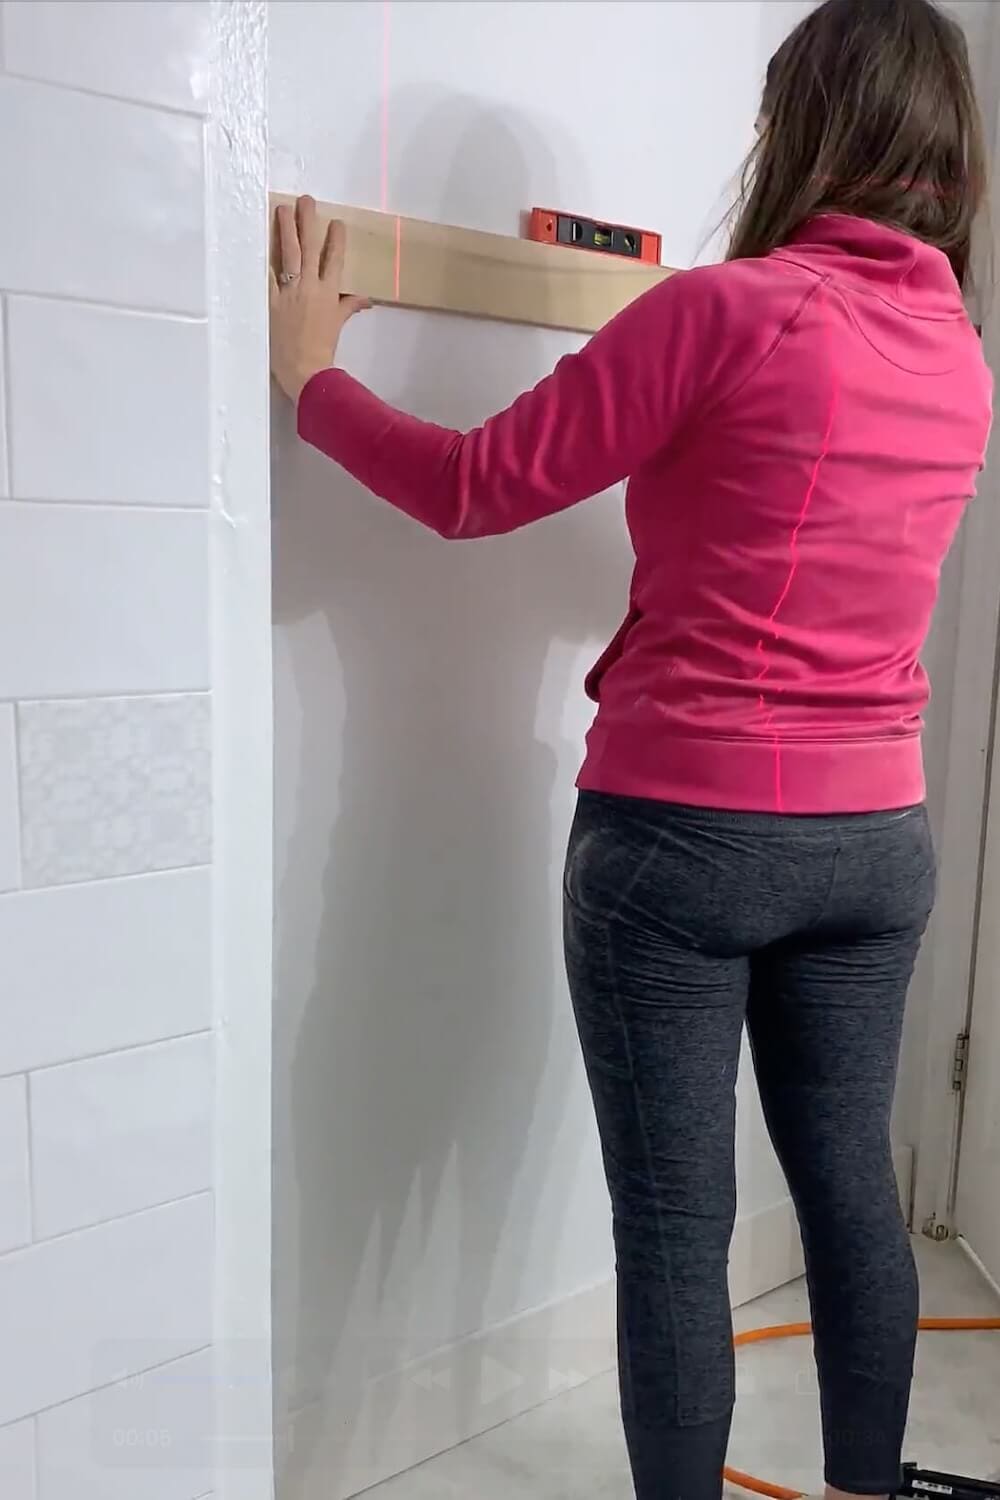
To add architecture and a bit of “custom” feeling, I installed a board and batten wall treatment around the bathroom.
Highlights:
- Chose a height between 48″-52″-a little over halfway up the wall-so it lined up nicely with the vanity and mirror and made the room feel taller.
- Installed a 1×4 top rail into studs along a level line.
- Spaced 1×2 battens around 14-16″ apart (closer spacing tends to look better in small bathrooms).
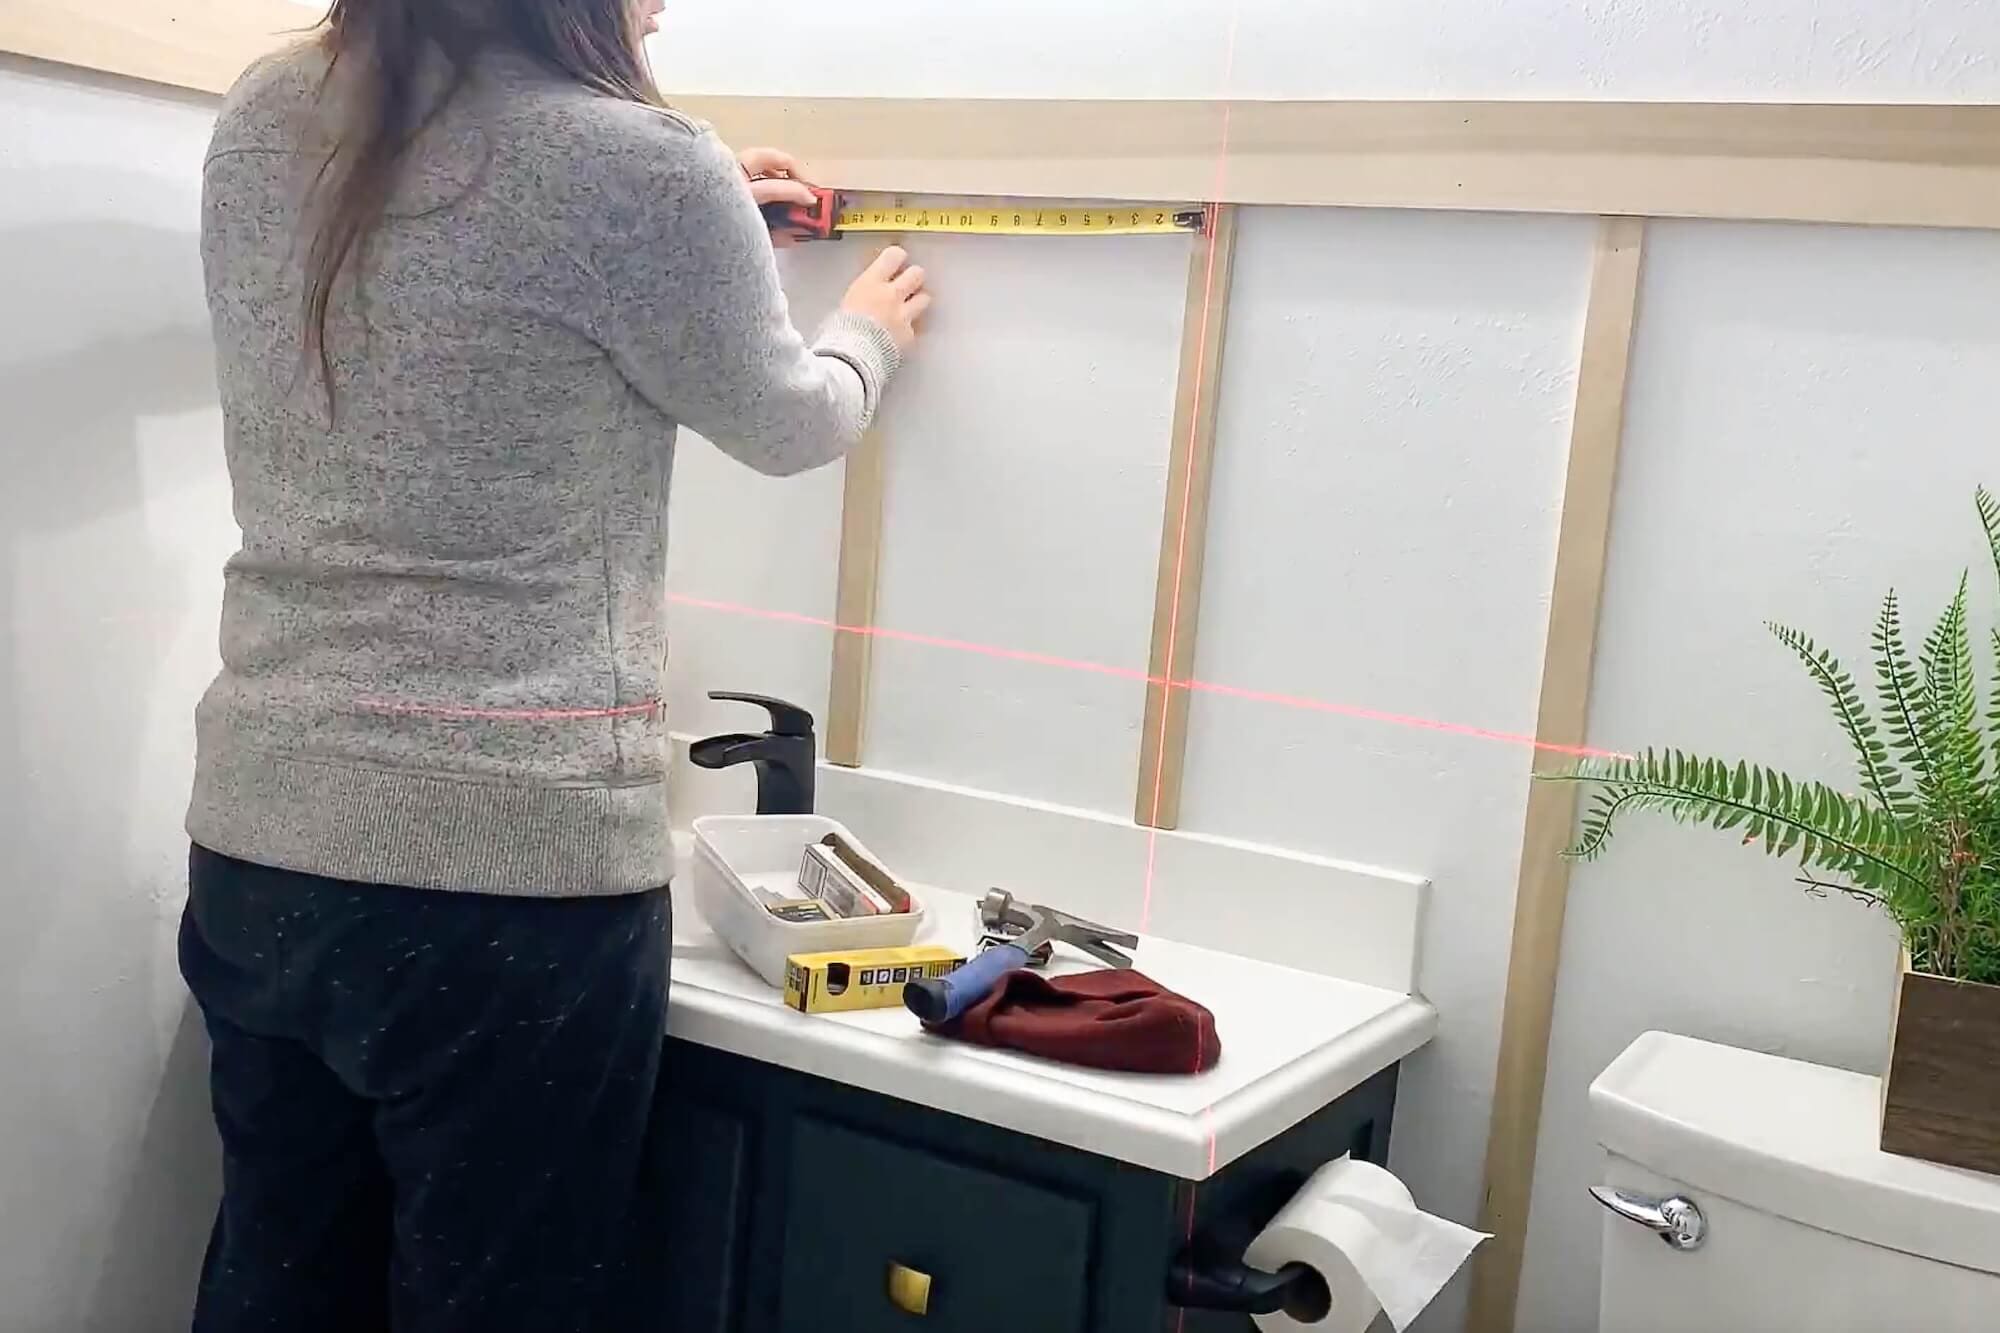
- Wrapped the trim around all four walls so it feels built-in, even behind the toilet and beside the shower.
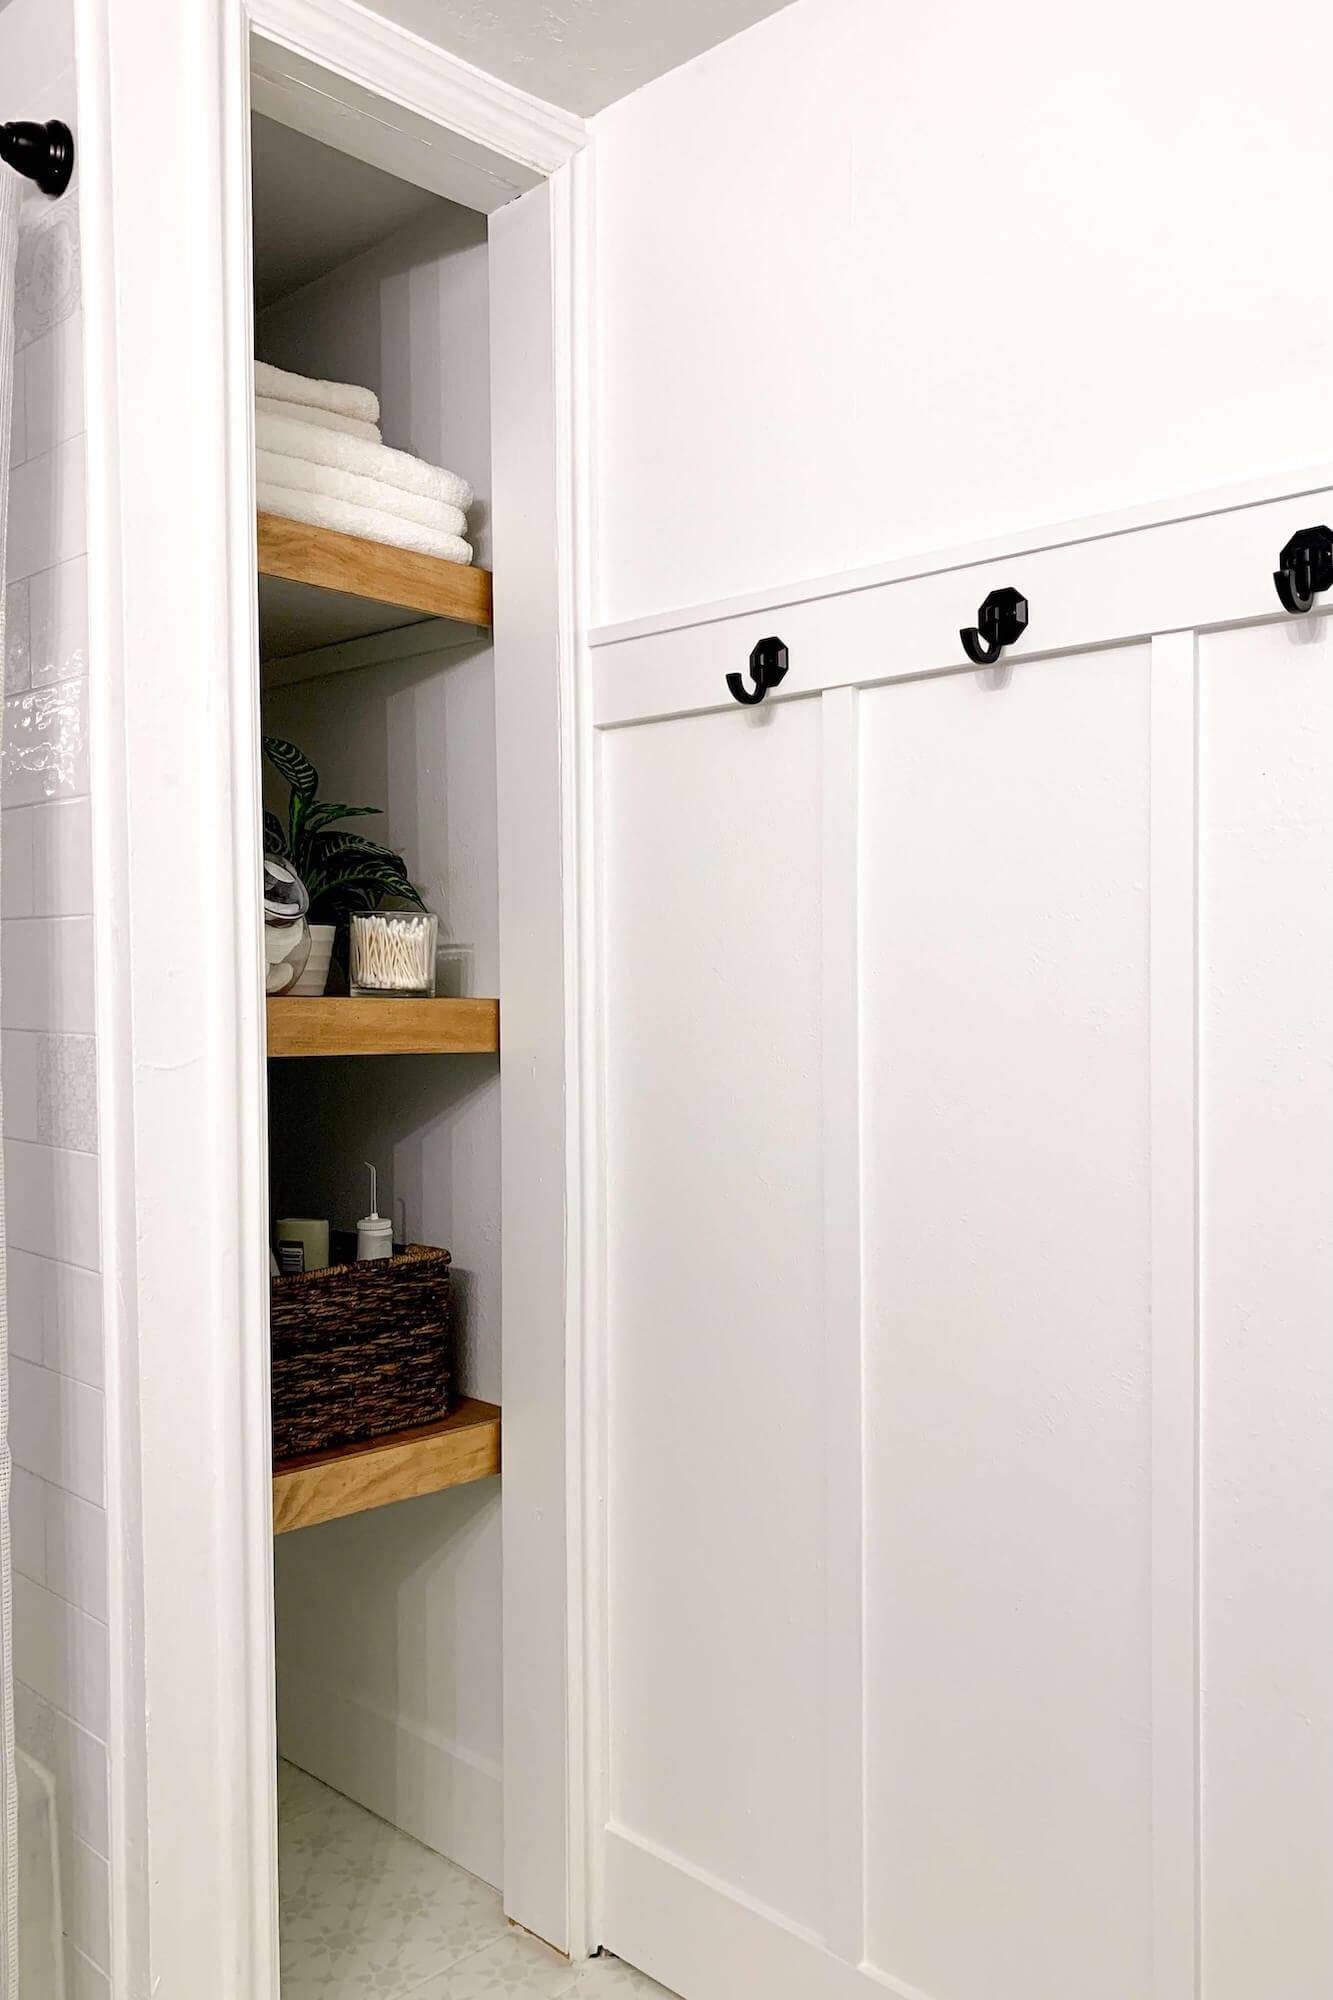
- Added a 1×2 top cap flat on the rail for a finished edge and a solid place to mount hooks.
- Filled nail holes, sanded, caulked all seams, then primed and painted everything white.
Hooks along the top cap added functional storage for towels and robes without taking up floor space-huge in a compact bathroom.
Optional: DIY Toilet Replacement
If you’re also swapping out your toilet as part of your remodel, you can follow my separate step-by-step guide here: How to Install a Toilet: A DIY Step-by-Step Guide.
While the toilet in this specific bathroom stayed, I do have a separate tutorial that walks through how to install a toilet step by step. If your own bathroom makeover includes replacing a toilet, that guide shows:
- Shutting off water and removing the old toilet
- Scraping off the old wax ring and inspecting the flange
- Setting new closet bolts and a fresh wax ring
- Lowering the new toilet into place, reconnecting water, and testing for leaks
It’s a beginner-friendly project that makes a surprisingly big difference in any bathroom.
Small Bathroom Remodel Ideas From This Space
If you’re collecting small bathroom remodel ideas or small bathroom ideas on a budget, here are the specific takeaways from this room:
- Use classic white subway tile in the shower and save pattern for the niche.
- Paint and stencil existing floor tile instead of replacing it.
- Update an old vanity with new doors, paint, and hardware rather than buying new.
- Turn a basic mirror into a gold statement piece with Rub ’n Buff.
- Add board and batten for height, character, and a place to hang hooks.
- Wrap cheap shelves with stained plywood to mimic thick wood shelving.
Each project is affordable on its own, but together they deliver a full small bathroom remodel on a budget.
Budget Notes: How Much Does a Small Bathroom Remodel Cost?
Every house and region is different, so I won’t list dollar amounts here, but this budget small bathroom remodel stayed far below contractor quotes because:
- We kept the existing tub, vanity box, and layout.
- We did the tiling, painting, trim work, and shelving ourselves.
- We mixed higher-impact items (like tile and fixtures) with very budget-friendly fixes (like paint and stencils).
If you’re wondering how to remodel a small bathroom yourself, this project is a good example of stacking smaller DIY upgrades instead of doing one giant, expensive overhaul.
What I’d Do Differently Next Time
Even though I love how this small bathroom remodel before and after turned out, there are a few tweaks I’d make if I were starting from scratch:
- Pre-paint all trim before installing board and batten.
- Use satin or scrubbable matte paint on wall panels to hide texture better.
- Upgrade the exhaust fan at the very beginning.
- Drop the shower niche an inch or two for tall bottles.
- Spot-prime wood/drywall transitions to keep tannins and sheen differences from showing.
- Map and pre-drill all hooks and hardware into studs before painting.
- Use a hardware template for vanity pulls and knobs.
- Add one extra clear topcoat on the painted floor for even more durability in a busy bathroom.
They’re all small changes, but they’d make the next basement bathroom makeover smoother.
📌 Save This Small Bathroom Remodel for Later
Pin now and come back anytime you’re planning your own budget-friendly bathroom makeover!
FAQ About Small Bathroom Remodels
Focus on affordable DIY upgrades like painting tile floors, updating vanity doors, and using budget-friendly finishes. Reusing what you already have saves the most money.
Painting is one of the easiest and most affordable options. Painting tile, walls, or cabinets can give your bathroom a fresh new look without the cost of replacing everything.
Yes! With patience and the right tools, DIYers can handle projects like tiling, painting, building shelves, and adding wall treatments. Doing it yourself cuts labor costs significantly.
Incorporate details like updated hardware, bold paint colors, statement mirrors, and custom shelving. Even small upgrades can make a bathroom feel high-end.
It depends how much you DIY and how many weekends you can give it. I tackled this small bathroom remodel on a budget over several weekends-demo and shower prep first, then tiling, then floor, vanity, walls, and closet. If you work part-time on it, expect a few weeks from start to finish, especially with cure times for paint, grout, and caulk.
I like to start with anything structural and messy first-demo, mold removal, framing, cement board, and waterproofing. Then I move to tiling the shower, painting or stenciling the floor, and finally the “pretty” projects like the vanity, mirror, board and batten, and linen closet. Thinking in this order keeps your DIY small bathroom remodel from turning into a repaint-and-touch-up loop.
It depends on your local code and how much you’re changing. Cosmetic updates like painting, tiling, and building shelves usually don’t need permits. But moving plumbing, changing electrical, or altering structural walls often does. For this basement bathroom remodel, I followed local code, used GFCI protection at the vanity, and would always recommend checking with your city or county before making big changes.
n most cases, painting and stenciling existing tile is the more budget-friendly option. Retiling means buying new tile, renting or buying tools, and possibly dealing with subfloor issues. Painting bathroom floor tiles lets you keep the tile you have and just update the surface, which is why I chose it for this budget small bathroom remodel.
